Easy DIY Mixed Media Christmas Cards + Video

Save the Crafty YouTuber Video Hop

Have you ever wanted to quickly produce some fun and artistic Mixed Media Christmas Cards? Are you tired of sending bulky cards that require extra postage? What if I gave you the formula for how to create a whole stack of cards that have layered texture and character to them, but are pretty much flat, easy to put together and will have all your friends and family thinking you are quite the artist?!! Interested?

Now what if on top of that I told you that you could have a chance to win over 100 prizes – bet THAT sold ya!

Mixed Media Christmas Cards Video Tutorial

It’s that time of year again – my good friend Justine Hovey has organized the second Save the Crafty YouTuber Video Hop, and I decided to play along with 90 of my crafty friends – mixed media style! And I even have my OWN giveaway that I’m doing….so be sure to actually WATCH the video. I give the details along the way…

Click HERE to watch in HD on my YouTube Channel

Aren’t they FUN and super simple cards to make?!! Seriously – I’m going to be teaching this exact project (and so much more) in person in a few weeks in the Orlando, Florida area. If you’d like to come learn from me in person – be sure to email me at ingrid (at) thecreativegrove.com and I’ll send you all the details!!

For the specifics and Details to be entered for over 100 prizes – seriously…it’s more like 125+ prizes….GOOD ones too – read about those on my YouTube Channel in the section below the video!

The Save the Crafty YouTuber Video hop is a celebration of cardmaking video tutorials created by a group of talented crafters of all different styles and levels. We are coming together over 5 days to give our viewers a chance to discover other amazing cardmakers and help reach monetization goals!
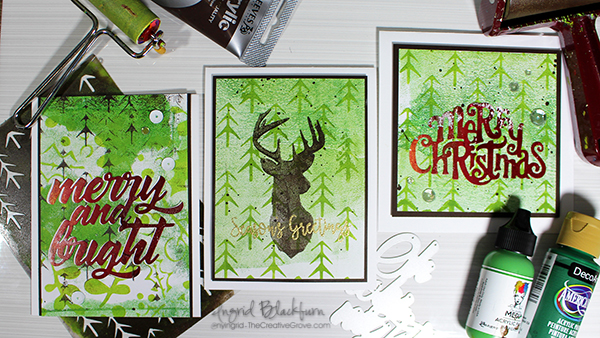
Mixed Media Christmas Cards

All you have to do is watch, like the video, consider subscribing, and click the link in the video description below to hop to the next video. Let yourself be inspired! Don’t forget to comment (on the video hop over at YouTube) because we have tons of prizes to give away. Please indicate if you are located in the USA or International so that prizes can be awarded appropriately as some prizes (not all!) have restrictions on them.

To be entered in for MY giveaway (closed) – watch the video – I give details on what you need to put in the comment section (USA only for that one).
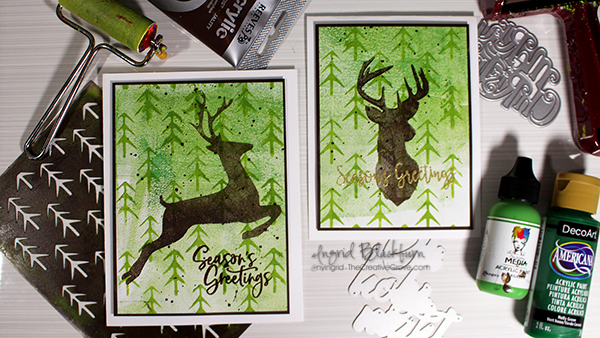
Monoprinting Christmas Cards

Don’t forget to check back every day this week since there are 5 themed days of video hops! You never know when you’ll discover your next favourite YouTuber! Hop Links are below.

I hope you enjoyed this tutorial. Here are a few close up photos for you and the supply list. Be sure to come back to this post on November 10th to see who won the prize pack – I’m giving away Dies, Stencils and ink pads – it’s worth over $40!!! That Merry Christmas Die is one of them!!! 🙂 Happy Hopping!!!
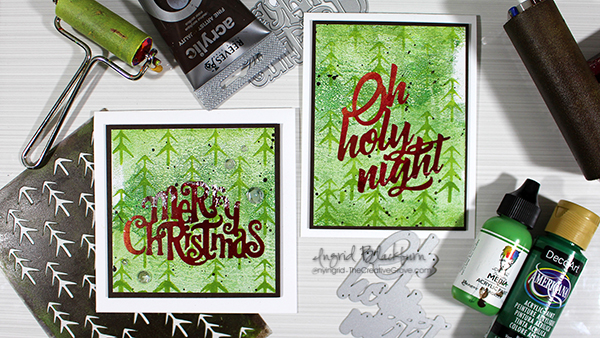
Mixed Media Monoprint Christmas

Aren’t those the prettiest cards?!! These photos do not do them justice!! Interested in seeing more Mixed Media Christmas Card possibilities? Check out this tutorial – just adjust for the Christmas Season

Sponsors & Hop Links (Giveaways closed)

Here are all those sponsors….and SO many channels in each of the five hops are giving away additional prizes – this is an AWESOME hop!
Here are links to all five hop days:

  1. Day One Hop Beginning
  2. Day Two Hop Beginning
  3. Day Three – Start on MY YouTube Channel
  4. Day Four Hop Beginning
  5. Day Five Hop Beginning

Good luck on winning all those great prizes – over 100!!! Leave me a comment below if you liked these cards – I’d LOVE to know.

Thanks for watching – till next time…

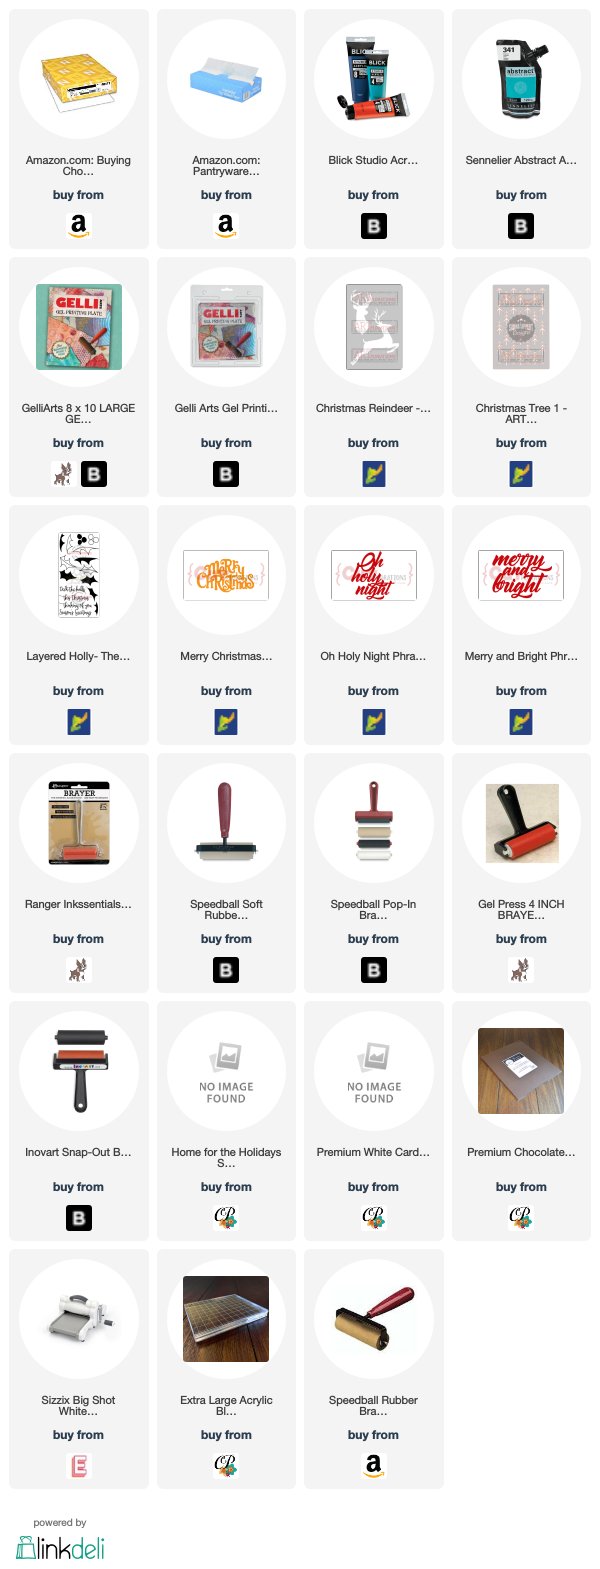
Supply List

Affiliate Links used if available
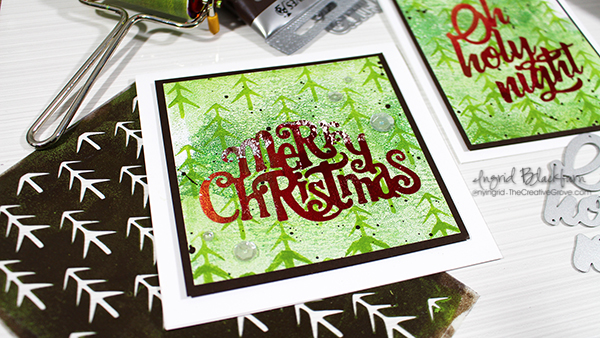
Mixed Media Christmas Cards

Hailey’s Shower Photo Supply List – https://ldli.co/e/jpxx6p
SOA Lovely Notes Blog Hop
Lovely Notes SOA Blog Hop

Welcome to the Lovely Notes Collection Blog Hop – Day 3! What do you think so far…pretty amazing, right? Well I hope to add a little creative inspiration for you today with a few projects. I’ve been sharing a few projects over the past few days – this collection is so easy to create with, and I have so much more to keep sharing with you this week.

The Stamp of Approval Lovely Notes Collection is a curated collection of stamps and dies that work fabulously together or alone. Not only do you get a box FULL of amazing stamps and dies, but you’ll get a downloadable PDF Project Guide (for free!) with tons of project tutorials using them!

The stamps and dies in the Stamp of Approval Collections are brand new on the market and won’t be released for individual sale for several months. To find out how to get a box, you have to be on the wait list! Yes, these boxes sell out so fast – the last one was gone in 33 hours….so don’t wait. The wait list will find out before the public will. Click Here to sign up for the wait list and find out more.

Today I’m going to inspire you with several of the components of this collection. Specifically the Lovely Flowers, Lovely Flowers & Banners Dies, Lovely Lattice Background, Butterfly Notes, Wonderful Wreath – all by Catherine Pooler Designs, and Handpainted Thanks by Neat & Tangled. So let’s get right to it with a little Christmas in July, here are your tutorials!

Lovely Notes Project Tutorials

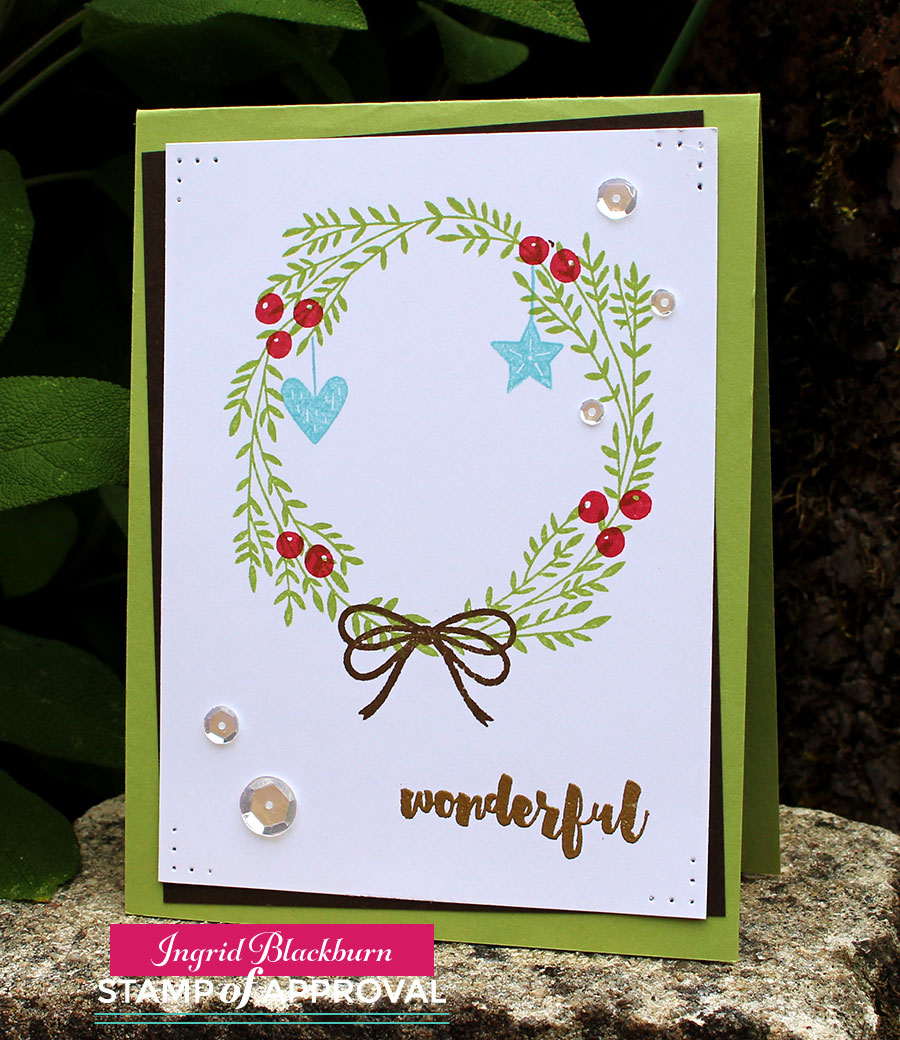
Wonderful Wreath

I was in love with this wreath the moment I saw it. It reminds me of olive branches – delicate and whimsical. To get this clean and simple look, stamp your wreath on white in Stampin Up Pear Pizzazz, the berries in Primrose Petals, hang some ornaments in Baja Breeze and tie it all up with an Early Espresso bow. It was that simple. This is a GREAT mass produced card.

Lovely-Notes-SOA-Project-2---Ingrid-Blackburn-001


For an elegant touch, emboss your greeting in Gilded Gold by Brutus Monroe – my new favorite gold. Add a few sparkling clear sequins by Pretty Pink Posh and a little simple paper piecing in the corners finishes it off.

I’m addicted to the tilt for the matte in the background (thanks Maureen!) – a little Early Espresso on a Pear Pizzazz card base. It’s that simple.

Thanks Friend

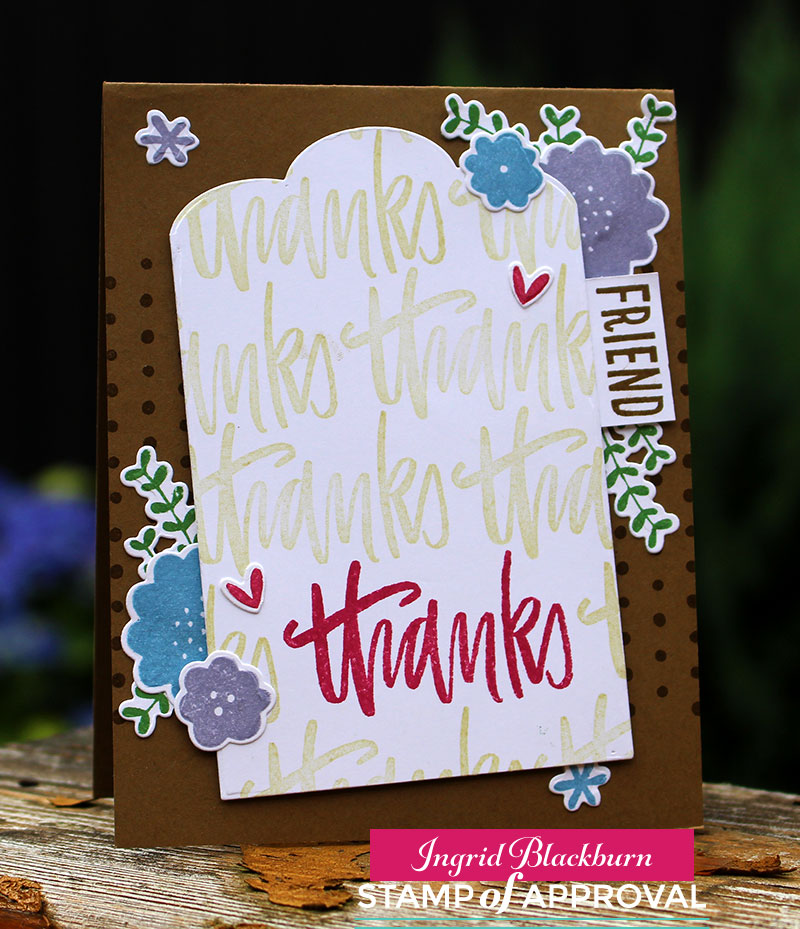
This awesome handpainted Thanks stamp by Neat & Tangled is my new favorite greeting – I love bold scripty greetings. I used this stamp just one way – did you know there are two others that layer for a multi tone effect! How cool is that?

You’ll want to stamp some of the Lowely Flowers and cut them using the coordinating Dies. I used the Stampin Up colors – Marina Mist, Wisteria Wonder, Rose Red & Garden Green. On a large piece of white scrap paper – at least card front size, stamp the thanks towards the bottom center/right. Repeatedly stamp thanks in a light neutral tone, I used River Rock. TIP – alter where the word starts on each line so that it flows.

Lovely Notes SOA Collection - Ingrid Blackburn


Stamp the dots from Lovely Flowers in the middle 2/3 of the Soft Suede card base. I stamped it completely across so that the left and right side were even.

Cut your tag out using the large banner die from the Lovely Flowers & Banners Dies set. Try to place the Rose Red Thanks a bit off centered to the right at the bottom. You definitely want some neutral below as well. Stamp the word Friend from the Lovely Flowers Stamp set in Soft Suede on a piece of scrap and attach to your tag.

Pop the tag up using Foam Tape or Fun Foam and adhere your embellishments. TIP – The leaf branch has three sprigs – I cut mine apart to get it just right – sometimes just one or two.

That’s it – it’s a cute card – I had way too much fun with the Lovely Flowers stamps & dies as you’ll see tomorrow!

Bold Watercolor Greetings

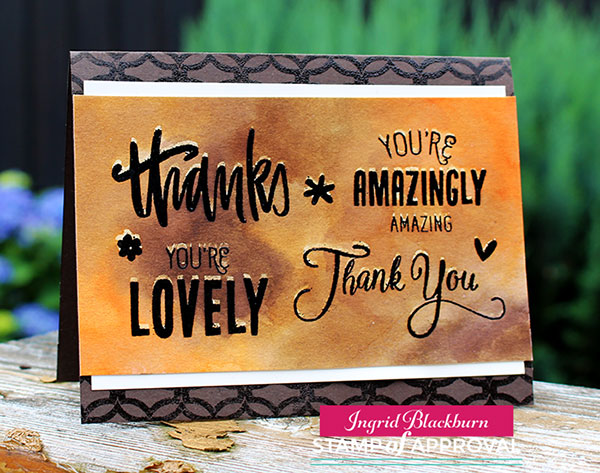
If you’ve followed me for a while here, on YouTube or in an online class – you know I love to watercolor! This project takes some of the various greetings in this collection and puts them to good use. I wanted greetings that would stand out, so I used two from Lovely Flowers, one from Butterfly Notes and one of my new favorite Thanks from Handpainted Thanks. Here’s a video tutorial for you:

Click Here to watch video in HD on YouTube

To get this outline look, first stamp your images in versamark. Go back over them with a de-static tool and stamp again in Versafine Onyx Black Ink. Emboss in Black and heat set. Once cool, secure your project down with low tack painters tape on the upper and lower edges.

Smoosh some Distress Ink onto your craft mat or acrylic block – I used Rusty Hinge, Ground Espresso, Gathered Twigs and Vintage Photo. Grab some ink with a large wet brush and start painting onto your dry watercolor paper. You want your watercolor to flow together without getting out of control.

Handpainted Thanks - Lovely Notes Collection - Ingrid Blackburn

TIP – if your paper accumulates too many puddles or your colors blend out of control, gently dip the edge of a dry paper towel into a puddle to sop it up without removing color. Or use a thirsty brush (Not dripping wet). Water will naturally be attracted to a dry surface.

Once you have the look you want, heat set or allow to dry on it’s own. TIP – keep some lighter areas along with dark for a balance.

Stamp the Lovely Lattice Background stamp in Ground Espresso onto a folded Espresso card base. I just inked up the top and bottom. Quickly dip into clear embossing powder and heat set for a tone on tone look. If using a vanilla or white background, use Versamark ink for a watermark look. The key is not to compete with your watercolor, but rather support it.

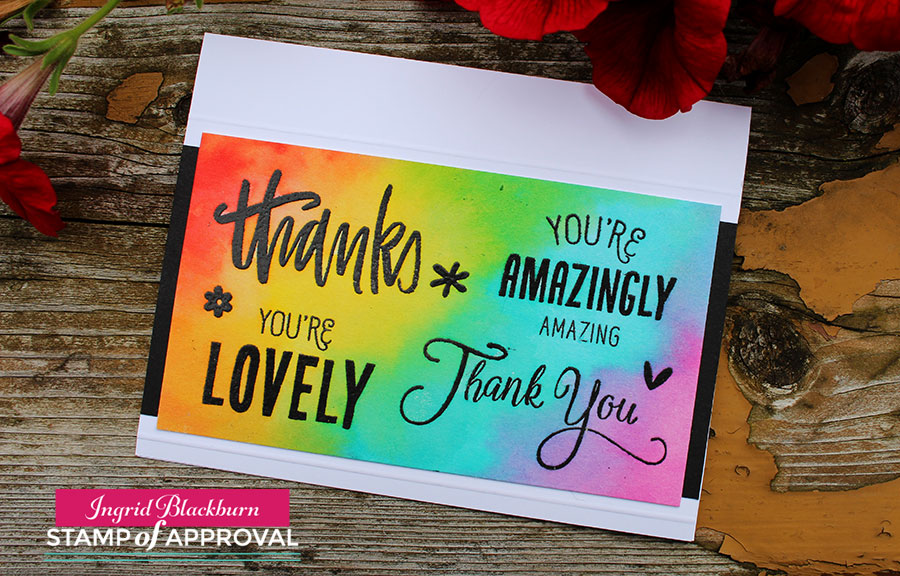
It’s a pretty quick and easy project. I made four as I wasn’t sure of the look I wanted. Here’s a rainbow one too:

Lovely Notes Stamp of Approval Ingrid Blackburn


I added a little dry embossed line to the top and bottom for a simple embellishment. No matter what color combination you choose, you’ll love this technique.

Now that you have some inspiration…time to find out just how you can win a free box!

Lovely Notes SOA Win

It’s your turn to hop along and check out what the uber talented Amy Tsutura has in store for you next! Here’s the blog hop list:

Catherine Pooler

Neat and Tangled

Kristie Goulet

Yoonsun Hur

Ingrid Blackburn – That’s Me * You are here*

Amy Tsuruta You’re next stop!

Justine Hovey

Be sure to leave a comment on each designers blog for a chance to win a Lovely Notes Collection of your own! There’s a giveaway for all three days of the hop! If you missed out on any of the Blog Hops – start at the beginning with Catherine’s Blog and Day 1.

And stop by tomorrow for more inspiration –

Signature

[optin_box style=”12″ alignment=”center” email_field=”email” email_default=”Enter your email address” integration_type=”aweber” double_optin=”Y” list=”3846012″ name_field=”name” name_default=”Enter your first name” name_required=”Y” opm_packages=””][optin_box_field name=”headline”]Learn more with our exclusive FREE video series:[/optin_box_field][optin_box_field name=”paragraph”]PHA+UGx1cyB5b3XigJlsbCBiZSBhZGRlZCB0byBteSBGUkVFIENyZWF0aXZlIFRpcHMgRS1sZXR0ZXIgd2hlcmUgSSBzaGFyZSBleGNsdXNpdmUgcHJvamVjdHMsIHZpZGVvcyAmYW1wOyB0aGUgMTIgRGF5cyBvZiBDaHJpc3RtYXMgUHJvamVjdCBTZXJpZXM8L3A+Cg==[/optin_box_field][optin_box_field name=”privacy”][/optin_box_field][optin_box_field name=”top_color”]undefined[/optin_box_field][optin_box_button type=”0″ button_below=”Y”]Get Instant Access![/optin_box_button] [/optin_box]

Video, 2 Tutorials, Blog Hop & Prizes

Gelli-Plate-Monoprinting-tutorials

I have all sorts of goodness for you today! Towards the bottom of this über long post, I have two – yes TWO tutorials for you – one in video form and another after.

First I wanted to tell you about an exclusive collection of stamping stuff just coming available – yup…it’s brand spankin new – not on the market yet! There’s a blog hop filled with awesome projects – great to inspire you this morning, plus at the bottom, I have a new video for you and more crafty goodness!

Normally I would be participating alongside these great card makers for a great blog hop showcasing the new Stamp of Approval collection – Young at Heart. But alas, customs has benched me. They’ve kept my supplies – secretly I think they’re having too much fun making birthday cards and have decided to keep all the fun for themselves! Not to worry, I still have all the information you need, plus I have some fun inspiration for you too!

SOA Feb 2016

Stamp of Approval (SOA) is an exclusive box of Stamps, Dies and Stencils designed by Catherine Pooler and some of your favorite stamp companies. Available quarterly, and only till they sell out – and let me be the first to tell you, it’s quick – the first SOA sold out in hours!

This year, StampNation celebrated it’s 5th Birthday, so naturally a box about birthdays makes sense – it’s called the Young at Heart Collection. I would think that birthday cards are probably the #1 card type made – so I’m sure you’ll find something in it for you. But don’t think just birthdays – after seeing the products myself in the videos, I have all sorts of ideas for non-birthday cards too! Here are some links to the three videos highlighting product from the box:

The stamps, dies and stencils designed for this collection are first only available through the SOA box. They will eventually be released by their stamp companies sometime later in 2016/2017, so this is your chance to get your hands on some great products before everyone else – I’m all about that! 🙂

Here’s how it works – you have to be on the waitlist to get the information and link about when the box goes on sale! And it goes quick. If you are a StampNation member – you’ll get the link an hour before the public on February 3rd! This box has products by CAS-ual Fridays, Sugar Pea Designs and Winnie & Walter – three of the hottest stamp companies out there today!!

And to give you some incredible inspiration, hop along with this talented blog hop. Be sure to leave a comment on everyone’s blog – Catherine is giving away two boxes!! And not to worry, if you purchase one and end up a winner – you’ll be reimbursed. The boxes are stuffed with over $100 worth of brand new product…that’s a pretty awesome prize!!!

Neutral Tone Stenciling Video Tutorial

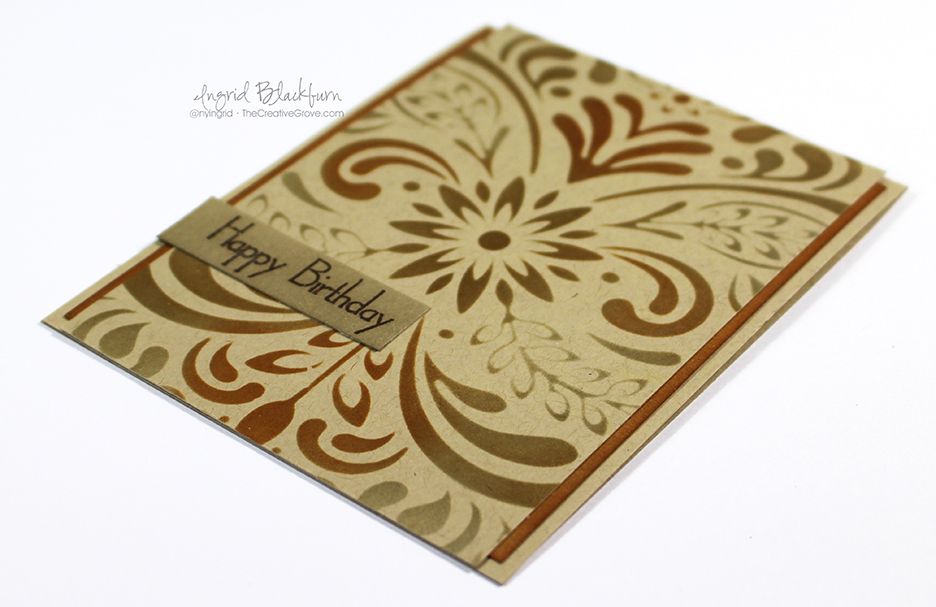
So, are you on creative inspiration overload yet? I hope not, because I have some crafty goodness to share with you too! The other day I released a new video on my YouTube channel. It’s a great birthday card that is quick, easy and has some great neutral tones in it – perfect for a masculine card. Here it is:

Watch video on YouTube

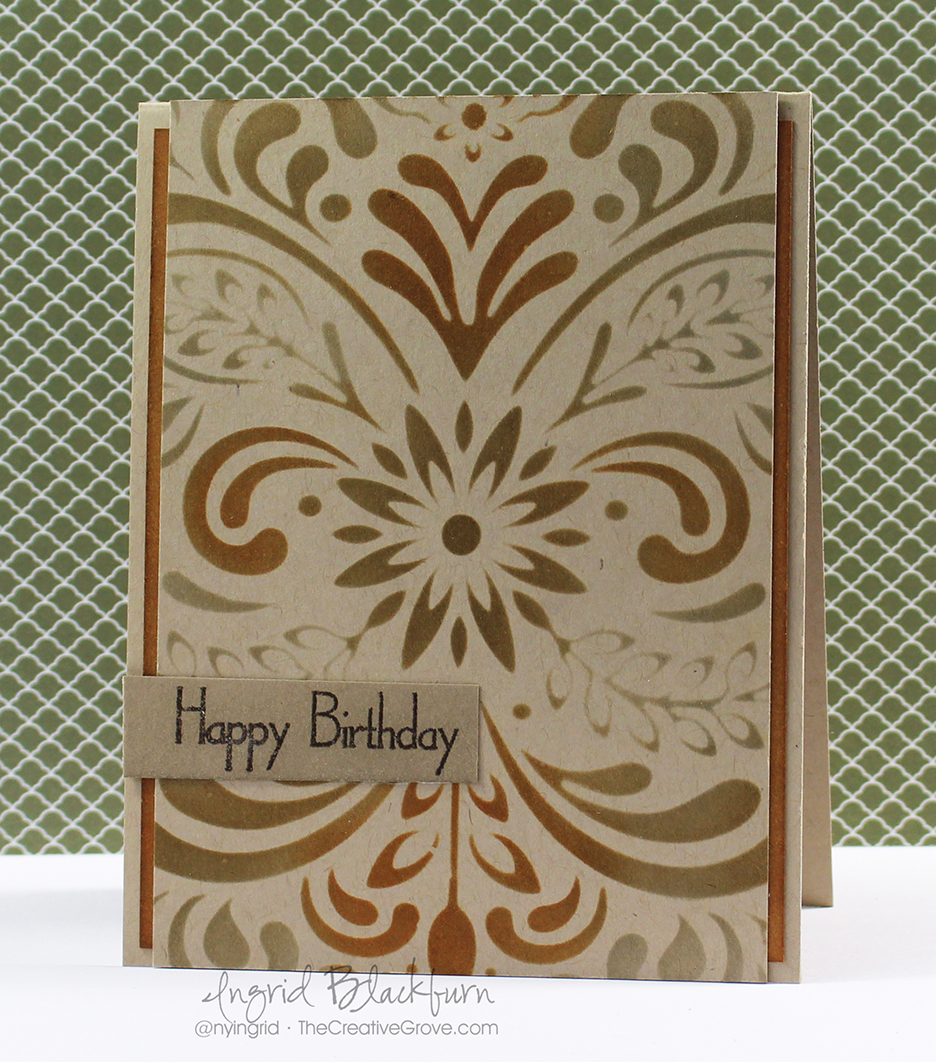
It’s a pretty straight forward card and the stencil really is the star here.

Masculine Birthday Stencil 004

Don’t you just love that stencil from Hero Arts! I love all the neutral tones. It’s simple, and kind of reminds me of New Mexico/Arizona a bit. What do you think?

Masculine Birthday Stencil 002


I’ve been playing around with stencils for the past month on overdrive. Mostly because I’ve been creating content for the Stencil Class over at StampNation that’s been going on for the past 2 1/2 weeks!

CSM 14

You may remember my Gelli Plate creation from last month, well, I filmed a video for the stencil class at SN and put up many more samples.

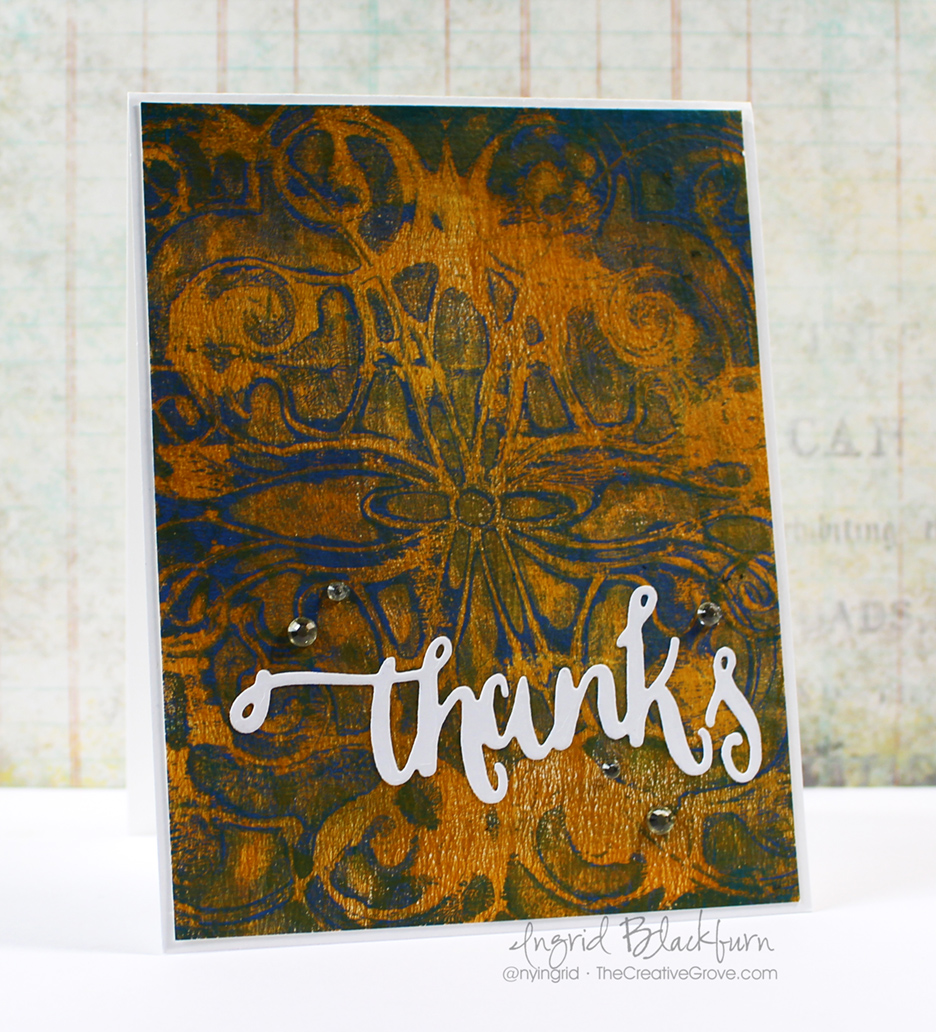
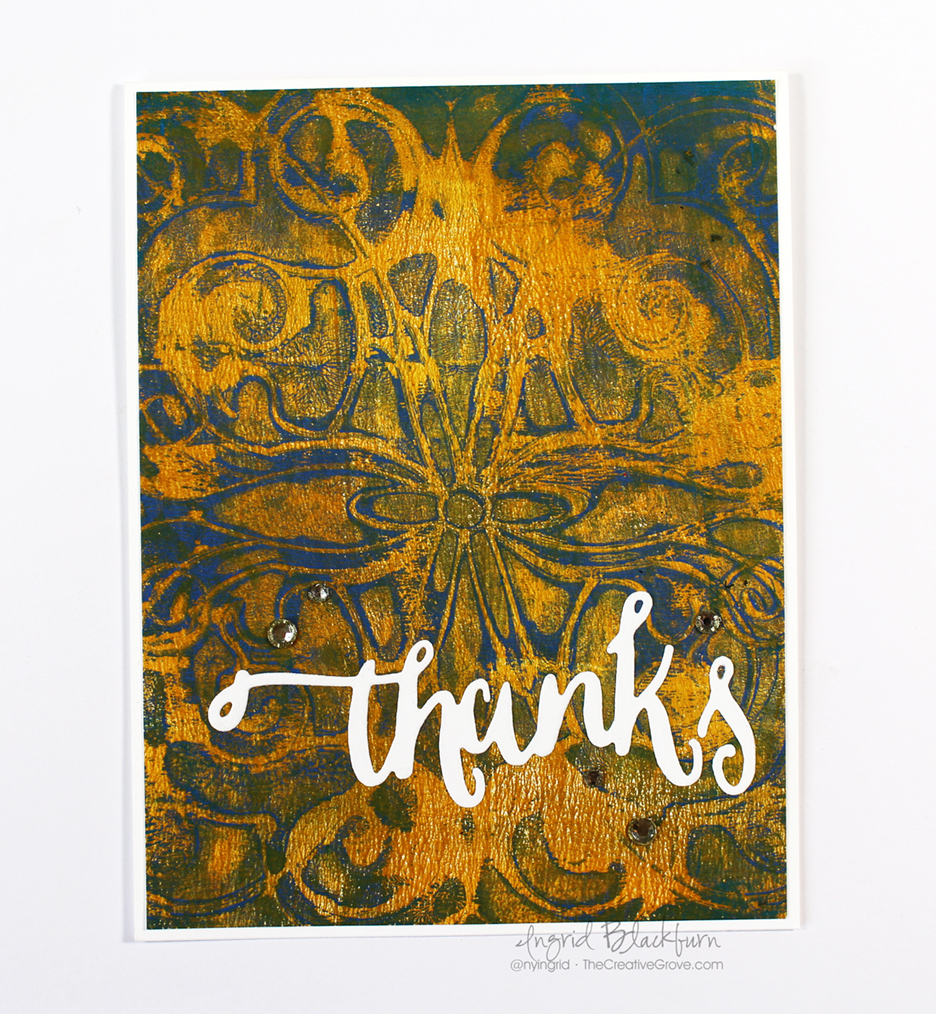
Gelli Plate Monoprinting in Layers Tutorial

Here’s a new one for you though. I have been having SO much fun with my Gelli Plate – it’s an amazing tool that really allows my inner artist to break out. Do you have one, or are you thinking about getting one? Let me know in the comments below!

Gelli-Plate-Monoprinting-1-001

Working with a gelli arts printing plate has been truly an eye opening experience. While I won’t say I’m and expert, I have learned a ton along the way! For instance, paper and paint do matter. You want a paint that will give you time to work, acrylics dry so quickly, the longer your paint remains open, the more flexibility you have. And when you’re new to something like this – that’s key. That doesn’t mean you can’t use your cheap acrylics, just work quickly!

Gelli-Plate-Monoprinting-1-002

  • For this project, I started by layering on some Phthalo Blue. I cleared my brayer of any paint and promptly brayered some back off. leaving only some around the edge and a little in the center.
  • The key to creating a monoprint in layers on your Gelli Plate, is to allow the layers to dry inbetween.
  • Next you’ll want to add another color – I chose Cobalt Blue. Repeat the process pulling up a lot of the blue.
  • Add your stencil – I added the Tula stencil by Memory Box. Pull a positive print to use on another project. That leaves a lot open space.
  • Finally, add your lightest color – I chose Ochre for a contrast.
  • I pulled the entire print up at this point. The Ochre allowed the dried layers enough moisture to pull the print up in it’s entirety. If your paint isn’t open enough, this can be a frustrating process and you won’t pull up all your colors. Sometimes that can look cool, other times it can just be frustrating. You’ll find that sweet spot for yourself.

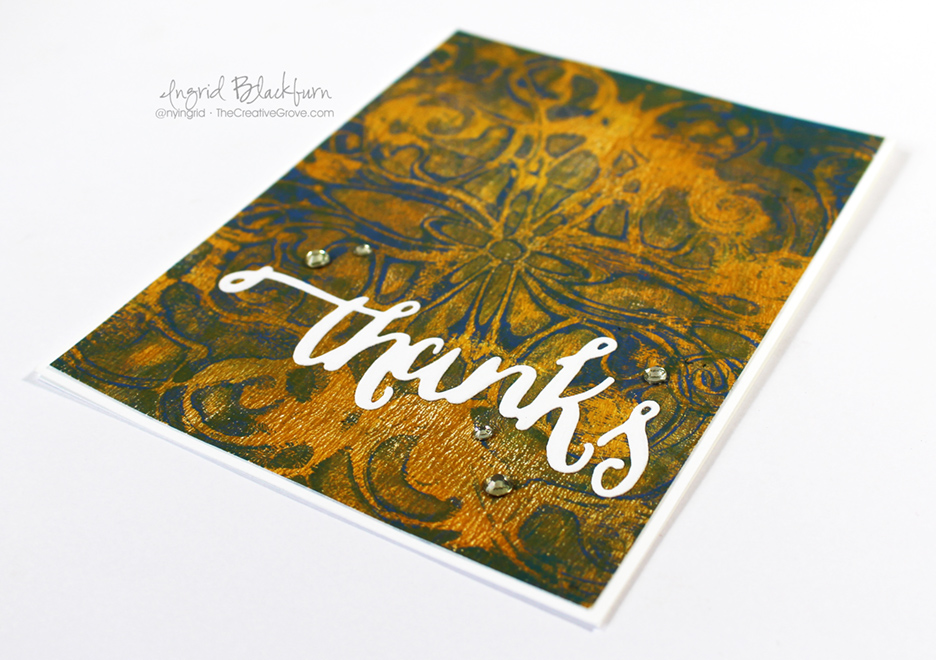
Gelli-Plate-Monoprinting-1-003

The interesting thing with this print is that in some spots the blue and yellow blended to form a slight green – that only gives this a more worn and aged look. The background naturally is the star, so keep the rest of the card simple. I added the Handlettered Thanks die by WPlus9 and a few Rhinestones.

Thanks for stopping by today. I hope you enjoyed these couple of projects – can you tell I have stenciling on the brain? Be sure to check out the new SOA box, or hop on over the StampNation and check it out along with the free stenciling class. I have a few videos in lessons #5 & #14.

See you next time, till then, keep those fingers inky!

Signature

[optin_box style=”2″ alignment=”center” email_field=”email” email_default=”Enter your email address” email_order=”2″ integration_type=”aweber” double_optin=”Y” list=”3846012″ name_field=”name” name_default=”Enter your first name” name_order=”1″ name_required=”Y”][optin_box_field name=”headline”]Learn with our exclusive FREE video series[/optin_box_field][optin_box_field name=”paragraph”]PHA+R2V0IHRoZSBmcmVlIENyZWF0aXZlIFRpcHMgRS1sZXR0ZXIgYW5kIGxlYXJuIHdpdGggc3Vic2NyaWJlciBleGNsdXNpdmUgdmlkZW8gYW5kIHBpY3RvcmlhbCBjb250ZW50LsKgPGVtPjxzdHJvbmc+SW5jbHVkaW5nwqA8L3N0cm9uZz48L2VtPm91ciB5ZWFybHkgMTIgRGF5cyBvZiBDaHJpc3RtYXMgc2VyaWVzITwvcD4K[/optin_box_field][optin_box_field name=”privacy”][/optin_box_field][optin_box_field name=”top_color”]undefined[/optin_box_field][optin_box_button type=”0″ button_below=”Y”]Send me exclusive tips now![/optin_box_button] [/optin_box]

Vintage Christmas Star

Vintage Christmas Star 001

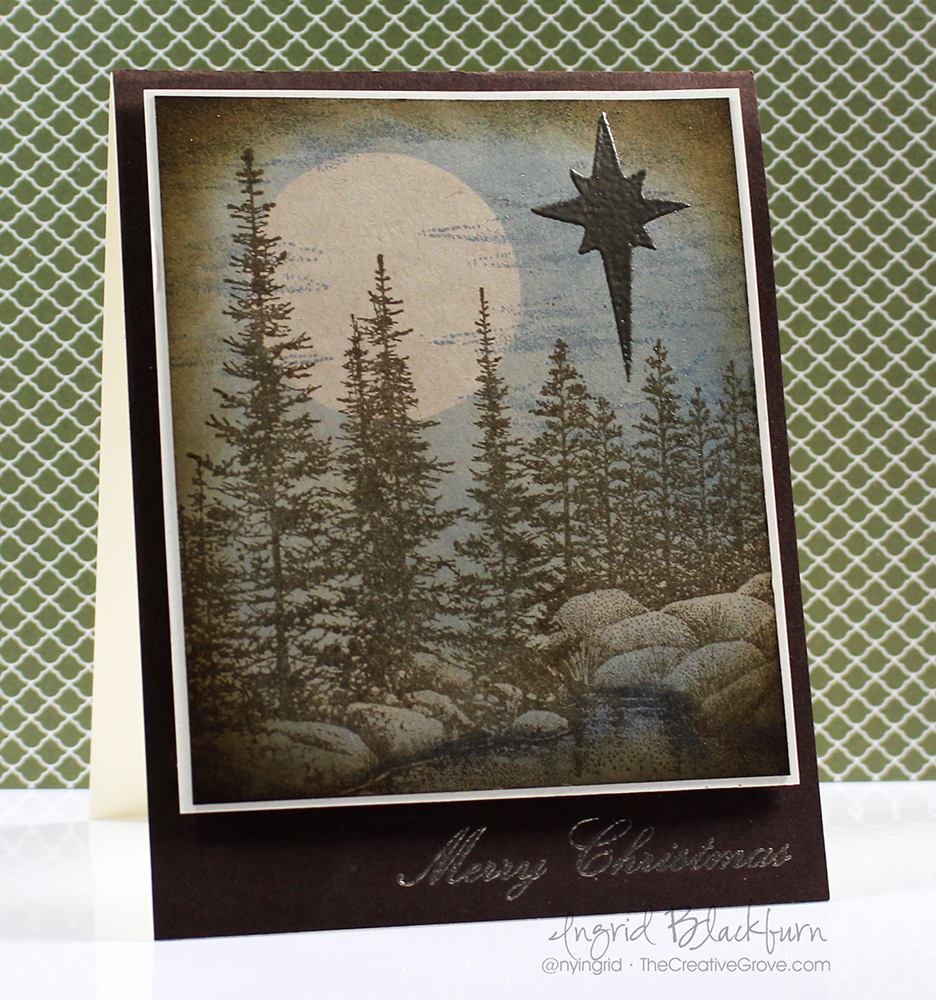
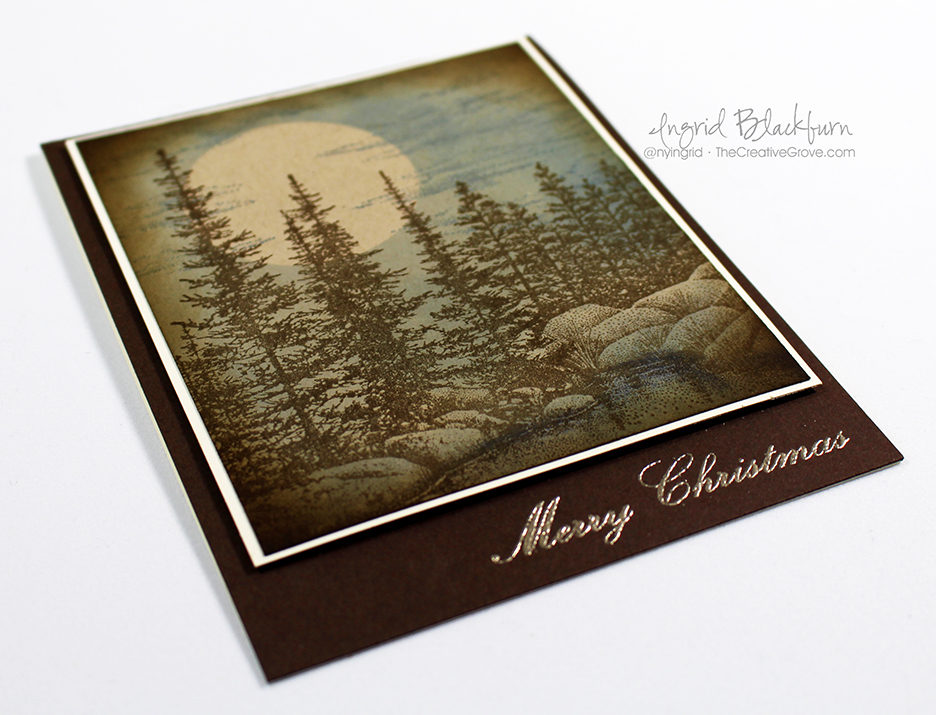
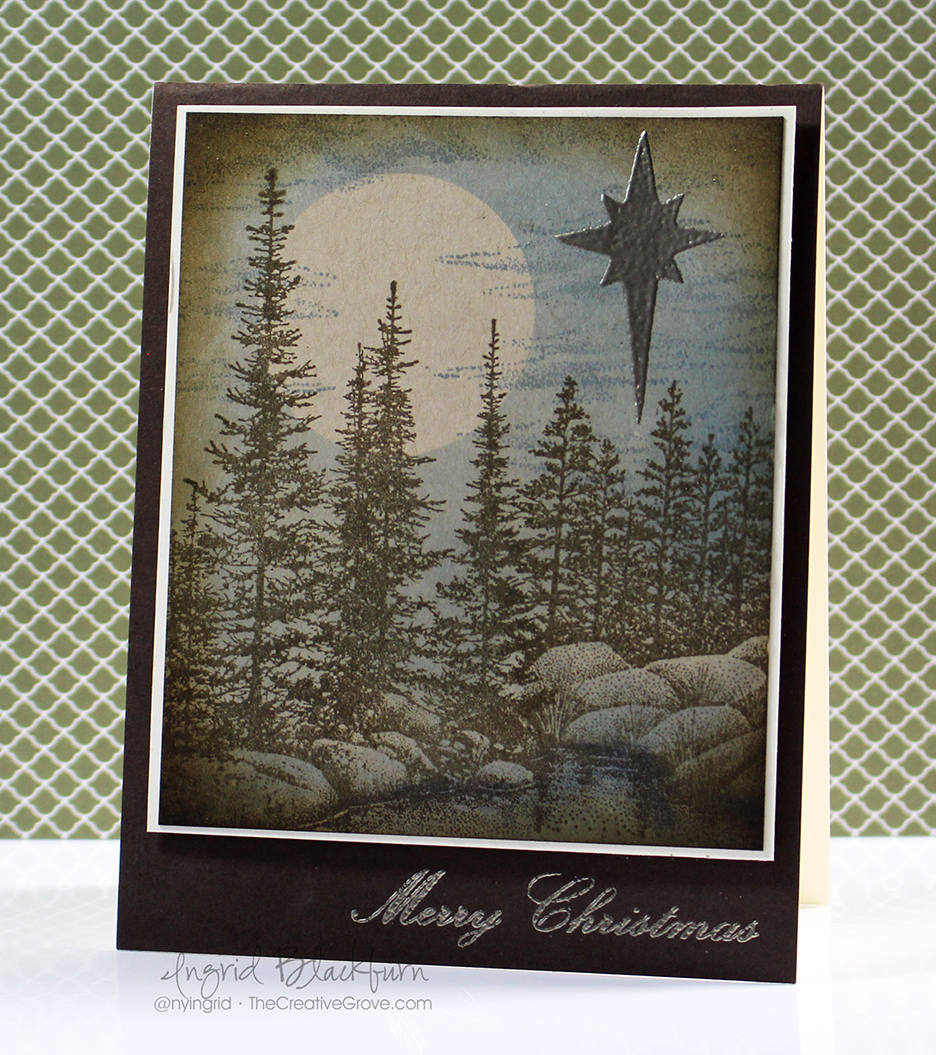
Today’s challenge keyword is star – so let’s learn how to incorporate that into this vintage holiday card. This month’s challenge at Happy Little Stampers is to use a star in some form on your card. I have to admit, I started off in a very different direction…then ultimately decided to create a simple card with a vintage masculine feel that could showcase the ultimate Christmas star.

HLS Christmas Challenge December 2015

I guess I’ve been in a vintage kind of a mood these past few months. At least here on the blog! I don’t know what it is that seems soothing about this color palette to me, but I’m really loving the feel. Maybe it’s because I’ve been injured and not able to walk as much as I would like in the woods…who knows?!! Here’s a quick tutorial for you, and be sure to stop by again next week for the video!

Creating a Quick Vintage Feel to your Holiday Cards –

  • This project was done on kraft colored paper – not white. It helps with the overall look and feel.
  • I find that the brown tone fits this style better than black. So ink your stamps up in a dark brown – something earthy. I used Ground Espresso by Ranger Distress.
  • Stamp the Stampscapes Pines & Rocks Lg on the left and the left side of Lakeside Reflections Lg to the right Tip – use a torn piece of paper towel to mask off the edge and create a seamless scene.

Vintage Christmas Star 002

  • Place two post it notes in copy paper and punch out your moon with a 1 1/4″ circle punch. This will be your mask.
  • Place your moon where you’d like it before adding blues to the sky
  • Use a mini sponge tool and some blue hues to shade in your water and sky.
  • Stamp Cloud Strips Lg by Stampscapes in Stormy Sky Distress. Be sure to overlap the moon slightly.
  • Once you have the look you’d like – add a little shading with s neutral like Weathered Wood Distress to the rocks.
  • Sponge the entire scene around the perimeter with  a brown – I used Gathered twigs for a slightly different feel than the trees.
  • Add your star and emboss in Pewter. I used the Nativity Angel Stencil by Stamplorations.

Vintage Christmas Star 004

  • The perfect sentiment makes this card and nails the vintage feel. Here you see one of the many sentiments from Mixed Christmas Sentiments by Happy Little Stampers. Emboss it in Pewter for a great look, rather than something bright.
  • The scene is matted onto Vanilla card stock for contrast before being popped up on fun foam onto an Espresso card base.

I do hope you like this card – it’s actually a great one to mass produce and goes much faster than you think! I hope this inspired you to create something special with a star for your cards. Be sure to enter them into the Christmas Challenge at Happy Little Stampers!

Keep those fingers inky –


Signature.jpg

[optin_box style=”2″ width=”500″ alignment=”center” email_field=”email” email_default=”Enter your email address” integration_type=”aweber” double_optin=”Y” list=”3846012″ name_field=”name” name_default=”Enter your first name” name_required=”N”][optin_box_field name=”headline”]Learn with our exclusive FREE Video Series[/optin_box_field][optin_box_field name=”paragraph”]PHA+R2V0IHRoZSBmcmVlIENyZWF0aXZlIFRpcHMgRS1sZXR0ZXIgYW5kIGxlYXJuIHdpdGggc3Vic2NyaWJlciBleGNsdXNpdmUgdmlkZW8gYW5kIHBpY3RvcmlhbCBjb250ZW50LiA8ZW0+PHN0cm9uZz48c3BhbiBzdHlsZT0iY29sb3I6ICM4MDAwMDA7Ij5JbmNsdWRpbmc8L3NwYW4+wqA8L3N0cm9uZz48L2VtPm91ciB5ZWFybHkgMTIgRGF5cyBvZiBDaHJpc3RtYXMgc2VyaWVzITwvcD4K[/optin_box_field][optin_box_field name=”privacy”][/optin_box_field][optin_box_field name=”top_color”]undefined[/optin_box_field][optin_box_button type=”1″ text=”Subscribe now!” text_size=”26″ text_color=”#ffffff” text_bold=”Y” text_letter_spacing=”0″ text_shadow_panel=”Y” text_shadow_vertical=”1″ text_shadow_horizontal=”0″ text_shadow_color=”#000000″ text_shadow_blur=”0″ styling_width=”36″ styling_height=”15″ styling_border_color=”#000000″ styling_border_size=”1″ styling_border_radius=”6″ styling_border_opacity=”100″ styling_shine=”Y” styling_gradient_start_color=”#345523″ styling_gradient_end_color=”#68ab46″ drop_shadow_panel=”Y” drop_shadow_vertical=”1″ drop_shadow_horizontal=”0″ drop_shadow_blur=”1″ drop_shadow_spread=”0″ drop_shadow_color=”#ffffff” drop_shadow_opacity=”50″ inset_shadow_panel=”Y” inset_shadow_vertical=”0″ inset_shadow_horizontal=”0″ inset_shadow_blur=”0″ inset_shadow_spread=”1″ inset_shadow_color=”#000000″ inset_shadow_opacity=”50″ location=”optin_box_style_2″ button_below=”Y”]Subscribe now![/optin_box_button] [/optin_box]

Happy Little Stampers 2nd Blog Hop!

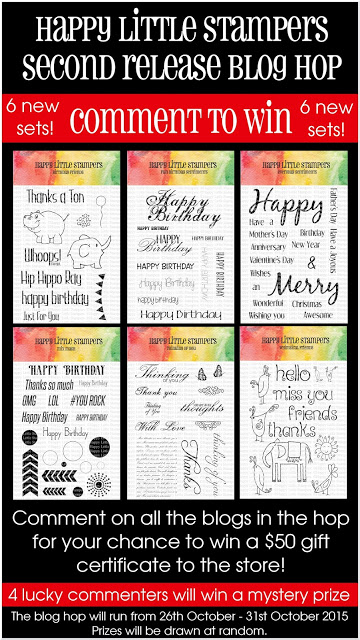
Welcome to The Creative Grove and the second Blog Hop for Happy Little Stampers! Chances are you hopped along from Carol’s blog. Today I have three projects to share for you from the second release at Happy Little Stampers!

Happy Little Stampers Blog Hop

In addition to some great inspired projects, HLS is giving away a $50 gift certificate to the store to one commenter! And, four other randomly selected lucky commenters will win a mystery prize too!  So as you’re hopping along, don’t forget to leave a comment!

Here’s what you do:
  • Start off by leaving a comment on the Happy Little Stampers blog, and then continue on to each Designer.
  • Be sure to comment on all the blogs – including the Happy Little Stampers blog in order to be eligible for the prizes!
  • The blog hop will run for one week giving you enough time to hop through and check out what the designers will be creating.

I used two of the new sets – Mix Mash and Everyday Sentiments to make some great cards that I hope you’ll love! Here are all the creative tips and details…

Blog Hop Projects

Ingrid Blackburn CAS Cards

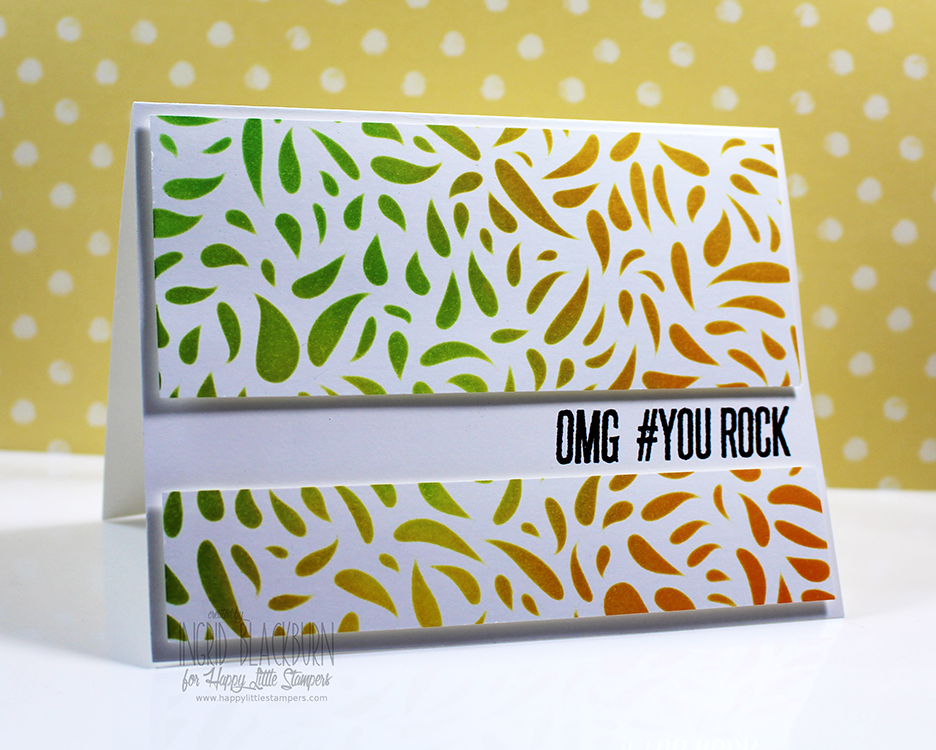
Project One – OMG #YOUROCK

For this fun card I wanted something funky and cool for my niece Rebecca. I love the lightheartedness of some of the sentiments in the Mix Mash set. To create this card:

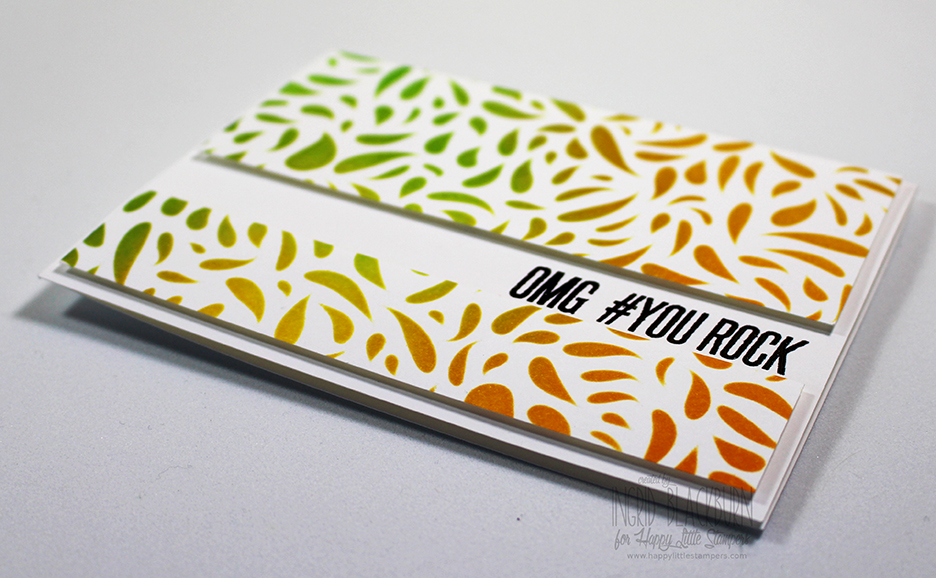
  • You’ll want to use the OMG and #YouRock stamps embossed in Black to really stand out from the colorful background.
  • You’ll need to match the quirkiness of the stamps, so choose a fun background stamp or stencil. I chose a Hero Arts Stencil that I recently purchased.
  • To get that fun colorful design, use a sponge applicator and sponge Mustard Seed, Fossilized Amber, Mowed Lawn and Spiced Marmalade Distress Inks to create the pattern on a piece of white card stock.

Hero Arts Stencils

  • To get the sentiment perfectly positioned, you’ll want to figure out how large you want your space to be, then plan on 1/8″ for the top and bottom.
  • I chose 3/4″ for my space and to keep with the Rule of Thirds theory of design, made sure to split my piece 1/3 of the way through. This helps to balance your project.
  • For a little dramatic effect – pop your panels up with dimensionals or foam tape. That will help to give you a great shadow effect.

It’s a fun project, right?

Happy Little Stampers

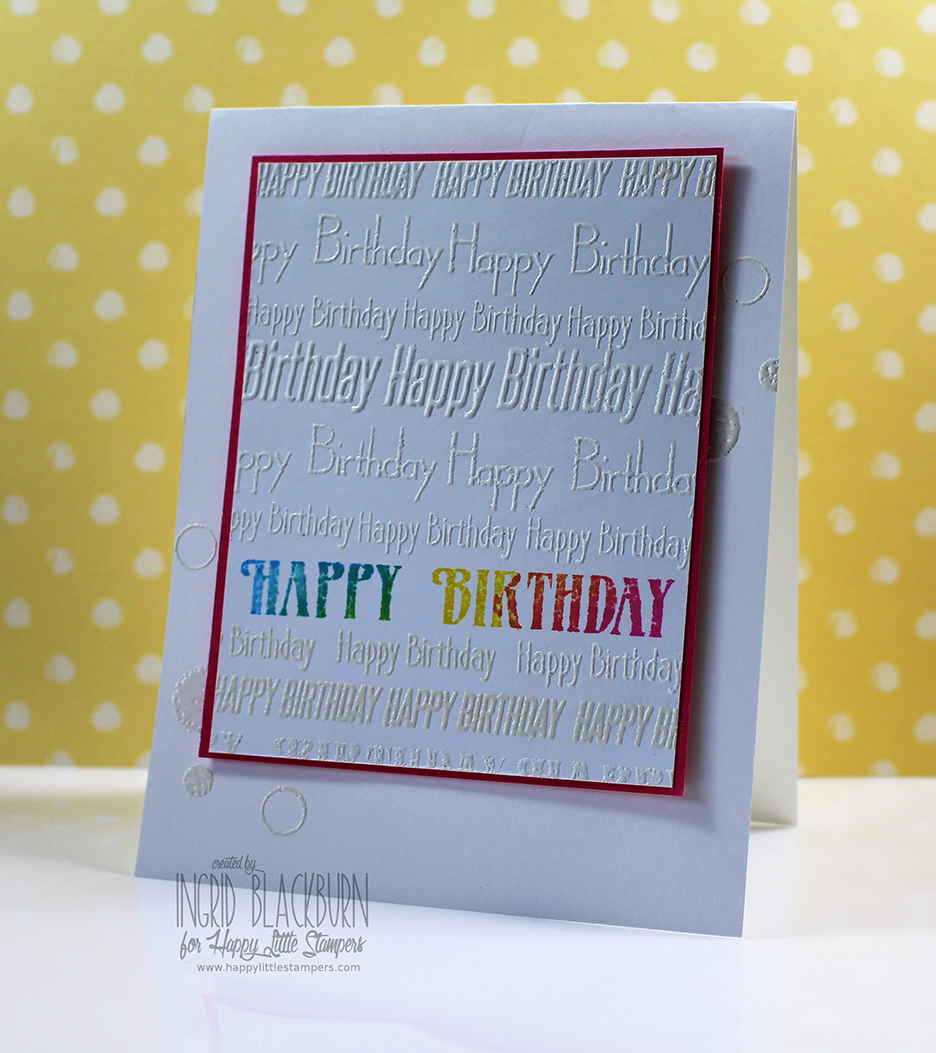
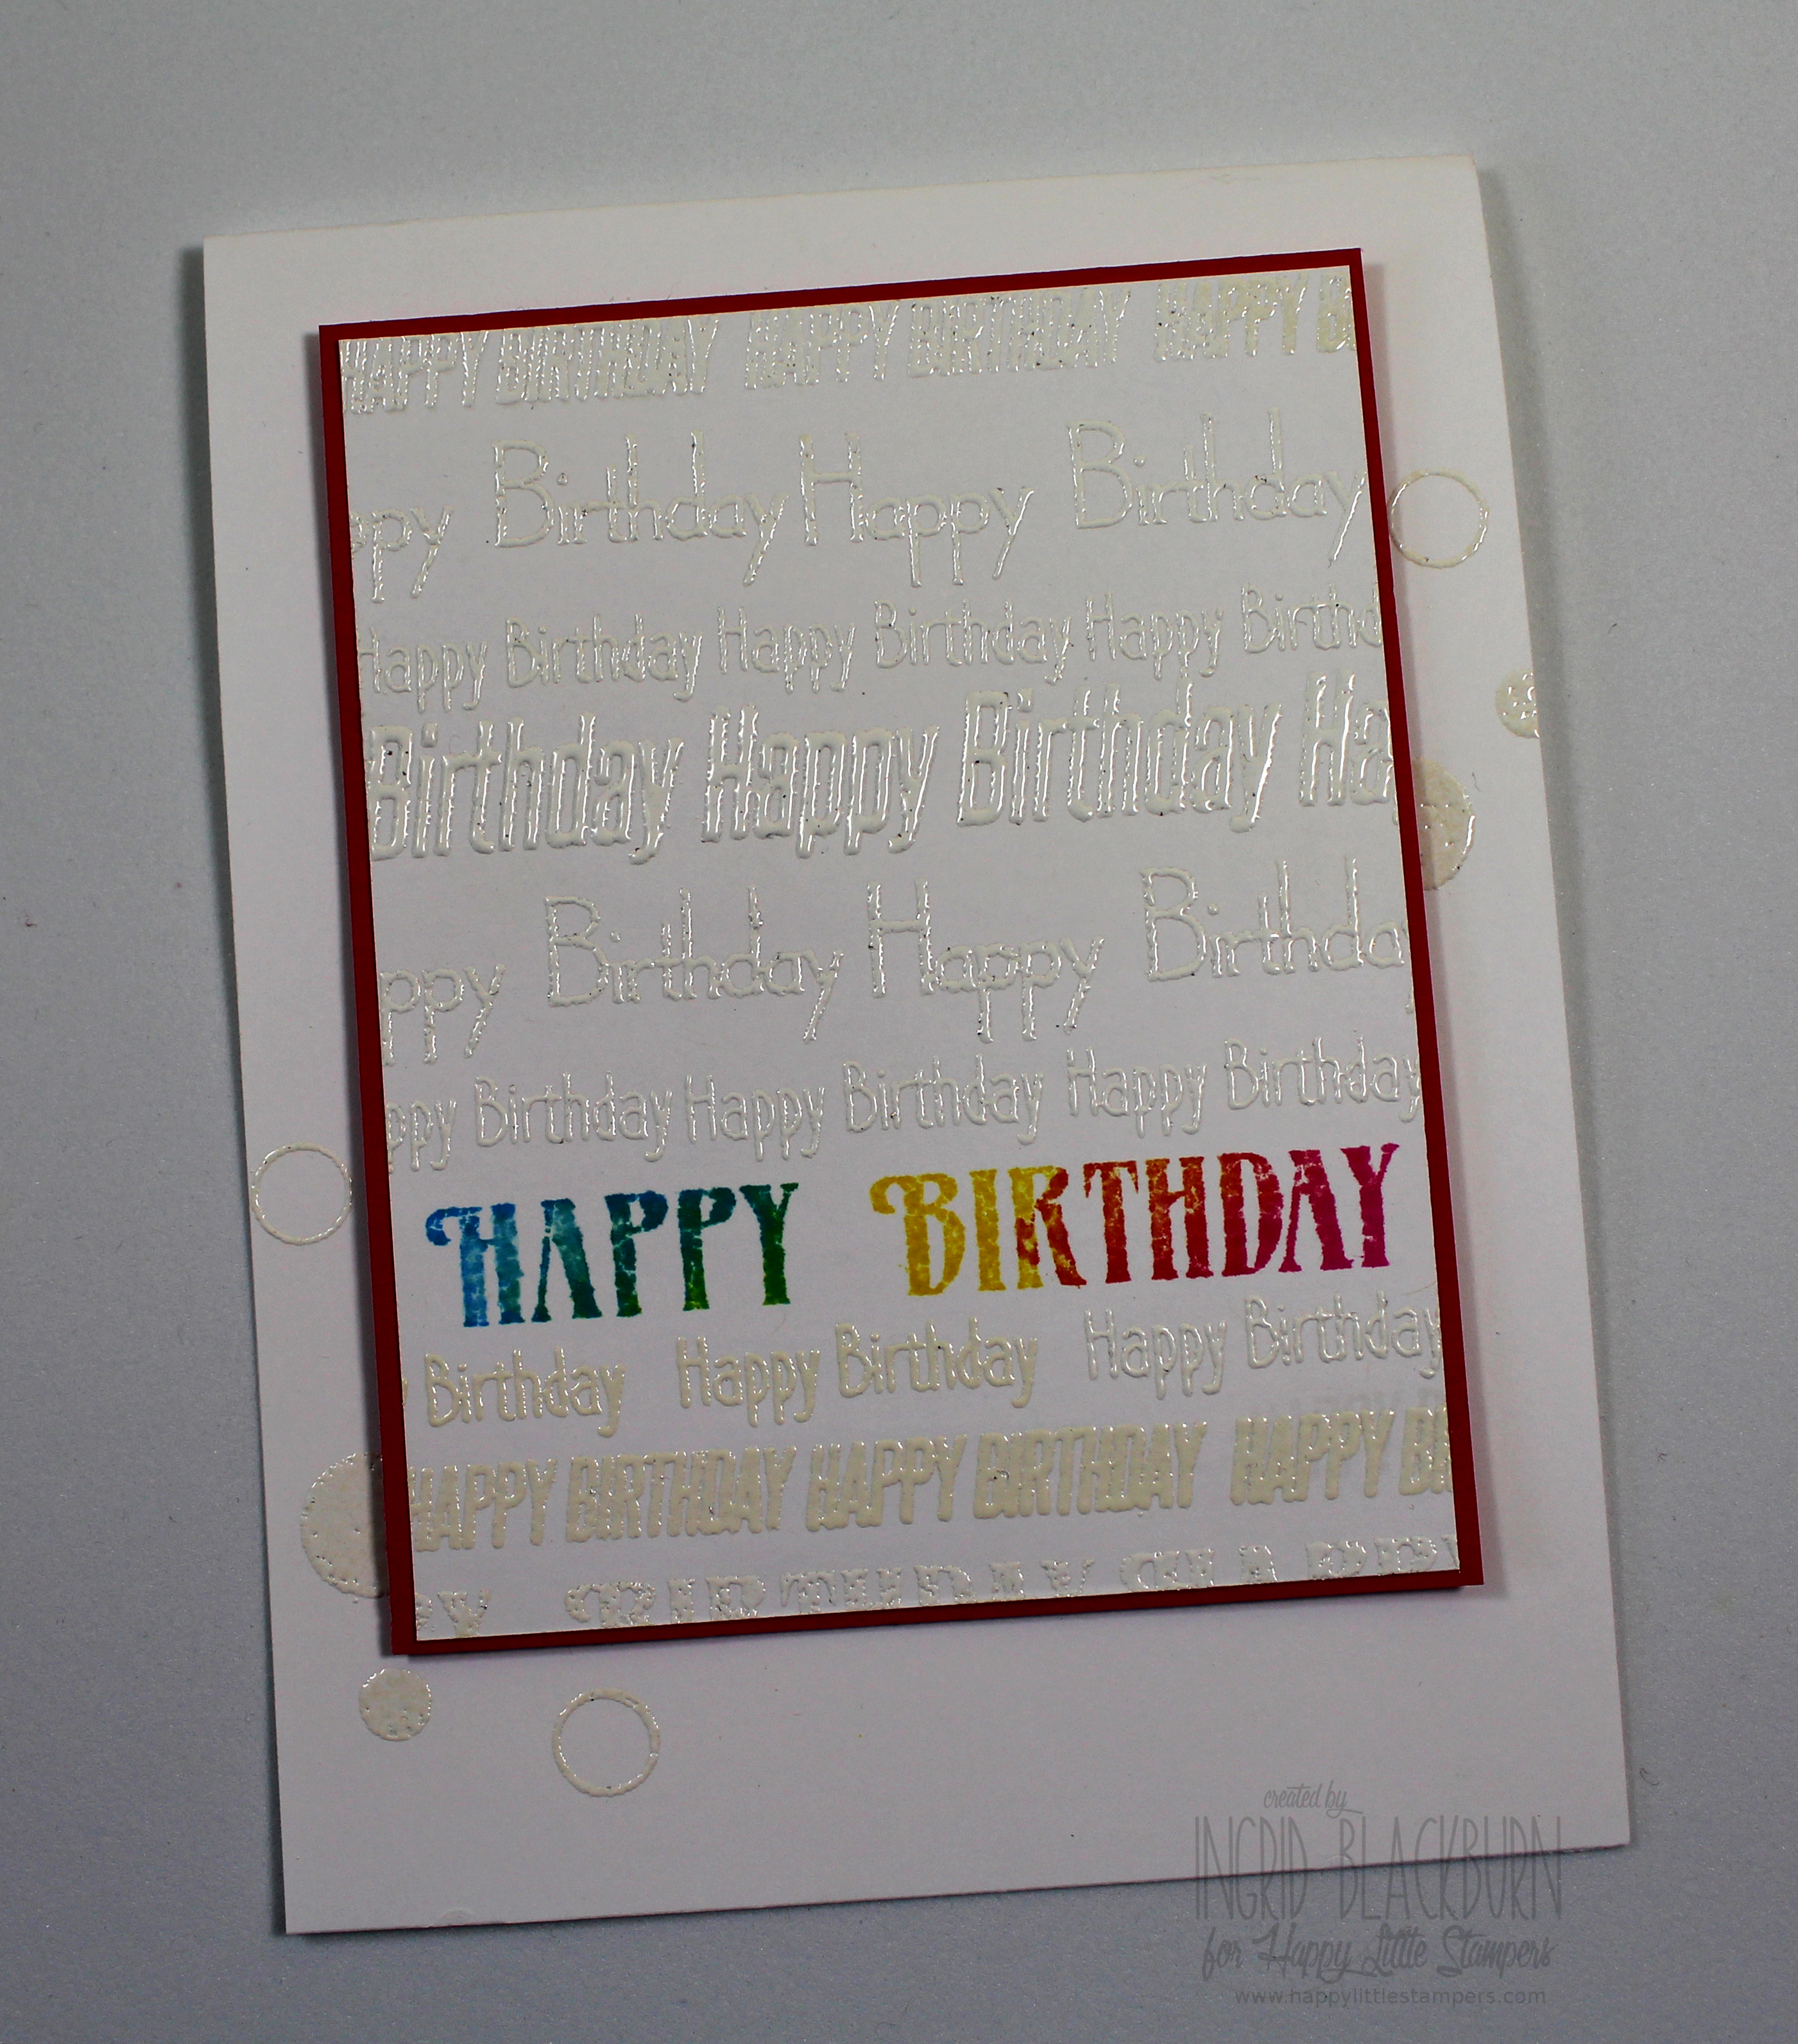
Project Two – Spunky Birthday

I just spent several weeks with my family in NY. My 10 year old niece Chiarra is all spunk and spirit. She loves to break out in song, dance or just start acting a scene – mark my words…she’ll be a future actress! I couldn’t get her singing out of my head this morning when I was stamping – so… fun, bright and playful is the direction this project went.

The Mix Mash stamp set is filled with great birthday sentiments and some awesome little detail stamps. I actually was going to add white sequins to it, when I decided to add the circle and lined circles in their place – it looks way better and talk about versatile! I love stamps like that. This project is a fun mixed mash itself! Here is how to recreate it:

  • First stamp your main sentiment.  Ink up the center of the largest Happy Birthday stamp with Distress – More Mustard, then use Picked Raspberries and Salty Ocean being sure to overlap them a bit to get a great mix of color. Keep it towards the bottom of a 3 3/4 x 4″ panel, leaving an inch to stamp other sentiments.
  • An embossing buddy/destatic tool is key for this project, as you’ll be handling it numerous times. Use your embossing buddy on a space above or below your main sentiment, and stamp one of the happy birthday stamps repeatedly across in versamark.

Happy Little Stampers Stamps

  • Try to keep them aligned. I had to stamp, add powder, then stamp again to see it right.
  • Once you have white powder on a line  – emboss with a heat tool and then repeat till your panel is filled.
  • Matte onto a matching panel – I used Melon Mambo by SU.  I trimmed my panel so that it was just slightly smaller than a 1/16″ border.
  • Figure out where you are placing your panel and stamp solid and lined circles in a few spots as in the card.
  • Pop up your panel and you’re all set!
  • This card is an A2 top folding card – 4 1/4 x 5 1/2″.

I know she’ll love it, it’s bright and fun. The white Happy Birthday’s really make a statement.

Masculine Cards

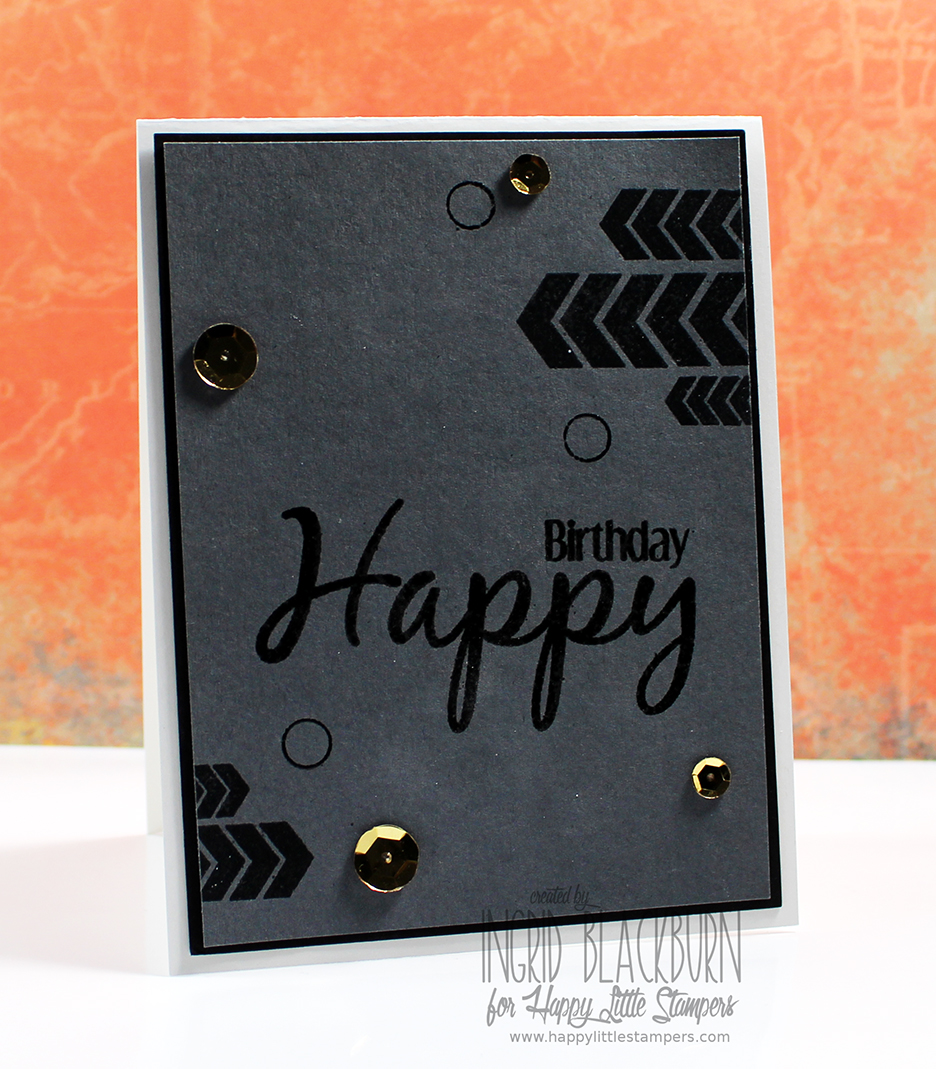
Project Three – Masculine Birthday

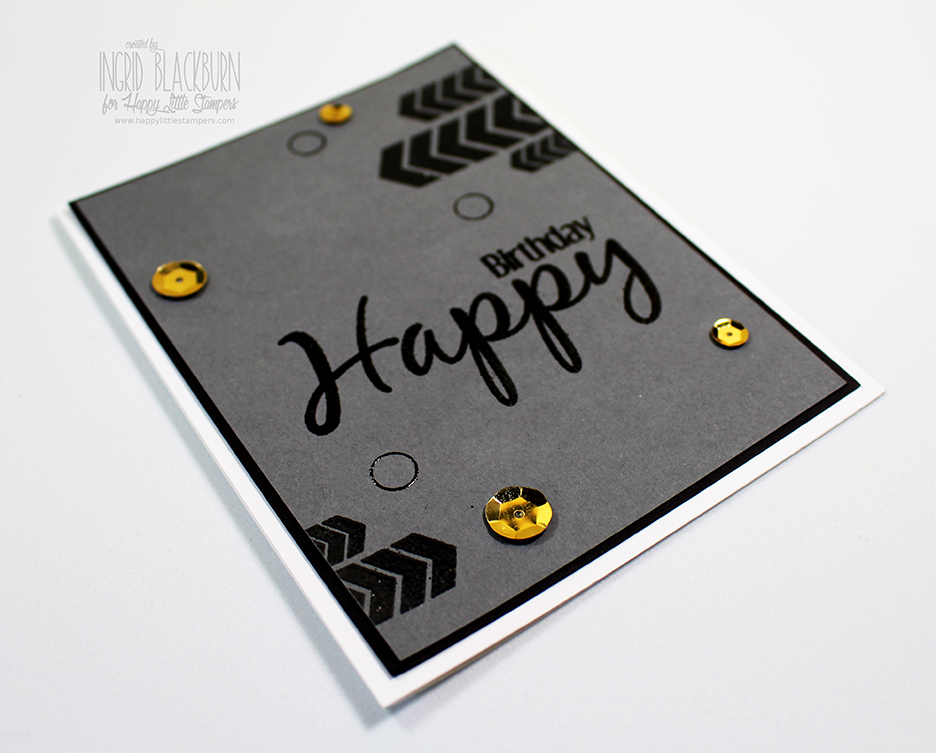
For this card, I wanted a more masculine look for my nephew Matt’s upcoming birthday. So I decided to go with a grey panel and keep it rather simple. Originally I was going to stamp and emboss the greeting on vellum, tear and overlay, but as I began, I thought simple might be better here. What do you think? This one is pretty straightforward, but here’s the step by step anyway!

  • Stamp and emboss your greeting from Everyday Sentiments in black about 1/3 rd of the way up from the bottom onto a piece of Basic Grey card stock (SU) – 3 7/8 x 5 1/8″.
  • Stamp the arrow stamps from the Mix Mash set in Versamark and emboss with clear powder to get the darker grey color.

Everyday Sentiments Masculine Card 002

  • Stamp and emboss your circle stamps from the Mix Mash set in black.
  • Add gold sequins and matte onto a black base 1/16″ larger ( 4 x 5 1/4″)
  • Adhere to a top folding A2 card – 4 1/4 x 5 1/2″.

It’s a simple card, but sometimes simple is just perfect. One of the reasons I just love CAS cards!!

Well, there you have it – just a few ideas and fun ways to use some of the new stamp sets in this second release. I hope you enjoyed the creative juice…and that’s a wrap for the second blog hop! If you didn’t start at the beginning with the Happy Little Stampers blog…be sure to head there next and hop along the way for 20 other designers ideas! WOW…that’s a ton of creativity!!

And be sure to comment to win too – in order to win, you need to comment on all the blogs including the HLS blog. Happy Hopping, see you next time!!

Signature-24-pt_thumb.jpg

Here are links for the whole hop!

Happy Little Stampers
Kylie Purtell
Loll Thompson
Joyce Mehrberg
Gloria Lee
Tanja Kabel
Susan Bridgman
LesLee
Gail Townsend
Carol Steedman
Melissa Lane
Linda Walmsley
Birgit Norton
Kim Heggins
Valentyna
Sue T.
Bonnie Klass
Toni
Chrissie
Anita
Carol Dunham
Ingrid Blackburn <—- You are Here!

Vintage Christmas Cards–How to achieve a vintage look

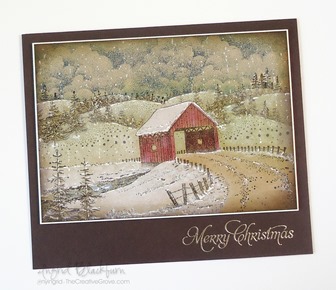
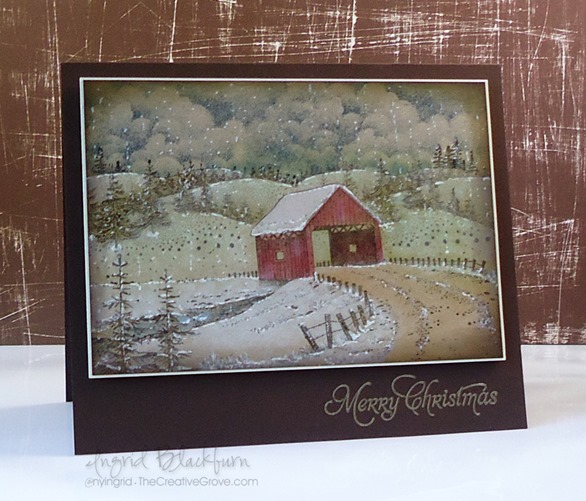
Vintage Snow Covered Bridge

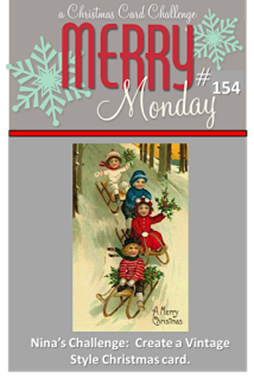
If you have been following my blog for a while, you know one thing you don’t usually see here are vintage Christmas cards! But this week the gals over at Merry Monday threw me for a loop – yes…the theme is to create a vintage Christmas card!

154

I don’t have ANY stamps that fit this bill, so I pulled out my trusty Stampscapes stamps and sat down to create my own vintage feel. Now if you’re a VIP Community member you’ll get to see exactly how I created this in a step by step video…I know all the members who love scenic cards will just love it. And if you want other exclusive videos, be sure to get the creative tips e-letter!

Every now and then it’s good to step outside your comfort zone and try something new. I know doing just that keeps my creative juices sharp! So how exactly do you make a vintage card.

Well, first I googled it…lol! Yes, I know it seems rather cut and dry, but like I said, this is not my style, so I thought I’d surf for a little visual help. I came across several how to tutorials for turning photos into a vintage look with Photoshop and that gave me my color palette. Basically, muted colors – a little more on the earthy side with some framing – which I would do with a scene anyway.

how to make a vintage christmas card

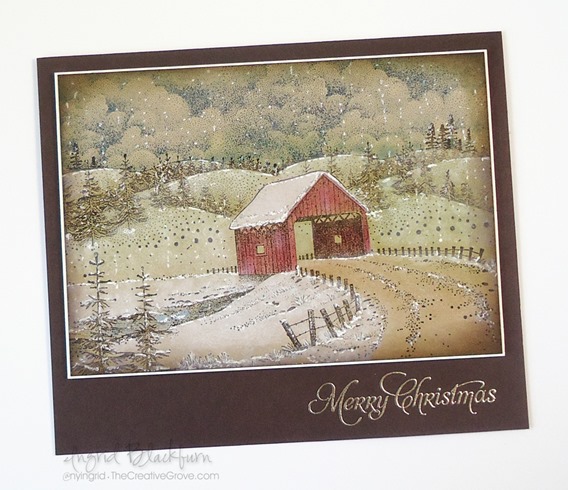
The scene is built on a foundation of Crumb Cake card stock. I used a stipple brush to color in my scene along with some Stampin’ Up! Classic Ink pads. For the road I used Tea Dye and the stream – Stormy Sky Distress inks. My hills are in Pear Pizazz, the barn is in Riding Hood Red, the clouds are in Midnight Muse and the stamping was done in Early Espresso.

You’ll want to add some concentrated Pigment ink in the form of a q-tip from a white Craft Pad, I used one by Stampin Up and a pigment pen – Signo Uniball Gel pen. I also stippled a little with the white craft ink to get a muted white feel. To get the vintage feel around the edges, use a mini sponge tool and some walnut stain distress ink.

Of course there is quite a bit of masking that went on to build the scene along with coloring certain elements. I just wish I had masked the sky off when I did the hills – at the horizon they are a bit green – oh well!

Vintage Snow Covered Bridge -vintage christmas cards

Overall, to build the scene, I used the following stampscapes stamps – Snowy Covered Bridge, Single Pine & Trees and Hills from Nature Set 1, Tree Duo Sm, Lilly Grass, Snowy Rocks Sm, and Cloud Cumulous Large. I stretched out the scene a bit with an Early Espresso Marker in a few spots.

To keep with the vintage feel, the greeting is embossed in Pewter rather than a shiny silver. The finishing touch of course is the sliver just shy of 1/16” matting in Very Vanilla popped up on dimensionals onto Early Espresso. My card measures 6 3/8 x 5 3/8”.

Overall, I think my vintage Christmas card turned out pretty cool. I’m glad I tried it out! Have a crafty weekend!

Signature

[optin_box style=”13″ width=”500″ alignment=”center” action=”https://www.aweber.com/scripts/addlead.pl” disable_name=”Y” method=”post” email_field=”email” email_default=”Enter your email address” integration_type=”aweber” double_optin=”Y” list=”3846012″ name_field=”name” name_default=”Enter your first name” name_required=”Y”][optin_box_field name=”headline”]If you enjoyed this tutorial…[/optin_box_field][optin_box_field name=”paragraph”]PHA+4oCmeW914oCZbGwgbG92ZSBvdXIgPGVtPjxzdHJvbmc+PHNwYW4gc3R5bGU9ImNvbG9yOiAjMjQ0YzVlOyI+ZnJlZTwvc3Bhbj4gPC9zdHJvbmc+PC9lbT5zdWJzY3JpYmVyIG9ubHkgdmlkZW8gc2VyaWVzLiDCoExlYXJuIG5ldyB0ZWNobmlxdWVzIHRocm91Z2ggb3VyIDxzcGFuIHN0eWxlPSJjb2xvcjogIzI0NGM1ZTsiPjxlbT48c3Ryb25nPmV4Y2x1c2l2ZTwvc3Ryb25nPjwvZW0+wqA8L3NwYW4+Q3JlYXRpdmUgVGlwcyBlLWxldHRlcsKgYW5kIHN1YnNjcmliZXIgb25seSB2aWRlbyBhbmQgcHJvamVjdCB0dXRvcmlhbHMhPC9wPgo=[/optin_box_field][optin_box_field name=”privacy”][/optin_box_field][optin_box_field name=”top_color”]undefined[/optin_box_field][optin_box_button type=”1″ text=”Send me exclusive tips!” text_size=”32″ text_color=”#000000″ text_bold=”Y” text_letter_spacing=”0″ text_shadow_panel=”Y” text_shadow_vertical=”1″ text_shadow_horizontal=”0″ text_shadow_color=”#f6fefb” text_shadow_blur=”0″ styling_width=”50″ styling_height=”19″ styling_border_color=”#000000″ styling_border_size=”1″ styling_border_radius=”6″ styling_border_opacity=”100″ styling_shine=”Y” styling_gradient_start_color=”#a3b640″ styling_gradient_end_color=”#80902c” drop_shadow_panel=”Y” drop_shadow_vertical=”1″ drop_shadow_horizontal=”0″ drop_shadow_blur=”1″ drop_shadow_spread=”0″ drop_shadow_color=”#000000″ drop_shadow_opacity=”50″ inset_shadow_panel=”Y” inset_shadow_vertical=”0″ inset_shadow_horizontal=”0″ inset_shadow_blur=”0″ inset_shadow_spread=”1″ inset_shadow_color=”#80902c” inset_shadow_opacity=”50″ location=”optin_box_style_13″ button_below=”Y”]Send me exclusive tips![/optin_box_button] [/optin_box]


Chalktalk Distress Layered Thanks

Chalktalk Thanks 001

What do you do when you try out a new technique on a piece of scrap paper?  Do you use the left over piece for a project?  I try to, I figure if I’m going to take the time to figure it out, why not create something small at the very least!  That’s what this project is – my scrap turned into tag.

Chalktalk Thanks 003

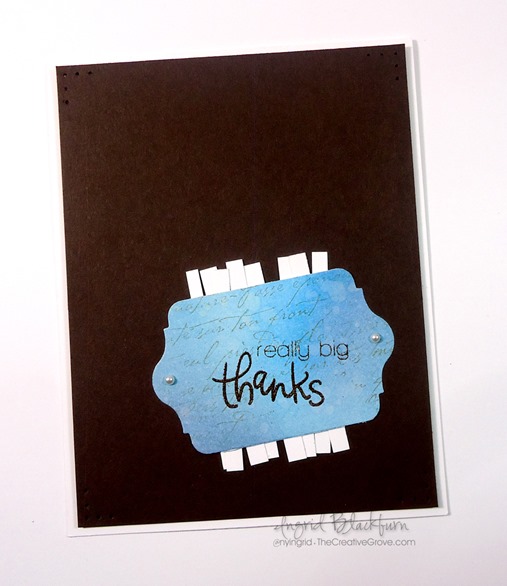
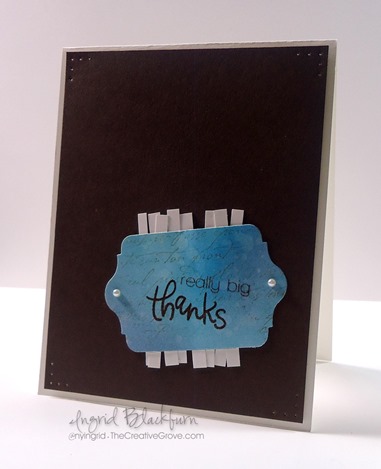
Layer several shades of blue distress inks with Vintage Photo, spatter a little water, dry your piece thoroughly and then layer a lightly stamped layer from a background script stamp.  The end result is stunning!  I cut out my scrap with the biggest tag framelit from the set Chalk Talk by Stampin’ Up! Next, you’ll want to use a darker brown to stamp your greeting from the stamp set Thanks by Simon Says Stamp on an angle and voila – you have a perfect tag.

Chalktalk Thanks 002

For a little emphasis, I decided to use some left over tiny strips of white to randomly place back and forth behind my tag.  I added a few pearls and some corner piercing to the main card front.  I like that the colors of the card are masculine – this card is a great clean and simple design that’s easily mass produced – just sponge colors on larger strips of white paper and then cut out your tags!

We have videos on this technique in our VIP Community with a few different projects if you want more step by step tutorials.  Hope to see you there!

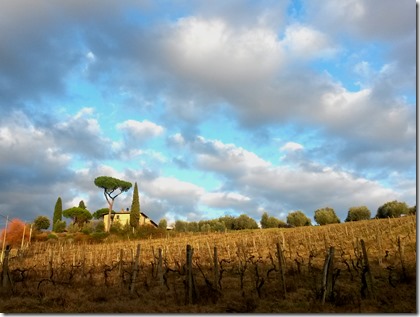
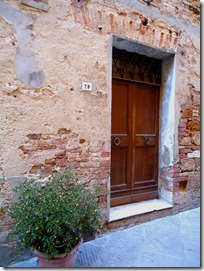
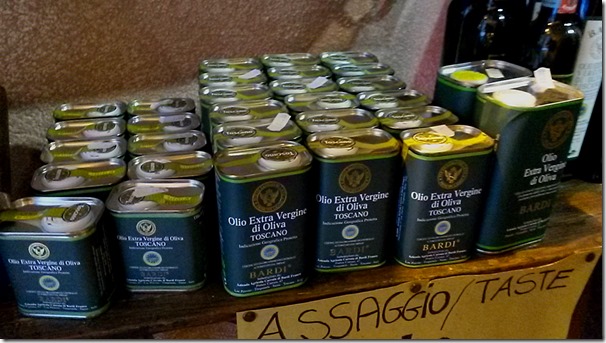
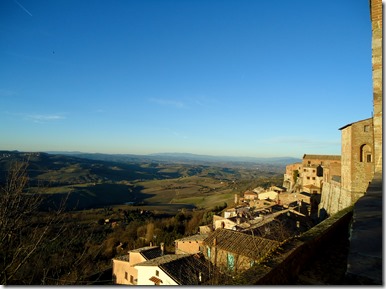
I’m wrapping up our week in Tuscany, we’re sad to go, but had a wonderful time here!  I must say after all the rich colors and texture, I’m excited to get into the stamping studio.  See you soon with more great projects.  For now, I’ll leave you with a few of the rich colors of the Tuscan countryside and villages.

20150113_15553720150112_144755DSC0831720141118_02332020150112_144938DSC08243DSC08355

Have a great day – thanks for stopping by!

Signature

Sparkly Pines and Rocks

It’s Merry Monday!  I am so honored to be a guest designer this week on this very cool weekly challenge blog.  If you haven’t yet participated…definitely check it out!  The challenges are fresh and intriguing.  You’ll definitely stretch your Christmas card making abilities into a new stratosphere.  Like this week – Sequins!

117

I wouldn’t normally reach for this little embellishment, but boy what a new addiction I have now after this one!  Thanks a lot girls – look what you’ve done. Smile

Pines on Rocks Winter Scene

Creative Tips –

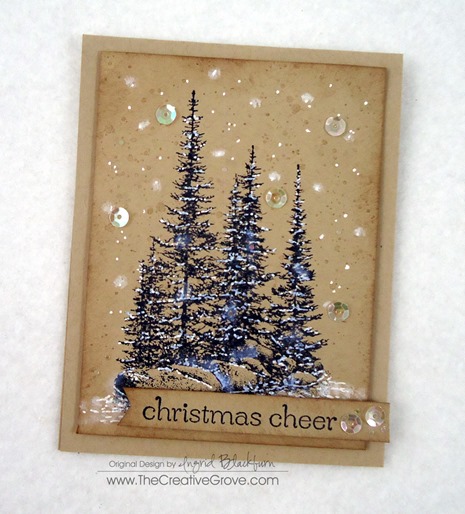
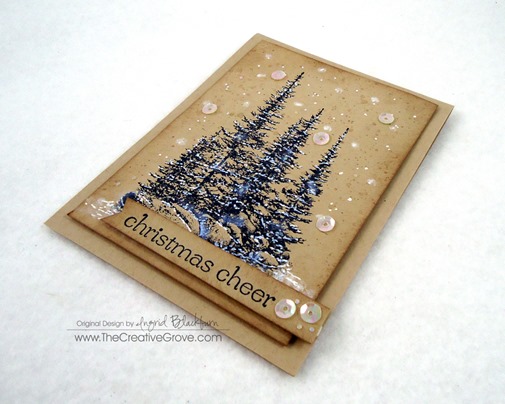
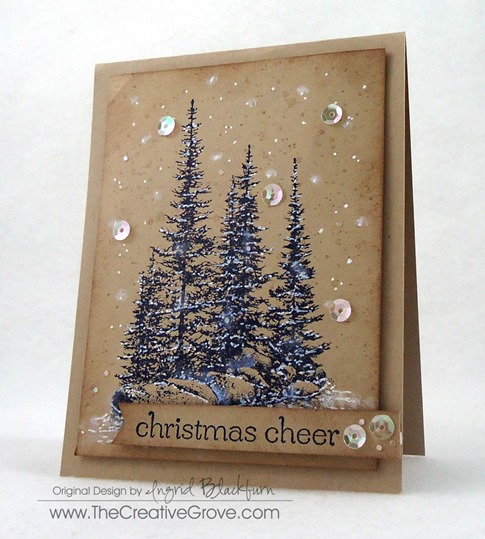
  • I used the large Stampscapes Pines and Rocks stamp in Night of Navy by Stampin’ Up! here.  Simple, just stamped on some Crumb Cake card stock.
  • To bring the snowy feel in, I used a Uniball Signo White Gel pen for some highlights and snow in the sky.

Pines on Rocks Winter Sequin Card (5)

  • To create some mist and bigger flakes, I used a qtip and white pigment ink.
  • For the sparkle and a fun touch, I added not only the sequins in clear, but the little pieces from the sequin holes.  They add just the right sparkle to this project.
  • The card front and banner are popped up for some character along with some subtle sponging in crumb cake.

Pines on Rocks Winter Sequin Card (8)Pines on Rocks Winter Sequin Card (7)

  • A simple banner greeting from Sweet Essentials from Stampin’ Up! finish this card perfectly.

Now it’s your turn!  I can’t wait to see your cards entered.  Have a Merry Monday!

Signature-Blog

[optin_box style=”13″ width=”500″ alignment=”center” action=”https://www.aweber.com/scripts/addlead.pl” disable_name=”Y” method=”post” email_field=”email” email_default=”Enter your email address” integration_type=”aweber” double_optin=”Y” list=”3846012″ name_field=”name” name_default=”Enter your first name” name_required=”Y”][optin_box_field name=”headline”]If you enjoyed this tutorial…[/optin_box_field][optin_box_field name=”paragraph”]PHA+4oCmeW914oCZbGwgbG92ZSBvdXIgPGVtPjxzdHJvbmc+PHNwYW4gc3R5bGU9ImNvbG9yOiAjMjQ0YzVlOyI+ZnJlZTwvc3Bhbj4gPC9zdHJvbmc+PC9lbT5zdWJzY3JpYmVyIG9ubHkgdmlkZW8gc2VyaWVzLiDCoExlYXJuIG5ldyB0ZWNobmlxdWVzIHRocm91Z2ggb3VyIDxzcGFuIHN0eWxlPSJjb2xvcjogIzI0NGM1ZTsiPjxlbT48c3Ryb25nPmV4Y2x1c2l2ZTwvc3Ryb25nPjwvZW0+wqA8L3NwYW4+Q3JlYXRpdmUgVGlwcyBlLWxldHRlcsKgYW5kIHN1YnNjcmliZXIgb25seSB2aWRlbyBhbmQgcHJvamVjdCB0dXRvcmlhbHMhPC9wPgo=[/optin_box_field][optin_box_field name=”privacy”][/optin_box_field][optin_box_field name=”top_color”]undefined[/optin_box_field][optin_box_button type=”1″ text=”Send me exclusive tips!” text_size=”32″ text_color=”#000000″ text_bold=”Y” text_letter_spacing=”0″ text_shadow_panel=”Y” text_shadow_vertical=”1″ text_shadow_horizontal=”0″ text_shadow_color=”#f6fefb” text_shadow_blur=”0″ styling_width=”50″ styling_height=”19″ styling_border_color=”#000000″ styling_border_size=”1″ styling_border_radius=”6″ styling_border_opacity=”100″ styling_shine=”Y” styling_gradient_start_color=”#a3b640″ styling_gradient_end_color=”#80902c” drop_shadow_panel=”Y” drop_shadow_vertical=”1″ drop_shadow_horizontal=”0″ drop_shadow_blur=”1″ drop_shadow_spread=”0″ drop_shadow_color=”#000000″ drop_shadow_opacity=”50″ inset_shadow_panel=”Y” inset_shadow_vertical=”0″ inset_shadow_horizontal=”0″ inset_shadow_blur=”0″ inset_shadow_spread=”1″ inset_shadow_color=”#80902c” inset_shadow_opacity=”50″ location=”optin_box_style_13″ button_below=”Y”]Send me exclusive tips![/optin_box_button] [/optin_box]

Pines on Rocks Winter Sequin Card (3)