Be different – Make amazing PAPER NAPKIN CARDS with a Gelli Plate

Paper Napkin Cards aren’t what they used to be. Have you ever used napkins or other frail papers in your art? Ever had the thinnest of papers fall apart on you? Tear as you separate them?

I’m just a girl (got gwen stefani stuck in your head now?) who LOVES that look you can get from a Gelli Arts® Gel Plate – (affectionately called Gelli Plate), a brayer, acrylic paints and a few stencils. Seriously – if you’ve never tried printing with a Gelli Plate, or used paper napkins on cards, keep reading…

I’m not talking about your everyday prints. I’m talking about those layered prints, that have the positive, negative and a whole lotta grungy colored goodness going on. So what in the world does that have to do with Paper Napkins you might ask? Well, let me start at the beginning…

Paper Napkin Cards

A few weeks ago I showed in this video exactly how I make cards quickly using the top layer of paper napkins. I always find paper napkin patterns that I LOVE. It’s become a little bit of an addiction. And forget about it around the holidays….that’s a great idea by the way…a stack of Christmas Cards made from an inexpensive pack ($3 for 80 focal images!) of Paper Napkins! It’s a no-brainer…

That video shows just how easy it is to make cards from a pack of paper napkins. Spoiler alert – they don’t even use adhesive to make the panels! Now you REALLY want to see how to make cards from paper napkins, huh?

Almost always, you’re only going to use the top layer for cards. That means that you are usually left with 2 blank layers unused. I told my youtube subscribers that I’d have some fun ideas for what to do with those left over layers, and that’s where we’re at today!

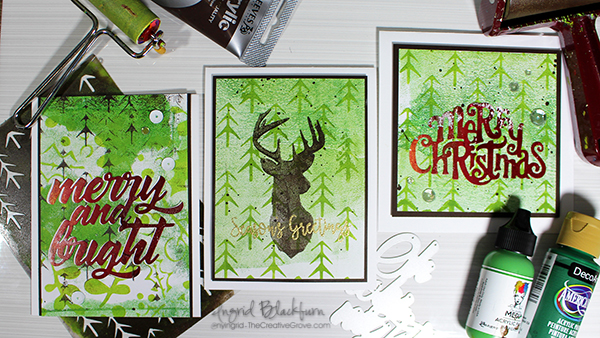
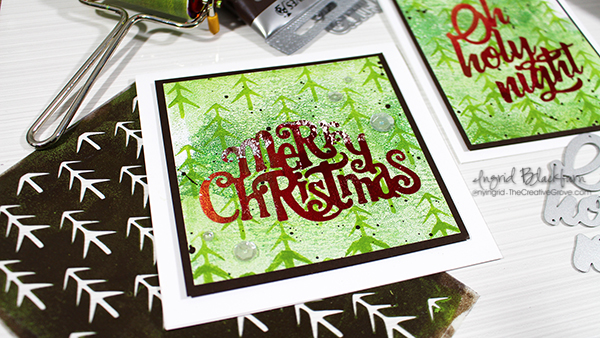
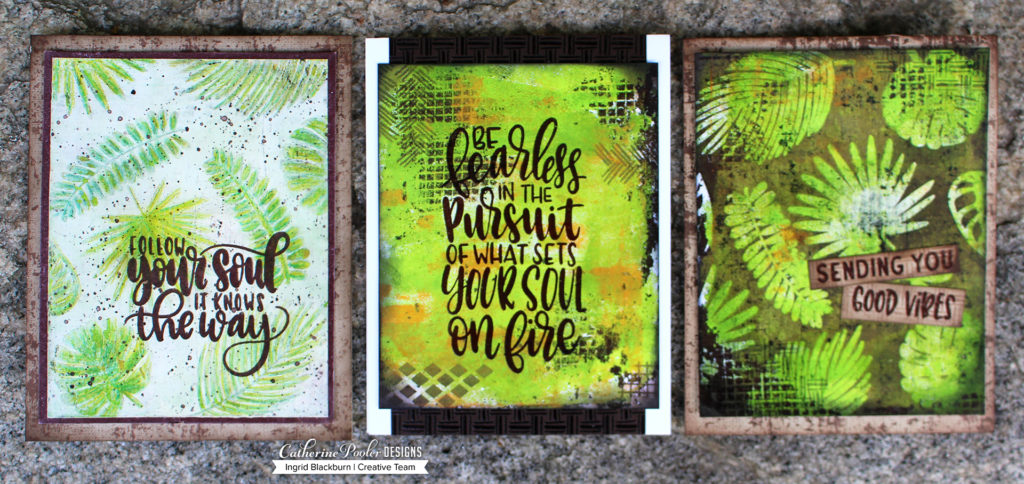
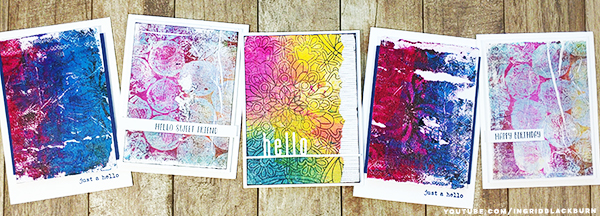
So, since today we’re making happy cards, I thought why not make THREE for you! The first two use layer 2 & 3 from the napkin – you know, the left over pieces.

I have a video coming on my youtube channel in the next few weeks, and you’re getting a sneak peek at the final projects. Are you a subscriber? If so, definitely tell me in the comments!

Here’s a little something to help you GET inspired and GET creating today with your gel plate.

If you want to know how to use one…I’ve got a great how to use a gelli plate video here and this one shows a fun multi layered print that showcases 11 ways to improve your card design.

The Prints

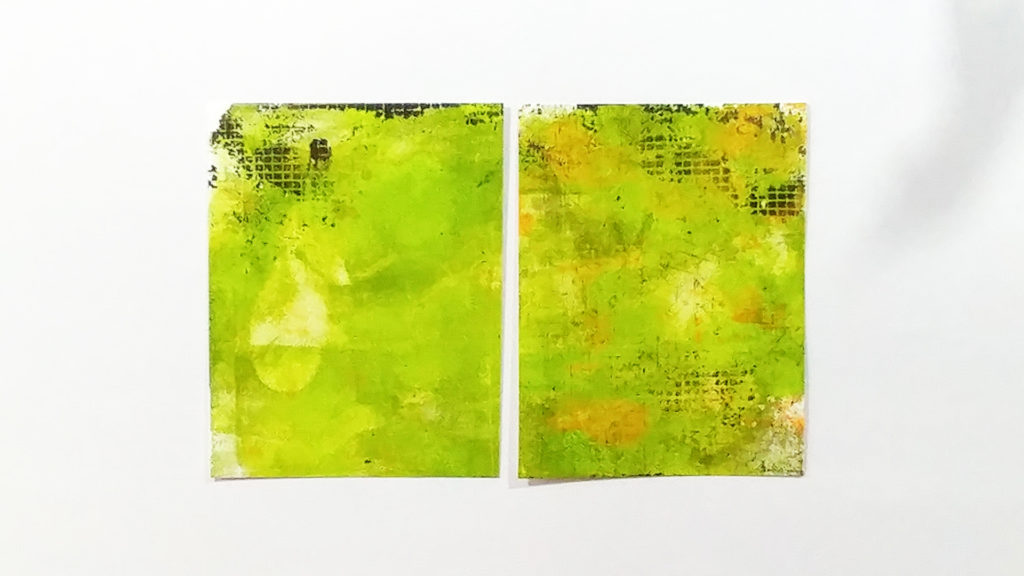
Now you’re going to need the unprinted layers from when you separated your napkin – it’s okay if they have some ghost imaging on them. I’m going to show you two ways of getting some COOL pieces for your cards and mixed media projects.

If when making your cards, you run up against needing an easy way to separate the layers, I have a way to do that. It’s quick, easy and works every time. And the video is only 2 minutes…even better:

CLICK HERE to watch in HD on YouTube

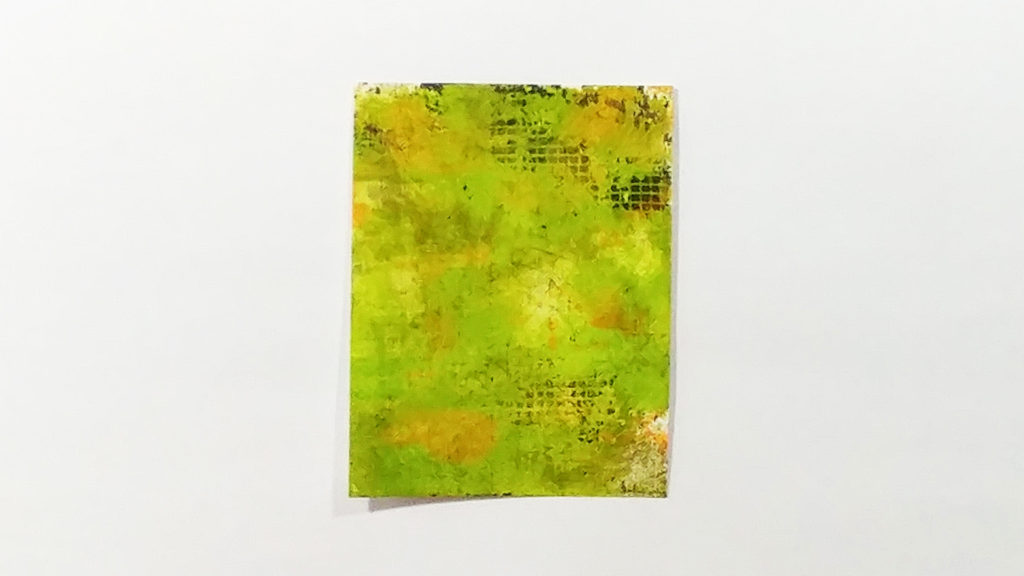
Now that you have your layers separated, our first two projects use white, plain, layers. This is perfect for those prints that still have a ghost image on them too.

Did you subscribe to my youtube channel? I post weekly videos on a variety of card making and mixed media projects. Hope you pop by!

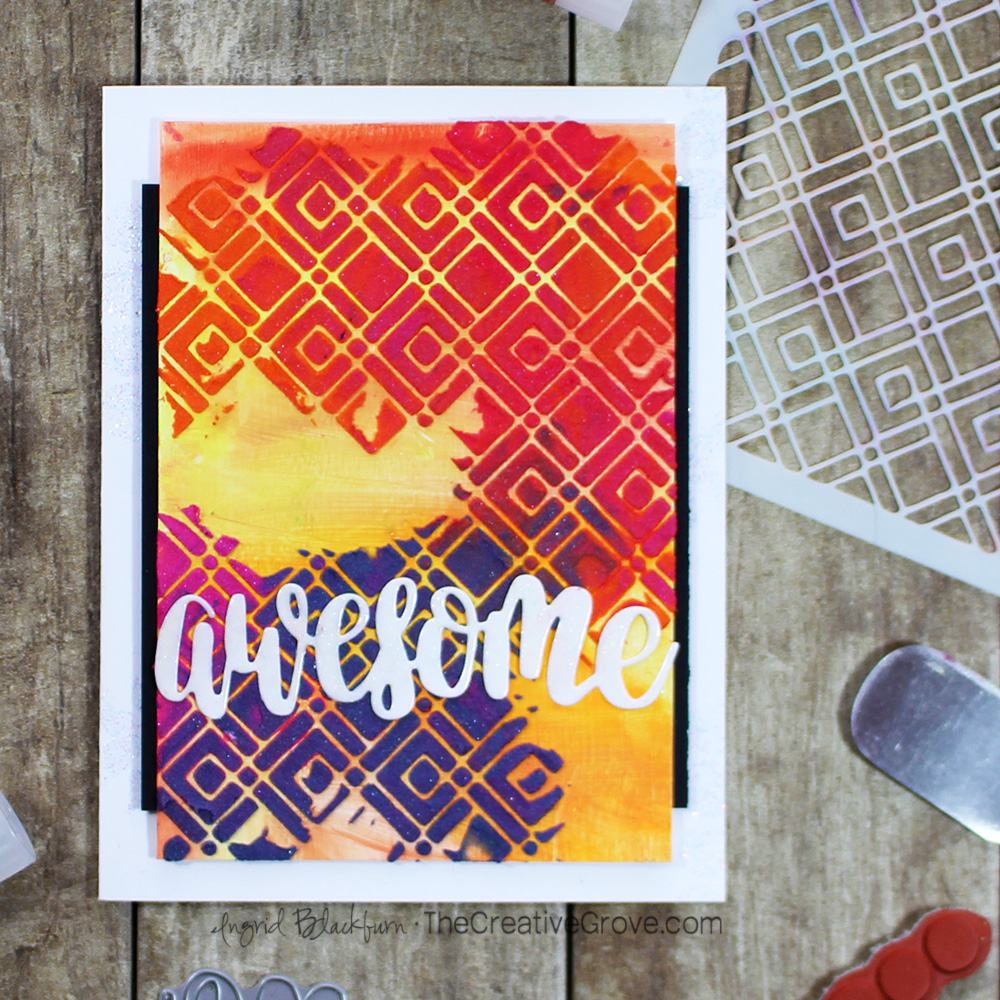
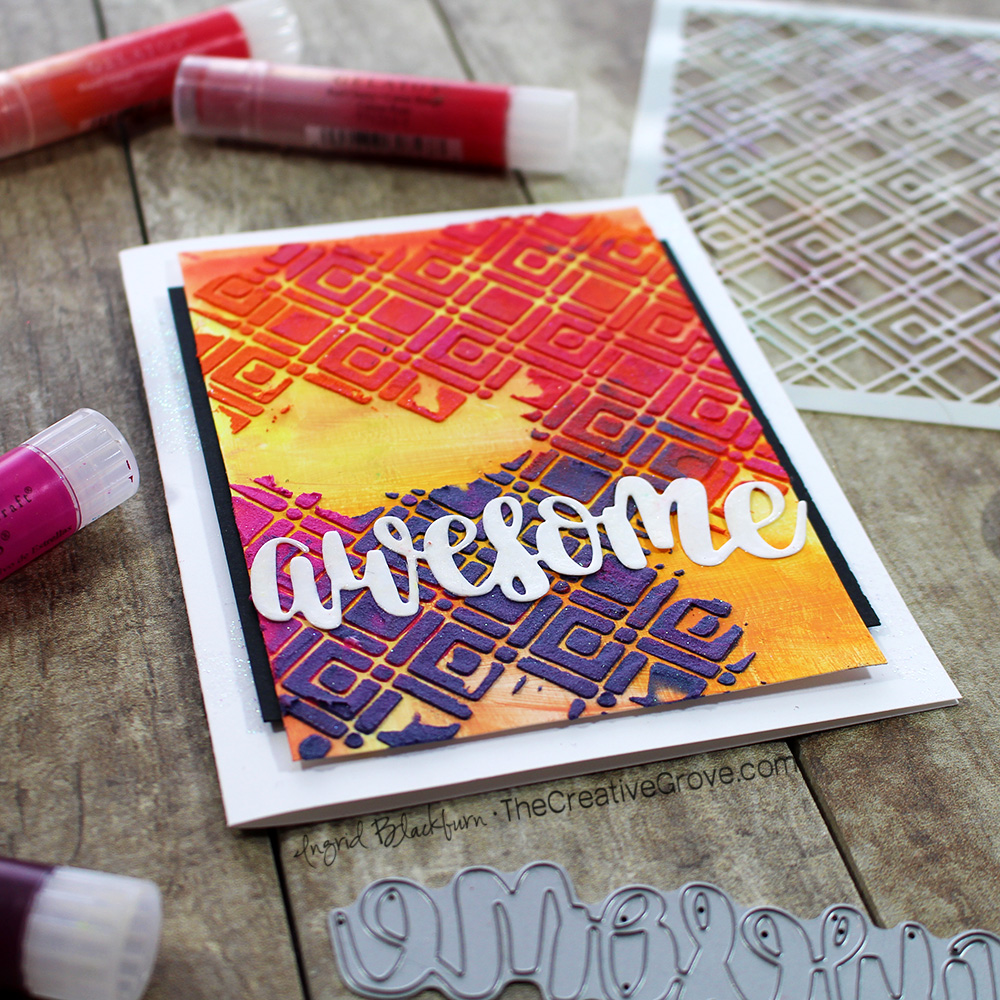
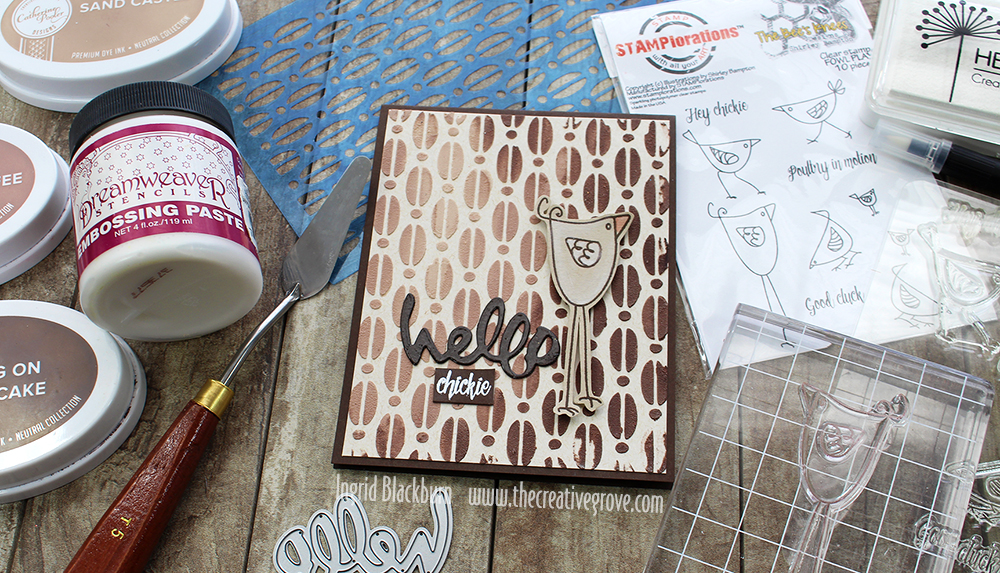
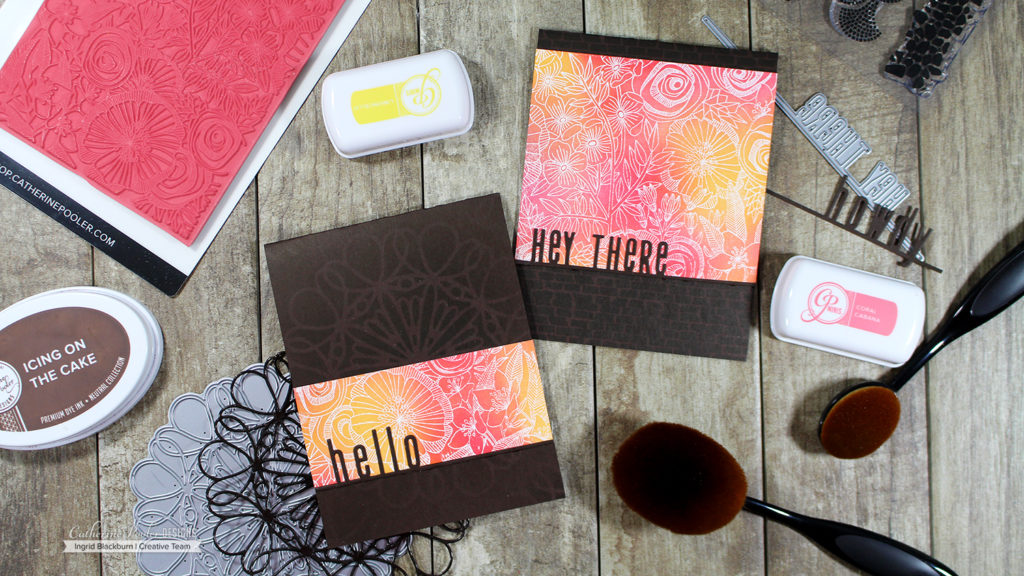
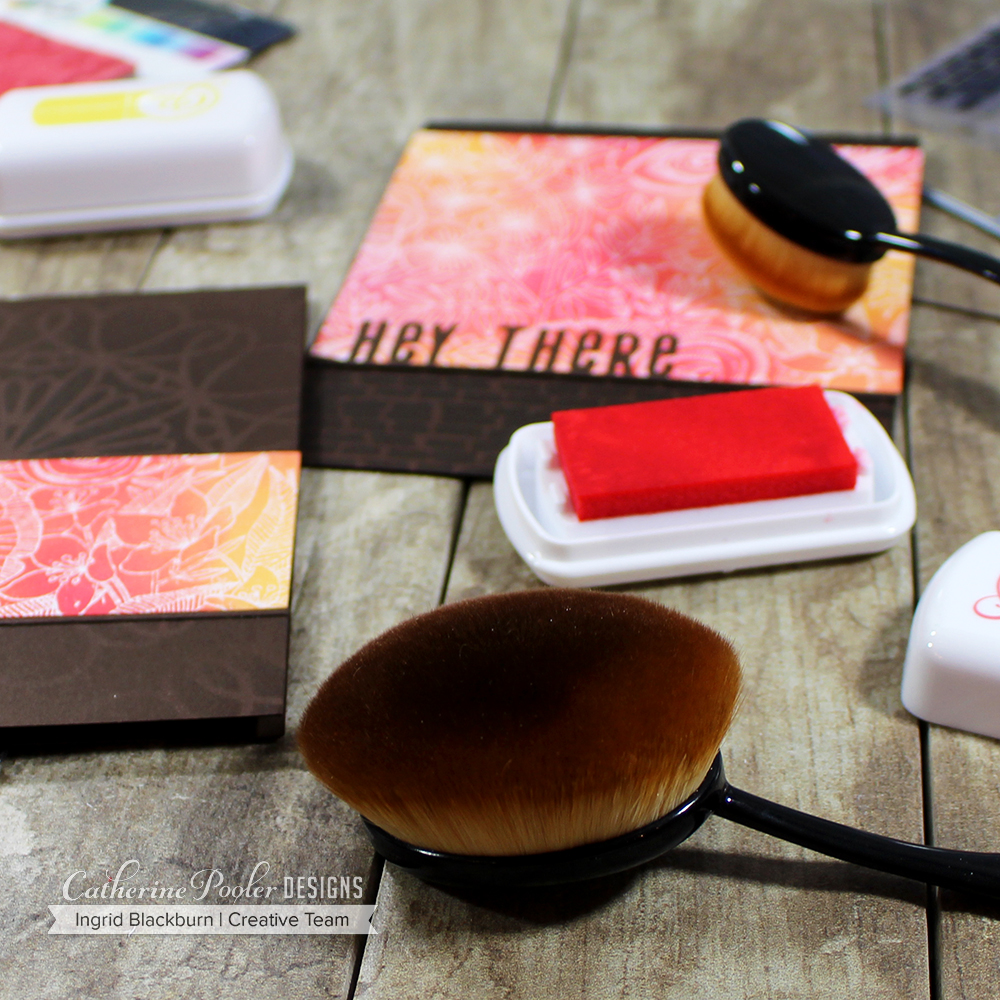
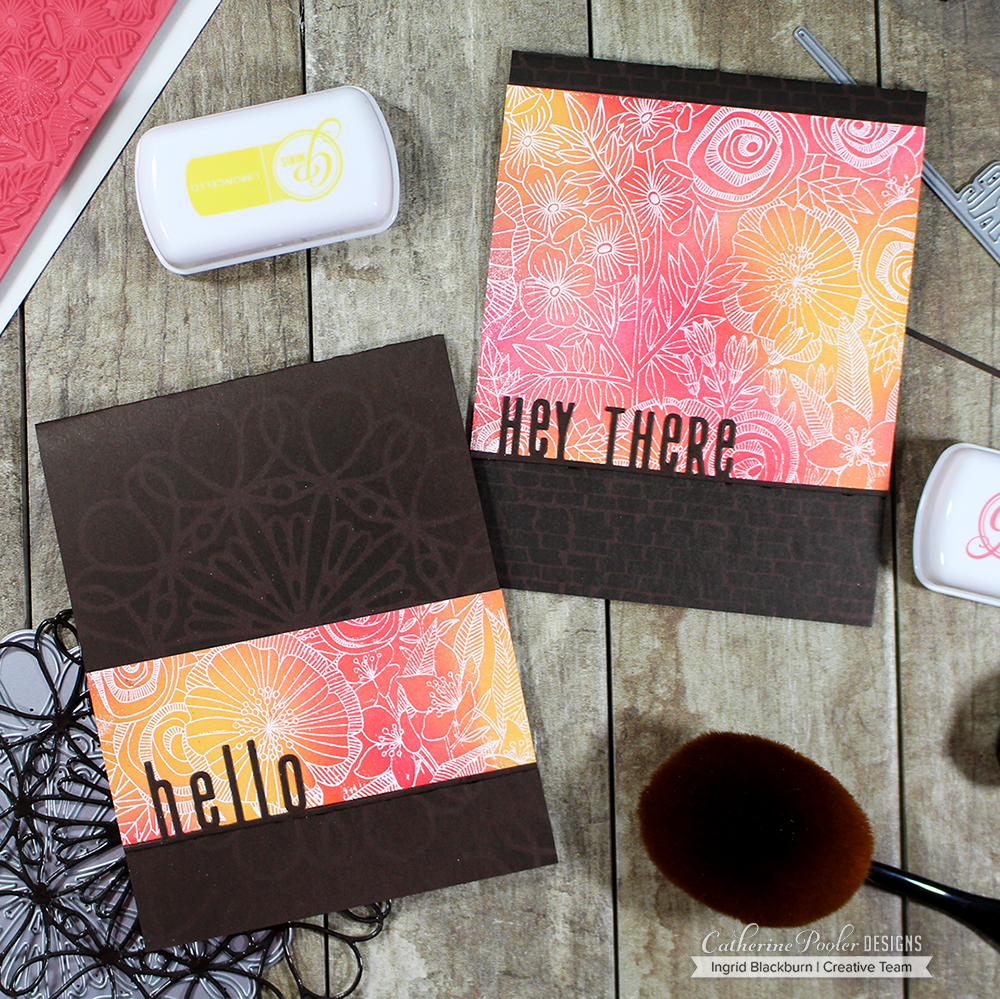
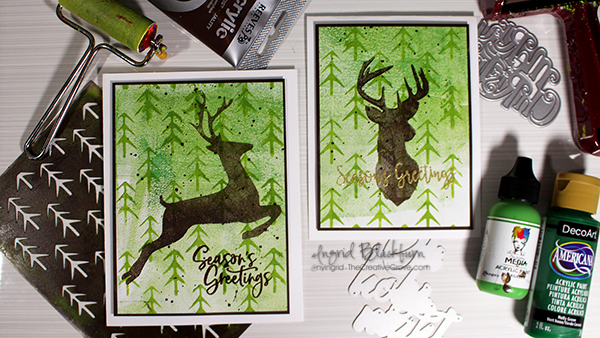
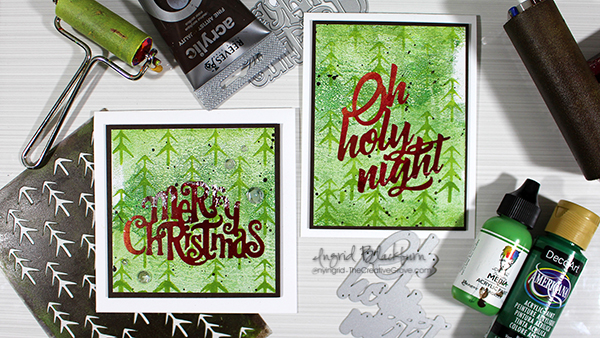
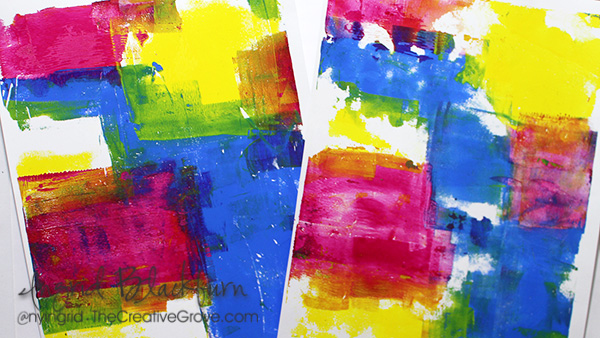
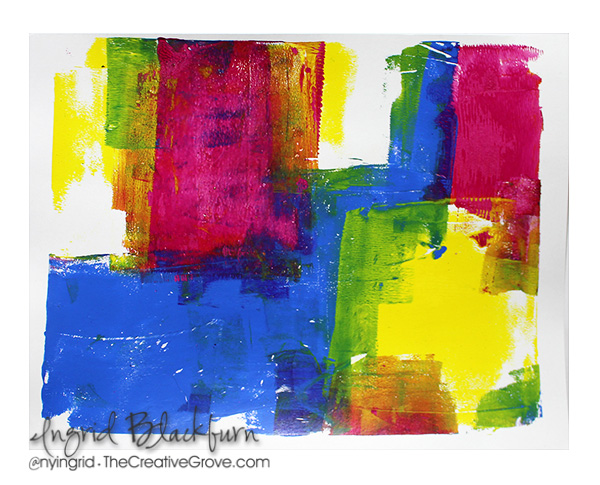
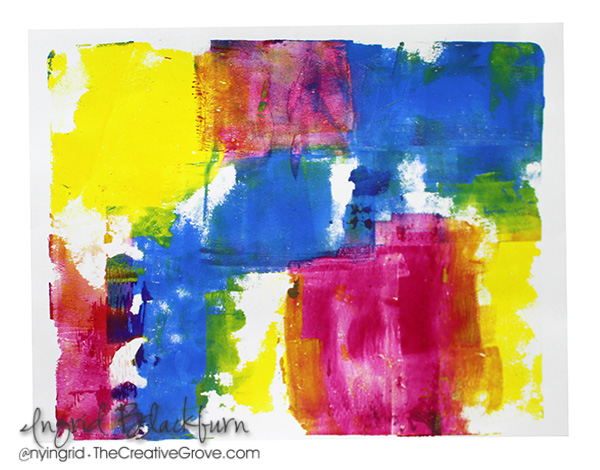
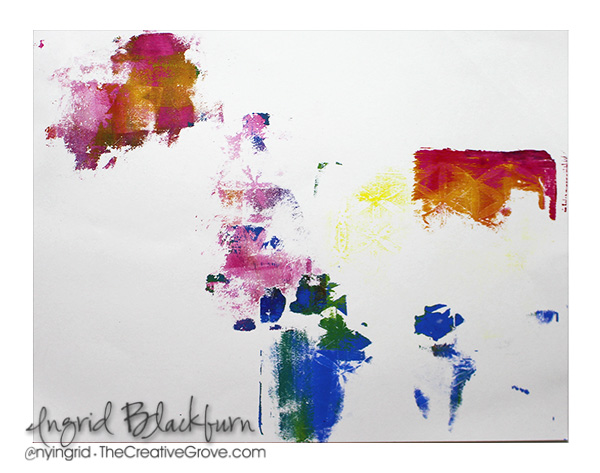
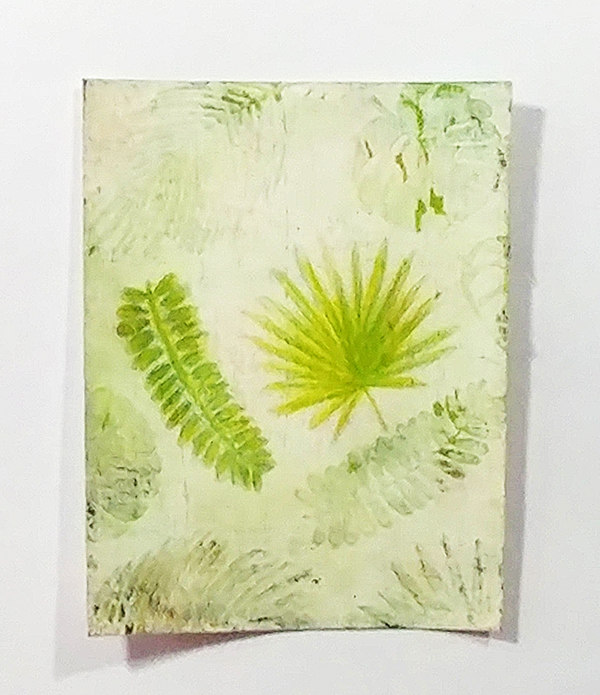
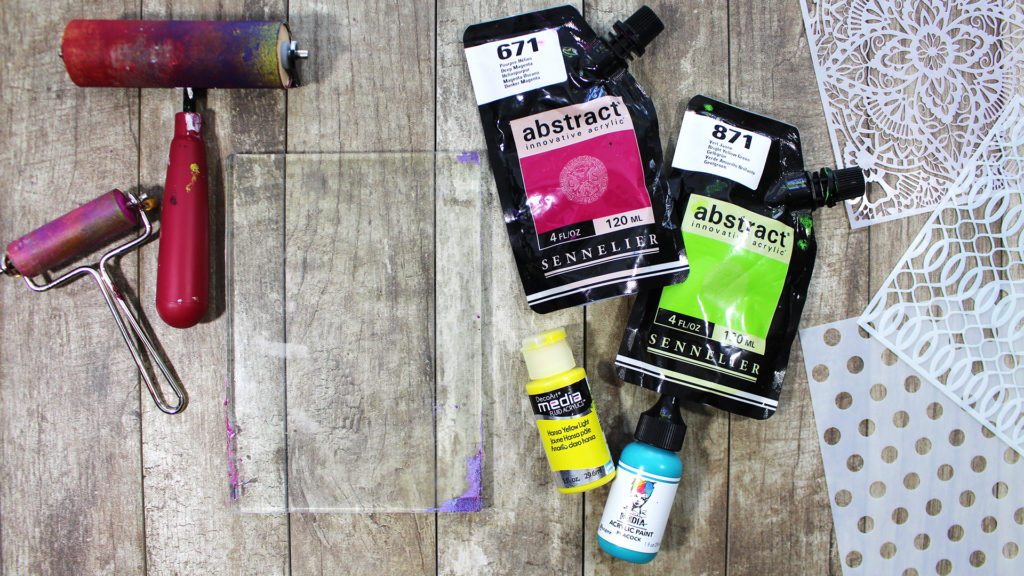
For these two Paper Napkin Layers, you’ll need to create a fun pattern on your gel plate with whatever medium you want. I used a Gelli Arts® Gel Plate, a Brayer, Acrylics, stencils and items that create texture – like the above one – large bubble wrap.

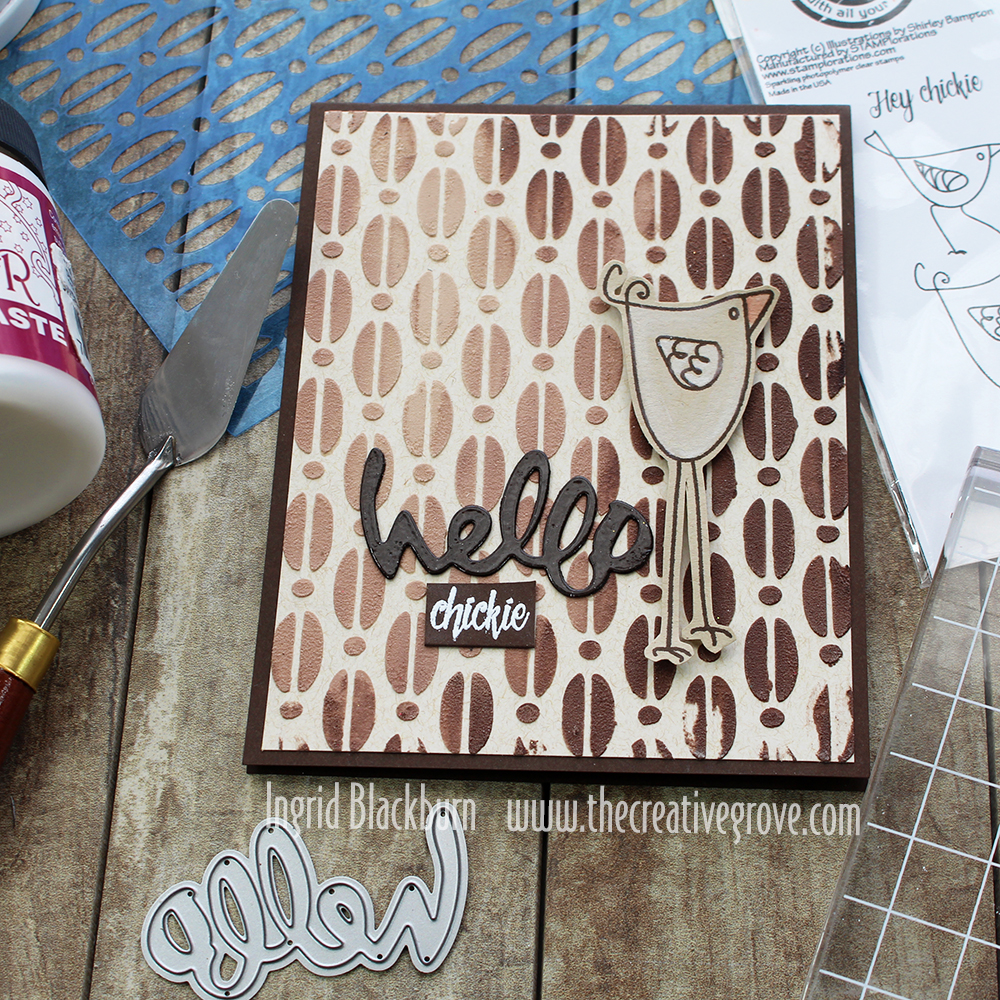
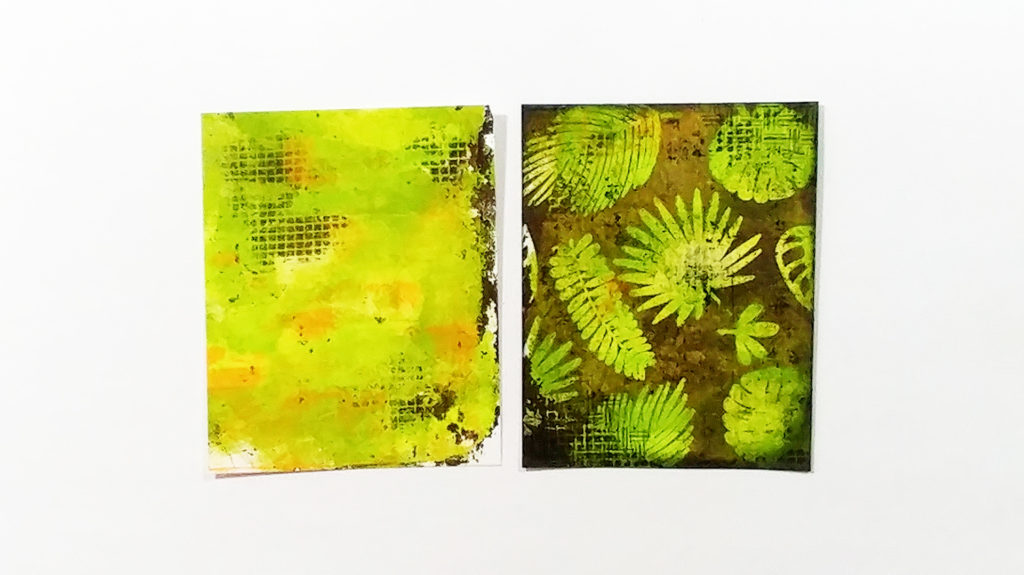
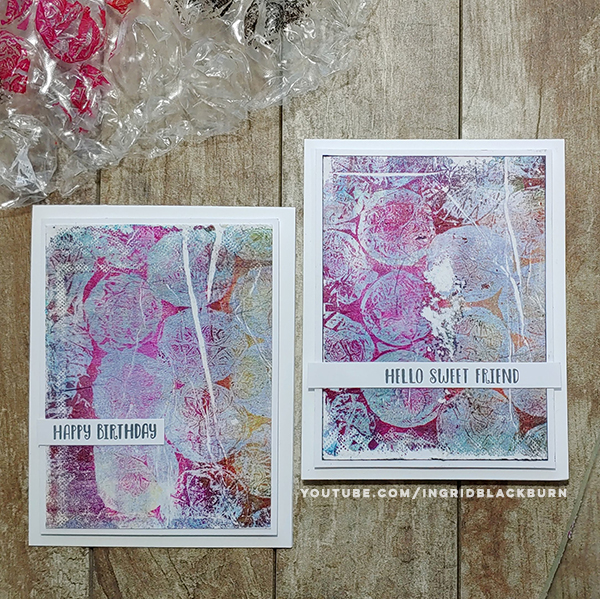
Don’t leave your napkin down too long, pull your print right away. Be careful, as it’ll be wet and napkins can tear easily. This one below tore. To fix it, I adhered it next to each other. It ended up creating this cool torn look.

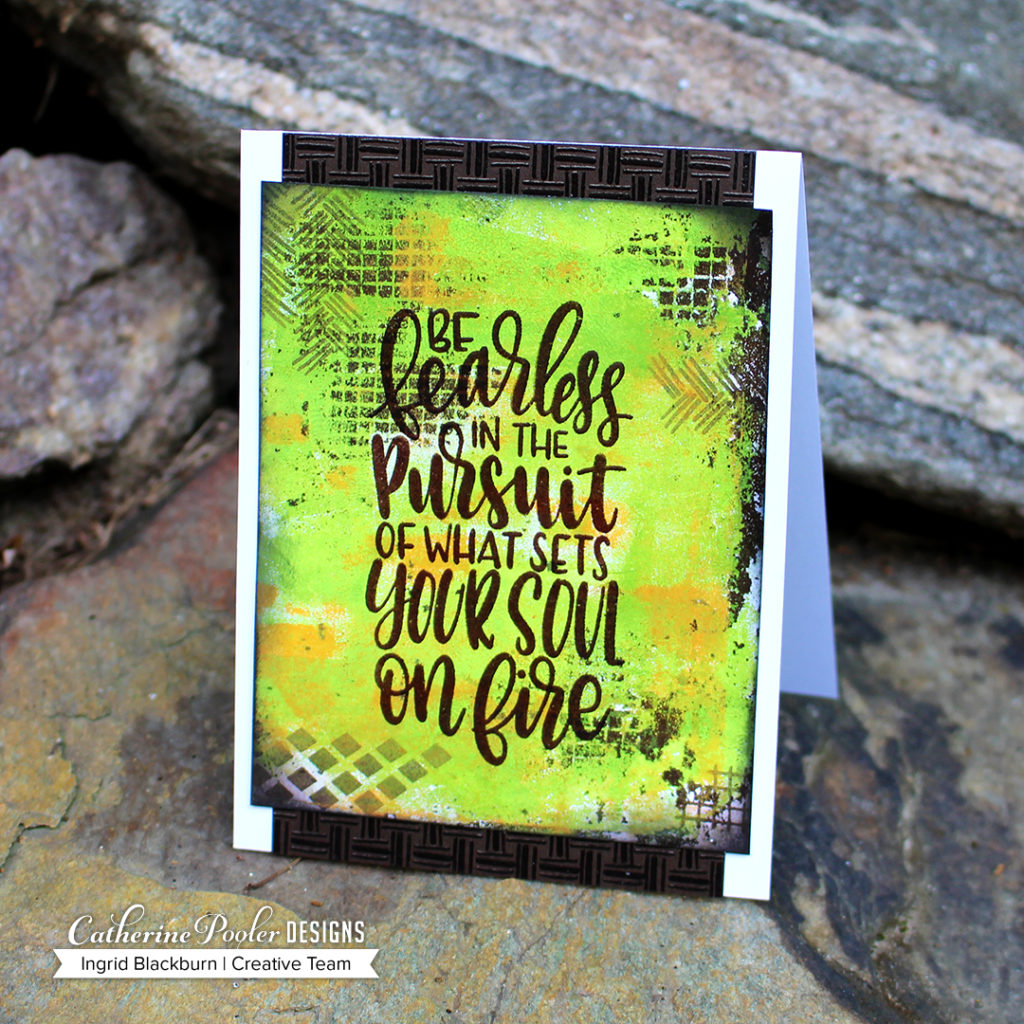
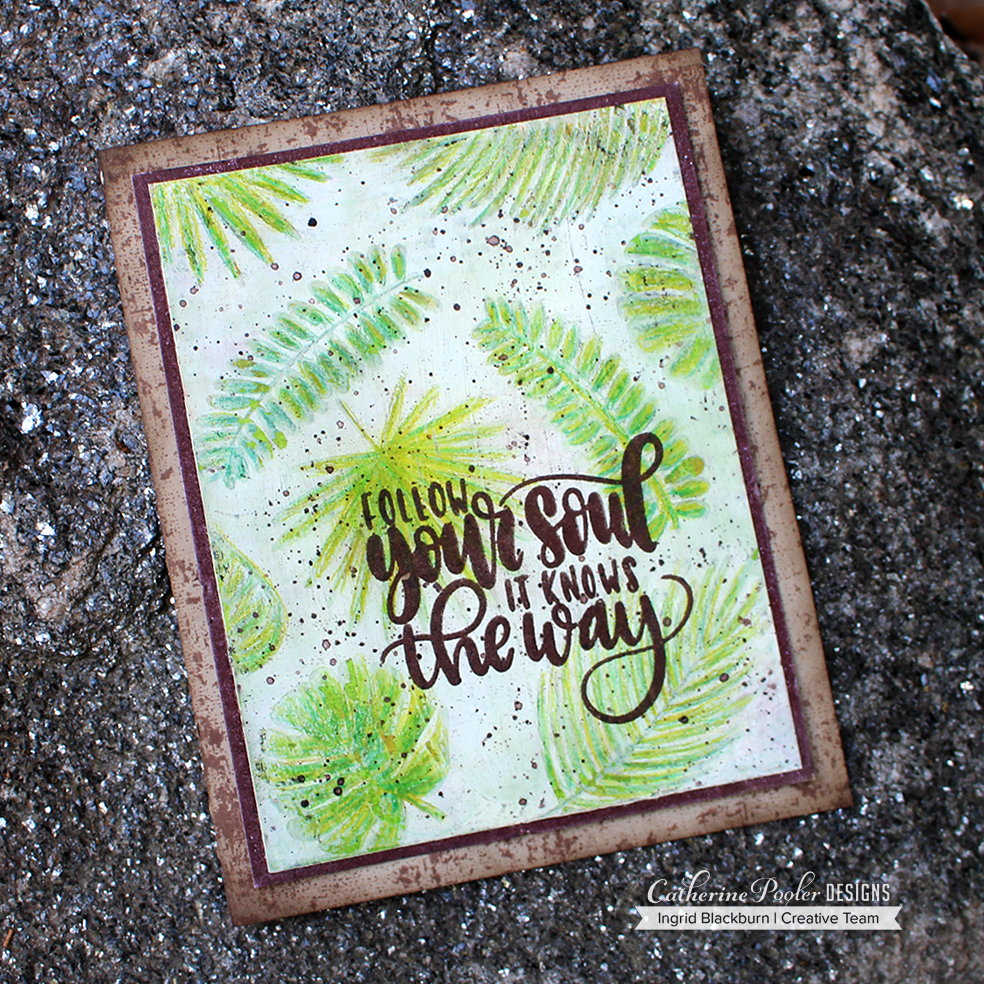
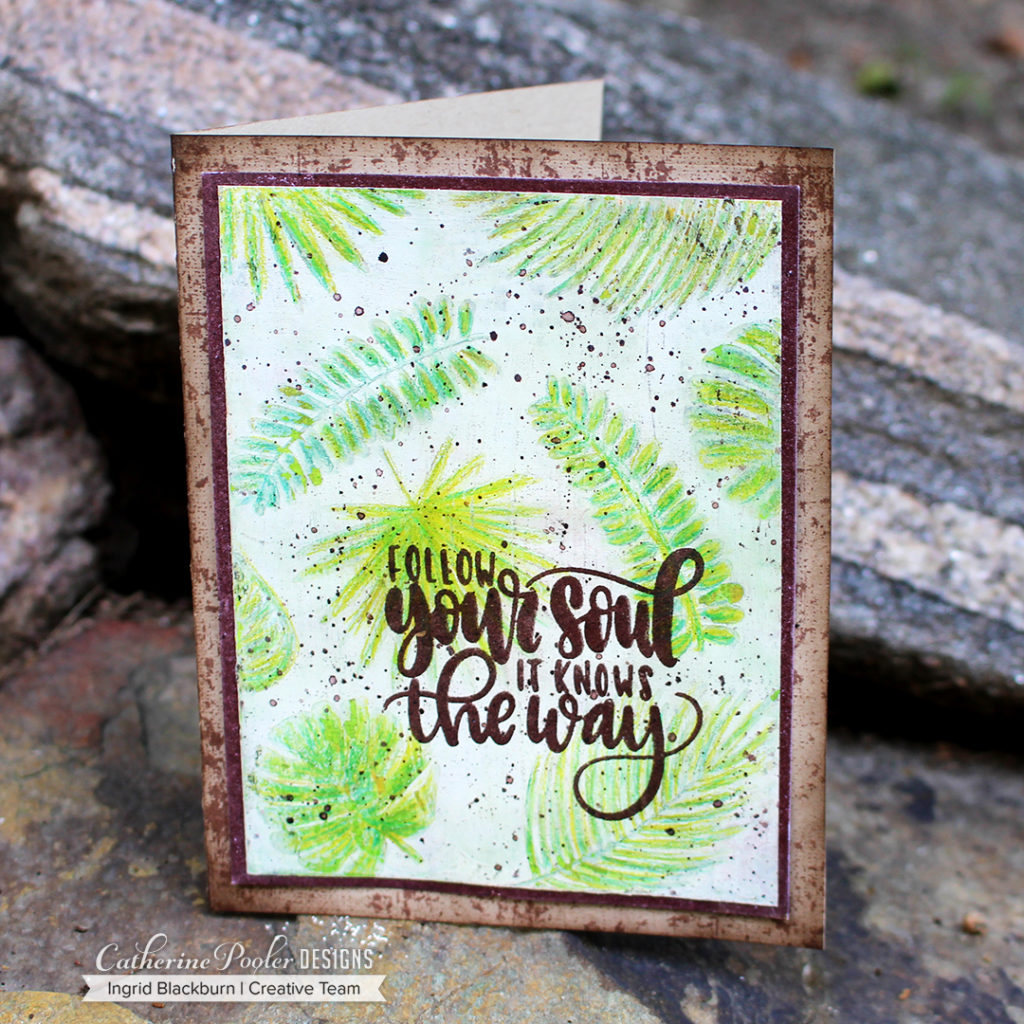
Notice the cool texture from the napkins? The pattern from the embossed edge? I’m telling you – it’s the COOLEST textured look.

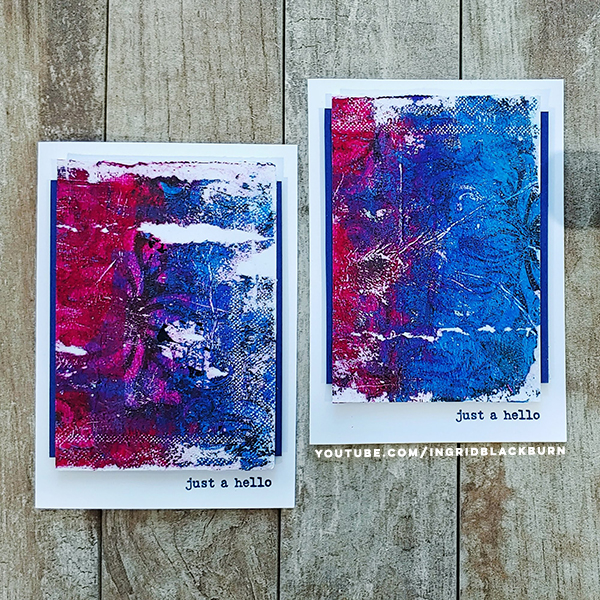
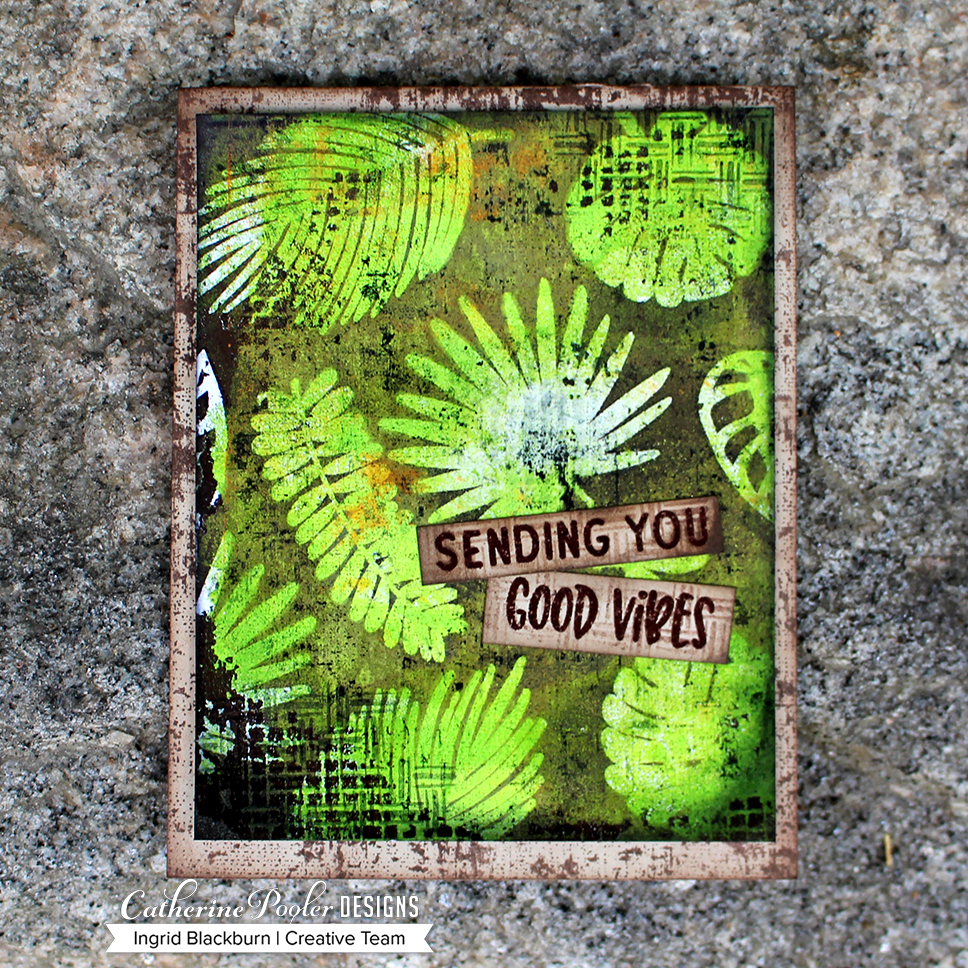
And you don’t need anything complex for a sentiment. I used some go to sentiments like the ones from the stamp set Fluttering Friends.

Custom Gloss Spray Prints

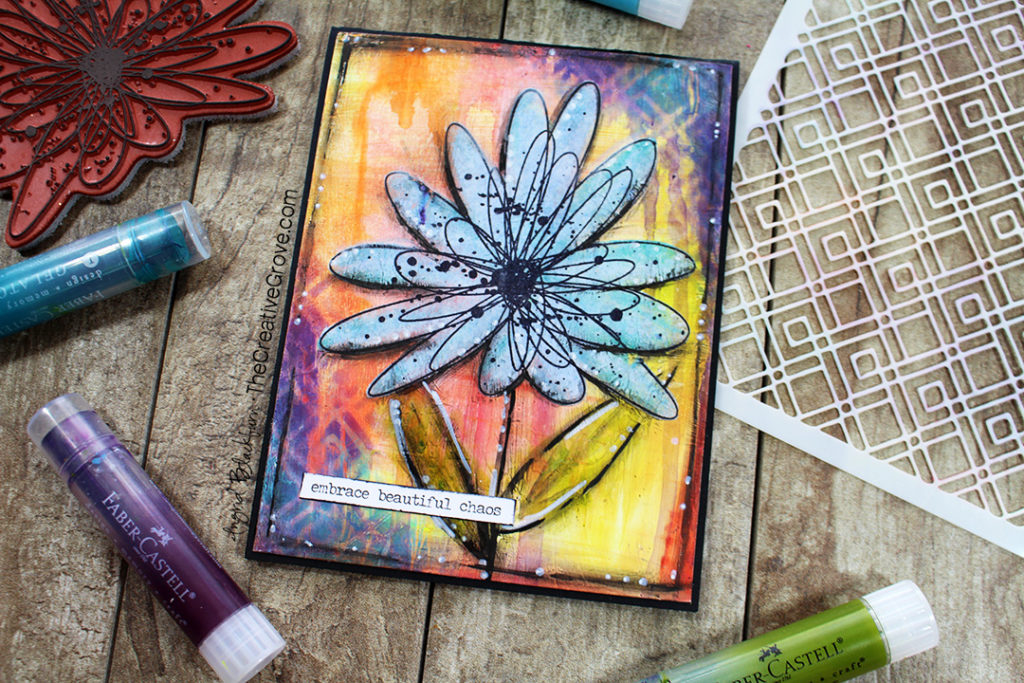
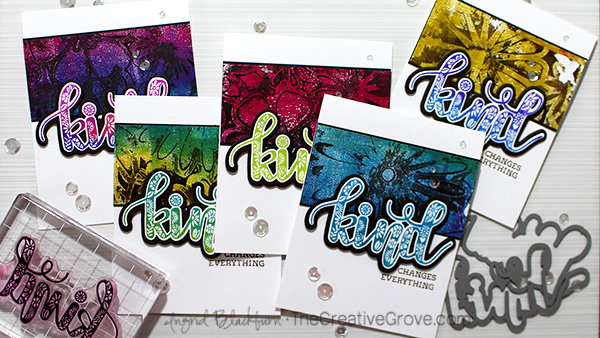
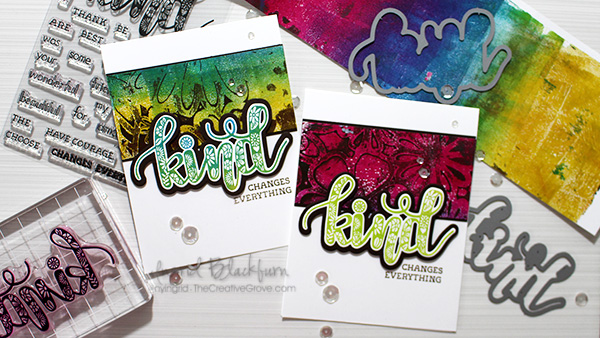
For the third project, get a little creative and create your own papers – who needs to buy those?!! USE WHAT YOU HAVE. First up, try stamping with your favorite background image in archival ink on the napkin layers or tissue paper.

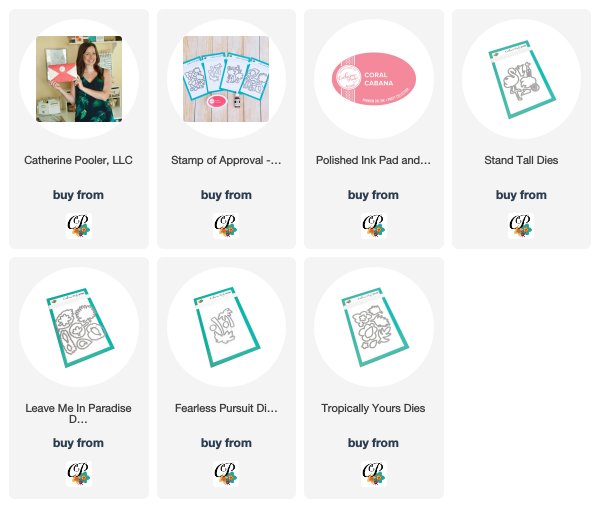
I had the need to be a little creative for about 20 minutes one day. Look at all these you can create! I used LOTS of backgrounds by Catherine Pooler, some Unity stamps (see those flying keys…love a good nod to Harry Potter) and a few other favorite stamps.

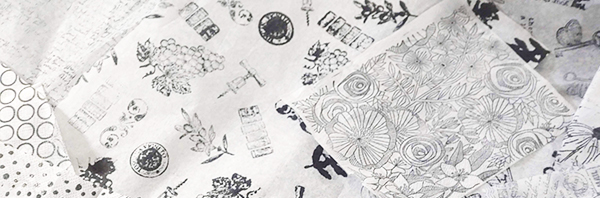
This way, when you need something interesting for a project, you have a cool stash. Best part, you’re using what you already have – doesn’t get better than that! Isn’t that cottage garden background by Catherine amazing!

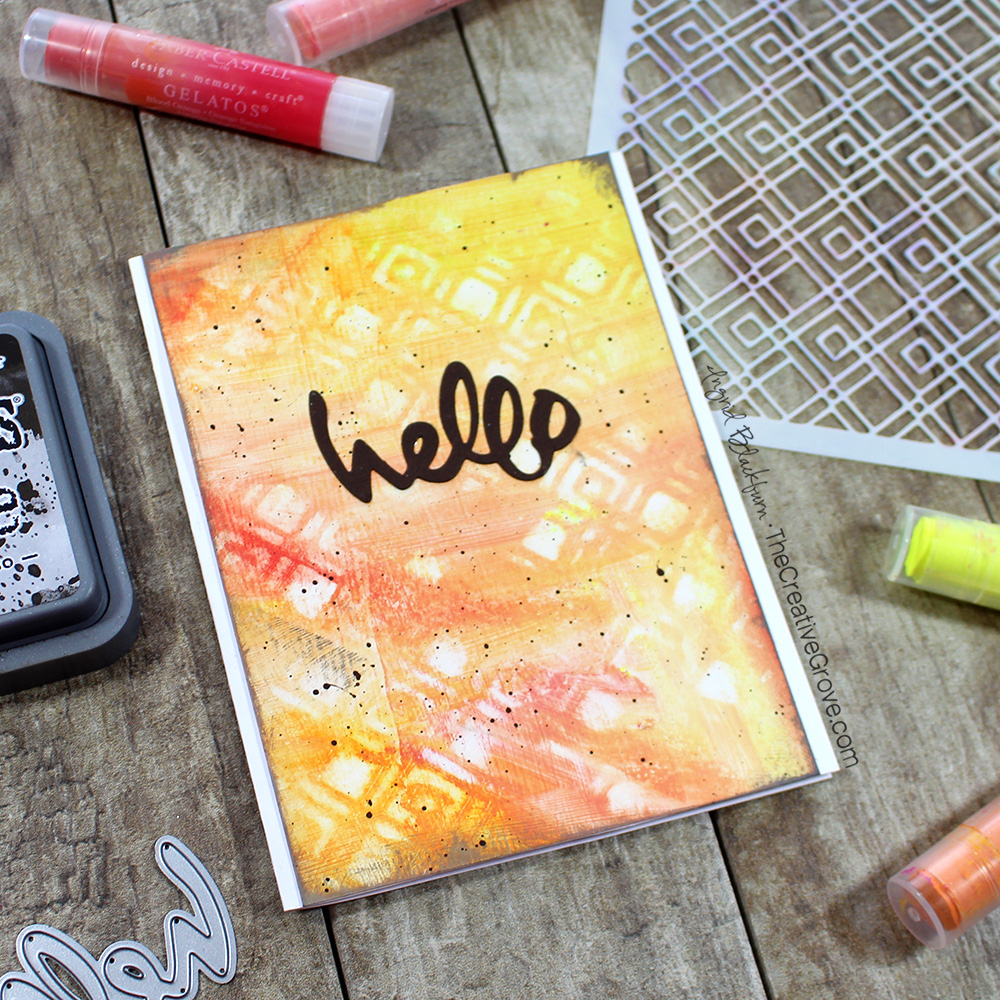
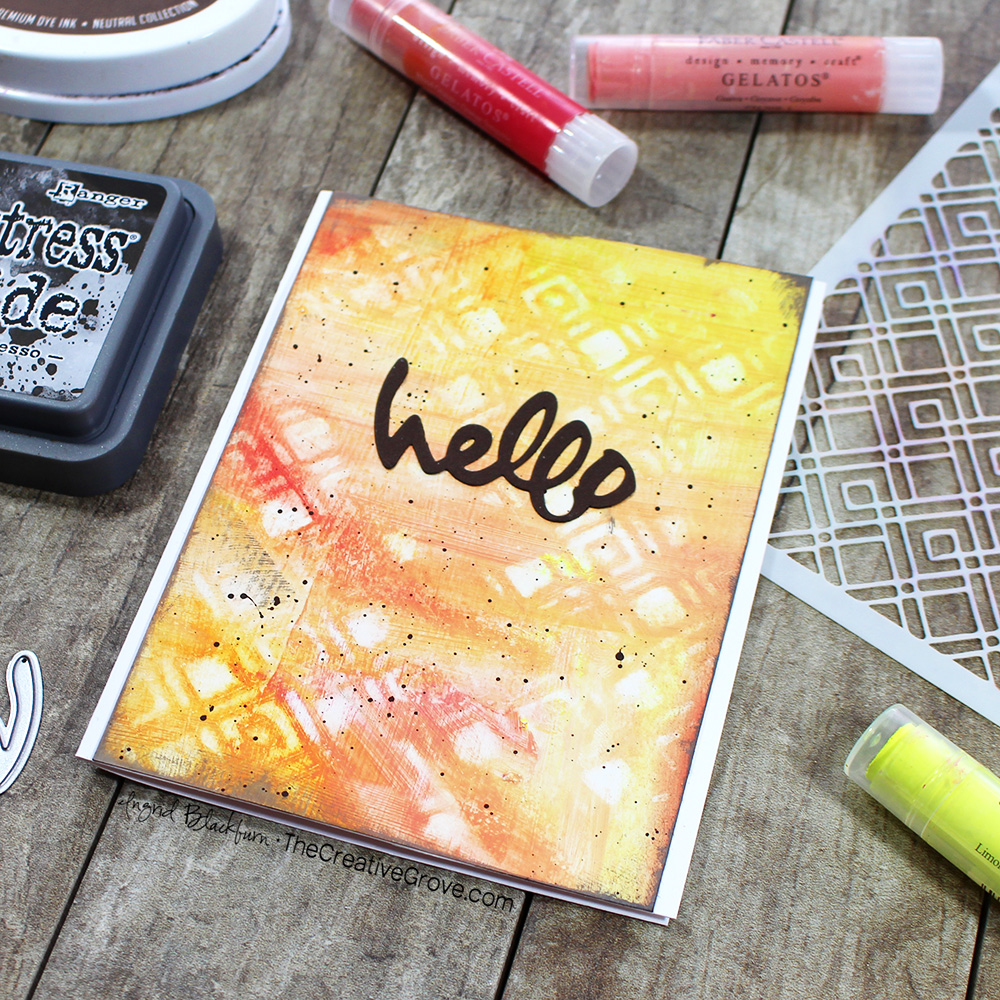
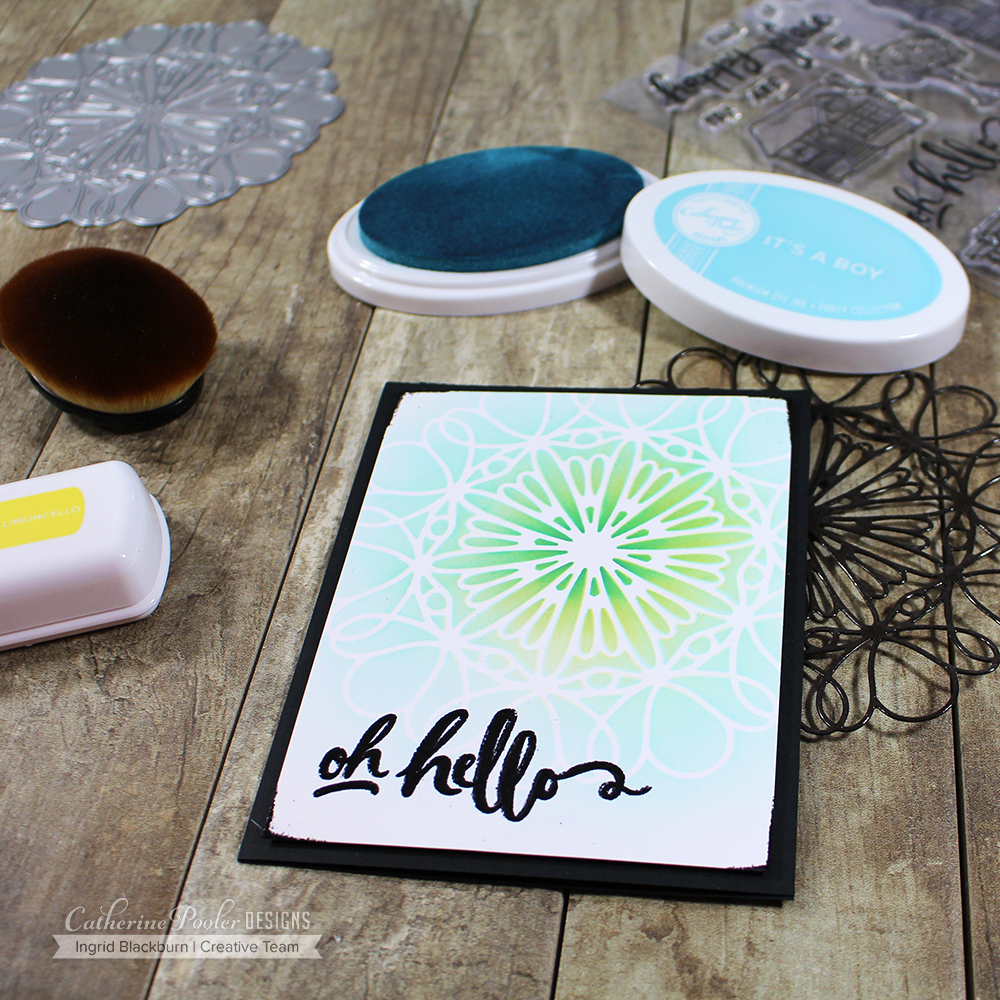
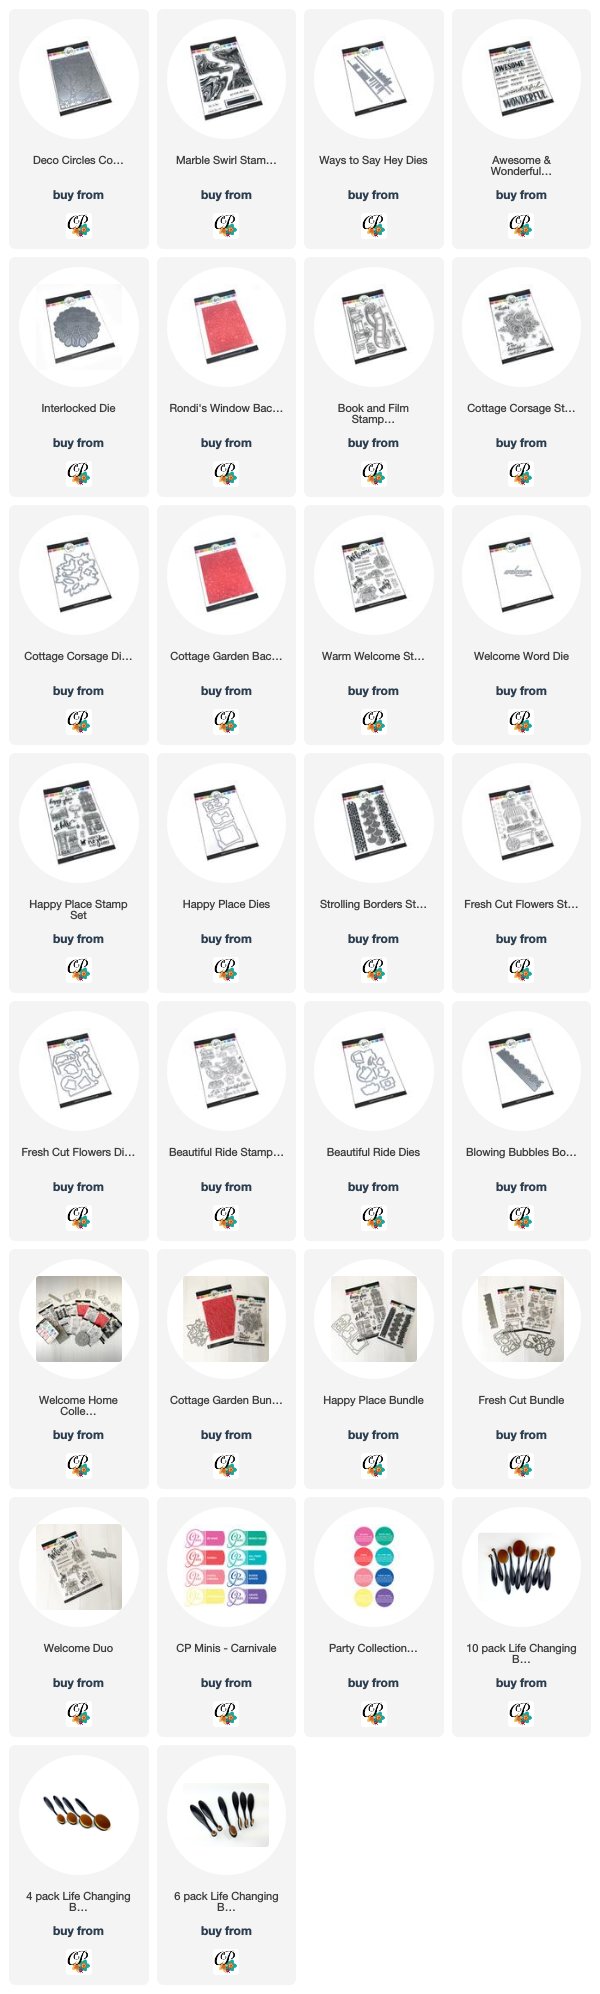
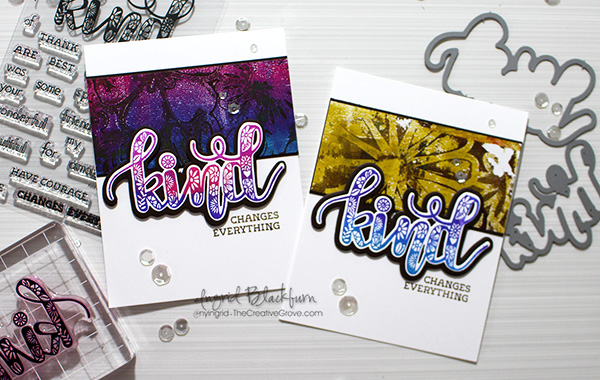
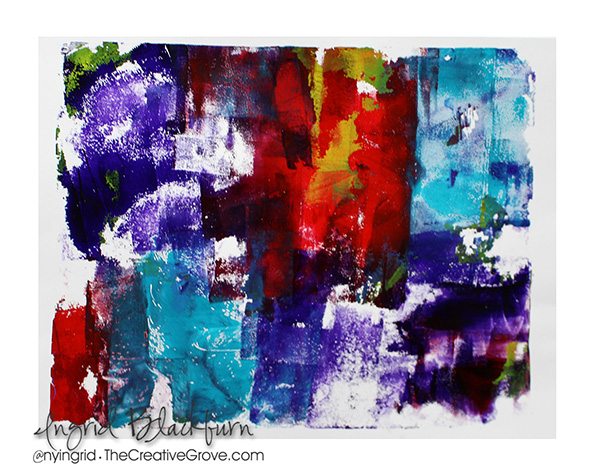
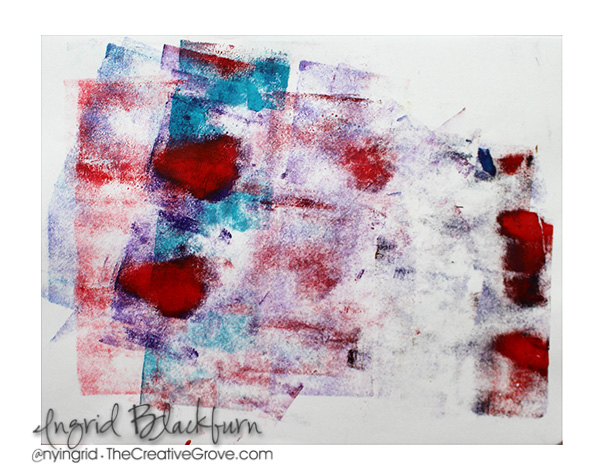
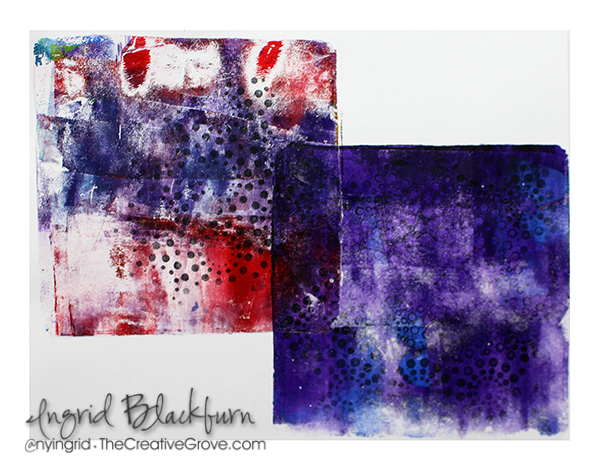
For this project, I thought it would be fun to use one of my favorites (not pictured above) – Rondi’s Window Background Stamp. I love this background stamp. You can create some of the most gorgeous cards with this stamp. Now, I got a little creative here, and didn’t use a gelli plate! GASP!

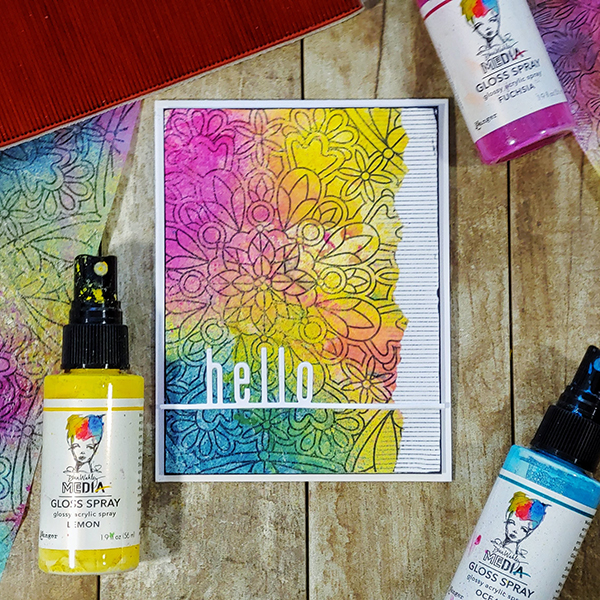
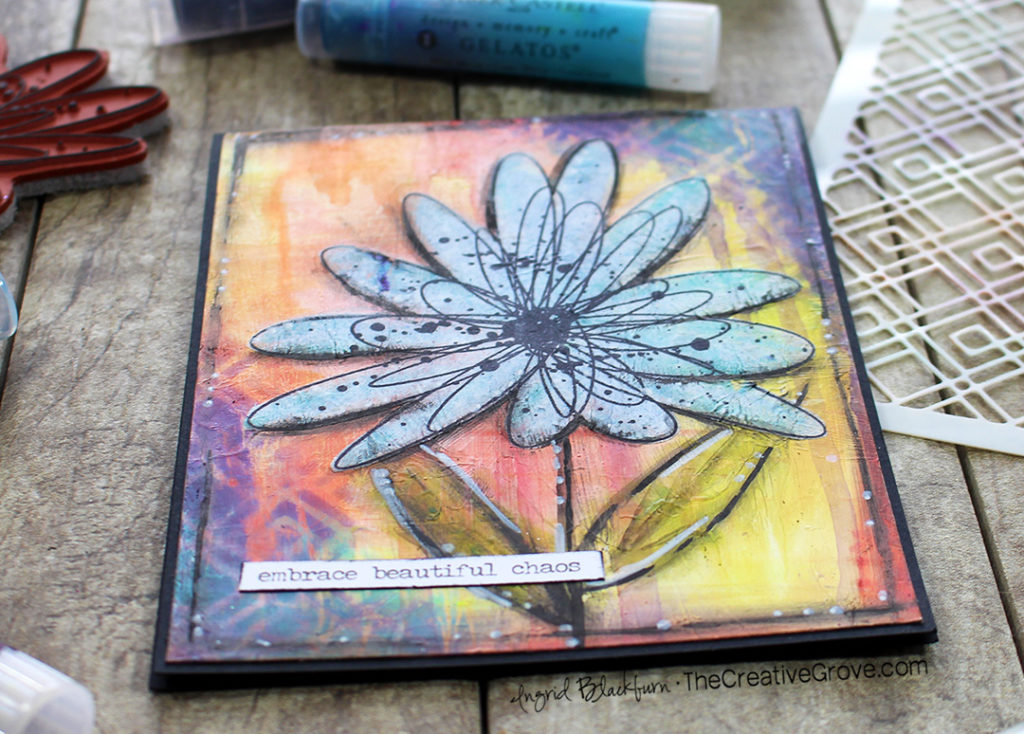
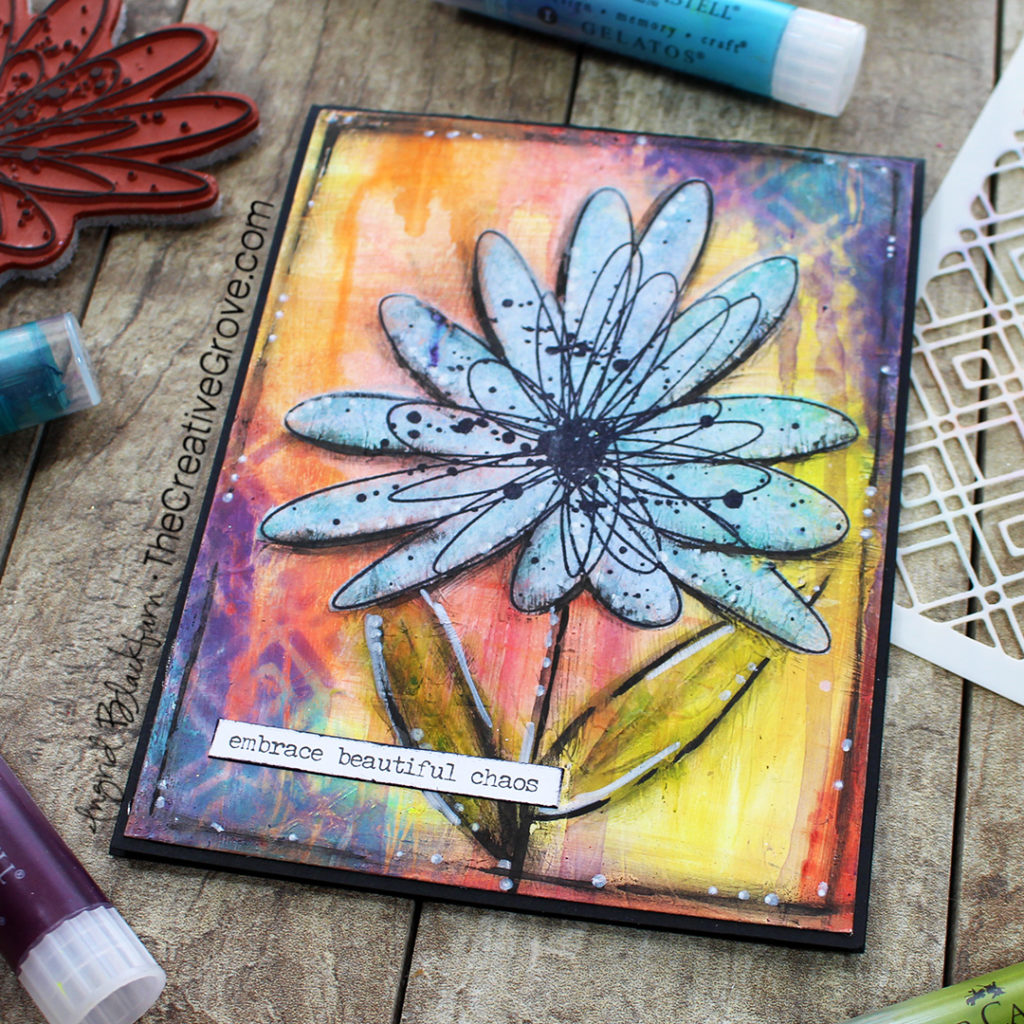
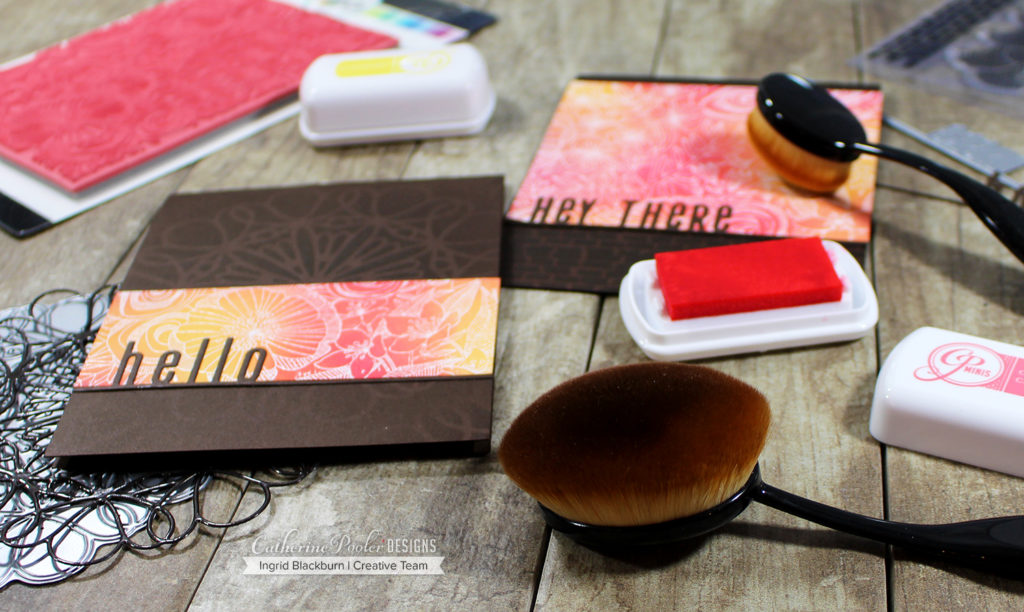
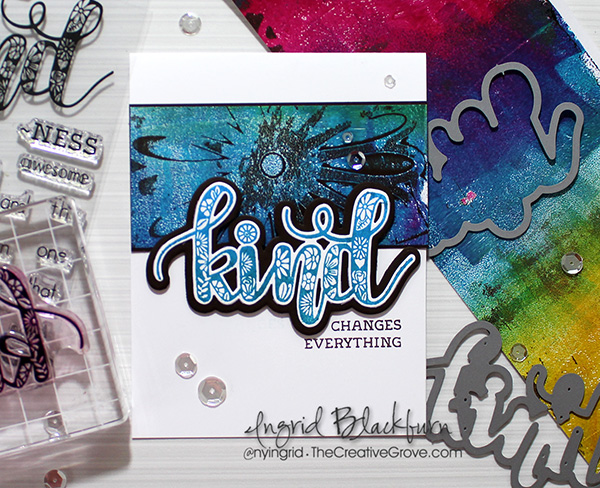
Instead, I thought it would be fun to break out some of my new Dina Wakely Gloss Sprays and see how well they color fragile papers. Isn’t that tie dye effect just gorgeous?!! I love that hello die by Catherine Pooler, it’s the perfect compliment to backgrounds!

And speaking of the PERFECT compliment. Like those super THIN stripes? That’s the single best background stamp you could EVER own! It’s by The Ton and Effie outdid herself on that one. They are thin, perfectly thin and the best compliment to any background. Enough to hold interest, yet not steal the show.

Hope you enjoyed those!!

The Happy Hop

It’s been quite an interesting few months, and we all have been cooped up in our homes! A few companies decided that we all need a little joy and happiness.

Can you believe there are 146 stops on the hop – seriously…can you believe THAT?!! Crazy, right?

Be sure to hop on next to the incredibly talented Kevin Bray Here!

Happy hopping, be sure to subscribe to my youtube channel for weekly inspiration, and stay safe!

7 Ways to Use Gelatos

7 ways to use gelatos

Gelatos by Faber-Castell, are powerfully pigmented creamy sticks that pack a punch. Do you have some sitting in a drawer or in a bin somewhere? My hope is that you will be inspired to break out those awesome pigmented creamy sticks and get creating. Here are 7 Ways you can use Gelatos on your projects!

Let’s dive right in!!

I have three amazing projects to share with you today. To get started, you’ll want to spread some gesso onto an 8 1/2 x 11 sheet of white cardstock. For gelatos to spread properly, they need a base to spread easily. Without that, it can be a challenge!

If you haven’t already – please subscribe to my newsletter (you’ll get an exclusive video series), instagram, youtube channel, and blog (subscribe in the sidebar on the right)!!

I filmed a video for you, but have each one detailed below as well in photos and instructions. Be sure to leave me a comment on the youtube channel too with which one you loved the most!

Click here to watch over on YT.

#1 – Gelato Blending Technique

Our first Gelatos technique is the most basic of them all – blending. You will want to choose colors that go well together and scribble them all over your paper – no need to worry about being neat – the water and that ever so special tool (your fingers) will do all the heavy lifting!

A tool that helps with blending Gelatos is the Ranger spritzer. You will first want to mist your surface lightly by squeezing quickly on your Ranger Spritzer. To blend those amazing colored pigments together, use your fingers or a damp towel, to get the coverage you love. Dry with a heat tool, or set aside and cut up into a few card fronts. I split mine in 1/2 – 5.5 x 8.5. For the card fronts, I cut one into two, and one I cut into a 5″ square and 3.5 x 5.5 with a 1/2″ strip left over. That will give you 4 backgrounds to create with – not bad!

gelato blended backgrounds

#2 – Disappearing Gelato Technique

Next, line up your favorite stencil over one of your panels. I’m using the Quadrilaterals Stencil by AALL & Create which has some great space to work with. Grab a Baby Wipe or wet paper towel and twist your wipe through the stencil to wipe away the color – what?!!

Yes, you’re going to remove the gelatos color easily through your stencil. The key – keep alternating to a clean spot on your wipe/towel. I intentionally only removed the color in spots, to give an organic look to my project. The end result gives you an artsy stenciled look!

baby wipe gelatos technique

Add some splatters and edge your piece and all that’s left is to mat it onto a base and use a simple word die. Don’t take away from the background – the disappearing gelatos piece is the star!

#3 – Gelato Colored Paste Technique

Did you know that you can shave off some pigments and do loads of techniques with them?!! Here’s just one of many – Coloring Paste. Now keep in mind – you can do this with just about any medium too!

Use a palette knife to scrape off some pigment (a little goes a long way) and mix with some white embossing paste and a palette knife. Mix your gelatos and paste thoroughly. I mixed four gelato colors, each with a tiny amount of paste. Add each color, a small amount at a time, directly through the stencil with a palette knife.

tinting mediums with gelatos

In this project, you’ll notice that I intentionally left some spots without paste. That was so that the rockin’ background can shine through. It makes for some interesting breaks in your project.

Try overlapping your colors a bit too – that creates new ones! Just keep the color wheel in mind – leave complimentary colors apart – blue/orange, red/green, etc… Doesn’t that look stunning through the Quadrilaterals Stencil?!!

stenciling mediums with gelatos

Again, a simple word die and some fun matting and you’re all set. Now I did stamp the Eclectica Tracy Scott 25 stamp set onto the card base in embossing ink and embossed it in Wanderlust Embossing Glitter for a little interest. To keep adding a little sparkle, highlight the awesome word die with a sparkle pen.

#4 Gelato Dripping Technique

This technique is probably a fan favorite of many! You can try this on plain or colored backgrounds. I decided to add more of the same to one of the existing panels. Keep color theory in mind, when using this technique. Gelatos have fugitive properties, so try and stay away from complimentary colors in order to avoid making mud.

Here’s the skinny – rub some gelatos at the top of your panel – nice and concentrated. Spritz or add water with a paint brush and watch the drips!! It’s a very cool look.

The dripping technique gave an awesome depth to the background of our third project – a real mixed media card. This is just he beginning!!

gelatos dripping backgrounds

#5 Gelato Layering Technique

One of the properties of Gelatos is that it is always live and reactive. To set them, you’ll need to seal it. You can use a spray, or if you’d like to flex your mixed media muscles a bit – try matte medium! Pour a little over your background to set those colors.

This helps in two ways – one locks that colored goodness in place, and two – you can layer ANY colors on top of each other!! To use Matte Medium – drip a little onto your project and carefully spread with a palette knife or silicone spatula. Be careful not wipe all that colored goodness away – you are adding a liquid to it! You will find that it is better to start with a little of the matte medium in one place, just until you get the hang of using it. You want only a thin layer. Dry naturally, or with a heat tool.

how to seal gelatos

Gelatos are vibrant in color. To allow the second layer of color to pop, you will need to first lay down a layer of white gelato to give your second layer a neutral base. I used Coconut as a white base underneath a few pops of color in my second layer. I added purple right onto yellow and blue right over orange – normally that would be a muddy mess. Not with Gelato layering!!

That brings us to #6…

#6 Gelato Stenciling Technique

Since Gelatos are SO super creamy and pigmented, I like to avoid rubbing them directly onto my stencil. That way too much pigment doesn’t get stuck in the nooks and crannies of my stencil. Instead, use a makeup sponge!

Scribble some gelato pigment onto your craft mat or a palette and sponge through your stencil onto your project. This way you have a smooth application and can be quite deliberate in where you want to add color. On your Mixed Media card – add a little Stardust, Galaxy and Blue Moon for a nice little accent in both corners. The Quadrilaterals Stencil adds a little lattice look to the corners, don’t you think?

stenciling with gelatos

I love the dark popping off the bright base. None of which would show up without locking the layers and adding the white underneath.

#7 Gelato Coloring Technique

And last, but certainly not least, add color to all your embellishments with Gelatos! A unique way to add color to an embellishment, is to stamp your piece in Archival ink onto Tissue Paper and use the gelatos to color from behind!

On tissue paper, the gelatos blended super easily. No need for Gesso. Add as much pigment as you’d like – you want it to pop from the other side. I added Aqua Dolce, Nebula and Blue Moon for a fun blue flower. The background has some good orange tones from blending the Blood Orange Gelato over Guava. Can you see the Blood Orange drips on the left side? The blue would be the perfect pop to the project in a complimentary color…

coloring tissue paper with gelatos

To help the blue flower pop even more, hold your fussy cut flower onto your project, lift the edges, and add a little white gelato underneath. Seal the stenciled corners and white flower with some matte medium, giving your flower a base to grab onto. Add matte medium over the top too and dry your entire piece.

Pulling it All Together

To complete your flower, add a little Pistachio green for some leaves and rub it into shape with your fingers. Next add some black charcoal pencil for shading, rub in with your finger, and add some Black Big Brush Pen accents too. Rub and add white where needed. Add a little matte medium over your green leaves and add some finishing touches.

For a sentiment, I used a sticker from Small Talk collection by Tim Holtz Ideology. To help it to stand out, edge your sticker with a Pitt Pen. I love the end result, and now I want to create a two page spread like this in my art journal – it’s TOO pretty!!

Mixed Media Cards using Gelatos

Whoever receives this card in the mail, is certain to cherish it.

Which of the 7 Ways to Use Gelatos is your favorite? Have you tried any? Tell me in the comments!! I’d love to know which projects you liked too! Want to see more with Gelatos?

Did You Know?

I popped all the supplies I used in the list below. This post was written for a fun hop celebrating Top Flight Stamps and their 2nd anniersary. Have you had a chance to check out Topflight Stamps yet? If you have not checked it out yet, then you MUST pop over. It’s one of the best collections of artsy stamps and stencils I’ve seen.

Topflight Stamps differs from most online retailers. You will find an incredibly diverse collection of artistic stamp products from around the world – all under one roof. Don’t you just love the two products I used today, and hope you enjoyed seeing a few ways you too could use them!

7 ways to use Gelatos - easy techniques

But first, keep hopping along. Be sure to leave comments all along the way. There are some INCREDIBLE crafters in this hop – seriously – I’m so honored to have been asked to be a small part of it. So thanks for hanging with my novel of a post. If you haven’t already – please subscribe to my newsletter, blog (subscribe in the sidebar on the right), instagram and youtube channels!!

Till next time, keep those fingers inky…

Blog Hop List

Supplies

To make finding the supplies I used in these projects a bit easier for you, here are a few clickable links. Compensated Affiliate Links are used when possible. Click here for disclosure. Happy Shopping!

How to Color Embossing Paste

This tutorial is a great DIY tip for how to color embossing paste quickly and easily on your cards and mixed media projects. I think you will be blown away with how easy it really is!

Here’s a video showing you exactly how to color embossing paste – and once you start, I guarantee you won’t want to stop…lol!

Click Here to watch it on YouTube in HD

And when you watch this over on YouTube – I’d LOVE for you to subscribe to my channel too! Don’t forget to click the notification bell as well. I’ll be doing some lives and premieres, and I’d LOVE to have you there as well.

So what did you think? Tell me in the comment section if you’ve ever done this? And have you tried multiple colors too? Don’t you love how they easily overlap in color to create their own? Which one is your favorite?

How to Color Embossing Paste Tutorial

In a nutshell, you’ll want to blend your medium with a color source. In this video I used foam ink pads by Catherine Pooler. The colors are great, and her ink pads release quite a bit of ink. You can always use ink refills or something else like gelatos, etc…

You’ll also want to use a palette knife. I personally like using metal knives vs. the plastic ones. It’s a personal preference.

DIY how to color embossing paste

Your colored paste will really go far, so do a little at a time. How much color you add, will directly result in the depth of color in your medium. When using something like whipped spackle, that one always ends up lighter in color, so I have to add more ink.

Here’s my final project. I didn’t explain really how I colored in this little chick, so here you go!

Since I used Sand Dunes cardstock by Catherine Pooler for my base, I needed to make my chickie white. Did you know that I commonly greet my friends with hey chickie all the time!!! That’s why I got the Foul Play stamp set in the first place….lol. But these little chick images totally ROCK.

how to color embossing paste tutorial

To make her white, I used a zig blender pen and Hero Arts Unicorn white pigment ink. Don’t think those pens are just for dye inks – use whatever you have!!! Just be sure to clean it thoroughly in between.

The hello die (my all time favorite hello die) also by Stamplorations is embossed with clear embossing powder by WOW! That way it really stands apart from the rockin’ background. I found without that, it just wasn’t popping.

The hello die and chickie (embossed in white on Chocolate cardstock), are glued directly to my card, the Chick is popped up with foam tape.

I hope you enjoyed this! Just like I said in the video – don’t forget to tag me with your creations over on Instagram with my new IG handle – @thecgstudio. I’d LOVE to see what you make.

Have a great day!!

Catherine Pooler Welcome Home Release + Giveaway

Welcome Home Release

It’s the Welcome Home Release! You’ve probably arrived from Daniel Wests’ blog – Welcome! Today I have some fun quick little projects for you using some of my favorite pieces from the Catherine Pooler Welcome Home collection. Let’s jump right in!

This collection first premiered at the Creativation show in Arizona. And I have been just waiting to show you some of these amazing pieces.

Here are the new Stamps and Dies that are in the Welcome Home Collection:

PLUS…these amazing new must have products:

I’ve been using the Life Changing Brushes for a few months now. I thought it would be fun if we played with the Carnivale minis as well today. Let’s see how they work with some of the stamps and dies in action…

Welcome Home Release – Project No 1

Nothing makes an impact like the Interlocked Die. To say I was over the moon excited the first time I saw this die by Julie Mogford is putting it mildly! This is not your average cover plate – this die measures 5 1/8″ around, and today we’re going to use it as a stencil.

That’s what I love about Cover Plates – using them as stencils! So that you can get as much use from yours as possible, cut it out of heavy weight cardstock and embossed it in clear on both sides. You can also seal it with gel medium.

To get that light airy look in a quick way – you’ll definitely want to try out the Life Changing Brushes. Last November I purchased some of the inexpensive make up brush counterparts, and let me tell you – the Life Changing Brushes are the real deal. They are made for Paper Crafting. Let me say that again – that’s the biggest difference – these are made for Paper Crafting! They are designed to release ink without soaking the ink up.

Another big difference is that with the Life Changing Brushes, I have not had the little hairs come loose, unlike their cheaper counterparts. You do get what you pay for! Just like anything else in life. So which size do you need? Definitely the larger four, and if you want to use them with stencils and get a bit more precise, you may want the Full 10 set. That way you can get into the nooks and crannies of those intricate stencils or background stamps.

So I wanted a fun masculine feel to my card today. I quickly layered some It’s a boy down, keeping my pressure light as I went outward. To get the full stenciled effect of this amazing die, be sure to go beyond the edge of the Interlocked Die. For some pop – use Limoncello (CP Minis – Carnivale Collection), from the center outward – just look at this AMAZING green it creates!!

So that your sentiment from the Happy Place stamp set makes an impact, emboss it in WOW Black Embossing Powder. I also ran my WOW Embossing Pad along the corners and added a little powder there too – it’s a bit hard to tell, with the card front adhered to the Midnight cardstock, but you really notice it in real life (shiny vs. the matte cardstock).

This card was so quick to make, you can really made several in the whole rainbow and literally use any sentiment on it! Do you use dies as stencils ever? If so, tell me in the comments what your favorite is?!!

Project No 2 (and 3)

Next up we’re going to use the same Life Changing Brushes to get a flawless look, but over an embossed image – the Cottage Garden Background Stamp.

Emboss your image in Opaque Bright White Embossing Powder on CPD 100# Bright White Cardstock. Did you know that WOW! puts antistatic product right into their powders? On an intricate image like the Cottage Garden Background, that really matters! It helps so that your powders don’t stick to the non-embossed parts.

I embossed one card front panel – 5 1/2 x 4 1/4″, and then blended Limoncello, Coral Cabana, a little Be Mine and some Samba inks from the CP Minis – Carnivale Collection. That’s what is so great about Catherine Pooler ink – the amount of ink it releases. Even Picket Fence Studios who designed the Life Changing Brushes recommends CPD ink for it’s brushes!

The key to getting a light blended look on your project is the same as with the Ranger Mini Sponge Tools – light even pressure. The difference between the tools – there is no rounded edge, so you’re more likely to get a smoother application with the brushes. And they are ergonomic in design – quite flexible and easy to hold. All that makes a difference if you love to ink blend.

I recommend having a brush dedicated to a color family – that way you don’t have to constantly clean them. But you will want to clean them from time to time – just rinse in the sink with soap (any will do) and let air dry. Do not use a heat tool – the little hairs are made of a plastic material!

Once you have your background how you want it, cut a 1 3/4″ section off from the top or bottom (I chose the part with mostly flowers). This card is relatively simple to put together.

First ink blend a background using your Interlocked Die as a stencil with Icing on the Cake on the card base for the skinnier piece. On the other – stamp the brick border from the Strolling Borders Stamp Set in Icing on the Cake.

Adhere your backgrounds to the bottom and top third of your folded card base. Cut out the Ways to Say Hey Dies for your sentiments out of Chocolate cardstock with your die cutting machine and glue both your sentiments to the bottom – just off the edge (to the card base), but with the sentiment part on your background.

That’s it! Quick and easy, and the best part – you get two cards from every Background. I love how they look and mixing the fun, vibrant nature of the Carnivale inks with the deep dark Icing on the Cake ink and Chocolate cardstock. What do you think? What would YOUR color choices be?

Now it’s time for you to be inspired! Hop along the hop – and be sure to leave comments along the way to be entered in for some gift certificates! Definitely let Julie Mogford know when you get to her stop if you love her Interlocked Die!! Be sure to stop by my Instagram channel too on Wednesday for another inspiring hop as well. Have an awesome day!

Catherine PoolerHop Here Next!!
Tracie Pond
Jen Carter
Karen Baker
Susan Powell
Kristie Goulet
Ilina Crouse
Lisa Harrolle
Nanette Tracy
Kelly Martin
Maureen Merritt
Julie Mogford
Daniel West
Ingrid Blackburn – You’re HERE!

Keep those fingers inky!! Below you’ll find a supply list for each project.

Easy DIY Mixed Media Christmas Cards + Video

Save the Crafty YouTuber Video Hop

Have you ever wanted to quickly produce some fun and artistic Mixed Media Christmas Cards? Are you tired of sending bulky cards that require extra postage? What if I gave you the formula for how to create a whole stack of cards that have layered texture and character to them, but are pretty much flat, easy to put together and will have all your friends and family thinking you are quite the artist?!! Interested?

Now what if on top of that I told you that you could have a chance to win over 100 prizes – bet THAT sold ya!

Mixed Media Christmas Cards Video Tutorial

It’s that time of year again – my good friend Justine Hovey has organized the second Save the Crafty YouTuber Video Hop, and I decided to play along with 90 of my crafty friends – mixed media style! And I even have my OWN giveaway that I’m doing….so be sure to actually WATCH the video. I give the details along the way…

Click HERE to watch in HD on my YouTube Channel

Aren’t they FUN and super simple cards to make?!! Seriously – I’m going to be teaching this exact project (and so much more) in person in a few weeks in the Orlando, Florida area. If you’d like to come learn from me in person – be sure to email me at ingrid (at) thecreativegrove.com and I’ll send you all the details!!

For the specifics and Details to be entered for over 100 prizes – seriously…it’s more like 125+ prizes….GOOD ones too – read about those on my YouTube Channel in the section below the video!

The Save the Crafty YouTuber Video hop is a celebration of cardmaking video tutorials created by a group of talented crafters of all different styles and levels. We are coming together over 5 days to give our viewers a chance to discover other amazing cardmakers and help reach monetization goals!

Mixed Media Christmas Cards

All you have to do is watch, like the video, consider subscribing, and click the link in the video description below to hop to the next video. Let yourself be inspired! Don’t forget to comment (on the video hop over at YouTube) because we have tons of prizes to give away. Please indicate if you are located in the USA or International so that prizes can be awarded appropriately as some prizes (not all!) have restrictions on them.

To be entered in for MY giveaway (closed) – watch the video – I give details on what you need to put in the comment section (USA only for that one).

Monoprinting Christmas Cards

Don’t forget to check back every day this week since there are 5 themed days of video hops! You never know when you’ll discover your next favourite YouTuber! Hop Links are below.

I hope you enjoyed this tutorial. Here are a few close up photos for you and the supply list. Be sure to come back to this post on November 10th to see who won the prize pack – I’m giving away Dies, Stencils and ink pads – it’s worth over $40!!! That Merry Christmas Die is one of them!!! 🙂 Happy Hopping!!!

Mixed Media Monoprint Christmas

Aren’t those the prettiest cards?!! These photos do not do them justice!! Interested in seeing more Mixed Media Christmas Card possibilities? Check out this tutorial – just adjust for the Christmas Season

Sponsors & Hop Links (Giveaways closed)

Here are all those sponsors….and SO many channels in each of the five hops are giving away additional prizes – this is an AWESOME hop!

Here are links to all five hop days:

  1. Day One Hop Beginning
  2. Day Two Hop Beginning
  3. Day Three – Start on MY YouTube Channel
  4. Day Four Hop Beginning
  5. Day Five Hop Beginning

Good luck on winning all those great prizes – over 100!!! Leave me a comment below if you liked these cards – I’d LOVE to know.

Thanks for watching – till next time…

Supply List

Affiliate Links used if available

Mixed Media Christmas Cards

Hailey’s Shower Photo Supply List – https://ldli.co/e/jpxx6p

How to Mass Produce Clean & Simple Quick Cards

How to make 20 diy quick cards

Have you ever created an awesome background that you could quickly turn into several quick cards? Did you know that the Clean & Simple (CAS) style can have some mixed media elements in it? This tutorial will show you just how simple and easy it is to create two backgrounds that you can literally turn into 20, yes – you read that correctly…twenty cards!! Let me show you exactly how…

Watch on YouTube in HD & Subscribe for more Tutorials

Quick Cards Tutorial & Tips

When I’m trying to come up with quick cards, I usually start with a larger background piece. That’s the key for me! Well, that and some great word dies (or large stamp sentiments) and a classic clean and simple design. Cards don’t always have to be complicated. SCREEETCH!!!! Did you just hear that in your head – from little ‘ol me?!! You are on my blog and YouTube channel after all, right? Yes, I love artsy complicated cards and mixed media projects just like the next person – even complex watercolor projects. But not every one has to be uber-complicated. Sometimes simple is better!

How to make 20 quick cards with monoprints

20 quick cards tutorial and tips

What do you love – CAS or Complex designs? Seriously, there’s no right or wrong, but I’m curious – tell me in the comments below & over on my YouTube channel here!

Giveaway alert – I’ll choose one person to send one of these beauties to if you comment on my YouTube channel in the first 72 hours!!

Now that you’ve seen just how easy it is to create those backgrounds – colorful ones too….Here are a few tips you’ll want to keep in mind:

  • Create backgrounds that can be split up – you want the design to be everywhere – not just in one little corner. Yes, in my video, you only see the flowers on one side – but I can quickly stencil something over the clean side too – it’s all in how you look at it, no?
  • Don’t have the Flower Frenzy stencil by The Crafters Workshop (I LOVE their stencils) or any 12 x 12 stencils? No problem – just use your 6×6 ones a few times! But seriously – check out their flower stencils – they have SO many gorgeous ones…
  • To fill up your space if your background piece is small – use a large stamp or die cut like I did. You can always build a sentiment like you see here too
  • Keep the rule of thirds in mind
  • Use powerful colors that make an impact – it helps to have all that white space around as well. The contrast is amazing.

quick cards with monoprints and word dies

What did you think? That’s one rockin’ die, right? Designed by Nanette Tracy for Catherine Pooler Designs – and newly released last week – don’t miss out on it. Get your hands on the Three Kind Dies and Kind of Wonderful Stamp Set right here! And Catherine Pooler inks are SO super vibrant and saturated, they are the perfect choice when matching to your acrylic paints.

I’ll be back soon with some more Clean and Simple AND Mixed Media designs. And don’t forget to comment on my YouTube Channel!! I’d LOVE to send you one of these cards – I may just include something else that’s fun too!

Till then – keep those fingers inky!

Supplies

To make finding the supplies I used in these projects a bit easier for you, here are a few clickable links. Compensated Affiliate Links are used when possible. Click here for disclosure. Happy Shopping!


Creating Bright & Colorful Monoprint Backgrounds with a Gel Plate

Colorful Bright Monoprint Backgrounds

Have you ever used a gel plate to create bright colorful monoprint backgrounds? It’s so super easy, I think you’ll be shocked at how you quickly you can create a ton of vibrant colorful pieces to use on your cards, in your art journal or just create a fun piece of artwork!

To make this even easier for you – I filmed a little video for you. And there’s SO much more you can do with a gel plate, you’ll definitely want to add one (preferably two) to your tool arsenal.

Monoprint Backgrounds Tutorial

Click this link to see video on YouTube

If you aren’t subscribed to my YouTube channel, definitely consider it. I have many more videos headed your way – you won’t want to miss them. You can even hit the little bell to be notified!

Abstract looking monoprint backgrounds

Here are a few tips you’ll want to keep in mind when playing around with this fun technique:

  • Avoid muddy colors – Use colors that work well together. Remember that you’re going to be overlapping several, so you don’t want to use complimentary colors (opposite sides of the color wheel) when wet. You can layer those once one layer is dry – but not while wet.

bright and colorful monoprint backgrounds made with a gel plate bright and colorful monoprint backgrounds made with a gel plate

  • Use a second gel plate to help clean off your brayer – you’d be surprised how fast you can create multiple prints with just one application of paint!
  • Use good paper for your scrap clean up piece. (9/10 times, I turn that piece into a print.) The colors work amazing together, and it usually becomes a great base for a layered print

scrap piece from a monoprint gel plate session

  • Try to be patient when pulling your prints. Allow the paint to dry a bit so that you are able to lift those left behind layers underneath your newest paint application
  • Remember to lift your brayer when applying your paint. If you just keep it on the surface of your gel plate, you are only really staying in that one section. Lifting it allows for better rotation and coverage.

  • Don’t stress if just a little pulls off the plate. You can always add more – or use it as that little something in the background of a card!

bright and colorful monoprint backgrounds made with a gel plate

I use a 4″ and 2″ brayer when creating monoprint backgrounds. Sometimes that small brayer is quite helpful to get into those little spaces. And sometimes having a larger brayer is just oh so much easier!

Don’t you just LOVE these? Next up I’m going to show you what to do with some of these fun backgrounds, and just how easy it is to create a whole set of cards.

Till next time –

Supplies

To make finding the supplies I used in these projects a bit easier for you, here are a few clickable links. Compensated Affiliate Links are used when possible. Click here for disclosure. Happy Shopping!


Mixed Media Tropical Cards

I love the look of Mixed Media Tropical Cards. Today I’m getting a little inky with my Gel Press and have created some  incredible textured Tropical inspired masterpieces!

Tutorial: Mixed Media Tropical Cards

To get that fun island weathered feel, I thought a tropical looking monoprint would be a great base to these projects. What exactly is a monoprint? A monoprint is a form of printmaking where the lines and images of the print can only be made once. This makes it a bit unique and special. You can always create multiple prints, but no two will be exactly alike.

When I saw the Leave Me in Paradise and Fearless Pursuit stamp sets in the Tropically Yours SOA, I knew I wanted to create some Mixed Media Tropical cards.

First, you’ll need a base print for these projects. I chose to use an 8×10 Gel Press plate. This gave me a larger print that I could then cut down into 4 card fronts – hey I’m all about getting the most bang for my buck, you know?!!

Creating a Monoprint can be as simple or complex as you want. The one thing to remember, when you start a Gel Printing session, the more you get into it – the more interesting character and texture you build up and leave behind for future prints.

Here is the concept broken down into it’s most simplest form:

  1. Spread Acrylic Paint onto your gel press with a brayer
  2. Add texture with stencils or other items, or leave as is
  3. Start to pull prints. You’ll get 2-3 prints with each pull – a first print, the ghost print, and the final remnants.

That’s pretty much it. What makes them so intriguing are the stories between the lines. Meaning the stuff that gets left behind, or built up. That’s what we have going on in today’s print.

I knew I wanted to use the Leave me in Paradise stamp set, so I wanted to work with Greens as a base. To get the layered weathered look, I created several prints first in various shade – Browns, Orange, Yellows and Greens. Once I had little bits of paint left behind, and the prints were starting to feel a bit more complex, I created an orange print. Have you ever seen tropical leaves? They are deep and vibrant greens, yellows, orange and red.

With some orange bits dried onto the gel press, and some interesting Brown in the corners, layer up some vibrant greens. I used Dirty Martini by Dylusions mixed with some lime by Dina Wakely. Both of these paints are fairly fluid. They helped to reactivate all that dried goodness underneath.

Lay a sheet of cardstock over, and run your hands firmly on the back. We’re trying to pull as much as we can off here. The print had gorgeous depth and interesting character from a piece of Dry Wall Mounting Tape in the corners.

Cut down that piece into four and next create your cards. To see the main card I was looking to create and read a bit more about it’s process, Click Here for my blog post yesterday.

The goal was always to create a batik look to my project. But what happened next, I wasn’t prepared for and nearly threw in the towel! I had stamped the gorgeous leaves from Leave me in Paradise in Versamark ink and heat embossed them in Clear. I wanted to create a Joseph’s Coat/Faux Watercolored look to my project, so rather than coat it in dark ink, I chose to paint over everything with White Gesso.

Next was the Faux Watercolor technique – Place your piece in a phone book (or other scrap paper), fold a few sheets over it and iron off your embossing. No problem, right? Boy was I wrong. That Gesso held tight and the clear embossed leaf images were trapped.

So how do you fix this? I thought it was something for the round file, but I talked myself into just putting it to the side and trying one more time. Next I did a true Joseph’s Coat technique and used Icing on the Cake Dye ink. Here’s what it should have looked like – monoprint base and ironed off/joseph’s coat technique:

And here’s the final piece – a success! That project turned out to be a stunner…Details are on yesterday’s blog post.

And with one the other two remaining monoprints, just pop the drop dead gorgeous Fearless sentiment onto it and emboss in WOW Bark embossing powder. Add some of the textures from Good Vibes Borders in the corners to accentuate the print in Icing on the Cake ink and Matte it onto a a strip of cardstock that’s been embossed in the textures and bark for added interest. Doesn’t it look like basketweave? This card is simple, fun and definitely easy to duplicate. But in the sense that the monoprints will be different – how cool, right?

Now back to the piece headed to the trash…wait….hold the phone! That’s when genius struck. Okay – I’m bound to have one good idea every now and again…What if we could bring the covered images back to life with colored pencils?!!

Here’s a look at it along the way….

Next up, just color the images with several shades of colored pencils. I used a 72 pencil set I have by Arteza, and about 6 shades of Green. Once the pencil colors were laid on top of the botched images, smooth them out using a blender pencil. I used one by Caran d’Ache to get a smoother look. The end result was a light watercolor almost look to the piece.

The Gesso in-between is cracked and weathered, which only adds to the project. It needed something, so once you’ve embossed that rockin’ sentiment from the Fearless Pursuit stamp set in Bark by WOW, splatter some Payne’s Grey acrylic paint watered down with a few drops of Icing on the Cake ink refill.

Matte onto an edged embossed piece in Bark – notice how different it looks on white cardstock than Chocolate?!! I LOVE this embossing powder. It’s new to Catherine’s shop too!

Create a little grunge on your card base with Over Coffee Ink on Sand Dunes cardstock and you’re all set.

Overall, the monoprints are super cool true Mixed Media pieces. But what’s really awesome about them, they are one layer. The person you give these cards to will never figure out how you did that?!!

And the moral of this long epic story #2…don’t throw anything in the round file.

I hope you’ve enjoyed these couple of cards. I love the texture and creative way I can use these stamps. There are some FUN products in the box. You’ll love it all. Best part – it truly works with each other.

Thanks for stopping by today! Keep those fingers inky –

Supplies

To make finding the supplies I used in these projects a bit easier for you, here are a few clickable links. Compensated Affiliate Links are used when possible. Click here for disclosure. Happy Shopping!