How to Color Embossing Paste

This tutorial is a great DIY tip for how to color embossing paste quickly and easily on your cards and mixed media projects. I think you will be blown away with how easy it really is!

Here’s a video showing you exactly how to color embossing paste – and once you start, I guarantee you won’t want to stop…lol!

Click Here to watch it on YouTube in HD

And when you watch this over on YouTube – I’d LOVE for you to subscribe to my channel too! Don’t forget to click the notification bell as well. I’ll be doing some lives and premieres, and I’d LOVE to have you there as well.

So what did you think? Tell me in the comment section if you’ve ever done this? And have you tried multiple colors too? Don’t you love how they easily overlap in color to create their own? Which one is your favorite?

How to Color Embossing Paste Tutorial

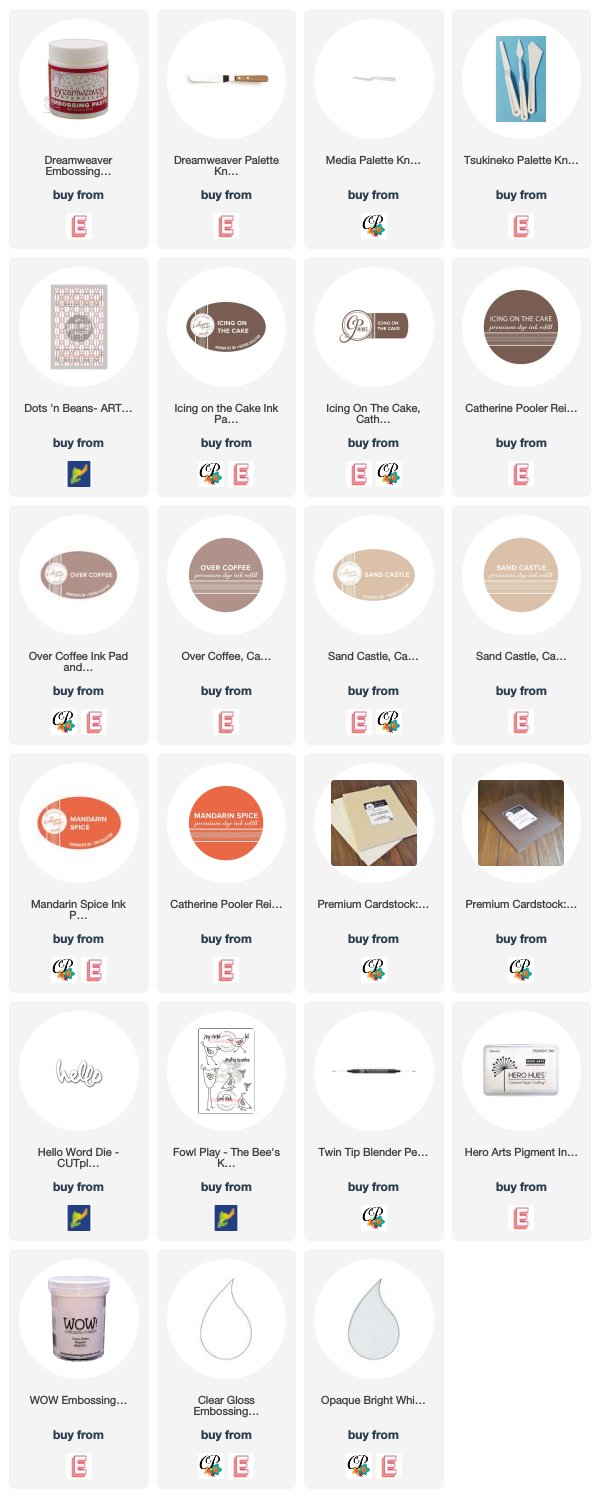
In a nutshell, you’ll want to blend your medium with a color source. In this video I used foam ink pads by Catherine Pooler. The colors are great, and her ink pads release quite a bit of ink. You can always use ink refills or something else like gelatos, etc…

You’ll also want to use a palette knife. I personally like using metal knives vs. the plastic ones. It’s a personal preference.
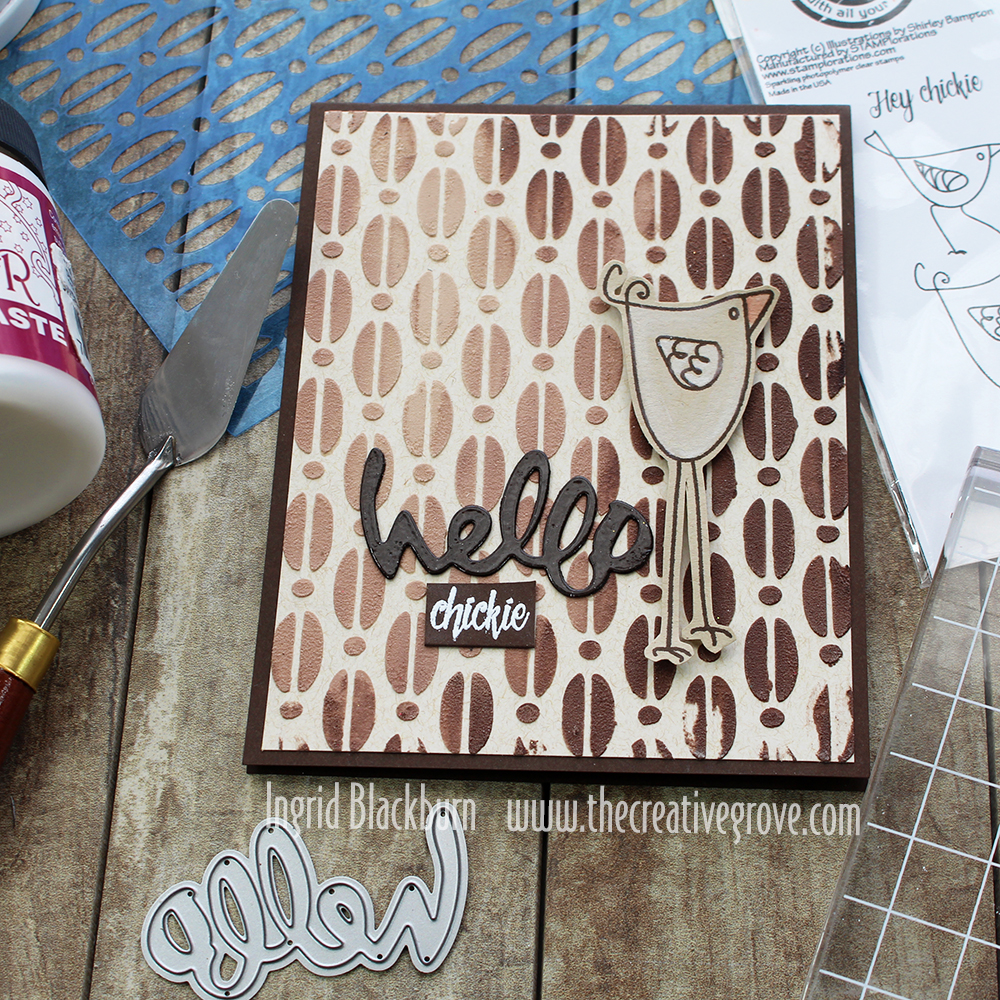
DIY how to color embossing paste

Your colored paste will really go far, so do a little at a time. How much color you add, will directly result in the depth of color in your medium. When using something like whipped spackle, that one always ends up lighter in color, so I have to add more ink.

Here’s my final project. I didn’t explain really how I colored in this little chick, so here you go!

Since I used Sand Dunes cardstock by Catherine Pooler for my base, I needed to make my chickie white. Did you know that I commonly greet my friends with hey chickie all the time!!! That’s why I got the Foul Play stamp set in the first place….lol. But these little chick images totally ROCK.
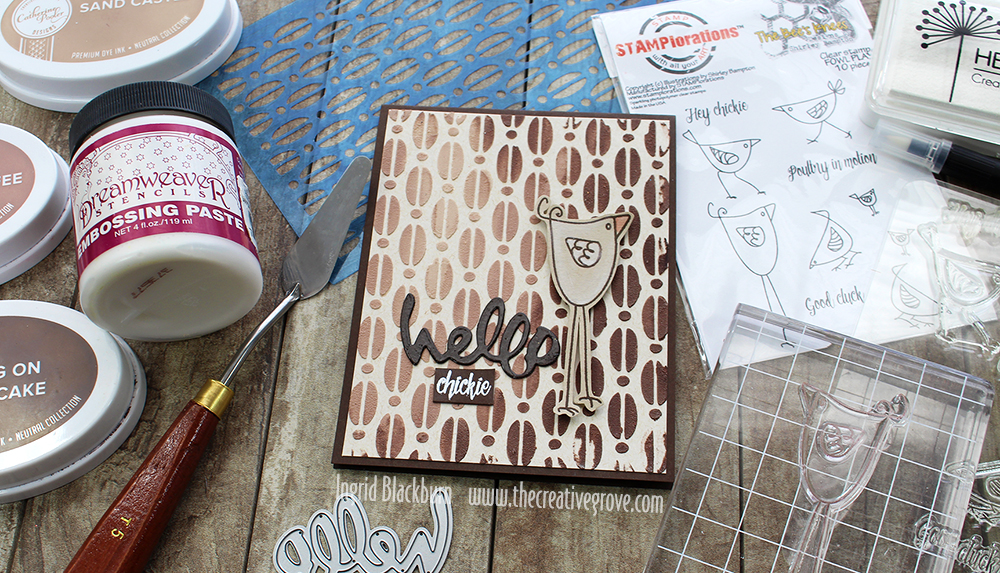
how to color embossing paste tutorial

To make her white, I used a zig blender pen and Hero Arts Unicorn white pigment ink. Don’t think those pens are just for dye inks – use whatever you have!!! Just be sure to clean it thoroughly in between.

The hello die (my all time favorite hello die) also by Stamplorations is embossed with clear embossing powder by WOW! That way it really stands apart from the rockin’ background. I found without that, it just wasn’t popping.

The hello die and chickie (embossed in white on Chocolate cardstock), are glued directly to my card, the Chick is popped up with foam tape.

I hope you enjoyed this! Just like I said in the video – don’t forget to tag me with your creations over on Instagram with my new IG handle – @thecgstudio. I’d LOVE to see what you make.

Have a great day!!

Easy DIY Mixed Media Christmas Cards + Video

Save the Crafty YouTuber Video Hop

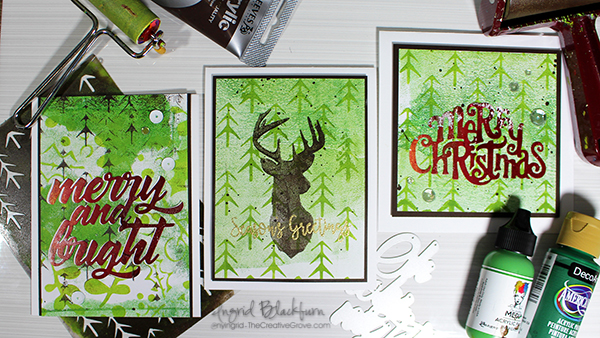
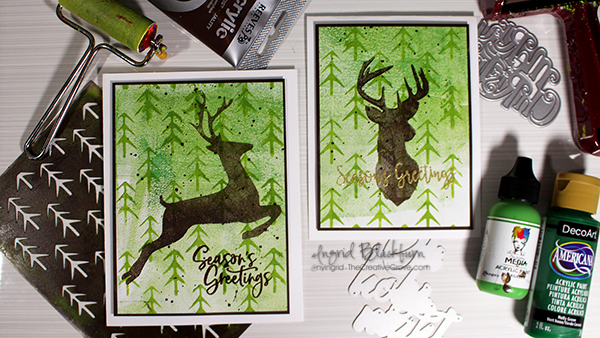
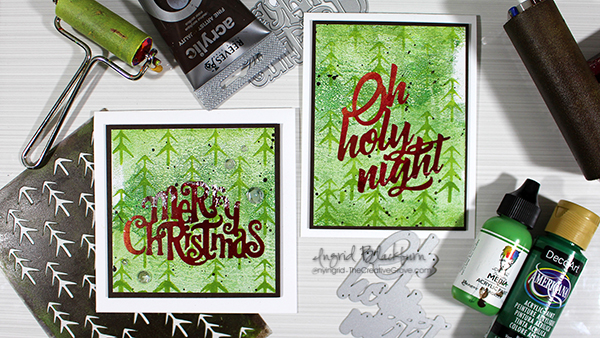
Have you ever wanted to quickly produce some fun and artistic Mixed Media Christmas Cards? Are you tired of sending bulky cards that require extra postage? What if I gave you the formula for how to create a whole stack of cards that have layered texture and character to them, but are pretty much flat, easy to put together and will have all your friends and family thinking you are quite the artist?!! Interested?
Now what if on top of that I told you that you could have a chance to win over 100 prizes – bet THAT sold ya!
Mixed Media Christmas Cards Video Tutorial

It’s that time of year again – my good friend Justine Hovey has organized the second Save the Crafty YouTuber Video Hop, and I decided to play along with 90 of my crafty friends – mixed media style! And I even have my OWN giveaway that I’m doing….so be sure to actually WATCH the video. I give the details along the way…

Click HERE to watch in HD on my YouTube Channel

Aren’t they FUN and super simple cards to make?!! Seriously – I’m going to be teaching this exact project (and so much more) in person in a few weeks in the Orlando, Florida area. If you’d like to come learn from me in person – be sure to email me at ingrid (at) thecreativegrove.com and I’ll send you all the details!!

For the specifics and Details to be entered for over 100 prizes – seriously…it’s more like 125+ prizes….GOOD ones too – read about those on my YouTube Channel in the section below the video!

The Save the Crafty YouTuber Video hop is a celebration of cardmaking video tutorials created by a group of talented crafters of all different styles and levels. We are coming together over 5 days to give our viewers a chance to discover other amazing cardmakers and help reach monetization goals!

Mixed Media Christmas Cards

All you have to do is watch, like the video, consider subscribing, and click the link in the video description below to hop to the next video. Let yourself be inspired! Don’t forget to comment (on the video hop over at YouTube) because we have tons of prizes to give away. Please indicate if you are located in the USA or International so that prizes can be awarded appropriately as some prizes (not all!) have restrictions on them.

To be entered in for MY giveaway (closed) – watch the video – I give details on what you need to put in the comment section (USA only for that one).

Monoprinting Christmas Cards

Don’t forget to check back every day this week since there are 5 themed days of video hops! You never know when you’ll discover your next favourite YouTuber! Hop Links are below.

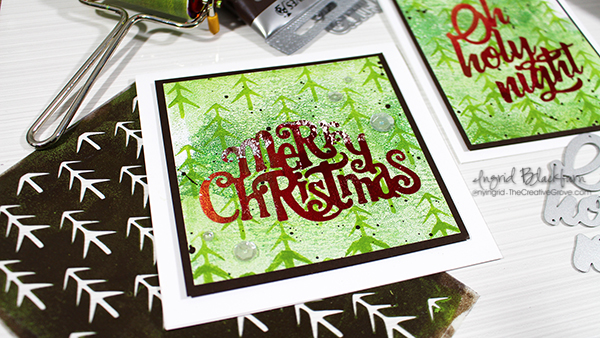
I hope you enjoyed this tutorial. Here are a few close up photos for you and the supply list. Be sure to come back to this post on November 10th to see who won the prize pack – I’m giving away Dies, Stencils and ink pads – it’s worth over $40!!! That Merry Christmas Die is one of them!!! 🙂 Happy Hopping!!!

Mixed Media Monoprint Christmas

Aren’t those the prettiest cards?!! These photos do not do them justice!! Interested in seeing more Mixed Media Christmas Card possibilities? Check out this tutorial – just adjust for the Christmas Season

Sponsors & Hop Links (Giveaways closed)

Here are all those sponsors….and SO many channels in each of the five hops are giving away additional prizes – this is an AWESOME hop!

Here are links to all five hop days:

  1. Day One Hop Beginning
  2. Day Two Hop Beginning
  3. Day Three – Start on MY YouTube Channel
  4. Day Four Hop Beginning
  5. Day Five Hop Beginning

Good luck on winning all those great prizes – over 100!!! Leave me a comment below if you liked these cards – I’d LOVE to know.

Thanks for watching – till next time…

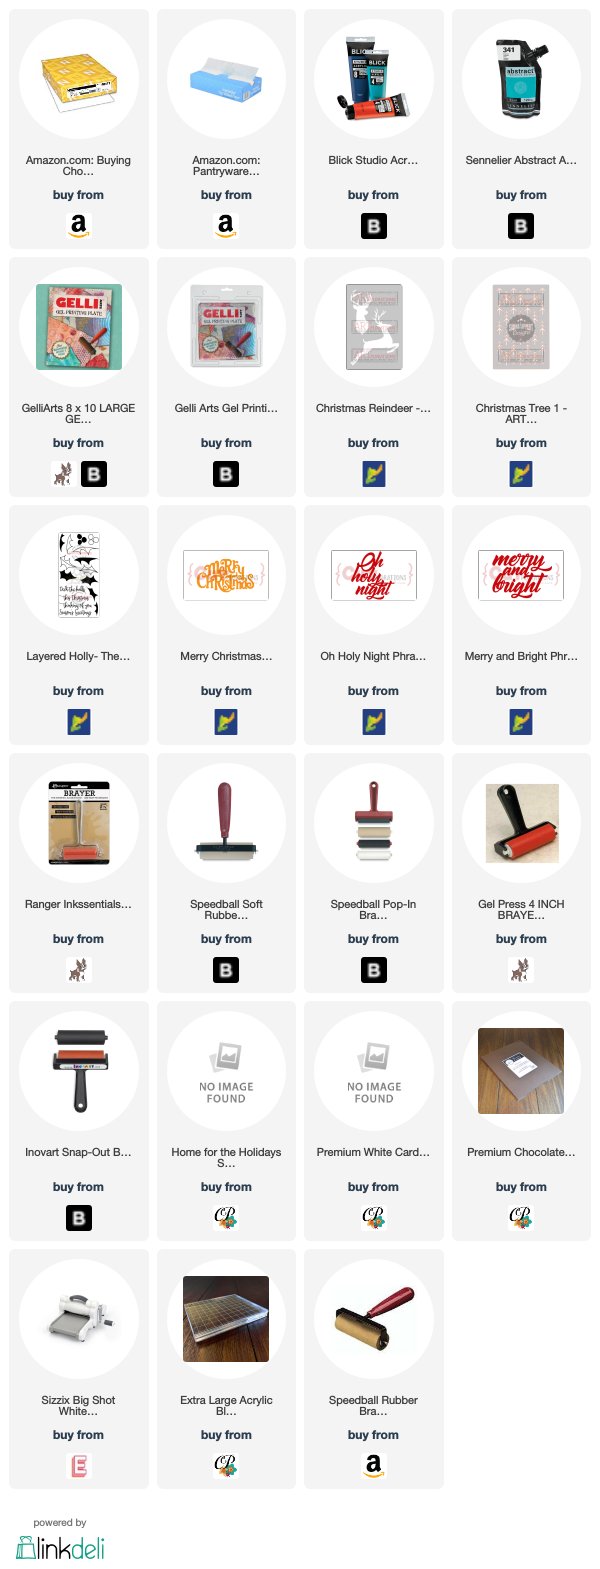
Supply List

Affiliate Links used if available

Mixed Media Christmas Cards

Hailey’s Shower Photo Supply List – https://ldli.co/e/jpxx6p

Art Happens – New Craft Stash Blog Hop: Day Three + Giveaways

Art Happens

One thing I’ve learned over the past few years is that Art Happens. It truly does. Today I’m kicking off Day Three of the New Craft Stash Blog Hop with some of my crafty friends. We’ve all collected & hoarded craft supplies…come on – I know you’re one of us! Several of us were chatting a few weeks ago and decided – let’s just hop for fun and made the rule that we had to use something new. Now that means – literally new or just new as in it’s been in the drawer for a bit and it’s finally time to break it out! Today I’m using several products just like that…and I can’t wait to show you what I’ve done.

Be sure to hop on to all three days worth of hops. Get inspired to use your “new” stash, leave a comment and be entered for prizes! You’ll have until the 23rd to leave a comment. I’d love to know what new item you’re going to play with next!

Gorgeous Art Happens Tutorial

It’s no secret that I’m in love with mixed media supplies. I love to create simple mixed media projects, AND real mixed media. Well I have a treat for you today. Today’s projects are the result of a fun little gel printing session I had the other day. I wanted to use some of my newer acrylics and some new Stamplorations masks (Art Happens) and word dies. I’ll post a time lapse video later with my entire printing session, so today’s video just showcases the print I made for these two beauties…enjoy!

Click Here to view video in HD on YouTube

What do you think? It’s actually quite fun. When I first started, I’ll admit…I was quite intimidated. But the more I got into that session, and the more art that just literally poured off the plate…I kept saying things like WOW, I can’t believe I just made that and Ooh that’s gorgeous. Seriously…I was quite impressed with myself! And I think I’ll always keep that first fabulous card – cause it literally is one of those where I still say – I can’t believe I made that! You know that feeling, right?

Well, this gel printing session didn’t disappoint. I ended up with 8 art journal pages and 34 prints. Yup! Gel Printing goes so fast, and more you get into the session – little bits are left behind on the plate – Tip:  do not clean your gel plate in-between. The work you create will do that for you. Today’s print that I used came about 4/5 prints into the session. Some of the beauty on the print is from prior prints. I love the patina kind of feel. That weathered look that you usually only get with time and exposure to the elements.

Art Happens by Stamplorations

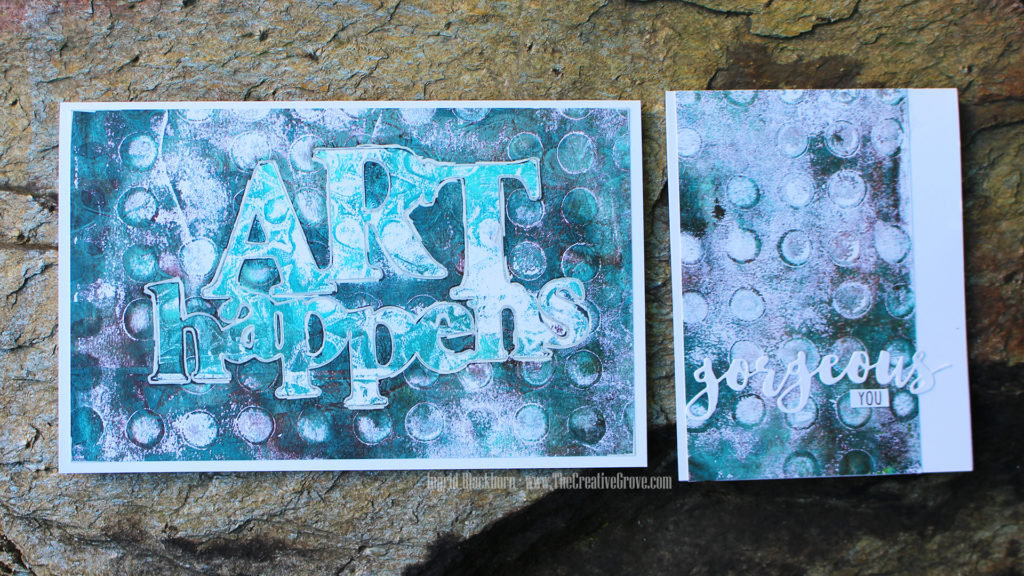
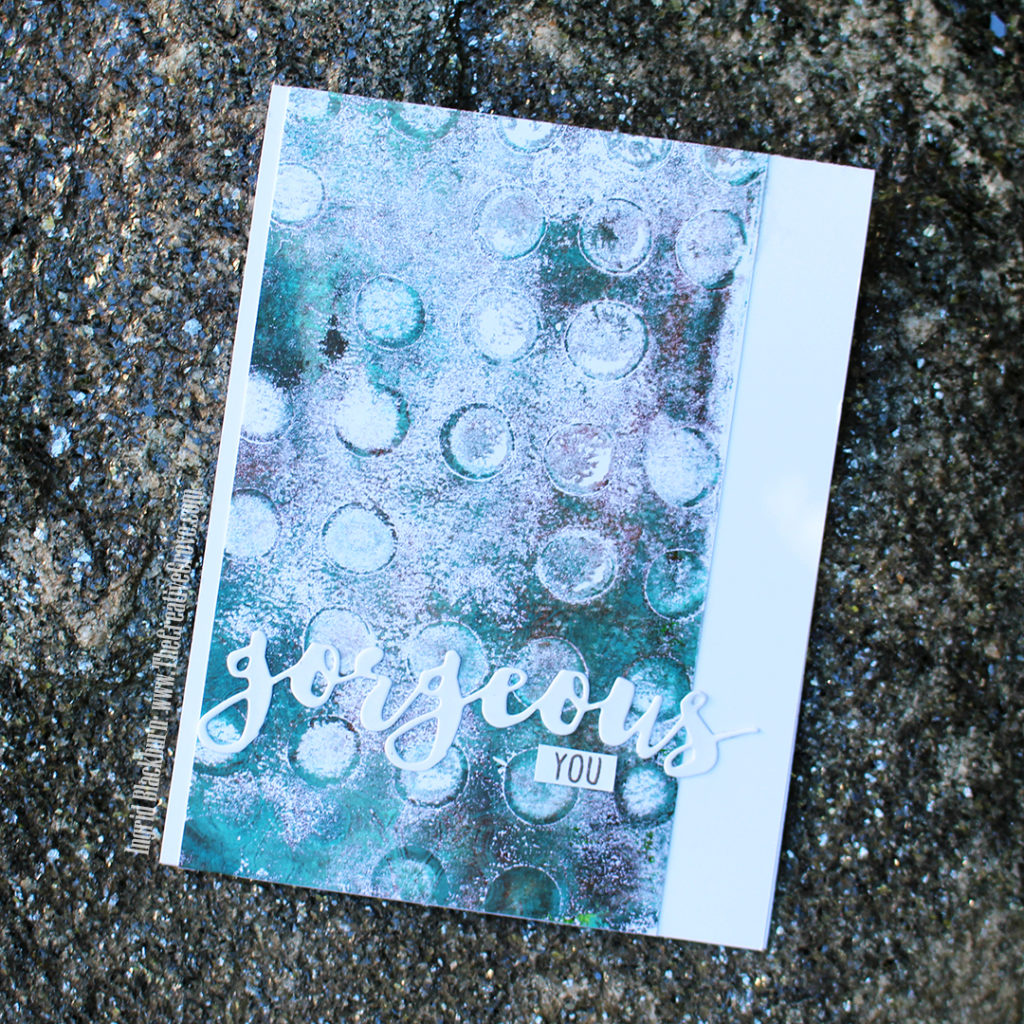
Here are the two cards – one is a traditional A2 sized card – and it needs so little to complete it. Just the Gorgeous die, cause…well hello, it’s gorgeous! And a simple little You to complete the sentiment. The die is one of the MANY fabulous word dies from Stamplorations – I am such an addict of Shery Russ dies and stencils – stamps too! She’s got some ah-mazing stuff. She’s a one woman operation, has phenomenal customer service and I swear the woman doesn’t sleep. Want to see her stuff? Click Here and use the code STAMPINGRID for 20% off orders of $15+. Hey, every little bit helps, right?!

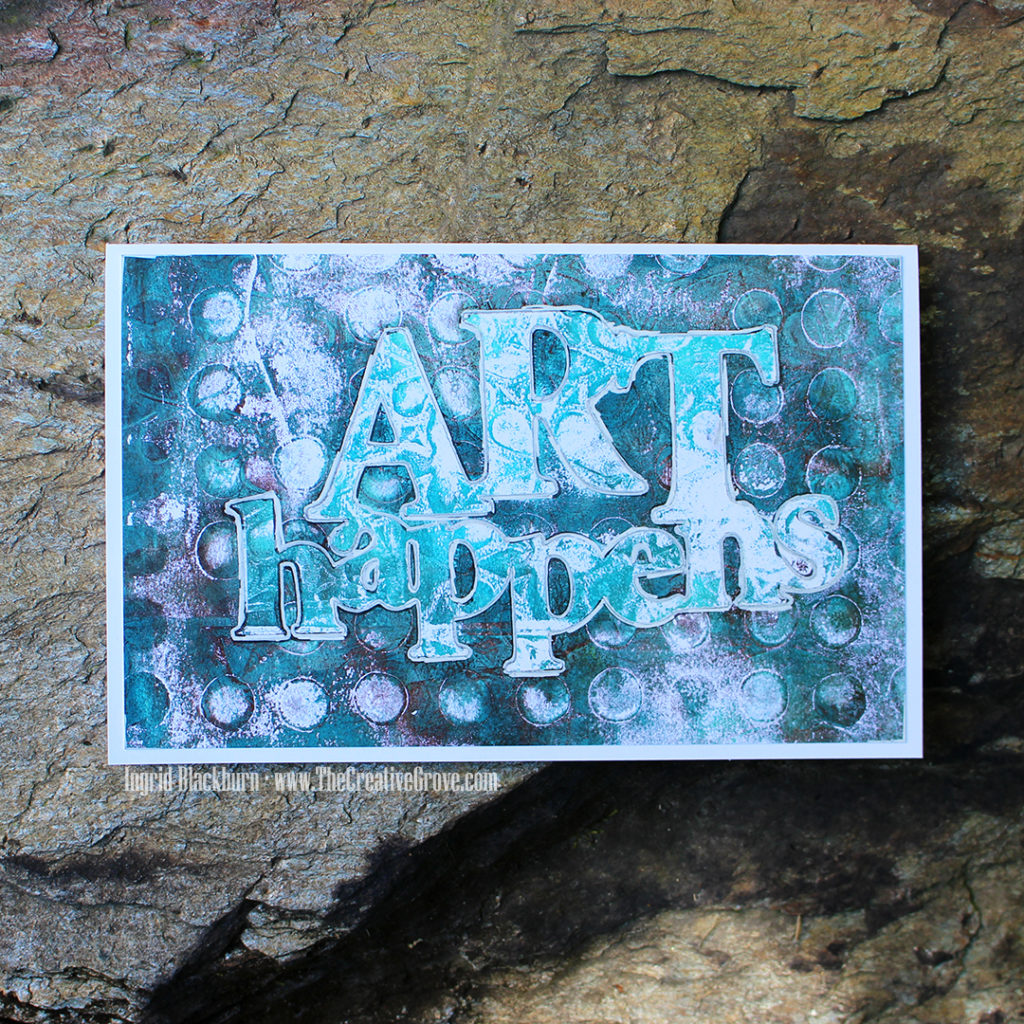
The second project uses the mask Art Happens. I have this same sentiment from Stamplorations in a smaller sized die. WAIT till you see the mixed media project coming up using that – it’s a beauty! Using masks in gel printing is a great way to preserve colors in layers and really allow them to pop as in this project. I wanted to emphasize it a bit more, so I outlined it using a Pitt pen and Posca paint pen. I was going for a sloppy look, cause let’s be honest – there’s nothing perfect about monoprinting.

Art Happens Monoprint

Here’s a funny fact – ask any of my crafty friends who really know me – in card making, perfection is kind of one of my OCD things. Everything has to be lined up right, matted properly, etc…so mixed media nearly gave me convulsions at first. I tried to control everything – until I realized that the magic happens when you let go and just let the art actually happen.

So I hope you’re encouraged to give monoprinting a go. It’s SO relaxing, you’ll have a crazy amount of prints to create cards with, and I know you’ll just fall in love with it like I did. Hey, if this OCD papercrafter can become a mixed media artist – there’s hope for all of us, right?

Thanks for stopping by, be sure to visit all my friends’ blogs on today’s hop, and if you missed the first two days – hop on over to those too. I have the full list below. We have incredible prizes and I’m giving away a prize pack myself! Thanks for joining us on this fun little Summer journey. I hope you’re inspired now that you know Art Happens!

Comment to Win Prizes

We have some amazing sponsors & Prizes:

PLUS….

I’m giving away a prize pack to one lucky commenter from one of my blog posts! So be sure to leave comments on all the blogs – all three days for your chance to win!! Just comment on all the blog hop stops by 7/23/18.

So now it’s YOUR turn to hop along and be inspired by some of my crafty friends. Thanks for taking the time to hang a bit with me today. I’ll be back in a few days with a mixed media project for you. And stop by tomorrow as well – I’ll post that hop list too!

Today’s Hop List – Day Three

  1. Ingrid Blackburn <— You are here!
  2. Ardyth Percy-Robb <— Hop here next!!
  3. Josefine Fouarge 
  4. Tracie Pond 
  5. Nanette Tracy 
  6. Lisa Harrolle  
  7. Justine Hovey 
  8. Susan Powell
  9. Jennifer Cerizo

Did you miss Day one or Two? Get caught up here:

Day One Blog Hop List:

  1. Ingrid Blackburn  – Yup that’s me with a different post & project!
  2. Jenny Colacicco
  3. Ashlea Cornell
  4. Karen Baker
  5. Ali Farmer
  6. Catherine Pooler
  7. Allison Cope
  8. Veronica Zalis

Day Two Blog Hop List:

  1. Melissa Miller
  2. Tracey McNeely
  3. Kelly Martin
  4. Amy Seigler
  5. Michelle Wallace
  6. Ilina Crouse
  7. Maureen Merritt
  8. Nance Salkeld
  9. Deepti Stephens

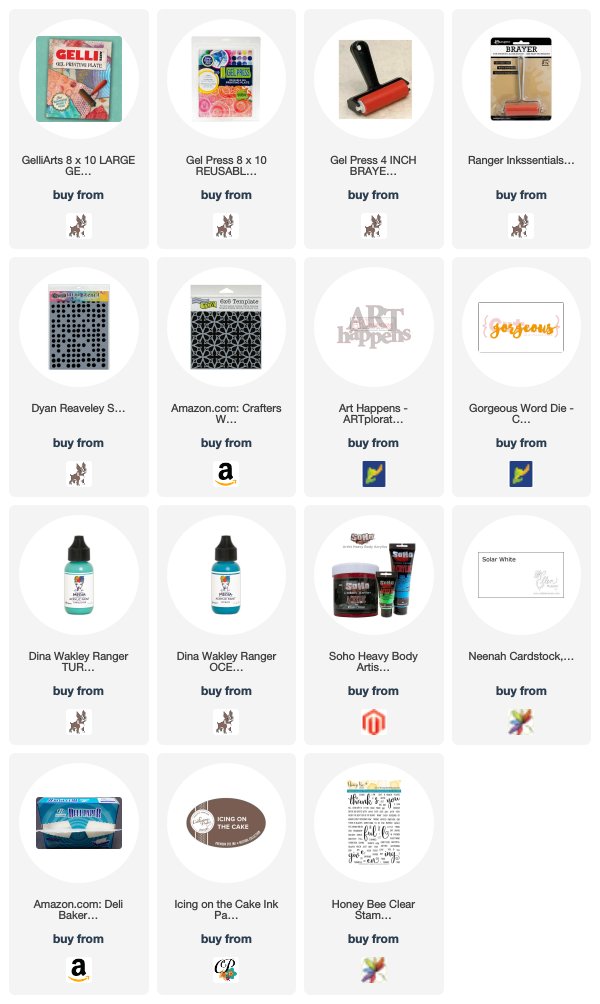
To make finding the supplies I used in these projects a bit easier for you, here are a few clickable links. Compensated Affiliate Links are used when possible. Click here for disclosure. Happy Shopping!


Kylie’s 12 Days of Christmas Card Challenge – Day Seven

There are two things I’m grateful for this year – my online friends and a good ole Christmas Card Challenge. Okay there are lots of other things too, but today is about a sweet friend of mine – Kylie Purtell and her 12 Days of Christmas Card Challenge with friends.

12-days-of-christmas-graphic

I’ve had a wonderful last few years participating in many online card challenges – most of them Christmas! Yes, I’m a sucker for Christmas. And I normally have my own 12 Days of Christmas Series myself…but between a move from Europe back to the USA (we’re settling in the Raleigh, North Carolina) area, and purchasing a new home unexpectedly – my November/December got turned upside down – please forgive me!

So I was elated when Kylie asked me to participate in her 12 Days of Christmas with Friends Challenge. And I encourage you to enter too – pick any inspiration from any day….today is Day 7 – and just jump on in. The prizes are from three of my favorite stamp stores – all small businesses owned by amazing women.

To Salute these three creative women – Kylie, Shery & Christine, I thought it would be fun to put together a little Christmas fun using products from all three – from where else…my hotel room…lol!

ingrid-blackburn-candy-cane-holly-001

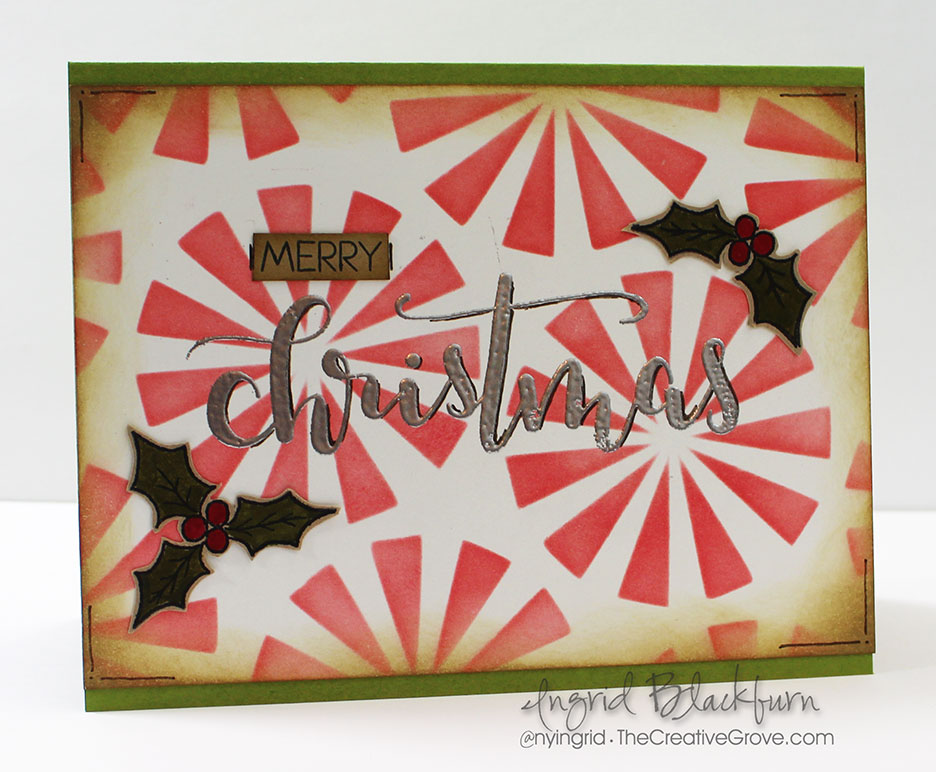
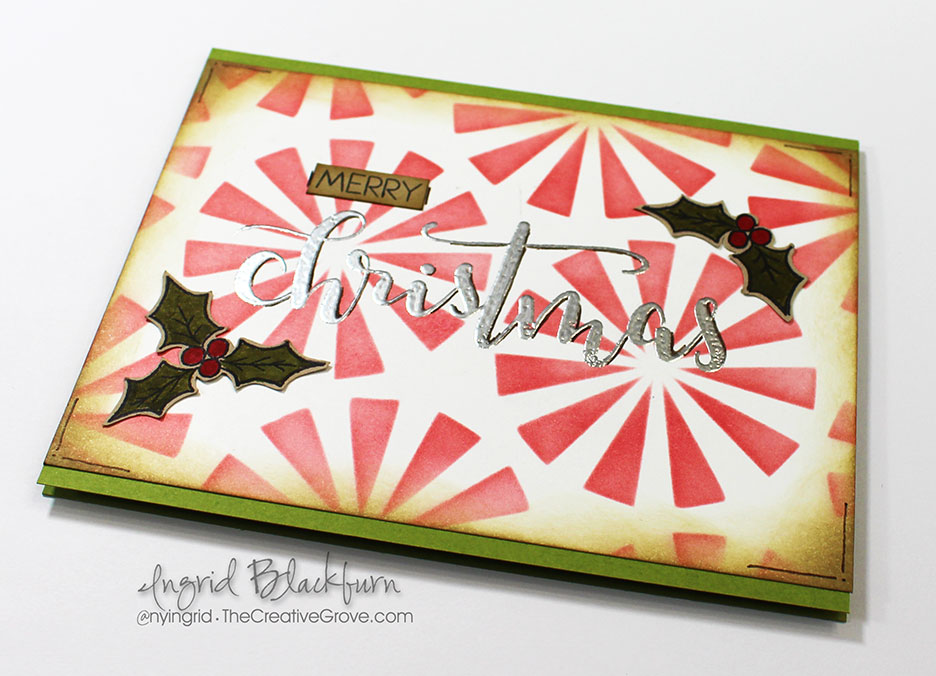
I went for a little rustic look with some toned down colors here.

  • To create it you’ll want to sponge a little Festive Berries through the ARTplorations by STAMPlorations Merry Go Round Stencil  – keep it light to have it look effortless.
  • Next sponge around the perimeter with a little Tea Dye Distress Ink lightly and add a few lines and dots to the corners with an Early Espresso Distress Marker.
  • Next Stamp the Holly & Berry images from the Christmas Joy stamp set by Happy Little Stampers in Black Archival Ink on Kraft colored card stock.

ingrid-blackburn-candy-cane-holly-002

  • Color in your images using Zig Clean Color Markers and cut out leaving a little edge to allow the images to pop.
  • Once your background is fully dry (I zapped mine with a Heat Tool), test it to see if any embossing powder sticks, and then stamp the gorgeous Christmas greeting in Versamark ink from the Christmas Surprise stamp set by Create a Smile Stamps.
  • Emboss it in Silver powder and stamp the coordinating greeting onto a little strip of Kraft in Black. Adhere to your background and edge with an Early Espresso Distress Marker.
  • Edge the greeting a bit with the same Early Espresso Distress Marker – keeping it uniform – mine is slightly to the right and underside of the letters. This helped to pop the image off the busy background.
  • Add your panel to a folded piece of Olive card stock and there you have it! My card front measures 5 1/2 x 4″.

ingrid-blackburn-candy-cane-holly-001

Don’t you just love how the background looks like little peppermint candies…I love all these elements, and these three companies are some of my favorites – I’ve spent my fare share at each this past year – just don’t tell Michael! 😉

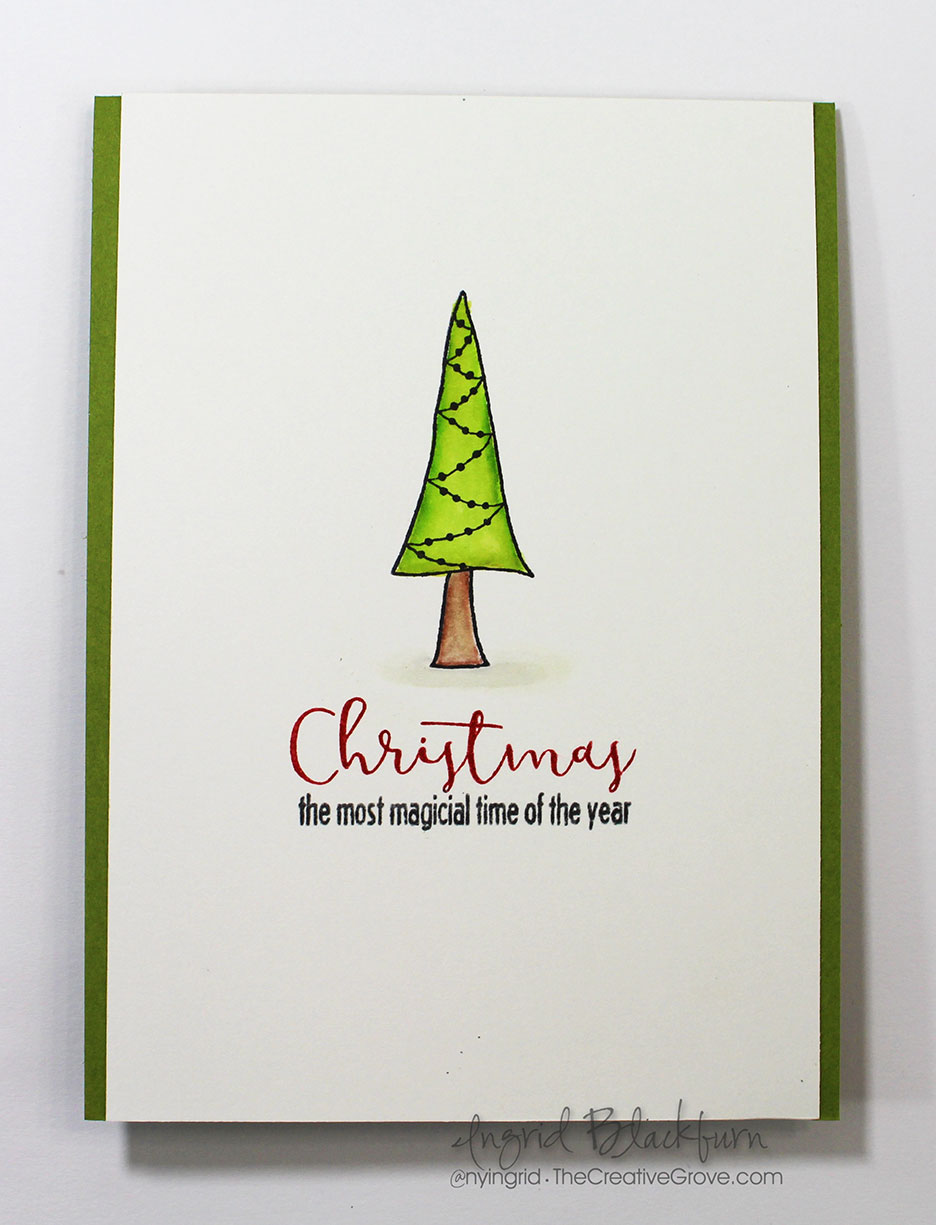
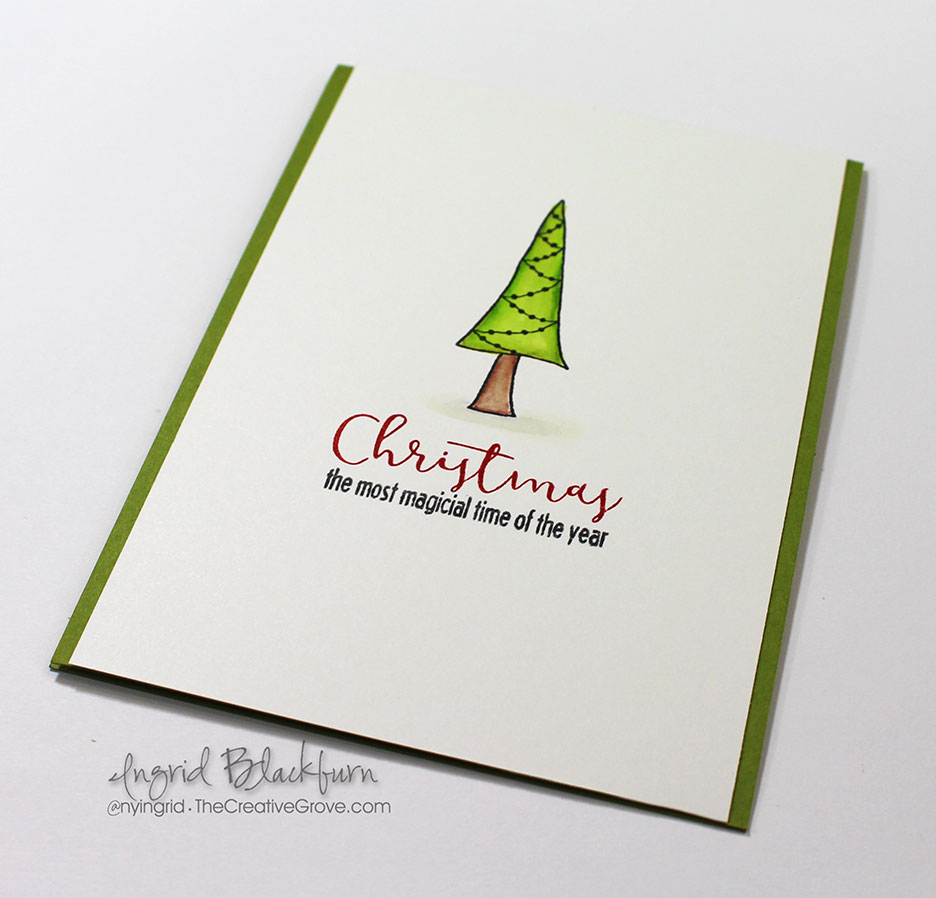
And for another fun little card for some inspiration…I kept it Clean and Simple using Kylies super cute newest Christmas set – Christmas Joy. I’m in love with the little trees in it and the sentiments. Be sure to stop by the Happy Little Stampers video channel this week for lots of Christmas inspiration too…

ingrid-blackburn-cas-tree-002

I used Strathmore Bristol paper for a super smooth finish that works effortlessly with Zig Clean Color Markers. If you have these awesome watercolor markers – you NEED this paper! Lower quality papers just don’t get the same blend.

  • Use several shades of green to blend the perfect tree after stamping it in Archival Ink (Ranger), and a few browns for the trunk.
  • Add a light shadow underneath the tree in a warm grey for a simple shadow which grounds your tree for a realistic look.
  • Use a MISTI stamp tool to position your greeting, then ink up the Christmas in Red, stamp…clean and repeat using black on the bottom. It was so easy to do. I used Catherine Pooler’s new ink pads – Polka Dot Red and Midnight Black.

ingrid-blackburn-cas-tree-003

  • Originally I thought a one layer card would be perfect…but the little Olive borders added so much – I just HAD to trim it and layer.

It’s cute though, right? I just love these little trees – seriously…I can’t stamp enough with them!

So now it’s up to you! Enter the challenge to win gift certificates from Happy Little Stampers, STAMPlorations and Create a Smile! If not just to enter to finish off those cards – and if you’re done…start on next year!

Click Here to visit Kylie’s blog and enter in the Linky contest – run, don’t walk!!! You have until 12 pm – December 17th (AEST) Winners will be chosen at random. for a $20 gift certificate to one of the following sponsors:

createasmile stamplorations1-webhls-shop-badge

Thanks for stopping by and saying hi! It’s been a little bit, I’m happy to have had the opportunity to actually stamp again! Be sure to stop by the Happy Little Stampers Video Channel to see our Christmas Series – we’re live right now! Notice some of those cute little trees?


Happy Little Stampers YouTube Channel

Hope to see you very soon – and if we don’t cross paths until 2017 – Merry Christmas and Happy New Year!

Signature


Simple Distress Background

Today we’re going to focus on a simple Distress Background that really pack a punch. It’s all part of the Distress Mixed Media challenge going on over at Happy Little Stampers this month.

HLS Mixed Media challenge September 2016 - Distress

Be sure to stop by all the designer blogs for some cool looks with this challenge. And welcome Autumn from Sew Paper Paint for a very cool look. I love her blog – can seriously get lost in her work!

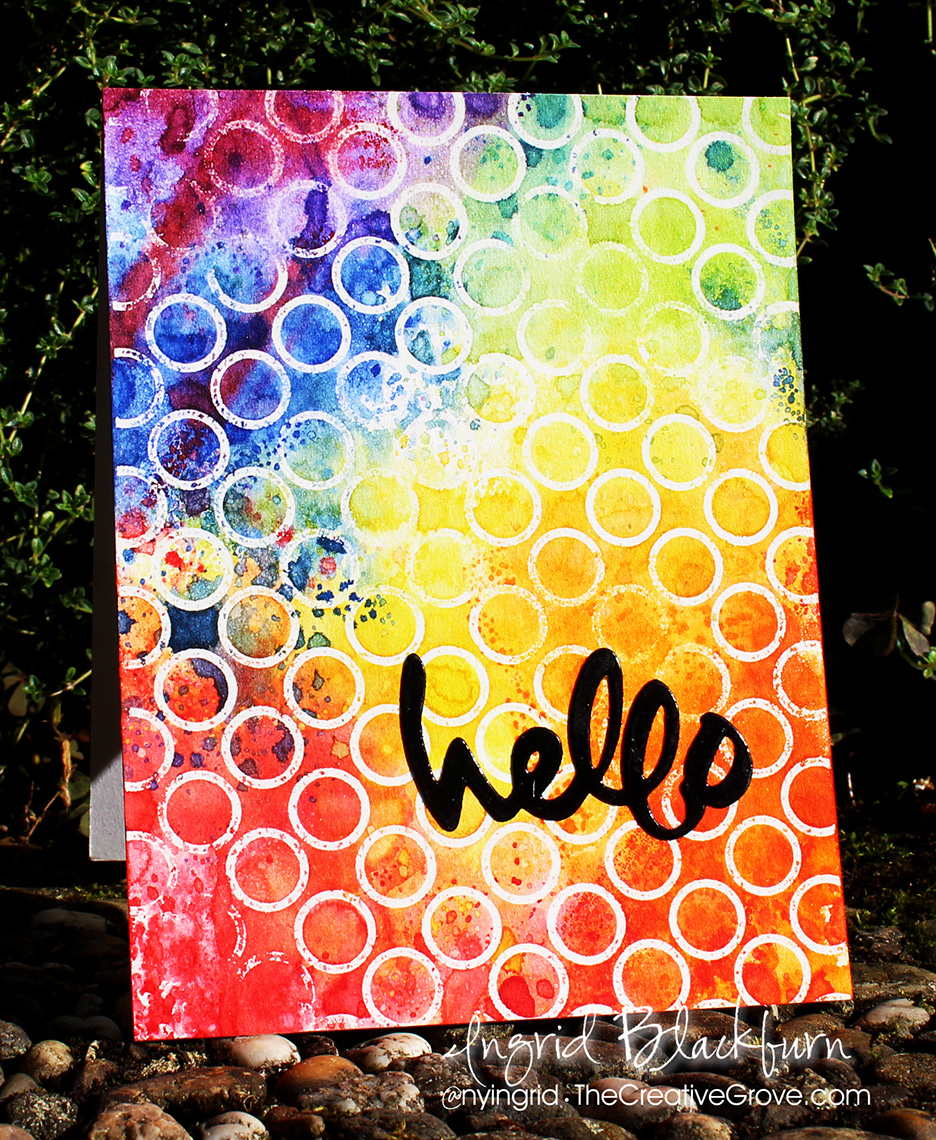
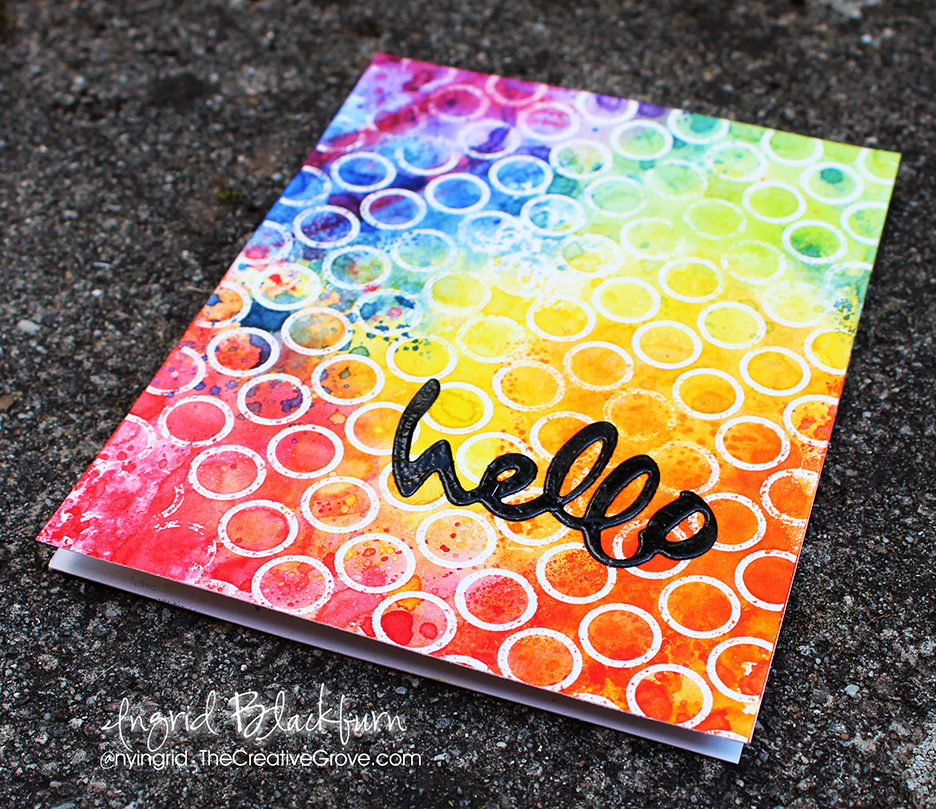
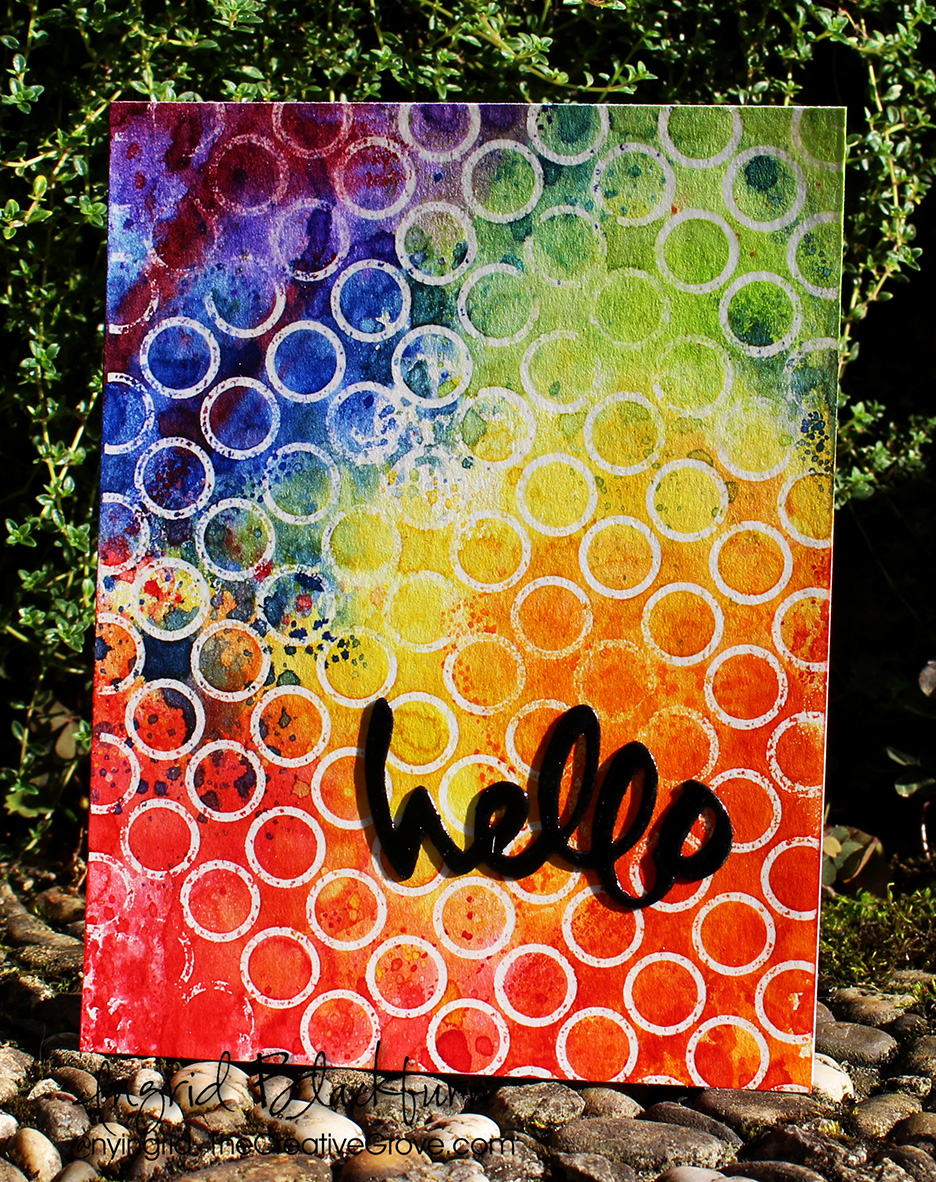
It’s no secret that I love anything distressed – from inks to paper to texture. This project really takes the word distress and not only uses the ink, but gives it a great Mixed Media look with the Winkle Free Distress Technique. The end result is a very cool distress background.

Distress-Mixed-Media---001

Distress Background Tutorial

To get a cool look, emboss a background stamp or series of images in clear on 140# Cold Pressed Watercolor Paper. Don’t worry if you don’t get the whole image – I missed a spot and rubbed off some powder in several spots to get a distressed/grunge look. This will resist the Distress watercolor we’re about to add next.

First lay down your lightest color onto your craft mat – Mustard Seed (Yellow) and spritz. You’ll keep it to the center and a little outward. Click here for a video on just how to do this technique. Be sure to mostly dry it inbetween layers to build up the texture and distress look. Then move onto the next color. You’ll do it in this sequence after each color. TIP – keep the color wheel in mind when overlapping colors. You don’t want to overlap complimentary colors – colors that are opposite on the color wheel such as Purple & Yellow. Complimentary colors look awesome together, but when blended turn to mud.

Distress Background

Next add the Carved Pumpkin – overlapping a little with the yellow. Next the Candied Apple overlapping with the Yellow a little and the Orange. The key is to overlap a little, but also preserve some of the original color and keep some pure too.

Going counter clockwise, add some Blueprint Sketch in the same manner, skip over the the right and add some Twisted Citron. Fill the remaining spot with Wilted Violet. Add a little Candied Apple to the Wilted Violet to create that cool Blackberry color…and add some spots here and there where you feel you need some texture or an added spot of color.

Distress Inks - Wrinkle Free Technique

Once completely dry, place your dried watercolor paper in-between some old pages of a phone book and iron it on the hottest setting. This will transfer the embossing powder to the phone book page and give you the added bonus of straightening out your watercolor piece! Iron just a few minutes (30 sec to 2 min). The key is that you don’t want to see any shiny – switch to a clean page in the phone book if needed. To see me do this, check out this HLS video (at 15:30). This technique is called Faux Bleaching.

Wrinkle free technique - Distress Background

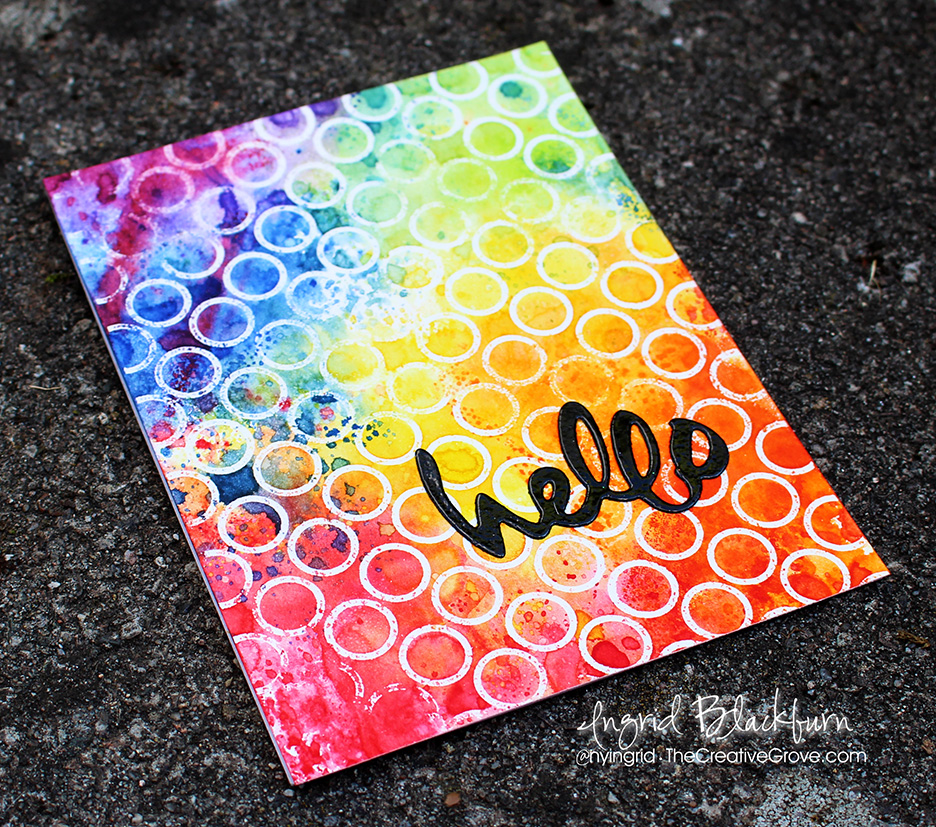
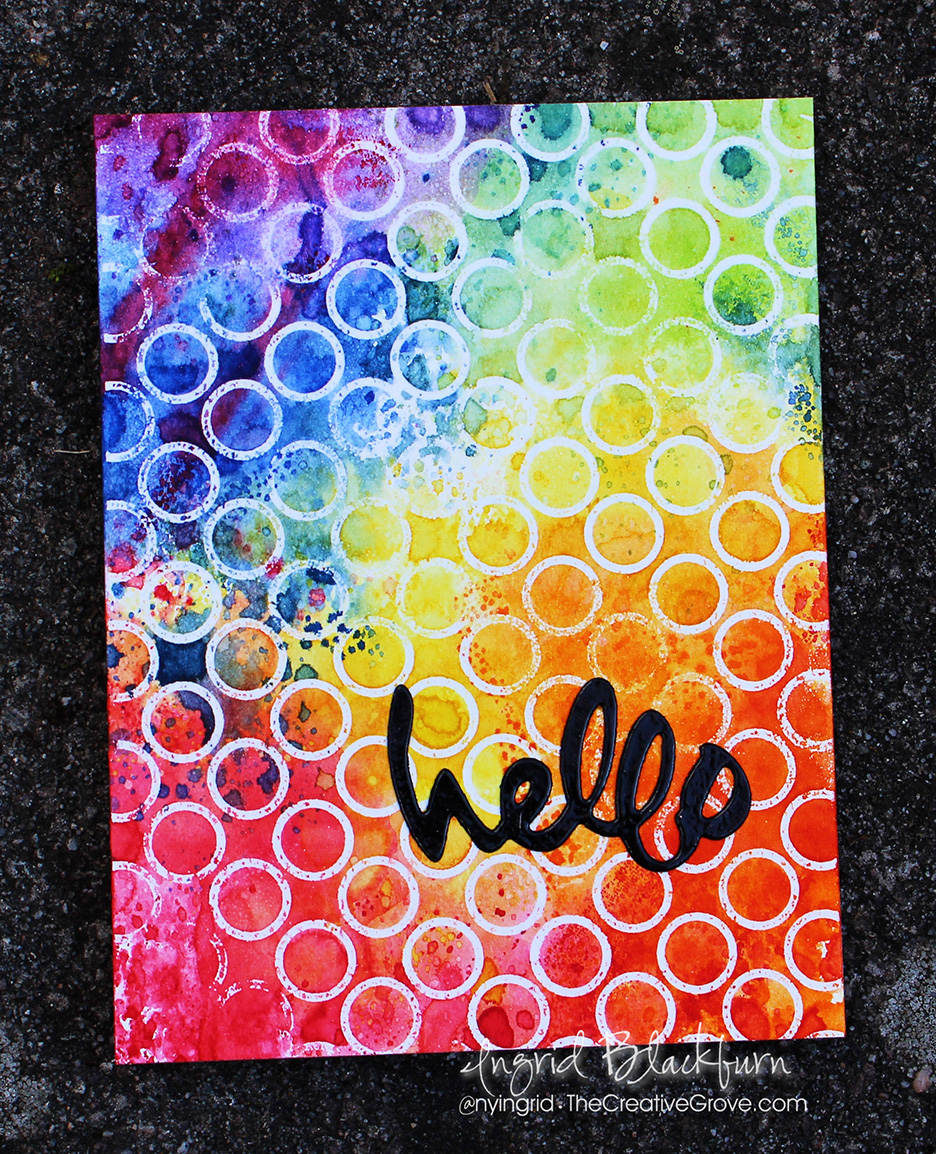
Isn’t it a cool project!!! What’s so awesome about it is that the Mixture of medias used really blend together to create an amazing Distress look. I didn’t want to take away from the cool background, so I kept the greeting simple and didn’t add any sequins (though I was tempted). I embossed the Hello (new die from Stamplorations – isn’t it cute?!!) in clear embossing powder. The shine against the flat distressed background just rocks. I hope you think so too!

Distress-Mixed-Media---005

SO I’m challenging YOU now. It’s my favorite technique/medium….Distress. Jump on into this challenge – leave me a comment that you did and I can’t WAIT to see what you create!

Until next time –

Signature

[optin_box style=”12″ alignment=”center” email_field=”email” email_default=”Enter your email address” integration_type=”aweber” double_optin=”Y” list=”3846012″ name_field=”name” name_default=”Enter your first name” name_required=”Y” opm_packages=””][optin_box_field name=”headline”]Learn more with our exclusive FREE video series:[/optin_box_field][optin_box_field name=”paragraph”]PHA+UGx1cyB5b3XigJlsbCBiZSBhZGRlZCB0byBteSBGUkVFIENyZWF0aXZlIFRpcHMgRS1sZXR0ZXIgd2hlcmUgSSBzaGFyZSBleGNsdXNpdmUgcHJvamVjdHMsIHZpZGVvcyAmYW1wOyB0aGUgMTIgRGF5cyBvZiBDaHJpc3RtYXMgUHJvamVjdCBTZXJpZXM8L3A+Cg==[/optin_box_field][optin_box_field name=”privacy”][/optin_box_field][optin_box_field name=”top_color”]undefined[/optin_box_field][optin_box_button type=”0″ button_below=”Y”]Get Instant Access![/optin_box_button] [/optin_box]

Supplies

I get asked a lot where I get some of my supplies. To make it easier for you, I’ve listed all the supplies below. I myself shop at various places and know you probably have your favorite online stores too! So I included choices where I could or if there is just one – it’s the best price I’ve found. 🙂

The letters below each image are links to stores where you can buy each of the products listed. EH – Ellen Hutson, SSS = Simon Says Stamp, AZ = Amazon, etc. I buy almost all my own supplies. To help support my blog, videos & allow me to keep creating for you, I use compensated affiliate links when possible.