HLS Watercolor Challenge – Mixed Media Butterflies

Have you ever watercolored with stencils before? Today I’m guest designing for a new watercolor challenge over at Happy Little Stampers. I don’t know of many watercolor challenges out there, so if watercolor is one of your loves, I encourage you to check it out! The design team is pretty talented over there, and I’m loving what they are creating every month.

I thought you would love a video in addition to a written tutorial, so here you have it. The watercolor challenge is always anything goes, and if you need a little structure – there’s always a little twist. You can play along or not, up to you – this month it’s dies.

Happy Little Stampers Watercolor Challenge

Happy Little Stampers challenges are always a lot of fun, and I encourage you to enter. This month there’s a prize too, you have nothing to lose!

HLS Challenge

I have been undergoing a massive move from Germany back to the US (plus all our things out of storage up from Florida), hunting for a new home, and living in a hotel for three months – yes, it’s been interesting to say the least! So, I haven’t been able to film much the past few months…boy did it feel good to FINALLY get to film in my new stamping studio in my new home. I’m still buried under boxes and the contractor is still doing work in our home (though we’re in the home stretch….finally).

Here’s a video for you of how I created this month’s project – step by step. You’ll learn to watercolor with stencils, and create some fun vibrant die cut embellishments with Brusho Crystals – which I’m totally addicted to!

Click Here to watch the video in HD on YouTube & Subscribe to my Channel

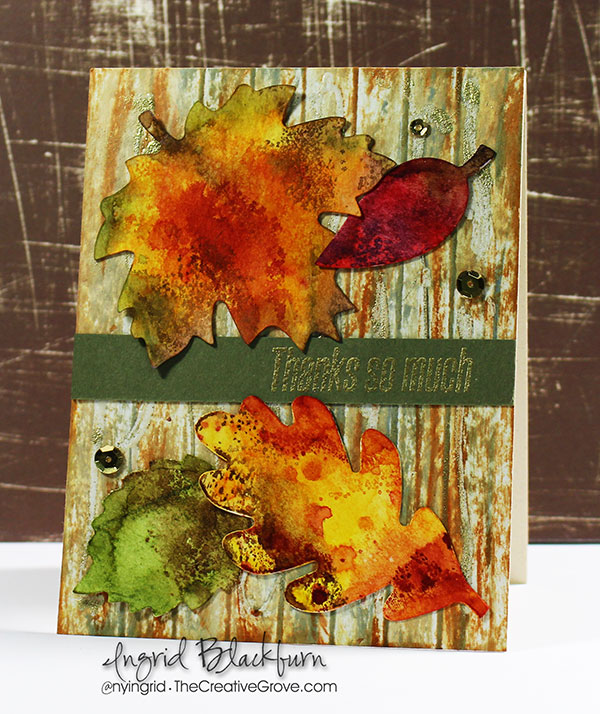
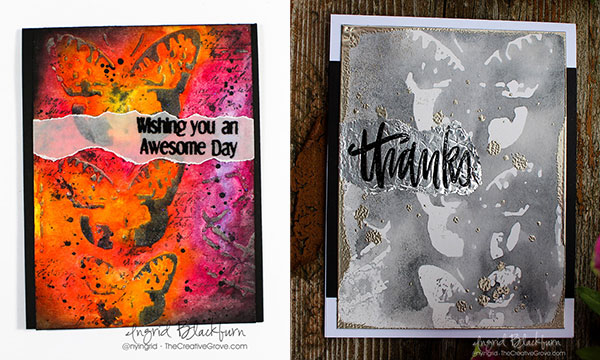
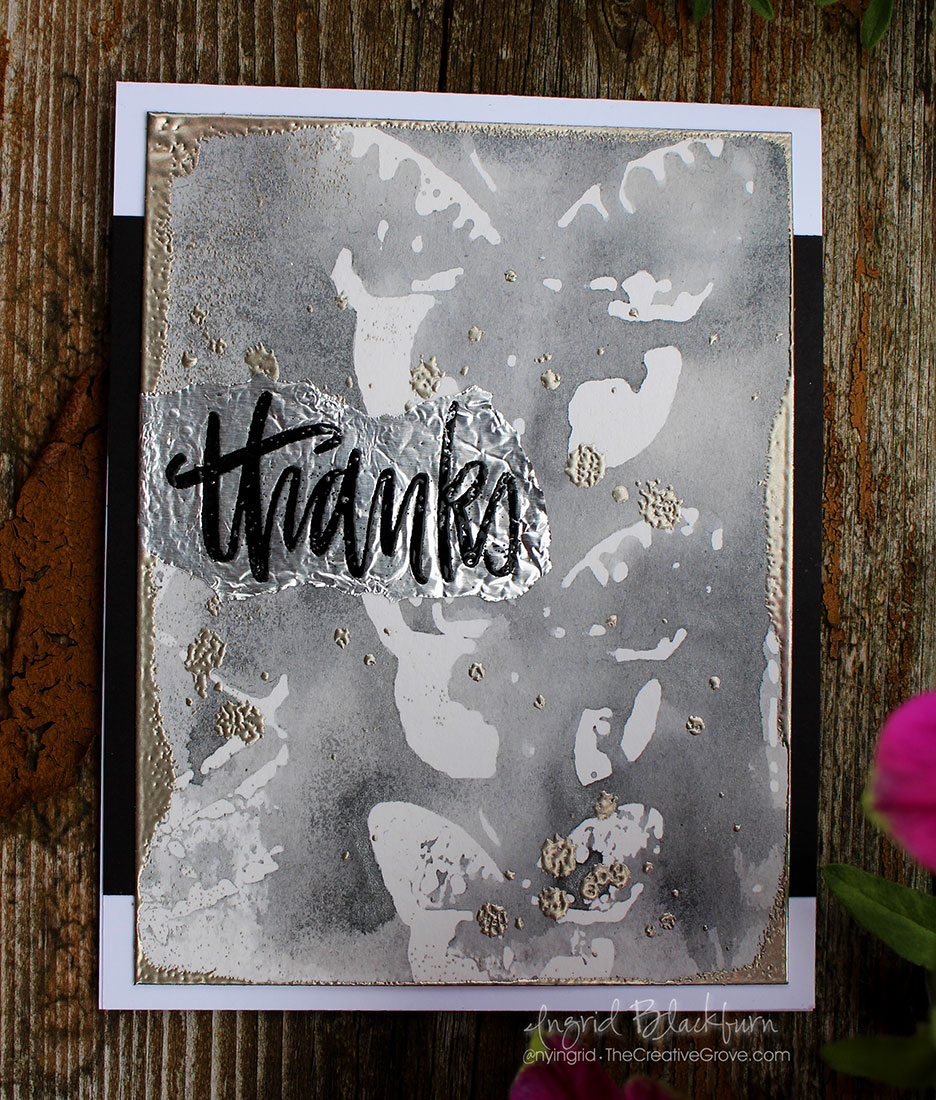
How to Watercolor with Stencils & Brusho

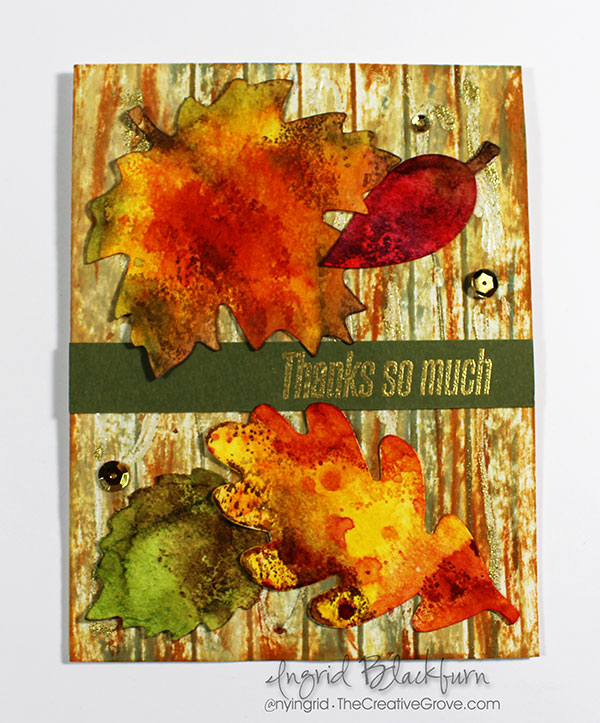
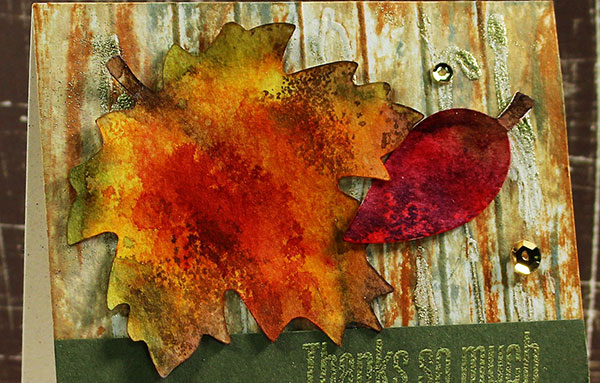
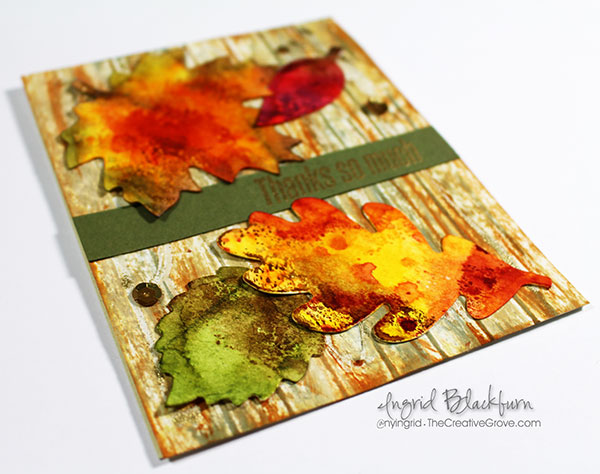
So, my original thought was to create cool watercolored die cuts – enter a little embossing and Brusho for the pop in color. It’s SO easy to watercolor with Brusho and you always look like a watercolor master.

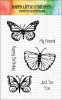
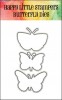
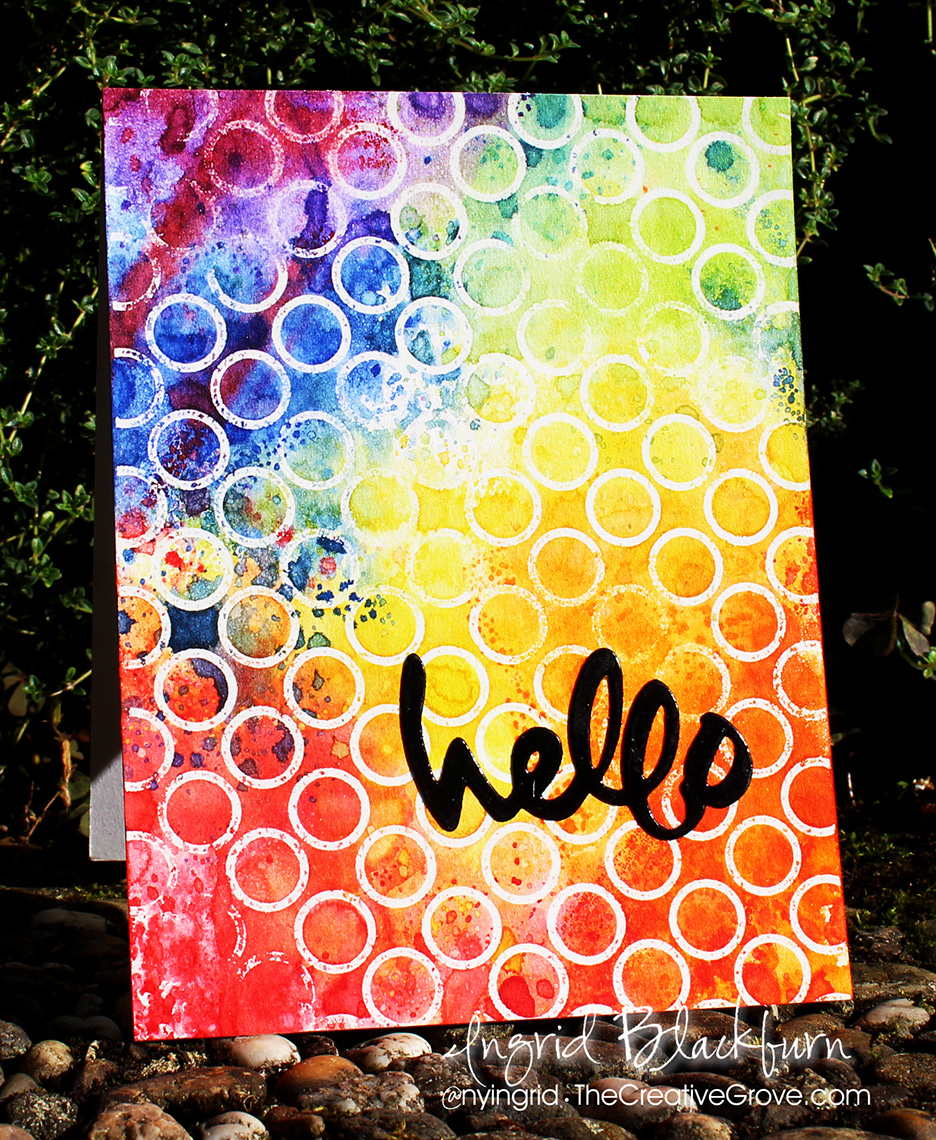
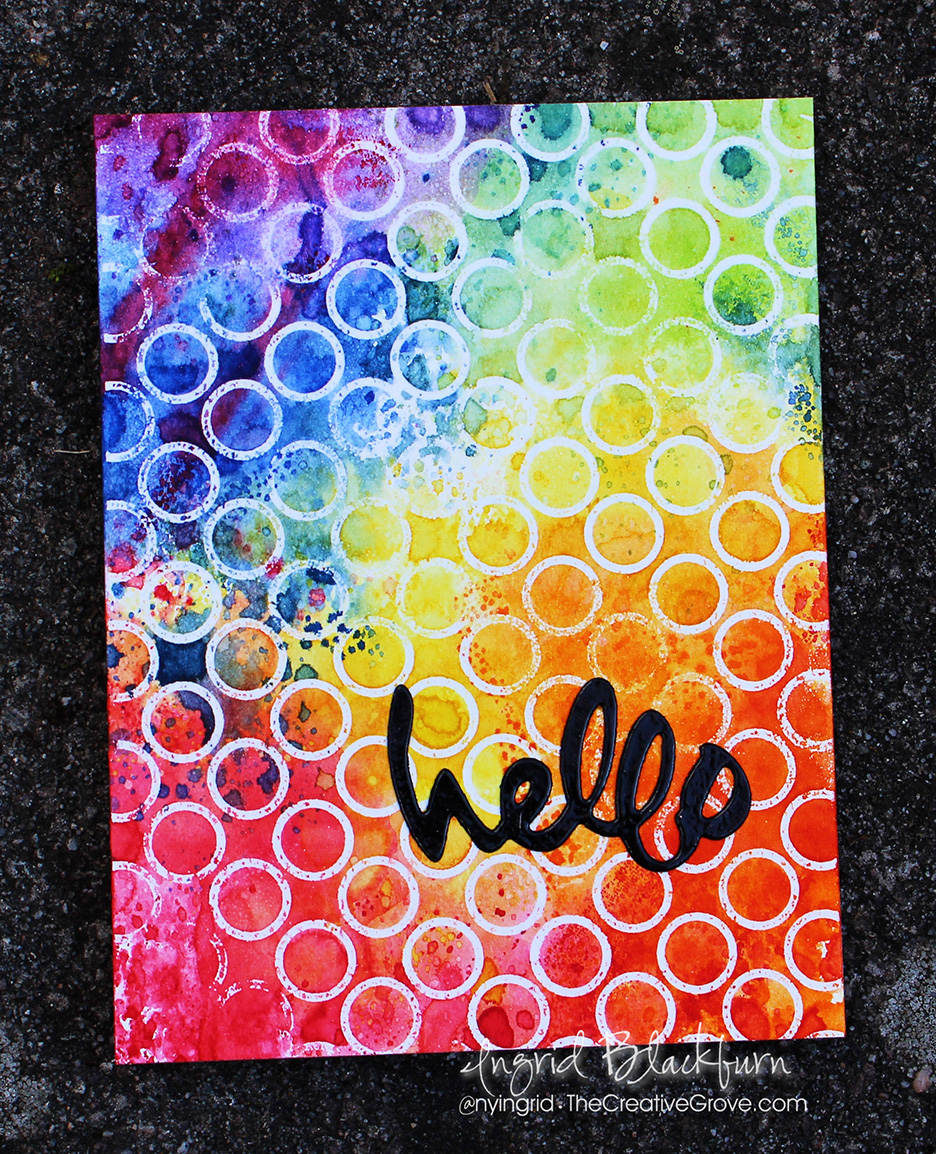
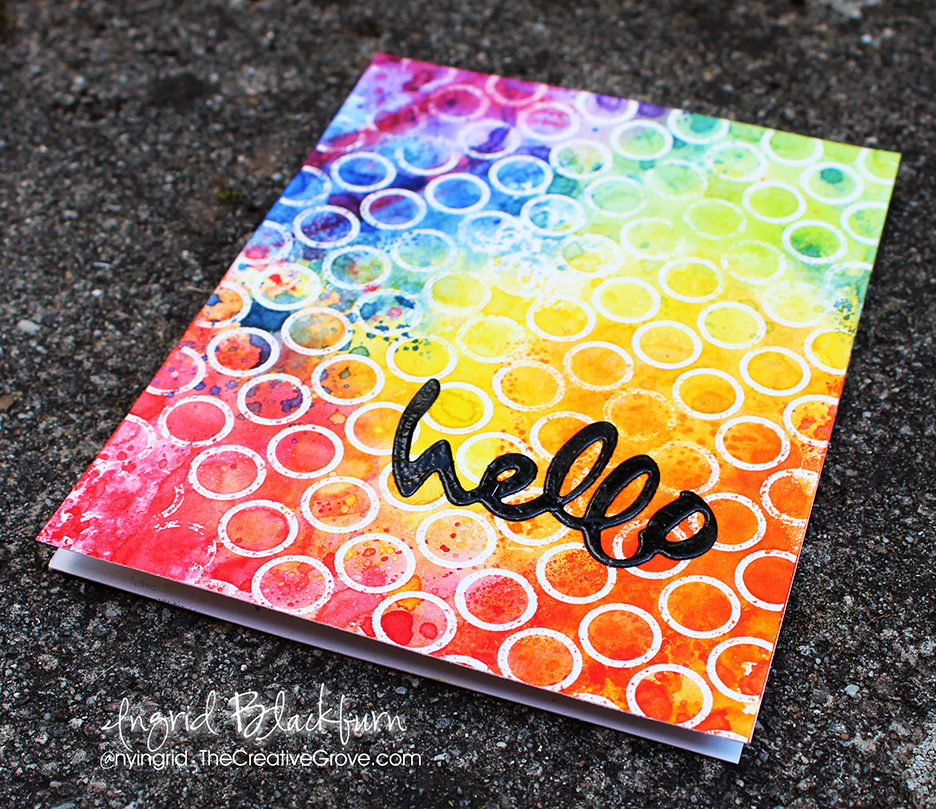
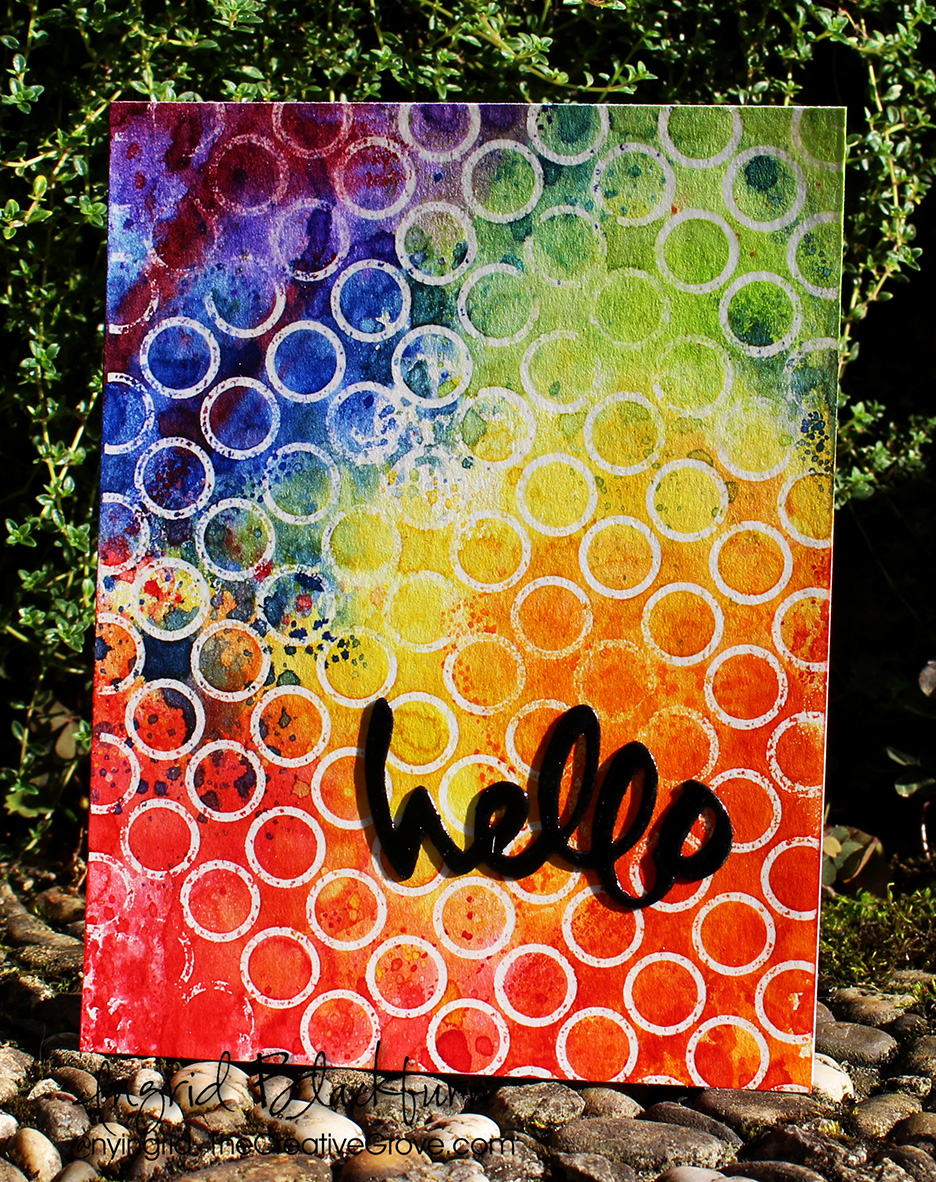
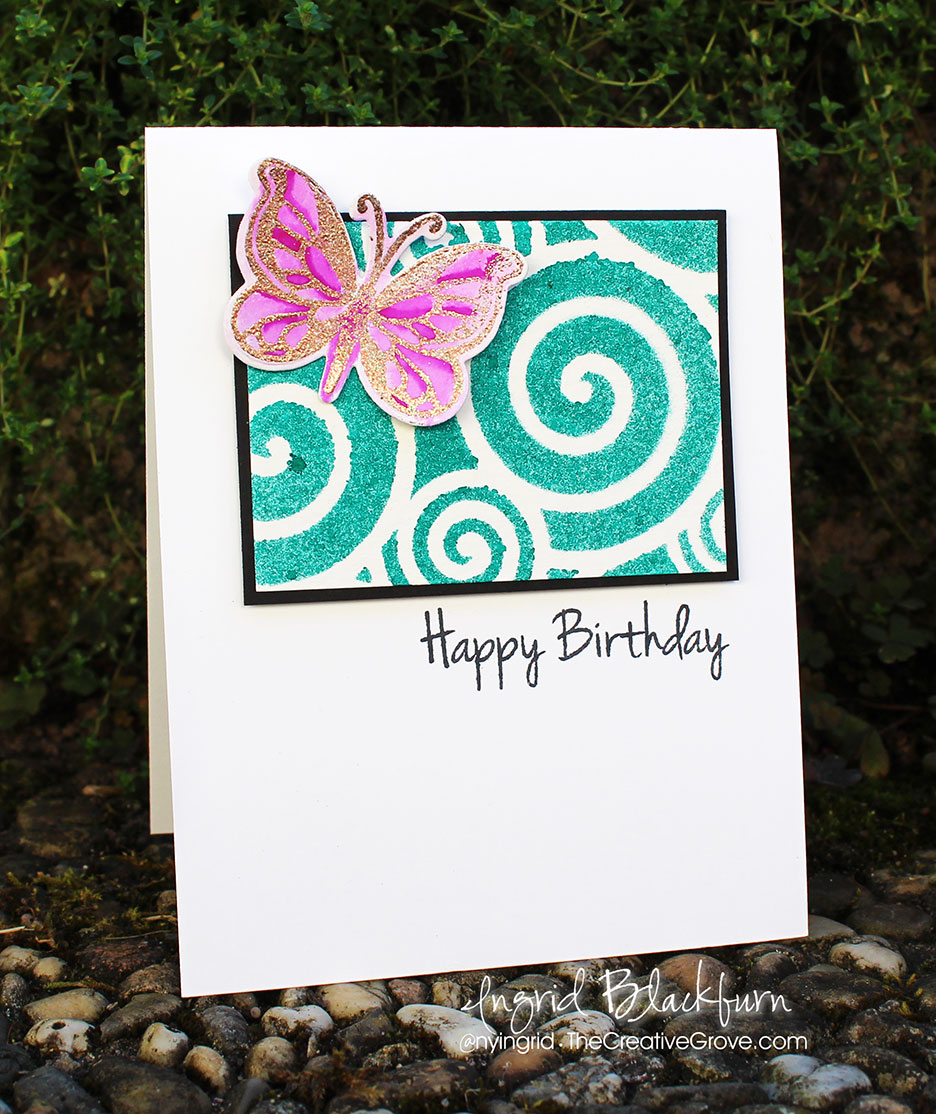
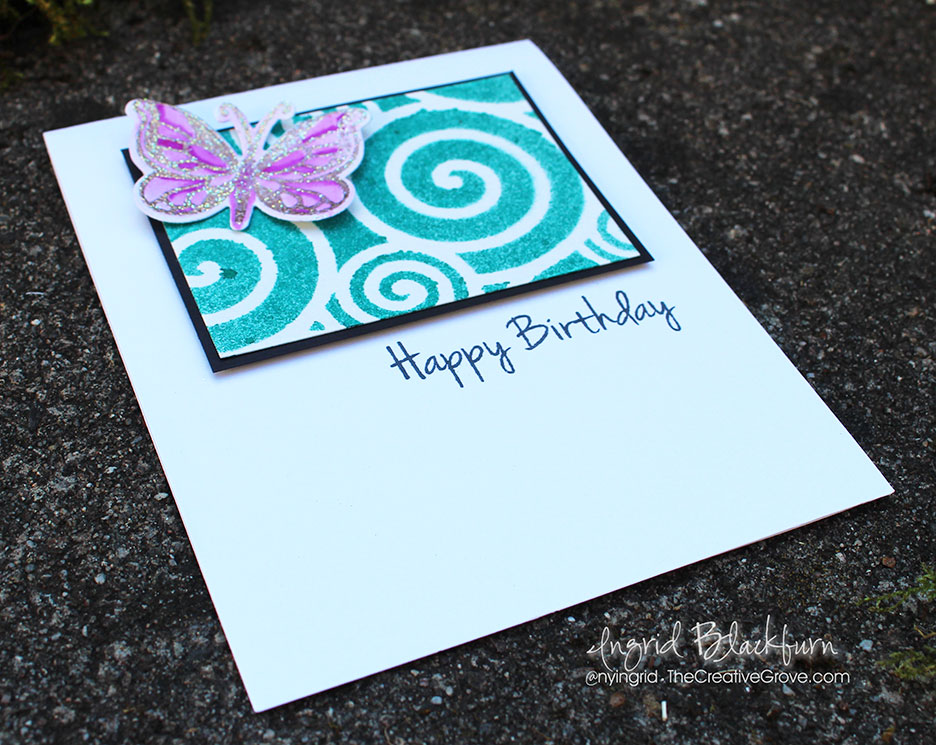
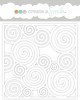
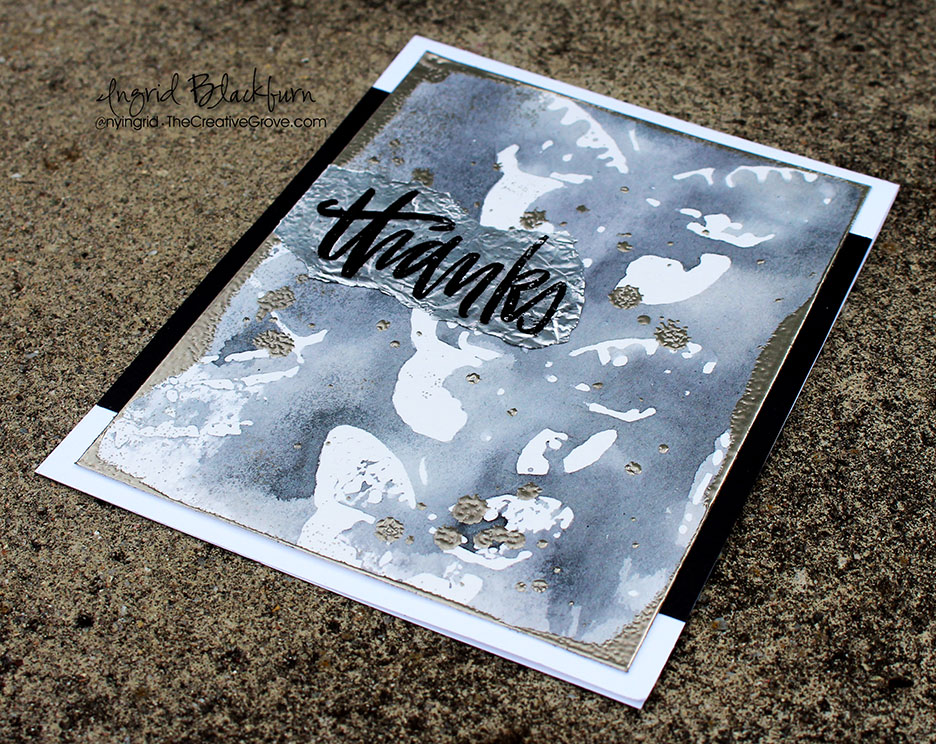
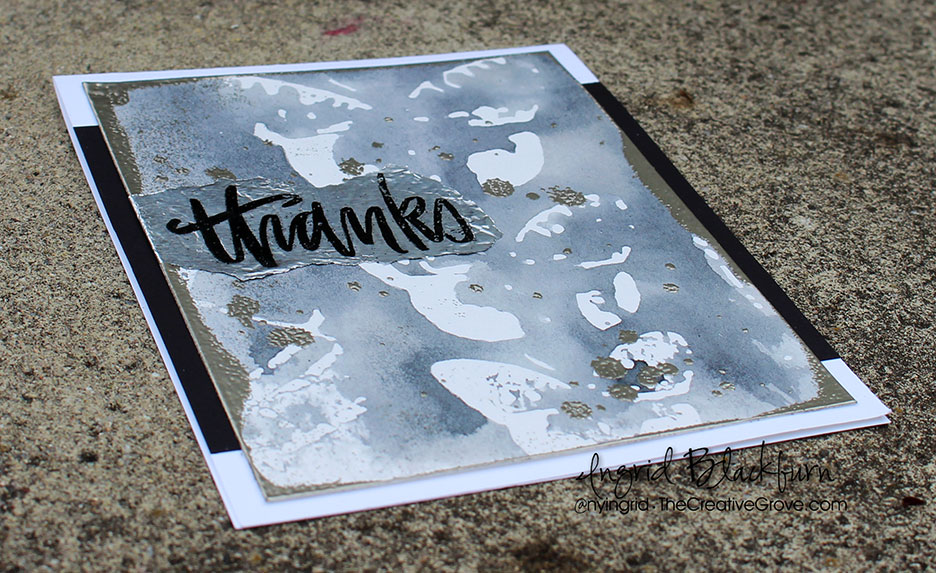
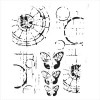
To compliment it, I thought you’d enjoy seeing how I sometimes watercolor with stencils – a not so perfect technique, but it really adds a lot to the background. My thought was to create a cool lattice for the butterflies from the Butterfly Birthday stamp set.

watercolor with stencils

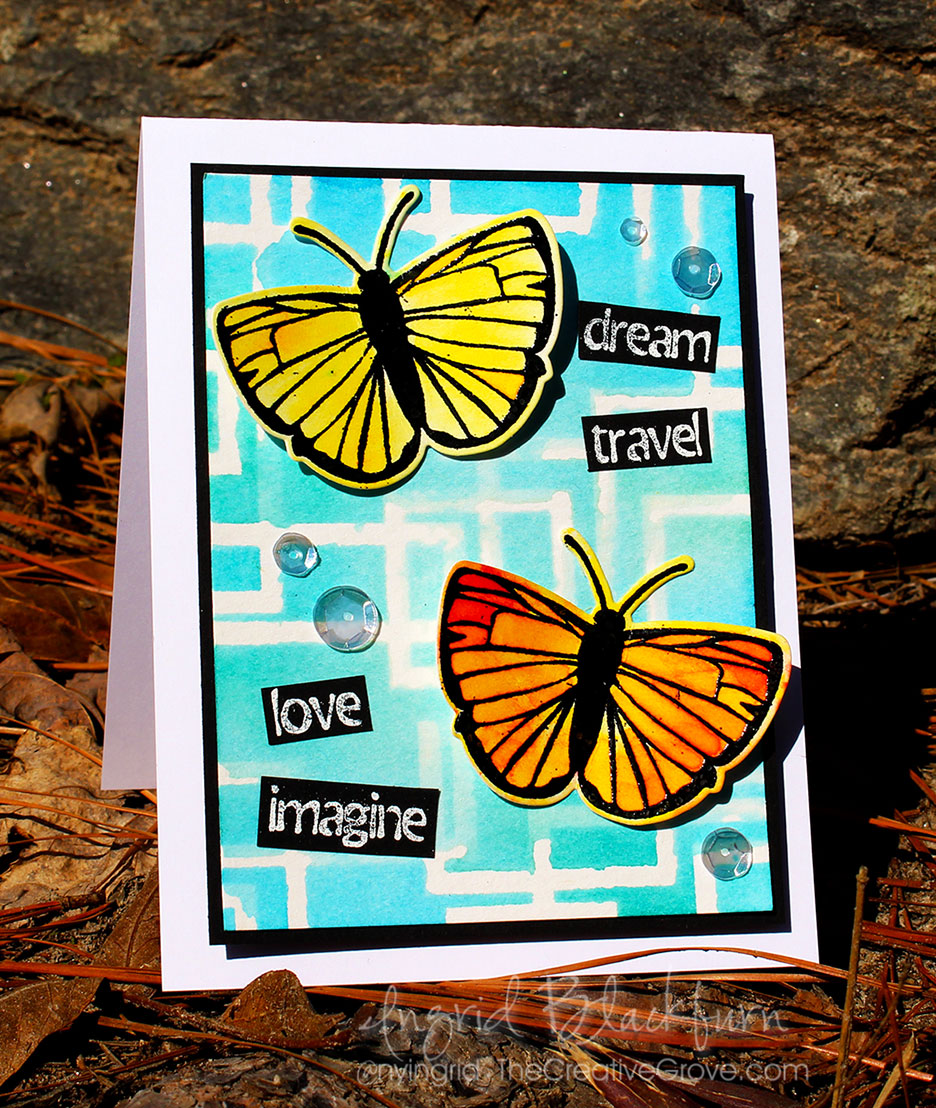
And I’ve been just dying to use my new Mixed Media Fun stamp set – I just love all the components and words – it’s the perfect card for my niece.

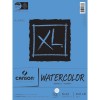
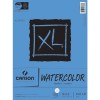
  • First – secure your 140# Cold Pressed Watercolor paper to your work surface, and your stencil over that.
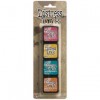
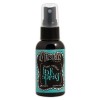
  • Apply your color, I used several shades of Distress inks and created a varied Blue background
  • I didn’t do this in the video, but next remove your tape securing your stencil down so you can lift it after the next step a bit easier.

watercolor with stencils - ingrid blackburn

  • To truly get a watercolor with stencils look, spritz with a mini mister and get the water going. Be careful of adding TOO much water. If you overdo it – water will run everywhere – especially under your stencil design.
  • Carefully lift up your stencil – straight up.
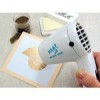
  • You can blot off any excess water with a paper towel – but be careful to lift it from your pattern – you’ll pull all the color. I use this mostly for the sides where the water is pooling. Dry immediately with a heat tool or naturally.

Watercoloring with Brusho

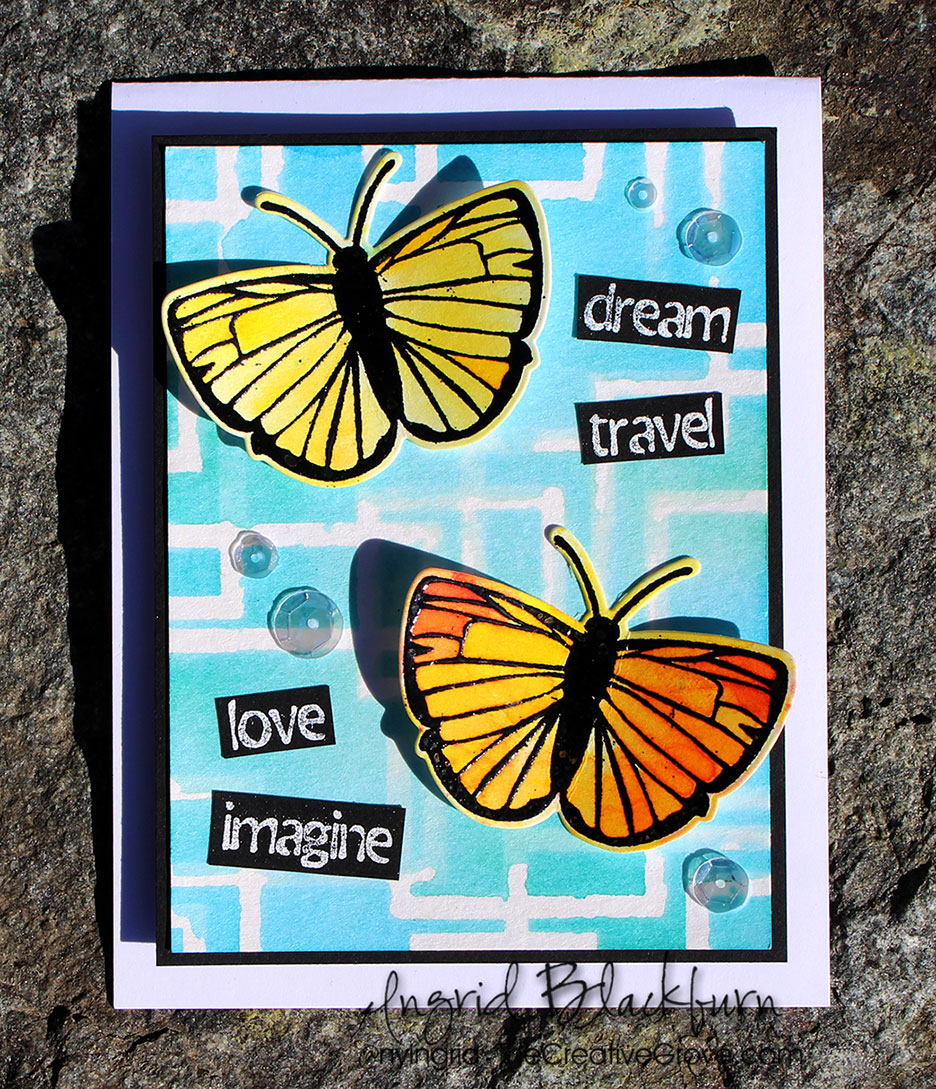
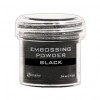
  • Next, on another piece of scrap watercolor paper, stamp two butterflies from Butterfly Birthday in Versafine Onyx Black ink. I love this ink to emboss with – it’s a pigment ink and is super crisp and deep in color.
  • Emboss in black and heat set.
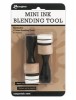
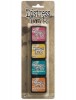
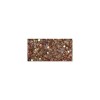
  • Sprinkle some brusho powders over your butterflies and spritz as in the video to activate the pigments.
  • Dry with a heat tool or naturally
  • Cut out using the co-ordinating Butterfy Dies & a Die Cut Machine
  • Emboss some of the greetings from Mixed Media Fun in white on Black card stock
  • Cut them out using long handled scissors – this helps to give you a straighter edge.

Watercolor with Stencils & Brusho

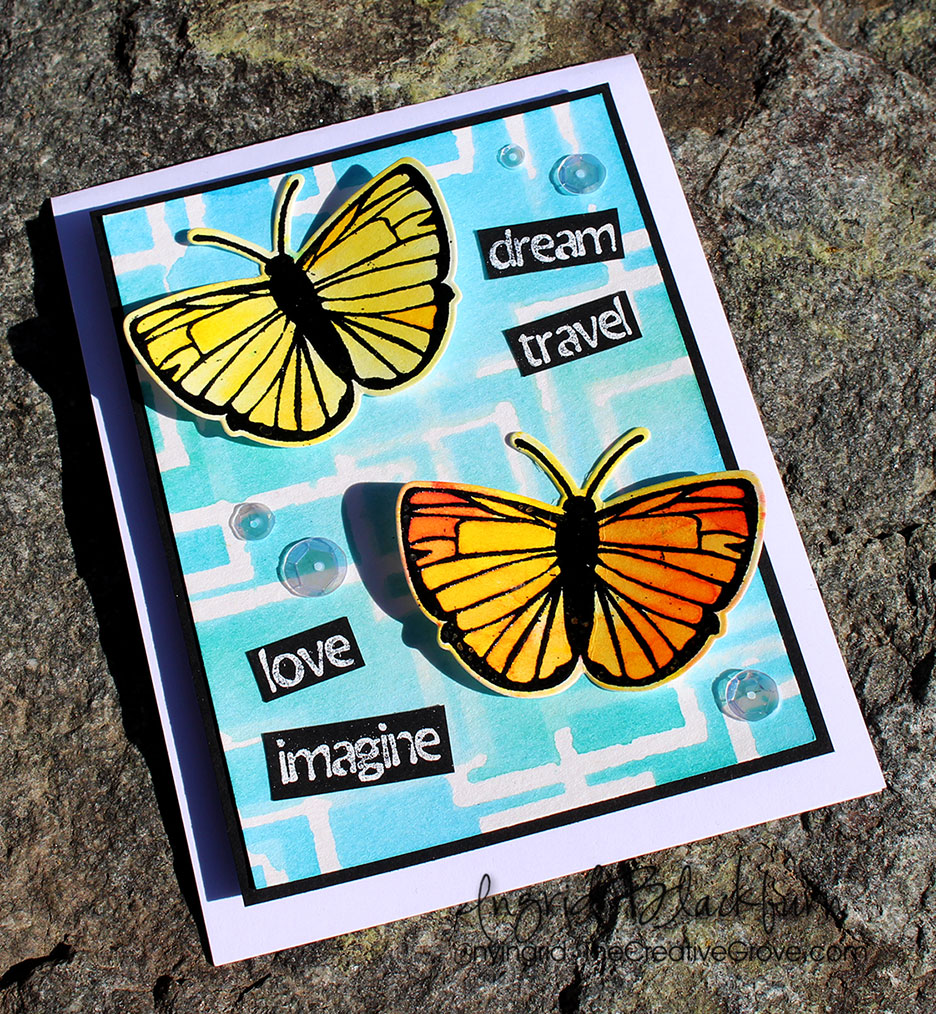
  • Adhere your pieces like the card. TIP – use Mono Liquid Glue to adhere the watercolor to the black, bend straight or place something heavy on to help straighten your card stock. You may also want to pop up the main watercolor panel onto fun foam for a little drama.
  • Bend up the sides of your butterflies and pop the sides up with some dimensional foam. I have the tops of the wings higher than the bottom (doubled the foam) and adhered with some glue in the center. This gives the illusion of flight.
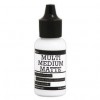
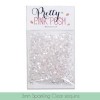
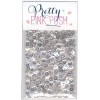
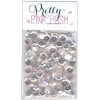
  • Add some sparkling clear sequins from Pretty Pink Posh with Rangers Multi Matte Medium (dries clear).

Watercoloring with Stencils

Ultimately, my watercolor got a little into the pattern, but I don’t let stuff like that get me down anymore. You can cover a lot of it up with the die cuts and words, and it gives it a more organic feel anyway. It’s art, don’t stress over it, have fun!

Let me know what you think in the comment section below. I hope now, you’ll try to watercolor with stencils yourself, and that you enjoyed this tutorial!

Now head on over to the Happy Little Stampers Watercolor Challenge to see what the Design Team whipped up for you. I can’t wait to see what you create – I’ll visit your blog and definitely check it out! 🙂

HLS Watercolor Challenge

And if you liked this tutorial, subscribe to my YouTube channel and newsletter list for more exclusive tutorials. See you very soon!

[optin_box style=”28″ alignment=”center” disable_name=”Y” email_field=”email” email_default=”Enter your email address” email_order=”1″ integration_type=”aweber” double_optin=”Y” list=”3846012″ name_field=”name” name_default=”Enter your first name” name_order=”0″ name_required=”N” extra_field_1_name=”Name” extra_field_1_order=”0″ extra_field_1_required=”Y” extra_field_1_hidden=”N” extra_field_1_title=”Enter Your Name” opm_packages=””][optin_box_field name=”headline”]Learn more with exclusive video tutorials…[/optin_box_field][optin_box_field name=”paragraph”]PHA+UGx1cyB5b3UnbGwgYmUgYWRkZWQgdG8gbXk8c3Ryb25nPiBGUkVFPC9zdHJvbmc+IENyZWF0aXZlIFRpcHMgRS1sZXR0ZXIgd2hlcmUgSSBzaGFyZSBleGNsdXNpdmUgcHJvamVjdHMsIHZpZGVvcyAmYW1wOyB0aGUgMTIgRGF5cyBvZiBDaHJpc3RtYXM8L3A+Cg==[/optin_box_field][optin_box_field name=”privacy”][/optin_box_field][optin_box_field name=”top_color”]undefined[/optin_box_field][optin_box_button type=”1″ text=”Click For Immediate Access” text_size=”24″ text_color=”#ffffff” text_font=”Lato;google” text_bold=”Y” text_letter_spacing=”-1″ text_shadow_panel=”Y” text_shadow_vertical=”1″ text_shadow_horizontal=”0″ text_shadow_color=”#000000″ text_shadow_blur=”0″ styling_width=”75″ styling_height=”20″ styling_border_color=”#666666″ styling_border_size=”1″ styling_border_radius=”8″ styling_border_opacity=”99″ styling_gradient_start_color=”#86c833″ styling_gradient_end_color=”#3f8e30″ drop_shadow_panel=”Y” drop_shadow_vertical=”1″ drop_shadow_horizontal=”0″ drop_shadow_blur=”0″ drop_shadow_spread=”0″ drop_shadow_color=”#000000″ drop_shadow_opacity=”50″ inset_shadow_panel=”Y” inset_shadow_vertical=”1″ inset_shadow_horizontal=”0″ inset_shadow_blur=”0″ inset_shadow_spread=”0″ inset_shadow_color=”#c2ee80″ inset_shadow_opacity=”100″ location=”optin_box_style_28″ button_below=”Y”]Click For Immediate Access[/optin_box_button] [/optin_box]


[op_advanced_headline style=”1″ effect=”type” align=”left” accent=”#244C5E” headline_tag=”h2″ line_height=”” highlight=”” top_margin=”0″ bottom_margin=”0″]U3VwcGxpZXM=[/op_advanced_headline]

To make finding the supplies I used in this project a bit easier for you, here are a few clickable links. Those that have multiple shopping options are indicated with letters – EH – Ellen Hutson, SSS – Simon Says Stamp. Compensated Affiliate Links are used when possible. Click here for disclosure. Happy Shopping!


Kylie’s 12 Days of Christmas Card Challenge – Day Seven

There are two things I’m grateful for this year – my online friends and a good ole Christmas Card Challenge. Okay there are lots of other things too, but today is about a sweet friend of mine – Kylie Purtell and her 12 Days of Christmas Card Challenge with friends.

12-days-of-christmas-graphic

I’ve had a wonderful last few years participating in many online card challenges – most of them Christmas! Yes, I’m a sucker for Christmas. And I normally have my own 12 Days of Christmas Series myself…but between a move from Europe back to the USA (we’re settling in the Raleigh, North Carolina) area, and purchasing a new home unexpectedly – my November/December got turned upside down – please forgive me!

So I was elated when Kylie asked me to participate in her 12 Days of Christmas with Friends Challenge. And I encourage you to enter too – pick any inspiration from any day….today is Day 7 – and just jump on in. The prizes are from three of my favorite stamp stores – all small businesses owned by amazing women.

To Salute these three creative women – Kylie, Shery & Christine, I thought it would be fun to put together a little Christmas fun using products from all three – from where else…my hotel room…lol!

ingrid-blackburn-candy-cane-holly-001

I went for a little rustic look with some toned down colors here.

  • To create it you’ll want to sponge a little Festive Berries through the ARTplorations by STAMPlorations Merry Go Round Stencil  – keep it light to have it look effortless.
  • Next sponge around the perimeter with a little Tea Dye Distress Ink lightly and add a few lines and dots to the corners with an Early Espresso Distress Marker.
  • Next Stamp the Holly & Berry images from the Christmas Joy stamp set by Happy Little Stampers in Black Archival Ink on Kraft colored card stock.

ingrid-blackburn-candy-cane-holly-002

  • Color in your images using Zig Clean Color Markers and cut out leaving a little edge to allow the images to pop.
  • Once your background is fully dry (I zapped mine with a Heat Tool), test it to see if any embossing powder sticks, and then stamp the gorgeous Christmas greeting in Versamark ink from the Christmas Surprise stamp set by Create a Smile Stamps.
  • Emboss it in Silver powder and stamp the coordinating greeting onto a little strip of Kraft in Black. Adhere to your background and edge with an Early Espresso Distress Marker.
  • Edge the greeting a bit with the same Early Espresso Distress Marker – keeping it uniform – mine is slightly to the right and underside of the letters. This helped to pop the image off the busy background.
  • Add your panel to a folded piece of Olive card stock and there you have it! My card front measures 5 1/2 x 4″.

ingrid-blackburn-candy-cane-holly-001

Don’t you just love how the background looks like little peppermint candies…I love all these elements, and these three companies are some of my favorites – I’ve spent my fare share at each this past year – just don’t tell Michael! 😉

And for another fun little card for some inspiration…I kept it Clean and Simple using Kylies super cute newest Christmas set – Christmas Joy. I’m in love with the little trees in it and the sentiments. Be sure to stop by the Happy Little Stampers video channel this week for lots of Christmas inspiration too…

ingrid-blackburn-cas-tree-002

I used Strathmore Bristol paper for a super smooth finish that works effortlessly with Zig Clean Color Markers. If you have these awesome watercolor markers – you NEED this paper! Lower quality papers just don’t get the same blend.

  • Use several shades of green to blend the perfect tree after stamping it in Archival Ink (Ranger), and a few browns for the trunk.
  • Add a light shadow underneath the tree in a warm grey for a simple shadow which grounds your tree for a realistic look.
  • Use a MISTI stamp tool to position your greeting, then ink up the Christmas in Red, stamp…clean and repeat using black on the bottom. It was so easy to do. I used Catherine Pooler’s new ink pads – Polka Dot Red and Midnight Black.

ingrid-blackburn-cas-tree-003

  • Originally I thought a one layer card would be perfect…but the little Olive borders added so much – I just HAD to trim it and layer.

It’s cute though, right? I just love these little trees – seriously…I can’t stamp enough with them!

So now it’s up to you! Enter the challenge to win gift certificates from Happy Little Stampers, STAMPlorations and Create a Smile! If not just to enter to finish off those cards – and if you’re done…start on next year!

Click Here to visit Kylie’s blog and enter in the Linky contest – run, don’t walk!!! You have until 12 pm – December 17th (AEST) Winners will be chosen at random. for a $20 gift certificate to one of the following sponsors:

createasmile stamplorations1-webhls-shop-badge

Thanks for stopping by and saying hi! It’s been a little bit, I’m happy to have had the opportunity to actually stamp again! Be sure to stop by the Happy Little Stampers Video Channel to see our Christmas Series – we’re live right now! Notice some of those cute little trees?


Happy Little Stampers YouTube Channel

Hope to see you very soon – and if we don’t cross paths until 2017 – Merry Christmas and Happy New Year!

Signature


Nature Mixed Media Challenge

mixed-media-card-woodgrain background

Fall is one of my favorite times of the year. The rich textures and colors that Nature gives us is not only excellent inspiration, but the colors are one of my favorite palette to work with! For today’s project, I have a nature themed card done in a mixed media style. It’s card nature mixed media fun – creative and full of gorgeous textured techniques. Time for the Happy Little Stampers Nature Mixed Media Challenge.

hls-mixed-media-challenge-october-2016

You may be wondering what makes this a nature mixed media card. We have a background that has some glue mixed with direct to paper distress techniques, water & then some embossing over top. Then some added die cuts that use the layered watercolor technique – wrinkle free distress with some stamping & embossing. That’s it!

The ideas were flowing for this project – fern stenciling or monoprinting….I tore off actual bark from some wood headed into our fireplace tonight – it’s 38 degrees outside…yikes! But eventually I settled on some good ole mixed media techniques to give my card texture and interest.

Nature Mixed Media Tutorial

You’ll love this cool technique for a woody background, I’ve been wanting to try it out for a while – Glue Woodgrain Texture. Over on my friend Karen Dunbrook’s blog – Snippets, you’ll find a great tutorial. This technique uses glue to create some great texture for a wood grain look. I’m not sure I nailed it this first time, but since the fence is only peeking out – I figured it would work!

mixed-media-card-nature-ingrid-blackburn-003

Not straying at all from Karen’s design, I had a gorgeous woody background for this card. In a nutshell, you’ll spread a little glue over a thick piece of card stock. Let it dry, flip over and score some lines – mine were 1/2″ apart. Use direct to paper techniques with Antique Linen, Rusty Hinge and Weathered Wood Distress Inks. Spread them out with a little water – I misted mine then used a water brush. Overall it looks pretty cool.

nature-mixed-media-fall leaves technique

The glue would not dry fast enough on this wood grain background for me. I’m SO not patient enough…so I dried it the best I could, laid it to the side & hit it with a heat tool. Then I chose to spread some Gilded Gold embossing powder by Brutus Monroe over the sticky parts and started embossing – it has an awesome look!

wrinkle free distress technique

Once the background is done and attached to the card base, use the wrinkle free distress technique to add fall colors to some die cut leaves. The leaves are cut from #140 Cold Pressed Watercolor paper to get a smooth look. I can’t decide which leaf is my favorite – the colors are so great together. I just kept playing….and I think some actually look natural, what do you think?

nature mixed-media-card-

Next you’ll want to add a greeting – to get it to pop a bit, emboss it on a strip. I used one from the HLS Mix Mash stamp set in Gilded Gold.  A few gold sequins, and it’s a great fall inspired card.

Your Turn Now

Now it’s your turn….how does Nature and Mixed Media inspire you? For more inspiration, be sure to check out the awesome projects my team mates designed too. Here’s the main Challenge Post for you to post your creation! There’s even a prize….

See you tomorrow for some more creative inspiration!

Signature

[optin_box style=”12″ alignment=”center” email_field=”email” email_default=”Enter your email address” integration_type=”aweber” double_optin=”Y” list=”3846012″ name_field=”name” name_default=”Enter your first name” name_required=”Y” opm_packages=””][optin_box_field name=”headline”]Learn more with our exclusive FREE video series:[/optin_box_field][optin_box_field name=”paragraph”]PHA+UGx1cyB5b3XigJlsbCBiZSBhZGRlZCB0byBteSBGUkVFIENyZWF0aXZlIFRpcHMgRS1sZXR0ZXIgd2hlcmUgSSBzaGFyZSBleGNsdXNpdmUgcHJvamVjdHMsIHZpZGVvcyAmYW1wOyB0aGUgPHN0cm9uZz4xMiBEYXlzIG9mIENocmlzdG1hczwvc3Ryb25nPiBQcm9qZWN0IFNlcmllczwvcD4K[/optin_box_field][optin_box_field name=”privacy”][/optin_box_field][optin_box_field name=”top_color”]undefined[/optin_box_field][optin_box_button type=”0″ button_below=”Y”]Get Instant Access![/optin_box_button] [/optin_box]


CAS – Embossing on Vellum

cas-embossing-on-vellum-ingrid-blackburn-hls

Chances are if you love to emboss, you’ve tried embossing on vellum before. Embossing really gets a pop when laid on top of the slick vellum surface. Today I’m playing along with the Clean and Simple challenge over at Happy Little Stampers. And the technique is yup, you guessed it –  embossing on vellum.

oct-2016-cas-badge

Embossing on Vellum Tutorial

Clean and simple cards need a focal point. This project uses embossing on vellum not just to highlight the focal point, but to soften a busy background as well. To bring more attention to that focal point, emboss a golden twig wreath around.

Embossing on Vellum - DIY Christmas Cards

The focal point. One of the brilliant properties of vellum is that it is translucent. So I took a busy stamped off Peppermint Stick background in green and placed it behind my vellum window. With the golden twigs – it really worked.

But the card needed a tiny bit more. The clean and simple look was what I was after, so I didn’t want to clutter it up too much. I ended up choosing to add some golden holly leaves & berries in the corner.

Embossing on Vellum Technique

All the little touches seem to pull it together. The vellum cuts down the strong stamped background just the right amount….now it adds something rather than dominating. The golden accents added to the card, without pulling your eye from the dominant focal point – just what you’re looking for in clean and simple design.

When working on your clean and simple cards – don’t be afraid to stray from a white card. White space – which is what CAS design needs doesn’t literally mean white!

Now it’s your turn – head on over to Happy Little Stampers and join in the Embossing on Vellum Challenge fun!

Till next time –

Signature

[optin_box style=”12″ alignment=”center” email_field=”email” email_default=”Enter your email address” integration_type=”aweber” double_optin=”Y” list=”3846012″ name_field=”name” name_default=”Enter your first name” name_required=”Y” opm_packages=””][optin_box_field name=”headline”]Learn more with our exclusive FREE video series:[/optin_box_field][optin_box_field name=”paragraph”]PHA+UGx1cyB5b3XigJlsbCBiZSBhZGRlZCB0byBteSBGUkVFIENyZWF0aXZlIFRpcHMgRS1sZXR0ZXIgd2hlcmUgSSBzaGFyZSBleGNsdXNpdmUgcHJvamVjdHMsIHZpZGVvcyAmYW1wOyB0aGUgPHN0cm9uZz4xMiBEYXlzIG9mIENocmlzdG1hczwvc3Ryb25nPiBQcm9qZWN0IFNlcmllczwvcD4K[/optin_box_field][optin_box_field name=”privacy”][/optin_box_field][optin_box_field name=”top_color”]undefined[/optin_box_field][optin_box_button type=”0″ button_below=”Y”]Get Instant Access![/optin_box_button] [/optin_box]

Simple Distress Background

Today we’re going to focus on a simple Distress Background that really pack a punch. It’s all part of the Distress Mixed Media challenge going on over at Happy Little Stampers this month.

HLS Mixed Media challenge September 2016 - Distress

Be sure to stop by all the designer blogs for some cool looks with this challenge. And welcome Autumn from Sew Paper Paint for a very cool look. I love her blog – can seriously get lost in her work!

It’s no secret that I love anything distressed – from inks to paper to texture. This project really takes the word distress and not only uses the ink, but gives it a great Mixed Media look with the Winkle Free Distress Technique. The end result is a very cool distress background.

Distress-Mixed-Media---001

Distress Background Tutorial

To get a cool look, emboss a background stamp or series of images in clear on 140# Cold Pressed Watercolor Paper. Don’t worry if you don’t get the whole image – I missed a spot and rubbed off some powder in several spots to get a distressed/grunge look. This will resist the Distress watercolor we’re about to add next.

First lay down your lightest color onto your craft mat – Mustard Seed (Yellow) and spritz. You’ll keep it to the center and a little outward. Click here for a video on just how to do this technique. Be sure to mostly dry it inbetween layers to build up the texture and distress look. Then move onto the next color. You’ll do it in this sequence after each color. TIP – keep the color wheel in mind when overlapping colors. You don’t want to overlap complimentary colors – colors that are opposite on the color wheel such as Purple & Yellow. Complimentary colors look awesome together, but when blended turn to mud.

Distress Background

Next add the Carved Pumpkin – overlapping a little with the yellow. Next the Candied Apple overlapping with the Yellow a little and the Orange. The key is to overlap a little, but also preserve some of the original color and keep some pure too.

Going counter clockwise, add some Blueprint Sketch in the same manner, skip over the the right and add some Twisted Citron. Fill the remaining spot with Wilted Violet. Add a little Candied Apple to the Wilted Violet to create that cool Blackberry color…and add some spots here and there where you feel you need some texture or an added spot of color.

Distress Inks - Wrinkle Free Technique

Once completely dry, place your dried watercolor paper in-between some old pages of a phone book and iron it on the hottest setting. This will transfer the embossing powder to the phone book page and give you the added bonus of straightening out your watercolor piece! Iron just a few minutes (30 sec to 2 min). The key is that you don’t want to see any shiny – switch to a clean page in the phone book if needed. To see me do this, check out this HLS video (at 15:30). This technique is called Faux Bleaching.

Wrinkle free technique - Distress Background

Isn’t it a cool project!!! What’s so awesome about it is that the Mixture of medias used really blend together to create an amazing Distress look. I didn’t want to take away from the cool background, so I kept the greeting simple and didn’t add any sequins (though I was tempted). I embossed the Hello (new die from Stamplorations – isn’t it cute?!!) in clear embossing powder. The shine against the flat distressed background just rocks. I hope you think so too!

Distress-Mixed-Media---005

SO I’m challenging YOU now. It’s my favorite technique/medium….Distress. Jump on into this challenge – leave me a comment that you did and I can’t WAIT to see what you create!

Until next time –

Signature

[optin_box style=”12″ alignment=”center” email_field=”email” email_default=”Enter your email address” integration_type=”aweber” double_optin=”Y” list=”3846012″ name_field=”name” name_default=”Enter your first name” name_required=”Y” opm_packages=””][optin_box_field name=”headline”]Learn more with our exclusive FREE video series:[/optin_box_field][optin_box_field name=”paragraph”]PHA+UGx1cyB5b3XigJlsbCBiZSBhZGRlZCB0byBteSBGUkVFIENyZWF0aXZlIFRpcHMgRS1sZXR0ZXIgd2hlcmUgSSBzaGFyZSBleGNsdXNpdmUgcHJvamVjdHMsIHZpZGVvcyAmYW1wOyB0aGUgMTIgRGF5cyBvZiBDaHJpc3RtYXMgUHJvamVjdCBTZXJpZXM8L3A+Cg==[/optin_box_field][optin_box_field name=”privacy”][/optin_box_field][optin_box_field name=”top_color”]undefined[/optin_box_field][optin_box_button type=”0″ button_below=”Y”]Get Instant Access![/optin_box_button] [/optin_box]

Supplies

I get asked a lot where I get some of my supplies. To make it easier for you, I’ve listed all the supplies below. I myself shop at various places and know you probably have your favorite online stores too! So I included choices where I could or if there is just one – it’s the best price I’ve found. 🙂

The letters below each image are links to stores where you can buy each of the products listed. EH – Ellen Hutson, SSS = Simon Says Stamp, AZ = Amazon, etc. I buy almost all my own supplies. To help support my blog, videos & allow me to keep creating for you, I use compensated affiliate links when possible.


Christmas Song Inspired Cards

I have a Jazzy Christmas Song playing in my stamp studio today. Yup….it’s that time of year – the Christmas card production begins for most paper crafters. Dare I say some of you are already done! And it’s just the beginning of September – I’d love to know if you’ve started or are finished – tell me in the comments below!

HLS Christmas Challenge September 2016

But first….let’s get back to the Christmas songs playing…they serve as inspiration for my new creations one of which I have for you today – two actually and a video from my YouTube Channel! Over at Happy Little Stampers Christmas Challenge – this month we’re challenging you to pick a Christmas song as inspiration and create a card! How fun is that!

Christmas Song #1 – Joy to the World Tutorial

For my first card and my inspiration for the challenge today, I chose Joy to the World – a big booming song that Iin a watercolor of the forest on a glorious day. Are you on my train of thought?

DIY Christmas Cards inspired by Christmas Song

First paint a light blue sky over the top 2/3 of your card – darker toward the top. I first started with some yellow to give me a heavenly glow. Fade it out toward the edges and do the same with your blue – or you’ll get green where they overlap.

Next, Mask off the bottom for a snowy base and watercolor stamp your tree line using Peeled Paint Distress Stain and a fir tree. I used the Lovely as a Tree by Stampin Up, but you can also use the trees from the Prancers Penny Black set or a Stampscapes tree. Stamp a few tiems to get depth at various heights – some reinking, some not.

Joy-to-the-World---ingrid-blackburn---002

Paint a shadow with some Distress Weathered Wood ink that has been sprintzed along the tree line. Fully dry and emboss your greeting. For a little snowy effect – use a toothbrush and some Daler Rowney Pro White to add some snowy flecks to your scene.

Christmas Song #2 – Partridge in a Christmas Tree Tutorial

For a bonus project today, I have a video tutorial that I did for the Happy Little Stampers Channel a few months ago – I waited to show you till today, so unless you were subscribed to the HLS channel, you probably missed it! It’s my take on the Christmas classic 12 Days of Christmas – it’s my Partridge in a Christmas Tree.

I love these little bird creatures that Kylie designed for the Whimsical Friends stamp set – I know they’re probably chickens, but they serve my purpose as partridges today!

To see how I created this great card, here’s a step by step video for you:

Click Here to Watch Video in HD on YouTube

First you’ll want to add a lightly drawn tree using a pencil and ruler. Then stamp and & emboss your Partridges in gold. I used Gilded Gold by Brutus Monroe – love that stuff!

Christmas Song inspired DIY Cards

Mask off your tree with some painters tape keeping the line on the inside and erase with a white eraser. Sponge in your tree using greens, and add the gold embossed baubles from the HLS Mix Mash stamp set. Color in your partridges and add the song greeting to the sides of the tree.

Mine was a bit to high on the right…but that’s okay – I’m not perfect!! 🙂

For a little extra flair – add a slight border to your card front with some more gold embossing powder.

Partridge-in-a-Pear-Tree-Christmas Song

So what do you think, cute, huh?! Now it’s your turn. I can’t wait to see how you’re inspired for this month’s Christmas Challenge!

Be sure to subscribe to both my YouTube Channel & the Happy Little Stampers Channel to get weekly inspiration! And if you want to get more Christmas inspiration – don’t forget about my 12 Days of Christmas series, only available to those on the Creative Tips e-letter.

See you again in a few days for more creative fun!

Keep those fingers inky –

Signature

[optin_box style=”12″ alignment=”center” email_field=”email” email_default=”Enter your email address” integration_type=”aweber” double_optin=”Y” list=”3846012″ name_field=”name” name_default=”Enter your first name” name_required=”Y” opm_packages=””][optin_box_field name=”headline”]Learn more with our exclusive FREE video series:[/optin_box_field][optin_box_field name=”paragraph”]PHA+UGx1cyB5b3XigJlsbCBiZSBhZGRlZCB0byBteTxzdHJvbmc+IEZSRUU8L3N0cm9uZz4gQ3JlYXRpdmUgVGlwcyBFLWxldHRlciB3aGVyZSBJIHNoYXJlIGV4Y2x1c2l2ZSBwcm9qZWN0cywgdmlkZW9zICZhbXA7IHRoZSAxMiBEYXlzIG9mIENocmlzdG1hczwvcD4K[/optin_box_field][optin_box_field name=”privacy”][/optin_box_field][optin_box_field name=”top_color”]undefined[/optin_box_field][optin_box_button type=”0″ button_below=”Y”]Get Instant Access![/optin_box_button] [/optin_box]

CAS Watercolor Spritz

Have you tried Watercolor Spritzing much on cards before? I”ll be honest – I use my mini mister like it goes out of style, but mostly with water! This month over at Happy Little Stampers, the Clean and Simple challenge is Watercolor Spritzing. So here goes –

Sept 2016 CAS Badge

Adding Watercolor Spritzing to your Projects:

For this project, I kept it super simple and clean. Take any stencil you like – I used the Swirly Stencil by Create a Smile. Lay it over some watercolor paper – I used 140# Cold Pressed by Strathmore, an spritz! That’s it!!

Watercolor Spritzing

For my watercolor spritzing look, I used Vibrant Turquoise Dylusions Spray by Ranger. The bright and deep colors in that line are incredible. One thing I don’t like though is that my fingers get quite stained with these products – no matter how careful I am…lol!

TIP – Don’t over spritz it – you want just enough to get a good pattern. If you add too much, then it will seep under your stencil and color the pattern. A little looks good, but too much defeats the purpose. Fully dry it before moving on.

Spritzing Techniques

For a little contrast to the cool vibrant turquoise background, die cut and emboss one of the Happy Little Stampers butterflies in Iridium WOW embossing glitter and watercolor with the Purple Zig Clean Color Real Brush Pen by Kuratake. Blend it out with a water brush. I just LOVE the vibrant colors in that line.

They’re both popped up, add a quick sentiment and you’re good to go. Quick, easy and definitely mass producible!

Now it’s your turn – I can’t wait to see what you create for the CAS Watercolor Spritzing Challenge!

Go get those fingers inky – mine are….

Signature

[optin_box style=”12″ alignment=”center” email_field=”email” email_default=”Enter your email address” integration_type=”aweber” double_optin=”Y” list=”3846012″ name_field=”name” name_default=”Enter your first name” name_required=”Y” opm_packages=””][optin_box_field name=”headline”]Learn more with our exclusive FREE video series:[/optin_box_field][optin_box_field name=”paragraph”]PHA+UGx1cyB5b3UnbGwgYmUgYWRkZWQgdG8gbXk8c3Ryb25nPiBGUkVFPC9zdHJvbmc+IENyZWF0aXZlIFRpcHMgRS1sZXR0ZXIgd2hlcmUgSSBzaGFyZSBleGNsdXNpdmUgcHJvamVjdHMsIHZpZGVvcyAmYW1wOyB0aGUgMTIgRGF5cyBvZiBDaHJpc3RtYXM8L3A+Cg==[/optin_box_field][optin_box_field name=”privacy”][/optin_box_field][optin_box_field name=”top_color”]undefined[/optin_box_field][optin_box_button type=”0″ button_below=”Y”]Get Instant Access![/optin_box_button] [/optin_box]

Supplies

I get asked a lot where I get some of my supplies. To make it easier for you, I’ve listed all the supplies below. I myself shop at various places and know you probably have your favorite online stores too! So I included choices where I could or if there is just one – it’s the best price I’ve found. 🙂

The letters below each image are links to stores where you can buy each of the products listed. EH – Ellen Hutson, SSS = Simon Says Stamp, AZ = Amazon, etc. I buy almost all my own supplies. To help support my blog, videos & allow me to keep creating for you, I use compensated affiliate links when possible.


Adding a Simple Metal Look to Your Cards

Mixed-Media-Metal---Ingrid-Blackburn-001

I love adding metal to cards. It’s an unexpected look and it’s always fun playing with textures that I don’t use in my day to day crafting. Metal is something that’s quite easy to add.

It’s time for yet another Mixed Media challenge over at Happy Little Stampers….first up – I have something totally easy that you can immediately implement in your crafting – tin foil and metallic embossing powders – and be sure to read on – I didn’t add them the traditional way!

HLS Mixed Media challenge August 2016

When you think of metal, you may go to the chunky pieces that you can add, but I wanted to keep my mixed media piece a little flatter. So to get a natural look, I used two everyday items we all have in our homes – aluminum foil and water.

Simple ways to add Metal to your Projects:

To get a nicely watercolored look in the project on the right, you’ll want to use a stencil with a solid negative space (the space that doesn’t get used). I chose the Mini Specimens stencil by The Crafters Workshop – I LOVE their stencils.

First, stencil through your positive image onto a project. The excess ink will collect on the negative space of the stencil. The watercolored look in our project today comes from the ink that was left over from the project on the left. I added Hickory Smoke and then some Soot Black on top of some embossing paste in this watercolor mixed media piece – there’s a video for that project (link below):

Mixed-Media-Metal---Ingrid-Blackburn-010

Click Here for the Left Project’s Tutorial & Video

Once you’re done adding color to your positive image (the colorful one on the left), grab a second piece of watercolor paper, spritz your stencil with all the left over ink on it with a mini mister and press into your paper. You’ll then get a watercolored negative space look for your card stock. You basically turned your stencil into a stamp!

Since we’re using the negative of the image – note that when you stamp it – it’s reversed from the positive one (colorful left project above)!

It’s a little hard to see in the photos, but this project has a sparkly sheen to it. To get that look, use pearlized water by adding a little Perfect Pearl (Perfect Pearl shade by Ranger) into my water filled mini mister rather than regular water.

Mixed-Media-Metal---Ingrid-Blackburn-004

Now that we have our mixed media base – stenciling & watercolor, next up is adding some metallic accents. The coolest part is that for the splotches you don’t even use ink – what? Yup….spritz a little water into to palm of your hand and flick it at your project. Keep this a little at a time so you don’t add huge splotches.

Mixed-Media-Metal---Ingrid-Blackburn-002

Add embossing powder – I used Pewter Powder and emboss. Pretty cool, huh? That’s how you get that realistic splotch look.

TIP – when you heat your powder, since there’s no ink to really grab onto it – first heat from underneath. That way your powder will start the melting process, finish from above, but keep your heat tool a little further away so you don’t blow all the powder away.

Mixed-Media-Metal---Ingrid-Blackburn-003

To get that great look to the sides – use water or versamark in a direct to paper manner. Once you have the look you’re going for, grab some heavy duty tin foil. stamp a sentiment in versamark, and emboss in Black. I used a new stamp set Hand painted Thanks by Neat & Tangled.

The black is a nice contrast to the shiny Tin Foil. Tear around it  leaving a longer strip to one side to overlap when you attach. Use glue to attach it to your watercolor paper. If you wrinkle it a bit more than you want – just flatten it out with your finger – or leave them in – it’s texture!

Mixed-Media-Metal---Ingrid-Blackburn-005

I love the shiny mixed with the Pewter – it’s a new/old look. That’s it! Adding a simple metal look to your cards is really that easy! I’m curious…have you ever embossed with water?

So now it’s your turn to add a metal look to your mixed media projects! I can’t wait to see what you come up with, head on over the Mixed Media Challenge and check out everyone’s creations.

Till next time –

Signature

[optin_box style=”12″ alignment=”center” email_field=”email” email_default=”Enter your email address” integration_type=”aweber” double_optin=”Y” list=”3846012″ name_field=”name” name_default=”Enter your first name” name_required=”Y” opm_packages=””][optin_box_field name=”headline”]Learn more with our exclusive FREE video series:[/optin_box_field][optin_box_field name=”paragraph”]PHA+UGx1cyB5b3XigJlsbCBiZSBhZGRlZCB0byBteSBGUkVFIENyZWF0aXZlIFRpcHMgRS1sZXR0ZXIgd2hlcmUgSSBzaGFyZSBleGNsdXNpdmUgcHJvamVjdHMsIHZpZGVvcyAmYW1wOyB0aGUgMTIgRGF5cyBvZiBDaHJpc3RtYXMgUHJvamVjdCBTZXJpZXM8L3A+Cg==[/optin_box_field][optin_box_field name=”privacy”][/optin_box_field][optin_box_field name=”top_color”]undefined[/optin_box_field][optin_box_button type=”0″ button_below=”Y”]Get Instant Access![/optin_box_button] [/optin_box]