Freshly Picked: Layered Watercolor Stamping

Today I have some fun new cards using products from the latest release by Catherine Pooler Designs – the Freshly Picked collection. The Freshly Picked Collection has four stencils, two new stamp sets, three new die sets and two new ink colors – neutrals!!! I have been waiting for these inks – and you won’t be disappointed – the shades are gorgeous.

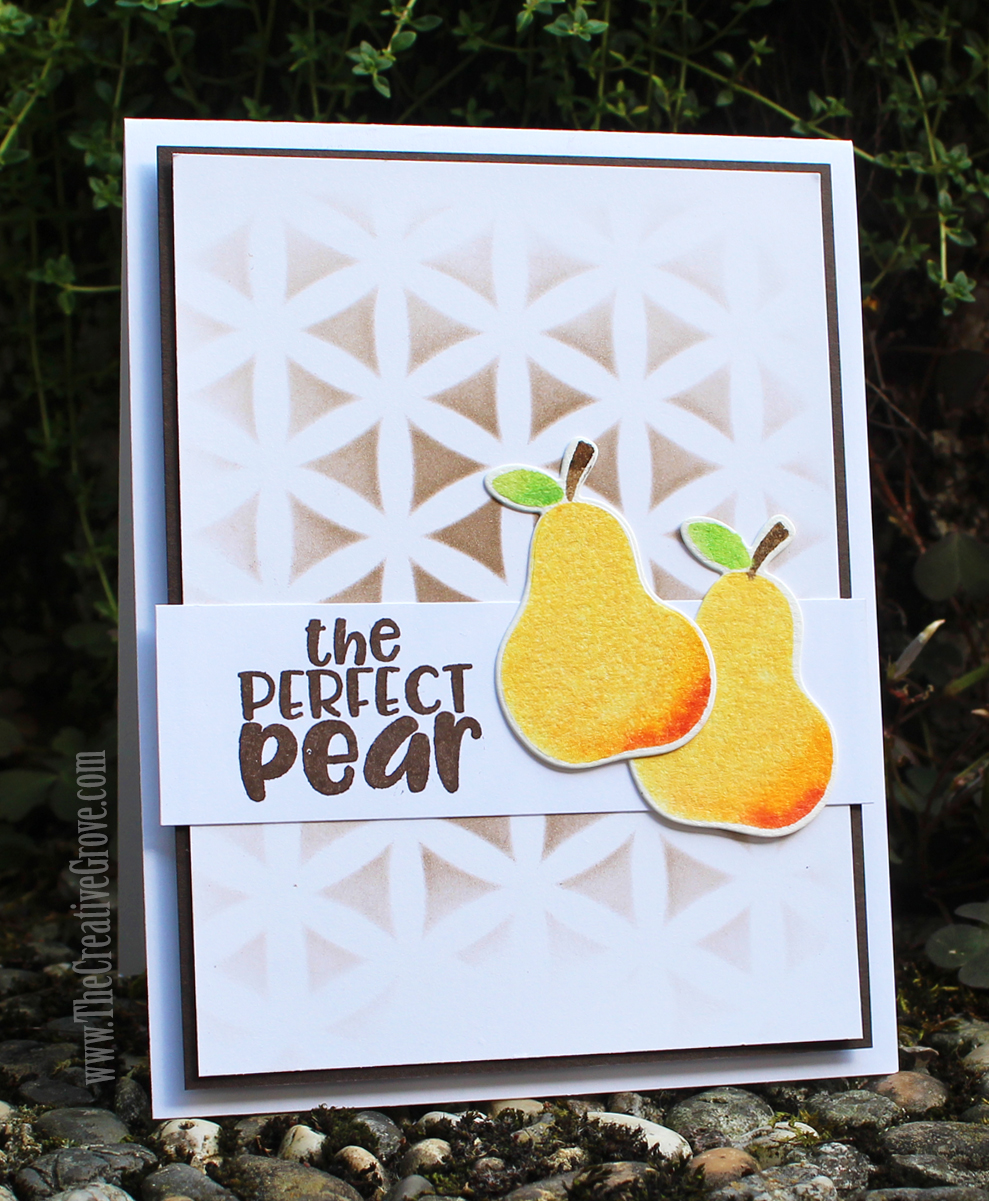
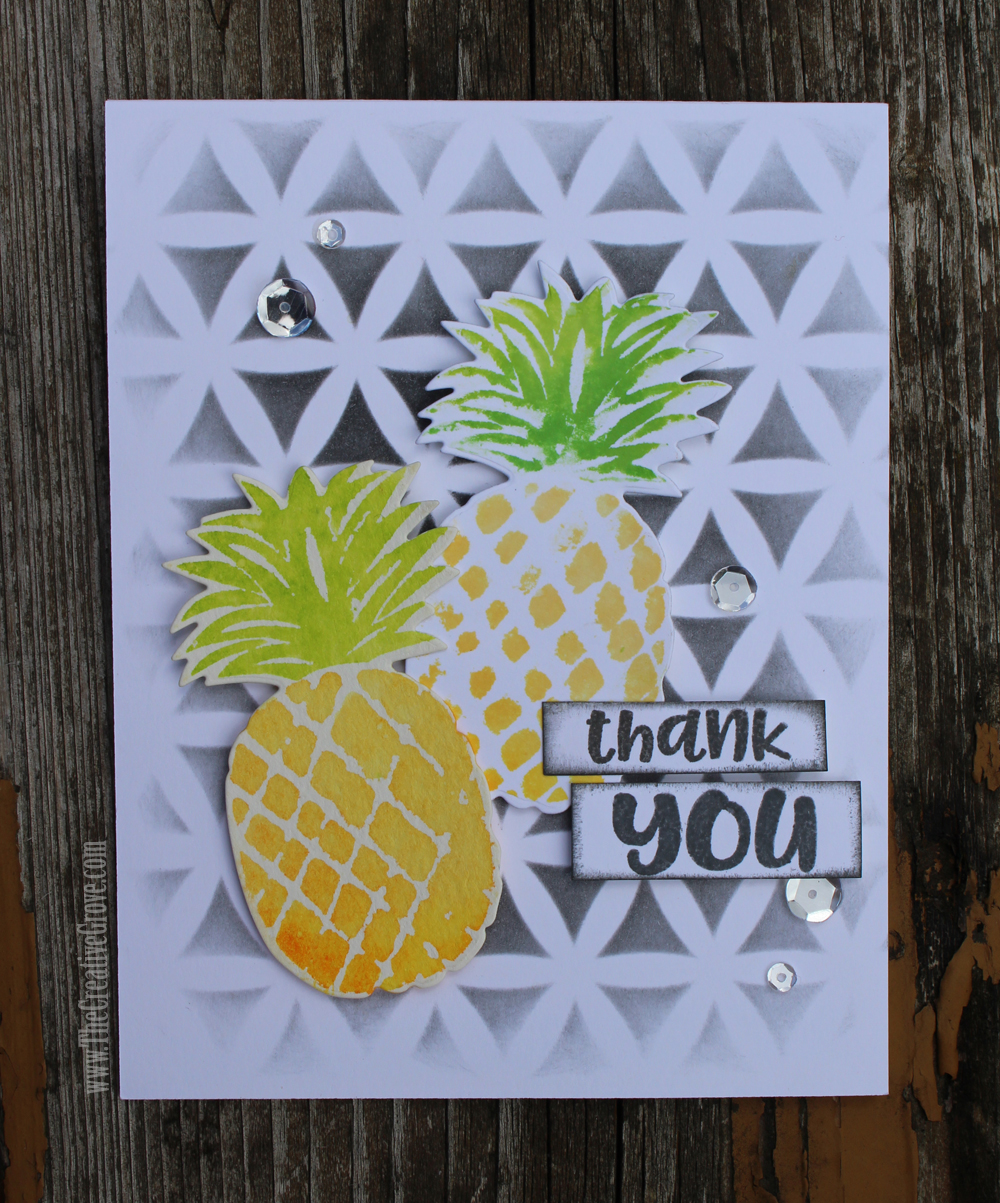
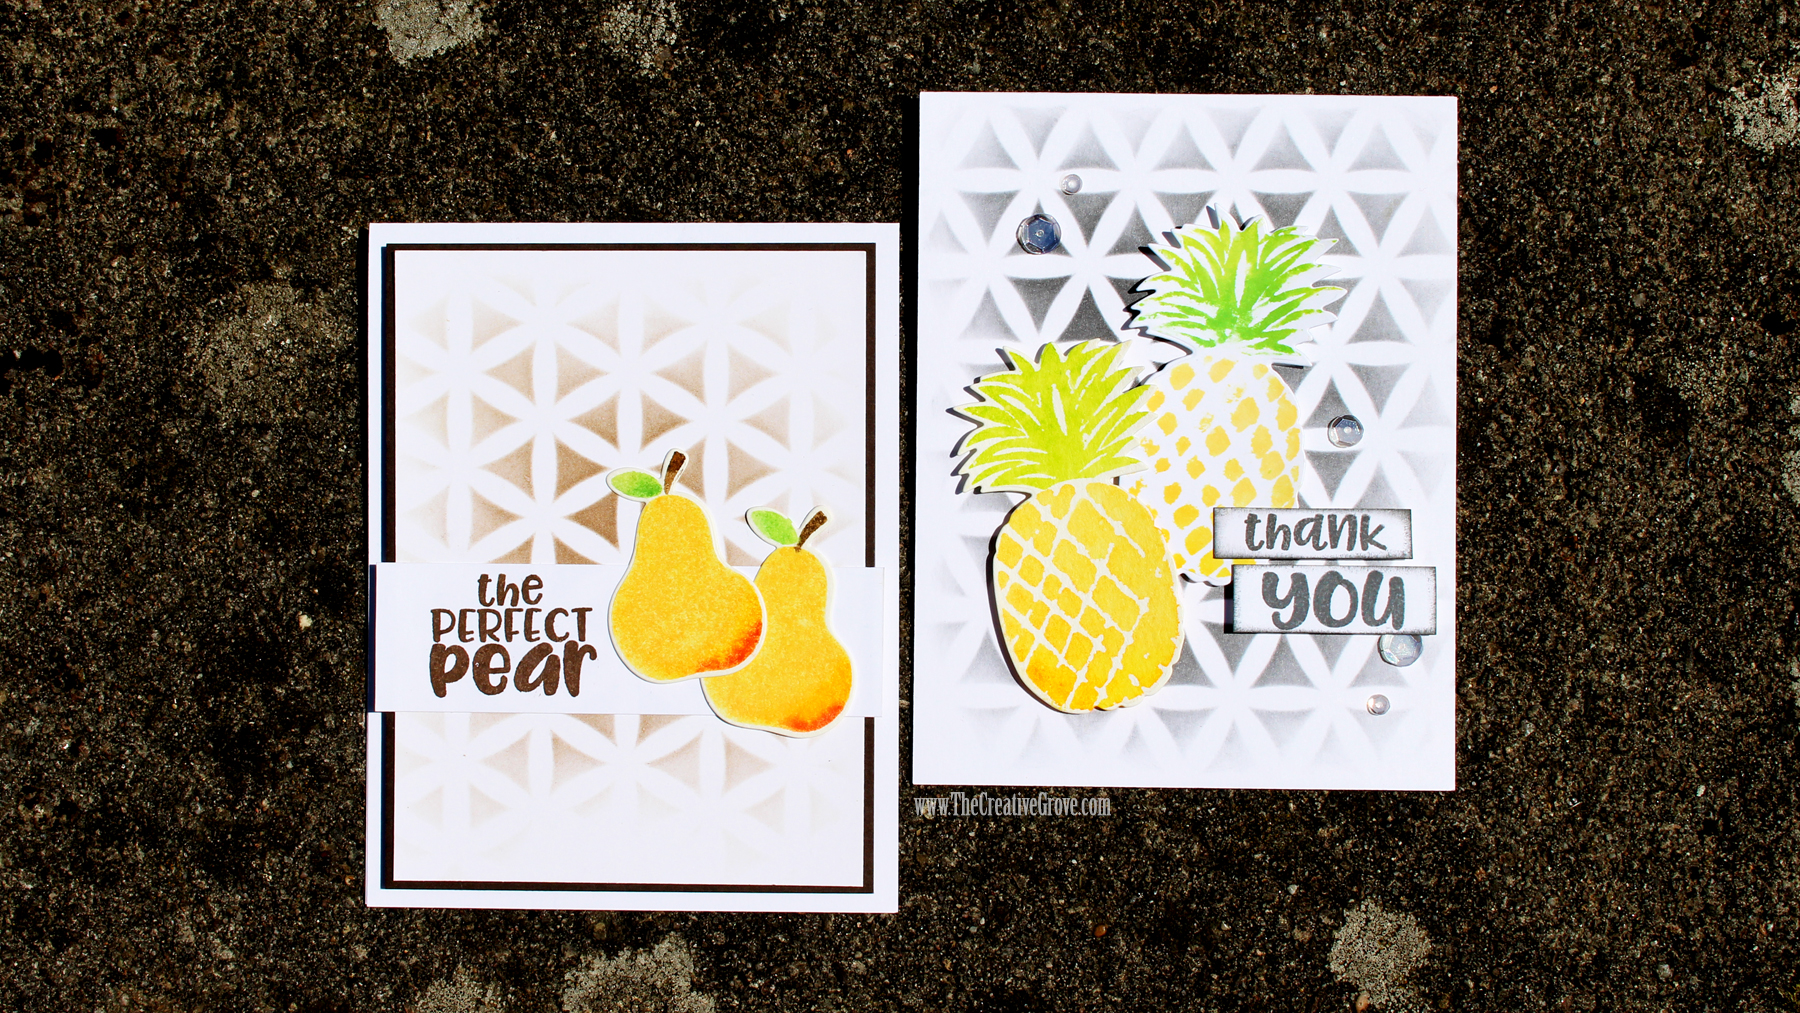
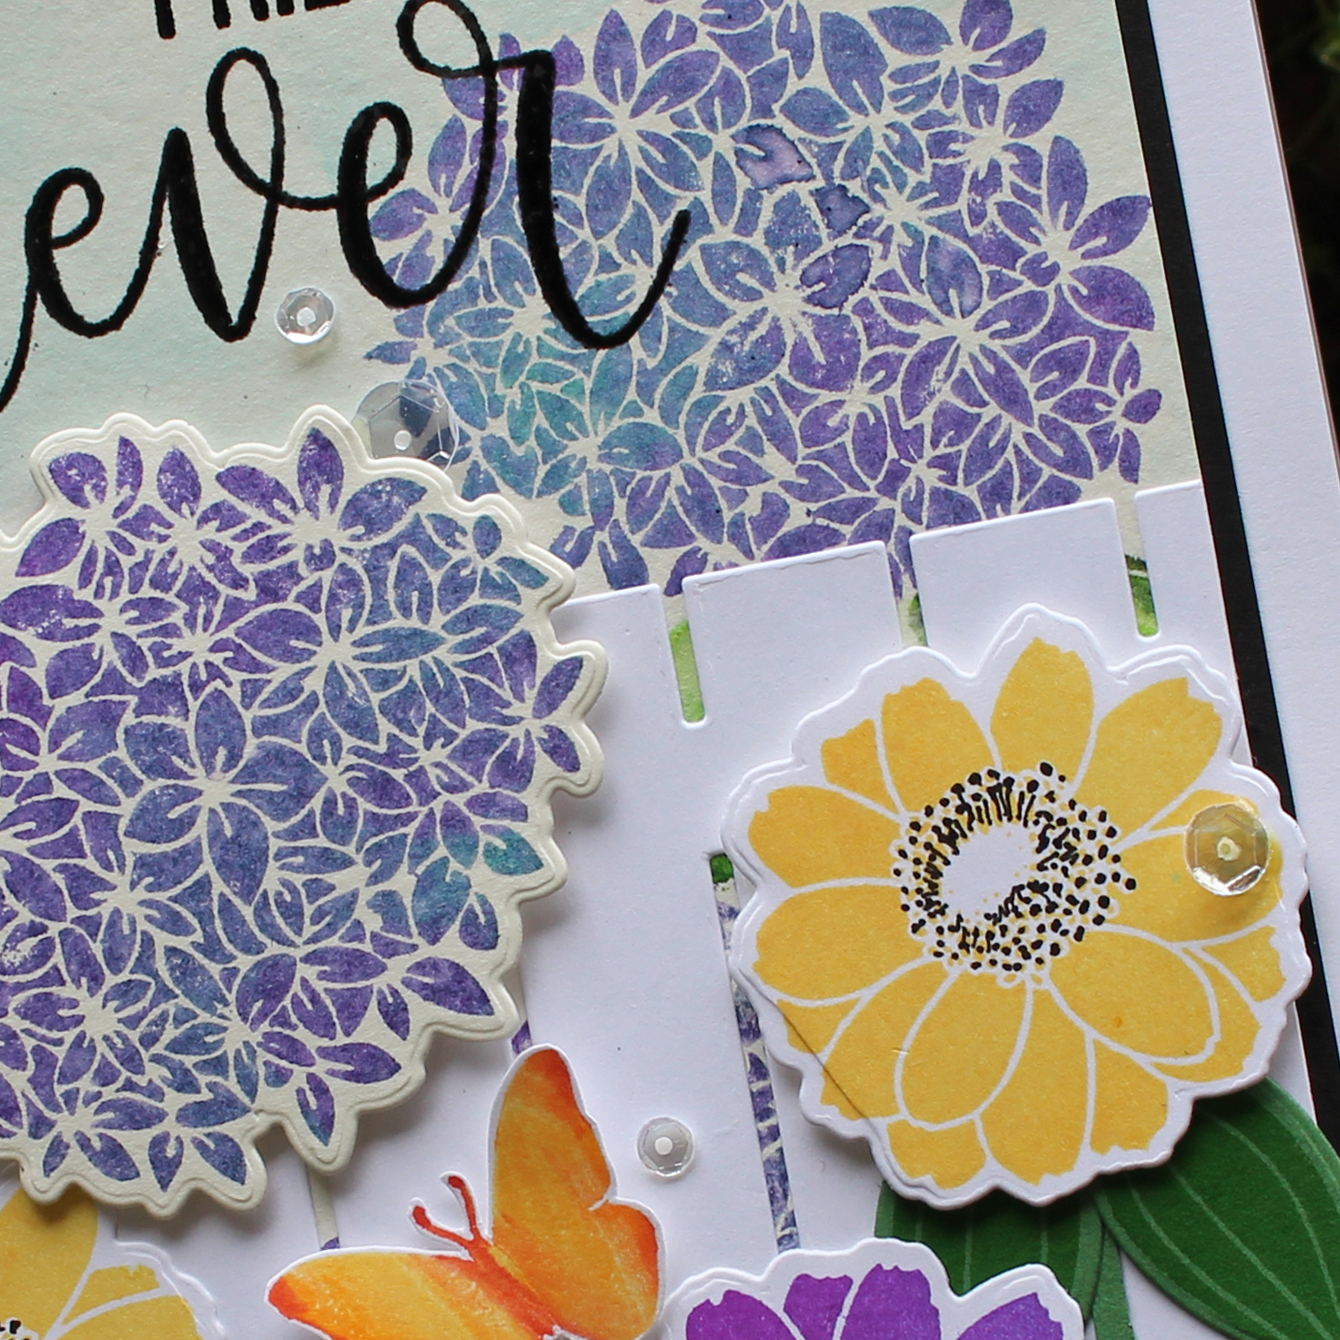
Today I have two cards using the I Pick You stamp/die sets and the Mod Flowers stencil from the Freshly Picked collection. And naturally – we’ll play with a simple little watercolor technique that I love – layered watercoloring.

When you layer multiple colors in watercoloring, you get a little more realism in your works of art. Now, you can also layer the same color over dry layers for more depth, but today we’re going to work with different hues. Adding a different hue gives a little more depth to your image – and that’s perfect for fruit. I even created a quick video tutorial for you here:

Click Here to watch in HD on YouTube

Freshly Picked Watercolor Tutorial

First we’ll create our background. Secure your project and Mod Flowers stencil to your surface. Using a light touch, blend a background from the center outward, fading your pressure as you near the edges. That helps to give you a faded vignette look. Isn’t this color just gorgeous?!!

Next die cut the fruit shapes you wish to use out of 140# cold pressed watercolor paper. The die shapes are together, making it easy to create multi colored images by just stamping the pieces you need – I LOVE the way that is designed!
Freshly Picked Collection by Catherine Pooler Designs

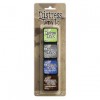
Ink up your Pear in Tiara ink first. Then add a little shading on the bottom with Tiki Torch. Come back over it with your Tiara pad just like in the video to blend the edge out. If you don’t do that, you’ll have a harsher transition that doesn’t always look natural. If you get some of the darker ink on your pad, gently lift it off with a paper towel. As long as your pad comes up the right color – you’re good to go!

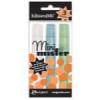
Finish the edge off with a little Tutti Fruitti and lightly spritz with a mini mister. Stamp and you’re all set!

You can see how easy it is to create these artsy little creations.

In this one – I had a little too much water on my first stamped image – and the second is a second generation stamped image – thus much more white!
I pick You Stamp set - Freshly Picked Collection

Because the Black Jack background was a bit more prominent, I didn’t want the greeting to get lost – so I edged it with the Black Jack color. I can tell you – this is absolutely my all time favorite deep grey I’ve ever owned. It’s the perfect alternate to black and when watered down is the perfect light grey shade for grounding images in watercolor.

Both the new neutrals are a must have in my opinion. They are deep, rich and flawless colors – you will not be disappointed!

So, now it’s your turn. There are awesome new stencils in this Freshly Picked release – so check them all out…and I’ll have some more projects for you soon.
Mod Flowers Stencil - Freshly Picked

And if you’re a StampNation member – check out the new challenge that went live today for the Concord & 9th Masterclass. There’s even a live class with the owners of Concord & 9th today. Don’t miss out – if you’re not a member…you have no idea what you’re missing!
Be sure to stop by tomorrow…I have a special video featuring Concord & 9th products! Now it’s your turn – get inky!

Till tomorrow –

[optin_box style=”27″ alignment=”center” email_field=”email” email_default=”Enter your email address” integration_type=”aweber” double_optin=”Y” list=”3846012″ name_field=”name” name_default=”Enter your first name” name_required=”Y” opm_packages=””][optin_box_field name=”headline”]Want to LEARN with more exclusive videos?[/optin_box_field][optin_box_field name=”paragraph”]PHA+UGx1cyB5b3XigJlsbCBiZSBhZGRlZCB0byBteTxzdHJvbmc+wqBGUkVFPC9zdHJvbmc+wqBDcmVhdGl2ZSBUaXBzIEUtbGV0dGVyIHdoZXJlIEkgc2hhcmUgZXhjbHVzaXZlIHByb2plY3RzLCB2aWRlb3MgJmFtcDsgdGhlIDEyIERheXMgb2YgQ2hyaXN0bWFzPC9wPgo=[/optin_box_field][optin_box_field name=”privacy”][/optin_box_field][optin_box_field name=”top_color”]undefined[/optin_box_field][optin_box_button type=”0″ button_below=”Y”]Get Instant Access![/optin_box_button] [/optin_box]

Supplies

To make finding the supplies I used in this project a bit easier for you, here are a few clickable links. Those that have multiple shopping options are indicated with letters – EH – Ellen Hutson, SSS – Simon Says Stamp. Compensated Affiliate Links are used when possible. Click here for disclosure. Happy Shopping!


Combining Stencils & Background Stamps

Don’t you just love taking things that you already have and using them in new ways? Today I thought it would be fun to show you how to combine stencils & background stamps for an unexpected look! So dust them off, and let today’s video inspire you to create something fun.

I’m honored to be participating in a video hop today to celebrate my friend Justine Hovey’s 1 Million views on her YouTube channel! WOW – she’s worked hard over the years to create something special, and I’m so excited to celebrate alongside her and some good friends.

Justine will be posting new videos all month long and giving away tons of prizes too. So definitely check her blog out here for all the details. She’s doing something fun with the video hop – each video along the hop has a secret word somewhere in it. Make sure to collect all of them to enter! And I think you’ll find plenty of fun YouTube channels to subscribe to along the way.

Combining Stencils & Background Stamps Tutorial

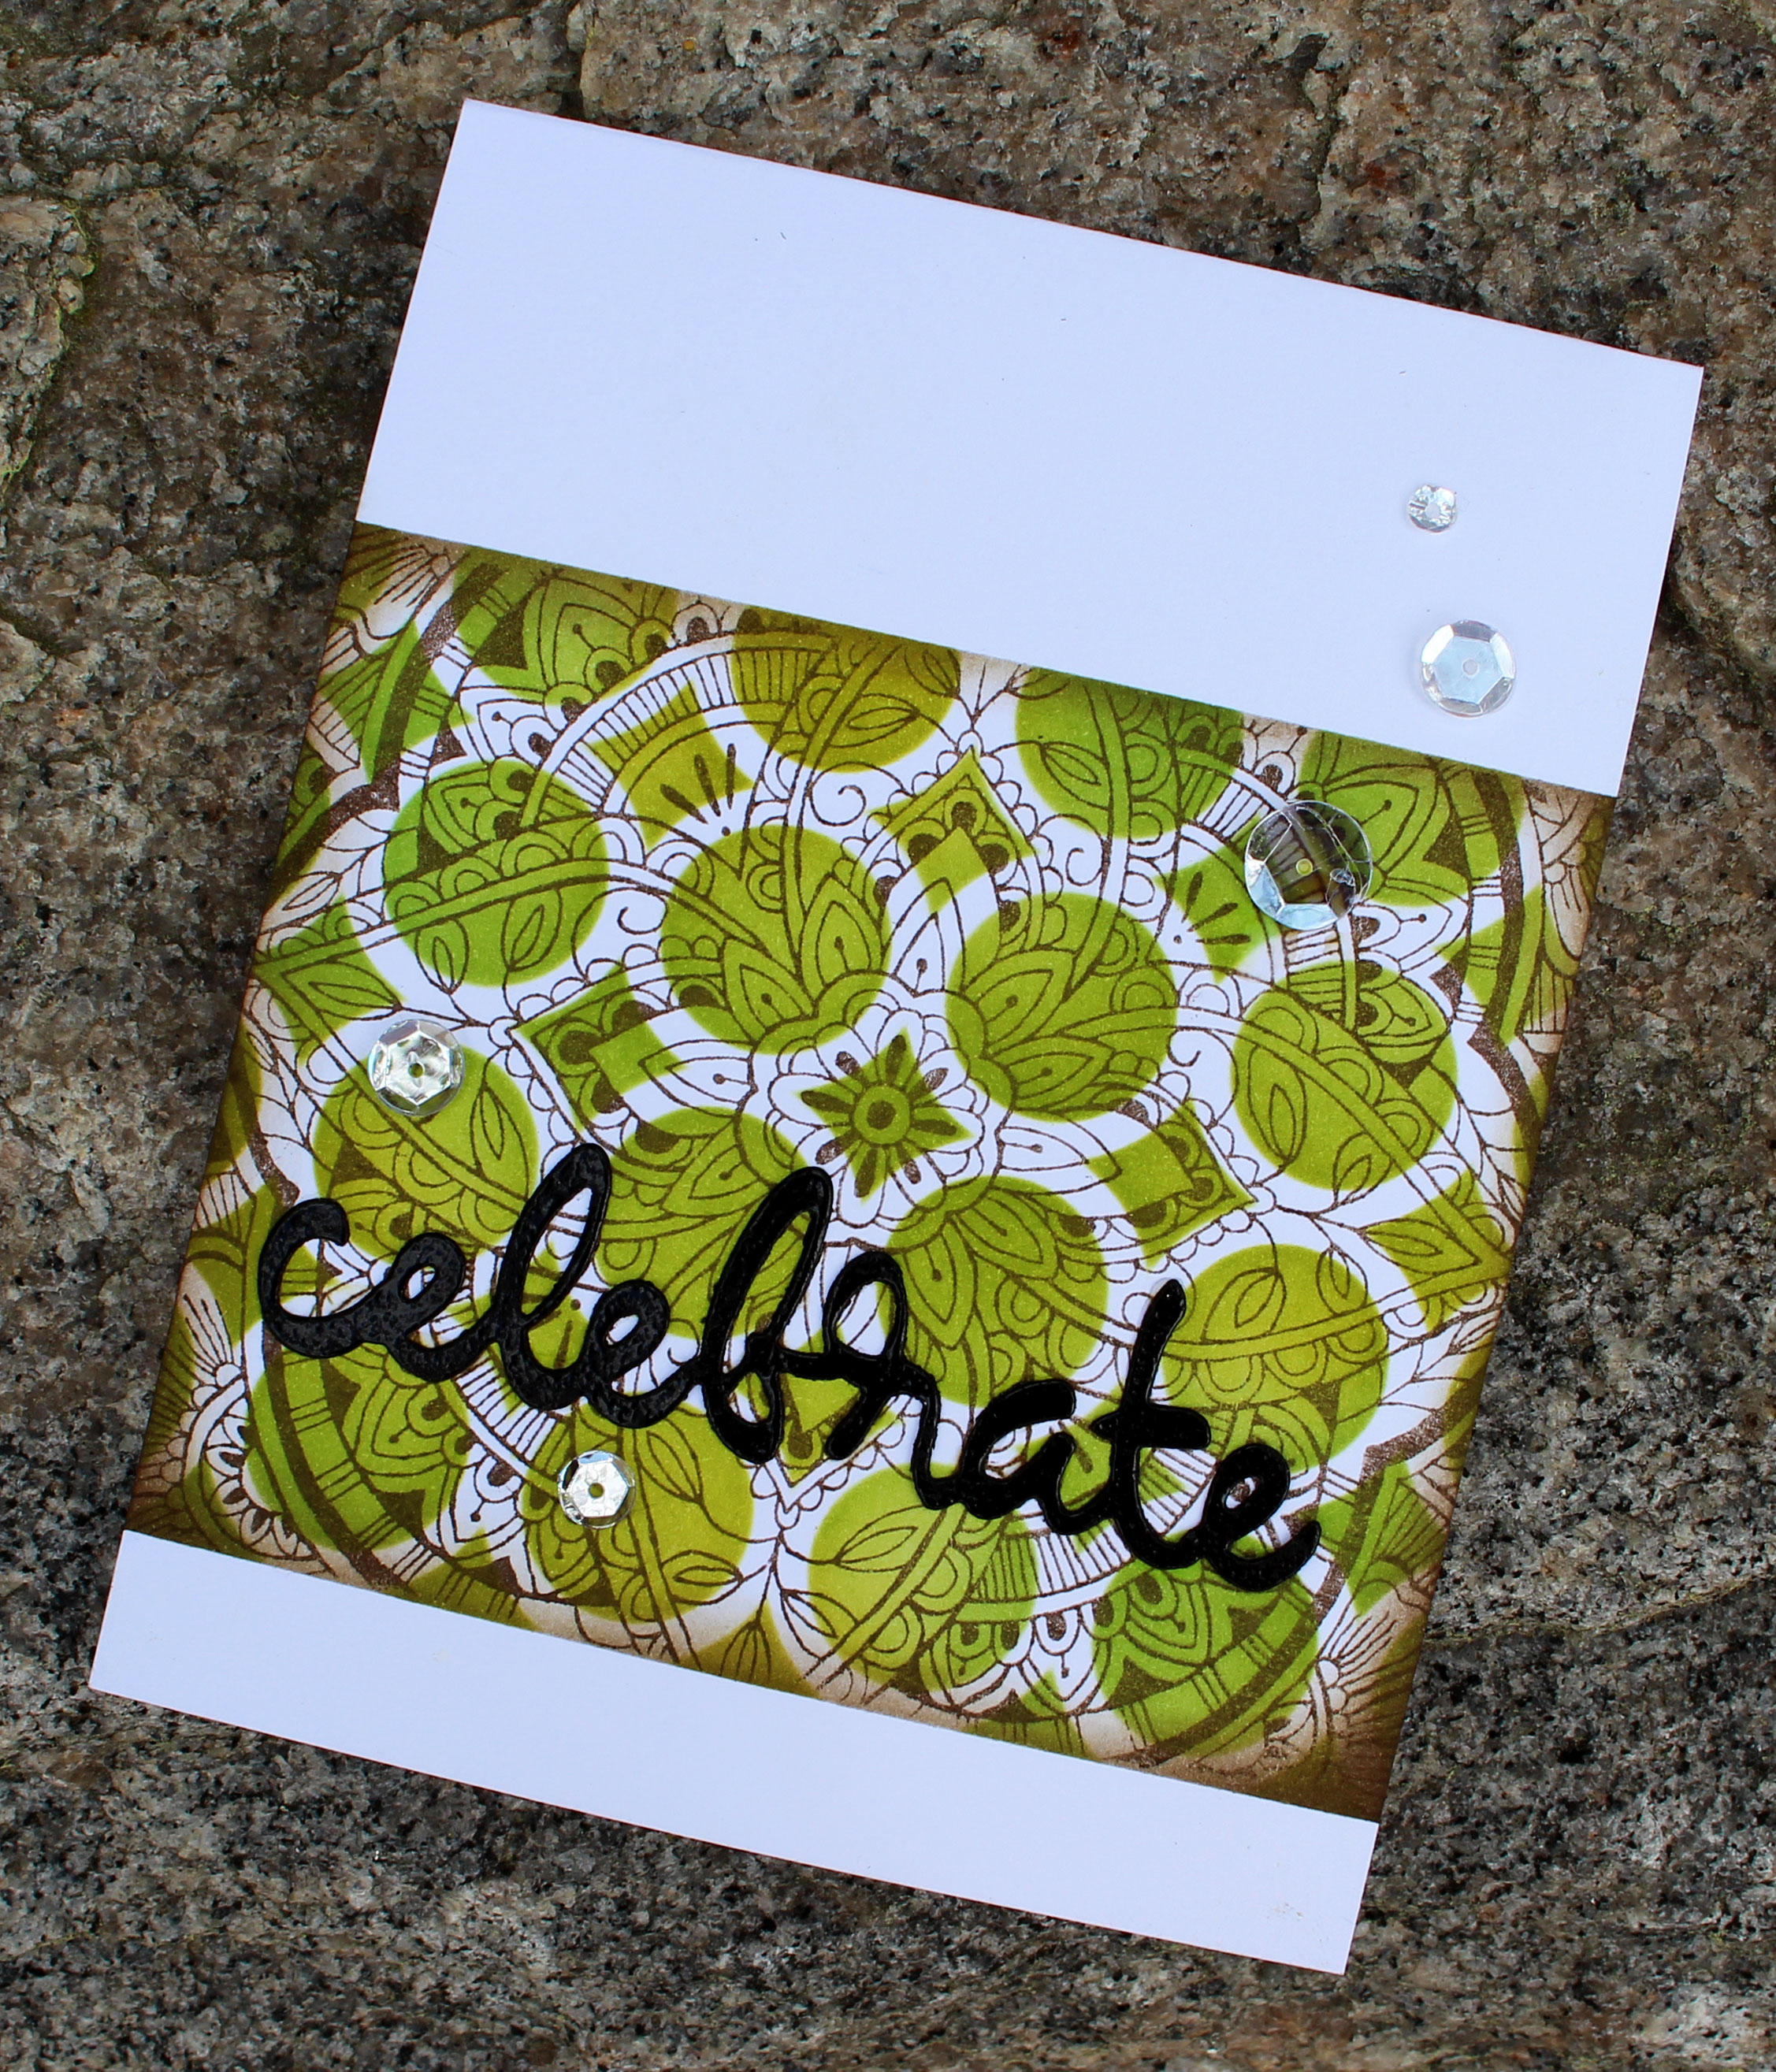
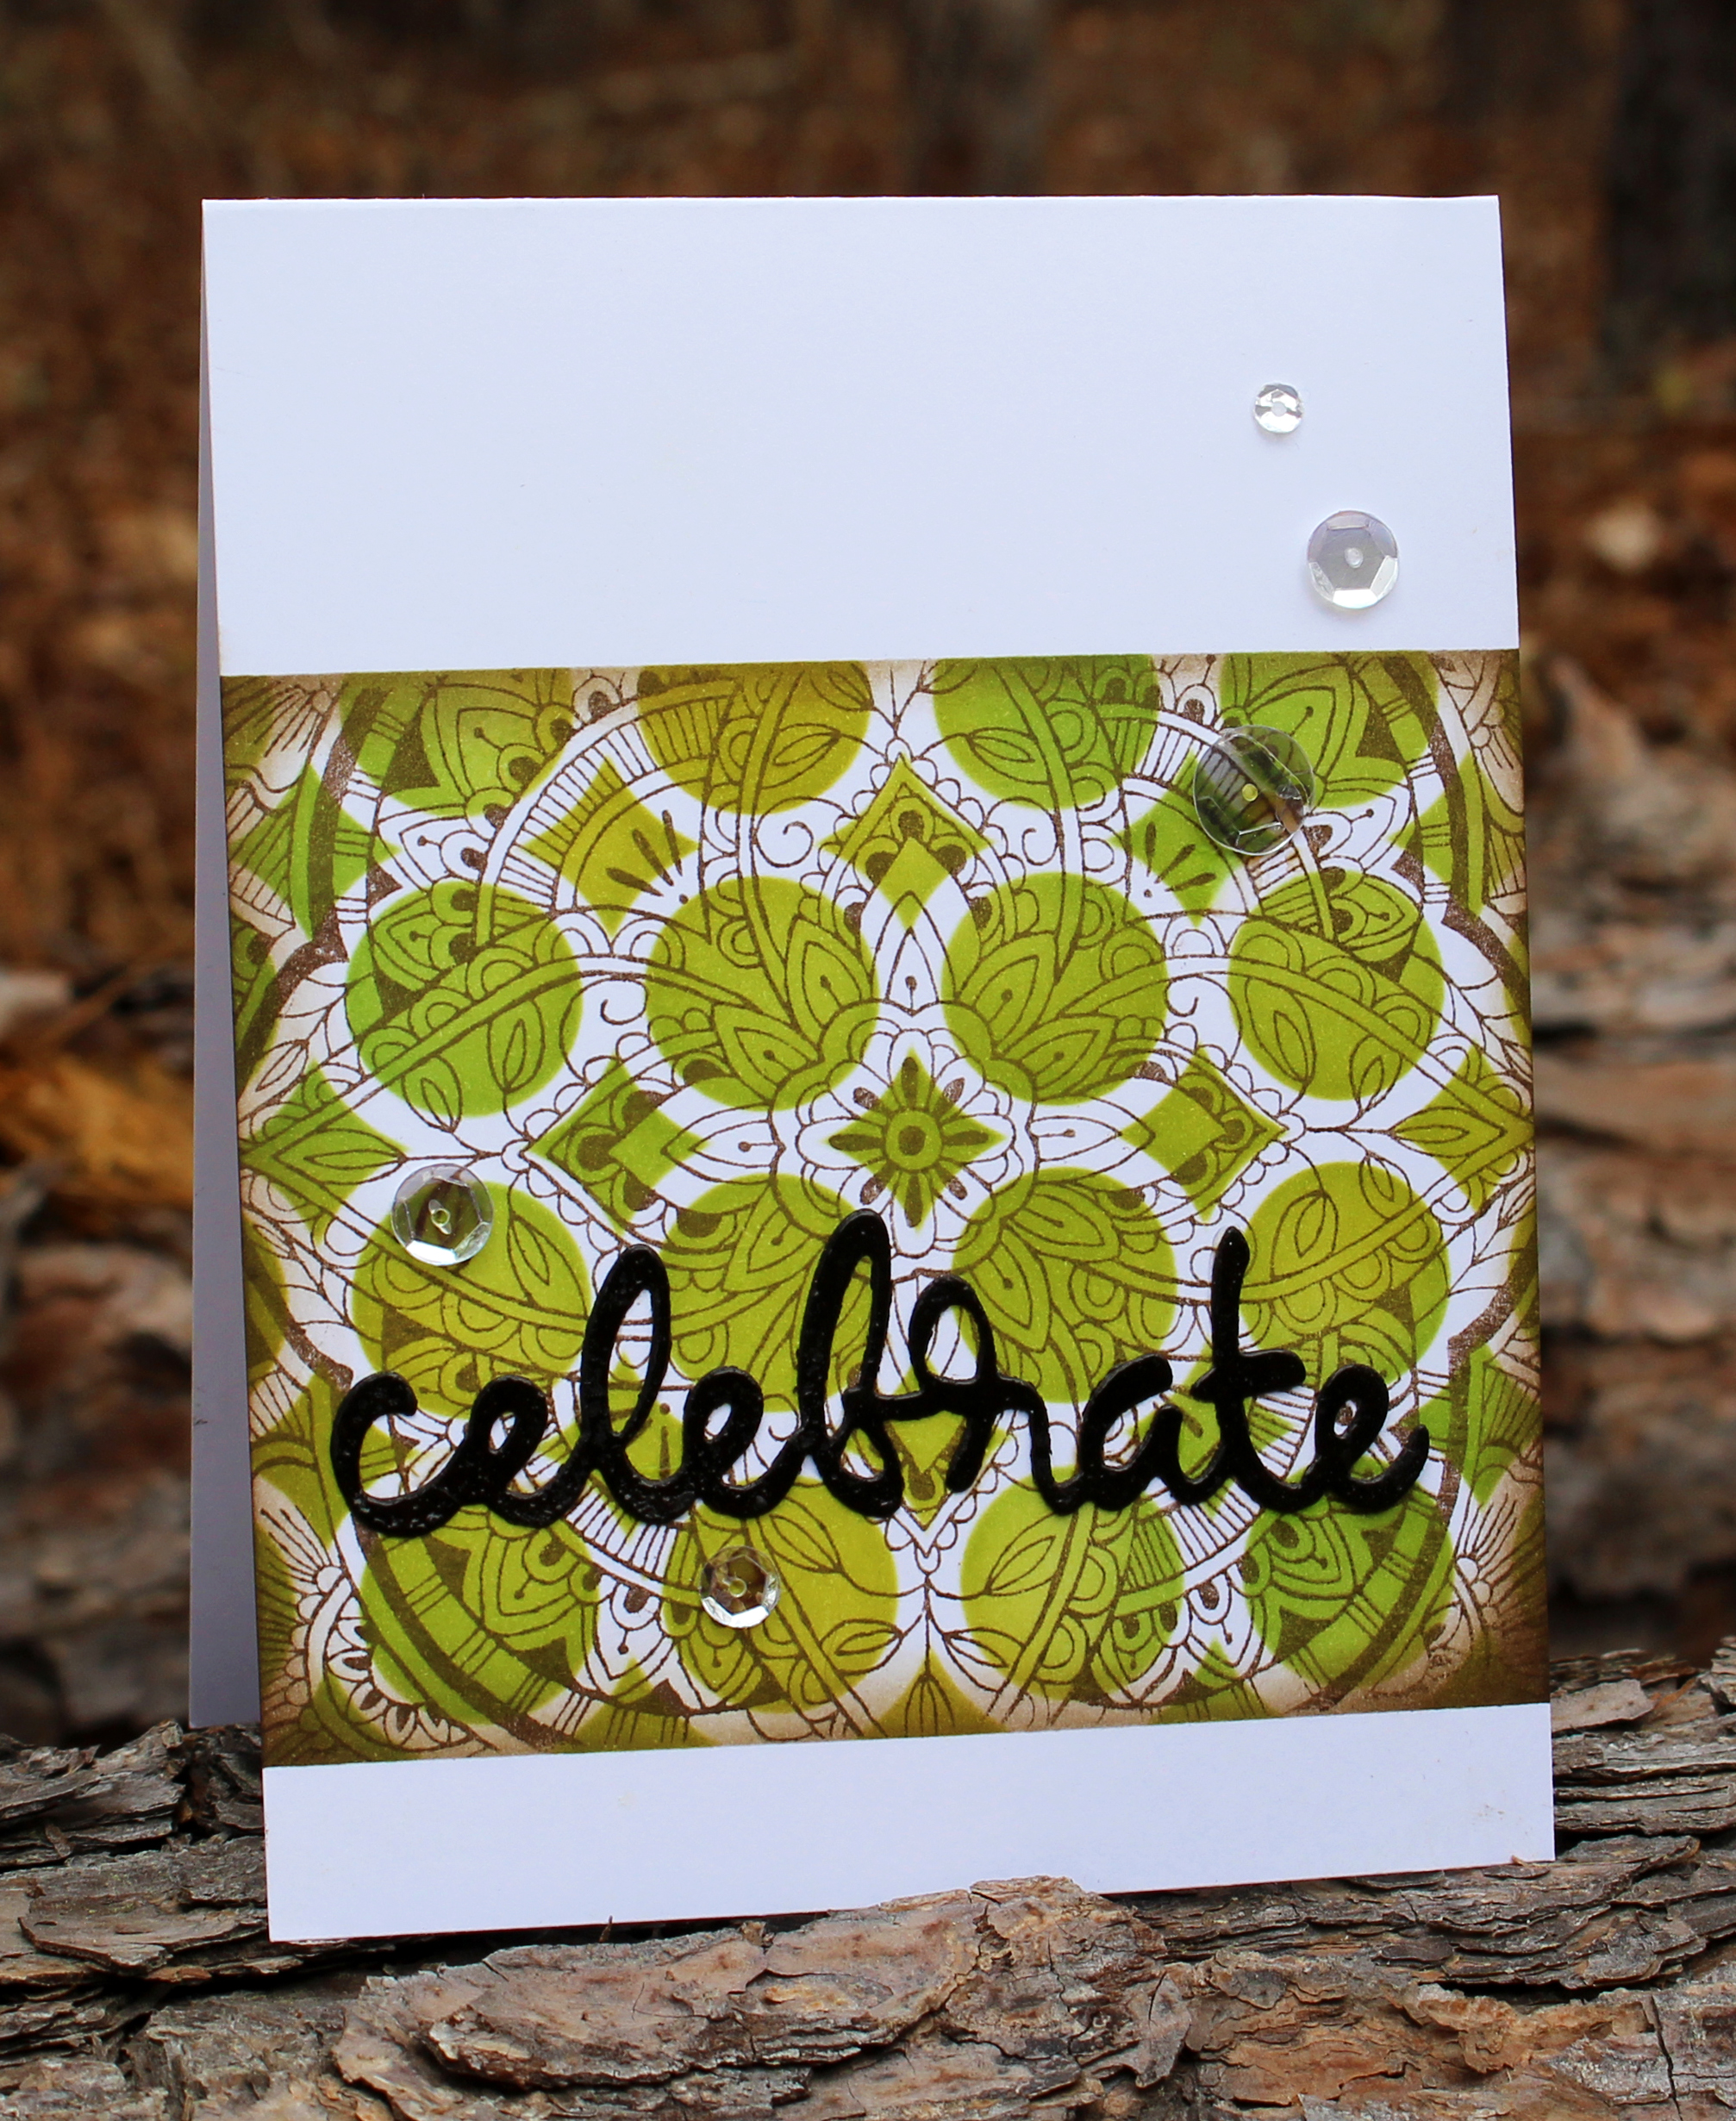
The theme for the video hop today is Celebrate, so my mind instantly went to putting on a party and getting out my fun colorful serving dishes. Michael and I love to entertain! I have several in the color Olive, and the Spice Market stamp design reminded me of fun entertaining dishes – so I just HAD to combine the two in some way for you over on my YouTube Channel. And inspiration struck.

Here are all the details and exactly how you can create this fun project:

Click here to view in HD on YouTube

I used the Pattern of Rings stencil designed by Winnie & Walter for the Friendship Stamp of Approval Collection and combined it with one of my favorite background stamps – Spice Market by Hero Arts. And you can see – it’s a totally new look!

When combining stencils & background stamps yourself, look at recurring patterns. I chose the Pattern of Rings stencil because it was circles and there were lots of circular designs in the Spice Market stamp, so I thought they’d play well together.

Combining Stencils & Background Stamps

So now it’s your turn – raid your stash of stencils and background stamps and start to create some amazing patterns!

Till next time –

[optin_box style=”31″ alignment=”center” email_field=”email” email_default=”Enter your email address” email_order=”0″ integration_type=”aweber” double_optin=”Y” list=”3846012″ name_field=”name” name_default=”Enter your first name” name_order=”0″ name_required=”Y” opm_packages=””][optin_box_field name=”headline”]Learn more with our exclusive FREE video series[/optin_box_field][optin_box_field name=”paragraph”]PHA+TG9yZW0gaXBzdW0gZG9sb3Igc2l0IGFtZXQsIGNvbnNlY3RldHVyIGFkaXBpc2NpbmcgZWxpdC4gRG9uZWMgdmVsIG51bmMgbm9uIGxhY3VzIHZlbmVuYXRpcyBjb21tb2RvLjwvcD4K[/optin_box_field][optin_box_field name=”privacy”][/optin_box_field][optin_box_field name=”top_color”]undefined[/optin_box_field][optin_box_button type=”0″ button_below=”Y”]Get Instant Access![/optin_box_button] [/optin_box]


Supplies

To make finding the supplies I used in this project a bit easier for you, here are a few clickable links. Those that have multiple shopping options are indicated with letters – EH – Ellen Hutson, SSS – Simon Says Stamp. Compensated Affiliate Links are used when possible. Click here for disclosure. Happy Shopping!

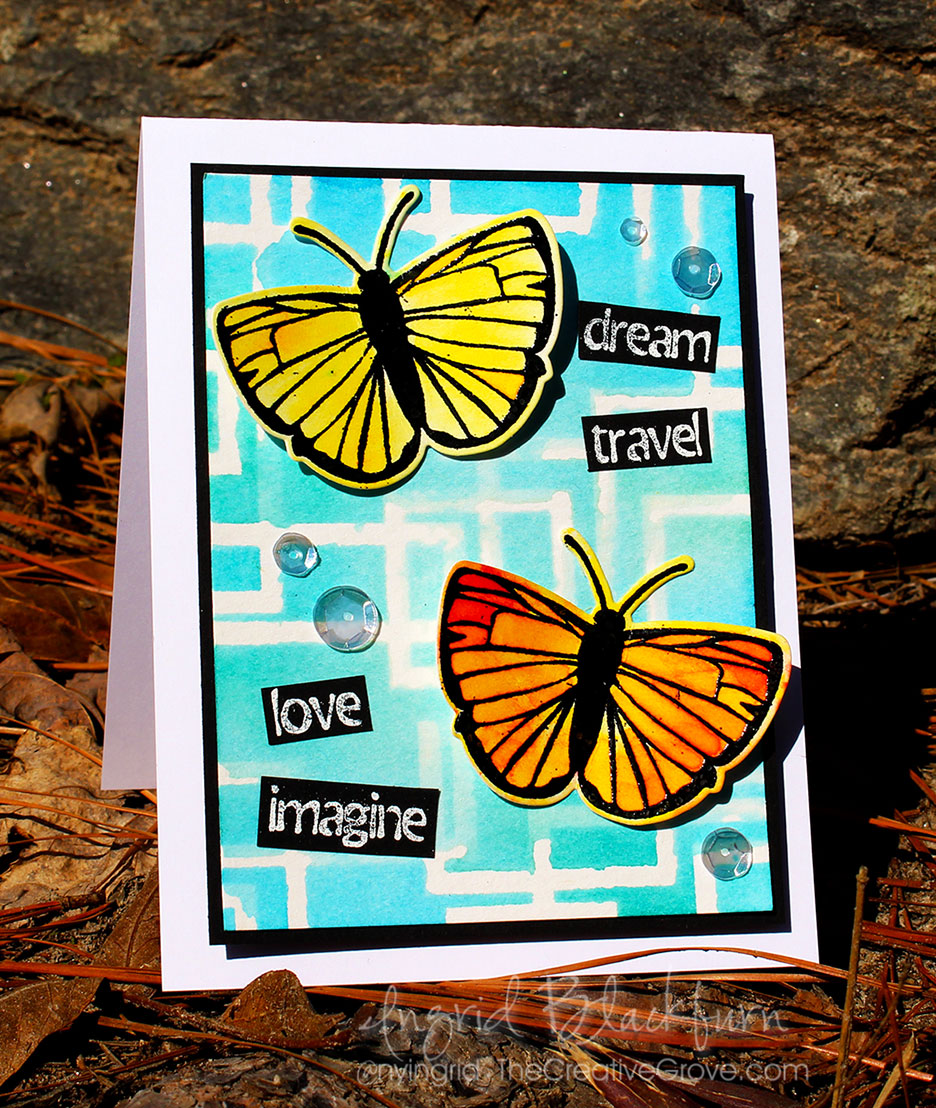
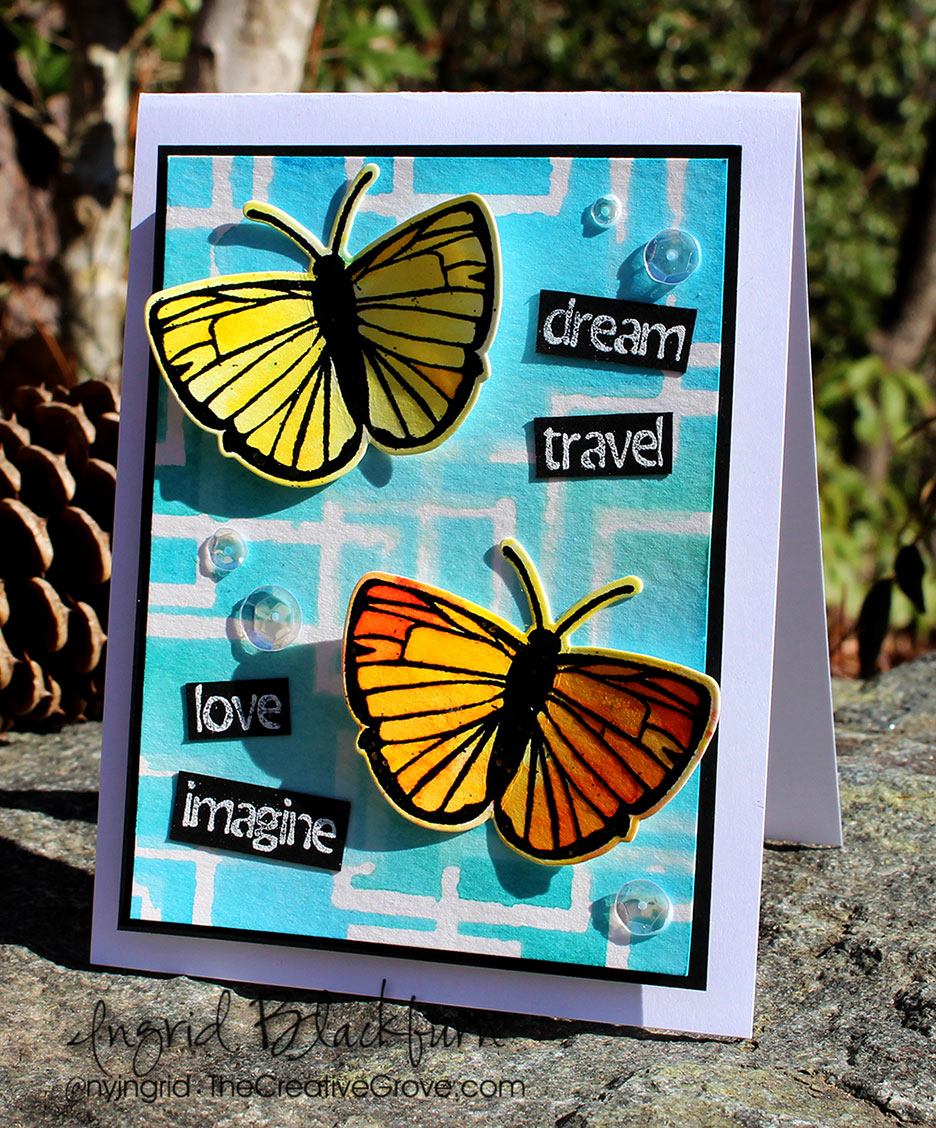
HLS Watercolor Challenge – Mixed Media Butterflies

Have you ever watercolored with stencils before? Today I’m guest designing for a new watercolor challenge over at Happy Little Stampers. I don’t know of many watercolor challenges out there, so if watercolor is one of your loves, I encourage you to check it out! The design team is pretty talented over there, and I’m loving what they are creating every month.

I thought you would love a video in addition to a written tutorial, so here you have it. The watercolor challenge is always anything goes, and if you need a little structure – there’s always a little twist. You can play along or not, up to you – this month it’s dies.

Happy Little Stampers Watercolor Challenge

Happy Little Stampers challenges are always a lot of fun, and I encourage you to enter. This month there’s a prize too, you have nothing to lose!

HLS Challenge

I have been undergoing a massive move from Germany back to the US (plus all our things out of storage up from Florida), hunting for a new home, and living in a hotel for three months – yes, it’s been interesting to say the least! So, I haven’t been able to film much the past few months…boy did it feel good to FINALLY get to film in my new stamping studio in my new home. I’m still buried under boxes and the contractor is still doing work in our home (though we’re in the home stretch….finally).

Here’s a video for you of how I created this month’s project – step by step. You’ll learn to watercolor with stencils, and create some fun vibrant die cut embellishments with Brusho Crystals – which I’m totally addicted to!

Click Here to watch the video in HD on YouTube & Subscribe to my Channel

How to Watercolor with Stencils & Brusho

So, my original thought was to create cool watercolored die cuts – enter a little embossing and Brusho for the pop in color. It’s SO easy to watercolor with Brusho and you always look like a watercolor master.

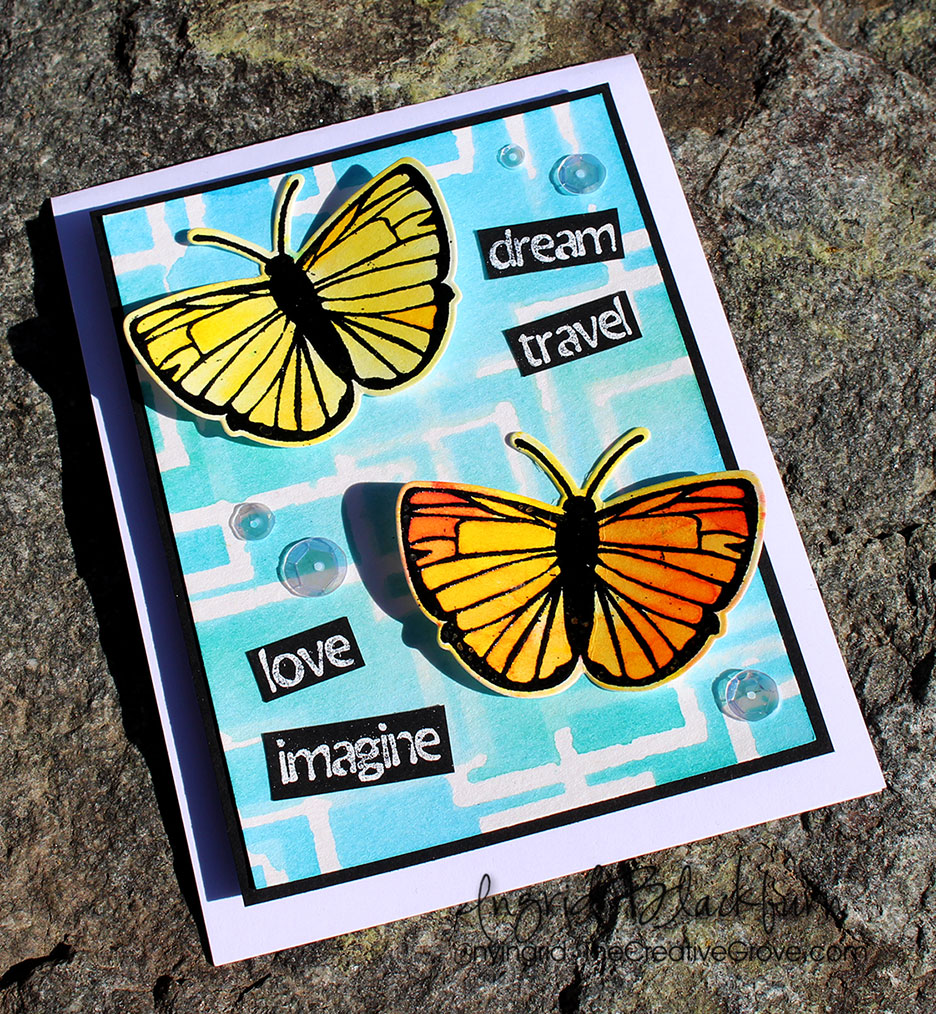
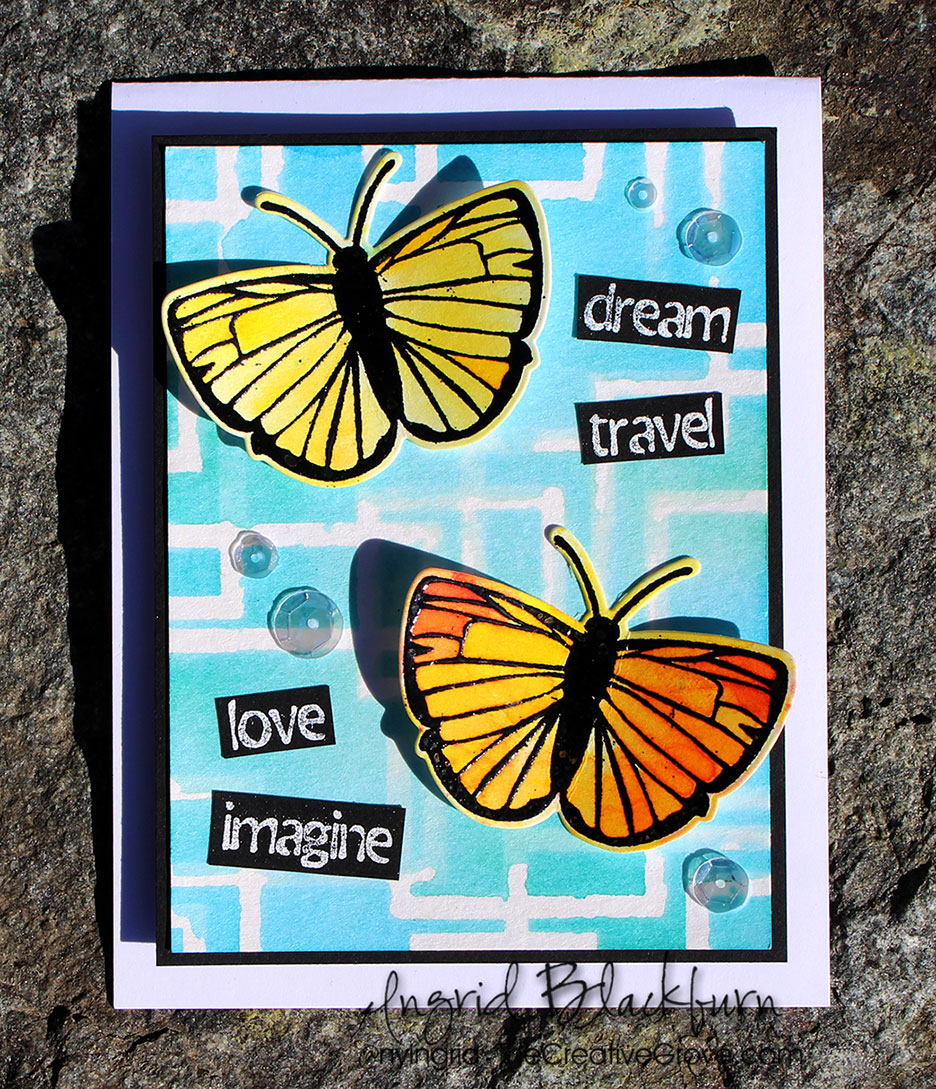
To compliment it, I thought you’d enjoy seeing how I sometimes watercolor with stencils – a not so perfect technique, but it really adds a lot to the background. My thought was to create a cool lattice for the butterflies from the Butterfly Birthday stamp set.

watercolor with stencils

And I’ve been just dying to use my new Mixed Media Fun stamp set – I just love all the components and words – it’s the perfect card for my niece.

  • First – secure your 140# Cold Pressed Watercolor paper to your work surface, and your stencil over that.
  • Apply your color, I used several shades of Distress inks and created a varied Blue background
  • I didn’t do this in the video, but next remove your tape securing your stencil down so you can lift it after the next step a bit easier.

watercolor with stencils - ingrid blackburn

  • To truly get a watercolor with stencils look, spritz with a mini mister and get the water going. Be careful of adding TOO much water. If you overdo it – water will run everywhere – especially under your stencil design.
  • Carefully lift up your stencil – straight up.
  • You can blot off any excess water with a paper towel – but be careful to lift it from your pattern – you’ll pull all the color. I use this mostly for the sides where the water is pooling. Dry immediately with a heat tool or naturally.

Watercoloring with Brusho

  • Next, on another piece of scrap watercolor paper, stamp two butterflies from Butterfly Birthday in Versafine Onyx Black ink. I love this ink to emboss with – it’s a pigment ink and is super crisp and deep in color.
  • Emboss in black and heat set.
  • Sprinkle some brusho powders over your butterflies and spritz as in the video to activate the pigments.
  • Dry with a heat tool or naturally
  • Cut out using the co-ordinating Butterfy Dies & a Die Cut Machine
  • Emboss some of the greetings from Mixed Media Fun in white on Black card stock
  • Cut them out using long handled scissors – this helps to give you a straighter edge.

Watercolor with Stencils & Brusho

  • Adhere your pieces like the card. TIP – use Mono Liquid Glue to adhere the watercolor to the black, bend straight or place something heavy on to help straighten your card stock. You may also want to pop up the main watercolor panel onto fun foam for a little drama.
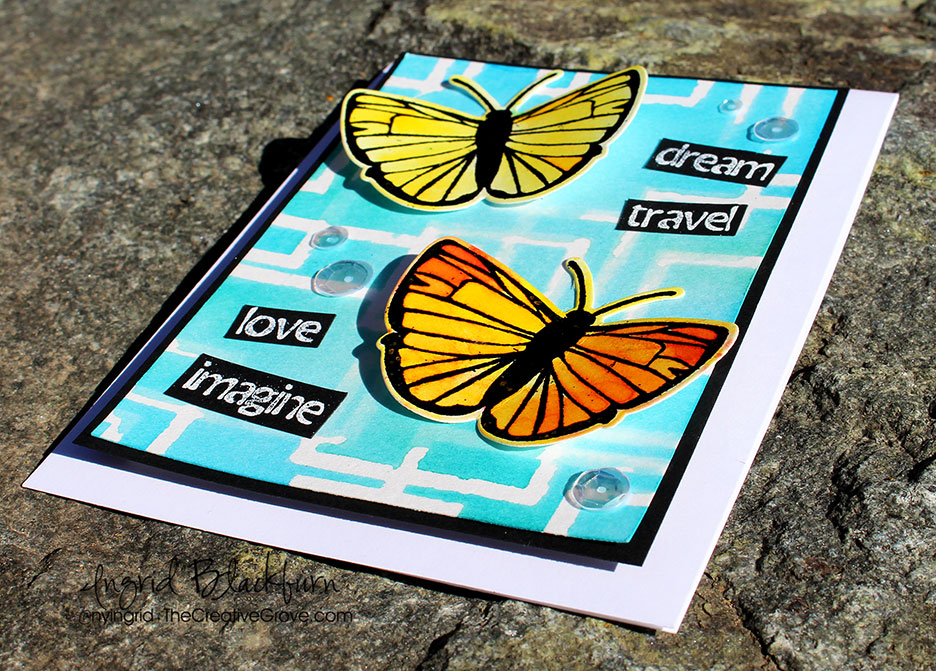
  • Bend up the sides of your butterflies and pop the sides up with some dimensional foam. I have the tops of the wings higher than the bottom (doubled the foam) and adhered with some glue in the center. This gives the illusion of flight.
  • Add some sparkling clear sequins from Pretty Pink Posh with Rangers Multi Matte Medium (dries clear).

Watercoloring with Stencils

Ultimately, my watercolor got a little into the pattern, but I don’t let stuff like that get me down anymore. You can cover a lot of it up with the die cuts and words, and it gives it a more organic feel anyway. It’s art, don’t stress over it, have fun!

Let me know what you think in the comment section below. I hope now, you’ll try to watercolor with stencils yourself, and that you enjoyed this tutorial!

Now head on over to the Happy Little Stampers Watercolor Challenge to see what the Design Team whipped up for you. I can’t wait to see what you create – I’ll visit your blog and definitely check it out! 🙂

HLS Watercolor Challenge

And if you liked this tutorial, subscribe to my YouTube channel and newsletter list for more exclusive tutorials. See you very soon!

[optin_box style=”28″ alignment=”center” disable_name=”Y” email_field=”email” email_default=”Enter your email address” email_order=”1″ integration_type=”aweber” double_optin=”Y” list=”3846012″ name_field=”name” name_default=”Enter your first name” name_order=”0″ name_required=”N” extra_field_1_name=”Name” extra_field_1_order=”0″ extra_field_1_required=”Y” extra_field_1_hidden=”N” extra_field_1_title=”Enter Your Name” opm_packages=””][optin_box_field name=”headline”]Learn more with exclusive video tutorials…[/optin_box_field][optin_box_field name=”paragraph”]PHA+UGx1cyB5b3UnbGwgYmUgYWRkZWQgdG8gbXk8c3Ryb25nPiBGUkVFPC9zdHJvbmc+IENyZWF0aXZlIFRpcHMgRS1sZXR0ZXIgd2hlcmUgSSBzaGFyZSBleGNsdXNpdmUgcHJvamVjdHMsIHZpZGVvcyAmYW1wOyB0aGUgMTIgRGF5cyBvZiBDaHJpc3RtYXM8L3A+Cg==[/optin_box_field][optin_box_field name=”privacy”][/optin_box_field][optin_box_field name=”top_color”]undefined[/optin_box_field][optin_box_button type=”1″ text=”Click For Immediate Access” text_size=”24″ text_color=”#ffffff” text_font=”Lato;google” text_bold=”Y” text_letter_spacing=”-1″ text_shadow_panel=”Y” text_shadow_vertical=”1″ text_shadow_horizontal=”0″ text_shadow_color=”#000000″ text_shadow_blur=”0″ styling_width=”75″ styling_height=”20″ styling_border_color=”#666666″ styling_border_size=”1″ styling_border_radius=”8″ styling_border_opacity=”99″ styling_gradient_start_color=”#86c833″ styling_gradient_end_color=”#3f8e30″ drop_shadow_panel=”Y” drop_shadow_vertical=”1″ drop_shadow_horizontal=”0″ drop_shadow_blur=”0″ drop_shadow_spread=”0″ drop_shadow_color=”#000000″ drop_shadow_opacity=”50″ inset_shadow_panel=”Y” inset_shadow_vertical=”1″ inset_shadow_horizontal=”0″ inset_shadow_blur=”0″ inset_shadow_spread=”0″ inset_shadow_color=”#c2ee80″ inset_shadow_opacity=”100″ location=”optin_box_style_28″ button_below=”Y”]Click For Immediate Access[/optin_box_button] [/optin_box]


[op_advanced_headline style=”1″ effect=”type” align=”left” accent=”#244C5E” headline_tag=”h2″ line_height=”” highlight=”” top_margin=”0″ bottom_margin=”0″]U3VwcGxpZXM=[/op_advanced_headline]

To make finding the supplies I used in this project a bit easier for you, here are a few clickable links. Those that have multiple shopping options are indicated with letters – EH – Ellen Hutson, SSS – Simon Says Stamp. Compensated Affiliate Links are used when possible. Click here for disclosure. Happy Shopping!


CAS Watercolor Spritz

Have you tried Watercolor Spritzing much on cards before? I”ll be honest – I use my mini mister like it goes out of style, but mostly with water! This month over at Happy Little Stampers, the Clean and Simple challenge is Watercolor Spritzing. So here goes –
Sept 2016 CAS Badge

Adding Watercolor Spritzing to your Projects:

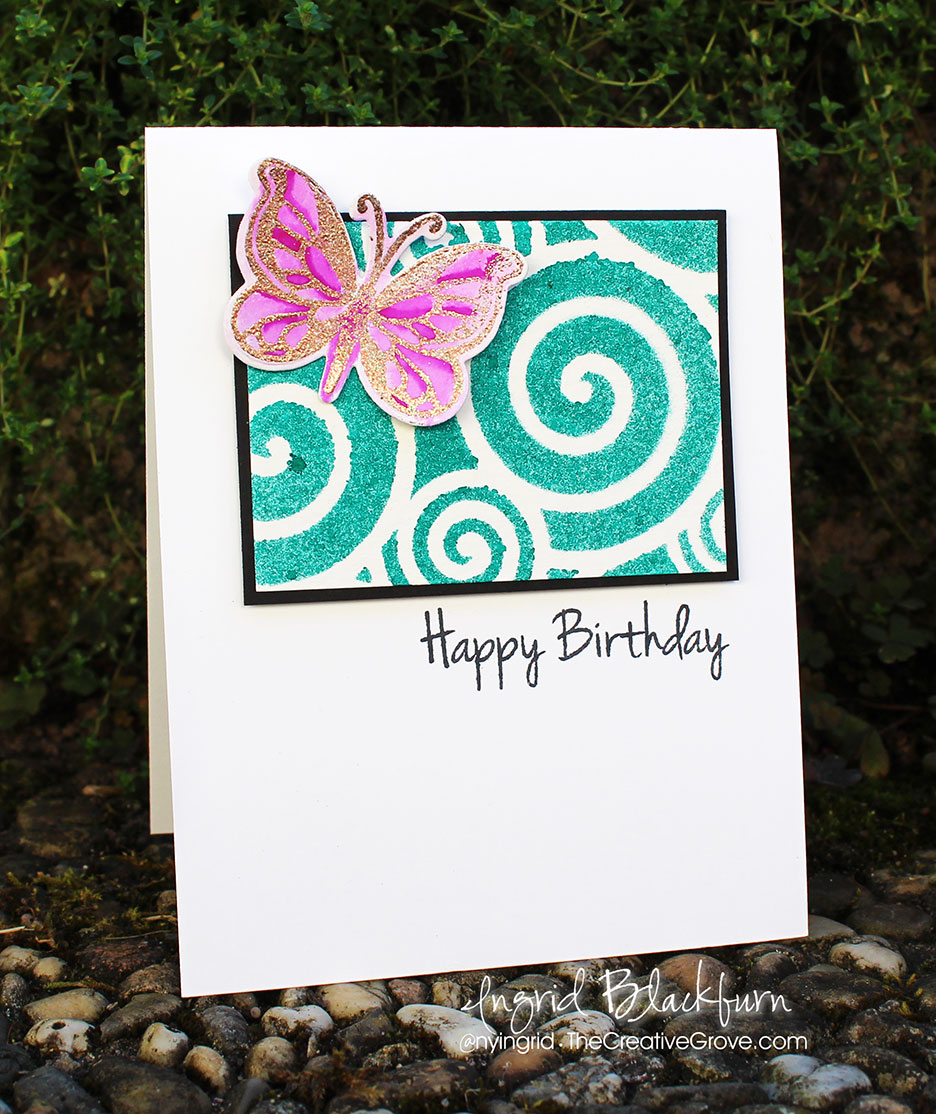
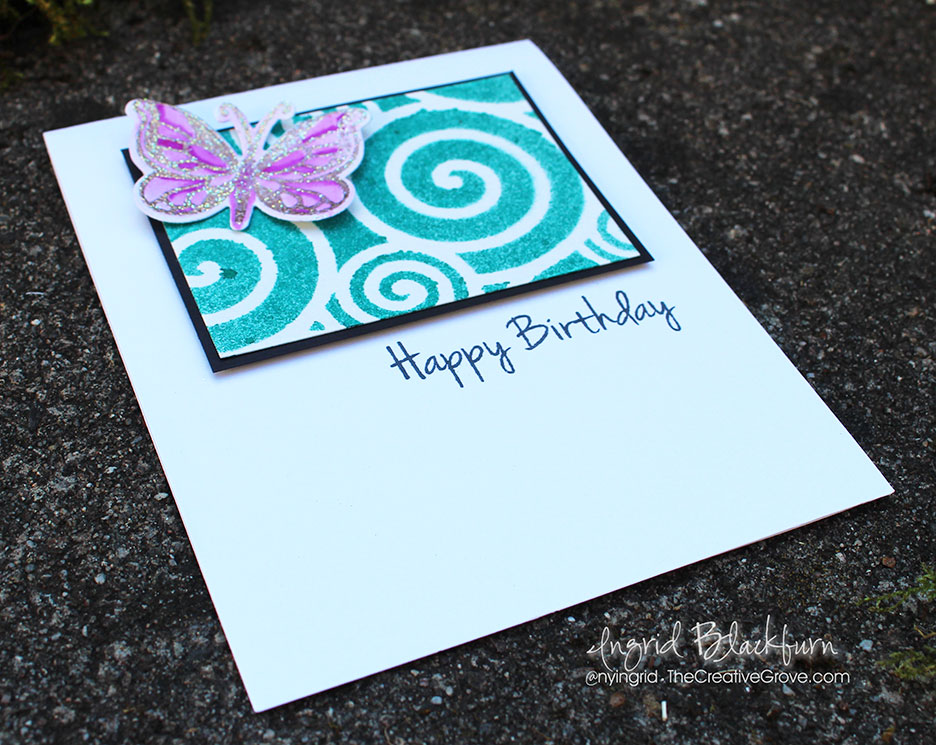
For this project, I kept it super simple and clean. Take any stencil you like – I used the Swirly Stencil by Create a Smile. Lay it over some watercolor paper – I used 140# Cold Pressed by Strathmore, an spritz! That’s it!!
Watercolor Spritzing

For my watercolor spritzing look, I used Vibrant Turquoise Dylusions Spray by Ranger. The bright and deep colors in that line are incredible. One thing I don’t like though is that my fingers get quite stained with these products – no matter how careful I am…lol!

TIP – Don’t over spritz it – you want just enough to get a good pattern. If you add too much, then it will seep under your stencil and color the pattern. A little looks good, but too much defeats the purpose. Fully dry it before moving on.

Spritzing Techniques

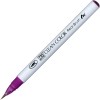
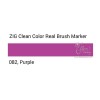
For a little contrast to the cool vibrant turquoise background, die cut and emboss one of the Happy Little Stampers butterflies in Iridium WOW embossing glitter and watercolor with the Purple Zig Clean Color Real Brush Pen by Kuratake. Blend it out with a water brush. I just LOVE the vibrant colors in that line.

They’re both popped up, add a quick sentiment and you’re good to go. Quick, easy and definitely mass producible!

Now it’s your turn – I can’t wait to see what you create for the CAS Watercolor Spritzing Challenge!

Go get those fingers inky – mine are….

Signature

[optin_box style=”12″ alignment=”center” email_field=”email” email_default=”Enter your email address” integration_type=”aweber” double_optin=”Y” list=”3846012″ name_field=”name” name_default=”Enter your first name” name_required=”Y” opm_packages=””][optin_box_field name=”headline”]Learn more with our exclusive FREE video series:[/optin_box_field][optin_box_field name=”paragraph”]PHA+UGx1cyB5b3UnbGwgYmUgYWRkZWQgdG8gbXk8c3Ryb25nPiBGUkVFPC9zdHJvbmc+IENyZWF0aXZlIFRpcHMgRS1sZXR0ZXIgd2hlcmUgSSBzaGFyZSBleGNsdXNpdmUgcHJvamVjdHMsIHZpZGVvcyAmYW1wOyB0aGUgMTIgRGF5cyBvZiBDaHJpc3RtYXM8L3A+Cg==[/optin_box_field][optin_box_field name=”privacy”][/optin_box_field][optin_box_field name=”top_color”]undefined[/optin_box_field][optin_box_button type=”0″ button_below=”Y”]Get Instant Access![/optin_box_button] [/optin_box]

Supplies

I get asked a lot where I get some of my supplies. To make it easier for you, I’ve listed all the supplies below. I myself shop at various places and know you probably have your favorite online stores too! So I included choices where I could or if there is just one – it’s the best price I’ve found. 🙂

The letters below each image are links to stores where you can buy each of the products listed. EH – Ellen Hutson, SSS = Simon Says Stamp, AZ = Amazon, etc. I buy almost all my own supplies. To help support my blog, videos & allow me to keep creating for you, I use compensated affiliate links when possible.


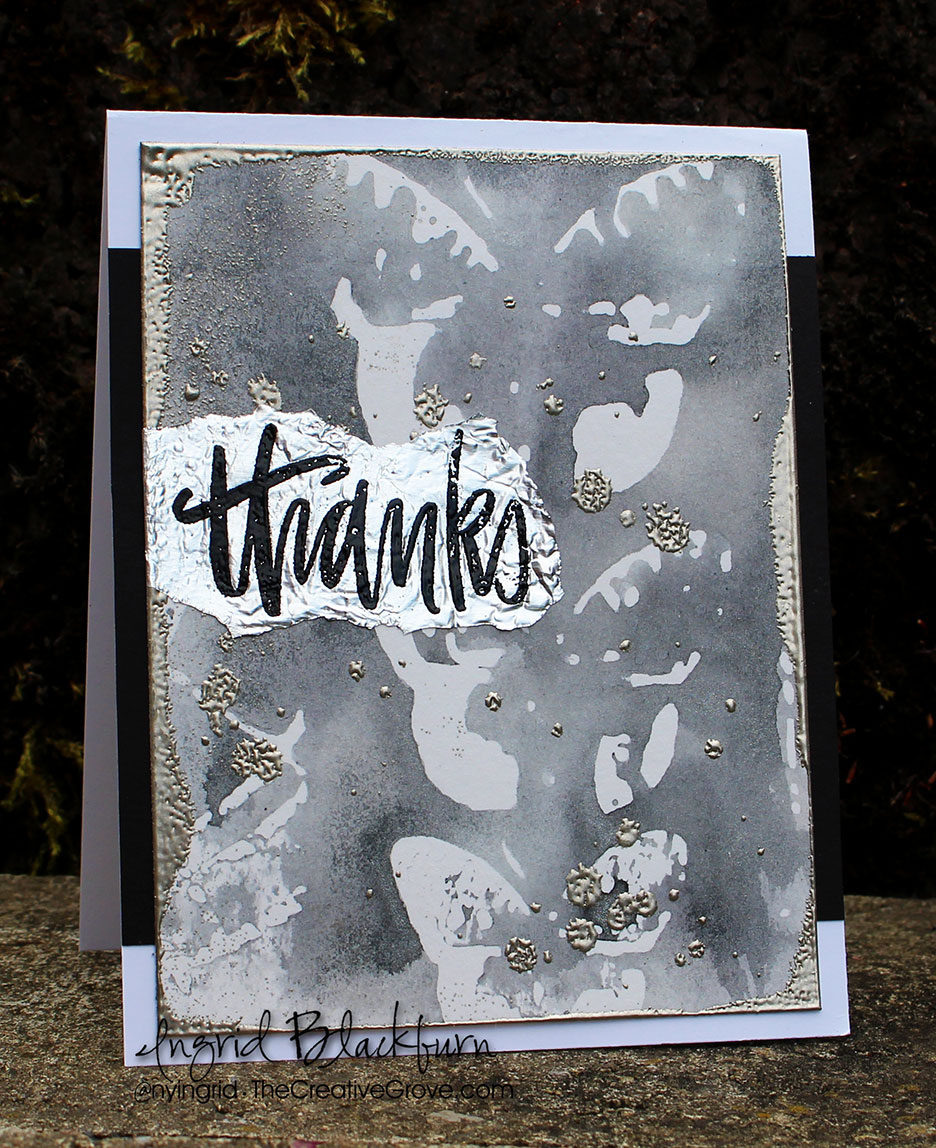
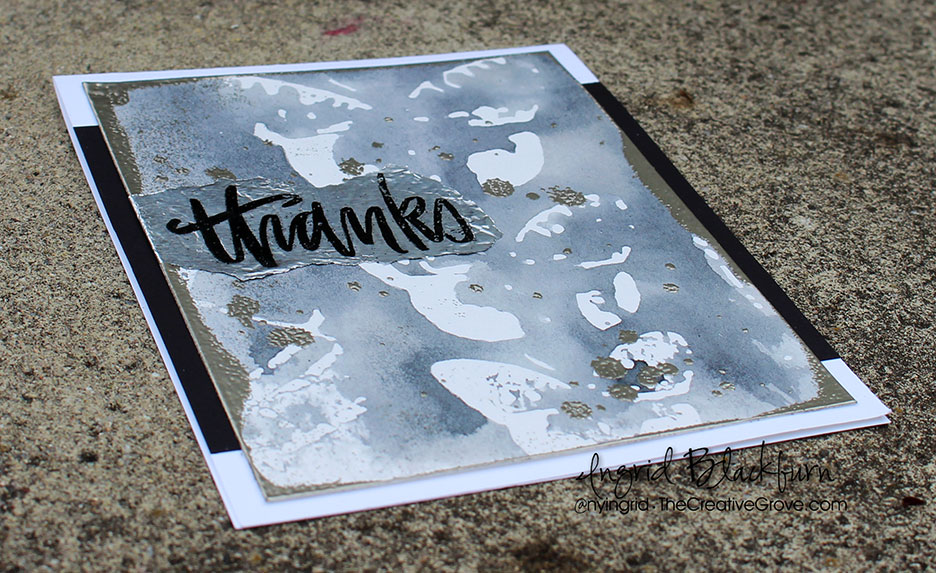
Adding a Simple Metal Look to Your Cards

Mixed-Media-Metal---Ingrid-Blackburn-001

I love adding metal to cards. It’s an unexpected look and it’s always fun playing with textures that I don’t use in my day to day crafting. Metal is something that’s quite easy to add.

It’s time for yet another Mixed Media challenge over at Happy Little Stampers….first up – I have something totally easy that you can immediately implement in your crafting – tin foil and metallic embossing powders – and be sure to read on – I didn’t add them the traditional way!

HLS Mixed Media challenge August 2016

When you think of metal, you may go to the chunky pieces that you can add, but I wanted to keep my mixed media piece a little flatter. So to get a natural look, I used two everyday items we all have in our homes – aluminum foil and water.

Simple ways to add Metal to your Projects:

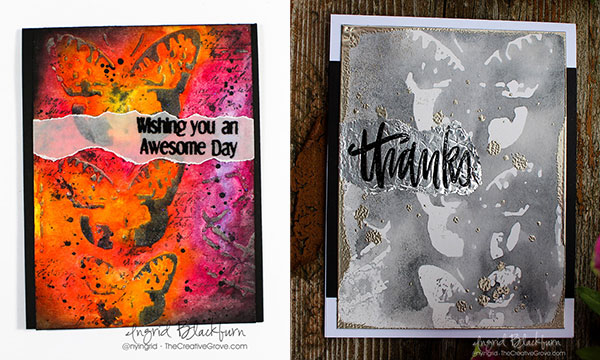
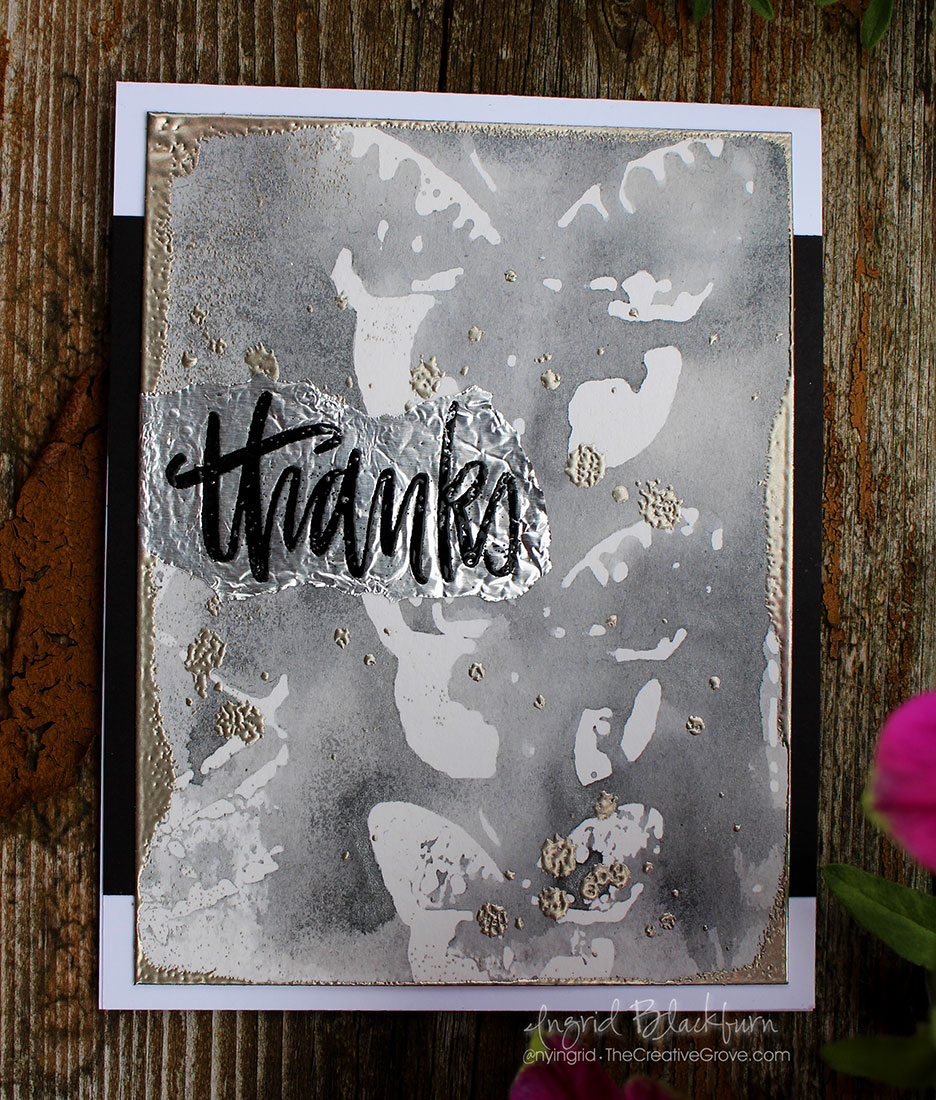
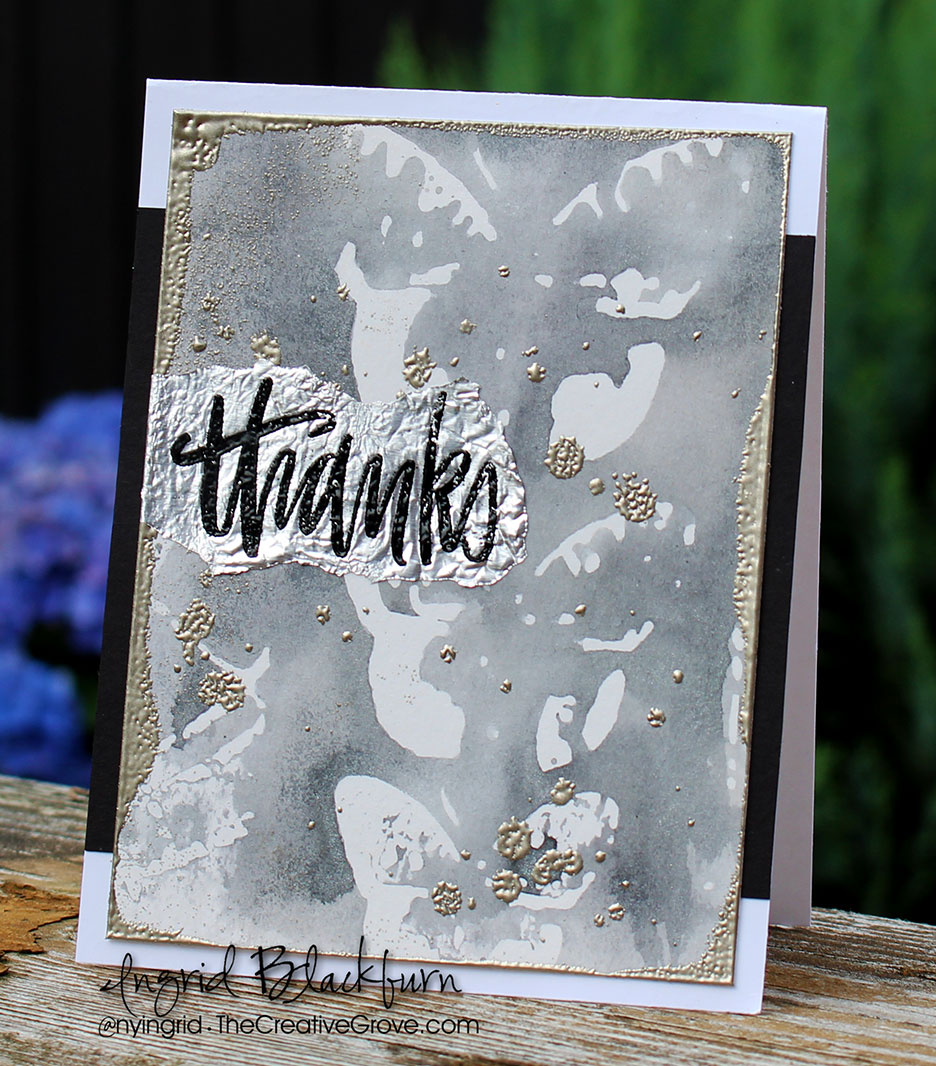
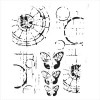
To get a nicely watercolored look in the project on the right, you’ll want to use a stencil with a solid negative space (the space that doesn’t get used). I chose the Mini Specimens stencil by The Crafters Workshop – I LOVE their stencils.

First, stencil through your positive image onto a project. The excess ink will collect on the negative space of the stencil. The watercolored look in our project today comes from the ink that was left over from the project on the left. I added Hickory Smoke and then some Soot Black on top of some embossing paste in this watercolor mixed media piece – there’s a video for that project (link below):

Mixed-Media-Metal---Ingrid-Blackburn-010

Click Here for the Left Project’s Tutorial & Video

Once you’re done adding color to your positive image (the colorful one on the left), grab a second piece of watercolor paper, spritz your stencil with all the left over ink on it with a mini mister and press into your paper. You’ll then get a watercolored negative space look for your card stock. You basically turned your stencil into a stamp!

Since we’re using the negative of the image – note that when you stamp it – it’s reversed from the positive one (colorful left project above)!

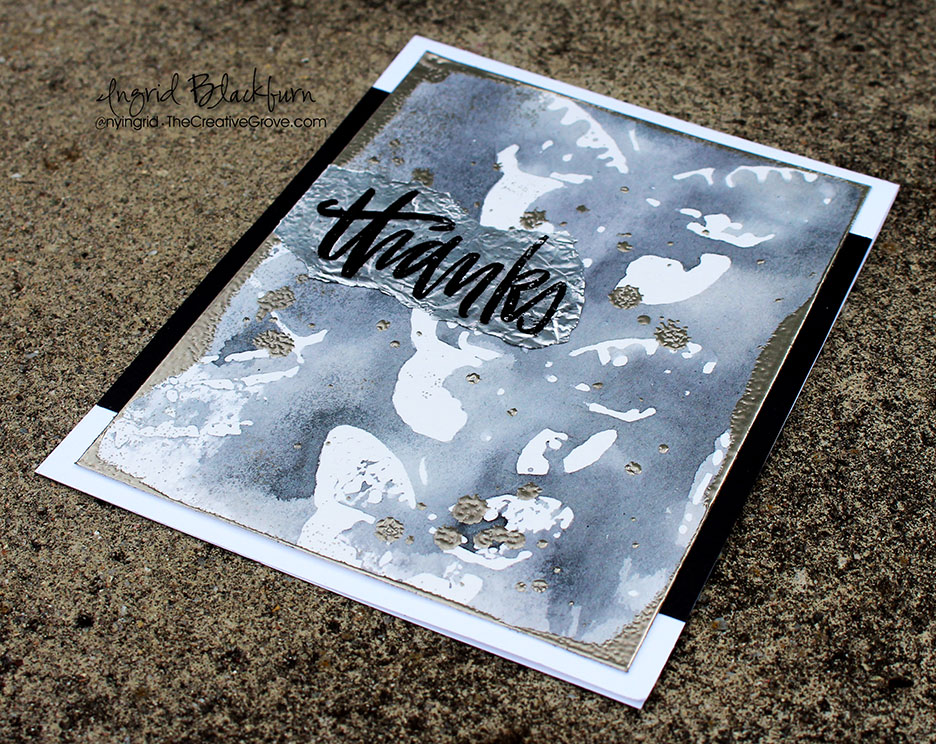
It’s a little hard to see in the photos, but this project has a sparkly sheen to it. To get that look, use pearlized water by adding a little Perfect Pearl (Perfect Pearl shade by Ranger) into my water filled mini mister rather than regular water.

Mixed-Media-Metal---Ingrid-Blackburn-004

Now that we have our mixed media base – stenciling & watercolor, next up is adding some metallic accents. The coolest part is that for the splotches you don’t even use ink – what? Yup….spritz a little water into to palm of your hand and flick it at your project. Keep this a little at a time so you don’t add huge splotches.

Mixed-Media-Metal---Ingrid-Blackburn-002

Add embossing powder – I used Pewter Powder and emboss. Pretty cool, huh? That’s how you get that realistic splotch look.

TIP – when you heat your powder, since there’s no ink to really grab onto it – first heat from underneath. That way your powder will start the melting process, finish from above, but keep your heat tool a little further away so you don’t blow all the powder away.

Mixed-Media-Metal---Ingrid-Blackburn-003

To get that great look to the sides – use water or versamark in a direct to paper manner. Once you have the look you’re going for, grab some heavy duty tin foil. stamp a sentiment in versamark, and emboss in Black. I used a new stamp set Hand painted Thanks by Neat & Tangled.

The black is a nice contrast to the shiny Tin Foil. Tear around it  leaving a longer strip to one side to overlap when you attach. Use glue to attach it to your watercolor paper. If you wrinkle it a bit more than you want – just flatten it out with your finger – or leave them in – it’s texture!

Mixed-Media-Metal---Ingrid-Blackburn-005

I love the shiny mixed with the Pewter – it’s a new/old look. That’s it! Adding a simple metal look to your cards is really that easy! I’m curious…have you ever embossed with water?

So now it’s your turn to add a metal look to your mixed media projects! I can’t wait to see what you come up with, head on over the Mixed Media Challenge and check out everyone’s creations.

Till next time –

Signature

[optin_box style=”12″ alignment=”center” email_field=”email” email_default=”Enter your email address” integration_type=”aweber” double_optin=”Y” list=”3846012″ name_field=”name” name_default=”Enter your first name” name_required=”Y” opm_packages=””][optin_box_field name=”headline”]Learn more with our exclusive FREE video series:[/optin_box_field][optin_box_field name=”paragraph”]PHA+UGx1cyB5b3XigJlsbCBiZSBhZGRlZCB0byBteSBGUkVFIENyZWF0aXZlIFRpcHMgRS1sZXR0ZXIgd2hlcmUgSSBzaGFyZSBleGNsdXNpdmUgcHJvamVjdHMsIHZpZGVvcyAmYW1wOyB0aGUgMTIgRGF5cyBvZiBDaHJpc3RtYXMgUHJvamVjdCBTZXJpZXM8L3A+Cg==[/optin_box_field][optin_box_field name=”privacy”][/optin_box_field][optin_box_field name=”top_color”]undefined[/optin_box_field][optin_box_button type=”0″ button_below=”Y”]Get Instant Access![/optin_box_button] [/optin_box]


How to Get Inks to Shine

Mixed-Media-Stained-Glass-Window-001

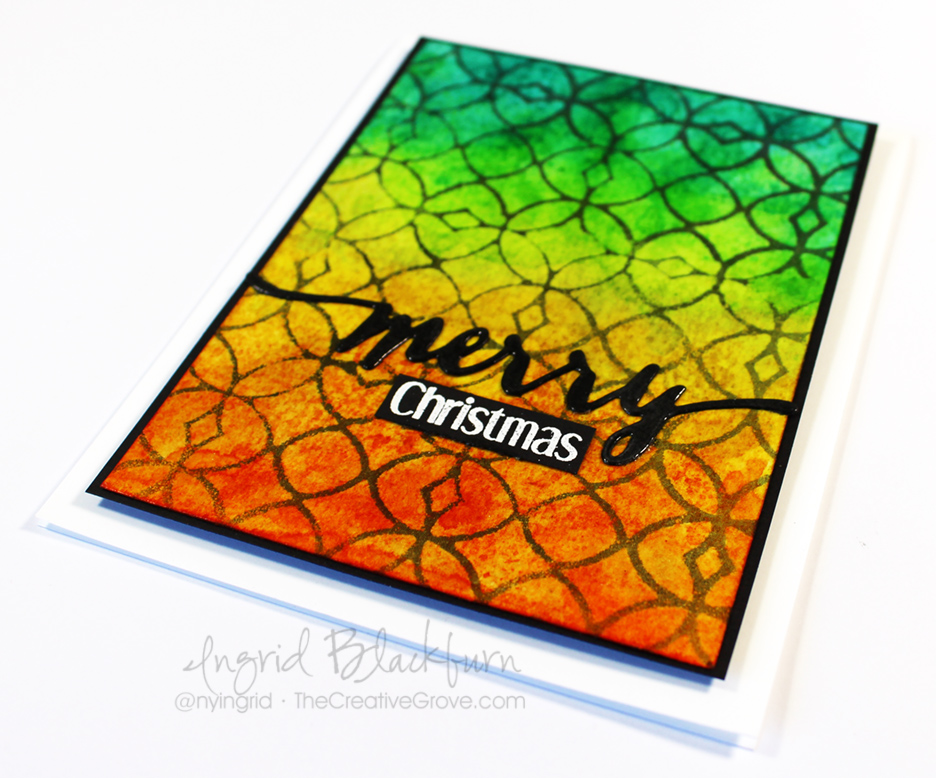
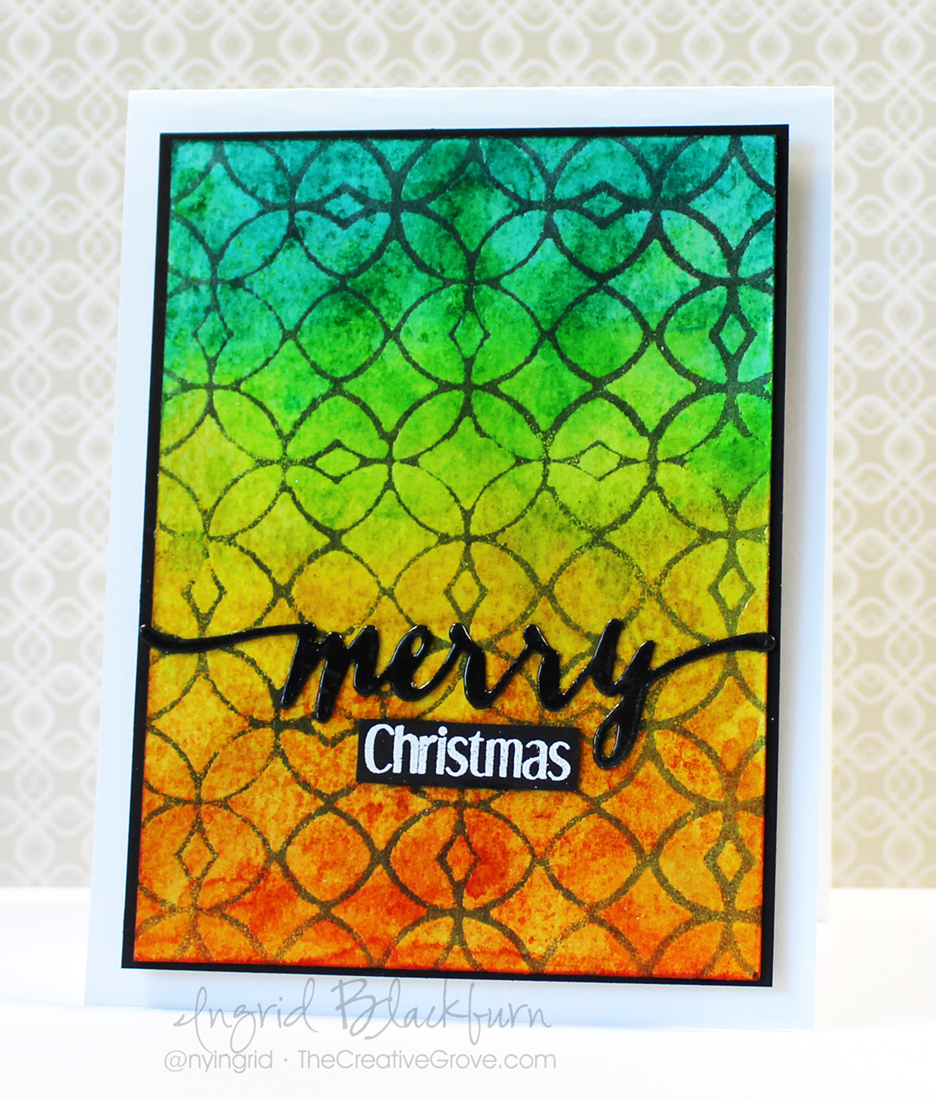
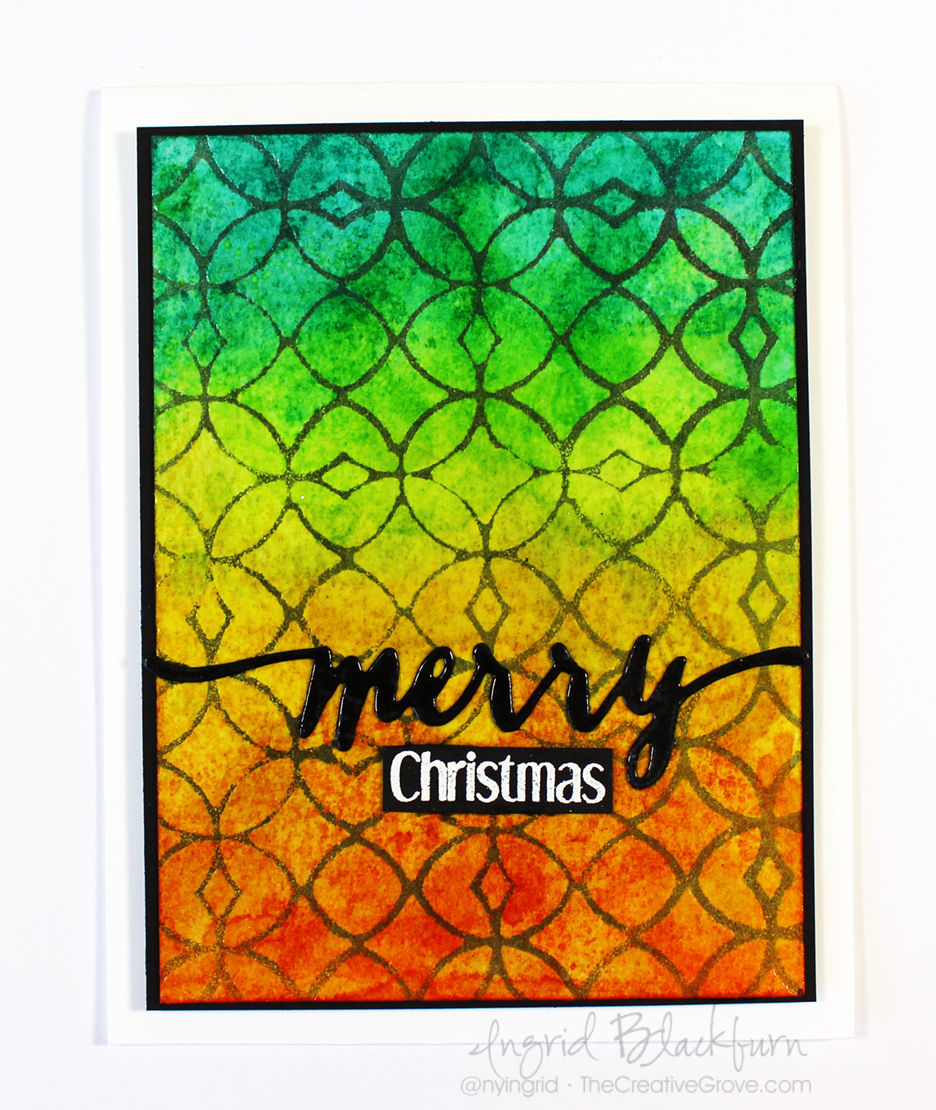
All you really wanted from your card was a little shine, right? Have you ever created a stunning background, but hours later your ink colors are flat and faded? Well, this technique is for you then! I’m playing along with the new Mixed Media Challenge over at Happy Little Stampers – Shine.

HLS Mixed Media challenge May 2016

I LOVE to create backgrounds – have you noticed? All to often in card making, we create these amazing colorful backgrounds on cards and then the colors settle as the project fully dries and we’re left with something that is a bit flat and has no vibrant nature left. At least I do! I’m always thinking where did the shine go? Okay, not all of it is shiny, but you know what I mean.

I have a video and step by step tutorial for you, so grab a drink, learn how to create amazing depth first, then a stain glass window that captures the true nature of those amazing colors by trapping the shine element of your card. Here’s the video:

Watch in HD on YouTube

So what did you think? Not that difficut really. What did you think about stretching your stencil for better coverage? Have you ever done that? Here’s the step by step tutorial, and if you really loved this, be sure to sign up for the Creative Tips E Letter for an exclusive video series and more…

[optin_box style=”12″ alignment=”center” email_field=”email” email_default=”Enter your email address” email_order=”2″ integration_type=”aweber” double_optin=”Y” list=”3846012″ name_field=”name” name_default=”Enter your first name” name_order=”1″ name_required=”Y” opm_packages=””][optin_box_field name=”headline”]Learn more with our exclusive FREE video series:[/optin_box_field][optin_box_field name=”paragraph”]PHA+UGx1cyB5b3XigJlsbCBiZSBhZGRlZCB0byBteSBGUkVFIENyZWF0aXZlIFRpcHMgRS1sZXR0ZXIgd2hlcmUgSSBzaGFyZSBleGNsdXNpdmUgcHJvamVjdHMsIHZpZGVvcyAmYW1wOyB0aGUgMTIgRGF5cyBvZiBDaHJpc3RtYXMgUHJvamVjdCBTZXJpZXM8L3A+Cg==[/optin_box_field][optin_box_field name=”privacy”][/optin_box_field][optin_box_field name=”top_color”]undefined[/optin_box_field][optin_box_button type=”0″ button_below=”Y”]Get Instant Access![/optin_box_button] [/optin_box]

Creative Tips on Shine, Texture and Stretching your Stencils

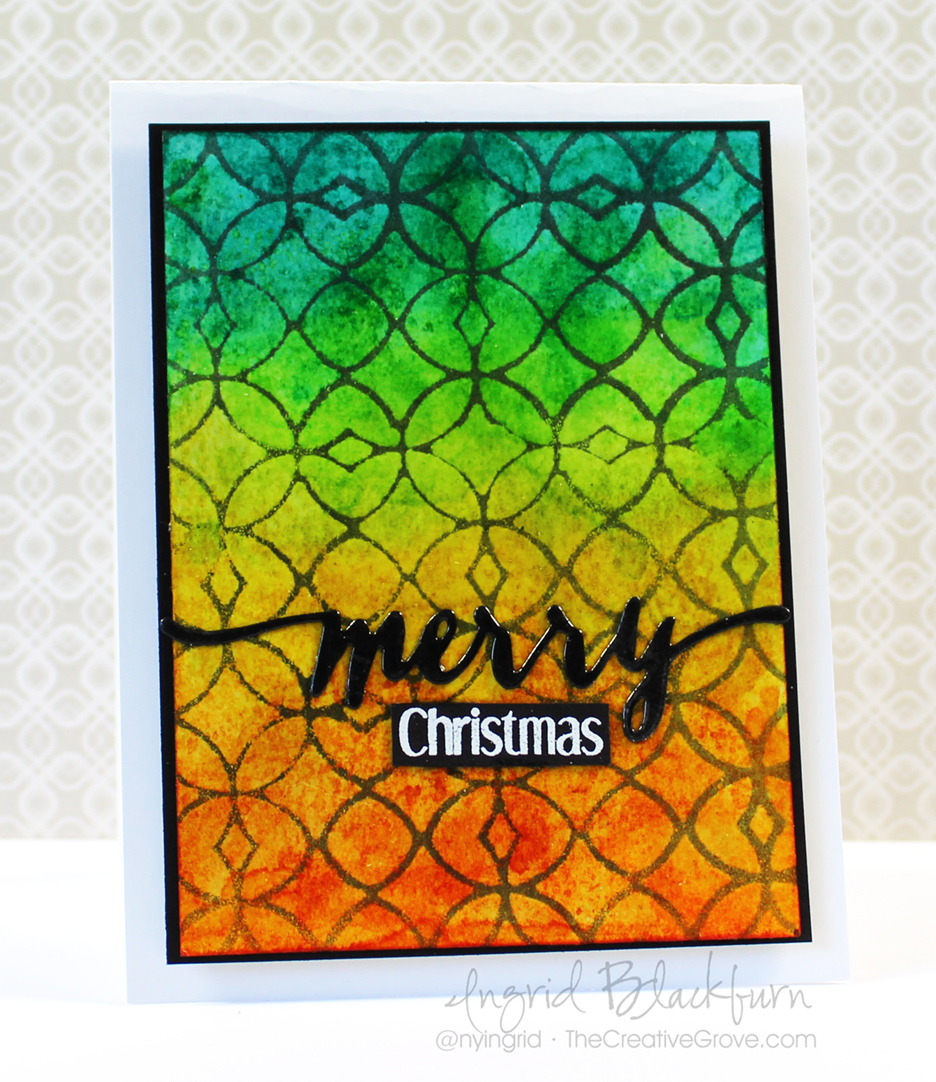
  • Create an in depth textured piece by using the wrinkle free distress technique on a piece of 140# cold pressed watercolor paper and dye based inks. (shown in detail in the video) Tip – For the most vibrant results, try Ranger’s Distress Inks.

Mixed-Media-Stained-Glass-Window-003


  • This project uses Distress Mustard Seed, Spiced Marmalade, Twisted Citron and Peacock Feathers
  • Once your project is totally dry, lightly buff over it with a de-static tool to remove any oils.
  • Smoosh Versamark through the Latticeworks stencil by Tim Holtz or your favorite one for a detailed design as in the video. Since this stencil didn’t cover my watercolor paper, I had to do this in two parts and overlap my design for a seamless flow.

Vibrant Mixed Media Cards

  • Emboss in Clear Embossing Powder – I used Brutus Monroe – and if you’ve never tried it – do so…it rocks!
  • Once your embossed stencil has fully dried, sponge over with Soot Black distress ink.
  • Wipe off your stenciled design with light pressure and a slightly damp cloth or paper towel to pick up the resisted ink.
  • Emboss your die cut greeting in clear for a shiny look. I used Handlettered Holiday by WPlus9. Adhere with Ranger Multi Medium Matte.

using distress inks in mixed media

  • Stamp and emboss the Christmas greeting from HLS Everyday Sentiments in white on black card stock – trim and adhere.
  • Adhere your watercolor paper with glue to a black matte with a 1/16″ border.
  • Pop up Mixed Media Panel with Fun Foam and adhere to a White card base with a 1/4″ border all around.

That’s it! Simple and striking Mixed Media card. I’m also going to play along with this months challenge over at CAS Mix it Up….it’s heat embossing – we definitely fit there!

may

So hop on over to the HLS Mixed Media Challenge and check out all the amazing projects my teammates have created for this challenge.  Plus you’ll want to stop by our Guest Designer Kalina’s blog – she’s SUPER talented when it comes to Mixed Media and her projects are out of this world!

Then get those fingers inky….I can’t wait to see what you do to let your creations shine!

Signature

[optin_box style=”12″ alignment=”center” email_field=”email” email_default=”Enter your email address” email_order=”2″ integration_type=”aweber” double_optin=”Y” list=”3846012″ name_field=”name” name_default=”Enter your first name” name_order=”1″ name_required=”Y” opm_packages=””][optin_box_field name=”headline”]Learn more with our exclusive FREE video series:[/optin_box_field][optin_box_field name=”paragraph”]PHA+UGx1cyB5b3XigJlsbCBiZSBhZGRlZCB0byBteSBGUkVFIENyZWF0aXZlIFRpcHMgRS1sZXR0ZXIgd2hlcmUgSSBzaGFyZSBleGNsdXNpdmUgcHJvamVjdHMsIHZpZGVvcyAmYW1wOyB0aGUgMTIgRGF5cyBvZiBDaHJpc3RtYXMgUHJvamVjdCBTZXJpZXM8L3A+Cg==[/optin_box_field][optin_box_field name=”privacy”][/optin_box_field][optin_box_field name=”top_color”]undefined[/optin_box_field][optin_box_button type=”0″ button_below=”Y”]Get Instant Access![/optin_box_button] [/optin_box]

Creative Cards – Snowflake Gift

Snowflake-Gift-001

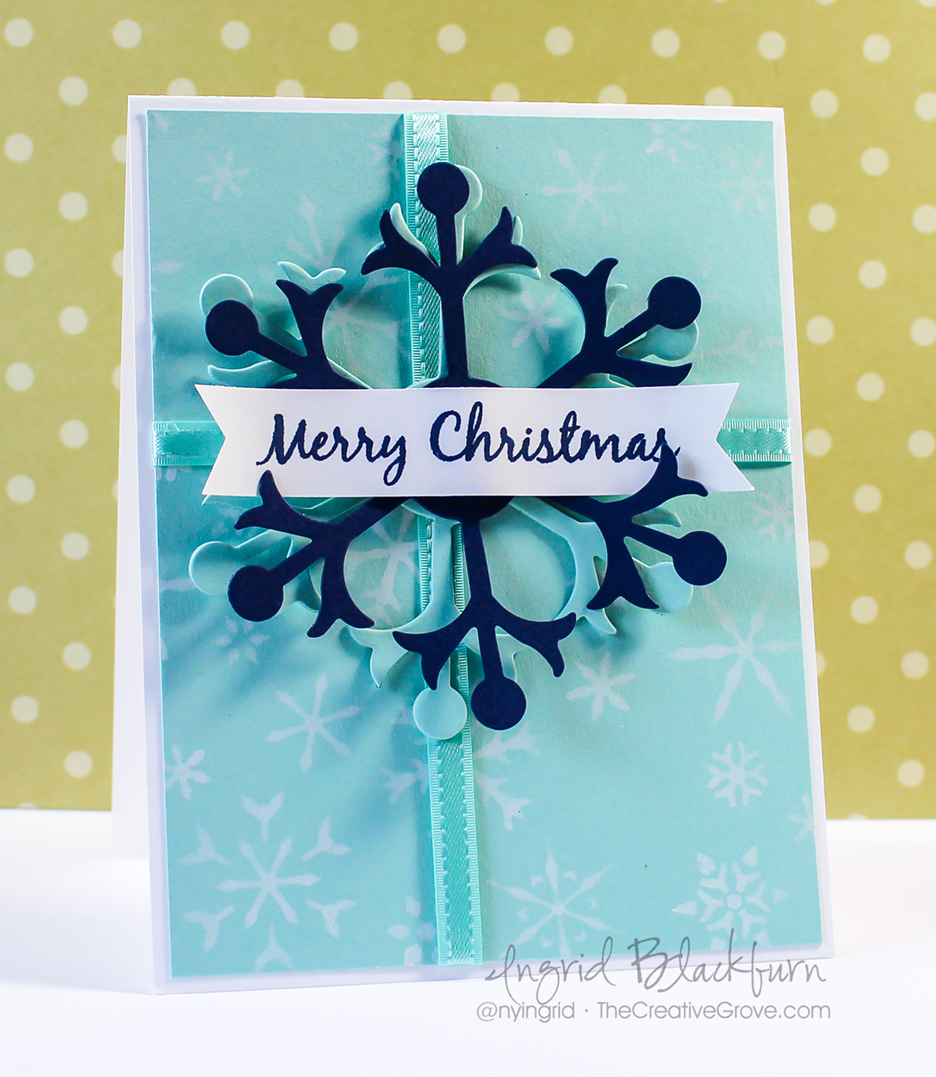
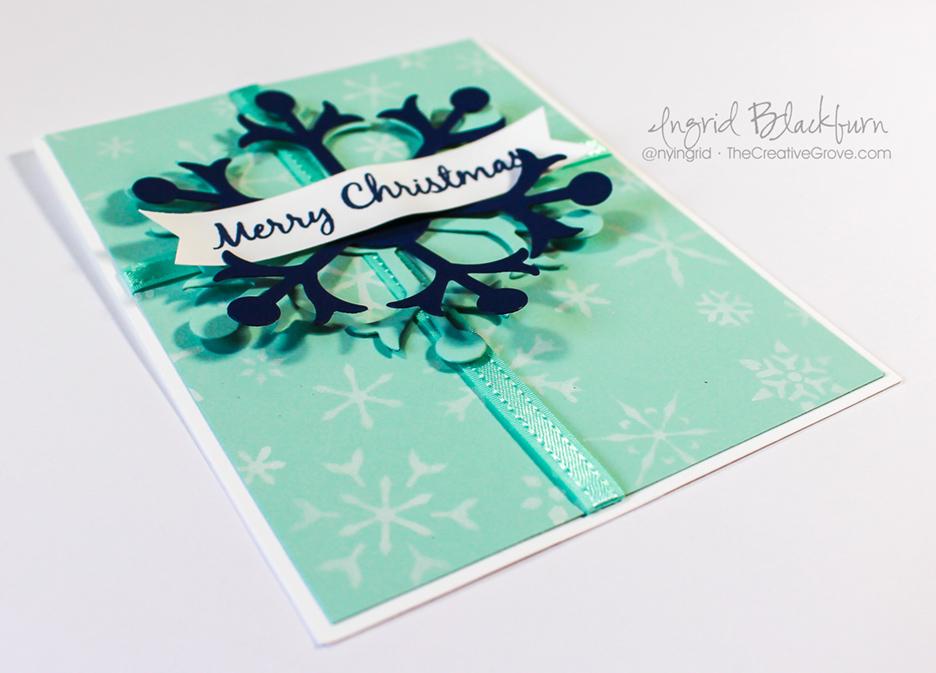
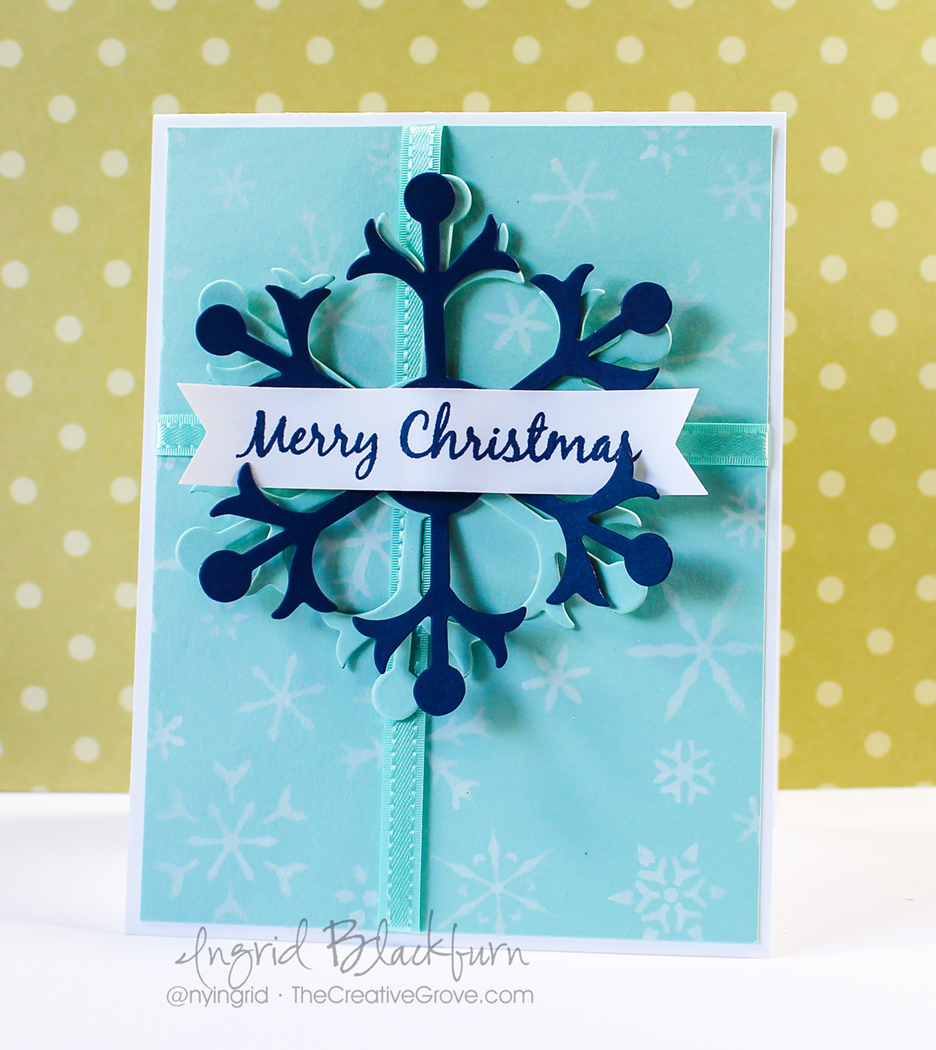
This month’s Christmas Challenge card is a creative card for you – a snowflake gift. The theme at the Happy Little Stampers Christmas challenge this month is Gift, so why not just wrap it all up in a snowflake bow?

HLS Christmas Challenge May 2016

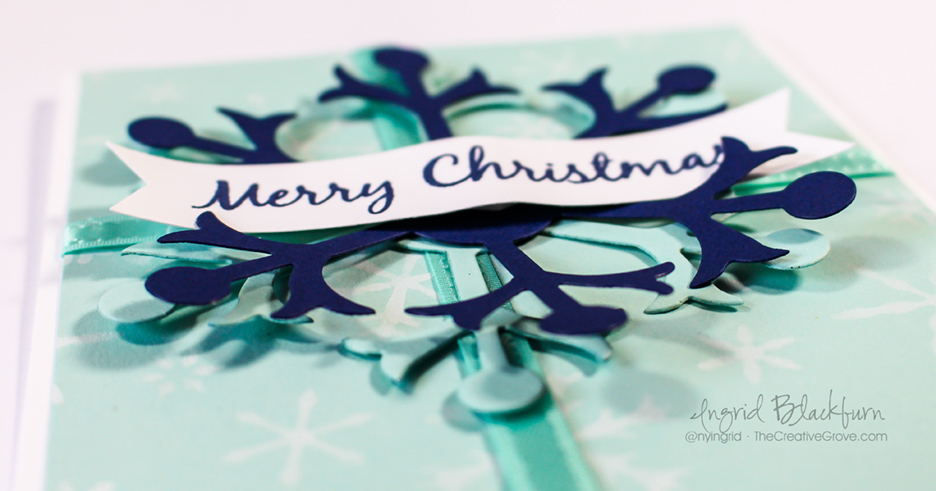
To create this card, I wanted a simple and straightforward background – white pigment ink stenciled with the Snowflakes stencil by Memory Box onto some Pool Party card stock by Stampin Up. I had some matching pool party satin ribbon for my wrapping, a couple Snowflake die cuts in Pool Party and Night of Navy card stock as my bow.

Snowflake-Gift-008

Just stamp the greeting from the Mixed Christmas Sentiments by Happy Little Stampers, cut some banner edges and pop up the middle for a little movement and Voila – all done!

Snowflake-Gift-0056Snowflake Gift Card

Quick, simple, interesting and this can be done over and over in any color theme and with any dies – think Graduation with hats and a diploma, Happy Birthday with anything – polka dots, little cakes, streamers – you name it. Baby, flowers, butterflies, I can go on and on and on. Quick, easily mass produced and so cute! Tell me YOUR idea in the comments below – I’d love to compile a list of awesome ideas.

Snowflake Stencil Gift

Thanks for stopping by today for this quick tutorial, be sure to swing by the Design Team’s cool creations as well. Now go create your own “Gift” for the challenge – I can’t wait to see what you do!

Signature

[optin_box style=”12″ alignment=”center” email_field=”email” email_default=”Enter your email address” email_order=”2″ integration_type=”aweber” double_optin=”Y” list=”3846012″ name_field=”name” name_default=”Enter your first name” name_order=”1″ name_required=”Y” opm_packages=””][optin_box_field name=”headline”]Learn more with our exclusive FREE video series:[/optin_box_field][optin_box_field name=”paragraph”]PHA+UGx1cyB5b3XigJlsbCBiZSBhZGRlZCB0byBteSBGUkVFIENyZWF0aXZlIFRpcHMgRS1sZXR0ZXIgd2hlcmUgSSBzaGFyZSBleGNsdXNpdmUgcHJvamVjdHMsIHZpZGVvcyAmYW1wOyB0aGUgMTIgRGF5cyBvZiBDaHJpc3RtYXMgUHJvamVjdCBTZXJpZXM8L3A+Cg==[/optin_box_field][optin_box_field name=”privacy”][/optin_box_field][optin_box_field name=”top_color”]undefined[/optin_box_field][optin_box_button type=”0″ button_below=”Y”]Get Instant Access![/optin_box_button] [/optin_box]

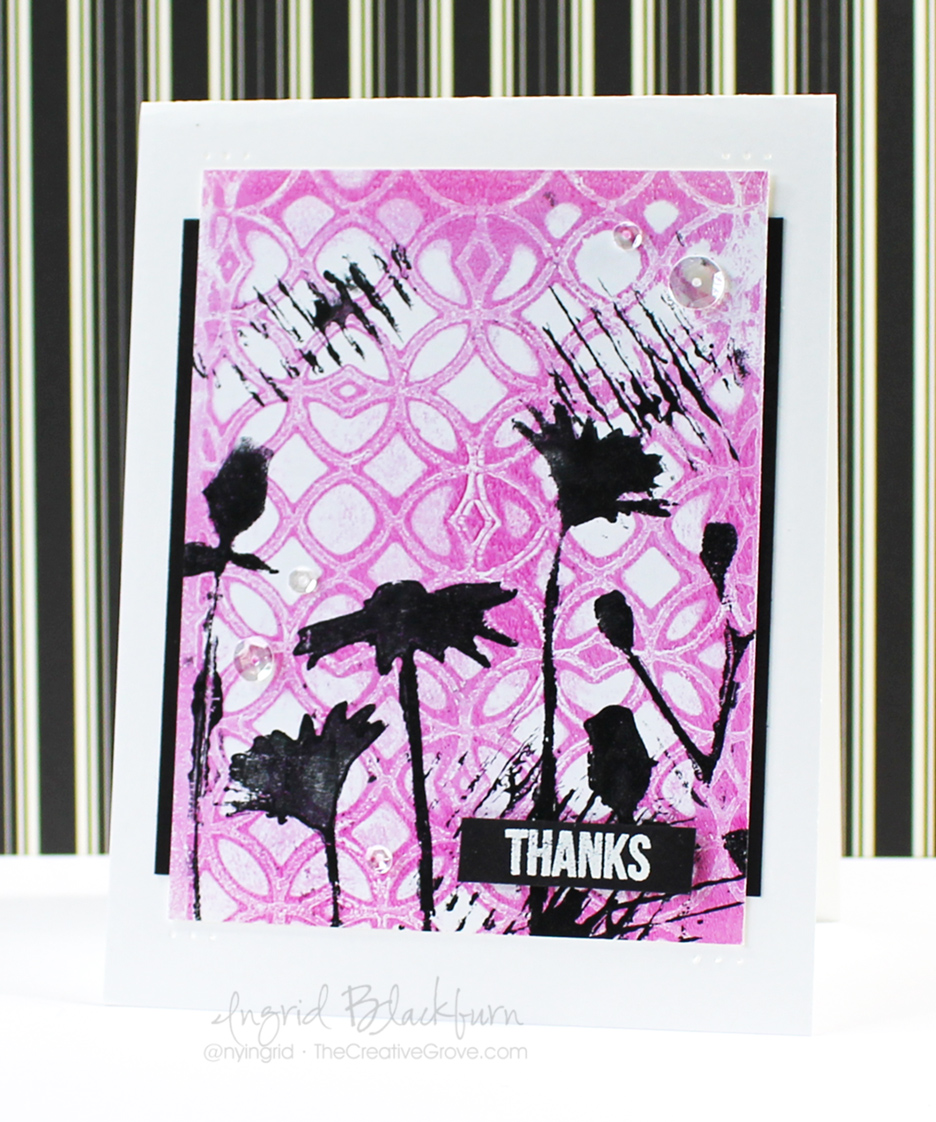
Mixing CAS & Monoprinting

Have you ever mixed a monoprint with clean and simple design? Monoprinting is not only super easy, it’s fun, quick and I’m always amazed at the results. I highly encourage you to give it a try. And most of us LOVE clean and simple, so why not mix them together?

It’s snowing here today in the Black Forest – hard to believe it’s almost May! Seems like a good day to work with my Gelli Plate.

Clean and Simple Mixed Media

In the spirit of creative card making, today we’re going to mix it up a little – for the CAS Mix it Up Challenge. I’m addicted to this challenge, and although it’s in it’s infancy – just two months old…it has a HUGE following already with some amazing card makers.

It’s the brain child of Bonnie Klass and Loll Thompson. You probably have crossed paths with one or both over the years, as they are avid card makers, have designed for numerous teams and both have distinct styles each their own.

april

This challenge is all about mixing clean and simple stamping/design with mixed media. Now the words mixed media get one of two reactions – interest and terror. But today’s project is hoping to not only peak your interest, but dispel the myth that all mixed media is intense, takes a long time and is only for artists who love to art journal.

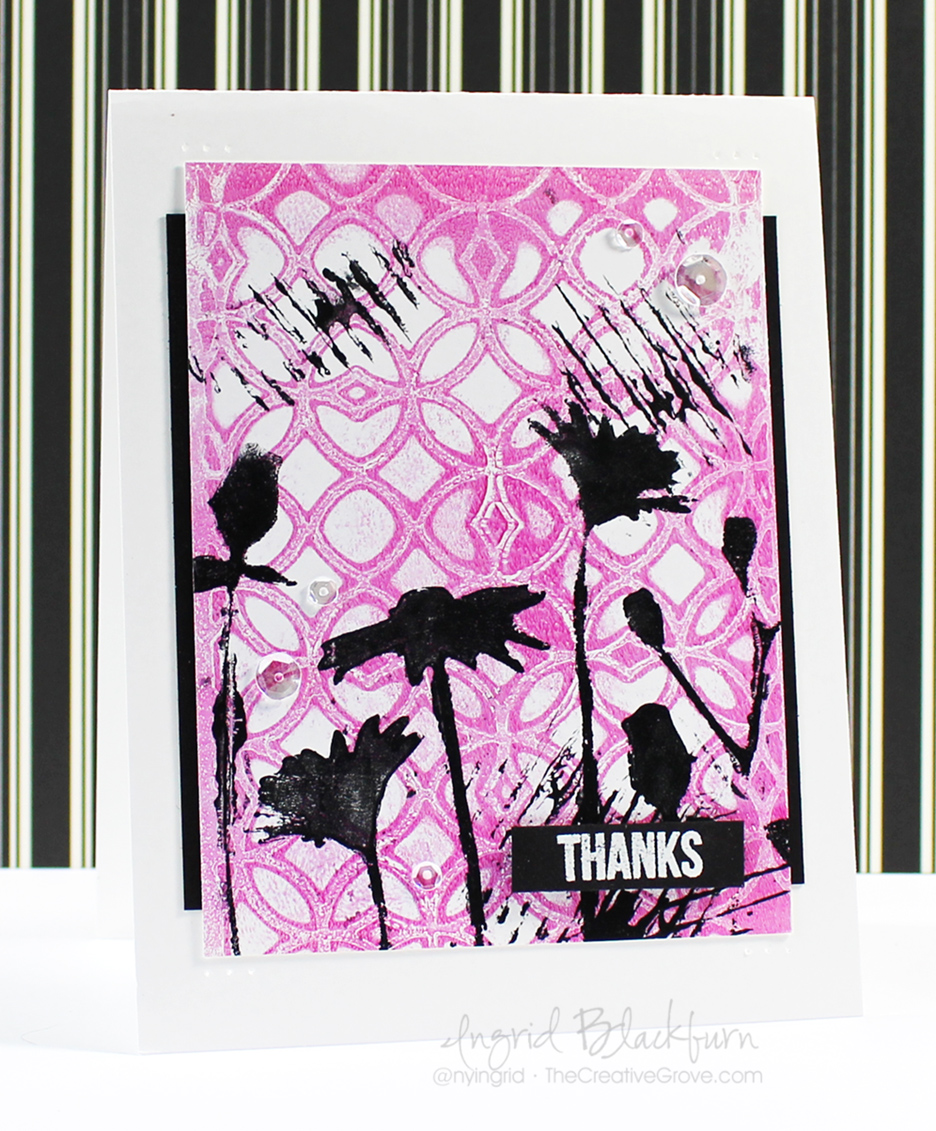
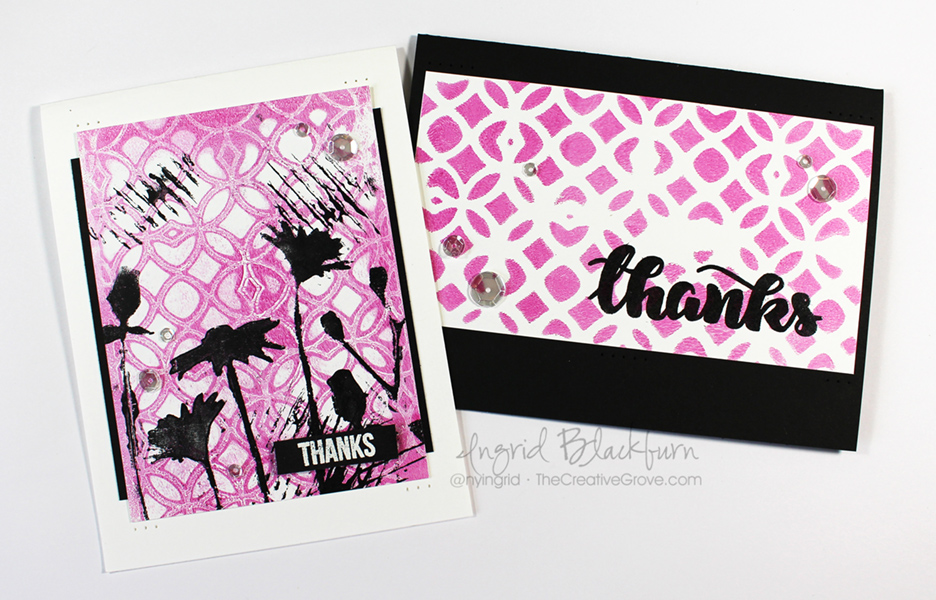
Both projects today were from the creation of one monoprint. To make a monoprint you need three things – a printing plate (I use a gelli plate), some acrylic paint and a tool to spread the paint – I used a brayer.

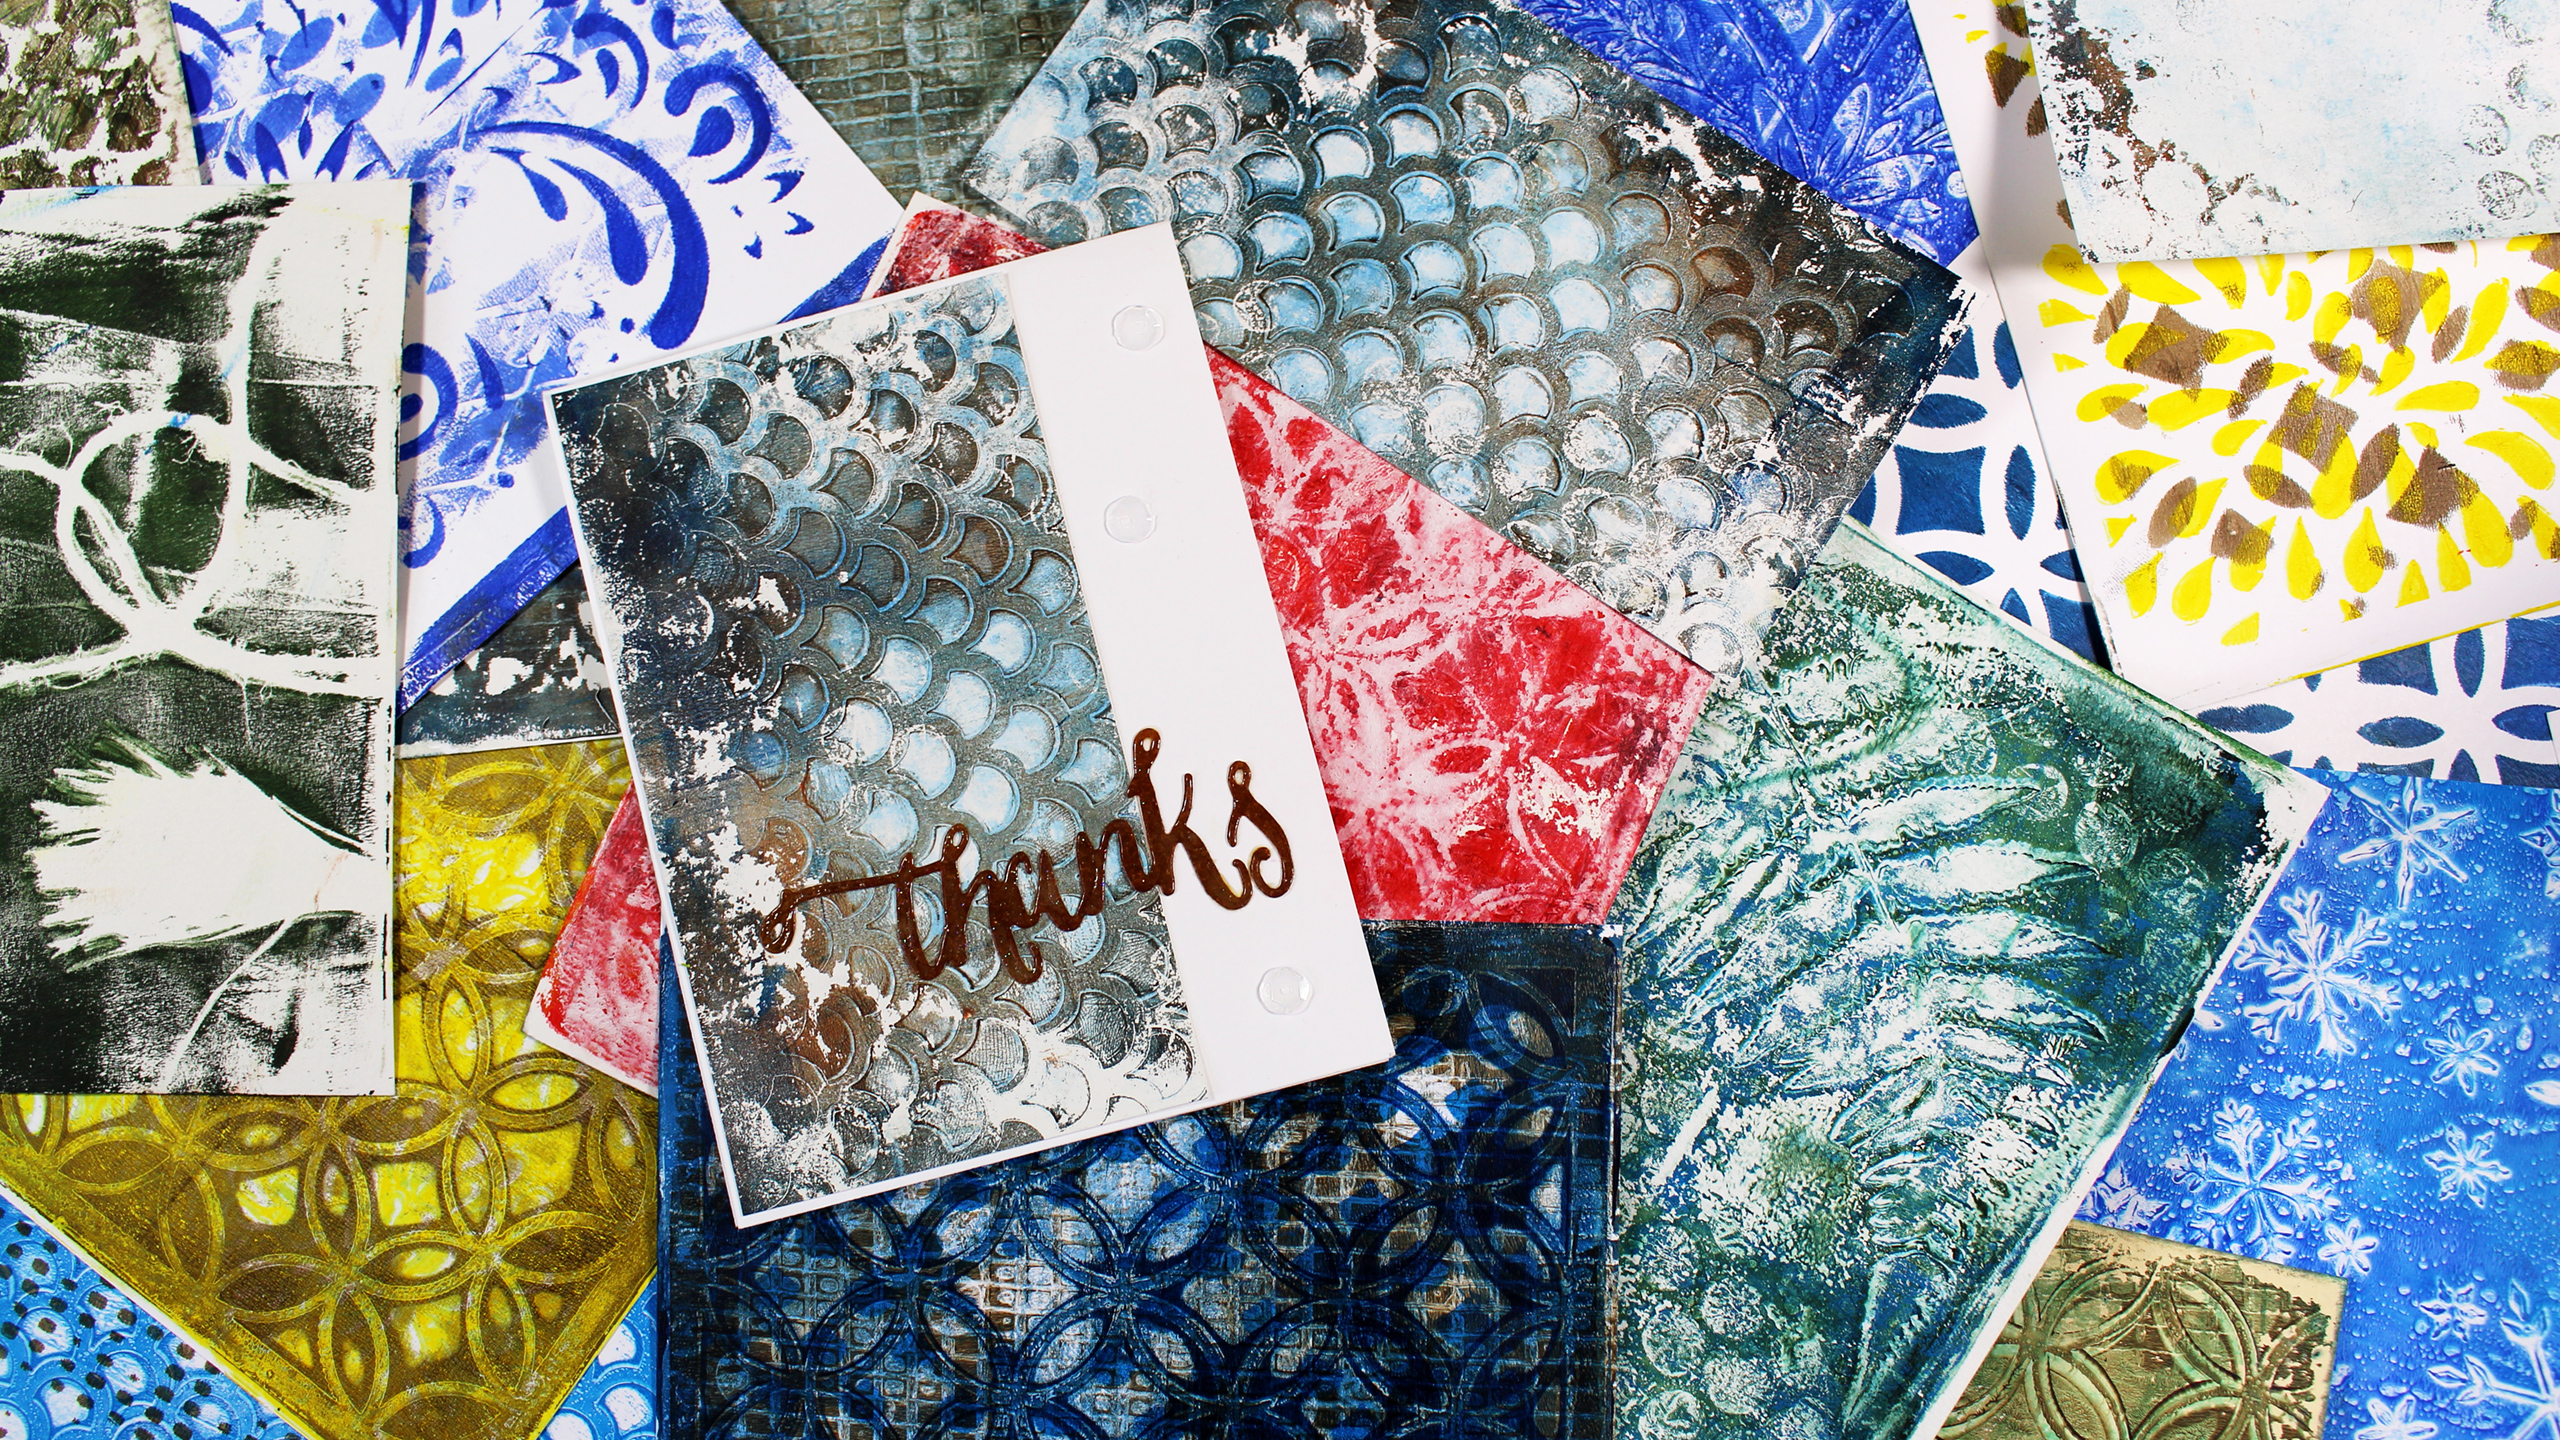
Gelli Plates are inexpensive tools that give you the ability to make your work looks masterful, unique and will definitely leave the recipient of your card wondering…how in the world did you do that?!! Here are just a few prints I made quickly one day to give you an idea of how fun this artform is:

Gelli Arts - Gelli Plate Monoprints for Mixed Media

Today we’re going to use a 6×6 inch plate by Gelli Arts. And for this challenge, we’ll incorporated a few stencils as well – after all, that is the theme of this month’s challenge! I think you’ll be pleasantly surprised to see there’s not much else to it.

Why don’t we get started. I filmed the process for you, wrote a step by step tutorial below and added some detailed pictures. The video has three distinct parts – the monoprinting (first five minutes – yup…that’s it), card specifics and why, and lastly (final 2 1/2 minutes) – all about clean and simple design and the rules I live by – don’t miss that part!

Click Here to watch in HD on YouTube

What do you think? Of course you can always use stencils in the traditional way too – I just thought it would be fun to bring a little monoprinting into the mix.

[divider style=”10″]

[optin_box style=”12″ alignment=”center” email_field=”email” email_default=”Enter your email address” email_order=”2″ integration_type=”aweber” double_optin=”Y” list=”3846012″ name_field=”name” name_default=”Enter your first name” name_order=”1″ name_required=”Y” opm_packages=””][optin_box_field name=”headline”]Learn more with our exclusive FREE video series:[/optin_box_field][optin_box_field name=”paragraph”]PHA+UGx1cyB5b3XigJlsbCBiZSBhZGRlZCB0byBteSBGUkVFIENyZWF0aXZlIFRpcHMgRS1sZXR0ZXIgd2hlcmUgSSBzaGFyZSBleGNsdXNpdmUgcHJvamVjdHMsIHZpZGVvcyAmYW1wOyB0aGUgMTIgRGF5cyBvZiBDaHJpc3RtYXMgUHJvamVjdCBTZXJpZXM8L3A+Cg==[/optin_box_field][optin_box_field name=”privacy”][/optin_box_field][optin_box_field name=”top_color”]undefined[/optin_box_field][optin_box_button type=”0″ button_below=”Y”]Get Instant Access![/optin_box_button] [/optin_box]

[divider style=”10″]

CAS Monoprint Tutorial

  • Start out by gathering up all your supplies. Monoprinting goes fast – and there’s nothing worse than not having your paper right there and your paint drying up on you!
  • Spread out your background color with a brayer and the rubber attachment.
  • Clean off your brayer on a piece of scrap paper and immediately roll over your gelli plate to “lift” some of the paint you just laid down. You want to get the look in the video – lots of color still, but a bit subdued. TIP – Don’t “lift” more than twice – you’ll remove too much paint.

Gelli Plate Mixed Media

  • Place your Latticeworks stencil by Tim Holtz over your paint and pull the positive print. TIP – if you want it to be a bit random, only pat the back of your paper in random spots. Try to leave a little paint behind, I chose to pull most of it.
  • Lift your stencil, and place your white card stock on the pattern left behind. Burnish the back of your paper with your hand (I like to add a piece of copy paper if my paper is shorter than my plate as in the video) to transfer as much of your print as possible.
  • Lift your print and try and pull a ghost print with copy paper if you can – I was unable to.

Monoprints and monoprinting

  • Clean your gelli plate in-between if you desire, for me that always depends on how much is left behind and what my goal with the project is.
  • Add the Bloom Silhouette stencil by Artplorations to your plate and add a dark color with a brayer to the desired flowers. I chose to add Paynes Grey. You want a contrasting color to your first color. Brown or Dark Purple with Yellow, Black with Blue or Red, etc…
  • Lift your stencil and pull the print onto your second print (the negative), if you have a ghost print – pull that as well onto another piece.

Mixed Media and CAS Monoprints - Ingrid Blackburn

  • Add some marks to your Gelli Plate with more Paynes Grey and the inside of a Starbucks Cup Wrapper. The corrugated inside is great for texture.
  • Add the lines in three spots – if I could do mine again, I’d add the last one a bit higher. I remember thinking not too high, but my original spot in my mind would have been better. TIP – Lesson learned – go with instinct in art, not the mind.
  • Trim your positive and negative prints down. Measurements are below.

Clean and Simple Mixed Media CAS

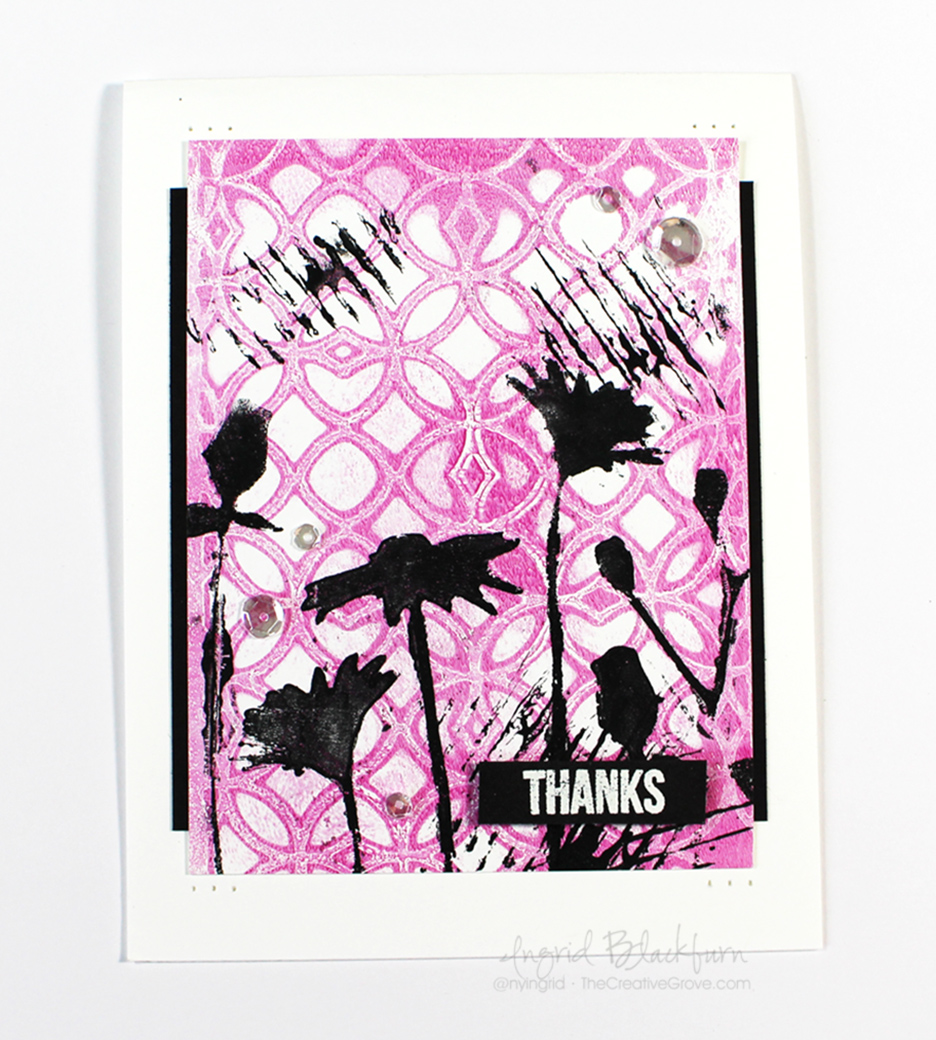
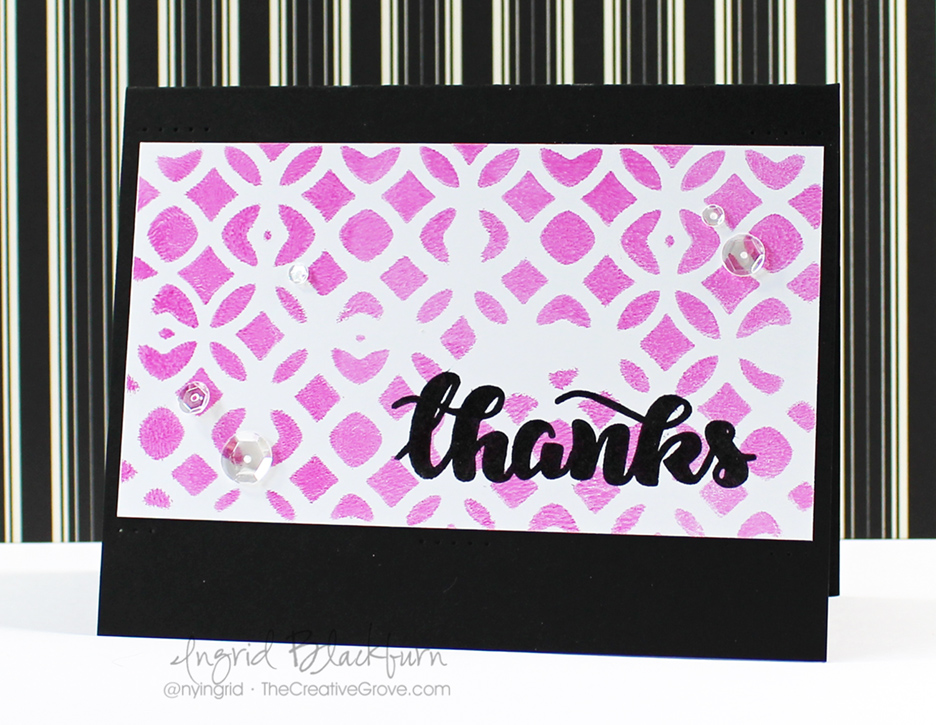
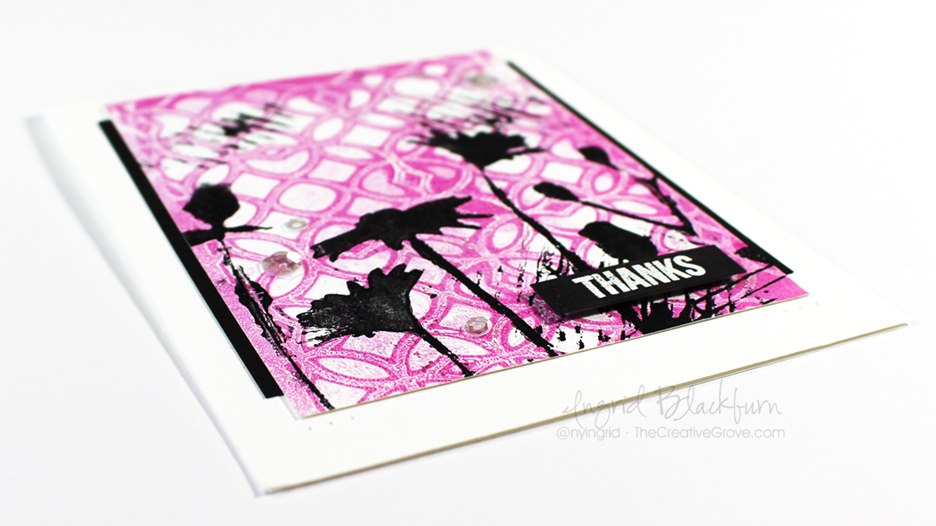
CAS Monoprint Card #1 – Black

  • Stamp Thanks from Mini Thanks (Create a Smile) in bold with Versafine Black ink (Tsukeniko) and emboss in clear.
  • Add the negative print to black card stock leaving more space on the bottom than the top (Rule of thirds). Add five sparkling clear sequins.
  • Add a little paper piercing to the top and bottom around your print and you’re set with Card #1

Dimensions:

  • Black card base – 5 1/2 s 4 1/4″ Folded
  • Monoprint –  5 1/4 x 2 7/8″ (trimmed down)

Gelli Plate Prints - Ingrid Blackburn

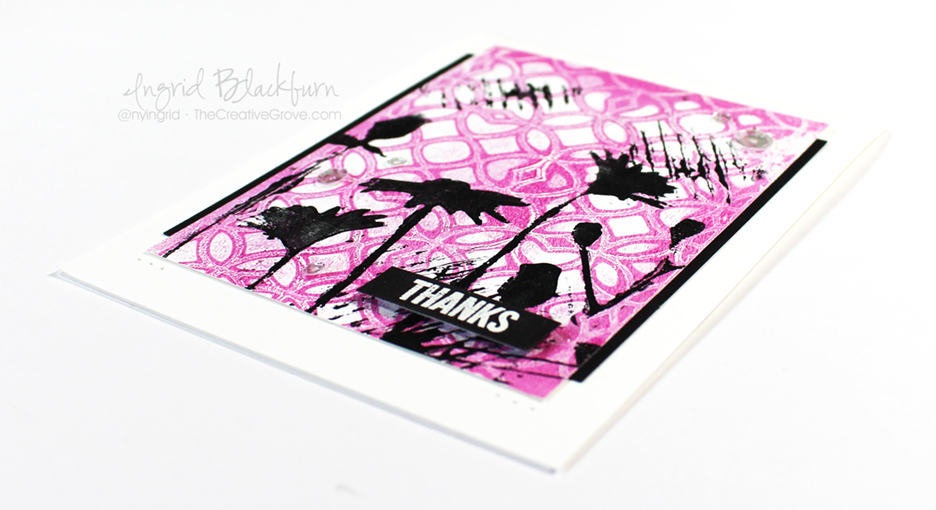
CAS Monoprint Card #2 – White

  • Stamp Thanks from Mini Thanks (Create a Smile) onto a scrap piece of black card stock with Versamark (Tsukeniko) and emboss in White. Trim it down as in the photo leaving more space to the right and left and just a hair top and bottom.
  • Adhere print to black card stock, making sure it’s centered and the black comes out left/right.
  • Adhere to white card base.
  • Add greeting, popping it up with fun foam.
  • Add five sparkling clear sequins.
  • Paper Pierce three holes top and bottom as in the photo.

Dimensions:

  • White card base – 4 1/4 x 5 1/2″ Folded
  • Monoprint – 3 1/2 x 4 1/2″
  • Black Matte – 3 5/8 x 4″

In the video at the end, I go over my rules for design and clean and simple cards. It’s the last 2 1/2 minutes.

Creative Cards - The Creative Grove

That’s it! What do you think? Don’t let mixed media scare you. It’s just combining different mediums on a project. This project used Acrylic Paint, Stencils, textured surfaces, stamping and heat embossing. We added a little sequins for bling and you’re all set – easy peasy!

Now it’s your turn to get those fingers a little inky. The challenge is coming to an end today, but there will be a new one on the 1st. There’s still time to get one last project in though!I’m also going to play along in some never ending challenges as well…I love all the companies products I used today, and can’t say enough about them. I purchased them all on my own….they are products that I use over and over again.

Playing along with – Stamplorations Anything Goes Challenge for my Bloom Silhouette Stencil, April’s Project Share over at Create a Smile , and Happy Little Stampers Stencil Monoprint challenge – how perfect is that!

Stamplorations and Artplorations Happy Little Stampers CAS Challenge

Leave me a comment and let me know what you think! Have you tried a little Mixed Media before? I’d love to know!

Till next time –

Signature

[optin_box style=”12″ alignment=”center” email_field=”email” email_default=”Enter your email address” email_order=”2″ integration_type=”aweber” double_optin=”Y” list=”3846012″ name_field=”name” name_default=”Enter your first name” name_order=”1″ name_required=”Y” opm_packages=””][optin_box_field name=”headline”]Learn more with our exclusive FREE video series:[/optin_box_field][optin_box_field name=”paragraph”]PHA+UGx1cyB5b3XigJlsbCBiZSBhZGRlZCB0byBteSBGUkVFIENyZWF0aXZlIFRpcHMgRS1sZXR0ZXIgd2hlcmUgSSBzaGFyZSBleGNsdXNpdmUgcHJvamVjdHMsIHZpZGVvcyAmYW1wOyB0aGUgMTIgRGF5cyBvZiBDaHJpc3RtYXMgUHJvamVjdCBTZXJpZXM8L3A+Cg==[/optin_box_field][optin_box_field name=”privacy”][/optin_box_field][optin_box_field name=”top_color”]undefined[/optin_box_field][optin_box_button type=”0″ button_below=”Y”]Get Instant Access![/optin_box_button] [/optin_box]