Butterflies and Remembering a Good Friend

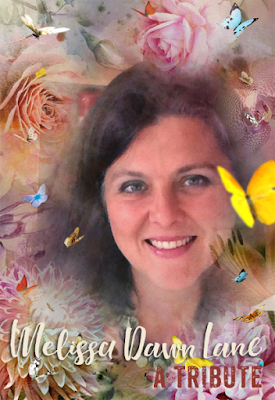
Our crafty world is such an amazing, inspiring and wonderful community. I’m blessed to have been a part of this community since 1994, and online since 1998. Over the years, I have gotten to know thousands of you, made more friendships than I can count and every now and then actually get to meet and know people in person. So many of us participate as watchers, teachers, and friends. Earlier this month, we suddenly lost one of those crafty spirits, Melissa Lane. Melissa inspired us, motivated and taught us how to pull the best out in what we do – usually in an unexpected and colorful way.

I had the first got to know Melissa as a team mate on the Happy Little Stampers Christmas Challenge Team and then really well on the Mixed Media Team. I was living in the Black Forest in Germany at the time, and was shocked that on a world wide team put together by Kylie Purtell, a few of my team mates lived just 45 minutes from me. Isn’t it funny, that in this big huge world – three of us were so close in geographically? Especially put together by a leader who lived in Australia, and two of us being American and living in a foreign country!

Melissa, Tanya Kabel & myself vowed one day to get together to flex our crafty muscles to just stamp with a friend. In this day and age, we all get to know about each other from blogs, instagram, facebook and youtube accounts – but when do you actually get to stamp LIVE and in person? I was no longer alone!! Sadly, Tanya ended up not being to make it that day, but Melissa and I had the rare opportunity to spend the entire day crafting, chatting and we even had dinner together with the family. It truly was a perfect day.

You can’t go empty handed, right? I brought my famous apple/raspberry German crumb cake for the family, since I towed all my craft supplies along with me like a little kid just excited to play with a good friend…lol. I think I had all my stencils (I had quickly been accumulating several Artplorations stencils), a gel plate, acrylic paints, nearly all my stamps, inks and anything else I could think of with me.

Melissa quickly grabbed my gel plate, and made several backgrounds with this very mask I used today. I remember borrowing it and she borrowed several of my stencils that she didn’t have as she was new on the Stamplorations Design Team – and I seemed to have almost all of them…lol. We ink blended, watercolored, got out the pastes and were just two kids in a candy store showing each other our favorite techniques and playing with mediums. We very quickly made a mess in her cute little crafting corner of the house – and the kids kept peeking in on us to see what we were creating. It was SO much fun.

I had also brought several cards with me, and we flipped though each others little works of art, don’t you just love doing that? Cards after all look SO much better in real life than in a photo. We took a break, walked through the garden, talked about art, and I became mesmerized with her father’s gorgeous watercolor artwork. Later we enjoyed a fabulous dinner, made by her beautiful family. Shortly thereafter, I moved back to the states, so we didn’t get a chance to stamp together again, but we remained good friends for years.

Melissa was not just an incredible artist, but she was a Christian, a military wife to her high school sweetheart Chris, loved homes educating her four children, avid gardener, cook and photographer. She had a zest for life and lived every day to the fullest. I loved chatting with her, Melissa knew who she was and loved her family fiercely. We will all miss her.

My life is richer for knowing you Melissa, first and foremost as a person, but also as an artist. I loved visiting your blog and seeing your creations on social media always put a smile on my face – especially when you used butterflies – your love for butterflies made such an impression on me that day. You loved color and butterflies.

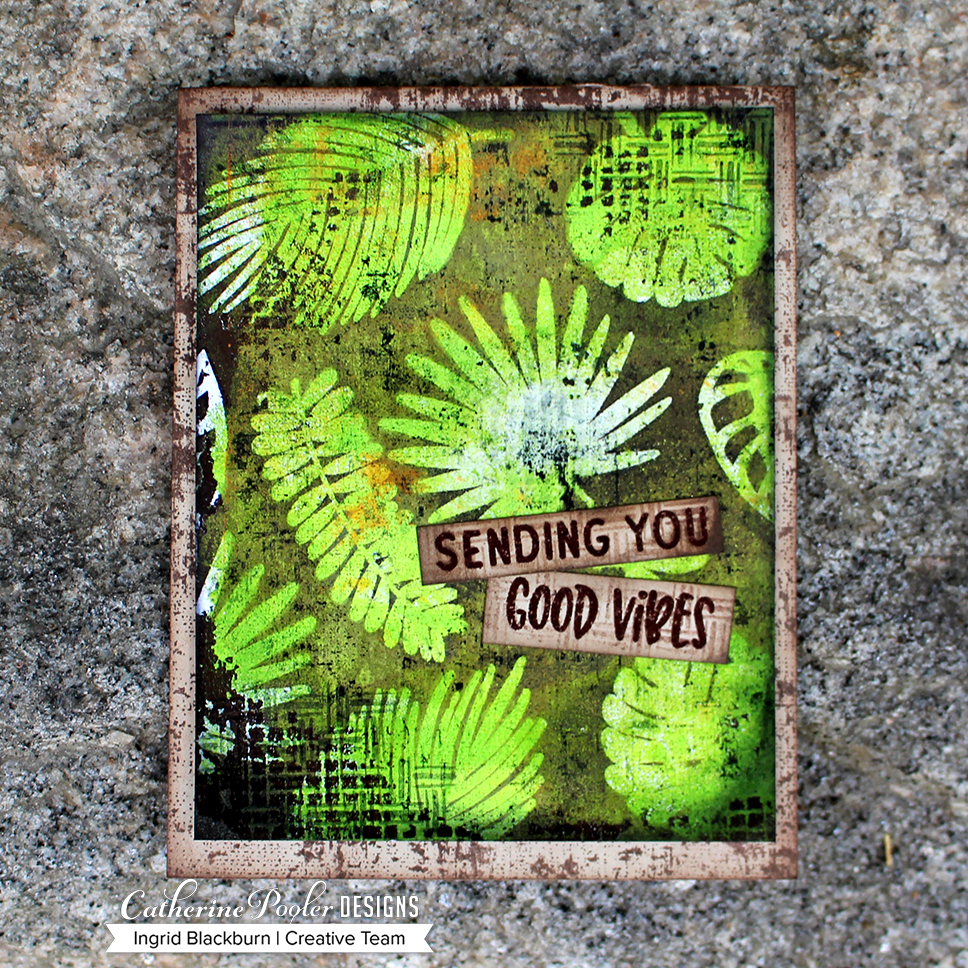
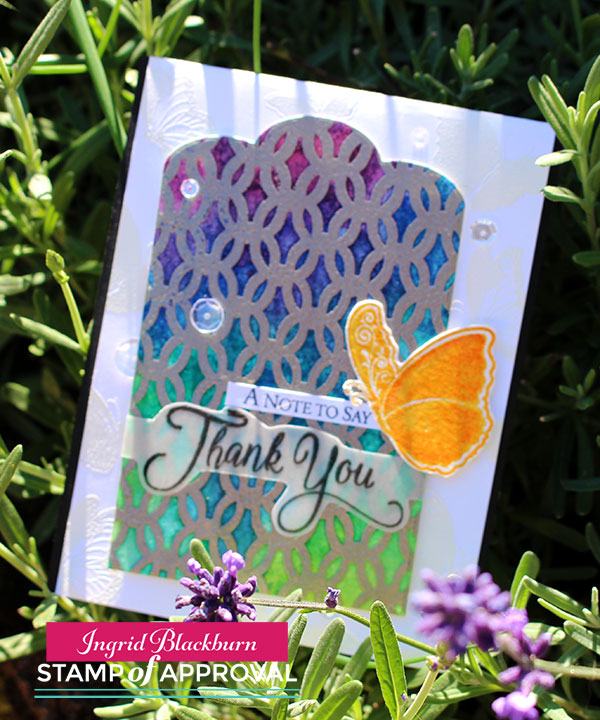
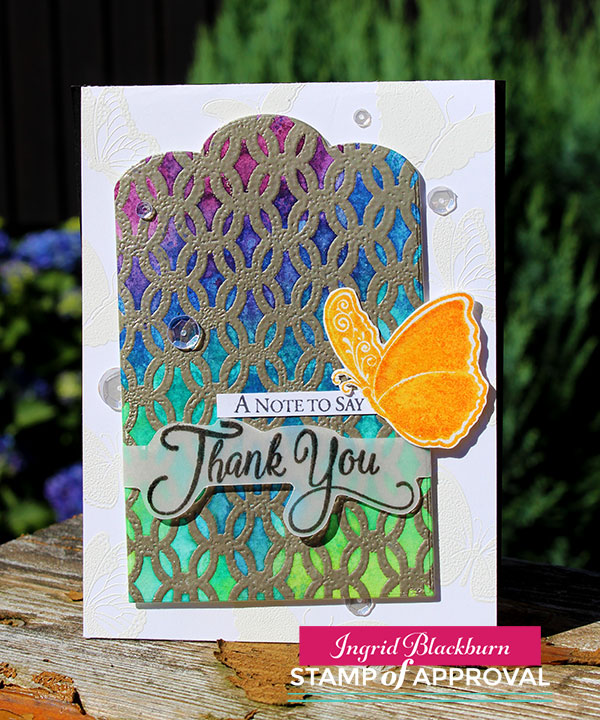
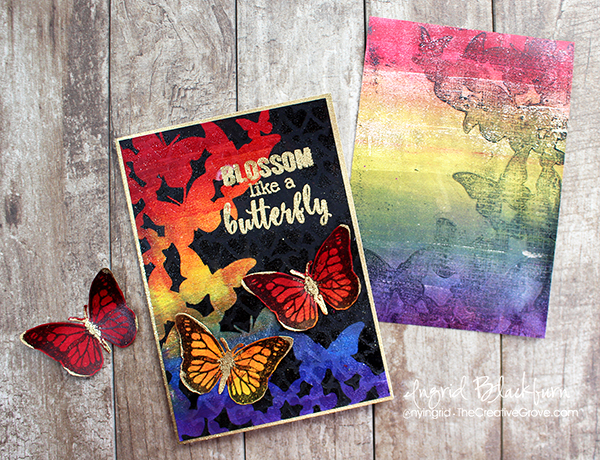
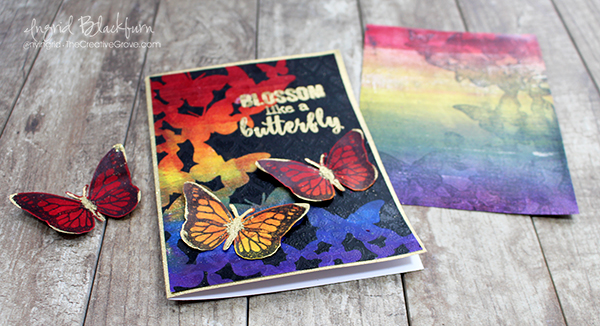
It’s only fitting that I create today in your honor, what else – a rainbow of butterflies. I always thought of you when I saw this stencil, and every butterfly I saw. I don’t think that will ever change.

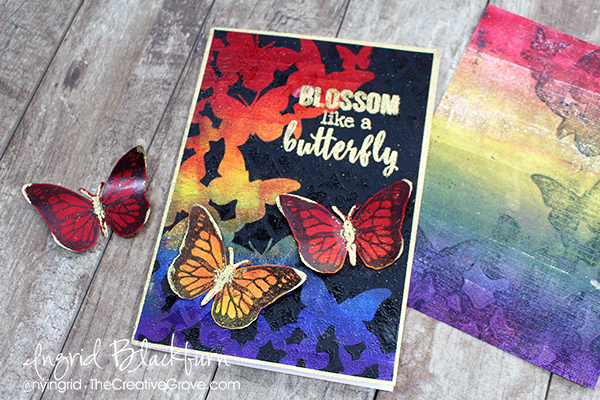
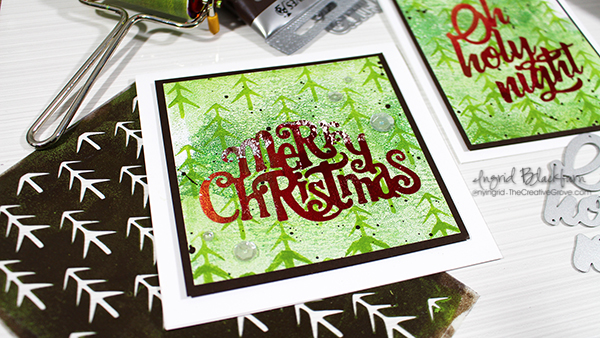
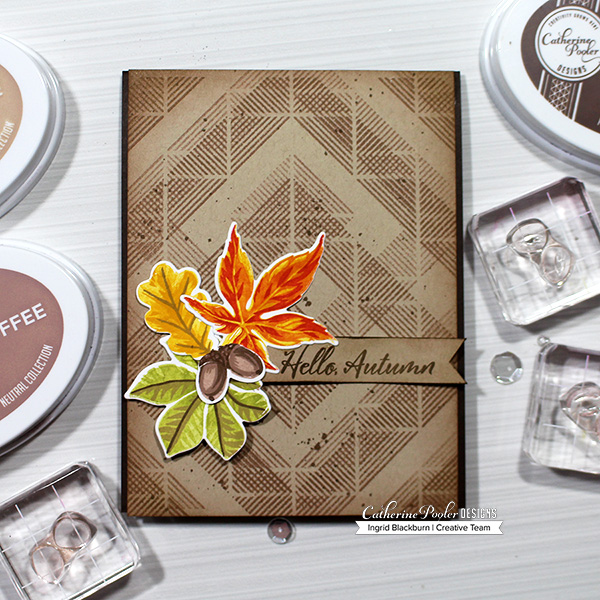
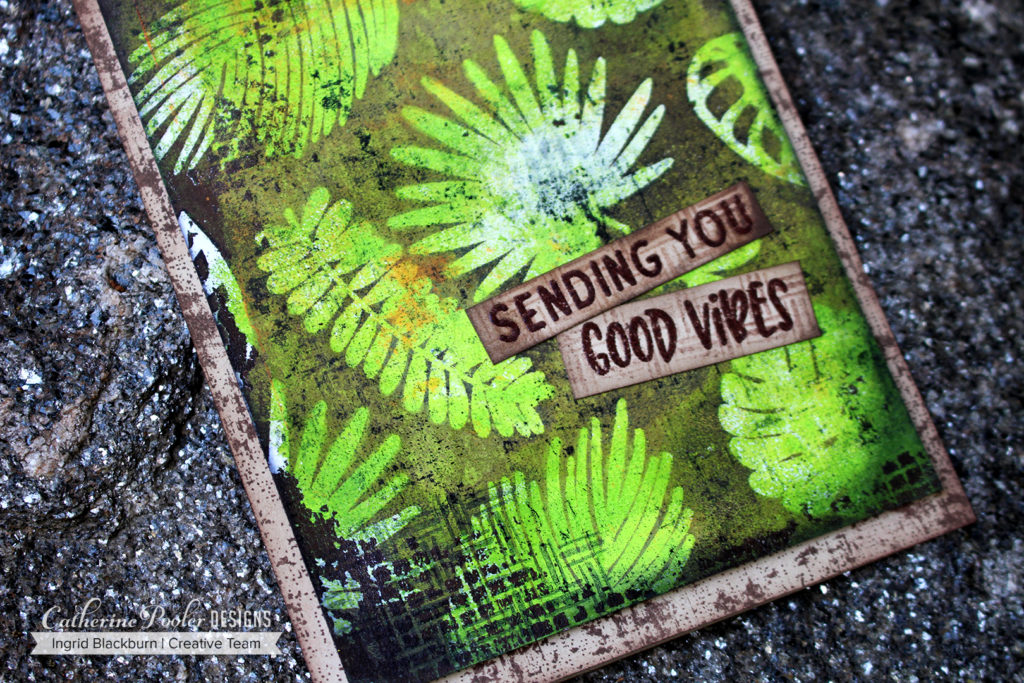
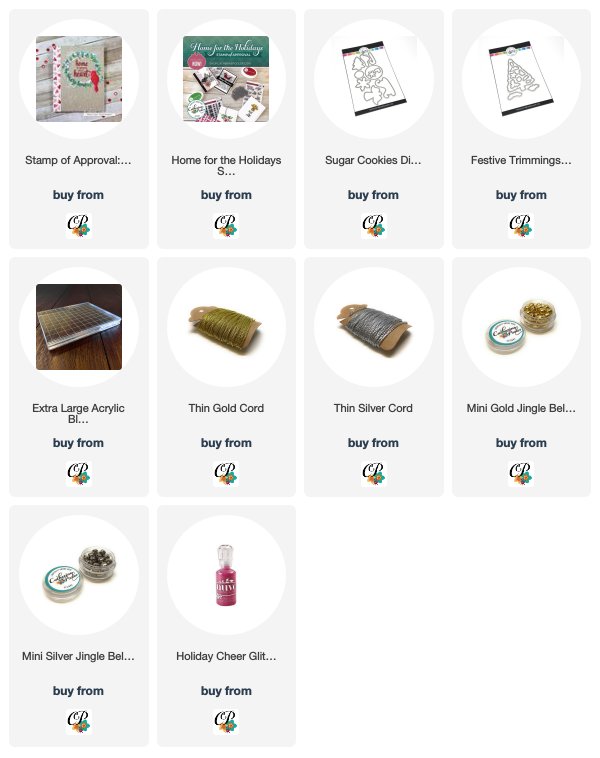
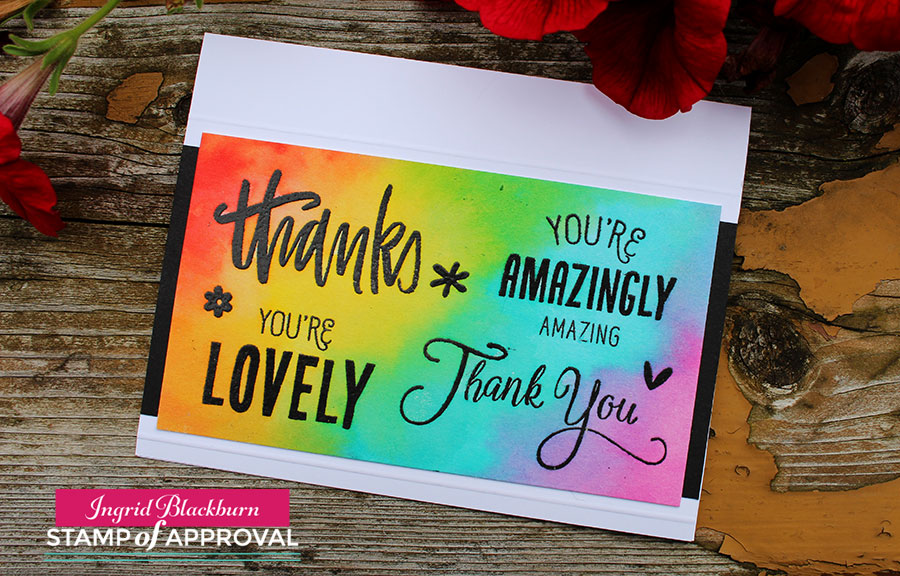
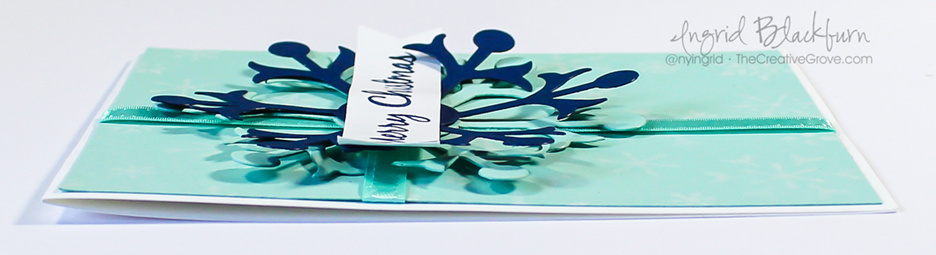
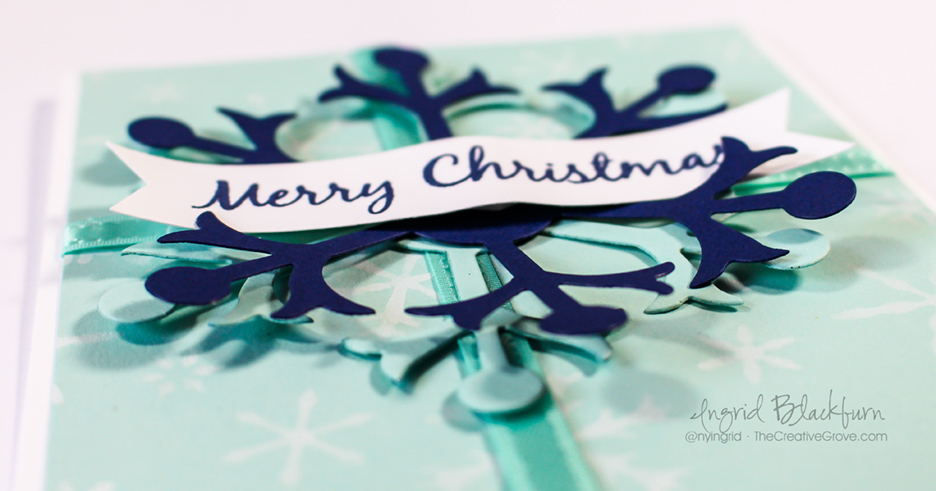
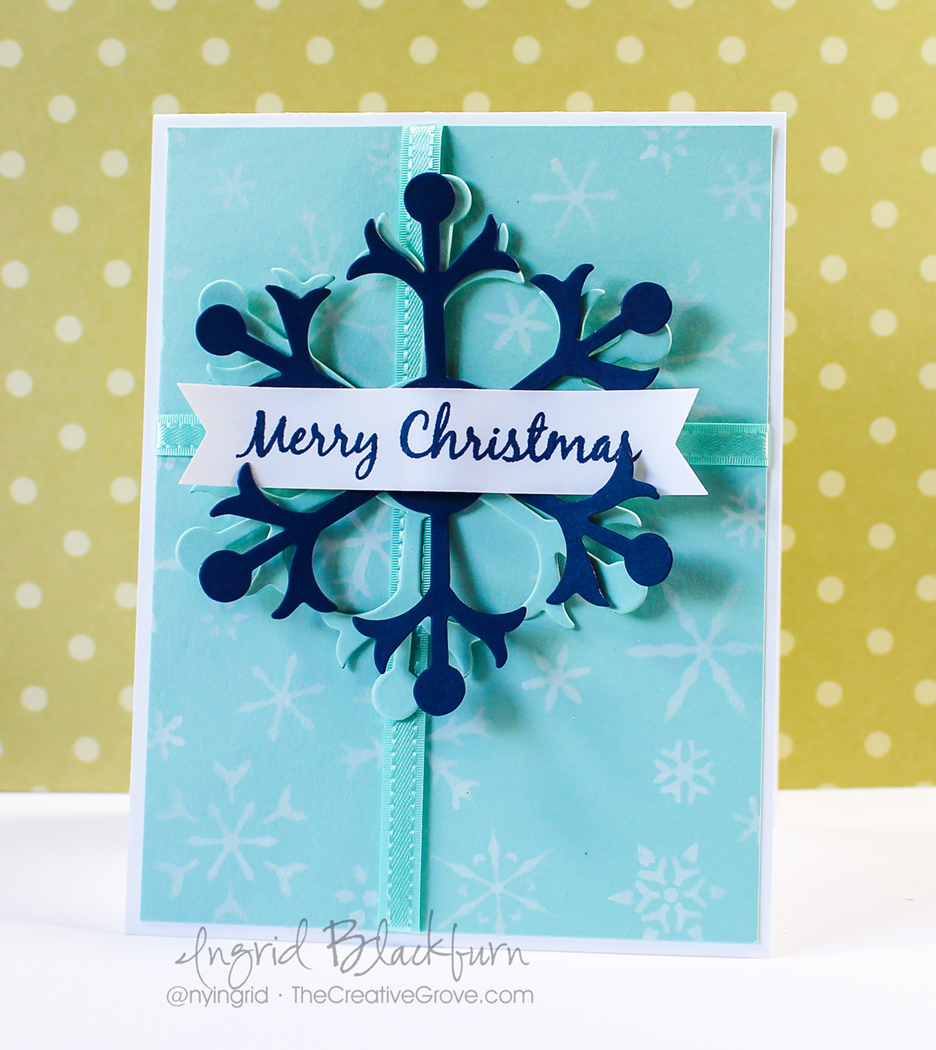
If you’re interested in knowing how I created this piece in Melissa’s honor, brayer a rainbow of acrylic color onto a gel plate, add your Shower of Flutters mask, sponge or brayer over with black paint, take a pull, and trim down. Emboss your greeting in gold, add hearts using the Row of Hearts stencil, embossed in clear embossing powder over your entire card.

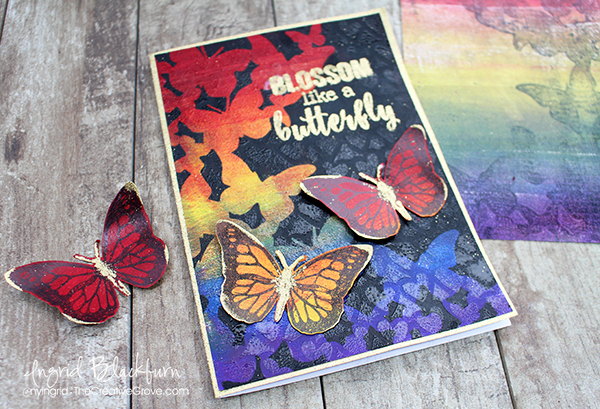
Stamp the butterflies from the set Blossom like a Butterfly in Catherine Pooler Midnight Archival ink onto colorful monoprinted backgrounds (Melissa loved red), fussy cut and add some gold embossing powder details. Pop up the wings, and emboss the edges of your card base. This card is sized 5 x 7″. That’s it!

I know you’re watching over us Melissa, but I miss you all the same. You were an inspiration to so many of us, and we’re better crafters for having known you.

To read more about Melissa, see her artwork and the outpouring of love from our community, visit the Stamplorations blog post here.

Much love my friend,

Ingrid Blackburn - The Creative Grove


Easy DIY Mixed Media Christmas Cards + Video

Save the Crafty YouTuber Video Hop

Have you ever wanted to quickly produce some fun and artistic Mixed Media Christmas Cards? Are you tired of sending bulky cards that require extra postage? What if I gave you the formula for how to create a whole stack of cards that have layered texture and character to them, but are pretty much flat, easy to put together and will have all your friends and family thinking you are quite the artist?!! Interested?

Now what if on top of that I told you that you could have a chance to win over 100 prizes – bet THAT sold ya!

Mixed Media Christmas Cards Video Tutorial

It’s that time of year again – my good friend Justine Hovey has organized the second Save the Crafty YouTuber Video Hop, and I decided to play along with 90 of my crafty friends – mixed media style! And I even have my OWN giveaway that I’m doing….so be sure to actually WATCH the video. I give the details along the way…

Click HERE to watch in HD on my YouTube Channel

Aren’t they FUN and super simple cards to make?!! Seriously – I’m going to be teaching this exact project (and so much more) in person in a few weeks in the Orlando, Florida area. If you’d like to come learn from me in person – be sure to email me at ingrid (at) thecreativegrove.com and I’ll send you all the details!!

For the specifics and Details to be entered for over 100 prizes – seriously…it’s more like 125+ prizes….GOOD ones too – read about those on my YouTube Channel in the section below the video!

The Save the Crafty YouTuber Video hop is a celebration of cardmaking video tutorials created by a group of talented crafters of all different styles and levels. We are coming together over 5 days to give our viewers a chance to discover other amazing cardmakers and help reach monetization goals!

Mixed Media Christmas Cards

All you have to do is watch, like the video, consider subscribing, and click the link in the video description below to hop to the next video. Let yourself be inspired! Don’t forget to comment (on the video hop over at YouTube) because we have tons of prizes to give away. Please indicate if you are located in the USA or International so that prizes can be awarded appropriately as some prizes (not all!) have restrictions on them.

To be entered in for MY giveaway (closed) – watch the video – I give details on what you need to put in the comment section (USA only for that one).

Monoprinting Christmas Cards

Don’t forget to check back every day this week since there are 5 themed days of video hops! You never know when you’ll discover your next favourite YouTuber! Hop Links are below.

I hope you enjoyed this tutorial. Here are a few close up photos for you and the supply list. Be sure to come back to this post on November 10th to see who won the prize pack – I’m giving away Dies, Stencils and ink pads – it’s worth over $40!!! That Merry Christmas Die is one of them!!! 🙂 Happy Hopping!!!

Mixed Media Monoprint Christmas

Aren’t those the prettiest cards?!! These photos do not do them justice!! Interested in seeing more Mixed Media Christmas Card possibilities? Check out this tutorial – just adjust for the Christmas Season

Sponsors & Hop Links (Giveaways closed)

Here are all those sponsors….and SO many channels in each of the five hops are giving away additional prizes – this is an AWESOME hop!

Here are links to all five hop days:

  1. Day One Hop Beginning
  2. Day Two Hop Beginning
  3. Day Three – Start on MY YouTube Channel
  4. Day Four Hop Beginning
  5. Day Five Hop Beginning

Good luck on winning all those great prizes – over 100!!! Leave me a comment below if you liked these cards – I’d LOVE to know.

Thanks for watching – till next time…

Supply List

Affiliate Links used if available

Mixed Media Christmas Cards

Hailey’s Shower Photo Supply List – https://ldli.co/e/jpxx6p

Kind of Batty Blog Hop: Day One

Kind of Batty Blog Hop - Catherine Pooler

A Cobweb Stamp, Fall Leaves, Patterns and Christmas? Welcome to the Catherine Pooler Designs Kind of Batty Blog Hop – Day One. I’m SO excited to share some fun new cards with you today! We have a full line up today and will be sharing some creative inspiration for the next three days! There are prizes and cool things to see, so let’s jump right on in.

This release is a bit different – there’s more traditional product, and then there’s Halloween! I never thought I was a Halloween person, but I’ll be honest – this collection was just TOO cool to not create with it! The Halloween products work SO well together, and I’m going to show you some non-traditional things you can do with them. So let’s get started.

Here are the new products being released today. It’s live in the shop now – click here to get yours before they sell out!


I’m creating with two of the background stamps, the fall Hello Autumn multi step stamp set, and the super fun Everything but the Broom Halloween set.

Cobweb Stamp - Spiderweb Background Stamp

Project No. One – Boo!

I love the unexpected, and thought it would be kinda fun to flip the cobweb stamp and die from Everything but the Broom around for a Cauldron! Don’t forget to add the cobweb stamp too – it creates some fun little interest to it.

To create a stirring the pot spoon, use the small border in that set along with some Black Jack ink! The eyeballs are the bubbles and need I say more? You just have to stamp one of those super cute spiders – I’m calling him Harry, he’s too cute, and I’m not the biggest fan of spiders – you get big girlie screams from me with those…lol!

Use the tag die from Tags, Etc (kind of reminds me of a headstone – just sayin’, create your little scene, lightly sponge the edge in the new Twilight ink and Voila! For some added interest, stamp the spiderweb in the background – that’s Twilight on Catherine Pooler Smoke cardstock. It’s the perfect tone on tone look. The spiders are stamped in Black Jack.

The card needed something, so I decided to add small strips to the bottom of the tag and side of the card front. That’s Black Twinkle Embossing Glitter by WOW! It’s the coolest, sparkliest powder – you will just LOVE it.

The bottom spider is literally hanging by a thread off the raised tag. A little Orange Ribbon with some black/white twine and you’re good to go!

Project No. Two – Cobweb Stamp for Christmas?

Would you believe that these trees are made from the Cobweb Stamp? Yup, to get this look, you’ll want to mask off a section of the Spiderweb Background Stamp with some masking tape and post it notes. I placed it in the MISTI stamping tool so that I could repeat stamp it if needed in the exact same spot since it’s a large Red Rubber Background Stamp vs. a Clear Stamp Set.

First you’ll want to create a hill mask and secure that over your Sand Dunes cardstock. Next stamp your foreground tree in Eucalyptus Ink and then create a mask and stencil from copy paper. Cut your mask out – just inside the line. You’ll also want to create a stencil by cutting the middle part of the image out, so that you can ink blend lightly to fill your tree in later. The two rear trees, are a different section of the web. Mask your stamped three and stamp those in Icing on the Cake.

The spa colors really work well on the Sand Dunes cardstock. Ink up the Believe in Peppermint Stick from the sentiment Believe in Yourself in the Rose Garden Stamp Set and stamp in the lower right corner. Use the revers side of your hill, and lightly sponge the hillside in the new ink Sand Castle. You’ll also want to do the edges on the bottom. The remaining edge of the project is lightly sponged in Juniper Breeze for a night sky.

Stamp a few of the wonky stars in Sauna ink from the new Spooky Hollow stamp set. I’ll have more with that set on Friday in the hop!! So check back.

Who would have thunk Christmas right? I LOVE these trees – and although I really really wanted to hang the spider from one….it didn’t read Christmas to me (I would have needed a tiny Santa’s cap for Harry…lol! You should see what this tree looks like embossed in Metallic Gold Sparkle glitter – it’s GORGEOUS!

Project No. Three – Hello Autumn

Now for a more traditional feel. I LOVE the fall. When I lived in New York, I was always mesmerized by the fall foliage. So I thought I’d pay a little homage to that today. No spiderweb stamp needed for this one, but you’ll want to break out the new Angled Square Background stamp from the brilliant mind of Shawna Clingerman. Seriously – this background stamp is striped vertical and horizontal triangles that make up squares that are ultimately offset – how cool is that?!

Ink up your Stamp in a Misti – you’ll need to have exact placement of this one. I tucked mine into the bottom corner and stamped onto my scrap paper so I could see where the lines were. That’s key! Ink up your Angled Square Background Stamp with the new Sand Castle ink and stamp once. Flip your card front, lining up the center line with the scrap piece stamped image. Ink up your stamp again in Sand Castle and stamp. The cool part about that, where they overlap it creates a tiny grid line pattern because the stripes are going different directions (the stripes that make up the triangles!!).

Next, layer stamp the leaves and acorns onto some white dies from the Hello Autumn Stamp Set. I used colors from the Spa line of ink with Rockin’ Red as a pop on the large leaf. I’m in awe at how beautiful the contrasting pop of color on the neutral background is.

Create a banner that’s 9/16 ths wide and stamp Hello Autumn in Icing on the Cake. Edge your banner and card front lightly in Sand Castle Ink and the banner with a slight edging of Icing on the Cake ink.

Adhere with glue, pop up the tails and under the hello for a wavy look and you’re good to go!

Pretty cool projects, huh? Just wait till Friday!!

Catherine Pooler Halloween

Be sure to comment all along the hop. Catherine is giving away Three $25 gift certificates to those who comment! Winners will be announced Monday Evening the 20th.

If you’re interested in any of the new items or other things I used today, check out the supply list below. Thanks for stopping by!

  1. Catherine Pooler  Hop HERE next!
  2. Ilina Crouse  
  3. Tracie Pond  
  4. Ashlea Cornell  
  5. Karen Baker   
  6. Jen Carter  
  7. Jenny Colacicco  
  8. Kristie Goulet 
  9. Maureen Merritt  
  10. Josefine Fouarge 
  11. Melissa Miller 
  12. Ingrid Blackburn – You are HERE!

Thanks for stopping by today! Keep those fingers inky –


Supplies

To make finding the supplies I used in these projects a bit easier for you, here are a few clickable links. Compensated Affiliate Links are used when possible. Click here for disclosure. Happy Shopping!


Tropically Yours Stamp of Approval Blog Hop Day Three

Tropically Yours Blog Hop

Welcome to the Tropically Yours Stamp of Approval Blog Hop – Day Three! You’re probably hopping on over from Laurel Beard’s blog. Laurel is ah-mazing, isn’t she?!!! I love the texture she creates in her projects – plus she enables my crafty habit all the time…lol!

We’ve been showcasing the fabulous products in the Tropically Yours SOA box since Sunday, and let me tell you, we’re gonna finish it off the Creative Team hops with a bang today.

The Tropically Yours Stamp of Approval box is by far my favorite. I’m a sucker for anything foliage, texture and pattern. Throw in some scenic elements, and um, hello…have you ever been to my blog before?!! But before we get into the creative…let’s talk about the when, where and why.

If you’re a StampNation member, then join us tonight live from the clubhouse PJ Release Party – yup – I’ll be there!! You’ll be the first to get access to this hot collection in the shop. The waitlist will get the secret link at 9 am Wednesday first. So don’t miss being on the waitlist – why not, right? It’s all about access! If any boxes are left over at 6 pm later on Wednesday (and I’ll be floored if there are any – the collection is that good), the box will release to the public.

Tropically Yours Stamp of Approval

The Tropically Yours SOA Collection works flawlessly together. Most of the sentiments are hand lettered, so they are unique. The images are bold, great for techniques, and have just the right amount of CPD spunk. The textures…can we talk about those a second?

First off, Canvas Grunge background stamp – when Shawna Clingerman designed this textured design, I nearly fell out of my chair! Now, I am a bit of a clutz, so that’s not that far of a stretch, but I think I did audibly gasp. This stamp is SO up my alley, and you’ll see why shortly…Good Vibes Borders – what can I say – there isn’t one stamp in that set that you will not use over, and over – and then over again. It’s just THAT good. It’s rare to find an entire set of texture stamps that can not only create incredible full backgrounds, but be just the right little something your project needs, you know? Plus have sentiments…

Leave me in Paradise, Stand Tall, Tropically Yours and Fearless Pursuit – all of which I’m using today…I’ve never seen four stamp sets that work SO well together. Each one is distinctly different and has it’s own flavor, but together they really bring out the best in each other.

Make sure you don’t miss the Add-Ons – all four cookie cutter dies are additional (perfect for those who have a scan and cut like me, right?!!). Um, and yes…there’s a new ink in town – Coral Cabana. It’s part of the Carnivale Collection of Inks in the Party Line, and it’s gorgeous.


I’m showcasing all six stamp sets for you today…but there’s more…the Cabana Tiles Dies – wow. I don’t have a project today with those, but did you see what some of my Creative Team teammates did with those – I mean WOW!

So, head on over to the shop – get all your extras already into your cart, so that when the time comes….you just have to add the SOA and Add-ons and checkout. After all, you don’t want to miss all those little things (adhesive, the new Zig Blender Pen, Embossing Powders & Glitters, Paper – you’ll want some Sand Dunes cardstock if you don’t already have it, and the INKS!

Tropically Yours Projects

No. 1 – You Had Me At Aloha

First up…a little playful fun. This card has a lot going on. First off – look past all the cuteness on it to the textures. That Canvas Grunge background stamp is so beautiful, especially in that Coral Cabana. The textures it has is incredible. And this is stamped off!

I rarely use it directly stamped – it’s a powerful image, and when using it in the background…place a piece of copy paper – or better yet – a different project on it, lightly tap with your fingers and then do the same with your piece. For added interest, use the Good Vibes Boirders stamps repetitively in a light manner in the corners. See how they fade into the card?

I also used the same stamp in Black Jack on the Smoke cardstock. That pattern is literally pure perfection for a background, and it’s super easy to line up too!

The Flamingos are just darling. Their legs are in Coral Cabana, bodies in Be Mine and to get a black beak, squeeze your Black Jack ink pad to collect some ink in the lid. Use a Zig Blender Pen to pull some ink and color like a marker. The Tropically Yours stamp set has some great tropical floral images to go with a few fun sentiments. I love how fun this card is – with a tropical nod to Jerry McGuire!

No. 2 – Sending You Good Vibes

This is one of my favorites. The colors and textures just have make me smile. Seriously – take a good look at the texture created on the stamped images – and that’s just with ink!

The background has a great weathered and distressed look. Use the Canvas Grunge and Good Vibes Borders stamps and do a little ink blending on the edges and corners to antique it a bit. To compliment that, Use a different border stamp on the tag and card base – embossed in my new favorite WOW embossing powder – Bark! I love that color – and wait till tomorrow when I showcase the look of it on dark vs. light cardstock. On Catherine Pooler Chocolate cardstock though, it takes on this deep brown color that with these incredible border stamps is texture galore.

Stamp the same image lightly in Over Coffee onto Sand Dunes, once you’ve embossed your sentiment. Those are a few of the options from the Good Vibes Borders stamps – have I mentioned that set rocks!!

Notice the corners. Again there’s some repetitive stamping going on with the borders stamps. The key to achieving that look is to start light – stamp off onto scrap paper once or twice and then stamp once or twice and repeat. Line your stamp up each time to extend your pattern, and to get that faded look, change up how far in you go with that stamp. I started not quite half way in and ended up less than half that distance. It’s a great look.

The gorgeous hues of the spa line of inks really look amazing on the Leave Me in Paradise images. I like to die cut my images first then stamp – I find it simpler. The green leaves are a mixture of Green Tea, Eucalyptus and on some Spruce. The Oranges are Sauna, Mandarin Spice and on one Rockin’ Red.

My favorite leaf though is the one above the word You. To get that look, you’ll want to ink up just the outsides in Sauna/Mandarin Spice. Fade out the edges towards the middle with a mini ink blending tool, stamp and then ink up the middle with a little Green Tea/Eucalyptus – fading out the edges. Stamp and there’s your blended look! Isn’t it gorgeous?

No. 3 – Here Comes the Sun

Here comes the sun, here comes the sun… And I say… it’s all right. Sorry – now that’ll be stuck in your head all day! This classic and super simple card is a fun one with endless possibilities. To get a super smooth ink blend, I use watercolor paper – Laurel Beard gave me that tip a few years ago, thanks chickie!!

You’ll want to mask off your horizon line and then sponge your sky. Here you see Coral Cabana up top and Limoncello at the horizon. That gorgeous tangerine color in the middle is those two colors blended. I love the shade it creates!

Once you are happy with your sky, reverse your horizon mask and sponge All That Jazz at the horizon and Fiesta Blue at the bottom. Create a mask by tearing a small space at the edge. Use that along with a straight edge mask for your island. Pounce in Icing on the Cake to create your island.

Because this is on watercolor paper, I used my MISTI to stamp my images. The rough texture is tough to get a perfect image the first time. I repeatedly stamped my two palm trees. Isn’t it cool how they almost form a heart! To make sure I had enough space – I laid out my sentiment, then the trees.

The five sentiments in the Fearless Pursuit stamp set are all hand lettered by Shawna. I just LOVE them all. They are unique in appearance and different from what you see everyday. They are uplifting and perfect for so many of the people in your lives. I see myself using them ALL the time. PLUS she added a crazy amount of image stamps – There are 28 stamps in this set!!

Don’t you just love that little frayed grid on the sides – yup, you guessed it – Good Vibes Borders again. That pattern reminds me of Easy Joint Dry Wall Tape. I use that in mixed media projects as a texture all the time. So I was so excited to see a stamped version of it!

No. 4 – Mixed Media Good Vibes

You didn’t think I wasn’t going to throw something unexpected your way did you? This project has a story – a good one. I almost skipped this one for today, but in the end…I just had to share it with you. And it went all sorts of wrong – I almost threw the messed up version away – GASP! So I laid it to the side, and set out to re-do it. That’s this project. The almost trash (which is now my favorite, by the way) project I’ll have up tomorrow.

So back to today’s Mixed Media project. I had Batik fabrics in my head when I thought of this. So I figured i’d get out my Gel Plate and create a fun little background for a starting point – 9 2 page art journal spreads, and about 16 more monoprints later I had an arsenal of things to choose from. I picked my favorite green textured print and set out to create some cards.

To play off the Canvas Grunge stamp, my goal was to create a textured look. I incorporated using some Easy Joint Dry Wall Tape as a stencil – I figured it looked just like the stamp in Good Vibes, this way I could get that look, but use acrylic paint. So I ended up with a gorgeous piece of Greens, Burnt Umber and some Orange.

I cut my monoprint down into four card front sized pieces and set out to make some cards. This is one, tomorrow Click Here to see the others….. Can’t have everything in one day…lol! Next up was to work on a few techniques to give me the look I was shooting for – Joseph’s Coat and Faux Bleaching.

To get this look, you’ll want to emboss your images in Versamark and emboss in Clear. This allows you to “trap” the gorgeous monoprint from underneath, in stamp form. Here’s where I went wrong – I covered my entire project with white gesso next. Normally, that would be fine – only when I went to create the Faux Bleached look – I couldn’t lift it! I just sat there stunned. Click Here to see how I “fixed it”.

So in the second pass, I skipped that part and went straight into the Joseph’s Coat technique. I took my Icing on the Cake ink pad and smooshed it all over my project. The embossed areas resisted the ink and I dried the rest with a heat tool. Now my base is covered in paint, so it’s not like regular paper – it doesn’t absorb dye ink like normal, and the effect is a great one. It’s a grungy, weathered brown, not the deep look you would think you’d get.  You can see some of the orange and green fighting it’s way to get out from under the brown cover.

Next up – Faux Bleaching. I turned on my iron, and got out the yellow pages. Place your project inbetween two pages and iron over it! The heat from the iron re-melts the clear embossing powder which gets absorbed by the pages in the book. You’ll need to move it around and switch up your pages a bit, and because there’s paint in there – it took a bit longer. The result was pretty awesome!

Next up, ink up your background stamp in Midnight ink…what?!! Yes…it’s an archival ink and perfect for stamping on painted surfaces. Lightly stamp off onto scrap paper first, then lay your project over your background stamp. With a light touch, tap a few areas from the back to transfer the ink. Your project with resist in some areas, so if you have a particular look in mind – you’ll need to work at it a bit.

The texture the Canvas Grunge Background Stamp added, made the card! Use the basket weave stamp to lightly add those corners in stamped off midnight like the other projects. Next, lightly sponge the edges in Midnight – ever so lightly. Midnight is the perfect super deep black archival ink to add to Mixed Media. It’s my go to actually over all others on the market.

Create a little grunge canvas look to your card base and super lightly frame with an ink blending tool Icing on the Cake ink. Pop up your Mixed Media piece for a little drama to your card and add your sentiments (from Good Vibes Borders) like a little sign you’d find on an island road.

What do you think? I think the coolest part of it is that the background is one layer – meaning, no raised areas and super smooth. It is a true work of art. Mixed Media isn’t for everyone, and that’s okay – I was super intimidated by it just a few years ago. But once you jump into the deep end, you’ll wish you had earlier. The projects are THAT incredible.

So, to wrap up an epic blog hop post – if you’ve hung in with me till the end – tell me in the comments! Which product are you the most excited by? I’d love to know… The Tropically Yours Collection is for stampers of all kinds. Those who love Clean and Simple, Scrapbookers, Art Journalers, and Mixed Media artists.

Tropically Yours Blog Hop

Tropically Yours Blog Hop List & Prizes

Did you know…we’re giving away a Tropically Yours SOA box to three lucky winners! And if you already bought one – no worries – you’ll get a $100 gift certificate instead, cool, right?!!! All you have to do, is comment on each stop along the hop – all three days. That’s it!

  1. Catherine<– Hop Here NEXT!!
  2. Tracie 
  3. Kristie  
  4. Jen Carter  
  5. Ilina Crouse  
  6. Laurel  
  7. Ingrid <– You’re HERE!!! 

Thanks for stopping by and hopping with us for the past three days!

Till next time –


Supplies

To make finding the supplies I used in these projects a bit easier for you, here are a few clickable links. Compensated Affiliate Links are used when possible. Click here for disclosure. Happy Shopping!


Adoring You SOA Collection – Blog Hop + Giveaway

Welcome to the Adoring You Blog Hop – isn’t a Stamp of Approval collection a great way to kick off the new 2019 year?!! And you’re in for a treat – this collection has some incredible products. Let’s dive right in…

Hopefully you’ve been hopping along the blog hop – if this is your first stop, you have some incredibly talented stampers that will knock your socks off today! If I’m your last stop, I hope you love my take on one layout – two cards.

I’ve been in Europe traveling (and doing a little work) for several weeks now. This collection comes to my mind everywhere I look. I got some real inspiration for my projects over the next several days.

Since I’m traveling – I was limited to how much I could bring with me – so I’m doing everything with just the Life of the Party, Foundations, Midnight, Icing on the Cake, Twilight and Black Jack! That was a challenge for me – I’m so used to having my spa collection, but those were the minis I had – so off we went!

Adoring You Stamp of Approval

Stamp of Approval is a curated box put together by Catherine Pooler. It has stamps/dies and even sometimes stencils and ink in it! The products work effortlessly together, and this box is no exception. SOA is sold while supplies last, and I wouldn’t be surprised if this one sold out.

StampNation members will get to order first (perk of being a member) the night before. They also get a special kick off party live with Catherine and the CPD staff from the clubhouse. Then the next morning at 9 am, if anything is left – the waitlist will get a secret link to shop! It’s free to be on the waitlist – if you’re not on it – what are you waiting for?

The remaining boxes and add-ons will go live to the public at 6 pm on Wednesday January 9th. Seriously – at least get on the waitlist – have I mentioned that it’s free?

Here’s what’s in the collection:

Add Ons:

The Key – One Layout, Two Ways

I’m gonna play a little with a stamp set that literally stopped me in my place the first time I saw it – The Key. If you’ve followed me on social media or my travels over the years – you know that I LOVE to take photos of doors, locks and interesting textures. Over here in Europe, there are SO many interesting doors, locks and each one feels like it has an amazing story to tell.

The basic design for the cards today was to feature a long tall card front 3 1/2 inch wide. Use those amazing locks and keys in fun ways – both in the foreground and background. Plus don’t you just want to pop some of these incredible locks up? Here are two different looks:

The Last Key – Project No. 1

The Key Stamp Set - Adoring You SOA

A good color palette is always key to a great project (do you like that play on the stamp set name…lol?!!). When you need something eyecatching that will work for men and women, try the combo – Tutti Fruitti, Tiki Torch, Aquatini and Icing on the Cake. I wanted a warm golden look to the lock, so I used Tiara and a Zig Blender to color it in.

Don’t you just love the sentiments in this set – Love is the Key to Happily Ever After, If it doesn’t open, It’s not your door? And that’s just two! There are four.

The Key Stamp set - Adoring You SOA

The locks are absolutely stunning. Such detail, character and charm. This card has all the heart locks in the background, the four keys on the card front and the next features the remainder of the locks.

You’ll want the coordinating The Key Dies set too – look how perfectly those locks are cut out on the inside!!

Simple thin Matte in Chocolate cardstock is the perfect accent. You don’t need much!

Congratulations Lock & Key – No 2

In addition to the gorgeous curves of all those locks and keys, this collection boasts an incredible Congratulations Sentiments Stamp Set. This set not only has many options on how to congratulate someone, but some very cool little pieces. And if you love the little tile pieces, definitely check out their larger die form – Backsplash Dies. I have a cool project with those in the coming days…

Congratulations Sentiments Stamp Set - Adoring You SOA

So, as you can see – the basic design of this card is the same, just with a slight little twist! Instead of the card front running the length of the card, shorten it by a quarter of an inch and pop a smaller matte behind it only 3 1/8″ wide. That little gap at the edges adds a fun little look to a traditionally matted piece.

For a fun rainbow look, stamp the three Congratulations Sentiments in rainbow order using the Life of the Party and Foundations ink collections. It’s a fun card, right? Perfect for someone just moving into a new home – or other occasion.

Pop up your matte and add a lock/key done the same way as the first card – only use BlackJack/Twilight and a Zig Blender pen. I love to stamp with Black Jack instead of black. It’s slightly softer and doesn’t overpower the card.

What did you think? I’m totally curious – do you too take photos of locks and doors when you’re traveling? Tell me in the comments below!!

I have to say it was fun to keep my color palette for this release simple. When you are used to using the entire CPD rainbow, you get used to the colors that are your go to colors. I enjoyed picking up colors I don’t normally reach for again. I challenge you to try something similar.

Now it’s your turn. Leave a comment on ALL the blogs in the hop to be entered in for a prize. Hey, it’s a new year – you never know!! And stay tuned to my Instagram channel and come back to the blog in a few days – I have more to share! Below you’ll find the full hop list and product list.

Till then – keep those fingers inky –

SOA Lovely Notes Blog Hop

Lovely Notes SOA Blog Hop

Welcome to the Lovely Notes Collection Blog Hop – Day 3! What do you think so far…pretty amazing, right? Well I hope to add a little creative inspiration for you today with a few projects. I’ve been sharing a few projects over the past few days – this collection is so easy to create with, and I have so much more to keep sharing with you this week.

The Stamp of Approval Lovely Notes Collection is a curated collection of stamps and dies that work fabulously together or alone. Not only do you get a box FULL of amazing stamps and dies, but you’ll get a downloadable PDF Project Guide (for free!) with tons of project tutorials using them!

The stamps and dies in the Stamp of Approval Collections are brand new on the market and won’t be released for individual sale for several months. To find out how to get a box, you have to be on the wait list! Yes, these boxes sell out so fast – the last one was gone in 33 hours….so don’t wait. The wait list will find out before the public will. Click Here to sign up for the wait list and find out more.

Today I’m going to inspire you with several of the components of this collection. Specifically the Lovely Flowers, Lovely Flowers & Banners Dies, Lovely Lattice Background, Butterfly Notes, Wonderful Wreath – all by Catherine Pooler Designs, and Handpainted Thanks by Neat & Tangled. So let’s get right to it with a little Christmas in July, here are your tutorials!

Lovely Notes Project Tutorials

Wonderful Wreath

I was in love with this wreath the moment I saw it. It reminds me of olive branches – delicate and whimsical. To get this clean and simple look, stamp your wreath on white in Stampin Up Pear Pizzazz, the berries in Primrose Petals, hang some ornaments in Baja Breeze and tie it all up with an Early Espresso bow. It was that simple. This is a GREAT mass produced card.

Lovely-Notes-SOA-Project-2---Ingrid-Blackburn-001


For an elegant touch, emboss your greeting in Gilded Gold by Brutus Monroe – my new favorite gold. Add a few sparkling clear sequins by Pretty Pink Posh and a little simple paper piecing in the corners finishes it off.

I’m addicted to the tilt for the matte in the background (thanks Maureen!) – a little Early Espresso on a Pear Pizzazz card base. It’s that simple.

Thanks Friend

This awesome handpainted Thanks stamp by Neat & Tangled is my new favorite greeting – I love bold scripty greetings. I used this stamp just one way – did you know there are two others that layer for a multi tone effect! How cool is that?

You’ll want to stamp some of the Lowely Flowers and cut them using the coordinating Dies. I used the Stampin Up colors – Marina Mist, Wisteria Wonder, Rose Red & Garden Green. On a large piece of white scrap paper – at least card front size, stamp the thanks towards the bottom center/right. Repeatedly stamp thanks in a light neutral tone, I used River Rock. TIP – alter where the word starts on each line so that it flows.

Lovely Notes SOA Collection - Ingrid Blackburn


Stamp the dots from Lovely Flowers in the middle 2/3 of the Soft Suede card base. I stamped it completely across so that the left and right side were even.

Cut your tag out using the large banner die from the Lovely Flowers & Banners Dies set. Try to place the Rose Red Thanks a bit off centered to the right at the bottom. You definitely want some neutral below as well. Stamp the word Friend from the Lovely Flowers Stamp set in Soft Suede on a piece of scrap and attach to your tag.

Pop the tag up using Foam Tape or Fun Foam and adhere your embellishments. TIP – The leaf branch has three sprigs – I cut mine apart to get it just right – sometimes just one or two.

That’s it – it’s a cute card – I had way too much fun with the Lovely Flowers stamps & dies as you’ll see tomorrow!

Bold Watercolor Greetings

If you’ve followed me for a while here, on YouTube or in an online class – you know I love to watercolor! This project takes some of the various greetings in this collection and puts them to good use. I wanted greetings that would stand out, so I used two from Lovely Flowers, one from Butterfly Notes and one of my new favorite Thanks from Handpainted Thanks. Here’s a video tutorial for you:

Click Here to watch video in HD on YouTube

To get this outline look, first stamp your images in versamark. Go back over them with a de-static tool and stamp again in Versafine Onyx Black Ink. Emboss in Black and heat set. Once cool, secure your project down with low tack painters tape on the upper and lower edges.

Smoosh some Distress Ink onto your craft mat or acrylic block – I used Rusty Hinge, Ground Espresso, Gathered Twigs and Vintage Photo. Grab some ink with a large wet brush and start painting onto your dry watercolor paper. You want your watercolor to flow together without getting out of control.

Handpainted Thanks - Lovely Notes Collection - Ingrid Blackburn

TIP – if your paper accumulates too many puddles or your colors blend out of control, gently dip the edge of a dry paper towel into a puddle to sop it up without removing color. Or use a thirsty brush (Not dripping wet). Water will naturally be attracted to a dry surface.

Once you have the look you want, heat set or allow to dry on it’s own. TIP – keep some lighter areas along with dark for a balance.

Stamp the Lovely Lattice Background stamp in Ground Espresso onto a folded Espresso card base. I just inked up the top and bottom. Quickly dip into clear embossing powder and heat set for a tone on tone look. If using a vanilla or white background, use Versamark ink for a watermark look. The key is not to compete with your watercolor, but rather support it.

It’s a pretty quick and easy project. I made four as I wasn’t sure of the look I wanted. Here’s a rainbow one too:

Lovely Notes Stamp of Approval Ingrid Blackburn


I added a little dry embossed line to the top and bottom for a simple embellishment. No matter what color combination you choose, you’ll love this technique.

Now that you have some inspiration…time to find out just how you can win a free box!

Lovely Notes SOA Win

It’s your turn to hop along and check out what the uber talented Amy Tsutura has in store for you next! Here’s the blog hop list:

Catherine Pooler

Neat and Tangled

Kristie Goulet

Yoonsun Hur

Ingrid Blackburn – That’s Me * You are here*

Amy Tsuruta You’re next stop!

Justine Hovey

Be sure to leave a comment on each designers blog for a chance to win a Lovely Notes Collection of your own! There’s a giveaway for all three days of the hop! If you missed out on any of the Blog Hops – start at the beginning with Catherine’s Blog and Day 1.

And stop by tomorrow for more inspiration –

Signature

[optin_box style=”12″ alignment=”center” email_field=”email” email_default=”Enter your email address” integration_type=”aweber” double_optin=”Y” list=”3846012″ name_field=”name” name_default=”Enter your first name” name_required=”Y” opm_packages=””][optin_box_field name=”headline”]Learn more with our exclusive FREE video series:[/optin_box_field][optin_box_field name=”paragraph”]PHA+UGx1cyB5b3XigJlsbCBiZSBhZGRlZCB0byBteSBGUkVFIENyZWF0aXZlIFRpcHMgRS1sZXR0ZXIgd2hlcmUgSSBzaGFyZSBleGNsdXNpdmUgcHJvamVjdHMsIHZpZGVvcyAmYW1wOyB0aGUgMTIgRGF5cyBvZiBDaHJpc3RtYXMgUHJvamVjdCBTZXJpZXM8L3A+Cg==[/optin_box_field][optin_box_field name=”privacy”][/optin_box_field][optin_box_field name=”top_color”]undefined[/optin_box_field][optin_box_button type=”0″ button_below=”Y”]Get Instant Access![/optin_box_button] [/optin_box]

Butterfly Notes in the Garden

The day has finally arrived – the new Stamp of Approval Blog Hops are here! While I’m not on the “official” list for today…catch that on Tuesday, I will be sharing some creative fun with you from this collection over the next week.  I have to admit, it’s been hard to sit on my hands and not share this awesome jam packed collection with you, and I’m excited that I finally get to let the stamps fly – well in this case today…here are some new Butterflies for you – Butterfly Notes by Catherine Pooler Designs.

Butterfly Notes - Catherine Pooler Designs

This card is so much prettier in person than photographed. It was really hard to capture the background – soaring skies filled with four different fluttering butterflies – all embossed in white on white. But I needed something to support the colorful tag – or banner (upside down of course).

This collection of butterflies really is a great one. What I love about it so much is that there are various orientations of the butterfly images – everything from transparent wings, to flight directions, to gorgeous details along the edges or back wings – as you see in this close up here:

Lovely-Notes-SOA-Project-3---Ingrid-Blackburn-005


And then of course my all time favorite thing – sentiments with images. I don’t know about you, but for me when sentiments are included with stamps, my heart sings. I love it when I can go back to a stamp set over and over again, not just for the images. I’m all about versatility in my purchases, aren’t you?

I watercolored the tag with distress inks first – my thought was garden at the bottom – greens, then sky – blues evolving darker into some purple. To create the garden metal gate, once the watercolored piece was dry, emboss the Lovely Lattice background stamp in Pewter. Pewter is such an elegant color and gives an antique look that I just love. Next, you’ll want to cut this gorgeous watercolored piece out using the large banner/tag from the Lovely Flowers & Banners Dies set.

Lovely Lattice Background


Watercolor stamp Spiced Marmalade using the butterfly image & once dry add a little Spectrum Sparkle Pen to it for some glitz. Place your orange butterfly over the blues – they are complimentary colors so they really support each other in harmony.

A little strip saying above the cut out embossed on vellum scripty Thank You from this set supports the card without taking away any focus. Of course, I couldn’t resist a few sparkling clear sequins as well – were you really surprised?

The card is folded white (11 x 4″) and then mounted onto a 1/4 panel of black for the base. That gives a slight black edge on the left and right – it needed it to help pop the white, and is a bit unexpected.

Lovely-Notes-SOA-Project-3---Ingrid-Blackburn-003

I love this card for it’s subtle notes and pop of bright colors. Be sure to stop by Catherine’s Blog to start the hop today – each of the three days, there’s a collection up for grabs – so leave comments along the way for all the blog hops! Catherine shared three videos over the past few days showcasing the products in the Lovely Notes Collection, so be sure you are on the wait list to be the first to get a hold of it right when it’s released July 13th – they go really fast!

Lovely Notes SOA Banner

See you tomorrow with more inspiration –

Signature

[optin_box style=”12″ alignment=”center” email_field=”email” email_default=”Enter your email address” integration_type=”aweber” double_optin=”Y” list=”3846012″ name_field=”name” name_default=”Enter your first name” name_required=”Y” opm_packages=””][optin_box_field name=”headline”]Learn more with our exclusive FREE video series:[/optin_box_field][optin_box_field name=”paragraph”]PHA+UGx1cyB5b3XigJlsbCBiZSBhZGRlZCB0byBteSBGUkVFIENyZWF0aXZlIFRpcHMgRS1sZXR0ZXIgd2hlcmUgSSBzaGFyZSBleGNsdXNpdmUgcHJvamVjdHMsIHZpZGVvcyAmYW1wOyB0aGUgMTIgRGF5cyBvZiBDaHJpc3RtYXMgUHJvamVjdCBTZXJpZXM8L3A+Cg==[/optin_box_field][optin_box_field name=”privacy”][/optin_box_field][optin_box_field name=”top_color”]undefined[/optin_box_field][optin_box_button type=”0″ button_below=”Y”]Get Instant Access![/optin_box_button] [/optin_box]


Creative Cards – Snowflake Gift

Snowflake-Gift-001

This month’s Christmas Challenge card is a creative card for you – a snowflake gift. The theme at the Happy Little Stampers Christmas challenge this month is Gift, so why not just wrap it all up in a snowflake bow?

HLS Christmas Challenge May 2016

To create this card, I wanted a simple and straightforward background – white pigment ink stenciled with the Snowflakes stencil by Memory Box onto some Pool Party card stock by Stampin Up. I had some matching pool party satin ribbon for my wrapping, a couple Snowflake die cuts in Pool Party and Night of Navy card stock as my bow.

Snowflake-Gift-008

Just stamp the greeting from the Mixed Christmas Sentiments by Happy Little Stampers, cut some banner edges and pop up the middle for a little movement and Voila – all done!

Snowflake-Gift-0056Snowflake Gift Card

Quick, simple, interesting and this can be done over and over in any color theme and with any dies – think Graduation with hats and a diploma, Happy Birthday with anything – polka dots, little cakes, streamers – you name it. Baby, flowers, butterflies, I can go on and on and on. Quick, easily mass produced and so cute! Tell me YOUR idea in the comments below – I’d love to compile a list of awesome ideas.

Snowflake Stencil Gift

Thanks for stopping by today for this quick tutorial, be sure to swing by the Design Team’s cool creations as well. Now go create your own “Gift” for the challenge – I can’t wait to see what you do!

Signature

[optin_box style=”12″ alignment=”center” email_field=”email” email_default=”Enter your email address” email_order=”2″ integration_type=”aweber” double_optin=”Y” list=”3846012″ name_field=”name” name_default=”Enter your first name” name_order=”1″ name_required=”Y” opm_packages=””][optin_box_field name=”headline”]Learn more with our exclusive FREE video series:[/optin_box_field][optin_box_field name=”paragraph”]PHA+UGx1cyB5b3XigJlsbCBiZSBhZGRlZCB0byBteSBGUkVFIENyZWF0aXZlIFRpcHMgRS1sZXR0ZXIgd2hlcmUgSSBzaGFyZSBleGNsdXNpdmUgcHJvamVjdHMsIHZpZGVvcyAmYW1wOyB0aGUgMTIgRGF5cyBvZiBDaHJpc3RtYXMgUHJvamVjdCBTZXJpZXM8L3A+Cg==[/optin_box_field][optin_box_field name=”privacy”][/optin_box_field][optin_box_field name=”top_color”]undefined[/optin_box_field][optin_box_button type=”0″ button_below=”Y”]Get Instant Access![/optin_box_button] [/optin_box]