Naturally Inspired Stamp of Approval Collection – 2 videos!

Naturally Inspired Stamp of Approval Blog Hop - Ingrid Blackburn

Welcome to Day 3 of The Naturally Inspired Stamp of Approval Blog Hop! You probably hopped on over from Lydia Evans’ blog – she’s uber talented, isn’t she? I’m such a fan of hers. The whole hop list is at the end, but first here are a few projects to showcase just how amazing this curated collection inspired me.

If you’re new to Stamp of Approval – click here to check out everything you need to know about this amazing collection of Stamps, Dies and Stencils.

And make sure you are on the wait list so you get access to the collection at 9:00 am tomorrow June 7th before the public. The Add-ons are limited – especially the Wild Garden Dies, you don’t want to miss out.

Of course, If you are a StampNation member – you not only get to order hours earlier…but I’ll see you at the exclusive Slumber Party release tonight – I’ll be participating live – so come stamp with me, Catherine and many others from the Design Team.

Stamp of Approval

How I’m Naturally Inspired

If you’ve followed me for a while you know nature is my thing – in case you haven’t noticed – I love trees, the mountains, flowers – and especially greenery! I’m 100% at home walking in the mountains, woods, among trees & flowing water – I’m a born and raised northern California girl after all. Growing up in San Francisco, I’m partial to the ocean – and having lived 10 years in Florida…I never tire of these sunsets:

My true inspiration for my work is nature around me – it brings me the peace I need to think clearly and allow the creativity to flow. So much so, that I even have a few little Christmas trees all around me on my desk…lol!

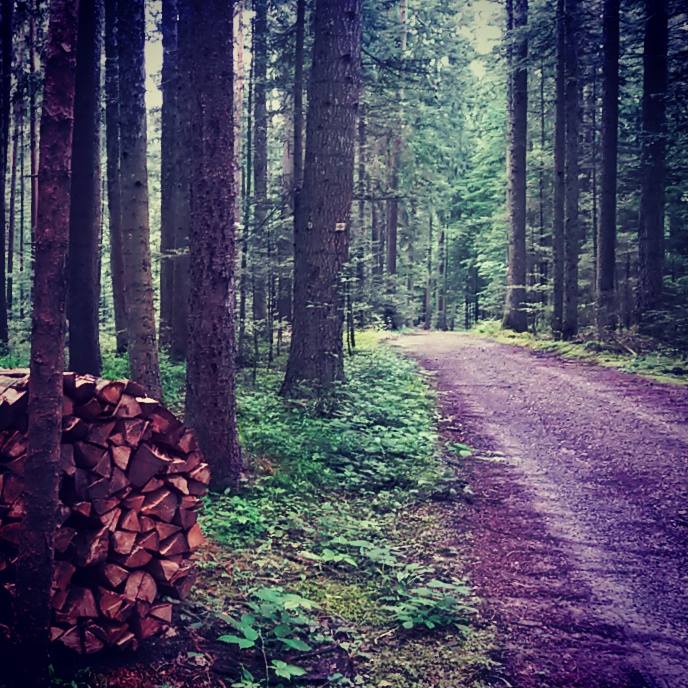
In a few weeks, I’m heading back to the Black Forest for the Summer – and I can’t wait to just be in my element again (I spent the last three years there). Here’s a little sneak into my world – sadly it’s the wrong time of year for the snow, but you will definitely find me shortly wandering along one of thousands of paths and trails daily:

I love the textures and colors of nature. It drives my creations. Today I have a few colorful pieces (and videos) for you too! And wouldn’t you know…I even managed two scenic cards – very different from each other as well. Enjoy!

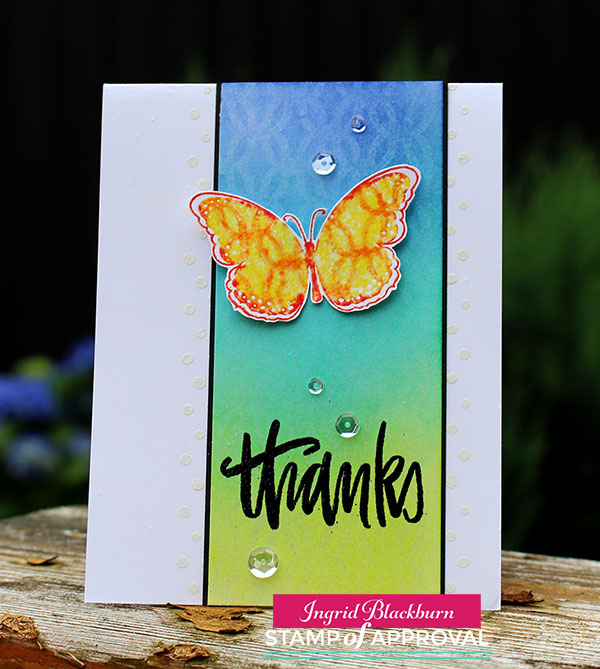
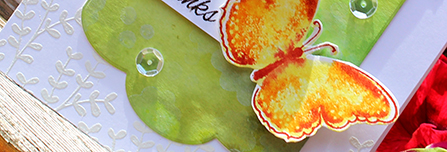
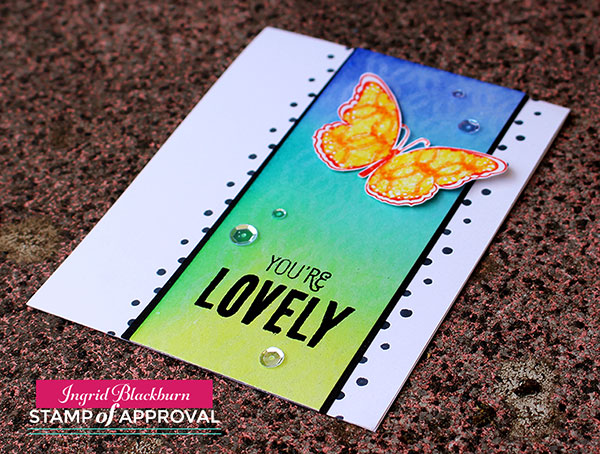
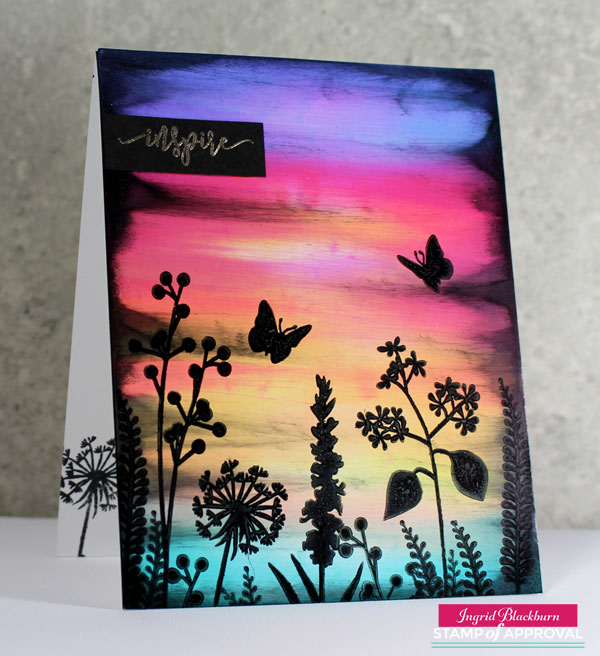
Project One – Naturally Inspired Sunset Silhouettes

I love scenic cards – and when I first saw the Wild Garden stamp set designed by Lisa Kirkbride, this card literally popped into my head. Paired up with Catherine Pooler Designs vibrant inks, I just knew the ink swipe technique was calling. Here’s a video on how I created this colorful layered sunset on glossy paper.

Click Here to view the video tutorial in HD on YouTube

Aren’t those colors just amazing. And with this fun technique, the possibilities are unlimited. In addition to the SOA collection, the Wild Garden set also has add-on dies which are perfect to cut out those intricate shapes.

Ink Swipe Technique on Scenic Cards

Project Two – Medallions

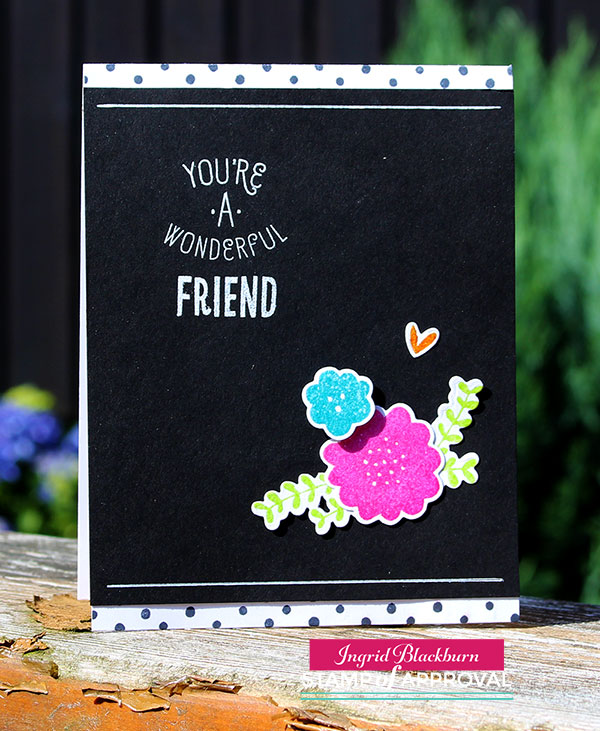
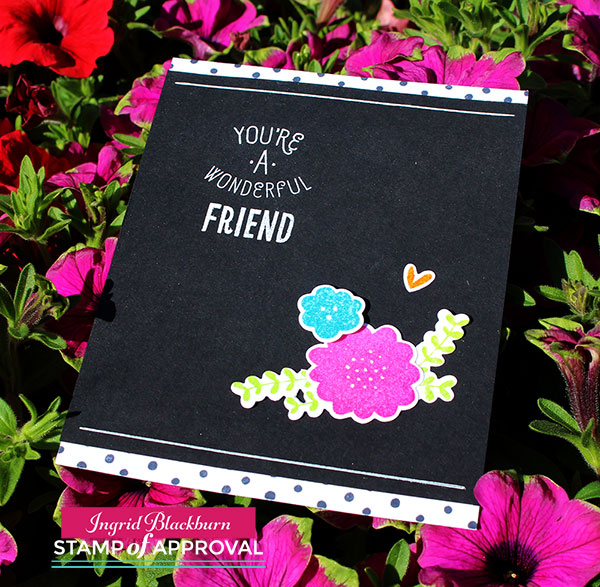
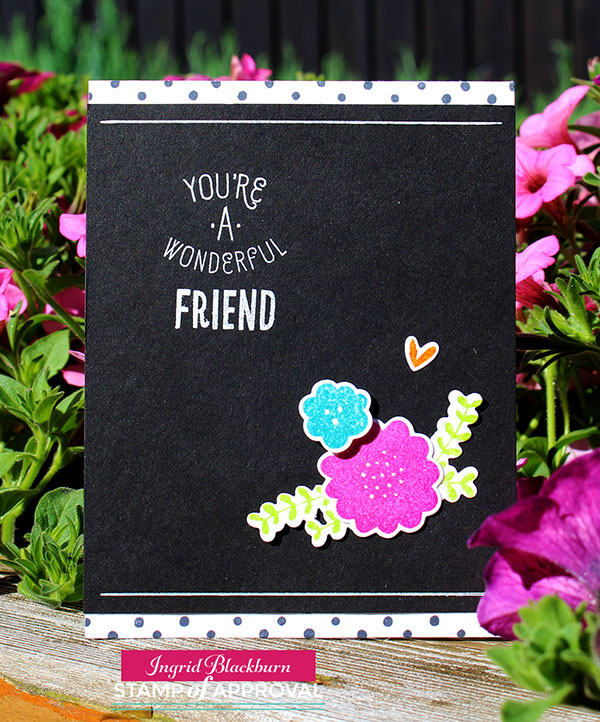
One of my favorite parts of this box is the surprise elements. Usually you’ll have some awesome stamps, dies and maybe even a stencil – but Catherine really outdid herself this time. Especially with the Wanderlust exclusive embossing glitter by WOW! It’s an exclusive mix just for this Collection and let me tell you – it sparkles! I think I was able to capture the sparkle pretty well here – it’s super cool on black too, becomes sparkly yellow – like a yellow diamond.

The Medallions are so versatile – I’ve just scratched the surface with them. If you didn’t see the sneak peek Catherine let you in on for my Navy Metallic card in the Facebook Live the other day – stop by in a few days, I’ll have that project right here along with a few more.

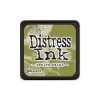
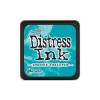
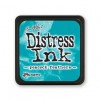
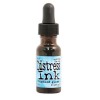
This project showcases Catherine Pooler Designs Inks: Party Dress, Bellini, It’s a Girl, Sweet Sixteen and Tiki Torch.

Medallion Mix Up by Catherine Pooler Designs

This project keeps the Medallion Mix Up images stamped as a nest within each other – but then uses the same colors in an overlapped pattern in the back. While I love the look, it was a bit busy – so to tone it down just a smidge and allow the focal piece to jump out a bit – try adding a simple sheet of vellum. You still see all that colorful goodness, without allowing it to overtake your project.

But today it’s all about some fun colorful medallions mixed with all that sparkly goodness. I won’t lie, I’m addicted to the Best Die – I LOVE Shawna Clingerman’s (the illustrator) hand scripted font – who wouldn’t, right?

And then glitter that baby up – WOW! Literally.

WOW! Wanderlust Embossing Glitter

But don’t think to just keep the glitter to just there – add it to the edge of your circle or card front for a truly special look. And just imagine this card in Blues & browns for a great Masculine look!

Project Three – Colorful Feathers

The Naturally Inspired Collection lends itself quite well to great clean and simple design, here’s a super quick and fun one. The Feather stamp is amazing – did you see that all the little birds in the set that can be stamped as if they are transformed out of the tip?!! How clever is that!

I kept things colorful and simple here – some great ink colors…a little mystery too! I’m in LOVE with the Simply the Best stamp set – you can create so many amazing sentiments with this set. And I just love the various ways to stamp Best – quirky, scripty – just LOVE that.

Quick Clean and Simple Cards by Ingrid Blackburn

But I have to admit – my favorite stamp in the entire collection is that diamond pattern. It’s only about 1 1/2 inches long – but look at how cool it looks stamped in a row?!! You will find that it is SUPER easy to layer end to end – I did this one by hand – no Misti needed here.

Pretty cool huh? NOW…see how I used that very same feather – and colors in the next project. Yes, this next project was made with all those colorful bright colors – honest!

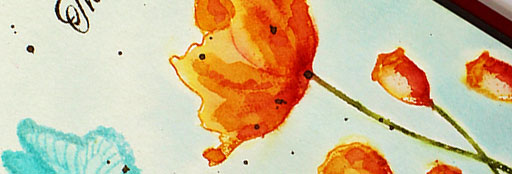
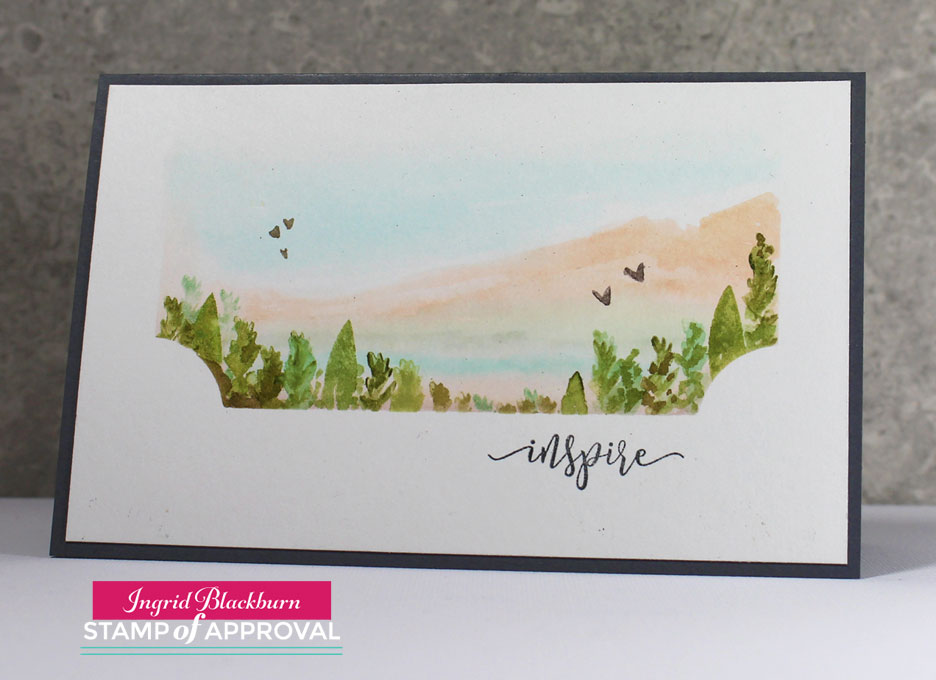
Project Four – Watercolored Landscape

I love both my scenic cards today for very different reasons. The techniques couldn’t be any farther apart from one another. This one is an effortless watercolor that combines the vibrant colors from the first into the muted subtle shades that you see here. The moment I saw the little birds from Birds of a Feather, I was on a mission to see how I could take the stamps from this collection and stretch them into something different – trees!

Here’s a detailed video on how to recreate just that. And if you loved this, definitely subscribe to my YouTube channel too:

Click Here to see this video tutorial in HD on YouTube

Kind of cool, huh? I love creating something new and unique from existing supplies – versatility in my products is SO important. Plus being a fan and DT team mate of Kristie Goulet – the queen of uniquely stamped cards will do that to you!

Watercolor Landscape Cards using the Naturally Inspired Collection

I have detailed supplies and instructions on both scenic cards in the Naturally Inspired SOA PDF Guide – it’s jam packed with great projects to get you started – definitely one of my favorite components of each collection – detailed how to instructions!

So I encourage you to think outside the box with this collection. It won’t be hard. You’ll get such varied results which is just awesome.

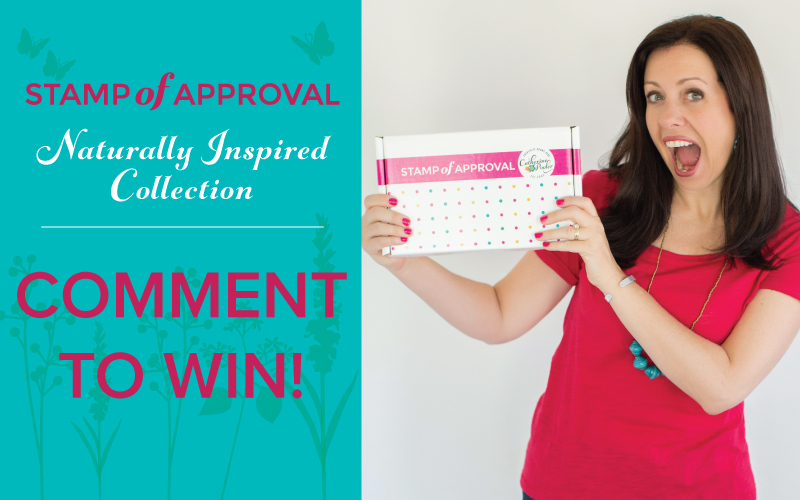
These four projects believe it or not – uses almost every item in the box. I love it when I can create 10 different projects and no two are the same – I can’t wait to show you the rest. That’s the sign of a home run to me! So let’s get you entered in to win one of these amazing Naturally Inspired collections yourself!

Naturally Inspired Stamp of Approval Collection by Catherine Pooler Designs

To win one, just hop along and leave some love on all my team mates blogs. All the blogs from the last two days too – the Design Team inspirational line up is epic! Tell us what inspires you too.

Here’s the talented line up for today:

1. Catherine Pooler
2. Taheerah Atchia
3. Laurel Beard
4. Lydia Evans
5. Ingrid Blackburn You are here!
6. Heather North < Hop here Next!
7. Cynde Whitlow

Hope you enjoyed these projects and videos. Was I was able to inspire you to get creating yourself? I want to know what inspires you – tell me in the comments below! You never know – you may just win a Naturally Inspired Collection yourself.

Till next time –

[optin_box style=”31″ alignment=”center” email_field=”email” email_default=”Enter your email address” integration_type=”aweber” double_optin=”Y” list=”3846012″ name_field=”name” name_default=”Enter your first name” name_required=”Y” opm_packages=””][optin_box_field name=”headline”]LEARN MORE WITH OUR EXCLUSIVE FREE VIDEO SERIES[/optin_box_field][optin_box_field name=”paragraph”]PHA+TG9yZW0gaXBzdW0gZG9sb3Igc2l0IGFtZXQsIGNvbnNlY3RldHVyIGFkaXBpc2NpbmcgZWxpdC4gRG9uZWMgdmVsIG51bmMgbm9uIGxhY3VzIHZlbmVuYXRpcyBjb21tb2RvLjwvcD4K[/optin_box_field][optin_box_field name=”privacy”][/optin_box_field][optin_box_field name=”top_color”]undefined[/optin_box_field][optin_box_button type=”0″ button_below=”Y”]Get Instant Access![/optin_box_button] [/optin_box]


Forest Stag – Masculine Christmas Cards

We all need a few different types of Christmas cards – especially Masculine Cards. So what makes a Masculine Christmas card? Well, color mostly! When I think masculine, I think neutral colors – earthy, and not too overly cutesy.

forest-stag-ingrid-blackburn-001

Today’s project is just that – and my first to really feature the rockin’ Stag from the Hip Holiday stamp set in the Candy Cane Lane Collection by Stamp of Approval. I’ve shared a few projects this past week already from this great collection – that goes on sale if you’re on the Wish List or a StampNation member this morning.

Tomorrow – if there are any left, it will go live to the public. There’s still time to get on the Wish List – so don’t wait if you like any piece of the collection. We also had three great Blog Hops loaded with Holiday card ideas for you. I have links to everything you may have missed below – not to worry!

candy-cane-lane-collection

Now back to our Masculine Christmas Stag….Here’s a quick tutorial for this great clean and simple card – another great mass producible one:

Masculine Christmas Cards: Forest Stag Tutorial

To keep with a masculine look – use neutral or muted colors. I chose to use Kraft card stock for the frame & card base. For the panel I used a dusky green – Always Artichoke by Stampin Up. For red accents – Cherry Cobbler and the Stag in White so that he really pops.

Once you’ve die cut your frame with the Merry Label Dies (CAS-ual Fridays for Stamp of Approval), edge it lightly with Tea Dye Distress Ink. This helps to accentuate the edge, give it a rustic look and showcase some of the debossing around the edges.

Masculine Christmas Cards - Ingrid Blackburn

Use the coordinating dies for the Hip Holiday set to cut the stag out in white. Next, stamp the stag in Soft Suede & Early Espresso for the patterned ears & neck. I just love him – isn’t he great! I made one with eyes and a smile, but ended up liking the one without a face better.

Rather than clutter the label die with stamped images – add some tone on tone boughs from the Merry & Bright Bough Stamp set. Keep it minimal so that it doesn’t overtake the card.

TIP – to get the bough placement just right, lightly trace the label die so you have a guide, then erase your lines once done! If you are mass producing cards, create a label out of masking paper, trim it down to the inner debossed line. That way you don’t have to keep tracing it!

Fold your card base in half and stamp the Peppermint Stick background stamp in Cherry Cobbler on the edge. Glue your Artichoke card front on.

Masculine Christmas Cards - Candy Cane Lane

Glue your stag to the label, emboss a greeting in gold onto Cherry Cobbler. I used the lower part of Sweetest Holiday Wishes from the Candy Cane Lane stamp set. TIP – I actually cut that one apart – there is a bit of space between the sweetest and Holiday Wishes – it easily lines back up if desired – but I’ll get so much more use from it this way without having to constantly mask it off!

Glue your greeting over the stag and label – trim the edges and pop it all up with foam tape. Add a few gold sequins by Pretty Pink Posh (that large one is by Rico Designs) and you’re all set!

It’s cute, right? I’m in love with this color combo.

More Christmas Project Ideas

If you didn’t get a chance to see my two videos for this collection, here are the links to those pages. There’s a video on each!

CAS Peppermint Bark      Peek-a-Boo Candy Canes & Christmas in a Box

I also have a great Christmas in a Box project on there too. Tomorrow, you’ll get to see another video tutorial with a technique project right here, so stop on by.

If you would like to get even more Christmas ideas from me, check out my YouTube channel, plus subscribe to my Creative Tips E-letter below or to the right. In about a month, I will be starting my yearly 12 Days of Christmas series. You’ll only see those projects free in your inbox through Creative Tips.

[optin_box style=”12″ alignment=”center” email_field=”email” email_default=”Enter your email address” integration_type=”aweber” double_optin=”Y” list=”3846012″ name_field=”name” name_default=”Enter your first name” name_required=”Y” opm_packages=””][optin_box_field name=”headline”]Learn more with our exclusive FREE video series:[/optin_box_field][optin_box_field name=”paragraph”]PHA+UGx1cyB5b3XigJlsbCBiZSBhZGRlZCB0byBteSBGUkVFIENyZWF0aXZlIFRpcHMgRS1sZXR0ZXIgd2hlcmUgSSBzaGFyZSBleGNsdXNpdmUgcHJvamVjdHMsIHZpZGVvcyAmYW1wOyB0aGUgPHN0cm9uZz4xMiBEYXlzIG9mIENocmlzdG1hczwvc3Ryb25nPiBQcm9qZWN0IFNlcmllczwvcD4K[/optin_box_field][optin_box_field name=”privacy”][/optin_box_field][optin_box_field name=”top_color”]undefined[/optin_box_field][optin_box_button type=”0″ button_below=”Y”]Get Instant Access![/optin_box_button] [/optin_box]

ccl_commenttowin

To see all the amazing creations from the past few days – don’t miss the blog hops….You can still win a free box! Leave comments along the way. Check them out here:

Blog Hop – Day One          Blog Hop – Day Two          Peppermint Watercolor

StampNationGeneralBlogPost

And finally… if you’re a StampNation member – be sure to check out the Challenge this morning! It’s loaded with Stamp of Approval cards!!! Can you guess which one is mine?!

StampNation - Ingrid Blackburn

Now you have some serious holiday inspiration! See you tomorrow with even more…

Signature

[optin_box style=”12″ alignment=”center” email_field=”email” email_default=”Enter your email address” integration_type=”aweber” double_optin=”Y” list=”3846012″ name_field=”name” name_default=”Enter your first name” name_required=”Y” opm_packages=””][optin_box_field name=”headline”]Learn more with our exclusive FREE video series:[/optin_box_field][optin_box_field name=”paragraph”]PHA+UGx1cyB5b3XigJlsbCBiZSBhZGRlZCB0byBteSBGUkVFIENyZWF0aXZlIFRpcHMgRS1sZXR0ZXIgd2hlcmUgSSBzaGFyZSBleGNsdXNpdmUgcHJvamVjdHMsIHZpZGVvcyAmYW1wOyB0aGUgPHN0cm9uZz4xMiBEYXlzIG9mIENocmlzdG1hczwvc3Ryb25nPiBQcm9qZWN0IFNlcmllczwvcD4K[/optin_box_field][optin_box_field name=”privacy”][/optin_box_field][optin_box_field name=”top_color”]undefined[/optin_box_field][optin_box_button type=”0″ button_below=”Y”]Get Instant Access![/optin_box_button] [/optin_box]

Watercolor Painted Poppies Video Tutorial

Blooming-Garden---Ingrid-Blackburn-Sneak-2

Have you every just had a crazy amount of fun making a card before? Well, that was me with this project! I’m guest blogging over at my friend Catherine Pooler’s blog today and have a written and video tutorial for you – be sure to hop on over there to check it out!

A few weeks ago over at StampNation, we had a fun challenge CASEing one of our members – Gail Hislop. I used one of her creations to get inspired and created this field of poppies – I have to say, I think it’s the prettiest watercolored card I’ve EVER made! To see it, you need to be on StampNation, so if you’re a member – here’s a direct link…Field of Poppies Card

Gail-Hilsop-Case---Sneak-Peek

The last time I was with Catherine – in real life – was last fall. We hung out one morning over coffee. I did what any good crafter would do…I brought cards with me! She fell in love with one of my tutorials for my Just Cards class, and wanted me to show how to watercolor stamp and paint it. So we hopped onto periscope and I did a quick live tutorial.

When she asked me to do a guest post on her blog…I immediately went to this technique. I knew she’d love an in depth tutorial, so what are you waiting for – hop on over to Catherine’s blog and check it out! Be sure to leave a comment and let us know what you think!! 🙂

See you VERY soon!

Signature

thumbnail-2

PS – and if you’re a StampNation member…be sure to see my in depth tutorials on Embossing Powders & some fun techniques for the summer event – Heat it Up!


Lovely Flowers – Little Touches

Polka Dot Floral Cards

It’s the little touches in cardmaking that make the biggest statements. Today’s project is the perfect case in point. I’m in love with the Lovely Flowers stamp set and matching dies from the Stamp of Approval Lovely Notes Collection.

I thought it would be fun to stamp a few simple flowers in bright colors (Distress Picked Raspberry &  Mermaid Lagoon) accent them with some sprigs in Twisted Citron and a little heart in Wild Honey. I LOVE that little heart.

Lovely-Polka-Dots-004


To really make your embellishments pop – try embossing them in clear and then popping them on black like this card! A simple white greeting the opposite corner for balance is all you need.

But that alone isn’t enough. The card was falling a little flat – enter the little touches. Add some polka dots with the dotted stamp from this stamp set (see what I did with it yesterday is a video here) for the top and bottom – or just one. To finish the card off completely – I left off sequins or anything that would clutter it up, and instead try adding a simple white line to the top and bottom. All around would have been too much – remember, little touches.

Lovely-Polka-Dots-005

So what do you think? I think Bria likes it…lol! Here’s our gorgeous younger cat – she loves my craft studio…I find her hair everywhere! Do you have a little someone who loves your corner too?

Lovely-Polka-Dots-003

[divider style=”9″]
Lovely Notes SOA Now

If you’ve been hopping along the past few days, the winners were just announce! Head over to Catherine’s Blog to see if you won. 🙂

And if you missed the 18 designers that showcased two-three projects each…here are the links to those Blog Hop days. Have fun!

Day 1               Day 2               Day 3

SO….did you treat yourself to the current Stamp of Approval? Ordering is officially open to the public…don’t wait! It will sell out, and it’s a great collection. To find out more – check out the Stamp of Approval site here.

Those that were on the early notice wait list already are set to ship – check out all this goodness headed all over the world!

Stamp of Approval

I can’t wait to see what you all create with this amazing collection – Till next time!

Signature

[optin_box style=”12″ alignment=”center” email_field=”email” email_default=”Enter your email address” integration_type=”aweber” double_optin=”Y” list=”3846012″ name_field=”name” name_default=”Enter your first name” name_required=”Y” opm_packages=””][optin_box_field name=”headline”]Learn more with our exclusive FREE video series:[/optin_box_field][optin_box_field name=”paragraph”]PHA+UGx1cyB5b3XigJlsbCBiZSBhZGRlZCB0byBteSBGUkVFIENyZWF0aXZlIFRpcHMgRS1sZXR0ZXIgd2hlcmUgSSBzaGFyZSBleGNsdXNpdmUgcHJvamVjdHMsIHZpZGVvcyAmYW1wOyB0aGUgMTIgRGF5cyBvZiBDaHJpc3RtYXMgUHJvamVjdCBTZXJpZXM8L3A+Cg==[/optin_box_field][optin_box_field name=”privacy”][/optin_box_field][optin_box_field name=”top_color”]undefined[/optin_box_field][optin_box_button type=”0″ button_below=”Y”]Get Instant Access![/optin_box_button] [/optin_box]

Lovely Lattice Butterflies – SOA is live!

Lovely Lattice Background - Catherine Pooler Designs

I’ve been creating a lot with the kissing technique lately. I have to say, this simple technique always amazed me!  It’s been a cram packed few days of inspiration here and on the design team blogs. If you’ve missed any of the fun, I have links at the end for you.

Lovely Notes SOA Now

Today the Stamp of Approval Lovely Notes Collection goes live – yup…if you’re on the wait list you’ve received a link to head on over and grab a box. It’s the first release of these six stamp and two dies sets. You’ll also get a loaded PDF with projects and step by step instructions – how’s that for a place to start! Not on the list – no worries – get on it right here and get a head start on the public release tomorrow (if it hasn’t sold out!).

If you’ve seen any of my past three posts, you know I still have more projects for you – yup…today I even have another video! Over at StampNation, there’s a challenge going live today – Meadow Daydreams. I have to say, this challenge is made for me – I LOVE this kind of a color palette and theme. I’m actually shocked that I didn’t do a scenic card! Here’s a sneak peek into the project I created…to see it, you have to be a member of StampNation though.

Meadow-Daydreams-Sneak Peek

New Inspiration for you

So to piggy back on the challenge – I created a few cards with the same color palette, theme and then I loaded them up with techniques – after all, that’s kind of my thing, isn’t it?I have a video tutorial for you here and a written one below.And if you aren’t already – I’d love for you to subscribe to my YouTube channel too – click here.

Click Here to see the video in HD

Lattice Butterfly Tutorial – the Kissing Technique + others

  • Ink up your Lovely Lattice Background stamp by Catherine Pooler Designs in Versamark
  • Transfer your image to a piece of 140# Cold Pressed Watercolor Paper (5 1/2 x 4 3/4″) & clean your stamp
  • Sponge your colors over your image blending the colors Twisted Citron, Peacock Feathers and Blueprint Sketch

Kissing Technique - Stamp of Approval

  • Allow your Distress Ink to fully dry while working on your butterflies
  • Ink up the large butterfly from Butterfly Notes by Catherine Pooler Designs in Squeezed Lemonade & Edge in Barn Door.
  • Ink up your Lovely Lattice Background stamp in Spiced Marmalade (you only need an area as large as your stamp)
  • Kiss your inked up butterfly to your inked up background stamp; thus transferring your image to it – or kissing

Butterfly Notes - Stamp of Approval - Catherine Pooler

  • Stamp on a piece of regular white card stock and heat emboss immediately in clear embossing powder. If your image has dried before your powder sticks, just stamp over your butterfly in versamark. Repeat for a second butterfly.
  • Fussy cut out your images
  • Cut your background in half (5 1/2 x 4 3/8″) and rub a de-static bag onto the bottom half. Stamp (Versamark) the greeting Thanks – Handpainted Thanks by Neat & Tangled & You’re Lovely by Catherine Pooler Designs – Lovely Flowers. Emboss in Black.
  • Trace the edges of your strip lightly for a guide where you plan to adhere it to your card base.
  • Stamp the polka dots from Lovely Flowers (landscape so you have the alternating ends) down the side using the line to keep your pattern straight. You’ll need to overlap the bottom dot with the top for an even pattern. I stamped one in Memento Tuxedo Black and the other I embossed with Versamark and white embossing powder.

The Kissing Technique - Versamark - Ingrid Blackburn

  • Matte your background onto black (5 1/2 x 4 1/2″) so that it just has a sliver of black – this will cover your line.
  • Adhere your butterfly with two mini glue dots in the center and place a foam dot under each wing toward the top to help with the illusion of flight.
  • Add Sparkling Clear Sequins by Pretty Pink Posh.

I love how the background stamp just magically appears. This technique has the biggest wow on glossy card stock & with darker inks, but the subtle effect here is lovely and the perfect accent.

Stamp of Approval

Lovely Notes SOA Banner

Thanks for joining me today! I have two more projects headed your way in the days to come, so be sure to stop back by! In the meantime, if you missed any of the six projects I posted this week, or the blog hops for all 18 designers – yup…there were that many – click on the links below for the starting point of each hop:

Day 1               Day 2               Day 3

And don’t forget to check out the Stamp of Approval – Lovely Notes Collection – it’s live right now – but just for those on the wait list!

Now that we’ve given you a ton of inspiration, it’s your turn – take what you learned here today or over the past three days and create your own cards – go get your fingers inky!!!

Signature

[optin_box style=”12″ alignment=”center” email_field=”email” email_default=”Enter your email address” integration_type=”aweber” double_optin=”Y” list=”3846012″ name_field=”name” name_default=”Enter your first name” name_required=”Y” opm_packages=””][optin_box_field name=”headline”]Learn more with our exclusive FREE video series:[/optin_box_field][optin_box_field name=”paragraph”]PHA+UGx1cyB5b3XigJlsbCBiZSBhZGRlZCB0byBteSBGUkVFIENyZWF0aXZlIFRpcHMgRS1sZXR0ZXIgd2hlcmUgSSBzaGFyZSBleGNsdXNpdmUgcHJvamVjdHMsIHZpZGVvcyAmYW1wOyB0aGUgMTIgRGF5cyBvZiBDaHJpc3RtYXMgUHJvamVjdCBTZXJpZXM8L3A+Cg==[/optin_box_field][optin_box_field name=”privacy”][/optin_box_field][optin_box_field name=”top_color”]undefined[/optin_box_field][optin_box_button type=”0″ button_below=”Y”]Get Instant Access![/optin_box_button] [/optin_box]


SOA Lovely Notes Blog Hop

Lovely Notes SOA Blog Hop

Welcome to the Lovely Notes Collection Blog Hop – Day 3! What do you think so far…pretty amazing, right? Well I hope to add a little creative inspiration for you today with a few projects. I’ve been sharing a few projects over the past few days – this collection is so easy to create with, and I have so much more to keep sharing with you this week.

The Stamp of Approval Lovely Notes Collection is a curated collection of stamps and dies that work fabulously together or alone. Not only do you get a box FULL of amazing stamps and dies, but you’ll get a downloadable PDF Project Guide (for free!) with tons of project tutorials using them!

The stamps and dies in the Stamp of Approval Collections are brand new on the market and won’t be released for individual sale for several months. To find out how to get a box, you have to be on the wait list! Yes, these boxes sell out so fast – the last one was gone in 33 hours….so don’t wait. The wait list will find out before the public will. Click Here to sign up for the wait list and find out more.

Today I’m going to inspire you with several of the components of this collection. Specifically the Lovely Flowers, Lovely Flowers & Banners Dies, Lovely Lattice Background, Butterfly Notes, Wonderful Wreath – all by Catherine Pooler Designs, and Handpainted Thanks by Neat & Tangled. So let’s get right to it with a little Christmas in July, here are your tutorials!

Lovely Notes Project Tutorials

Wonderful Wreath

I was in love with this wreath the moment I saw it. It reminds me of olive branches – delicate and whimsical. To get this clean and simple look, stamp your wreath on white in Stampin Up Pear Pizzazz, the berries in Primrose Petals, hang some ornaments in Baja Breeze and tie it all up with an Early Espresso bow. It was that simple. This is a GREAT mass produced card.

Lovely-Notes-SOA-Project-2---Ingrid-Blackburn-001


For an elegant touch, emboss your greeting in Gilded Gold by Brutus Monroe – my new favorite gold. Add a few sparkling clear sequins by Pretty Pink Posh and a little simple paper piecing in the corners finishes it off.

I’m addicted to the tilt for the matte in the background (thanks Maureen!) – a little Early Espresso on a Pear Pizzazz card base. It’s that simple.

Thanks Friend

This awesome handpainted Thanks stamp by Neat & Tangled is my new favorite greeting – I love bold scripty greetings. I used this stamp just one way – did you know there are two others that layer for a multi tone effect! How cool is that?

You’ll want to stamp some of the Lowely Flowers and cut them using the coordinating Dies. I used the Stampin Up colors – Marina Mist, Wisteria Wonder, Rose Red & Garden Green. On a large piece of white scrap paper – at least card front size, stamp the thanks towards the bottom center/right. Repeatedly stamp thanks in a light neutral tone, I used River Rock. TIP – alter where the word starts on each line so that it flows.

Lovely Notes SOA Collection - Ingrid Blackburn


Stamp the dots from Lovely Flowers in the middle 2/3 of the Soft Suede card base. I stamped it completely across so that the left and right side were even.

Cut your tag out using the large banner die from the Lovely Flowers & Banners Dies set. Try to place the Rose Red Thanks a bit off centered to the right at the bottom. You definitely want some neutral below as well. Stamp the word Friend from the Lovely Flowers Stamp set in Soft Suede on a piece of scrap and attach to your tag.

Pop the tag up using Foam Tape or Fun Foam and adhere your embellishments. TIP – The leaf branch has three sprigs – I cut mine apart to get it just right – sometimes just one or two.

That’s it – it’s a cute card – I had way too much fun with the Lovely Flowers stamps & dies as you’ll see tomorrow!

Bold Watercolor Greetings

If you’ve followed me for a while here, on YouTube or in an online class – you know I love to watercolor! This project takes some of the various greetings in this collection and puts them to good use. I wanted greetings that would stand out, so I used two from Lovely Flowers, one from Butterfly Notes and one of my new favorite Thanks from Handpainted Thanks. Here’s a video tutorial for you:

Click Here to watch video in HD on YouTube

To get this outline look, first stamp your images in versamark. Go back over them with a de-static tool and stamp again in Versafine Onyx Black Ink. Emboss in Black and heat set. Once cool, secure your project down with low tack painters tape on the upper and lower edges.

Smoosh some Distress Ink onto your craft mat or acrylic block – I used Rusty Hinge, Ground Espresso, Gathered Twigs and Vintage Photo. Grab some ink with a large wet brush and start painting onto your dry watercolor paper. You want your watercolor to flow together without getting out of control.

Handpainted Thanks - Lovely Notes Collection - Ingrid Blackburn

TIP – if your paper accumulates too many puddles or your colors blend out of control, gently dip the edge of a dry paper towel into a puddle to sop it up without removing color. Or use a thirsty brush (Not dripping wet). Water will naturally be attracted to a dry surface.

Once you have the look you want, heat set or allow to dry on it’s own. TIP – keep some lighter areas along with dark for a balance.

Stamp the Lovely Lattice Background stamp in Ground Espresso onto a folded Espresso card base. I just inked up the top and bottom. Quickly dip into clear embossing powder and heat set for a tone on tone look. If using a vanilla or white background, use Versamark ink for a watermark look. The key is not to compete with your watercolor, but rather support it.

It’s a pretty quick and easy project. I made four as I wasn’t sure of the look I wanted. Here’s a rainbow one too:

Lovely Notes Stamp of Approval Ingrid Blackburn


I added a little dry embossed line to the top and bottom for a simple embellishment. No matter what color combination you choose, you’ll love this technique.

Now that you have some inspiration…time to find out just how you can win a free box!

Lovely Notes SOA Win

It’s your turn to hop along and check out what the uber talented Amy Tsutura has in store for you next! Here’s the blog hop list:

Catherine Pooler

Neat and Tangled

Kristie Goulet

Yoonsun Hur

Ingrid Blackburn – That’s Me * You are here*

Amy Tsuruta You’re next stop!

Justine Hovey

Be sure to leave a comment on each designers blog for a chance to win a Lovely Notes Collection of your own! There’s a giveaway for all three days of the hop! If you missed out on any of the Blog Hops – start at the beginning with Catherine’s Blog and Day 1.

And stop by tomorrow for more inspiration –

Signature

[optin_box style=”12″ alignment=”center” email_field=”email” email_default=”Enter your email address” integration_type=”aweber” double_optin=”Y” list=”3846012″ name_field=”name” name_default=”Enter your first name” name_required=”Y” opm_packages=””][optin_box_field name=”headline”]Learn more with our exclusive FREE video series:[/optin_box_field][optin_box_field name=”paragraph”]PHA+UGx1cyB5b3XigJlsbCBiZSBhZGRlZCB0byBteSBGUkVFIENyZWF0aXZlIFRpcHMgRS1sZXR0ZXIgd2hlcmUgSSBzaGFyZSBleGNsdXNpdmUgcHJvamVjdHMsIHZpZGVvcyAmYW1wOyB0aGUgMTIgRGF5cyBvZiBDaHJpc3RtYXMgUHJvamVjdCBTZXJpZXM8L3A+Cg==[/optin_box_field][optin_box_field name=”privacy”][/optin_box_field][optin_box_field name=”top_color”]undefined[/optin_box_field][optin_box_button type=”0″ button_below=”Y”]Get Instant Access![/optin_box_button] [/optin_box]

Blog Hop, Prizes, and lots of inspiration!

Welcome back my friend – it’s the fifth day of sharing great creativity with you and we’re going out with a bang! Yup…it’s a uber talented line up for the Blog Hop and *gasp* there are prizes!!! In addition to all that goodness – I have two projects for you today and a video! But first – I chose these cards – and more importantly their sayings because that’s how I feel about you – my blog readers! So enjoy this post, all the creative goodness and thanks for Making me Smile, you all are just awesome! 🙂 🙂

SOA April 2016

Just in case you were trapped under something heavy the past four days and couldn’t get to a computer to see all the creative goodness – whew…I hope you’re okay…Stamp of Approval is a curated collection put together by my friend Catherine Pooler. Tomorrow’s collection – yup – tomorrow, is called Beautiful World. This collection has gorgeous stamps and dies by Gina K, CAS-ual Fridays, SugarPea Designs and the debut of Catherine Pooler Designs. It’s a very cool collection.

I wasn’t sure when I first saw it, then when I laid it all out in front of me and I started sketching I literally couldn’t stop. (See my Day One post – link at the bottom for my sketches) And I have been creating for weeks. The ideas just keep coming – it is seriously that easy to stamp with!

But to find out how to get it, you want to be on the wait list – because first – StampNation members will get the sales link, then the wait list finds out, and if you’re not on one of those two places – the -public won’t find out until the day after. You may think – that’s okay, I’ll wait…but the first SOA Collection literally sold out in a few hours! So if you’ve liked what you’ve seen from myself and all the amazing, talented designers – get on the wait list at the very least – I’d hate for you to miss out. Click Here for more detailed information on that

win win win

GIVEAWAY Okay…let’s get to the good stuff – prizes….yup – you guessed it! Someone will win the entire Stamp of Approval – Beautiful World Collection! Not bad, huh? Just stop along the hop and leave comments along the way – don’t forget Catherine’s! The more you stop, the more entries you’ll have! *Entries close on THURSDAY at 9AM EST. The winner will be announced that morning. If you already bought a box, then you will be refunded! How cool is that!

And now….are you ready for some creative inspiration?!!!

Beautiful World Blog Hop Creations – Day Five

Project One

To say thank you to you all, I wanted to showcase something elegant and SUPER simple. Now put your imagination caps on and envision matching Wedding invites, or an Anniversary celebration – Tea invitations, you name it. I LOVE this stamp! And did you see some of the cool coloring my team mates have done with it? I mean really!!! If you love Copics, then make sure you see some of the past features (Links at the bottom).

Simple and classic silver on Navy – you can NEVER go wrong. Little things like a pop of white at the top and bottom (that’s the card base) – easy to print on, and less $ than colored card stock. When mass producing you have to think of these things. Simple triple wrapped silver cord – you can buy that stuff cheap! It’s timeless and a classic, don’t you agree?

Elegant Silver Flourish

So thank you for always stopping by and commenting. Visiting my YouTube channel and being a subscriber and student. From the bottom of my heart – Thank You!

Project Two

And for the grand finale one of my favorite projects from the week. I wish I could take credit for the design of this card, but my good friend Kylie Purtell came up with it. When I saw her version, I just had to add the rainbow colors and it was screaming for that awesome butterfly from Beautiful World by Gina K. Add those killer greetings from All about YOU by CAS-ual Fridays and it’s sheer perfection.

Here’s a super short video on how I created this card – plus a little trip down memory lane from the past five days at the end!

Click Here to watch in HD on YouTube

Let’s chat about those greetings by CAS-ual Fridays for a second. If you love versatility – then I highly encourage stamp sets where you can build your own greetings. I love that you can mix and match stuff, and the Riesling font (one of my favs for years) paired with that bold is just awesome! It’s a super cute card – isn’t it?
SOA Rainbow Butterflies

Thanks for coming back each and every day over the past five days – in all we’ve had 11 projects on The Creative Grove alone! But don’t just stop here – my fellow Dream Team sistahs are super creative and talented, be sure to check out all their creations as well, Catherine has had five solid days of videos and tons of projects PLUS we have several creative and very inspiring additions from all over Blog-land!

SO….check out all this goodness, be sure to leave me a comment – you wouldn’t want to miss out on prizes, would you?!!! And I certainly hope to see you again either here, on the e-letter or over at my YouTube channel again!

* Note that Kathy Racoosin (After me in the hop) is traveling today and we had a slight change in the line up! Be sure to go directly to Kelly Latevola after her, just click on both names here and you’re all set!

Catherine Pooler
Maureen Merritt
Kristie Goulet
Heather North
Allison Cope
Laurel Beard
Lisa Harrolle
Ingrid Blackburn – That’s me! You are HERE
Kathy Racoosin Quick…Hop HERE next!
Kelly Latevola 
Beth Silaika

And when you’re all done hopping – seriously you don’t want to miss out on this talented line up… if you missed the first four feature days loaded with projects….check them out here:

Day One            Day Two               Day Three            Day Four

Happy Hopping – Keep those fingers inky –

Signature

[optin_box style=”12″ alignment=”center” email_field=”email” email_default=”Enter your email address” email_order=”2″ integration_type=”aweber” double_optin=”Y” list=”3846012″ name_field=”name” name_default=”Enter your first name” name_order=”1″ name_required=”Y” opm_packages=””][optin_box_field name=”headline”]Learn more with our exclusive FREE video series:[/optin_box_field][optin_box_field name=”paragraph”]PHA+UGx1cyB5b3XigJlsbCBiZSBhZGRlZCB0byBteTxzdHJvbmc+IEZSRUU8L3N0cm9uZz4gQ3JlYXRpdmUgVGlwcyBFLWxldHRlci4gRnJvbSB0aW1lIHRvIHRpbWUgeW914oCZbGwgZ2V0IGV4Y2x1c2l2ZSBwcm9qZWN0cywgdmlkZW9zICZhbXA7IHRoZSAxMiBEYXlzIG9mIENocmlzdG1hcyBzZXJpZXMuPC9wPgo=[/optin_box_field][optin_box_field name=”privacy”]We value your privacy and would never spam you[/optin_box_field][optin_box_field name=”top_color”]undefined[/optin_box_field][optin_box_button type=”0″ button_below=”Y”]Get Instant Access![/optin_box_button] [/optin_box]

Enchanted Garden & Dies

Today I’m going to showcase a little from the Enchanted Garden and coordinating Dies collection. We’re going to stay in Clean and simple mode today. Normally I stay away from too many lined images, unless I’m going to watercolor, but I can not stop using these two items from the new  Stamp of Approval – Beautiful World Collection.

If you don’t know what Stamp of Approval (SOA) is, then you must have missed my post yesterday! Click Here to see the three projects I created, real all about Stamp of Approval and see my video too!

Today’s products are from SugarPea Designs. I love the whimsical nature of these flowers. And I have some incredible mixed media pieces headed your way with these two products in a few days – you don’t want to miss those! But today we’re going to stay CAS.

If you like what you see, then be sure you are on the wait list for this collection – that’s the only way to get the sales link when it goes live on April 20th!

To see all the products in action before it goes on sale, just stop by my friend Catherine’s blog every day leading up to the 20th. She’ll showcase each piece so you can see them in action ahead of time.

PLUS...there are feature days from a whole team of designers that are super creative. Today we have a large list of amazing designers. I have links to everyone below.

Stamp of Approval Beautiful World

 Get on the wait list HERE to find out when it’s available

Now… let’s get our fingers inky and started with some CAS inspiration for today. There are many more images from the stamp set Enchanted Garden, you’ll have to check out Catherine’s blog and all the other designers to see how they’re put to use. I’m in love with the dies and flowers. But a quick favorite from all the designers is that cute loose dandelion seed – what a perfect filler stamp. See it below? It rocks!

Enchanted Garden – Day Two

Project One

To create this beauty, you’ll want to cut your panel on the diagonal and space it out however far you’d like. It’s a great way to showcase some pop of color. I love doing this on cards. For the pop, I stamped this cool flower a few times onto vellum with StazOn ink. Color them in using markers or chalk from behind – it gives it a subtler look and attach it to the top piece of your panel.

I find that if I lay it onto an acrylic grid or mat with dimensions, in exactly the size I want it on my card, I’ll get the right spacing.  Another way would be to lie it down on your project upside down to get the spacing right.

Stamp your front – love that greeting, add the little fly away seed and a little black border with a pigment liner by micron or staedtler and you’re all set! Super cute, huh?

Enchanted Garden

Project Two

For my second project, I wanted something super quick, easy and in color! I usually gravitate toward black, brown and white as my based, I thought it would be fun to do a card with this gorgeous Basic Grey color by Stampin Up.

For the popped up details, I chose the SU colors Marina Mist, So Saffron and Gumball Green. They work so great together. My die cuts are layered over each other and to bring a little focus in on one, I popped it up. That simple.

For a slightly different look, you could also stamp these with the coordinating stamps to match the dies. I was going for a simpler look, but that looks awesome too!

I kept the greeting simple and embossed in Pearl which turns grey/pearl on this card stock. To emphasize it a bit better, I shadowed it with a pigment liner by Staedtler. The greeting is from the Beautiful World stamp set by GinaK. It’s by far my favorite greeting – I just LOVE that sentiment.  Just a little sneak peek into tomorrow’s feature stamp set. 🙂

So what do you think , do you like the clean and simple design? I bet you’re thinking – I could totally do that with x dies…tell me in the comments below what YOU would use and what you think of this cool new stamp set/dies. I hope I gave you a little inspiration!

Enchanted Garden Dies

Cute, huh? Now be sure to check out all the other designer’s creations. I have them all linked here for your convenience, Catherine will also have everyone linked for you. Enjoy the creativity – be sure to check back tomorrow for more! And if you missed yesterday’s post, Click Here!

Our featured Designers for today are:

See you tomorrow for more…

Signature

[optin_box style=”12″ alignment=”center” email_field=”email” email_default=”Enter your email address” email_order=”2″ integration_type=”aweber” double_optin=”Y” list=”3846012″ name_field=”name” name_default=”Enter your first name” name_order=”1″ name_required=”Y” opm_packages=””][optin_box_field name=”headline”]Learn more with our exclusive FREE video series:[/optin_box_field][optin_box_field name=”paragraph”]PHA+UGx1cyB5b3XigJlsbCBiZSBhZGRlZCB0byBteTxzdHJvbmc+IEZSRUU8L3N0cm9uZz4gQ3JlYXRpdmUgVGlwcyBFLWxldHRlci4gRnJvbSB0aW1lIHRvIHRpbWUgeW914oCZbGwgZ2V0IGV4Y2x1c2l2ZSBwcm9qZWN0cywgdmlkZW9zICZhbXA7IHRoZSAxMiBEYXlzIG9mIENocmlzdG1hcyBzZXJpZXMuPC9wPgo=[/optin_box_field][optin_box_field name=”privacy”][/optin_box_field][optin_box_field name=”top_color”]undefined[/optin_box_field][optin_box_button type=”0″ button_below=”Y”]Get Instant Access![/optin_box_button] [/optin_box]