Mass Produce These Easy Rustic Christmas Cards + Giveaway

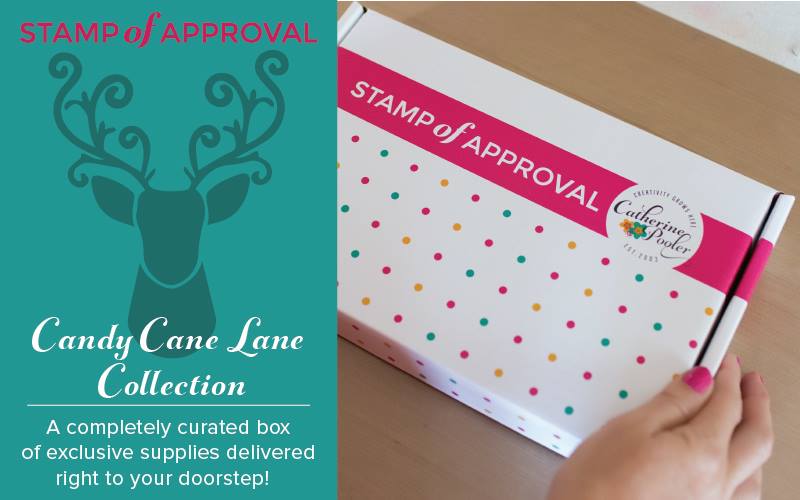
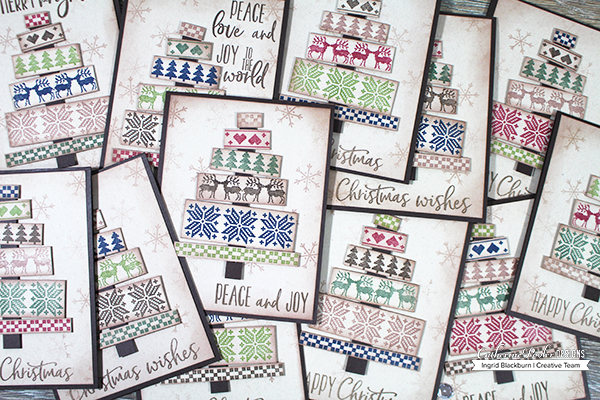
Today I have a great video for you – how to mass produce 12 easy rustic Christmas Cards! Plus, it’s a Video Hop with great holiday inspiration and even a giveaway! It’s that time again, Catherine Pooler’s Stamp of Approval. This release is called Home for the Holidays, and the box is filled with everything that is warm and cozy. Speaking of cozy….today’s project uses the new Cozy Borders Stamp Set.

Home for the Holidays SOA Box

If you aren’t familiar with Stamp of Approval, it’s a curated collection of stamps and dies that work so well together. It’s perfect to help take the guess work out of your holiday cards. These boxes always sell out, sometimes as fast as a few hours, so don’t miss it! Catherine’s private online community get the link to purchase the collection first – tonight, Tuesday September 18th in an online live stream PJ party of sorts! I’ll be there too. It’s a fun way to kick off the release. Then tomorrow – Wednesday September 19th at 9 am, the waitlist gets the secret link. If you aren’t on the waitlist – click here. If there are any boxes left, then the public gets access in the Shop Here.

This release has 10 products in it (5 Stamp Sets, 2 Dies, and 3 Embossing Glitters):

In addition to the release, there are a few new products being released as well – including a brand new “colossal” sized block – you’ll see me use it in the video – it’s the lightest weight block of its size I’ve used yet!

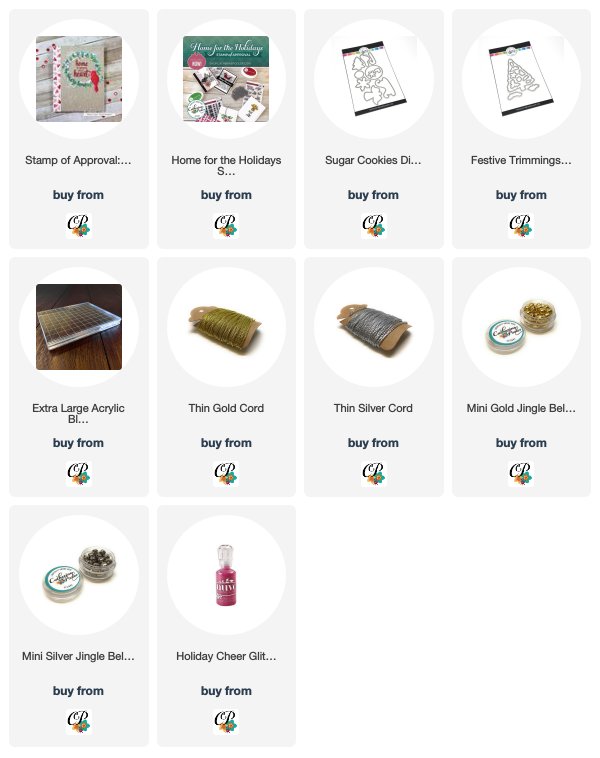
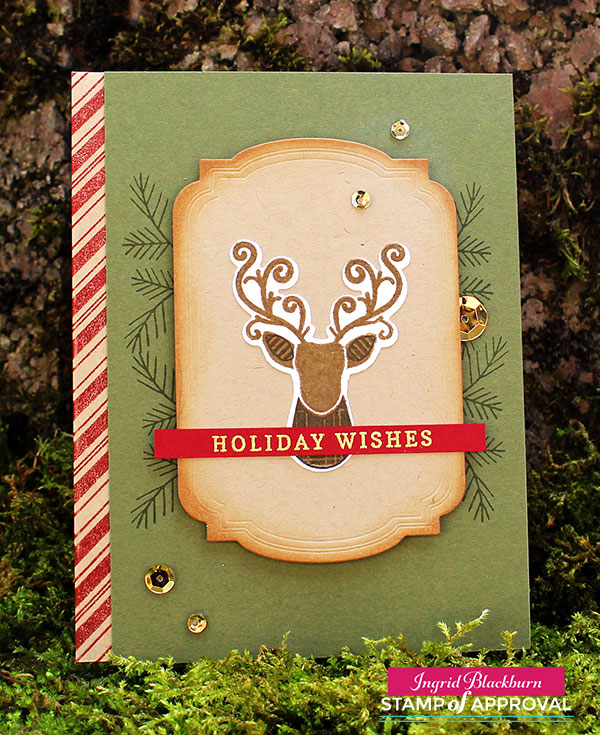
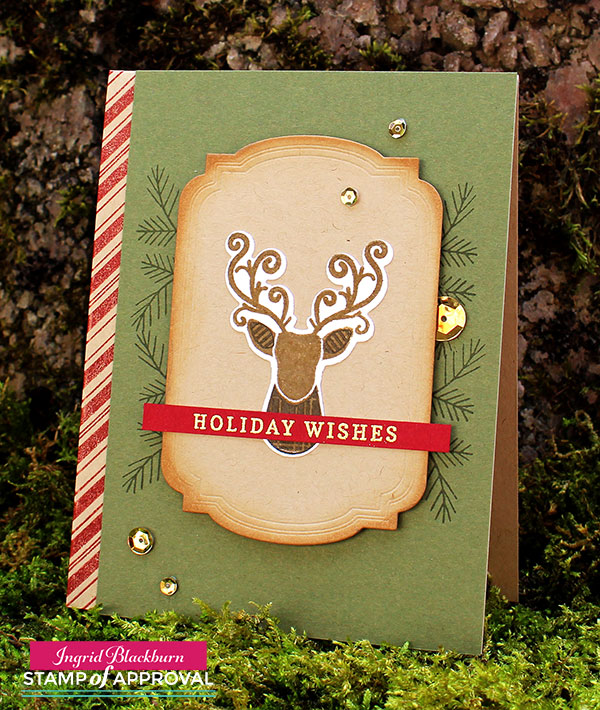
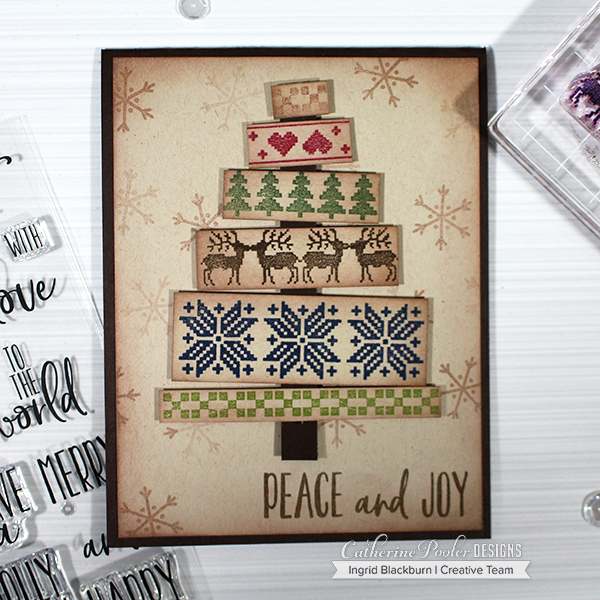
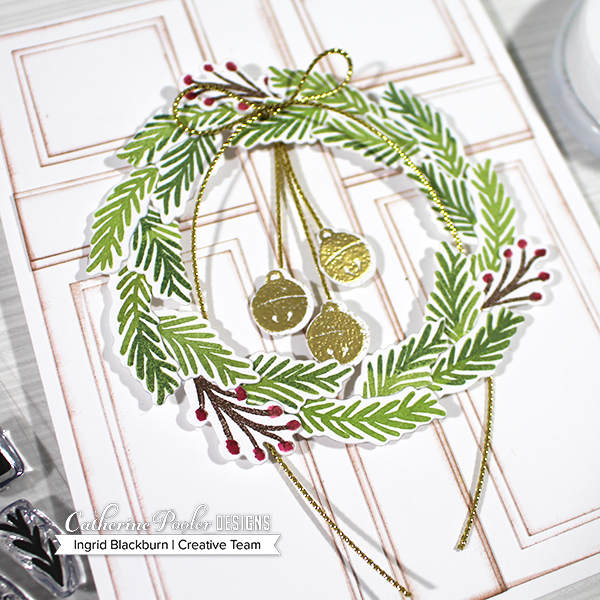
I love those little jingle bells, they are the perfect way to finish a card! And I use that cord ALL the time. Gold and Silver cord is one of my favorite accents on holiday cards. Now for the good stuff. I love this project. The inspiration for it came from Nordic sweaters, and Scandinavian holiday decor. Here’s a detailed video showing you how:

Click Here to Watch on YouTube in HD + Hop along & Comment for Giveaway

So what did you think? Not bad, huh! And I have a treat for you. It’s not in the video…but below I have some close ups and a card done in red with white embossing powder even! It was quite easy to mass produce these. And the Extra Large Block made it super simple to stamp!

Easy Rustic Christmas Cards Tutorial

You’ll want to get your stamps lined up on your acrylic block like this, or you can use a MISTI too, but I liked the speed of using a block. A MISTI gives you the option of stamping a second time, the only draw back to that is that with every additional time, the darker your images get. And that isn’t necessarily the look I was going for here. Sure that’s fine with a dark brown or black, but with Peppermint Scrub and Eucalyptus, the color gets really dark.

DIY Easy Rustic Christmas Cards - SOA Box

Stamp your images from the Cozy Borders Stamp Set onto Sand Dunes cardstock. When stamping a large image or several as in the video, you may have noticed that I stamp them upside down. That way I can rub my hand over the cardstock on the back helping to transfer the ink. Tip – be sure to rub over every section thoroughly and you’ll get a perfectly stamped image every time! To duplicate this project, you’ll want to use the following Spa colors (pictured in the supply list below) Eucalyptus, Spruce, Juniper Mist, Peppermint Scrub, Sand Castle, Icing on the Cake.

Cut each border image out using your paper trimmer. I personally use a guillotine trimmer by Tonic Studios. I never have to sharpen the blade, and it’s cuts perfectly for me every time! I’ve been using it for over 10 years.

DIY Easy Rustic Christmas Cards

Next, stamp the small snowflake from the Christmas Cookies stamp set in Sand Castle. To give a varying look, you’ll want to ink your stamp, stamp and then stamp again getting a lighter snowflake in spots. This is called generational stamping.

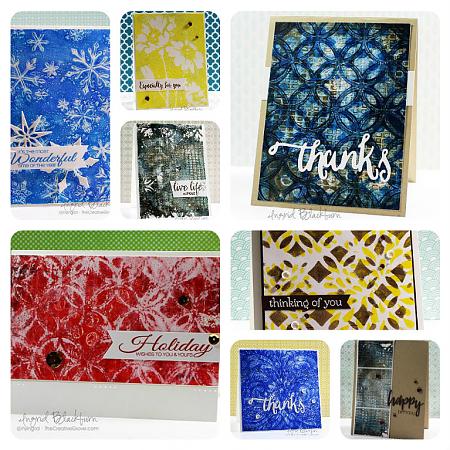
Stamp your greeting at the bottom in Icing on the Cake. I used three words from the Holiday Mix Stamp Set. That set is unbelievable – you see a small snapshot in the photo above. There are print and scripty words, some together, some not. You get a good idea of all the possibilities here in my shot of all 12 of my cards.

https://shop.catherinepooler.com/?aff=3

Now that you have all your pieces cut, along with 12 Sand Dunes card fronts (4 x 5 1/4″) you’ll want to edge them using a mini blending tool and Sand Castle ink. Keep it light!

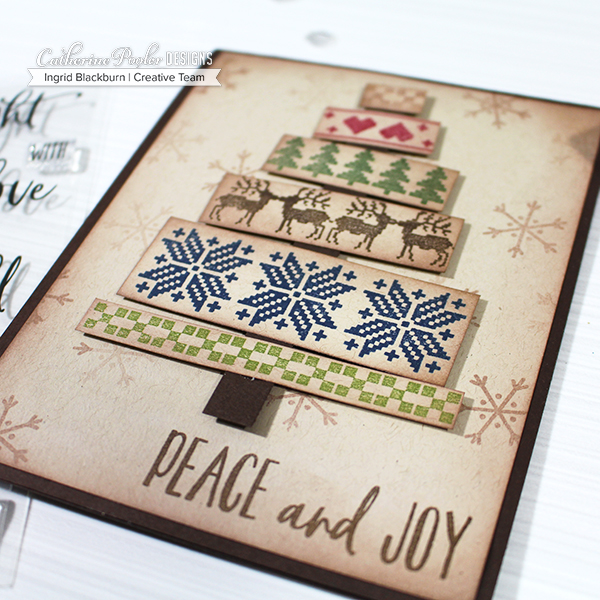
Next you’ll want to assemble your trees. I did these all at once – it’s quite easy to mass produce them. Arrange your six pieces, one color for each level. You’ll also need 12 tree trunks (7/16 x 4″) cut out of Chocolate cardstock (hands down my favorite deep brown card stock). Start at the top, use a Matte liquid glue (that way it dried crystal clear), glue down each piece. I made mine slightly wonky. You don’t want to have too much brown in-between or you’ll run out of trunk!

Glue your card front onto a folded A2 sized Chocolate card base (4 1/4 x 5 1/2), and pop your tree up with foam tape and squares. That’s it! Simple as that. I made 12 in the time it took to watch a movie.

scandinavian christmas cards

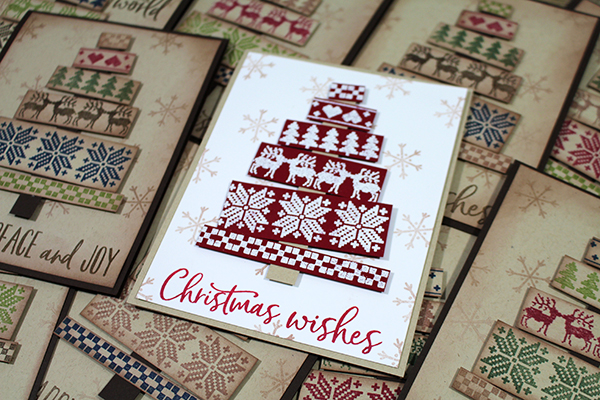
And for fun, I made a few extras in red/white to really go for that Scandinavian feel. I’m not sure which one I like better? Tell me which one you prefer in the comments below. What did you think? I love that I have 12 cards done and ready to go – well 14 with my red ones…lol! And I MAY just make some more – they were that easy.

Easy Rustic Christmas Cards

If you haven’t checked out the video hop yet, don’t miss out. Details on the Giveaway can be found in the section below the video. Be sure to watch the video on my YouTube channel and leave a comment THERE to be entered in for the giveaway. You can always leave me a comment here too – but for the giveaway, it needs to be on YouTube. Hop all along the hop – you won’t be disappointed. Be sure to like and subscribe along the way too!

There are three ways to win. You can always start on Catherine’s channels too.

  • Instagram Hop – 3 $25 gift certificates as Prizes
  • Blog Hop – 3 $25 gift certificates as Prizes
  • Video Hop – Stamp of Approval Collection as a Prize

And stay tuned – I have another project tomorrow and if you missed this one in the instagram hop – there are different prizes for that too! Click Here for this project on my Instagram Channel and be sure to swipe to see all the photos! Look for this card:

wreath on door christmas card by ingrid blackburn

Click on the card and in the description is the next person to hop along to. Be sure to like each channel and leave comments along the way! Happy Hopping.

Keep those fingers inky –
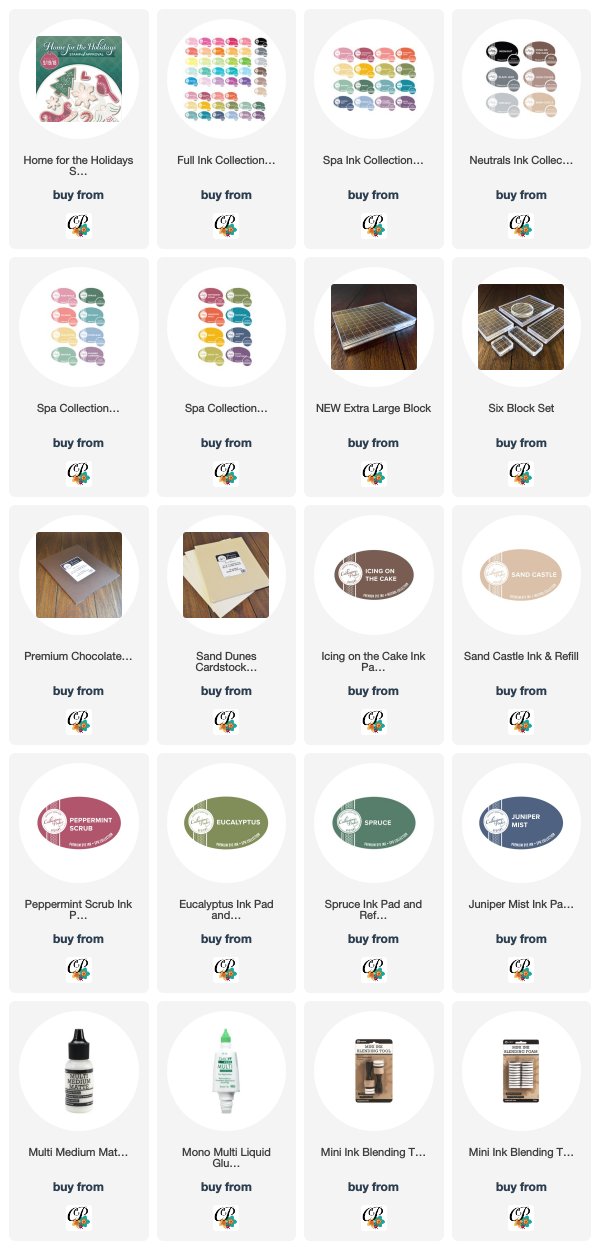


Supplies

To make finding the supplies I used in these projects a bit easier for you, here are a few clickable links. Compensated Affiliate Links are used when possible. Click here for disclosure. Happy Shopping!


Forest Stag – Masculine Christmas Cards

We all need a few different types of Christmas cards – especially Masculine Cards. So what makes a Masculine Christmas card? Well, color mostly! When I think masculine, I think neutral colors – earthy, and not too overly cutesy.

forest-stag-ingrid-blackburn-001

Today’s project is just that – and my first to really feature the rockin’ Stag from the Hip Holiday stamp set in the Candy Cane Lane Collection by Stamp of Approval. I’ve shared a few projects this past week already from this great collection – that goes on sale if you’re on the Wish List or a StampNation member this morning.

Tomorrow – if there are any left, it will go live to the public. There’s still time to get on the Wish List – so don’t wait if you like any piece of the collection. We also had three great Blog Hops loaded with Holiday card ideas for you. I have links to everything you may have missed below – not to worry!

candy-cane-lane-collection

Now back to our Masculine Christmas Stag….Here’s a quick tutorial for this great clean and simple card – another great mass producible one:

Masculine Christmas Cards: Forest Stag Tutorial

To keep with a masculine look – use neutral or muted colors. I chose to use Kraft card stock for the frame & card base. For the panel I used a dusky green – Always Artichoke by Stampin Up. For red accents – Cherry Cobbler and the Stag in White so that he really pops.

Once you’ve die cut your frame with the Merry Label Dies (CAS-ual Fridays for Stamp of Approval), edge it lightly with Tea Dye Distress Ink. This helps to accentuate the edge, give it a rustic look and showcase some of the debossing around the edges.

Masculine Christmas Cards - Ingrid Blackburn

Use the coordinating dies for the Hip Holiday set to cut the stag out in white. Next, stamp the stag in Soft Suede & Early Espresso for the patterned ears & neck. I just love him – isn’t he great! I made one with eyes and a smile, but ended up liking the one without a face better.

Rather than clutter the label die with stamped images – add some tone on tone boughs from the Merry & Bright Bough Stamp set. Keep it minimal so that it doesn’t overtake the card.

TIP – to get the bough placement just right, lightly trace the label die so you have a guide, then erase your lines once done! If you are mass producing cards, create a label out of masking paper, trim it down to the inner debossed line. That way you don’t have to keep tracing it!

Fold your card base in half and stamp the Peppermint Stick background stamp in Cherry Cobbler on the edge. Glue your Artichoke card front on.

Masculine Christmas Cards - Candy Cane Lane

Glue your stag to the label, emboss a greeting in gold onto Cherry Cobbler. I used the lower part of Sweetest Holiday Wishes from the Candy Cane Lane stamp set. TIP – I actually cut that one apart – there is a bit of space between the sweetest and Holiday Wishes – it easily lines back up if desired – but I’ll get so much more use from it this way without having to constantly mask it off!

Glue your greeting over the stag and label – trim the edges and pop it all up with foam tape. Add a few gold sequins by Pretty Pink Posh (that large one is by Rico Designs) and you’re all set!

It’s cute, right? I’m in love with this color combo.

More Christmas Project Ideas

If you didn’t get a chance to see my two videos for this collection, here are the links to those pages. There’s a video on each!

CAS Peppermint Bark      Peek-a-Boo Candy Canes & Christmas in a Box

I also have a great Christmas in a Box project on there too. Tomorrow, you’ll get to see another video tutorial with a technique project right here, so stop on by.

If you would like to get even more Christmas ideas from me, check out my YouTube channel, plus subscribe to my Creative Tips E-letter below or to the right. In about a month, I will be starting my yearly 12 Days of Christmas series. You’ll only see those projects free in your inbox through Creative Tips.

[optin_box style=”12″ alignment=”center” email_field=”email” email_default=”Enter your email address” integration_type=”aweber” double_optin=”Y” list=”3846012″ name_field=”name” name_default=”Enter your first name” name_required=”Y” opm_packages=””][optin_box_field name=”headline”]Learn more with our exclusive FREE video series:[/optin_box_field][optin_box_field name=”paragraph”]PHA+UGx1cyB5b3XigJlsbCBiZSBhZGRlZCB0byBteSBGUkVFIENyZWF0aXZlIFRpcHMgRS1sZXR0ZXIgd2hlcmUgSSBzaGFyZSBleGNsdXNpdmUgcHJvamVjdHMsIHZpZGVvcyAmYW1wOyB0aGUgPHN0cm9uZz4xMiBEYXlzIG9mIENocmlzdG1hczwvc3Ryb25nPiBQcm9qZWN0IFNlcmllczwvcD4K[/optin_box_field][optin_box_field name=”privacy”][/optin_box_field][optin_box_field name=”top_color”]undefined[/optin_box_field][optin_box_button type=”0″ button_below=”Y”]Get Instant Access![/optin_box_button] [/optin_box]

ccl_commenttowin

To see all the amazing creations from the past few days – don’t miss the blog hops….You can still win a free box! Leave comments along the way. Check them out here:

Blog Hop – Day One          Blog Hop – Day Two          Peppermint Watercolor

StampNationGeneralBlogPost

And finally… if you’re a StampNation member – be sure to check out the Challenge this morning! It’s loaded with Stamp of Approval cards!!! Can you guess which one is mine?!

StampNation - Ingrid Blackburn

Now you have some serious holiday inspiration! See you tomorrow with even more…

Signature

[optin_box style=”12″ alignment=”center” email_field=”email” email_default=”Enter your email address” integration_type=”aweber” double_optin=”Y” list=”3846012″ name_field=”name” name_default=”Enter your first name” name_required=”Y” opm_packages=””][optin_box_field name=”headline”]Learn more with our exclusive FREE video series:[/optin_box_field][optin_box_field name=”paragraph”]PHA+UGx1cyB5b3XigJlsbCBiZSBhZGRlZCB0byBteSBGUkVFIENyZWF0aXZlIFRpcHMgRS1sZXR0ZXIgd2hlcmUgSSBzaGFyZSBleGNsdXNpdmUgcHJvamVjdHMsIHZpZGVvcyAmYW1wOyB0aGUgPHN0cm9uZz4xMiBEYXlzIG9mIENocmlzdG1hczwvc3Ryb25nPiBQcm9qZWN0IFNlcmllczwvcD4K[/optin_box_field][optin_box_field name=”privacy”][/optin_box_field][optin_box_field name=”top_color”]undefined[/optin_box_field][optin_box_button type=”0″ button_below=”Y”]Get Instant Access![/optin_box_button] [/optin_box]

Video, 2 Tutorials, Blog Hop & Prizes

Gelli-Plate-Monoprinting-tutorials

I have all sorts of goodness for you today! Towards the bottom of this über long post, I have two – yes TWO tutorials for you – one in video form and another after.

First I wanted to tell you about an exclusive collection of stamping stuff just coming available – yup…it’s brand spankin new – not on the market yet! There’s a blog hop filled with awesome projects – great to inspire you this morning, plus at the bottom, I have a new video for you and more crafty goodness!

Normally I would be participating alongside these great card makers for a great blog hop showcasing the new Stamp of Approval collection – Young at Heart. But alas, customs has benched me. They’ve kept my supplies – secretly I think they’re having too much fun making birthday cards and have decided to keep all the fun for themselves! Not to worry, I still have all the information you need, plus I have some fun inspiration for you too!

SOA Feb 2016

Stamp of Approval (SOA) is an exclusive box of Stamps, Dies and Stencils designed by Catherine Pooler and some of your favorite stamp companies. Available quarterly, and only till they sell out – and let me be the first to tell you, it’s quick – the first SOA sold out in hours!

This year, StampNation celebrated it’s 5th Birthday, so naturally a box about birthdays makes sense – it’s called the Young at Heart Collection. I would think that birthday cards are probably the #1 card type made – so I’m sure you’ll find something in it for you. But don’t think just birthdays – after seeing the products myself in the videos, I have all sorts of ideas for non-birthday cards too! Here are some links to the three videos highlighting product from the box:

The stamps, dies and stencils designed for this collection are first only available through the SOA box. They will eventually be released by their stamp companies sometime later in 2016/2017, so this is your chance to get your hands on some great products before everyone else – I’m all about that! 🙂

Here’s how it works – you have to be on the waitlist to get the information and link about when the box goes on sale! And it goes quick. If you are a StampNation member – you’ll get the link an hour before the public on February 3rd! This box has products by CAS-ual Fridays, Sugar Pea Designs and Winnie & Walter – three of the hottest stamp companies out there today!!

And to give you some incredible inspiration, hop along with this talented blog hop. Be sure to leave a comment on everyone’s blog – Catherine is giving away two boxes!! And not to worry, if you purchase one and end up a winner – you’ll be reimbursed. The boxes are stuffed with over $100 worth of brand new product…that’s a pretty awesome prize!!!

Neutral Tone Stenciling Video Tutorial

So, are you on creative inspiration overload yet? I hope not, because I have some crafty goodness to share with you too! The other day I released a new video on my YouTube channel. It’s a great birthday card that is quick, easy and has some great neutral tones in it – perfect for a masculine card. Here it is:

Watch video on YouTube

It’s a pretty straight forward card and the stencil really is the star here.

Masculine Birthday Stencil 004

Don’t you just love that stencil from Hero Arts! I love all the neutral tones. It’s simple, and kind of reminds me of New Mexico/Arizona a bit. What do you think?

Masculine Birthday Stencil 002


I’ve been playing around with stencils for the past month on overdrive. Mostly because I’ve been creating content for the Stencil Class over at StampNation that’s been going on for the past 2 1/2 weeks!

CSM 14

You may remember my Gelli Plate creation from last month, well, I filmed a video for the stencil class at SN and put up many more samples.

Gelli Plate Monoprinting in Layers Tutorial

Here’s a new one for you though. I have been having SO much fun with my Gelli Plate – it’s an amazing tool that really allows my inner artist to break out. Do you have one, or are you thinking about getting one? Let me know in the comments below!

Gelli-Plate-Monoprinting-1-001

Working with a gelli arts printing plate has been truly an eye opening experience. While I won’t say I’m and expert, I have learned a ton along the way! For instance, paper and paint do matter. You want a paint that will give you time to work, acrylics dry so quickly, the longer your paint remains open, the more flexibility you have. And when you’re new to something like this – that’s key. That doesn’t mean you can’t use your cheap acrylics, just work quickly!

Gelli-Plate-Monoprinting-1-002

  • For this project, I started by layering on some Phthalo Blue. I cleared my brayer of any paint and promptly brayered some back off. leaving only some around the edge and a little in the center.
  • The key to creating a monoprint in layers on your Gelli Plate, is to allow the layers to dry inbetween.
  • Next you’ll want to add another color – I chose Cobalt Blue. Repeat the process pulling up a lot of the blue.
  • Add your stencil – I added the Tula stencil by Memory Box. Pull a positive print to use on another project. That leaves a lot open space.
  • Finally, add your lightest color – I chose Ochre for a contrast.
  • I pulled the entire print up at this point. The Ochre allowed the dried layers enough moisture to pull the print up in it’s entirety. If your paint isn’t open enough, this can be a frustrating process and you won’t pull up all your colors. Sometimes that can look cool, other times it can just be frustrating. You’ll find that sweet spot for yourself.

Gelli-Plate-Monoprinting-1-003

The interesting thing with this print is that in some spots the blue and yellow blended to form a slight green – that only gives this a more worn and aged look. The background naturally is the star, so keep the rest of the card simple. I added the Handlettered Thanks die by WPlus9 and a few Rhinestones.

Thanks for stopping by today. I hope you enjoyed these couple of projects – can you tell I have stenciling on the brain? Be sure to check out the new SOA box, or hop on over the StampNation and check it out along with the free stenciling class. I have a few videos in lessons #5 & #14.

See you next time, till then, keep those fingers inky!

Signature

[optin_box style=”2″ alignment=”center” email_field=”email” email_default=”Enter your email address” email_order=”2″ integration_type=”aweber” double_optin=”Y” list=”3846012″ name_field=”name” name_default=”Enter your first name” name_order=”1″ name_required=”Y”][optin_box_field name=”headline”]Learn with our exclusive FREE video series[/optin_box_field][optin_box_field name=”paragraph”]PHA+R2V0IHRoZSBmcmVlIENyZWF0aXZlIFRpcHMgRS1sZXR0ZXIgYW5kIGxlYXJuIHdpdGggc3Vic2NyaWJlciBleGNsdXNpdmUgdmlkZW8gYW5kIHBpY3RvcmlhbCBjb250ZW50LsKgPGVtPjxzdHJvbmc+SW5jbHVkaW5nwqA8L3N0cm9uZz48L2VtPm91ciB5ZWFybHkgMTIgRGF5cyBvZiBDaHJpc3RtYXMgc2VyaWVzITwvcD4K[/optin_box_field][optin_box_field name=”privacy”][/optin_box_field][optin_box_field name=”top_color”]undefined[/optin_box_field][optin_box_button type=”0″ button_below=”Y”]Send me exclusive tips now![/optin_box_button] [/optin_box]

Chalktalk Distress Layered Thanks

Chalktalk Thanks 001

What do you do when you try out a new technique on a piece of scrap paper?  Do you use the left over piece for a project?  I try to, I figure if I’m going to take the time to figure it out, why not create something small at the very least!  That’s what this project is – my scrap turned into tag.

Chalktalk Thanks 003

Layer several shades of blue distress inks with Vintage Photo, spatter a little water, dry your piece thoroughly and then layer a lightly stamped layer from a background script stamp.  The end result is stunning!  I cut out my scrap with the biggest tag framelit from the set Chalk Talk by Stampin’ Up! Next, you’ll want to use a darker brown to stamp your greeting from the stamp set Thanks by Simon Says Stamp on an angle and voila – you have a perfect tag.

Chalktalk Thanks 002

For a little emphasis, I decided to use some left over tiny strips of white to randomly place back and forth behind my tag.  I added a few pearls and some corner piercing to the main card front.  I like that the colors of the card are masculine – this card is a great clean and simple design that’s easily mass produced – just sponge colors on larger strips of white paper and then cut out your tags!

We have videos on this technique in our VIP Community with a few different projects if you want more step by step tutorials.  Hope to see you there!

I’m wrapping up our week in Tuscany, we’re sad to go, but had a wonderful time here!  I must say after all the rich colors and texture, I’m excited to get into the stamping studio.  See you soon with more great projects.  For now, I’ll leave you with a few of the rich colors of the Tuscan countryside and villages.

20150113_15553720150112_144755DSC0831720141118_02332020150112_144938DSC08243DSC08355

Have a great day – thanks for stopping by!

Signature

Mojo World Map Thank You

Zoo Review 002 Main R

Happy Monday!  Today I am taking you to Africa for our Mojo Monday challenge via the new World Map Stamp and Zoo Review Stamp Set.  The World Map background stamp was at the top of my list when the new catalog came out and its release was delayed until just recently – it’s another must have! 

I struggled for about a minute this morning and then I saw the Zoo Review set and it all fell into place.  All my Brayer 102 students will be thrilled as this set is one of the ones we use in that class.  And this card was so simple to put together.  I really like the masculine feel of it, I hope you do to.  Here is what the Mojo Sketch looked like:

       Mojo304Sketch Zoo Review 002 Main Front

Creative Tips –

  • I wanted an easy feel to this card and for the lion to be the stand out.
  • I used the #6 and #7 Circle Framelits for the circle part.  I didn’t want a 1/4” matte, so I took the #6 and used my xacto knife to cut around the outer edge.  It gave me a 1/8” border which is what I was looking for.  The #7 I ran through my Big Shot.Zoo Review 002 Main CU
  • The World Map is stamped tone on tone in Pear Pizzazz.
  • Of course the color combination came straight out of the Color Coach!
  • I added one of the Antique Brads for some texture and interest along with some paper piercing in the top corners.Zoo Review 002 Main Side
  • The Lion is the stand out of the card, so I embossed him and the greeting in Early Espresso Embossing Powder.

It’s a quick and easy card, but I love the feel.  The world map is the perfect accent and feels more like Designer Paper.  I hope you’ve enjoyed another fun Mojo Monday card!  Zoo Review 002 Main L

Wetlands and Gorgeous Grunge Stamp Sets

Wetlands 001 Main

I had two stamp sets that were must have’s for me from the new Stampin’ Up! catalog – Wetlands and Gorgeous Grunge.  Wetlands is one everyone should get – it’s easy to stamp with and has three sayings.  Gorgeous Grunge on the other hand is going to become a staple of mine.  Gorgeous Grunge is made up of filler and background type images, which are worth their weight in gold!  Read through to see how you can get this very card sent directly to you!

For today’s project, I wanted to do something fun for you.  I spent all day yesterday cleaning my computer from a virus that had taken it over, so while the scans were running and keeping me from blogging, I stamped!  Go figure?! On a side note – as I just typed this sentence about having a virus, my husband calls me to come look at his computer, and lo and behold – he had one too!  Weird, right?!!  Okay, back to stamping….

I started to create some of the projects for my online brayer classes and I just had to do something that you would see with this stamp set!  I decided to launch a virtual brayer monthly club where those who become part of the CG brayer community will get exclusive projects each month – let me tell you, I was a sketching fool yesterday and then made some amazing cards!  That’s going to launch July 1st so stay tuned!Wetlands 001 Front

Creative Tips –

  • I wanted to use the Canadian Goose stamp so I decided to highlight this amazing stamp by using one of the coolest new framelits that we have – Chalk Talk.  This is the large tag in this cool set. 
  • I stamped the goose in Basic Black and hit it with my heat tool to set it.  The new black ink in this pad rocks.  The color is so rich.  Since it reacts with our Whisper White in a way that leaves it a bit wet, the best thing to do with it is to hit it with the heat tool to properly set it so that it doesn’t smear. 
  • Once the goose was dry, I created a mask out of print paper and then added some grass.  TIP – You want to use printer/copy paper rather than cardstock when creating masks – they aren’t as thick and you will get a better stamped image of the back image.  When you use card stock, you get a white space because the card stock is thicker and your stamp won’t be able to get too close to the mask edge.Wetlands 001 Chalk Talk
  • I have to admit I didn’t know what kind of bird this was, so I googled wetland birds and there she was – a Canadian Goose.  I like my images to have some factual representation to them, so I colored it exactly as I saw it.  I used my Aqua Painter to get a light look using Sahara Sand.  Because I used our Basic Black instead of StazOn, I knew some of the black would smear with the water – I was looking for that.  It gave me just the right look that this bird had.  I added a little Smoky Slate to the neck and beak, and my bird was done.
  • My grass was stamped first in So Saffron and then directly in Pear Pizazz before stamping.  I wanted the blend of color.  To finish the grass, I filled in a few blades on the left and right and wherever needed using my Pear Pizazz Stampin’ Write Marker.  Wetlands 001 Side
  • I sponged the edge of my Chalk Tag tag with Smoky Slate and sponged a little at the top of the tag like a cloudy day.  I have to admit, that was a result of my getting a little black on my tag from my finger.  It’s the perfect way to cover up an unwanted smudge.  I actually love the end result – I love when that happens!
  • For a little texture behind the tag I added the lined stamp from Gorgeous Grunge.  I stamped this image four times top to bottom.  I trim my stamps, so I knew exactly where the edge was for perfect placement.  I love this stamp and I know you’ll see it a ton from me.  This stamp set will quickly become one of my most used along with Sweet Essentials.  I’m calling it now!
  • For the greeting, I copied the white with Smoky Slate sponging and stamped it in Basic Gray.  I added an individual wheat stalk to it in So Saffron/Pear Pizazz to tie it back to my tag.  Learn how I create my Banner FlagsWetlands 001 Banner
  • Some drama was needed for this crisp looking card, so I popped up the banner and tag before matting my Smoky Slate card front to a piece of Basic Black cut just 1/16” larger.  I adhered that to a Pear Pizazz card base.  The proportion of color is just right. 
  • For the finishing touch I added a few Pearl Basic Jewels in triangles.  It’s the perfect touch.

I hope you love the end result.  I have one of these cards that I’m going to send to a random winner!  All you have to do is leave me a comment.  Tell me what you like about it or the stamp sets I used.  Have a great stamping day!

Signature-Snowflake-001_thumb1

To Shop 24/7 in the Creative Store – Click here!

Wetlands 001 Angle

Stamp Sets – Wetlands (126697c, 126695w), Gorgeous Grunge (130517c, 130514w)  Ink – Smoky Slate (131179), Basic Gray (126981), So Saffron (126957), Pear Pizazz (131180), So Saffron and Pear Pizazz Stampin’ Write Markers (131264) Paper – Whisper White (100730), Smoky Slate (131202), Basic Black (121045), Pear Pizazz (131201) Cool Tools – 1” Square Punch (124094), Chalk Talk Framelits (129983), Stampin’ Sponges (101610) Finishing Touch – Stampin’ Dimensionals (104430), Pearl Basic Jewels (119247)

Untitled-12Gorgeous Grunge

Chalk Talk Bundle

Mojo Happy Hour

Happy Hour 001 Main

It’s that sad and exciting week in Stampin’ Up!  It’s our final time to say good bye to good ‘ol friends and hello to new ones.  What am I talking about, you may be wondering – well…it’s the final week for some of my all time favorite products – some that have been with me for 11 1/2 years!  And of course – hello to the brand spankin’ new ones in the new catalog.  If you want your very own free catalog click here!

Of course, what better way to send of our dear favs other than Mojo Monday!  I truly love creating in this fun Challenge.  I find that it really gets my week off to a great creative start. Smile

Mojo295Sketch

Today we are saying good bye to my two favorite retiring colors – Not Quite Navy (Gasp!!) and More Mustard.  Not Quite Navy and I have been good friends my whole life.  So it was natural, when I joined the Stampin’ Up! sisterhood in January 2002, that Not Quite Navy quickly became my all time favorite color.  And More Mustard, which is the exact color of Dijon Mustard – another favorite of mine…I can’t eat a hard boiled egg without it, is sadly being depleted with each card here in the Creative Studio.  I think I only have three full sheets of it left!

And my favorite Designer Series Paper this year was hands down Fan Fair.  How could you not like something with a giant Eiffel Tower and World Map in it?! 

So since we’re saying good bye to some good friends, I thought I would say hello to a new one for me.  Not that the stamp set Happy Hour is new to the catalog, but it is new to me!  I’ve wanted this set all year, and felt it was about time to start stamping with it.  And since Champagne is a fitting beverage to toast our retiring and new friends, why not three glasses of it!

Of course, I had to sneak my signature smashed flower in there too – everything is better with a smashed flower!   And just plug in smashed flower into the search box on the right to see the many projects I’ve created with this easy and addictive flowers.  Click Here To learn how to make smashed flowers

Creative Tips:

  • I gravitate to the square cards in this challenge, so that was an easy choice for me.
  • I used my color coach to choose my colors and then decided on Early Espresso as a highlight. 
  • Champagne is bubbly and sparkly, so I had to have Rhinestone Basic Jewels!  Instead of my usual flower center, I chose to add our Large Rhinestone Jewels. 
  • My card needed a little something in the corners, so I added a large and two small Rhinestones instead of Paper Piercing.  But the Paper Piercing would have looked great too. Happy Hour 001 Side
  • I chose the Fan Fair DSP because it’s just the right amount of pattern without taking away from the spirit of card.  Balance is important when working with patterned paper, otherwise you can quickly overwhelm your project.
  • To bring a little drama and emphasis to various spots, I popped up the Champagne glasses, banner flag and smashed flowerClick Here for a video on how to make a perfect Banner Flag endHappy Hour 001 Height
  • I couldn’t get my greeting stamped right today for the life of me – ever had that happen?  So I finally just filled it in with my Not Quite Navy Stampin’ Write marker.  I’m so glad it’s the same ink as our Classic Ink Pads.  If you look closely at my photos you can tell, but only because it’s zoomed in, holding the card in front of you, you’d never notice.
  • My card measures 5 3/8” x 5 3/8” and my white panel is 5” x 5”.  My Early Espresso panel is just an 1/8” larger so that I have a 1/16” border…or is it too early in the day for fractions…lol!
  • My interior white square is 3”x 3” and the Not Quite Navy square is 3 1/8”x 3 1/8”. This card came together easily for me.  I hope you like it, it has a classic and traditional look to it.  I love the colors, I hope you do too!  Happy Memorial Day. Smile

Free New Catalog

If you would like your very own brand new FREE 2013-2014 catalog click here to find out how to get one!

Signature-Snowflake-001_thumb1

To Shop 24/7 in the Creative Store – Click here!

Stamp Sets – Happy Hour (126642c, 132013w) Ink – Not Quite Navy (126971), Not Quite Navy Stampin’ Write Marker (Regals Collection – 119701) Paper – Whisper White (100730), Not Quite Navy (101722), Early Espresso (119686), More Mustard (100946), Fan Fair Designer Series Paper (126918) Cool Tools – 1” Square Punch (124094), Fancy Flower Punch (118073), Paper Snips (103579) Finishing Touch – Stampin’ Dimensionals (104430), Rhinestone Basic Jewels (119246), Large Rhinestone Basic Jewels (129324)

Happy Hour

Hearts a Flutter Mojo Monday

Happy Monday to you!  It’s Mojo Monday again and today is my anniversary, so I thought I’d make a special card for my sweetheart Michael.  I obviously wanted it to be somewhat masculine since I was using hearts from Hearts a Flutter.  I started with the color Basic Gray and wanted to use the new Designer Series Paper Parker’s Patterns from the brand new Spring Mini Catalog.  It all kind of fell into place there.  Today’s Mojo sketch was easy to use and I think the end result is rather striking.  I wouldn’t have used the ribbon this way myself, so it took me a little out of my comfort zone, which I love.  Hope you like it!

  Mojo275Sketch   

Creative Tips:

  • I just love the new DSP Parker’s Patterns, and the Chevron Cherry Cobbler page was perfect for this project.  I didn’t want it to take over, so I kept the strip to 1 1/4” in width.
  • The Cherry Cobbler strip was too plain, so I stamped the outline heart image several times on it tone on tone.
  • I changed the shape of the Cherry Cobbler banner, that is the rounded one, but I wanted the draped banner, don’t be afraid to switch them up.  I love the pattern on the rounded one and thought it would be the perfect background for my heart.
  • When I placed my banner and heart on the Very Vanilla square, it was too plain, so I ran it through the Big Shot with my Chevron Textured Impressions Embossing Folder.  It’s subtle since it’s so small.  I needed it to pop too, so I added a 1/16” border in Basic Black – the Basic Gray and Cherry Cobbler were just not right; I needed the contrast of the black.
  • I needed a little more on the page, but didn’t want to take away from my several patterns that I already had going on, so I added the half punched heart from the new Occasions Paper-Piercing Pack.  I just LOVE that one, it’s perfect for the upcoming Valentine, Spring and Easter seasons.

  • For my ribbon, I added a knot as my embellishment to the sketch.  Since I was already layering the heart on top of the banner, another embellishment would have been too much.  I originally had the small punched heart there, but it took away from everything, so I added a knot to the ribbon instead.  I used the Basic Black 3/8” Taffeta Ribbon, I just can’t get enough of that ribbon – it’s my all time favorite type of ribbon that we have!
  • For the saying, I used the Teeny Tiny Wishes Stamp Set. I originally had it on a 1/2” banner, but it was just too much white space, so I cut a 3/8” banner instead.  It’s just right.  I played with a few places to have the banner cut, and felt it needed to overlap the Parker’s Patterns DSP on the left and bottom.  To create the banner part, I used the 1” square punch.
  • I added the tiny heart from the Owl Punch (I just love that heart), and I also stamped it tone on tone in Cherry Cobbler with the same banner pattern stamp from the Cherry Cobbler banner under the main heart – that pattern just rocks.
  • For a little added emphasis, I popped the main heart image and greeting banner up on Stampin’ Dimensionals


I’m looking forward to a special anniversary with my soul mate – Michael. And now I have the perfect card.  :)  Love you honey!

Signature Snowflake 001

To Shop 24/7 in the Creative Store Click here!

Stamp Sets – Hearts a Flutter (129252c, 129249w), Teeny Tiny Wishes (115370c, 127802w) Ink – Basic Gray (126981), Cherry Cobbler (126966) Paper – Very Vanilla (101650), Cherry Cobbler (119685), Basic Black (121045), Parker’s Patterns (131021) Cool Tools – Hearts a Flutter Framelits (130159) OR Bundle (131097c, 131098w) Big Shot (113439), Chevron Embossing Folder (127749), Occasions Paper-Piercing Pack (129387), Paper-Piercing Tool (126189), Stampin’ Pierce Mat (126119), Owl Punch (118074), 1” Square Punch (124094)  The Perfect Finish – Stampin’ Dimensionals (104430), Basic Black 3/8” Taffeta Ribbon (109070)

131097L