Easy DIY Mixed Media Christmas Cards + Video

Save the Crafty YouTuber Video Hop

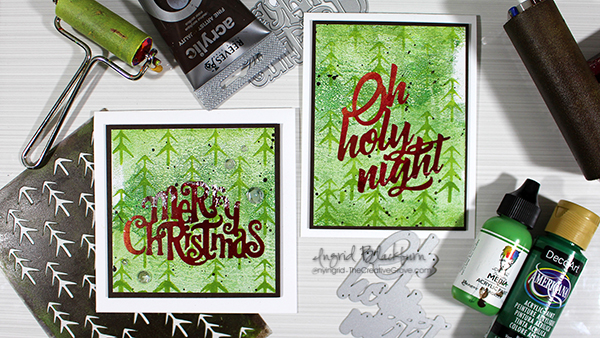
Have you ever wanted to quickly produce some fun and artistic Mixed Media Christmas Cards? Are you tired of sending bulky cards that require extra postage? What if I gave you the formula for how to create a whole stack of cards that have layered texture and character to them, but are pretty much flat, easy to put together and will have all your friends and family thinking you are quite the artist?!! Interested?

Now what if on top of that I told you that you could have a chance to win over 100 prizes – bet THAT sold ya!

Mixed Media Christmas Cards Video Tutorial

It’s that time of year again – my good friend Justine Hovey has organized the second Save the Crafty YouTuber Video Hop, and I decided to play along with 90 of my crafty friends – mixed media style! And I even have my OWN giveaway that I’m doing….so be sure to actually WATCH the video. I give the details along the way…

Click HERE to watch in HD on my YouTube Channel

Aren’t they FUN and super simple cards to make?!! Seriously – I’m going to be teaching this exact project (and so much more) in person in a few weeks in the Orlando, Florida area. If you’d like to come learn from me in person – be sure to email me at ingrid (at) thecreativegrove.com and I’ll send you all the details!!

For the specifics and Details to be entered for over 100 prizes – seriously…it’s more like 125+ prizes….GOOD ones too – read about those on my YouTube Channel in the section below the video!

The Save the Crafty YouTuber Video hop is a celebration of cardmaking video tutorials created by a group of talented crafters of all different styles and levels. We are coming together over 5 days to give our viewers a chance to discover other amazing cardmakers and help reach monetization goals!
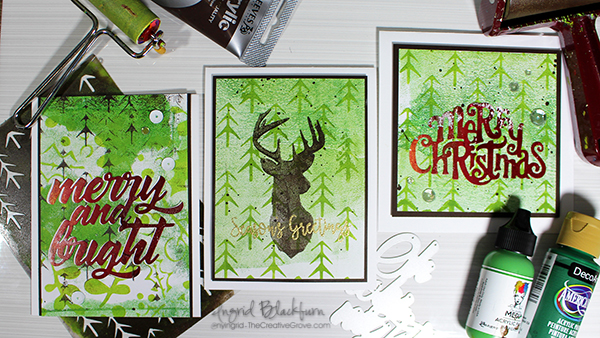
Mixed Media Christmas Cards

All you have to do is watch, like the video, consider subscribing, and click the link in the video description below to hop to the next video. Let yourself be inspired! Don’t forget to comment (on the video hop over at YouTube) because we have tons of prizes to give away. Please indicate if you are located in the USA or International so that prizes can be awarded appropriately as some prizes (not all!) have restrictions on them.

To be entered in for MY giveaway (closed) – watch the video – I give details on what you need to put in the comment section (USA only for that one).
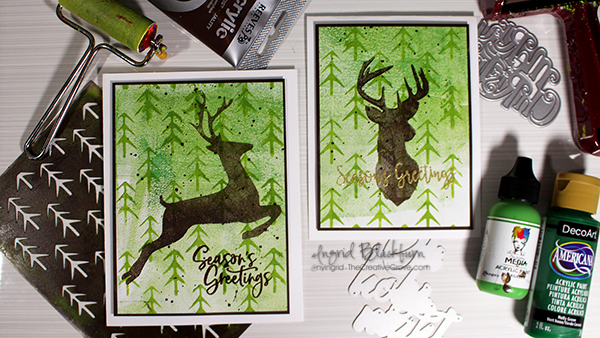
Monoprinting Christmas Cards

Don’t forget to check back every day this week since there are 5 themed days of video hops! You never know when you’ll discover your next favourite YouTuber! Hop Links are below.

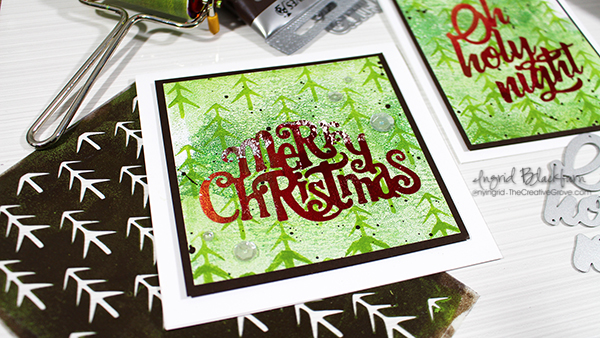
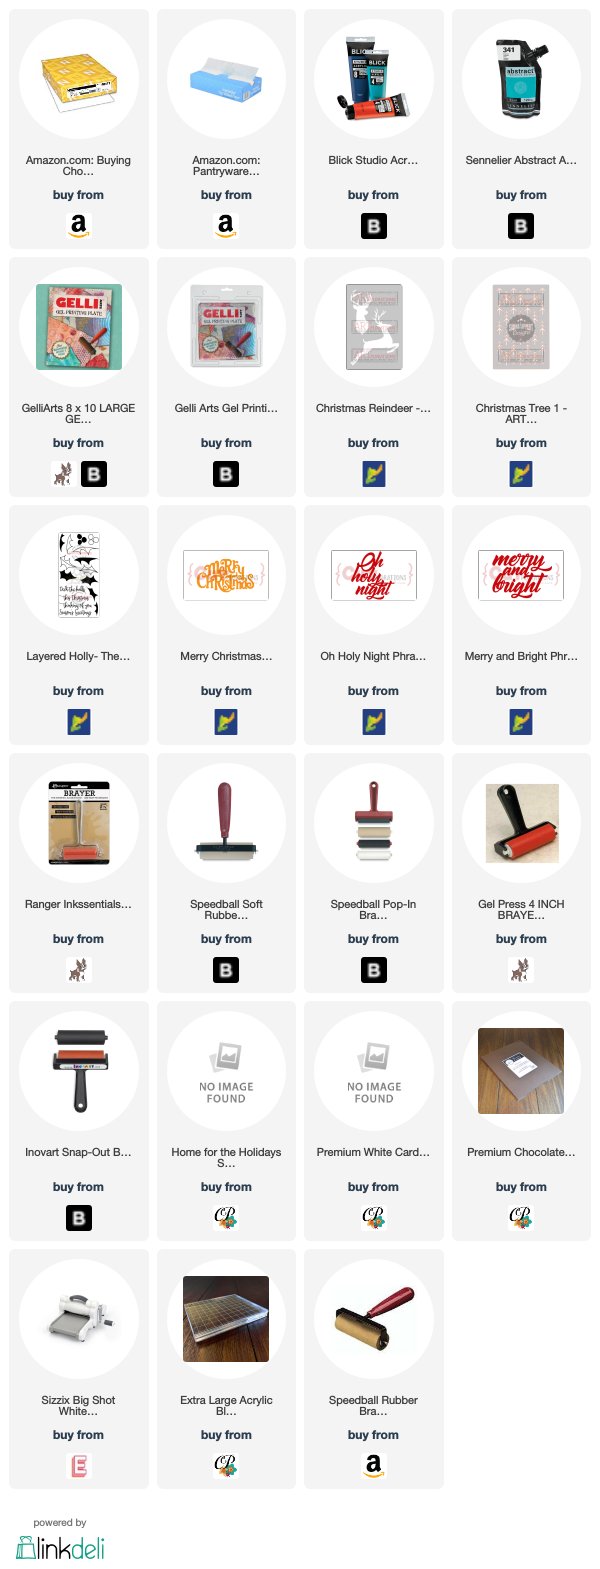
I hope you enjoyed this tutorial. Here are a few close up photos for you and the supply list. Be sure to come back to this post on November 10th to see who won the prize pack – I’m giving away Dies, Stencils and ink pads – it’s worth over $40!!! That Merry Christmas Die is one of them!!! 🙂 Happy Hopping!!!
Mixed Media Monoprint Christmas

Aren’t those the prettiest cards?!! These photos do not do them justice!! Interested in seeing more Mixed Media Christmas Card possibilities? Check out this tutorial – just adjust for the Christmas Season

Sponsors & Hop Links (Giveaways closed)

Here are all those sponsors….and SO many channels in each of the five hops are giving away additional prizes – this is an AWESOME hop!

Here are links to all five hop days:

  1. Day One Hop Beginning
  2. Day Two Hop Beginning
  3. Day Three – Start on MY YouTube Channel
  4. Day Four Hop Beginning
  5. Day Five Hop Beginning

Good luck on winning all those great prizes – over 100!!! Leave me a comment below if you liked these cards – I’d LOVE to know.

Thanks for watching – till next time…

Supply List

Affiliate Links used if available
Mixed Media Christmas Cards

Hailey’s Shower Photo Supply List – https://ldli.co/e/jpxx6p
Christmas Sugar Cookies Card

Nothing is better than good Christmas Sugar Cookies, right? I have a quick and simple treat for you this evening. It’s the live public release of the new Catherine Pooler Home for the Holidays Stamp of Approval Collection! This fun collection of stamps, dies and brand new exclusive embossing glitters is a dream to create with. I’ve been having fun all week showing you how to create wreaths for your custom doors, mass producing my take on the classic nordic sweater turned Christmas tree cards, and I thought tonight we’d tackle the holiday sweet tooth!
Home for the Holidays Stamp of APproval

This release has 10 products in it (5 Stamp Sets, 2 Dies, and 3 Embossing Glitters):

In addition to the release, there are a few new products being released as well – including a brand new “colossal” sized block – you probably saw me use it in my video on this post here – it’s the lightest weight block of its size I’ve used yet!

If you aren’t familiar with Stamp of Approval, it’s a curated collection of stamps and dies that work so well together. It’s perfect to help take the guess work out of your holiday cards. These boxes always sell out, and they are going fast, so don’t miss it! To grab one, just go directly to the Shop Here.

Christmas Sugar Cookies Tutorial

So here’s some fun sugary inspiration for you. This project showcases the Sugar Cookie Dies and Christmas Cookies Stamp Set. The sentiment is from the nordic folk art themed Tiny Wishes Stamp Set using the new Tiny Tags Dies. There’s even a little of the new Thin Silver Cord on there!

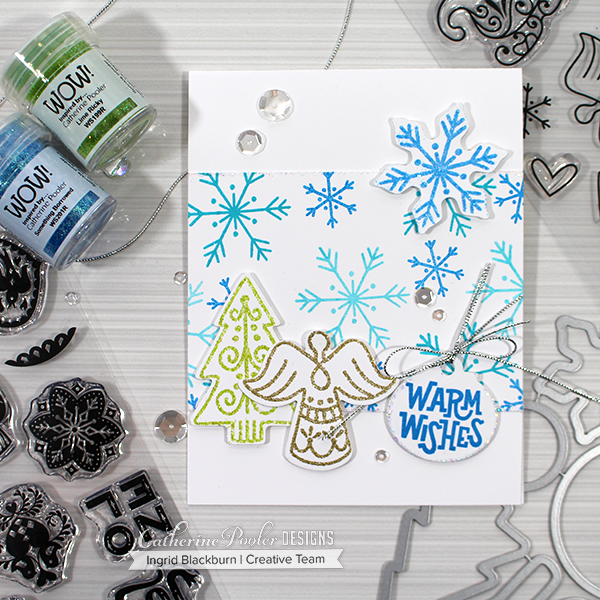
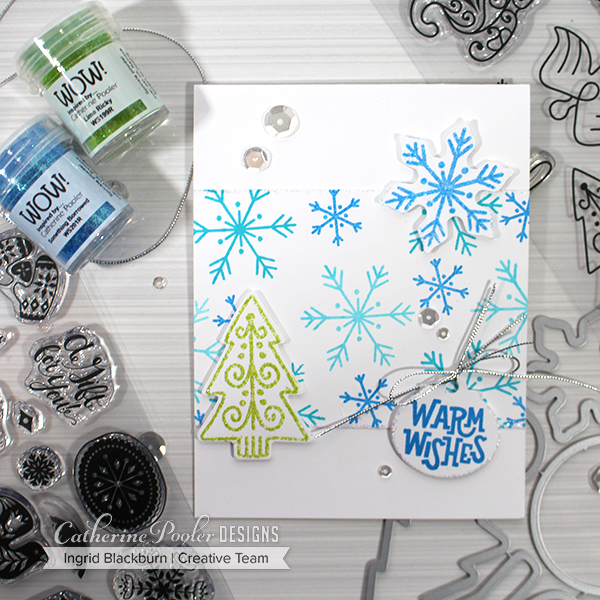
I have similar cards here – you’ll have to tell me which one you prefer – withor without the Angel? I love angels…but it was messing with my need to have odd numbers of elements on my cards. I literally could not decide, so I’m leaving it up to you!!!

TCG Giveaway – Leave me a comment below and I’ll choose three people randomly to send a Christmas Card to this season!! (I did make 12 the other day for the video hop….) 😉 I’ll announce the winners this weekend!

Christmas Sugar Cookie Card #1

Christmas Sugar Cookies Card by Ingrid Blackburn

Christmas Sugar Cookie Card #2

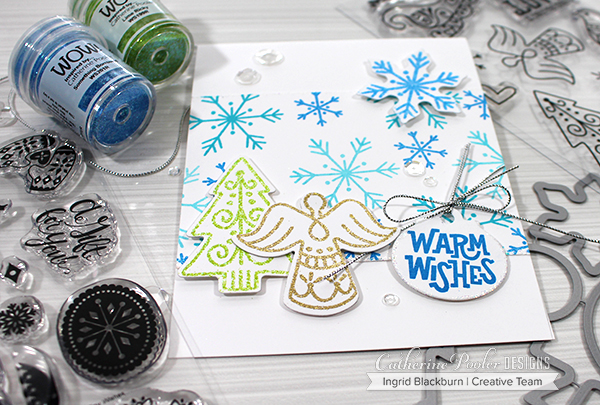
Christmas Sugar Cookies Card

To have some fun with the sugar cookie theme, The large snowflake die is embossed in the new exclusive Something Borrowed Embossing Glitter – what? Yup you read that right – embossing powder in Catherine’s colors – just in time for the holiday season! The Tree is in Lime Rickey Embossing Glitter – my favorite Party Line Green ink, what’s yours? Tell me in the comments below!!

Only one missing is Rockin’ Red, I know I probably should have snuck a peek of it – it’s awesome!

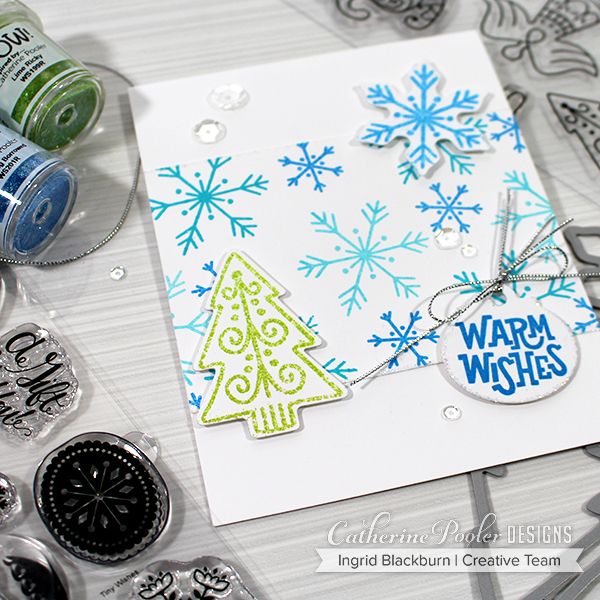
Christmas Sugar Cookies Card

I’m not a big straight glitter fan, but Embossing Glitters I can do! Why you may ask…well, they stick to the paper and don’t rub off! I swear, every time I use glitter, I wear it for days (hubby too), what about you? Do you have that same problem? For the Angel, I used Wow Metallic Sparkle Embossing Glitter and around the Circle Tag, some of Catherine’s exclusive Wanderlust Embossing Glitter – literally the BEST (hands down) sparkly clear glitter. See it in this photo?

Christmas Sugar Cookies Card

I hope you loved these cards. They are pretty straight forward. Stamp the two snowflakes in three colors – It’s a boy, Fiesta Blue and Something Borrowed. Stamp your dies in Versamark or WOW embossing ink and heat set with your desired embossing glitters. The warm wishes was stamped in Something Borrowed. The snowflake panel is also edged with Versamark and embossed in Wanderlust Embossing Glitter.  Tie a little Thin Silver Cord and you’re all set! I popped the dies up on a little foam tape and it’s a simple, cost effective card. VERY easy to mass produce.

Catherine Pooler Stamp of APproval

Thanks for joining me this week. There are still prizes up for grabs in the three hops – don’t miss out!! Here are the three hops, be sure you like, comment and subscribe all along the hops! There are three ways to win 7 prizes. You can always start on Catherine’s channels too.

  • Instagram Hop – 3 $25 gift certificates as Prizes
  • Blog Hop – 3 $25 gift certificates as Prizes
  • Video Hop – Stamp of Approval Collection as a Prize

You have through Thursday 9/20 to enter, winners will be announced on Catherine’s blog on Monday 9/24.

Have a great night!


Supplies

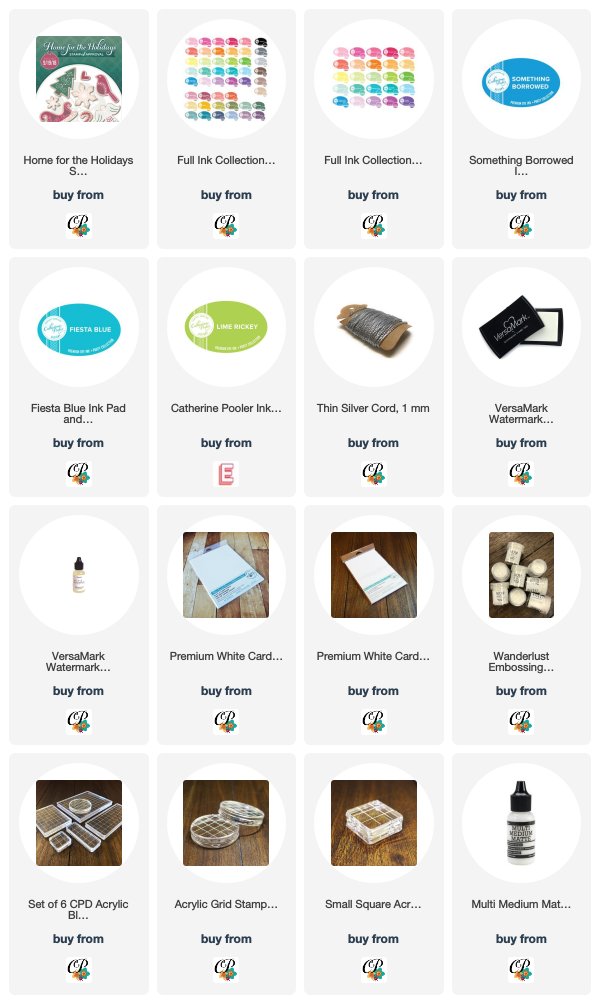
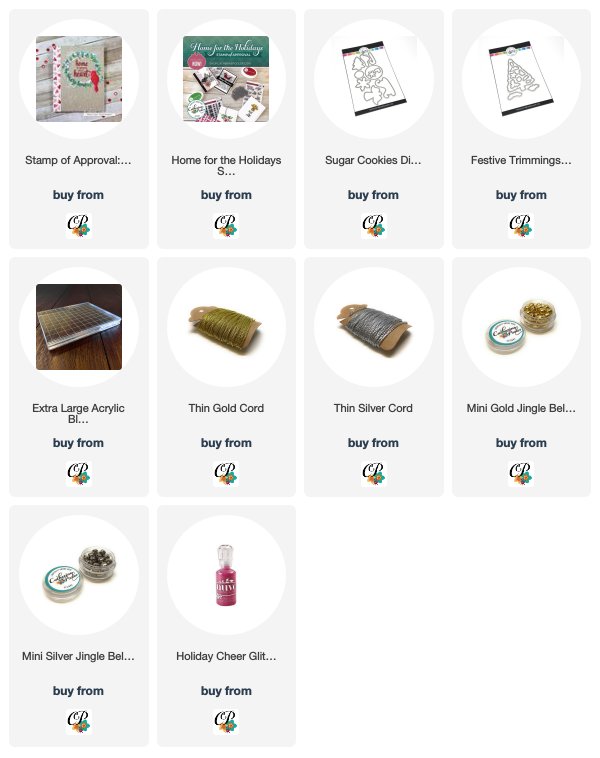
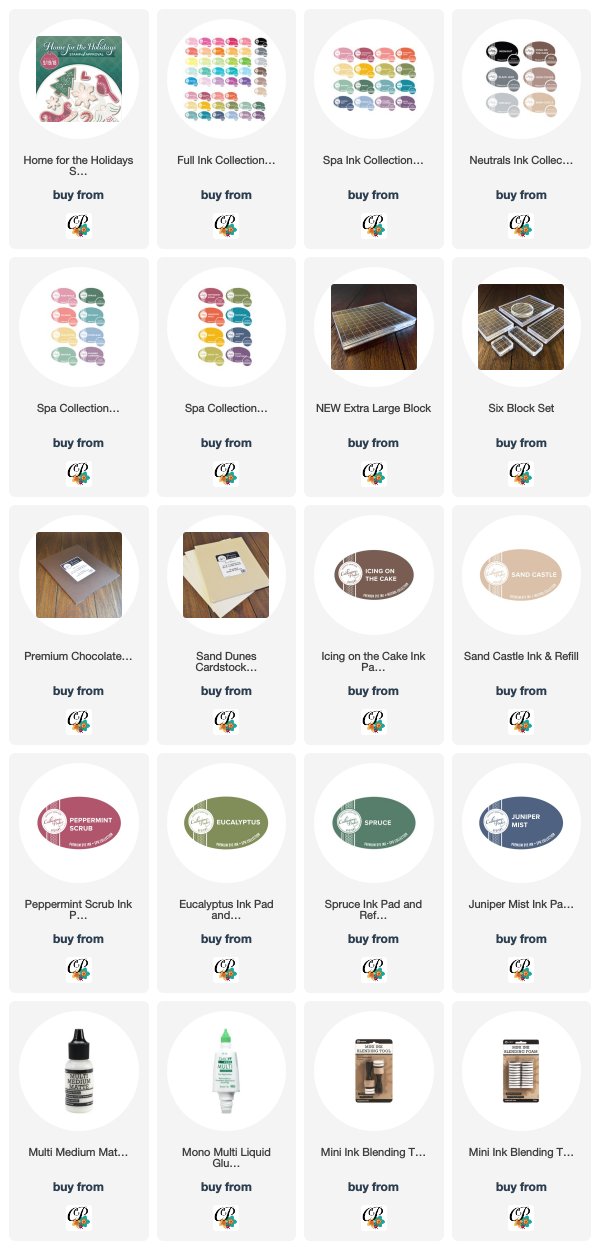
To make finding the supplies I used in these projects a bit easier for you, here are a few clickable links. Compensated Affiliate Links are used when possible. Click here for disclosure. Happy Shopping!


Mass Produce These Easy Rustic Christmas Cards + Giveaway

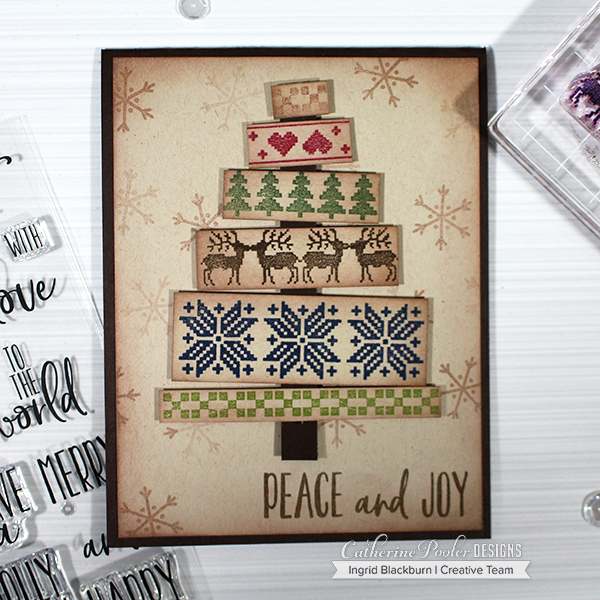
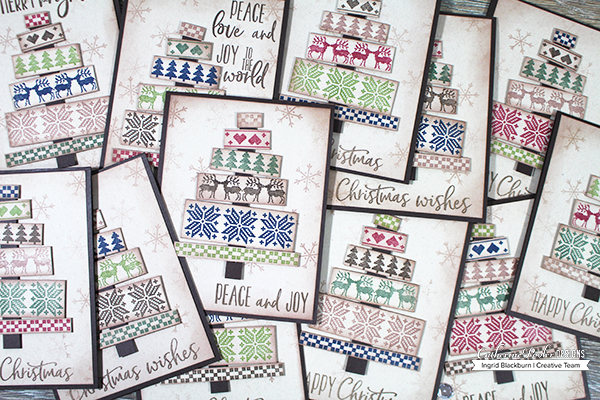
Today I have a great video for you – how to mass produce 12 easy rustic Christmas Cards! Plus, it’s a Video Hop with great holiday inspiration and even a giveaway! It’s that time again, Catherine Pooler’s Stamp of Approval. This release is called Home for the Holidays, and the box is filled with everything that is warm and cozy. Speaking of cozy….today’s project uses the new Cozy Borders Stamp Set.

Home for the Holidays SOA Box

If you aren’t familiar with Stamp of Approval, it’s a curated collection of stamps and dies that work so well together. It’s perfect to help take the guess work out of your holiday cards. These boxes always sell out, sometimes as fast as a few hours, so don’t miss it! Catherine’s private online community get the link to purchase the collection first – tonight, Tuesday September 18th in an online live stream PJ party of sorts! I’ll be there too. It’s a fun way to kick off the release. Then tomorrow – Wednesday September 19th at 9 am, the waitlist gets the secret link. If you aren’t on the waitlist – click here. If there are any boxes left, then the public gets access in the Shop Here.

This release has 10 products in it (5 Stamp Sets, 2 Dies, and 3 Embossing Glitters):

In addition to the release, there are a few new products being released as well – including a brand new “colossal” sized block – you’ll see me use it in the video – it’s the lightest weight block of its size I’ve used yet!

I love those little jingle bells, they are the perfect way to finish a card! And I use that cord ALL the time. Gold and Silver cord is one of my favorite accents on holiday cards. Now for the good stuff. I love this project. The inspiration for it came from Nordic sweaters, and Scandinavian holiday decor. Here’s a detailed video showing you how:

Click Here to Watch on YouTube in HD + Hop along & Comment for Giveaway

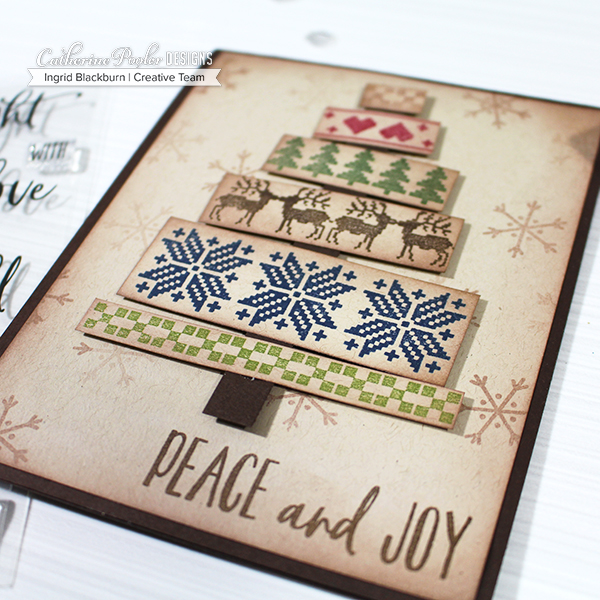
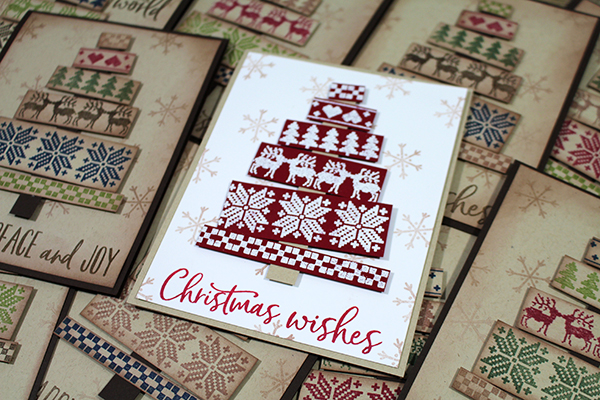
So what did you think? Not bad, huh! And I have a treat for you. It’s not in the video…but below I have some close ups and a card done in red with white embossing powder even! It was quite easy to mass produce these. And the Extra Large Block made it super simple to stamp!

Easy Rustic Christmas Cards Tutorial

You’ll want to get your stamps lined up on your acrylic block like this, or you can use a MISTI too, but I liked the speed of using a block. A MISTI gives you the option of stamping a second time, the only draw back to that is that with every additional time, the darker your images get. And that isn’t necessarily the look I was going for here. Sure that’s fine with a dark brown or black, but with Peppermint Scrub and Eucalyptus, the color gets really dark.

DIY Easy Rustic Christmas Cards - SOA Box

Stamp your images from the Cozy Borders Stamp Set onto Sand Dunes cardstock. When stamping a large image or several as in the video, you may have noticed that I stamp them upside down. That way I can rub my hand over the cardstock on the back helping to transfer the ink. Tip – be sure to rub over every section thoroughly and you’ll get a perfectly stamped image every time! To duplicate this project, you’ll want to use the following Spa colors (pictured in the supply list below) Eucalyptus, Spruce, Juniper Mist, Peppermint Scrub, Sand Castle, Icing on the Cake.

Cut each border image out using your paper trimmer. I personally use a guillotine trimmer by Tonic Studios. I never have to sharpen the blade, and it’s cuts perfectly for me every time! I’ve been using it for over 10 years.

DIY Easy Rustic Christmas Cards

Next, stamp the small snowflake from the Christmas Cookies stamp set in Sand Castle. To give a varying look, you’ll want to ink your stamp, stamp and then stamp again getting a lighter snowflake in spots. This is called generational stamping.

Stamp your greeting at the bottom in Icing on the Cake. I used three words from the Holiday Mix Stamp Set. That set is unbelievable – you see a small snapshot in the photo above. There are print and scripty words, some together, some not. You get a good idea of all the possibilities here in my shot of all 12 of my cards.

https://shop.catherinepooler.com/?aff=3

Now that you have all your pieces cut, along with 12 Sand Dunes card fronts (4 x 5 1/4″) you’ll want to edge them using a mini blending tool and Sand Castle ink. Keep it light!

Next you’ll want to assemble your trees. I did these all at once – it’s quite easy to mass produce them. Arrange your six pieces, one color for each level. You’ll also need 12 tree trunks (7/16 x 4″) cut out of Chocolate cardstock (hands down my favorite deep brown card stock). Start at the top, use a Matte liquid glue (that way it dried crystal clear), glue down each piece. I made mine slightly wonky. You don’t want to have too much brown in-between or you’ll run out of trunk!

Glue your card front onto a folded A2 sized Chocolate card base (4 1/4 x 5 1/2), and pop your tree up with foam tape and squares. That’s it! Simple as that. I made 12 in the time it took to watch a movie.

scandinavian christmas cards

And for fun, I made a few extras in red/white to really go for that Scandinavian feel. I’m not sure which one I like better? Tell me which one you prefer in the comments below. What did you think? I love that I have 12 cards done and ready to go – well 14 with my red ones…lol! And I MAY just make some more – they were that easy.

Easy Rustic Christmas Cards

If you haven’t checked out the video hop yet, don’t miss out. Details on the Giveaway can be found in the section below the video. Be sure to watch the video on my YouTube channel and leave a comment THERE to be entered in for the giveaway. You can always leave me a comment here too – but for the giveaway, it needs to be on YouTube. Hop all along the hop – you won’t be disappointed. Be sure to like and subscribe along the way too!

There are three ways to win. You can always start on Catherine’s channels too.

  • Instagram Hop – 3 $25 gift certificates as Prizes
  • Blog Hop – 3 $25 gift certificates as Prizes
  • Video Hop – Stamp of Approval Collection as a Prize

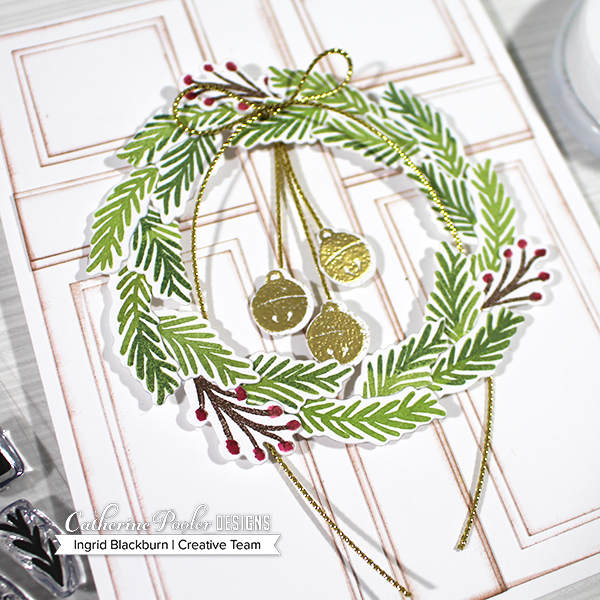
And stay tuned – I have another project tomorrow and if you missed this one in the instagram hop – there are different prizes for that too! Click Here for this project on my Instagram Channel and be sure to swipe to see all the photos! Look for this card:

wreath on door christmas card by ingrid blackburn

Click on the card and in the description is the next person to hop along to. Be sure to like each channel and leave comments along the way! Happy Hopping.

Keep those fingers inky –


Supplies

To make finding the supplies I used in these projects a bit easier for you, here are a few clickable links. Compensated Affiliate Links are used when possible. Click here for disclosure. Happy Shopping!


Kylie’s 12 Days of Christmas Card Challenge – Day Seven

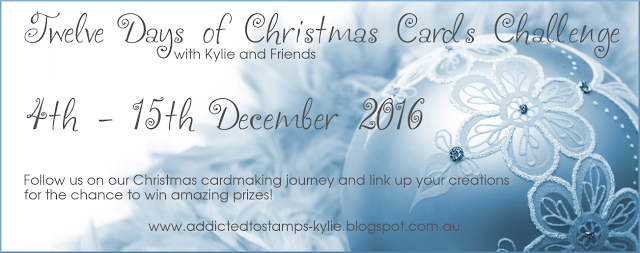
There are two things I’m grateful for this year – my online friends and a good ole Christmas Card Challenge. Okay there are lots of other things too, but today is about a sweet friend of mine – Kylie Purtell and her 12 Days of Christmas Card Challenge with friends.

12-days-of-christmas-graphic

I’ve had a wonderful last few years participating in many online card challenges – most of them Christmas! Yes, I’m a sucker for Christmas. And I normally have my own 12 Days of Christmas Series myself…but between a move from Europe back to the USA (we’re settling in the Raleigh, North Carolina) area, and purchasing a new home unexpectedly – my November/December got turned upside down – please forgive me!

So I was elated when Kylie asked me to participate in her 12 Days of Christmas with Friends Challenge. And I encourage you to enter too – pick any inspiration from any day….today is Day 7 – and just jump on in. The prizes are from three of my favorite stamp stores – all small businesses owned by amazing women.

To Salute these three creative women – Kylie, Shery & Christine, I thought it would be fun to put together a little Christmas fun using products from all three – from where else…my hotel room…lol!

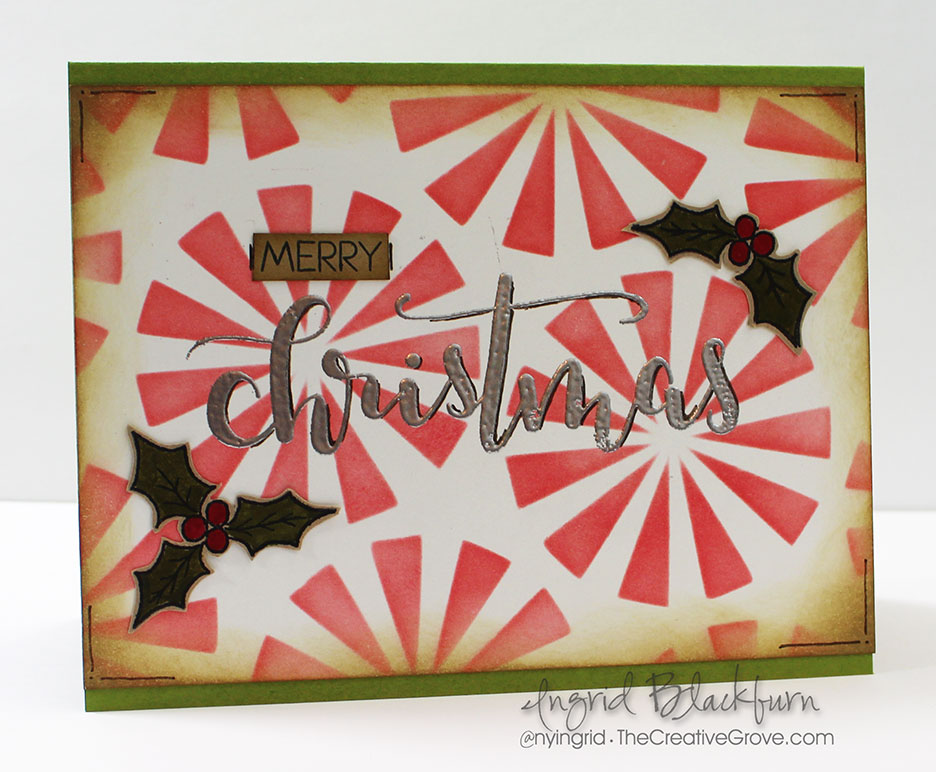
ingrid-blackburn-candy-cane-holly-001

I went for a little rustic look with some toned down colors here.

  • To create it you’ll want to sponge a little Festive Berries through the ARTplorations by STAMPlorations Merry Go Round Stencil  – keep it light to have it look effortless.
  • Next sponge around the perimeter with a little Tea Dye Distress Ink lightly and add a few lines and dots to the corners with an Early Espresso Distress Marker.
  • Next Stamp the Holly & Berry images from the Christmas Joy stamp set by Happy Little Stampers in Black Archival Ink on Kraft colored card stock.

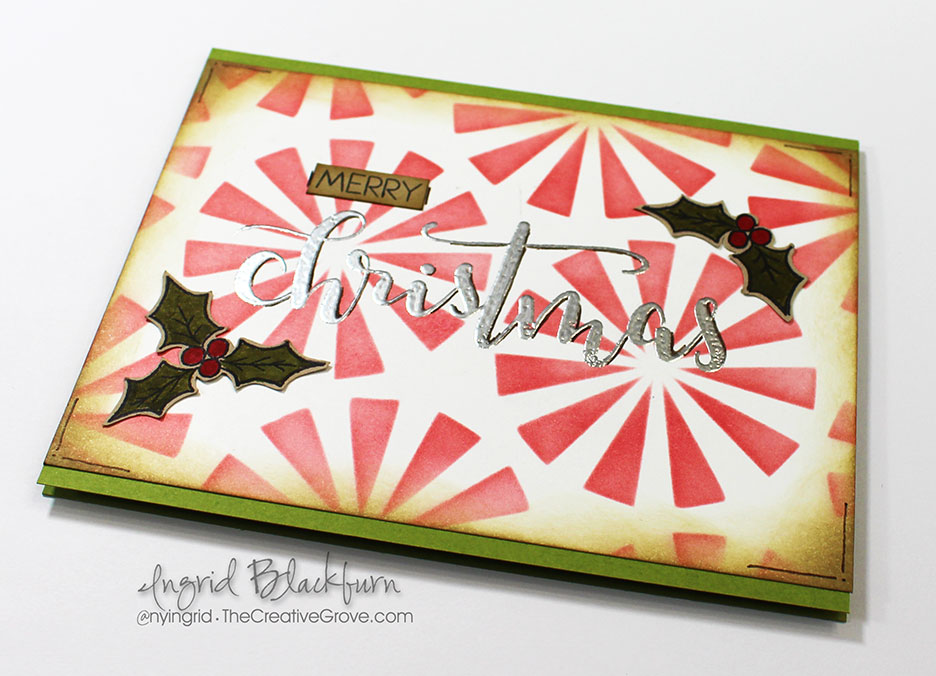
ingrid-blackburn-candy-cane-holly-002

  • Color in your images using Zig Clean Color Markers and cut out leaving a little edge to allow the images to pop.
  • Once your background is fully dry (I zapped mine with a Heat Tool), test it to see if any embossing powder sticks, and then stamp the gorgeous Christmas greeting in Versamark ink from the Christmas Surprise stamp set by Create a Smile Stamps.
  • Emboss it in Silver powder and stamp the coordinating greeting onto a little strip of Kraft in Black. Adhere to your background and edge with an Early Espresso Distress Marker.
  • Edge the greeting a bit with the same Early Espresso Distress Marker – keeping it uniform – mine is slightly to the right and underside of the letters. This helped to pop the image off the busy background.
  • Add your panel to a folded piece of Olive card stock and there you have it! My card front measures 5 1/2 x 4″.

ingrid-blackburn-candy-cane-holly-001

Don’t you just love how the background looks like little peppermint candies…I love all these elements, and these three companies are some of my favorites – I’ve spent my fare share at each this past year – just don’t tell Michael! 😉

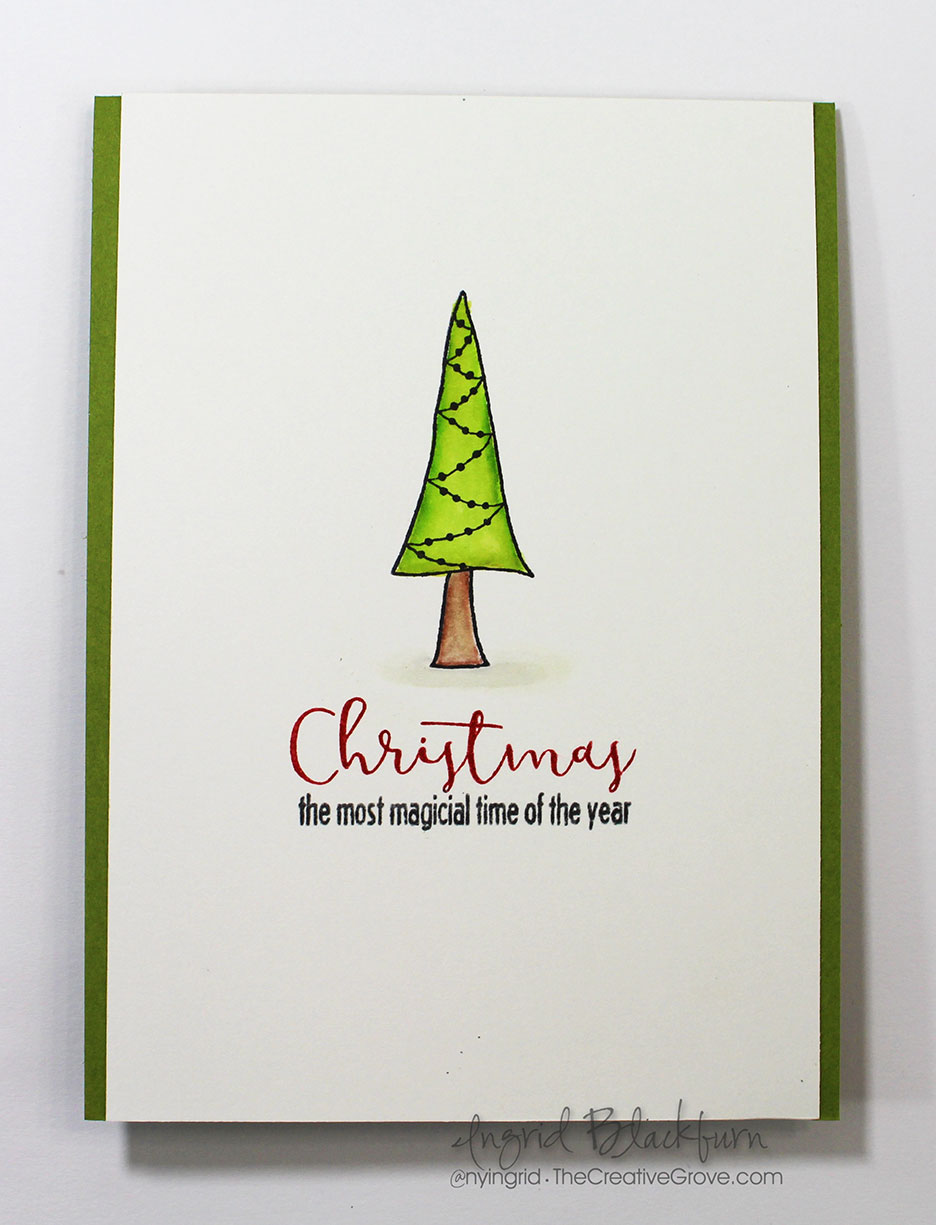
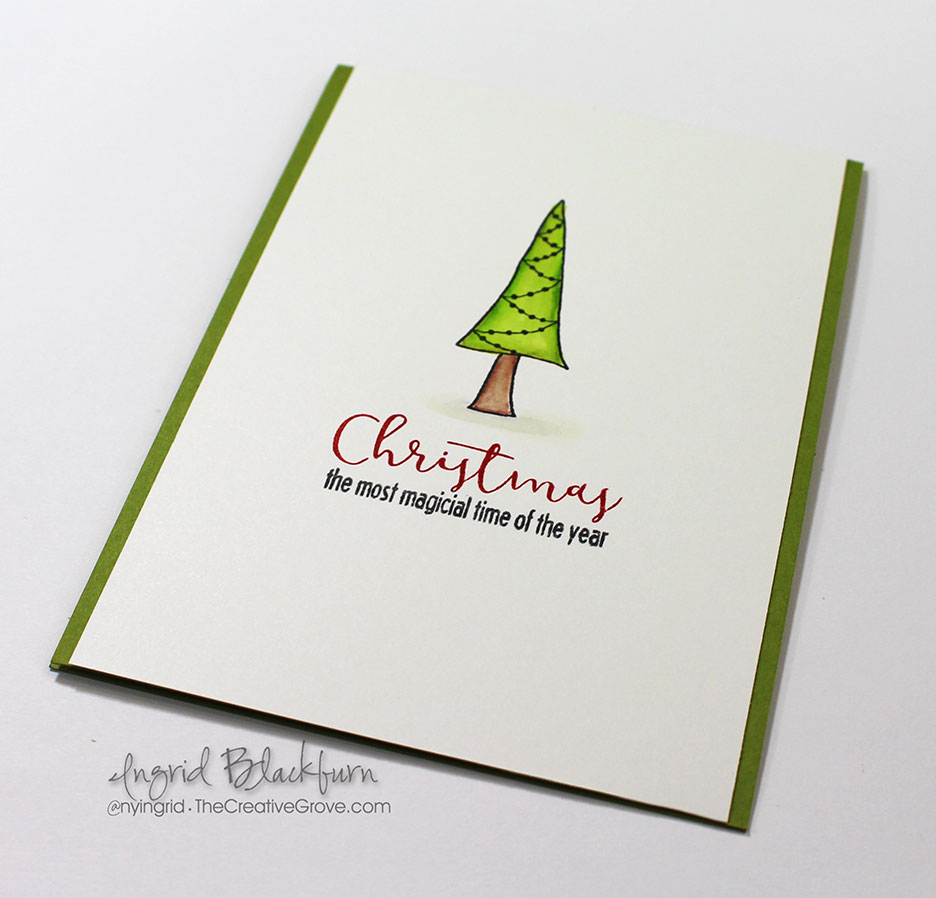
And for another fun little card for some inspiration…I kept it Clean and Simple using Kylies super cute newest Christmas set – Christmas Joy. I’m in love with the little trees in it and the sentiments. Be sure to stop by the Happy Little Stampers video channel this week for lots of Christmas inspiration too…

ingrid-blackburn-cas-tree-002

I used Strathmore Bristol paper for a super smooth finish that works effortlessly with Zig Clean Color Markers. If you have these awesome watercolor markers – you NEED this paper! Lower quality papers just don’t get the same blend.

  • Use several shades of green to blend the perfect tree after stamping it in Archival Ink (Ranger), and a few browns for the trunk.
  • Add a light shadow underneath the tree in a warm grey for a simple shadow which grounds your tree for a realistic look.
  • Use a MISTI stamp tool to position your greeting, then ink up the Christmas in Red, stamp…clean and repeat using black on the bottom. It was so easy to do. I used Catherine Pooler’s new ink pads – Polka Dot Red and Midnight Black.

ingrid-blackburn-cas-tree-003

  • Originally I thought a one layer card would be perfect…but the little Olive borders added so much – I just HAD to trim it and layer.

It’s cute though, right? I just love these little trees – seriously…I can’t stamp enough with them!

So now it’s up to you! Enter the challenge to win gift certificates from Happy Little Stampers, STAMPlorations and Create a Smile! If not just to enter to finish off those cards – and if you’re done…start on next year!

Click Here to visit Kylie’s blog and enter in the Linky contest – run, don’t walk!!! You have until 12 pm – December 17th (AEST) Winners will be chosen at random. for a $20 gift certificate to one of the following sponsors:

createasmile stamplorations1-webhls-shop-badge

Thanks for stopping by and saying hi! It’s been a little bit, I’m happy to have had the opportunity to actually stamp again! Be sure to stop by the Happy Little Stampers Video Channel to see our Christmas Series – we’re live right now! Notice some of those cute little trees?


Happy Little Stampers YouTube Channel

Hope to see you very soon – and if we don’t cross paths until 2017 – Merry Christmas and Happy New Year!

Signature


Embossing on Christmas Cards

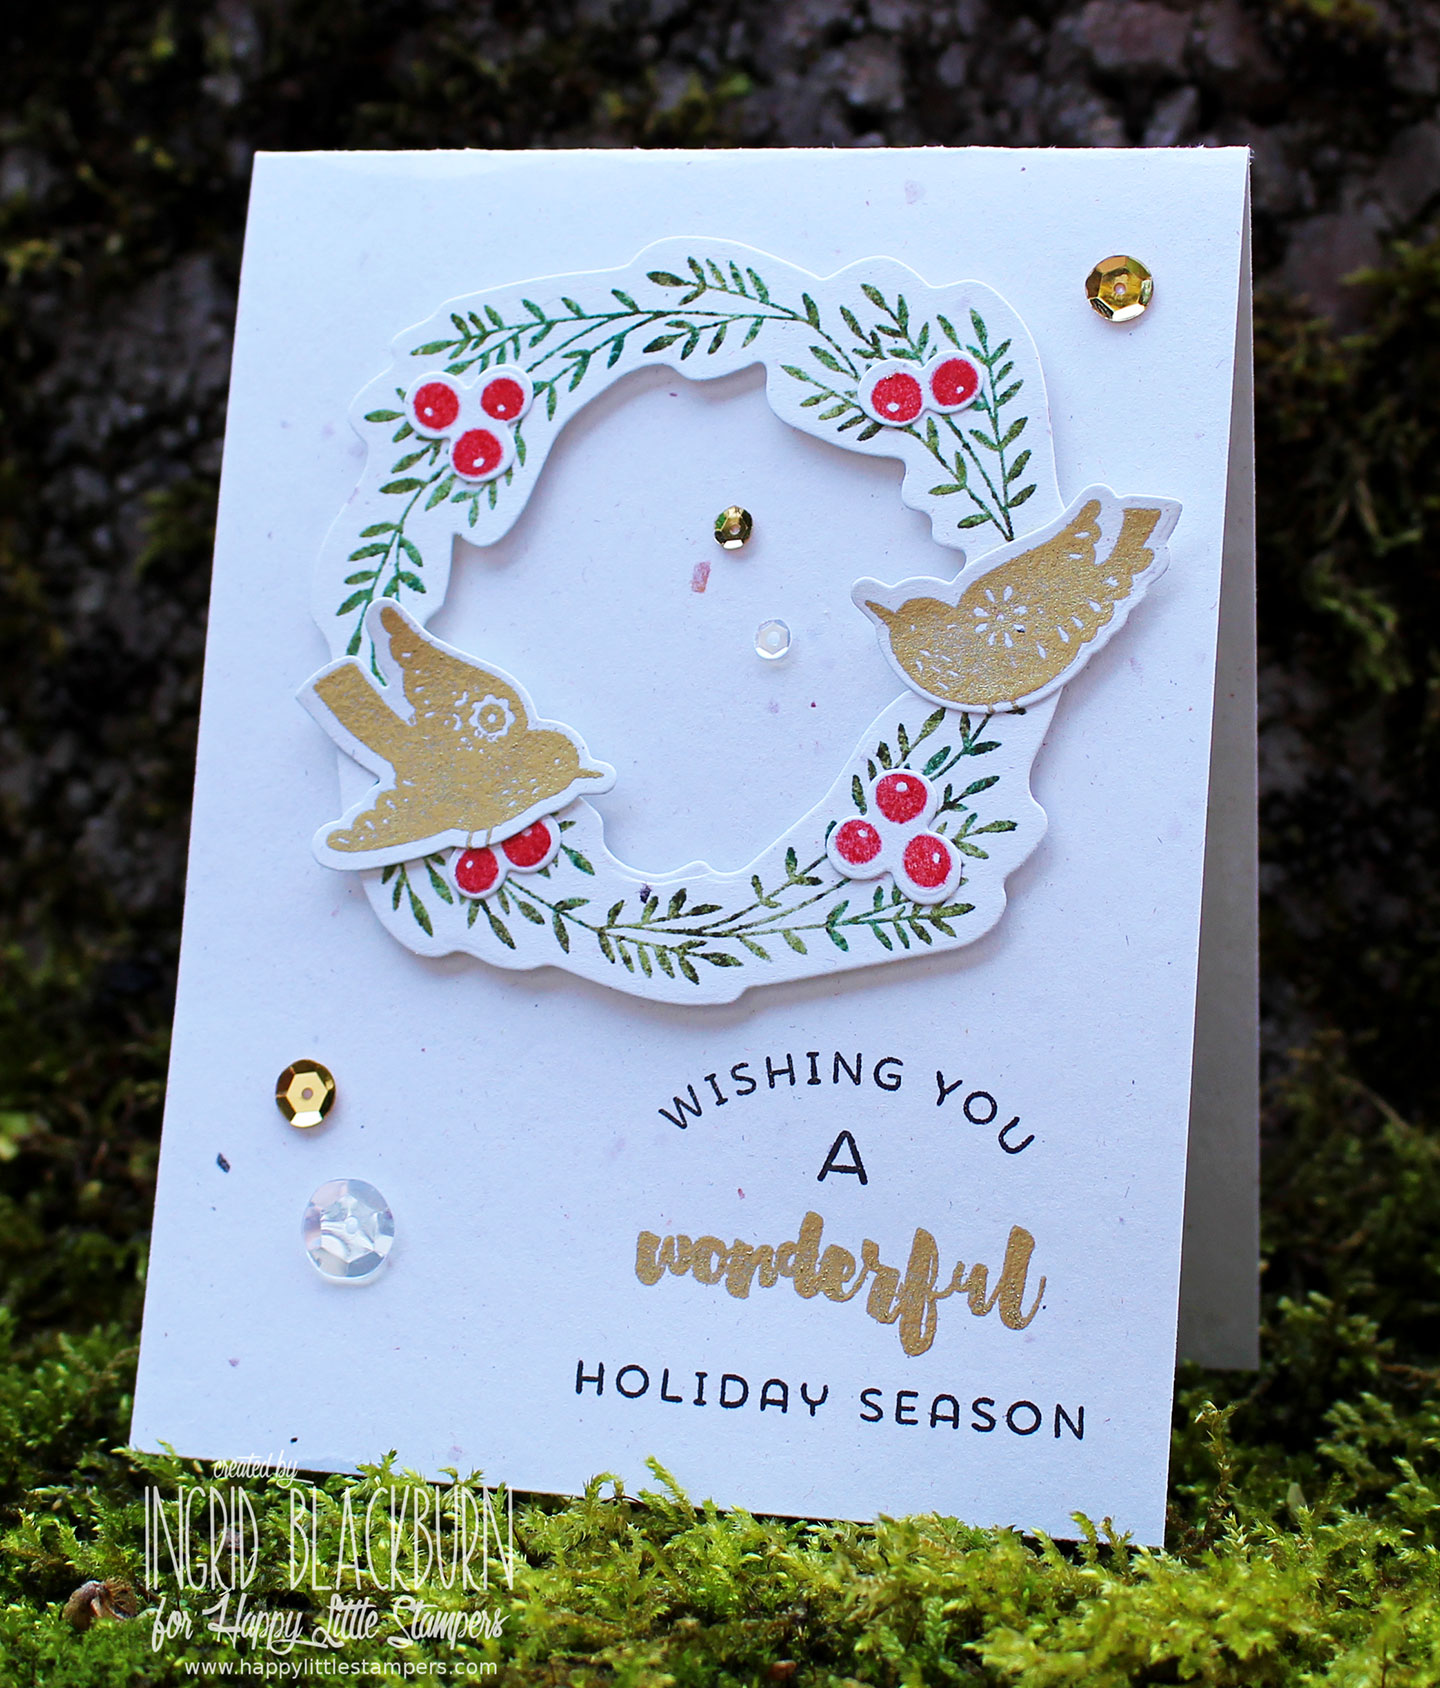
Today I have a Christmas card for you that would make a wonderful mass produced card. The theme over at the Happy Little Stampers Christmas Challenge this month is embossing – and this card is loaded with embossed pieces.

hls-christmas-challenge-october-2016

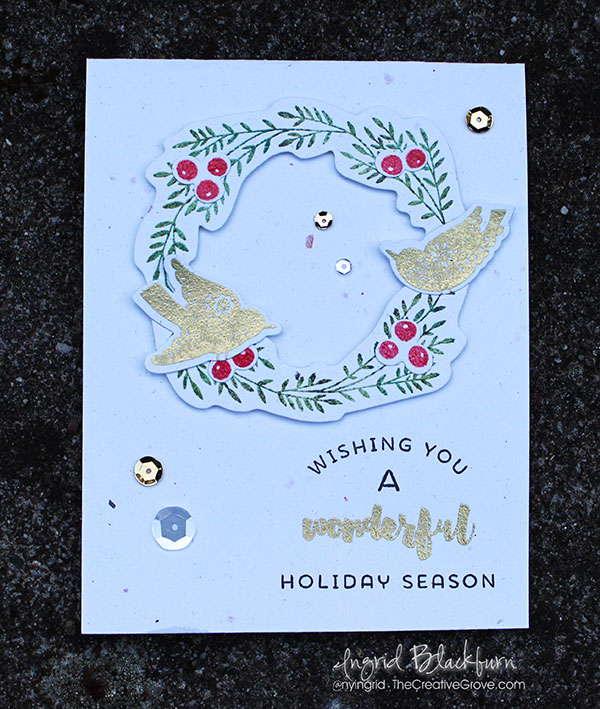
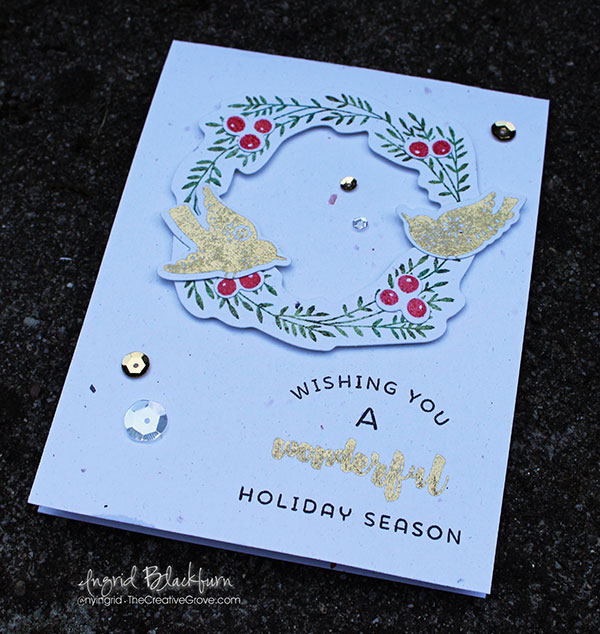
I”m using my favorite new wreath and stamped embellishments by Wonderful Wreath by Catherine Pooler Designs. And let me tell you, with the matching die cuts it’s SUPER easy to get nice cut out pieces – love that!

christmas-embossing-ingrid-blackburn-hls

First stamp & emboss the wreath in a few greens. I inked it up in Versamark, then Peeled Paint, Forest Moss & Evergreen Bough Distress inks. Then just emboss in clear and you have your own custom embossed color! Pretty awesome, right? I’ve been doing this technique for years – that way you don’t need to buy all those colors that you’ll only use once – use what you have!

christmas-embossing-ingrid-blackburn-003

Emboss your berries the same way, using Barn Door. Next, emboss the birds and scripty greeting from this set in Gilded Gold by Brutus Monroe – my go to gold. TIP – Keep in mind that the Gilded Gold looks so much like a foil – it’s a true metallic. Because of it’s metallic properties, it embosses in a flash, literally. If you do over emboss it, it will start to bubble – and that happens quick. I just LOVE this embossing powder.

The Wishing you….Holiday Season is stamped in Early Espresso by Stampin Up and is the only non-embossed image on here!

christmas-embossing-ingrid-blackburn-002

The finish off your card, pop up the wreath and add a few sequins. I think one of the things I love about this project is that it’s just 1/2 a sheet of card stock folded – and it’s a naturals type card stock with neutral flecks. The neutral quality adds to the card a bit – of course bright white would be great too!

Now it’s your turn to check out what the Design Team has done and join in on all the fun for this month’s Christmas Challenge. I KNOW you emboss!

Till next time –

Signature

[optin_box style=”12″ alignment=”center” email_field=”email” email_default=”Enter your email address” integration_type=”aweber” double_optin=”Y” list=”3846012″ name_field=”name” name_default=”Enter your first name” name_required=”Y” opm_packages=””][optin_box_field name=”headline”]Learn more with our exclusive FREE video series:[/optin_box_field][optin_box_field name=”paragraph”]PHA+UGx1cyB5b3XigJlsbCBiZSBhZGRlZCB0byBteSBGUkVFIENyZWF0aXZlIFRpcHMgRS1sZXR0ZXIgd2hlcmUgSSBzaGFyZSBleGNsdXNpdmUgcHJvamVjdHMsIHZpZGVvcyAmYW1wOyB0aGUgPHN0cm9uZz4xMiBEYXlzIG9mIENocmlzdG1hczwvc3Ryb25nPiBQcm9qZWN0IFNlcmllczwvcD4K[/optin_box_field][optin_box_field name=”privacy”][/optin_box_field][optin_box_field name=”top_color”]undefined[/optin_box_field][optin_box_button type=”0″ button_below=”Y”]Get Instant Access![/optin_box_button] [/optin_box]

CAS – Embossing on Vellum

cas-embossing-on-vellum-ingrid-blackburn-hls

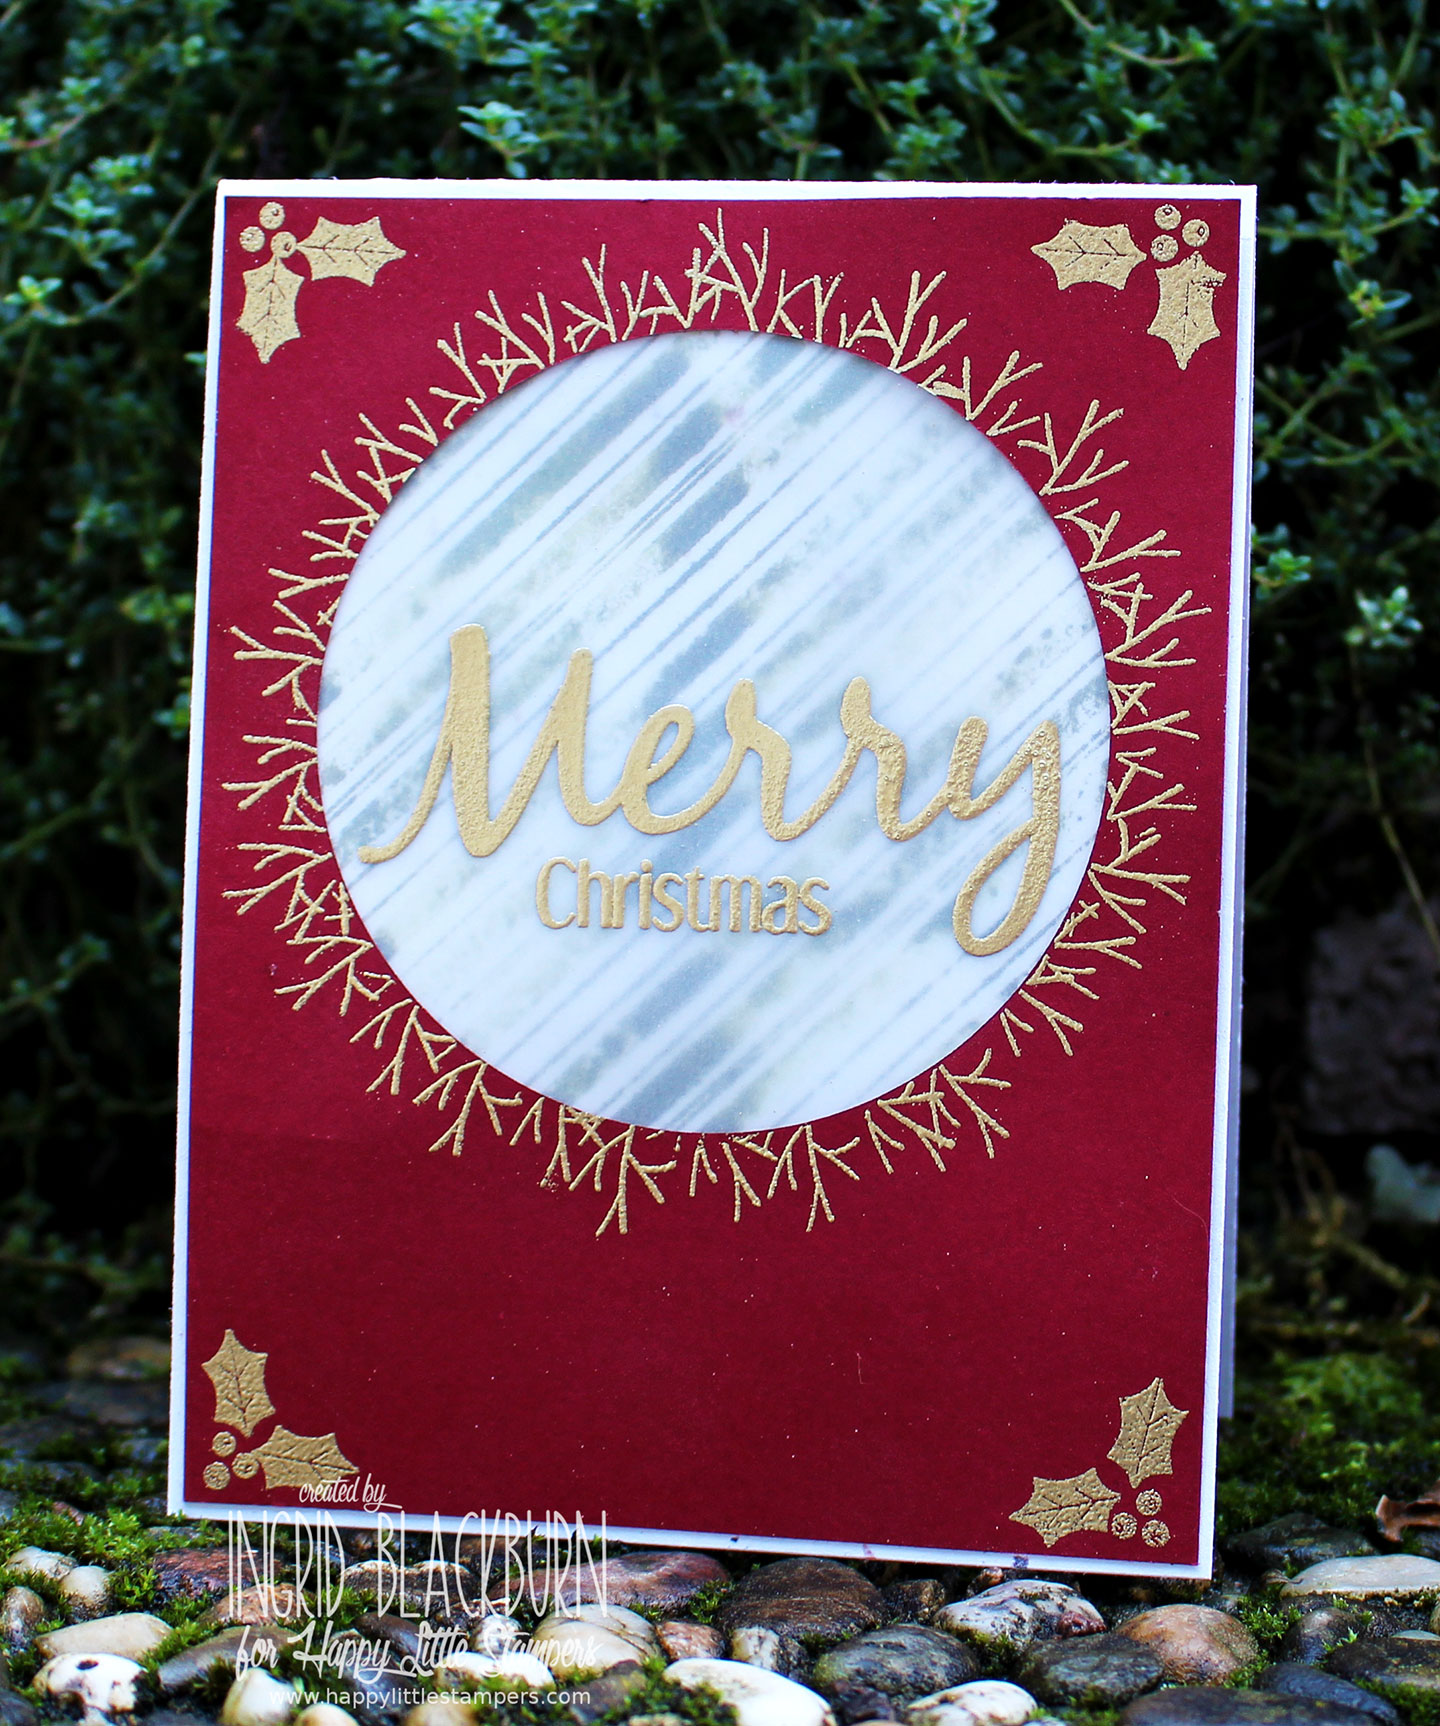
Chances are if you love to emboss, you’ve tried embossing on vellum before. Embossing really gets a pop when laid on top of the slick vellum surface. Today I’m playing along with the Clean and Simple challenge over at Happy Little Stampers. And the technique is yup, you guessed it –  embossing on vellum.

oct-2016-cas-badge

Embossing on Vellum Tutorial

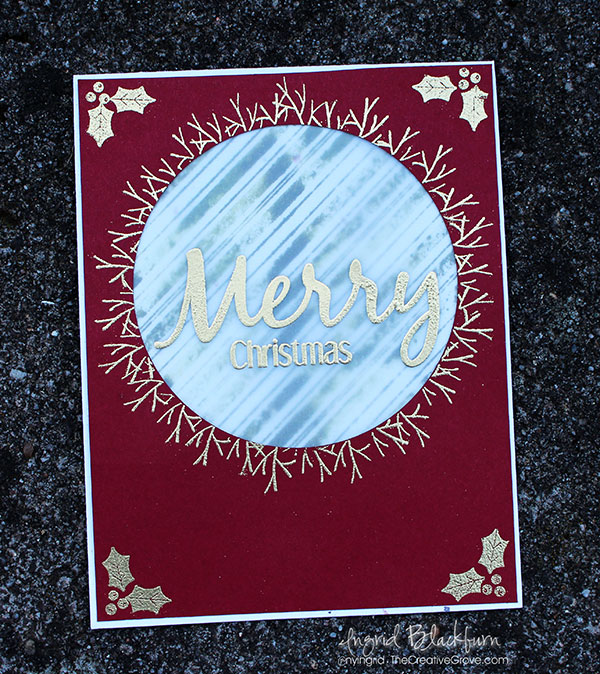
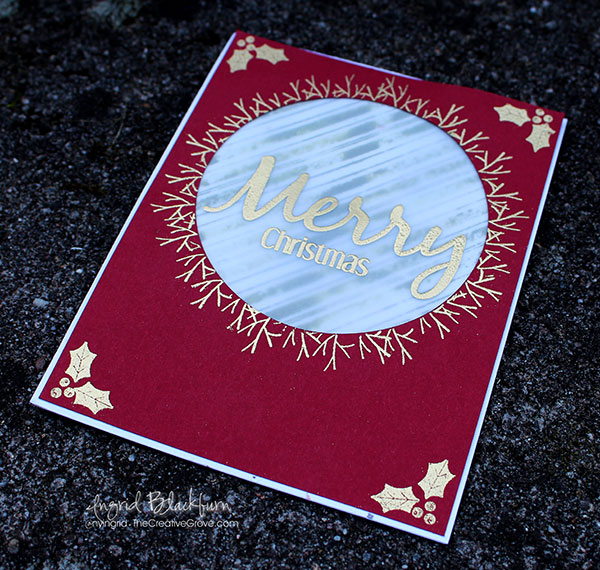
Clean and simple cards need a focal point. This project uses embossing on vellum not just to highlight the focal point, but to soften a busy background as well. To bring more attention to that focal point, emboss a golden twig wreath around.

Embossing on Vellum - DIY Christmas Cards

The focal point. One of the brilliant properties of vellum is that it is translucent. So I took a busy stamped off Peppermint Stick background in green and placed it behind my vellum window. With the golden twigs – it really worked.

But the card needed a tiny bit more. The clean and simple look was what I was after, so I didn’t want to clutter it up too much. I ended up choosing to add some golden holly leaves & berries in the corner.

Embossing on Vellum Technique

All the little touches seem to pull it together. The vellum cuts down the strong stamped background just the right amount….now it adds something rather than dominating. The golden accents added to the card, without pulling your eye from the dominant focal point – just what you’re looking for in clean and simple design.

When working on your clean and simple cards – don’t be afraid to stray from a white card. White space – which is what CAS design needs doesn’t literally mean white!

Now it’s your turn – head on over to Happy Little Stampers and join in the Embossing on Vellum Challenge fun!

Till next time –

Signature

[optin_box style=”12″ alignment=”center” email_field=”email” email_default=”Enter your email address” integration_type=”aweber” double_optin=”Y” list=”3846012″ name_field=”name” name_default=”Enter your first name” name_required=”Y” opm_packages=””][optin_box_field name=”headline”]Learn more with our exclusive FREE video series:[/optin_box_field][optin_box_field name=”paragraph”]PHA+UGx1cyB5b3XigJlsbCBiZSBhZGRlZCB0byBteSBGUkVFIENyZWF0aXZlIFRpcHMgRS1sZXR0ZXIgd2hlcmUgSSBzaGFyZSBleGNsdXNpdmUgcHJvamVjdHMsIHZpZGVvcyAmYW1wOyB0aGUgPHN0cm9uZz4xMiBEYXlzIG9mIENocmlzdG1hczwvc3Ryb25nPiBQcm9qZWN0IFNlcmllczwvcD4K[/optin_box_field][optin_box_field name=”privacy”][/optin_box_field][optin_box_field name=”top_color”]undefined[/optin_box_field][optin_box_button type=”0″ button_below=”Y”]Get Instant Access![/optin_box_button] [/optin_box]

World Card Making Day Weekend

It’s that time of year – World Card Making Day, and I thought this year….why not inspire you with projects all weekend long? Let’s kick it off today with a quick clean and simple card. I’m in love with angles and lines at the moment. So I thought it would be fun to get a little crooked today…

candy-cane-collection - clean and simple ingrid blackburn

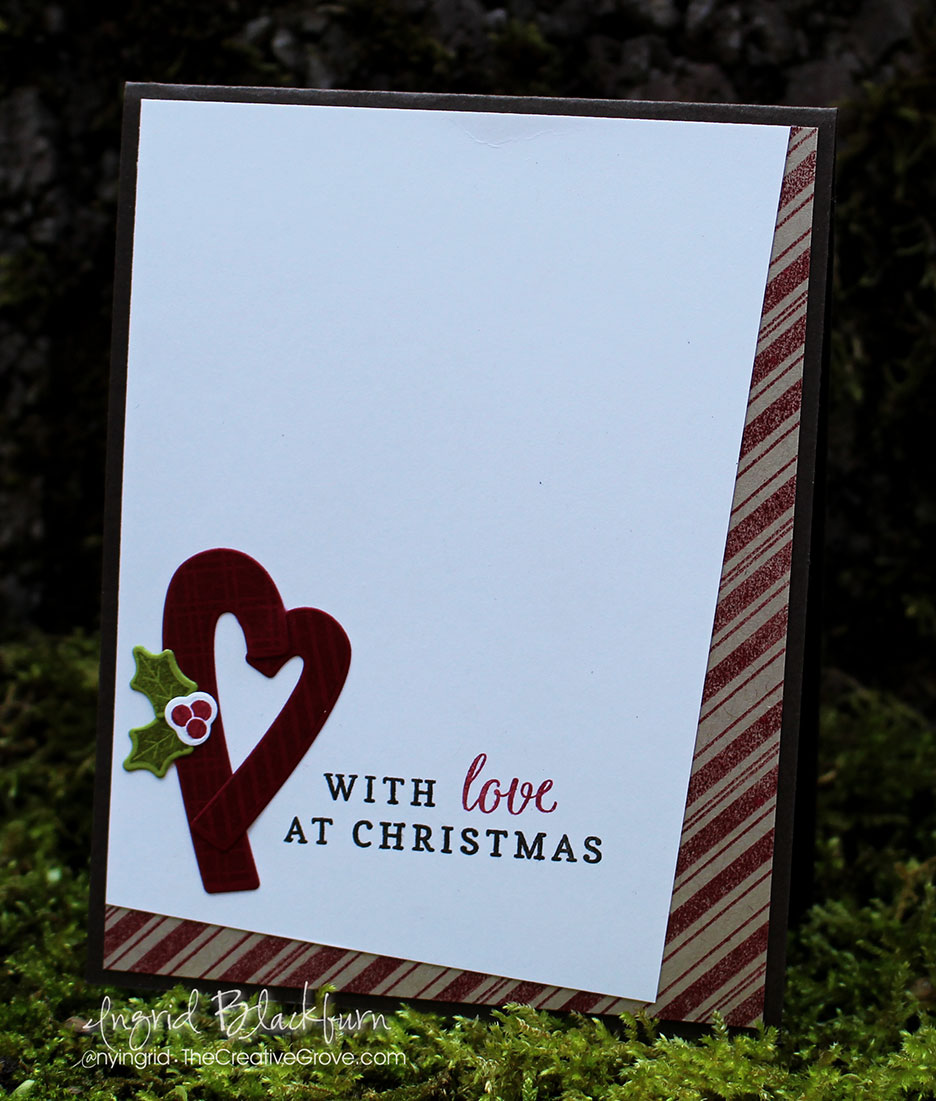
This card is pretty straight forward. To duplicate it, stamp your favorite background stamp  – I used the new Peppermint Stick Background by Catherine Pooler Designs. For a muted look, use a deep red on kraft. Use the same color red for your candy canes. Now you can stamp these on white – but I thought I’d keep them deep red to symbolize love a little better.

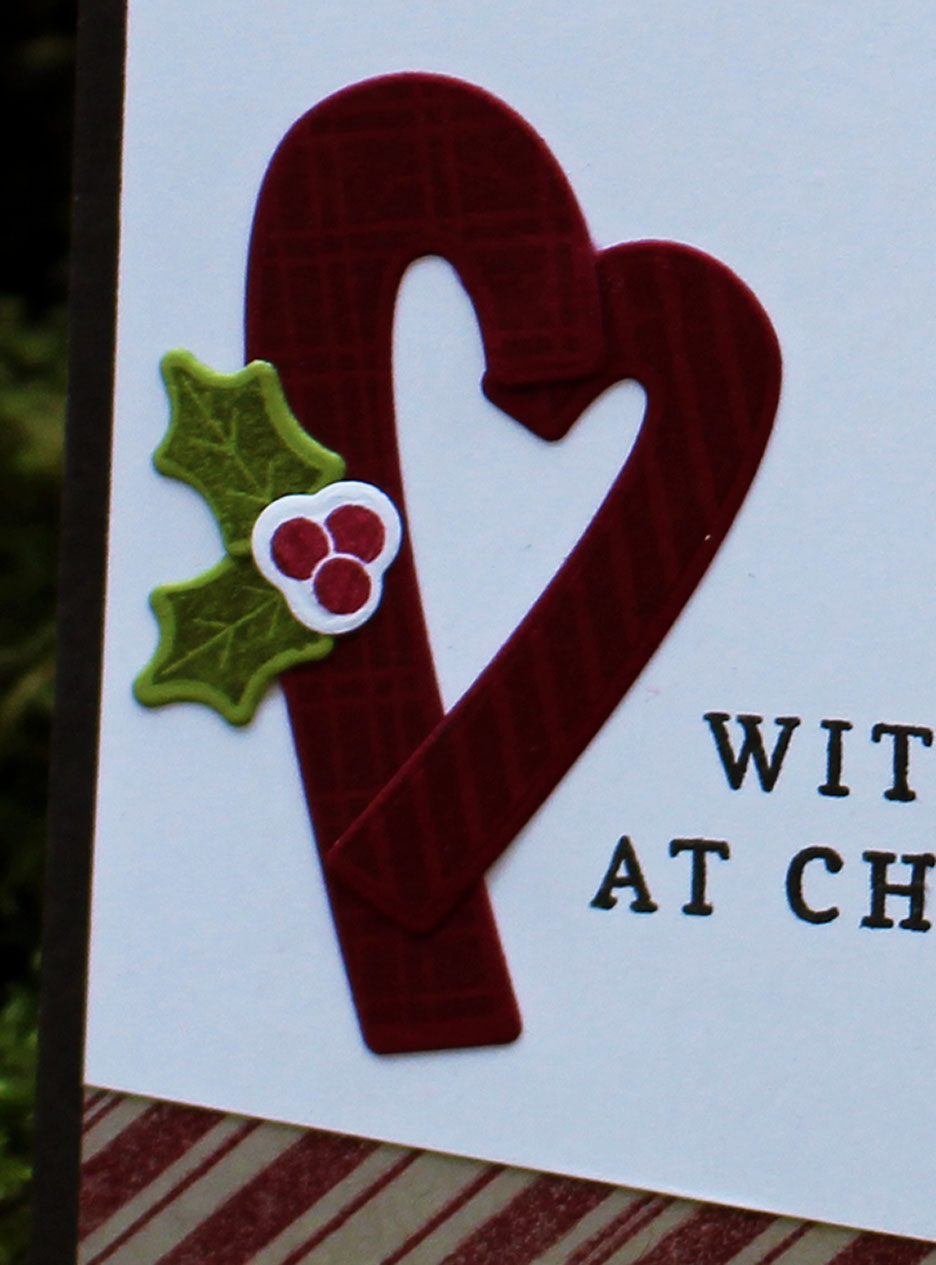
candy-cane-love-cu

Did you know that if you criss cross facing candy canes they form a heart? Now you see it, don’t you! I layered multiple patterns, added a little holly & berries and stamped a cute sentiment. Keep it real simple – no sequins or embellishments. It helps to focus on the dies, angles and patterns.

Be sure you’re signed up for my free 12 Days of Christmas series coming soon – Click Here to sign up

What do you think? Tell me in the comments if you’re going to be creating this weekend for world card making day?

Over at StampNation, the Design Team and a huge list of guest designers are going to crazy inspire us all weekend long –  four times each day – that’s a lot of inspiration. There are tons of prizes for those creating along with us too – it’s a worldwide party….here are just a few of the cards I made for the weekend over at StampNation – and I plan to stamp along making more as well!

wcmd-photo-array

Hope to see you there – or on your own blogs. Tell me if you’re creating this weekend in the comments below and I’ll stop by your blog this weekend!!

wcmd-blogsized

And be sure to stop by tomorrow & Sunday – I’m part of a blog hop for a great cause – yup….cards & a fundraiser…how fun is that! There will be lots of designers and a ton of awesome inspiration! Hope to see you here tomorrow….

Till then, keep those fingers inky –

Signature

[optin_box style=”12″ alignment=”center” email_field=”email” email_default=”Enter your email address” integration_type=”aweber” double_optin=”Y” list=”3846012″ name_field=”name” name_default=”Enter your first name” name_required=”Y” opm_packages=””][optin_box_field name=”headline”]Learn more with our exclusive FREE video series:[/optin_box_field][optin_box_field name=”paragraph”]PHA+UGx1cyB5b3XigJlsbCBiZSBhZGRlZCB0byBteSBGUkVFIENyZWF0aXZlIFRpcHMgRS1sZXR0ZXIgd2hlcmUgSSBzaGFyZSBleGNsdXNpdmUgcHJvamVjdHMsIHZpZGVvcyAmYW1wOyB0aGUgPHN0cm9uZz4xMiBEYXlzIG9mIENocmlzdG1hczwvc3Ryb25nPiBQcm9qZWN0IFNlcmllczwvcD4K[/optin_box_field][optin_box_field name=”privacy”][/optin_box_field][optin_box_field name=”top_color”]undefined[/optin_box_field][optin_box_button type=”0″ button_below=”Y”]Get Instant Access![/optin_box_button] [/optin_box]

The Perfect Christmas Tree

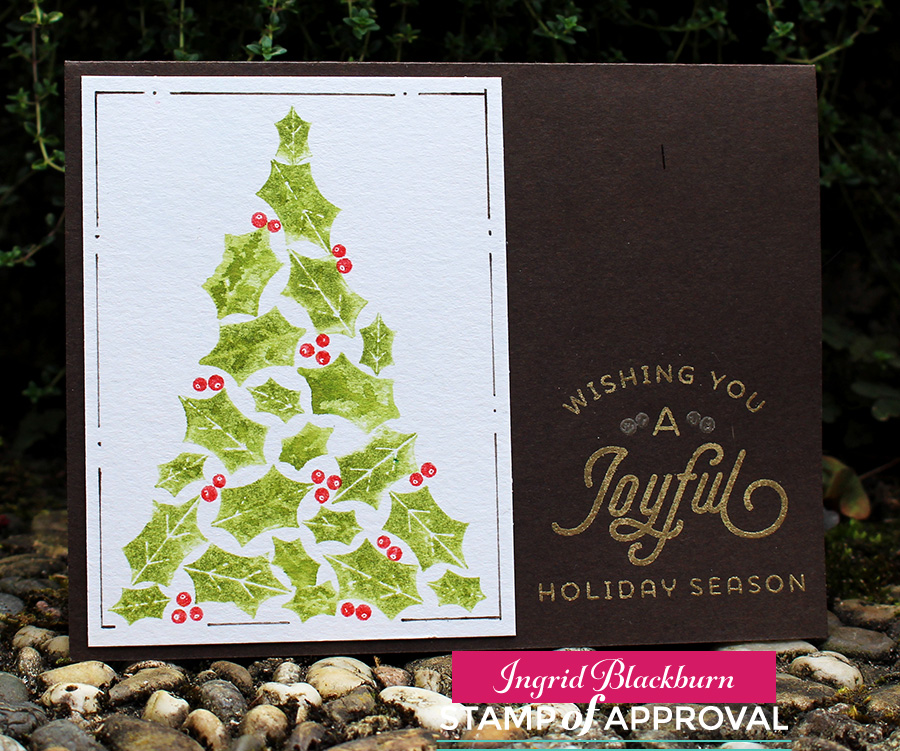
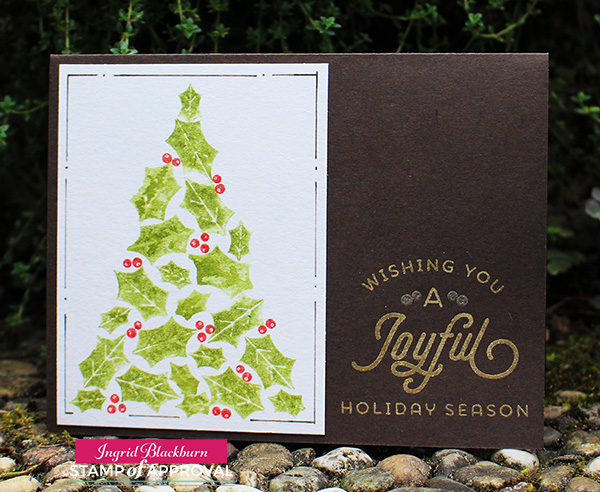
Are you always on the lookout for the perfect Christmas Tree? I am always striving for the perfect Christmas tree on my cards, and I think I’ve finally found it. After all, what’s more Christmas than a tree made of holly leaves and berries?

Today the Stamp of Approval Candy Cane Lane Collection is available to the public (while supplies last). We had three days of blog hops, and many of my fellow dream team members have been posting projects all week long. Click HERE to check mine out from a few days ago. I’ll have links to all three below.

Today everyone – including the guest designers all have another project on their blogs – so be sure to stop by all 16 blogs for more ideas! There was some serious inspiration going on, wasn’t there?

The perfect Christmas Tree - Ingrid Blackburn

Here’s a tutorial for a card that works for anyone – male or female. One of my favorite parts is the two toned embossing in the greeting.

Be sure to click the link to watch it on YouTube in High Definition. And be sure to subscribe to my YouTube channel so you see more in the future!

The Perfect Christmas Tree Video Tutorial

Click HERE to view in HD on YouTube

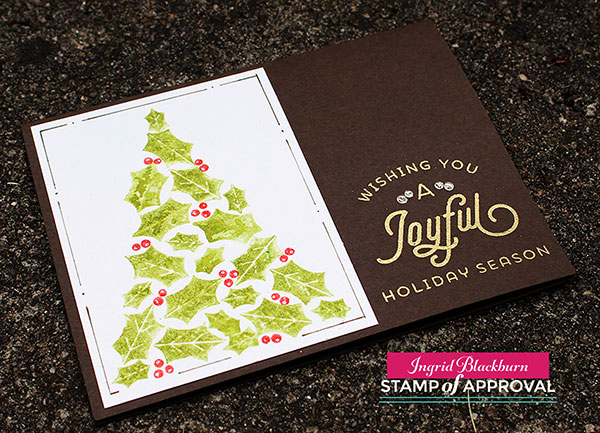
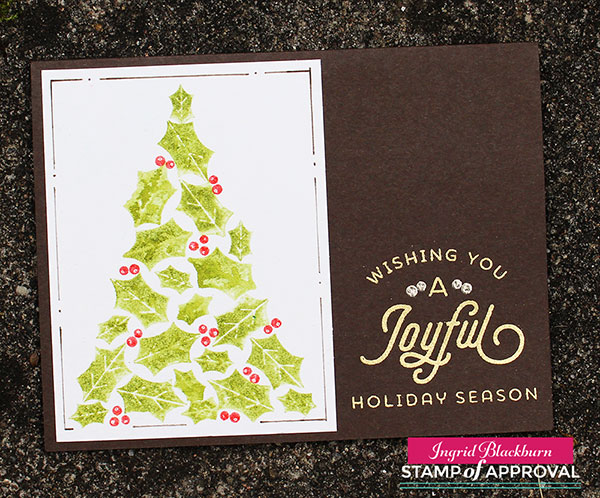
To get this look, use the watercolor stamping technique. But for a slight difference, I used Distress stain rather than ink pads – at least for the leaves. The result is so cool, the photos and video just don’t do it justice. Because every leaf has its own nuances, it looks like you hand painted it – and that’s really something for a stamped image!

Watercolor Stamping the perfect Christmas tree

The greetings are from the Merry & Bright Boughs stamp set, but for an added little something, use the double holly berries to give it an added touch with pewter embossing powder. That’s a great combination with the gilded gold.

As much as you want to add sequins and something else to complete the card – with a real watercolor, I encourage you to refrain. Allow the watercolor to shine. But the project did need something – that’s where the simple border of dots and lines comes in. It adds to it without taking away from it.

holly-tree-watercolor-ingrid-blackburn-003

I hope you love this one as much as I do. Have you tried watercolor stamping before? I think over the past week you can see I LOVE the technique. Let me know in the comments if you’ve tried it!

DIY Christmas Cards - Ingrid Blackburn

And if you missed my other two videos and four projects, here are some links for you to catch up:

CAS Peppermint Bark Watercolor            Peek-a-Boo & Christmas in a Box          Masculine Christmas Cards

Stamp of Approval - Catherine Pooler

And if you missed all the inspiration, go through all the Blog Hops for some great ideas. Each day features new designers and starts on Catherine’s Blog:

Blog Hop – Day One          Blog Hop – Day Two          Blog Hop – Day Three

Have a great time checking out all the other blogs for creative inspiration. It’s time now for you to get your fingers inky!

Signature

[optin_box style=”12″ alignment=”center” email_field=”email” email_default=”Enter your email address” integration_type=”aweber” double_optin=”Y” list=”3846012″ name_field=”name” name_default=”Enter your first name” name_required=”Y” opm_packages=””][optin_box_field name=”headline”]Learn more with our exclusive FREE video series:[/optin_box_field][optin_box_field name=”paragraph”]PHA+UGx1cyB5b3XigJlsbCBiZSBhZGRlZCB0byBteSBGUkVFIENyZWF0aXZlIFRpcHMgRS1sZXR0ZXIgd2hlcmUgSSBzaGFyZSBleGNsdXNpdmUgcHJvamVjdHMsIHZpZGVvcyAmYW1wOyB0aGUgPHN0cm9uZz4xMiBEYXlzIG9mIENocmlzdG1hczwvc3Ryb25nPiBQcm9qZWN0IFNlcmllczwvcD4K[/optin_box_field][optin_box_field name=”privacy”][/optin_box_field][optin_box_field name=”top_color”]undefined[/optin_box_field][optin_box_button type=”0″ button_below=”Y”]Get Instant Access![/optin_box_button] [/optin_box]