How to Create Realistic Scenic Cards

Spooky Hollow Clear Stamp Set used to create a Twilight Scenic Halloween Card

Earlier today I showcased a realistic scenic card when I participated in a fun blog hop for the new Catherine Pooler release – Kind of Batty. I had filmed my card, but hadn’t had a chance to get the video done – well…here it is!!

If you’ve already hopped through the incredible blog hop, enjoy this one! If you’re catching it later on in the evening – then you may have seen this. 🙂

Scenic cards are totally my jam. I LOVE to create scenes like these:

But the secret is in using the right stamps in the right location on your card! I talk about this in this video I filmed for you:

Click Here to watch in HD on YouTube

This card was SO much fun to make, and quite easy actually. You just need a plan. There are several techniques used in this one layer card, but the end result is fun and playful. It’s the perfect card for my 13 year old niece Chiarra. She’ll definitely love it.

Tips on making Realistic Scenic Cards

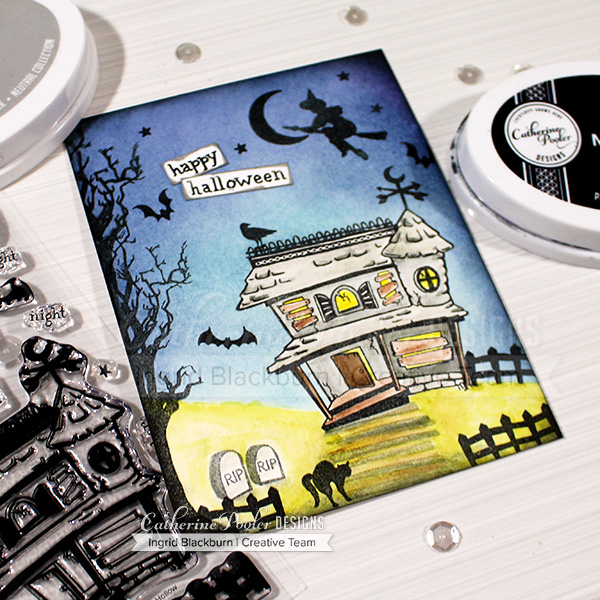
The best tip I can give you is to be aware of scale of your stamps. Larger images belong closer up and smaller images further away. Think about looking in the distance – the image is smaller, so should your stamp be. If I can stamped the cat for instance next to the house – it would be as big as the front door! Now that’s a BIG cat. But close up, makes sense – he’s at your feet. And the same sized door can be further away and be 10 times larger than the cat.

If you want a large tree in the foreground of your card – lengthen your tree – to give it that effect. Watch the video to see just how.

Framing also helps create realistic scenic cards. By framing my scene it drew the viewer in, giving you the feel of you’re watching something take place. You are coming out of the tunnel (vignette) and stumbling into the foreground of the scene.
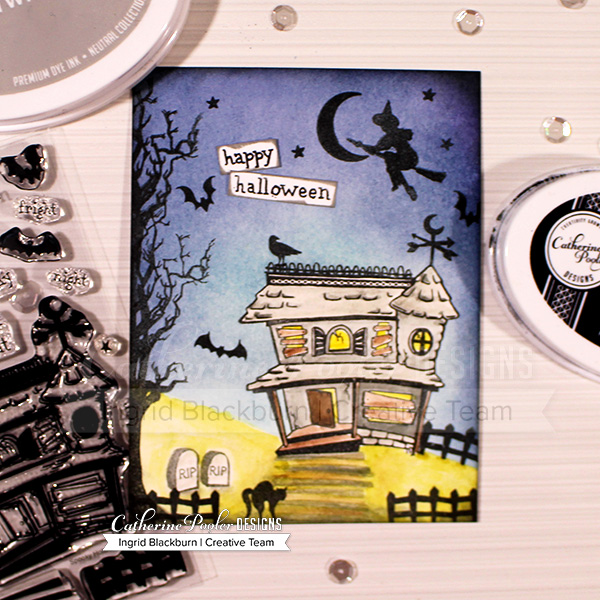
Spooky Hollow Twilight Scenic Card

So the next time you make a scenic card – think of the perspective. What do you see? What size are your stamps? Where can they positioned for more realistic scenic cards.

If you didn’t hop along the past three days – check out these blog posts here and the one on Catherine’s site. Prizes will be drawn on Monday 8/20! Be sure to leave comments along the way – and if you haven’t already – subscribe to my YouTube channel. I have many videos about to go live in the next few weeks – I’d love to hear what you think!

Blog Hops:

Leave me a comment below and tell me what kind of cards YOU love to make. I can’t wait to hear!!

Thanks for stopping by today! Keep those fingers inky –


Supplies

To make finding the supplies I used in these projects a bit easier for you, here are a few clickable links. Compensated Affiliate Links are used when possible. Click here for disclosure. Happy Shopping!

The Perfect Reason: Stamp of Approval Blog Hop – Day 3

Welcome to Day 3 of The Perfect Reason Stamp of Approval Blog Hop! You probably hopped on over from the crazy talented blog of Chrissie Tobas . I’m always amazed at what she creates. The whole hop list is at the end, but first here are a few projects to showcase just how amazing this curated collection inspired me.

If you’re new to Stamp of Approval – click here to check out everything you need to know about this amazing collection of Stamps, Dies and Stencils.

And make sure you are on the wait list so you get access to the collection at 10:00 am tomorrow. If any are still left at 3 pm, it will be released to the public.

Of course, If you are a StampNation member – you not only get to order a whole 10 hours early…but I’ll see you at the exclusive Midnight release party tonight – I’ll be participating live! We’re going to have FUN! 🙂

This collection has some incredible products in it that were a dream to create with. Let me show you just a few!

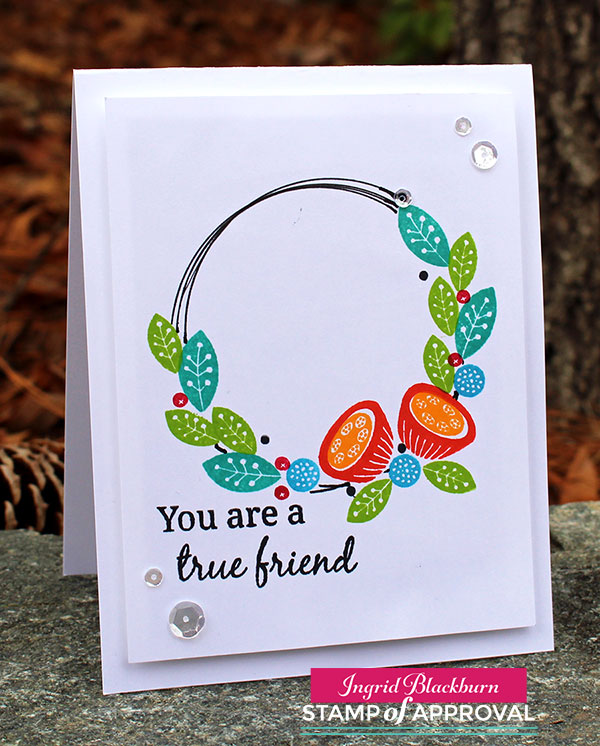
Project One: The Perfect Wreath

I love funky fun flowers and the Perfect Reason stamp set doesn’t disappoint. The flowers, foliage and greetings are not only easy to stamp with, but quirky & fun to work with. Oh, and it has a matching die set too!

Don’t you just love these shapes?!! And I LOVE little stamps like the teeny circle stamps – look at the Rockin Red ones – love that little detail in the middle. The greeting on this card is from the Everyday Mod stamp set.

The Perfect Reason Wreath

Be sure to check out The Perfect Reason Collection for detailed instructions on how to recreate this project.

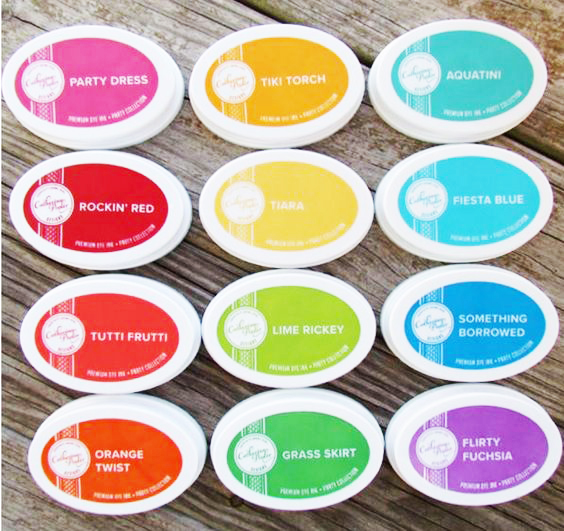
Inks: Tutti Frutti, Tiki Torch, Aquatini, Lime Rickey, Rockin Red, Midnight, Fiesta Blue

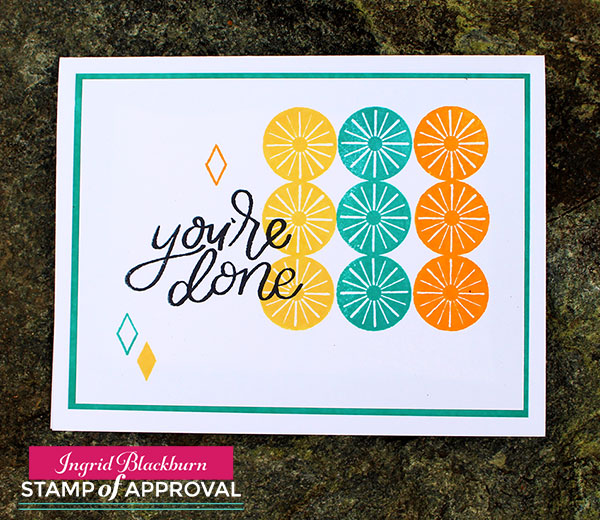
Project Two: Clean & Simple Mod

You will be able to create several Clean & Simple projects with this collection too. Here is one of my favorite stamps from the Everyday Mod stamp set – an AWESOME geometric set with great greetings. Seriously – I can’t STOP creating with it!

The greeting is from the You Did It stamp set – it’s a fun one, right? I love the range in this sentiment stamp set – to see all the products in detail…be sure to check out Catherine’s blog right here.

CAS The Perfect Reason - Everyday Mod

TIP – If you want coordinating paper to go with your inks, just swipe the edge with your ink pad for a perfect look.

Colors: Aquatini, Tiara, Tiki Torch, Midnight (Catherine Pooler Designs)

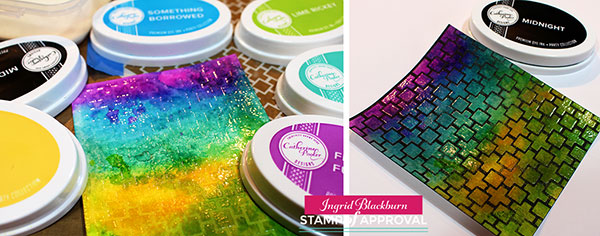
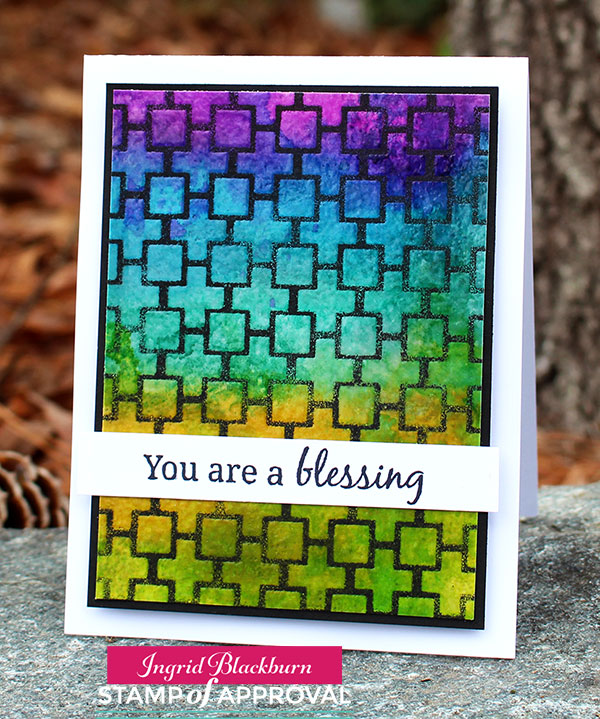
Project Three: Stained Glass Blessing

If you’ve ever stopped by my blog, taken a class with me or seen one of my tutorials on YouTube – you KNOW I’m a stencil girl. And I LOVE to watercolor with vibrant colors – hello – Catherine Pooler Designs inks!!

I took all that goodness and wanted to make the Mod Squared Stencil shine – literally.

Josephs Coat Technique

Aren’t these colors just fabulous? We have a little stained Glass Josephs Coat Technique action going on here. Isn’t it amazing how the Midnight just transforms this piece into something really special?

My goal was to have my earth colors at the bottom going skyward to a celestial heaven. I hope that translates! The greetings are from the Everyday Mod Stamp Set.

The Perfect Reason - Stained Glass Technique

Step by step instructions can be found in the PDF that comes with The Perfect Reason Stamp of Approval Collection.

Colors: Tiara, Lime Rickey, Aquatini, Something Borrowed, Flirty Fushia & Midnight – all Catherine Pooler Design inks + Versamark (Tsukeniko).

Stamp of Approval - The Perfect Reason

So now it’s your turn. Hop along to Taheerah’s blog – I’m SUCH a huge fan of hers, I just know you will be too. And if you haven’t seen the first two days of hops yet…what are you waiting for? Check them out – you can start right from Catherine’s Blog here. Leave a comment along the way for your chance to win one of three collections!

1. Catherine Pooler
2. Lisa Harrolle
3. Lydia Evans
4. Chrissie Tobas
5. Ingrid Blackburn You are here now
6. Taheerah Atchia – Hop on here next!

Have fun hopping, and I hope to see you at the live release party at StampNation tonight or right back here tomorrow for more inspiration!

[optin_box style=”27″ alignment=”center” email_field=”email” email_default=”Enter your email address” integration_type=”aweber” double_optin=”Y” list=”3846012″ name_field=”name” name_default=”Enter your first name” name_required=”Y” opm_packages=””][optin_box_field name=”headline”]Learn more with our exclusive FREE video series:[/optin_box_field][optin_box_field name=”paragraph”]PHA+UGx1cyB5b3UnbGwgYmUgYWRkZWQgdG8gbXk8c3Ryb25nPiBGUkVFPC9zdHJvbmc+IENyZWF0aXZlIFRpcHMgRS1sZXR0ZXIgd2hlcmUgSSBzaGFyZSBleGNsdXNpdmUgcHJvamVjdHMsIHZpZGVvcyAmYW1wOyB0aGUgMTIgRGF5cyBvZiBDaHJpc3RtYXM8L3A+Cg==[/optin_box_field][optin_box_field name=”privacy”][/optin_box_field][optin_box_field name=”top_color”]undefined[/optin_box_field][optin_box_button type=”0″ button_below=”Y”]Get Instant Access![/optin_box_button] [/optin_box]

HLS Watercolor Challenge – Mixed Media Butterflies

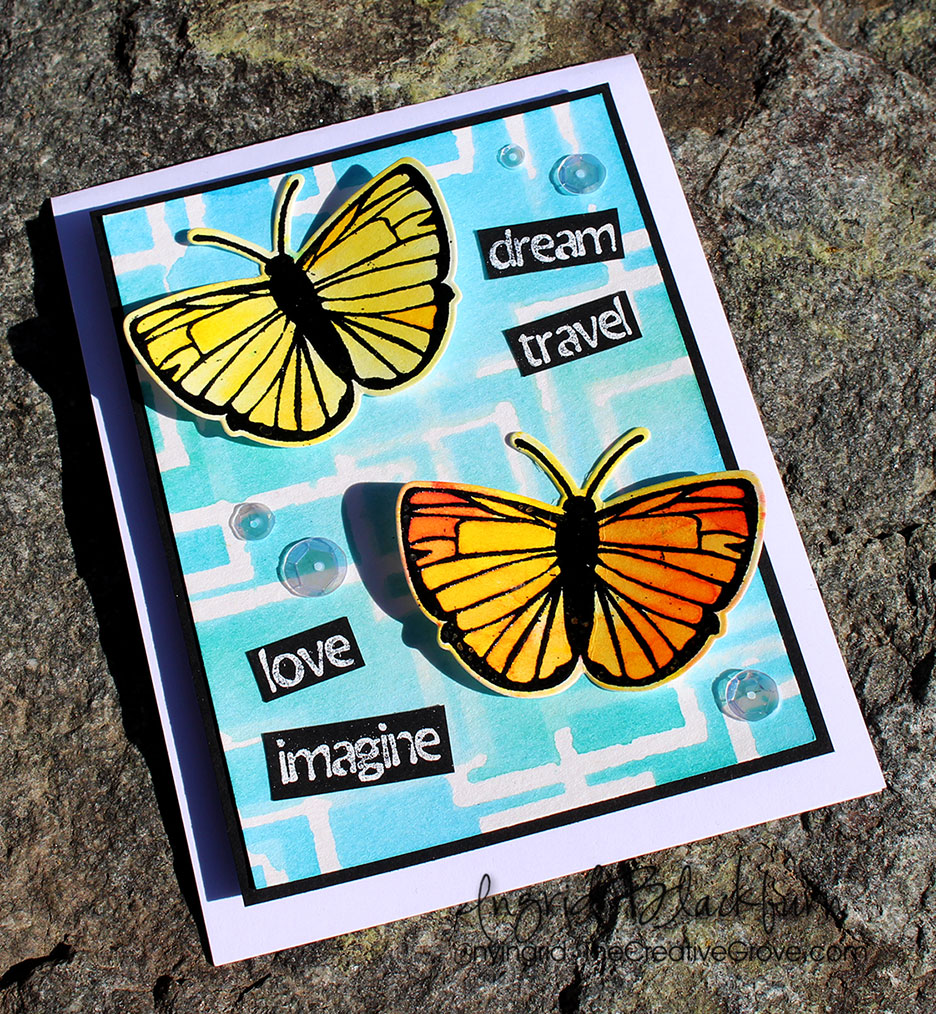
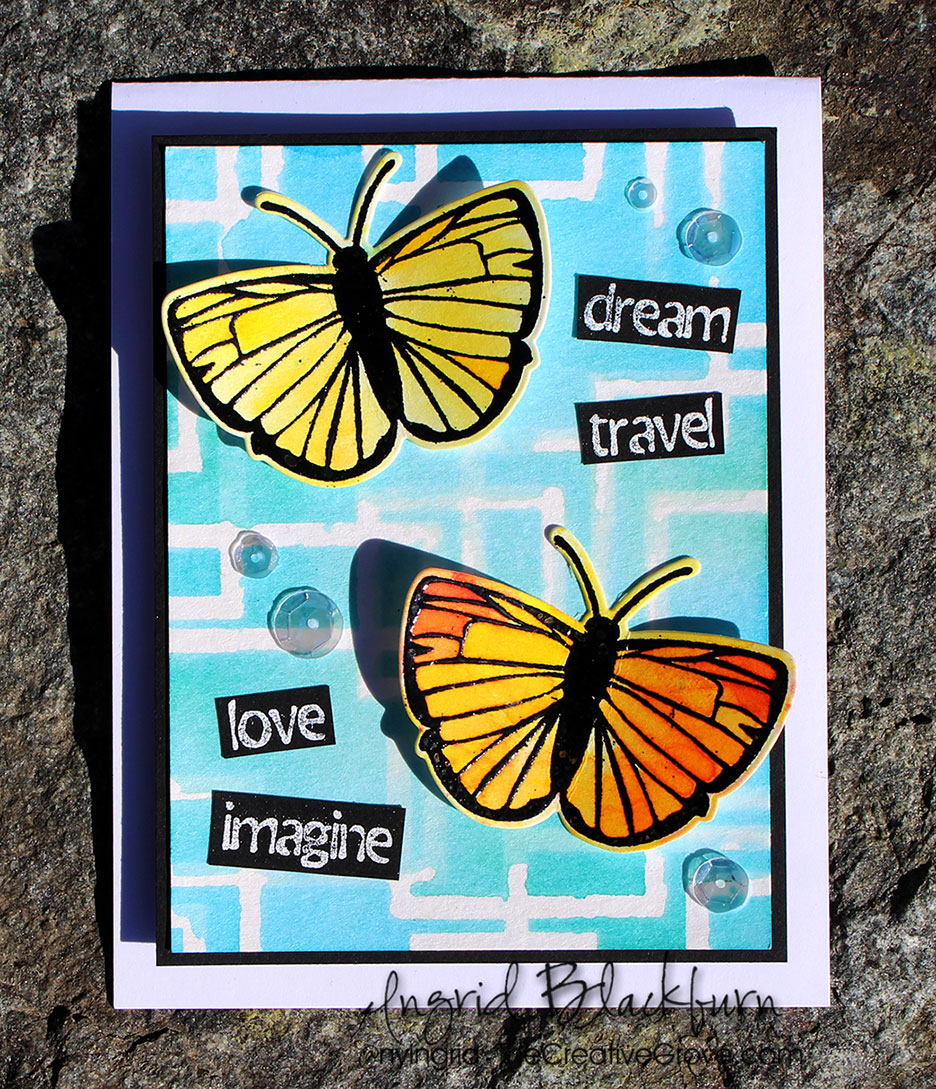
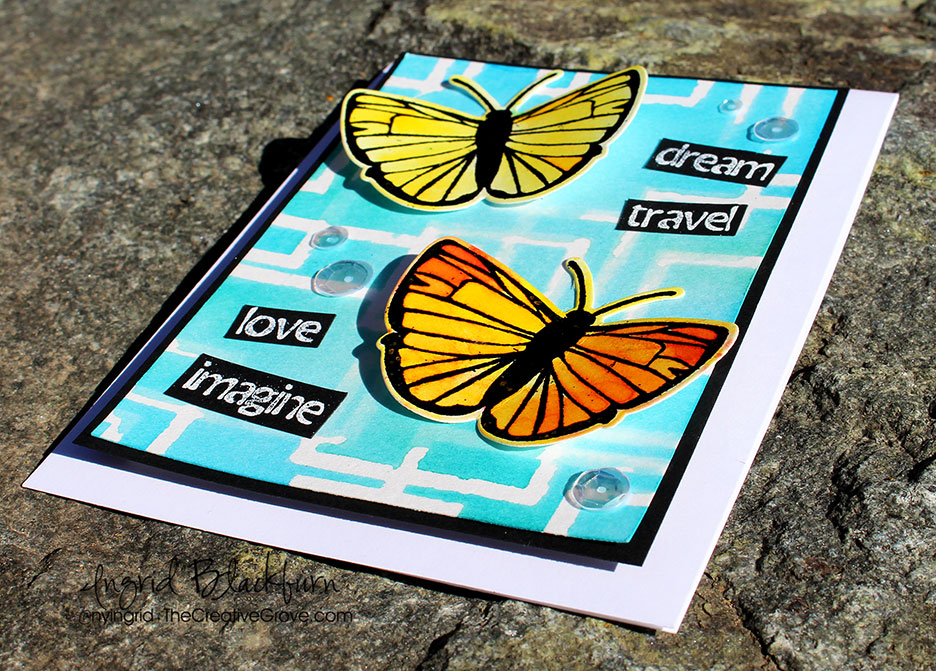
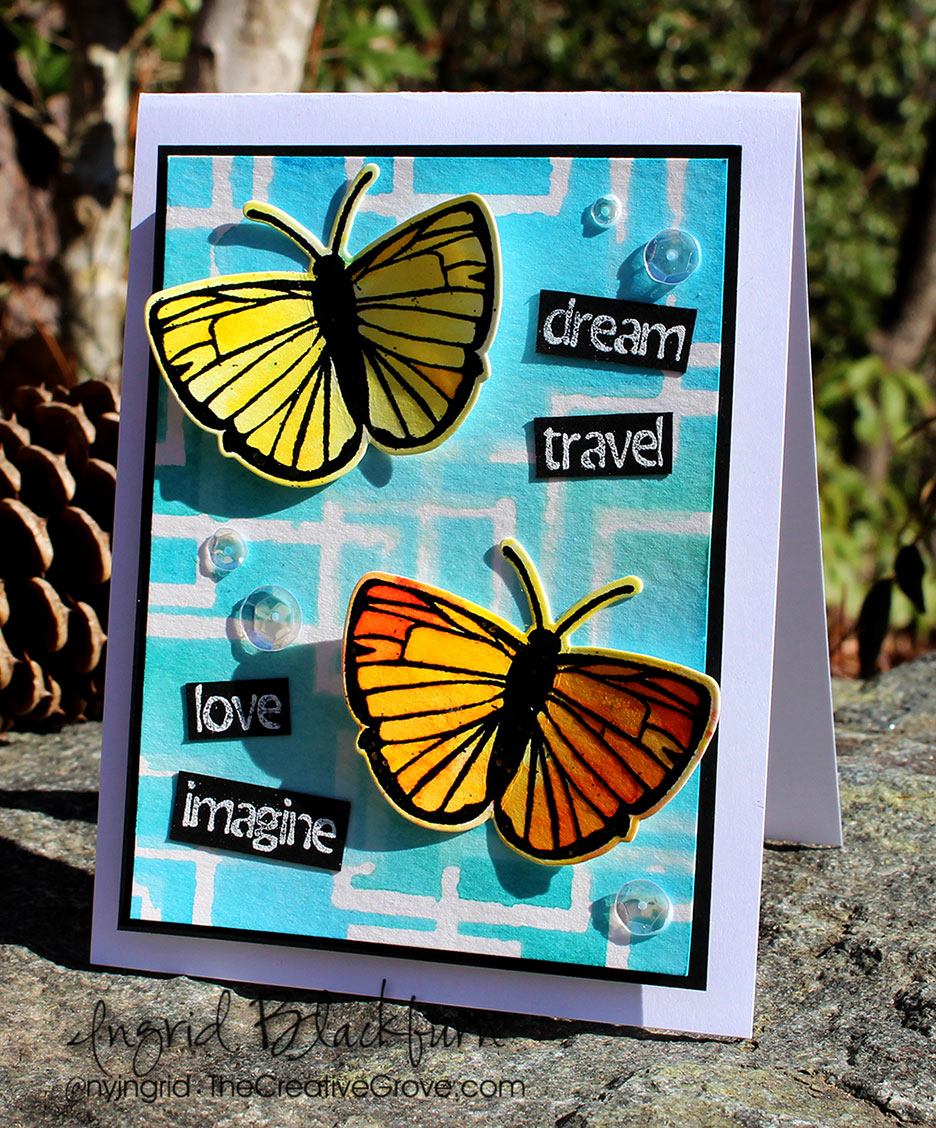
Have you ever watercolored with stencils before? Today I’m guest designing for a new watercolor challenge over at Happy Little Stampers. I don’t know of many watercolor challenges out there, so if watercolor is one of your loves, I encourage you to check it out! The design team is pretty talented over there, and I’m loving what they are creating every month.

I thought you would love a video in addition to a written tutorial, so here you have it. The watercolor challenge is always anything goes, and if you need a little structure – there’s always a little twist. You can play along or not, up to you – this month it’s dies.

Happy Little Stampers Watercolor Challenge

Happy Little Stampers challenges are always a lot of fun, and I encourage you to enter. This month there’s a prize too, you have nothing to lose!

HLS Challenge

I have been undergoing a massive move from Germany back to the US (plus all our things out of storage up from Florida), hunting for a new home, and living in a hotel for three months – yes, it’s been interesting to say the least! So, I haven’t been able to film much the past few months…boy did it feel good to FINALLY get to film in my new stamping studio in my new home. I’m still buried under boxes and the contractor is still doing work in our home (though we’re in the home stretch….finally).

Here’s a video for you of how I created this month’s project – step by step. You’ll learn to watercolor with stencils, and create some fun vibrant die cut embellishments with Brusho Crystals – which I’m totally addicted to!

Click Here to watch the video in HD on YouTube & Subscribe to my Channel

How to Watercolor with Stencils & Brusho

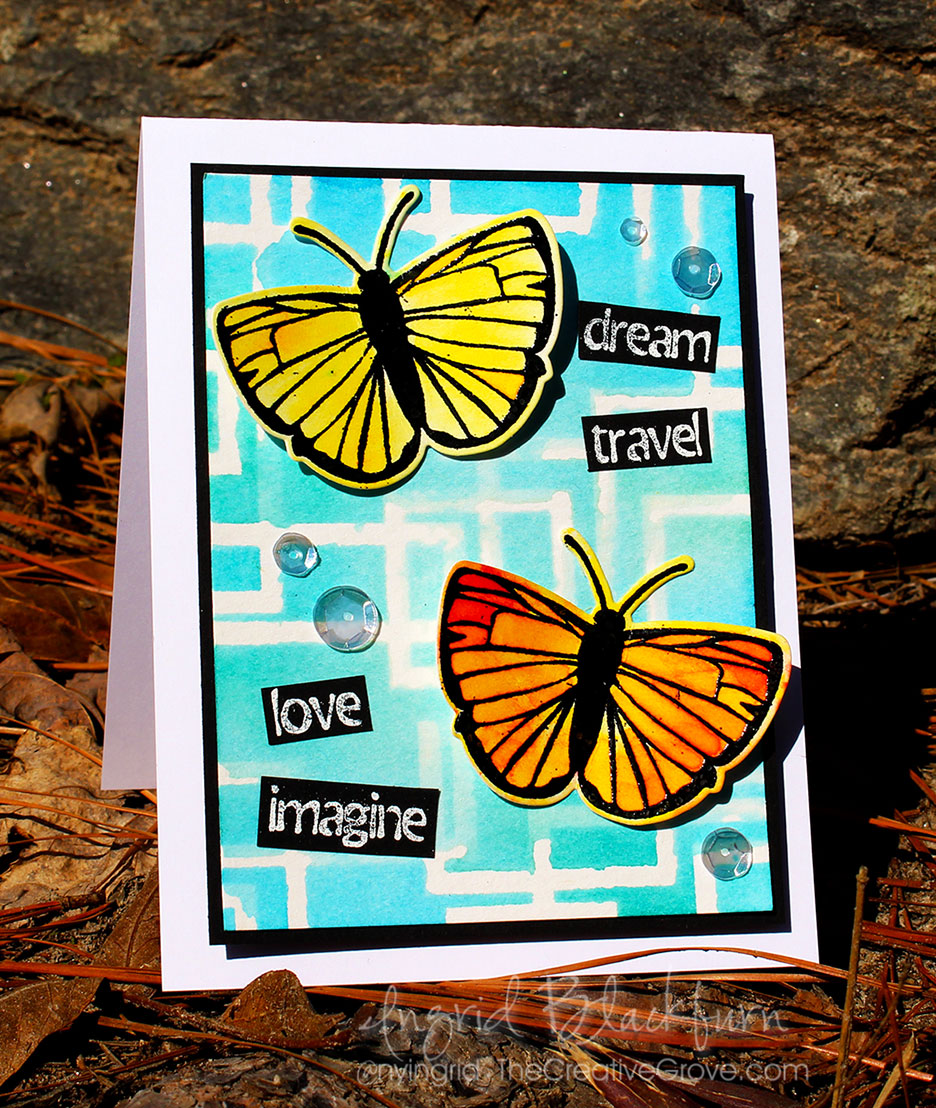
So, my original thought was to create cool watercolored die cuts – enter a little embossing and Brusho for the pop in color. It’s SO easy to watercolor with Brusho and you always look like a watercolor master.

To compliment it, I thought you’d enjoy seeing how I sometimes watercolor with stencils – a not so perfect technique, but it really adds a lot to the background. My thought was to create a cool lattice for the butterflies from the Butterfly Birthday stamp set.

watercolor with stencils

And I’ve been just dying to use my new Mixed Media Fun stamp set – I just love all the components and words – it’s the perfect card for my niece.

  • First – secure your 140# Cold Pressed Watercolor paper to your work surface, and your stencil over that.
  • Apply your color, I used several shades of Distress inks and created a varied Blue background
  • I didn’t do this in the video, but next remove your tape securing your stencil down so you can lift it after the next step a bit easier.

watercolor with stencils - ingrid blackburn

  • To truly get a watercolor with stencils look, spritz with a mini mister and get the water going. Be careful of adding TOO much water. If you overdo it – water will run everywhere – especially under your stencil design.
  • Carefully lift up your stencil – straight up.
  • You can blot off any excess water with a paper towel – but be careful to lift it from your pattern – you’ll pull all the color. I use this mostly for the sides where the water is pooling. Dry immediately with a heat tool or naturally.

Watercoloring with Brusho

  • Next, on another piece of scrap watercolor paper, stamp two butterflies from Butterfly Birthday in Versafine Onyx Black ink. I love this ink to emboss with – it’s a pigment ink and is super crisp and deep in color.
  • Emboss in black and heat set.
  • Sprinkle some brusho powders over your butterflies and spritz as in the video to activate the pigments.
  • Dry with a heat tool or naturally
  • Cut out using the co-ordinating Butterfy Dies & a Die Cut Machine
  • Emboss some of the greetings from Mixed Media Fun in white on Black card stock
  • Cut them out using long handled scissors – this helps to give you a straighter edge.

Watercolor with Stencils & Brusho

  • Adhere your pieces like the card. TIP – use Mono Liquid Glue to adhere the watercolor to the black, bend straight or place something heavy on to help straighten your card stock. You may also want to pop up the main watercolor panel onto fun foam for a little drama.
  • Bend up the sides of your butterflies and pop the sides up with some dimensional foam. I have the tops of the wings higher than the bottom (doubled the foam) and adhered with some glue in the center. This gives the illusion of flight.
  • Add some sparkling clear sequins from Pretty Pink Posh with Rangers Multi Matte Medium (dries clear).

Watercoloring with Stencils

Ultimately, my watercolor got a little into the pattern, but I don’t let stuff like that get me down anymore. You can cover a lot of it up with the die cuts and words, and it gives it a more organic feel anyway. It’s art, don’t stress over it, have fun!

Let me know what you think in the comment section below. I hope now, you’ll try to watercolor with stencils yourself, and that you enjoyed this tutorial!

Now head on over to the Happy Little Stampers Watercolor Challenge to see what the Design Team whipped up for you. I can’t wait to see what you create – I’ll visit your blog and definitely check it out! 🙂

HLS Watercolor Challenge

And if you liked this tutorial, subscribe to my YouTube channel and newsletter list for more exclusive tutorials. See you very soon!

[optin_box style=”28″ alignment=”center” disable_name=”Y” email_field=”email” email_default=”Enter your email address” email_order=”1″ integration_type=”aweber” double_optin=”Y” list=”3846012″ name_field=”name” name_default=”Enter your first name” name_order=”0″ name_required=”N” extra_field_1_name=”Name” extra_field_1_order=”0″ extra_field_1_required=”Y” extra_field_1_hidden=”N” extra_field_1_title=”Enter Your Name” opm_packages=””][optin_box_field name=”headline”]Learn more with exclusive video tutorials…[/optin_box_field][optin_box_field name=”paragraph”]PHA+UGx1cyB5b3UnbGwgYmUgYWRkZWQgdG8gbXk8c3Ryb25nPiBGUkVFPC9zdHJvbmc+IENyZWF0aXZlIFRpcHMgRS1sZXR0ZXIgd2hlcmUgSSBzaGFyZSBleGNsdXNpdmUgcHJvamVjdHMsIHZpZGVvcyAmYW1wOyB0aGUgMTIgRGF5cyBvZiBDaHJpc3RtYXM8L3A+Cg==[/optin_box_field][optin_box_field name=”privacy”][/optin_box_field][optin_box_field name=”top_color”]undefined[/optin_box_field][optin_box_button type=”1″ text=”Click For Immediate Access” text_size=”24″ text_color=”#ffffff” text_font=”Lato;google” text_bold=”Y” text_letter_spacing=”-1″ text_shadow_panel=”Y” text_shadow_vertical=”1″ text_shadow_horizontal=”0″ text_shadow_color=”#000000″ text_shadow_blur=”0″ styling_width=”75″ styling_height=”20″ styling_border_color=”#666666″ styling_border_size=”1″ styling_border_radius=”8″ styling_border_opacity=”99″ styling_gradient_start_color=”#86c833″ styling_gradient_end_color=”#3f8e30″ drop_shadow_panel=”Y” drop_shadow_vertical=”1″ drop_shadow_horizontal=”0″ drop_shadow_blur=”0″ drop_shadow_spread=”0″ drop_shadow_color=”#000000″ drop_shadow_opacity=”50″ inset_shadow_panel=”Y” inset_shadow_vertical=”1″ inset_shadow_horizontal=”0″ inset_shadow_blur=”0″ inset_shadow_spread=”0″ inset_shadow_color=”#c2ee80″ inset_shadow_opacity=”100″ location=”optin_box_style_28″ button_below=”Y”]Click For Immediate Access[/optin_box_button] [/optin_box]


[op_advanced_headline style=”1″ effect=”type” align=”left” accent=”#244C5E” headline_tag=”h2″ line_height=”” highlight=”” top_margin=”0″ bottom_margin=”0″]U3VwcGxpZXM=[/op_advanced_headline]

To make finding the supplies I used in this project a bit easier for you, here are a few clickable links. Those that have multiple shopping options are indicated with letters – EH – Ellen Hutson, SSS – Simon Says Stamp. Compensated Affiliate Links are used when possible. Click here for disclosure. Happy Shopping!


Catherine Pooler Ink Party Collection Release – Blog Hop

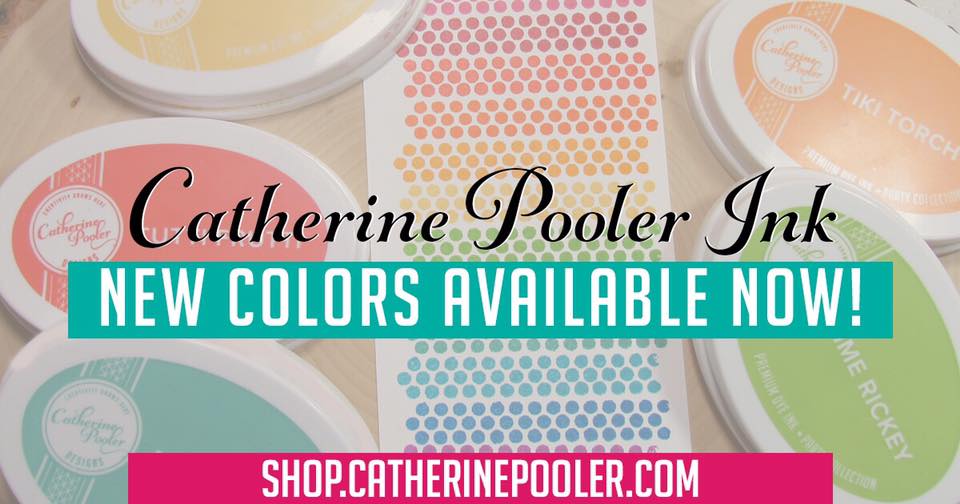
How cool were Lydia’s projects? You’re probably arriving from Lydia Evans blog….well, it’s finally here – the long awaited Party Collection of inks! I have to say – I have been really excited about this new ink release and I’m just bursting ready to continue to show you how great these inks are – and the colors – I’m in love with the vibrant new – Catherine Pooler Designs Premium Dye Ink – the Party Collection.

Catherine Pooler Ink Blog Hop - Party Collection

Catherine’s inks initially debuted in November with a small release in the Foundations Box – exclusive stamp sets, card stock, acrylic block & just five little ink pads – everything you need to get stamping…they sold out in under 24 hours. Up until today, you could only get your hands on these beauties that way – well now you can get the entire collection + refills in the Catherine Pooler Store!

This is the first line of colors to be released, and they are bright, vibrant, cover amazingly and watercolor like a dream. Along with some of the best card stock I’ve worked with (and that’s saying a lot – I’ve been stamping for over 15+ years), you will not be disappointed.

catherine-pooler-designs-ink-party-collection

The inks are foam pads – and that’s to your advantage. It’s different than most brands available today – one of the pluses to that is that the coverage is so much better than felt pads. You just need a little love tap and your coverage is incredible.

Well, today the Design Team has a blog hop filled with colorful creativity for you. There are prizes too – so comment along the way!

I have three projects, so let’s dive right in:

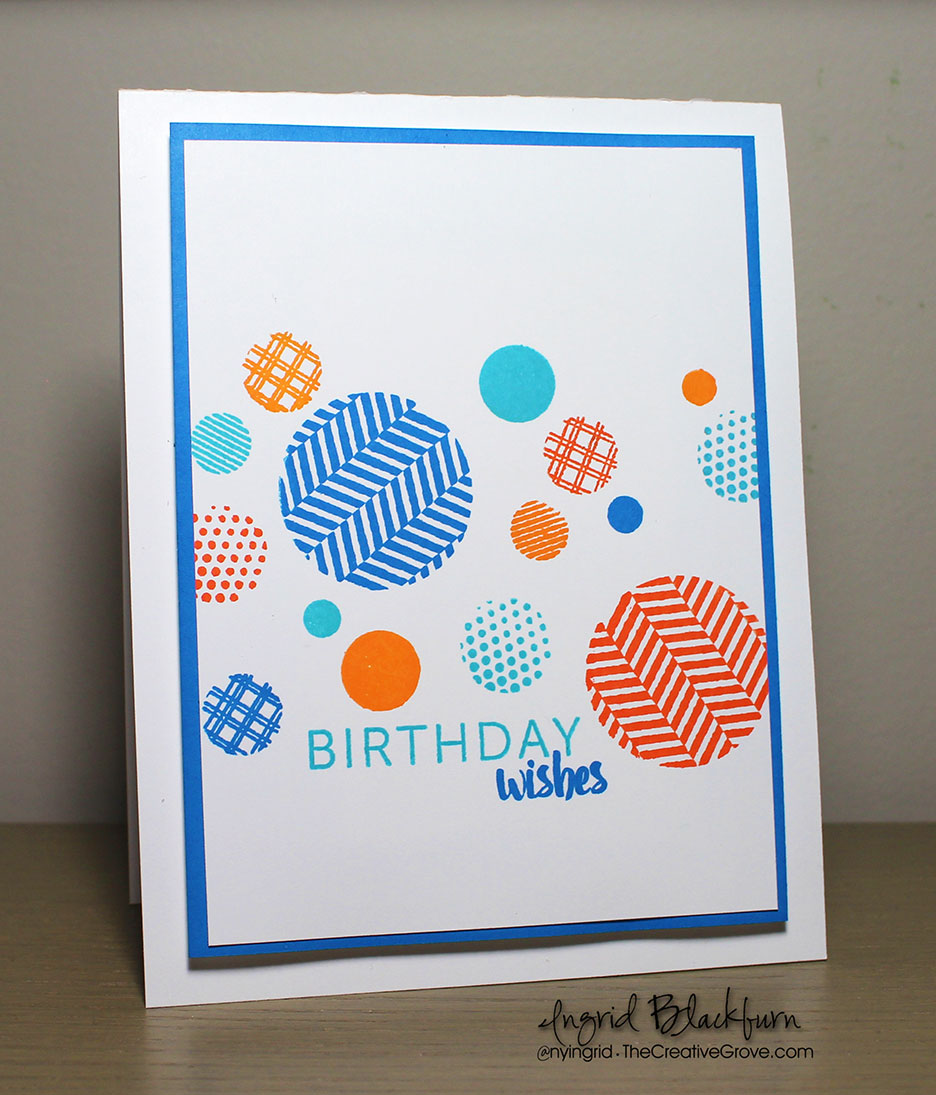
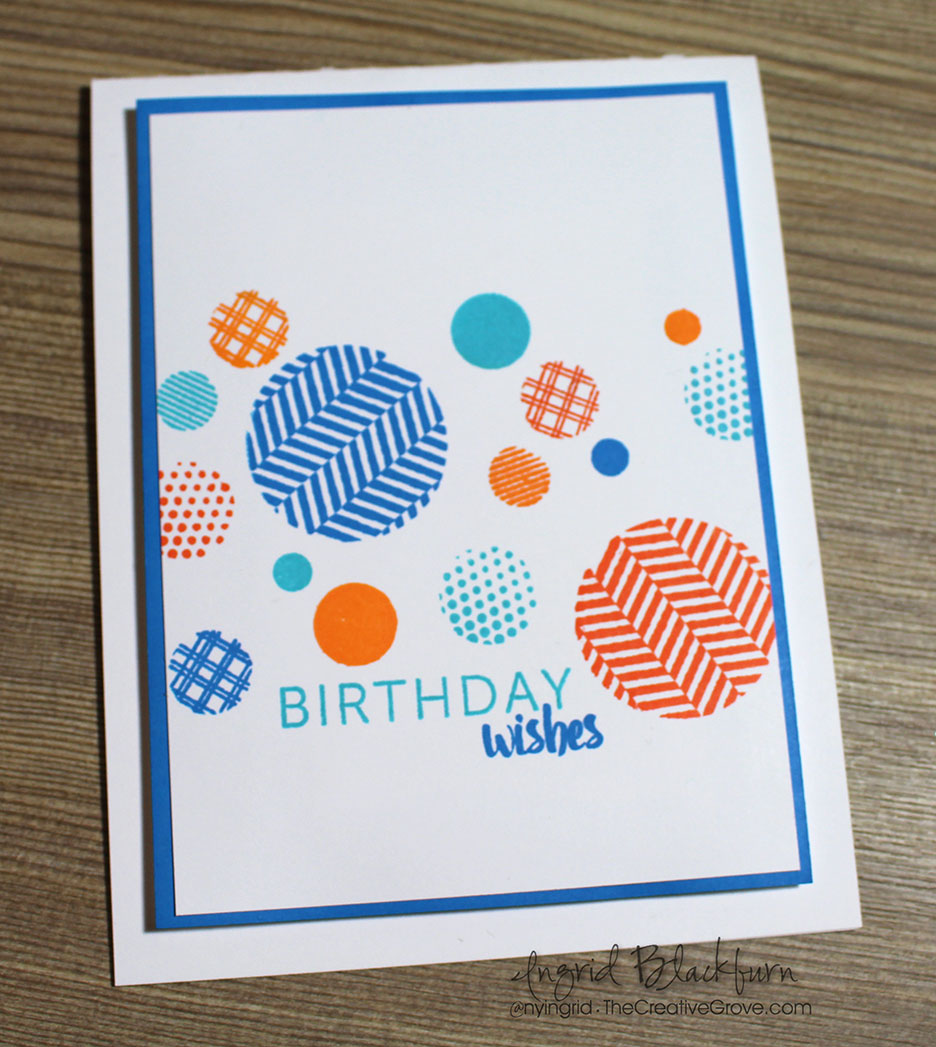
#1 – Birthday Wishes

I thought I would have some fun with the Spot On stamp set that is exclusive to the Foundations Box – you’ll also get the Fiesta Blue and Twisted Orange ink pads in there. Pair them up with Tiki Torch and Something Borrowed and you’re all set.

party-collection-ingrid-blackburn-002

The thought behind this card was to use complimentary colors – blue and orange. The colors just pop and those awesome graphic circles give a ton of interest.

But my favorite is mixing the many greetings in this set – how awesome is it to use print and script together? LOVE that!

party-collection-ingrid-blackburn-001

Notice how perfect that Something Borrowed mat is for my card front? I just ran the ink pad down a the sides of my white card stock and created my own perfectly matching card stock….think outside the box when you need perfect color co-ordination next time.

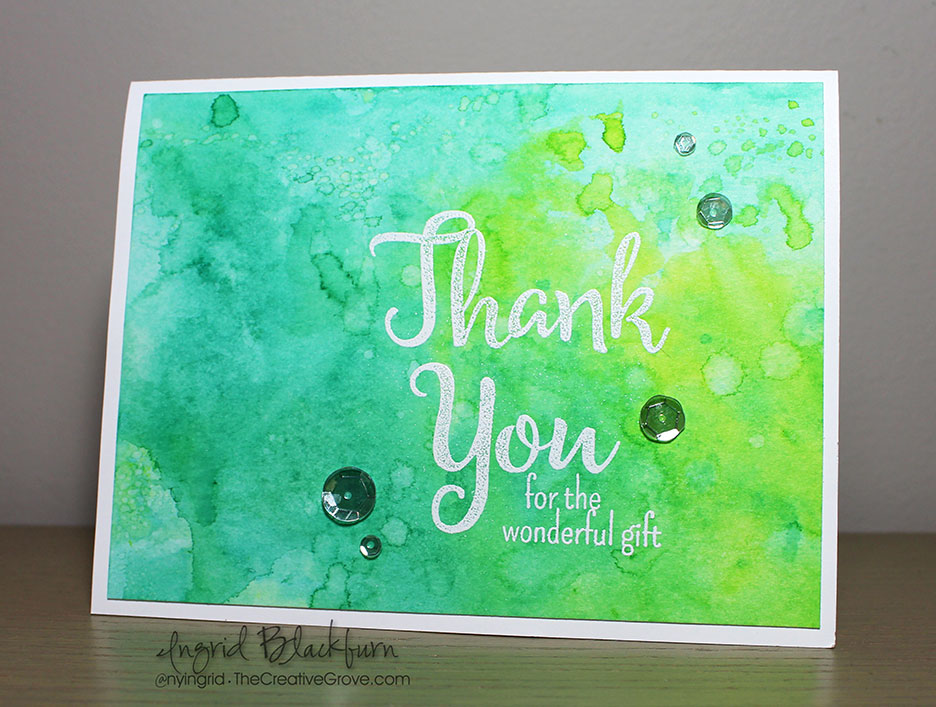
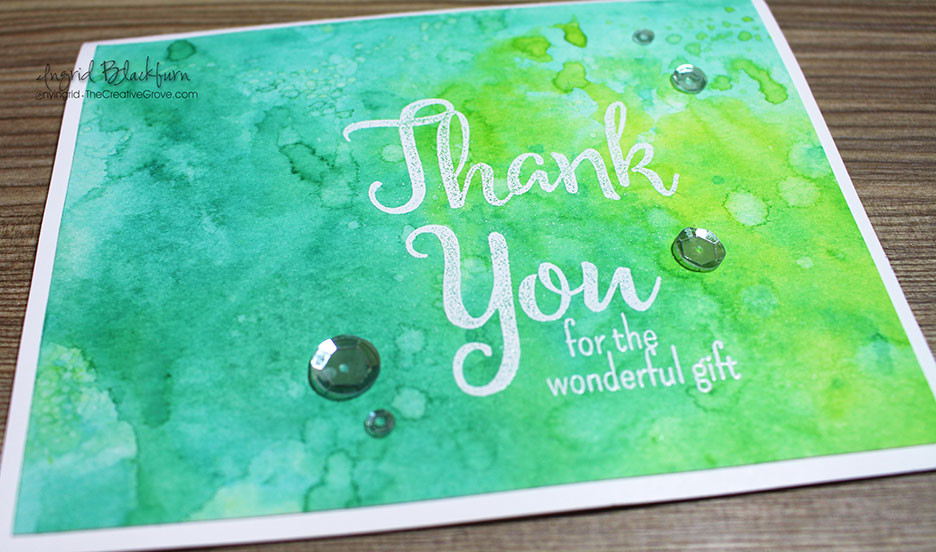
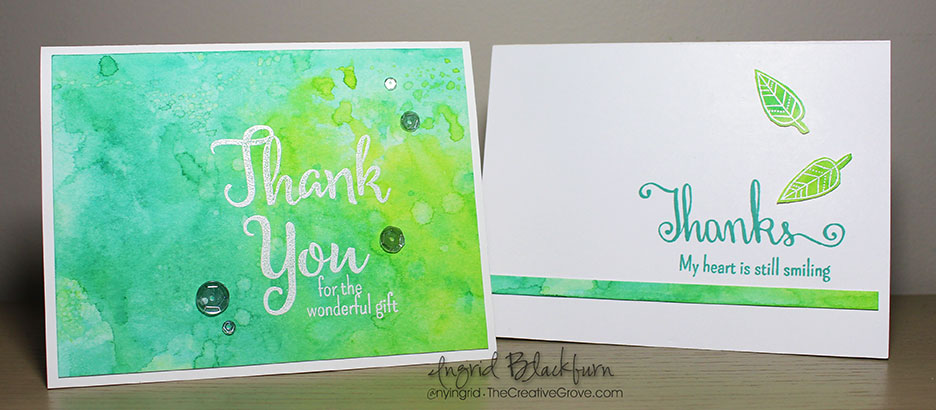
#2 Thank You Watercolor Dream

Okay – you had to know that I would do a little watercoloring today…lol! I’m OBSESSED with the new Aquatini ink pad from the Party Collection. Let’s just start with the name – brilliant! All the names are fun actually. To get this watercolor abstract look, use the Wrinkle Free Distress Technique – only with these amazing inks – yup….distress move on over – there’s a new watercolor ink in town.

party-collection-ingrid-blackburn-005

I mean look at this watercolor dream – I LOVE…just LOVE how these inks sponge, watercolor and react with water afterward. Everything I’m looking for in Mixed Media, watercolor and many more techniques.

This project has a blend of Aquatini, Lime Ricky and a hint of Tiara underneath (seriously – those names rock!). I really worked the Lime Rickey and Aquatini to get just the right look. Flick a little clean water and you’re all set.

party-collection-ingrid-blackburn-006

Once dry, emboss a greeting and add some sequins. Here I added the new Still Smiling Thank You…I’ve been in desperate need of a great thank you card for a dear friend…as our personal belongings are still en route from Europe to our new home! So I’m a crafter without any cards….go figure – Still Smiling and simple amazing techniques to the rescue!

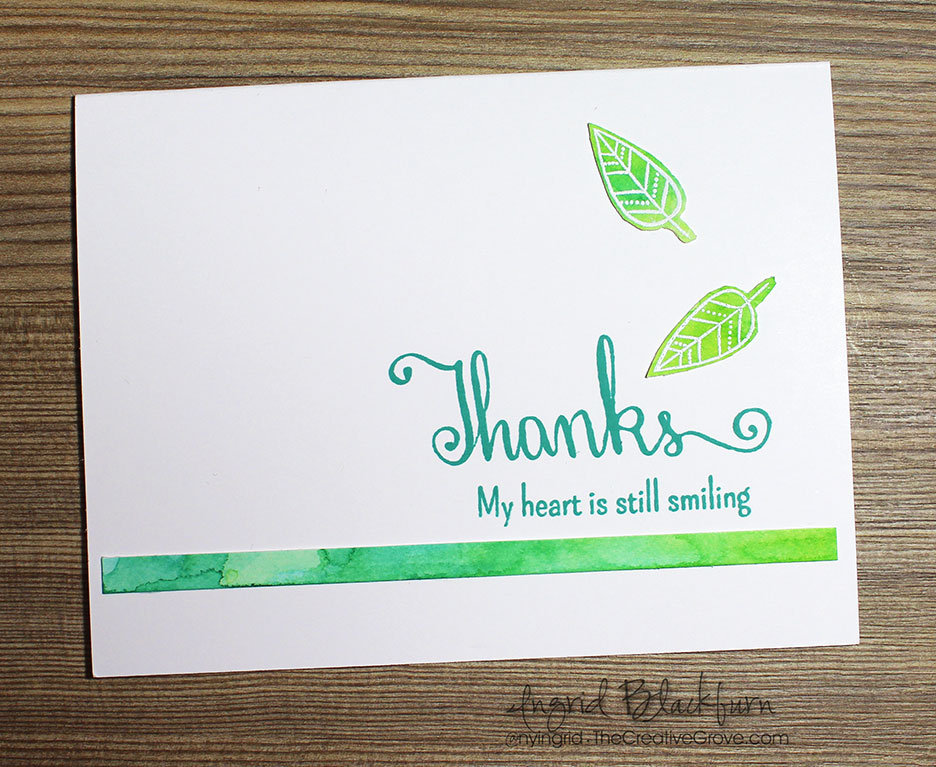
#3 CAS Thanks

I fell in love with project #2 – so I took my scraps from my trimmed down watercolor piece and stretched that technique piece into a great Clean and Simple card. The leaves are stamped and embossed in white from the Still Smiling stamp set and the greeting is stamped in what else – Aquatini!

party-collection-ingrid-blackburn-007

The greetings in this set are just priceless. You’ll have to check them out here. Isn’t that texture in the watercolor piece just awesome. I love how bright and vibrant it is…even after being diluted with the spritzed water/heat repeat!

party-collection-ingrid-blackburn-003

Well there you have it – just a quick little glimpse into the Party Collection at Catherine Pooler Designs. Now hop on next to Allison Copes blog for more colorful creativity!

I hope you had fun – see you VERY soon! 🙂

Signature

[optin_box style=”12″ alignment=”center” email_field=”email” email_default=”Enter your email address” integration_type=”aweber” double_optin=”Y” list=”3846012″ name_field=”name” name_default=”Enter your first name” name_required=”Y” opm_packages=””][optin_box_field name=”headline”]Learn more with our exclusive FREE video series:[/optin_box_field][optin_box_field name=”paragraph”]PHA+UGx1cyB5b3UnbGwgYmUgYWRkZWQgdG8gbXk8c3Ryb25nPiBGUkVFPC9zdHJvbmc+IENyZWF0aXZlIFRpcHMgRS1sZXR0ZXIgd2hlcmUgSSBzaGFyZSBleGNsdXNpdmUgcHJvamVjdHMsIHZpZGVvcyAmYW1wOyB0aGUgMTIgRGF5cyBvZiBDaHJpc3RtYXM8L3A+Cg==[/optin_box_field][optin_box_field name=”privacy”][/optin_box_field][optin_box_field name=”top_color”]undefined[/optin_box_field][optin_box_button type=”0″ button_below=”Y”]Get Instant Access![/optin_box_button] [/optin_box]

The Perfect Christmas Tree

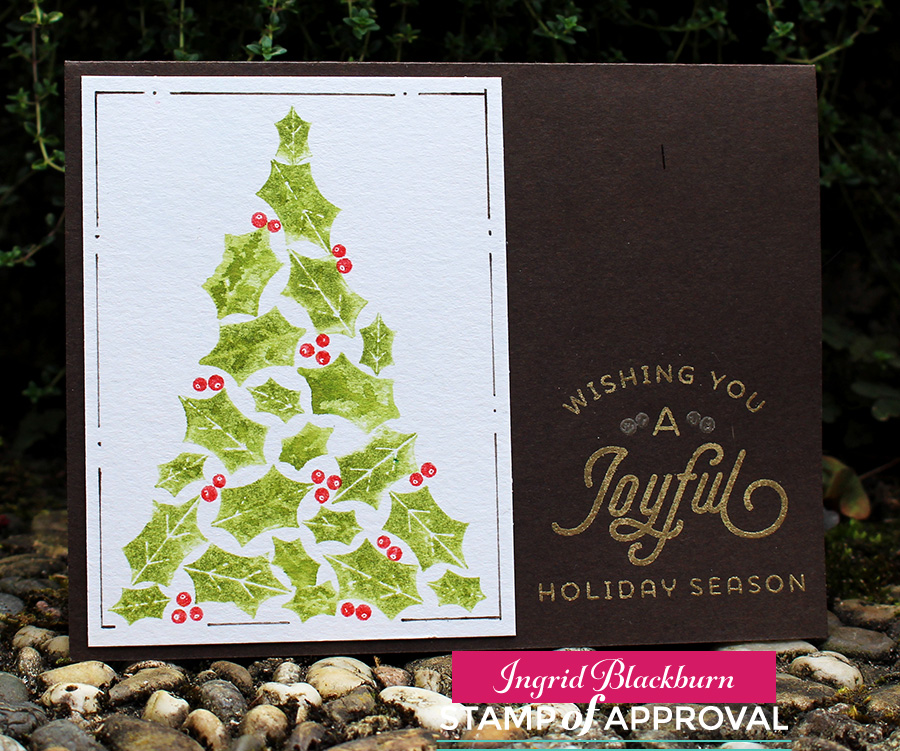
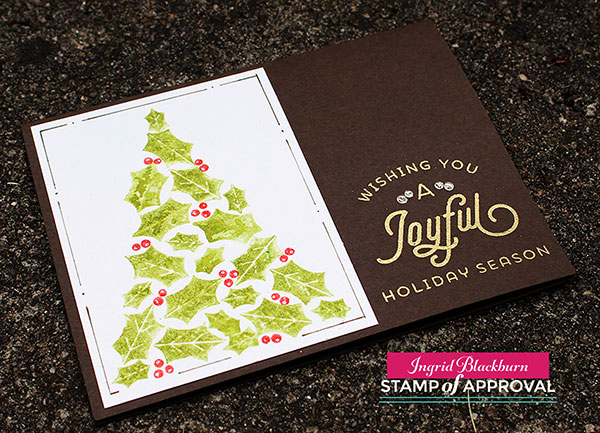
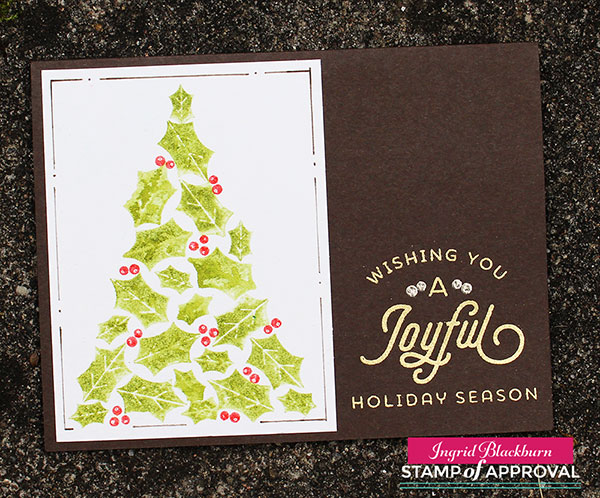
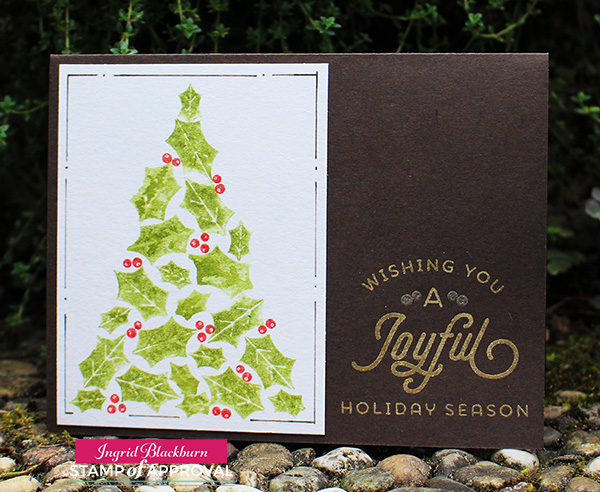
Are you always on the lookout for the perfect Christmas Tree? I am always striving for the perfect Christmas tree on my cards, and I think I’ve finally found it. After all, what’s more Christmas than a tree made of holly leaves and berries?

Today the Stamp of Approval Candy Cane Lane Collection is available to the public (while supplies last). We had three days of blog hops, and many of my fellow dream team members have been posting projects all week long. Click HERE to check mine out from a few days ago. I’ll have links to all three below.

Today everyone – including the guest designers all have another project on their blogs – so be sure to stop by all 16 blogs for more ideas! There was some serious inspiration going on, wasn’t there?

The perfect Christmas Tree - Ingrid Blackburn

Here’s a tutorial for a card that works for anyone – male or female. One of my favorite parts is the two toned embossing in the greeting.

Be sure to click the link to watch it on YouTube in High Definition. And be sure to subscribe to my YouTube channel so you see more in the future!

The Perfect Christmas Tree Video Tutorial

Click HERE to view in HD on YouTube

To get this look, use the watercolor stamping technique. But for a slight difference, I used Distress stain rather than ink pads – at least for the leaves. The result is so cool, the photos and video just don’t do it justice. Because every leaf has its own nuances, it looks like you hand painted it – and that’s really something for a stamped image!

Watercolor Stamping the perfect Christmas tree

The greetings are from the Merry & Bright Boughs stamp set, but for an added little something, use the double holly berries to give it an added touch with pewter embossing powder. That’s a great combination with the gilded gold.

As much as you want to add sequins and something else to complete the card – with a real watercolor, I encourage you to refrain. Allow the watercolor to shine. But the project did need something – that’s where the simple border of dots and lines comes in. It adds to it without taking away from it.

holly-tree-watercolor-ingrid-blackburn-003

I hope you love this one as much as I do. Have you tried watercolor stamping before? I think over the past week you can see I LOVE the technique. Let me know in the comments if you’ve tried it!

DIY Christmas Cards - Ingrid Blackburn

And if you missed my other two videos and four projects, here are some links for you to catch up:

CAS Peppermint Bark Watercolor            Peek-a-Boo & Christmas in a Box          Masculine Christmas Cards

Stamp of Approval - Catherine Pooler

And if you missed all the inspiration, go through all the Blog Hops for some great ideas. Each day features new designers and starts on Catherine’s Blog:

Blog Hop – Day One          Blog Hop – Day Two          Blog Hop – Day Three

Have a great time checking out all the other blogs for creative inspiration. It’s time now for you to get your fingers inky!

Signature

[optin_box style=”12″ alignment=”center” email_field=”email” email_default=”Enter your email address” integration_type=”aweber” double_optin=”Y” list=”3846012″ name_field=”name” name_default=”Enter your first name” name_required=”Y” opm_packages=””][optin_box_field name=”headline”]Learn more with our exclusive FREE video series:[/optin_box_field][optin_box_field name=”paragraph”]PHA+UGx1cyB5b3XigJlsbCBiZSBhZGRlZCB0byBteSBGUkVFIENyZWF0aXZlIFRpcHMgRS1sZXR0ZXIgd2hlcmUgSSBzaGFyZSBleGNsdXNpdmUgcHJvamVjdHMsIHZpZGVvcyAmYW1wOyB0aGUgPHN0cm9uZz4xMiBEYXlzIG9mIENocmlzdG1hczwvc3Ryb25nPiBQcm9qZWN0IFNlcmllczwvcD4K[/optin_box_field][optin_box_field name=”privacy”][/optin_box_field][optin_box_field name=”top_color”]undefined[/optin_box_field][optin_box_button type=”0″ button_below=”Y”]Get Instant Access![/optin_box_button] [/optin_box]


Quick & Easy DIY Christmas Card Tutorial

I’m all about the DIY Christmas cards – how about you? As card makers , we probably all make three kinds of cards…all the time – Christmas, Birthday and Thanks. I’ve been creating some amazing cards this past month gearing up for the big Stamp of Approval holiday release – Candy Cane Lane Collection. How cute is that name?!

Well, Catherine and the team did not disappoint with this one. Blog Hops begin today – I’m up the last day…and I have some beauties to share with you that day. But not to fret – I have a card today, tomorrow and knowing me, I just won’t be able to stop past the release….lol!

candy-cane-lane-collection

Stamp of Approval is a curated box of stamps and dies that were designed to work together. Best part about it is that it works with previous collections as well. Those you can get in the store – of course…the don’t get released for a long time – so don’t wait thinking you can just get them in a few months – you’ll be sad you missed out!

The way it works is you want to be on the waitlist – that way you will get notified the moment the shop is open. They sell out quick – sometimes in a matter of hours – and this particular collection is REALLY good. It’s definitely my favorite so far – I can’t stop creating with it – so if you’re not on the waitlist – get on it right here.

In addition to all the great projects you’ll see over the next several days from the Blog Hops – Design Team member blogs….when you decide to get the box on Wednesday Sept 21st….you’ll also get a PDF cram packed with ideas to get you started. Boxes ship right away – so you could be crafting with these stamps by the weekend!

ccl_commenttowin

Oh…and there are three boxes up for grabs too! Be sure to hop along each day and leave comments along the way – last time one of our commenters won a box!!! You can start the hop on Catherine’s Blog – but read this tutorial too…lol!

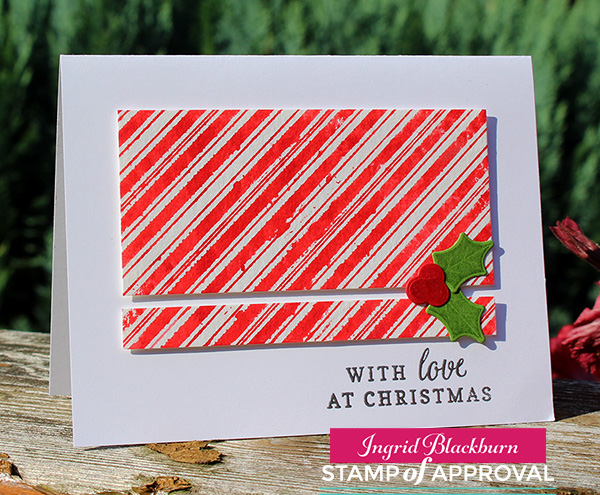
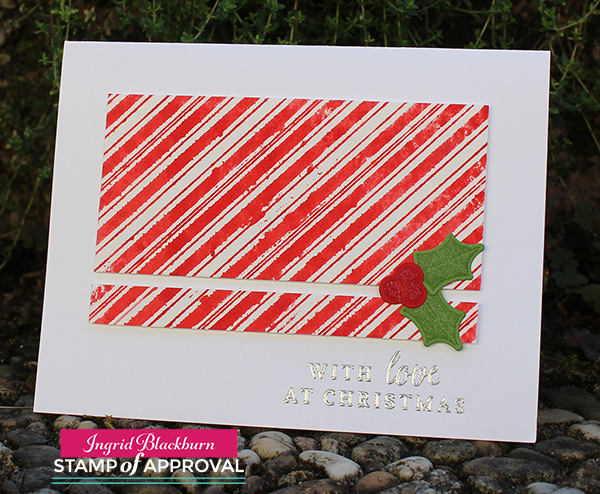
I’m kicking off my Candy Cane Lane creations with one of my favorite cards – and one of the best to mass produce too! I have it in traditional colors – but what about non-traditional colors? I bet it would look awesome in baby blue/brown, or Pink and Grey….it doesn’t just have to be red/green!

DIY Christmas Card Tutorial

DIY Christmas Card Tutorial

I did a ton of watercolor stamping in my creations this time – this Peppermint Stick background stamp just screams – watercolor stamp me! To mass produce it, you just need to cut several pieces of watercolor paper – twice the height of the final watercolor piece and you will get two cards with each one!

Enjoy the video tutorial:

Click Here to watch in HD on YouTube

So what did you think? I love it – it’s super quick and easy. And the watercolor stamped look is artsy and unique. When you mass produce yours – do all the embossing at once – die cut/stamping at once, etc…. Just throw on a good movie – and you’re set!

Be sure to stop by the blog hop today to see the amazing creations!!! Comment along the way and win yourself a box too. Come back tomorrow, and definitely Tuesday – I’m up then!

DIY Christmas Card Watercolor Tutorial - Ingrid Blackburn

If you like what you see – subscribe to my YouTube channel and definitely get on the Creative Tips E-letter – I have exclusive video tutorials that go out to subscribers and coming up soon – my 12 Days of Christmas series! Don’t miss out!

See you tomorrow – happy hopping!
Signature

[optin_box style=”12″ alignment=”center” email_field=”email” email_default=”Enter your email address” integration_type=”aweber” double_optin=”Y” list=”3846012″ name_field=”name” name_default=”Enter your first name” name_required=”Y” opm_packages=””][optin_box_field name=”headline”]Learn more with our exclusive FREE video series:[/optin_box_field][optin_box_field name=”paragraph”]PHA+UGx1cyB5b3XigJlsbCBiZSBhZGRlZCB0byBteSBGUkVFIENyZWF0aXZlIFRpcHMgRS1sZXR0ZXIgd2hlcmUgSSBzaGFyZSBleGNsdXNpdmUgcHJvamVjdHMsIHZpZGVvcyAmYW1wOyB0aGUgMTIgRGF5cyBvZiBDaHJpc3RtYXMgUHJvamVjdCBTZXJpZXM8L3A+Cg==[/optin_box_field][optin_box_field name=”privacy”][/optin_box_field][optin_box_field name=”top_color”]undefined[/optin_box_field][optin_box_button type=”0″ button_below=”Y”]Get Instant Access![/optin_box_button] [/optin_box]

Adding a Simple Metal Look to Your Cards

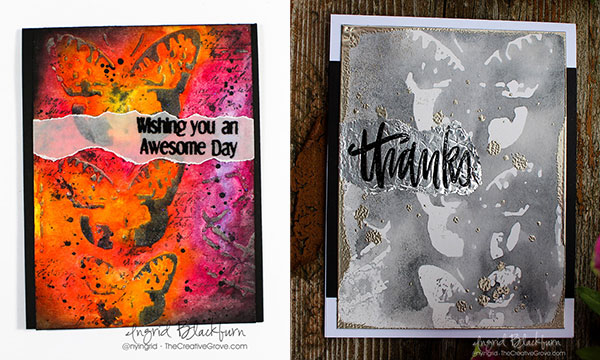
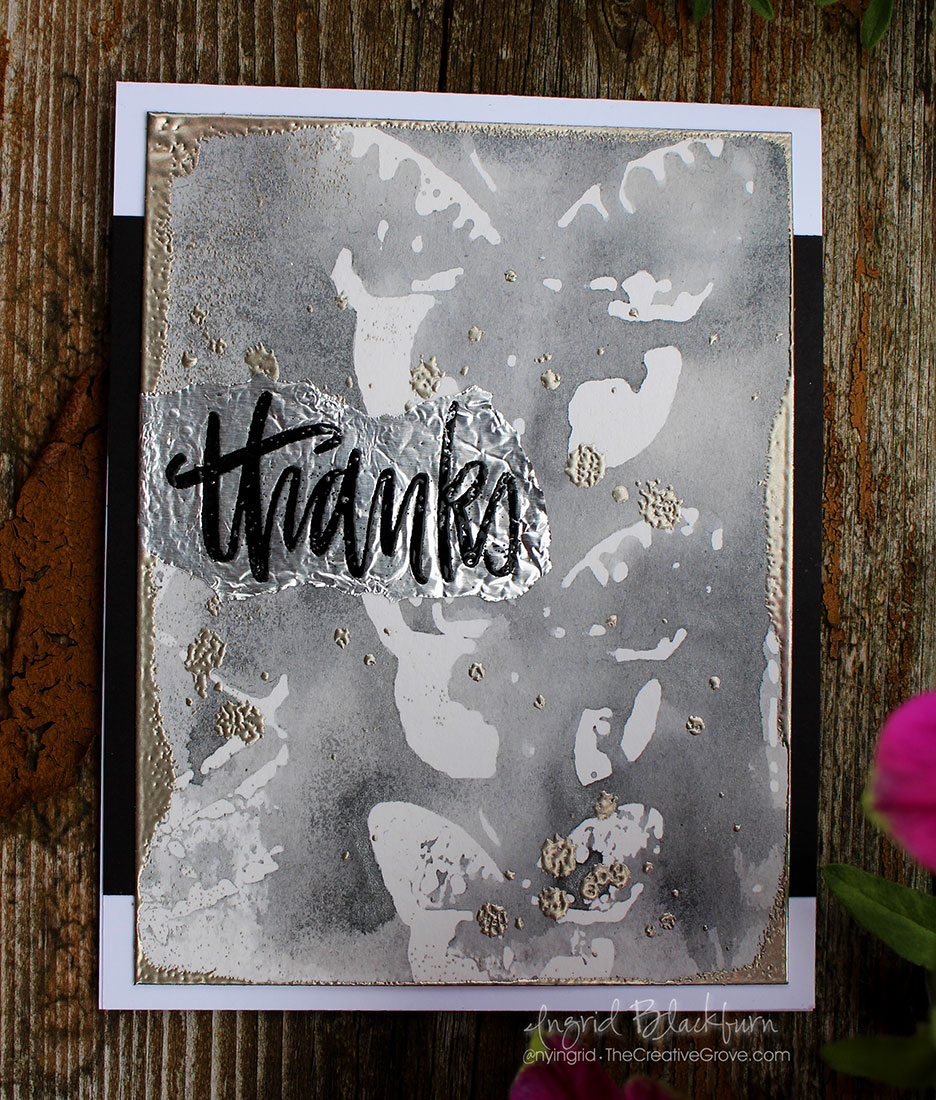
Mixed-Media-Metal---Ingrid-Blackburn-001

I love adding metal to cards. It’s an unexpected look and it’s always fun playing with textures that I don’t use in my day to day crafting. Metal is something that’s quite easy to add.

It’s time for yet another Mixed Media challenge over at Happy Little Stampers….first up – I have something totally easy that you can immediately implement in your crafting – tin foil and metallic embossing powders – and be sure to read on – I didn’t add them the traditional way!

HLS Mixed Media challenge August 2016

When you think of metal, you may go to the chunky pieces that you can add, but I wanted to keep my mixed media piece a little flatter. So to get a natural look, I used two everyday items we all have in our homes – aluminum foil and water.

Simple ways to add Metal to your Projects:

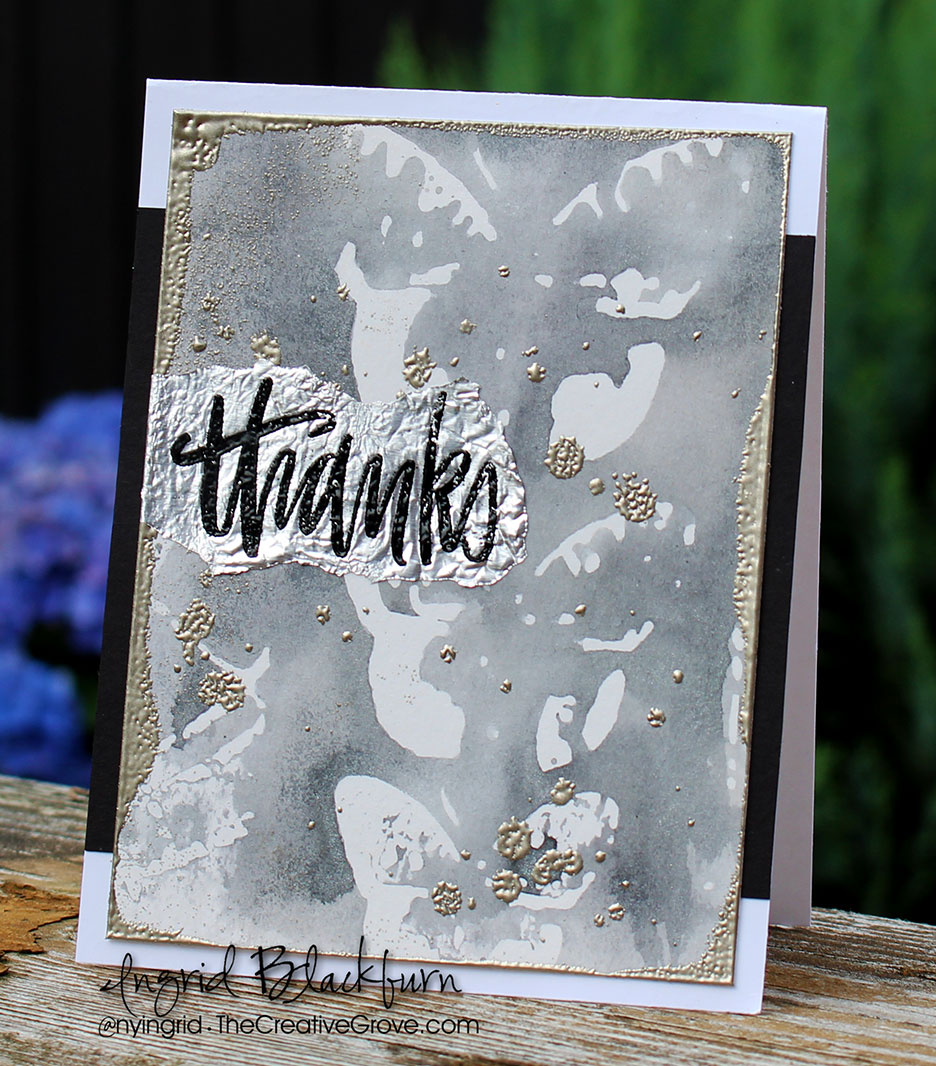
To get a nicely watercolored look in the project on the right, you’ll want to use a stencil with a solid negative space (the space that doesn’t get used). I chose the Mini Specimens stencil by The Crafters Workshop – I LOVE their stencils.

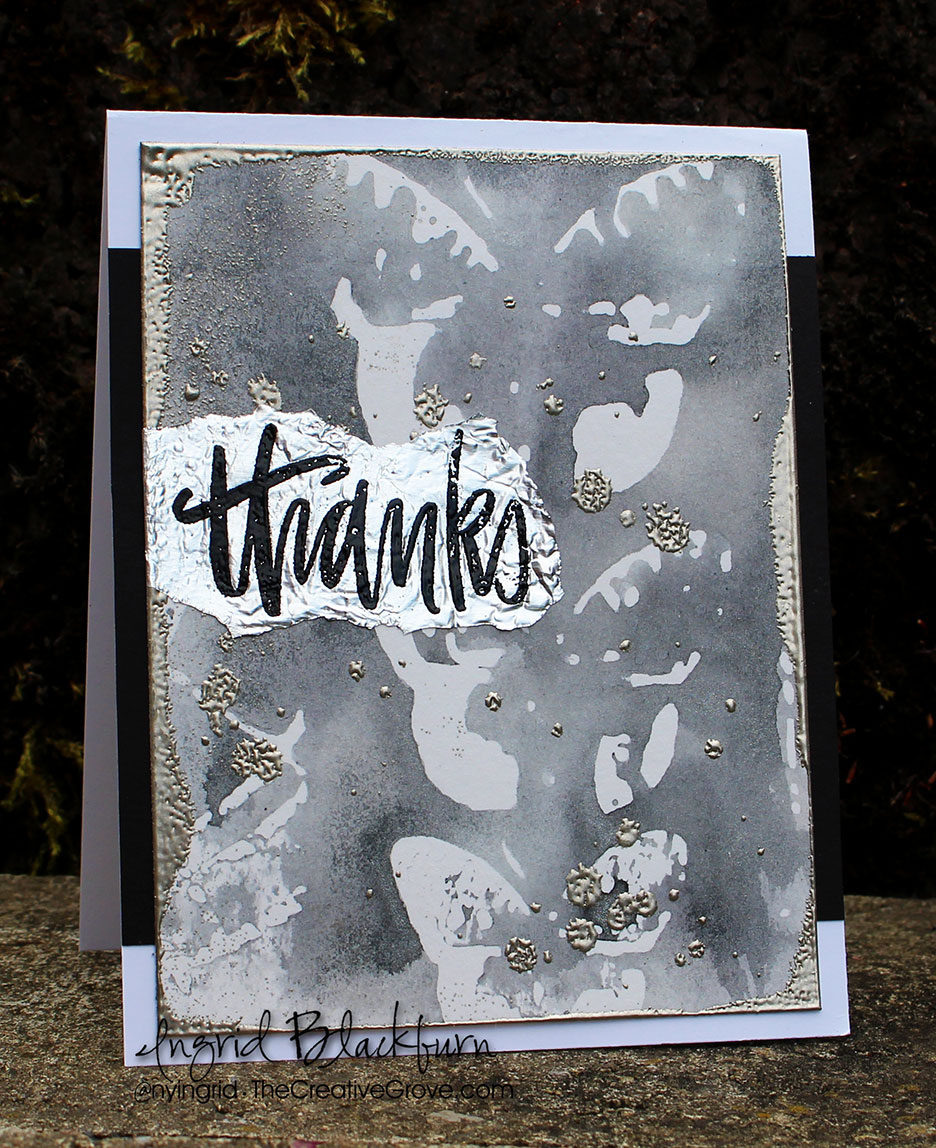
First, stencil through your positive image onto a project. The excess ink will collect on the negative space of the stencil. The watercolored look in our project today comes from the ink that was left over from the project on the left. I added Hickory Smoke and then some Soot Black on top of some embossing paste in this watercolor mixed media piece – there’s a video for that project (link below):

Mixed-Media-Metal---Ingrid-Blackburn-010

Click Here for the Left Project’s Tutorial & Video

Once you’re done adding color to your positive image (the colorful one on the left), grab a second piece of watercolor paper, spritz your stencil with all the left over ink on it with a mini mister and press into your paper. You’ll then get a watercolored negative space look for your card stock. You basically turned your stencil into a stamp!

Since we’re using the negative of the image – note that when you stamp it – it’s reversed from the positive one (colorful left project above)!

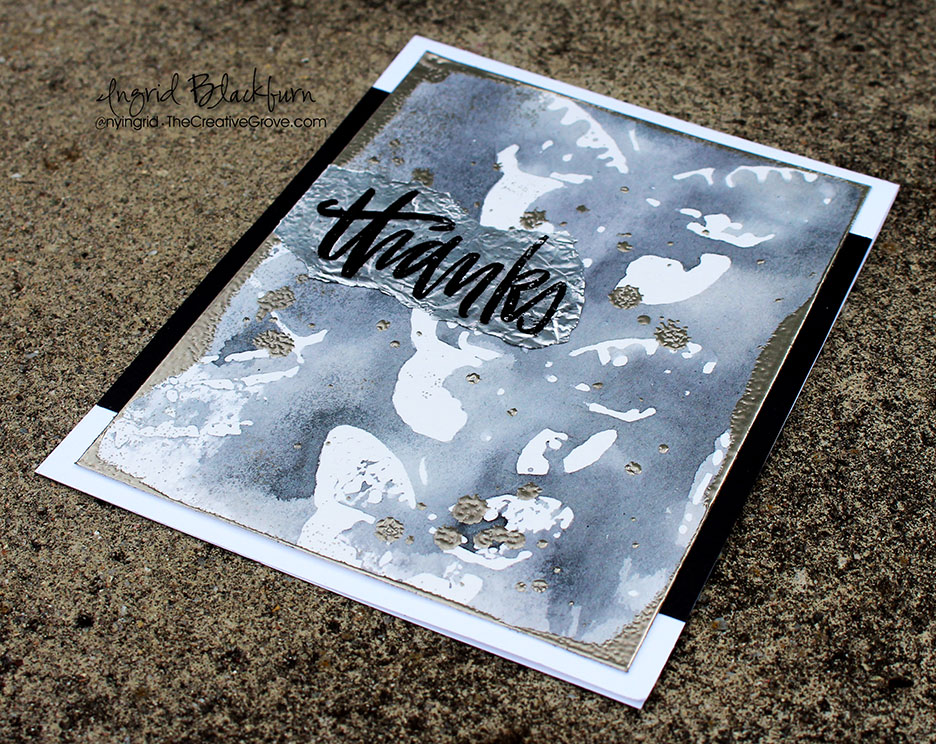
It’s a little hard to see in the photos, but this project has a sparkly sheen to it. To get that look, use pearlized water by adding a little Perfect Pearl (Perfect Pearl shade by Ranger) into my water filled mini mister rather than regular water.

Mixed-Media-Metal---Ingrid-Blackburn-004

Now that we have our mixed media base – stenciling & watercolor, next up is adding some metallic accents. The coolest part is that for the splotches you don’t even use ink – what? Yup….spritz a little water into to palm of your hand and flick it at your project. Keep this a little at a time so you don’t add huge splotches.

Mixed-Media-Metal---Ingrid-Blackburn-002

Add embossing powder – I used Pewter Powder and emboss. Pretty cool, huh? That’s how you get that realistic splotch look.

TIP – when you heat your powder, since there’s no ink to really grab onto it – first heat from underneath. That way your powder will start the melting process, finish from above, but keep your heat tool a little further away so you don’t blow all the powder away.

Mixed-Media-Metal---Ingrid-Blackburn-003

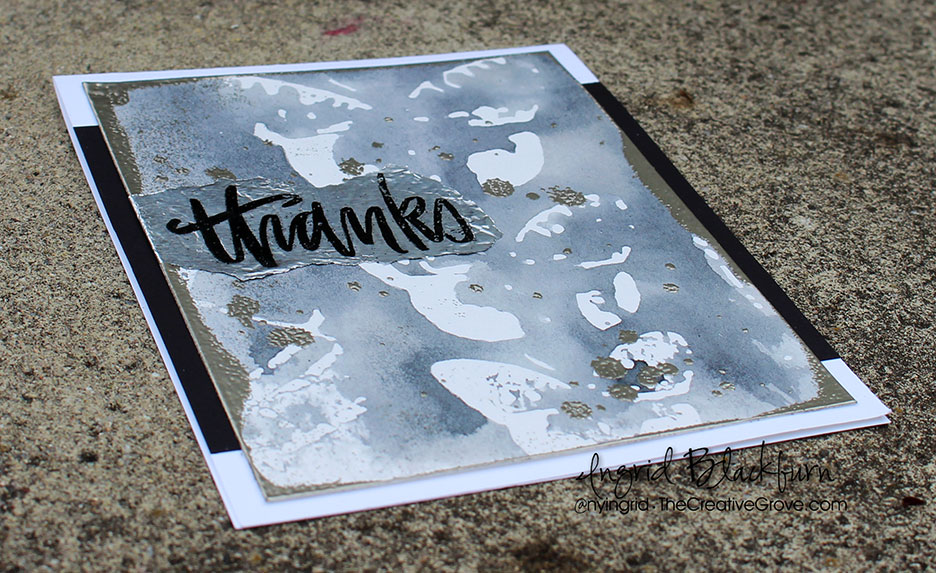
To get that great look to the sides – use water or versamark in a direct to paper manner. Once you have the look you’re going for, grab some heavy duty tin foil. stamp a sentiment in versamark, and emboss in Black. I used a new stamp set Hand painted Thanks by Neat & Tangled.

The black is a nice contrast to the shiny Tin Foil. Tear around it  leaving a longer strip to one side to overlap when you attach. Use glue to attach it to your watercolor paper. If you wrinkle it a bit more than you want – just flatten it out with your finger – or leave them in – it’s texture!

Mixed-Media-Metal---Ingrid-Blackburn-005

I love the shiny mixed with the Pewter – it’s a new/old look. That’s it! Adding a simple metal look to your cards is really that easy! I’m curious…have you ever embossed with water?

So now it’s your turn to add a metal look to your mixed media projects! I can’t wait to see what you come up with, head on over the Mixed Media Challenge and check out everyone’s creations.

Till next time –

Signature

[optin_box style=”12″ alignment=”center” email_field=”email” email_default=”Enter your email address” integration_type=”aweber” double_optin=”Y” list=”3846012″ name_field=”name” name_default=”Enter your first name” name_required=”Y” opm_packages=””][optin_box_field name=”headline”]Learn more with our exclusive FREE video series:[/optin_box_field][optin_box_field name=”paragraph”]PHA+UGx1cyB5b3XigJlsbCBiZSBhZGRlZCB0byBteSBGUkVFIENyZWF0aXZlIFRpcHMgRS1sZXR0ZXIgd2hlcmUgSSBzaGFyZSBleGNsdXNpdmUgcHJvamVjdHMsIHZpZGVvcyAmYW1wOyB0aGUgMTIgRGF5cyBvZiBDaHJpc3RtYXMgUHJvamVjdCBTZXJpZXM8L3A+Cg==[/optin_box_field][optin_box_field name=”privacy”][/optin_box_field][optin_box_field name=”top_color”]undefined[/optin_box_field][optin_box_button type=”0″ button_below=”Y”]Get Instant Access![/optin_box_button] [/optin_box]


SOA Lovely Notes Blog Hop

Lovely Notes SOA Blog Hop

Welcome to the Lovely Notes Collection Blog Hop – Day 3! What do you think so far…pretty amazing, right? Well I hope to add a little creative inspiration for you today with a few projects. I’ve been sharing a few projects over the past few days – this collection is so easy to create with, and I have so much more to keep sharing with you this week.

The Stamp of Approval Lovely Notes Collection is a curated collection of stamps and dies that work fabulously together or alone. Not only do you get a box FULL of amazing stamps and dies, but you’ll get a downloadable PDF Project Guide (for free!) with tons of project tutorials using them!

The stamps and dies in the Stamp of Approval Collections are brand new on the market and won’t be released for individual sale for several months. To find out how to get a box, you have to be on the wait list! Yes, these boxes sell out so fast – the last one was gone in 33 hours….so don’t wait. The wait list will find out before the public will. Click Here to sign up for the wait list and find out more.

Today I’m going to inspire you with several of the components of this collection. Specifically the Lovely Flowers, Lovely Flowers & Banners Dies, Lovely Lattice Background, Butterfly Notes, Wonderful Wreath – all by Catherine Pooler Designs, and Handpainted Thanks by Neat & Tangled. So let’s get right to it with a little Christmas in July, here are your tutorials!

Lovely Notes Project Tutorials

Wonderful Wreath

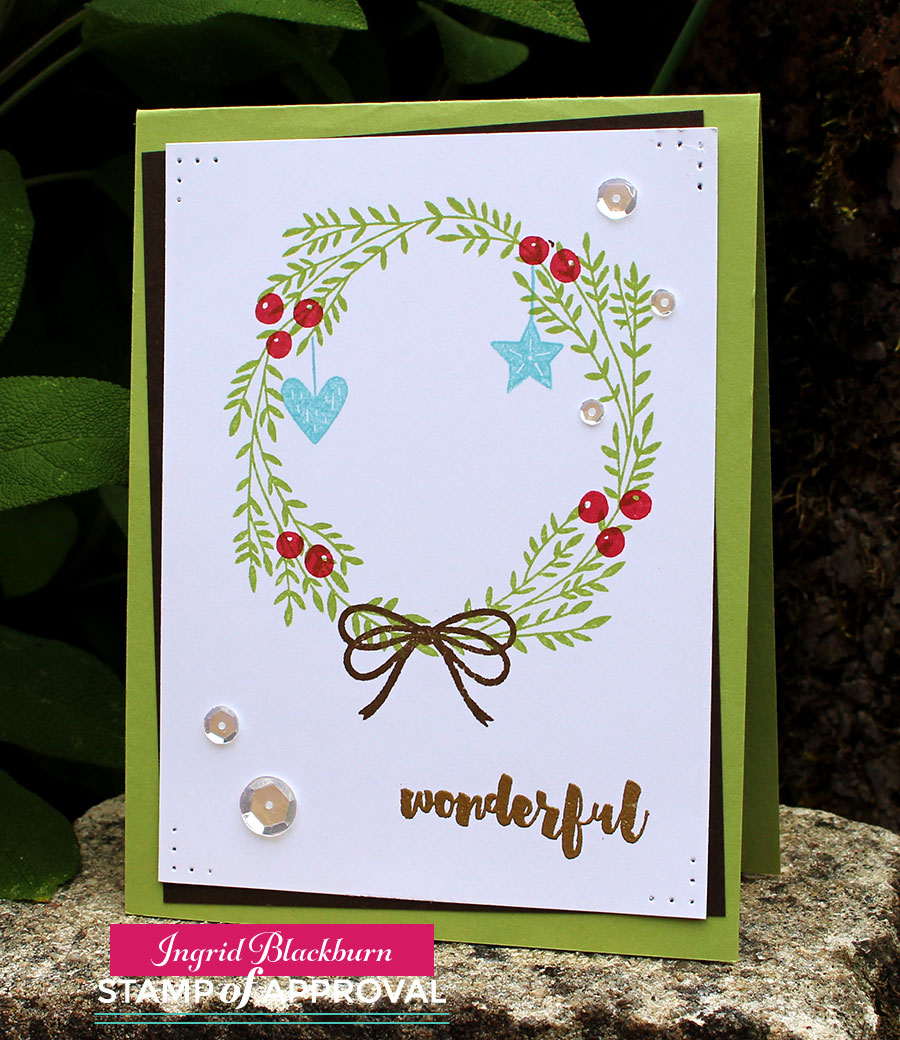
I was in love with this wreath the moment I saw it. It reminds me of olive branches – delicate and whimsical. To get this clean and simple look, stamp your wreath on white in Stampin Up Pear Pizzazz, the berries in Primrose Petals, hang some ornaments in Baja Breeze and tie it all up with an Early Espresso bow. It was that simple. This is a GREAT mass produced card.

Lovely-Notes-SOA-Project-2---Ingrid-Blackburn-001


For an elegant touch, emboss your greeting in Gilded Gold by Brutus Monroe – my new favorite gold. Add a few sparkling clear sequins by Pretty Pink Posh and a little simple paper piecing in the corners finishes it off.

I’m addicted to the tilt for the matte in the background (thanks Maureen!) – a little Early Espresso on a Pear Pizzazz card base. It’s that simple.

Thanks Friend

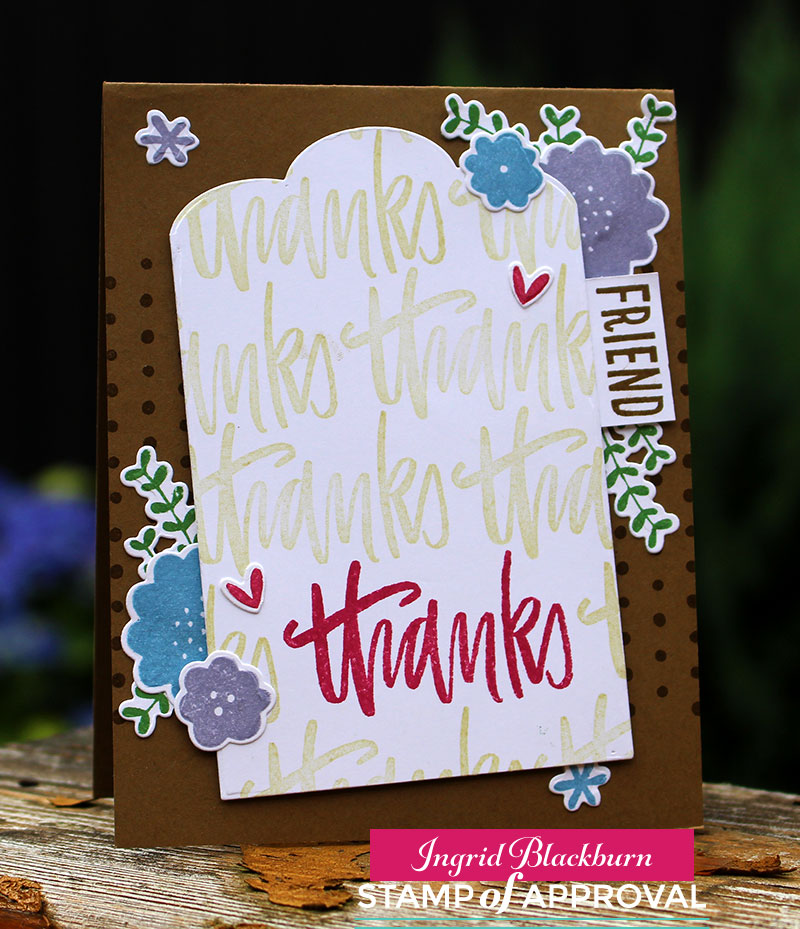
This awesome handpainted Thanks stamp by Neat & Tangled is my new favorite greeting – I love bold scripty greetings. I used this stamp just one way – did you know there are two others that layer for a multi tone effect! How cool is that?

You’ll want to stamp some of the Lowely Flowers and cut them using the coordinating Dies. I used the Stampin Up colors – Marina Mist, Wisteria Wonder, Rose Red & Garden Green. On a large piece of white scrap paper – at least card front size, stamp the thanks towards the bottom center/right. Repeatedly stamp thanks in a light neutral tone, I used River Rock. TIP – alter where the word starts on each line so that it flows.

Lovely Notes SOA Collection - Ingrid Blackburn


Stamp the dots from Lovely Flowers in the middle 2/3 of the Soft Suede card base. I stamped it completely across so that the left and right side were even.

Cut your tag out using the large banner die from the Lovely Flowers & Banners Dies set. Try to place the Rose Red Thanks a bit off centered to the right at the bottom. You definitely want some neutral below as well. Stamp the word Friend from the Lovely Flowers Stamp set in Soft Suede on a piece of scrap and attach to your tag.

Pop the tag up using Foam Tape or Fun Foam and adhere your embellishments. TIP – The leaf branch has three sprigs – I cut mine apart to get it just right – sometimes just one or two.

That’s it – it’s a cute card – I had way too much fun with the Lovely Flowers stamps & dies as you’ll see tomorrow!

Bold Watercolor Greetings

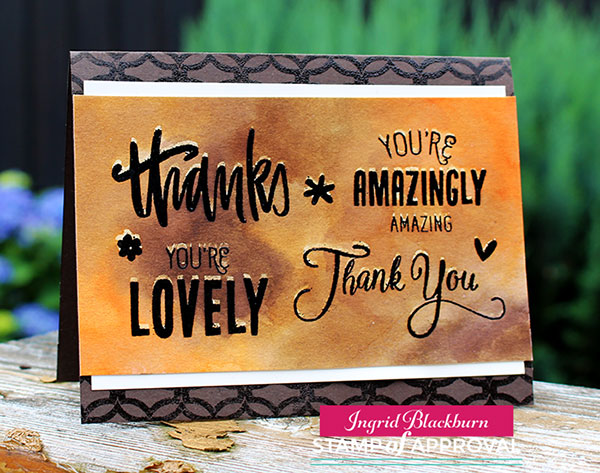
If you’ve followed me for a while here, on YouTube or in an online class – you know I love to watercolor! This project takes some of the various greetings in this collection and puts them to good use. I wanted greetings that would stand out, so I used two from Lovely Flowers, one from Butterfly Notes and one of my new favorite Thanks from Handpainted Thanks. Here’s a video tutorial for you:

Click Here to watch video in HD on YouTube

To get this outline look, first stamp your images in versamark. Go back over them with a de-static tool and stamp again in Versafine Onyx Black Ink. Emboss in Black and heat set. Once cool, secure your project down with low tack painters tape on the upper and lower edges.

Smoosh some Distress Ink onto your craft mat or acrylic block – I used Rusty Hinge, Ground Espresso, Gathered Twigs and Vintage Photo. Grab some ink with a large wet brush and start painting onto your dry watercolor paper. You want your watercolor to flow together without getting out of control.

Handpainted Thanks - Lovely Notes Collection - Ingrid Blackburn

TIP – if your paper accumulates too many puddles or your colors blend out of control, gently dip the edge of a dry paper towel into a puddle to sop it up without removing color. Or use a thirsty brush (Not dripping wet). Water will naturally be attracted to a dry surface.

Once you have the look you want, heat set or allow to dry on it’s own. TIP – keep some lighter areas along with dark for a balance.

Stamp the Lovely Lattice Background stamp in Ground Espresso onto a folded Espresso card base. I just inked up the top and bottom. Quickly dip into clear embossing powder and heat set for a tone on tone look. If using a vanilla or white background, use Versamark ink for a watermark look. The key is not to compete with your watercolor, but rather support it.

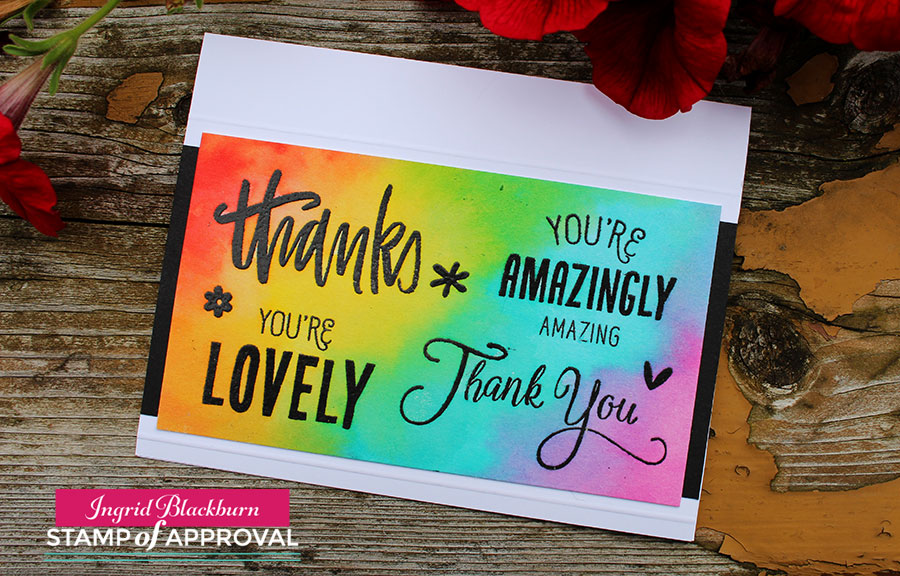
It’s a pretty quick and easy project. I made four as I wasn’t sure of the look I wanted. Here’s a rainbow one too:

Lovely Notes Stamp of Approval Ingrid Blackburn


I added a little dry embossed line to the top and bottom for a simple embellishment. No matter what color combination you choose, you’ll love this technique.

Now that you have some inspiration…time to find out just how you can win a free box!

Lovely Notes SOA Win

It’s your turn to hop along and check out what the uber talented Amy Tsutura has in store for you next! Here’s the blog hop list:

Catherine Pooler

Neat and Tangled

Kristie Goulet

Yoonsun Hur

Ingrid Blackburn – That’s Me * You are here*

Amy Tsuruta You’re next stop!

Justine Hovey

Be sure to leave a comment on each designers blog for a chance to win a Lovely Notes Collection of your own! There’s a giveaway for all three days of the hop! If you missed out on any of the Blog Hops – start at the beginning with Catherine’s Blog and Day 1.

And stop by tomorrow for more inspiration –

Signature

[optin_box style=”12″ alignment=”center” email_field=”email” email_default=”Enter your email address” integration_type=”aweber” double_optin=”Y” list=”3846012″ name_field=”name” name_default=”Enter your first name” name_required=”Y” opm_packages=””][optin_box_field name=”headline”]Learn more with our exclusive FREE video series:[/optin_box_field][optin_box_field name=”paragraph”]PHA+UGx1cyB5b3XigJlsbCBiZSBhZGRlZCB0byBteSBGUkVFIENyZWF0aXZlIFRpcHMgRS1sZXR0ZXIgd2hlcmUgSSBzaGFyZSBleGNsdXNpdmUgcHJvamVjdHMsIHZpZGVvcyAmYW1wOyB0aGUgMTIgRGF5cyBvZiBDaHJpc3RtYXMgUHJvamVjdCBTZXJpZXM8L3A+Cg==[/optin_box_field][optin_box_field name=”privacy”][/optin_box_field][optin_box_field name=”top_color”]undefined[/optin_box_field][optin_box_button type=”0″ button_below=”Y”]Get Instant Access![/optin_box_button] [/optin_box]