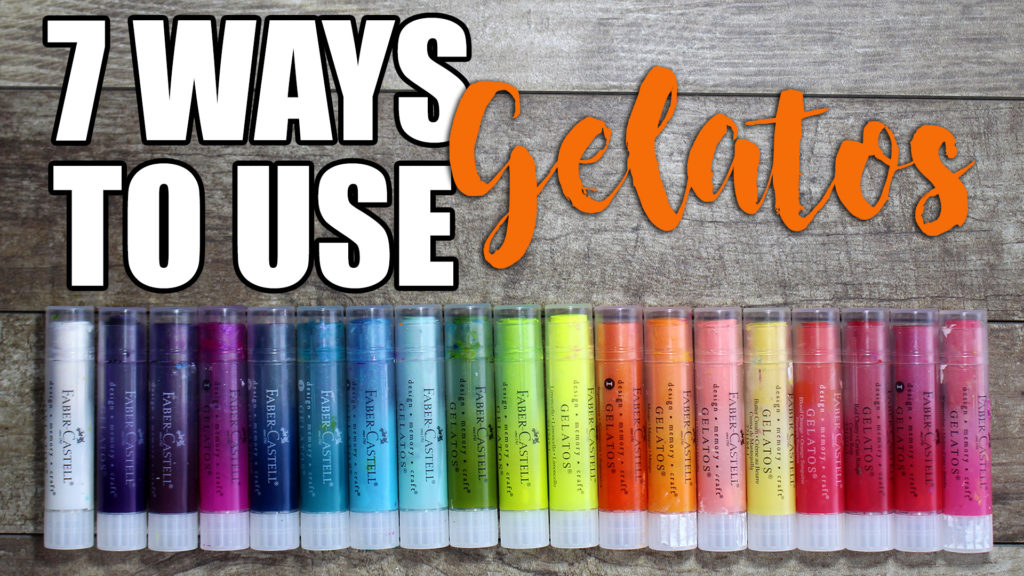
7 Ways to Use Gelatos

7 ways to use gelatos

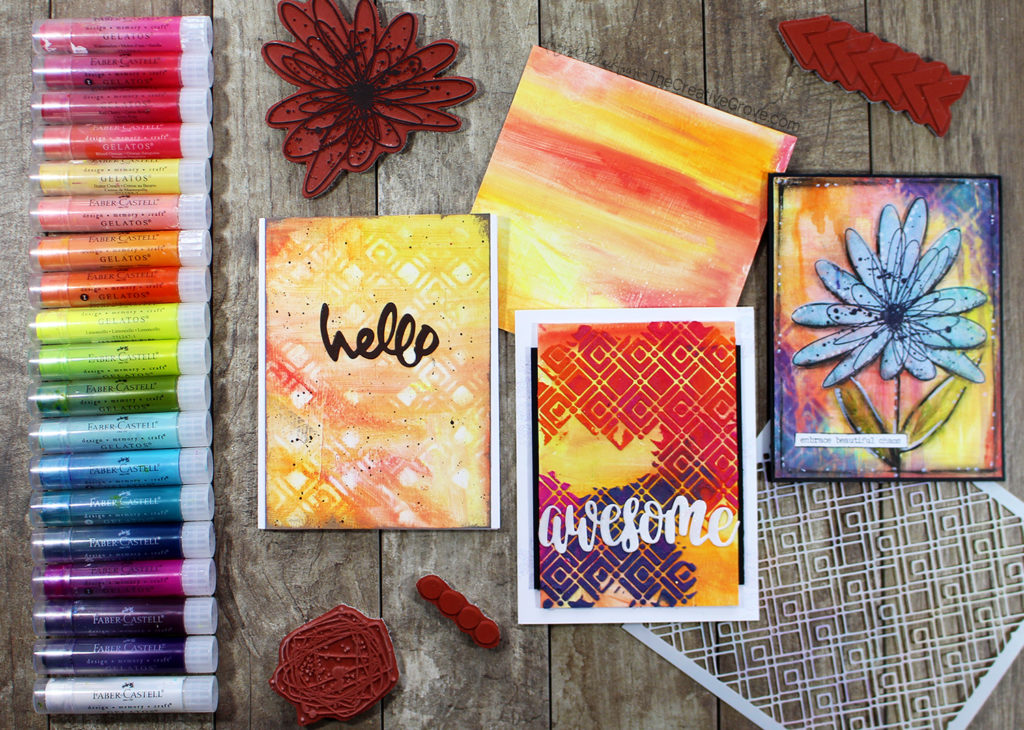
Gelatos by Faber-Castell, are powerfully pigmented creamy sticks that pack a punch. Do you have some sitting in a drawer or in a bin somewhere? My hope is that you will be inspired to break out those awesome pigmented creamy sticks and get creating. Here are 7 Ways you can use Gelatos on your projects!

Let’s dive right in!!

I have three amazing projects to share with you today. To get started, you’ll want to spread some gesso onto an 8 1/2 x 11 sheet of white cardstock. For gelatos to spread properly, they need a base to spread easily. Without that, it can be a challenge!

If you haven’t already – please subscribe to my newsletter (you’ll get an exclusive video series), instagram, youtube channel, and blog (subscribe in the sidebar on the right)!!

I filmed a video for you, but have each one detailed below as well in photos and instructions. Be sure to leave me a comment on the youtube channel too with which one you loved the most!

Click here to watch over on YT.

#1 – Gelato Blending Technique

Our first Gelatos technique is the most basic of them all – blending. You will want to choose colors that go well together and scribble them all over your paper – no need to worry about being neat – the water and that ever so special tool (your fingers) will do all the heavy lifting!

A tool that helps with blending Gelatos is the Ranger spritzer. You will first want to mist your surface lightly by squeezing quickly on your Ranger Spritzer. To blend those amazing colored pigments together, use your fingers or a damp towel, to get the coverage you love. Dry with a heat tool, or set aside and cut up into a few card fronts. I split mine in 1/2 – 5.5 x 8.5. For the card fronts, I cut one into two, and one I cut into a 5″ square and 3.5 x 5.5 with a 1/2″ strip left over. That will give you 4 backgrounds to create with – not bad!
gelato blended backgrounds

#2 – Disappearing Gelato Technique

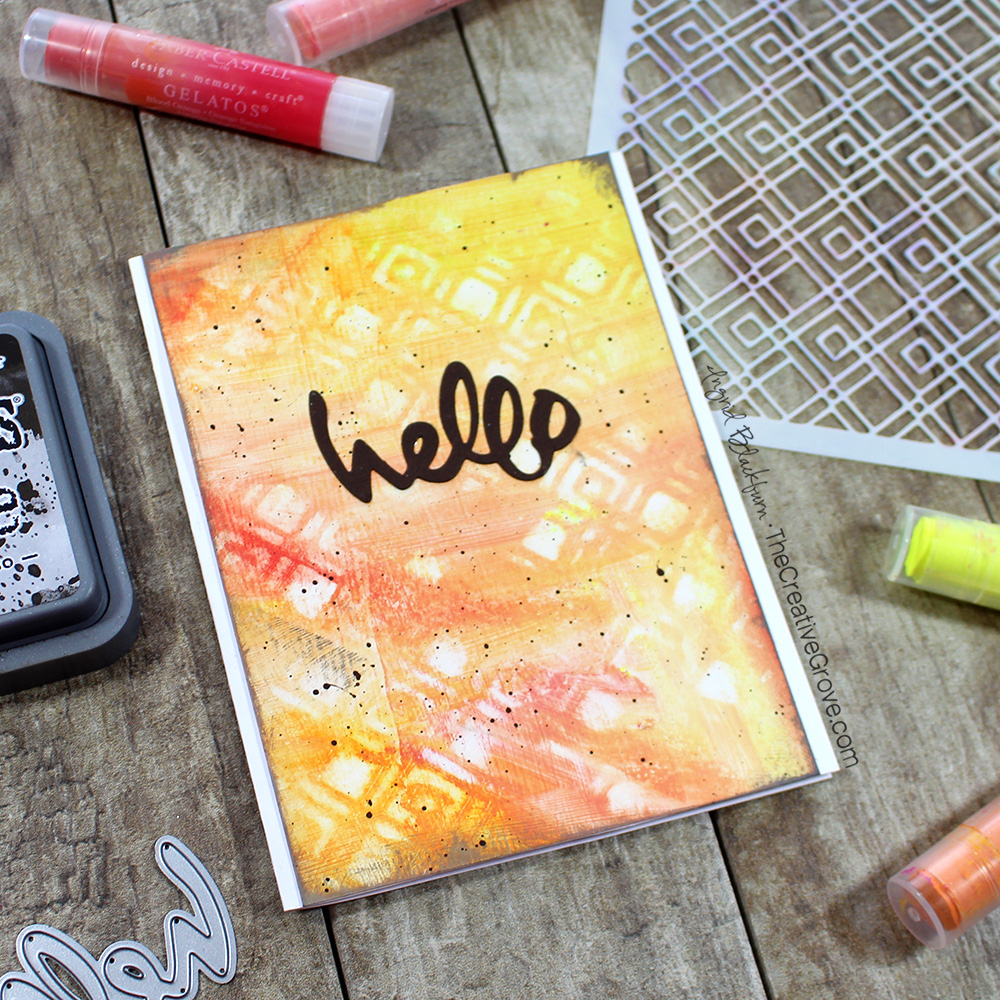
Next, line up your favorite stencil over one of your panels. I’m using the Quadrilaterals Stencil by AALL & Create which has some great space to work with. Grab a Baby Wipe or wet paper towel and twist your wipe through the stencil to wipe away the color – what?!!

Yes, you’re going to remove the gelatos color easily through your stencil. The key – keep alternating to a clean spot on your wipe/towel. I intentionally only removed the color in spots, to give an organic look to my project. The end result gives you an artsy stenciled look!
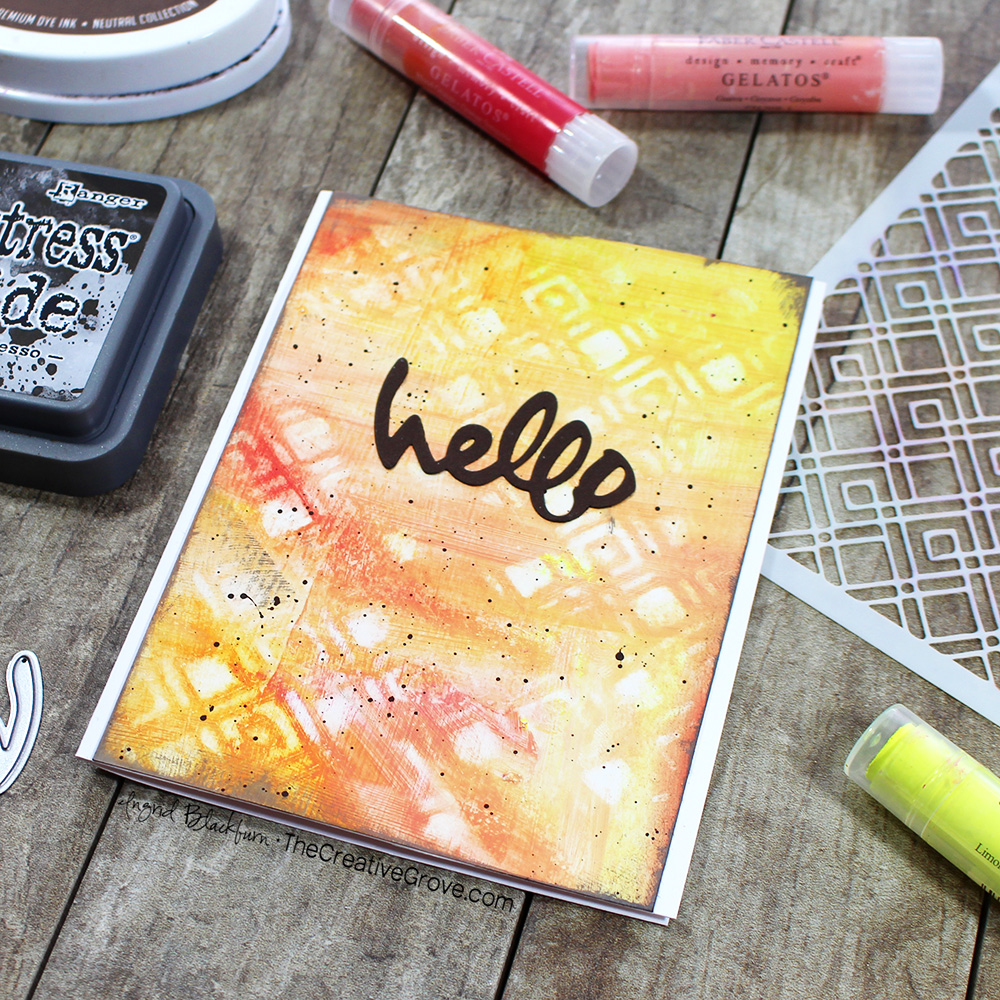
baby wipe gelatos technique

Add some splatters and edge your piece and all that’s left is to mat it onto a base and use a simple word die. Don’t take away from the background – the disappearing gelatos piece is the star!

#3 – Gelato Colored Paste Technique

Did you know that you can shave off some pigments and do loads of techniques with them?!! Here’s just one of many – Coloring Paste. Now keep in mind – you can do this with just about any medium too!

Use a palette knife to scrape off some pigment (a little goes a long way) and mix with some white embossing paste and a palette knife. Mix your gelatos and paste thoroughly. I mixed four gelato colors, each with a tiny amount of paste. Add each color, a small amount at a time, directly through the stencil with a palette knife.
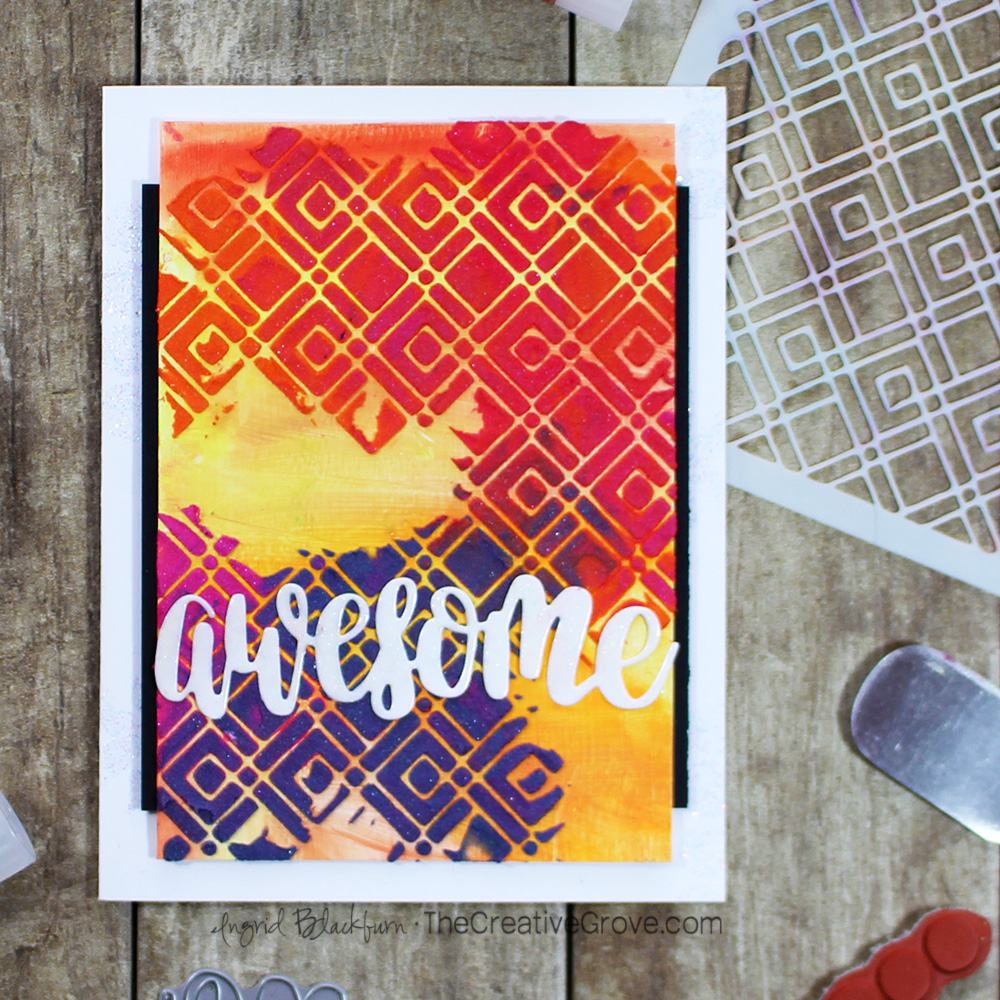
tinting mediums with gelatos

In this project, you’ll notice that I intentionally left some spots without paste. That was so that the rockin’ background can shine through. It makes for some interesting breaks in your project.

Try overlapping your colors a bit too – that creates new ones! Just keep the color wheel in mind – leave complimentary colors apart – blue/orange, red/green, etc… Doesn’t that look stunning through the Quadrilaterals Stencil?!!
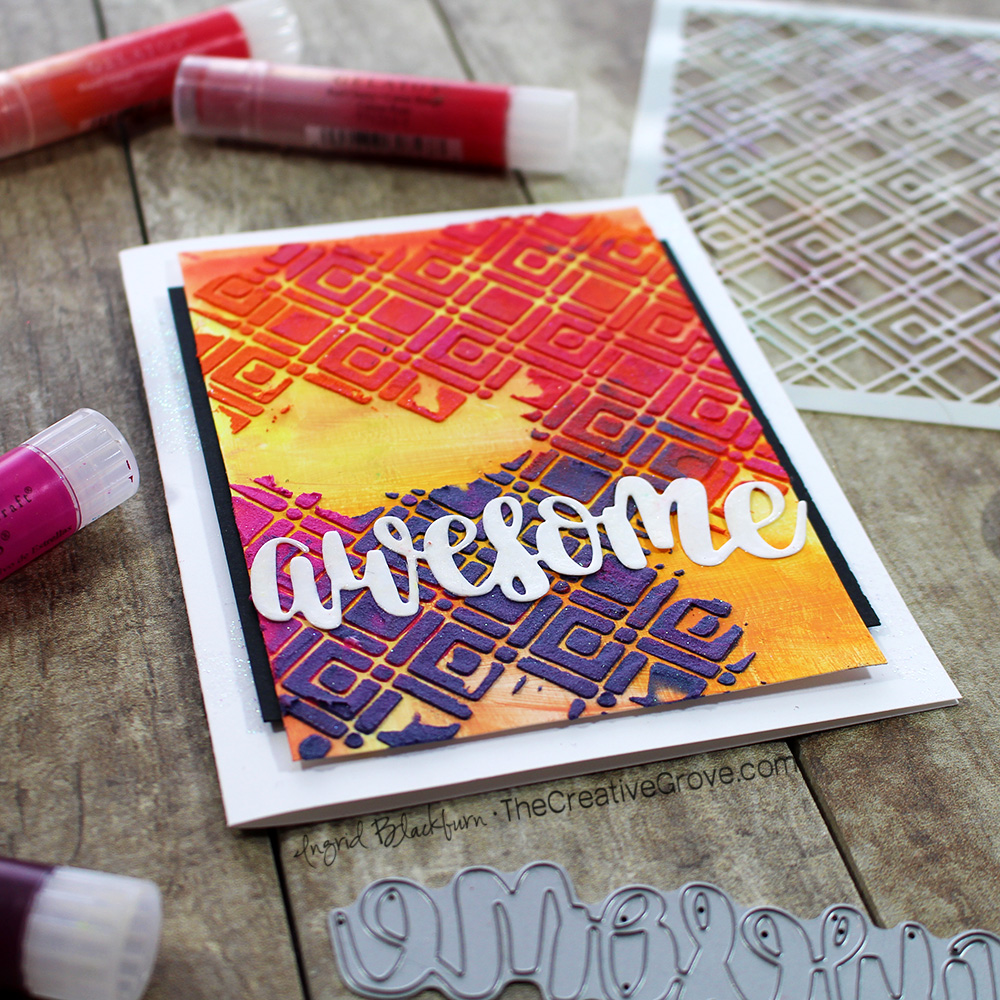
stenciling mediums with gelatos

Again, a simple word die and some fun matting and you’re all set. Now I did stamp the Eclectica Tracy Scott 25 stamp set onto the card base in embossing ink and embossed it in Wanderlust Embossing Glitter for a little interest. To keep adding a little sparkle, highlight the awesome word die with a sparkle pen.

#4 Gelato Dripping Technique

This technique is probably a fan favorite of many! You can try this on plain or colored backgrounds. I decided to add more of the same to one of the existing panels. Keep color theory in mind, when using this technique. Gelatos have fugitive properties, so try and stay away from complimentary colors in order to avoid making mud.

Here’s the skinny – rub some gelatos at the top of your panel – nice and concentrated. Spritz or add water with a paint brush and watch the drips!! It’s a very cool look.

The dripping technique gave an awesome depth to the background of our third project – a real mixed media card. This is just he beginning!!
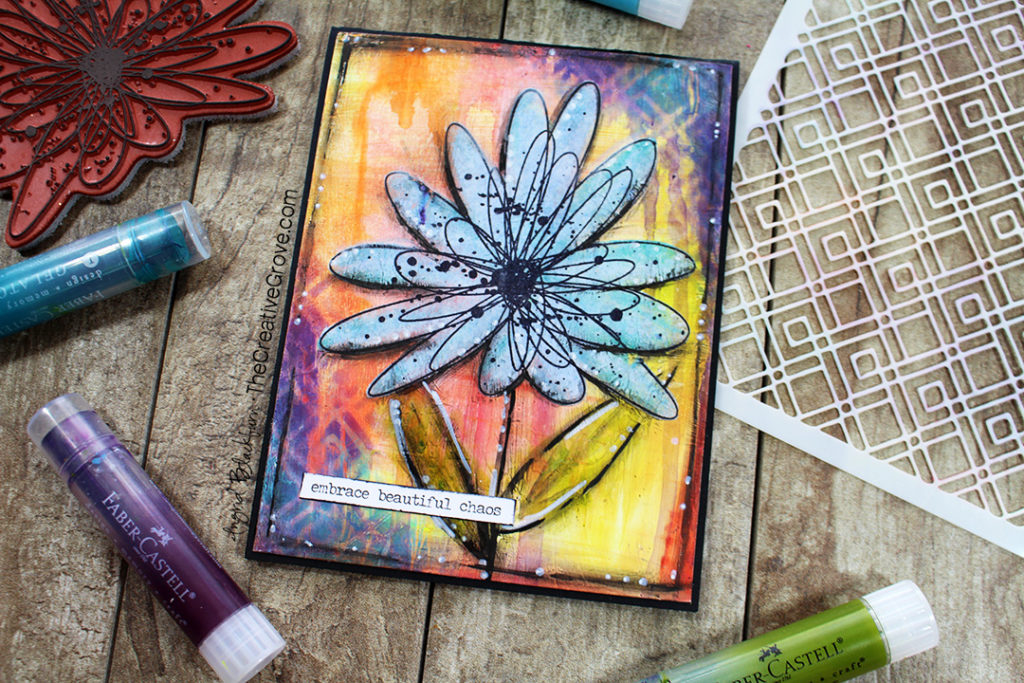
gelatos dripping backgrounds

#5 Gelato Layering Technique

One of the properties of Gelatos is that it is always live and reactive. To set them, you’ll need to seal it. You can use a spray, or if you’d like to flex your mixed media muscles a bit – try matte medium! Pour a little over your background to set those colors.

This helps in two ways – one locks that colored goodness in place, and two – you can layer ANY colors on top of each other!! To use Matte Medium – drip a little onto your project and carefully spread with a palette knife or silicone spatula. Be careful not wipe all that colored goodness away – you are adding a liquid to it! You will find that it is better to start with a little of the matte medium in one place, just until you get the hang of using it. You want only a thin layer. Dry naturally, or with a heat tool.
how to seal gelatos

Gelatos are vibrant in color. To allow the second layer of color to pop, you will need to first lay down a layer of white gelato to give your second layer a neutral base. I used Coconut as a white base underneath a few pops of color in my second layer. I added purple right onto yellow and blue right over orange – normally that would be a muddy mess. Not with Gelato layering!!

That brings us to #6…

#6 Gelato Stenciling Technique

Since Gelatos are SO super creamy and pigmented, I like to avoid rubbing them directly onto my stencil. That way too much pigment doesn’t get stuck in the nooks and crannies of my stencil. Instead, use a makeup sponge!

Scribble some gelato pigment onto your craft mat or a palette and sponge through your stencil onto your project. This way you have a smooth application and can be quite deliberate in where you want to add color. On your Mixed Media card – add a little Stardust, Galaxy and Blue Moon for a nice little accent in both corners. The Quadrilaterals Stencil adds a little lattice look to the corners, don’t you think?
stenciling with gelatos

I love the dark popping off the bright base. None of which would show up without locking the layers and adding the white underneath.

#7 Gelato Coloring Technique

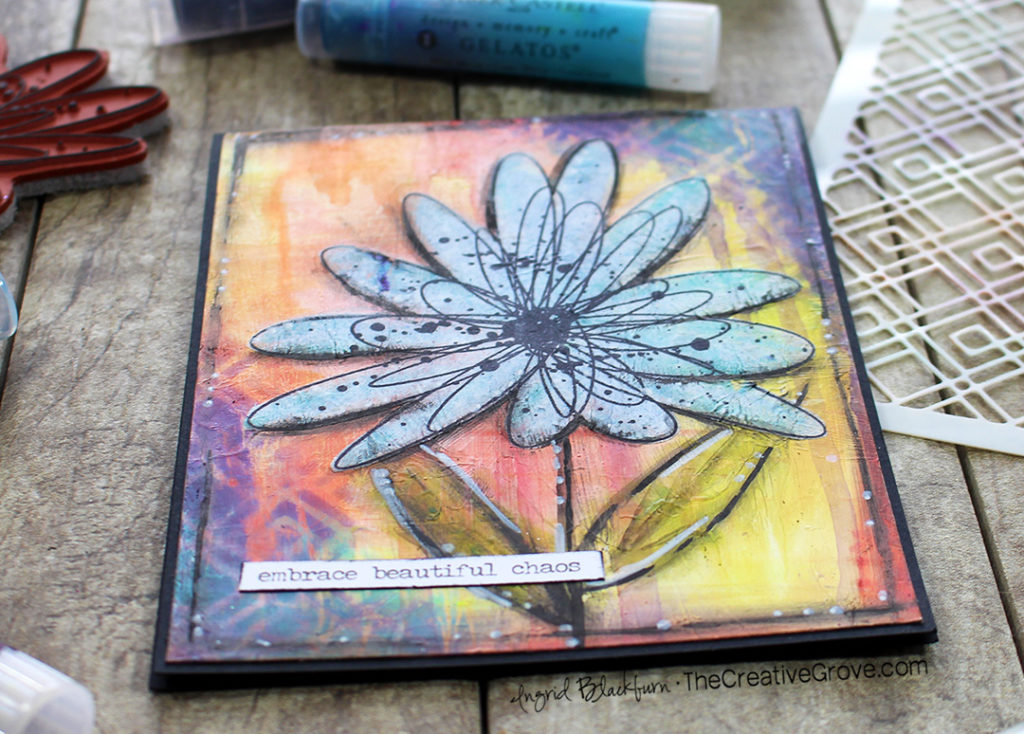
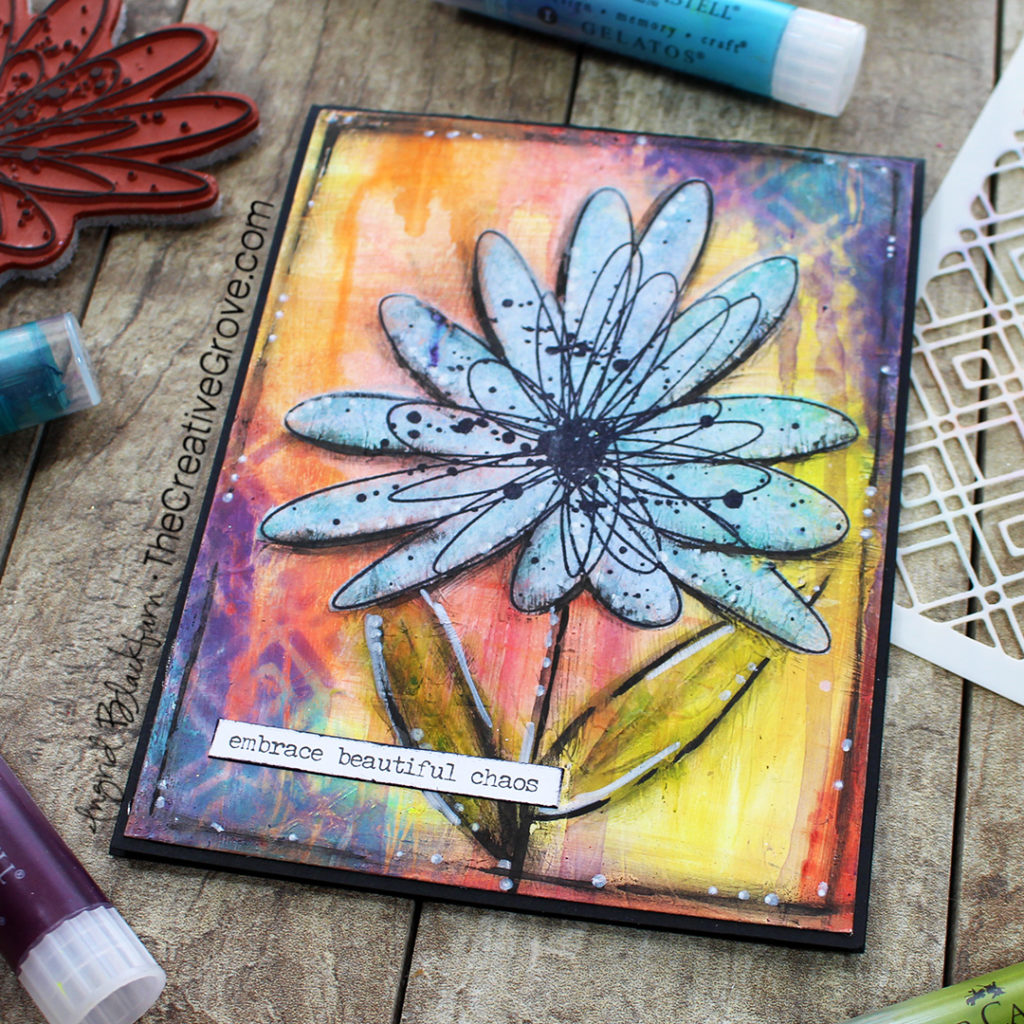
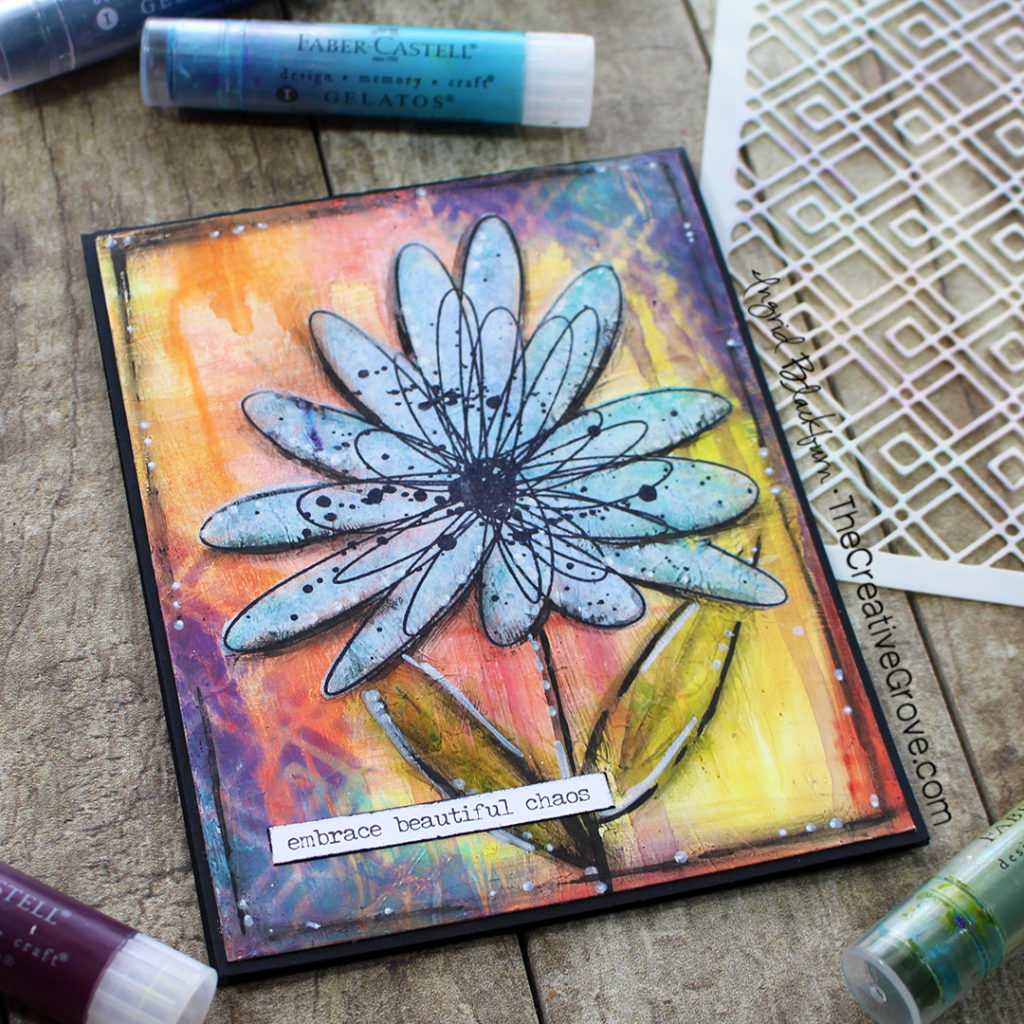
And last, but certainly not least, add color to all your embellishments with Gelatos! A unique way to add color to an embellishment, is to stamp your piece in Archival ink onto Tissue Paper and use the gelatos to color from behind!

On tissue paper, the gelatos blended super easily. No need for Gesso. Add as much pigment as you’d like – you want it to pop from the other side. I added Aqua Dolce, Nebula and Blue Moon for a fun blue flower. The background has some good orange tones from blending the Blood Orange Gelato over Guava. Can you see the Blood Orange drips on the left side? The blue would be the perfect pop to the project in a complimentary color…
coloring tissue paper with gelatos

To help the blue flower pop even more, hold your fussy cut flower onto your project, lift the edges, and add a little white gelato underneath. Seal the stenciled corners and white flower with some matte medium, giving your flower a base to grab onto. Add matte medium over the top too and dry your entire piece.

Pulling it All Together

To complete your flower, add a little Pistachio green for some leaves and rub it into shape with your fingers. Next add some black charcoal pencil for shading, rub in with your finger, and add some Black Big Brush Pen accents too. Rub and add white where needed. Add a little matte medium over your green leaves and add some finishing touches.

For a sentiment, I used a sticker from Small Talk collection by Tim Holtz Ideology. To help it to stand out, edge your sticker with a Pitt Pen. I love the end result, and now I want to create a two page spread like this in my art journal – it’s TOO pretty!!
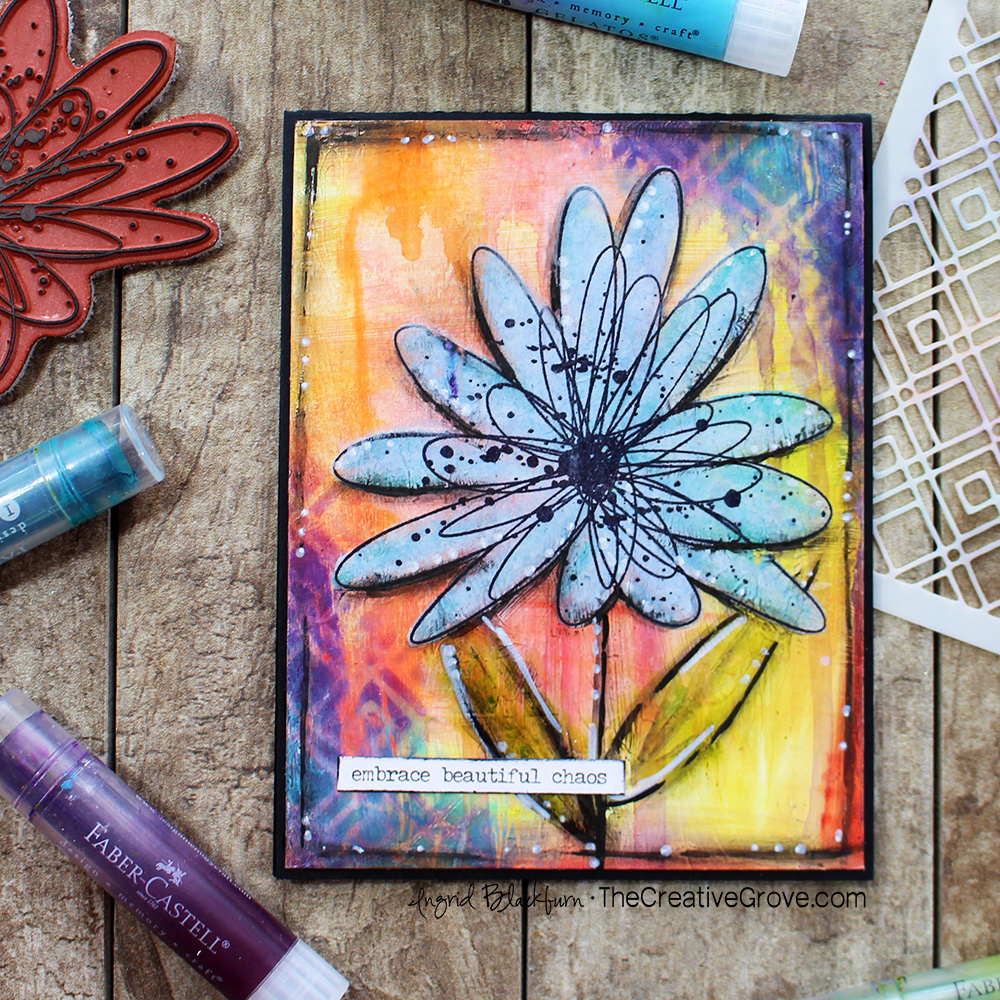
Mixed Media Cards using Gelatos

Whoever receives this card in the mail, is certain to cherish it.

Which of the 7 Ways to Use Gelatos is your favorite? Have you tried any? Tell me in the comments!! I’d love to know which projects you liked too! Want to see more with Gelatos?

Did You Know?

I popped all the supplies I used in the list below. This post was written for a fun hop celebrating Top Flight Stamps and their 2nd anniersary. Have you had a chance to check out Topflight Stamps yet? If you have not checked it out yet, then you MUST pop over. It’s one of the best collections of artsy stamps and stencils I’ve seen.

Topflight Stamps differs from most online retailers. You will find an incredibly diverse collection of artistic stamp products from around the world – all under one roof. Don’t you just love the two products I used today, and hope you enjoyed seeing a few ways you too could use them!
7 ways to use Gelatos - easy techniques

But first, keep hopping along. Be sure to leave comments all along the way. There are some INCREDIBLE crafters in this hop – seriously – I’m so honored to have been asked to be a small part of it. So thanks for hanging with my novel of a post. If you haven’t already – please subscribe to my newsletter, blog (subscribe in the sidebar on the right), instagram and youtube channels!!

Till next time, keep those fingers inky…

Blog Hop List

Supplies

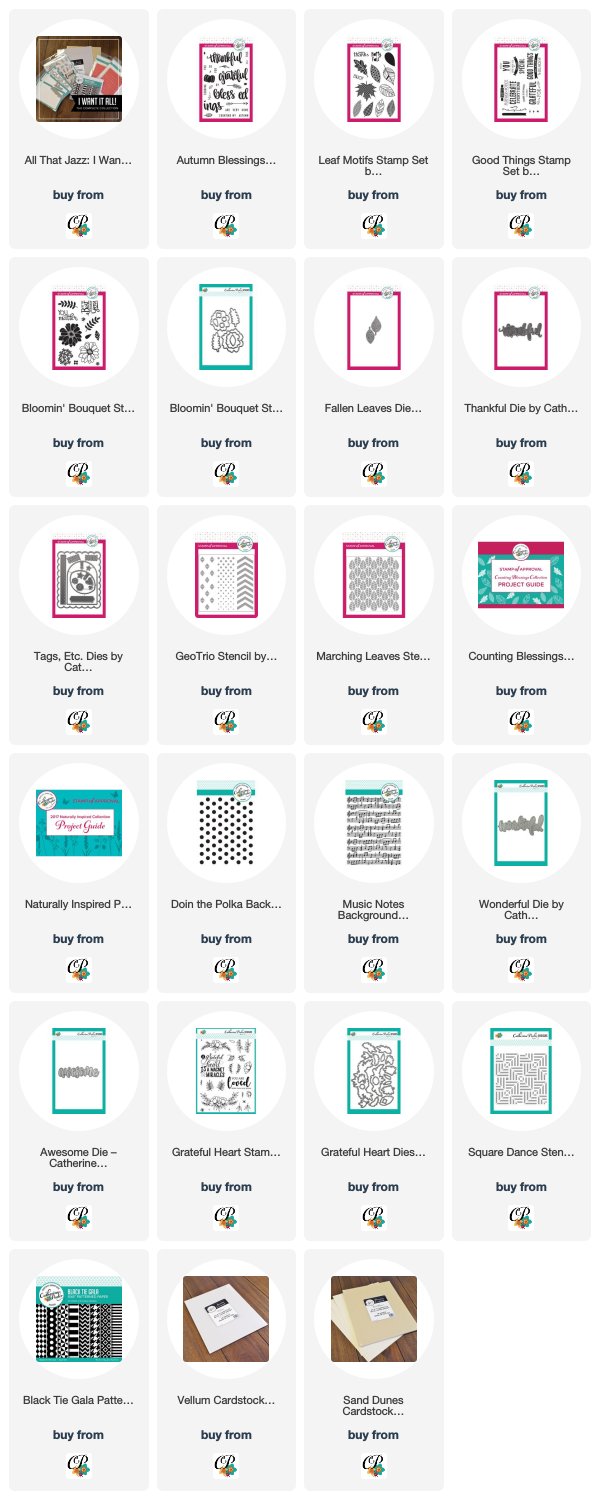
To make finding the supplies I used in these projects a bit easier for you, here are a few clickable links. Compensated Affiliate Links are used when possible. Click here for disclosure. Happy Shopping!

How to Mass Produce Clean & Simple Quick Cards

How to make 20 diy quick cards

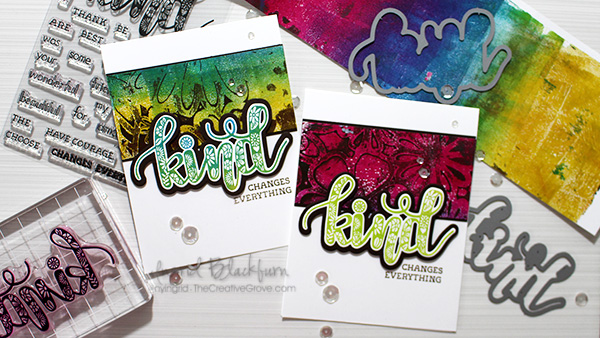
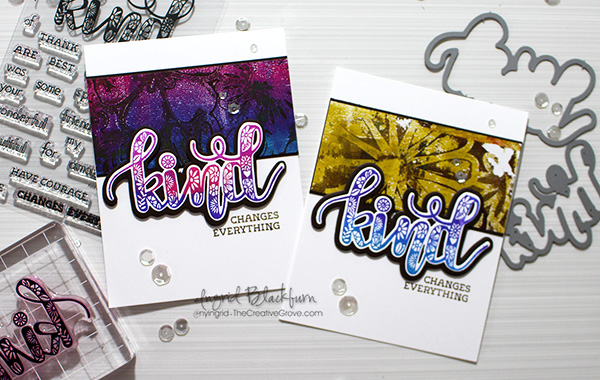
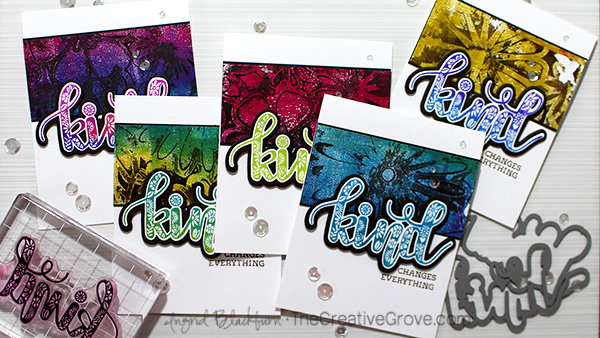
Have you ever created an awesome background that you could quickly turn into several quick cards? Did you know that the Clean & Simple (CAS) style can have some mixed media elements in it? This tutorial will show you just how simple and easy it is to create two backgrounds that you can literally turn into 20, yes – you read that correctly…twenty cards!! Let me show you exactly how…

Watch on YouTube in HD & Subscribe for more Tutorials

Quick Cards Tutorial & Tips

When I’m trying to come up with quick cards, I usually start with a larger background piece. That’s the key for me! Well, that and some great word dies (or large stamp sentiments) and a classic clean and simple design. Cards don’t always have to be complicated. SCREEETCH!!!! Did you just hear that in your head – from little ‘ol me?!! You are on my blog and YouTube channel after all, right? Yes, I love artsy complicated cards and mixed media projects just like the next person – even complex watercolor projects. But not every one has to be uber-complicated. Sometimes simple is better!

How to make 20 quick cards with monoprints

20 quick cards tutorial and tips

What do you love – CAS or Complex designs? Seriously, there’s no right or wrong, but I’m curious – tell me in the comments below & over on my YouTube channel here!

Giveaway alert – I’ll choose one person to send one of these beauties to if you comment on my YouTube channel in the first 72 hours!!

Now that you’ve seen just how easy it is to create those backgrounds – colorful ones too….Here are a few tips you’ll want to keep in mind:

  • Create backgrounds that can be split up – you want the design to be everywhere – not just in one little corner. Yes, in my video, you only see the flowers on one side – but I can quickly stencil something over the clean side too – it’s all in how you look at it, no?
  • Don’t have the Flower Frenzy stencil by The Crafters Workshop (I LOVE their stencils) or any 12 x 12 stencils? No problem – just use your 6×6 ones a few times! But seriously – check out their flower stencils – they have SO many gorgeous ones…
  • To fill up your space if your background piece is small – use a large stamp or die cut like I did. You can always build a sentiment like you see here too
  • Keep the rule of thirds in mind
  • Use powerful colors that make an impact – it helps to have all that white space around as well. The contrast is amazing.

quick cards with monoprints and word dies

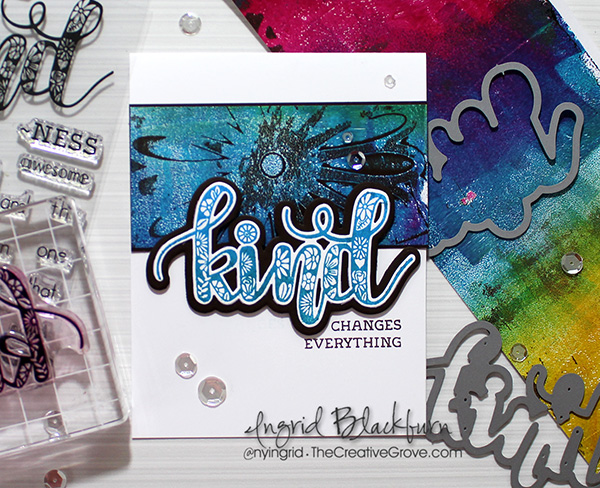
What did you think? That’s one rockin’ die, right? Designed by Nanette Tracy for Catherine Pooler Designs – and newly released last week – don’t miss out on it. Get your hands on the Three Kind Dies and Kind of Wonderful Stamp Set right here! And Catherine Pooler inks are SO super vibrant and saturated, they are the perfect choice when matching to your acrylic paints.

I’ll be back soon with some more Clean and Simple AND Mixed Media designs. And don’t forget to comment on my YouTube Channel!! I’d LOVE to send you one of these cards – I may just include something else that’s fun too!

Till then – keep those fingers inky!

Supplies

To make finding the supplies I used in these projects a bit easier for you, here are a few clickable links. Compensated Affiliate Links are used when possible. Click here for disclosure. Happy Shopping!


All That Jazz: New Release from Catherine Pooler – Blog Hop

Catherine Pooler All That Jazz Ink

Welcome to the All That Jazz release blog hop – Day One! I’ll be honest, every time I type All That Jazz, I hear a broadway chorus sing it and see jazz hands…lol! Now you will too, sorry about that! So, it’s only fitting that we have that singing around in our heads while looking over all the gorgeous inspiration the Creative Team came up with, right?

Today marks the first day of three amazing project inspired days for the next release over at Catherine Pooler Designs. And what a release it is. It’s literally packed with new cool products (many of which I’ve used today), the previous Stamp of Approval Counting Blessings Collection (one of my all time favorites) and drumroll….you’ve been waiting….the ink color All That Jazz.

If you were lucky enough to nab a Naturally Inspired SOA last June, then you have this deep Teal that’s part of the Party Collection of Inks. If not, it’s finally here!!

Catherine Pooler All That Jazz Ink

All that Jazz Tutorial #1

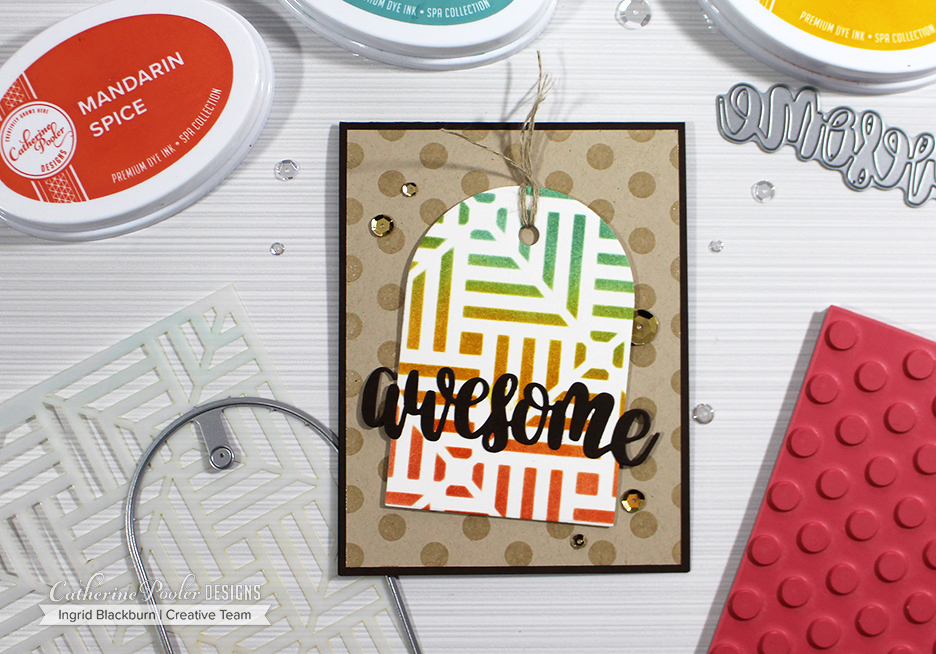
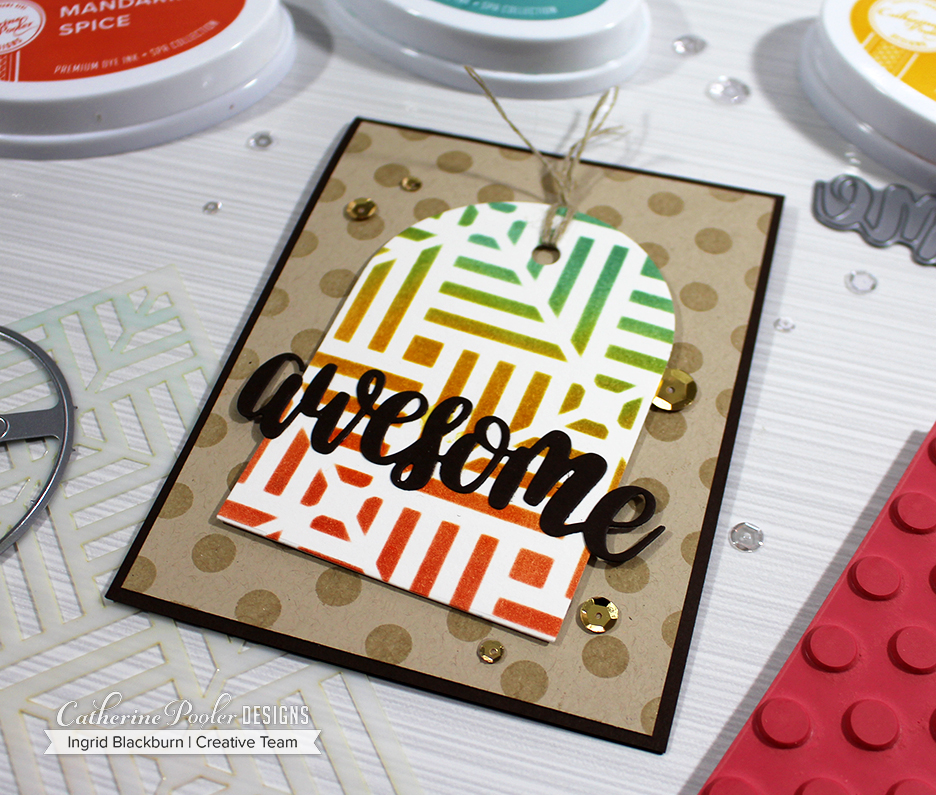
So let’s dive right in. First up is a quick, fun little project that works for just about any occasion….I was tempted to pop a have a…birthday on there, but then decided to leave it just Awesome.

Catherine Pooler Designs Stencils - All that Jazz

Isn’t that stencil pattern just WAY cool? It’s called Square Dance and you can get it on the 20th in the stencil section over at Catherine Pooler Designs. This stencil has SO many possibilities. I’m just getting started. WAIT till you see what I have up my sleeve for it later this week!

To get this look – sponge some Sauna, over lap it with Mandarin Spice and Daylight and voila! I used watercolor paper to get a smooth blend, and then cut out the tag using the Tags, Etc. Dies set. That’s an awesome collection of shapes and embellishment dies that everyone should have.

Pop it up onto a fun simple embossed in clear background using the new Doin’ the Polka Background stamp. Who doesn’t need a fabulous Polka Dot background stamp. They are just the right size – there, but not over powering, you know?

Catherine Pooler Ink - All that Jazz

To keep the muted theme going cut out the new hand lettered awesome die and you’re all set. I just LOVE that Chocolate cardstock. Oh speaking of cardstock….um…did you notice the Sand Dunes? YUP – it’s NEW. The perfect shade of sandy goodness.

All That Jazz Tutorial #2

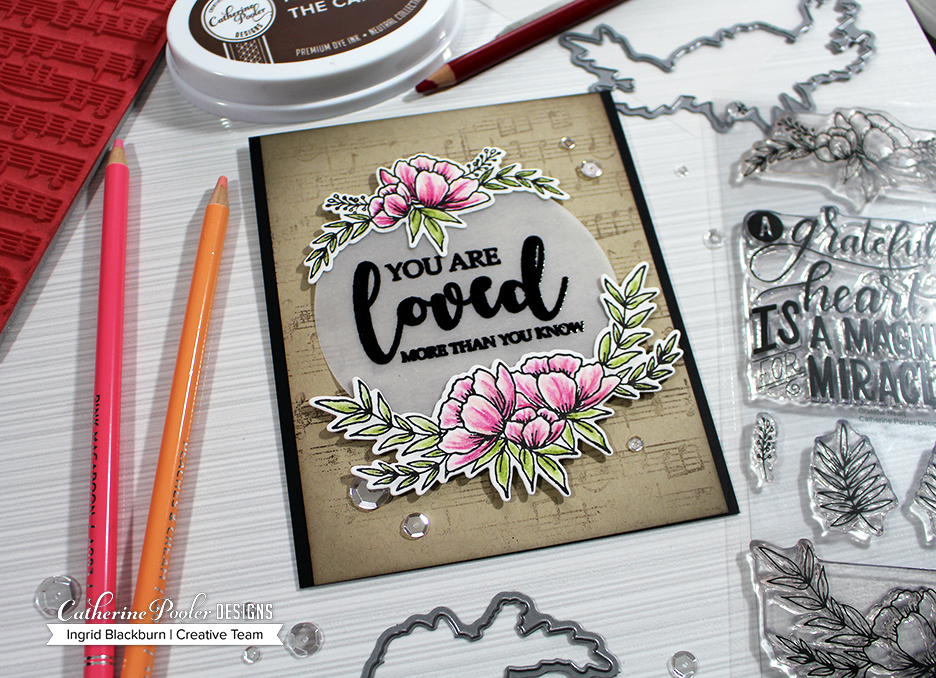
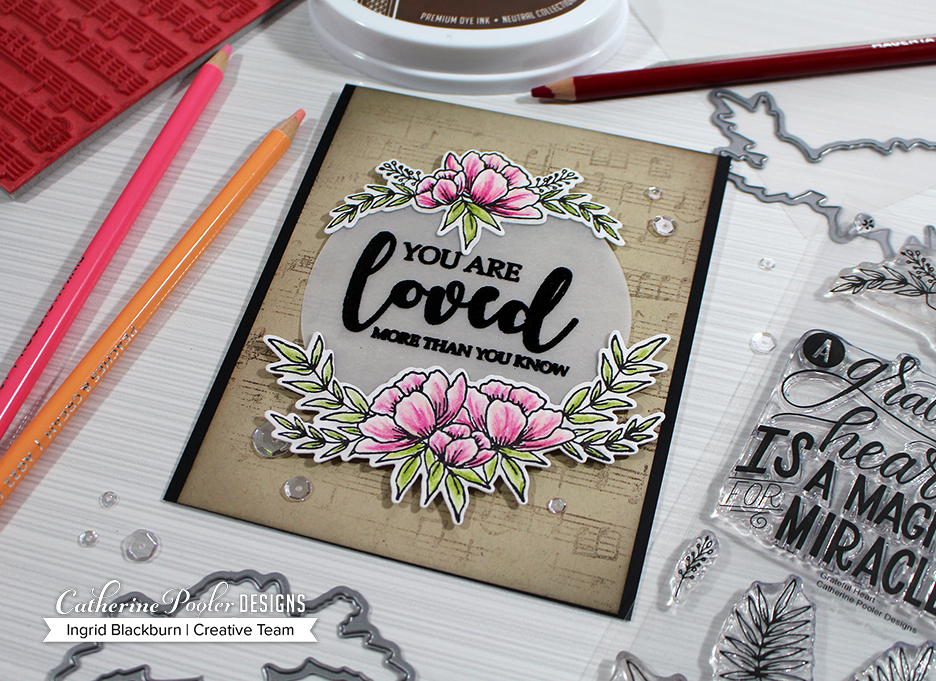
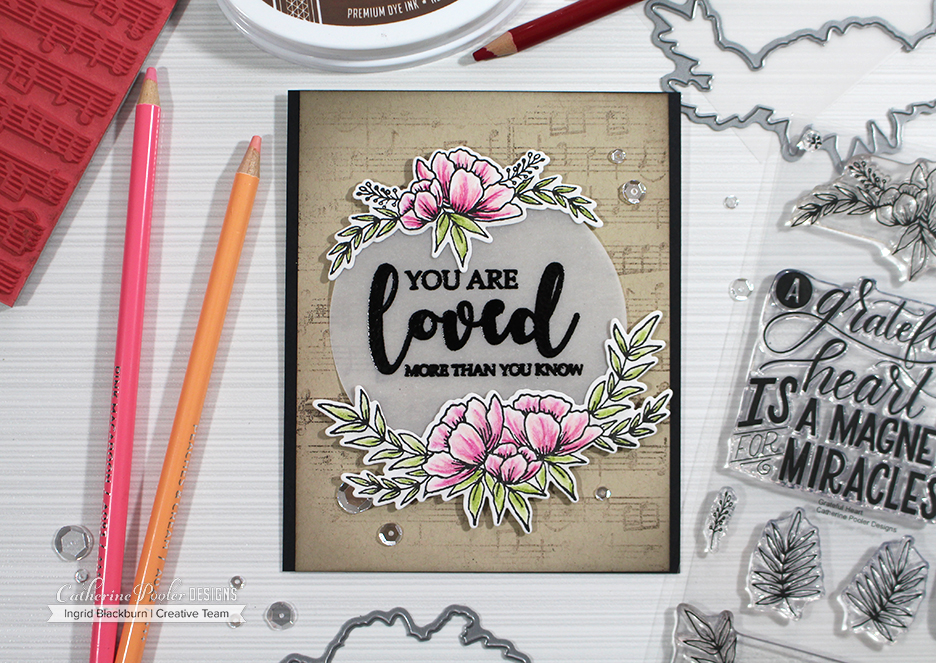
Next up, I have to admit, it’s one of my favorites. When Catherine showed me the Grateful Heart stamp set designed by our very own Creative Team member Lydia Evans, I nearly fell over. True story. This stamp set is SO unbelievably gorgeous it’s crazy! What I love about it the most is that you have all the images as singles AND two huge floral sprays. So masks your own creation, or just stamp – brilliant, right?

All That Jazz Ink Release - Grateful Heart Ingrid Blackburn

First, stamp the two floral sprays in Midnight ink and then use some pretty colored pencil shades to bring then to life. First add some green to the leaves, I used some colored pencils from Arteza, then create some shadows around the images in light grey keeping in mind where your light source is. You’re going to cut them out, so do the shading first.

Now it’s time to color. Start with your darkest shade for your petals, keeping your strokes light. Feather in some light pink and then blush. Blend your colors with some gamsol and a blending stump and you’ve got a beautiful little creation. Cut each spray out with the coordinating dies from the Grateful Heart Dies Collection. Since it’s so intricate, I used some washi tape to hold them in place.

All that Jazz - Catherine Pooler Ink

Next use the Circles Dies to cut a large circle out of the new Vellum Cardstock – YES, another new paper. I’m a sucker for Vellum cardstock. This one is 48# weight and just gorgeous. It’s heavy enough to hold up to techniques, yet you can still see through it. Emboss one of the two sentiments in the set onto your circle and glue your spray keeping them off-centered.

Using that gorgeous Sand Dunes cardstock, imperfectly ink up the new Music Notes background stamp in Icing on the Cake. Take a paper towel and dab a little away. Stamp onto scratch paper and then stamp onto your Sand Dunes cardstock. You want that stamped off look so it doesn’t overpower your card. It’s background music support, the flowers are the main show.

To give the card a soft look, try adding some super light sponging around the border with the icing on the cake. I wanted to keep it not just brown, so I used my black sponge tool. That way whatever was on there from last time, mixed with my brown Icing on the Cake and I got this gorgeous aged look.

TIP – put the pressure on your tool that is off your project, kind of angling it so that you keep the pressure SUPER light.

Grateful Heart Stamp Set and Dies - Ingrid Blackburn

Pop up your flowers and mount onto a black base. My card measures 4.5 x 5.5″. I wanted it a bit wider so it wasn’t too skinny on the sides. I’m sending this card to my mom. I know it’ll make her smile. 🙂

What did you think? I’d love to hear which one is more your style! In addition to the previously released items (counting blessings collection and all that jazz ink pad), there’s also a new hand lettered wonderful die just like the awesome die, and some fun new 6×6 patterned paper – more on that Tuesday ;).

All That Jazz Blog Hop Prizes

Here’s the full hop in case you missed any on the way here. Be sure to comment along the way. There will be five lucky winners that get two free ink pads & free shipping on their order!! 🙂

  1. Catherine Pooler   <– Go Here Next!
  2. Josefine Fouarge   
  3. Melissa Miller  
  4. Jenny Colacicco  
  5. Karen Baker 
  6. Justine Hovey  
  7. Ilina Crouse  
  8. Maureen Merritt  
  9. Allison Cope  
  10.  Ingrid Blackburn  You are here. 🙂

Thanks so much for stopping by today! I hope you loved these couple of projects. Of course if you’re a StampNation member, you’ll get to order early tomorrow – perks of membership! Everything goes on sale Tuesday March 20th over at Catherine Pooler Designs. Be sure to hop along the next two days too. Just start over on Catherine’s blog.

All That Jazz - Catherine Pooler Designs

And stop by here too. I’ll have some more creative fun for you! See you then.

Supplies

To make finding the supplies I used in these projects a bit easier for you, here are a few clickable links. Compensated Affiliate Links are used when possible. Click here for disclosure. Happy Shopping!

FULL Release – Available now!!


Lovely Flowers – Little Touches

Polka Dot Floral Cards

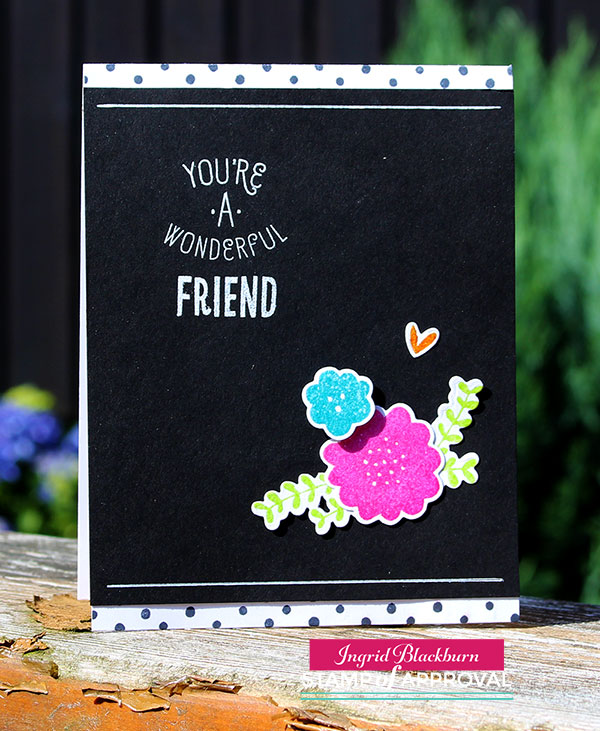
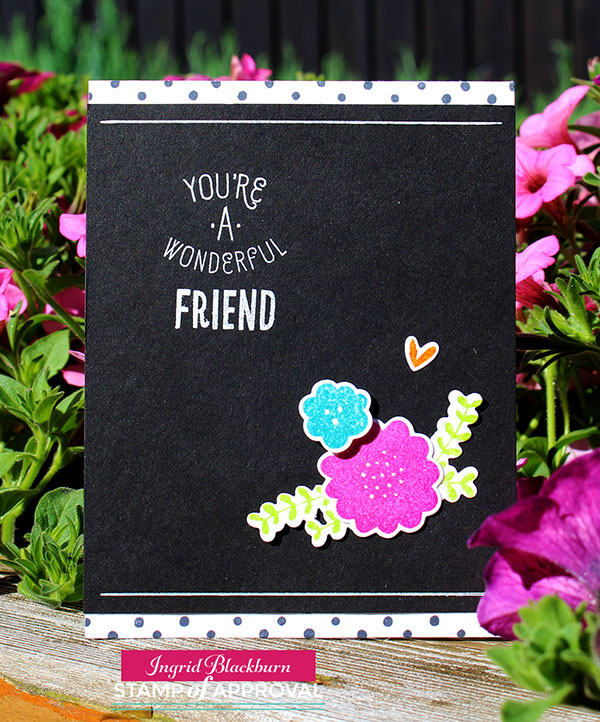
It’s the little touches in cardmaking that make the biggest statements. Today’s project is the perfect case in point. I’m in love with the Lovely Flowers stamp set and matching dies from the Stamp of Approval Lovely Notes Collection.

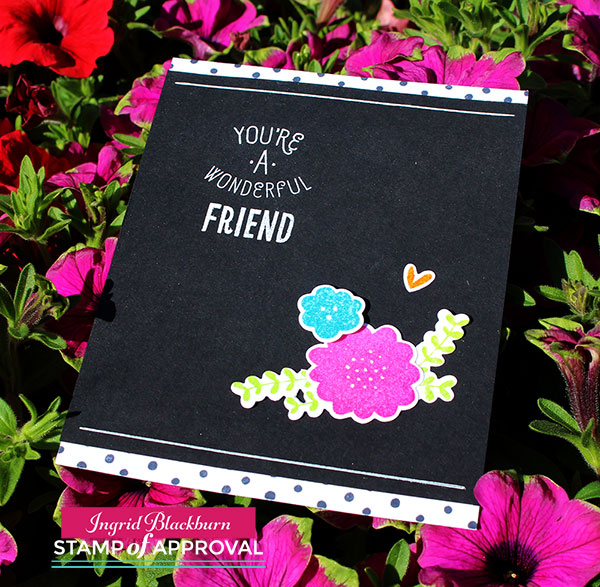
I thought it would be fun to stamp a few simple flowers in bright colors (Distress Picked Raspberry &  Mermaid Lagoon) accent them with some sprigs in Twisted Citron and a little heart in Wild Honey. I LOVE that little heart.

Lovely-Polka-Dots-004


To really make your embellishments pop – try embossing them in clear and then popping them on black like this card! A simple white greeting the opposite corner for balance is all you need.

But that alone isn’t enough. The card was falling a little flat – enter the little touches. Add some polka dots with the dotted stamp from this stamp set (see what I did with it yesterday is a video here) for the top and bottom – or just one. To finish the card off completely – I left off sequins or anything that would clutter it up, and instead try adding a simple white line to the top and bottom. All around would have been too much – remember, little touches.

Lovely-Polka-Dots-005

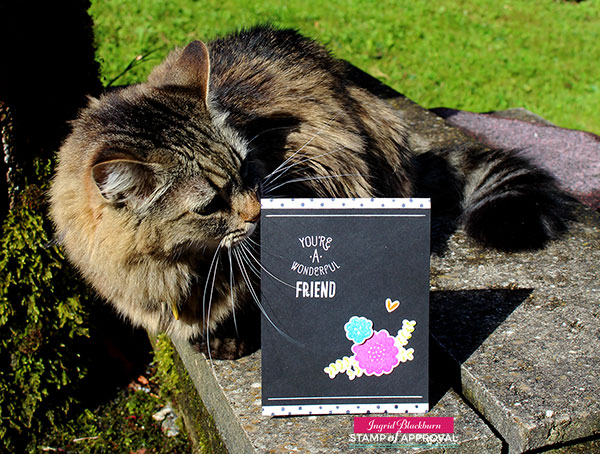
So what do you think? I think Bria likes it…lol! Here’s our gorgeous younger cat – she loves my craft studio…I find her hair everywhere! Do you have a little someone who loves your corner too?

Lovely-Polka-Dots-003

[divider style=”9″]
Lovely Notes SOA Now

If you’ve been hopping along the past few days, the winners were just announce! Head over to Catherine’s Blog to see if you won. 🙂

And if you missed the 18 designers that showcased two-three projects each…here are the links to those Blog Hop days. Have fun!

Day 1               Day 2               Day 3

SO….did you treat yourself to the current Stamp of Approval? Ordering is officially open to the public…don’t wait! It will sell out, and it’s a great collection. To find out more – check out the Stamp of Approval site here.

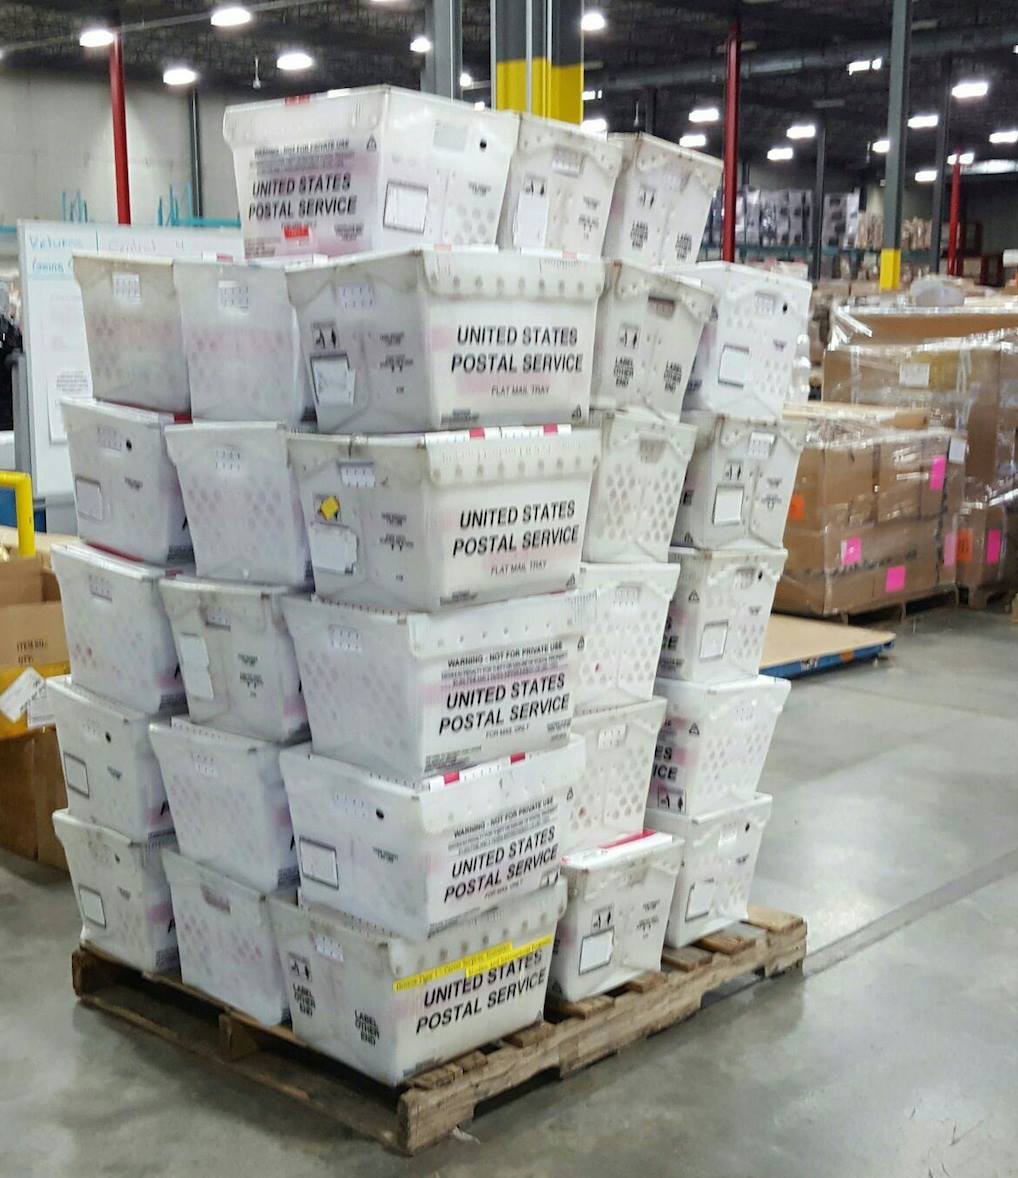
Those that were on the early notice wait list already are set to ship – check out all this goodness headed all over the world!

Stamp of Approval

I can’t wait to see what you all create with this amazing collection – Till next time!

Signature

[optin_box style=”12″ alignment=”center” email_field=”email” email_default=”Enter your email address” integration_type=”aweber” double_optin=”Y” list=”3846012″ name_field=”name” name_default=”Enter your first name” name_required=”Y” opm_packages=””][optin_box_field name=”headline”]Learn more with our exclusive FREE video series:[/optin_box_field][optin_box_field name=”paragraph”]PHA+UGx1cyB5b3XigJlsbCBiZSBhZGRlZCB0byBteSBGUkVFIENyZWF0aXZlIFRpcHMgRS1sZXR0ZXIgd2hlcmUgSSBzaGFyZSBleGNsdXNpdmUgcHJvamVjdHMsIHZpZGVvcyAmYW1wOyB0aGUgMTIgRGF5cyBvZiBDaHJpc3RtYXMgUHJvamVjdCBTZXJpZXM8L3A+Cg==[/optin_box_field][optin_box_field name=”privacy”][/optin_box_field][optin_box_field name=”top_color”]undefined[/optin_box_field][optin_box_button type=”0″ button_below=”Y”]Get Instant Access![/optin_box_button] [/optin_box]

SOA Lovely Notes Blog Hop

Lovely Notes SOA Blog Hop

Welcome to the Lovely Notes Collection Blog Hop – Day 3! What do you think so far…pretty amazing, right? Well I hope to add a little creative inspiration for you today with a few projects. I’ve been sharing a few projects over the past few days – this collection is so easy to create with, and I have so much more to keep sharing with you this week.

The Stamp of Approval Lovely Notes Collection is a curated collection of stamps and dies that work fabulously together or alone. Not only do you get a box FULL of amazing stamps and dies, but you’ll get a downloadable PDF Project Guide (for free!) with tons of project tutorials using them!

The stamps and dies in the Stamp of Approval Collections are brand new on the market and won’t be released for individual sale for several months. To find out how to get a box, you have to be on the wait list! Yes, these boxes sell out so fast – the last one was gone in 33 hours….so don’t wait. The wait list will find out before the public will. Click Here to sign up for the wait list and find out more.

Today I’m going to inspire you with several of the components of this collection. Specifically the Lovely Flowers, Lovely Flowers & Banners Dies, Lovely Lattice Background, Butterfly Notes, Wonderful Wreath – all by Catherine Pooler Designs, and Handpainted Thanks by Neat & Tangled. So let’s get right to it with a little Christmas in July, here are your tutorials!

Lovely Notes Project Tutorials

Wonderful Wreath

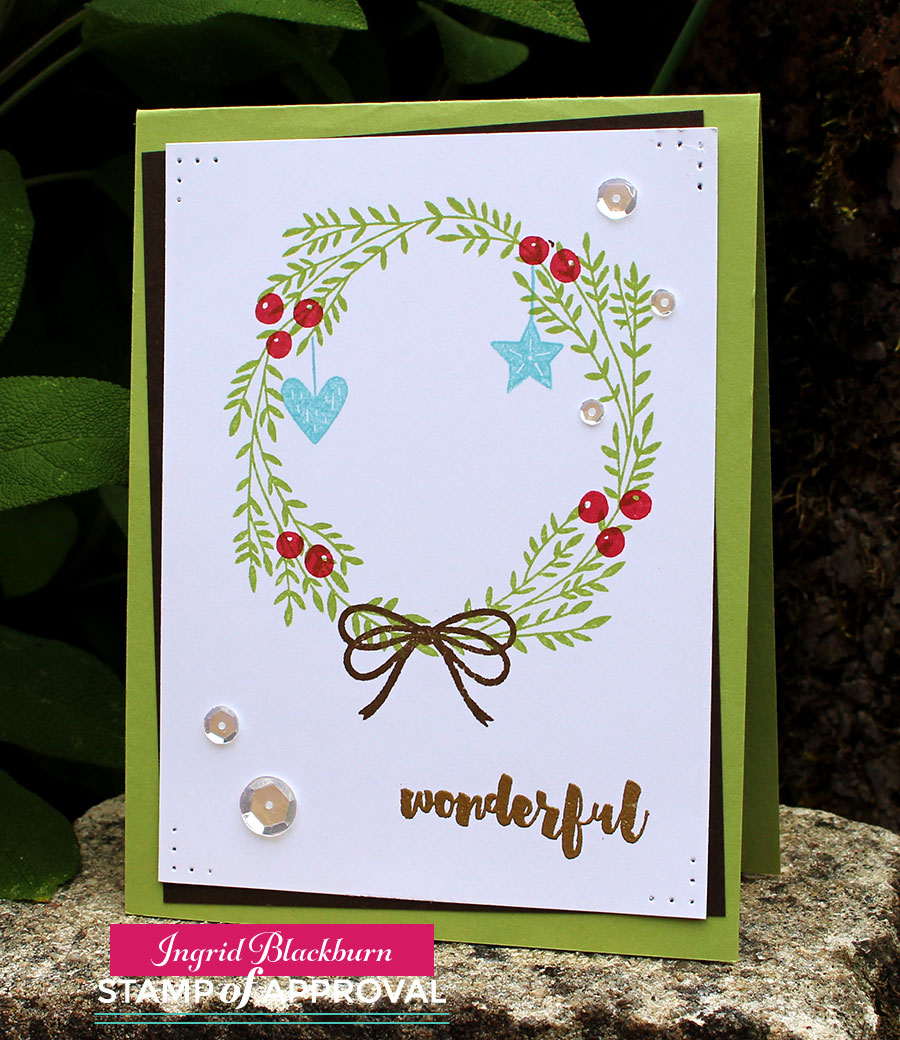
I was in love with this wreath the moment I saw it. It reminds me of olive branches – delicate and whimsical. To get this clean and simple look, stamp your wreath on white in Stampin Up Pear Pizzazz, the berries in Primrose Petals, hang some ornaments in Baja Breeze and tie it all up with an Early Espresso bow. It was that simple. This is a GREAT mass produced card.

Lovely-Notes-SOA-Project-2---Ingrid-Blackburn-001


For an elegant touch, emboss your greeting in Gilded Gold by Brutus Monroe – my new favorite gold. Add a few sparkling clear sequins by Pretty Pink Posh and a little simple paper piecing in the corners finishes it off.

I’m addicted to the tilt for the matte in the background (thanks Maureen!) – a little Early Espresso on a Pear Pizzazz card base. It’s that simple.

Thanks Friend

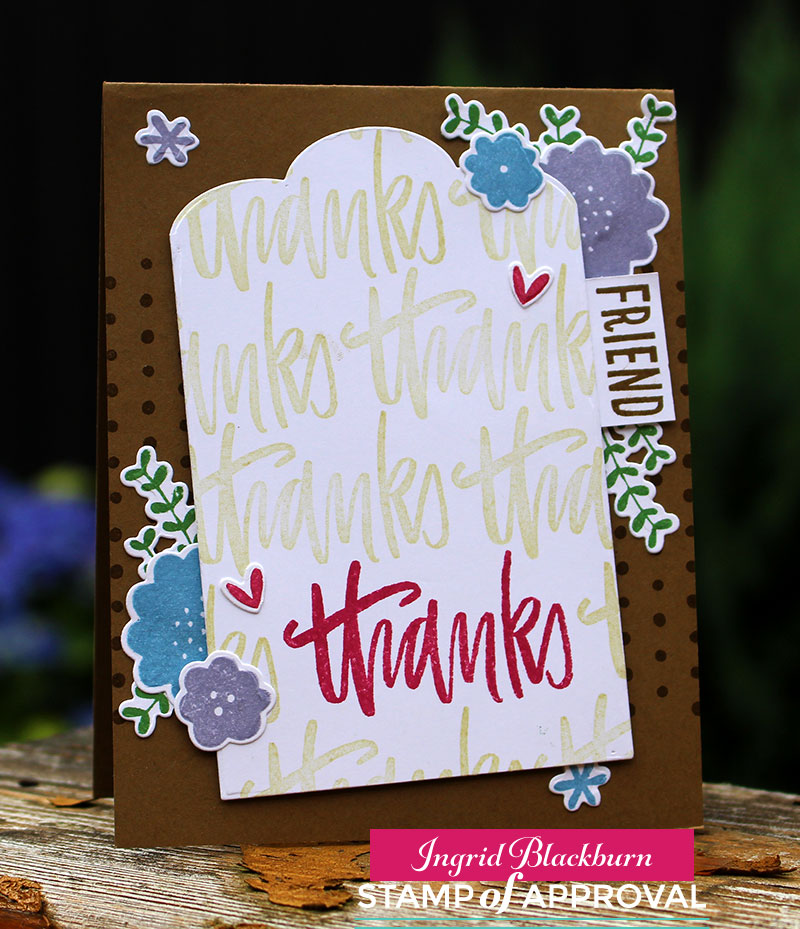
This awesome handpainted Thanks stamp by Neat & Tangled is my new favorite greeting – I love bold scripty greetings. I used this stamp just one way – did you know there are two others that layer for a multi tone effect! How cool is that?

You’ll want to stamp some of the Lowely Flowers and cut them using the coordinating Dies. I used the Stampin Up colors – Marina Mist, Wisteria Wonder, Rose Red & Garden Green. On a large piece of white scrap paper – at least card front size, stamp the thanks towards the bottom center/right. Repeatedly stamp thanks in a light neutral tone, I used River Rock. TIP – alter where the word starts on each line so that it flows.

Lovely Notes SOA Collection - Ingrid Blackburn


Stamp the dots from Lovely Flowers in the middle 2/3 of the Soft Suede card base. I stamped it completely across so that the left and right side were even.

Cut your tag out using the large banner die from the Lovely Flowers & Banners Dies set. Try to place the Rose Red Thanks a bit off centered to the right at the bottom. You definitely want some neutral below as well. Stamp the word Friend from the Lovely Flowers Stamp set in Soft Suede on a piece of scrap and attach to your tag.

Pop the tag up using Foam Tape or Fun Foam and adhere your embellishments. TIP – The leaf branch has three sprigs – I cut mine apart to get it just right – sometimes just one or two.

That’s it – it’s a cute card – I had way too much fun with the Lovely Flowers stamps & dies as you’ll see tomorrow!

Bold Watercolor Greetings

If you’ve followed me for a while here, on YouTube or in an online class – you know I love to watercolor! This project takes some of the various greetings in this collection and puts them to good use. I wanted greetings that would stand out, so I used two from Lovely Flowers, one from Butterfly Notes and one of my new favorite Thanks from Handpainted Thanks. Here’s a video tutorial for you:

Click Here to watch video in HD on YouTube

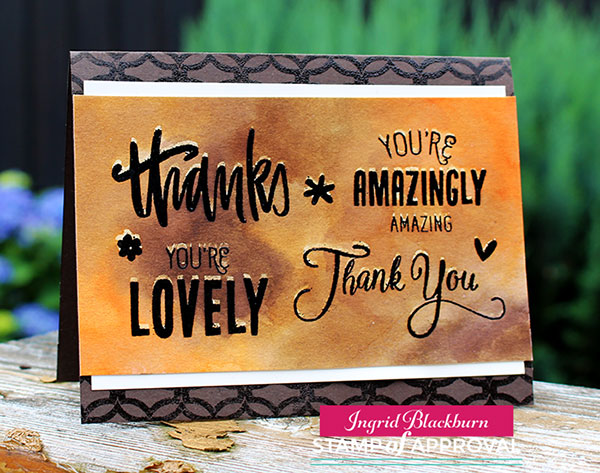
To get this outline look, first stamp your images in versamark. Go back over them with a de-static tool and stamp again in Versafine Onyx Black Ink. Emboss in Black and heat set. Once cool, secure your project down with low tack painters tape on the upper and lower edges.

Smoosh some Distress Ink onto your craft mat or acrylic block – I used Rusty Hinge, Ground Espresso, Gathered Twigs and Vintage Photo. Grab some ink with a large wet brush and start painting onto your dry watercolor paper. You want your watercolor to flow together without getting out of control.

Handpainted Thanks - Lovely Notes Collection - Ingrid Blackburn

TIP – if your paper accumulates too many puddles or your colors blend out of control, gently dip the edge of a dry paper towel into a puddle to sop it up without removing color. Or use a thirsty brush (Not dripping wet). Water will naturally be attracted to a dry surface.

Once you have the look you want, heat set or allow to dry on it’s own. TIP – keep some lighter areas along with dark for a balance.

Stamp the Lovely Lattice Background stamp in Ground Espresso onto a folded Espresso card base. I just inked up the top and bottom. Quickly dip into clear embossing powder and heat set for a tone on tone look. If using a vanilla or white background, use Versamark ink for a watermark look. The key is not to compete with your watercolor, but rather support it.

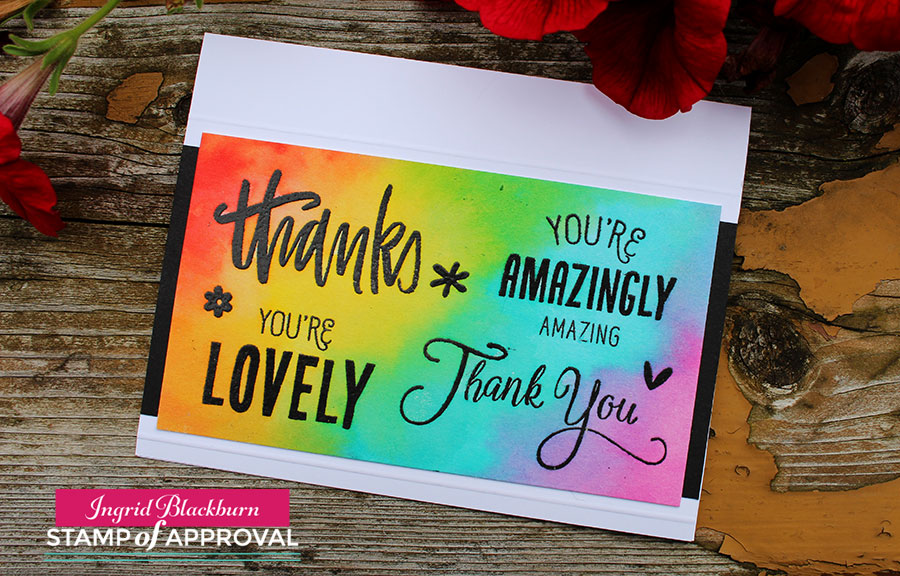
It’s a pretty quick and easy project. I made four as I wasn’t sure of the look I wanted. Here’s a rainbow one too:

Lovely Notes Stamp of Approval Ingrid Blackburn


I added a little dry embossed line to the top and bottom for a simple embellishment. No matter what color combination you choose, you’ll love this technique.

Now that you have some inspiration…time to find out just how you can win a free box!

Lovely Notes SOA Win

It’s your turn to hop along and check out what the uber talented Amy Tsutura has in store for you next! Here’s the blog hop list:

Catherine Pooler

Neat and Tangled

Kristie Goulet

Yoonsun Hur

Ingrid Blackburn – That’s Me * You are here*

Amy Tsuruta You’re next stop!

Justine Hovey

Be sure to leave a comment on each designers blog for a chance to win a Lovely Notes Collection of your own! There’s a giveaway for all three days of the hop! If you missed out on any of the Blog Hops – start at the beginning with Catherine’s Blog and Day 1.

And stop by tomorrow for more inspiration –

Signature

[optin_box style=”12″ alignment=”center” email_field=”email” email_default=”Enter your email address” integration_type=”aweber” double_optin=”Y” list=”3846012″ name_field=”name” name_default=”Enter your first name” name_required=”Y” opm_packages=””][optin_box_field name=”headline”]Learn more with our exclusive FREE video series:[/optin_box_field][optin_box_field name=”paragraph”]PHA+UGx1cyB5b3XigJlsbCBiZSBhZGRlZCB0byBteSBGUkVFIENyZWF0aXZlIFRpcHMgRS1sZXR0ZXIgd2hlcmUgSSBzaGFyZSBleGNsdXNpdmUgcHJvamVjdHMsIHZpZGVvcyAmYW1wOyB0aGUgMTIgRGF5cyBvZiBDaHJpc3RtYXMgUHJvamVjdCBTZXJpZXM8L3A+Cg==[/optin_box_field][optin_box_field name=”privacy”][/optin_box_field][optin_box_field name=”top_color”]undefined[/optin_box_field][optin_box_button type=”0″ button_below=”Y”]Get Instant Access![/optin_box_button] [/optin_box]

Using Recycled Materials on Cards

Have you every thought to use Recycled Materials on your cards before? This month over at Happy Little Stampers, the challenge is just that – Recycle. This one threw me. Yes, I could come up with lots of 3D projects, and that was where my head kept going…but I wanted to challenge myself to a card. So what do you use? Well, you can use anything that your recycling!

HLS Mixed Media challenge July 2016

I’m currently living in Germany – and recycling is a MAJOR thing here. SO big, that it’s the #2 country in the world for diverting 62% of its trash from landfills – second only to Austria which diverts 63% of all trash. And it’s no joke over here – our recycling calendar is insane – almost all garbage is separated. (And in case you were wondering where the US stacks up…34% – toward the end of the middle pack)

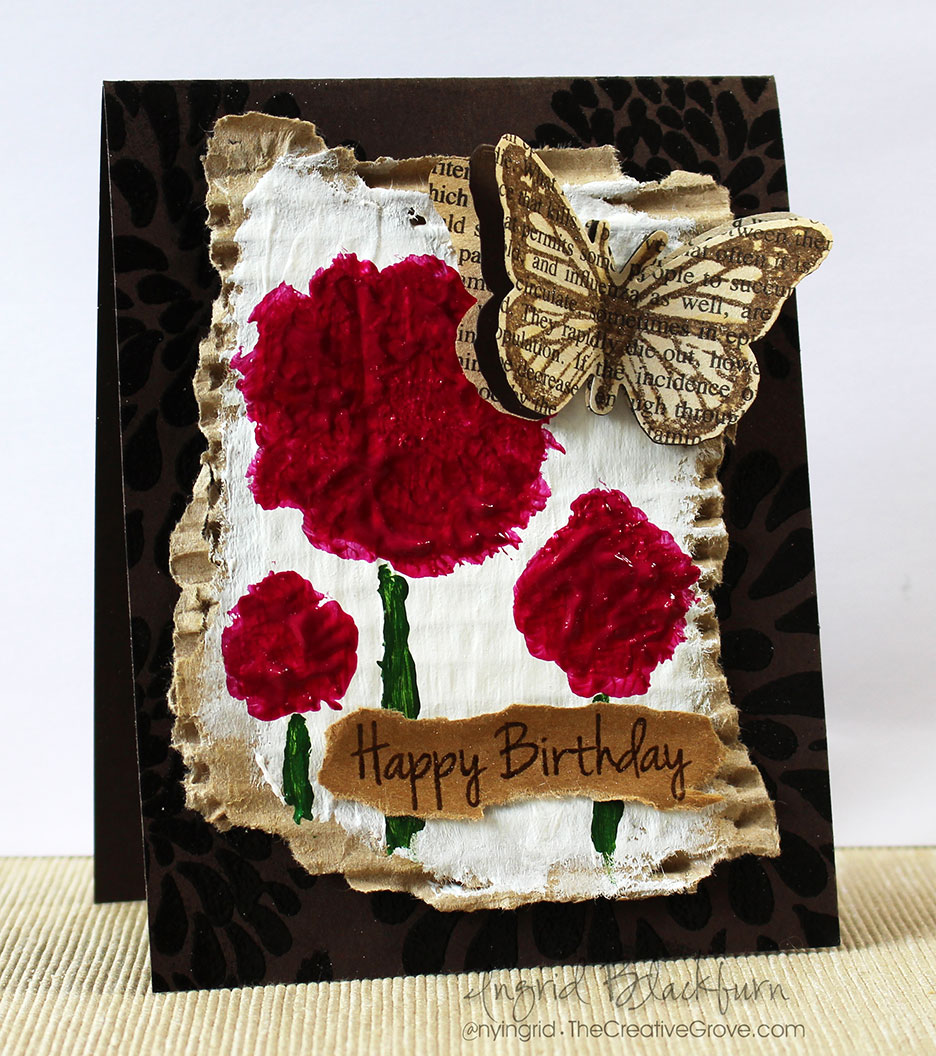
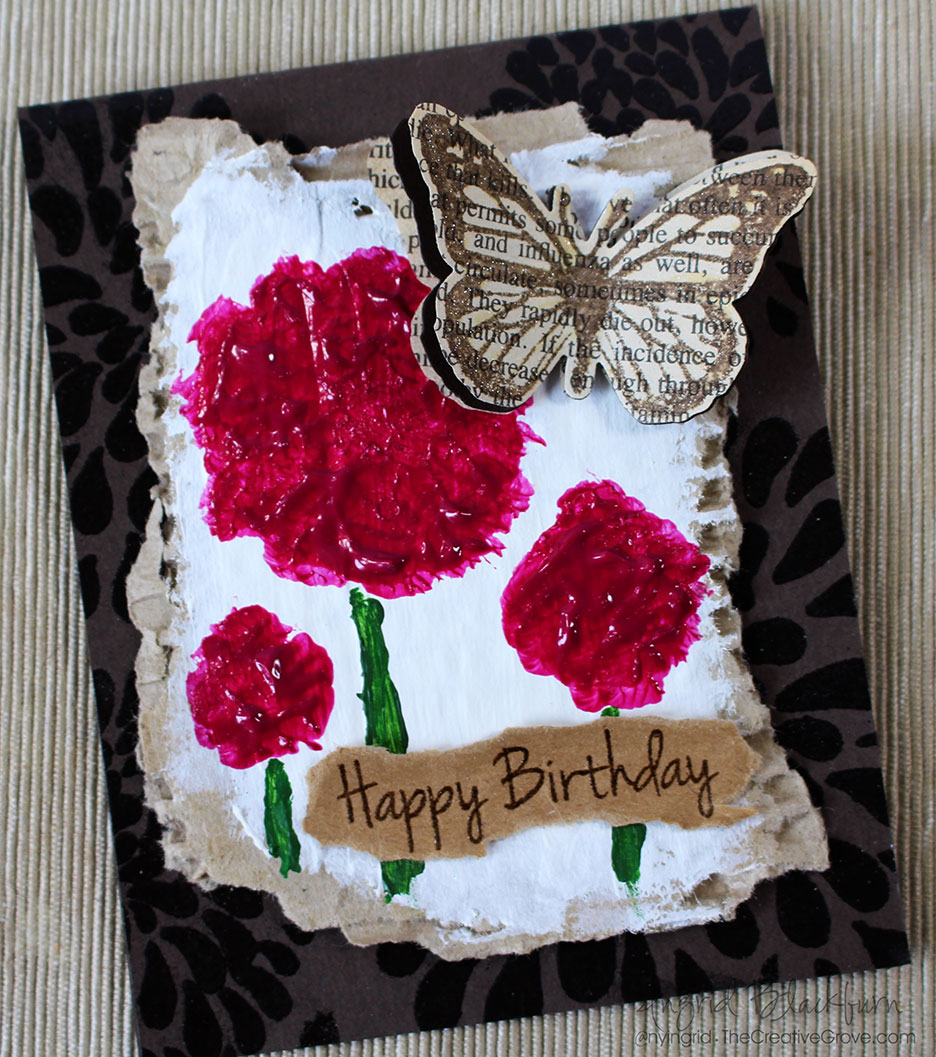
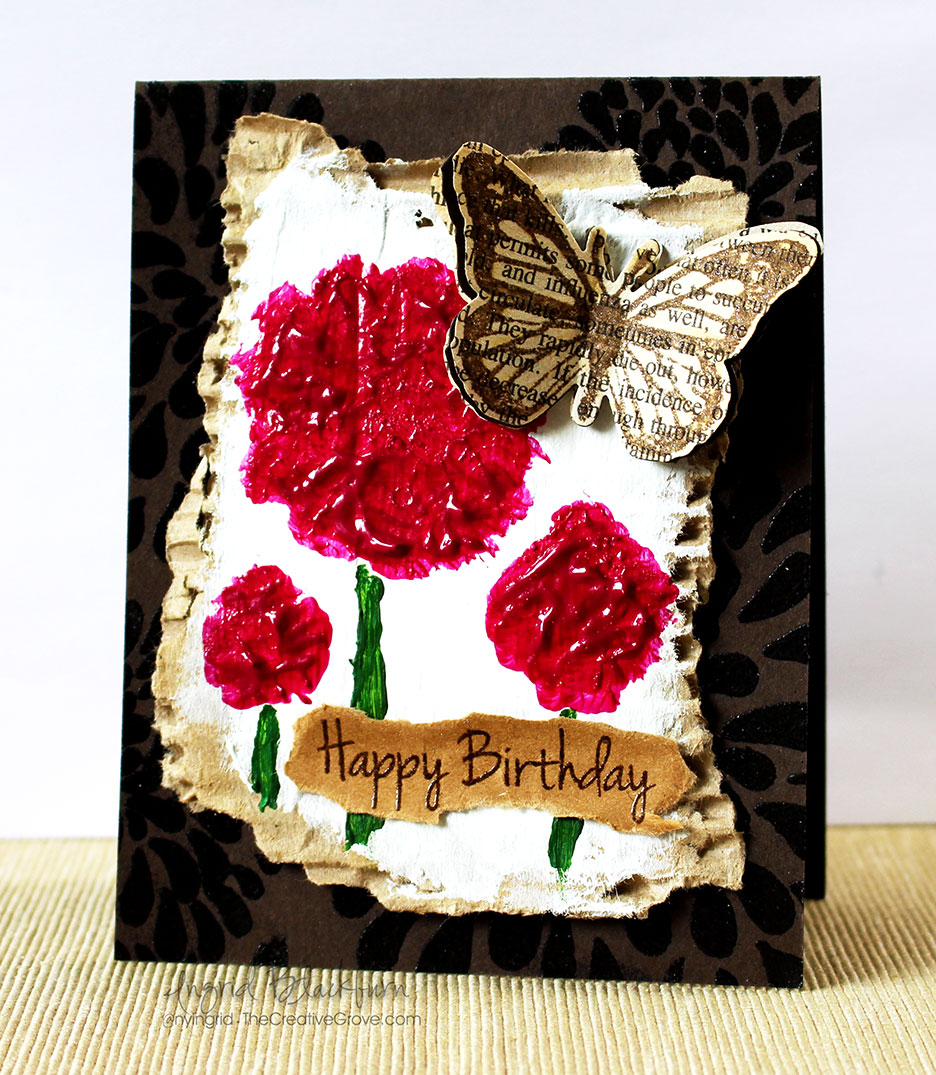
So, I thought it was appropriate that I add my fair share on this project. With the exception of my card base, and one tiny die cut, all my materials (paper) used on this project are…yup, you guessed it – recycled!

Recycle-Mixed-Media-Card-Ingrid-Blackburn---001

Be sure to stop by this month’s guest designer – Stephanie Lanzalotto’s blog as well as the other design team members blogs.

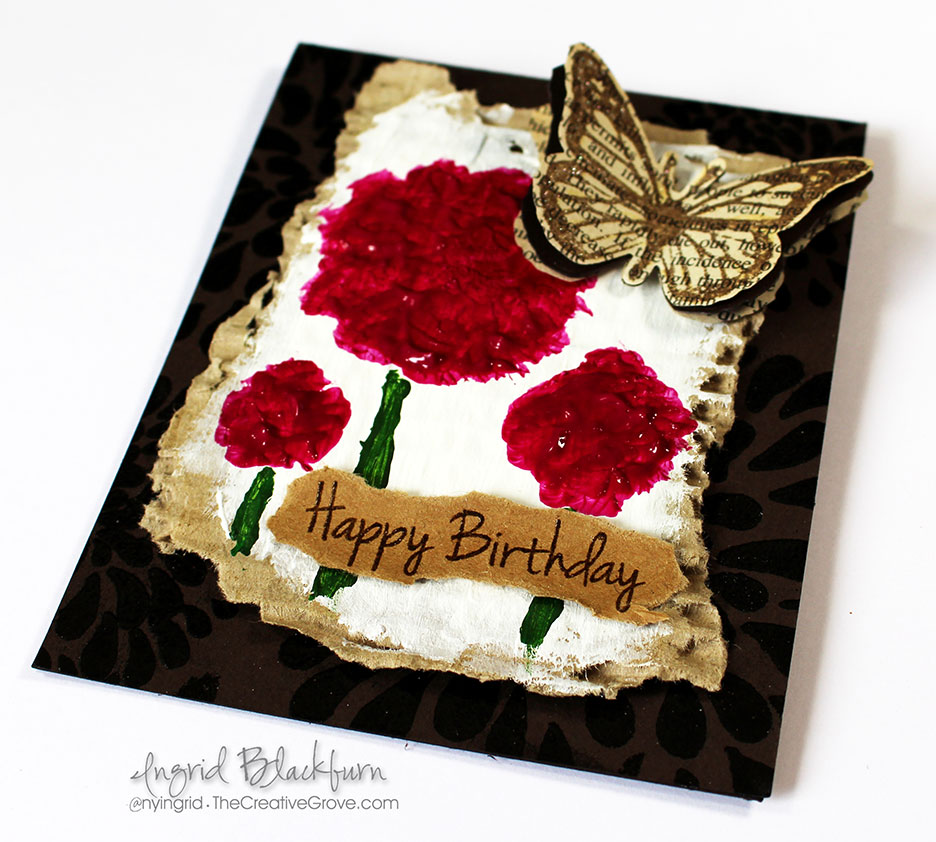
Recycled Birthday Butterfly Tutorial

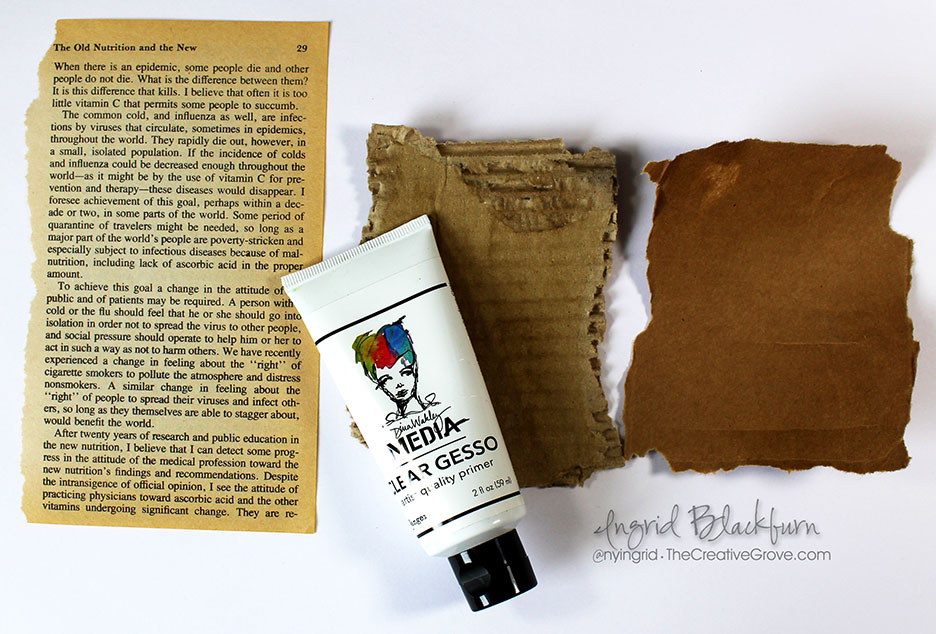
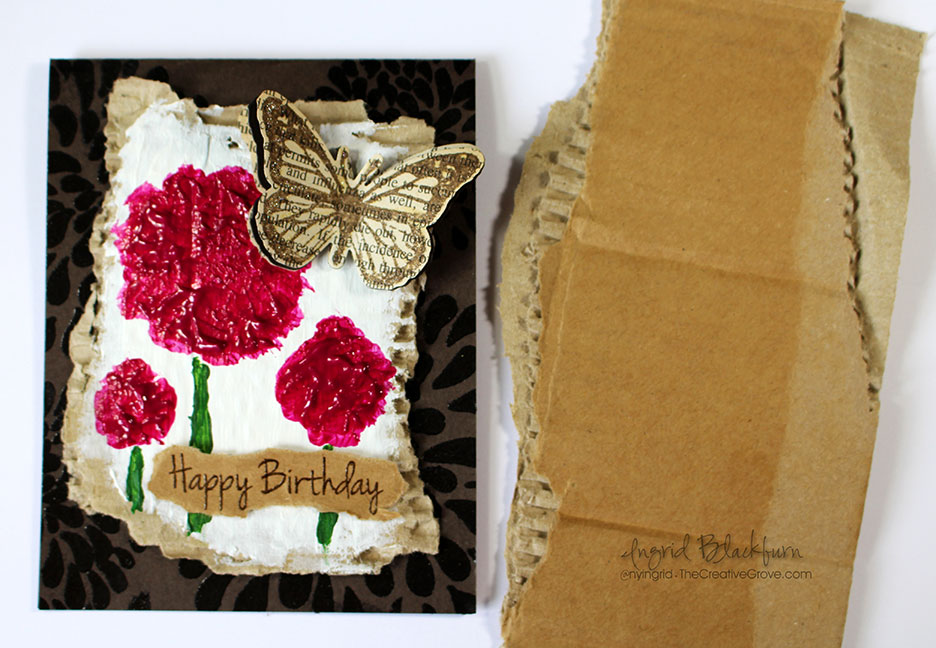
My card front is made of something we ALL have plenty of – a torn up box from Amazon. The base of my painting is the corrugated inside of the box. I tore it so you can see a little more of the texture and character. In order to have the paint really grab onto my cardboard without sinking into it, I first covered it with some clear gesso.

To make the piece lighter, remove one of the slick sides that cover the corrugated part – I used that for the greeting…yup – that’s not card stock – it’s recycled cardboard!

Recycled-Mixed-Media-Card-Ingrid-Blackburn--007

For the butterflies, I used a page from an old book. I definitely wanted to have some discoloration on the pages. If you don’t want to break apart a book, try newspaper!

  • Tear a piece of the box the size you want and remove one of the slick sides for later.
  • Paint some clear gesso onto your recycled cardboard piece.

Recycled Materials in Cards

  • Cover your cardboard in a few coats of white acrylic paint – this will become the background for your painting.
  • While your white is drying (I sped mine up a bit with a heat tool), stamp your butterfly from the HLS Butterfly Birthday set in Ground Espresso onto a page from an old book.
  • Layer your stamped butterfly over a piece of espresso card stock and another piece from the book – die cut at once.
  • Curl up the card stock and stamped layers a bit. Attach to each other using mini glue dots at the butterfly body.
  • Separate the top and middle layer with a foam dot cut in half. This will help to pop up those top wings.

Recycled-Mixed-Media-Card-Ingrid-Blackburn--006

  • Once your white is dry, add some pink flowers by thickly applying some acrylic paint with a rounded brush. To get the texture, just keep dabbing in a push down motion and move to another area. I left it rather thick so that it would give the appearance of petals.
  • Add stems with a little sap green mixed with Burnt Umber for an olive green look. I needed to use a smaller brush to keep the stems from being too thick.
  • Allow your flowers to dry – I used a heat tool a little, and then allowed the flowers to dry over several hours. Once dry, they had a shiny appearance.

Painted Mixed Media Flowers - Recycled

  • Stamp your greeting (HLS Doodled Flowers) using Ground Espresso Distress Ink onto the back piece of card board that you separated from the center & front. I used the slick side as the reverse had the imprint from the corrugated part.
  • Immediately dip your greeting into clear embossing powder and heat set. To see how I use distress inks with embossing powders and other embossing techniques – click here for a great video tutorial.
  • Tear closely around your greeting and adhere to your project using Multi Medium Matte or glue (be sure your stems are dry!)

Happy Little Stampers Mixed Media Challenge - Recycled

  • Smoosh a versamark pad through the Patina stencil by Penny Black so that creates a border on your card base. I didn’t want to add too many layers, as the recycled cardboard was heavy enough.
  • Add clear embossing powder and heat set.
  • Adhere your cardboard card front to the card base using glue on the ridges.
  • Go over your stamped butterfly image with a Spectrum Noir glitter pen & Attach to your painted base using foam dots.

Patina Stencil - Penny Black - Recycle

So what do you think? I bet you think twice about throwing out that Amazon box next time…lol! The best part about this Mixed Media card is that the recycled cardboard has such great texture! And to think I usually use it just to add lines with acrylic paints! Thanks for joining me today, I hope I inspired you in some way to use some recycled materials on your cards. I can’t WAIT to see what you come up with.

Join us over at Happy Little Stampers Mixed Media Challenge – now it’s your turn.

Go get those fingers inky –

Signature

[optin_box style=”12″ alignment=”center” email_field=”email” email_default=”Enter your email address” integration_type=”aweber” double_optin=”Y” list=”4161292″ name_field=”name” name_default=”Enter your first name” name_required=”Y” opm_packages=””][optin_box_field name=”headline”]Learn more with our exclusive FREE video series:[/optin_box_field][optin_box_field name=”paragraph”]PHA+UGx1cyB5b3XigJlsbCBiZSBhZGRlZCB0byBteSBGUkVFIENyZWF0aXZlIFRpcHMgRS1sZXR0ZXIgd2hlcmUgSSBzaGFyZSBleGNsdXNpdmUgcHJvamVjdHMsIHZpZGVvcyAmYW1wOyB0aGUgMTIgRGF5cyBvZiBDaHJpc3RtYXMgUHJvamVjdCBTZXJpZXM8L3A+Cg==[/optin_box_field][optin_box_field name=”privacy”][/optin_box_field][optin_box_field name=”top_color”]undefined[/optin_box_field][optin_box_button type=”0″ button_below=”Y”]Get Instant Access![/optin_box_button] [/optin_box]

Easy Texture in Mixed Media

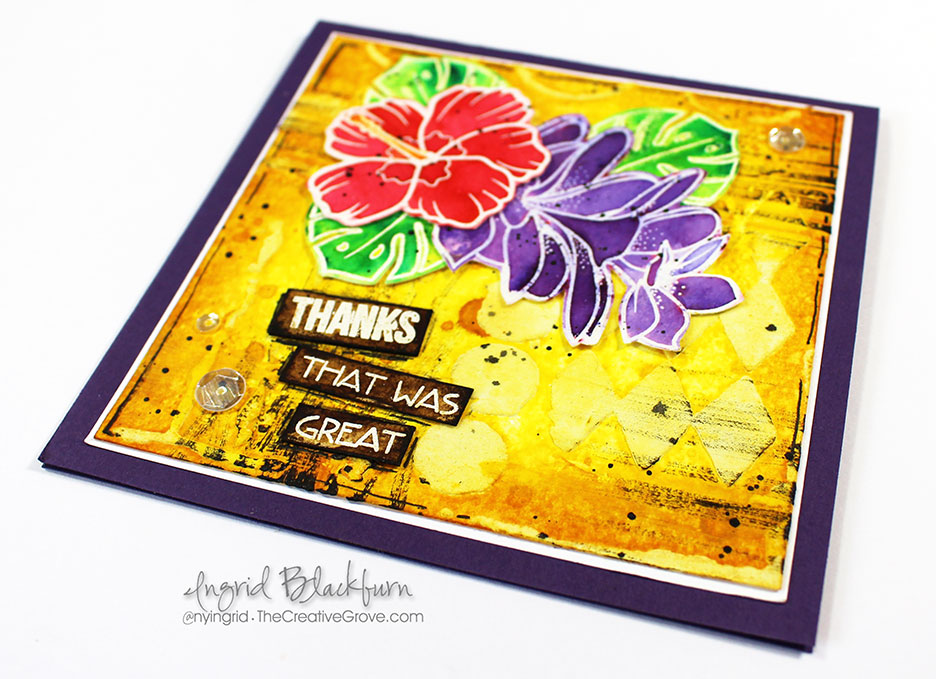
Mixed-Media-Tropical-Thanks-001

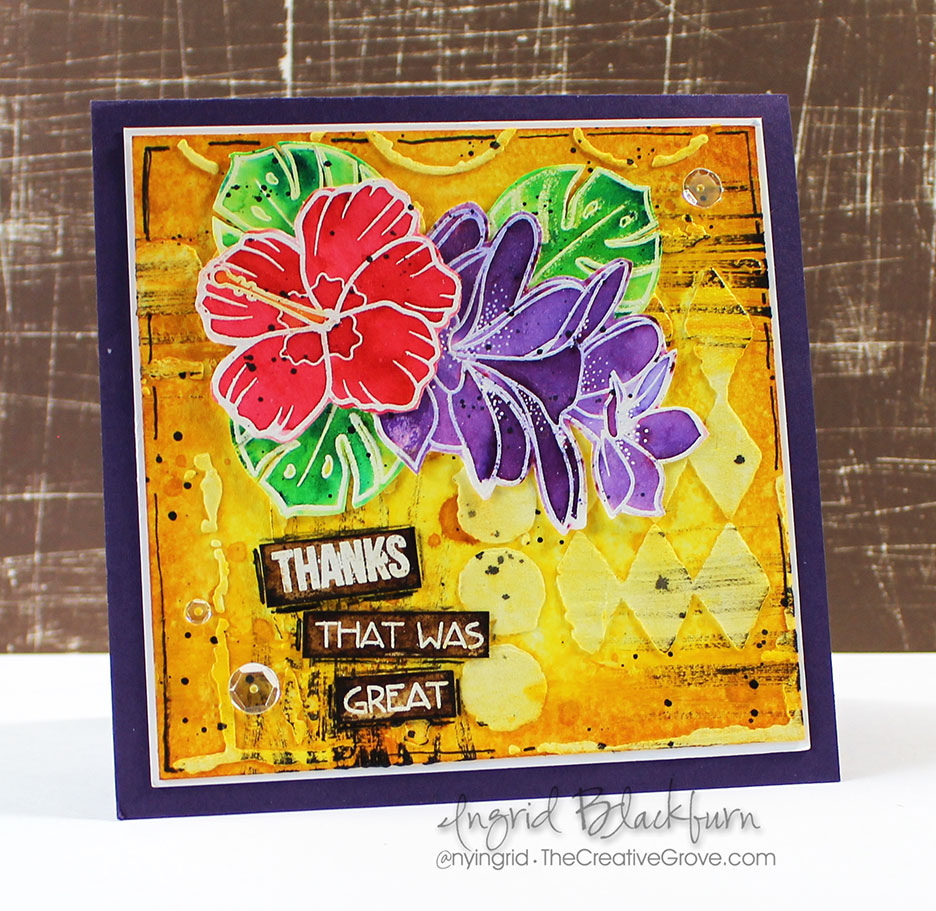
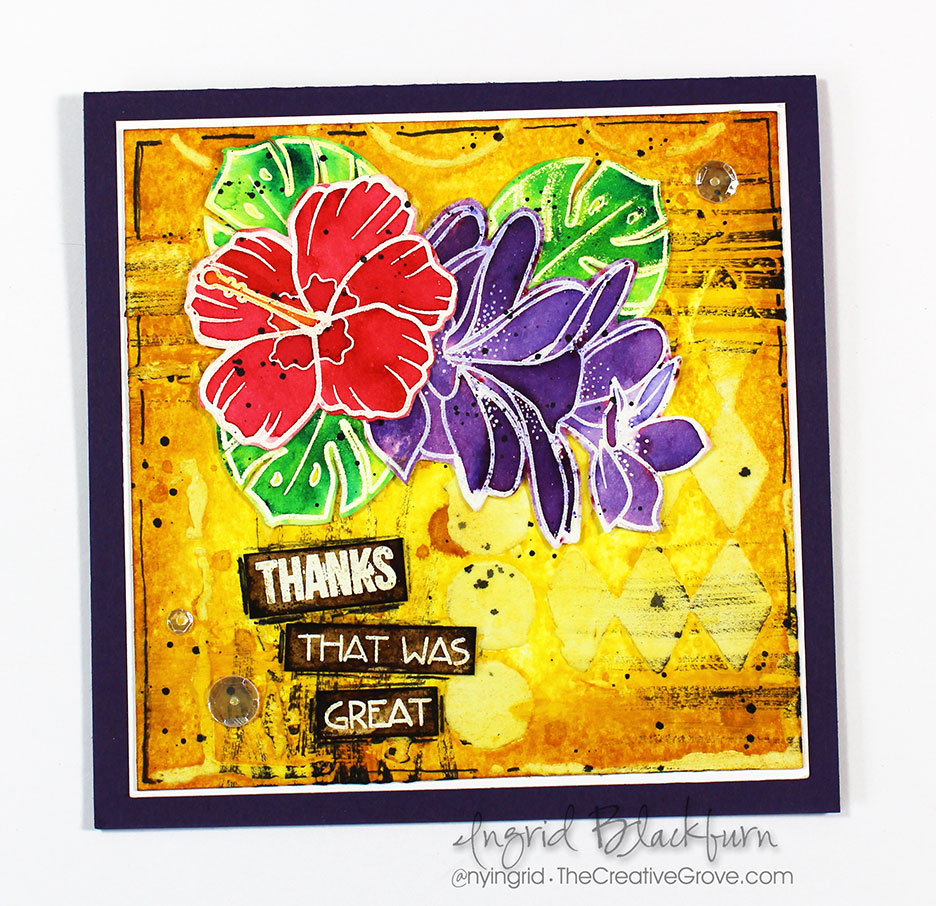
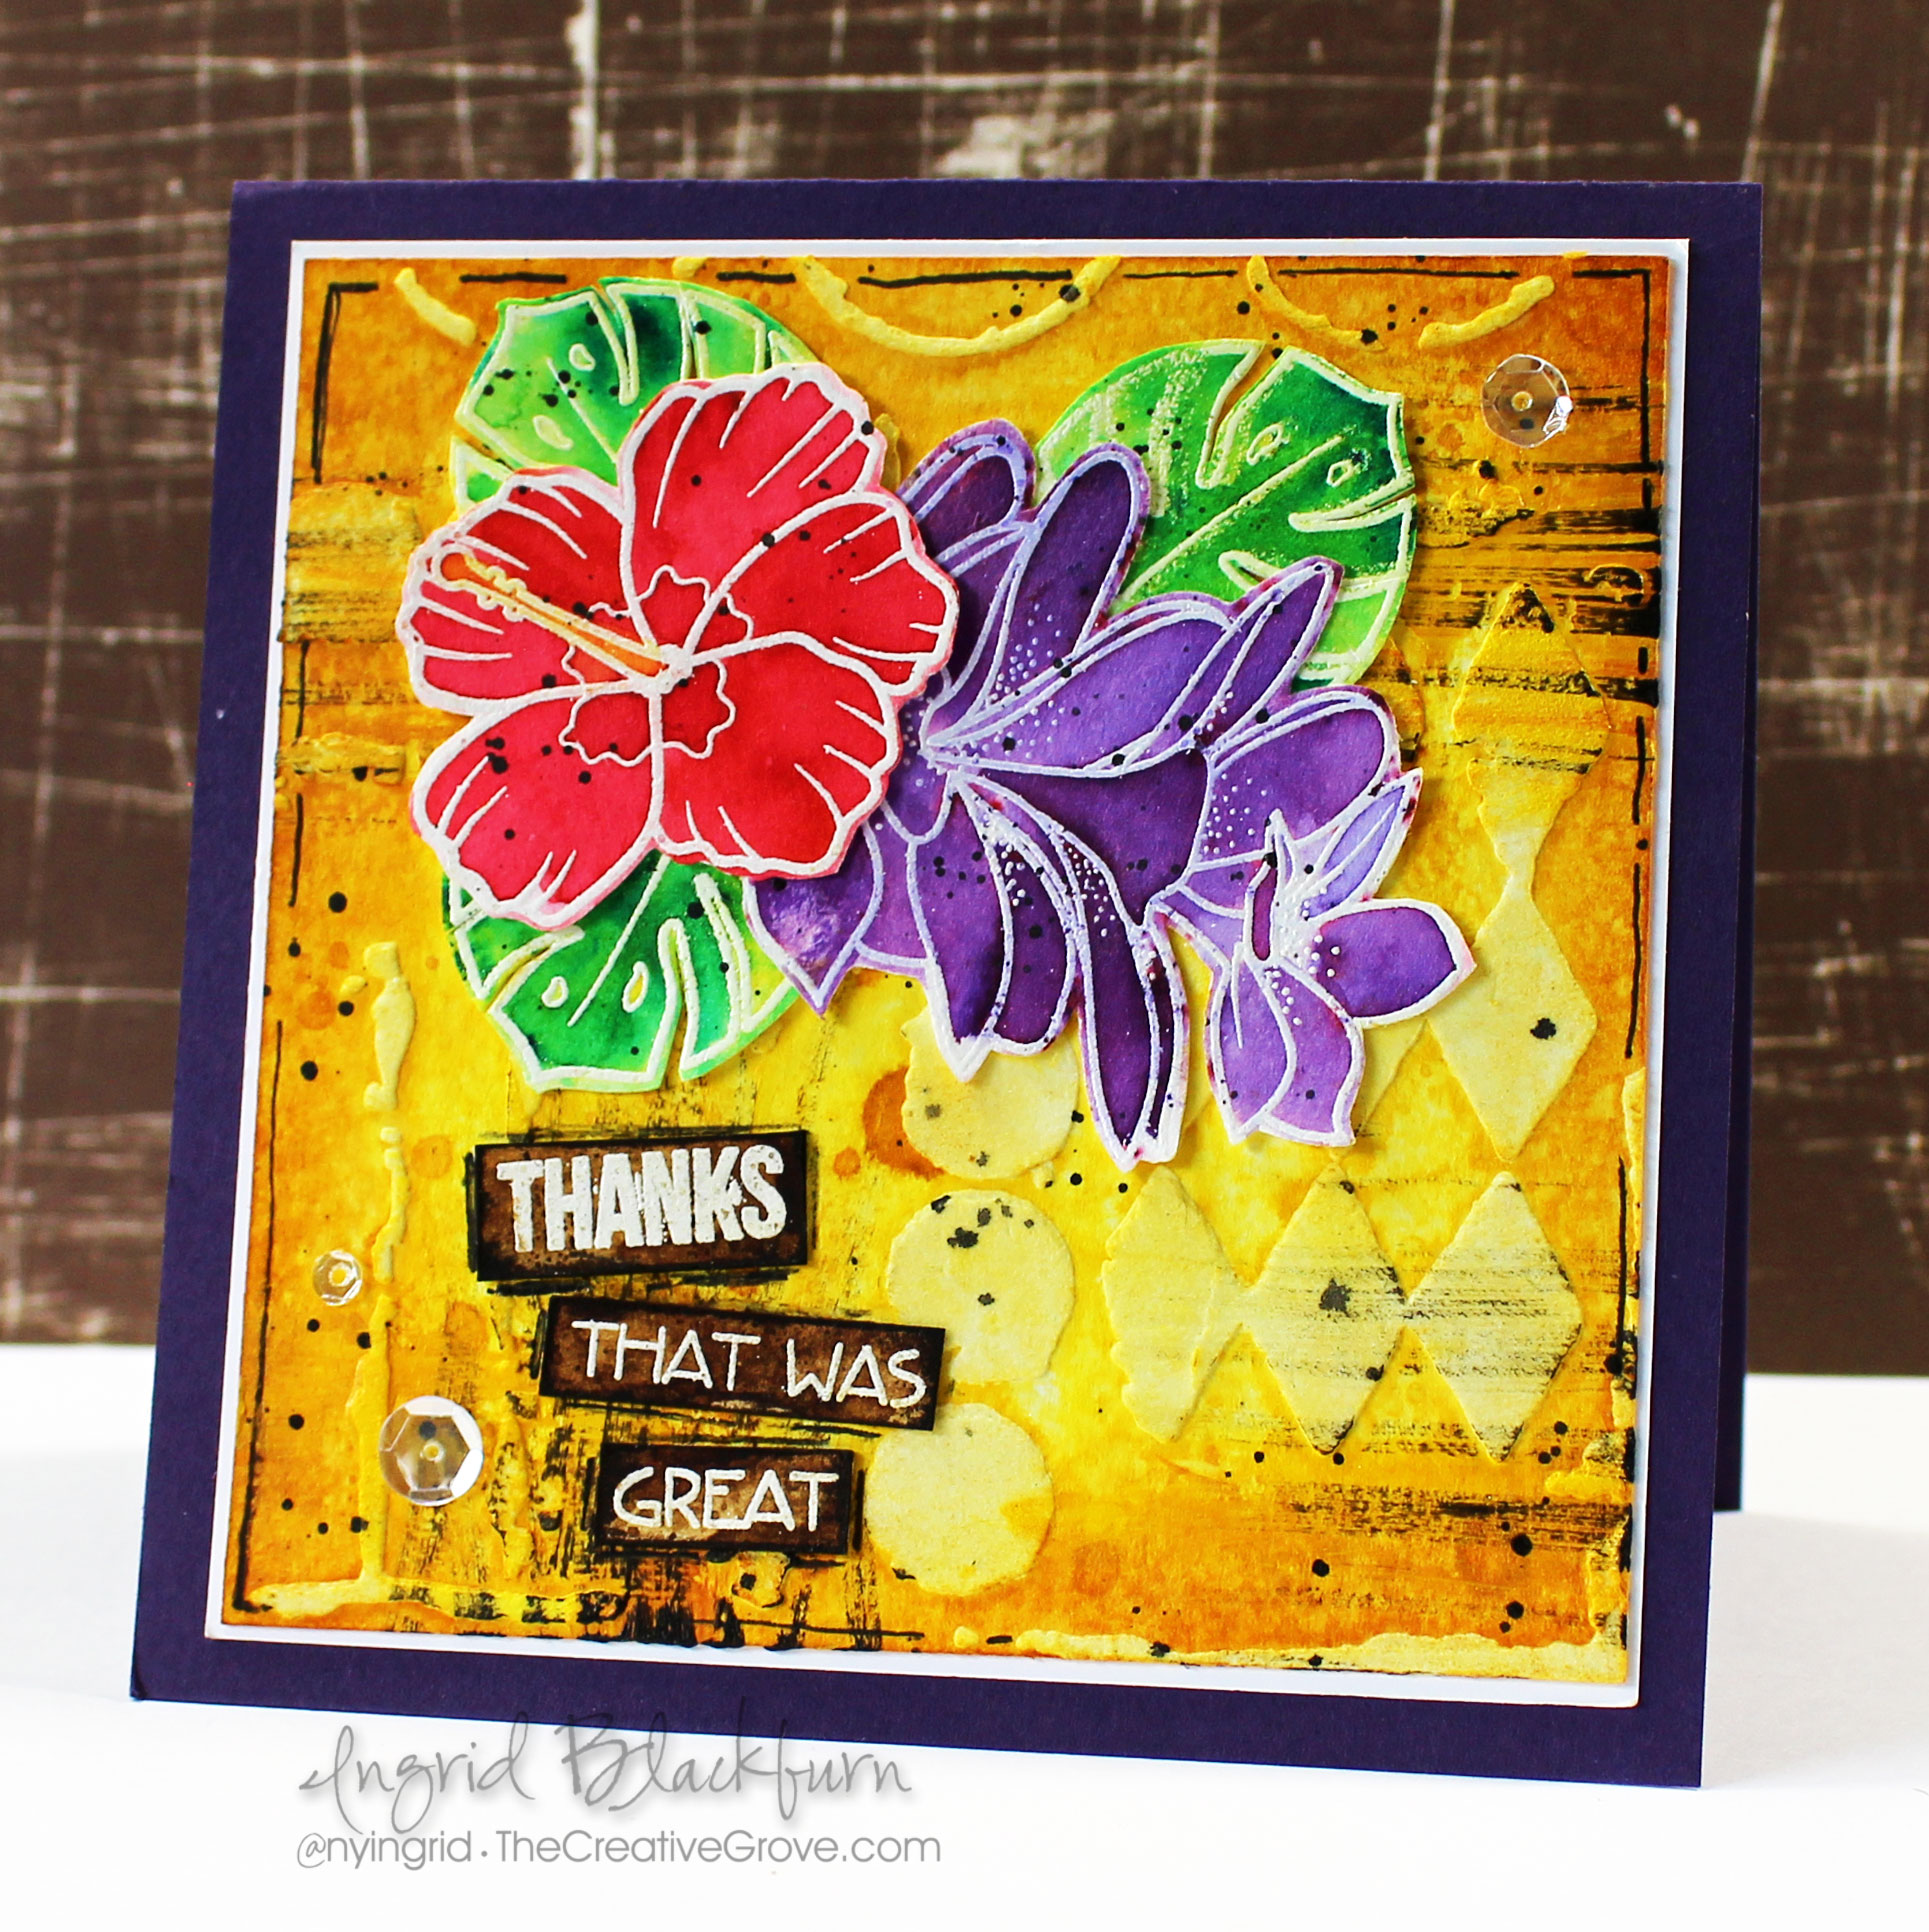
What would a mixed media piece be without a little texture? Today’s project showcases just how easy it is to add some great texture, both literally, and then with ink too!

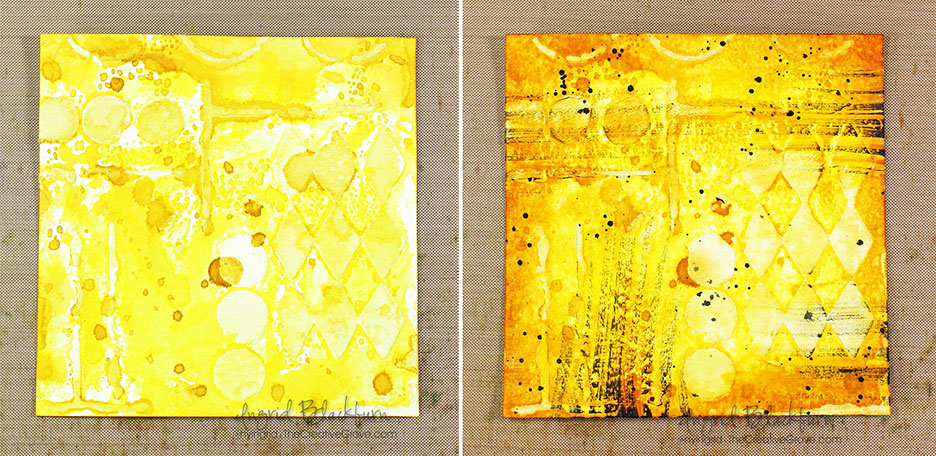
For the mixed media challenge over at Happy Little Stampers – we were challenged to use texture in our projects. This project uses embossing paste as a texture base. Once dry, add some color to it. I chose to not go the traditional watercolor route, rather use a wrinkle free distress watercolor technique instead.

Mixed-Media-Tropical-Thanks-002

I love the vibrant colors of Ranger’s Distress Inks, how about you? This base showcases several shades of yellow – Squeezed Lemonade, Mustard Seed, Fossilized Amber and Mustard Seed. Here’s the light version with just a few layers and splotches, and the final version with blending added to it, plus a little acrylic paint brushed over – Lemon Yellow, Cadmium Yellow, Ochre and Raw Umber mixed with Paynes Grey. I love how it turned out – it was hard to cover any of it up!

Mixed-Media-Tropical-base-003

Mixed-Media-Tropical-Thanks-003Mixed-Media-Tropical-Thanks-006

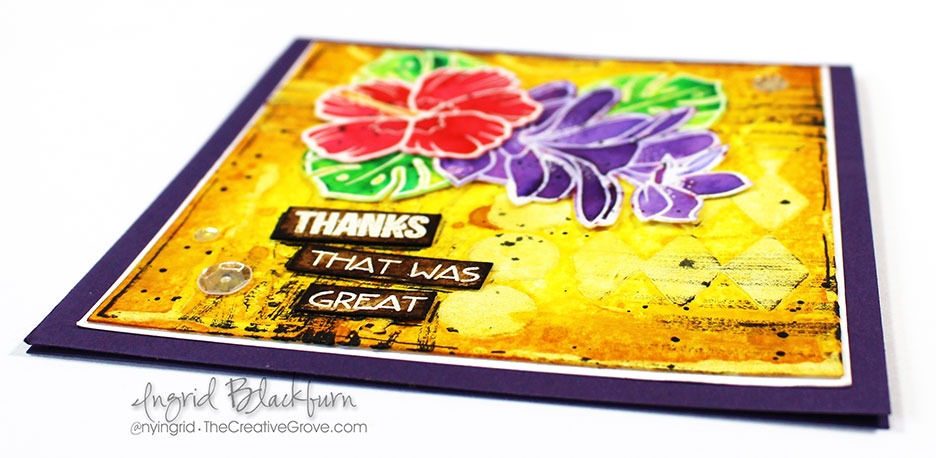
To complete the piece, Add a few embellishments. I chose to add a few fussy cut flowers and leaves watercolored with Brusho from the Aloha Spirit set by Create a  Smile as well as some greetings from the Mini Thanks set – LOVE those stamps!

Add a little doodling around the border and greeting pieces – which, by the way were also colored with Early Espresso and Gathered Twigs after embossing them in White. Some sparkling clear sequins by Pretty Pink Posh and you’re all set!

Mixed-Media-Tropical-Thanks-005

I hope you like it – it was super fun to make, I’m really into adding textures and character to projects.  I can’t wait to see what you do with yours! Till next time –

Signature

[optin_box style=”12″ alignment=”center” email_field=”email” email_default=”Enter your email address” integration_type=”aweber” double_optin=”Y” list=”3846012″ name_field=”name” name_default=”Enter your first name” name_required=”Y” opm_packages=””][optin_box_field name=”headline”]Learn more with our exclusive FREE video series:[/optin_box_field][optin_box_field name=”paragraph”]PHA+UGx1cyB5b3XigJlsbCBiZSBhZGRlZCB0byBteSBGUkVFIENyZWF0aXZlIFRpcHMgRS1sZXR0ZXIgd2hlcmUgSSBzaGFyZSBleGNsdXNpdmUgcHJvamVjdHMsIHZpZGVvcyAmYW1wOyB0aGUgMTIgRGF5cyBvZiBDaHJpc3RtYXMgUHJvamVjdCBTZXJpZXM8L3A+Cg==[/optin_box_field][optin_box_field name=”privacy”][/optin_box_field][optin_box_field name=”top_color”]undefined[/optin_box_field][optin_box_button type=”0″ button_below=”Y”]Get Instant Access![/optin_box_button] [/optin_box]

For Dad

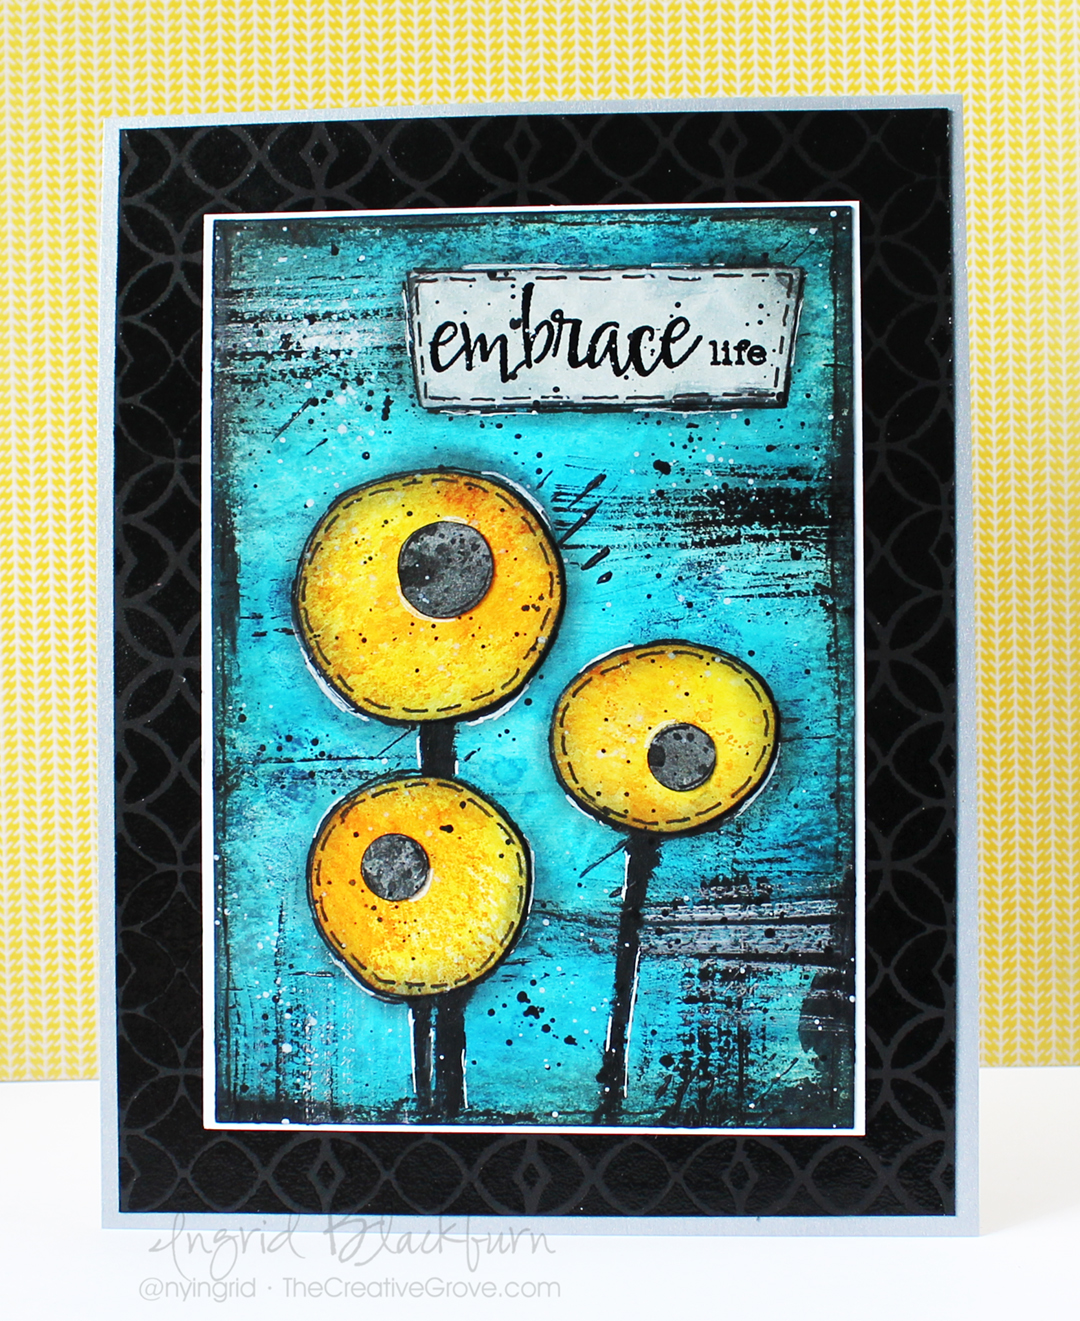
I’m honored to be a guest designer for the Mixed Media Mojo Challenge today. This month, the girls are challenging you to create a mixed media piece (more than one medium) with a flower theme in mind – I chose to make a few abstract flowers. There’s even an optional twist – real or faux stitching – I’m sure you can guess which one I applied!

Mixed Media Mojo

I started out wanting to create a card for a friend. But something happened as I was working on my piece. My dad wandered into my crafting office, stopped an said Wow – that’s really nice! THUD….that was me picking myself up off the floor.

You see, my father has NEVER commented on anything I’ve made unless I gave it to him directly….lol! He lingered next to my crafting desk, and continued to tell me how much he liked this piece – it was about 80% done. Maybe it was the flowers? The colors? I was too dumbstruck to even ask why! Who cares why….He liked it, he liked it – he really, really liked it! (channeling my inner Sally Field)

My dad loves flowers – so in my mind – that’s it. Well, I decided right then and there that this would not be a card, but rather a frame-able piece that I’ll give him for Father’s day. He’s hard to shop for – at 83 he doesn’t need much – and did I mention that he liked it!

So here it is – my little masterpiece. This project was so much fun to make, here’s how I did it.

Mixed Media Mojo Flowers Challenge - Ingrid Blackburn

Abstract Flowers Project Instructions

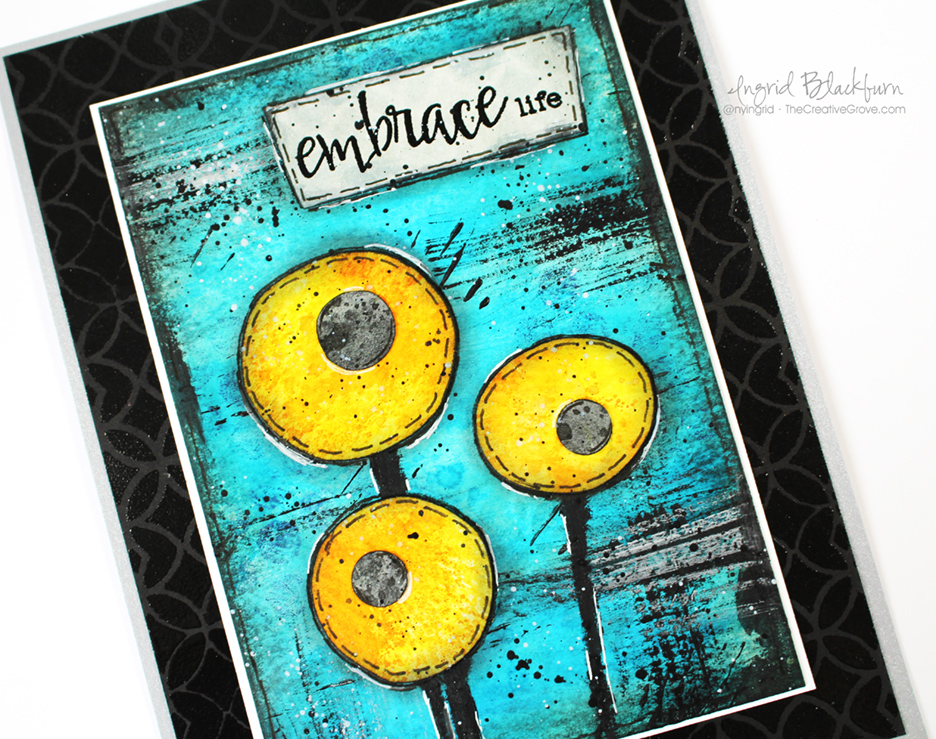
First you’ll need to create a few Wrinkle Free Distress backgrounds – one in Mustard Seed/Spiced Marmalade and another in Tumbled Glass/Broken China/Mermaid Lagoon/Salty Ocean. The centers of the abstract flowers are with the same technique in Hickory Smoke/Soot Black. Once you have those done, free hand cut the flowers and centers. The background was edged in Hickory Smoke, Soot Black and some Paynes Grey Acrylic diluted with water. Brush some Paynes Grey and Silver acrylic paint onto the background with a fan brush. A little background detail was added using the Latticeworks stencil, a Starbucks cup holder and some bubble wrap. Next add a little faux stitching on the flowers and greeting (from the Noteworthy set by Stamplorations).

Add a little basic shadowing under the abstract flowers, paint some stems in Paynes Grey, and add some PG & White splatters, and a little edging in a black and white pigment pen – that’s it! I love the Mixed Media Mojo piece, I wanted to keep it cool – no browns which is very unlike me!

Since I had decided to frame it for my father, it needed a cool matte. Once I settled on the combination of 1/16 white, 3/4 black and 1/8 Brushed Silver…the black needed to stand apart, add to the design and not take away all at the same time – that’s asking a lot!

Enter clear embossing for a subtle tone on tone effect. To get this perfect result with the Tim Holtz stencil, you’ll want to find the center point in your project. Then line up your stencil over the center. That way you can go up and down in perfect unison to get as close to a perfect pattern as possible. Line up your patterns top and bottom and smoosh Versamark to your project. Add Brutus Monroe clear embossing powder – it’s hands down the best powder I’ve used in 18 years of embossing!  And I’ve used many different kinds. 🙂
Abstract Flowers - Mixed Media Project

I just love the end result – it turned out almost exactly as I envisioned…which is rare! I hope you enjoyed it too. It doesn’t matter if you go the more traditional or Abstract Flower route, you’ll have fun creating your own piece. And stop by the challenge blog for sure a few times this month – there’s a new Mixed Media tutorial every week – a true treasure of creative inspirational how to!
So here’s what I want you to do now….go to the Mixed Media Mojo Challenge and give the Flowers Challenge a try – Mixed Media doesn’t have to be crazy involved, you’d be surprised what you can come up with with just some simple things like watercolor, acrylics, stencils and some water. It’s relaxing and you’ll amaze yourself – I promise!

Now click here to visit the challenge and get inspired with all the great projects designed by the UBER talented Design Team!  I’m off to find the perfect frame for this beauty. Now it’s your turn to get your fingers inky –

Signature

[optin_box style=”12″ alignment=”center” email_field=”email” email_default=”Enter your email address” email_order=”2″ integration_type=”aweber” double_optin=”Y” list=”3846012″ name_field=”name” name_default=”Enter your first name” name_order=”1″ name_required=”Y” opm_packages=””][optin_box_field name=”headline”]Learn more with our exclusive FREE video series:[/optin_box_field][optin_box_field name=”paragraph”]PHA+UGx1cyB5b3XigJlsbCBiZSBhZGRlZCB0byBteSBGUkVFIENyZWF0aXZlIFRpcHMgRS1sZXR0ZXIgd2hlcmUgSSBzaGFyZSBleGNsdXNpdmUgcHJvamVjdHMsIHZpZGVvcyAmYW1wOyB0aGUgMTIgRGF5cyBvZiBDaHJpc3RtYXMgUHJvamVjdCBTZXJpZXM8L3A+Cg==[/optin_box_field][optin_box_field name=”privacy”][/optin_box_field][optin_box_field name=”top_color”]undefined[/optin_box_field][optin_box_button type=”0″ button_below=”Y”]Get Instant Access![/optin_box_button] [/optin_box]