Easy DIY Mixed Media Christmas Cards + Video

Save the Crafty YouTuber Video Hop

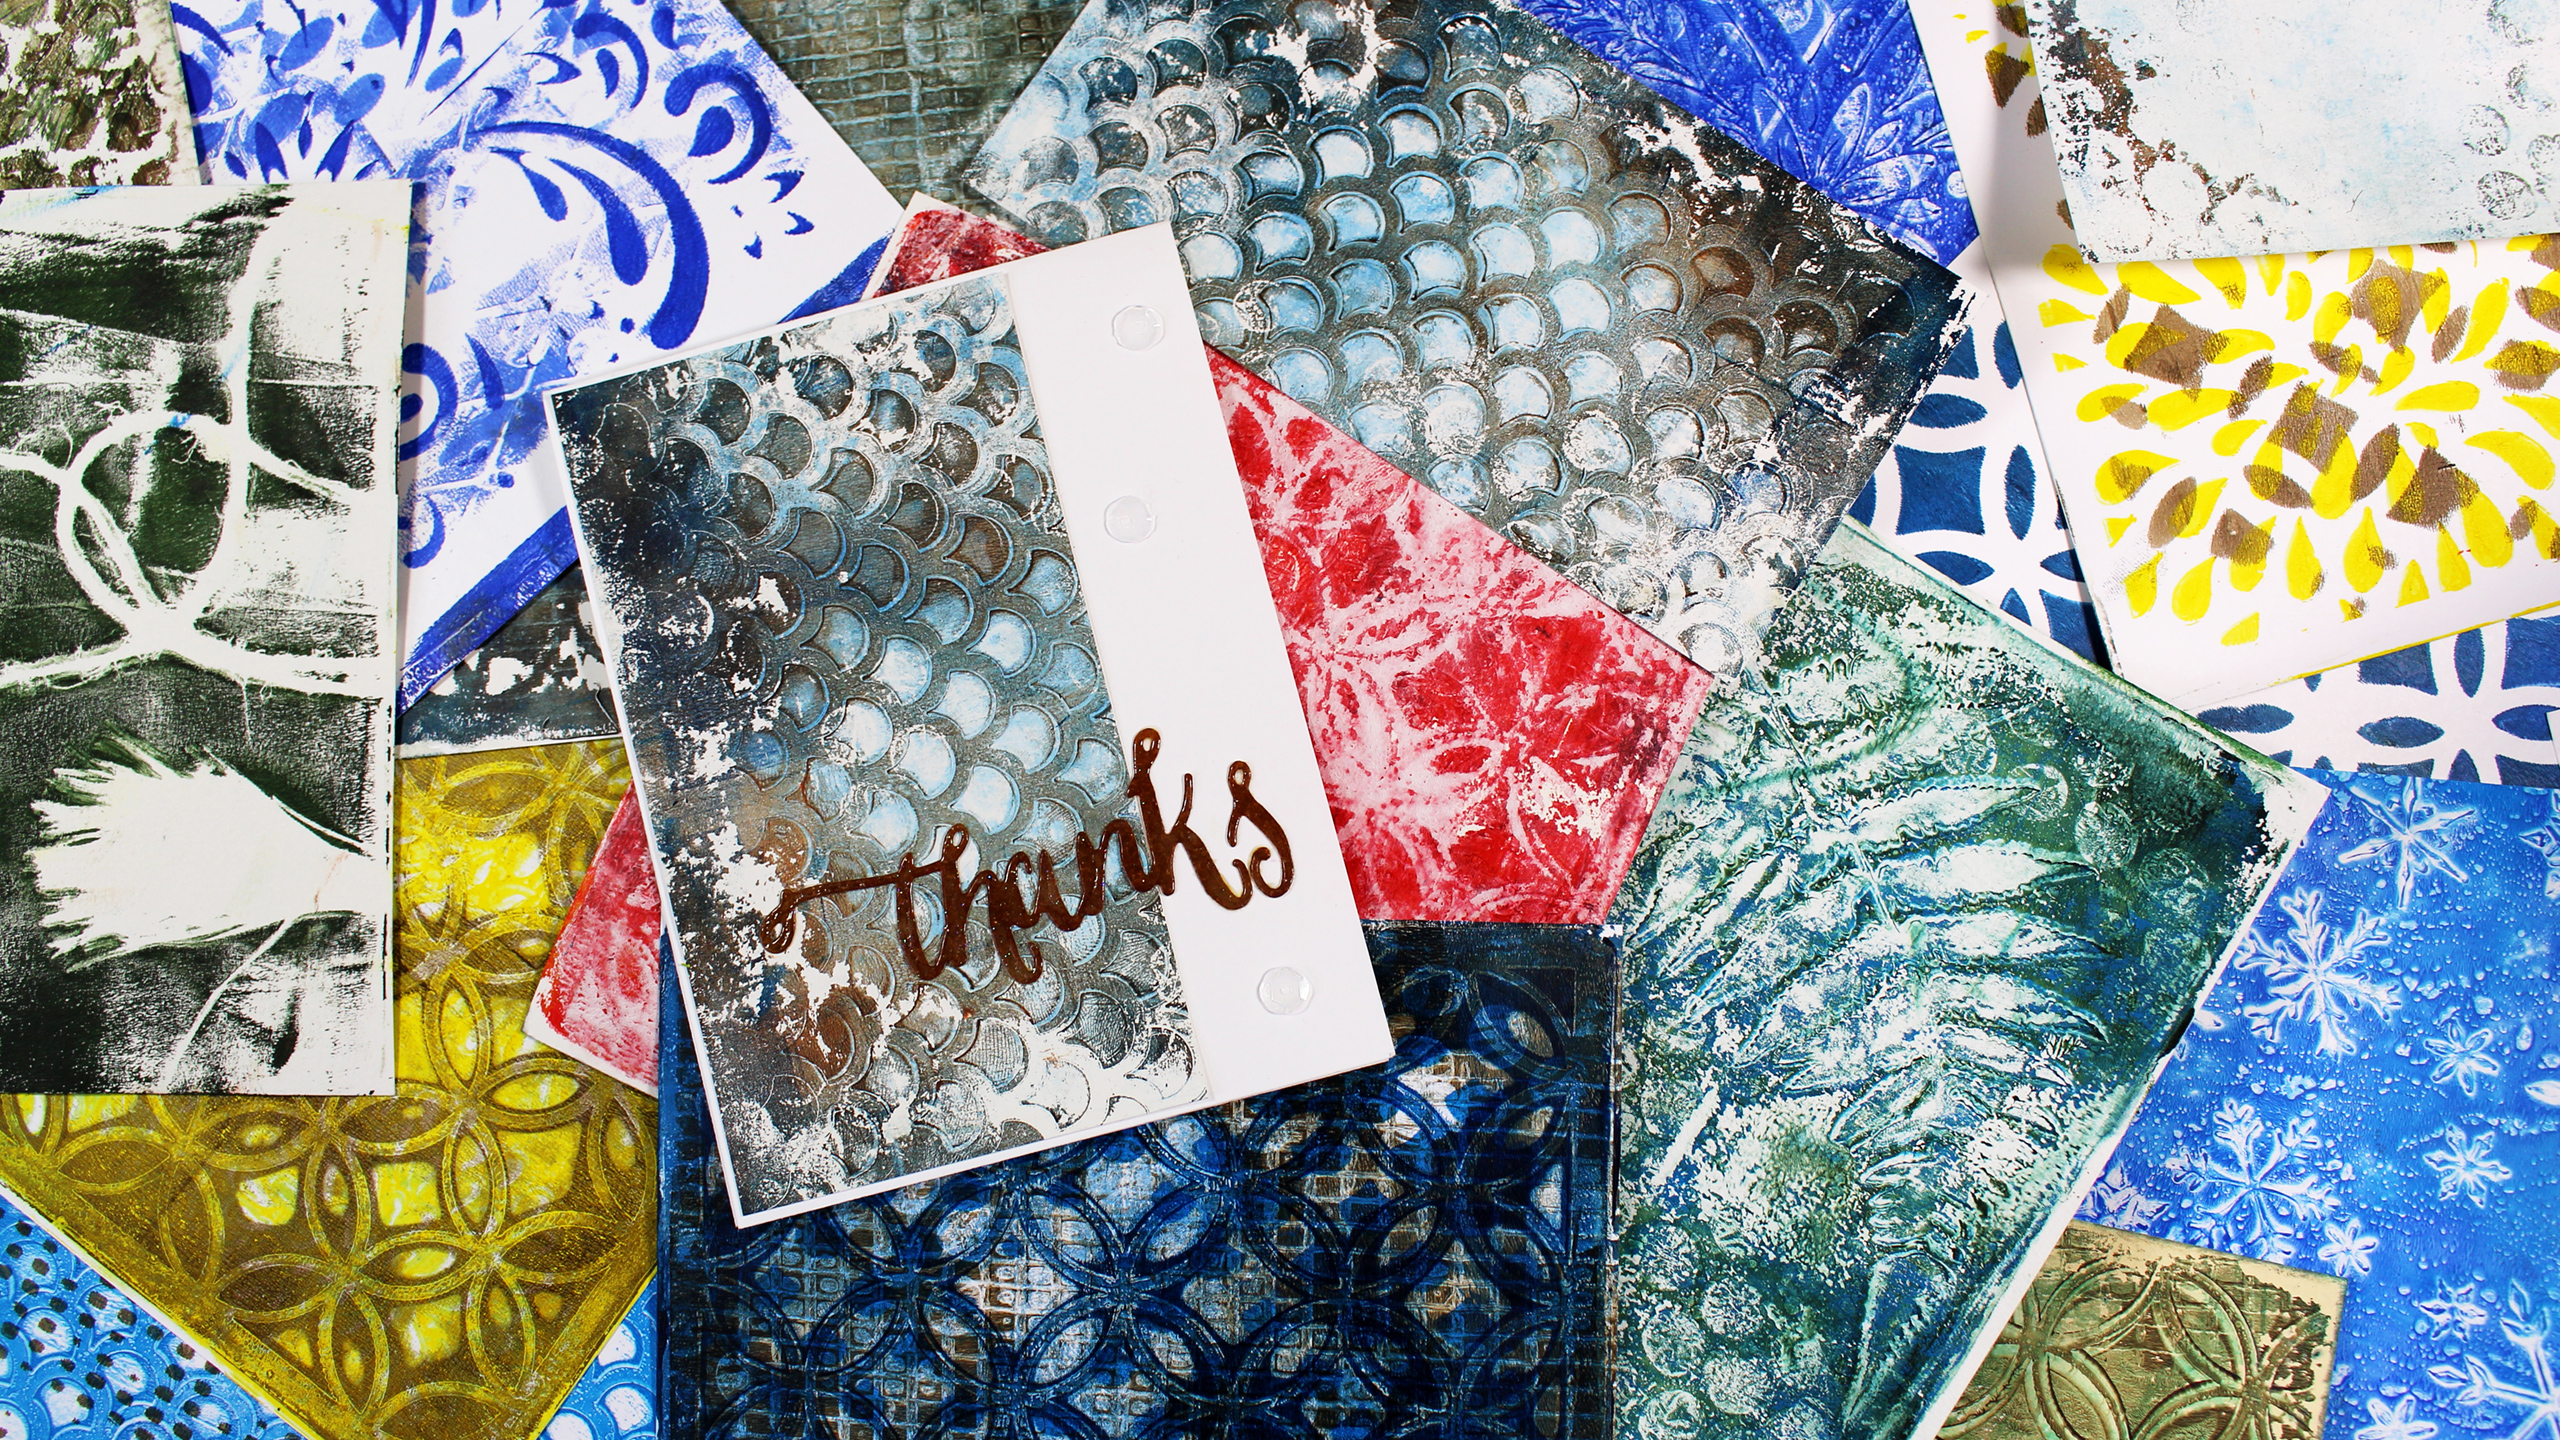
Have you ever wanted to quickly produce some fun and artistic Mixed Media Christmas Cards? Are you tired of sending bulky cards that require extra postage? What if I gave you the formula for how to create a whole stack of cards that have layered texture and character to them, but are pretty much flat, easy to put together and will have all your friends and family thinking you are quite the artist?!! Interested?

Now what if on top of that I told you that you could have a chance to win over 100 prizes – bet THAT sold ya!

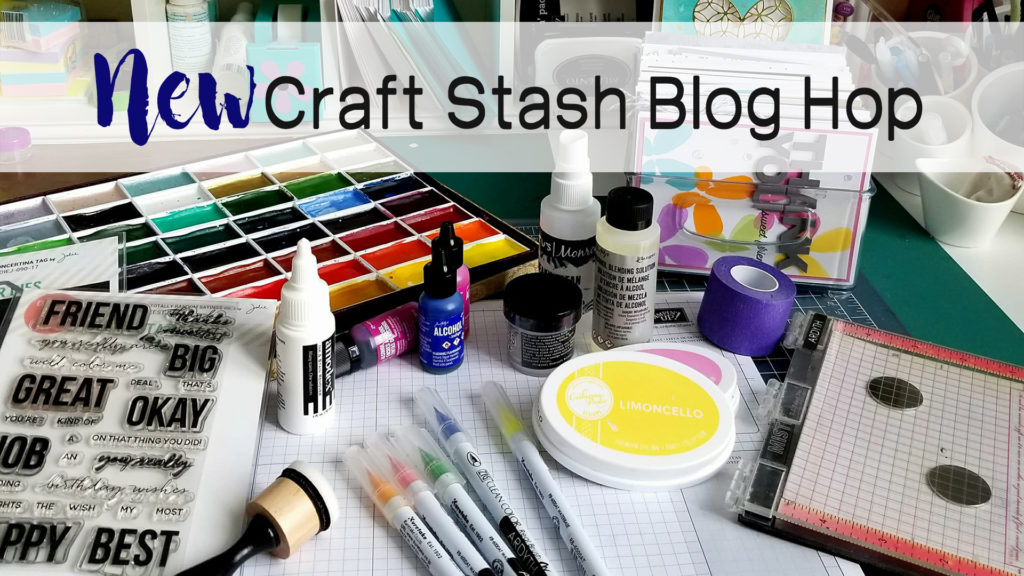
Mixed Media Christmas Cards Video Tutorial

It’s that time of year again – my good friend Justine Hovey has organized the second Save the Crafty YouTuber Video Hop, and I decided to play along with 90 of my crafty friends – mixed media style! And I even have my OWN giveaway that I’m doing….so be sure to actually WATCH the video. I give the details along the way…

Click HERE to watch in HD on my YouTube Channel

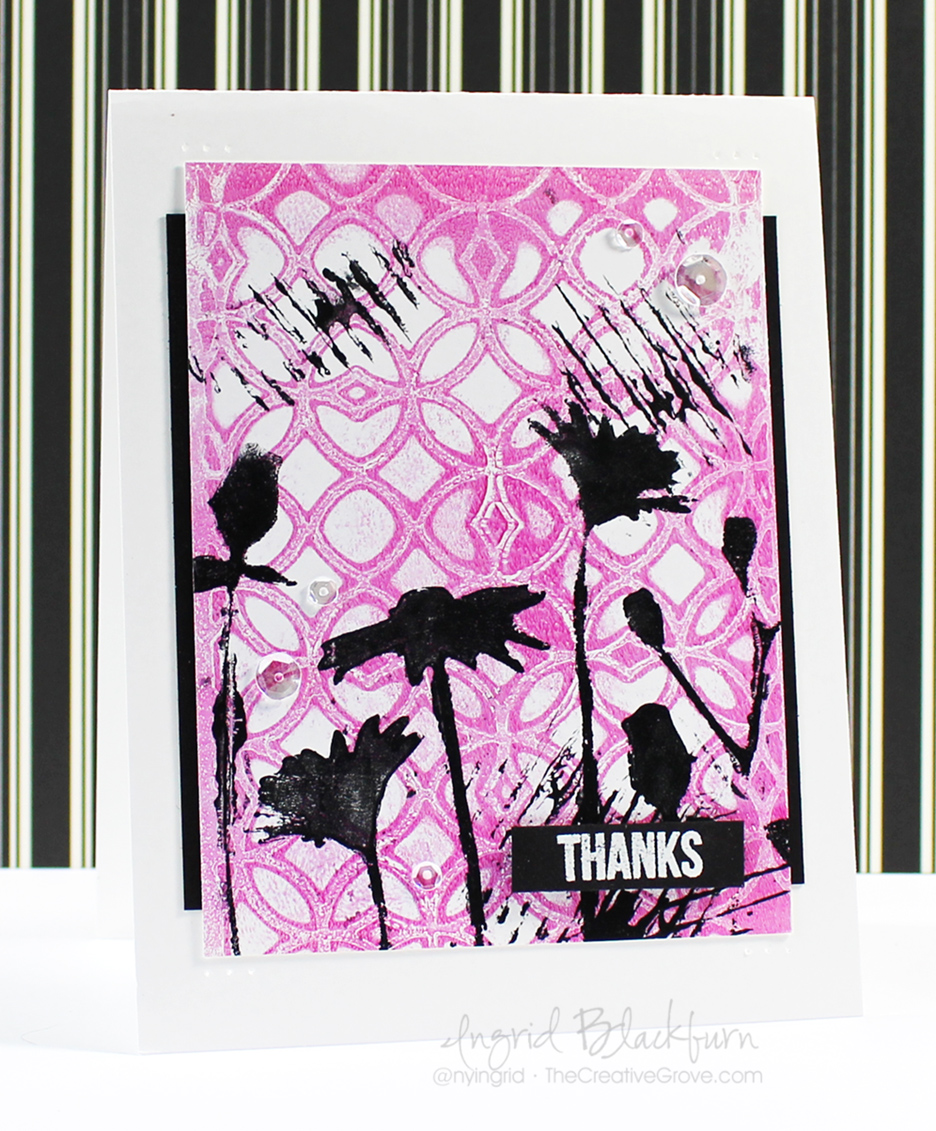
Aren’t they FUN and super simple cards to make?!! Seriously – I’m going to be teaching this exact project (and so much more) in person in a few weeks in the Orlando, Florida area. If you’d like to come learn from me in person – be sure to email me at ingrid (at) thecreativegrove.com and I’ll send you all the details!!

For the specifics and Details to be entered for over 100 prizes – seriously…it’s more like 125+ prizes….GOOD ones too – read about those on my YouTube Channel in the section below the video!

The Save the Crafty YouTuber Video hop is a celebration of cardmaking video tutorials created by a group of talented crafters of all different styles and levels. We are coming together over 5 days to give our viewers a chance to discover other amazing cardmakers and help reach monetization goals!

Mixed Media Christmas Cards

All you have to do is watch, like the video, consider subscribing, and click the link in the video description below to hop to the next video. Let yourself be inspired! Don’t forget to comment (on the video hop over at YouTube) because we have tons of prizes to give away. Please indicate if you are located in the USA or International so that prizes can be awarded appropriately as some prizes (not all!) have restrictions on them.

To be entered in for MY giveaway (closed) – watch the video – I give details on what you need to put in the comment section (USA only for that one).

Monoprinting Christmas Cards

Don’t forget to check back every day this week since there are 5 themed days of video hops! You never know when you’ll discover your next favourite YouTuber! Hop Links are below.

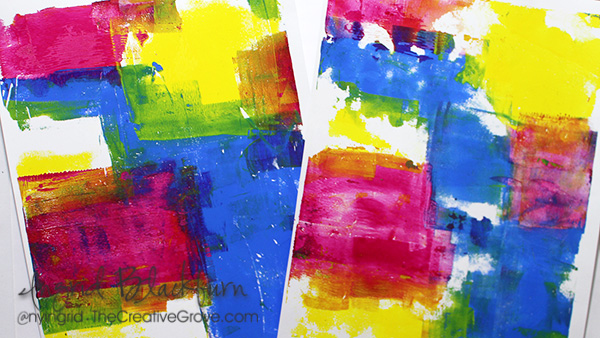
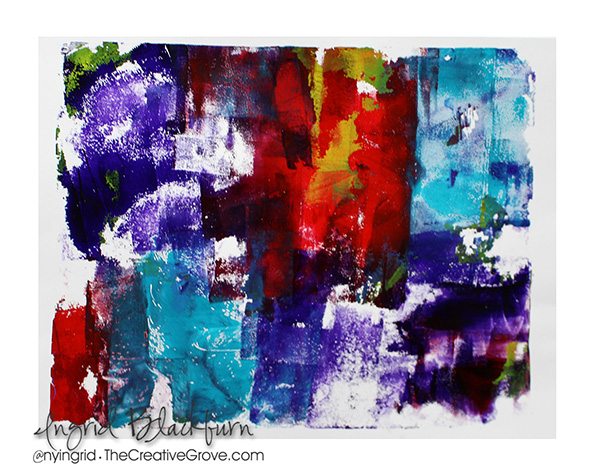
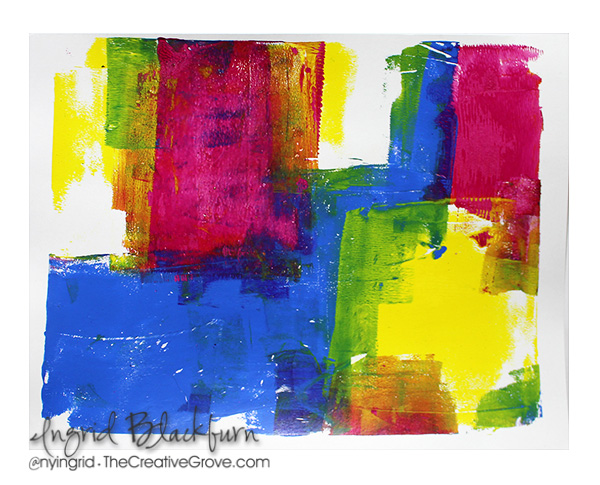
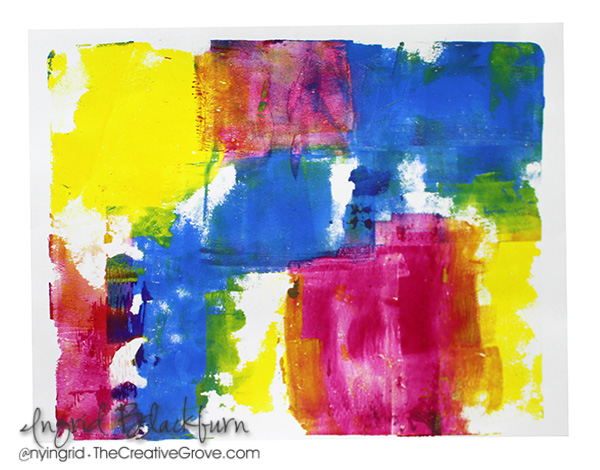
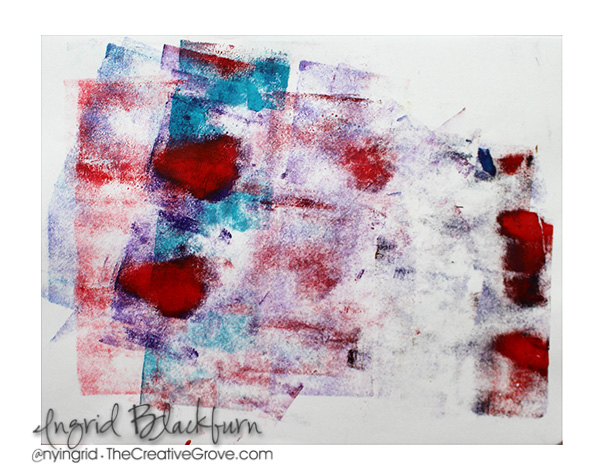
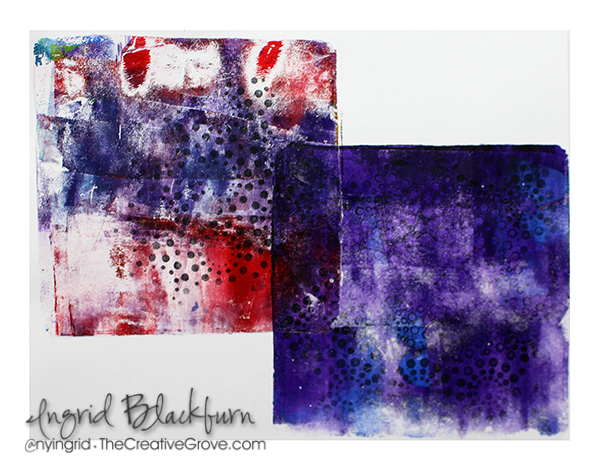
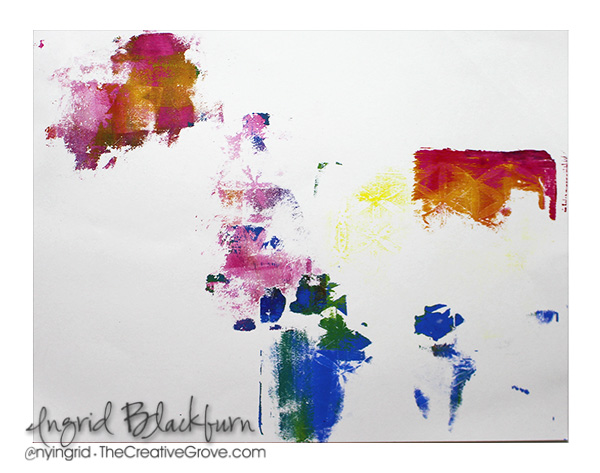
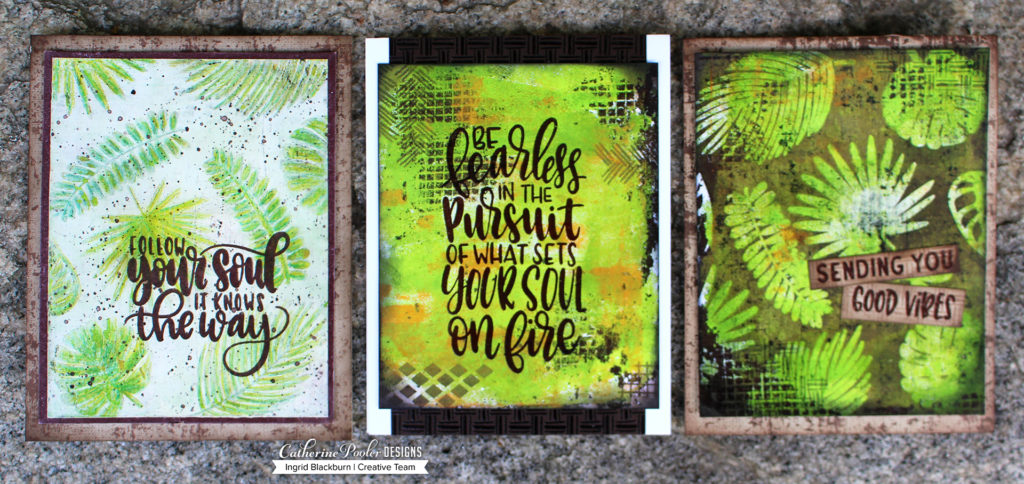
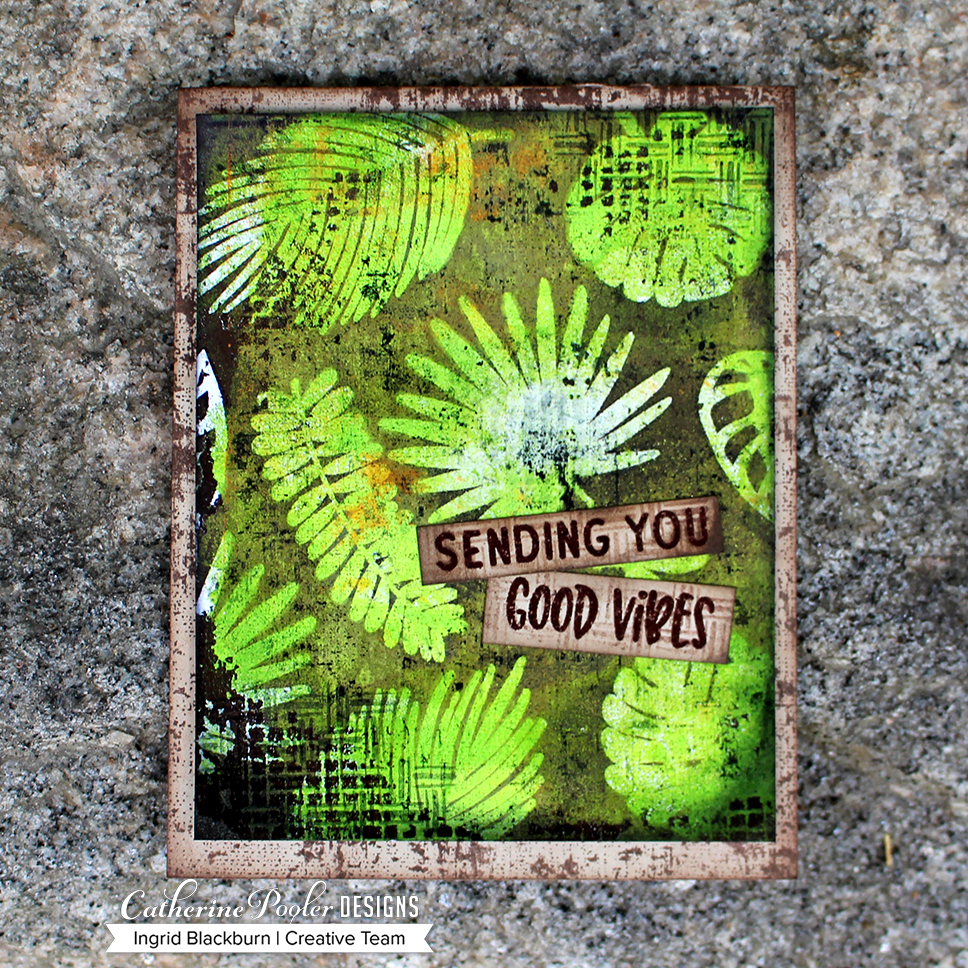
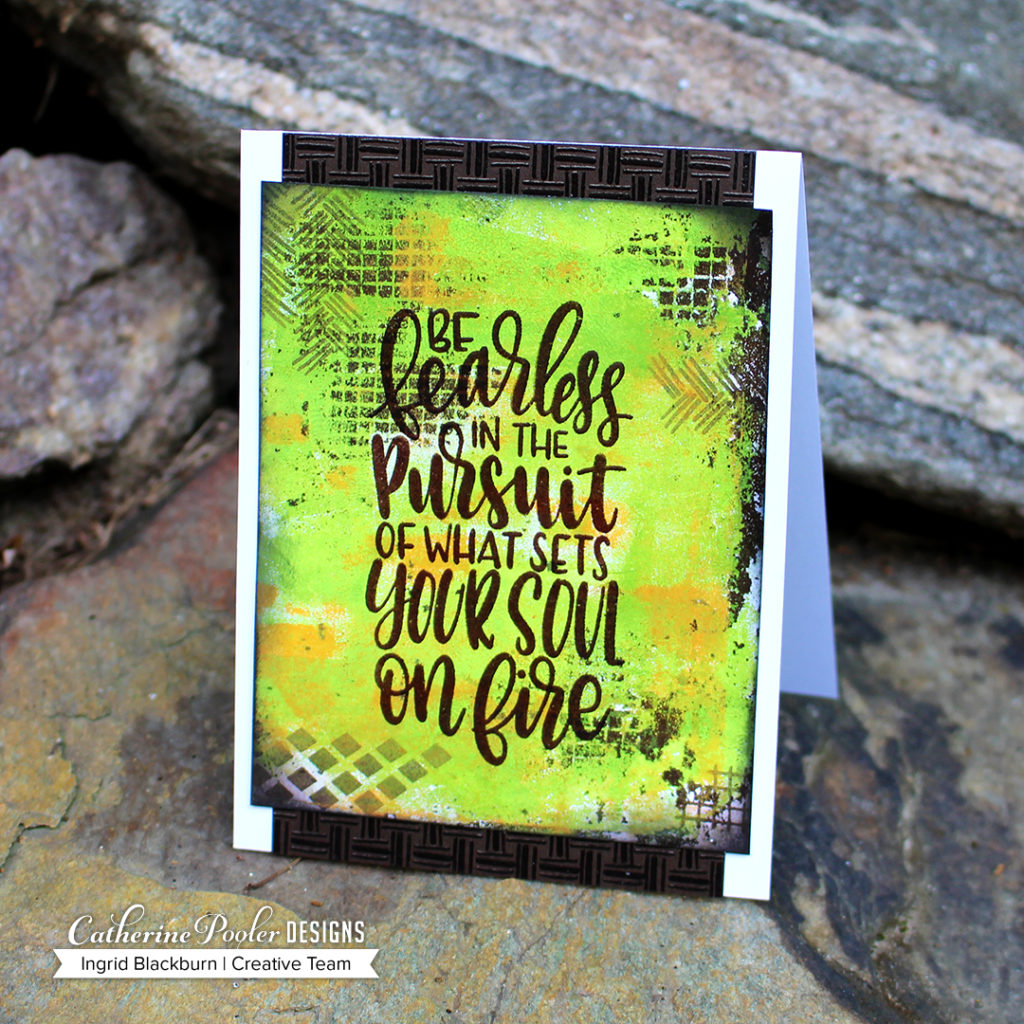
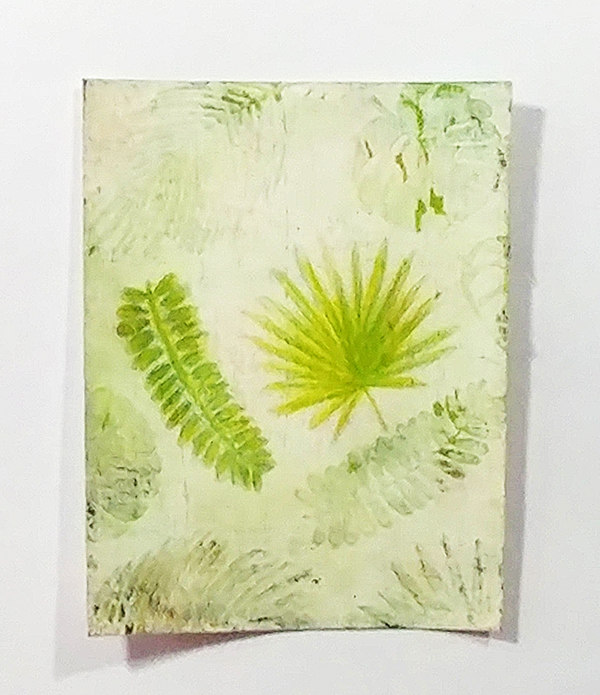
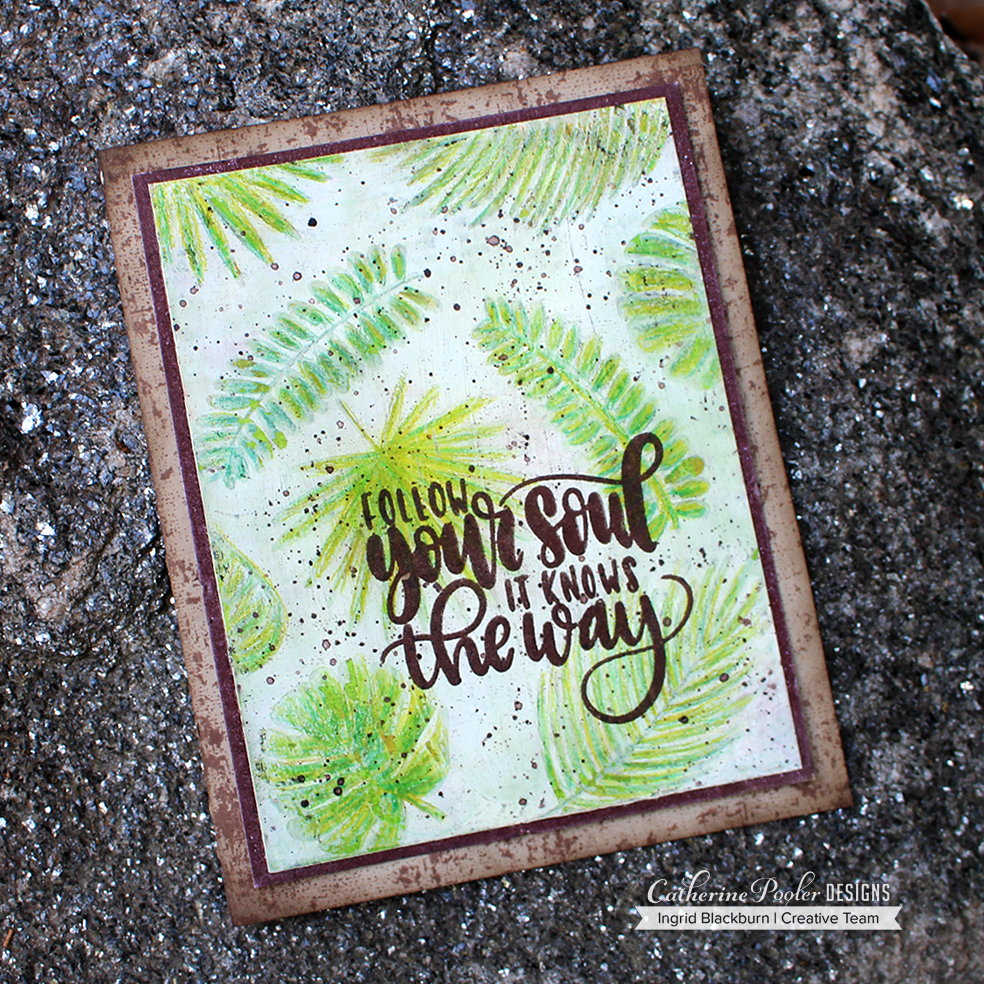
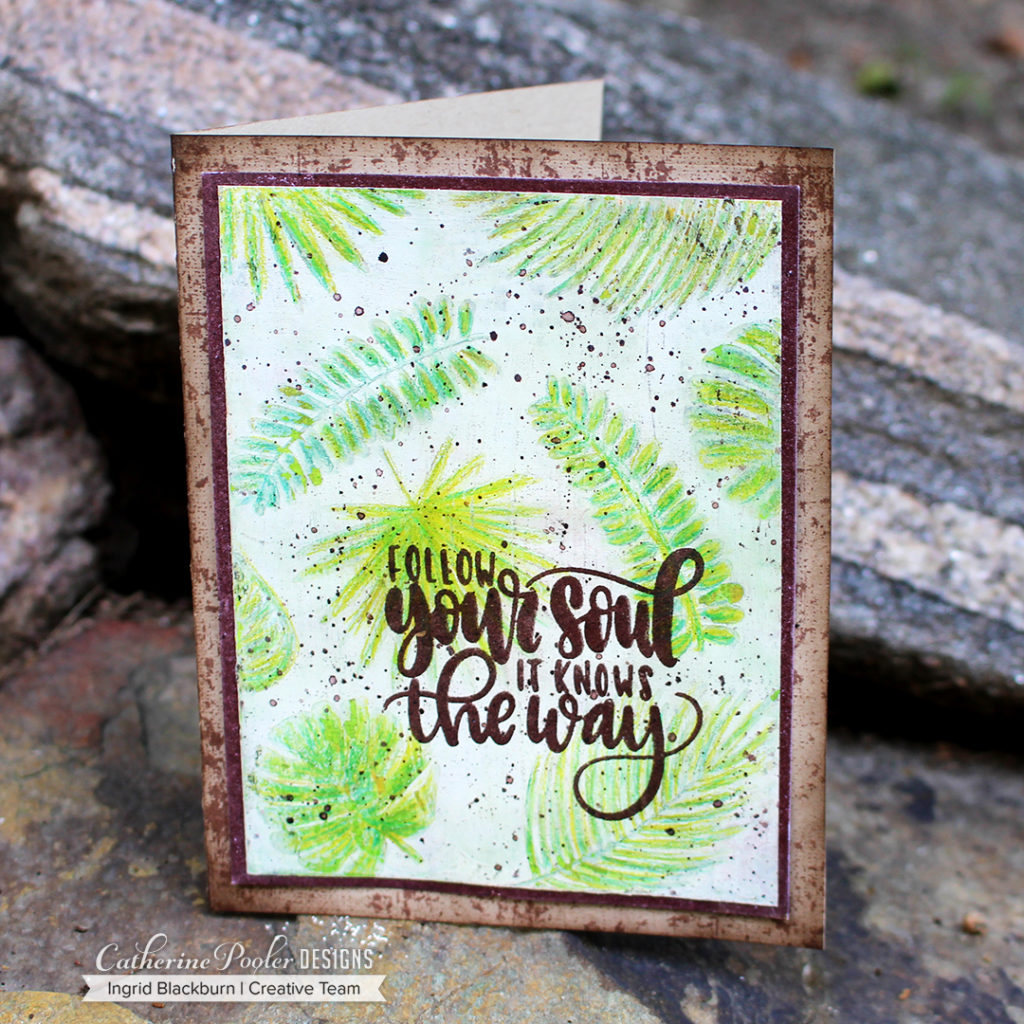
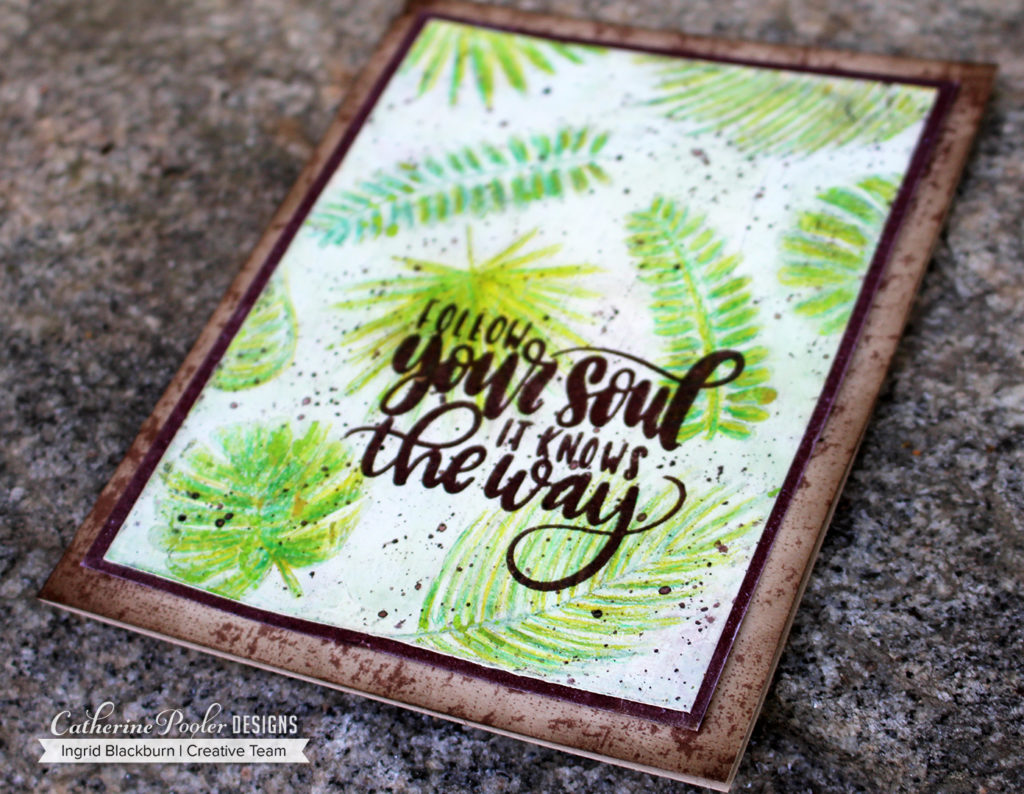
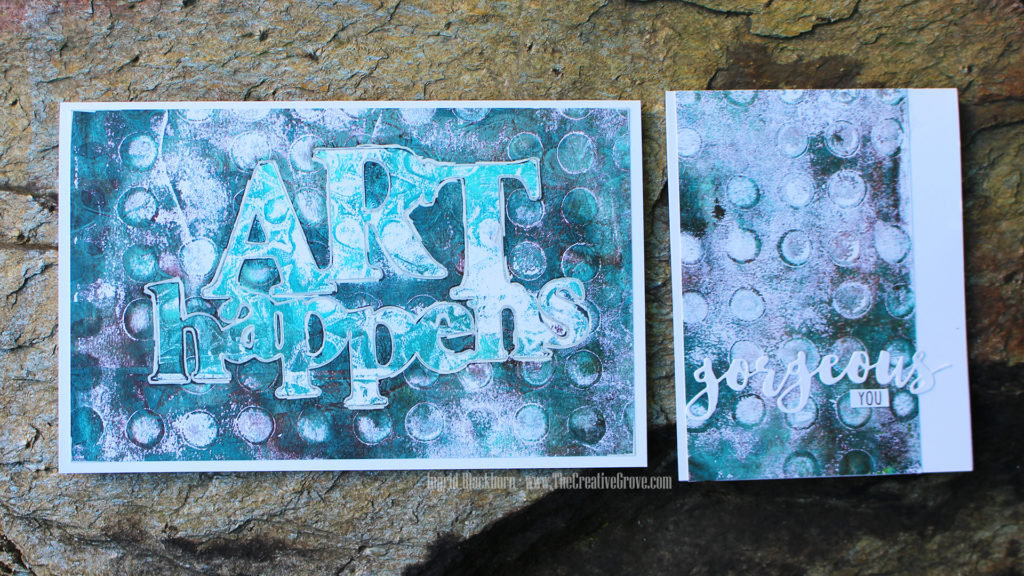
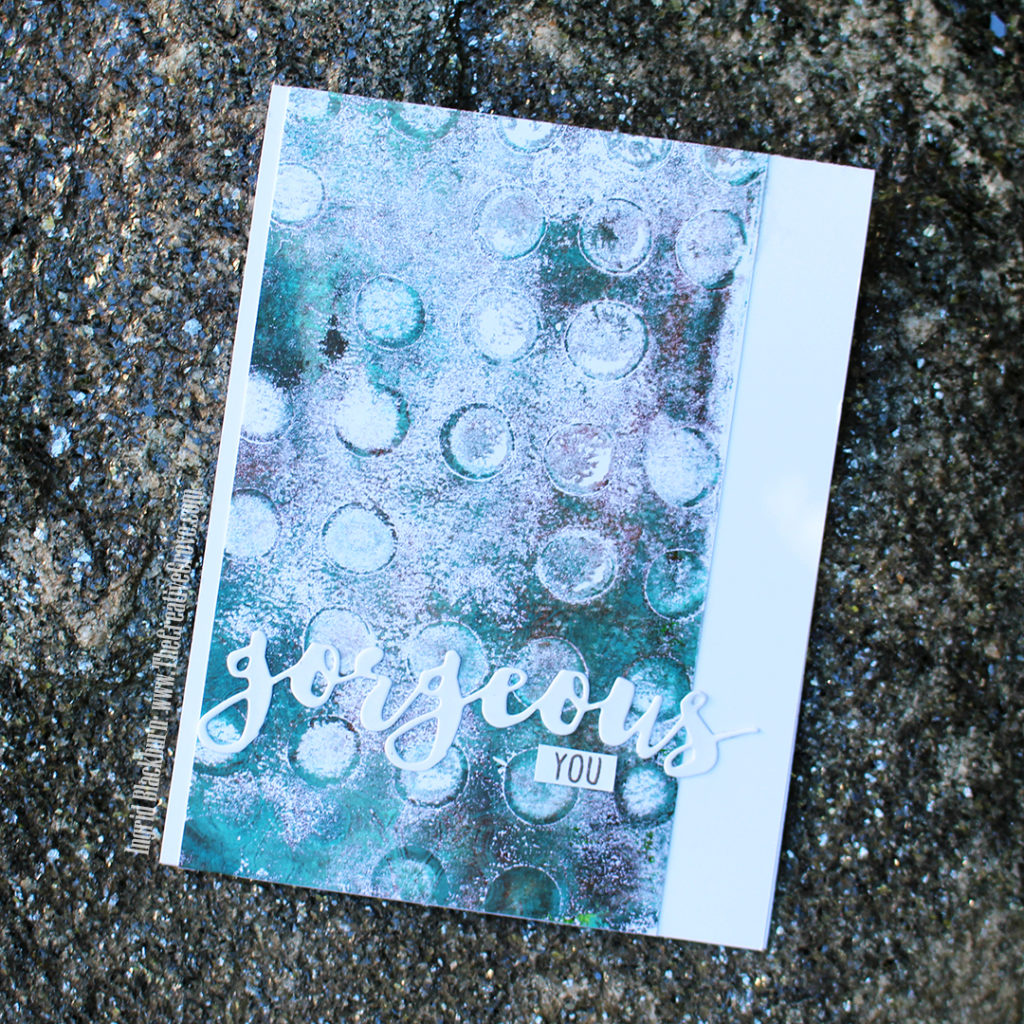
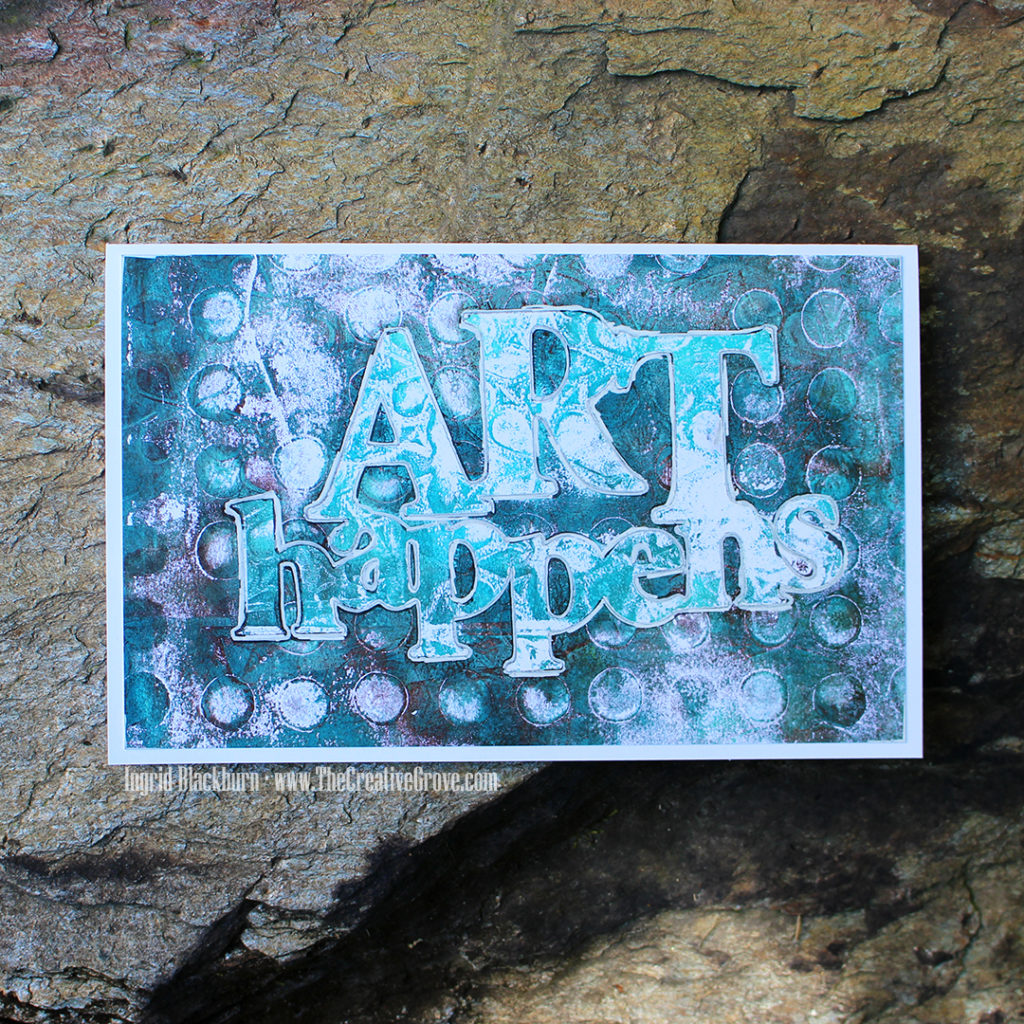
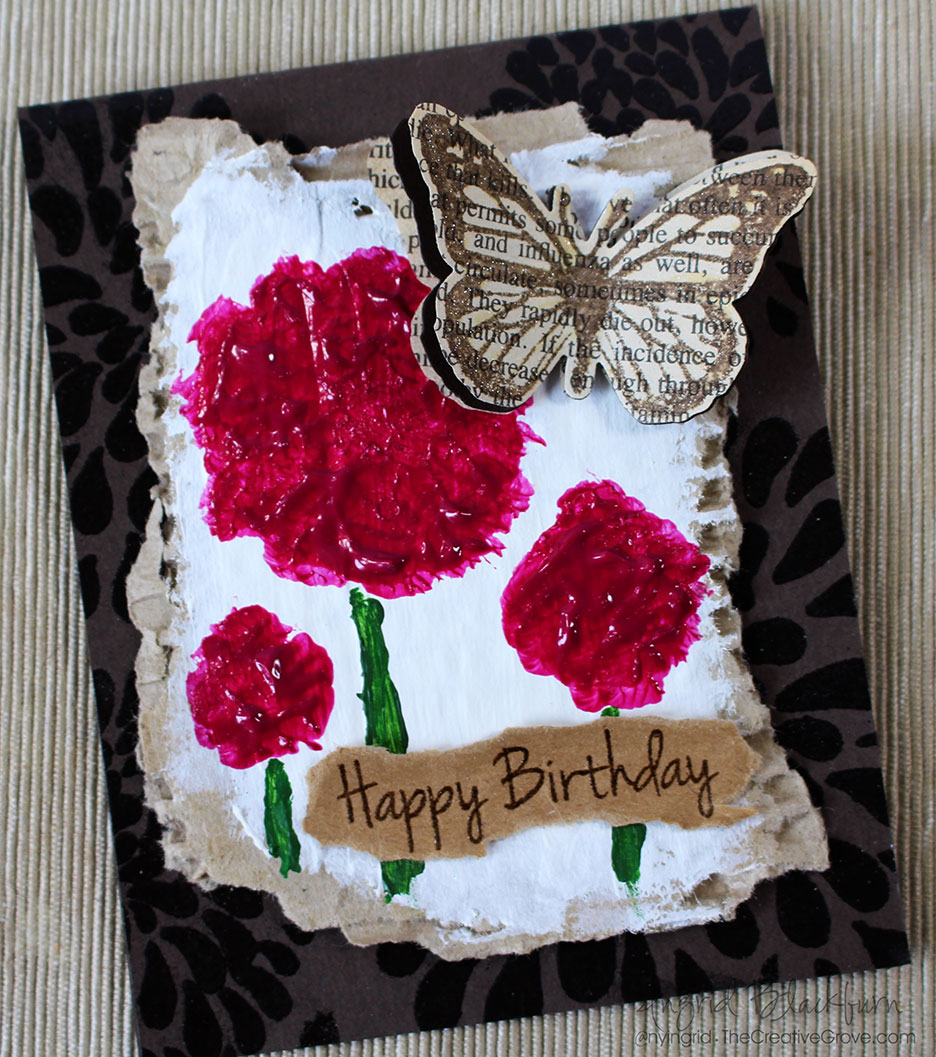
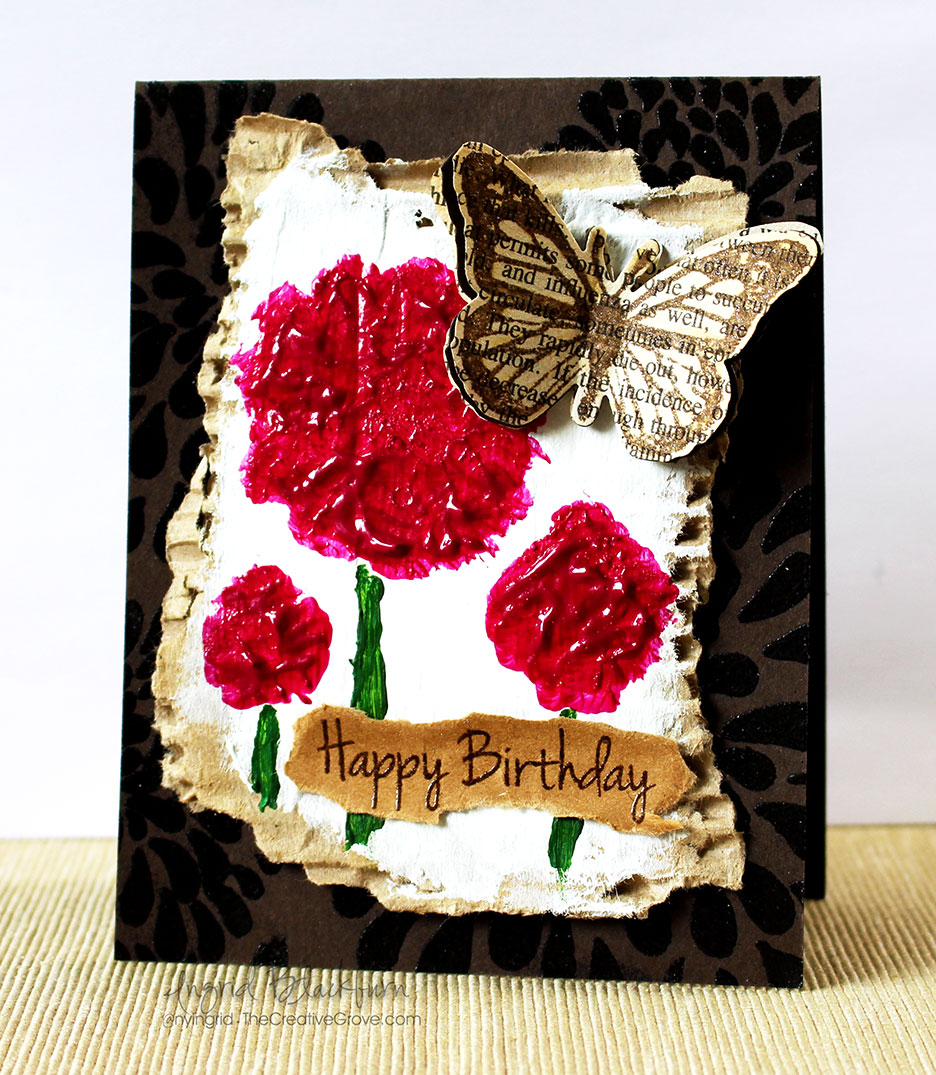
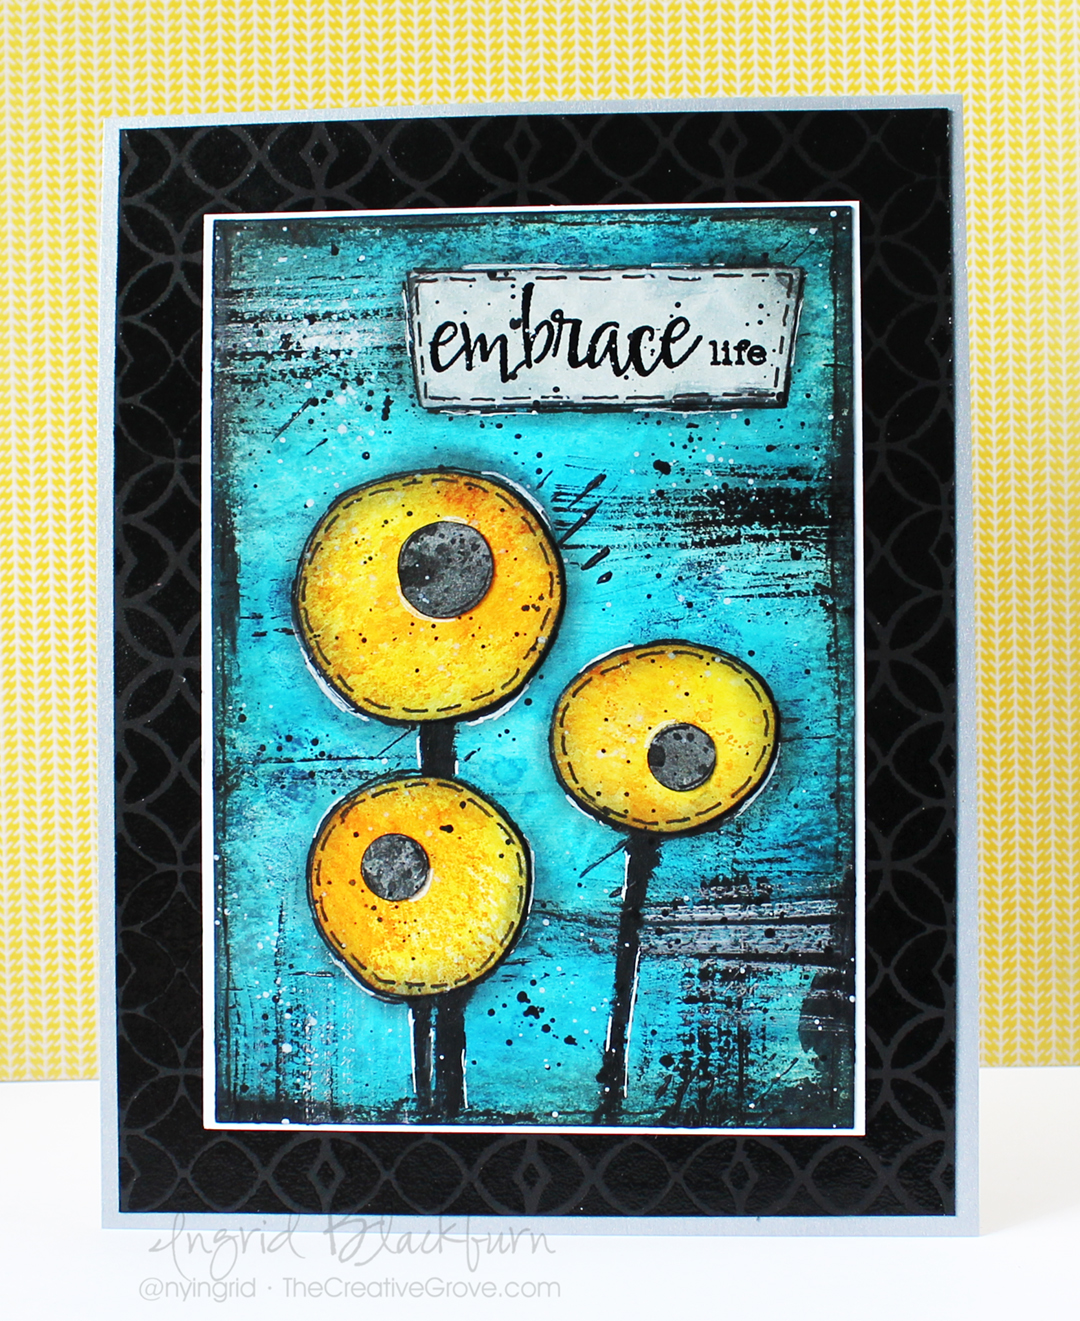
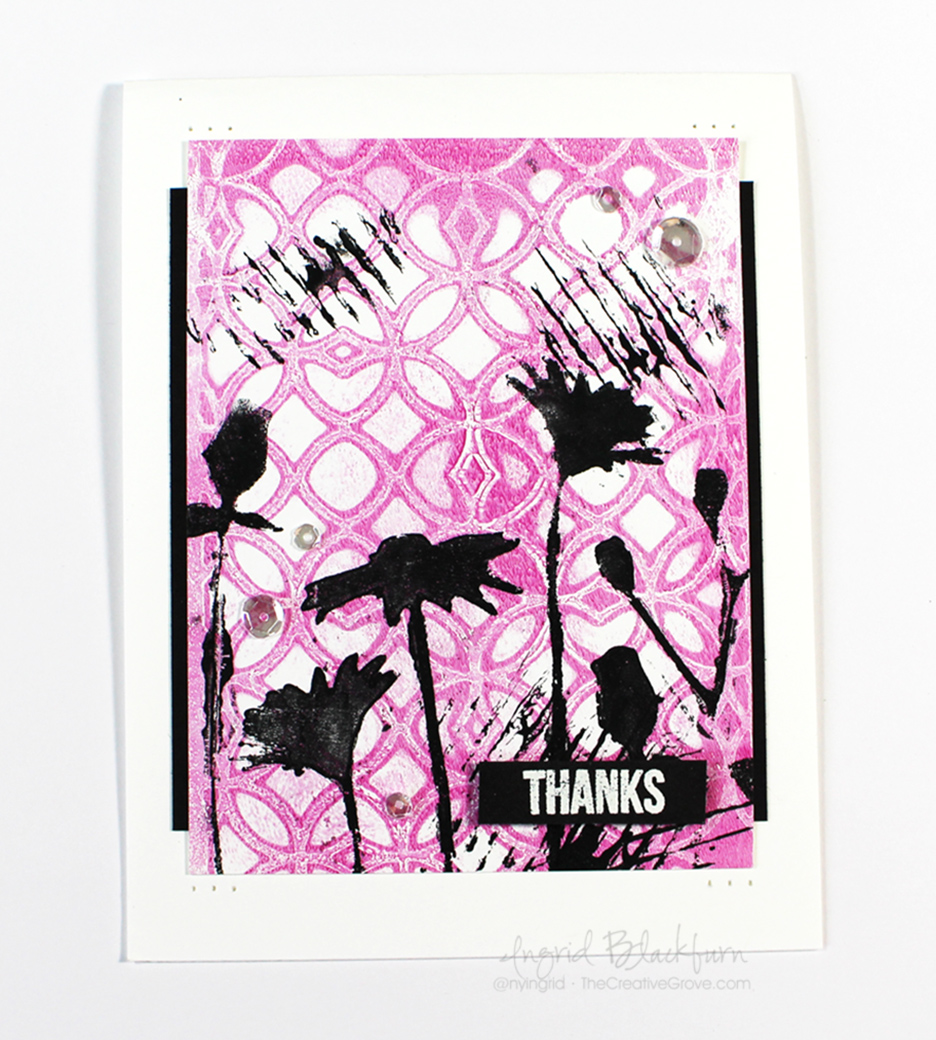
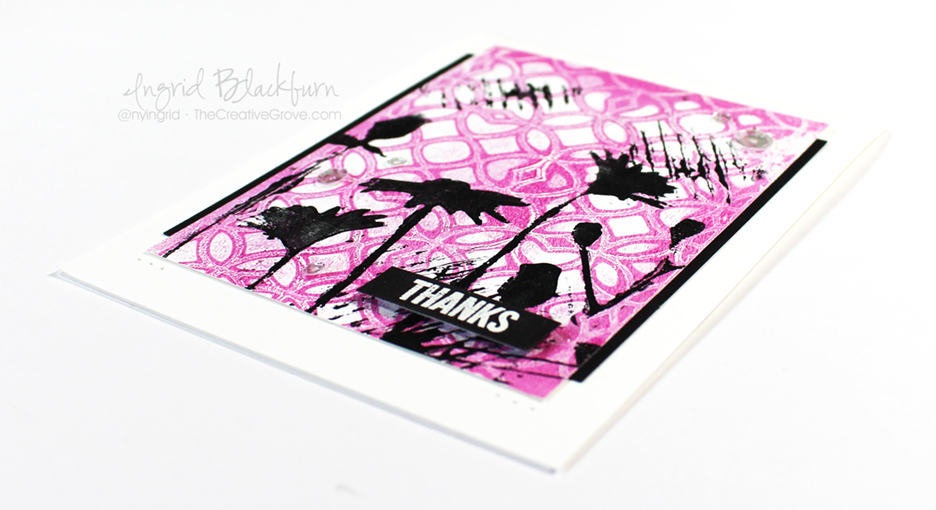
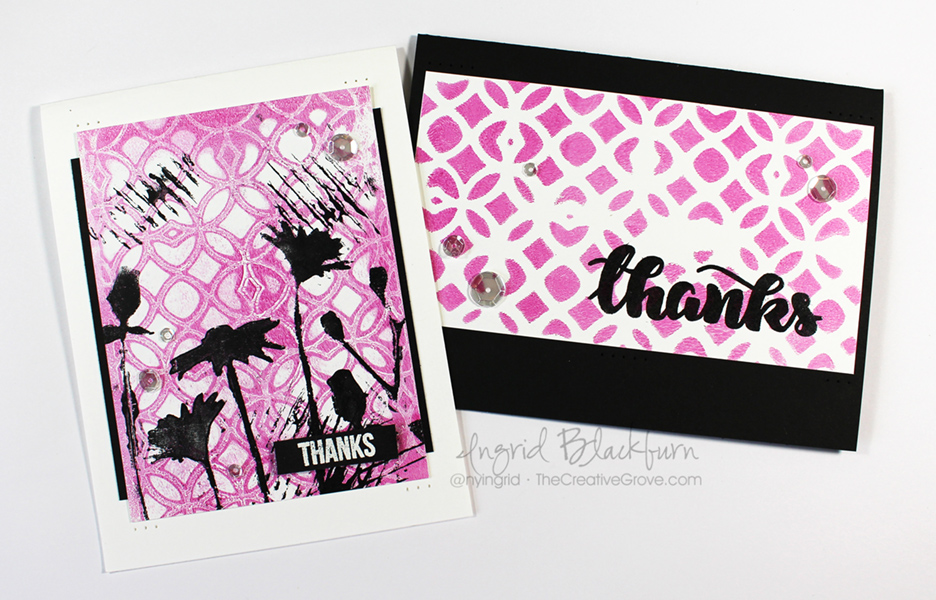
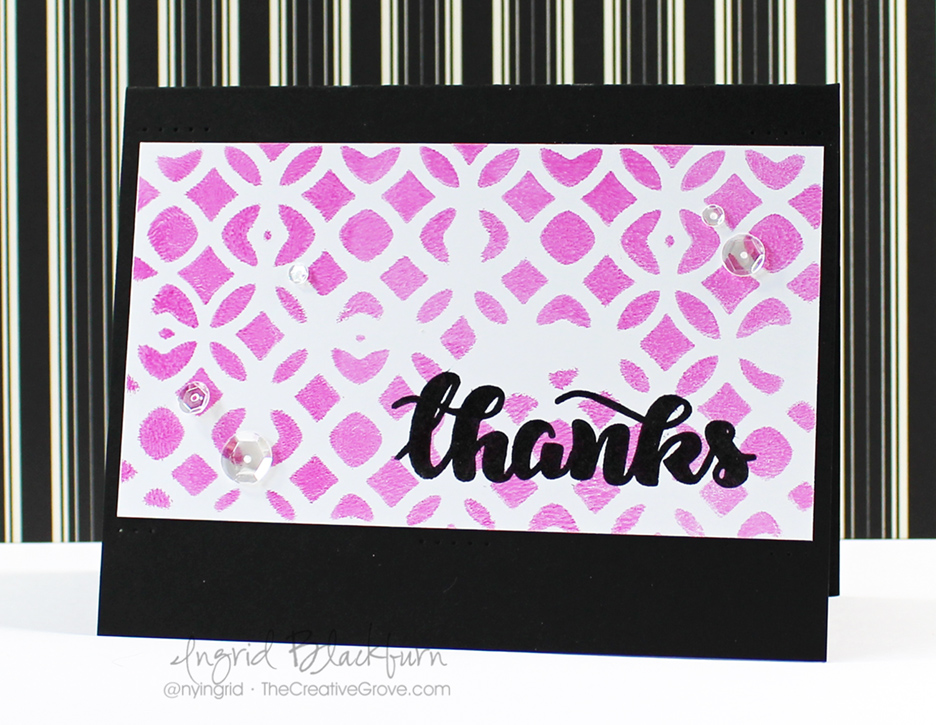
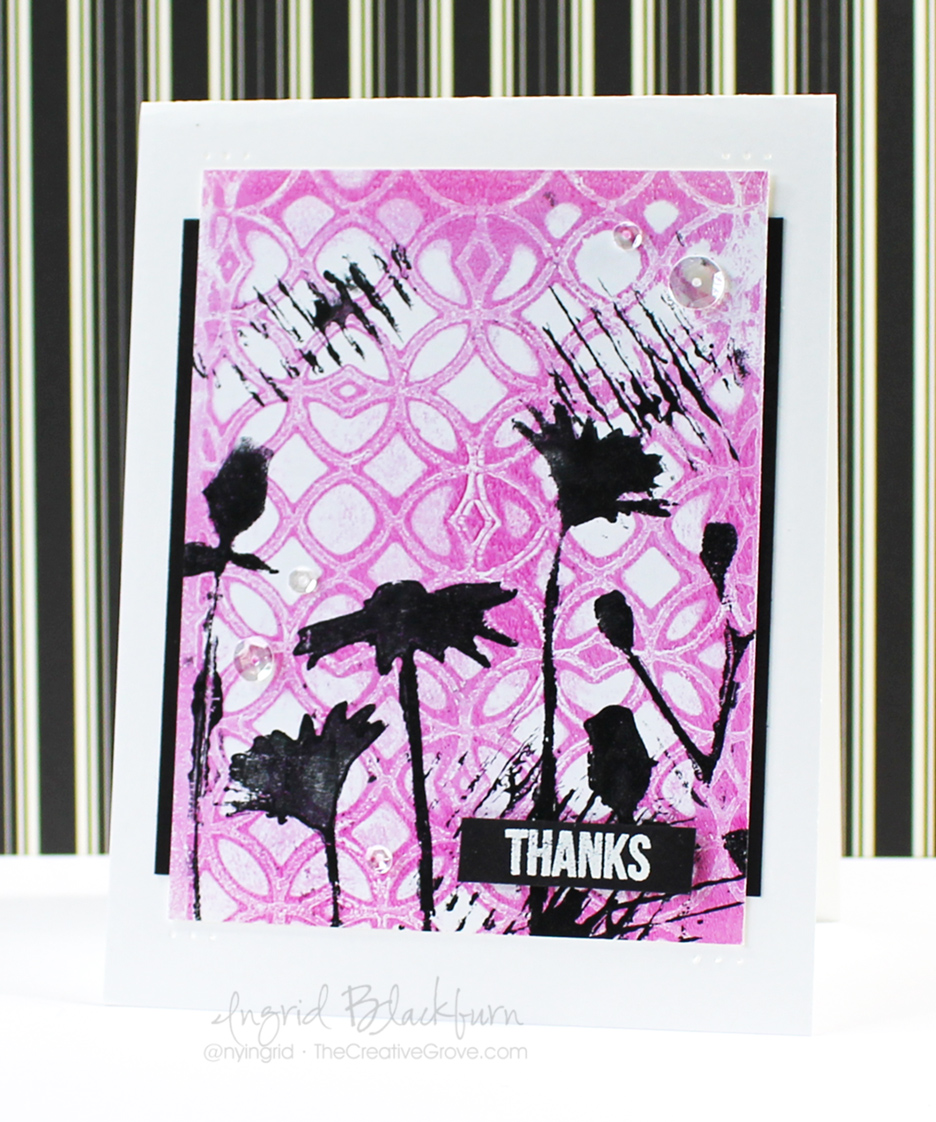
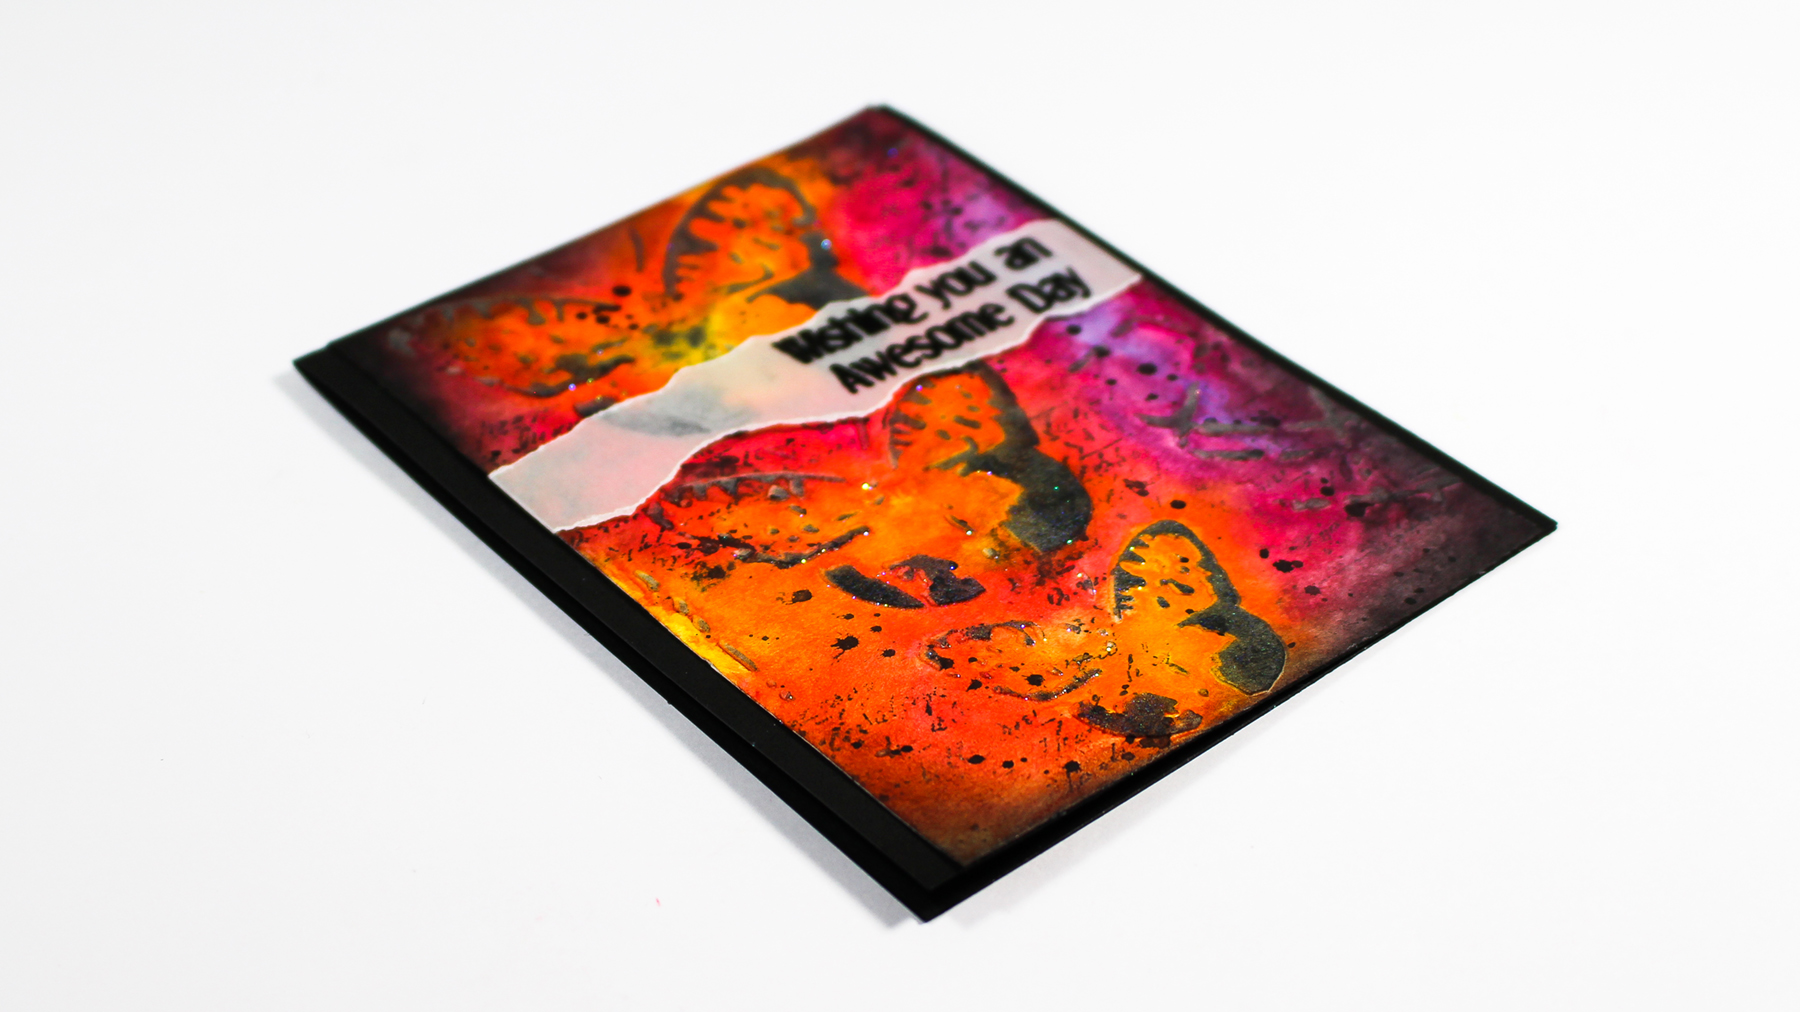
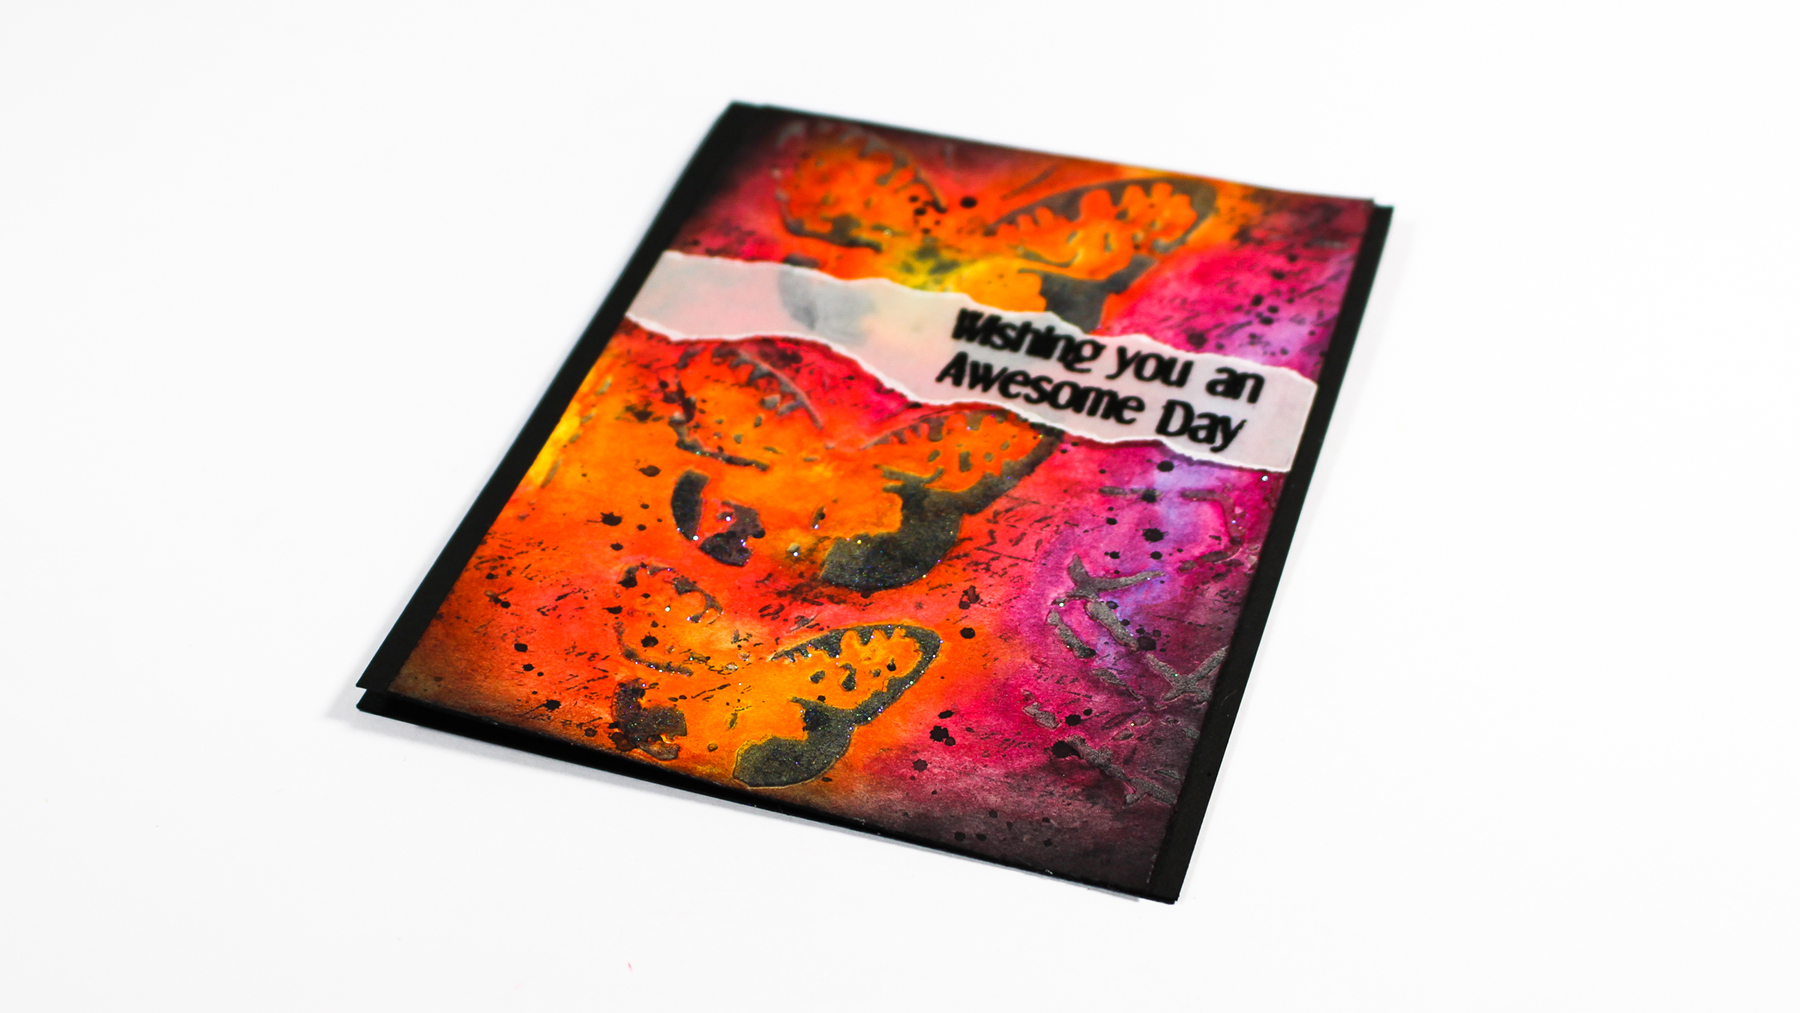
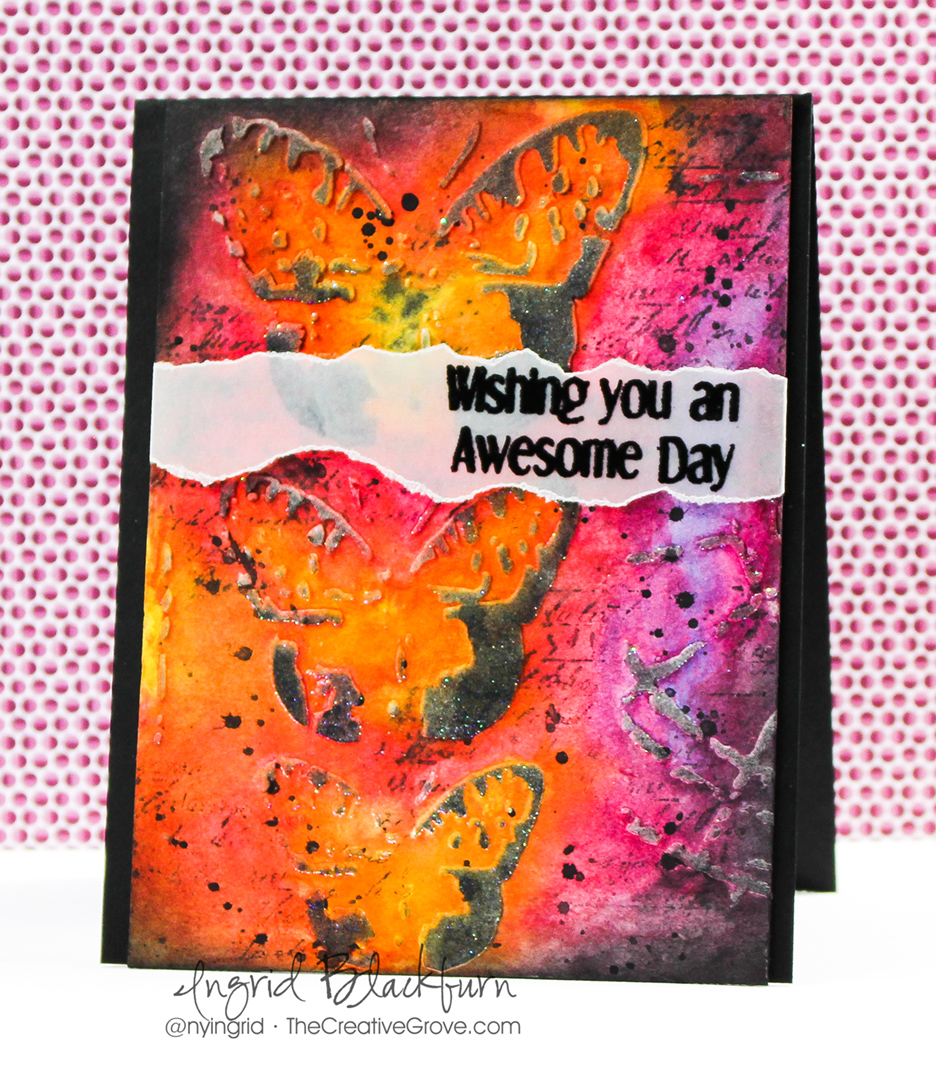
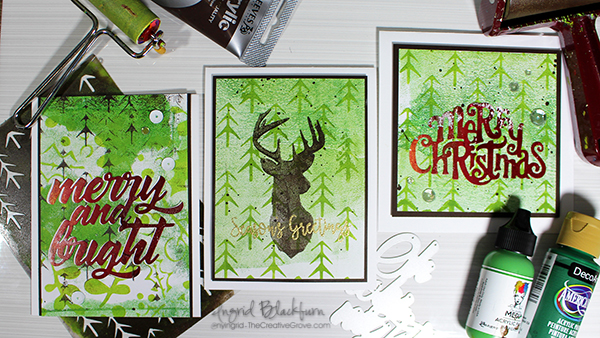
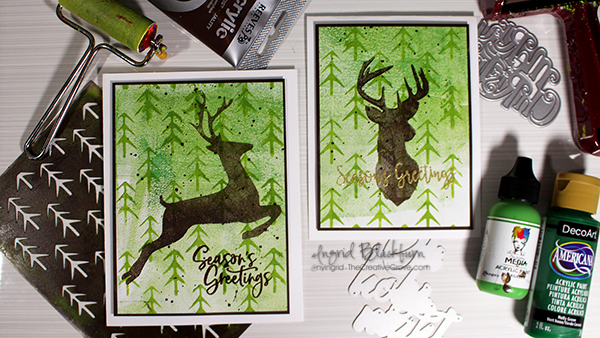
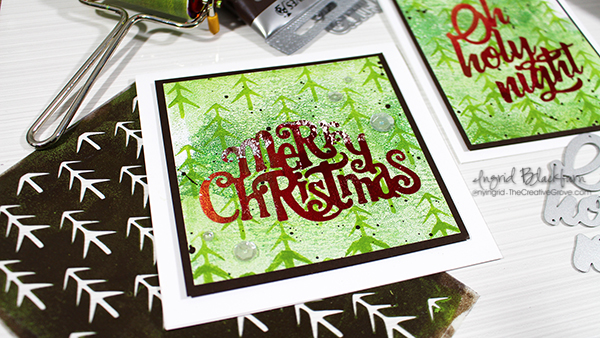
I hope you enjoyed this tutorial. Here are a few close up photos for you and the supply list. Be sure to come back to this post on November 10th to see who won the prize pack – I’m giving away Dies, Stencils and ink pads – it’s worth over $40!!! That Merry Christmas Die is one of them!!! 🙂 Happy Hopping!!!

Mixed Media Monoprint Christmas

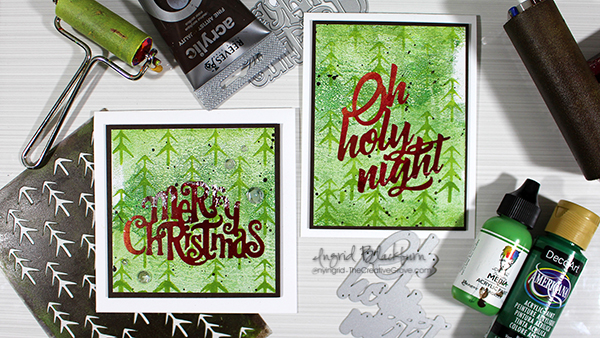
Aren’t those the prettiest cards?!! These photos do not do them justice!! Interested in seeing more Mixed Media Christmas Card possibilities? Check out this tutorial – just adjust for the Christmas Season

Sponsors & Hop Links (Giveaways closed)

Here are all those sponsors….and SO many channels in each of the five hops are giving away additional prizes – this is an AWESOME hop!

Here are links to all five hop days:

  1. Day One Hop Beginning
  2. Day Two Hop Beginning
  3. Day Three – Start on MY YouTube Channel
  4. Day Four Hop Beginning
  5. Day Five Hop Beginning

Good luck on winning all those great prizes – over 100!!! Leave me a comment below if you liked these cards – I’d LOVE to know.

Thanks for watching – till next time…
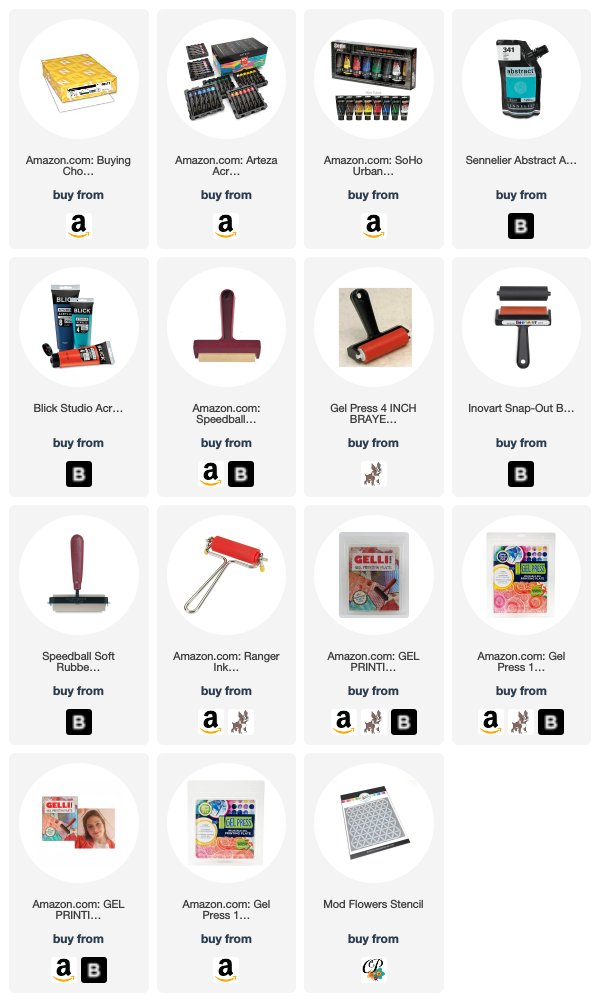
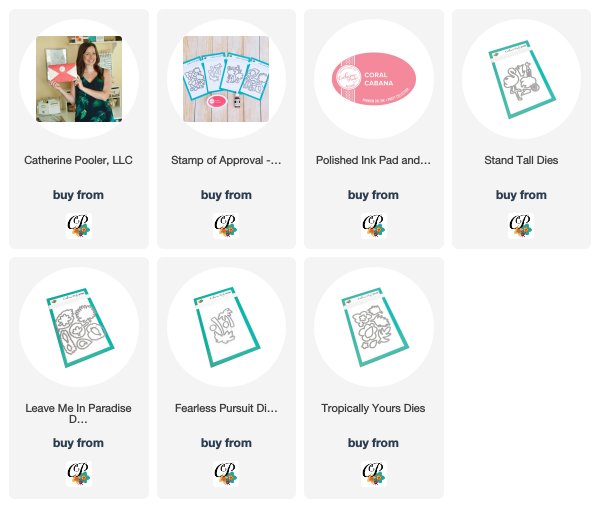
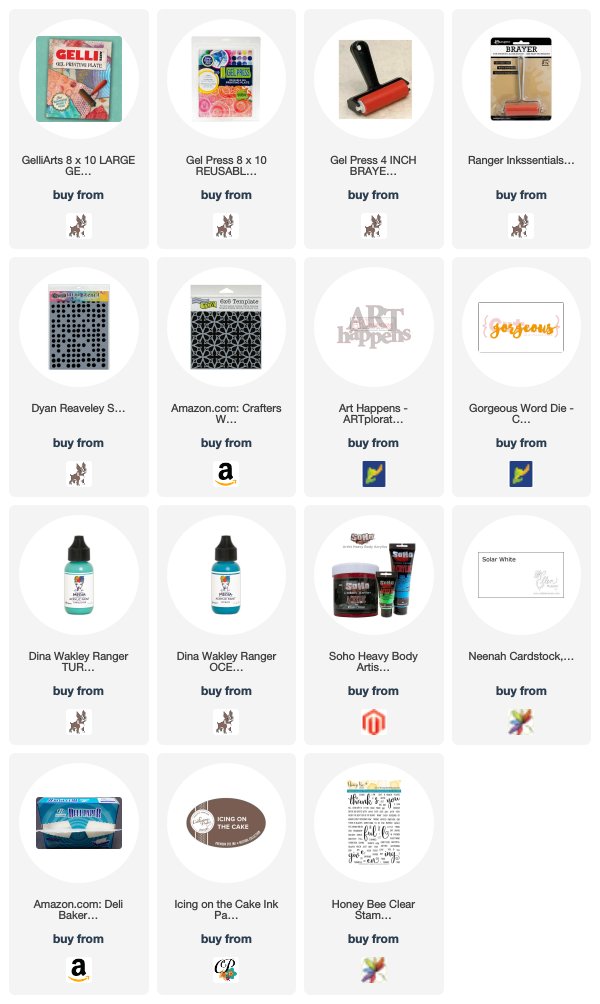
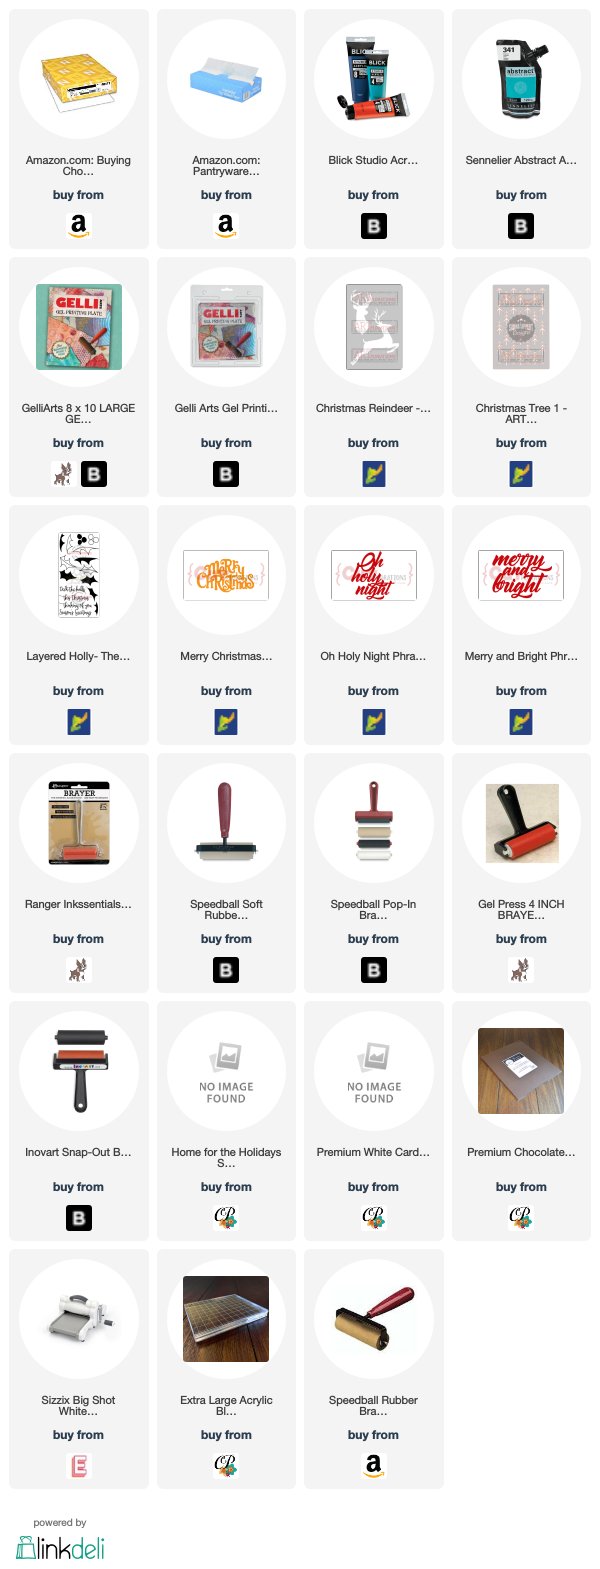
Supply List

Affiliate Links used if available

Mixed Media Christmas Cards

Hailey’s Shower Photo Supply List – https://ldli.co/e/jpxx6p

Creating Bright & Colorful Monoprint Backgrounds with a Gel Plate

Colorful Bright Monoprint Backgrounds

Have you ever used a gel plate to create bright colorful monoprint backgrounds? It’s so super easy, I think you’ll be shocked at how you quickly you can create a ton of vibrant colorful pieces to use on your cards, in your art journal or just create a fun piece of artwork!

To make this even easier for you – I filmed a little video for you. And there’s SO much more you can do with a gel plate, you’ll definitely want to add one (preferably two) to your tool arsenal.

Monoprint Backgrounds Tutorial

Click this link to see video on YouTube

If you aren’t subscribed to my YouTube channel, definitely consider it. I have many more videos headed your way – you won’t want to miss them. You can even hit the little bell to be notified!

Abstract looking monoprint backgrounds

Here are a few tips you’ll want to keep in mind when playing around with this fun technique:

  • Avoid muddy colors – Use colors that work well together. Remember that you’re going to be overlapping several, so you don’t want to use complimentary colors (opposite sides of the color wheel) when wet. You can layer those once one layer is dry – but not while wet.

bright and colorful monoprint backgrounds made with a gel plate bright and colorful monoprint backgrounds made with a gel plate

  • Use a second gel plate to help clean off your brayer – you’d be surprised how fast you can create multiple prints with just one application of paint!
  • Use good paper for your scrap clean up piece. (9/10 times, I turn that piece into a print.) The colors work amazing together, and it usually becomes a great base for a layered print

scrap piece from a monoprint gel plate session

  • Try to be patient when pulling your prints. Allow the paint to dry a bit so that you are able to lift those left behind layers underneath your newest paint application
  • Remember to lift your brayer when applying your paint. If you just keep it on the surface of your gel plate, you are only really staying in that one section. Lifting it allows for better rotation and coverage.

  • Don’t stress if just a little pulls off the plate. You can always add more – or use it as that little something in the background of a card!

bright and colorful monoprint backgrounds made with a gel plate

I use a 4″ and 2″ brayer when creating monoprint backgrounds. Sometimes that small brayer is quite helpful to get into those little spaces. And sometimes having a larger brayer is just oh so much easier!

Don’t you just LOVE these? Next up I’m going to show you what to do with some of these fun backgrounds, and just how easy it is to create a whole set of cards.

Till next time –

Supplies

To make finding the supplies I used in these projects a bit easier for you, here are a few clickable links. Compensated Affiliate Links are used when possible. Click here for disclosure. Happy Shopping!


Mixed Media Tropical Cards

I love the look of Mixed Media Tropical Cards. Today I’m getting a little inky with my Gel Press and have created some  incredible textured Tropical inspired masterpieces!

Tutorial: Mixed Media Tropical Cards

To get that fun island weathered feel, I thought a tropical looking monoprint would be a great base to these projects. What exactly is a monoprint? A monoprint is a form of printmaking where the lines and images of the print can only be made once. This makes it a bit unique and special. You can always create multiple prints, but no two will be exactly alike.

When I saw the Leave Me in Paradise and Fearless Pursuit stamp sets in the Tropically Yours SOA, I knew I wanted to create some Mixed Media Tropical cards.

First, you’ll need a base print for these projects. I chose to use an 8×10 Gel Press plate. This gave me a larger print that I could then cut down into 4 card fronts – hey I’m all about getting the most bang for my buck, you know?!!

Creating a Monoprint can be as simple or complex as you want. The one thing to remember, when you start a Gel Printing session, the more you get into it – the more interesting character and texture you build up and leave behind for future prints.

Here is the concept broken down into it’s most simplest form:

  1. Spread Acrylic Paint onto your gel press with a brayer
  2. Add texture with stencils or other items, or leave as is
  3. Start to pull prints. You’ll get 2-3 prints with each pull – a first print, the ghost print, and the final remnants.

That’s pretty much it. What makes them so intriguing are the stories between the lines. Meaning the stuff that gets left behind, or built up. That’s what we have going on in today’s print.

I knew I wanted to use the Leave me in Paradise stamp set, so I wanted to work with Greens as a base. To get the layered weathered look, I created several prints first in various shade – Browns, Orange, Yellows and Greens. Once I had little bits of paint left behind, and the prints were starting to feel a bit more complex, I created an orange print. Have you ever seen tropical leaves? They are deep and vibrant greens, yellows, orange and red.

With some orange bits dried onto the gel press, and some interesting Brown in the corners, layer up some vibrant greens. I used Dirty Martini by Dylusions mixed with some lime by Dina Wakely. Both of these paints are fairly fluid. They helped to reactivate all that dried goodness underneath.

Lay a sheet of cardstock over, and run your hands firmly on the back. We’re trying to pull as much as we can off here. The print had gorgeous depth and interesting character from a piece of Dry Wall Mounting Tape in the corners.

Cut down that piece into four and next create your cards. To see the main card I was looking to create and read a bit more about it’s process, Click Here for my blog post yesterday.

The goal was always to create a batik look to my project. But what happened next, I wasn’t prepared for and nearly threw in the towel! I had stamped the gorgeous leaves from Leave me in Paradise in Versamark ink and heat embossed them in Clear. I wanted to create a Joseph’s Coat/Faux Watercolored look to my project, so rather than coat it in dark ink, I chose to paint over everything with White Gesso.

Next was the Faux Watercolor technique – Place your piece in a phone book (or other scrap paper), fold a few sheets over it and iron off your embossing. No problem, right? Boy was I wrong. That Gesso held tight and the clear embossed leaf images were trapped.

So how do you fix this? I thought it was something for the round file, but I talked myself into just putting it to the side and trying one more time. Next I did a true Joseph’s Coat technique and used Icing on the Cake Dye ink. Here’s what it should have looked like – monoprint base and ironed off/joseph’s coat technique:

And here’s the final piece – a success! That project turned out to be a stunner…Details are on yesterday’s blog post.

And with one the other two remaining monoprints, just pop the drop dead gorgeous Fearless sentiment onto it and emboss in WOW Bark embossing powder. Add some of the textures from Good Vibes Borders in the corners to accentuate the print in Icing on the Cake ink and Matte it onto a a strip of cardstock that’s been embossed in the textures and bark for added interest. Doesn’t it look like basketweave? This card is simple, fun and definitely easy to duplicate. But in the sense that the monoprints will be different – how cool, right?

Now back to the piece headed to the trash…wait….hold the phone! That’s when genius struck. Okay – I’m bound to have one good idea every now and again…What if we could bring the covered images back to life with colored pencils?!!

Here’s a look at it along the way….

Next up, just color the images with several shades of colored pencils. I used a 72 pencil set I have by Arteza, and about 6 shades of Green. Once the pencil colors were laid on top of the botched images, smooth them out using a blender pencil. I used one by Caran d’Ache to get a smoother look. The end result was a light watercolor almost look to the piece.

The Gesso in-between is cracked and weathered, which only adds to the project. It needed something, so once you’ve embossed that rockin’ sentiment from the Fearless Pursuit stamp set in Bark by WOW, splatter some Payne’s Grey acrylic paint watered down with a few drops of Icing on the Cake ink refill.

Matte onto an edged embossed piece in Bark – notice how different it looks on white cardstock than Chocolate?!! I LOVE this embossing powder. It’s new to Catherine’s shop too!

Create a little grunge on your card base with Over Coffee Ink on Sand Dunes cardstock and you’re all set.

Overall, the monoprints are super cool true Mixed Media pieces. But what’s really awesome about them, they are one layer. The person you give these cards to will never figure out how you did that?!!

And the moral of this long epic story #2…don’t throw anything in the round file.

I hope you’ve enjoyed these couple of cards. I love the texture and creative way I can use these stamps. There are some FUN products in the box. You’ll love it all. Best part – it truly works with each other.

Thanks for stopping by today! Keep those fingers inky –

Supplies

To make finding the supplies I used in these projects a bit easier for you, here are a few clickable links. Compensated Affiliate Links are used when possible. Click here for disclosure. Happy Shopping!


Art Happens – New Craft Stash Blog Hop: Day Three + Giveaways

Art Happens

One thing I’ve learned over the past few years is that Art Happens. It truly does. Today I’m kicking off Day Three of the New Craft Stash Blog Hop with some of my crafty friends. We’ve all collected & hoarded craft supplies…come on – I know you’re one of us! Several of us were chatting a few weeks ago and decided – let’s just hop for fun and made the rule that we had to use something new. Now that means – literally new or just new as in it’s been in the drawer for a bit and it’s finally time to break it out! Today I’m using several products just like that…and I can’t wait to show you what I’ve done.

Be sure to hop on to all three days worth of hops. Get inspired to use your “new” stash, leave a comment and be entered for prizes! You’ll have until the 23rd to leave a comment. I’d love to know what new item you’re going to play with next!

Gorgeous Art Happens Tutorial

It’s no secret that I’m in love with mixed media supplies. I love to create simple mixed media projects, AND real mixed media. Well I have a treat for you today. Today’s projects are the result of a fun little gel printing session I had the other day. I wanted to use some of my newer acrylics and some new Stamplorations masks (Art Happens) and word dies. I’ll post a time lapse video later with my entire printing session, so today’s video just showcases the print I made for these two beauties…enjoy!

Click Here to view video in HD on YouTube

What do you think? It’s actually quite fun. When I first started, I’ll admit…I was quite intimidated. But the more I got into that session, and the more art that just literally poured off the plate…I kept saying things like WOW, I can’t believe I just made that and Ooh that’s gorgeous. Seriously…I was quite impressed with myself! And I think I’ll always keep that first fabulous card – cause it literally is one of those where I still say – I can’t believe I made that! You know that feeling, right?

Well, this gel printing session didn’t disappoint. I ended up with 8 art journal pages and 34 prints. Yup! Gel Printing goes so fast, and more you get into the session – little bits are left behind on the plate – Tip:  do not clean your gel plate in-between. The work you create will do that for you. Today’s print that I used came about 4/5 prints into the session. Some of the beauty on the print is from prior prints. I love the patina kind of feel. That weathered look that you usually only get with time and exposure to the elements.

Art Happens by Stamplorations

Here are the two cards – one is a traditional A2 sized card – and it needs so little to complete it. Just the Gorgeous die, cause…well hello, it’s gorgeous! And a simple little You to complete the sentiment. The die is one of the MANY fabulous word dies from Stamplorations – I am such an addict of Shery Russ dies and stencils – stamps too! She’s got some ah-mazing stuff. She’s a one woman operation, has phenomenal customer service and I swear the woman doesn’t sleep. Want to see her stuff? Click Here and use the code STAMPINGRID for 20% off orders of $15+. Hey, every little bit helps, right?!

The second project uses the mask Art Happens. I have this same sentiment from Stamplorations in a smaller sized die. WAIT till you see the mixed media project coming up using that – it’s a beauty! Using masks in gel printing is a great way to preserve colors in layers and really allow them to pop as in this project. I wanted to emphasize it a bit more, so I outlined it using a Pitt pen and Posca paint pen. I was going for a sloppy look, cause let’s be honest – there’s nothing perfect about monoprinting.

Art Happens Monoprint

Here’s a funny fact – ask any of my crafty friends who really know me – in card making, perfection is kind of one of my OCD things. Everything has to be lined up right, matted properly, etc…so mixed media nearly gave me convulsions at first. I tried to control everything – until I realized that the magic happens when you let go and just let the art actually happen.

So I hope you’re encouraged to give monoprinting a go. It’s SO relaxing, you’ll have a crazy amount of prints to create cards with, and I know you’ll just fall in love with it like I did. Hey, if this OCD papercrafter can become a mixed media artist – there’s hope for all of us, right?

Thanks for stopping by, be sure to visit all my friends’ blogs on today’s hop, and if you missed the first two days – hop on over to those too. I have the full list below. We have incredible prizes and I’m giving away a prize pack myself! Thanks for joining us on this fun little Summer journey. I hope you’re inspired now that you know Art Happens!

Comment to Win Prizes

We have some amazing sponsors & Prizes:

PLUS….

I’m giving away a prize pack to one lucky commenter from one of my blog posts! So be sure to leave comments on all the blogs – all three days for your chance to win!! Just comment on all the blog hop stops by 7/23/18.

So now it’s YOUR turn to hop along and be inspired by some of my crafty friends. Thanks for taking the time to hang a bit with me today. I’ll be back in a few days with a mixed media project for you. And stop by tomorrow as well – I’ll post that hop list too!

Today’s Hop List – Day Three

  1. Ingrid Blackburn <— You are here!
  2. Ardyth Percy-Robb <— Hop here next!!
  3. Josefine Fouarge 
  4. Tracie Pond 
  5. Nanette Tracy 
  6. Lisa Harrolle  
  7. Justine Hovey 
  8. Susan Powell
  9. Jennifer Cerizo

Did you miss Day one or Two? Get caught up here:

Day One Blog Hop List:

  1. Ingrid Blackburn  – Yup that’s me with a different post & project!
  2. Jenny Colacicco
  3. Ashlea Cornell
  4. Karen Baker
  5. Ali Farmer
  6. Catherine Pooler
  7. Allison Cope
  8. Veronica Zalis

Day Two Blog Hop List:

  1. Melissa Miller
  2. Tracey McNeely
  3. Kelly Martin
  4. Amy Seigler
  5. Michelle Wallace
  6. Ilina Crouse
  7. Maureen Merritt
  8. Nance Salkeld
  9. Deepti Stephens

To make finding the supplies I used in these projects a bit easier for you, here are a few clickable links. Compensated Affiliate Links are used when possible. Click here for disclosure. Happy Shopping!


Using Recycled Materials on Cards

Have you every thought to use Recycled Materials on your cards before? This month over at Happy Little Stampers, the challenge is just that – Recycle. This one threw me. Yes, I could come up with lots of 3D projects, and that was where my head kept going…but I wanted to challenge myself to a card. So what do you use? Well, you can use anything that your recycling!

HLS Mixed Media challenge July 2016

I’m currently living in Germany – and recycling is a MAJOR thing here. SO big, that it’s the #2 country in the world for diverting 62% of its trash from landfills – second only to Austria which diverts 63% of all trash. And it’s no joke over here – our recycling calendar is insane – almost all garbage is separated. (And in case you were wondering where the US stacks up…34% – toward the end of the middle pack)

So, I thought it was appropriate that I add my fair share on this project. With the exception of my card base, and one tiny die cut, all my materials (paper) used on this project are…yup, you guessed it – recycled!

Recycle-Mixed-Media-Card-Ingrid-Blackburn---001

Be sure to stop by this month’s guest designer – Stephanie Lanzalotto’s blog as well as the other design team members blogs.

Recycled Birthday Butterfly Tutorial

My card front is made of something we ALL have plenty of – a torn up box from Amazon. The base of my painting is the corrugated inside of the box. I tore it so you can see a little more of the texture and character. In order to have the paint really grab onto my cardboard without sinking into it, I first covered it with some clear gesso.

To make the piece lighter, remove one of the slick sides that cover the corrugated part – I used that for the greeting…yup – that’s not card stock – it’s recycled cardboard!

Recycled-Mixed-Media-Card-Ingrid-Blackburn--007

For the butterflies, I used a page from an old book. I definitely wanted to have some discoloration on the pages. If you don’t want to break apart a book, try newspaper!

  • Tear a piece of the box the size you want and remove one of the slick sides for later.
  • Paint some clear gesso onto your recycled cardboard piece.

Recycled Materials in Cards

  • Cover your cardboard in a few coats of white acrylic paint – this will become the background for your painting.
  • While your white is drying (I sped mine up a bit with a heat tool), stamp your butterfly from the HLS Butterfly Birthday set in Ground Espresso onto a page from an old book.
  • Layer your stamped butterfly over a piece of espresso card stock and another piece from the book – die cut at once.
  • Curl up the card stock and stamped layers a bit. Attach to each other using mini glue dots at the butterfly body.
  • Separate the top and middle layer with a foam dot cut in half. This will help to pop up those top wings.

Recycled-Mixed-Media-Card-Ingrid-Blackburn--006

  • Once your white is dry, add some pink flowers by thickly applying some acrylic paint with a rounded brush. To get the texture, just keep dabbing in a push down motion and move to another area. I left it rather thick so that it would give the appearance of petals.
  • Add stems with a little sap green mixed with Burnt Umber for an olive green look. I needed to use a smaller brush to keep the stems from being too thick.
  • Allow your flowers to dry – I used a heat tool a little, and then allowed the flowers to dry over several hours. Once dry, they had a shiny appearance.

Painted Mixed Media Flowers - Recycled

  • Stamp your greeting (HLS Doodled Flowers) using Ground Espresso Distress Ink onto the back piece of card board that you separated from the center & front. I used the slick side as the reverse had the imprint from the corrugated part.
  • Immediately dip your greeting into clear embossing powder and heat set. To see how I use distress inks with embossing powders and other embossing techniques – click here for a great video tutorial.
  • Tear closely around your greeting and adhere to your project using Multi Medium Matte or glue (be sure your stems are dry!)

Happy Little Stampers Mixed Media Challenge - Recycled

  • Smoosh a versamark pad through the Patina stencil by Penny Black so that creates a border on your card base. I didn’t want to add too many layers, as the recycled cardboard was heavy enough.
  • Add clear embossing powder and heat set.
  • Adhere your cardboard card front to the card base using glue on the ridges.
  • Go over your stamped butterfly image with a Spectrum Noir glitter pen & Attach to your painted base using foam dots.

Patina Stencil - Penny Black - Recycle

So what do you think? I bet you think twice about throwing out that Amazon box next time…lol! The best part about this Mixed Media card is that the recycled cardboard has such great texture! And to think I usually use it just to add lines with acrylic paints! Thanks for joining me today, I hope I inspired you in some way to use some recycled materials on your cards. I can’t WAIT to see what you come up with.

Join us over at Happy Little Stampers Mixed Media Challenge – now it’s your turn.

Go get those fingers inky –

Signature

[optin_box style=”12″ alignment=”center” email_field=”email” email_default=”Enter your email address” integration_type=”aweber” double_optin=”Y” list=”4161292″ name_field=”name” name_default=”Enter your first name” name_required=”Y” opm_packages=””][optin_box_field name=”headline”]Learn more with our exclusive FREE video series:[/optin_box_field][optin_box_field name=”paragraph”]PHA+UGx1cyB5b3XigJlsbCBiZSBhZGRlZCB0byBteSBGUkVFIENyZWF0aXZlIFRpcHMgRS1sZXR0ZXIgd2hlcmUgSSBzaGFyZSBleGNsdXNpdmUgcHJvamVjdHMsIHZpZGVvcyAmYW1wOyB0aGUgMTIgRGF5cyBvZiBDaHJpc3RtYXMgUHJvamVjdCBTZXJpZXM8L3A+Cg==[/optin_box_field][optin_box_field name=”privacy”][/optin_box_field][optin_box_field name=”top_color”]undefined[/optin_box_field][optin_box_button type=”0″ button_below=”Y”]Get Instant Access![/optin_box_button] [/optin_box]

For Dad

I’m honored to be a guest designer for the Mixed Media Mojo Challenge today. This month, the girls are challenging you to create a mixed media piece (more than one medium) with a flower theme in mind – I chose to make a few abstract flowers. There’s even an optional twist – real or faux stitching – I’m sure you can guess which one I applied!

Mixed Media Mojo

I started out wanting to create a card for a friend. But something happened as I was working on my piece. My dad wandered into my crafting office, stopped an said Wow – that’s really nice! THUD….that was me picking myself up off the floor.

You see, my father has NEVER commented on anything I’ve made unless I gave it to him directly….lol! He lingered next to my crafting desk, and continued to tell me how much he liked this piece – it was about 80% done. Maybe it was the flowers? The colors? I was too dumbstruck to even ask why! Who cares why….He liked it, he liked it – he really, really liked it! (channeling my inner Sally Field)

My dad loves flowers – so in my mind – that’s it. Well, I decided right then and there that this would not be a card, but rather a frame-able piece that I’ll give him for Father’s day. He’s hard to shop for – at 83 he doesn’t need much – and did I mention that he liked it!

So here it is – my little masterpiece. This project was so much fun to make, here’s how I did it.

Mixed Media Mojo Flowers Challenge - Ingrid Blackburn

Abstract Flowers Project Instructions

First you’ll need to create a few Wrinkle Free Distress backgrounds – one in Mustard Seed/Spiced Marmalade and another in Tumbled Glass/Broken China/Mermaid Lagoon/Salty Ocean. The centers of the abstract flowers are with the same technique in Hickory Smoke/Soot Black. Once you have those done, free hand cut the flowers and centers. The background was edged in Hickory Smoke, Soot Black and some Paynes Grey Acrylic diluted with water. Brush some Paynes Grey and Silver acrylic paint onto the background with a fan brush. A little background detail was added using the Latticeworks stencil, a Starbucks cup holder and some bubble wrap. Next add a little faux stitching on the flowers and greeting (from the Noteworthy set by Stamplorations).

Add a little basic shadowing under the abstract flowers, paint some stems in Paynes Grey, and add some PG & White splatters, and a little edging in a black and white pigment pen – that’s it! I love the Mixed Media Mojo piece, I wanted to keep it cool – no browns which is very unlike me!

Since I had decided to frame it for my father, it needed a cool matte. Once I settled on the combination of 1/16 white, 3/4 black and 1/8 Brushed Silver…the black needed to stand apart, add to the design and not take away all at the same time – that’s asking a lot!

Enter clear embossing for a subtle tone on tone effect. To get this perfect result with the Tim Holtz stencil, you’ll want to find the center point in your project. Then line up your stencil over the center. That way you can go up and down in perfect unison to get as close to a perfect pattern as possible. Line up your patterns top and bottom and smoosh Versamark to your project. Add Brutus Monroe clear embossing powder – it’s hands down the best powder I’ve used in 18 years of embossing!  And I’ve used many different kinds. 🙂

Abstract Flowers - Mixed Media Project

I just love the end result – it turned out almost exactly as I envisioned…which is rare! I hope you enjoyed it too. It doesn’t matter if you go the more traditional or Abstract Flower route, you’ll have fun creating your own piece. And stop by the challenge blog for sure a few times this month – there’s a new Mixed Media tutorial every week – a true treasure of creative inspirational how to!

So here’s what I want you to do now….go to the Mixed Media Mojo Challenge and give the Flowers Challenge a try – Mixed Media doesn’t have to be crazy involved, you’d be surprised what you can come up with with just some simple things like watercolor, acrylics, stencils and some water. It’s relaxing and you’ll amaze yourself – I promise!

Now click here to visit the challenge and get inspired with all the great projects designed by the UBER talented Design Team!  I’m off to find the perfect frame for this beauty. Now it’s your turn to get your fingers inky –

Signature

[optin_box style=”12″ alignment=”center” email_field=”email” email_default=”Enter your email address” email_order=”2″ integration_type=”aweber” double_optin=”Y” list=”3846012″ name_field=”name” name_default=”Enter your first name” name_order=”1″ name_required=”Y” opm_packages=””][optin_box_field name=”headline”]Learn more with our exclusive FREE video series:[/optin_box_field][optin_box_field name=”paragraph”]PHA+UGx1cyB5b3XigJlsbCBiZSBhZGRlZCB0byBteSBGUkVFIENyZWF0aXZlIFRpcHMgRS1sZXR0ZXIgd2hlcmUgSSBzaGFyZSBleGNsdXNpdmUgcHJvamVjdHMsIHZpZGVvcyAmYW1wOyB0aGUgMTIgRGF5cyBvZiBDaHJpc3RtYXMgUHJvamVjdCBTZXJpZXM8L3A+Cg==[/optin_box_field][optin_box_field name=”privacy”][/optin_box_field][optin_box_field name=”top_color”]undefined[/optin_box_field][optin_box_button type=”0″ button_below=”Y”]Get Instant Access![/optin_box_button] [/optin_box]


Mixing CAS & Monoprinting

Have you ever mixed a monoprint with clean and simple design? Monoprinting is not only super easy, it’s fun, quick and I’m always amazed at the results. I highly encourage you to give it a try. And most of us LOVE clean and simple, so why not mix them together?

It’s snowing here today in the Black Forest – hard to believe it’s almost May! Seems like a good day to work with my Gelli Plate.

Clean and Simple Mixed Media

In the spirit of creative card making, today we’re going to mix it up a little – for the CAS Mix it Up Challenge. I’m addicted to this challenge, and although it’s in it’s infancy – just two months old…it has a HUGE following already with some amazing card makers.

It’s the brain child of Bonnie Klass and Loll Thompson. You probably have crossed paths with one or both over the years, as they are avid card makers, have designed for numerous teams and both have distinct styles each their own.

april

This challenge is all about mixing clean and simple stamping/design with mixed media. Now the words mixed media get one of two reactions – interest and terror. But today’s project is hoping to not only peak your interest, but dispel the myth that all mixed media is intense, takes a long time and is only for artists who love to art journal.

Both projects today were from the creation of one monoprint. To make a monoprint you need three things – a printing plate (I use a gelli plate), some acrylic paint and a tool to spread the paint – I used a brayer.

Gelli Plates are inexpensive tools that give you the ability to make your work looks masterful, unique and will definitely leave the recipient of your card wondering…how in the world did you do that?!! Here are just a few prints I made quickly one day to give you an idea of how fun this artform is:

Gelli Arts - Gelli Plate Monoprints for Mixed Media

Today we’re going to use a 6×6 inch plate by Gelli Arts. And for this challenge, we’ll incorporated a few stencils as well – after all, that is the theme of this month’s challenge! I think you’ll be pleasantly surprised to see there’s not much else to it.

Why don’t we get started. I filmed the process for you, wrote a step by step tutorial below and added some detailed pictures. The video has three distinct parts – the monoprinting (first five minutes – yup…that’s it), card specifics and why, and lastly (final 2 1/2 minutes) – all about clean and simple design and the rules I live by – don’t miss that part!

Click Here to watch in HD on YouTube

What do you think? Of course you can always use stencils in the traditional way too – I just thought it would be fun to bring a little monoprinting into the mix.

[divider style=”10″]

[optin_box style=”12″ alignment=”center” email_field=”email” email_default=”Enter your email address” email_order=”2″ integration_type=”aweber” double_optin=”Y” list=”3846012″ name_field=”name” name_default=”Enter your first name” name_order=”1″ name_required=”Y” opm_packages=””][optin_box_field name=”headline”]Learn more with our exclusive FREE video series:[/optin_box_field][optin_box_field name=”paragraph”]PHA+UGx1cyB5b3XigJlsbCBiZSBhZGRlZCB0byBteSBGUkVFIENyZWF0aXZlIFRpcHMgRS1sZXR0ZXIgd2hlcmUgSSBzaGFyZSBleGNsdXNpdmUgcHJvamVjdHMsIHZpZGVvcyAmYW1wOyB0aGUgMTIgRGF5cyBvZiBDaHJpc3RtYXMgUHJvamVjdCBTZXJpZXM8L3A+Cg==[/optin_box_field][optin_box_field name=”privacy”][/optin_box_field][optin_box_field name=”top_color”]undefined[/optin_box_field][optin_box_button type=”0″ button_below=”Y”]Get Instant Access![/optin_box_button] [/optin_box]

[divider style=”10″]

CAS Monoprint Tutorial

  • Start out by gathering up all your supplies. Monoprinting goes fast – and there’s nothing worse than not having your paper right there and your paint drying up on you!
  • Spread out your background color with a brayer and the rubber attachment.
  • Clean off your brayer on a piece of scrap paper and immediately roll over your gelli plate to “lift” some of the paint you just laid down. You want to get the look in the video – lots of color still, but a bit subdued. TIP – Don’t “lift” more than twice – you’ll remove too much paint.

Gelli Plate Mixed Media

  • Place your Latticeworks stencil by Tim Holtz over your paint and pull the positive print. TIP – if you want it to be a bit random, only pat the back of your paper in random spots. Try to leave a little paint behind, I chose to pull most of it.
  • Lift your stencil, and place your white card stock on the pattern left behind. Burnish the back of your paper with your hand (I like to add a piece of copy paper if my paper is shorter than my plate as in the video) to transfer as much of your print as possible.
  • Lift your print and try and pull a ghost print with copy paper if you can – I was unable to.

Monoprints and monoprinting

  • Clean your gelli plate in-between if you desire, for me that always depends on how much is left behind and what my goal with the project is.
  • Add the Bloom Silhouette stencil by Artplorations to your plate and add a dark color with a brayer to the desired flowers. I chose to add Paynes Grey. You want a contrasting color to your first color. Brown or Dark Purple with Yellow, Black with Blue or Red, etc…
  • Lift your stencil and pull the print onto your second print (the negative), if you have a ghost print – pull that as well onto another piece.

Mixed Media and CAS Monoprints - Ingrid Blackburn

  • Add some marks to your Gelli Plate with more Paynes Grey and the inside of a Starbucks Cup Wrapper. The corrugated inside is great for texture.
  • Add the lines in three spots – if I could do mine again, I’d add the last one a bit higher. I remember thinking not too high, but my original spot in my mind would have been better. TIP – Lesson learned – go with instinct in art, not the mind.
  • Trim your positive and negative prints down. Measurements are below.

Clean and Simple Mixed Media CAS

CAS Monoprint Card #1 – Black

  • Stamp Thanks from Mini Thanks (Create a Smile) in bold with Versafine Black ink (Tsukeniko) and emboss in clear.
  • Add the negative print to black card stock leaving more space on the bottom than the top (Rule of thirds). Add five sparkling clear sequins.
  • Add a little paper piercing to the top and bottom around your print and you’re set with Card #1

Dimensions:

  • Black card base – 5 1/2 s 4 1/4″ Folded
  • Monoprint –  5 1/4 x 2 7/8″ (trimmed down)

Gelli Plate Prints - Ingrid Blackburn

CAS Monoprint Card #2 – White

  • Stamp Thanks from Mini Thanks (Create a Smile) onto a scrap piece of black card stock with Versamark (Tsukeniko) and emboss in White. Trim it down as in the photo leaving more space to the right and left and just a hair top and bottom.
  • Adhere print to black card stock, making sure it’s centered and the black comes out left/right.
  • Adhere to white card base.
  • Add greeting, popping it up with fun foam.
  • Add five sparkling clear sequins.
  • Paper Pierce three holes top and bottom as in the photo.

Dimensions:

  • White card base – 4 1/4 x 5 1/2″ Folded
  • Monoprint – 3 1/2 x 4 1/2″
  • Black Matte – 3 5/8 x 4″

In the video at the end, I go over my rules for design and clean and simple cards. It’s the last 2 1/2 minutes.

Creative Cards - The Creative Grove

That’s it! What do you think? Don’t let mixed media scare you. It’s just combining different mediums on a project. This project used Acrylic Paint, Stencils, textured surfaces, stamping and heat embossing. We added a little sequins for bling and you’re all set – easy peasy!

Now it’s your turn to get those fingers a little inky. The challenge is coming to an end today, but there will be a new one on the 1st. There’s still time to get one last project in though!I’m also going to play along in some never ending challenges as well…I love all the companies products I used today, and can’t say enough about them. I purchased them all on my own….they are products that I use over and over again.

Playing along with – Stamplorations Anything Goes Challenge for my Bloom Silhouette Stencil, April’s Project Share over at Create a Smile , and Happy Little Stampers Stencil Monoprint challenge – how perfect is that!

Stamplorations and Artplorations Happy Little Stampers CAS Challenge

Leave me a comment and let me know what you think! Have you tried a little Mixed Media before? I’d love to know!

Till next time –

Signature

[optin_box style=”12″ alignment=”center” email_field=”email” email_default=”Enter your email address” email_order=”2″ integration_type=”aweber” double_optin=”Y” list=”3846012″ name_field=”name” name_default=”Enter your first name” name_order=”1″ name_required=”Y” opm_packages=””][optin_box_field name=”headline”]Learn more with our exclusive FREE video series:[/optin_box_field][optin_box_field name=”paragraph”]PHA+UGx1cyB5b3XigJlsbCBiZSBhZGRlZCB0byBteSBGUkVFIENyZWF0aXZlIFRpcHMgRS1sZXR0ZXIgd2hlcmUgSSBzaGFyZSBleGNsdXNpdmUgcHJvamVjdHMsIHZpZGVvcyAmYW1wOyB0aGUgMTIgRGF5cyBvZiBDaHJpc3RtYXMgUHJvamVjdCBTZXJpZXM8L3A+Cg==[/optin_box_field][optin_box_field name=”privacy”][/optin_box_field][optin_box_field name=”top_color”]undefined[/optin_box_field][optin_box_button type=”0″ button_below=”Y”]Get Instant Access![/optin_box_button] [/optin_box]

Mixed Media Watercolor

Mixed-Media-Watercolor-March-2016-HLS

If I were to say Textured Watercolor to you, what would you think of? Mixed Media? Embossing Paste? I have to admit, this month I felt a little challenged when I saw the theme over at the Mixed Media Challenge at Happy Little Stampers – Water. Now you can take this a few ways – water based  techniques or literally create a water scene (Usually what I’d do). SO, I thought I’d give a little Textured Watercolor a shot.

HLS Mixed Media challenge March 2016

To get the water flowing on my mixed media piece, and have a little fun – I whipped out some bright colors, stencils, stamps and a few different mediums. I even shot a real time video for you too – so if you want to see how I watercolored Embossing Paste to create a beautiful textured card, just watch here – or click the link below to watch in HD on YouTube.

Watch in HD on YouTube

The snow is falling as I write this blog post, so it was fun to work on a project that gave me a spring/summer feel. That’s what I love about art, it takes you away to some cool places! Here’s a written tutorial for you too – but the video has much more detail.

Mixed Media: Creating Textured Watercolor

  • Add embossing paste  through a stencil where you want to on 140# cold pressed watercolor or mixed media paper. I used Specimens 12×12″ by The Crafters Workshop. Set aside to dry.
  • Paint over your dried piece with bright vibrant watercolors as in the video. I used Lemon Yellow, Translucent Orange, Magenta, Quinacrodone Violet, Cobalt, Paynes Grey (Schminke) and Permanent Rose (Mission).

Mixed Media Watercolor-002

  • Keep your watercolor loose and bright, adding dimension through layers and depth by keeping the darker areas balanced with the light.
  • Allow to dry thoroughly.
  • Stamp Script stamp in Soot Black Distress Ink in random spots, touching up in spots with water to keep it loose and imperfect.
  • Add splats with a watery Paynes Grey and a paint brush.

Textured Mixed Media

  • Once dry, add a little sponging to the edges and lightly on the sides with Hickory Smoke and Soot Black Distress inks.
  • Secure your project and stencil over it again. Sponge your embossing paste in Hickory Smoke and Soot Black. If not dark enough to your liking, use your Distress Inks in the direct to paper method.
  • Cover your project with a destatic tool.
  • Place your stencil over top your project again and smoosh a versamark pad over your embossed images.

Mixed Media Watercolor

  • Add glitter, then a little clear embossing powder. Heat set
  • Rub over your project with a cloth or paper towel to remove the destatic powder and some of the glitter.
  • Emboss a greeting on a piece of Vellum card stock, tear and add to your project as in the video. I used Everyday Sentiments (Happy Little Stampers)
  • Add piece to black card stock and trim if needed. If you do trim, add a little black to the bottom as in the video and touch up your sponging.

Mixed-Media-Watercolor-007

And come to think of it – I created another Watercolor Mixed Media piece earlier in the week for my friends Loll & Bonnie’s new challenge too – CAS Mix Up. See that card here. I decided to play along with two other challenges today – Anything but Cute – Color and Mixed Media Mojo – Springtime/Watercolor.

abc-badge-crazy-for-color  Graphic to copy 3

So grab those bright watercolors, and have fun creating your own Mixed Media piece! I’m sure you’ll get just as lost in it as I did. Till next time –

Signature

[optin_box style=”2″ alignment=”center” email_field=”email” email_default=”Enter your email address” email_order=”2″ integration_type=”aweber” double_optin=”Y” list=”3846012″ name_field=”name” name_default=”Enter your first name” name_order=”1″ name_required=”Y” opm_packages=””][optin_box_field name=”headline”]Learn with our exclusive FREE video series[/optin_box_field][optin_box_field name=”paragraph”]PHA+R2V0IHRoZSBmcmVlIENyZWF0aXZlIFRpcHMgRS1sZXR0ZXIgYW5kIGxlYXJuIHdpdGggc3Vic2NyaWJlciBleGNsdXNpdmUgdmlkZW8gYW5kIHBpY3RvcmlhbCBjb250ZW50LiBJbmNsdWRpbmcgb3VyIHllYXJseSAxMiBEYXlzIG9mIENocmlzdG1hcyBzZXJpZXMhPC9wPgo=[/optin_box_field][optin_box_field name=”privacy”][/optin_box_field][optin_box_field name=”top_color”]undefined[/optin_box_field][optin_box_button type=”0″ button_below=”Y”]Get Instant Access![/optin_box_button] [/optin_box]