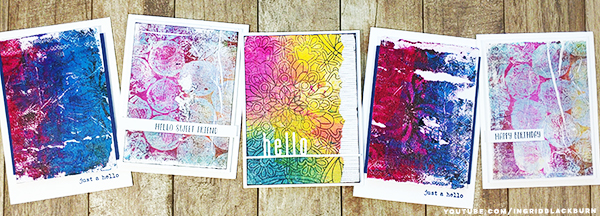
Be different – Make amazing PAPER NAPKIN CARDS with a Gelli Plate

Paper Napkin Cards aren’t what they used to be. Have you ever used napkins or other frail papers in your art? Ever had the thinnest of papers fall apart on you? Tear as you separate them?

I’m just a girl (got gwen stefani stuck in your head now?) who LOVES that look you can get from a Gelli Arts® Gel Plate – (affectionately called Gelli Plate), a brayer, acrylic paints and a few stencils. Seriously – if you’ve never tried printing with a Gelli Plate, or used paper napkins on cards, keep reading…
I’m not talking about your everyday prints. I’m talking about those layered prints, that have the positive, negative and a whole lotta grungy colored goodness going on. So what in the world does that have to do with Paper Napkins you might ask? Well, let me start at the beginning…

Paper Napkin Cards

A few weeks ago I showed in this video exactly how I make cards quickly using the top layer of paper napkins. I always find paper napkin patterns that I LOVE. It’s become a little bit of an addiction. And forget about it around the holidays….that’s a great idea by the way…a stack of Christmas Cards made from an inexpensive pack ($3 for 80 focal images!) of Paper Napkins! It’s a no-brainer…

That video shows just how easy it is to make cards from a pack of paper napkins. Spoiler alert – they don’t even use adhesive to make the panels! Now you REALLY want to see how to make cards from paper napkins, huh?

Almost always, you’re only going to use the top layer for cards. That means that you are usually left with 2 blank layers unused. I told my youtube subscribers that I’d have some fun ideas for what to do with those left over layers, and that’s where we’re at today!

So, since today we’re making happy cards, I thought why not make THREE for you! The first two use layer 2 & 3 from the napkin – you know, the left over pieces.

I have a video coming on my youtube channel in the next few weeks, and you’re getting a sneak peek at the final projects. Are you a subscriber? If so, definitely tell me in the comments!

Here’s a little something to help you GET inspired and GET creating today with your gel plate.

If you want to know how to use one…I’ve got a great how to use a gelli plate video here and this one shows a fun multi layered print that showcases 11 ways to improve your card design.

The Prints

Now you’re going to need the unprinted layers from when you separated your napkin – it’s okay if they have some ghost imaging on them. I’m going to show you two ways of getting some COOL pieces for your cards and mixed media projects.

If when making your cards, you run up against needing an easy way to separate the layers, I have a way to do that. It’s quick, easy and works every time. And the video is only 2 minutes…even better:

CLICK HERE to watch in HD on YouTube

Now that you have your layers separated, our first two projects use white, plain, layers. This is perfect for those prints that still have a ghost image on them too.

Did you subscribe to my youtube channel? I post weekly videos on a variety of card making and mixed media projects. Hope you pop by!
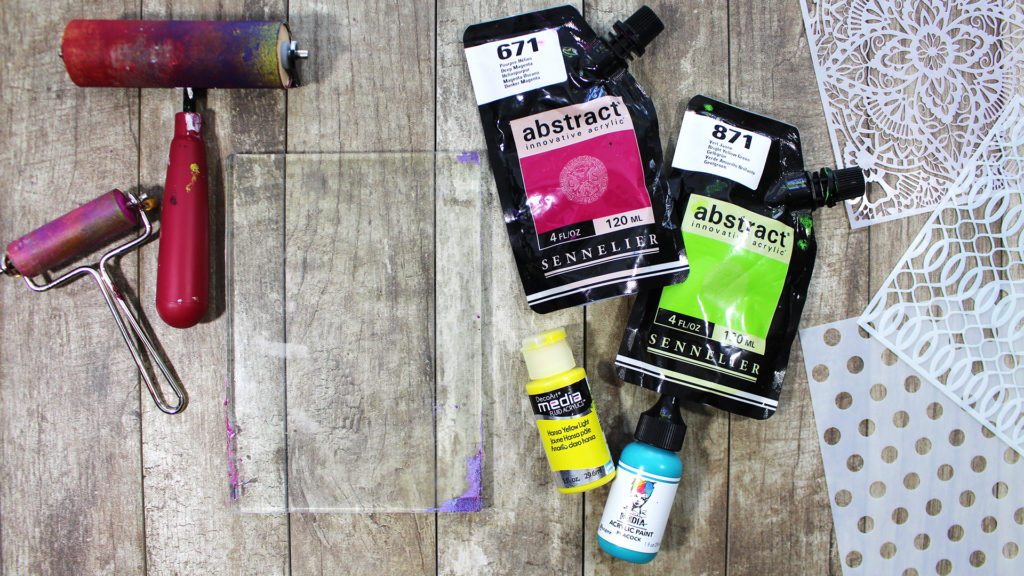
For these two Paper Napkin Layers, you’ll need to create a fun pattern on your gel plate with whatever medium you want. I used a Gelli Arts® Gel Plate, a Brayer, Acrylics, stencils and items that create texture – like the above one – large bubble wrap.

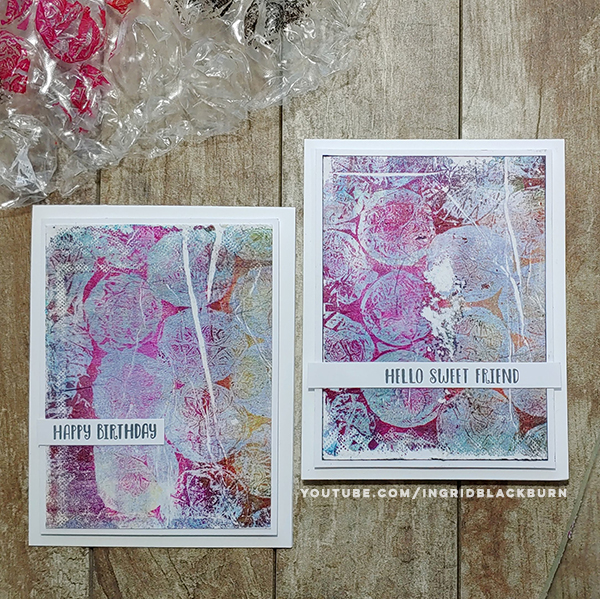
Don’t leave your napkin down too long, pull your print right away. Be careful, as it’ll be wet and napkins can tear easily. This one below tore. To fix it, I adhered it next to each other. It ended up creating this cool torn look.

Notice the cool texture from the napkins? The pattern from the embossed edge? I’m telling you – it’s the COOLEST textured look.
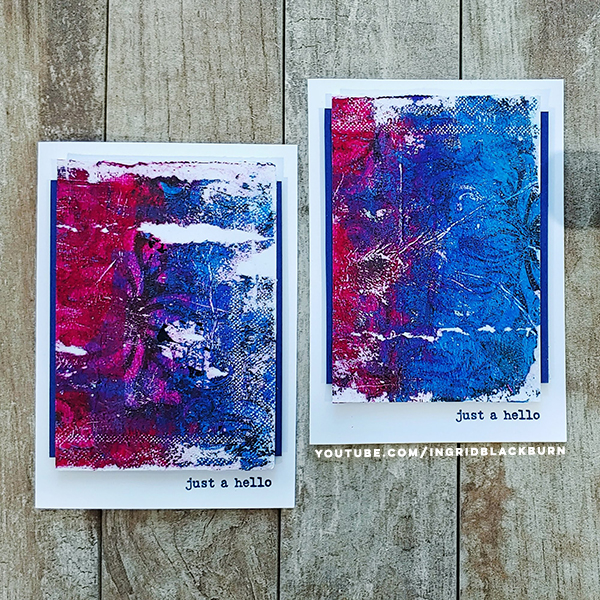
And you don’t need anything complex for a sentiment. I used some go to sentiments like the ones from the stamp set Fluttering Friends.

Custom Gloss Spray Prints

For the third project, get a little creative and create your own papers – who needs to buy those?!! USE WHAT YOU HAVE. First up, try stamping with your favorite background image in archival ink on the napkin layers or tissue paper.

I had the need to be a little creative for about 20 minutes one day. Look at all these you can create! I used LOTS of backgrounds by Catherine Pooler, some Unity stamps (see those flying keys…love a good nod to Harry Potter) and a few other favorite stamps.

This way, when you need something interesting for a project, you have a cool stash. Best part, you’re using what you already have – doesn’t get better than that! Isn’t that cottage garden background by Catherine amazing!

For this project, I thought it would be fun to use one of my favorites (not pictured above) – Rondi’s Window Background Stamp. I love this background stamp. You can create some of the most gorgeous cards with this stamp. Now, I got a little creative here, and didn’t use a gelli plate! GASP!
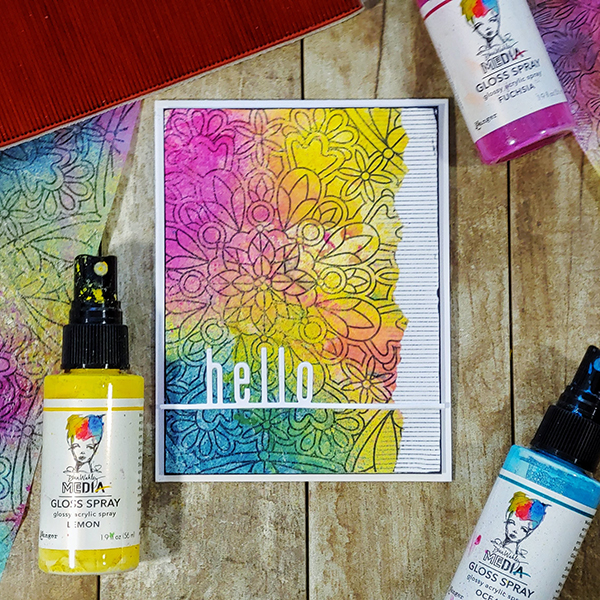
Instead, I thought it would be fun to break out some of my new Dina Wakely Gloss Sprays and see how well they color fragile papers. Isn’t that tie dye effect just gorgeous?!! I love that hello die by Catherine Pooler, it’s the perfect compliment to backgrounds!

And speaking of the PERFECT compliment. Like those super THIN stripes? That’s the single best background stamp you could EVER own! It’s by The Ton and Effie outdid herself on that one. They are thin, perfectly thin and the best compliment to any background. Enough to hold interest, yet not steal the show.

Hope you enjoyed those!!

The Happy Hop

It’s been quite an interesting few months, and we all have been cooped up in our homes! A few companies decided that we all need a little joy and happiness.

Can you believe there are 146 stops on the hop – seriously…can you believe THAT?!! Crazy, right?

Be sure to hop on next to the incredibly talented Kevin Bray Here!

Happy hopping, be sure to subscribe to my youtube channel for weekly inspiration, and stay safe!

5 Card Ideas

5 card ideas with 4 new ink colors in the Spa line of ink by Catherine Pooler. BOOM! Or as my good crafty friend Laurel Beard likes to say…BOOM BOOM!

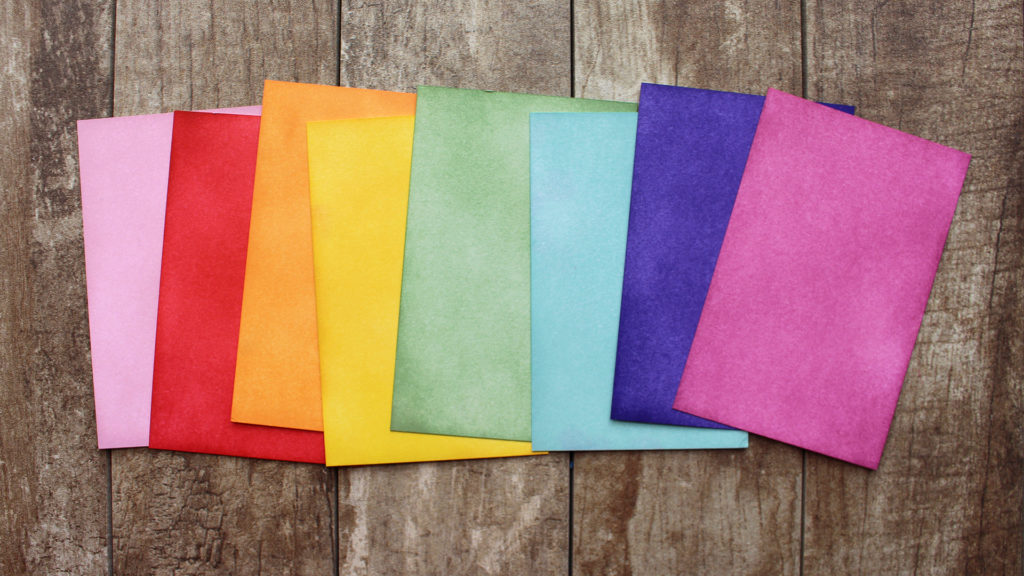
That’s right, Catherine released the final four colors to complete the Urban Oasis collection. These are spa inks, so muted colors – but boy do they pack a punch when used together – just look!

The Creative Grove Ingrid Blackburn

I love good solid card designs, and here are some fun ones for you. Because we always need go to looks that are always home runs, right?

But wait, there’s more…In addition to these 5 card ideas, I even have two videos for you. SOLD! Let’s dive right in…

Frosted Sangria Blossoms – the card that almost wasn’t. I posed this question to my newsletter subscribers first and then to my community over on YouTube. Sometimes a card just doesn’t work out the way you want it to. This first one was just that.

5 card ideas

Now, mind you… it wasn’t the stamp set – it’s a great elements set that is quite versatile. And, it most definitely was not the inks. I don’t even think it was the layout. Something just didn’t click.

I filmed my struggle for you, but was unsure of whether or not you’d want a video? The card isn’t rocket science, and my videos are more about techniques, not just making an easy card like this. (#shameless channel plug…Subscribe here lol) That’s not why you watch my videos, let’s be honest.

So what am I even talking about? It’s about the very real struggle we all sometimes go through when cardmaking – it just not working out as planned, and troubleshooting that very struggle, along the way. If you do want to see a video on THAT, leave me a comment!

And more importantly, if you don’t – me mentioning it here is enough – that’s totally fair, and I definitely want to know that too. 🙂 Let’s get to it, shall we?

Card Idea no. 1 – Frosted Sangria Blossoms

Spoiler alert – without all the little, I like to call them ‘somethin’ ‘somethin’ techniques on this card – it just does NOT work. Do you like it?

5 card ideas

You’ve heard my little story… So, should I make the video, or pass? Would you watch? Feel free to tell me what you would be interested in seeing too, that’s always of great value to me.

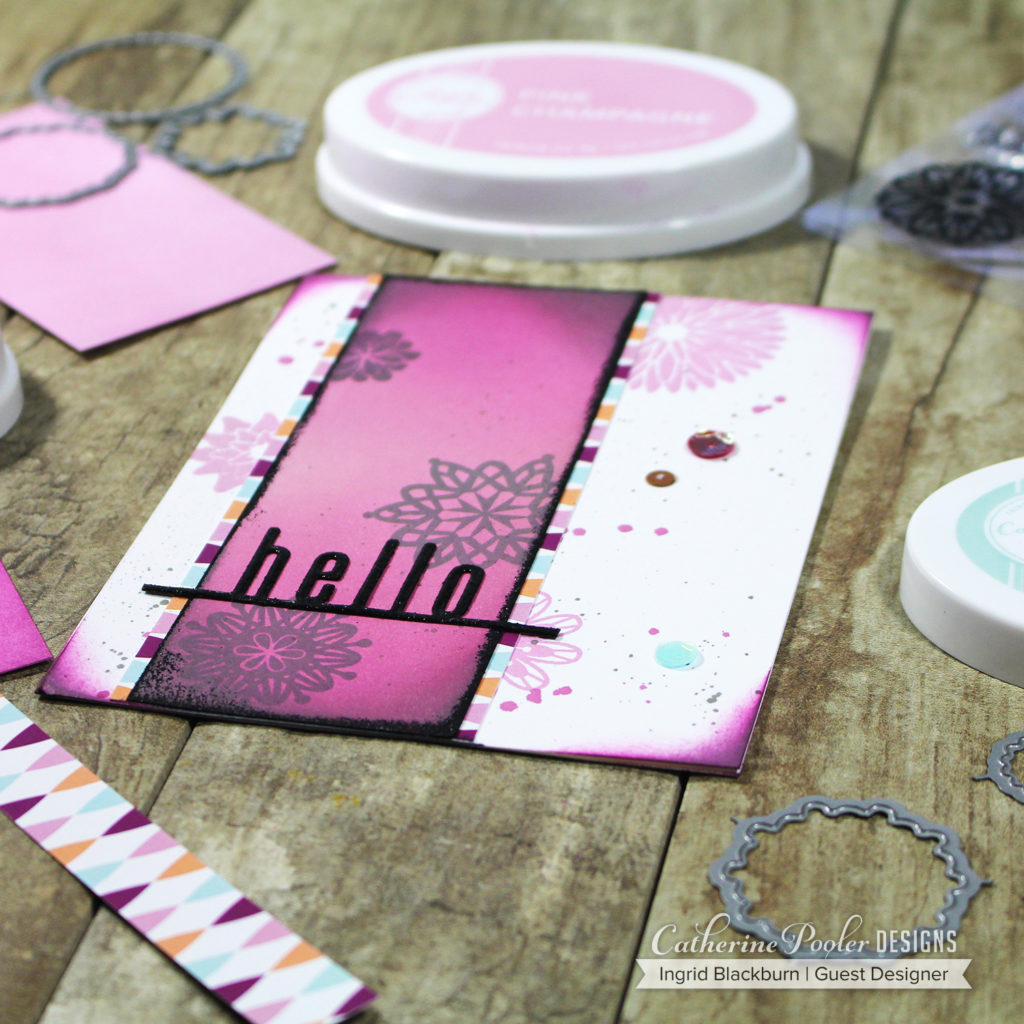
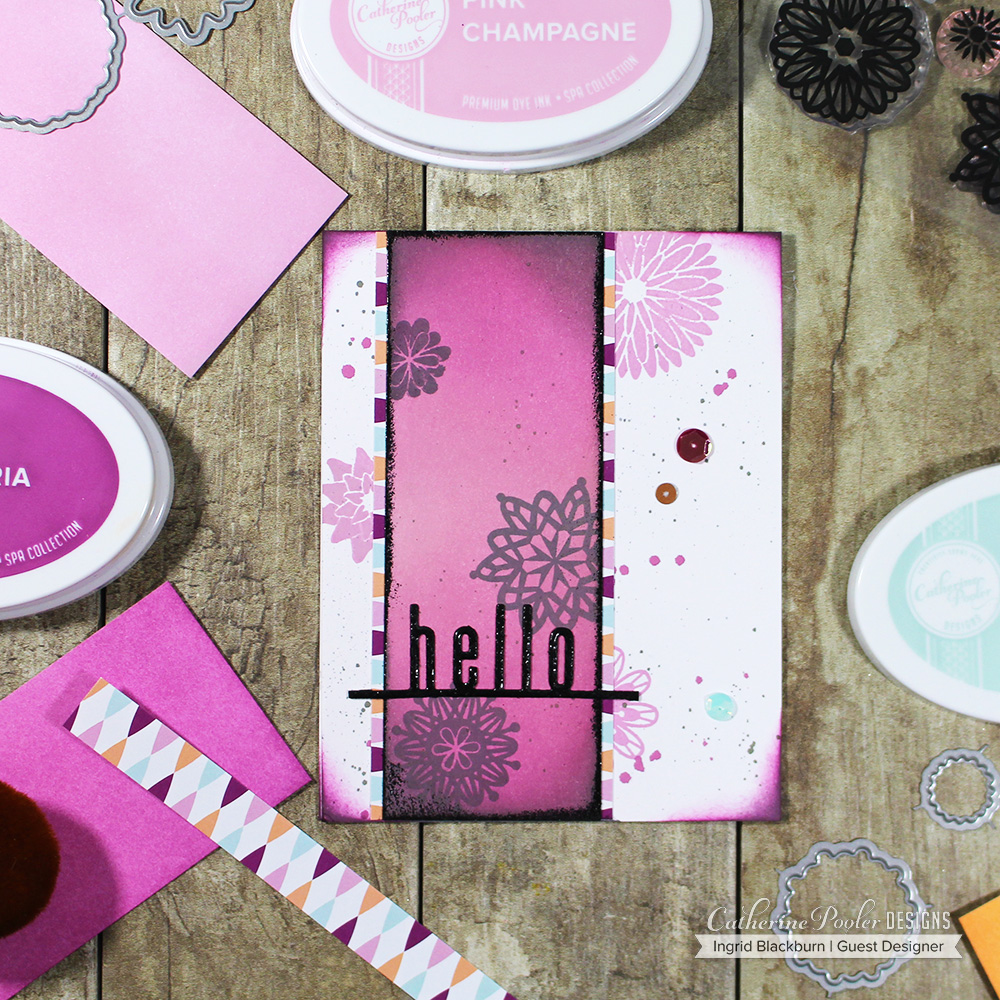
Card Idea no. 2 – The Classic Strip

You’ve seen it before, and you’ll see it again – the classic strip card. No that’s not a dirty word…seriously get your mind out of the gutter…lol!

Here’s the deal – sponge, watercolor, smoosh, however you wish to do it, and use all the colors of the rainbow. I chose to use each color of the now complete Urban Oasis spa ink collection by Catherine Pooler. These inks are muted, and SO my thing.

Next, Cut down little 3/8″ strips, assemble, lop off the edges and matte. THAT’s it. BAM! (inner Emeril Lagase). And you have a super easy card to make. Seriously, think patterned paper – theme it, white on white, embossed black on matte black – whatever you want!

You just got some great ideas, didn’t you? I see the wheels turning….

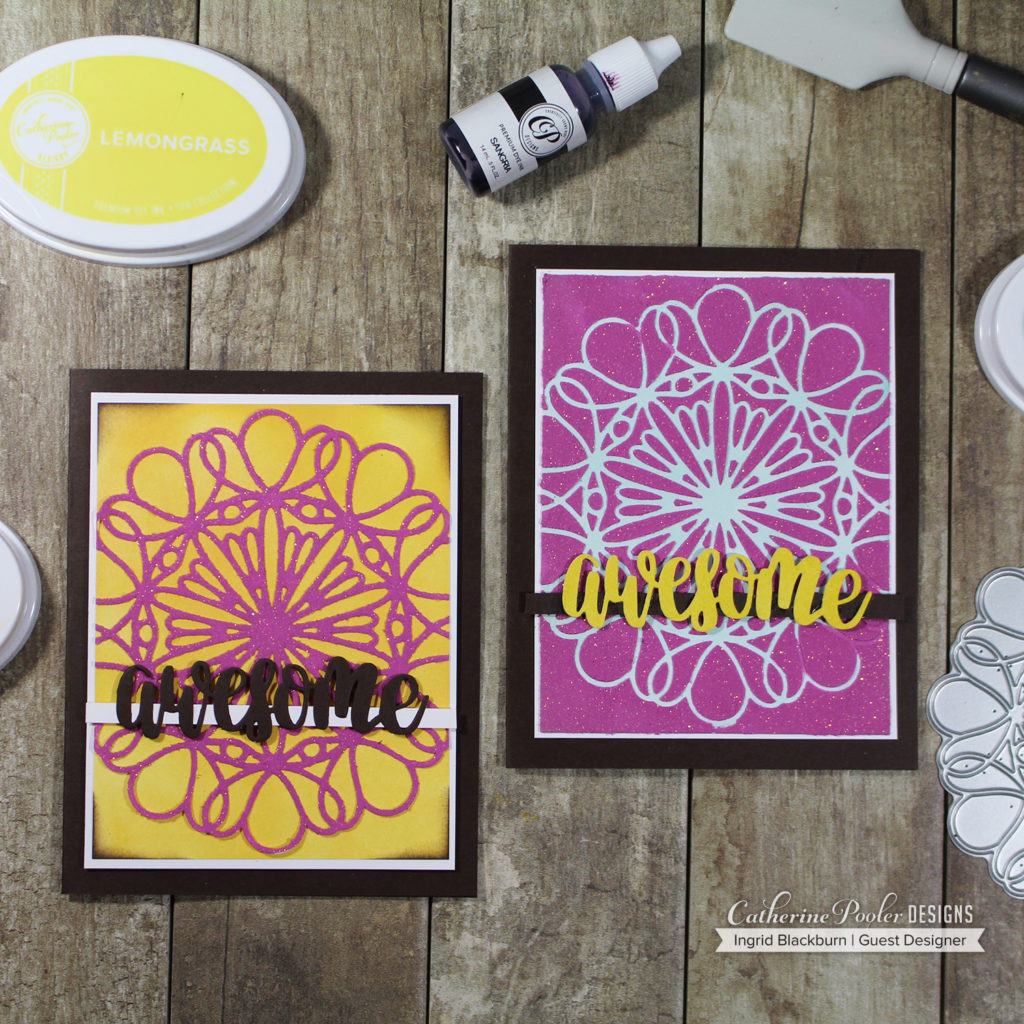
Card Idea no. 3 and no. 4 – DIY Colored Glitter Paste

Okay, the video on this one says it all. Actually it shows it all. These two cards do NOT photograph as pretty as they are. The texture, sparkle and strangely weird color combination are very cool, you’ll just have to trust me on that.

Watch on YouTube

Making your own glitter paste could not be ANY easier. Paste + Glitter = Glitter Paste. Okay – spoiler….but did you see what I did in the video to color that paste? Is it with perhaps a tool you have in your own craft room, which you forget to use all the time? Hummm…….

Card Idea no. 5 – Galaxy Card

Are you addicted to galaxy cards as much as I am?

Watch on YouTube

I can not tell you how many I have pinned, between aurora borealis cards, nebula’s, and just galaxy skies – we’re talking hundreds…if not a thousand inspiration photos. Here’s a video on just how easy it is to create your own with ink blending. Pay attention the the end, that final corner tip makes the card!! (seriously watch it, it’s only 5 minutes).

I have a killer watercolor version coming in the next few months – that’s a true painting tutorial, you interested?

Okay – so if you haven’t heard yet….Catherine Pooler released four new ink colors and a whole slew of new products – some very cool products. I just used one stamp set, a little paper and sequins…wait till you see the rest. Click here to see those.

Till next time, thanks for reading, watching and if you haven’t already (get on that…) commenting!

Ciao –

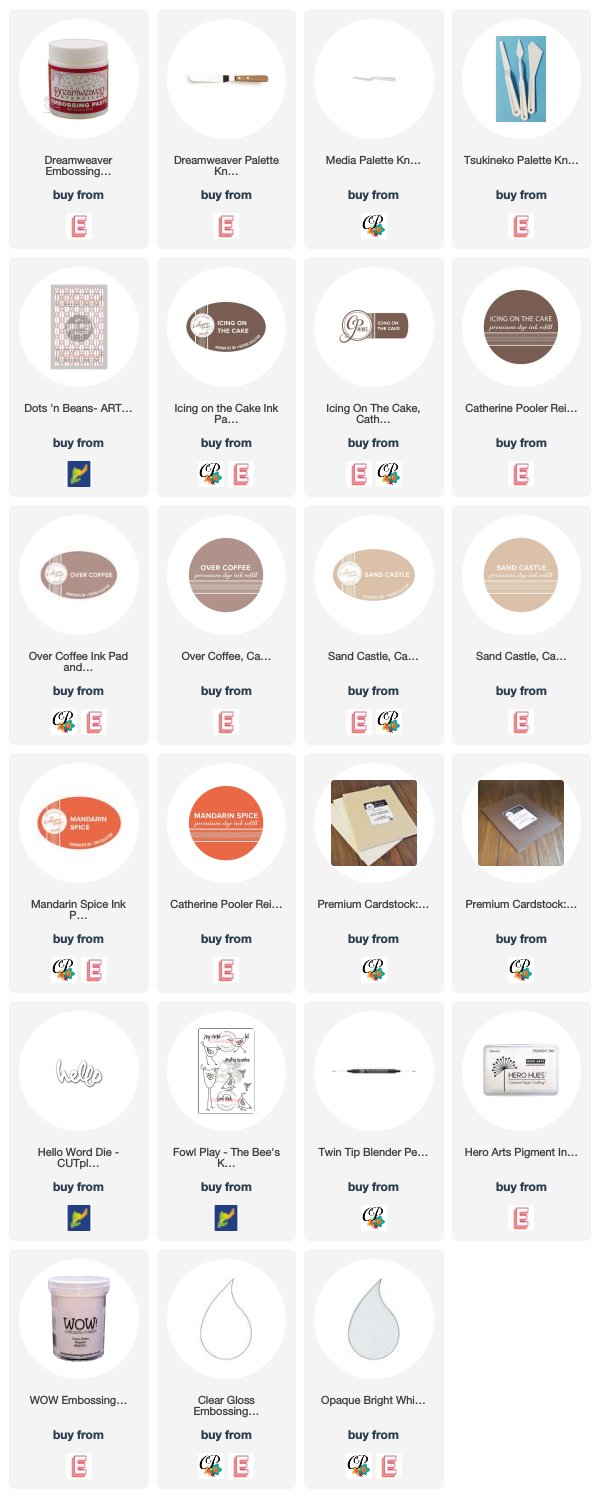
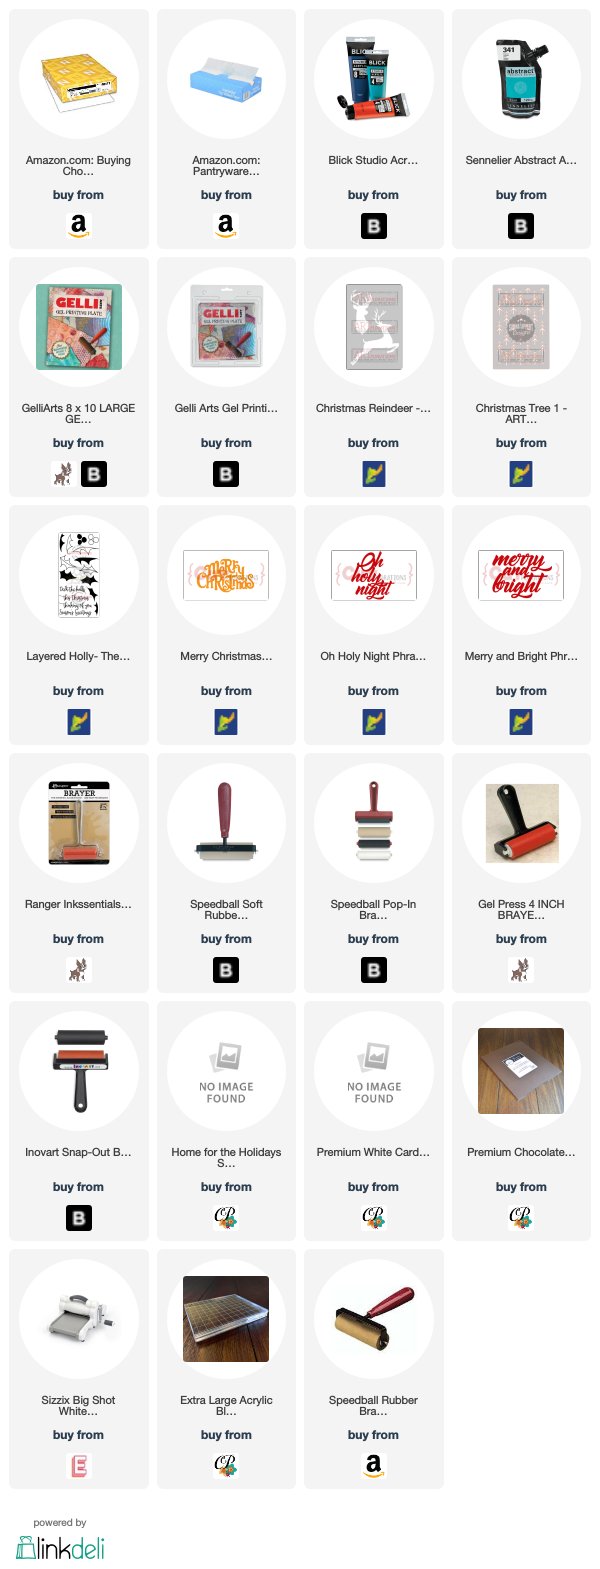
Here’s what I used…. I’d love it if you shop through my links – it keeps me making videos for you – you know, those supplies are not cheap! I appreciate you supporting my art – check out the Patron page too! 😉

How to Color Embossing Paste

This tutorial is a great DIY tip for how to color embossing paste quickly and easily on your cards and mixed media projects. I think you will be blown away with how easy it really is!

Here’s a video showing you exactly how to color embossing paste – and once you start, I guarantee you won’t want to stop…lol!

Click Here to watch it on YouTube in HD

And when you watch this over on YouTube – I’d LOVE for you to subscribe to my channel too! Don’t forget to click the notification bell as well. I’ll be doing some lives and premieres, and I’d LOVE to have you there as well.

So what did you think? Tell me in the comment section if you’ve ever done this? And have you tried multiple colors too? Don’t you love how they easily overlap in color to create their own? Which one is your favorite?

How to Color Embossing Paste Tutorial

In a nutshell, you’ll want to blend your medium with a color source. In this video I used foam ink pads by Catherine Pooler. The colors are great, and her ink pads release quite a bit of ink. You can always use ink refills or something else like gelatos, etc…

You’ll also want to use a palette knife. I personally like using metal knives vs. the plastic ones. It’s a personal preference.

DIY how to color embossing paste

Your colored paste will really go far, so do a little at a time. How much color you add, will directly result in the depth of color in your medium. When using something like whipped spackle, that one always ends up lighter in color, so I have to add more ink.

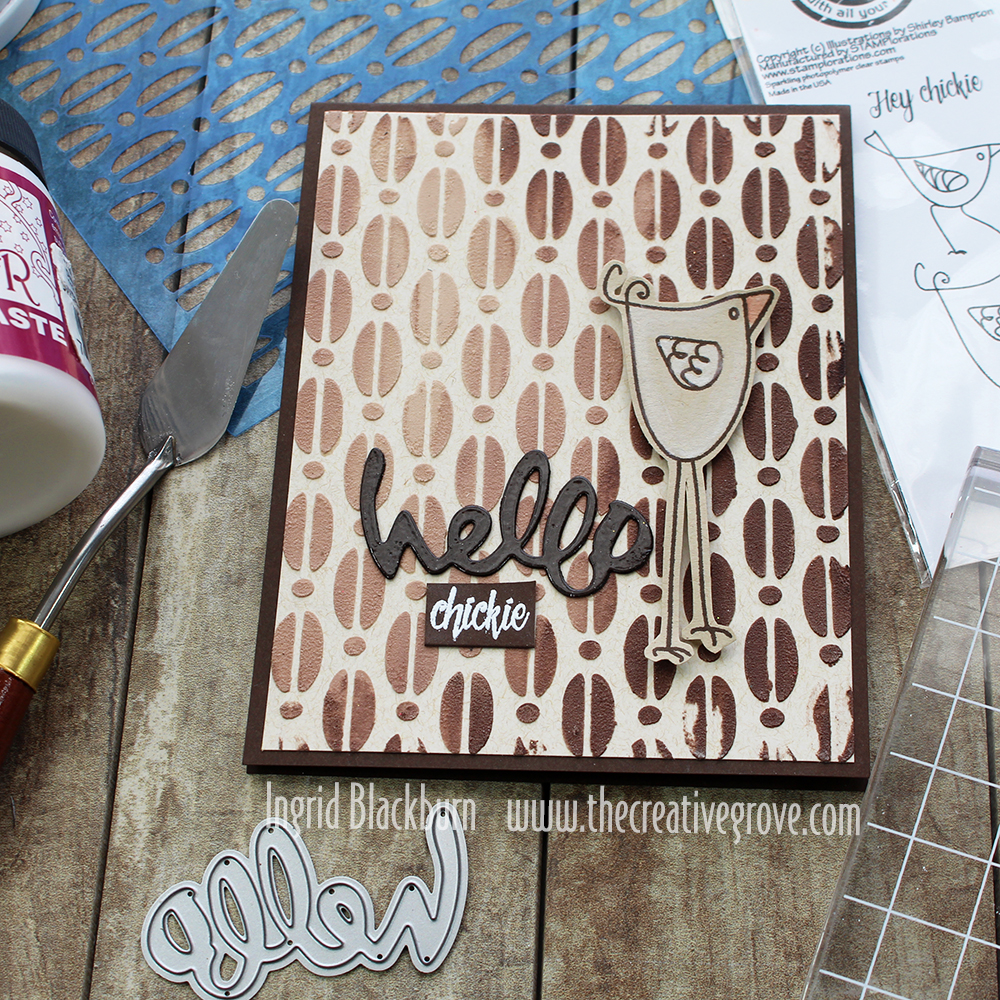
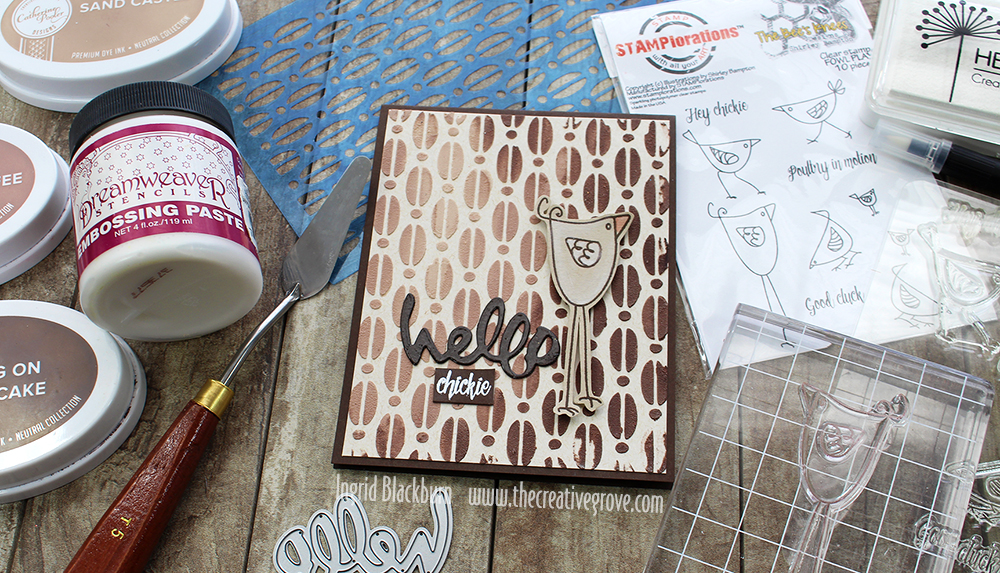
Here’s my final project. I didn’t explain really how I colored in this little chick, so here you go!

Since I used Sand Dunes cardstock by Catherine Pooler for my base, I needed to make my chickie white. Did you know that I commonly greet my friends with hey chickie all the time!!! That’s why I got the Foul Play stamp set in the first place….lol. But these little chick images totally ROCK.

how to color embossing paste tutorial

To make her white, I used a zig blender pen and Hero Arts Unicorn white pigment ink. Don’t think those pens are just for dye inks – use whatever you have!!! Just be sure to clean it thoroughly in between.

The hello die (my all time favorite hello die) also by Stamplorations is embossed with clear embossing powder by WOW! That way it really stands apart from the rockin’ background. I found without that, it just wasn’t popping.

The hello die and chickie (embossed in white on Chocolate cardstock), are glued directly to my card, the Chick is popped up with foam tape.

I hope you enjoyed this! Just like I said in the video – don’t forget to tag me with your creations over on Instagram with my new IG handle – @thecgstudio. I’d LOVE to see what you make.

Have a great day!!

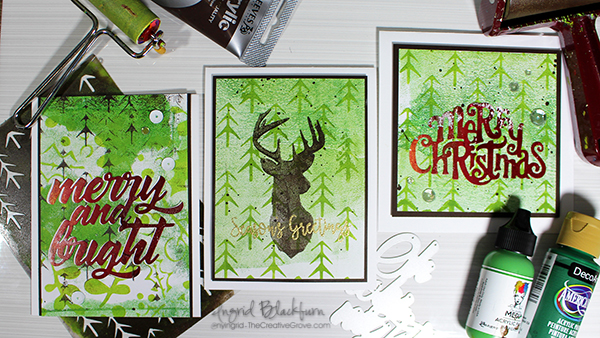
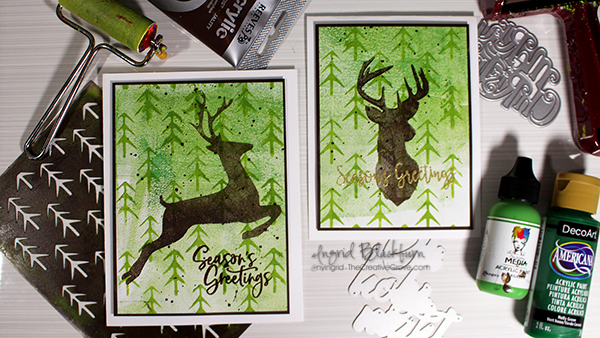
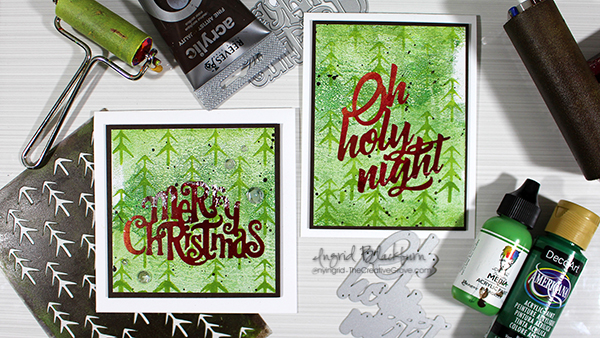
Easy DIY Mixed Media Christmas Cards + Video

Save the Crafty YouTuber Video Hop

Have you ever wanted to quickly produce some fun and artistic Mixed Media Christmas Cards? Are you tired of sending bulky cards that require extra postage? What if I gave you the formula for how to create a whole stack of cards that have layered texture and character to them, but are pretty much flat, easy to put together and will have all your friends and family thinking you are quite the artist?!! Interested?

Now what if on top of that I told you that you could have a chance to win over 100 prizes – bet THAT sold ya!

Mixed Media Christmas Cards Video Tutorial

It’s that time of year again – my good friend Justine Hovey has organized the second Save the Crafty YouTuber Video Hop, and I decided to play along with 90 of my crafty friends – mixed media style! And I even have my OWN giveaway that I’m doing….so be sure to actually WATCH the video. I give the details along the way…
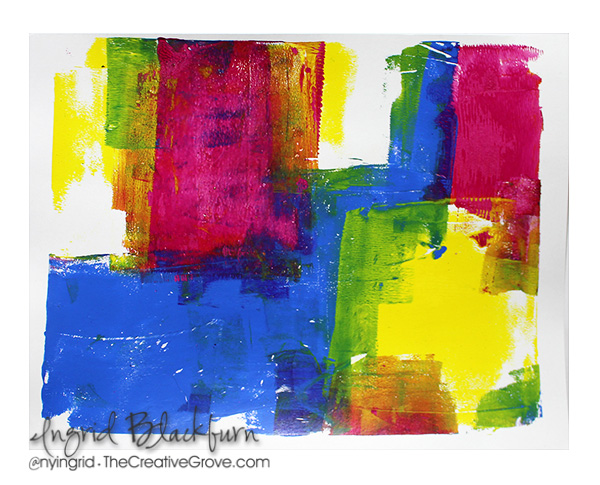
Click HERE to watch in HD on my YouTube Channel

Aren’t they FUN and super simple cards to make?!! Seriously – I’m going to be teaching this exact project (and so much more) in person in a few weeks in the Orlando, Florida area. If you’d like to come learn from me in person – be sure to email me at ingrid (at) thecreativegrove.com and I’ll send you all the details!!
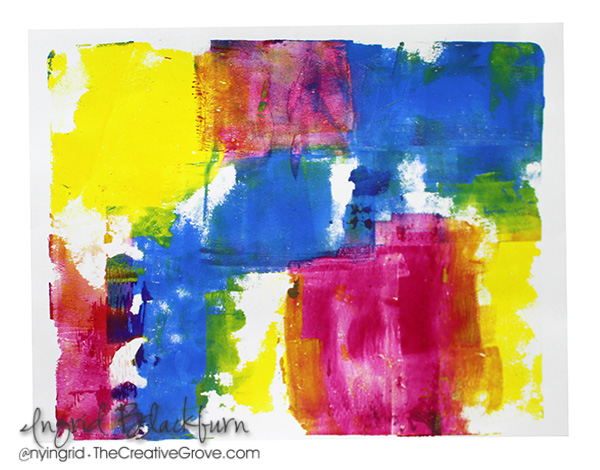
For the specifics and Details to be entered for over 100 prizes – seriously…it’s more like 125+ prizes….GOOD ones too – read about those on my YouTube Channel in the section below the video!

The Save the Crafty YouTuber Video hop is a celebration of cardmaking video tutorials created by a group of talented crafters of all different styles and levels. We are coming together over 5 days to give our viewers a chance to discover other amazing cardmakers and help reach monetization goals!

Mixed Media Christmas Cards

All you have to do is watch, like the video, consider subscribing, and click the link in the video description below to hop to the next video. Let yourself be inspired! Don’t forget to comment (on the video hop over at YouTube) because we have tons of prizes to give away. Please indicate if you are located in the USA or International so that prizes can be awarded appropriately as some prizes (not all!) have restrictions on them.

To be entered in for MY giveaway (closed) – watch the video – I give details on what you need to put in the comment section (USA only for that one).

Monoprinting Christmas Cards

Don’t forget to check back every day this week since there are 5 themed days of video hops! You never know when you’ll discover your next favourite YouTuber! Hop Links are below.

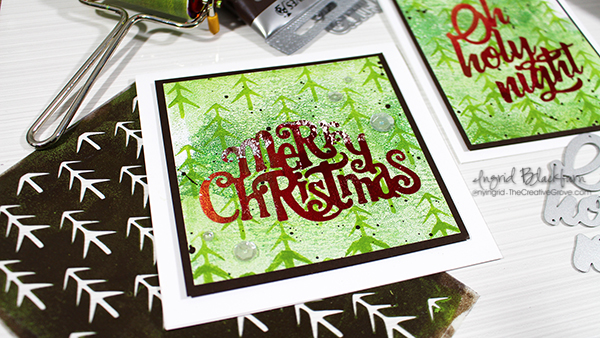
I hope you enjoyed this tutorial. Here are a few close up photos for you and the supply list. Be sure to come back to this post on November 10th to see who won the prize pack – I’m giving away Dies, Stencils and ink pads – it’s worth over $40!!! That Merry Christmas Die is one of them!!! 🙂 Happy Hopping!!!

Mixed Media Monoprint Christmas

Aren’t those the prettiest cards?!! These photos do not do them justice!! Interested in seeing more Mixed Media Christmas Card possibilities? Check out this tutorial – just adjust for the Christmas Season

Sponsors & Hop Links (Giveaways closed)

Here are all those sponsors….and SO many channels in each of the five hops are giving away additional prizes – this is an AWESOME hop!

Here are links to all five hop days:

  1. Day One Hop Beginning
  2. Day Two Hop Beginning
  3. Day Three – Start on MY YouTube Channel
  4. Day Four Hop Beginning
  5. Day Five Hop Beginning

Good luck on winning all those great prizes – over 100!!! Leave me a comment below if you liked these cards – I’d LOVE to know.

Thanks for watching – till next time…

Supply List

Affiliate Links used if available

Mixed Media Christmas Cards

Hailey’s Shower Photo Supply List – https://ldli.co/e/jpxx6p

Mass Produce These Easy Rustic Christmas Cards + Giveaway

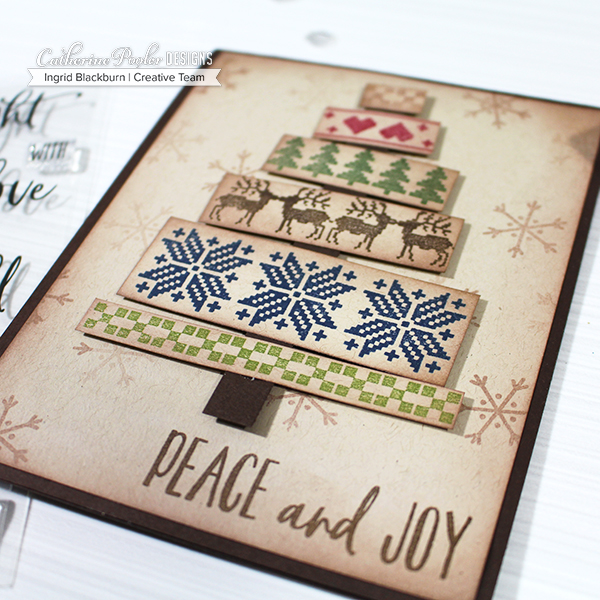
Today I have a great video for you – how to mass produce 12 easy rustic Christmas Cards! Plus, it’s a Video Hop with great holiday inspiration and even a giveaway! It’s that time again, Catherine Pooler’s Stamp of Approval. This release is called Home for the Holidays, and the box is filled with everything that is warm and cozy. Speaking of cozy….today’s project uses the new Cozy Borders Stamp Set.

Home for the Holidays SOA Box

If you aren’t familiar with Stamp of Approval, it’s a curated collection of stamps and dies that work so well together. It’s perfect to help take the guess work out of your holiday cards. These boxes always sell out, sometimes as fast as a few hours, so don’t miss it! Catherine’s private online community get the link to purchase the collection first – tonight, Tuesday September 18th in an online live stream PJ party of sorts! I’ll be there too. It’s a fun way to kick off the release. Then tomorrow – Wednesday September 19th at 9 am, the waitlist gets the secret link. If you aren’t on the waitlist – click here. If there are any boxes left, then the public gets access in the Shop Here.

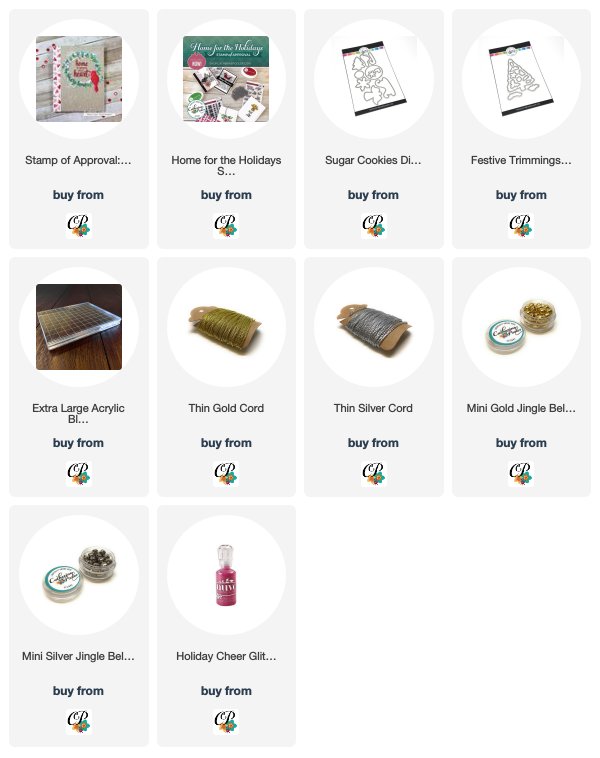
This release has 10 products in it (5 Stamp Sets, 2 Dies, and 3 Embossing Glitters):

In addition to the release, there are a few new products being released as well – including a brand new “colossal” sized block – you’ll see me use it in the video – it’s the lightest weight block of its size I’ve used yet!

I love those little jingle bells, they are the perfect way to finish a card! And I use that cord ALL the time. Gold and Silver cord is one of my favorite accents on holiday cards. Now for the good stuff. I love this project. The inspiration for it came from Nordic sweaters, and Scandinavian holiday decor. Here’s a detailed video showing you how:

Click Here to Watch on YouTube in HD + Hop along & Comment for Giveaway

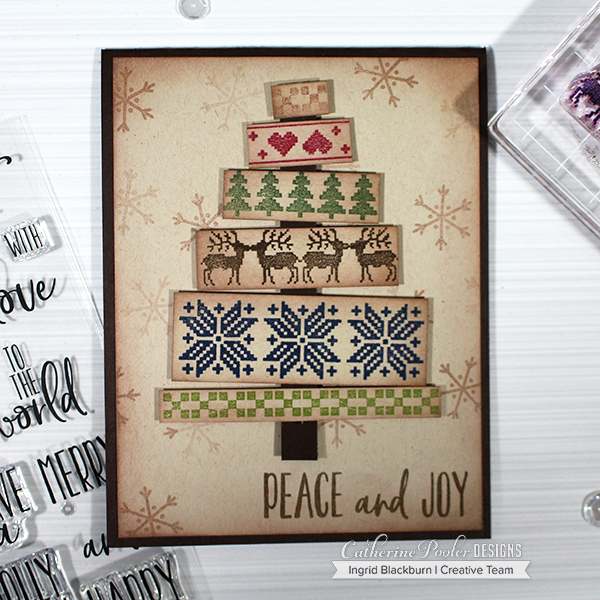
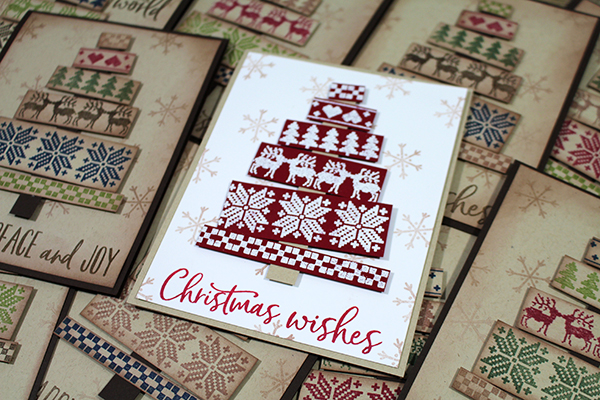
So what did you think? Not bad, huh! And I have a treat for you. It’s not in the video…but below I have some close ups and a card done in red with white embossing powder even! It was quite easy to mass produce these. And the Extra Large Block made it super simple to stamp!

Easy Rustic Christmas Cards Tutorial

You’ll want to get your stamps lined up on your acrylic block like this, or you can use a MISTI too, but I liked the speed of using a block. A MISTI gives you the option of stamping a second time, the only draw back to that is that with every additional time, the darker your images get. And that isn’t necessarily the look I was going for here. Sure that’s fine with a dark brown or black, but with Peppermint Scrub and Eucalyptus, the color gets really dark.

DIY Easy Rustic Christmas Cards - SOA Box

Stamp your images from the Cozy Borders Stamp Set onto Sand Dunes cardstock. When stamping a large image or several as in the video, you may have noticed that I stamp them upside down. That way I can rub my hand over the cardstock on the back helping to transfer the ink. Tip – be sure to rub over every section thoroughly and you’ll get a perfectly stamped image every time! To duplicate this project, you’ll want to use the following Spa colors (pictured in the supply list below) Eucalyptus, Spruce, Juniper Mist, Peppermint Scrub, Sand Castle, Icing on the Cake.

Cut each border image out using your paper trimmer. I personally use a guillotine trimmer by Tonic Studios. I never have to sharpen the blade, and it’s cuts perfectly for me every time! I’ve been using it for over 10 years.

DIY Easy Rustic Christmas Cards

Next, stamp the small snowflake from the Christmas Cookies stamp set in Sand Castle. To give a varying look, you’ll want to ink your stamp, stamp and then stamp again getting a lighter snowflake in spots. This is called generational stamping.

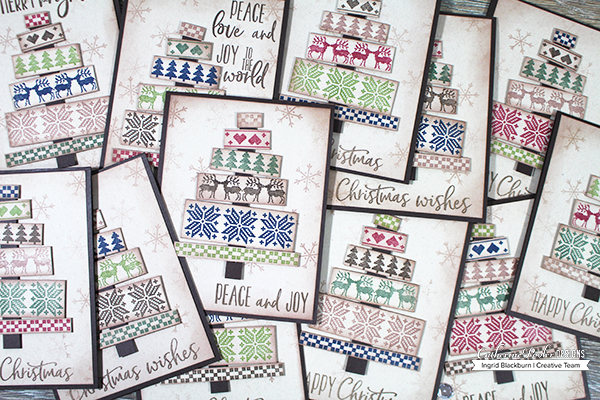
Stamp your greeting at the bottom in Icing on the Cake. I used three words from the Holiday Mix Stamp Set. That set is unbelievable – you see a small snapshot in the photo above. There are print and scripty words, some together, some not. You get a good idea of all the possibilities here in my shot of all 12 of my cards.

https://shop.catherinepooler.com/?aff=3

Now that you have all your pieces cut, along with 12 Sand Dunes card fronts (4 x 5 1/4″) you’ll want to edge them using a mini blending tool and Sand Castle ink. Keep it light!

Next you’ll want to assemble your trees. I did these all at once – it’s quite easy to mass produce them. Arrange your six pieces, one color for each level. You’ll also need 12 tree trunks (7/16 x 4″) cut out of Chocolate cardstock (hands down my favorite deep brown card stock). Start at the top, use a Matte liquid glue (that way it dried crystal clear), glue down each piece. I made mine slightly wonky. You don’t want to have too much brown in-between or you’ll run out of trunk!

Glue your card front onto a folded A2 sized Chocolate card base (4 1/4 x 5 1/2), and pop your tree up with foam tape and squares. That’s it! Simple as that. I made 12 in the time it took to watch a movie.

scandinavian christmas cards

And for fun, I made a few extras in red/white to really go for that Scandinavian feel. I’m not sure which one I like better? Tell me which one you prefer in the comments below. What did you think? I love that I have 12 cards done and ready to go – well 14 with my red ones…lol! And I MAY just make some more – they were that easy.

Easy Rustic Christmas Cards

If you haven’t checked out the video hop yet, don’t miss out. Details on the Giveaway can be found in the section below the video. Be sure to watch the video on my YouTube channel and leave a comment THERE to be entered in for the giveaway. You can always leave me a comment here too – but for the giveaway, it needs to be on YouTube. Hop all along the hop – you won’t be disappointed. Be sure to like and subscribe along the way too!

There are three ways to win. You can always start on Catherine’s channels too.

  • Instagram Hop – 3 $25 gift certificates as Prizes
  • Blog Hop – 3 $25 gift certificates as Prizes
  • Video Hop – Stamp of Approval Collection as a Prize

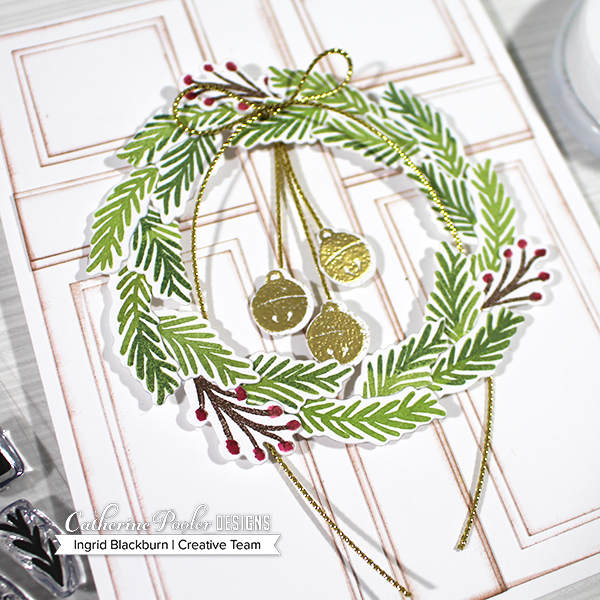
And stay tuned – I have another project tomorrow and if you missed this one in the instagram hop – there are different prizes for that too! Click Here for this project on my Instagram Channel and be sure to swipe to see all the photos! Look for this card:

wreath on door christmas card by ingrid blackburn

Click on the card and in the description is the next person to hop along to. Be sure to like each channel and leave comments along the way! Happy Hopping.

Keep those fingers inky –


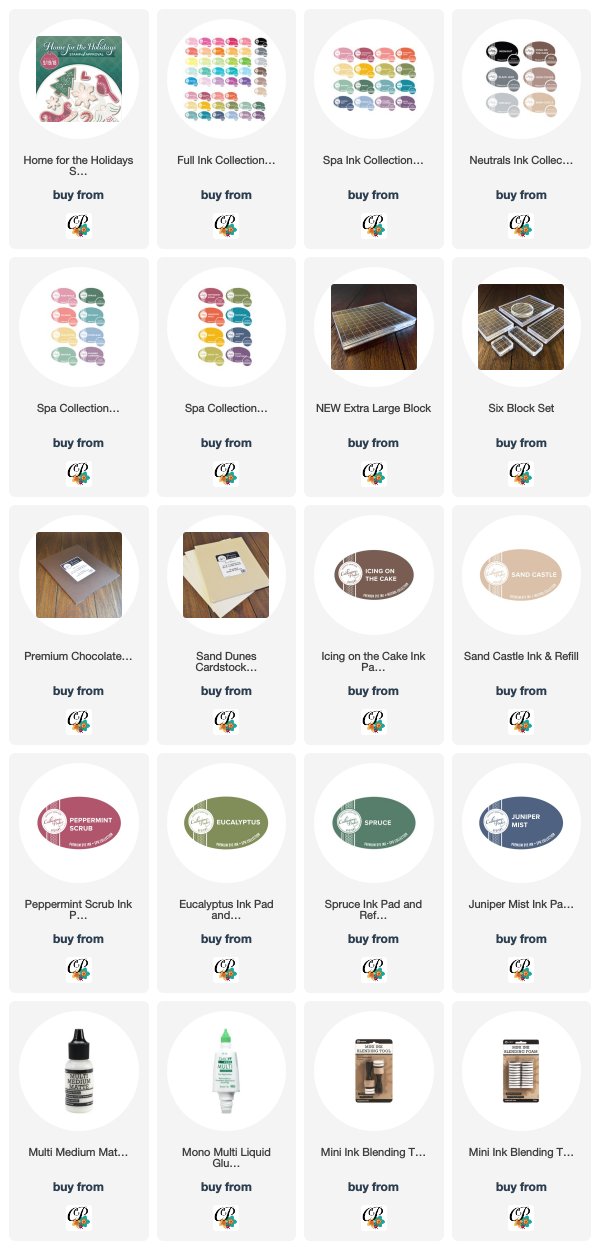
Supplies

To make finding the supplies I used in these projects a bit easier for you, here are a few clickable links. Compensated Affiliate Links are used when possible. Click here for disclosure. Happy Shopping!


How to Mass Produce Clean & Simple Quick Cards

How to make 20 diy quick cards

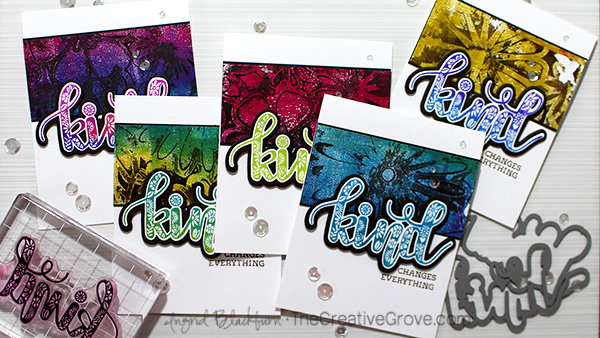
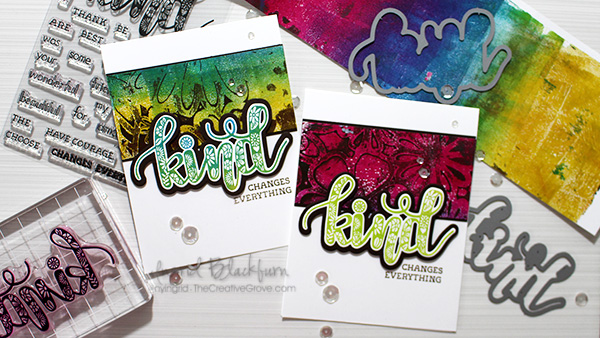
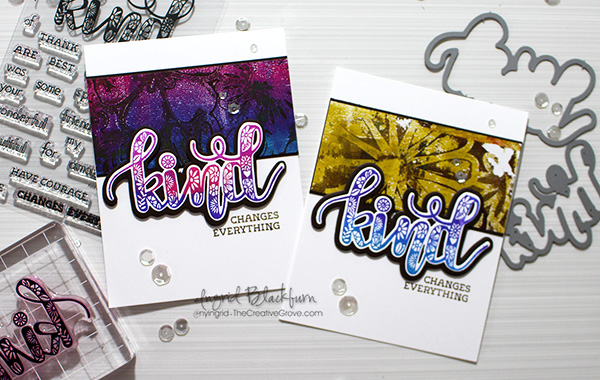
Have you ever created an awesome background that you could quickly turn into several quick cards? Did you know that the Clean & Simple (CAS) style can have some mixed media elements in it? This tutorial will show you just how simple and easy it is to create two backgrounds that you can literally turn into 20, yes – you read that correctly…twenty cards!! Let me show you exactly how…

Watch on YouTube in HD & Subscribe for more Tutorials

Quick Cards Tutorial & Tips

When I’m trying to come up with quick cards, I usually start with a larger background piece. That’s the key for me! Well, that and some great word dies (or large stamp sentiments) and a classic clean and simple design. Cards don’t always have to be complicated. SCREEETCH!!!! Did you just hear that in your head – from little ‘ol me?!! You are on my blog and YouTube channel after all, right? Yes, I love artsy complicated cards and mixed media projects just like the next person – even complex watercolor projects. But not every one has to be uber-complicated. Sometimes simple is better!

How to make 20 quick cards with monoprints

20 quick cards tutorial and tips

What do you love – CAS or Complex designs? Seriously, there’s no right or wrong, but I’m curious – tell me in the comments below & over on my YouTube channel here!

Giveaway alert – I’ll choose one person to send one of these beauties to if you comment on my YouTube channel in the first 72 hours!!

Now that you’ve seen just how easy it is to create those backgrounds – colorful ones too….Here are a few tips you’ll want to keep in mind:

  • Create backgrounds that can be split up – you want the design to be everywhere – not just in one little corner. Yes, in my video, you only see the flowers on one side – but I can quickly stencil something over the clean side too – it’s all in how you look at it, no?
  • Don’t have the Flower Frenzy stencil by The Crafters Workshop (I LOVE their stencils) or any 12 x 12 stencils? No problem – just use your 6×6 ones a few times! But seriously – check out their flower stencils – they have SO many gorgeous ones…
  • To fill up your space if your background piece is small – use a large stamp or die cut like I did. You can always build a sentiment like you see here too
  • Keep the rule of thirds in mind
  • Use powerful colors that make an impact – it helps to have all that white space around as well. The contrast is amazing.

quick cards with monoprints and word dies

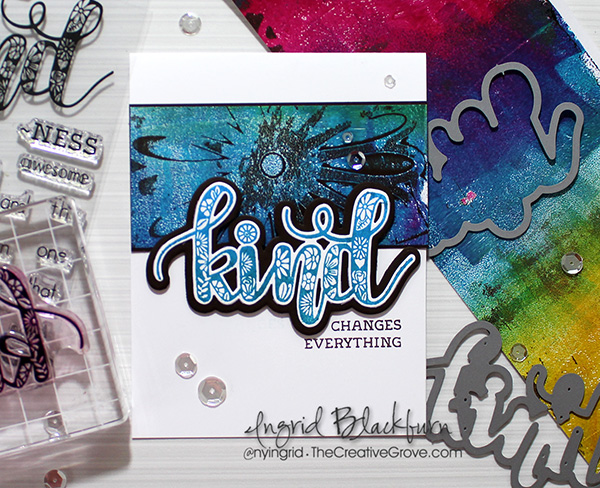
What did you think? That’s one rockin’ die, right? Designed by Nanette Tracy for Catherine Pooler Designs – and newly released last week – don’t miss out on it. Get your hands on the Three Kind Dies and Kind of Wonderful Stamp Set right here! And Catherine Pooler inks are SO super vibrant and saturated, they are the perfect choice when matching to your acrylic paints.

I’ll be back soon with some more Clean and Simple AND Mixed Media designs. And don’t forget to comment on my YouTube Channel!! I’d LOVE to send you one of these cards – I may just include something else that’s fun too!

Till then – keep those fingers inky!

Supplies

To make finding the supplies I used in these projects a bit easier for you, here are a few clickable links. Compensated Affiliate Links are used when possible. Click here for disclosure. Happy Shopping!


Creating Bright & Colorful Monoprint Backgrounds with a Gel Plate

Colorful Bright Monoprint Backgrounds

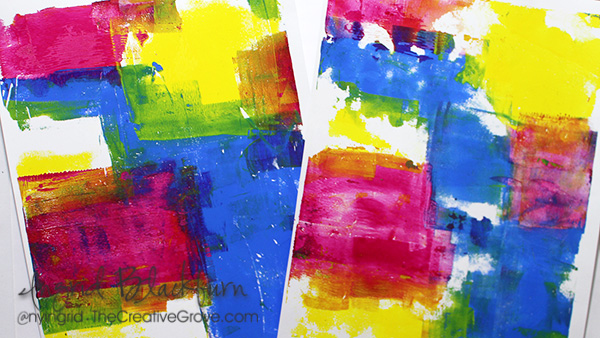
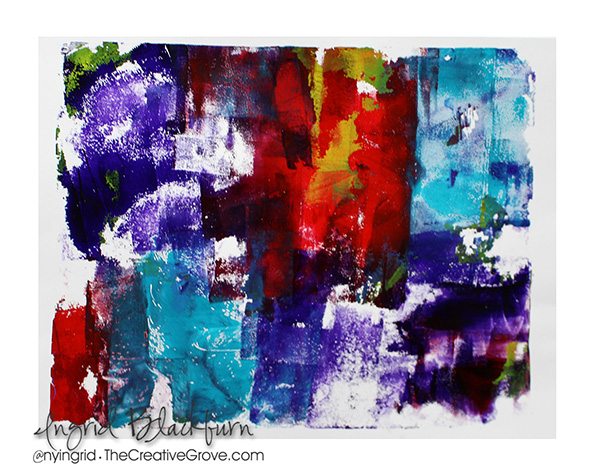
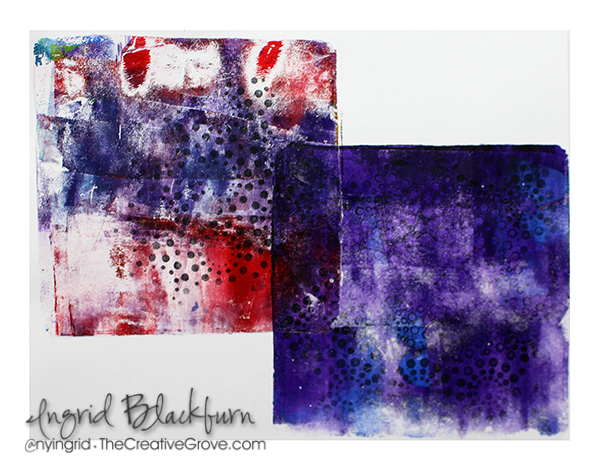
Have you ever used a gel plate to create bright colorful monoprint backgrounds? It’s so super easy, I think you’ll be shocked at how you quickly you can create a ton of vibrant colorful pieces to use on your cards, in your art journal or just create a fun piece of artwork!

To make this even easier for you – I filmed a little video for you. And there’s SO much more you can do with a gel plate, you’ll definitely want to add one (preferably two) to your tool arsenal.

Monoprint Backgrounds Tutorial

Click this link to see video on YouTube

If you aren’t subscribed to my YouTube channel, definitely consider it. I have many more videos headed your way – you won’t want to miss them. You can even hit the little bell to be notified!

Abstract looking monoprint backgrounds

Here are a few tips you’ll want to keep in mind when playing around with this fun technique:

  • Avoid muddy colors – Use colors that work well together. Remember that you’re going to be overlapping several, so you don’t want to use complimentary colors (opposite sides of the color wheel) when wet. You can layer those once one layer is dry – but not while wet.

bright and colorful monoprint backgrounds made with a gel plate bright and colorful monoprint backgrounds made with a gel plate

  • Use a second gel plate to help clean off your brayer – you’d be surprised how fast you can create multiple prints with just one application of paint!
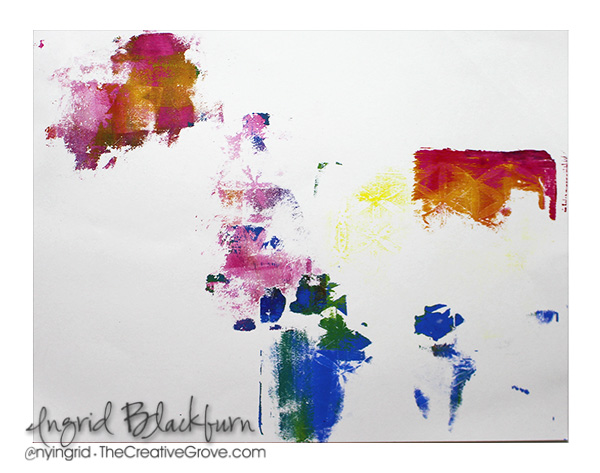
  • Use good paper for your scrap clean up piece. (9/10 times, I turn that piece into a print.) The colors work amazing together, and it usually becomes a great base for a layered print

scrap piece from a monoprint gel plate session

  • Try to be patient when pulling your prints. Allow the paint to dry a bit so that you are able to lift those left behind layers underneath your newest paint application
  • Remember to lift your brayer when applying your paint. If you just keep it on the surface of your gel plate, you are only really staying in that one section. Lifting it allows for better rotation and coverage.

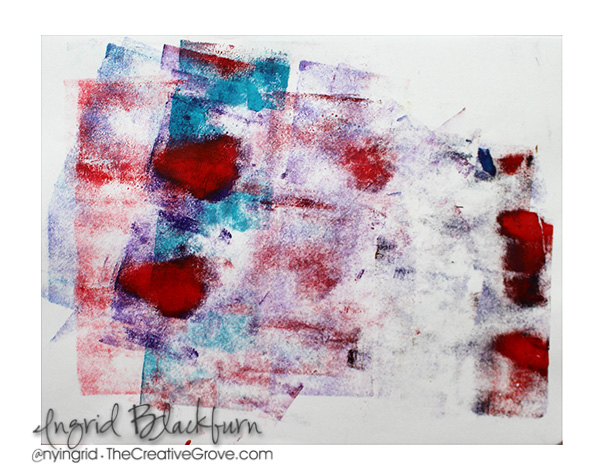
  • Don’t stress if just a little pulls off the plate. You can always add more – or use it as that little something in the background of a card!

bright and colorful monoprint backgrounds made with a gel plate

I use a 4″ and 2″ brayer when creating monoprint backgrounds. Sometimes that small brayer is quite helpful to get into those little spaces. And sometimes having a larger brayer is just oh so much easier!

Don’t you just LOVE these? Next up I’m going to show you what to do with some of these fun backgrounds, and just how easy it is to create a whole set of cards.

Till next time –

Supplies

To make finding the supplies I used in these projects a bit easier for you, here are a few clickable links. Compensated Affiliate Links are used when possible. Click here for disclosure. Happy Shopping!


How to Create Realistic Scenic Cards

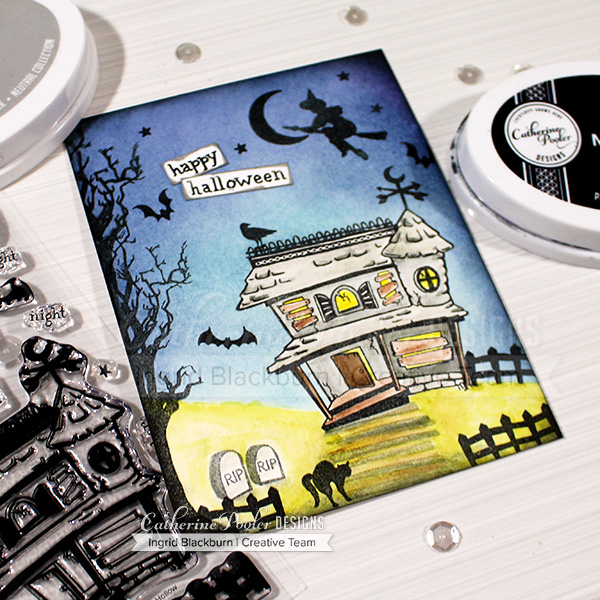
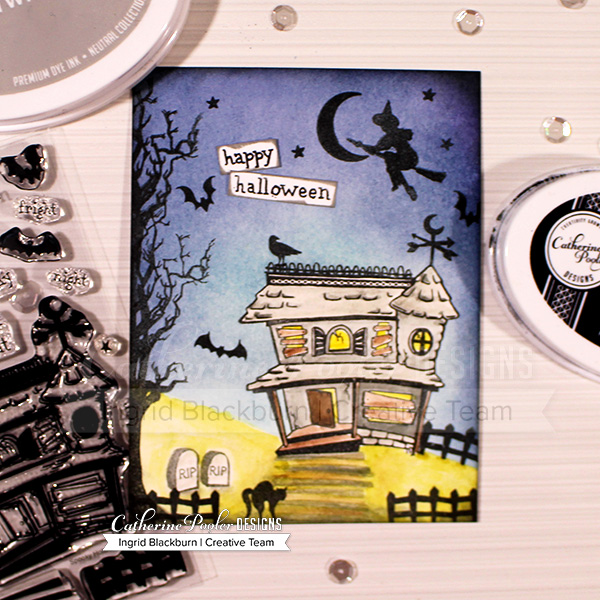
Spooky Hollow Clear Stamp Set used to create a Twilight Scenic Halloween Card

Earlier today I showcased a realistic scenic card when I participated in a fun blog hop for the new Catherine Pooler release – Kind of Batty. I had filmed my card, but hadn’t had a chance to get the video done – well…here it is!!

If you’ve already hopped through the incredible blog hop, enjoy this one! If you’re catching it later on in the evening – then you may have seen this. 🙂

Scenic cards are totally my jam. I LOVE to create scenes like these:

But the secret is in using the right stamps in the right location on your card! I talk about this in this video I filmed for you:

Click Here to watch in HD on YouTube

This card was SO much fun to make, and quite easy actually. You just need a plan. There are several techniques used in this one layer card, but the end result is fun and playful. It’s the perfect card for my 13 year old niece Chiarra. She’ll definitely love it.

Tips on making Realistic Scenic Cards

The best tip I can give you is to be aware of scale of your stamps. Larger images belong closer up and smaller images further away. Think about looking in the distance – the image is smaller, so should your stamp be. If I can stamped the cat for instance next to the house – it would be as big as the front door! Now that’s a BIG cat. But close up, makes sense – he’s at your feet. And the same sized door can be further away and be 10 times larger than the cat.

If you want a large tree in the foreground of your card – lengthen your tree – to give it that effect. Watch the video to see just how.

Framing also helps create realistic scenic cards. By framing my scene it drew the viewer in, giving you the feel of you’re watching something take place. You are coming out of the tunnel (vignette) and stumbling into the foreground of the scene.

Spooky Hollow Twilight Scenic Card

So the next time you make a scenic card – think of the perspective. What do you see? What size are your stamps? Where can they positioned for more realistic scenic cards.

If you didn’t hop along the past three days – check out these blog posts here and the one on Catherine’s site. Prizes will be drawn on Monday 8/20! Be sure to leave comments along the way – and if you haven’t already – subscribe to my YouTube channel. I have many videos about to go live in the next few weeks – I’d love to hear what you think!

Blog Hops:

Leave me a comment below and tell me what kind of cards YOU love to make. I can’t wait to hear!!

Thanks for stopping by today! Keep those fingers inky –


Supplies

To make finding the supplies I used in these projects a bit easier for you, here are a few clickable links. Compensated Affiliate Links are used when possible. Click here for disclosure. Happy Shopping!