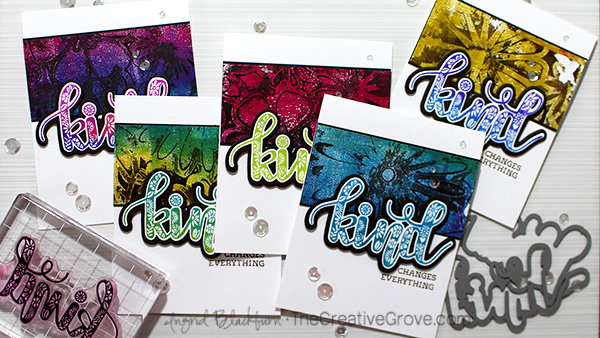
5 Card Ideas

5 card ideas with 4 new ink colors in the Spa line of ink by Catherine Pooler. BOOM! Or as my good crafty friend Laurel Beard likes to say…BOOM BOOM!

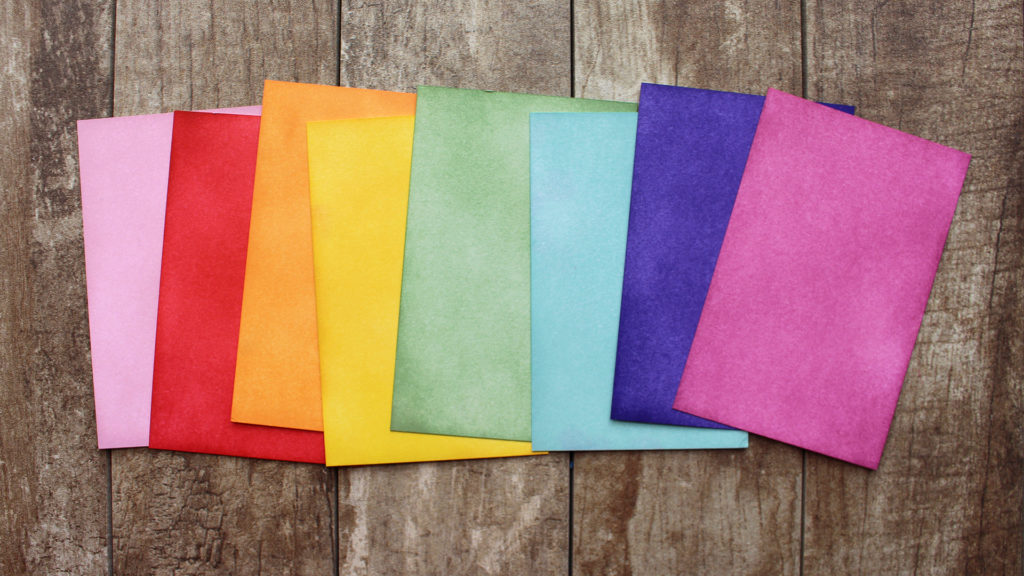
That’s right, Catherine released the final four colors to complete the Urban Oasis collection. These are spa inks, so muted colors – but boy do they pack a punch when used together – just look!
The Creative Grove Ingrid Blackburn

I love good solid card designs, and here are some fun ones for you. Because we always need go to looks that are always home runs, right?

But wait, there’s more…In addition to these 5 card ideas, I even have two videos for you. SOLD! Let’s dive right in…

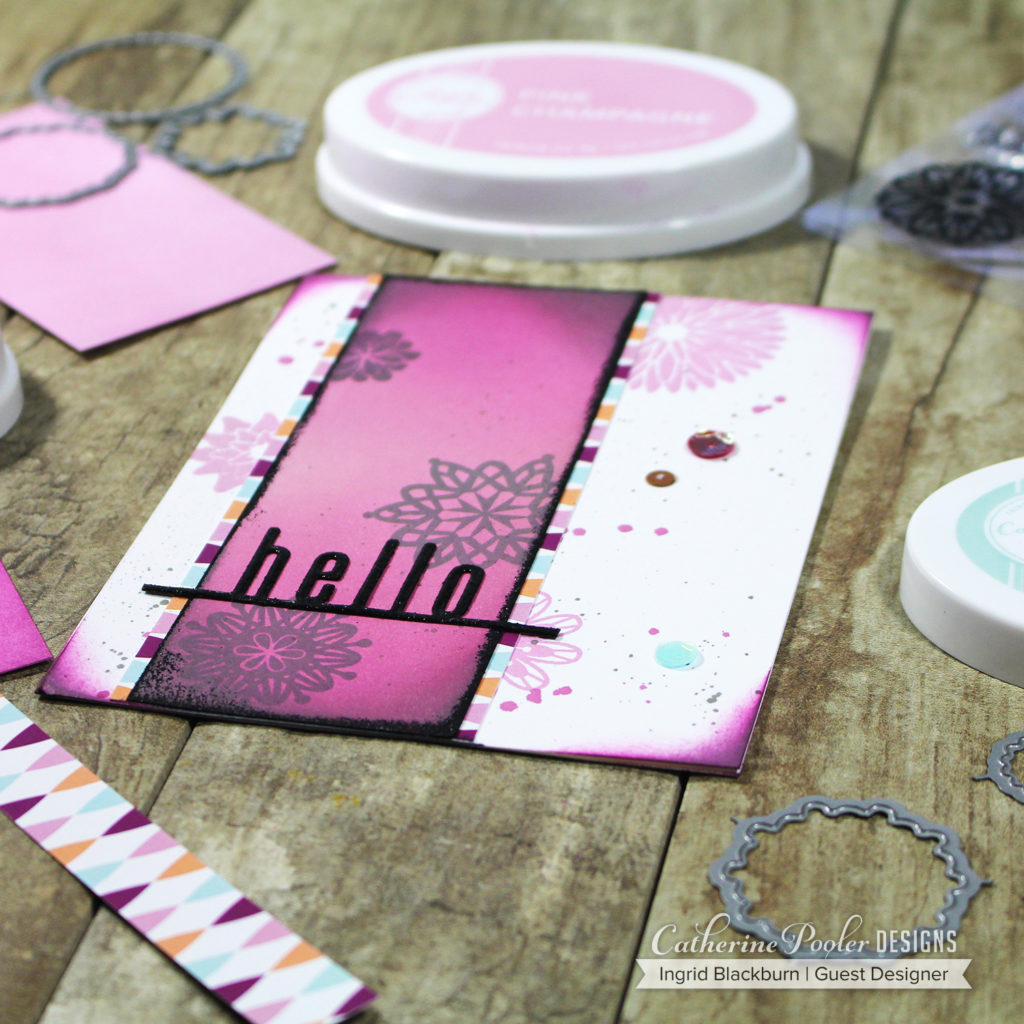
Frosted Sangria Blossoms – the card that almost wasn’t. I posed this question to my newsletter subscribers first and then to my community over on YouTube. Sometimes a card just doesn’t work out the way you want it to. This first one was just that.
5 card ideas

Now, mind you… it wasn’t the stamp set – it’s a great elements set that is quite versatile. And, it most definitely was not the inks. I don’t even think it was the layout. Something just didn’t click.

I filmed my struggle for you, but was unsure of whether or not you’d want a video? The card isn’t rocket science, and my videos are more about techniques, not just making an easy card like this. (#shameless channel plug…Subscribe here lol) That’s not why you watch my videos, let’s be honest.

So what am I even talking about? It’s about the very real struggle we all sometimes go through when cardmaking – it just not working out as planned, and troubleshooting that very struggle, along the way. If you do want to see a video on THAT, leave me a comment!

And more importantly, if you don’t – me mentioning it here is enough – that’s totally fair, and I definitely want to know that too. 🙂 Let’s get to it, shall we?

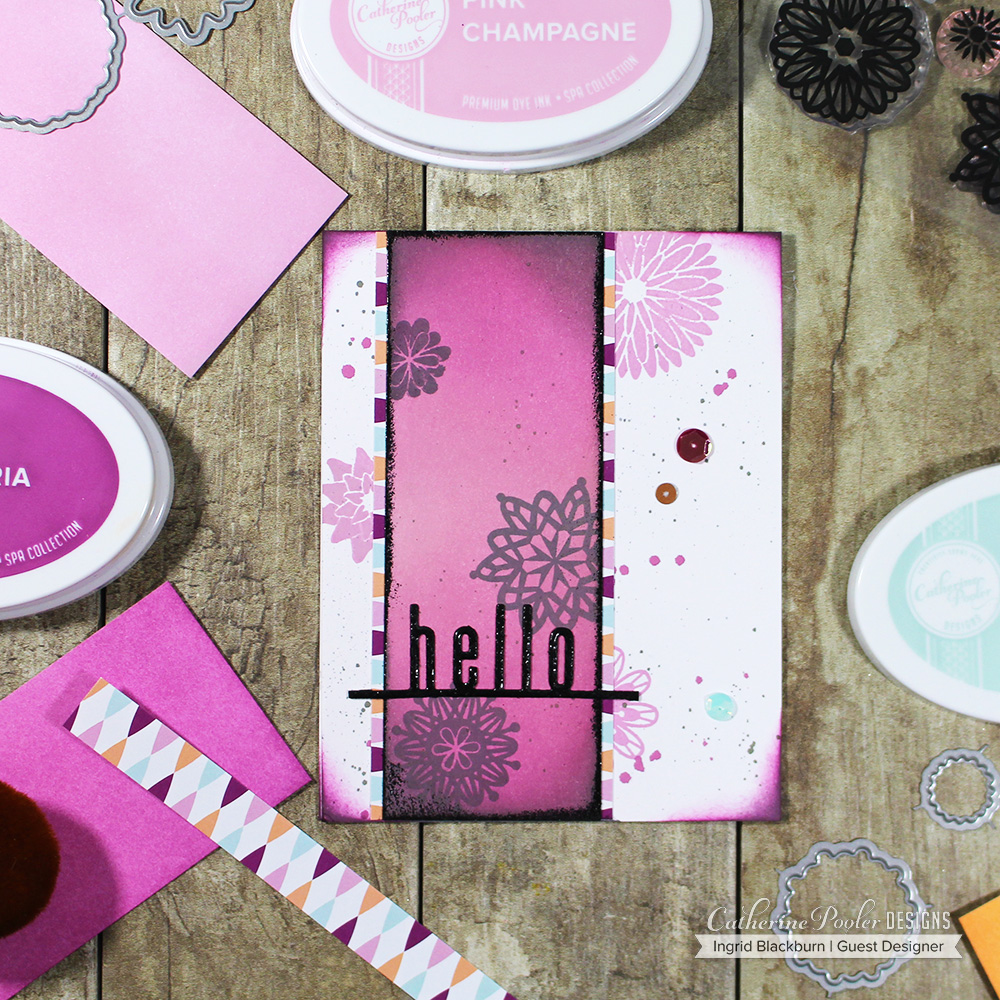
Card Idea no. 1 – Frosted Sangria Blossoms

Spoiler alert – without all the little, I like to call them ‘somethin’ ‘somethin’ techniques on this card – it just does NOT work. Do you like it?
5 card ideas

You’ve heard my little story… So, should I make the video, or pass? Would you watch? Feel free to tell me what you would be interested in seeing too, that’s always of great value to me.

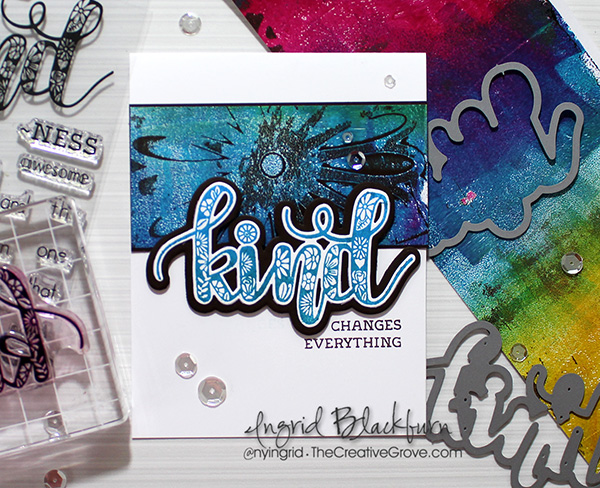
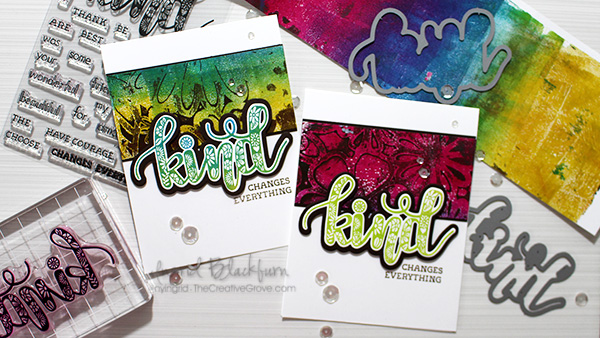
Card Idea no. 2 – The Classic Strip

You’ve seen it before, and you’ll see it again – the classic strip card. No that’s not a dirty word…seriously get your mind out of the gutter…lol!

Here’s the deal – sponge, watercolor, smoosh, however you wish to do it, and use all the colors of the rainbow. I chose to use each color of the now complete Urban Oasis spa ink collection by Catherine Pooler. These inks are muted, and SO my thing.

Next, Cut down little 3/8″ strips, assemble, lop off the edges and matte. THAT’s it. BAM! (inner Emeril Lagase). And you have a super easy card to make. Seriously, think patterned paper – theme it, white on white, embossed black on matte black – whatever you want!

You just got some great ideas, didn’t you? I see the wheels turning….

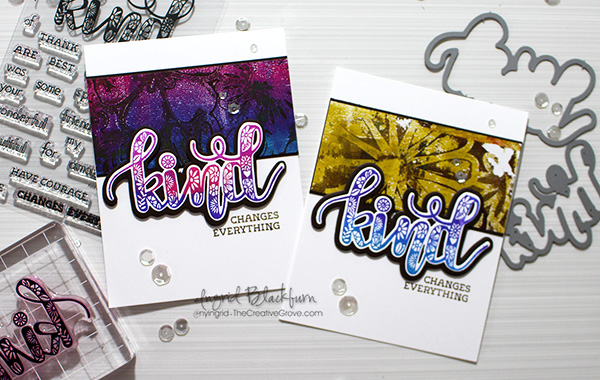
Card Idea no. 3 and no. 4 – DIY Colored Glitter Paste

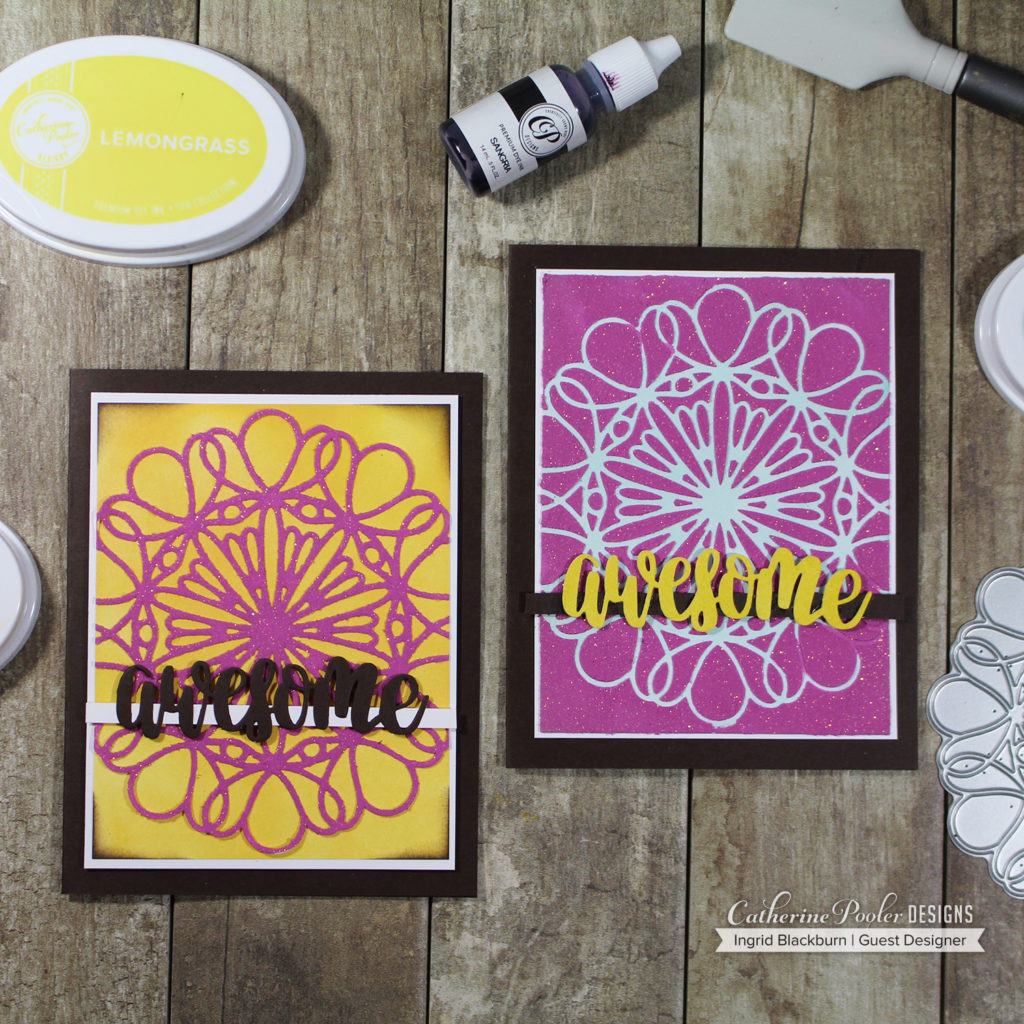
Okay, the video on this one says it all. Actually it shows it all. These two cards do NOT photograph as pretty as they are. The texture, sparkle and strangely weird color combination are very cool, you’ll just have to trust me on that.

Watch on YouTube

Making your own glitter paste could not be ANY easier. Paste + Glitter = Glitter Paste. Okay – spoiler….but did you see what I did in the video to color that paste? Is it with perhaps a tool you have in your own craft room, which you forget to use all the time? Hummm…….
Card Idea no. 5 – Galaxy Card

Are you addicted to galaxy cards as much as I am?

Watch on YouTube

I can not tell you how many I have pinned, between aurora borealis cards, nebula’s, and just galaxy skies – we’re talking hundreds…if not a thousand inspiration photos. Here’s a video on just how easy it is to create your own with ink blending. Pay attention the the end, that final corner tip makes the card!! (seriously watch it, it’s only 5 minutes).

I have a killer watercolor version coming in the next few months – that’s a true painting tutorial, you interested?

Okay – so if you haven’t heard yet….Catherine Pooler released four new ink colors and a whole slew of new products – some very cool products. I just used one stamp set, a little paper and sequins…wait till you see the rest. Click here to see those.

Till next time, thanks for reading, watching and if you haven’t already (get on that…) commenting!

Ciao –

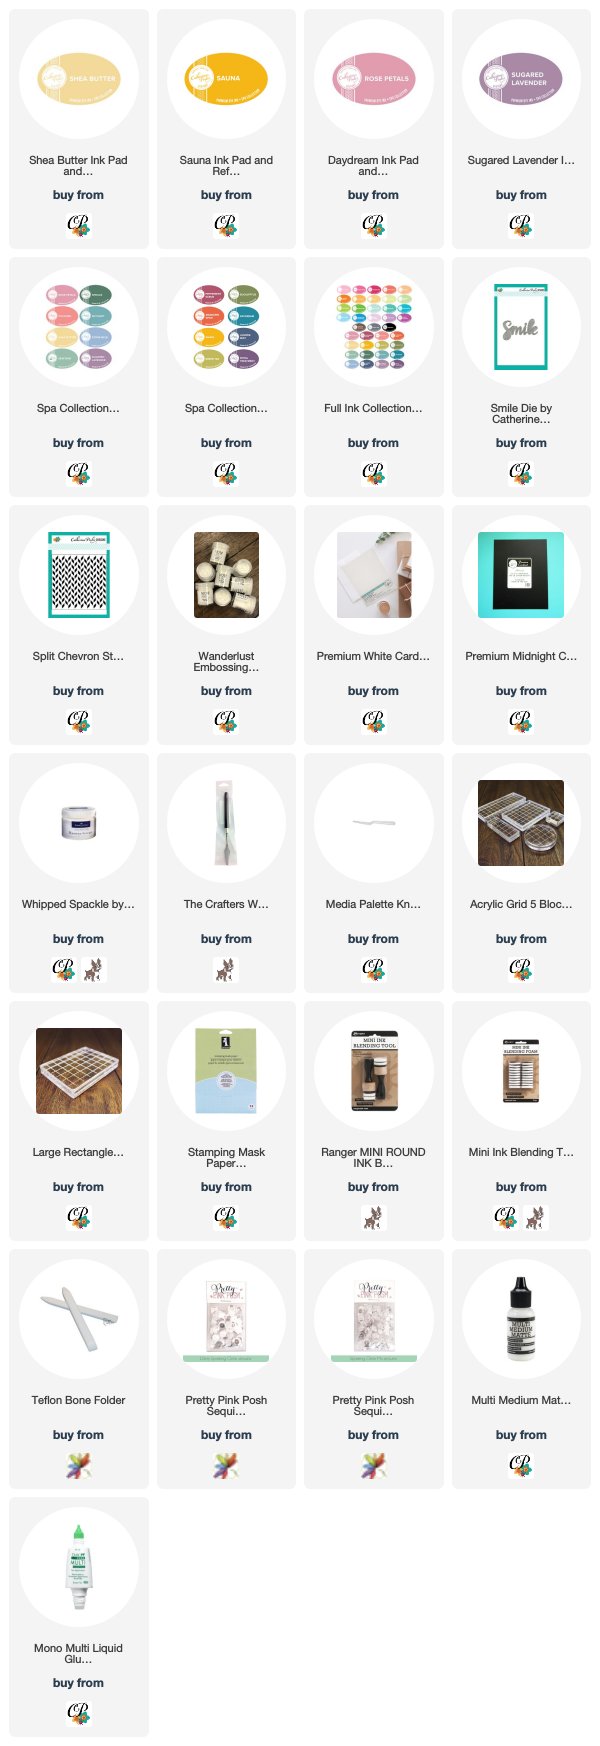
Here’s what I used…. I’d love it if you shop through my links – it keeps me making videos for you – you know, those supplies are not cheap! I appreciate you supporting my art – check out the Patron page too! 😉

Catherine Pooler Welcome Home Release + Giveaway

Welcome Home Release

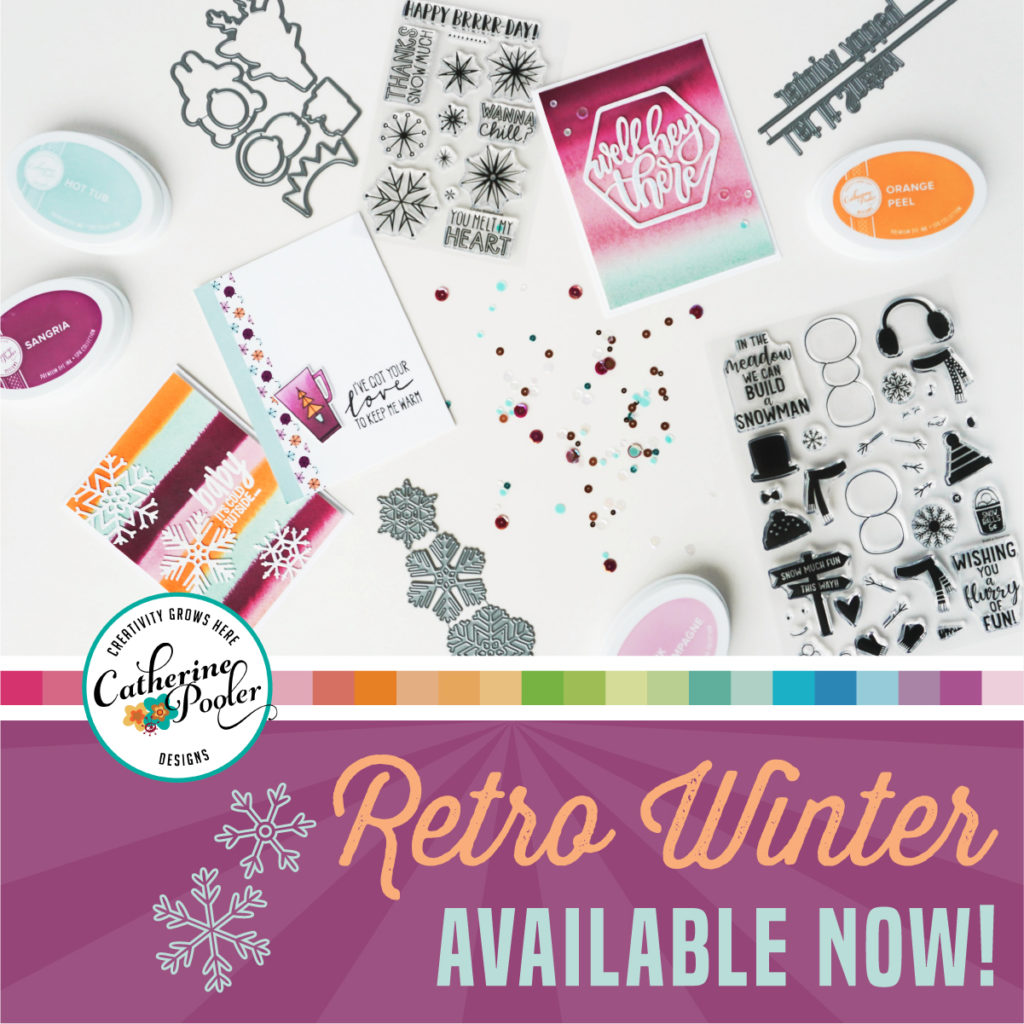
It’s the Welcome Home Release! You’ve probably arrived from Daniel Wests’ blog – Welcome! Today I have some fun quick little projects for you using some of my favorite pieces from the Catherine Pooler Welcome Home collection. Let’s jump right in!

This collection first premiered at the Creativation show in Arizona. And I have been just waiting to show you some of these amazing pieces.

Here are the new Stamps and Dies that are in the Welcome Home Collection:

PLUS…these amazing new must have products:

I’ve been using the Life Changing Brushes for a few months now. I thought it would be fun if we played with the Carnivale minis as well today. Let’s see how they work with some of the stamps and dies in action…

Welcome Home Release – Project No 1

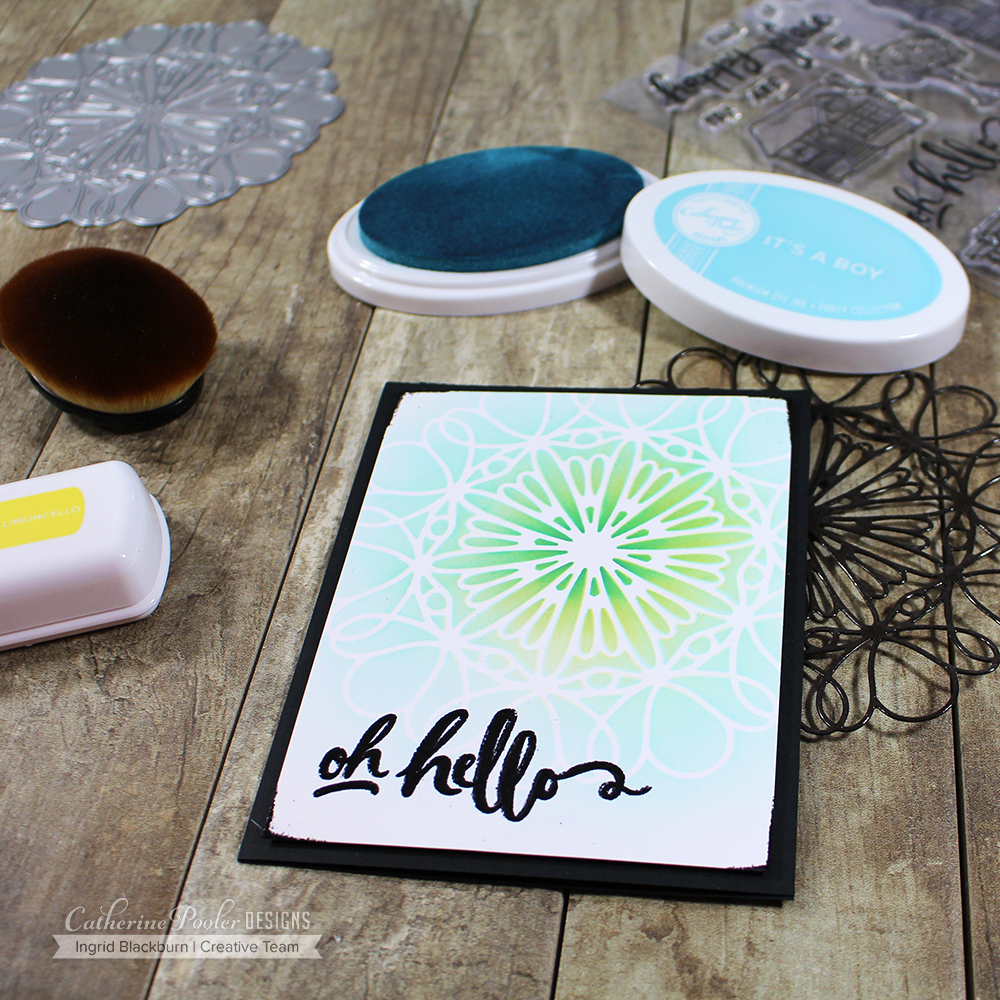
Nothing makes an impact like the Interlocked Die. To say I was over the moon excited the first time I saw this die by Julie Mogford is putting it mildly! This is not your average cover plate – this die measures 5 1/8″ around, and today we’re going to use it as a stencil.

That’s what I love about Cover Plates – using them as stencils! So that you can get as much use from yours as possible, cut it out of heavy weight cardstock and embossed it in clear on both sides. You can also seal it with gel medium.

To get that light airy look in a quick way – you’ll definitely want to try out the Life Changing Brushes. Last November I purchased some of the inexpensive make up brush counterparts, and let me tell you – the Life Changing Brushes are the real deal. They are made for Paper Crafting. Let me say that again – that’s the biggest difference – these are made for Paper Crafting! They are designed to release ink without soaking the ink up.

Another big difference is that with the Life Changing Brushes, I have not had the little hairs come loose, unlike their cheaper counterparts. You do get what you pay for! Just like anything else in life. So which size do you need? Definitely the larger four, and if you want to use them with stencils and get a bit more precise, you may want the Full 10 set. That way you can get into the nooks and crannies of those intricate stencils or background stamps.

So I wanted a fun masculine feel to my card today. I quickly layered some It’s a boy down, keeping my pressure light as I went outward. To get the full stenciled effect of this amazing die, be sure to go beyond the edge of the Interlocked Die. For some pop – use Limoncello (CP Minis – Carnivale Collection), from the center outward – just look at this AMAZING green it creates!!

So that your sentiment from the Happy Place stamp set makes an impact, emboss it in WOW Black Embossing Powder. I also ran my WOW Embossing Pad along the corners and added a little powder there too – it’s a bit hard to tell, with the card front adhered to the Midnight cardstock, but you really notice it in real life (shiny vs. the matte cardstock).

This card was so quick to make, you can really made several in the whole rainbow and literally use any sentiment on it! Do you use dies as stencils ever? If so, tell me in the comments what your favorite is?!!

Project No 2 (and 3)

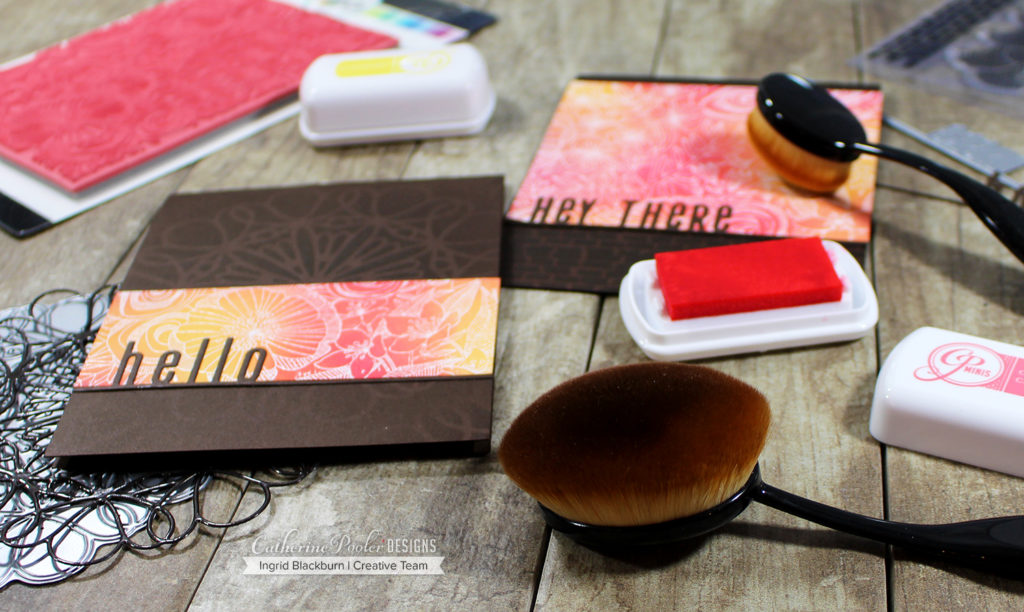
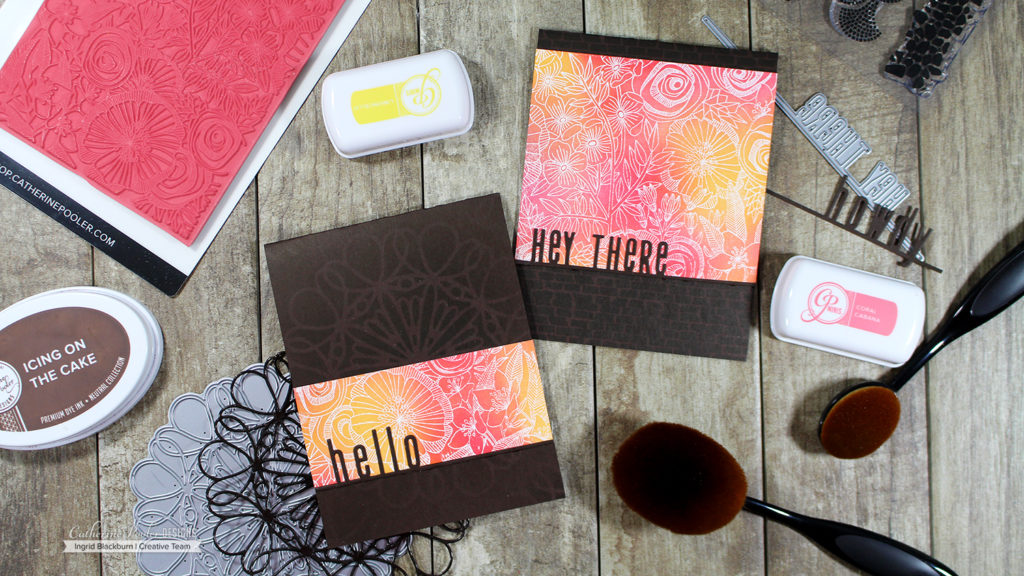
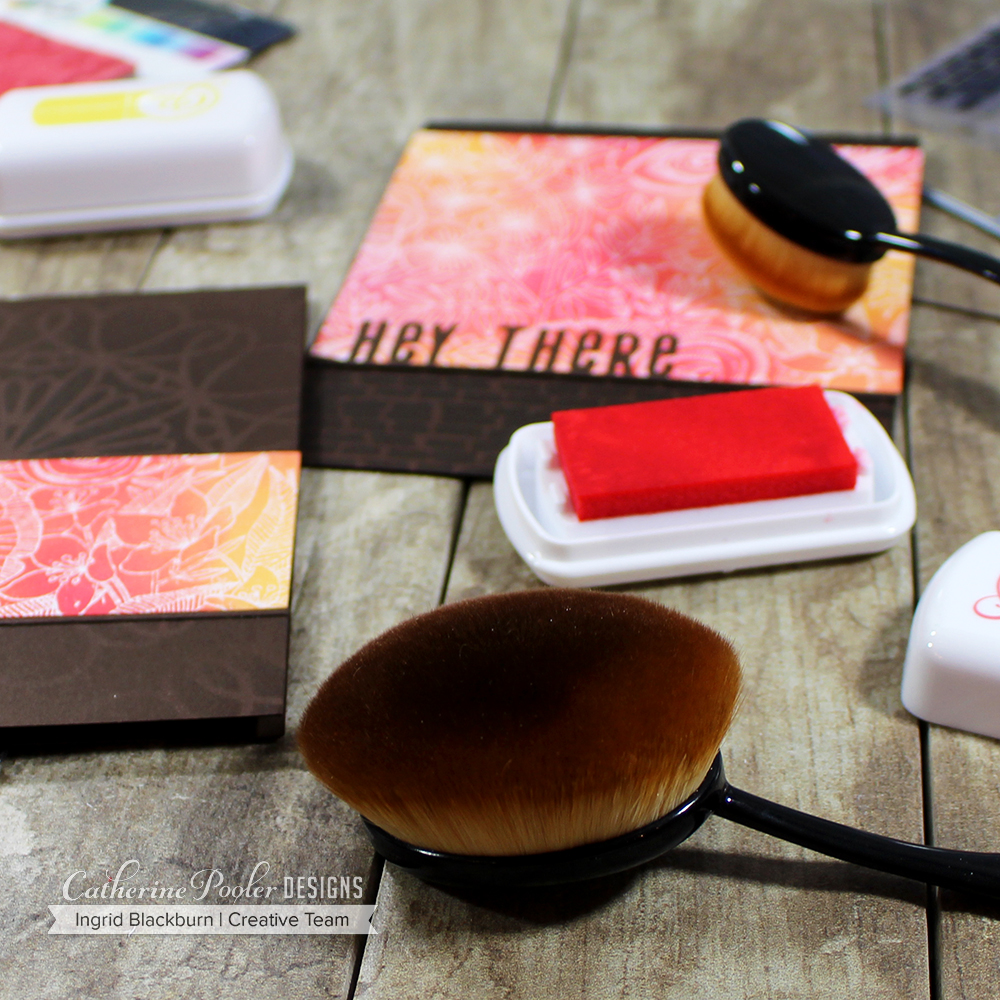
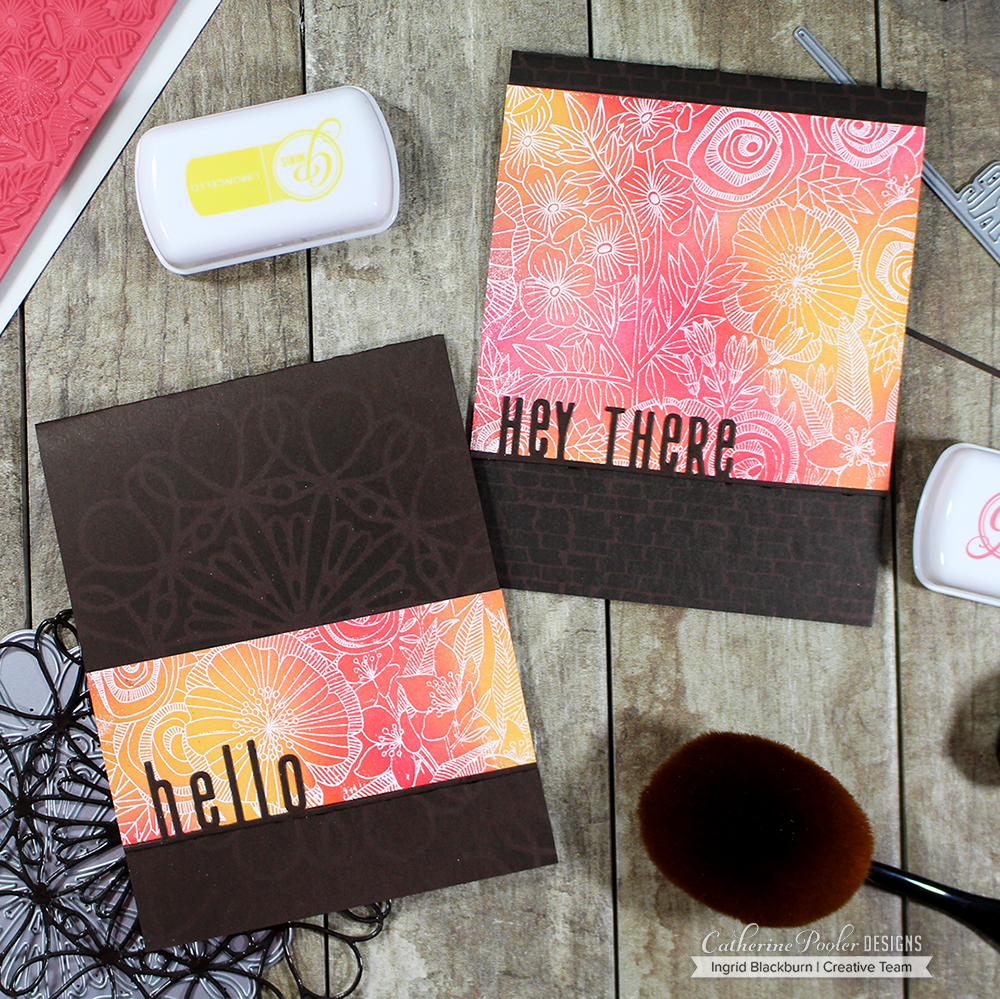
Next up we’re going to use the same Life Changing Brushes to get a flawless look, but over an embossed image – the Cottage Garden Background Stamp.

Emboss your image in Opaque Bright White Embossing Powder on CPD 100# Bright White Cardstock. Did you know that WOW! puts antistatic product right into their powders? On an intricate image like the Cottage Garden Background, that really matters! It helps so that your powders don’t stick to the non-embossed parts.

I embossed one card front panel – 5 1/2 x 4 1/4″, and then blended Limoncello, Coral Cabana, a little Be Mine and some Samba inks from the CP Minis – Carnivale Collection. That’s what is so great about Catherine Pooler ink – the amount of ink it releases. Even Picket Fence Studios who designed the Life Changing Brushes recommends CPD ink for it’s brushes!

The key to getting a light blended look on your project is the same as with the Ranger Mini Sponge Tools – light even pressure. The difference between the tools – there is no rounded edge, so you’re more likely to get a smoother application with the brushes. And they are ergonomic in design – quite flexible and easy to hold. All that makes a difference if you love to ink blend.

I recommend having a brush dedicated to a color family – that way you don’t have to constantly clean them. But you will want to clean them from time to time – just rinse in the sink with soap (any will do) and let air dry. Do not use a heat tool – the little hairs are made of a plastic material!

Once you have your background how you want it, cut a 1 3/4″ section off from the top or bottom (I chose the part with mostly flowers). This card is relatively simple to put together.

First ink blend a background using your Interlocked Die as a stencil with Icing on the Cake on the card base for the skinnier piece. On the other – stamp the brick border from the Strolling Borders Stamp Set in Icing on the Cake.

Adhere your backgrounds to the bottom and top third of your folded card base. Cut out the Ways to Say Hey Dies for your sentiments out of Chocolate cardstock with your die cutting machine and glue both your sentiments to the bottom – just off the edge (to the card base), but with the sentiment part on your background.

That’s it! Quick and easy, and the best part – you get two cards from every Background. I love how they look and mixing the fun, vibrant nature of the Carnivale inks with the deep dark Icing on the Cake ink and Chocolate cardstock. What do you think? What would YOUR color choices be?

Now it’s time for you to be inspired! Hop along the hop – and be sure to leave comments along the way to be entered in for some gift certificates! Definitely let Julie Mogford know when you get to her stop if you love her Interlocked Die!! Be sure to stop by my Instagram channel too on Wednesday for another inspiring hop as well. Have an awesome day!

Catherine PoolerHop Here Next!!
Tracie Pond
Jen Carter
Karen Baker
Susan Powell
Kristie Goulet
Ilina Crouse
Lisa Harrolle
Nanette Tracy
Kelly Martin
Maureen Merritt
Julie Mogford
Daniel West
Ingrid Blackburn – You’re HERE!

Keep those fingers inky!! Below you’ll find a supply list for each project.

Easy DIY Mixed Media Christmas Cards + Video

Save the Crafty YouTuber Video Hop

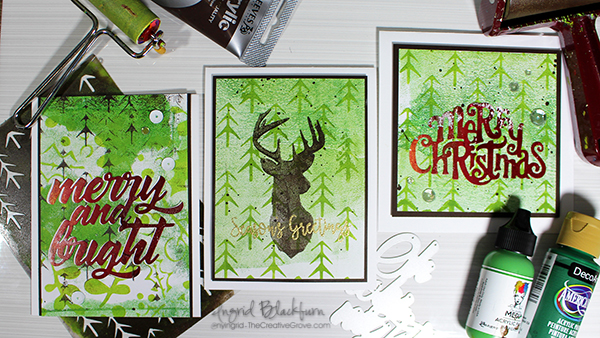
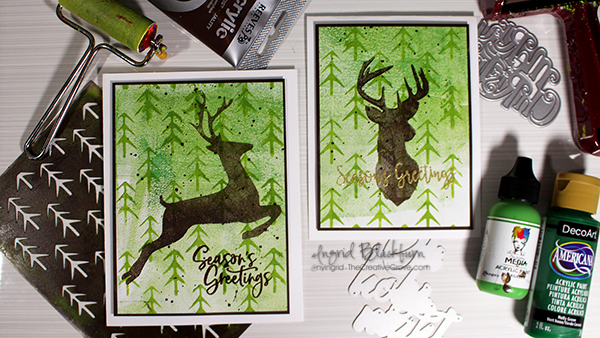
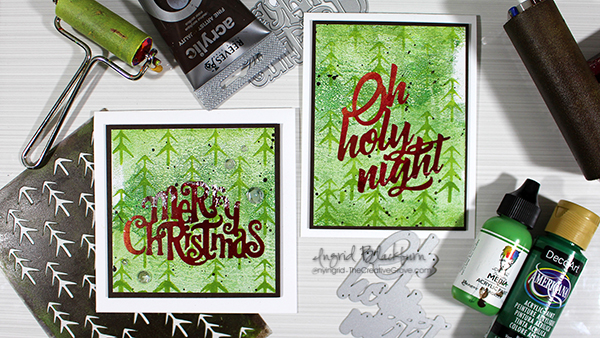
Have you ever wanted to quickly produce some fun and artistic Mixed Media Christmas Cards? Are you tired of sending bulky cards that require extra postage? What if I gave you the formula for how to create a whole stack of cards that have layered texture and character to them, but are pretty much flat, easy to put together and will have all your friends and family thinking you are quite the artist?!! Interested?

Now what if on top of that I told you that you could have a chance to win over 100 prizes – bet THAT sold ya!

Mixed Media Christmas Cards Video Tutorial

It’s that time of year again – my good friend Justine Hovey has organized the second Save the Crafty YouTuber Video Hop, and I decided to play along with 90 of my crafty friends – mixed media style! And I even have my OWN giveaway that I’m doing….so be sure to actually WATCH the video. I give the details along the way…

Click HERE to watch in HD on my YouTube Channel

Aren’t they FUN and super simple cards to make?!! Seriously – I’m going to be teaching this exact project (and so much more) in person in a few weeks in the Orlando, Florida area. If you’d like to come learn from me in person – be sure to email me at ingrid (at) thecreativegrove.com and I’ll send you all the details!!

For the specifics and Details to be entered for over 100 prizes – seriously…it’s more like 125+ prizes….GOOD ones too – read about those on my YouTube Channel in the section below the video!

The Save the Crafty YouTuber Video hop is a celebration of cardmaking video tutorials created by a group of talented crafters of all different styles and levels. We are coming together over 5 days to give our viewers a chance to discover other amazing cardmakers and help reach monetization goals!

Mixed Media Christmas Cards

All you have to do is watch, like the video, consider subscribing, and click the link in the video description below to hop to the next video. Let yourself be inspired! Don’t forget to comment (on the video hop over at YouTube) because we have tons of prizes to give away. Please indicate if you are located in the USA or International so that prizes can be awarded appropriately as some prizes (not all!) have restrictions on them.

To be entered in for MY giveaway (closed) – watch the video – I give details on what you need to put in the comment section (USA only for that one).

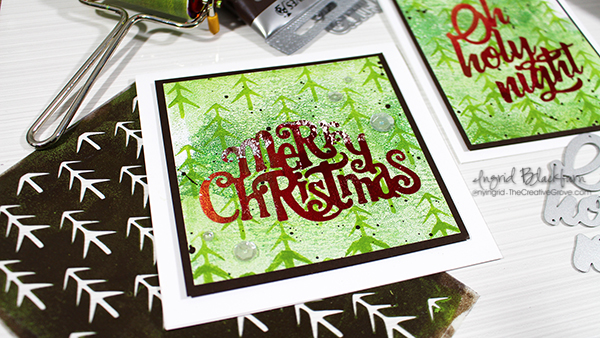
Monoprinting Christmas Cards

Don’t forget to check back every day this week since there are 5 themed days of video hops! You never know when you’ll discover your next favourite YouTuber! Hop Links are below.

I hope you enjoyed this tutorial. Here are a few close up photos for you and the supply list. Be sure to come back to this post on November 10th to see who won the prize pack – I’m giving away Dies, Stencils and ink pads – it’s worth over $40!!! That Merry Christmas Die is one of them!!! 🙂 Happy Hopping!!!

Mixed Media Monoprint Christmas

Aren’t those the prettiest cards?!! These photos do not do them justice!! Interested in seeing more Mixed Media Christmas Card possibilities? Check out this tutorial – just adjust for the Christmas Season

Sponsors & Hop Links (Giveaways closed)

Here are all those sponsors….and SO many channels in each of the five hops are giving away additional prizes – this is an AWESOME hop!

Here are links to all five hop days:

  1. Day One Hop Beginning
  2. Day Two Hop Beginning
  3. Day Three – Start on MY YouTube Channel
  4. Day Four Hop Beginning
  5. Day Five Hop Beginning

Good luck on winning all those great prizes – over 100!!! Leave me a comment below if you liked these cards – I’d LOVE to know.

Thanks for watching – till next time…

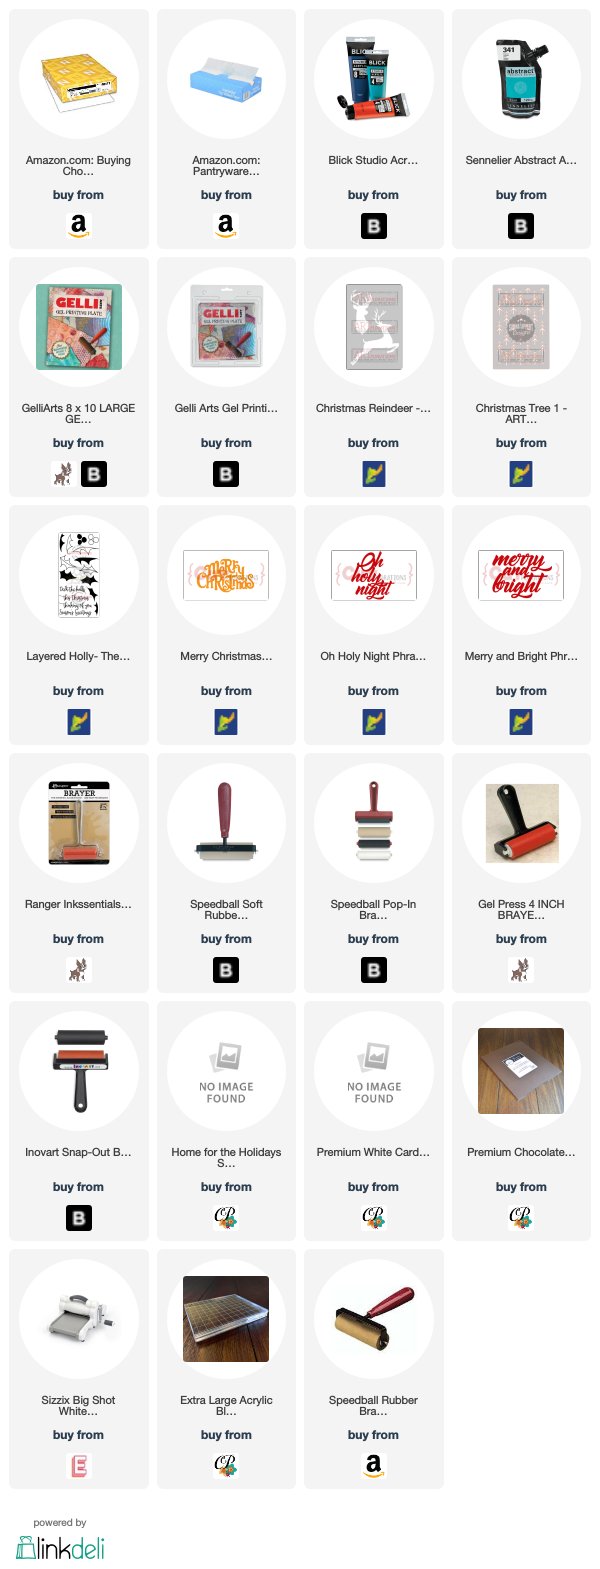
Supply List

Affiliate Links used if available

Mixed Media Christmas Cards

Hailey’s Shower Photo Supply List – https://ldli.co/e/jpxx6p

Christmas Sugar Cookies Card

Nothing is better than good Christmas Sugar Cookies, right? I have a quick and simple treat for you this evening. It’s the live public release of the new Catherine Pooler Home for the Holidays Stamp of Approval Collection! This fun collection of stamps, dies and brand new exclusive embossing glitters is a dream to create with. I’ve been having fun all week showing you how to create wreaths for your custom doors, mass producing my take on the classic nordic sweater turned Christmas tree cards, and I thought tonight we’d tackle the holiday sweet tooth!

Home for the Holidays Stamp of APproval

This release has 10 products in it (5 Stamp Sets, 2 Dies, and 3 Embossing Glitters):

In addition to the release, there are a few new products being released as well – including a brand new “colossal” sized block – you probably saw me use it in my video on this post here – it’s the lightest weight block of its size I’ve used yet!

If you aren’t familiar with Stamp of Approval, it’s a curated collection of stamps and dies that work so well together. It’s perfect to help take the guess work out of your holiday cards. These boxes always sell out, and they are going fast, so don’t miss it! To grab one, just go directly to the Shop Here.

Christmas Sugar Cookies Tutorial

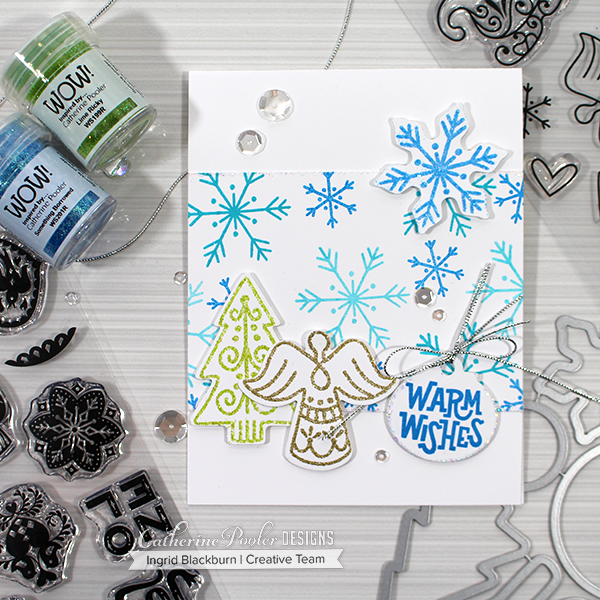
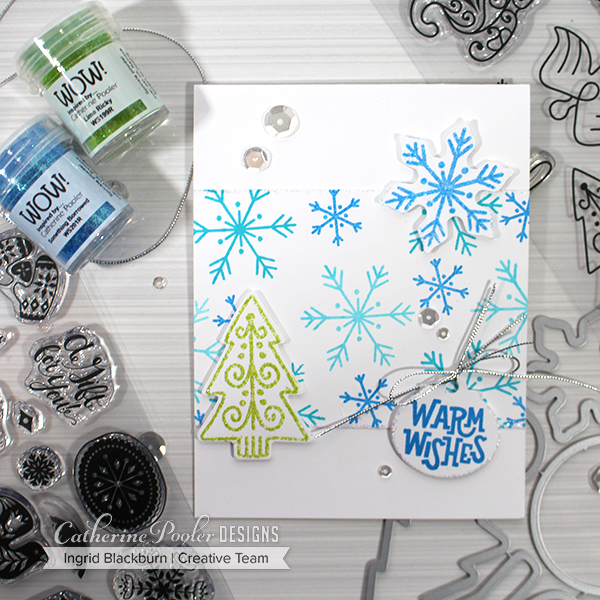
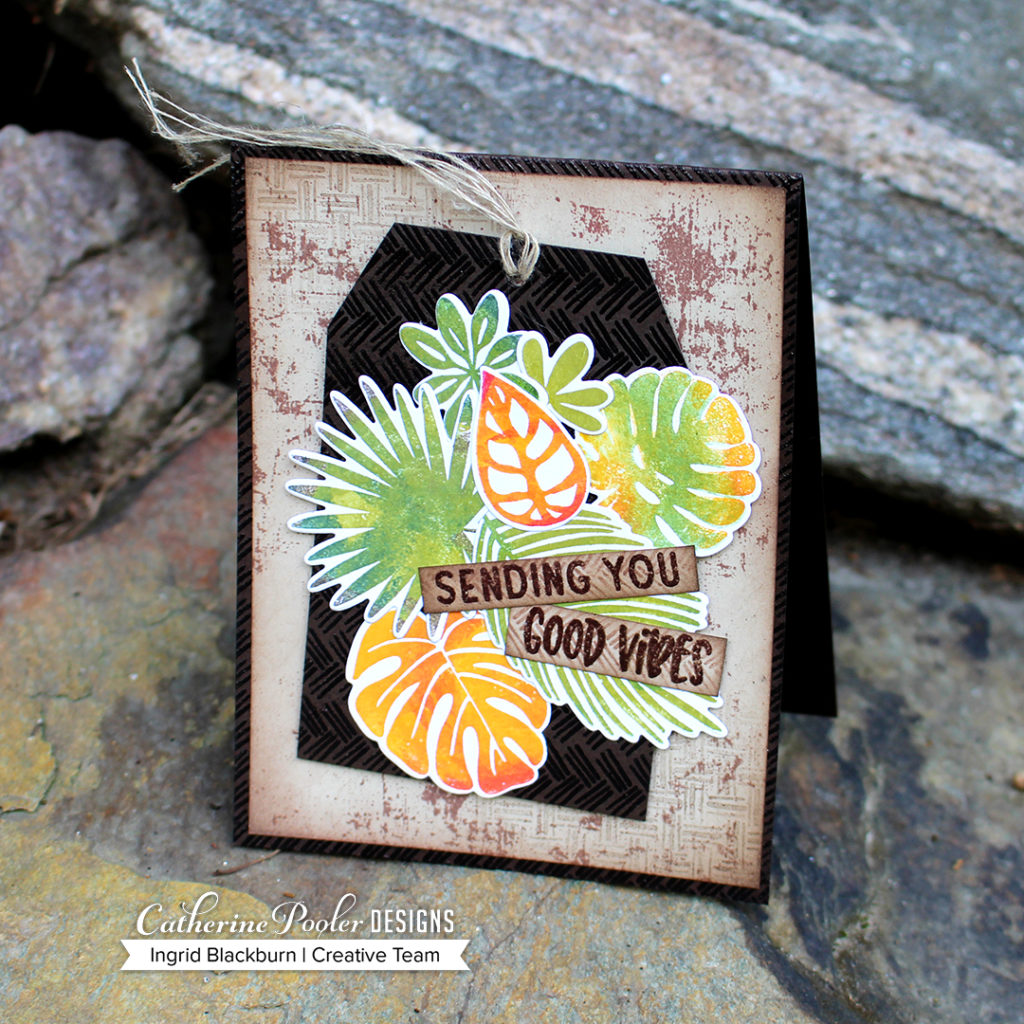
So here’s some fun sugary inspiration for you. This project showcases the Sugar Cookie Dies and Christmas Cookies Stamp Set. The sentiment is from the nordic folk art themed Tiny Wishes Stamp Set using the new Tiny Tags Dies. There’s even a little of the new Thin Silver Cord on there!

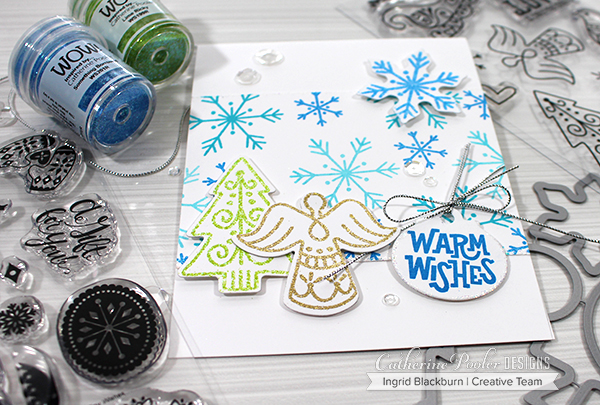
I have similar cards here – you’ll have to tell me which one you prefer – withor without the Angel? I love angels…but it was messing with my need to have odd numbers of elements on my cards. I literally could not decide, so I’m leaving it up to you!!!

TCG Giveaway – Leave me a comment below and I’ll choose three people randomly to send a Christmas Card to this season!! (I did make 12 the other day for the video hop….) 😉 I’ll announce the winners this weekend!
Christmas Sugar Cookie Card #1

Christmas Sugar Cookies Card by Ingrid Blackburn

Christmas Sugar Cookie Card #2

Christmas Sugar Cookies Card

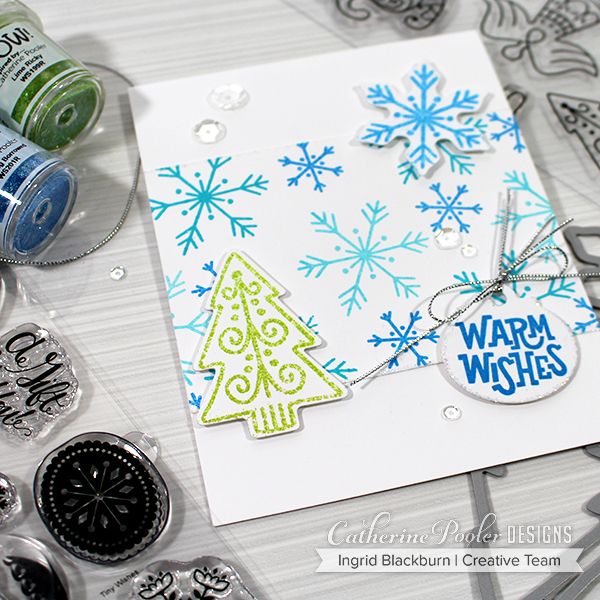
To have some fun with the sugar cookie theme, The large snowflake die is embossed in the new exclusive Something Borrowed Embossing Glitter – what? Yup you read that right – embossing powder in Catherine’s colors – just in time for the holiday season! The Tree is in Lime Rickey Embossing Glitter – my favorite Party Line Green ink, what’s yours? Tell me in the comments below!!

Only one missing is Rockin’ Red, I know I probably should have snuck a peek of it – it’s awesome!

Christmas Sugar Cookies Card

I’m not a big straight glitter fan, but Embossing Glitters I can do! Why you may ask…well, they stick to the paper and don’t rub off! I swear, every time I use glitter, I wear it for days (hubby too), what about you? Do you have that same problem? For the Angel, I used Wow Metallic Sparkle Embossing Glitter and around the Circle Tag, some of Catherine’s exclusive Wanderlust Embossing Glitter – literally the BEST (hands down) sparkly clear glitter. See it in this photo?

Christmas Sugar Cookies Card

I hope you loved these cards. They are pretty straight forward. Stamp the two snowflakes in three colors – It’s a boy, Fiesta Blue and Something Borrowed. Stamp your dies in Versamark or WOW embossing ink and heat set with your desired embossing glitters. The warm wishes was stamped in Something Borrowed. The snowflake panel is also edged with Versamark and embossed in Wanderlust Embossing Glitter.  Tie a little Thin Silver Cord and you’re all set! I popped the dies up on a little foam tape and it’s a simple, cost effective card. VERY easy to mass produce.

Catherine Pooler Stamp of APproval

Thanks for joining me this week. There are still prizes up for grabs in the three hops – don’t miss out!! Here are the three hops, be sure you like, comment and subscribe all along the hops! There are three ways to win 7 prizes. You can always start on Catherine’s channels too.

  • Instagram Hop – 3 $25 gift certificates as Prizes
  • Blog Hop – 3 $25 gift certificates as Prizes
  • Video Hop – Stamp of Approval Collection as a Prize

You have through Thursday 9/20 to enter, winners will be announced on Catherine’s blog on Monday 9/24.

Have a great night!


Supplies

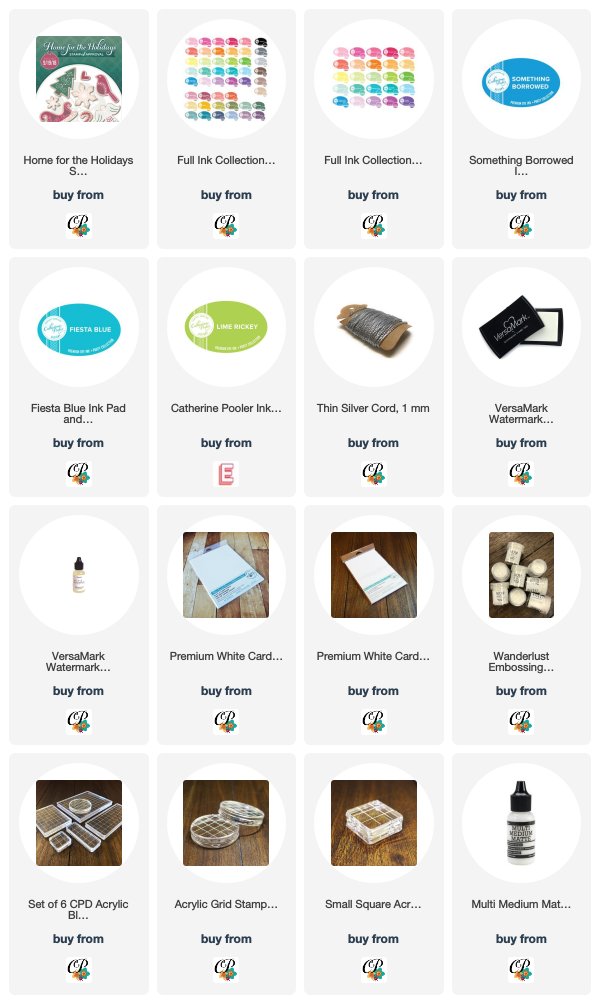
To make finding the supplies I used in these projects a bit easier for you, here are a few clickable links. Compensated Affiliate Links are used when possible. Click here for disclosure. Happy Shopping!


How to Mass Produce Clean & Simple Quick Cards

How to make 20 diy quick cards

Have you ever created an awesome background that you could quickly turn into several quick cards? Did you know that the Clean & Simple (CAS) style can have some mixed media elements in it? This tutorial will show you just how simple and easy it is to create two backgrounds that you can literally turn into 20, yes – you read that correctly…twenty cards!! Let me show you exactly how…

Watch on YouTube in HD & Subscribe for more Tutorials

Quick Cards Tutorial & Tips

When I’m trying to come up with quick cards, I usually start with a larger background piece. That’s the key for me! Well, that and some great word dies (or large stamp sentiments) and a classic clean and simple design. Cards don’t always have to be complicated. SCREEETCH!!!! Did you just hear that in your head – from little ‘ol me?!! You are on my blog and YouTube channel after all, right? Yes, I love artsy complicated cards and mixed media projects just like the next person – even complex watercolor projects. But not every one has to be uber-complicated. Sometimes simple is better!

How to make 20 quick cards with monoprints

20 quick cards tutorial and tips

What do you love – CAS or Complex designs? Seriously, there’s no right or wrong, but I’m curious – tell me in the comments below & over on my YouTube channel here!

Giveaway alert – I’ll choose one person to send one of these beauties to if you comment on my YouTube channel in the first 72 hours!!

Now that you’ve seen just how easy it is to create those backgrounds – colorful ones too….Here are a few tips you’ll want to keep in mind:

  • Create backgrounds that can be split up – you want the design to be everywhere – not just in one little corner. Yes, in my video, you only see the flowers on one side – but I can quickly stencil something over the clean side too – it’s all in how you look at it, no?
  • Don’t have the Flower Frenzy stencil by The Crafters Workshop (I LOVE their stencils) or any 12 x 12 stencils? No problem – just use your 6×6 ones a few times! But seriously – check out their flower stencils – they have SO many gorgeous ones…
  • To fill up your space if your background piece is small – use a large stamp or die cut like I did. You can always build a sentiment like you see here too
  • Keep the rule of thirds in mind
  • Use powerful colors that make an impact – it helps to have all that white space around as well. The contrast is amazing.

quick cards with monoprints and word dies

What did you think? That’s one rockin’ die, right? Designed by Nanette Tracy for Catherine Pooler Designs – and newly released last week – don’t miss out on it. Get your hands on the Three Kind Dies and Kind of Wonderful Stamp Set right here! And Catherine Pooler inks are SO super vibrant and saturated, they are the perfect choice when matching to your acrylic paints.

I’ll be back soon with some more Clean and Simple AND Mixed Media designs. And don’t forget to comment on my YouTube Channel!! I’d LOVE to send you one of these cards – I may just include something else that’s fun too!

Till then – keep those fingers inky!

Supplies

To make finding the supplies I used in these projects a bit easier for you, here are a few clickable links. Compensated Affiliate Links are used when possible. Click here for disclosure. Happy Shopping!


Tropically Yours Stamp of Approval Blog Hop Day Three

Tropically Yours Blog Hop

Welcome to the Tropically Yours Stamp of Approval Blog Hop – Day Three! You’re probably hopping on over from Laurel Beard’s blog. Laurel is ah-mazing, isn’t she?!!! I love the texture she creates in her projects – plus she enables my crafty habit all the time…lol!

We’ve been showcasing the fabulous products in the Tropically Yours SOA box since Sunday, and let me tell you, we’re gonna finish it off the Creative Team hops with a bang today.

The Tropically Yours Stamp of Approval box is by far my favorite. I’m a sucker for anything foliage, texture and pattern. Throw in some scenic elements, and um, hello…have you ever been to my blog before?!! But before we get into the creative…let’s talk about the when, where and why.

If you’re a StampNation member, then join us tonight live from the clubhouse PJ Release Party – yup – I’ll be there!! You’ll be the first to get access to this hot collection in the shop. The waitlist will get the secret link at 9 am Wednesday first. So don’t miss being on the waitlist – why not, right? It’s all about access! If any boxes are left over at 6 pm later on Wednesday (and I’ll be floored if there are any – the collection is that good), the box will release to the public.

Tropically Yours Stamp of Approval

The Tropically Yours SOA Collection works flawlessly together. Most of the sentiments are hand lettered, so they are unique. The images are bold, great for techniques, and have just the right amount of CPD spunk. The textures…can we talk about those a second?

First off, Canvas Grunge background stamp – when Shawna Clingerman designed this textured design, I nearly fell out of my chair! Now, I am a bit of a clutz, so that’s not that far of a stretch, but I think I did audibly gasp. This stamp is SO up my alley, and you’ll see why shortly…Good Vibes Borders – what can I say – there isn’t one stamp in that set that you will not use over, and over – and then over again. It’s just THAT good. It’s rare to find an entire set of texture stamps that can not only create incredible full backgrounds, but be just the right little something your project needs, you know? Plus have sentiments…

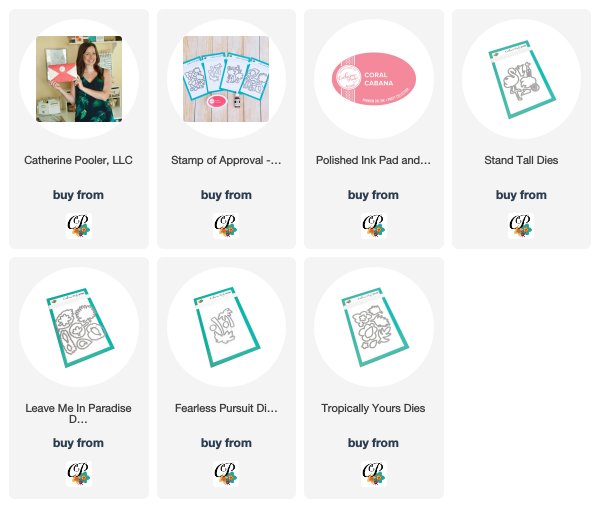
Leave me in Paradise, Stand Tall, Tropically Yours and Fearless Pursuit – all of which I’m using today…I’ve never seen four stamp sets that work SO well together. Each one is distinctly different and has it’s own flavor, but together they really bring out the best in each other.

Make sure you don’t miss the Add-Ons – all four cookie cutter dies are additional (perfect for those who have a scan and cut like me, right?!!). Um, and yes…there’s a new ink in town – Coral Cabana. It’s part of the Carnivale Collection of Inks in the Party Line, and it’s gorgeous.


I’m showcasing all six stamp sets for you today…but there’s more…the Cabana Tiles Dies – wow. I don’t have a project today with those, but did you see what some of my Creative Team teammates did with those – I mean WOW!

So, head on over to the shop – get all your extras already into your cart, so that when the time comes….you just have to add the SOA and Add-ons and checkout. After all, you don’t want to miss all those little things (adhesive, the new Zig Blender Pen, Embossing Powders & Glitters, Paper – you’ll want some Sand Dunes cardstock if you don’t already have it, and the INKS!

Tropically Yours Projects

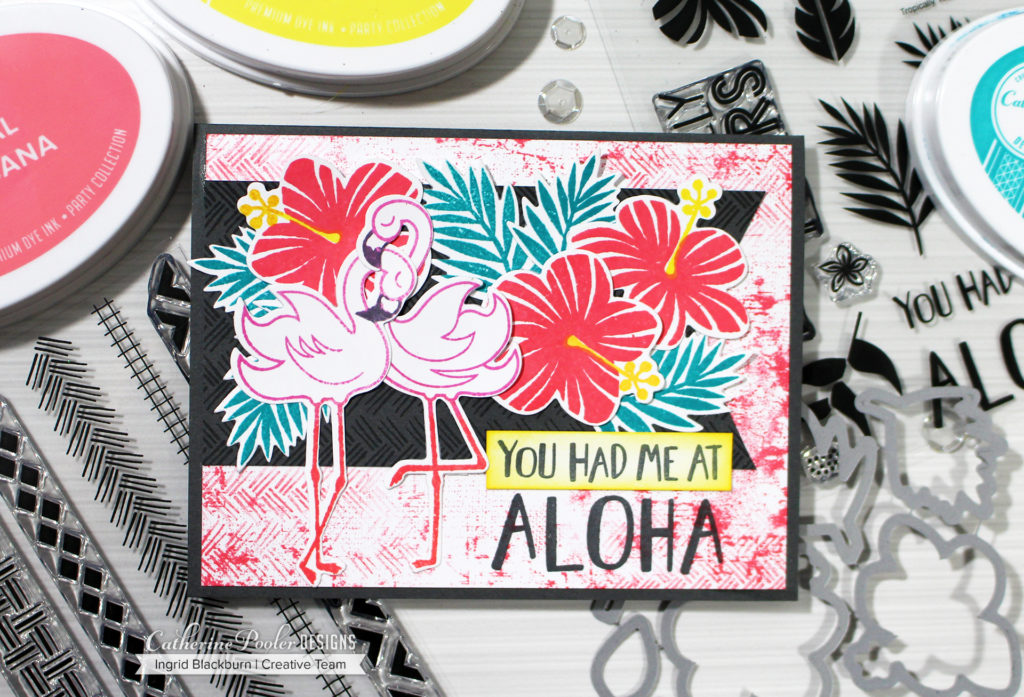
No. 1 – You Had Me At Aloha

First up…a little playful fun. This card has a lot going on. First off – look past all the cuteness on it to the textures. That Canvas Grunge background stamp is so beautiful, especially in that Coral Cabana. The textures it has is incredible. And this is stamped off!

I rarely use it directly stamped – it’s a powerful image, and when using it in the background…place a piece of copy paper – or better yet – a different project on it, lightly tap with your fingers and then do the same with your piece. For added interest, use the Good Vibes Boirders stamps repetitively in a light manner in the corners. See how they fade into the card?

I also used the same stamp in Black Jack on the Smoke cardstock. That pattern is literally pure perfection for a background, and it’s super easy to line up too!

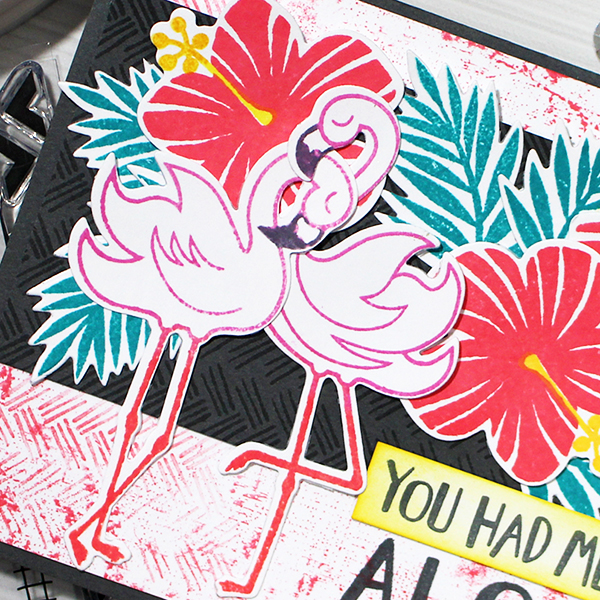
The Flamingos are just darling. Their legs are in Coral Cabana, bodies in Be Mine and to get a black beak, squeeze your Black Jack ink pad to collect some ink in the lid. Use a Zig Blender Pen to pull some ink and color like a marker. The Tropically Yours stamp set has some great tropical floral images to go with a few fun sentiments. I love how fun this card is – with a tropical nod to Jerry McGuire!

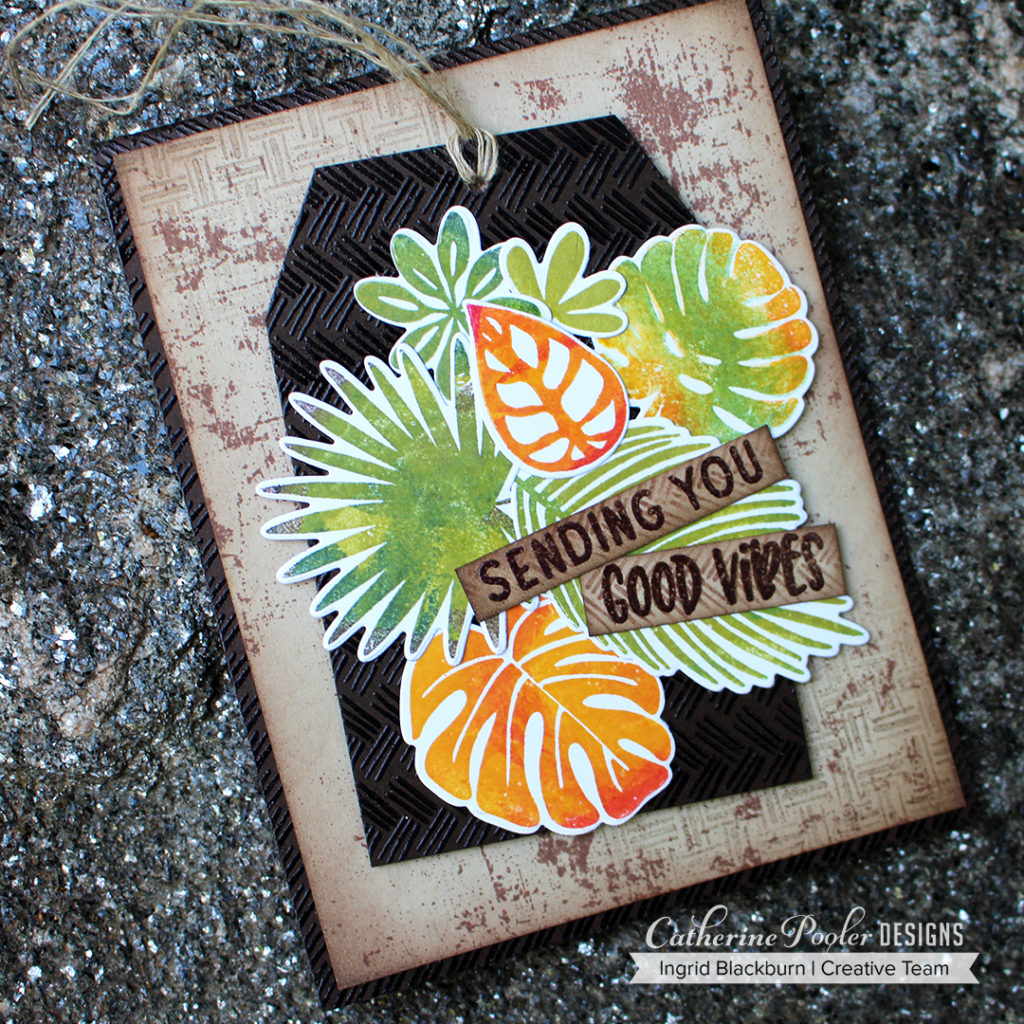
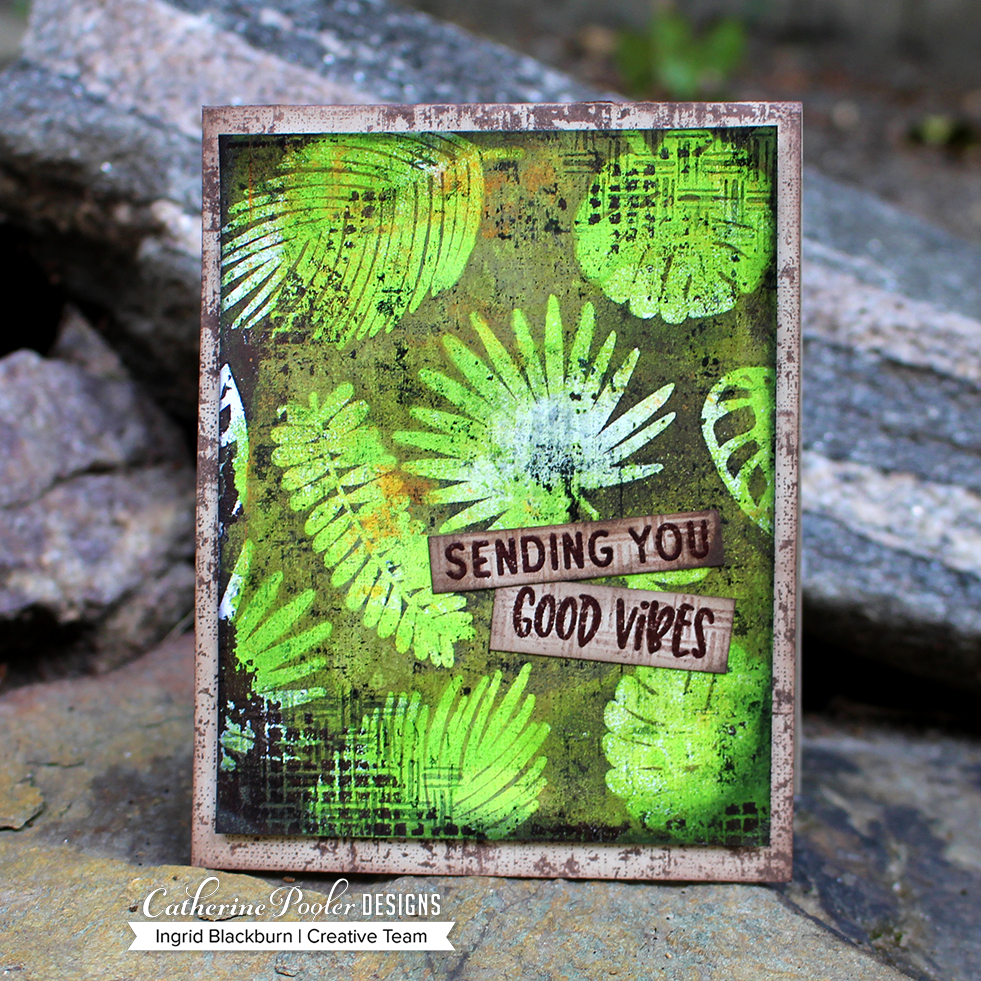
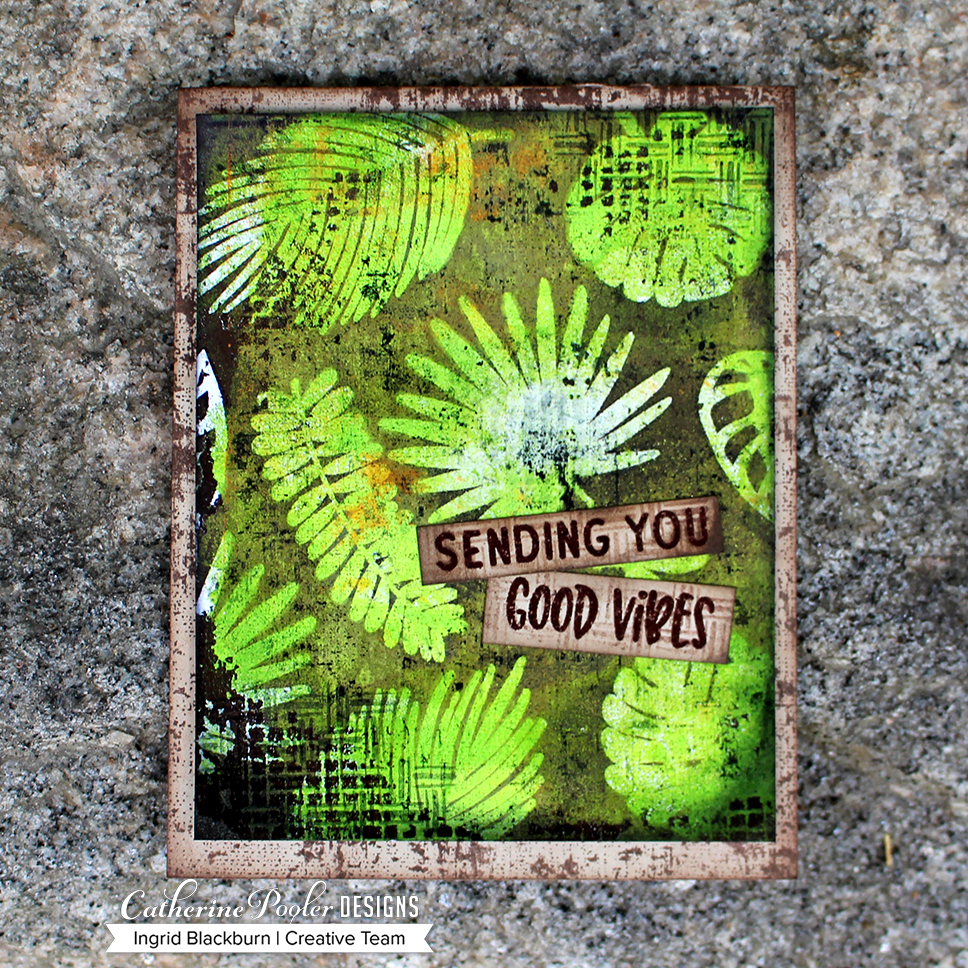
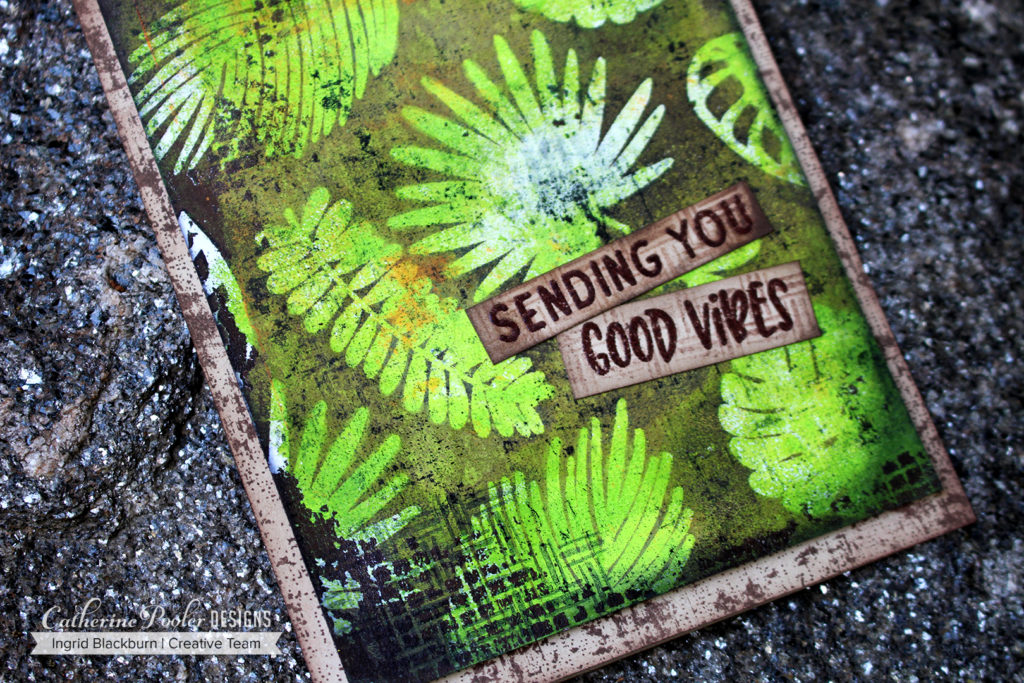
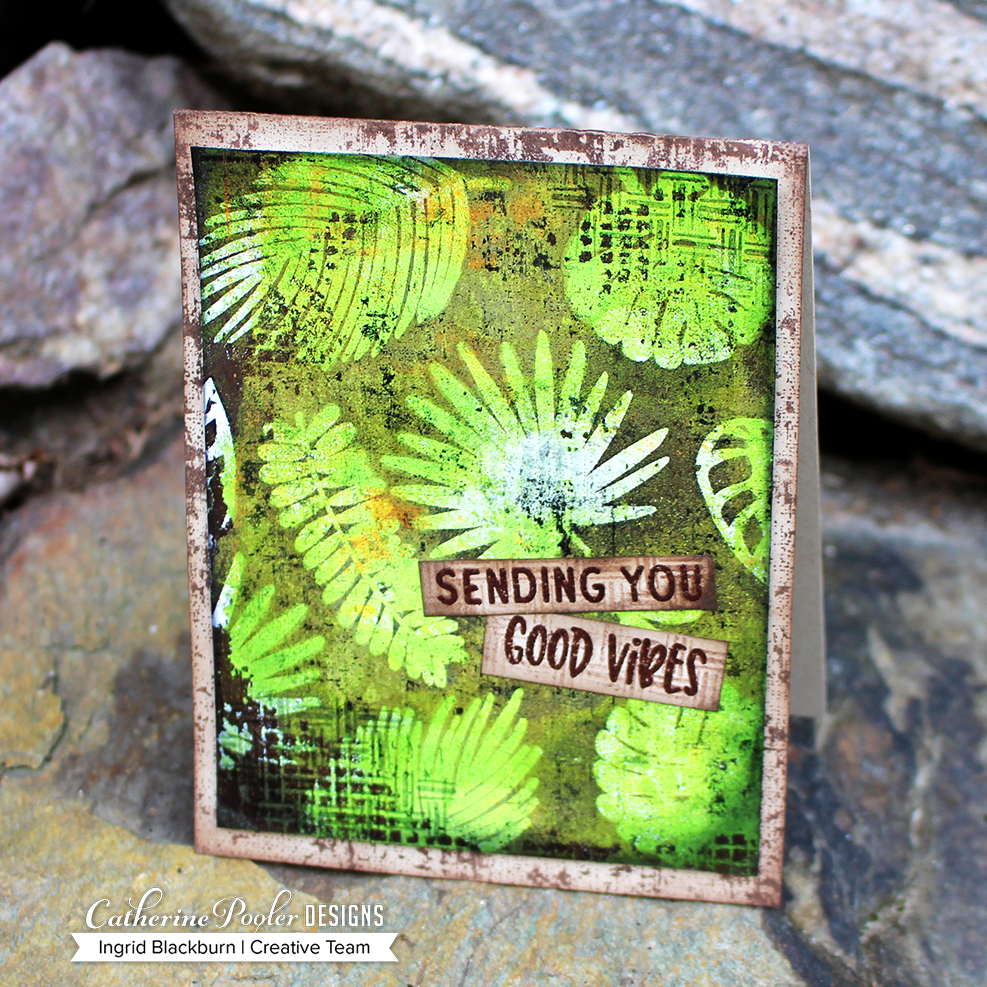
No. 2 – Sending You Good Vibes

This is one of my favorites. The colors and textures just have make me smile. Seriously – take a good look at the texture created on the stamped images – and that’s just with ink!

The background has a great weathered and distressed look. Use the Canvas Grunge and Good Vibes Borders stamps and do a little ink blending on the edges and corners to antique it a bit. To compliment that, Use a different border stamp on the tag and card base – embossed in my new favorite WOW embossing powder – Bark! I love that color – and wait till tomorrow when I showcase the look of it on dark vs. light cardstock. On Catherine Pooler Chocolate cardstock though, it takes on this deep brown color that with these incredible border stamps is texture galore.

Stamp the same image lightly in Over Coffee onto Sand Dunes, once you’ve embossed your sentiment. Those are a few of the options from the Good Vibes Borders stamps – have I mentioned that set rocks!!

Notice the corners. Again there’s some repetitive stamping going on with the borders stamps. The key to achieving that look is to start light – stamp off onto scrap paper once or twice and then stamp once or twice and repeat. Line your stamp up each time to extend your pattern, and to get that faded look, change up how far in you go with that stamp. I started not quite half way in and ended up less than half that distance. It’s a great look.

The gorgeous hues of the spa line of inks really look amazing on the Leave Me in Paradise images. I like to die cut my images first then stamp – I find it simpler. The green leaves are a mixture of Green Tea, Eucalyptus and on some Spruce. The Oranges are Sauna, Mandarin Spice and on one Rockin’ Red.

My favorite leaf though is the one above the word You. To get that look, you’ll want to ink up just the outsides in Sauna/Mandarin Spice. Fade out the edges towards the middle with a mini ink blending tool, stamp and then ink up the middle with a little Green Tea/Eucalyptus – fading out the edges. Stamp and there’s your blended look! Isn’t it gorgeous?

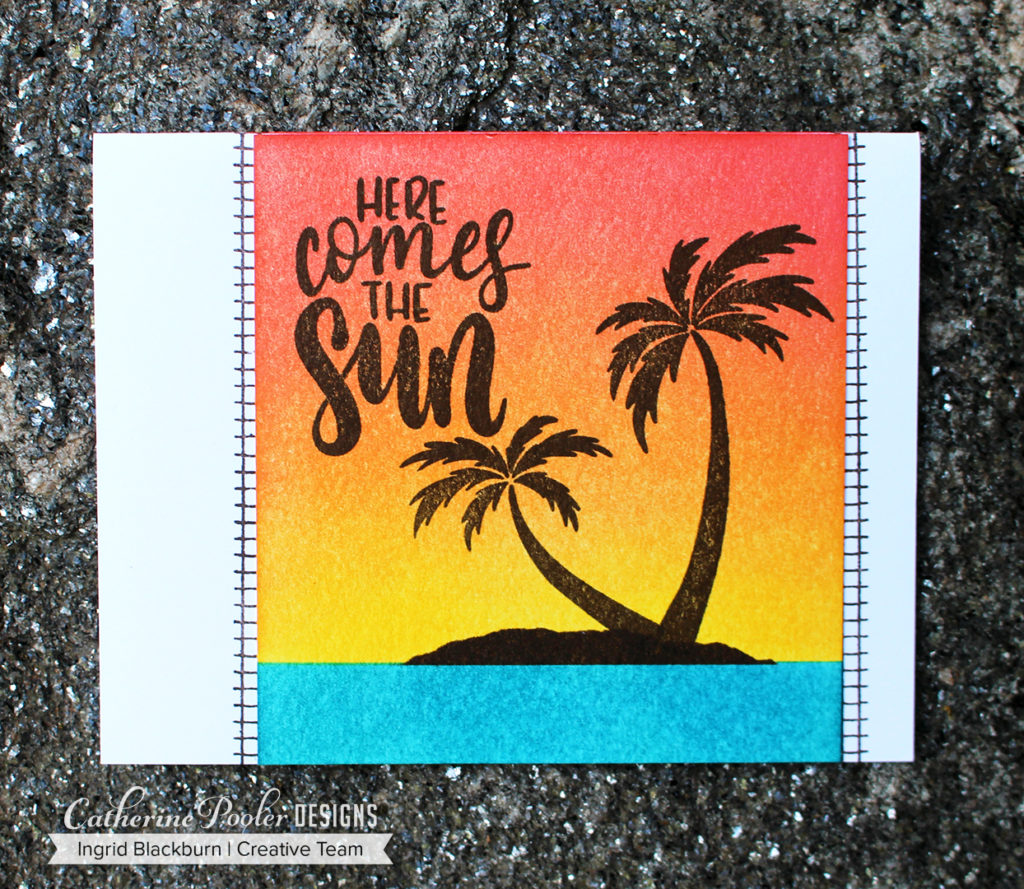
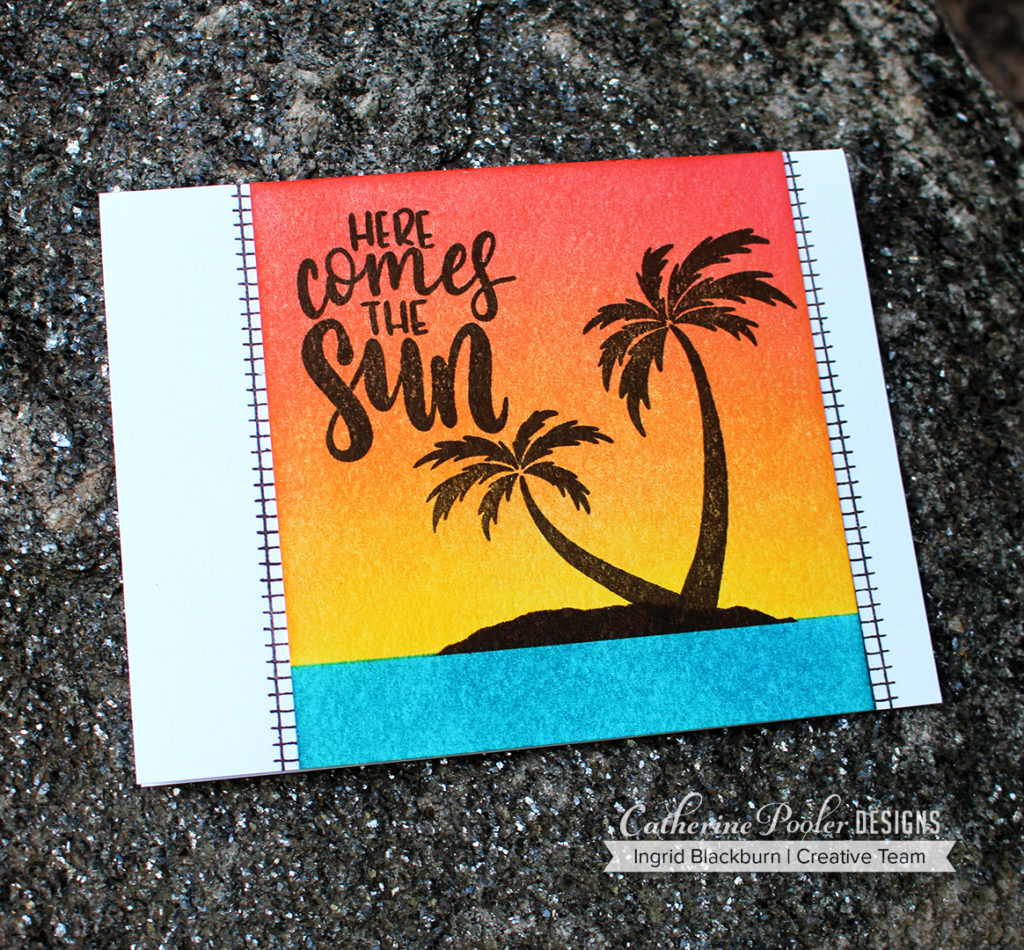
No. 3 – Here Comes the Sun

Here comes the sun, here comes the sun… And I say… it’s all right. Sorry – now that’ll be stuck in your head all day! This classic and super simple card is a fun one with endless possibilities. To get a super smooth ink blend, I use watercolor paper – Laurel Beard gave me that tip a few years ago, thanks chickie!!

You’ll want to mask off your horizon line and then sponge your sky. Here you see Coral Cabana up top and Limoncello at the horizon. That gorgeous tangerine color in the middle is those two colors blended. I love the shade it creates!

Once you are happy with your sky, reverse your horizon mask and sponge All That Jazz at the horizon and Fiesta Blue at the bottom. Create a mask by tearing a small space at the edge. Use that along with a straight edge mask for your island. Pounce in Icing on the Cake to create your island.

Because this is on watercolor paper, I used my MISTI to stamp my images. The rough texture is tough to get a perfect image the first time. I repeatedly stamped my two palm trees. Isn’t it cool how they almost form a heart! To make sure I had enough space – I laid out my sentiment, then the trees.

The five sentiments in the Fearless Pursuit stamp set are all hand lettered by Shawna. I just LOVE them all. They are unique in appearance and different from what you see everyday. They are uplifting and perfect for so many of the people in your lives. I see myself using them ALL the time. PLUS she added a crazy amount of image stamps – There are 28 stamps in this set!!

Don’t you just love that little frayed grid on the sides – yup, you guessed it – Good Vibes Borders again. That pattern reminds me of Easy Joint Dry Wall Tape. I use that in mixed media projects as a texture all the time. So I was so excited to see a stamped version of it!

No. 4 – Mixed Media Good Vibes

You didn’t think I wasn’t going to throw something unexpected your way did you? This project has a story – a good one. I almost skipped this one for today, but in the end…I just had to share it with you. And it went all sorts of wrong – I almost threw the messed up version away – GASP! So I laid it to the side, and set out to re-do it. That’s this project. The almost trash (which is now my favorite, by the way) project I’ll have up tomorrow.

So back to today’s Mixed Media project. I had Batik fabrics in my head when I thought of this. So I figured i’d get out my Gel Plate and create a fun little background for a starting point – 9 2 page art journal spreads, and about 16 more monoprints later I had an arsenal of things to choose from. I picked my favorite green textured print and set out to create some cards.

To play off the Canvas Grunge stamp, my goal was to create a textured look. I incorporated using some Easy Joint Dry Wall Tape as a stencil – I figured it looked just like the stamp in Good Vibes, this way I could get that look, but use acrylic paint. So I ended up with a gorgeous piece of Greens, Burnt Umber and some Orange.

I cut my monoprint down into four card front sized pieces and set out to make some cards. This is one, tomorrow Click Here to see the others….. Can’t have everything in one day…lol! Next up was to work on a few techniques to give me the look I was shooting for – Joseph’s Coat and Faux Bleaching.

To get this look, you’ll want to emboss your images in Versamark and emboss in Clear. This allows you to “trap” the gorgeous monoprint from underneath, in stamp form. Here’s where I went wrong – I covered my entire project with white gesso next. Normally, that would be fine – only when I went to create the Faux Bleached look – I couldn’t lift it! I just sat there stunned. Click Here to see how I “fixed it”.

So in the second pass, I skipped that part and went straight into the Joseph’s Coat technique. I took my Icing on the Cake ink pad and smooshed it all over my project. The embossed areas resisted the ink and I dried the rest with a heat tool. Now my base is covered in paint, so it’s not like regular paper – it doesn’t absorb dye ink like normal, and the effect is a great one. It’s a grungy, weathered brown, not the deep look you would think you’d get.  You can see some of the orange and green fighting it’s way to get out from under the brown cover.

Next up – Faux Bleaching. I turned on my iron, and got out the yellow pages. Place your project inbetween two pages and iron over it! The heat from the iron re-melts the clear embossing powder which gets absorbed by the pages in the book. You’ll need to move it around and switch up your pages a bit, and because there’s paint in there – it took a bit longer. The result was pretty awesome!

Next up, ink up your background stamp in Midnight ink…what?!! Yes…it’s an archival ink and perfect for stamping on painted surfaces. Lightly stamp off onto scrap paper first, then lay your project over your background stamp. With a light touch, tap a few areas from the back to transfer the ink. Your project with resist in some areas, so if you have a particular look in mind – you’ll need to work at it a bit.

The texture the Canvas Grunge Background Stamp added, made the card! Use the basket weave stamp to lightly add those corners in stamped off midnight like the other projects. Next, lightly sponge the edges in Midnight – ever so lightly. Midnight is the perfect super deep black archival ink to add to Mixed Media. It’s my go to actually over all others on the market.

Create a little grunge canvas look to your card base and super lightly frame with an ink blending tool Icing on the Cake ink. Pop up your Mixed Media piece for a little drama to your card and add your sentiments (from Good Vibes Borders) like a little sign you’d find on an island road.

What do you think? I think the coolest part of it is that the background is one layer – meaning, no raised areas and super smooth. It is a true work of art. Mixed Media isn’t for everyone, and that’s okay – I was super intimidated by it just a few years ago. But once you jump into the deep end, you’ll wish you had earlier. The projects are THAT incredible.

So, to wrap up an epic blog hop post – if you’ve hung in with me till the end – tell me in the comments! Which product are you the most excited by? I’d love to know… The Tropically Yours Collection is for stampers of all kinds. Those who love Clean and Simple, Scrapbookers, Art Journalers, and Mixed Media artists.

Tropically Yours Blog Hop

Tropically Yours Blog Hop List & Prizes

Did you know…we’re giving away a Tropically Yours SOA box to three lucky winners! And if you already bought one – no worries – you’ll get a $100 gift certificate instead, cool, right?!!! All you have to do, is comment on each stop along the hop – all three days. That’s it!

  1. Catherine<– Hop Here NEXT!!
  2. Tracie 
  3. Kristie  
  4. Jen Carter  
  5. Ilina Crouse  
  6. Laurel  
  7. Ingrid <– You’re HERE!!! 

Thanks for stopping by and hopping with us for the past three days!

Till next time –


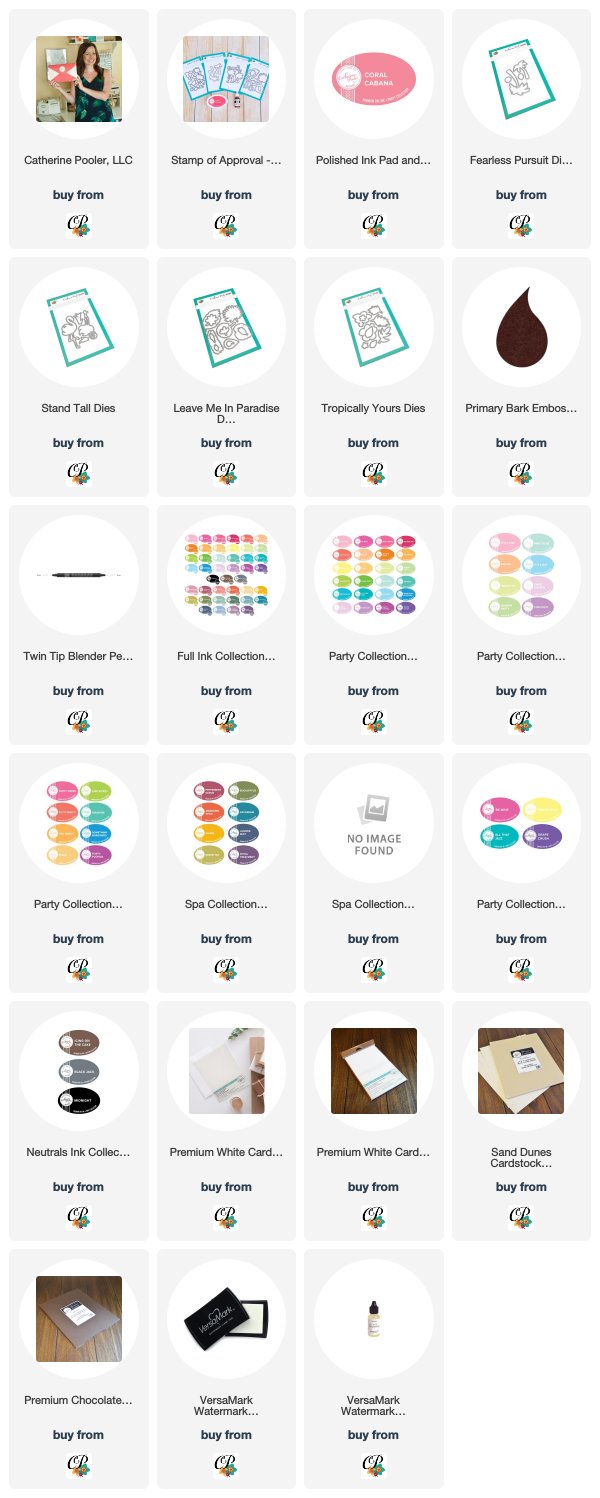
Supplies

To make finding the supplies I used in these projects a bit easier for you, here are a few clickable links. Compensated Affiliate Links are used when possible. Click here for disclosure. Happy Shopping!


All That Jazz: New Release from Catherine Pooler – Blog Hop

Catherine Pooler All That Jazz Ink

Welcome to the All That Jazz release blog hop – Day One! I’ll be honest, every time I type All That Jazz, I hear a broadway chorus sing it and see jazz hands…lol! Now you will too, sorry about that! So, it’s only fitting that we have that singing around in our heads while looking over all the gorgeous inspiration the Creative Team came up with, right?

Today marks the first day of three amazing project inspired days for the next release over at Catherine Pooler Designs. And what a release it is. It’s literally packed with new cool products (many of which I’ve used today), the previous Stamp of Approval Counting Blessings Collection (one of my all time favorites) and drumroll….you’ve been waiting….the ink color All That Jazz.

If you were lucky enough to nab a Naturally Inspired SOA last June, then you have this deep Teal that’s part of the Party Collection of Inks. If not, it’s finally here!!

Catherine Pooler All That Jazz Ink

All that Jazz Tutorial #1

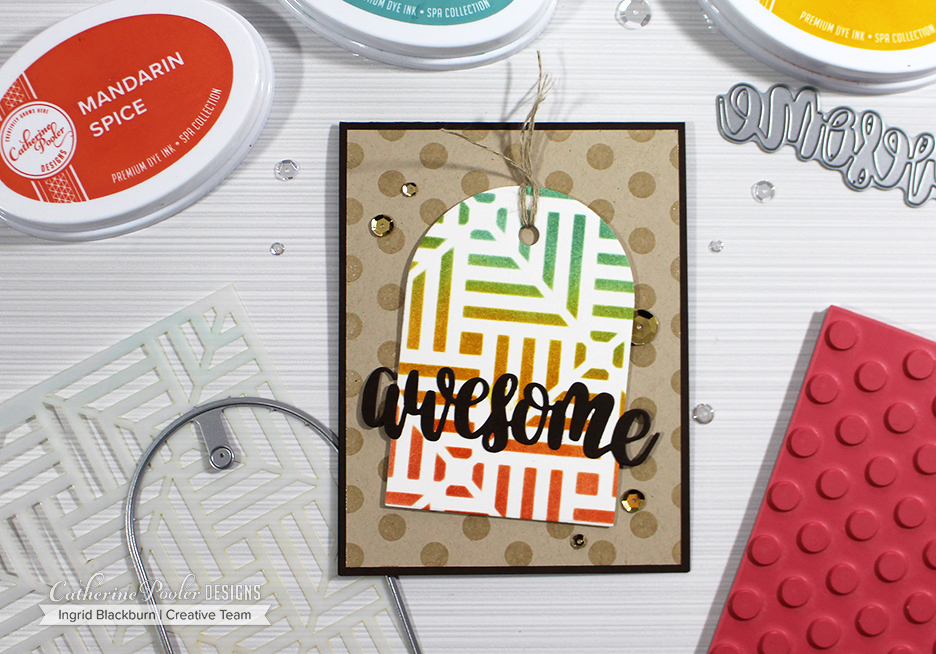
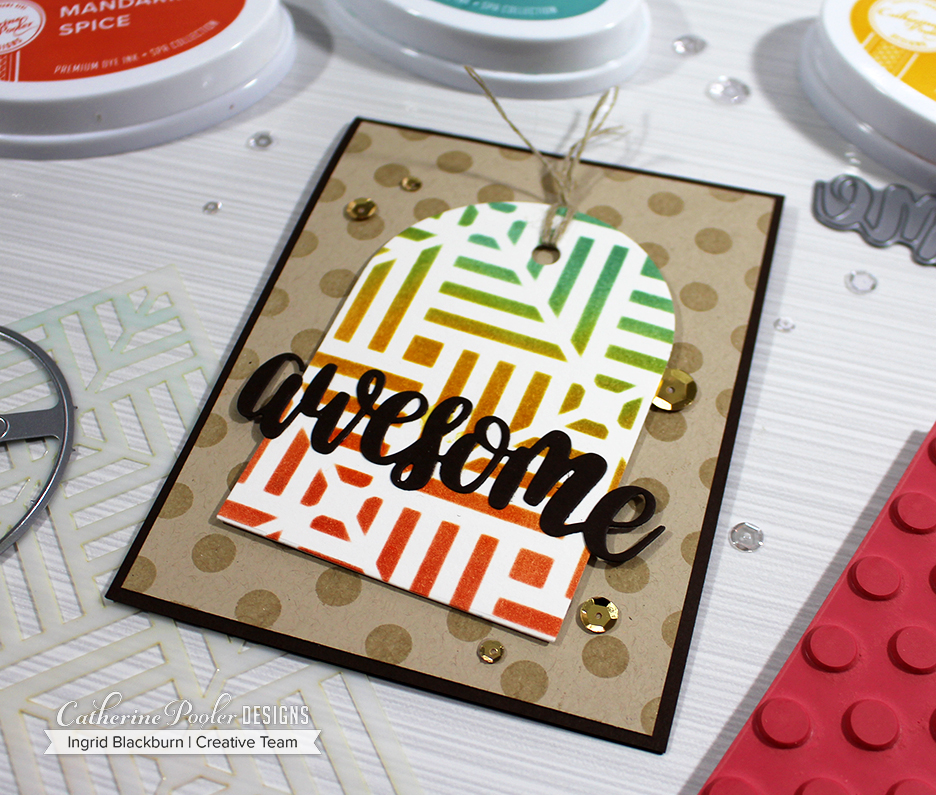
So let’s dive right in. First up is a quick, fun little project that works for just about any occasion….I was tempted to pop a have a…birthday on there, but then decided to leave it just Awesome.

Catherine Pooler Designs Stencils - All that Jazz

Isn’t that stencil pattern just WAY cool? It’s called Square Dance and you can get it on the 20th in the stencil section over at Catherine Pooler Designs. This stencil has SO many possibilities. I’m just getting started. WAIT till you see what I have up my sleeve for it later this week!

To get this look – sponge some Sauna, over lap it with Mandarin Spice and Daylight and voila! I used watercolor paper to get a smooth blend, and then cut out the tag using the Tags, Etc. Dies set. That’s an awesome collection of shapes and embellishment dies that everyone should have.

Pop it up onto a fun simple embossed in clear background using the new Doin’ the Polka Background stamp. Who doesn’t need a fabulous Polka Dot background stamp. They are just the right size – there, but not over powering, you know?

Catherine Pooler Ink - All that Jazz

To keep the muted theme going cut out the new hand lettered awesome die and you’re all set. I just LOVE that Chocolate cardstock. Oh speaking of cardstock….um…did you notice the Sand Dunes? YUP – it’s NEW. The perfect shade of sandy goodness.

All That Jazz Tutorial #2

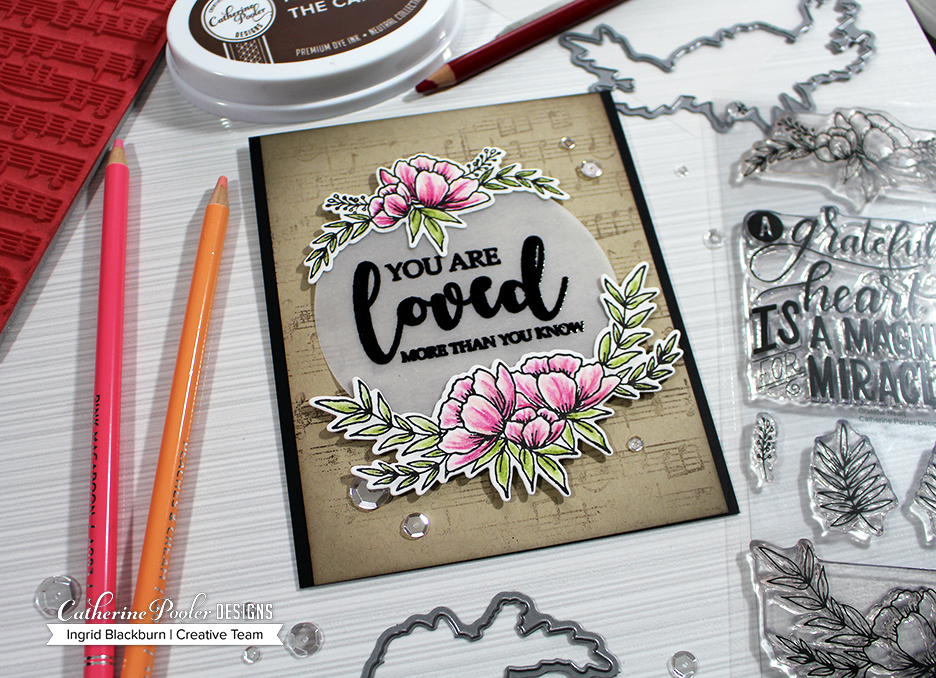
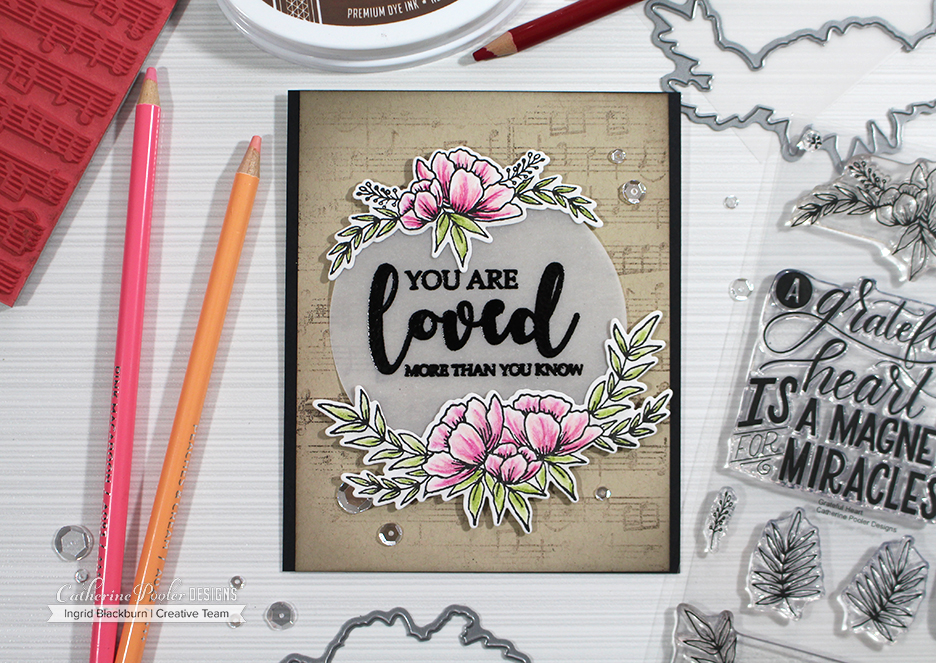
Next up, I have to admit, it’s one of my favorites. When Catherine showed me the Grateful Heart stamp set designed by our very own Creative Team member Lydia Evans, I nearly fell over. True story. This stamp set is SO unbelievably gorgeous it’s crazy! What I love about it the most is that you have all the images as singles AND two huge floral sprays. So masks your own creation, or just stamp – brilliant, right?

All That Jazz Ink Release - Grateful Heart Ingrid Blackburn

First, stamp the two floral sprays in Midnight ink and then use some pretty colored pencil shades to bring then to life. First add some green to the leaves, I used some colored pencils from Arteza, then create some shadows around the images in light grey keeping in mind where your light source is. You’re going to cut them out, so do the shading first.

Now it’s time to color. Start with your darkest shade for your petals, keeping your strokes light. Feather in some light pink and then blush. Blend your colors with some gamsol and a blending stump and you’ve got a beautiful little creation. Cut each spray out with the coordinating dies from the Grateful Heart Dies Collection. Since it’s so intricate, I used some washi tape to hold them in place.

All that Jazz - Catherine Pooler Ink

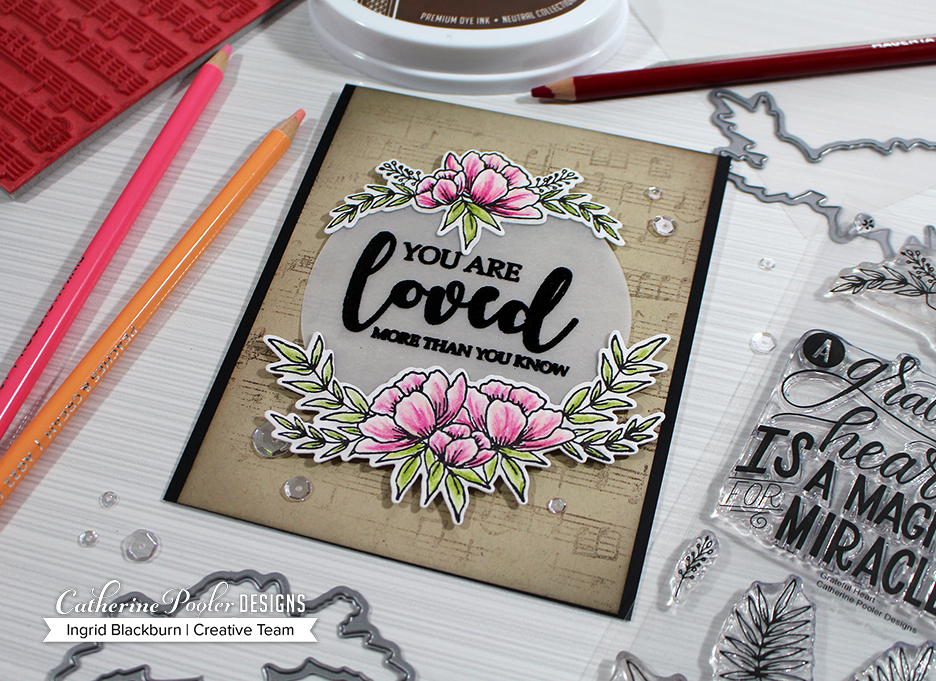
Next use the Circles Dies to cut a large circle out of the new Vellum Cardstock – YES, another new paper. I’m a sucker for Vellum cardstock. This one is 48# weight and just gorgeous. It’s heavy enough to hold up to techniques, yet you can still see through it. Emboss one of the two sentiments in the set onto your circle and glue your spray keeping them off-centered.

Using that gorgeous Sand Dunes cardstock, imperfectly ink up the new Music Notes background stamp in Icing on the Cake. Take a paper towel and dab a little away. Stamp onto scratch paper and then stamp onto your Sand Dunes cardstock. You want that stamped off look so it doesn’t overpower your card. It’s background music support, the flowers are the main show.

To give the card a soft look, try adding some super light sponging around the border with the icing on the cake. I wanted to keep it not just brown, so I used my black sponge tool. That way whatever was on there from last time, mixed with my brown Icing on the Cake and I got this gorgeous aged look.

TIP – put the pressure on your tool that is off your project, kind of angling it so that you keep the pressure SUPER light.

Grateful Heart Stamp Set and Dies - Ingrid Blackburn

Pop up your flowers and mount onto a black base. My card measures 4.5 x 5.5″. I wanted it a bit wider so it wasn’t too skinny on the sides. I’m sending this card to my mom. I know it’ll make her smile. 🙂

What did you think? I’d love to hear which one is more your style! In addition to the previously released items (counting blessings collection and all that jazz ink pad), there’s also a new hand lettered wonderful die just like the awesome die, and some fun new 6×6 patterned paper – more on that Tuesday ;).

All That Jazz Blog Hop Prizes

Here’s the full hop in case you missed any on the way here. Be sure to comment along the way. There will be five lucky winners that get two free ink pads & free shipping on their order!! 🙂

  1. Catherine Pooler   <– Go Here Next!
  2. Josefine Fouarge   
  3. Melissa Miller  
  4. Jenny Colacicco  
  5. Karen Baker 
  6. Justine Hovey  
  7. Ilina Crouse  
  8. Maureen Merritt  
  9. Allison Cope  
  10.  Ingrid Blackburn  You are here. 🙂

Thanks so much for stopping by today! I hope you loved these couple of projects. Of course if you’re a StampNation member, you’ll get to order early tomorrow – perks of membership! Everything goes on sale Tuesday March 20th over at Catherine Pooler Designs. Be sure to hop along the next two days too. Just start over on Catherine’s blog.

All That Jazz - Catherine Pooler Designs

And stop by here too. I’ll have some more creative fun for you! See you then.

Supplies

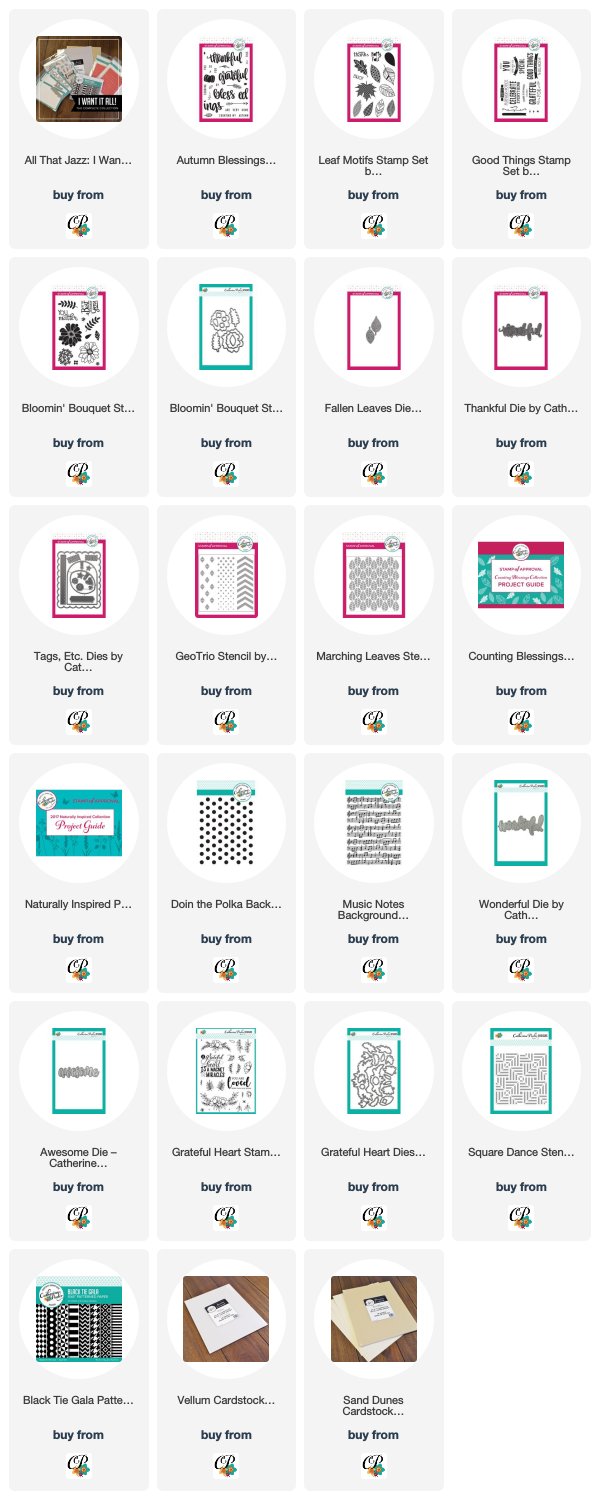
To make finding the supplies I used in these projects a bit easier for you, here are a few clickable links. Compensated Affiliate Links are used when possible. Click here for disclosure. Happy Shopping!


FULL Release – Available now!!


Effortless Ink Blending + Adding Texture – Video Hop with 120 Prizes

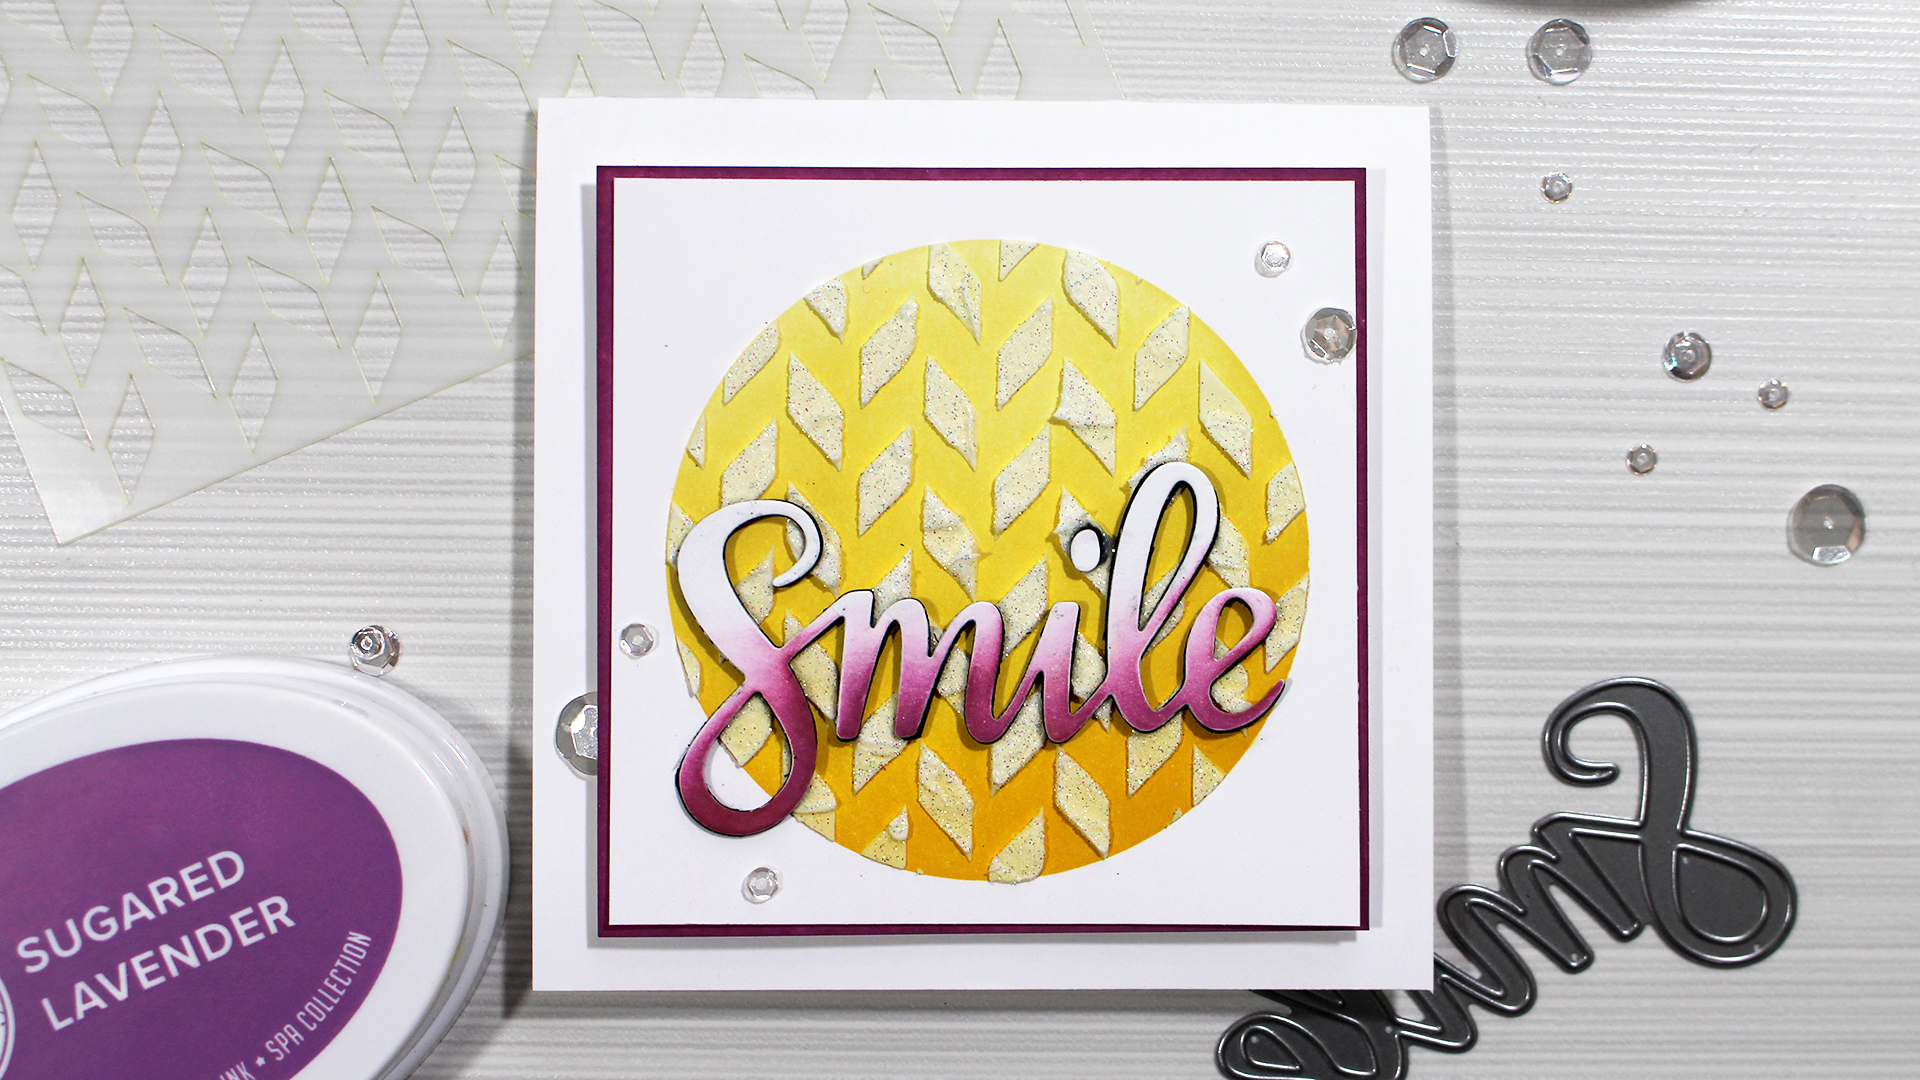
Do you want to know just how easy effortless ink blending can be? Well, then you’re in the right place! Today I’m participating in a video hop along with 55 other crafty friends to help Save the Crafty YouTuber!

Ink Blending Tutorial and Video Hop with prizes

What does that mean? YouTube just recently changed their requirements for being able to earn on your videos and channels. That’s how many crafters earn a little extra money to help pay for all those crafty supplies you want to see us teach you about in videos. Making a video seems like such a simple thing – trust me, it’s not. The little 8 minute video I’m showing you today took me 7 hours start to finish to bring to you. And that’s just the video part.

It’s nice to be able to earn a little bit from the ads you see on the videos. Trust me, it’s nothing to retire on, it helps cover some crafty/tech costs – but not much. I do it more for the love, but it is nice!

YouTube recently changed the minimum requirements for the ability to monetize your channel (ads on videos), and it will now take a new crafter quite an effort to get to that point. I remember what it was like to be new, it’s not easy, and it’ll take a bit to get to these new minimums.

So my good friend and fellow crafty YouTuber Justine Hovey had the brilliant idea to organize a video tutorial hop to help SAVE some of the crafty YouTuber’s out there. She’s like that – always the cheerleader for every single YouTuber – big and small. Not everyone is like that, and I’m proud to call her a dear friend.

Everyone was invited to join – including some big names. The folks you see on this hop are all true champions. They don’t care about WHO is on the hop – they just wanted to help the smaller channels. And I applaud that.

So, today I, along with several of my seasoned crafty friends and companies have teamed up with many smaller channels being directly affected by this.

The goal – help us save their ability to continue like they had before. WATCH the videos (minutes watched are important), & subscribe to their channels – another key component. I want to thank you for taking the time, not just to read this, but hop along. For your time and effort – COMMENT along the way on every video. LITERALLY every video has prizes attached to it!!!

Catherine Pooler Ink is great for Effortless Ink Blending

Catherine Pooler is giving away some ink pads on every single video! Simon Says Stamp is giving away a $25 gift certificate on every single video! Plus there are even more prizes from these amazing companies:

Ink Blending Video Hop Prizes

Effortless Ink Blending Tutorial & Video

For today’s tutorial, I wanted to showcase a technique that I have perfected. Seriously, if you have any trouble with getting an absolute effortless look to your ink blending – look no further. In just a few minutes I’ll show you how YOU too can have the perfectly ink blended look to your projects:

Click HERE to watch on YouTube in HD

Here are some tips to keep in mind:

  • Your pressure is EVERYTHING
  • Seriously, watch exactly how LIGHT I hold my tool in the video (1:05)
  • Work light to dark – not the other way around
  • Bring your lighter colors back into the transitions to help blend it out – KEY

I recently read an article that said to work dark to light. I 100% disagree with that.

You can not take away color, you CAN build it up.

Trust me, I have been ink blending for years. It’s probably one of the few techniques I’m the most disciplined at. Why? Pressure is EVERYTHING.

I am a fast crafter. Meaning – I’m a bit impatient. But not with ink blending. Cue screeching brake sounds….. Yes, even I have an internal throw on the brakes – watch your pressure, Ingrid voice!

Effortless look with ink blending

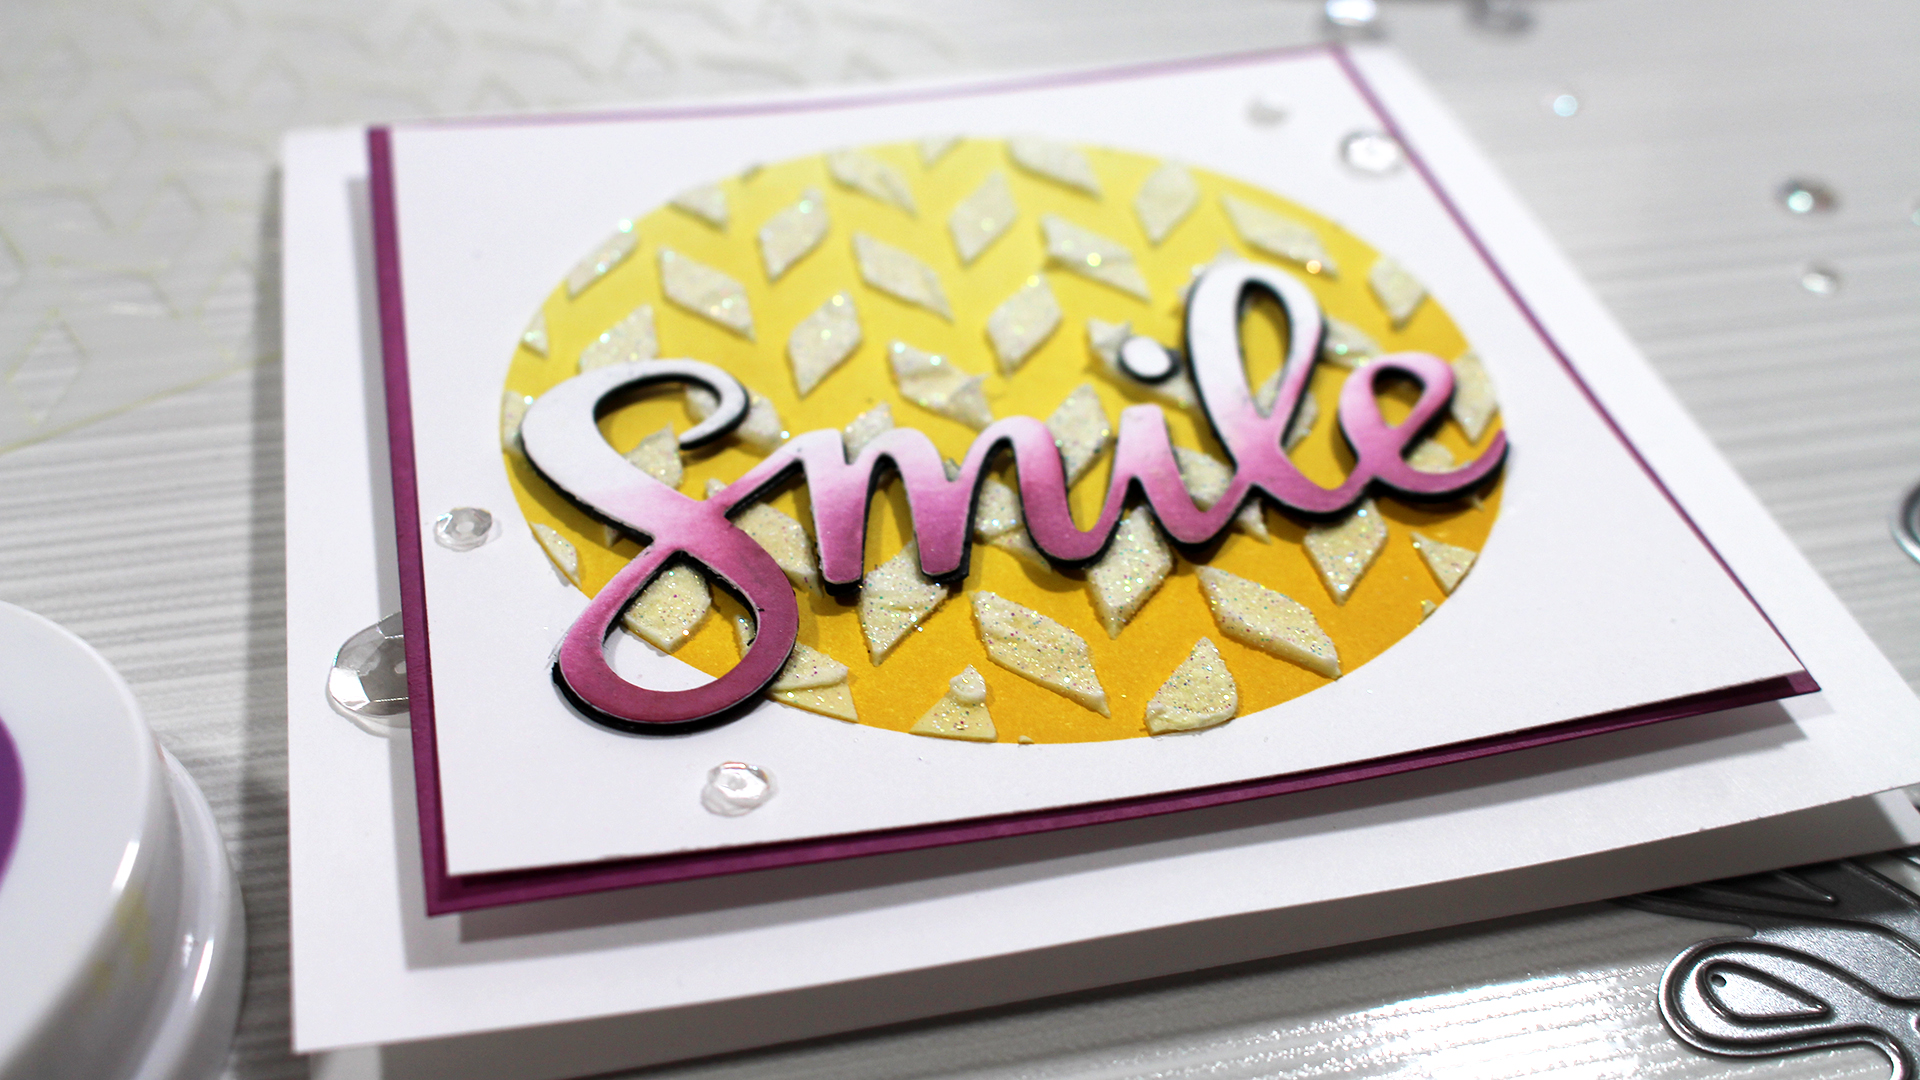
Isn’t that just gorgeous? Did you watch the video yet? Did you see how to add some fun sparkly texture to this project – oh, and did you notice the BRAND spanking new colors, word die and stencil?!!! YES, they are all being released tomorrow (2/13) over at CatherinePooler.com. Stop back by here for an awesome blog hop the next few days.

Ingrid Blackburn's Ink Blending tips

Want to learn more? Try these tutorials out:

Thanks for watching & thanks for subscribing…now go comment on everyone’s video post!!! Win those 120 prizes up for grabs!!! 🙂

Keep those fingers inky –

Ingrid Blackburn - The Creative Grove

Supplies

To shop all the fun items I used in today’s video visit these sites. Have any questions? Leave a comment here or on my YouTube Channel. I’ll be adding the new products on 2/13 so check back for links to those!