CP Designs Shop Grand Opening – Blog Hop

Welcome my crafty friends! Today I have three projects & a video that showcase some great things now available in Catherine Pooler’s brand new online shop. How exciting! We always need good quality designs and products, right? And Catherine Pooler Designs does not disappoint.

CP Designs Store

Before we get creative here are a few things you’ll want to know. The shop will open this afternoon. To find out the moment the cyber doors swing open, you’ll want to make sure you’re subscribed to Catherine’s newsletter – she’ll be announcing the moment it goes live! Catherine also has a great video series and some cool PDF’s for new subscribers. So when you’re on Catherine’s site, be sure to subscribe so that you’re in the know.

Prizes – Of course we have some prizes for you too! Leave a comment on the blogs along the hop – there are three $25 gift certificates up for grabs between now and noon (EST) on 9/1.

Now for a little creative mojo for you today. I have three projects, all very different from one another, a little Stamp of Approval mixed in with some fresh Catherine Pooler Designs! Enjoy and be sure to let me know what you think in the comments below!

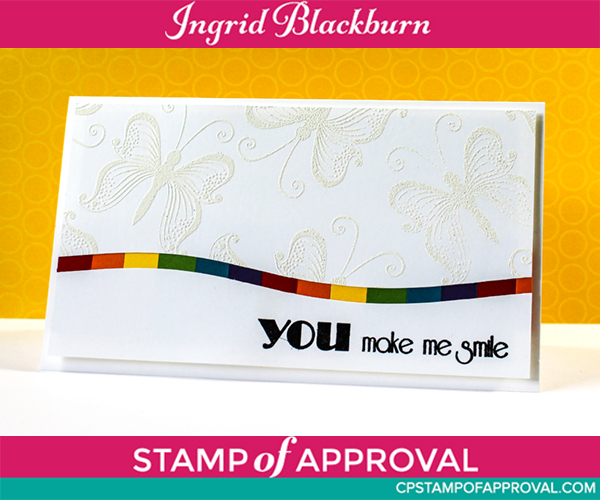
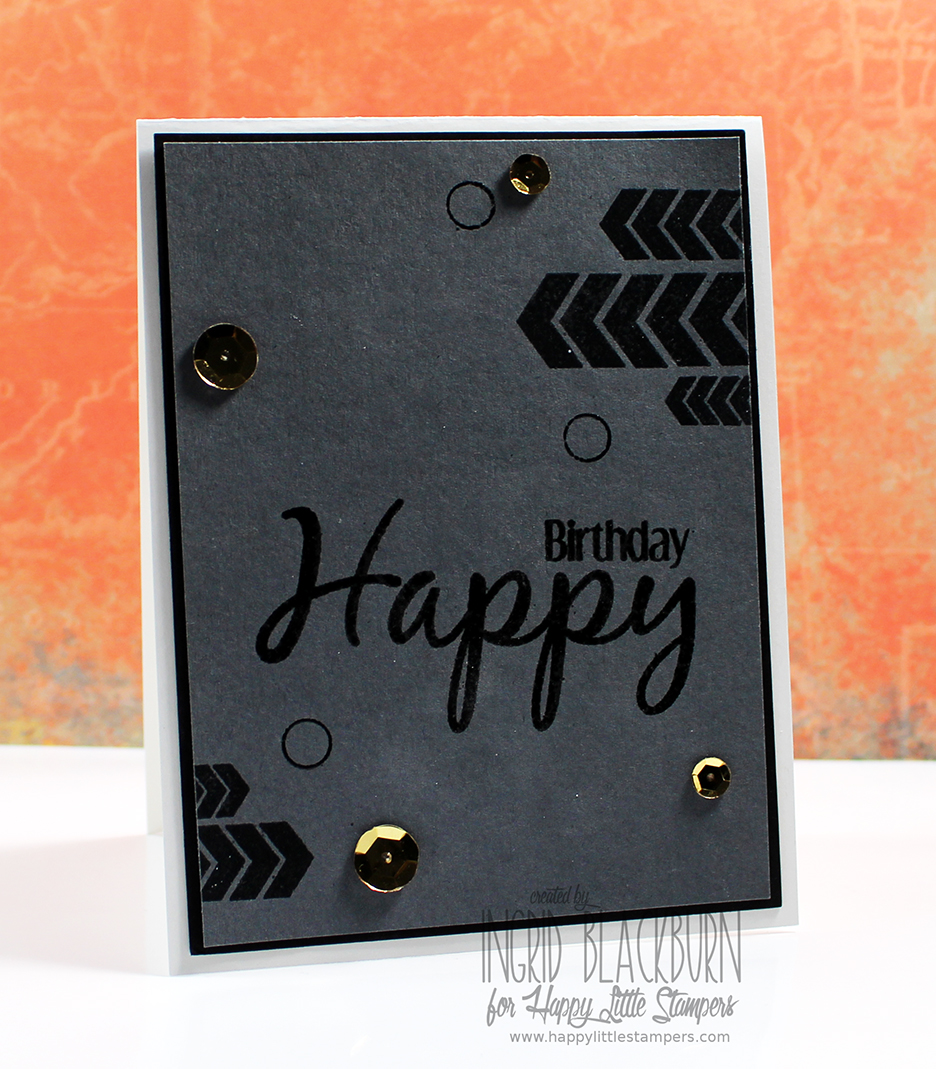
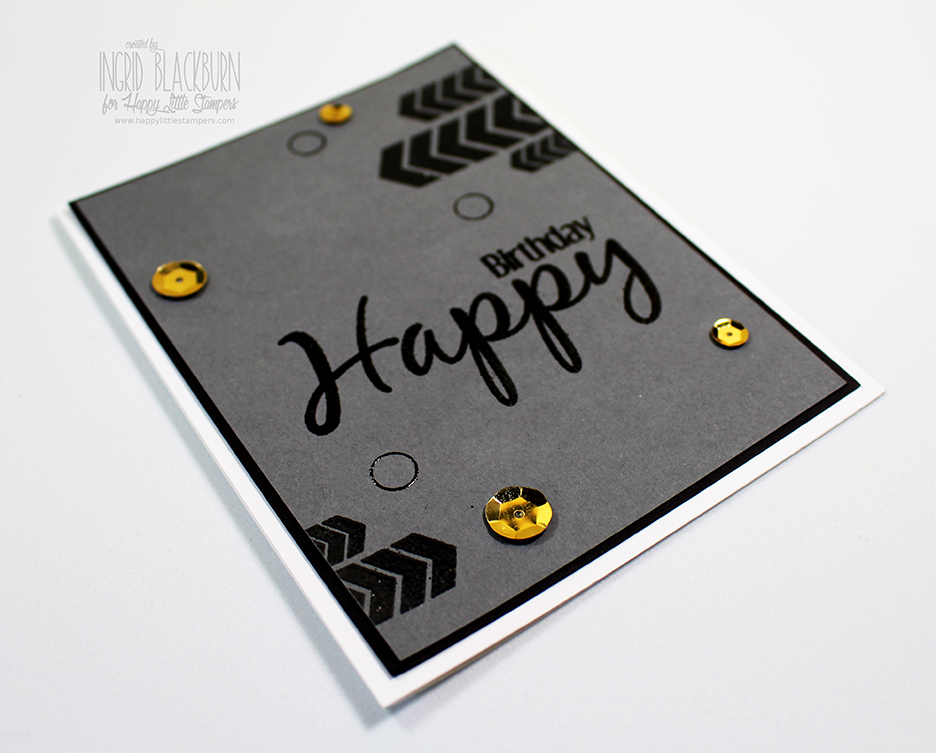
Contemporary Crooky Cake

Okay – I know the stamp set is called Bring on the Cake…but I just can’t not call it crooky cake…lol! I wanted some bright, bold colors to pop off a neutral dark background. I’m into dark greys at the moment. And I thought this have great masculine look, while still being a little fun and funky.

Those streamer stamps totally rock – they’re embossed in Alabaster by Brutus Monroe, and are the perfect little something in the background. I also left the card as a single layer to keep with a minimal look.

Crooky-Cake---Ingrid-Blackburn

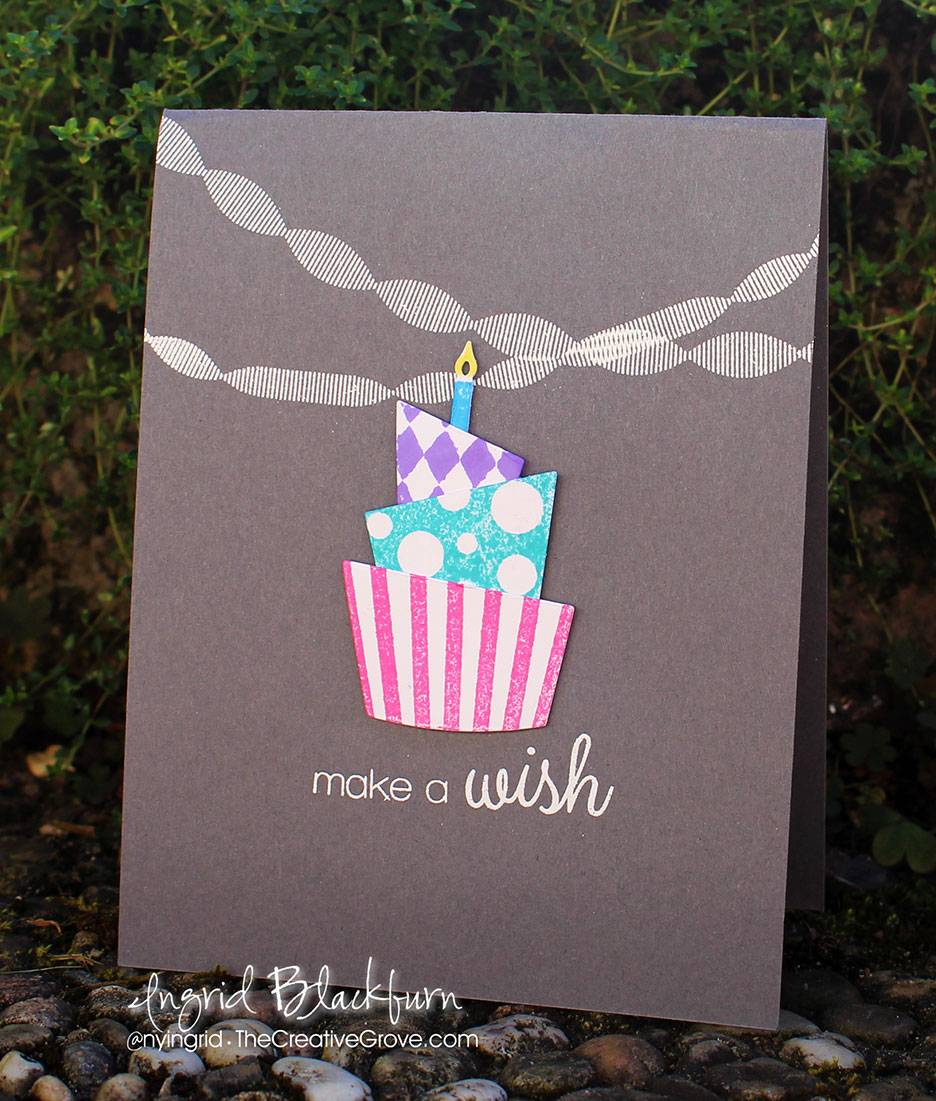
The cake is stamped in Distress Picked Raspberry, Peacock Feathers Wilted Violet, Salty Ocean & Squeezed Lemonade.
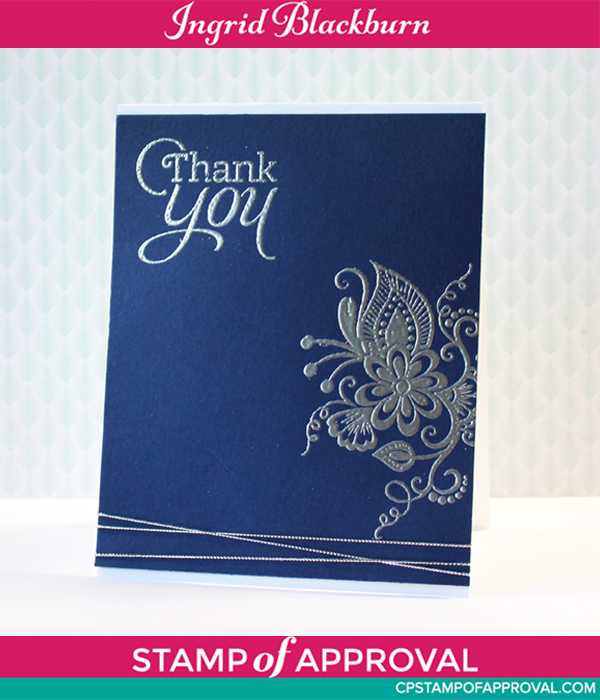
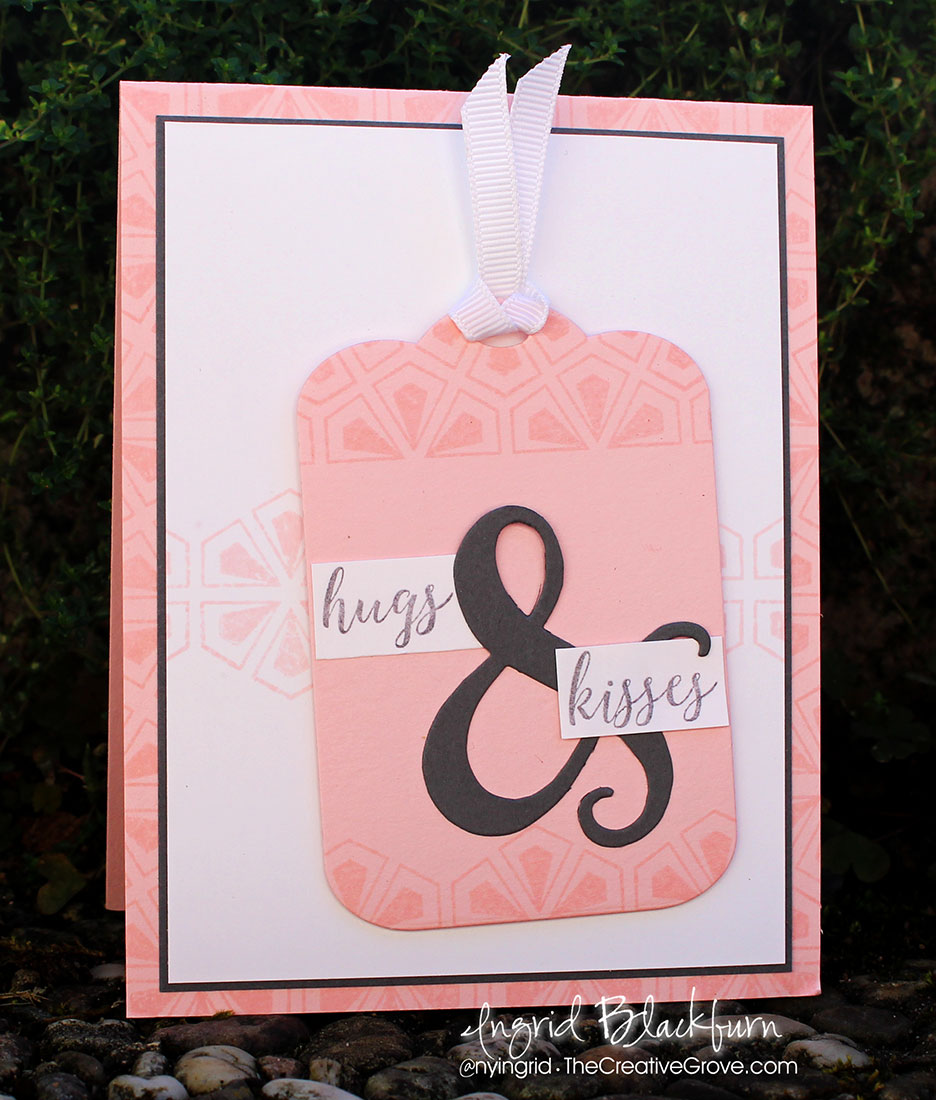
Geo Hugs & Kisses

For this project, I kept with my grey and added a little Pale Pink to the mix. Don’t you just love this geometric pattern used throught. It’s on the card base, card front and tag. The Geobuilders Stamp Set is so crazy versatile…it’s easy to see why it’s a favorite.

For this project I paired it up with the And Dies & And Sentiments set – two new sets recently released by Catherine Pooler Designs. They go quite well with the Tag Buddies by CAS-ual Fridays for the first Friendship SOA collection.

I love making cards that can be used for lots of occasions – and Hugs & Kisses covers that!

Geobuilders-And-Sentiments---Ingrid-Blackburn

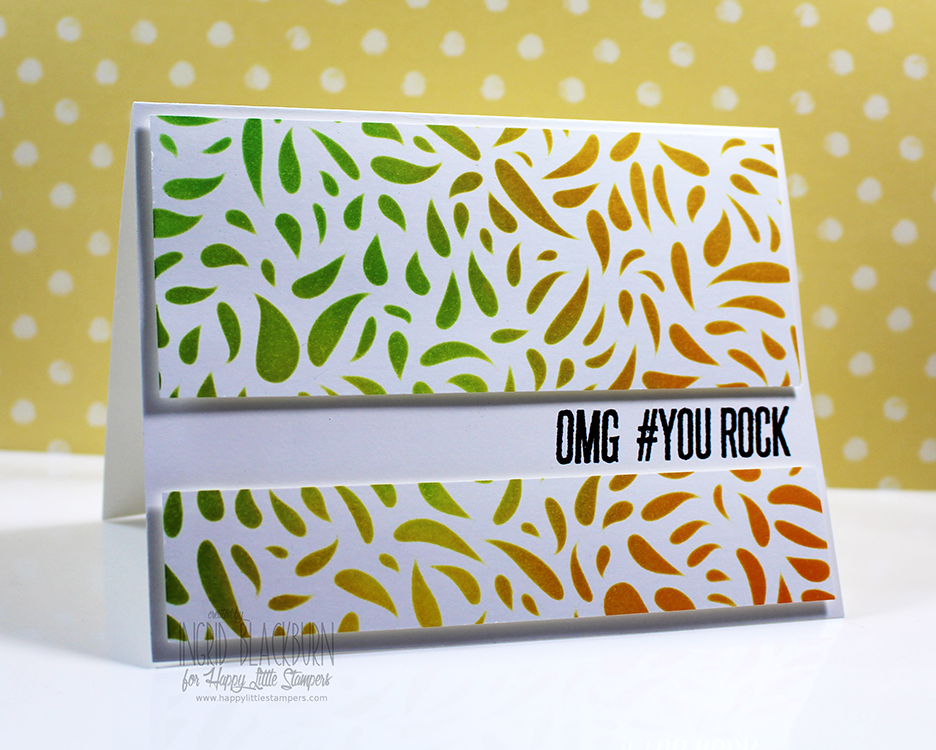
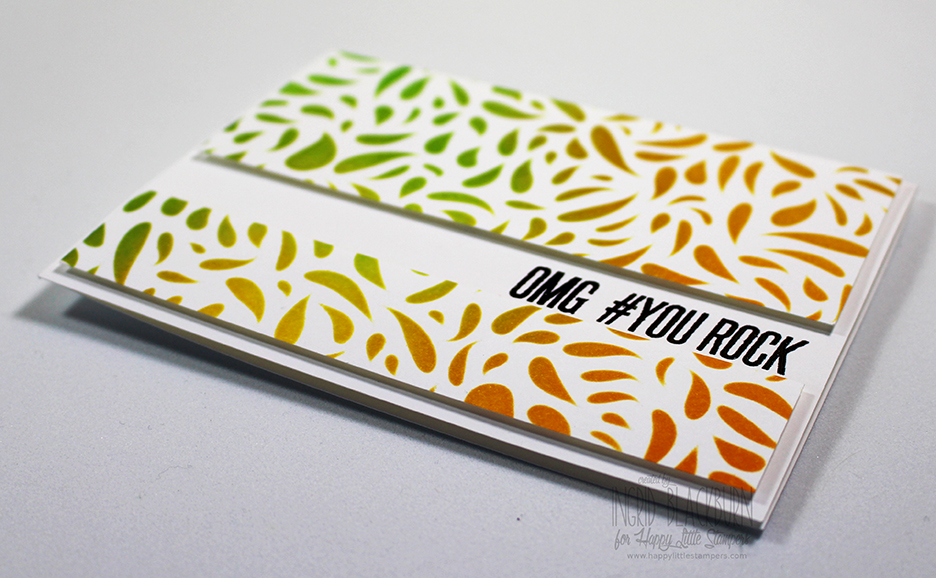
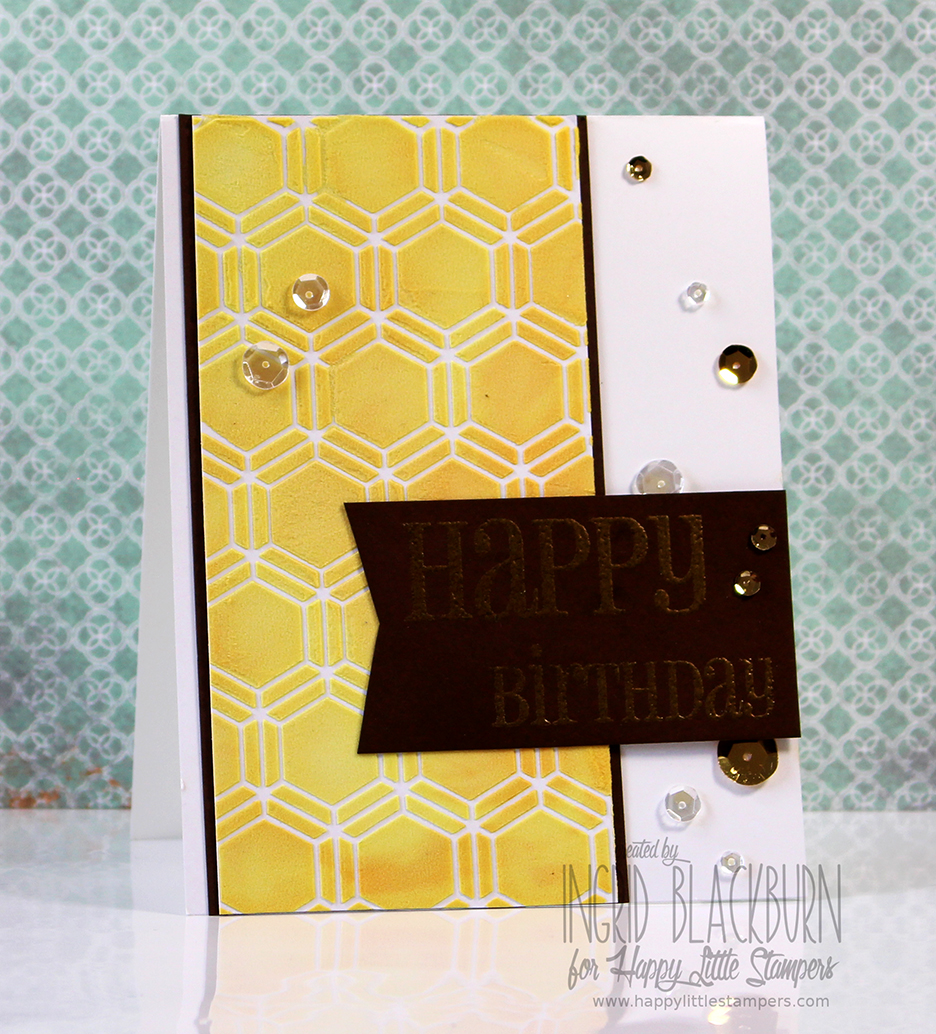
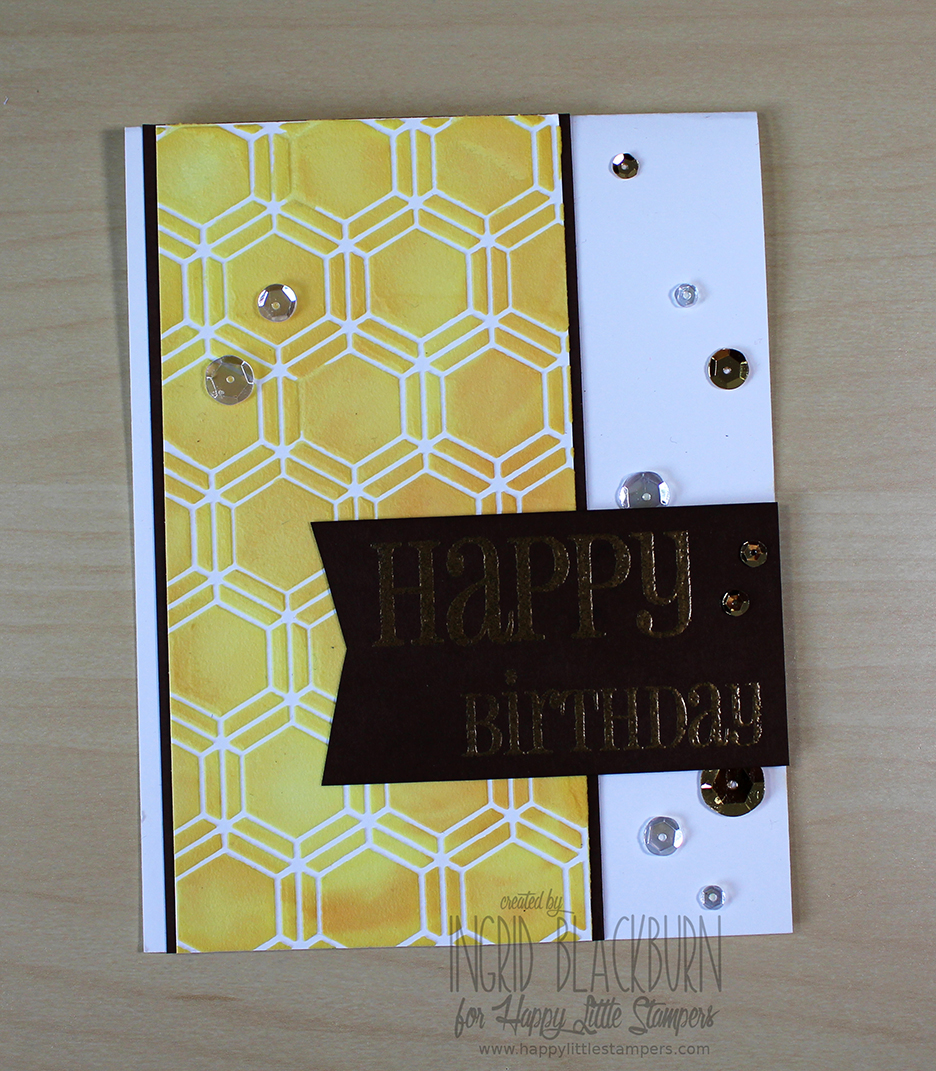
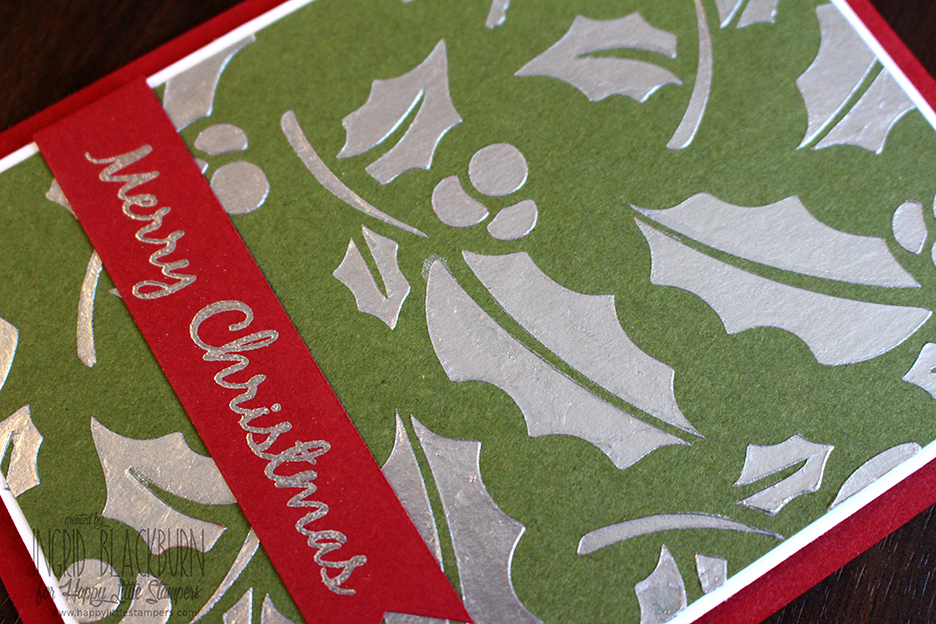
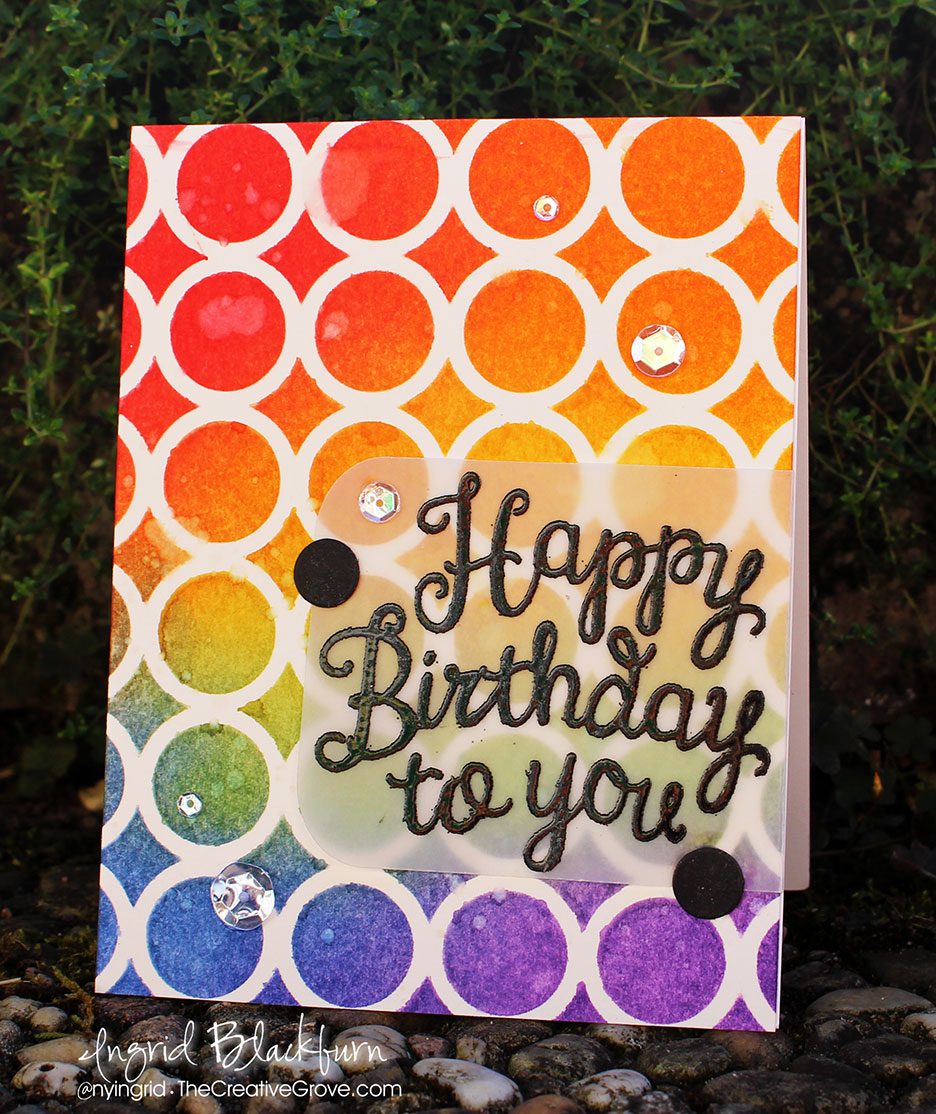
Ring in the Birthday

And last, but definitely not least – my favorite. I just recently got my hands on this Pattern of Rings stencil by Winnie & Walter for the first SOA Friendship Collection. I have wanted to make this card for FOREVER! It’s no secret that I love water & Distress Inks – so I did a little sponge/direct to paper combo with some really bright and vibrant Distress colors. Here’s a video of the technique:

Watch in HD on YouTube

You’ll want to use Wilted Violet, Chipped Sapphire, Twisted Citron, Mustard Seed, Candied Apple & Carved Pumpkin. Isn’t this combo cool?! Once the colors were added over the stencil, I spritzed it lightly with a mini mister being careful not to add too much water. You’ll want just enough to activate the ink and get that watercolor look, but not too much that it runs under your stencil. If you do find that you’ve added too much, just quickly sop it up with a paper towel.

Pattern-of-Rings-Birthday---Ingrid-Blackburn-001

Dry your project and then flick some water droplets at it. I did this two ways – one with my hands and another with a paint brush for some smaller more purposeful droplets.

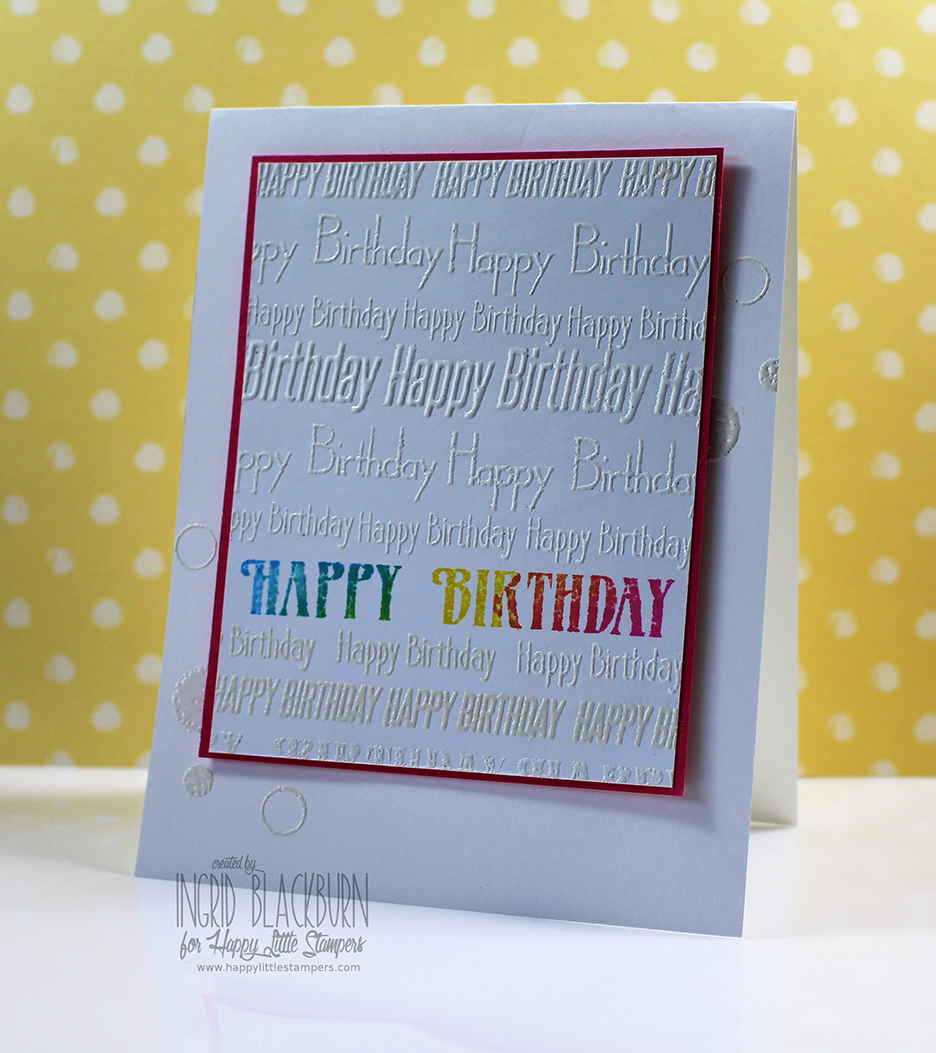
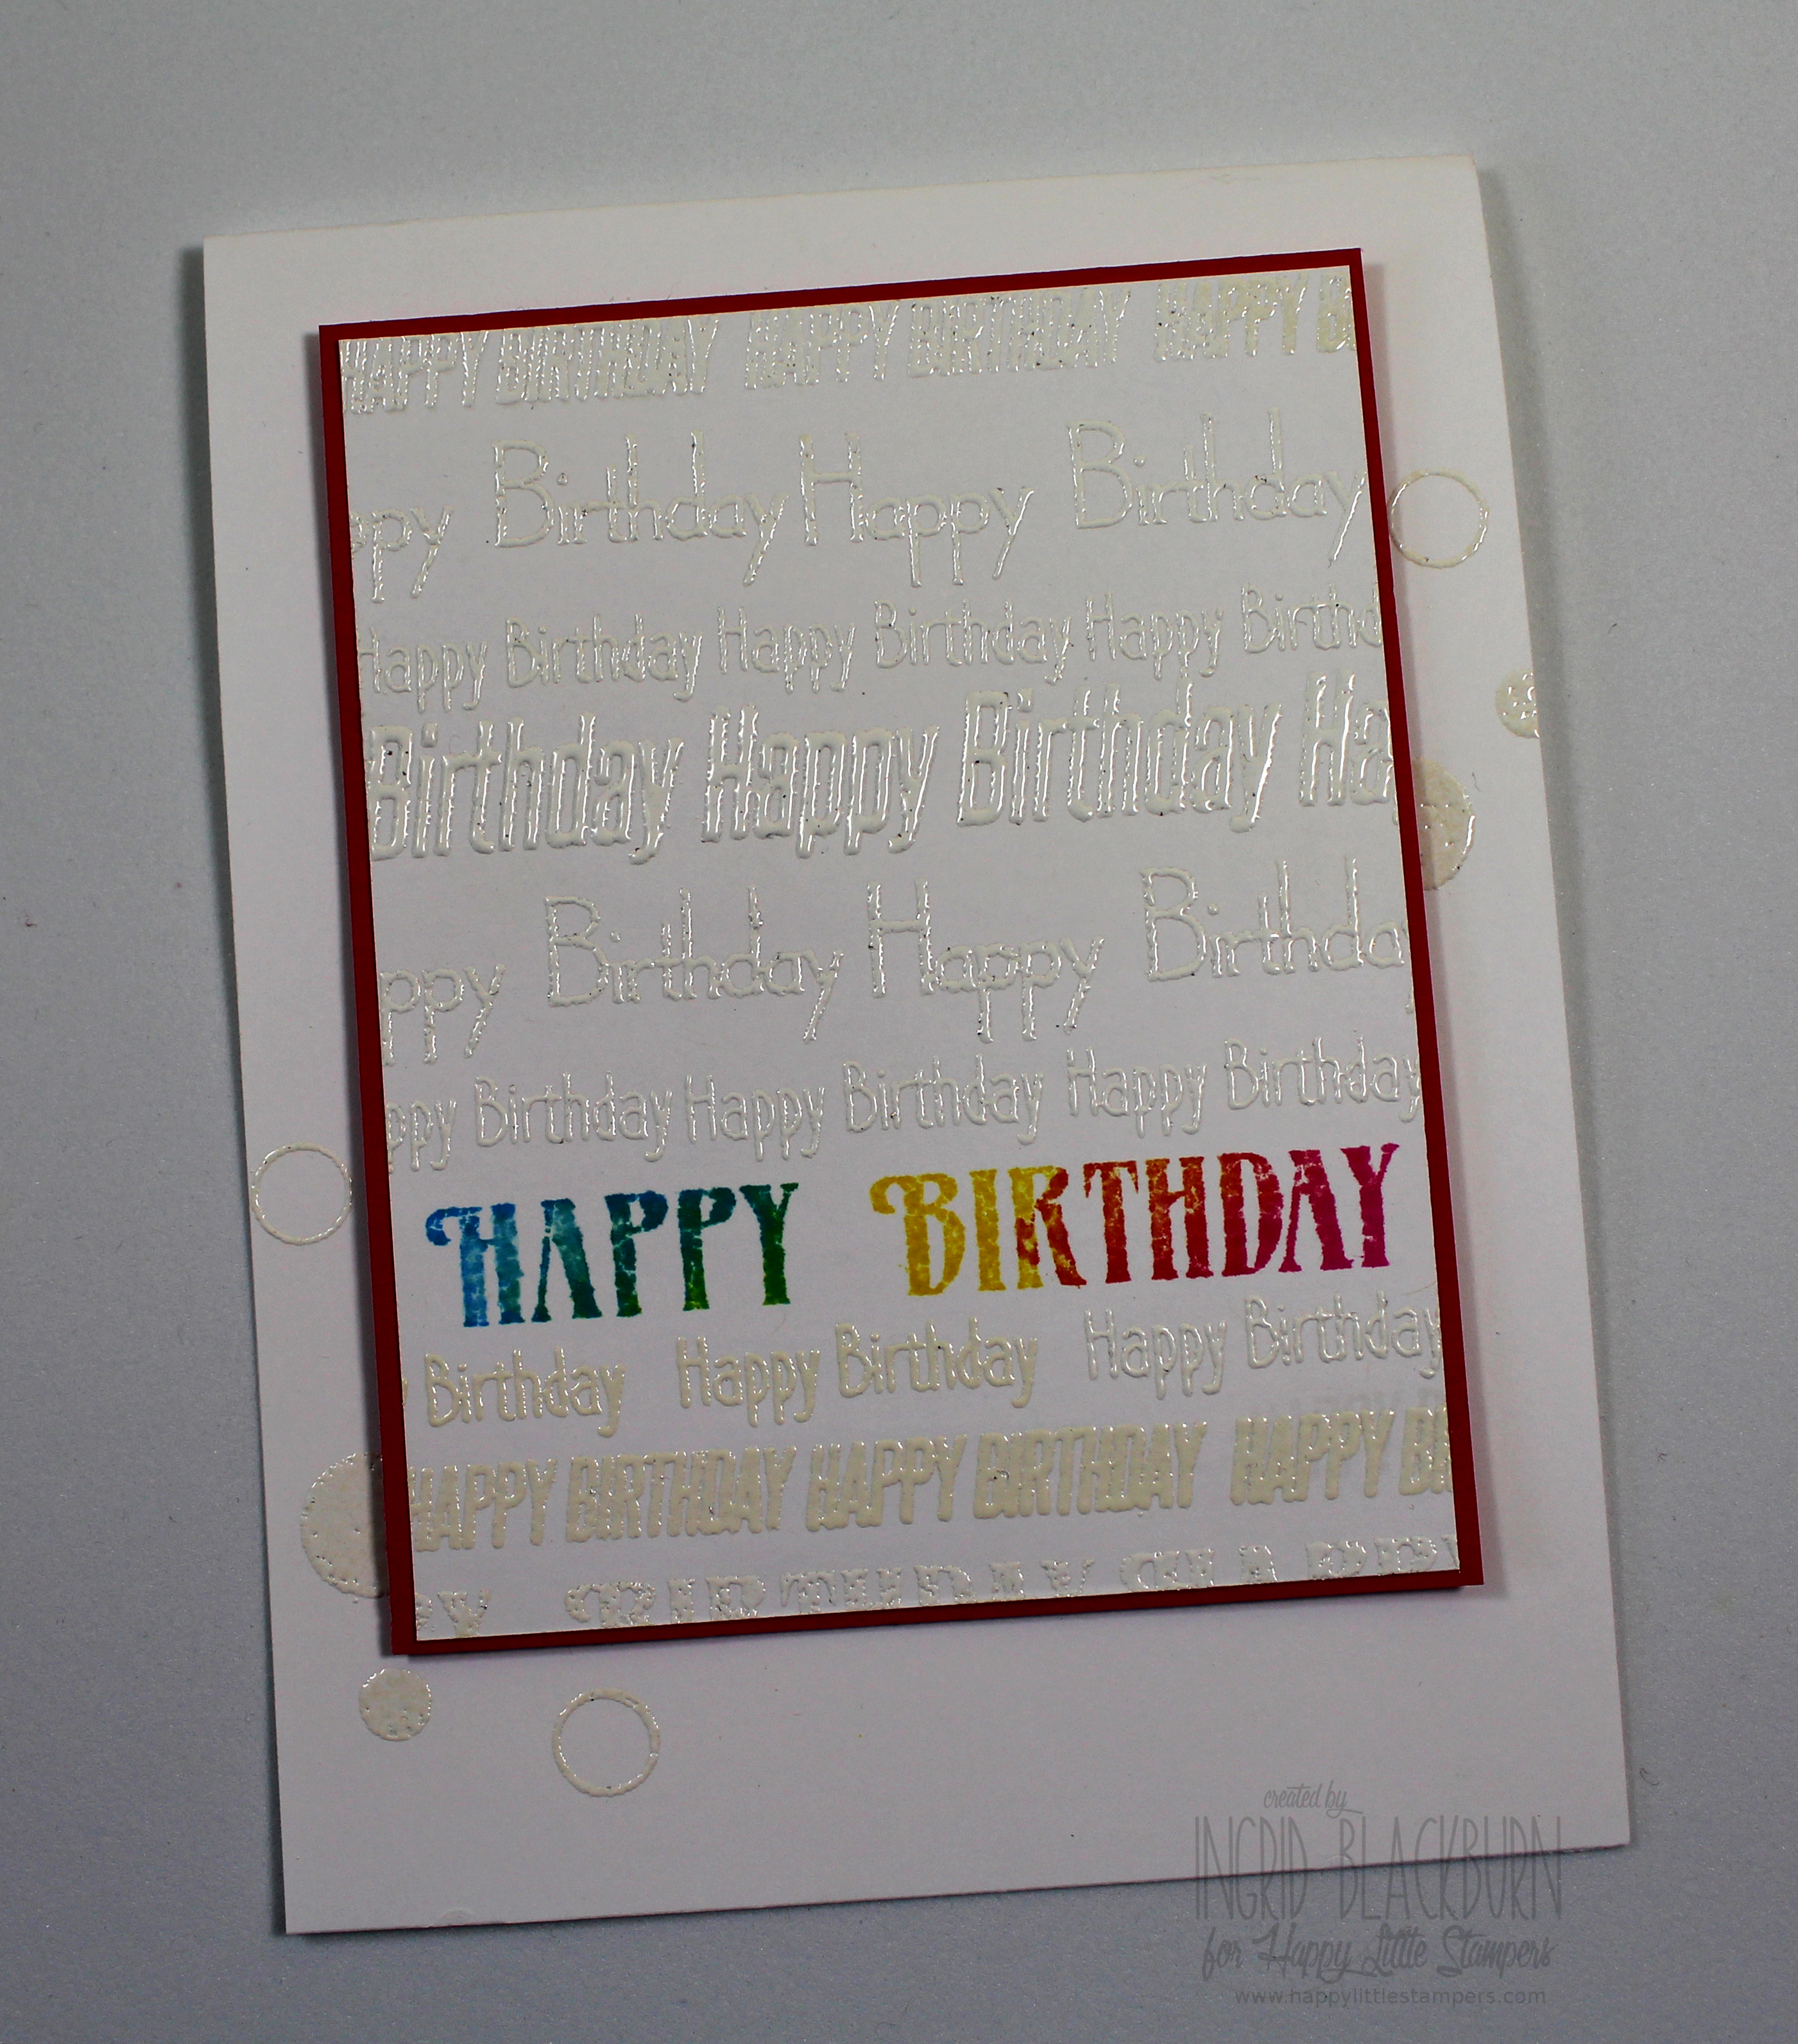
Once dry, add your greeting (HB2U by SugarPea Designs for the Young at Heart Collection) by embossing it in black onto vellum card stock. I cut it out using the larges tag from Tag Buddies by CAS-ual Fridays – yup the same one as above!

Pattern-of-Rings-Birthday---Ingrid-Blackburn-002

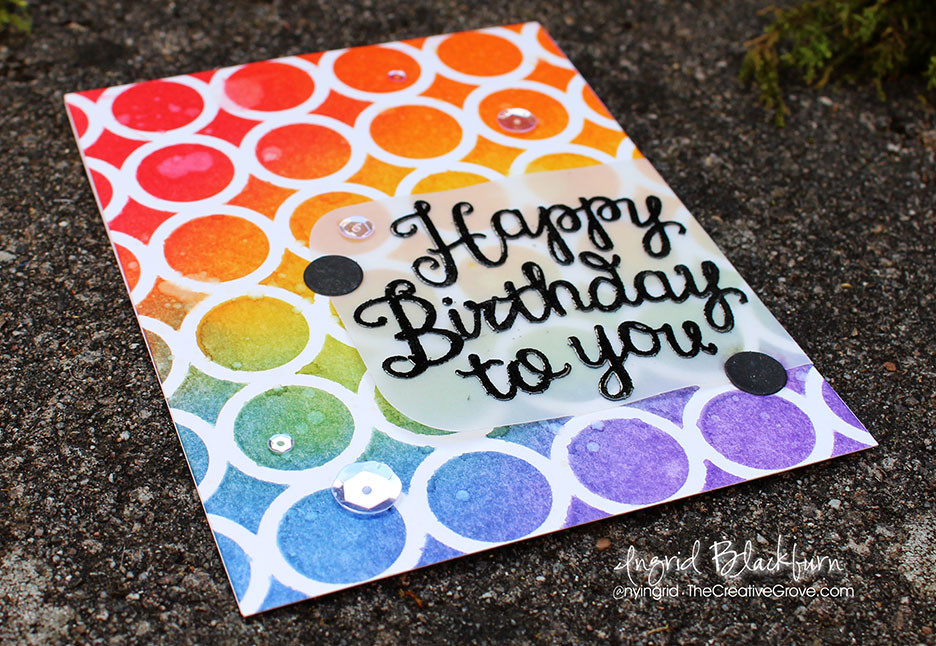
Add some embellishments and you’re all set. I added two little circles, cut out using Friendly Flowers Fri-Dies by CAS-ual Fridays – both die sets are from the Friendship collection. By adding those black circles and another strategic Sparkling Clear Sequin, you’ll be able to help secure that piece of vellum down. I also wrapped the top of the tag around to the back.

I love bright vibrant Birthday cards – and this stencil really didn’t disappoint.

Don’t miss out on all the crafty goodness!

I hope you enjoyed those three projects! If you liked that, be sure to sign up for my Creative Tips E-letter to get an exclusive video series with more. Up next – have fun hopping along to the talented Chaitali Narla. Be sure to leave comments along the way for a chance to win!

Here’s the list of all the talented designers for today’s hop!

BLOG HOP LIST:

Now go get your fingers inky –

Signature

[optin_box style=”12″ alignment=”center” email_field=”email” email_default=”Enter your email address” integration_type=”aweber” double_optin=”Y” list=”3846012″ name_field=”name” name_default=”Enter your first name” name_required=”Y” opm_packages=””][optin_box_field name=”headline”]Learn more with our exclusive FREE video series:[/optin_box_field][optin_box_field name=”paragraph”]PHA+UGx1cyB5b3XigJlsbCBiZSBhZGRlZCB0byBteSBGUkVFIENyZWF0aXZlIFRpcHMgRS1sZXR0ZXIgd2hlcmUgSSBzaGFyZSBleGNsdXNpdmUgcHJvamVjdHMsIHZpZGVvcyAmYW1wOyB0aGUgMTIgRGF5cyBvZiBDaHJpc3RtYXMgUHJvamVjdCBTZXJpZXM8L3A+Cg==[/optin_box_field][optin_box_field name=”privacy”][/optin_box_field][optin_box_field name=”top_color”]undefined[/optin_box_field][optin_box_button type=”0″ button_below=”Y”]Get Instant Access![/optin_box_button] [/optin_box]

Blog Hop, Prizes, and lots of inspiration!

Welcome back my friend – it’s the fifth day of sharing great creativity with you and we’re going out with a bang! Yup…it’s a uber talented line up for the Blog Hop and *gasp* there are prizes!!! In addition to all that goodness – I have two projects for you today and a video! But first – I chose these cards – and more importantly their sayings because that’s how I feel about you – my blog readers! So enjoy this post, all the creative goodness and thanks for Making me Smile, you all are just awesome! 🙂 🙂

SOA April 2016

Just in case you were trapped under something heavy the past four days and couldn’t get to a computer to see all the creative goodness – whew…I hope you’re okay…Stamp of Approval is a curated collection put together by my friend Catherine Pooler. Tomorrow’s collection – yup – tomorrow, is called Beautiful World. This collection has gorgeous stamps and dies by Gina K, CAS-ual Fridays, SugarPea Designs and the debut of Catherine Pooler Designs. It’s a very cool collection.

I wasn’t sure when I first saw it, then when I laid it all out in front of me and I started sketching I literally couldn’t stop. (See my Day One post – link at the bottom for my sketches) And I have been creating for weeks. The ideas just keep coming – it is seriously that easy to stamp with!

But to find out how to get it, you want to be on the wait list – because first – StampNation members will get the sales link, then the wait list finds out, and if you’re not on one of those two places – the -public won’t find out until the day after. You may think – that’s okay, I’ll wait…but the first SOA Collection literally sold out in a few hours! So if you’ve liked what you’ve seen from myself and all the amazing, talented designers – get on the wait list at the very least – I’d hate for you to miss out. Click Here for more detailed information on that

win win win

GIVEAWAY Okay…let’s get to the good stuff – prizes….yup – you guessed it! Someone will win the entire Stamp of Approval – Beautiful World Collection! Not bad, huh? Just stop along the hop and leave comments along the way – don’t forget Catherine’s! The more you stop, the more entries you’ll have! *Entries close on THURSDAY at 9AM EST. The winner will be announced that morning. If you already bought a box, then you will be refunded! How cool is that!

And now….are you ready for some creative inspiration?!!!

Beautiful World Blog Hop Creations – Day Five

Project One

To say thank you to you all, I wanted to showcase something elegant and SUPER simple. Now put your imagination caps on and envision matching Wedding invites, or an Anniversary celebration – Tea invitations, you name it. I LOVE this stamp! And did you see some of the cool coloring my team mates have done with it? I mean really!!! If you love Copics, then make sure you see some of the past features (Links at the bottom).

Simple and classic silver on Navy – you can NEVER go wrong. Little things like a pop of white at the top and bottom (that’s the card base) – easy to print on, and less $ than colored card stock. When mass producing you have to think of these things. Simple triple wrapped silver cord – you can buy that stuff cheap! It’s timeless and a classic, don’t you agree?

Elegant Silver Flourish

So thank you for always stopping by and commenting. Visiting my YouTube channel and being a subscriber and student. From the bottom of my heart – Thank You!

Project Two

And for the grand finale one of my favorite projects from the week. I wish I could take credit for the design of this card, but my good friend Kylie Purtell came up with it. When I saw her version, I just had to add the rainbow colors and it was screaming for that awesome butterfly from Beautiful World by Gina K. Add those killer greetings from All about YOU by CAS-ual Fridays and it’s sheer perfection.

Here’s a super short video on how I created this card – plus a little trip down memory lane from the past five days at the end!

Click Here to watch in HD on YouTube

Let’s chat about those greetings by CAS-ual Fridays for a second. If you love versatility – then I highly encourage stamp sets where you can build your own greetings. I love that you can mix and match stuff, and the Riesling font (one of my favs for years) paired with that bold is just awesome! It’s a super cute card – isn’t it?
SOA Rainbow Butterflies

Thanks for coming back each and every day over the past five days – in all we’ve had 11 projects on The Creative Grove alone! But don’t just stop here – my fellow Dream Team sistahs are super creative and talented, be sure to check out all their creations as well, Catherine has had five solid days of videos and tons of projects PLUS we have several creative and very inspiring additions from all over Blog-land!

SO….check out all this goodness, be sure to leave me a comment – you wouldn’t want to miss out on prizes, would you?!!! And I certainly hope to see you again either here, on the e-letter or over at my YouTube channel again!

* Note that Kathy Racoosin (After me in the hop) is traveling today and we had a slight change in the line up! Be sure to go directly to Kelly Latevola after her, just click on both names here and you’re all set!

Catherine Pooler
Maureen Merritt
Kristie Goulet
Heather North
Allison Cope
Laurel Beard
Lisa Harrolle
Ingrid Blackburn – That’s me! You are HERE
Kathy Racoosin Quick…Hop HERE next!
Kelly Latevola 
Beth Silaika

And when you’re all done hopping – seriously you don’t want to miss out on this talented line up… if you missed the first four feature days loaded with projects….check them out here:

Day One            Day Two               Day Three            Day Four

Happy Hopping – Keep those fingers inky –

Signature

[optin_box style=”12″ alignment=”center” email_field=”email” email_default=”Enter your email address” email_order=”2″ integration_type=”aweber” double_optin=”Y” list=”3846012″ name_field=”name” name_default=”Enter your first name” name_order=”1″ name_required=”Y” opm_packages=””][optin_box_field name=”headline”]Learn more with our exclusive FREE video series:[/optin_box_field][optin_box_field name=”paragraph”]PHA+UGx1cyB5b3XigJlsbCBiZSBhZGRlZCB0byBteTxzdHJvbmc+IEZSRUU8L3N0cm9uZz4gQ3JlYXRpdmUgVGlwcyBFLWxldHRlci4gRnJvbSB0aW1lIHRvIHRpbWUgeW914oCZbGwgZ2V0IGV4Y2x1c2l2ZSBwcm9qZWN0cywgdmlkZW9zICZhbXA7IHRoZSAxMiBEYXlzIG9mIENocmlzdG1hcyBzZXJpZXMuPC9wPgo=[/optin_box_field][optin_box_field name=”privacy”]We value your privacy and would never spam you[/optin_box_field][optin_box_field name=”top_color”]undefined[/optin_box_field][optin_box_button type=”0″ button_below=”Y”]Get Instant Access![/optin_box_button] [/optin_box]

Happy Little Stampers 2nd Blog Hop!

Welcome to The Creative Grove and the second Blog Hop for Happy Little Stampers! Chances are you hopped along from Carol’s blog. Today I have three projects to share for you from the second release at Happy Little Stampers!

Happy Little Stampers Blog Hop

In addition to some great inspired projects, HLS is giving away a $50 gift certificate to the store to one commenter! And, four other randomly selected lucky commenters will win a mystery prize too!  So as you’re hopping along, don’t forget to leave a comment!

Here’s what you do:
  • Start off by leaving a comment on the Happy Little Stampers blog, and then continue on to each Designer.
  • Be sure to comment on all the blogs – including the Happy Little Stampers blog in order to be eligible for the prizes!
  • The blog hop will run for one week giving you enough time to hop through and check out what the designers will be creating.

I used two of the new sets – Mix Mash and Everyday Sentiments to make some great cards that I hope you’ll love! Here are all the creative tips and details…

Blog Hop Projects

Ingrid Blackburn CAS Cards

Project One – OMG #YOUROCK

For this fun card I wanted something funky and cool for my niece Rebecca. I love the lightheartedness of some of the sentiments in the Mix Mash set. To create this card:

  • You’ll want to use the OMG and #YouRock stamps embossed in Black to really stand out from the colorful background.
  • You’ll need to match the quirkiness of the stamps, so choose a fun background stamp or stencil. I chose a Hero Arts Stencil that I recently purchased.
  • To get that fun colorful design, use a sponge applicator and sponge Mustard Seed, Fossilized Amber, Mowed Lawn and Spiced Marmalade Distress Inks to create the pattern on a piece of white card stock.

Hero Arts Stencils

  • To get the sentiment perfectly positioned, you’ll want to figure out how large you want your space to be, then plan on 1/8″ for the top and bottom.
  • I chose 3/4″ for my space and to keep with the Rule of Thirds theory of design, made sure to split my piece 1/3 of the way through. This helps to balance your project.
  • For a little dramatic effect – pop your panels up with dimensionals or foam tape. That will help to give you a great shadow effect.

It’s a fun project, right?

Happy Little Stampers

Project Two – Spunky Birthday

I just spent several weeks with my family in NY. My 10 year old niece Chiarra is all spunk and spirit. She loves to break out in song, dance or just start acting a scene – mark my words…she’ll be a future actress! I couldn’t get her singing out of my head this morning when I was stamping – so… fun, bright and playful is the direction this project went.

The Mix Mash stamp set is filled with great birthday sentiments and some awesome little detail stamps. I actually was going to add white sequins to it, when I decided to add the circle and lined circles in their place – it looks way better and talk about versatile! I love stamps like that. This project is a fun mixed mash itself! Here is how to recreate it:

  • First stamp your main sentiment.  Ink up the center of the largest Happy Birthday stamp with Distress – More Mustard, then use Picked Raspberries and Salty Ocean being sure to overlap them a bit to get a great mix of color. Keep it towards the bottom of a 3 3/4 x 4″ panel, leaving an inch to stamp other sentiments.
  • An embossing buddy/destatic tool is key for this project, as you’ll be handling it numerous times. Use your embossing buddy on a space above or below your main sentiment, and stamp one of the happy birthday stamps repeatedly across in versamark.

Happy Little Stampers Stamps

  • Try to keep them aligned. I had to stamp, add powder, then stamp again to see it right.
  • Once you have white powder on a line  – emboss with a heat tool and then repeat till your panel is filled.
  • Matte onto a matching panel – I used Melon Mambo by SU.  I trimmed my panel so that it was just slightly smaller than a 1/16″ border.
  • Figure out where you are placing your panel and stamp solid and lined circles in a few spots as in the card.
  • Pop up your panel and you’re all set!
  • This card is an A2 top folding card – 4 1/4 x 5 1/2″.

I know she’ll love it, it’s bright and fun. The white Happy Birthday’s really make a statement.

Masculine Cards

Project Three – Masculine Birthday

For this card, I wanted a more masculine look for my nephew Matt’s upcoming birthday. So I decided to go with a grey panel and keep it rather simple. Originally I was going to stamp and emboss the greeting on vellum, tear and overlay, but as I began, I thought simple might be better here. What do you think? This one is pretty straightforward, but here’s the step by step anyway!

  • Stamp and emboss your greeting from Everyday Sentiments in black about 1/3 rd of the way up from the bottom onto a piece of Basic Grey card stock (SU) – 3 7/8 x 5 1/8″.
  • Stamp the arrow stamps from the Mix Mash set in Versamark and emboss with clear powder to get the darker grey color.

Everyday Sentiments Masculine Card 002

  • Stamp and emboss your circle stamps from the Mix Mash set in black.
  • Add gold sequins and matte onto a black base 1/16″ larger ( 4 x 5 1/4″)
  • Adhere to a top folding A2 card – 4 1/4 x 5 1/2″.

It’s a simple card, but sometimes simple is just perfect. One of the reasons I just love CAS cards!!

Well, there you have it – just a few ideas and fun ways to use some of the new stamp sets in this second release. I hope you enjoyed the creative juice…and that’s a wrap for the second blog hop! If you didn’t start at the beginning with the Happy Little Stampers blog…be sure to head there next and hop along the way for 20 other designers ideas! WOW…that’s a ton of creativity!!

And be sure to comment to win too – in order to win, you need to comment on all the blogs including the HLS blog. Happy Hopping, see you next time!!

Signature-24-pt_thumb.jpg

Here are links for the whole hop!

Happy Little Stampers
Kylie Purtell
Loll Thompson
Joyce Mehrberg
Gloria Lee
Tanja Kabel
Susan Bridgman
LesLee
Gail Townsend
Carol Steedman
Melissa Lane
Linda Walmsley
Birgit Norton
Kim Heggins
Valentyna
Sue T.
Bonnie Klass
Toni
Chrissie
Anita
Carol Dunham
Ingrid Blackburn <—- You are Here!

Happy Little Stampers Blog Hop

Happy Little Stampers just had their first release of stamps and to celebrate we’re having a blog hop! So this month you get a whole lot of inspiration from a brand new stamp company – Happy Little Stampers, along with 18 of my crafty friends for some great inspiration.

blog hop graphic 2

In addition to some great inspired projects, the whole lot of stamps will be given away to one commenter. And, four other randomly selected lucky commenters will win a gift certificate to the HLS store!  So as you’re hopping along, don’t forget to leave a comment!

Here’s what you do:
  • Start off by leaving a comment on the Happy Little Stampers blog, and then continue on to each Designer.
  • To be eligible for the prizes, you must comment on all the blogs in the hop.
  • The blog hop will run for one week giving you enough time to hop through and check out what the designers will be creating.
You probably arrived here from Gloria’s blog. Pretty great isn’t she?! Well, here are a few projects I made for you today. Enjoy all the creative tips!

Colored Texture Paste Birthday 001

To get this look, you’ll want to color some white embossing paste with distress inks – the piece I used for this project is actually the left over from an hombre colored project I made for one of our classes here at The Creative Grove. I ended up with a lot left over, so I quickly took my scrap paste and ran it over another stencil for an extra piece – I actually got five extra projects that way!! I just love the way the yellows blended together with the orange and the texture the embossing paste gives is awesome!

Colored Texture Paste Birthday 003

I spread it over a fun stencil by The Crafters Workshop, added a little banner using the new, great birthday set from HLS – Bold Birthday Sentiments , added a few sequins and had a quick, bright, fun project.

But I didn’t stop there…I also played around the other day with my crafty friend Amy. We broke out her silver embossing paste and ran it over my new Holly stencil from Stamplorations. I just love the fluid look of the embossing paste against the Artichoke card stock. It really pops.

Texture Holly 001

Of course the card is only made complete with the silver embossed Merry Christmas greeting. I have to admit, I can’t seem to stop using it! You’ll just HAVE to check out the new Mixed Christmas Sentiments by Happy Little Stampers – the mixed set of fonts are great.

Texture Holly 002

To add a punch to the project I wanted to use Cherry Cobbler card stock. First you’ll want to separate the two colors with a small white 1/16″ edge so that it helps to define it a bit better. Little touches like that really help to bring the project together.

And since Holly is the theme over at Happy Little Stampers Christmas Challenge, I think I’ll add this one to the gallery as well – be sure to play along too! But first….time for more creative genius…

Now hop on over to Birgit’s blog to see more inspiration!

 Don’t forget to comment to win – now hop along!! 🙂
ingrid signature

[optin_box style=”13″ width=”500″ alignment=”center” action=”https://www.aweber.com/scripts/addlead.pl” disable_name=”Y” method=”post” email_field=”email” email_default=”Enter your email address” integration_type=”aweber” double_optin=”Y” list=”3846012″ name_field=”name” name_default=”Enter your first name” name_required=”Y”][optin_box_field name=”headline”]If you enjoyed this tutorial…[/optin_box_field][optin_box_field name=”paragraph”]PHA+4oCmeW914oCZbGwgbG92ZSBvdXIgPGVtPjxzdHJvbmc+PHNwYW4gc3R5bGU9ImNvbG9yOiAjMjQ0YzVlOyI+ZnJlZTwvc3Bhbj4gPC9zdHJvbmc+PC9lbT5zdWJzY3JpYmVyIG9ubHkgdmlkZW8gc2VyaWVzLiDCoExlYXJuIG5ldyB0ZWNobmlxdWVzIHRocm91Z2ggb3VyIDxzcGFuIHN0eWxlPSJjb2xvcjogIzI0NGM1ZTsiPjxlbT48c3Ryb25nPmV4Y2x1c2l2ZTwvc3Ryb25nPjwvZW0+wqA8L3NwYW4+Q3JlYXRpdmUgVGlwcyBlLWxldHRlcsKgYW5kIHN1YnNjcmliZXIgb25seSB2aWRlbyBhbmQgcHJvamVjdCB0dXRvcmlhbHMhPC9wPgo=[/optin_box_field][optin_box_field name=”privacy”][/optin_box_field][optin_box_field name=”top_color”]undefined[/optin_box_field][optin_box_button type=”1″ text=”Send me exclusive tips!” text_size=”32″ text_color=”#000000″ text_bold=”Y” text_letter_spacing=”0″ text_shadow_panel=”Y” text_shadow_vertical=”1″ text_shadow_horizontal=”0″ text_shadow_color=”#f6fefb” text_shadow_blur=”0″ styling_width=”50″ styling_height=”19″ styling_border_color=”#000000″ styling_border_size=”1″ styling_border_radius=”6″ styling_border_opacity=”100″ styling_shine=”Y” styling_gradient_start_color=”#a3b640″ styling_gradient_end_color=”#80902c” drop_shadow_panel=”Y” drop_shadow_vertical=”1″ drop_shadow_horizontal=”0″ drop_shadow_blur=”1″ drop_shadow_spread=”0″ drop_shadow_color=”#000000″ drop_shadow_opacity=”50″ inset_shadow_panel=”Y” inset_shadow_vertical=”0″ inset_shadow_horizontal=”0″ inset_shadow_blur=”0″ inset_shadow_spread=”1″ inset_shadow_color=”#80902c” inset_shadow_opacity=”50″ location=”optin_box_style_13″ button_below=”Y”]Send me exclusive tips![/optin_box_button] [/optin_box]