Kind of Batty Blog Hop: Day One

Kind of Batty Blog Hop - Catherine Pooler

A Cobweb Stamp, Fall Leaves, Patterns and Christmas? Welcome to the Catherine Pooler Designs Kind of Batty Blog Hop – Day One. I’m SO excited to share some fun new cards with you today! We have a full line up today and will be sharing some creative inspiration for the next three days! There are prizes and cool things to see, so let’s jump right on in.

This release is a bit different – there’s more traditional product, and then there’s Halloween! I never thought I was a Halloween person, but I’ll be honest – this collection was just TOO cool to not create with it! The Halloween products work SO well together, and I’m going to show you some non-traditional things you can do with them. So let’s get started.

Here are the new products being released today. It’s live in the shop now – click here to get yours before they sell out!


I’m creating with two of the background stamps, the fall Hello Autumn multi step stamp set, and the super fun Everything but the Broom Halloween set.

Cobweb Stamp - Spiderweb Background Stamp

Project No. One – Boo!

I love the unexpected, and thought it would be kinda fun to flip the cobweb stamp and die from Everything but the Broom around for a Cauldron! Don’t forget to add the cobweb stamp too – it creates some fun little interest to it.

To create a stirring the pot spoon, use the small border in that set along with some Black Jack ink! The eyeballs are the bubbles and need I say more? You just have to stamp one of those super cute spiders – I’m calling him Harry, he’s too cute, and I’m not the biggest fan of spiders – you get big girlie screams from me with those…lol!
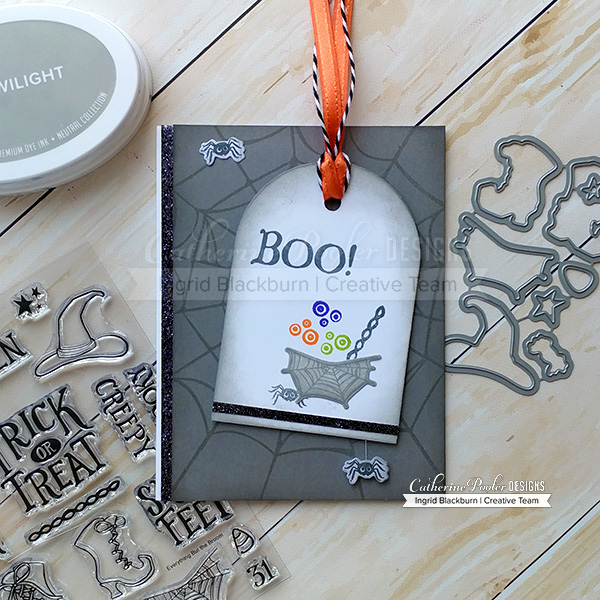
Use the tag die from Tags, Etc (kind of reminds me of a headstone – just sayin’, create your little scene, lightly sponge the edge in the new Twilight ink and Voila! For some added interest, stamp the spiderweb in the background – that’s Twilight on Catherine Pooler Smoke cardstock. It’s the perfect tone on tone look. The spiders are stamped in Black Jack.

The card needed something, so I decided to add small strips to the bottom of the tag and side of the card front. That’s Black Twinkle Embossing Glitter by WOW! It’s the coolest, sparkliest powder – you will just LOVE it.

The bottom spider is literally hanging by a thread off the raised tag. A little Orange Ribbon with some black/white twine and you’re good to go!

Project No. Two – Cobweb Stamp for Christmas?

Would you believe that these trees are made from the Cobweb Stamp? Yup, to get this look, you’ll want to mask off a section of the Spiderweb Background Stamp with some masking tape and post it notes. I placed it in the MISTI stamping tool so that I could repeat stamp it if needed in the exact same spot since it’s a large Red Rubber Background Stamp vs. a Clear Stamp Set.

First you’ll want to create a hill mask and secure that over your Sand Dunes cardstock. Next stamp your foreground tree in Eucalyptus Ink and then create a mask and stencil from copy paper. Cut your mask out – just inside the line. You’ll also want to create a stencil by cutting the middle part of the image out, so that you can ink blend lightly to fill your tree in later. The two rear trees, are a different section of the web. Mask your stamped three and stamp those in Icing on the Cake.
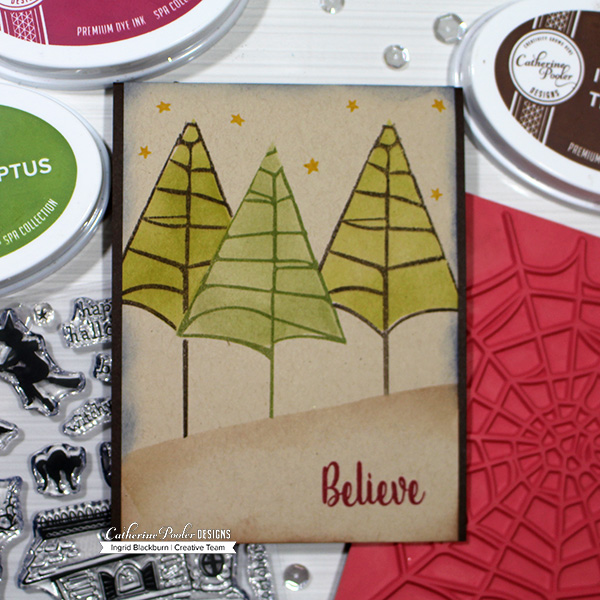
The spa colors really work well on the Sand Dunes cardstock. Ink up the Believe in Peppermint Stick from the sentiment Believe in Yourself in the Rose Garden Stamp Set and stamp in the lower right corner. Use the revers side of your hill, and lightly sponge the hillside in the new ink Sand Castle. You’ll also want to do the edges on the bottom. The remaining edge of the project is lightly sponged in Juniper Breeze for a night sky.

Stamp a few of the wonky stars in Sauna ink from the new Spooky Hollow stamp set. I’ll have more with that set on Friday in the hop!! So check back.

Who would have thunk Christmas right? I LOVE these trees – and although I really really wanted to hang the spider from one….it didn’t read Christmas to me (I would have needed a tiny Santa’s cap for Harry…lol! You should see what this tree looks like embossed in Metallic Gold Sparkle glitter – it’s GORGEOUS!

Project No. Three – Hello Autumn

Now for a more traditional feel. I LOVE the fall. When I lived in New York, I was always mesmerized by the fall foliage. So I thought I’d pay a little homage to that today. No spiderweb stamp needed for this one, but you’ll want to break out the new Angled Square Background stamp from the brilliant mind of Shawna Clingerman. Seriously – this background stamp is striped vertical and horizontal triangles that make up squares that are ultimately offset – how cool is that?!
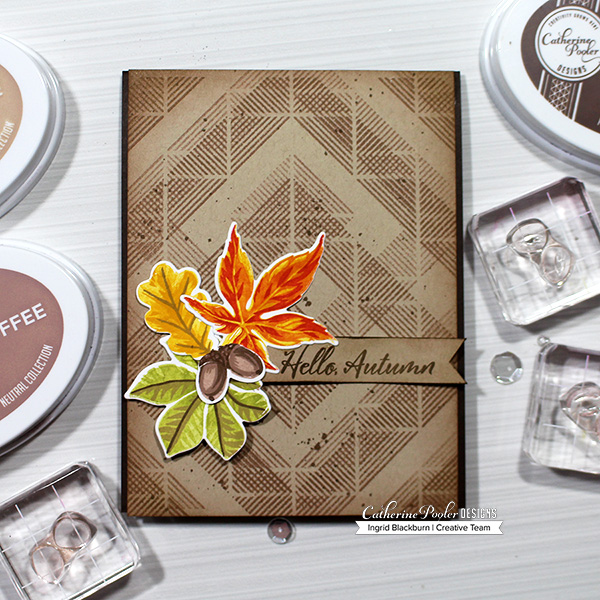
Ink up your Stamp in a Misti – you’ll need to have exact placement of this one. I tucked mine into the bottom corner and stamped onto my scrap paper so I could see where the lines were. That’s key! Ink up your Angled Square Background Stamp with the new Sand Castle ink and stamp once. Flip your card front, lining up the center line with the scrap piece stamped image. Ink up your stamp again in Sand Castle and stamp. The cool part about that, where they overlap it creates a tiny grid line pattern because the stripes are going different directions (the stripes that make up the triangles!!).

Next, layer stamp the leaves and acorns onto some white dies from the Hello Autumn Stamp Set. I used colors from the Spa line of ink with Rockin’ Red as a pop on the large leaf. I’m in awe at how beautiful the contrasting pop of color on the neutral background is.

Create a banner that’s 9/16 ths wide and stamp Hello Autumn in Icing on the Cake. Edge your banner and card front lightly in Sand Castle Ink and the banner with a slight edging of Icing on the Cake ink.

Adhere with glue, pop up the tails and under the hello for a wavy look and you’re good to go!

Pretty cool projects, huh? Just wait till Friday!!

Catherine Pooler Halloween

Be sure to comment all along the hop. Catherine is giving away Three $25 gift certificates to those who comment! Winners will be announced Monday Evening the 20th.

If you’re interested in any of the new items or other things I used today, check out the supply list below. Thanks for stopping by!

  1. Catherine Pooler  Hop HERE next!
  2. Ilina Crouse  
  3. Tracie Pond  
  4. Ashlea Cornell  
  5. Karen Baker   
  6. Jen Carter  
  7. Jenny Colacicco  
  8. Kristie Goulet 
  9. Maureen Merritt  
  10. Josefine Fouarge 
  11. Melissa Miller 
  12. Ingrid Blackburn – You are HERE!

Thanks for stopping by today! Keep those fingers inky –


Supplies

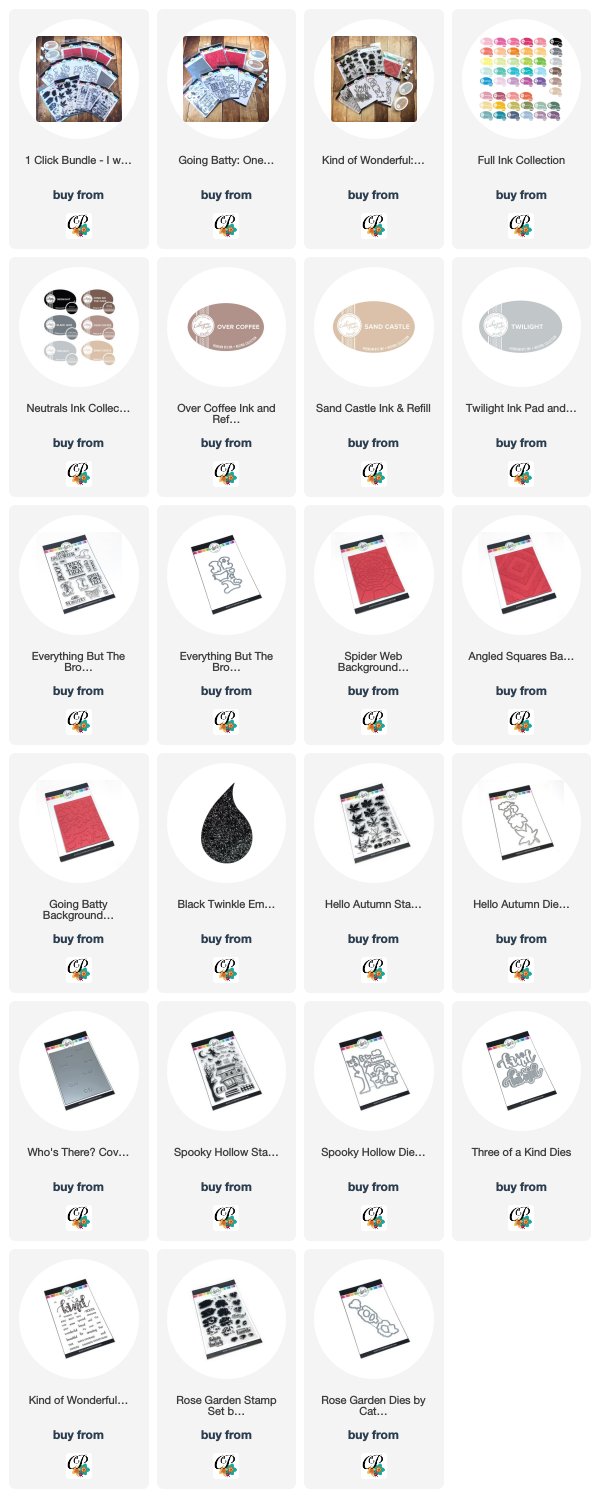
To make finding the supplies I used in these projects a bit easier for you, here are a few clickable links. Compensated Affiliate Links are used when possible. Click here for disclosure. Happy Shopping!


Harry Potter Inspired Card Video Hop

Harry Potter Card Hop

Have you ever been inspired by a favorite book or movie? Today I bring you a fun little video card hop, inspired by the Harry Potter series and a few of my crafty friends for a Harry Potter Scenic Card Tutorial!

This summer, Justine Hovey and I met up for lunch in Stuttgart, Germany while we were both visiting. I don’t even remember how we got onto the conversation – but we discovered yet, another love that we shared in common – Harry Potter! We thought, that would be a just for fun video hop – and my mind immediately went to my friend Laurel Beard – who I knew loved Harry Potter just as much as me. And Justine knew Jessica Frost Ballas was just as addicted, and this hop was born!

Harry Potter Scenic Card Tutorial - Ingrid Blackburn

So here’s a fun, book/movie series inspired hop for you – filled with prizes, a little magic and of course – Harry Potter!

Be sure to hop along all four blogs and YouTube channels – leave comments – cause we’re giving away prizes on each blog – Harry Potter themed prizes!! Plus it’s fun to see how each designer was inspired.

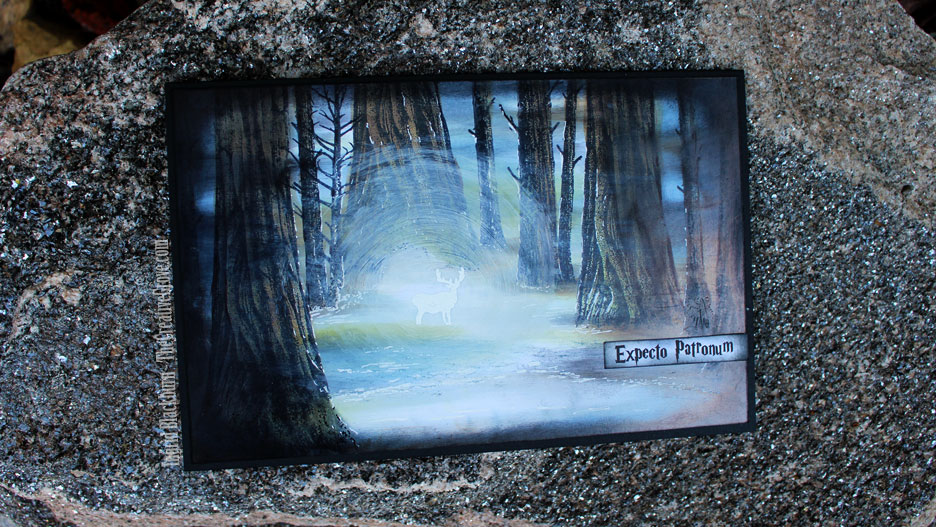
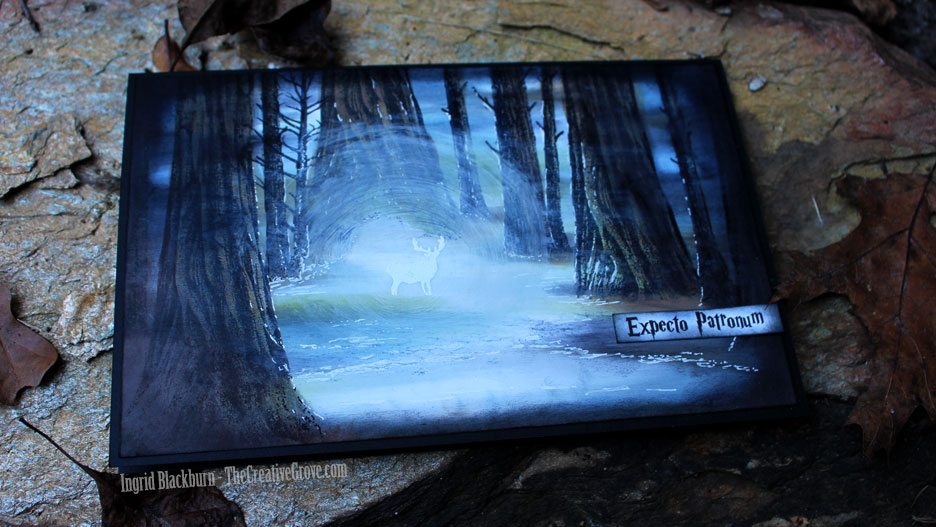
If you’ve followed me a little, I’m sure it’s no surprise to you that I just HAD to create a Harry Potter scenic card! Harry Potter inspires me in so many ways – the castle, forest, bricks, owls, forest, dark vs. light, books, forest, wands, magic and oh, did I mention FOREST?!!! Naturally I had to create one of my favorite scenes of all time (Spoiler Alert) – the Dementor attack/Patronus charm at the end of Book 3.

Harry Potter Scenic Card Tutorial

I knew the perfect stamps to use too…Stampscapes. Kevin Nakagawa’s gorgeous line of stamps would perfectly evoke that larger than life feel I wanted to create along the frozen lake deep into the Forbidden Forest. Here’s a video of exactly how I created this beauty.

Click Here to watch video in HD on YouTube

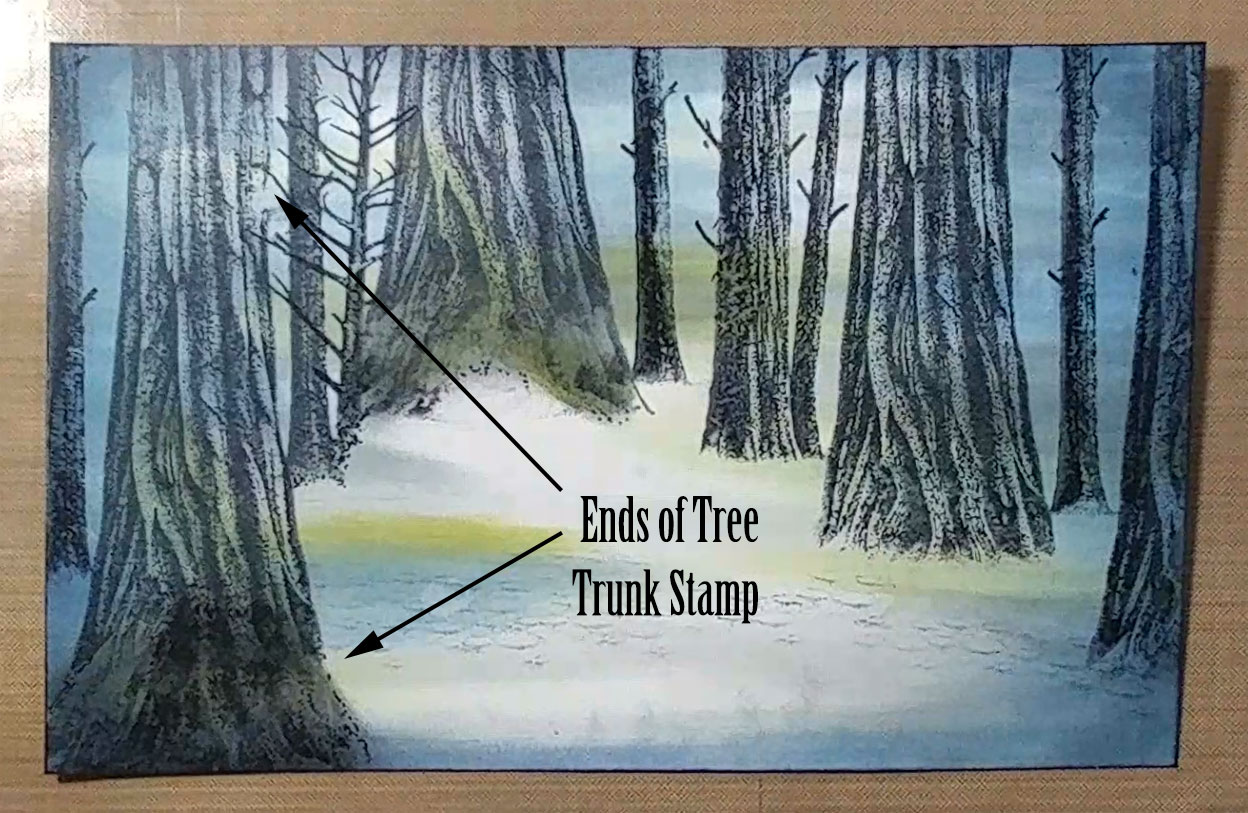
The Tree Trunk stamp was perfect for this card. But I needed it at different heights – and what do you do when your card is larger than the stamp? That’s part of the beauty of Stampscapes stamps. The way Kevin has beautifully drawn these scenic elements is with little dots. So it’s very easy to naturally stretch and build onto your scene with it looking effortless and part of the original design.

So in this image, the left most trunk is actually only 4.5″ tall and the card is 5.25″ high. So how do you stretch your image so that it goes the full length? Simple – flip the top of the trunk around and stamp to fill that area. Now, you can’t have your tree get fatter – so you’re limited to a small part of the stamp, but see how it seamlessly lines up?

Stampscapes Tree Trunk Stamp

For the bottom – fill in the area with a little bit of color – add some dots with a micron pen and some distress markers. Then take the bottom of your stamp – ink it up and fade out the edges on it. That leaves you with the gorgeous texture – use that to fill in your trunk base. It just blends effortlessly! With more shading, and there’s zero chance of anyone noticing that wasn’t meant to be. Would you have seen the seam if I hadn’t pointed it out to you?

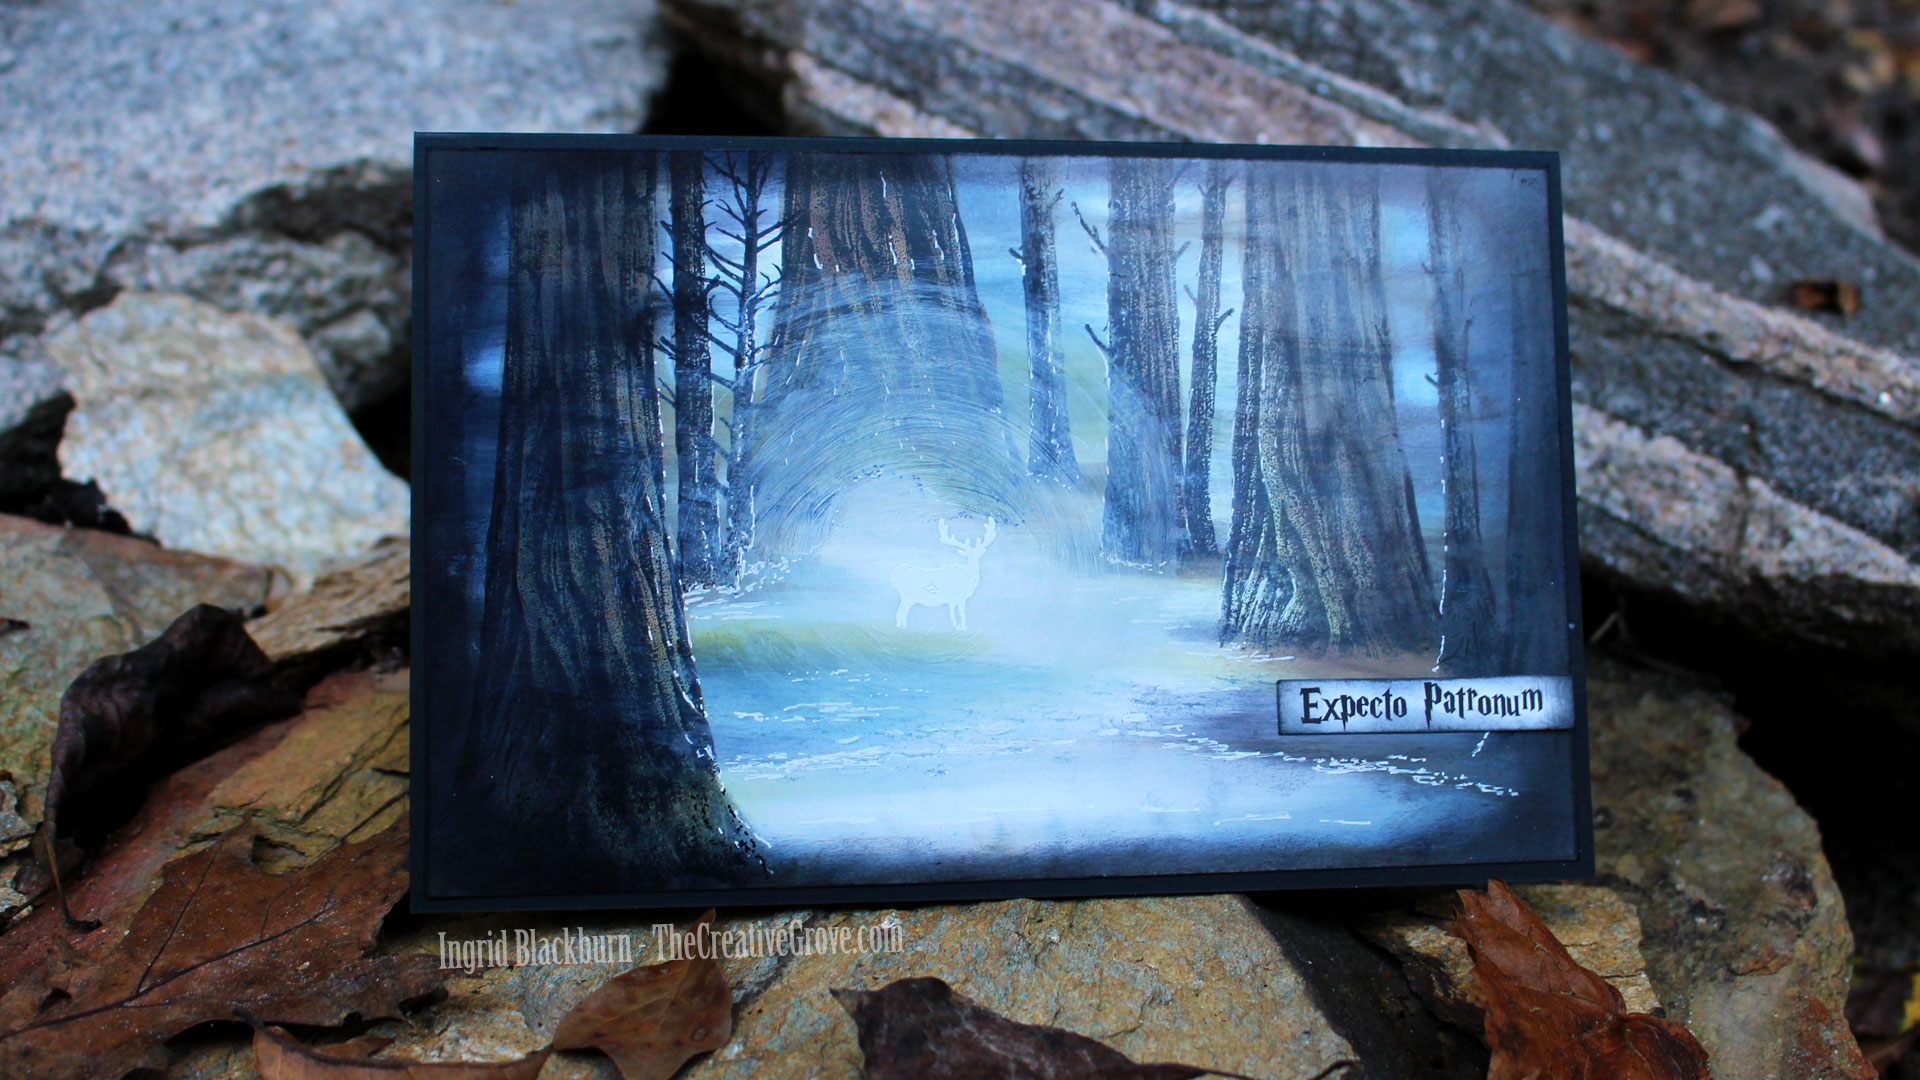
To bring the Harry Potter Scenic Card to life, layer your ink colors light to dark into your scene from the edge in. I used Kromekote Glossy cardstock – 12 pt for a strong base that let the colors glide with the Colorbox Stylus tool. Blues, Greys, Greens and Browns – your nature colors fill the scene with depth.

The key to this scene is the dark mystical nature of the Forbidden Forest. Without it, and it’s just another forest scene. We need the play of good vs. evil here – light vs. dark. Since I wasn’t sure how I could create a Dementor, I used dark shadows to get that effect playing off the bright explosive Patronus Charm.

Harry Potter Card - Forest Scene

And to get that bright glow – emboss the large buck (my Harry Patronus – the stag) and surround it with the white explosive glow. To get it to look just right, I had to play – and as you see in the video…a few ways just didn’t give the right feel. Swirls with a paper towel and some Hero Hues Unicorn Pigment ink did the trick.

Some finishing touches of white gel pen to emphasize ice and cold along the lake edge and glow in the tree trunks mixed with the perfect dark edging pulls the scene together. I didn’t have a greeting that worked for me, so I created my own with a downloaded Harry Potter free font.

I LOVE the third movie – and this is one of my favorite scenes. I think I love Harry and Hermine climbing over the huge roots at the base of these monster trees the most. The forest is so mystical and dark – I can do with out the dementors – they always freak me out…so it’s a good thing I can create my own Patronus – at least in a Harry Potter Scenic Card form!

Harry Potter Forest Card - Stampscapes - Ingrid Blackburn

What’s your favorite book/movie? Do you have something about this series that inspires you? Colors, characters, elements? When you start to create yourself – tag us with #CraftyPotterHeads! We’d love to see what you make.

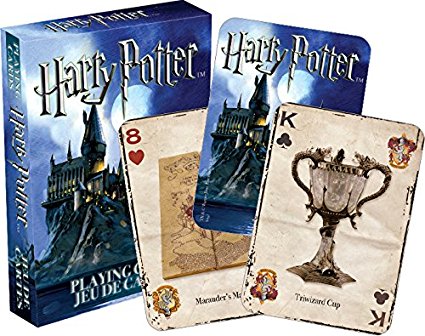
Leave me a comment and I’ll enter you into my Harry Potter drawing! I’m giving away a couple decks of Harry Potter playing cards – to be delivered by Owl Oct. 1st….okay…I guess USPS will have to do. Back to reality for this muggle…

Thanks for stopping by! Now Accio Firebolt – hop on and visit my crafty friends for more chances to win and some creative magical inspiration!

Harry Potter Magical Blog Hop List

Ingrid Blackburn – You are Here
Jessica Frost Ballas – Head on over here Next!
Justine Hovey
Laurel Beard

[optin_box style=”27″ alignment=”center” email_field=”email” email_default=”Enter your email address” integration_type=”aweber” double_optin=”Y” list=”3846012″ name_field=”name” name_default=”Enter your first name” name_required=”Y” opm_packages=””][optin_box_field name=”headline”]Want to LEARN with more exclusive videos?[/optin_box_field][optin_box_field name=”paragraph”]PHA+UGx1cyB5b3XigJlsbCBiZSBhZGRlZCB0byBteTxzdHJvbmc+wqBGUkVFPC9zdHJvbmc+wqBDcmVhdGl2ZSBUaXBzIEUtbGV0dGVyIHdoZXJlIEkgc2hhcmUgZXhjbHVzaXZlIHByb2plY3RzLCB2aWRlb3MgJmFtcDsgdGhlIDEyIERheXMgb2YgQ2hyaXN0bWFzPC9wPgo=[/optin_box_field][optin_box_field name=”privacy”][/optin_box_field][optin_box_field name=”top_color”]undefined[/optin_box_field][optin_box_button type=”0″ button_below=”Y”]Get Instant Access![/optin_box_button] [/optin_box]

Supplies

To make finding the supplies I used in these projects a bit easier for you, here are a few clickable links. Compensated Affiliate Links are used when possible. Click here for disclosure. Happy Shopping!

Creative uses for Twine

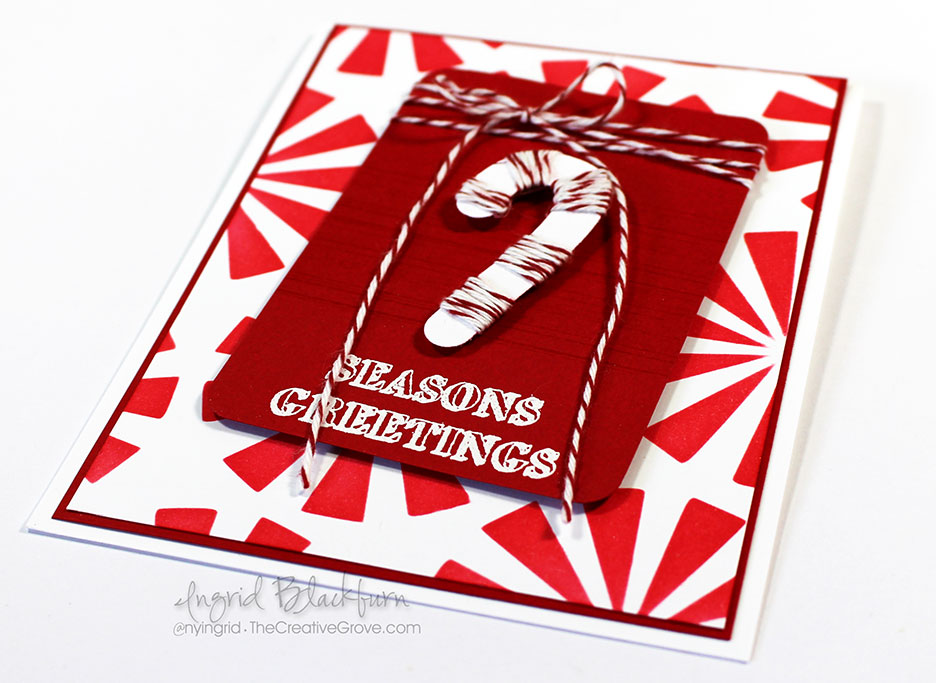
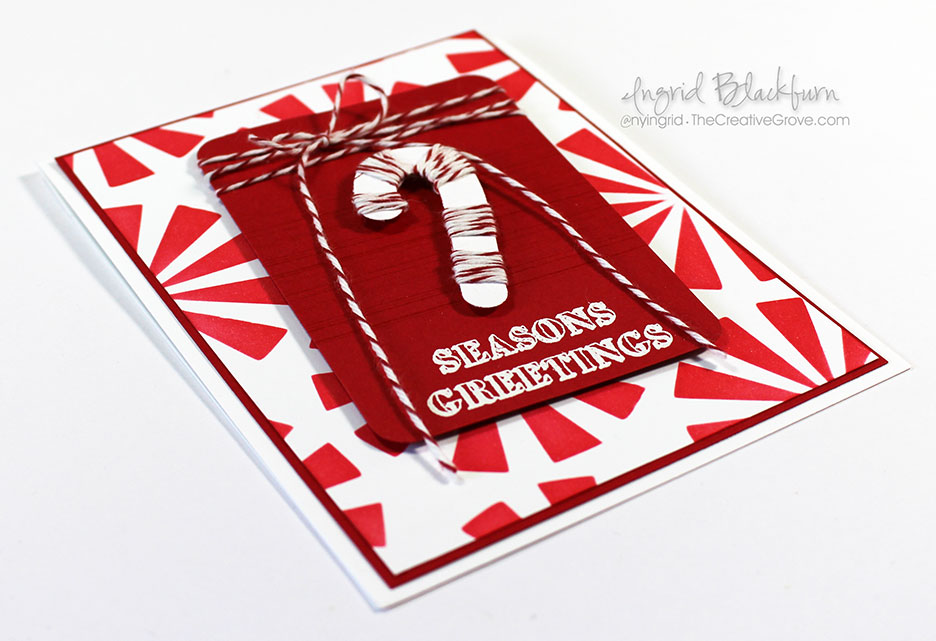
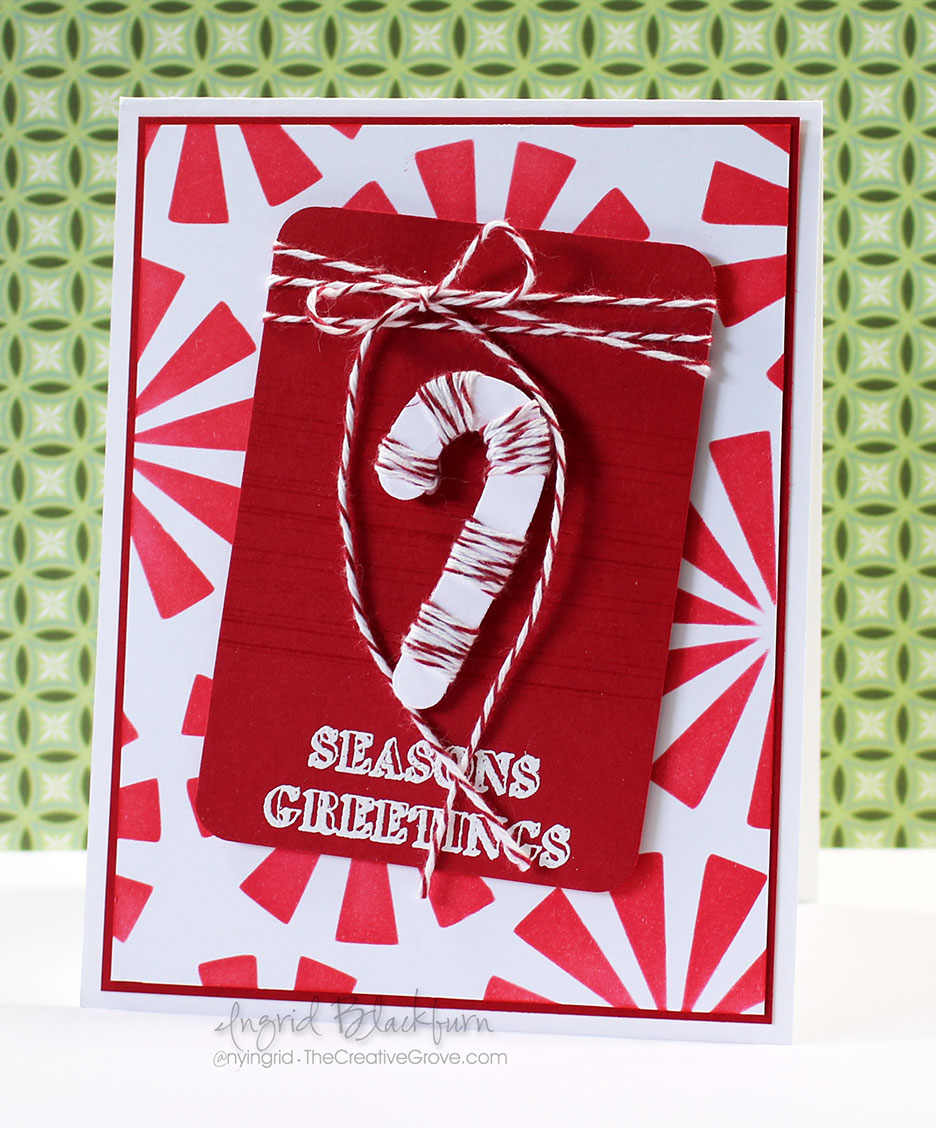
How do you use twine on a card? I’ll admit, I mostly criss-cross it on my pieces – it’s one of my signatures. So when I saw the challenge over at Happy Little Stampers this month uses twine – I thought no problem…wrong! I didn’t just want to do a criss-cross – I always do that….so I really racked my brain to come up with a creative use of twine for you.

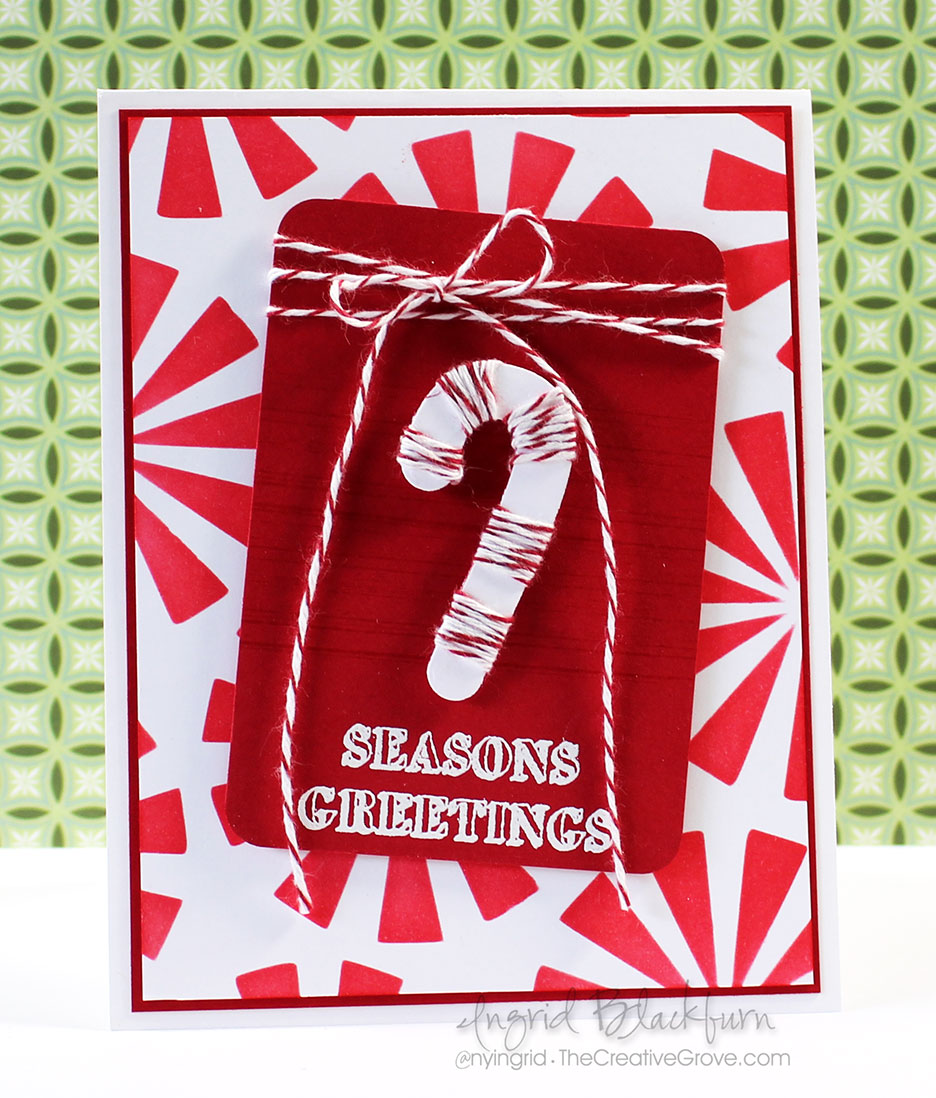
I looked at my stash, and I’ll be honest – I don’t get crazy with purchases like these – I mostly like neutrals like browns, white and black. But I remembered that I had some red/white bakers twine from back in my Stampin Up days. My first idea didn’t pan out, but it was perfect for a candy cane…so the card came together from there – with a little inspiration from a card online. Mind you, my card looks nothing at all like the muse, It was a giant strip of white with red flanking the sides that cemented the idea in my head.

How to use Twine on Cards

Candy Cane Twine Tutorial:

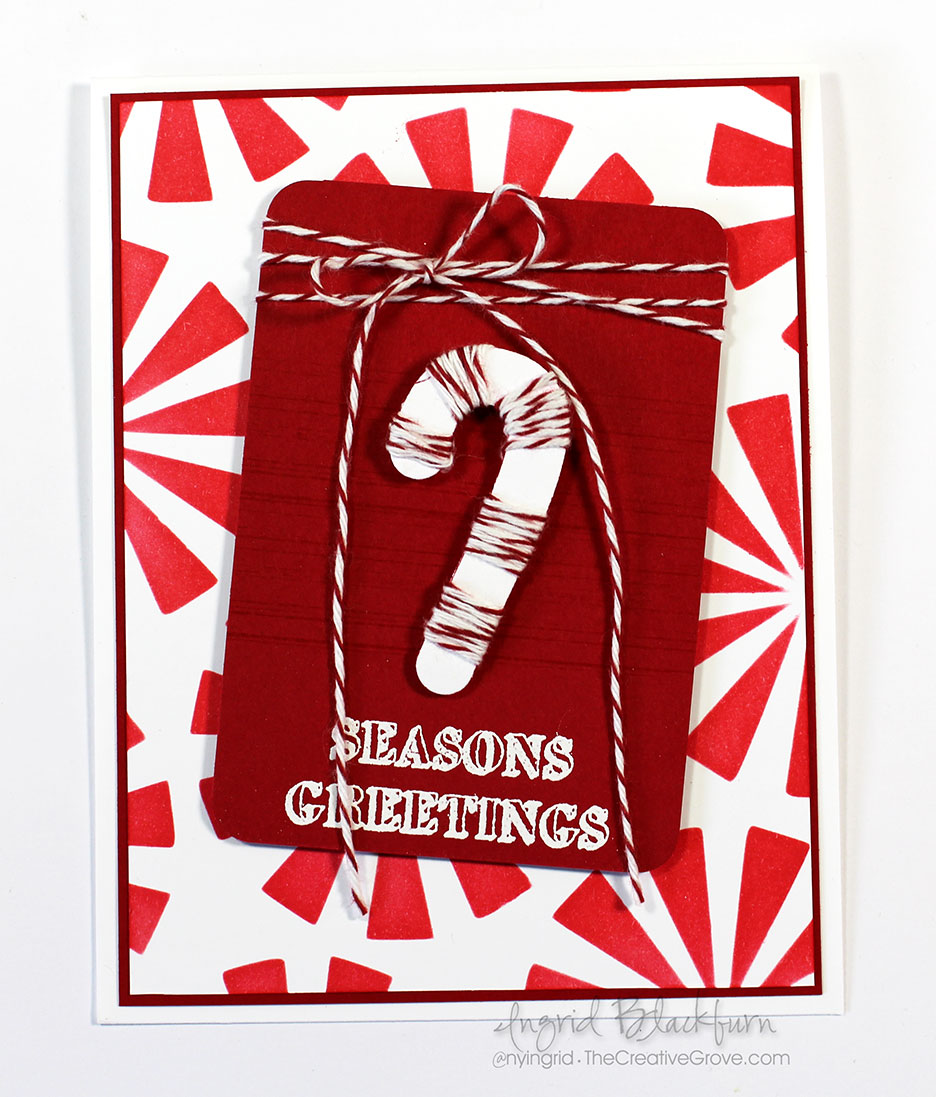
  • Sponge the Merry Go Round Stencil by ARTplorations in Barn Door and Festive Berries Distress Ink onto White Card Stock – 3 7/8 x 5 1/8″
  • Round the corners of a Real Red rectangle – 2 1/3 x 3 1/2″
  • Wrap some red/white twine around the top being sure to criss-cross it at the edges and tie a bow with some long tails. Tip – to get my loops to stay to the top and tails downward, I tie like a kindergartner would with bunny ears and upside down, so the top is toward me. I over-exaggerate the loops and make them smaller after by pulling on the tails.

Candy Cane Christmas Cards with Twine

  • Emboss a greeting at the opposite end in white. I used White EP by Brutus Monroe and the stamp set Mixed Christmas Sentiments by Happy Little Stampers
  • In the middle, stamp some lines in Barn Door using my favorite stamp from the Gorgeous Grunge stamp set by Stampin Up. It’s that little something that really helps to make this piece – I stamped it twice and left lots of space top and bottom.
  • Die cut or hand cut a candy cane image. Mine came from a retired SU die cut set. If you don’t have a die like this, stamp a candy cane on scrap paper, cut out and use that as a guide on the back of your card stock.

Peppermint Christmas Cards - Bakers Twine

  • Wrap the red/white twine spaced out to reflect the red parts of the candy cane. TIP – I never cut my twine. On the back, it connects to the upper pieces. I secured them down with glue and double sided tabs before popping it up on mini foam squares.
  • Attach the tag to your card front with fun foam or foam strips. The height helps to add drama to your card.

Creative Bakers Twine Uses Bakers Twine Tutorial - Ingrid Blackburn

  • Adhere your peppermint background to a real red matte that is 1/16″ larger – 4 x 5 1/4″
  • Attach to a white A2 card base – 4 1/4 x 5 1/2 for a 1/8″ matte and you’re done!

It’s a fun, cute card, right?!!! Now it’s your turn – grab some Twine and jump on into the Twine Challenge over at Happy Little Stampers. And while you’re there – check out all the other great challenges going on!

DIY Christmas Cards - Ingrid Blackburn

Of course, I do like to play along with multiple challenges, and two other’s in mind when I made this card. First up, my inspiration for the red/white – this week’s Muse Christmas Visions. The crazy talented muse this week is Kimberly Weiner – I love everything she creates. Kimberly created a beautiful red/white cardinal creation and that helped me to zero in on my candy cane idea for today’s twine card.

And of course, you know I just LOVE to play along with the CAS Mix it Up challenge as well. This month they’re featuring Die Cuts, so jump on into that fun one too!

Hope to see you in all the challenges! See you in a few days for yet another great project!

Now go get those fingers inky –

Signature

[optin_box style=”12″ alignment=”center” email_field=”email” email_default=”Enter your email address” integration_type=”aweber” double_optin=”Y” list=”3846012″ name_field=”name” name_default=”Enter your first name” name_required=”Y” opm_packages=””][optin_box_field name=”headline”]Learn more with our exclusive FREE video series:[/optin_box_field][optin_box_field name=”paragraph”]PHA+UGx1cyB5b3XigJlsbCBiZSBhZGRlZCB0byBteSBGUkVFIENyZWF0aXZlIFRpcHMgRS1sZXR0ZXIgd2hlcmUgSSBzaGFyZSBleGNsdXNpdmUgcHJvamVjdHMsIHZpZGVvcyAmYW1wOyB0aGUgMTIgRGF5cyBvZiBDaHJpc3RtYXMgUHJvamVjdCBTZXJpZXM8L3A+Cg==[/optin_box_field][optin_box_field name=”privacy”][/optin_box_field][optin_box_field name=”top_color”]undefined[/optin_box_field][optin_box_button type=”0″ button_below=”Y”]Get Instant Access![/optin_box_button] [/optin_box]

Vintage Christmas Star

Vintage Christmas Star 001

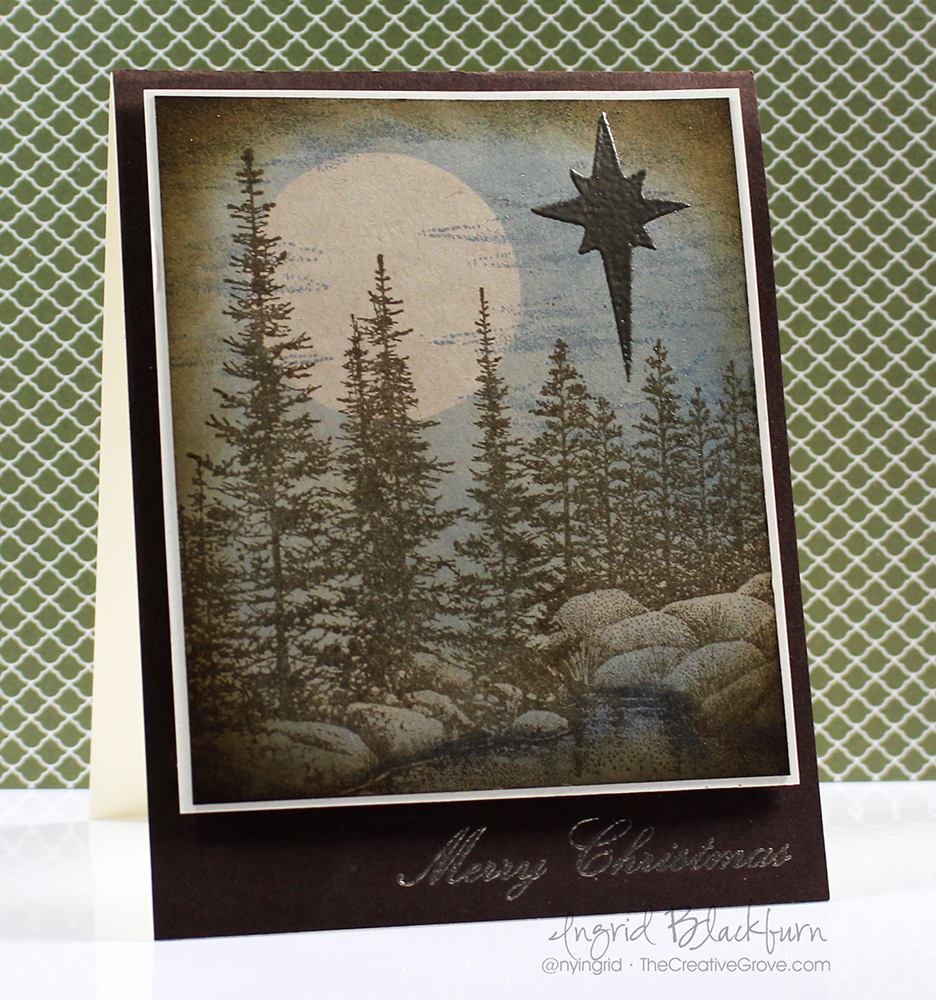
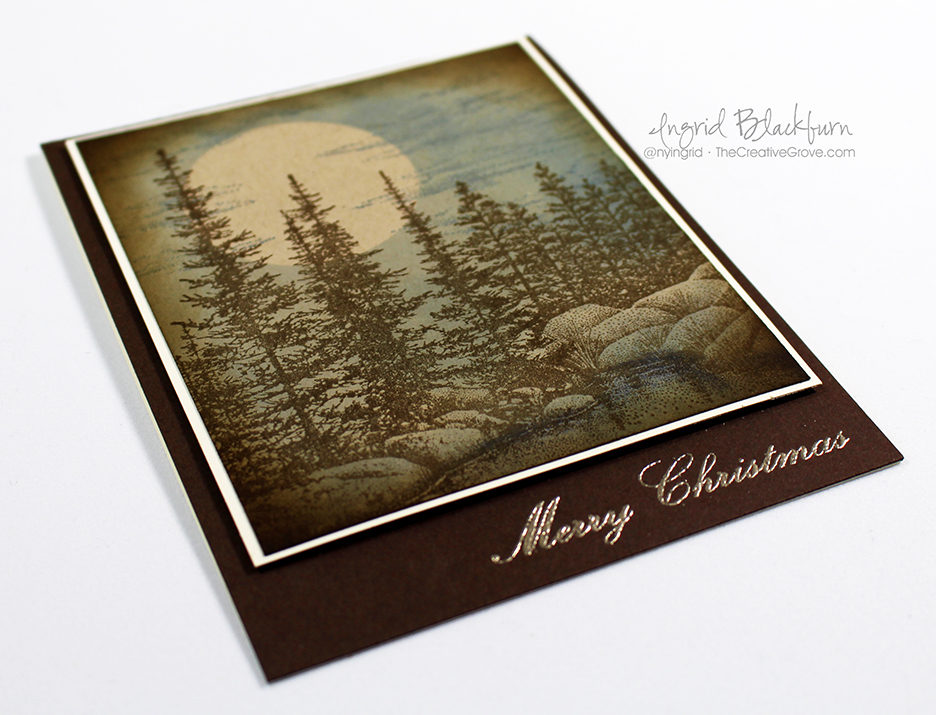
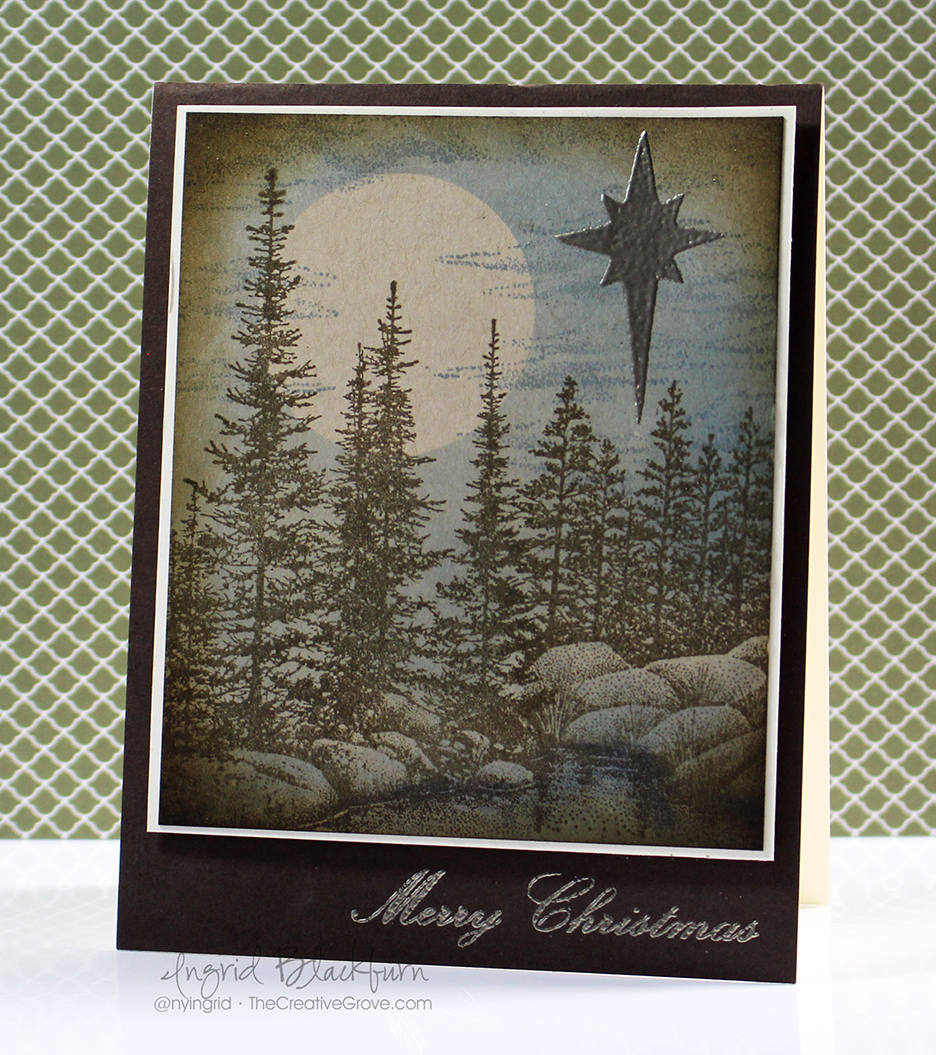
Today’s challenge keyword is star – so let’s learn how to incorporate that into this vintage holiday card. This month’s challenge at Happy Little Stampers is to use a star in some form on your card. I have to admit, I started off in a very different direction…then ultimately decided to create a simple card with a vintage masculine feel that could showcase the ultimate Christmas star.

HLS Christmas Challenge December 2015

I guess I’ve been in a vintage kind of a mood these past few months. At least here on the blog! I don’t know what it is that seems soothing about this color palette to me, but I’m really loving the feel. Maybe it’s because I’ve been injured and not able to walk as much as I would like in the woods…who knows?!! Here’s a quick tutorial for you, and be sure to stop by again next week for the video!

Creating a Quick Vintage Feel to your Holiday Cards –

  • This project was done on kraft colored paper – not white. It helps with the overall look and feel.
  • I find that the brown tone fits this style better than black. So ink your stamps up in a dark brown – something earthy. I used Ground Espresso by Ranger Distress.
  • Stamp the Stampscapes Pines & Rocks Lg on the left and the left side of Lakeside Reflections Lg to the right Tip – use a torn piece of paper towel to mask off the edge and create a seamless scene.

Vintage Christmas Star 002

  • Place two post it notes in copy paper and punch out your moon with a 1 1/4″ circle punch. This will be your mask.
  • Place your moon where you’d like it before adding blues to the sky
  • Use a mini sponge tool and some blue hues to shade in your water and sky.
  • Stamp Cloud Strips Lg by Stampscapes in Stormy Sky Distress. Be sure to overlap the moon slightly.
  • Once you have the look you’d like – add a little shading with s neutral like Weathered Wood Distress to the rocks.
  • Sponge the entire scene around the perimeter with  a brown – I used Gathered twigs for a slightly different feel than the trees.
  • Add your star and emboss in Pewter. I used the Nativity Angel Stencil by Stamplorations.

Vintage Christmas Star 004

  • The perfect sentiment makes this card and nails the vintage feel. Here you see one of the many sentiments from Mixed Christmas Sentiments by Happy Little Stampers. Emboss it in Pewter for a great look, rather than something bright.
  • The scene is matted onto Vanilla card stock for contrast before being popped up on fun foam onto an Espresso card base.

I do hope you like this card – it’s actually a great one to mass produce and goes much faster than you think! I hope this inspired you to create something special with a star for your cards. Be sure to enter them into the Christmas Challenge at Happy Little Stampers!

Keep those fingers inky –


Signature.jpg

[optin_box style=”2″ width=”500″ alignment=”center” email_field=”email” email_default=”Enter your email address” integration_type=”aweber” double_optin=”Y” list=”3846012″ name_field=”name” name_default=”Enter your first name” name_required=”N”][optin_box_field name=”headline”]Learn with our exclusive FREE Video Series[/optin_box_field][optin_box_field name=”paragraph”]PHA+R2V0IHRoZSBmcmVlIENyZWF0aXZlIFRpcHMgRS1sZXR0ZXIgYW5kIGxlYXJuIHdpdGggc3Vic2NyaWJlciBleGNsdXNpdmUgdmlkZW8gYW5kIHBpY3RvcmlhbCBjb250ZW50LiA8ZW0+PHN0cm9uZz48c3BhbiBzdHlsZT0iY29sb3I6ICM4MDAwMDA7Ij5JbmNsdWRpbmc8L3NwYW4+wqA8L3N0cm9uZz48L2VtPm91ciB5ZWFybHkgMTIgRGF5cyBvZiBDaHJpc3RtYXMgc2VyaWVzITwvcD4K[/optin_box_field][optin_box_field name=”privacy”][/optin_box_field][optin_box_field name=”top_color”]undefined[/optin_box_field][optin_box_button type=”1″ text=”Subscribe now!” text_size=”26″ text_color=”#ffffff” text_bold=”Y” text_letter_spacing=”0″ text_shadow_panel=”Y” text_shadow_vertical=”1″ text_shadow_horizontal=”0″ text_shadow_color=”#000000″ text_shadow_blur=”0″ styling_width=”36″ styling_height=”15″ styling_border_color=”#000000″ styling_border_size=”1″ styling_border_radius=”6″ styling_border_opacity=”100″ styling_shine=”Y” styling_gradient_start_color=”#345523″ styling_gradient_end_color=”#68ab46″ drop_shadow_panel=”Y” drop_shadow_vertical=”1″ drop_shadow_horizontal=”0″ drop_shadow_blur=”1″ drop_shadow_spread=”0″ drop_shadow_color=”#ffffff” drop_shadow_opacity=”50″ inset_shadow_panel=”Y” inset_shadow_vertical=”0″ inset_shadow_horizontal=”0″ inset_shadow_blur=”0″ inset_shadow_spread=”1″ inset_shadow_color=”#000000″ inset_shadow_opacity=”50″ location=”optin_box_style_2″ button_below=”Y”]Subscribe now![/optin_box_button] [/optin_box]

Happy Little Stampers 2nd Blog Hop!

Welcome to The Creative Grove and the second Blog Hop for Happy Little Stampers! Chances are you hopped along from Carol’s blog. Today I have three projects to share for you from the second release at Happy Little Stampers!

Happy Little Stampers Blog Hop

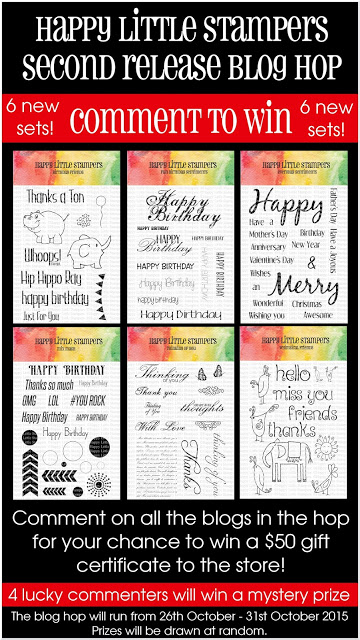
In addition to some great inspired projects, HLS is giving away a $50 gift certificate to the store to one commenter! And, four other randomly selected lucky commenters will win a mystery prize too!  So as you’re hopping along, don’t forget to leave a comment!

Here’s what you do:
  • Start off by leaving a comment on the Happy Little Stampers blog, and then continue on to each Designer.
  • Be sure to comment on all the blogs – including the Happy Little Stampers blog in order to be eligible for the prizes!
  • The blog hop will run for one week giving you enough time to hop through and check out what the designers will be creating.

I used two of the new sets – Mix Mash and Everyday Sentiments to make some great cards that I hope you’ll love! Here are all the creative tips and details…

Blog Hop Projects

Ingrid Blackburn CAS Cards

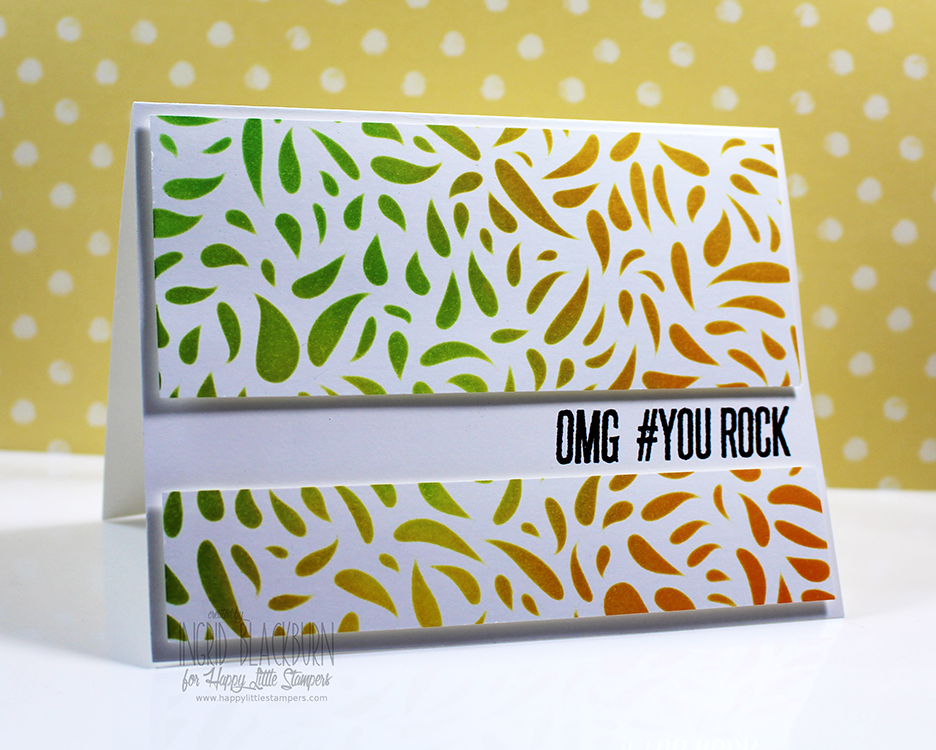
Project One – OMG #YOUROCK

For this fun card I wanted something funky and cool for my niece Rebecca. I love the lightheartedness of some of the sentiments in the Mix Mash set. To create this card:

  • You’ll want to use the OMG and #YouRock stamps embossed in Black to really stand out from the colorful background.
  • You’ll need to match the quirkiness of the stamps, so choose a fun background stamp or stencil. I chose a Hero Arts Stencil that I recently purchased.
  • To get that fun colorful design, use a sponge applicator and sponge Mustard Seed, Fossilized Amber, Mowed Lawn and Spiced Marmalade Distress Inks to create the pattern on a piece of white card stock.

Hero Arts Stencils

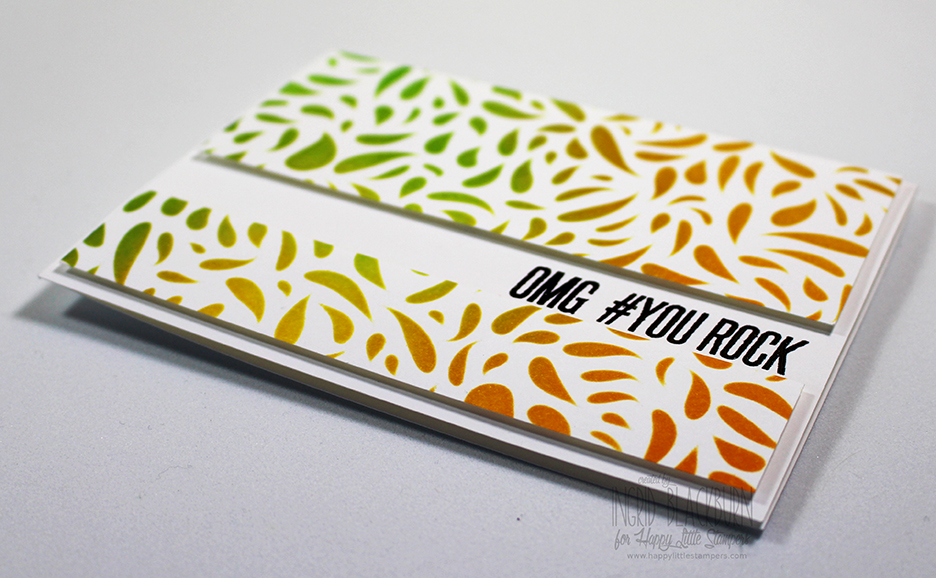
  • To get the sentiment perfectly positioned, you’ll want to figure out how large you want your space to be, then plan on 1/8″ for the top and bottom.
  • I chose 3/4″ for my space and to keep with the Rule of Thirds theory of design, made sure to split my piece 1/3 of the way through. This helps to balance your project.
  • For a little dramatic effect – pop your panels up with dimensionals or foam tape. That will help to give you a great shadow effect.

It’s a fun project, right?

Happy Little Stampers

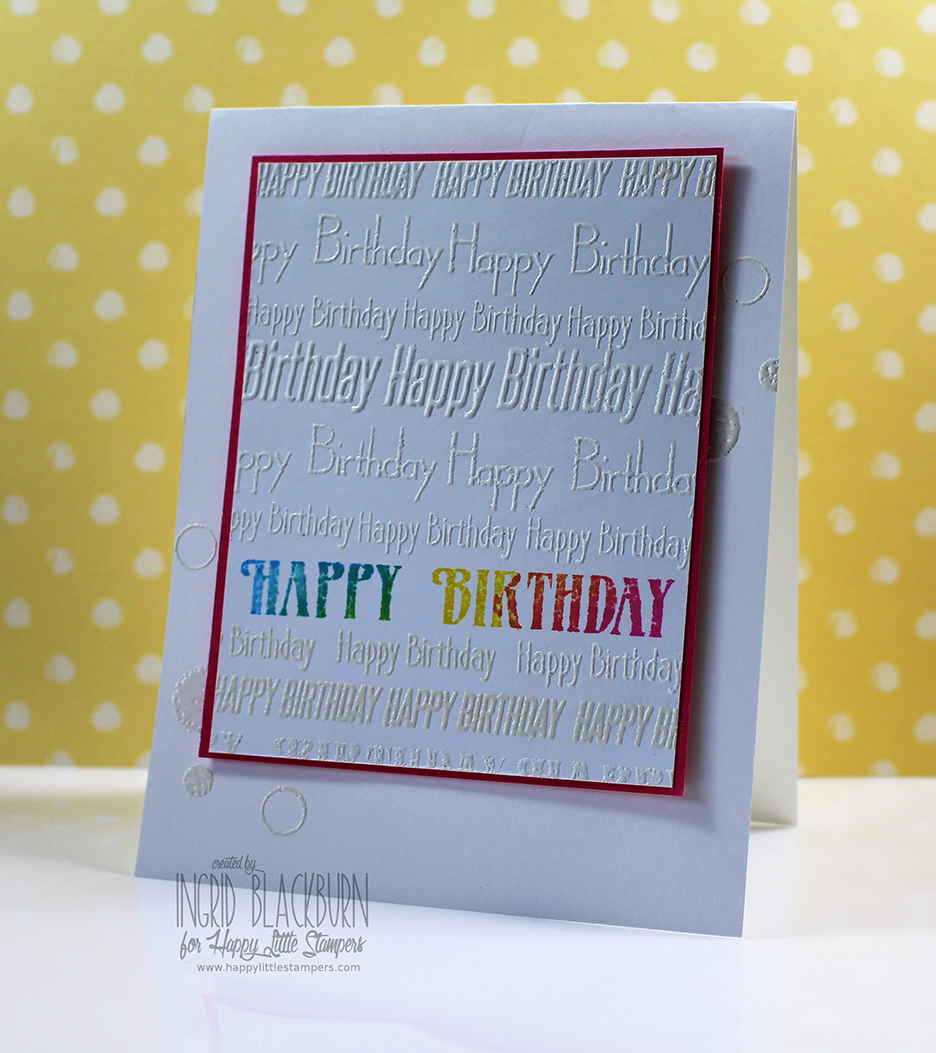
Project Two – Spunky Birthday

I just spent several weeks with my family in NY. My 10 year old niece Chiarra is all spunk and spirit. She loves to break out in song, dance or just start acting a scene – mark my words…she’ll be a future actress! I couldn’t get her singing out of my head this morning when I was stamping – so… fun, bright and playful is the direction this project went.

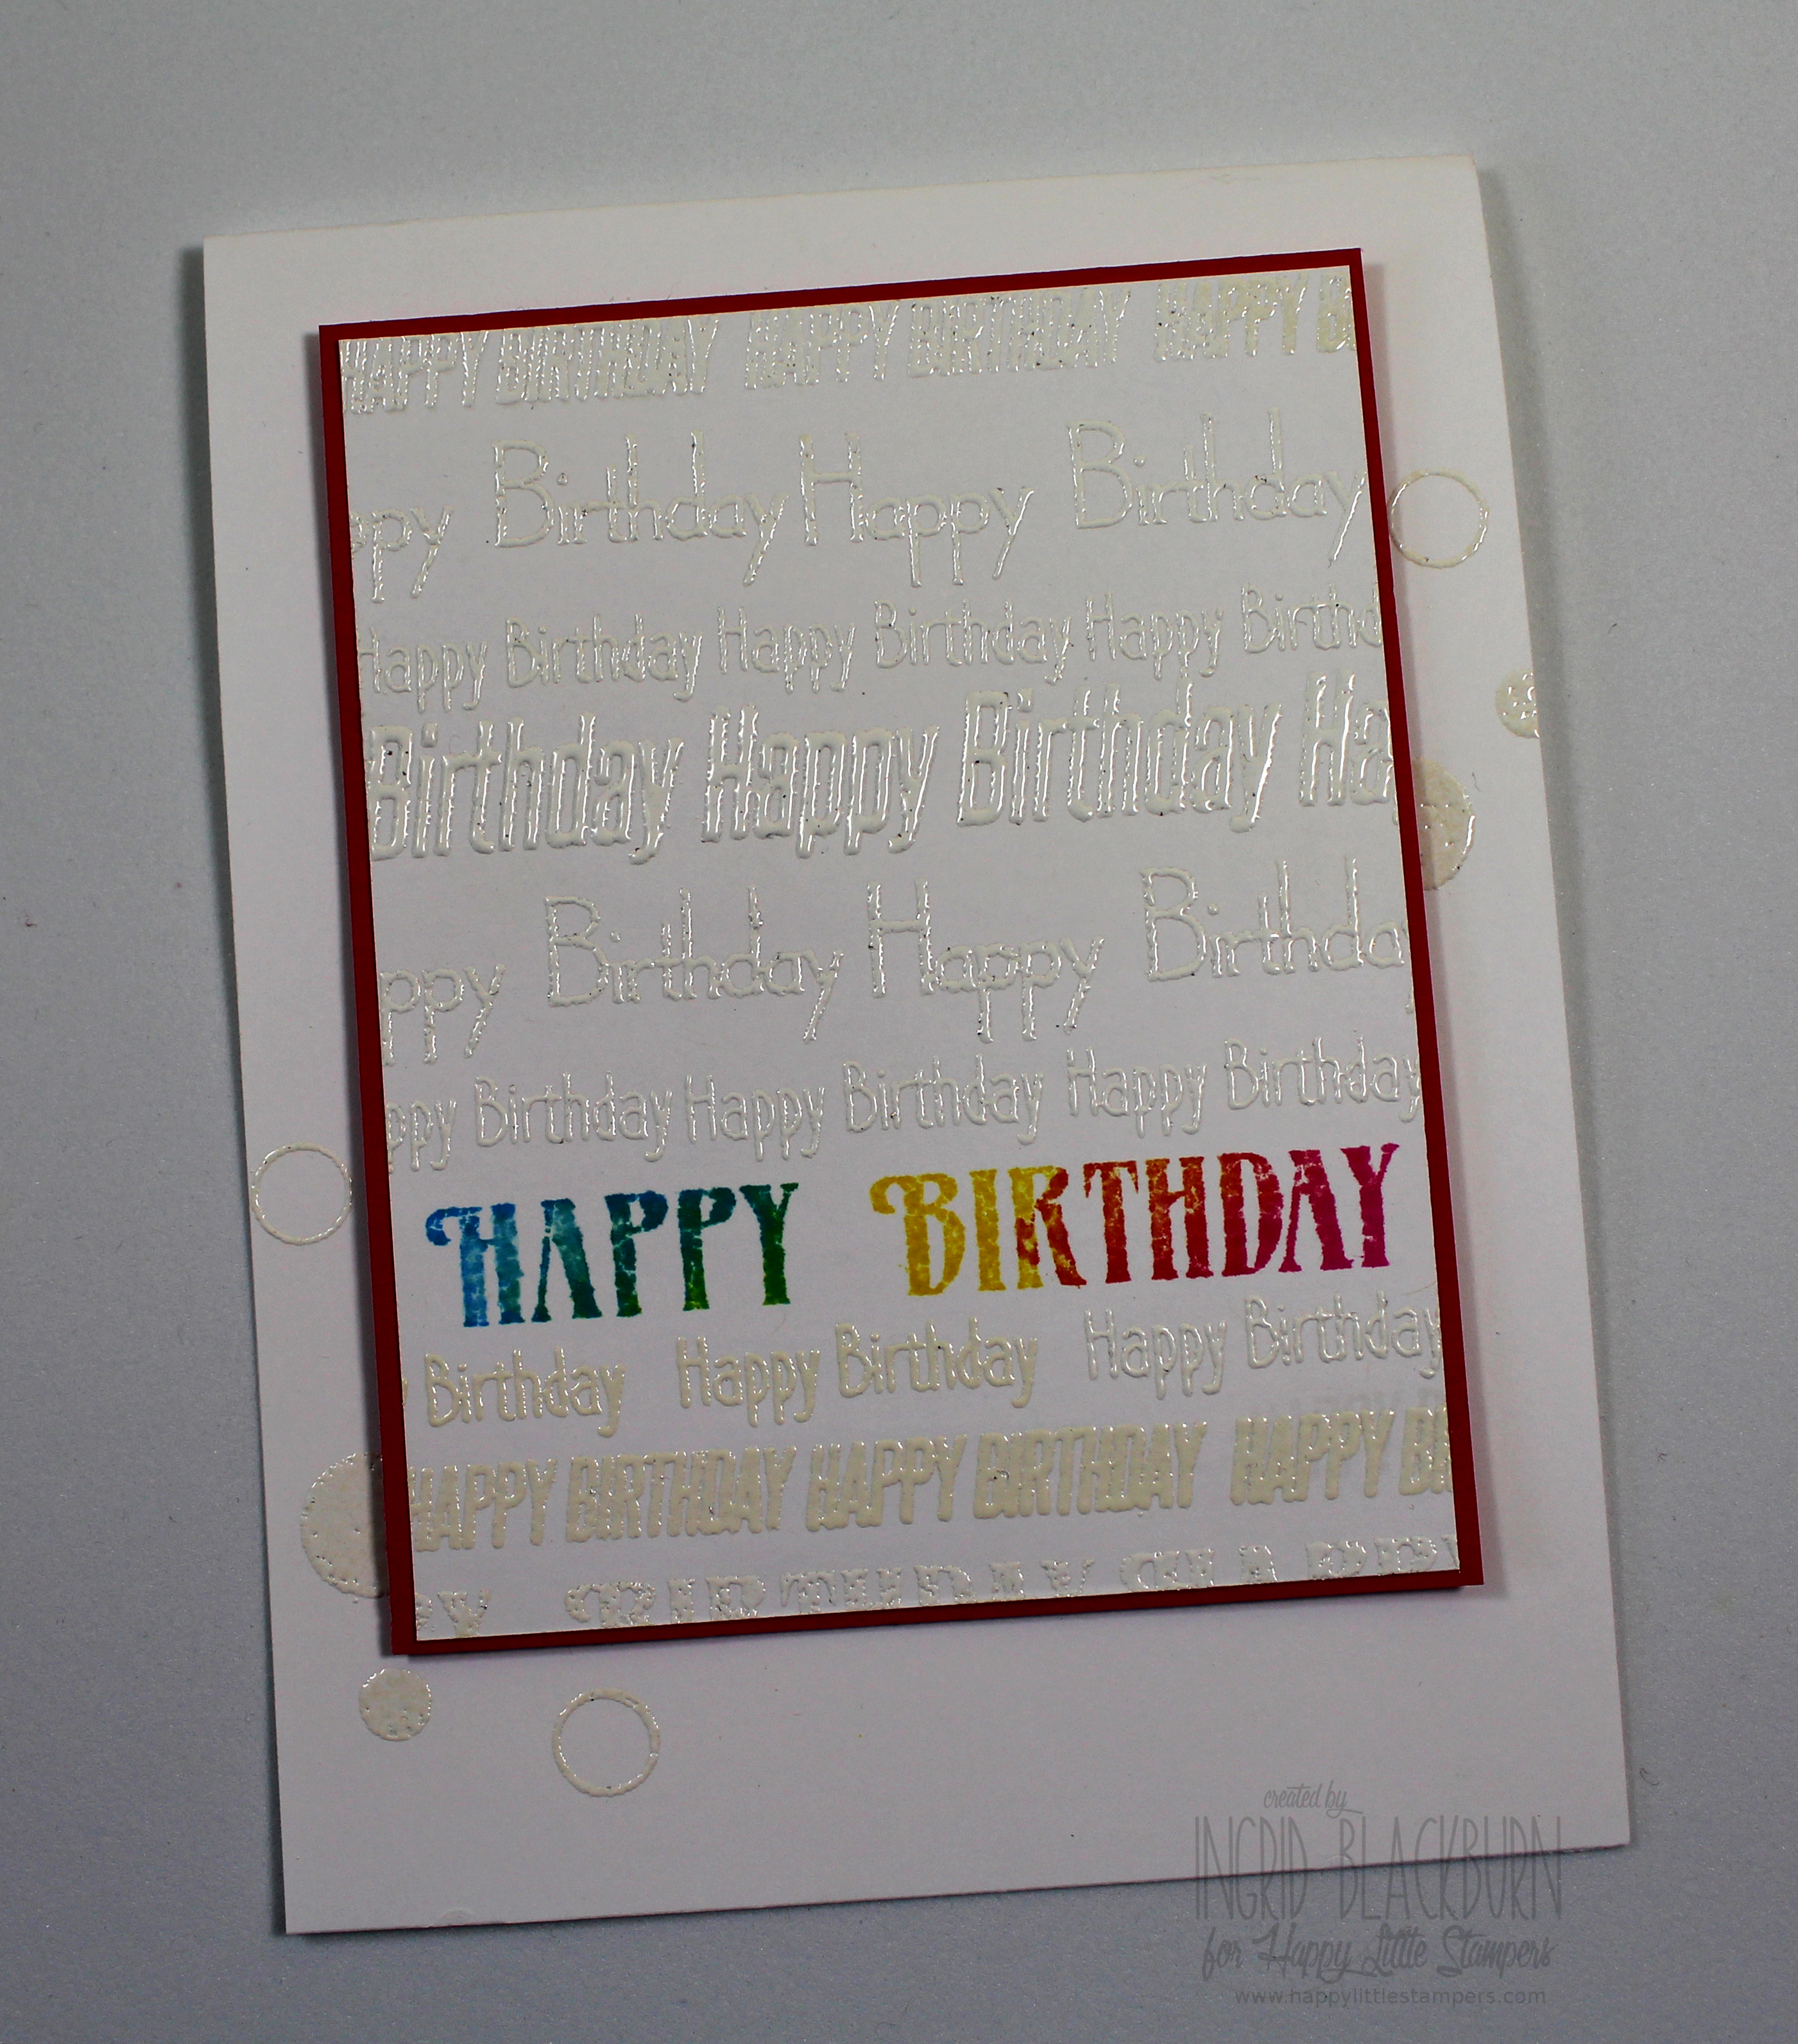
The Mix Mash stamp set is filled with great birthday sentiments and some awesome little detail stamps. I actually was going to add white sequins to it, when I decided to add the circle and lined circles in their place – it looks way better and talk about versatile! I love stamps like that. This project is a fun mixed mash itself! Here is how to recreate it:

  • First stamp your main sentiment.  Ink up the center of the largest Happy Birthday stamp with Distress – More Mustard, then use Picked Raspberries and Salty Ocean being sure to overlap them a bit to get a great mix of color. Keep it towards the bottom of a 3 3/4 x 4″ panel, leaving an inch to stamp other sentiments.
  • An embossing buddy/destatic tool is key for this project, as you’ll be handling it numerous times. Use your embossing buddy on a space above or below your main sentiment, and stamp one of the happy birthday stamps repeatedly across in versamark.

Happy Little Stampers Stamps

  • Try to keep them aligned. I had to stamp, add powder, then stamp again to see it right.
  • Once you have white powder on a line  – emboss with a heat tool and then repeat till your panel is filled.
  • Matte onto a matching panel – I used Melon Mambo by SU.  I trimmed my panel so that it was just slightly smaller than a 1/16″ border.
  • Figure out where you are placing your panel and stamp solid and lined circles in a few spots as in the card.
  • Pop up your panel and you’re all set!
  • This card is an A2 top folding card – 4 1/4 x 5 1/2″.

I know she’ll love it, it’s bright and fun. The white Happy Birthday’s really make a statement.

Masculine Cards

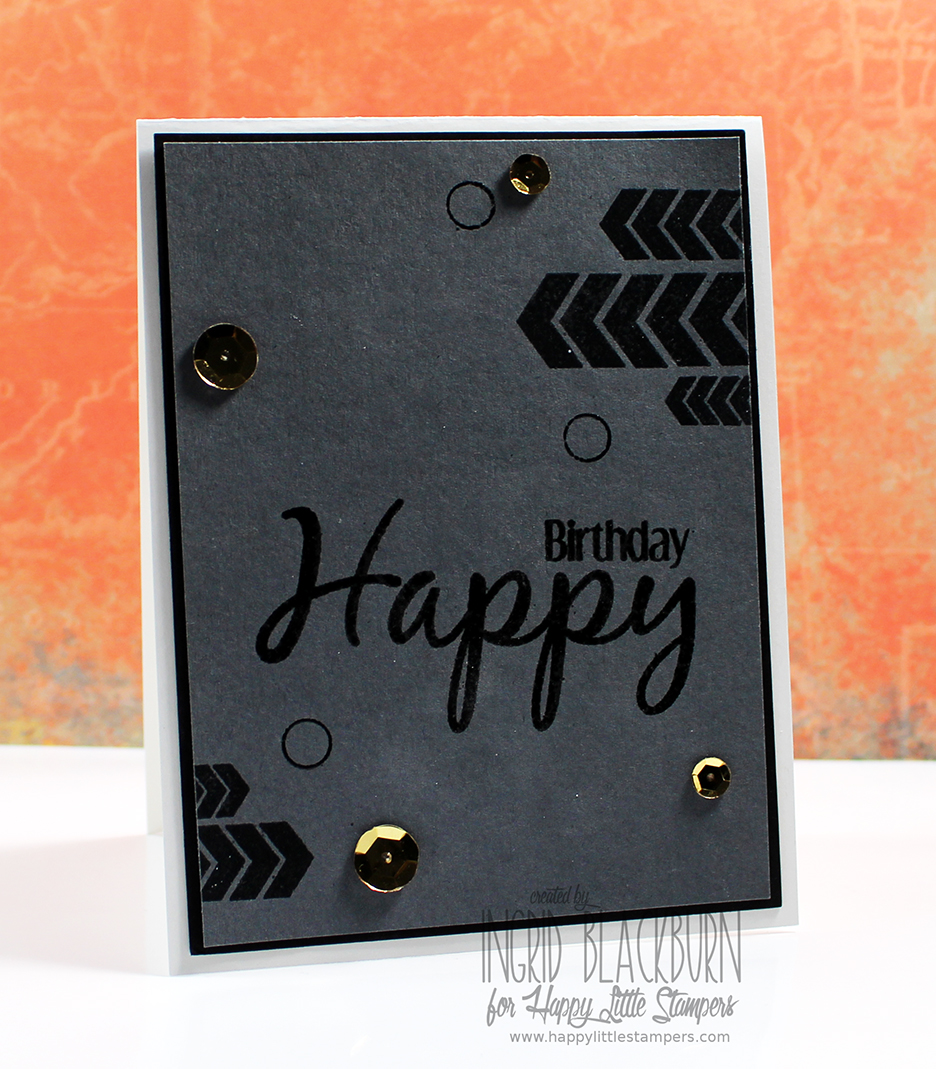
Project Three – Masculine Birthday

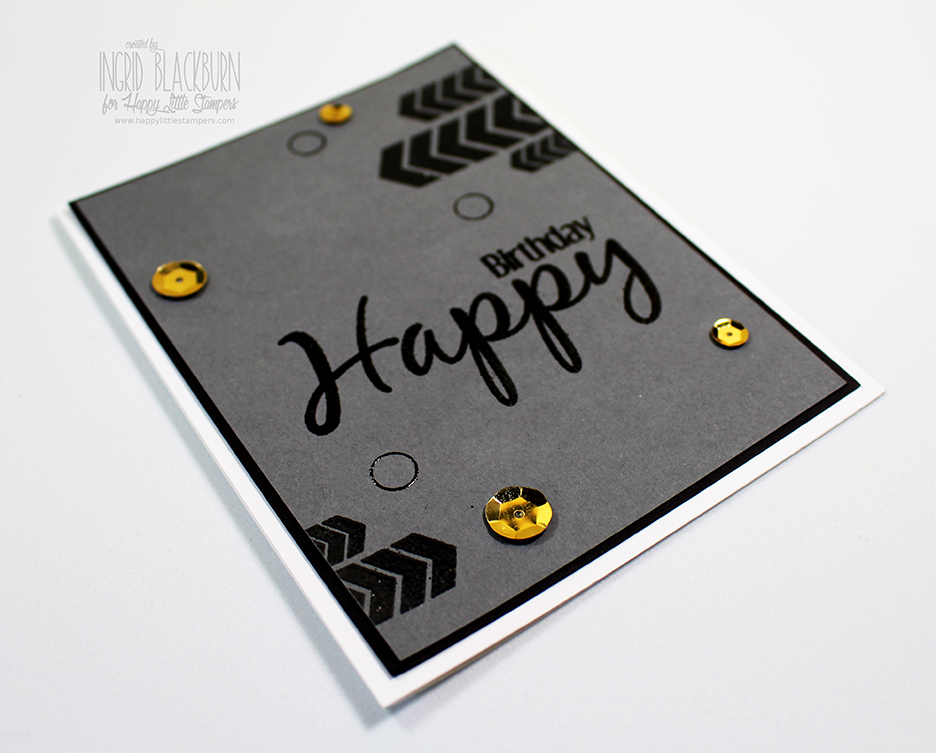
For this card, I wanted a more masculine look for my nephew Matt’s upcoming birthday. So I decided to go with a grey panel and keep it rather simple. Originally I was going to stamp and emboss the greeting on vellum, tear and overlay, but as I began, I thought simple might be better here. What do you think? This one is pretty straightforward, but here’s the step by step anyway!

  • Stamp and emboss your greeting from Everyday Sentiments in black about 1/3 rd of the way up from the bottom onto a piece of Basic Grey card stock (SU) – 3 7/8 x 5 1/8″.
  • Stamp the arrow stamps from the Mix Mash set in Versamark and emboss with clear powder to get the darker grey color.

Everyday Sentiments Masculine Card 002

  • Stamp and emboss your circle stamps from the Mix Mash set in black.
  • Add gold sequins and matte onto a black base 1/16″ larger ( 4 x 5 1/4″)
  • Adhere to a top folding A2 card – 4 1/4 x 5 1/2″.

It’s a simple card, but sometimes simple is just perfect. One of the reasons I just love CAS cards!!

Well, there you have it – just a few ideas and fun ways to use some of the new stamp sets in this second release. I hope you enjoyed the creative juice…and that’s a wrap for the second blog hop! If you didn’t start at the beginning with the Happy Little Stampers blog…be sure to head there next and hop along the way for 20 other designers ideas! WOW…that’s a ton of creativity!!

And be sure to comment to win too – in order to win, you need to comment on all the blogs including the HLS blog. Happy Hopping, see you next time!!

Signature-24-pt_thumb.jpg

Here are links for the whole hop!

Happy Little Stampers
Kylie Purtell
Loll Thompson
Joyce Mehrberg
Gloria Lee
Tanja Kabel
Susan Bridgman
LesLee
Gail Townsend
Carol Steedman
Melissa Lane
Linda Walmsley
Birgit Norton
Kim Heggins
Valentyna
Sue T.
Bonnie Klass
Toni
Chrissie
Anita
Carol Dunham
Ingrid Blackburn <—- You are Here!

CAS Non-traditional Christmas

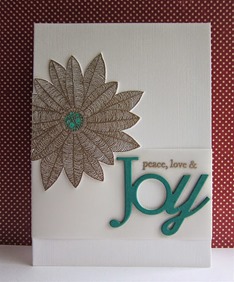
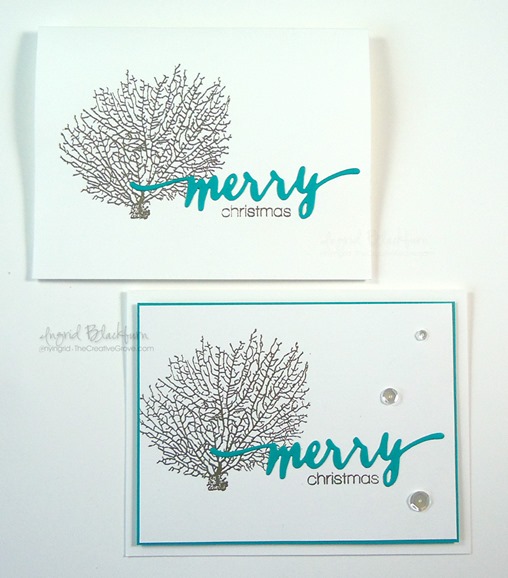
Do you ever use non-traditional Christmas colors or images? Today’s projects were inspired from Muse: Christmas Visions. Chris Blagrave created this non-traditional flower card. Her reasoning behind it was that it reminded her of a Poinsettia. Here is mine along side her creation.

Chris Blagrave Muse Christmas Visions   One Layer Christmas Cards

I love the clean and simple style of the card, it’s crisp and straightforward. The sentiment pops and the warm silver is perfect for it.

When I look at her card, I think Peacock for some reason – maybe it’s the color and the way her flower fans out. I didn’t have a peacock image, and I didn’t want to use Distress which has the perfect shade – Peacock Feathers. I wanted to use Bermuda Bay by Stampin Up, so off I went to create. My original project was this:

Non Traditional Evergreen Christmas Cards

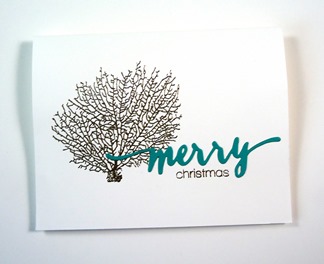
Although it is a great simple CAS card, something just wasn’t sitting well with me as far as the inspiration went. So I created the coral embossed card instead.

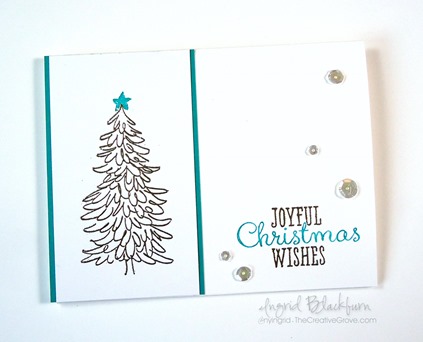
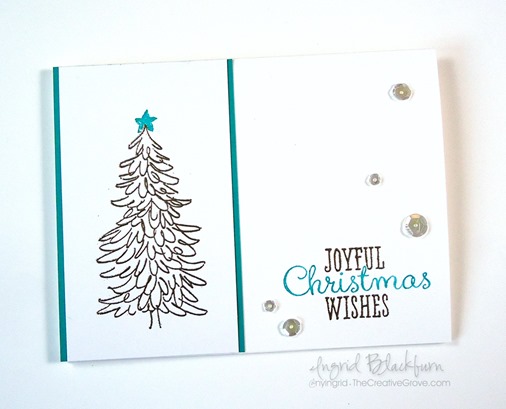
The image is perfect, and I love the Teal Christmas in-between the Silver Embossed Joyful Wishes – that looks great! You will want to use a Bermuda Bay Marker to do that part first, then you would use a stamp-a-majig/Misti to add the Versamark Words to emboss them in the Pewter.

My Non-Traditional Christmas Creation

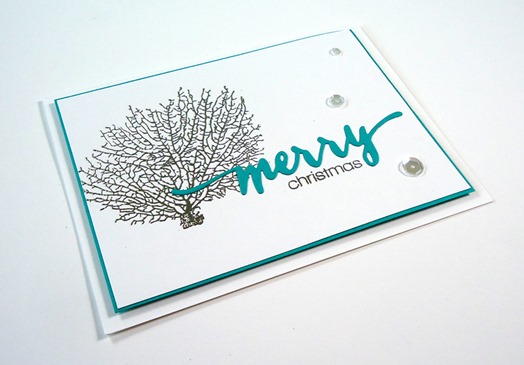
I also created one where the coral was going off the side and a bit smaller so I could layer it with a pop of the Bermuda Bay teal color.  You can also add a few sequins – it didn’t necessarily need it, but I couldn’t resist! Smile

Beach Christmas Cards

Overall, what you’ll love the most is how quick and easy these cards are to make. I literally made all three in a just a few minutes – they all work for Christmas cards.

I found it so interesting that the Coral stamp worked so well as a non-traditional Christmas image. It’s a beauty when embossed – and would be good for any occasion – especially weddings!

TIP – You will want to stay with a rich feel, so you’ll want to use Pewter instead of traditional Silver. It’s a bit warmer and muted which suits this card much better.

If I had to pick an absolute favorite…it’s the One Layer one! The simplicity and ease of just the single layer is stunning.

How about you? Which one is your favorite? Tell me in the comments – I’d love to know.

Quick DIY Christmas CardsClean and Simple Christmas Cards

Have fun crafting, be sure to whip out your Bermuda Bay or any Teal color – Peacock Feathers Distress would be great! Try the non-traditional Christmas route…you may just surprise yourself!

Signature 24 pt


[optin_box style=”13″ width=”500″ alignment=”center” action=”https://www.aweber.com/scripts/addlead.pl” disable_name=”Y” method=”post” email_field=”email” email_default=”Enter your email address” integration_type=”aweber” double_optin=”Y” list=”3846012″ name_field=”name” name_default=”Enter your first name” name_required=”Y”][optin_box_field name=”headline”]If you enjoyed this tutorial…[/optin_box_field][optin_box_field name=”paragraph”]PHA+4oCmeW914oCZbGwgbG92ZSBvdXIgPGVtPjxzdHJvbmc+PHNwYW4gc3R5bGU9ImNvbG9yOiAjMjQ0YzVlOyI+ZnJlZTwvc3Bhbj4gPC9zdHJvbmc+PC9lbT5zdWJzY3JpYmVyIG9ubHkgdmlkZW8gc2VyaWVzLiDCoExlYXJuIG5ldyB0ZWNobmlxdWVzIHRocm91Z2ggb3VyIDxzcGFuIHN0eWxlPSJjb2xvcjogIzI0NGM1ZTsiPjxlbT48c3Ryb25nPmV4Y2x1c2l2ZTwvc3Ryb25nPjwvZW0+wqA8L3NwYW4+Q3JlYXRpdmUgVGlwcyBlLWxldHRlcsKgYW5kIHN1YnNjcmliZXIgb25seSB2aWRlbyBhbmQgcHJvamVjdCB0dXRvcmlhbHMhPC9wPgo=[/optin_box_field][optin_box_field name=”privacy”][/optin_box_field][optin_box_field name=”top_color”]undefined[/optin_box_field][optin_box_button type=”1″ text=”Send me exclusive tips!” text_size=”32″ text_color=”#000000″ text_bold=”Y” text_letter_spacing=”0″ text_shadow_panel=”Y” text_shadow_vertical=”1″ text_shadow_horizontal=”0″ text_shadow_color=”#f6fefb” text_shadow_blur=”0″ styling_width=”50″ styling_height=”19″ styling_border_color=”#000000″ styling_border_size=”1″ styling_border_radius=”6″ styling_border_opacity=”100″ styling_shine=”Y” styling_gradient_start_color=”#a3b640″ styling_gradient_end_color=”#80902c” drop_shadow_panel=”Y” drop_shadow_vertical=”1″ drop_shadow_horizontal=”0″ drop_shadow_blur=”1″ drop_shadow_spread=”0″ drop_shadow_color=”#000000″ drop_shadow_opacity=”50″ inset_shadow_panel=”Y” inset_shadow_vertical=”0″ inset_shadow_horizontal=”0″ inset_shadow_blur=”0″ inset_shadow_spread=”1″ inset_shadow_color=”#80902c” inset_shadow_opacity=”50″ location=”optin_box_style_13″ button_below=”Y”]Send me exclusive tips![/optin_box_button] [/optin_box]

Blue, White & Gold Muse: Christmas Visions

Frosted Evening 002

This week I’m playing along at at few Christmas challenges, but my inspiration came from a new one – Muse: Christmas Visions. It’s no secret that I love clean and simple cards, and Ardyth Percy-Robb is the queen of Clean and Simple. I love all her creations and am inspired by her work. I encourage you to check out her blog – Maskerade. This past week, she started a new Christmas Challenge which is a spin off the weekly challenge – Muse. It’s called Muse: Christmas Visions.

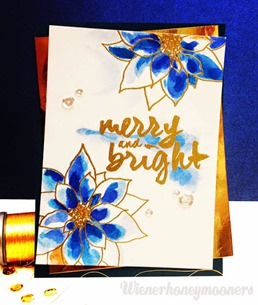
I’m excited to play along in their first challenge. The way the Muse challenge works is a design team member posts a project and you use that as your Muse for your creations. The first challenge was created by Kimberly Wiener and here is her card:

MUSE02

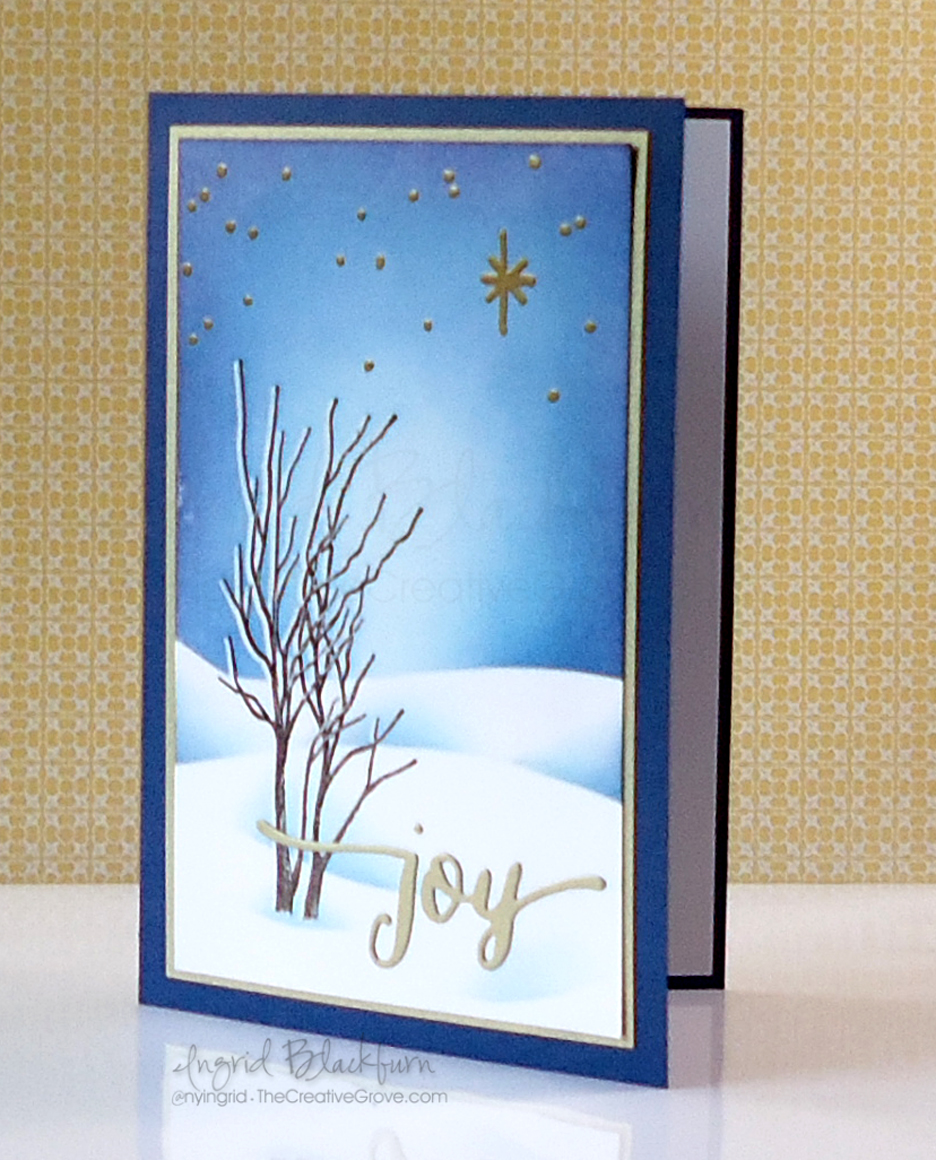
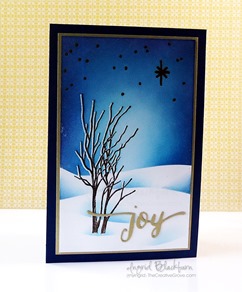
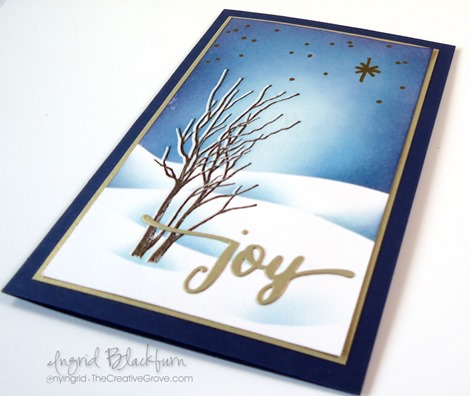
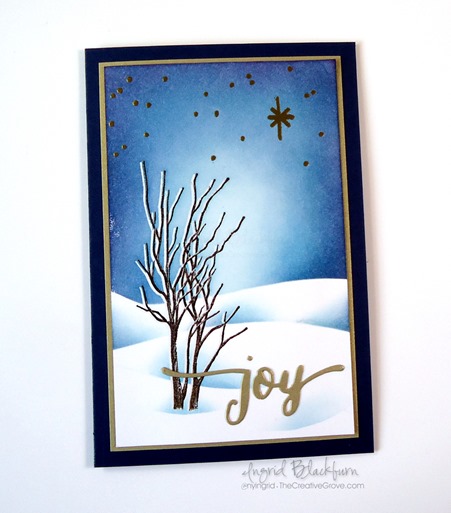
Kimberly’s card has several possibilities to pull from, but I chose the core – Blue, White and Gold. The colors immediately inspired me to think of the Christmas Star and a frosted scene, so I decided to grab one of my Stampscapes stamps and make a scenic card. Here is my creation:

Stampscapes Stamps

If you would like to see the exact video for this project, it’s in our project library at The Creative Grove VIP Community. Click here to find out more about becoming a member.

Creative Tips –

  • To get the soft winter glow in the sky, you’ll want to try Distress Inks as they blend quite effortless – Click Here for a video on how to blend distress inks
  • For the snow banks, I used a few shades of blue to create depth and interest among the drifts. If you’d like to learn more on how to create snow drifts – Click Here for a video on Snow Drifts

Muse Christmas Visions Challenge

  • The Leafless Limb stamp by Stampscapes was stamped twice, once in versamark, then again in Versamark/Espresso just slightly offset. They were then both embossed in clear embossing powder.
  • Embossing your limbs gives you that frosty shadow and allows you to use the emboss resist technique preserving your image while you create the scene around your image.
  • I wanted to have some stars, but wanted a little more gold in my card, so I created several dots with my Versamarker and drew a north star before embossing them in gold.

scenic card tutorials


  • The greeting is cut from Brushed Gold card stock and the Hand Lettered Holiday dies from WPlus9.
  • The scene is matted onto a brushed gold card stock layer before going onto a Night of Navy layer by Stampin Up.

I’m also submitting this project to three other great challenges that I encourage you to check out:

157

I love the feel of this peaceful frozen evening, I hope you do to! I encourage you to play along in all the above challenges, I had fun creating this one, and am excited for a few more at Muse: Christmas Visions. Smile

See you soon –

Signature 24 pt


[optin_box style=”13″ width=”500″ alignment=”center” action=”https://www.aweber.com/scripts/addlead.pl” disable_name=”Y” method=”post” email_field=”email” email_default=”Enter your email address” integration_type=”aweber” double_optin=”Y” list=”3846012″ name_field=”name” name_default=”Enter your first name” name_required=”Y”][optin_box_field name=”headline”]If you enjoyed this tutorial…[/optin_box_field][optin_box_field name=”paragraph”]PHA+4oCmeW914oCZbGwgbG92ZSBvdXIgPGVtPjxzdHJvbmc+PHNwYW4gc3R5bGU9ImNvbG9yOiAjMjQ0YzVlOyI+ZnJlZTwvc3Bhbj4gPC9zdHJvbmc+PC9lbT5zdWJzY3JpYmVyIG9ubHkgdmlkZW8gc2VyaWVzLiDCoExlYXJuIG5ldyB0ZWNobmlxdWVzIHRocm91Z2ggb3VyIDxzcGFuIHN0eWxlPSJjb2xvcjogIzI0NGM1ZTsiPjxlbT48c3Ryb25nPmV4Y2x1c2l2ZTwvc3Ryb25nPjwvZW0+wqA8L3NwYW4+Q3JlYXRpdmUgVGlwcyBlLWxldHRlcsKgYW5kIHN1YnNjcmliZXIgb25seSB2aWRlbyBhbmQgcHJvamVjdCB0dXRvcmlhbHMhPC9wPgo=[/optin_box_field][optin_box_field name=”privacy”][/optin_box_field][optin_box_field name=”top_color”]undefined[/optin_box_field][optin_box_button type=”1″ text=”Send me exclusive tips!” text_size=”32″ text_color=”#000000″ text_bold=”Y” text_letter_spacing=”0″ text_shadow_panel=”Y” text_shadow_vertical=”1″ text_shadow_horizontal=”0″ text_shadow_color=”#f6fefb” text_shadow_blur=”0″ styling_width=”50″ styling_height=”19″ styling_border_color=”#000000″ styling_border_size=”1″ styling_border_radius=”6″ styling_border_opacity=”100″ styling_shine=”Y” styling_gradient_start_color=”#a3b640″ styling_gradient_end_color=”#80902c” drop_shadow_panel=”Y” drop_shadow_vertical=”1″ drop_shadow_horizontal=”0″ drop_shadow_blur=”1″ drop_shadow_spread=”0″ drop_shadow_color=”#000000″ drop_shadow_opacity=”50″ inset_shadow_panel=”Y” inset_shadow_vertical=”0″ inset_shadow_horizontal=”0″ inset_shadow_blur=”0″ inset_shadow_spread=”1″ inset_shadow_color=”#80902c” inset_shadow_opacity=”50″ location=”optin_box_style_13″ button_below=”Y”]Send me exclusive tips![/optin_box_button] [/optin_box]

Non-Traditional Christmas Colors

Non-traditional Christmas 016

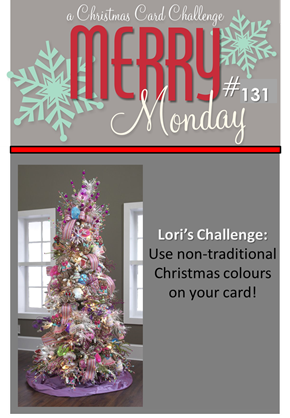
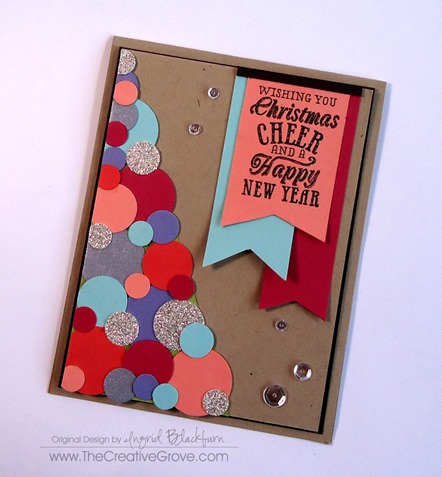
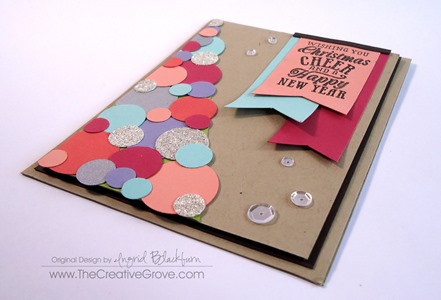
When you think of Christmas, if you’re anything like me I think of deep reds and greens, silver and gold and of course rich blues – well, I have a soft spot for jewel toned blue wrapping paper!  This week, over at Merry Monday Christmas Challenge, we’ve been challenged to use non-traditional Christmas colors.  Well, I think this card definitely fits the bill.  Here’s the inspirational photo…I think you can tell where my inspiration came from – Mine is a version of this tree!

131

And just to toot the horn a little….I was an honorable mention in last weeks challenge!  If you missed it, be sure to catch my fun snowy drift project and video here.

Honorable Mention

Non-traditional Christmas 020Non-traditional Christmas 022

Thanks for stopping by today – I had a ton of fun working with all sorts of colors I don’t usually use this week.  I hope you like the end result, I actually really love it!  So glad to step outside my comfort zone, yet again thanks to this challenge.  I encourage you to play along too!

Signature

12 Days of Christmas starts soon!

Be sure to sign up for the Creative Tips Newsletter – our 12 Days of Christmas starts at the end of this month!  Don’t miss out – and to tie you over till it starts, you’ll get a fun video series that will get your card making juices flowing!  Sign up here.