Faded Double Stenciling Video + Sneak Peek

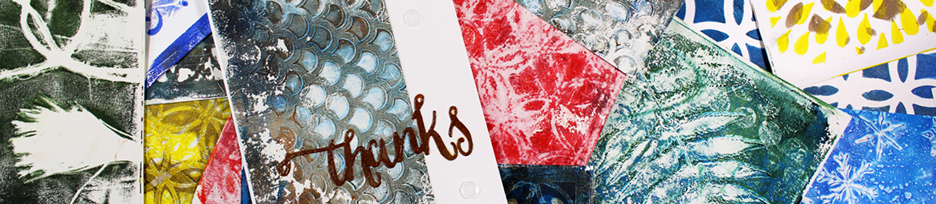
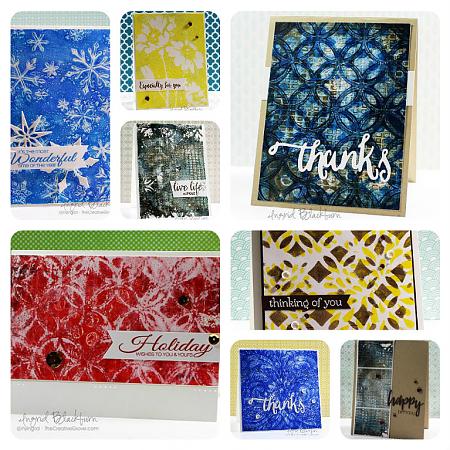
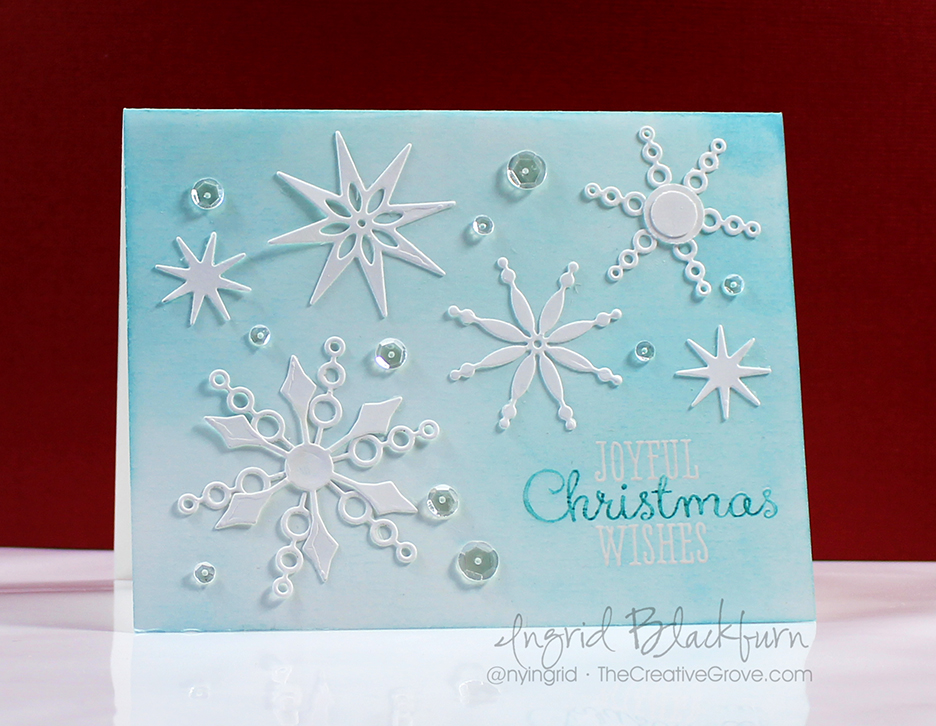
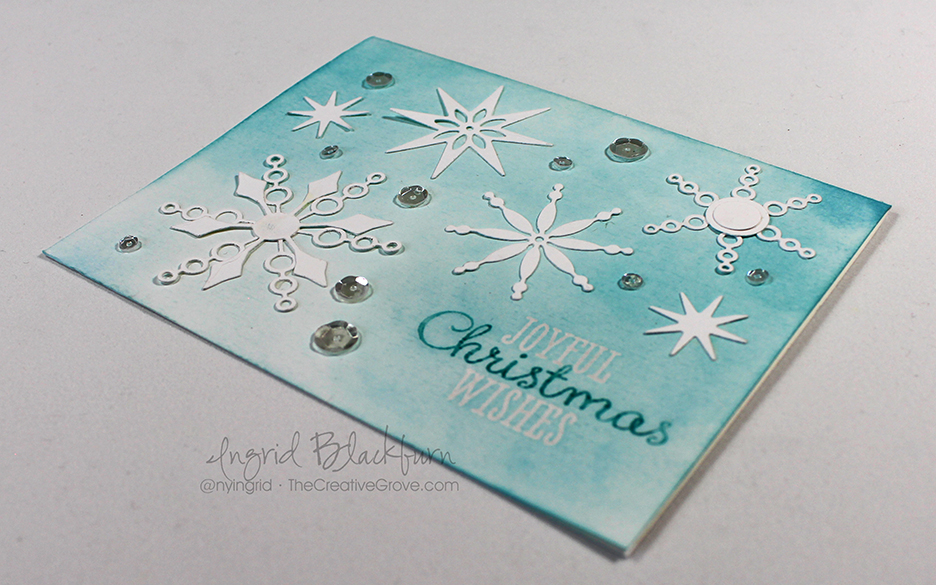
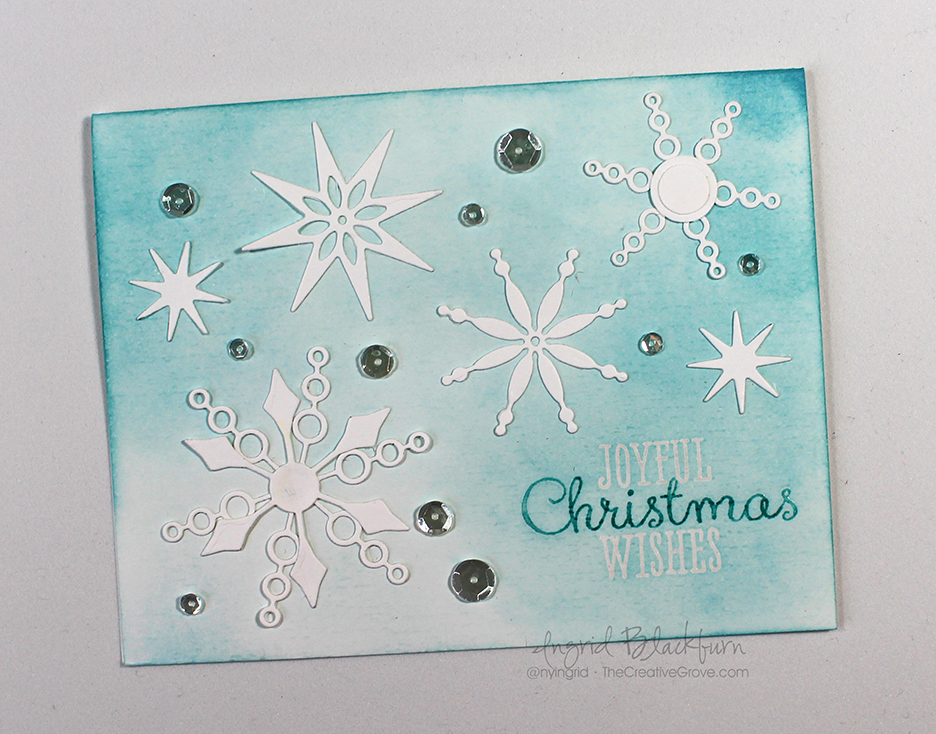
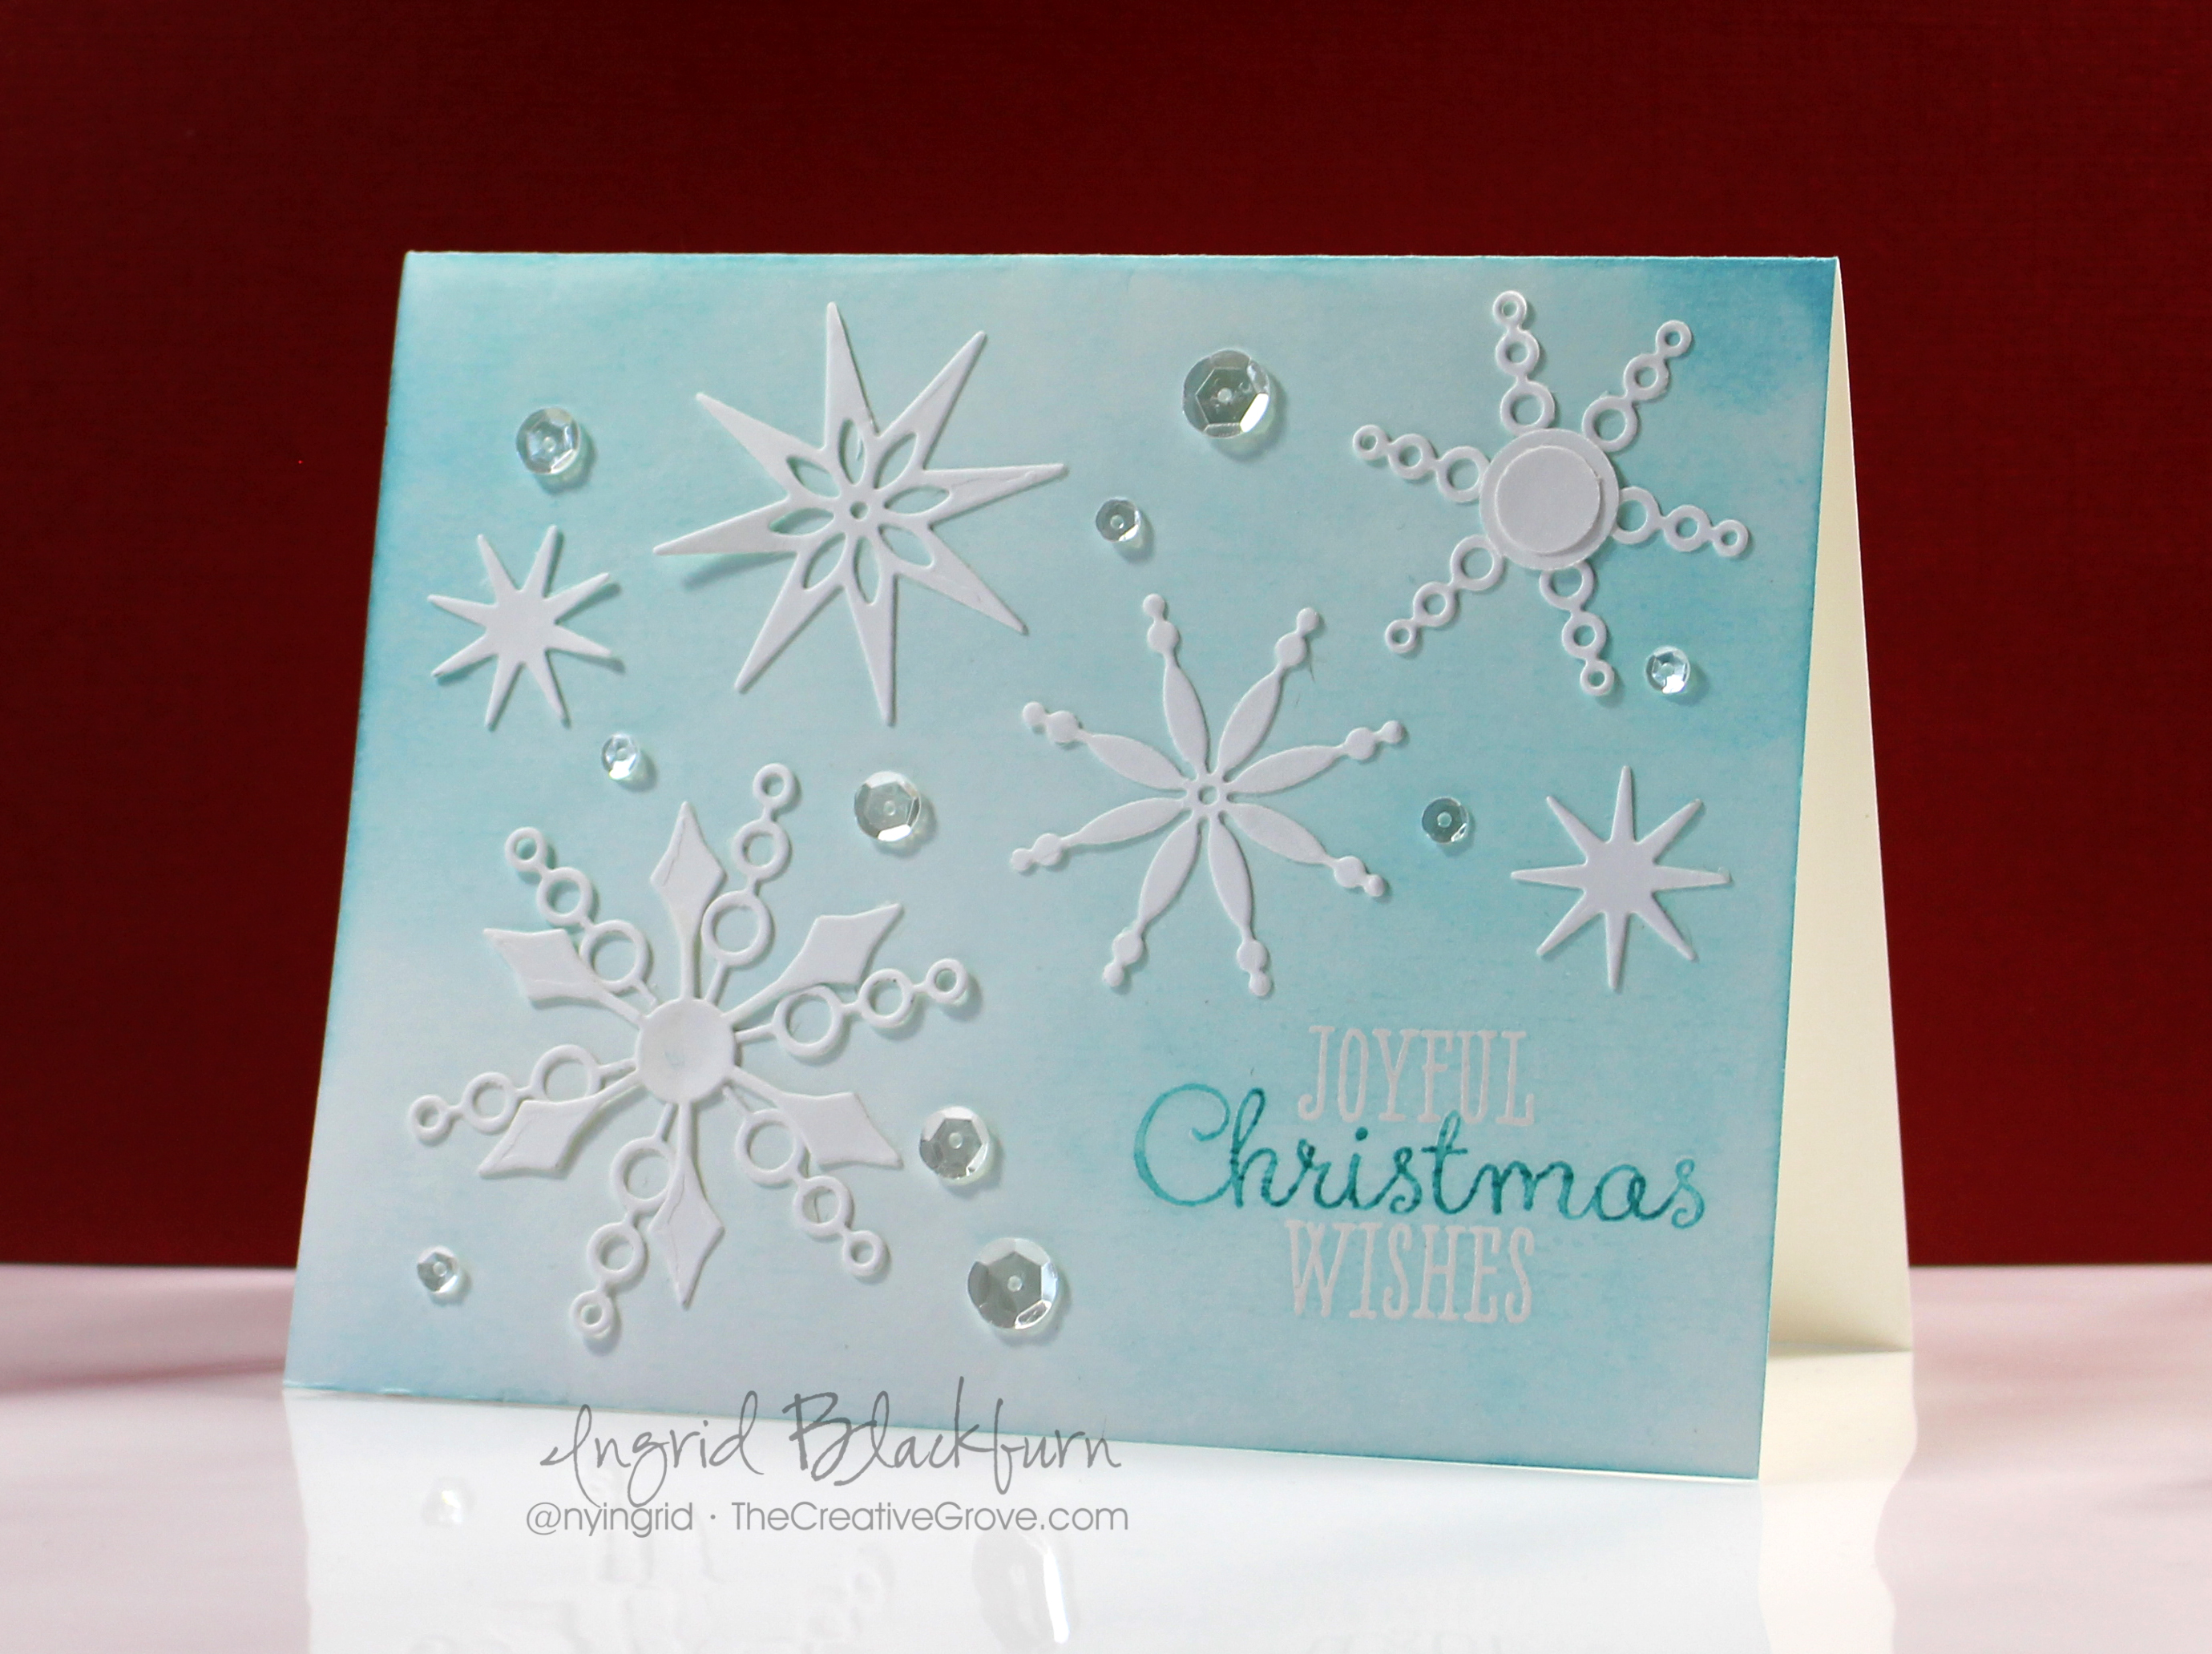
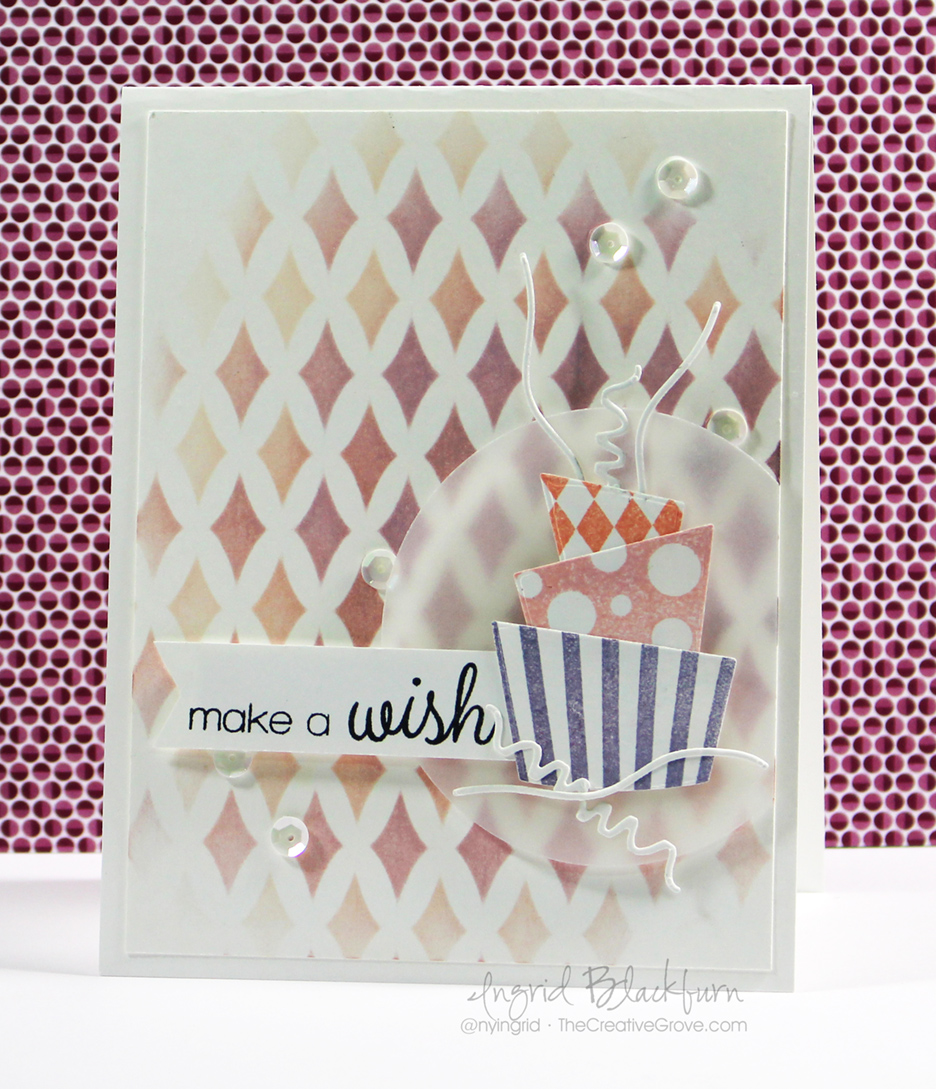
It’s Wednesday, and that means a sneak peek into the fun new challenge over at StampNation, but first I have the Crooky Cake video I promised. This video highlights the faded double stenciling technique, which is awesome for any background. If you recall, a few days ago I posted this card:

Frosted-Crooky-Cake-001

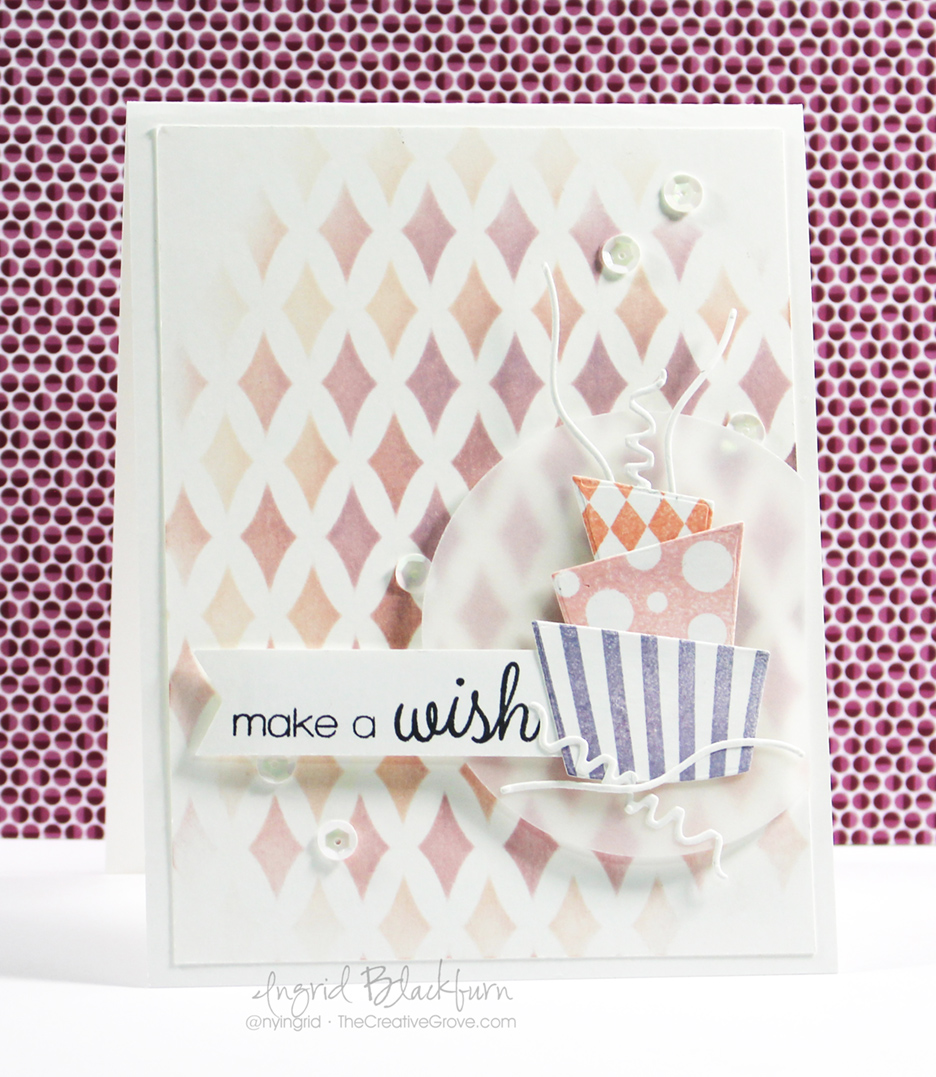
If you want a glimpse into how I created this frosted look, here you go!

Watch on YouTube

So what did you think? It’s a fun, cute frosted looking card. Here’s a written tutorial for you as well!

Faded Double Stenciling Technique

  • As with any stenciling work, you first want to secure both your work piece and your stencil to ensure they don’t move around on you.
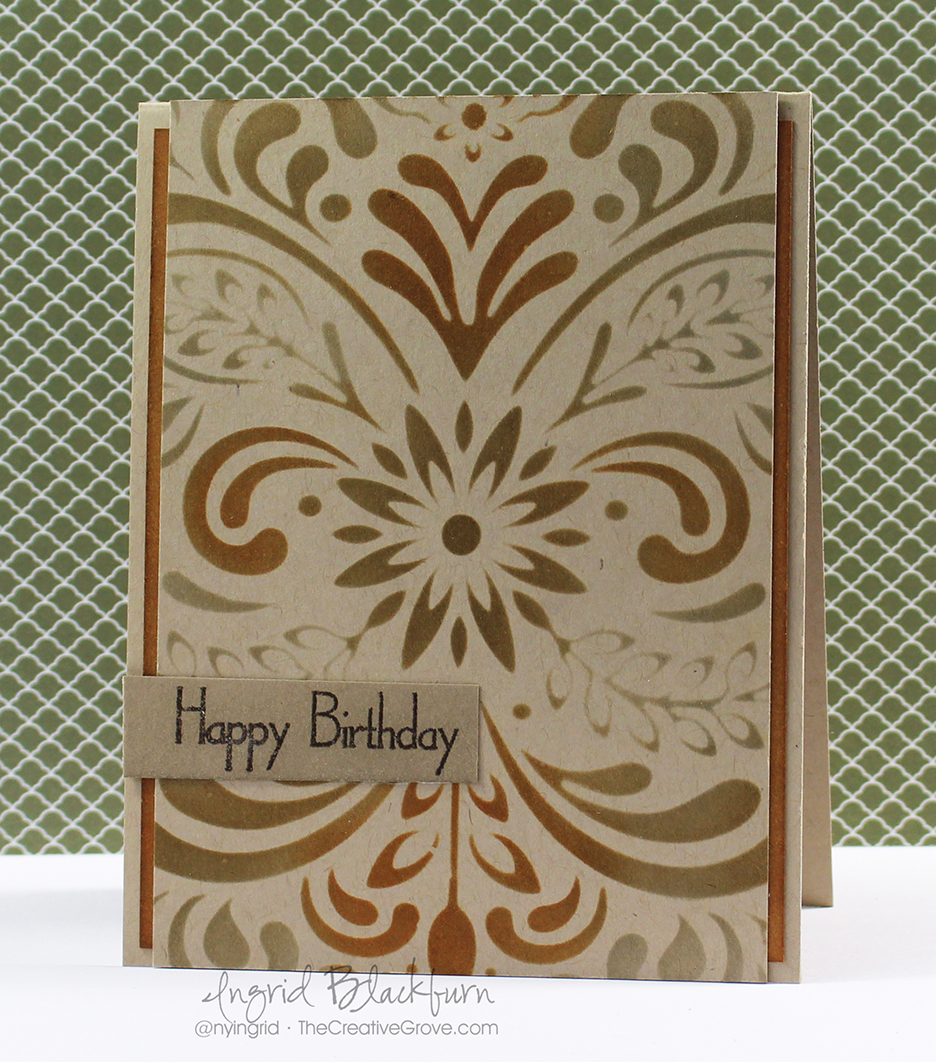
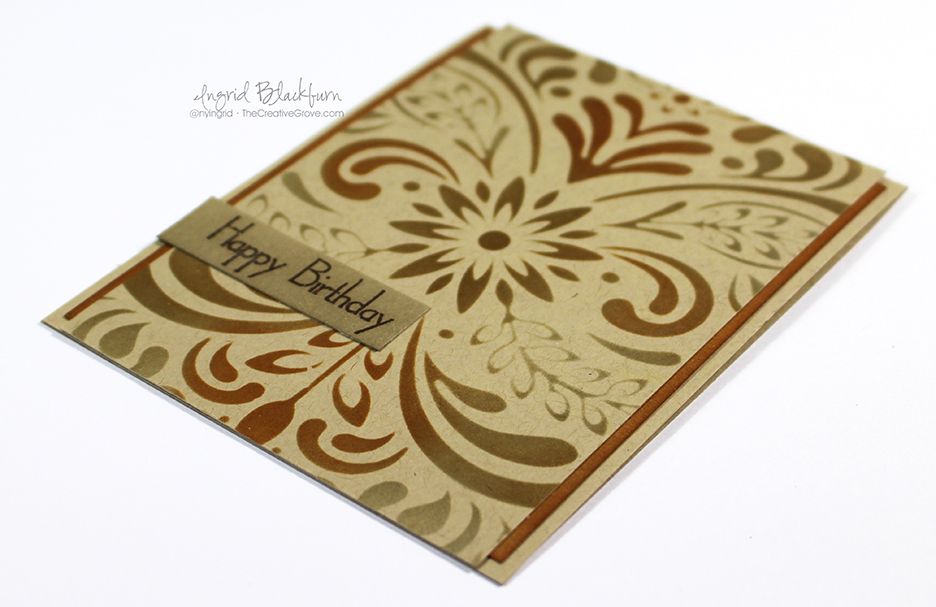
  • To achieve a faded look, keep the darkest part central on your project and sponge outward, varying the depth of color as you move outward. To accentuate this, I kept my lightest of three shades to the outside – Tattered Rose. I also made sure to leave the corners practically white.

Frosted-Crooky-Cake-003

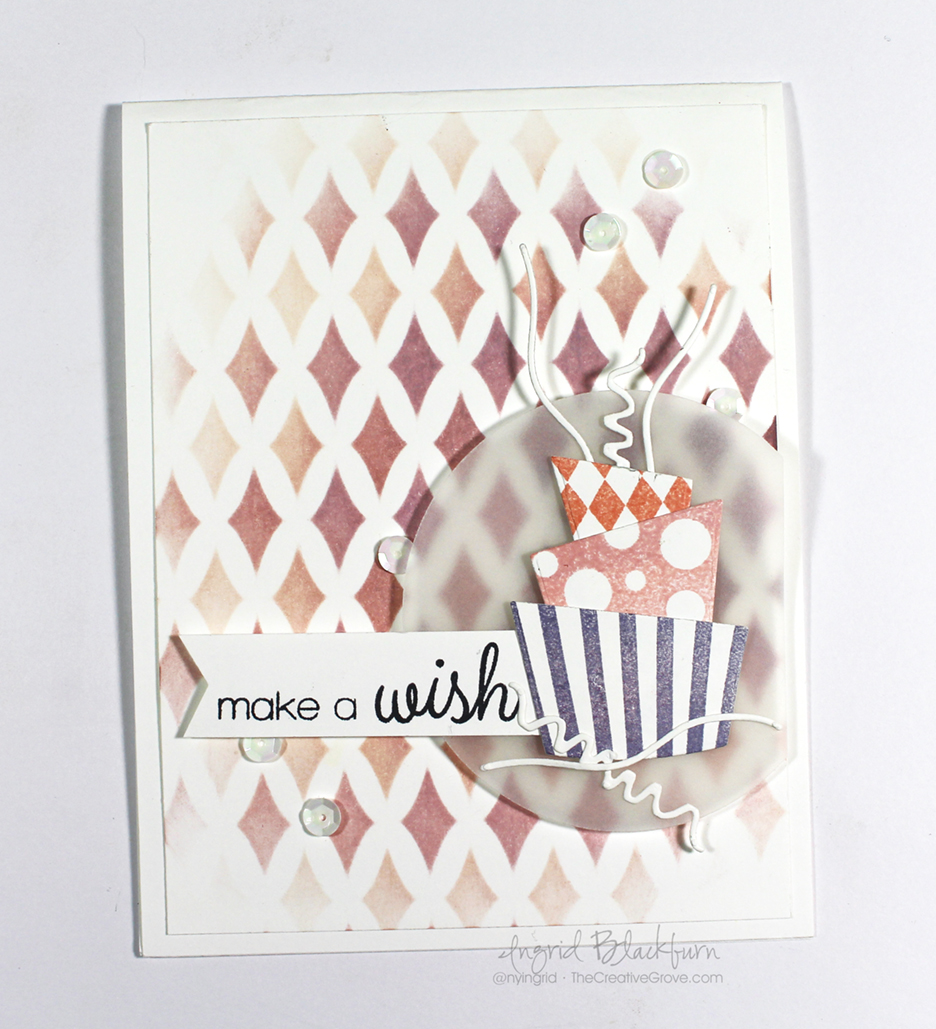
  • Sponge your colors from lightest to darkest – Tattered Rose, Victorian Velvet and Dusty Concord. Once you have the look you want, lift your stencil and shift to move the diamonds into the oval negative space left by the stencil. Repeat your pattern and perhaps vary your color – maybe the first set you kept lighter, and the second darker. This will help provide a visual difference and interest.
  • Next stamp your cake pieces using similar inks – I used Stampin Up Classics – Crisp Cantaloupe, Blushing Bride and Wisteria Wonder. Cut them out using the coordinating Dies along with a few streamers in white. To make the long squiggle at the bottom, I connected two smaller pieces. The bottom pieces I cut out using a white card stock that has Stick It on it.

Frosted-Crooky-Cake-002

  • Stamp the greeting from the set in black and create a banner with a hexagon punch or scissors.
  • Attach the cake together using a scrap piece of card stock and some liquid glue as in the video.
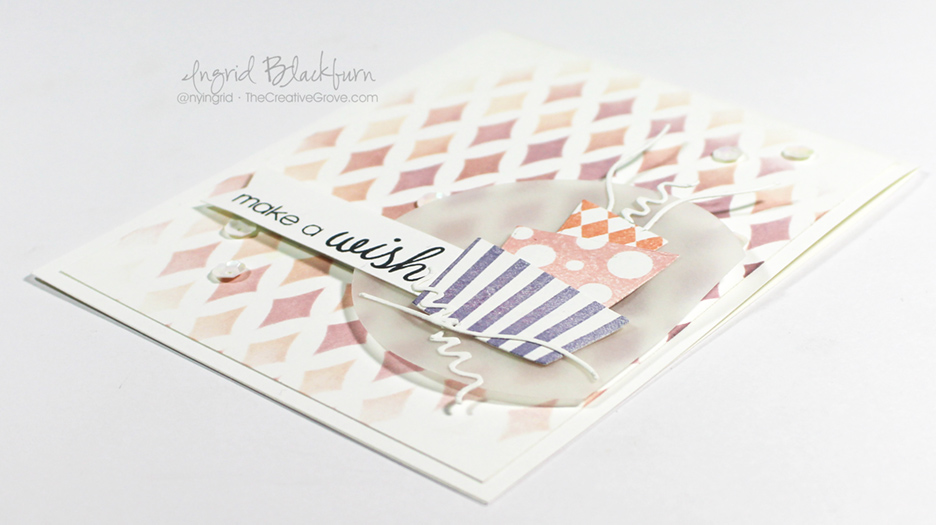
  • Attach the cake and banner to a trimmed circle cut from vellum card stock.

Frosted-Crooky-Cake-005

  • Pop your circle and banner up using fun foam or foam tape, add some sequins using Matte Medium and attach your card front to a white card base.
  • The card front measures 4 x 5 1/4″, card base – 4 1/4 x 5 1/2″

Supplies:

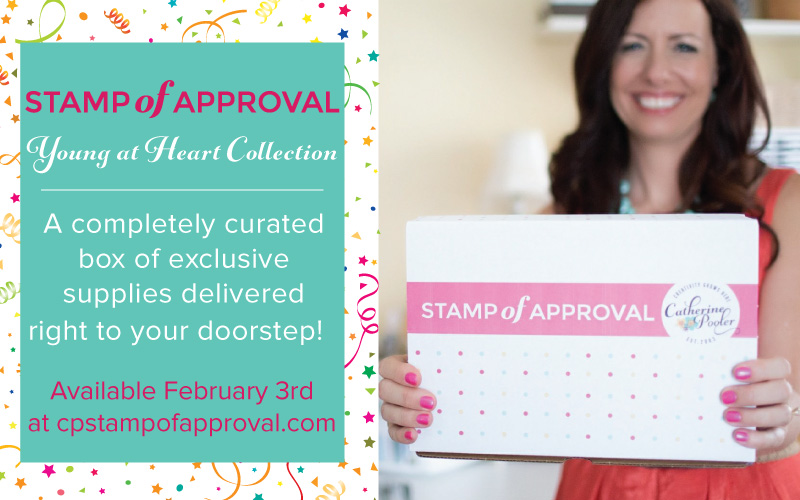
  • Stamps – Bring on the Cake stamp set and coordinating dies by SugarPea Designs for Stamp of Approval Young at Heart Collection
  • Ink – Ranger Distress -Tattered Rose, Victorian Velvet, Dusty Concord; Memento – Tuxedo Black; Stampin Up – Crisp Cantaloupe, Blushing Bride and Wisteria Wonder.
  • Paper – White, Vellum Card Stock (Stampin Up)
  • Accessories – Bring on the Cake Dies (SugarPea Designs), Harleen Stencil (Winne & Walter for SOA Young at Heart Collection), Hexagon Punch (Stampin Up), White Sequins (Rico Designs), Mini Sponge Tools (Ranger), Fun Foam

Frosted-Crooky-Cake-004

The Stamp of Approval Collection is almost sold out, but don’t fret. If you miss out, these products will be available through their companies later in 2016/2017. And definitely check out my other fun project made with this collection here.

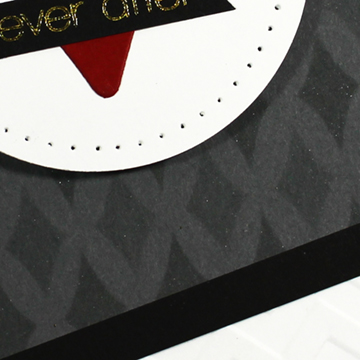
And if that wasn’t enough for you, be sure to check out this week’s challenge over at StampNation. Here’s a sneak peek at my challenge project for this week – notice a little more double stenciling? And the Stenciling class is still going on in the classroom there – over 16 individual lessons so far.

Queen of Hearts Sneak

StampNationGeneralBlogPost

Hope you enjoyed that! Be sure to stop by for more crafty goodness later this week. Till then, keep those fingers inky –

Signature

[optin_box style=”2″ alignment=”center” email_field=”email” email_default=”Enter your email address” email_order=”2″ integration_type=”aweber” double_optin=”Y” list=”3846012″ name_field=”name” name_default=”Enter your first name” name_order=”1″ name_required=”Y”][optin_box_field name=”headline”]Learn with our exclusive FREE video series[/optin_box_field][optin_box_field name=”paragraph”]PHA+R2V0IHRoZSBmcmVlIENyZWF0aXZlIFRpcHMgRS1sZXR0ZXIgYW5kIGxlYXJuIHdpdGggc3Vic2NyaWJlciBleGNsdXNpdmUgdmlkZW8gYW5kIHBpY3RvcmlhbCBjb250ZW50LsKgPGVtPjxzdHJvbmc+SW5jbHVkaW5nwqA8L3N0cm9uZz48L2VtPm91ciB5ZWFybHkgMTIgRGF5cyBvZiBDaHJpc3RtYXMgc2VyaWVzITwvcD4K[/optin_box_field][optin_box_field name=”privacy”][/optin_box_field][optin_box_field name=”top_color”]undefined[/optin_box_field][optin_box_button type=”0″ button_below=”Y”]Get Instant Access![/optin_box_button] [/optin_box]

Frosted Crooky Cake

Frosted-Crooky-Cake-001

Okay, I know Crooky Cake is not the official name of this stamp set, but it’s stuck in my head – thanks Catherine! The official name of this super cute stamp set is Bring on the Cake – designed by SugarPea Designs. For now, you can only get it the Young at Heart Stamp of Approval collection – which is almost sold out – just a few boxes left! It will be released, along with the matching dies sometime in 2016/2017.

I have to say, normally, I wouldn’t immediately buy this kind of a set for myself – I gravitate towards nature, backgrounds and designs. But the more I stamp with it, the more versatility I see in it, and I’m in love with this one & all the little companion dies too – those rock, especially since there are two frames with it too!

Frosted-Crooky-Cake-002

I love stamp sets that have little stamps – the flowers, swirls, streamers and stars make this a very cool and fun set to create with. The long streamer stamps will be quite cool for backgrounds (yes, tons of ideas for cards with that), and don’t get me started on the sentiments – those are great! I love font/script together, and this set did not disappoint. Can you tell how much I love it?!! To get a close up look, check out Catherine’s video about this set along with some cool samples – Click Here.

Along with today’s cake, I used the Harleen stencil by Winnie & Walter. Another great one – also in the Stamp of Approval collection. I did a little double stenciling. Since there are only a few boxes left, I wanted to show you this creation. Here’s the video post as well – be sure to check it out along with the written tutorial – Click here for Video and Tutorial  If you missed my other card – Click Here.

Frosted-Crooky-Cake-004

I wanted you to see what a fun and quirky design this card has. I call it the Frosted Crooky Cake, in honor of my friend Catherine Pooler who had a helping hand in designing this fun set.

So make a wish, check out the Stamp of Approval Young at Heart Collection if you haven’t already, and if you miss out on this great box of stamps, dies and stencils (did I mention there’s only a few left)…don’t fret – you too can have a piece of crooky cake (Bring on the Cake) later in 2016/2017 too – of course you’ll have to wait! 😉

See you soon with the video tutorial!

Signature

[optin_box style=”2″ alignment=”center” email_field=”email” email_default=”Enter your email address” email_order=”2″ integration_type=”aweber” double_optin=”Y” list=”3846012″ name_field=”name” name_default=”Enter your first name” name_order=”1″ name_required=”Y”][optin_box_field name=”headline”]Learn with our exclusive FREE video series[/optin_box_field][optin_box_field name=”paragraph”]PHA+R2V0IHRoZSBmcmVlIENyZWF0aXZlIFRpcHMgRS1sZXR0ZXIgYW5kIGxlYXJuIHdpdGggc3Vic2NyaWJlciBleGNsdXNpdmUgdmlkZW8gYW5kIHBpY3RvcmlhbCBjb250ZW50LsKgPGVtPjxzdHJvbmc+SW5jbHVkaW5nwqA8L3N0cm9uZz48L2VtPm91ciB5ZWFybHkgMTIgRGF5cyBvZiBDaHJpc3RtYXMgc2VyaWVzITwvcD4K[/optin_box_field][optin_box_field name=”privacy”][/optin_box_field][optin_box_field name=”top_color”]undefined[/optin_box_field][optin_box_button type=”0″ button_below=”Y”]Get started now![/optin_box_button] [/optin_box]

Video, 2 Tutorials, Blog Hop & Prizes

Gelli-Plate-Monoprinting-tutorials

I have all sorts of goodness for you today! Towards the bottom of this über long post, I have two – yes TWO tutorials for you – one in video form and another after.

First I wanted to tell you about an exclusive collection of stamping stuff just coming available – yup…it’s brand spankin new – not on the market yet! There’s a blog hop filled with awesome projects – great to inspire you this morning, plus at the bottom, I have a new video for you and more crafty goodness!

Normally I would be participating alongside these great card makers for a great blog hop showcasing the new Stamp of Approval collection – Young at Heart. But alas, customs has benched me. They’ve kept my supplies – secretly I think they’re having too much fun making birthday cards and have decided to keep all the fun for themselves! Not to worry, I still have all the information you need, plus I have some fun inspiration for you too!

SOA Feb 2016

Stamp of Approval (SOA) is an exclusive box of Stamps, Dies and Stencils designed by Catherine Pooler and some of your favorite stamp companies. Available quarterly, and only till they sell out – and let me be the first to tell you, it’s quick – the first SOA sold out in hours!

This year, StampNation celebrated it’s 5th Birthday, so naturally a box about birthdays makes sense – it’s called the Young at Heart Collection. I would think that birthday cards are probably the #1 card type made – so I’m sure you’ll find something in it for you. But don’t think just birthdays – after seeing the products myself in the videos, I have all sorts of ideas for non-birthday cards too! Here are some links to the three videos highlighting product from the box:

The stamps, dies and stencils designed for this collection are first only available through the SOA box. They will eventually be released by their stamp companies sometime later in 2016/2017, so this is your chance to get your hands on some great products before everyone else – I’m all about that! 🙂

Here’s how it works – you have to be on the waitlist to get the information and link about when the box goes on sale! And it goes quick. If you are a StampNation member – you’ll get the link an hour before the public on February 3rd! This box has products by CAS-ual Fridays, Sugar Pea Designs and Winnie & Walter – three of the hottest stamp companies out there today!!

And to give you some incredible inspiration, hop along with this talented blog hop. Be sure to leave a comment on everyone’s blog – Catherine is giving away two boxes!! And not to worry, if you purchase one and end up a winner – you’ll be reimbursed. The boxes are stuffed with over $100 worth of brand new product…that’s a pretty awesome prize!!!

Neutral Tone Stenciling Video Tutorial

So, are you on creative inspiration overload yet? I hope not, because I have some crafty goodness to share with you too! The other day I released a new video on my YouTube channel. It’s a great birthday card that is quick, easy and has some great neutral tones in it – perfect for a masculine card. Here it is:

Watch video on YouTube

It’s a pretty straight forward card and the stencil really is the star here.

Masculine Birthday Stencil 004

Don’t you just love that stencil from Hero Arts! I love all the neutral tones. It’s simple, and kind of reminds me of New Mexico/Arizona a bit. What do you think?

Masculine Birthday Stencil 002


I’ve been playing around with stencils for the past month on overdrive. Mostly because I’ve been creating content for the Stencil Class over at StampNation that’s been going on for the past 2 1/2 weeks!

CSM 14

You may remember my Gelli Plate creation from last month, well, I filmed a video for the stencil class at SN and put up many more samples.

Gelli Plate Monoprinting in Layers Tutorial

Here’s a new one for you though. I have been having SO much fun with my Gelli Plate – it’s an amazing tool that really allows my inner artist to break out. Do you have one, or are you thinking about getting one? Let me know in the comments below!

Gelli-Plate-Monoprinting-1-001

Working with a gelli arts printing plate has been truly an eye opening experience. While I won’t say I’m and expert, I have learned a ton along the way! For instance, paper and paint do matter. You want a paint that will give you time to work, acrylics dry so quickly, the longer your paint remains open, the more flexibility you have. And when you’re new to something like this – that’s key. That doesn’t mean you can’t use your cheap acrylics, just work quickly!

Gelli-Plate-Monoprinting-1-002

  • For this project, I started by layering on some Phthalo Blue. I cleared my brayer of any paint and promptly brayered some back off. leaving only some around the edge and a little in the center.
  • The key to creating a monoprint in layers on your Gelli Plate, is to allow the layers to dry inbetween.
  • Next you’ll want to add another color – I chose Cobalt Blue. Repeat the process pulling up a lot of the blue.
  • Add your stencil – I added the Tula stencil by Memory Box. Pull a positive print to use on another project. That leaves a lot open space.
  • Finally, add your lightest color – I chose Ochre for a contrast.
  • I pulled the entire print up at this point. The Ochre allowed the dried layers enough moisture to pull the print up in it’s entirety. If your paint isn’t open enough, this can be a frustrating process and you won’t pull up all your colors. Sometimes that can look cool, other times it can just be frustrating. You’ll find that sweet spot for yourself.

Gelli-Plate-Monoprinting-1-003

The interesting thing with this print is that in some spots the blue and yellow blended to form a slight green – that only gives this a more worn and aged look. The background naturally is the star, so keep the rest of the card simple. I added the Handlettered Thanks die by WPlus9 and a few Rhinestones.

Thanks for stopping by today. I hope you enjoyed these couple of projects – can you tell I have stenciling on the brain? Be sure to check out the new SOA box, or hop on over the StampNation and check it out along with the free stenciling class. I have a few videos in lessons #5 & #14.

See you next time, till then, keep those fingers inky!

Signature

[optin_box style=”2″ alignment=”center” email_field=”email” email_default=”Enter your email address” email_order=”2″ integration_type=”aweber” double_optin=”Y” list=”3846012″ name_field=”name” name_default=”Enter your first name” name_order=”1″ name_required=”Y”][optin_box_field name=”headline”]Learn with our exclusive FREE video series[/optin_box_field][optin_box_field name=”paragraph”]PHA+R2V0IHRoZSBmcmVlIENyZWF0aXZlIFRpcHMgRS1sZXR0ZXIgYW5kIGxlYXJuIHdpdGggc3Vic2NyaWJlciBleGNsdXNpdmUgdmlkZW8gYW5kIHBpY3RvcmlhbCBjb250ZW50LsKgPGVtPjxzdHJvbmc+SW5jbHVkaW5nwqA8L3N0cm9uZz48L2VtPm91ciB5ZWFybHkgMTIgRGF5cyBvZiBDaHJpc3RtYXMgc2VyaWVzITwvcD4K[/optin_box_field][optin_box_field name=”privacy”][/optin_box_field][optin_box_field name=”top_color”]undefined[/optin_box_field][optin_box_button type=”0″ button_below=”Y”]Send me exclusive tips now![/optin_box_button] [/optin_box]

Simple Snowflakes

It’s lightly snowing today – I’ve never had a white Thanksgiving! Although nothing is really sticking, and we lost all the snow from the other day…I’m enjoying the fire, and getting ready to make our Thanksgiving dinner. Michael asked me what time the “Wurst” was going in the oven…. I guess that’s his German/Thanksgiving day humor…lol! We’re making a stuffed Pork Loin, as I can never find a large turkey to save my life here. I do miss that!

Snowflake Wishes 001

It’s been a busy past few weeks here – getting ready for the holidays and more Christmas card making, videoing and editing than I’ve ever done! We’re in full swing for our 12 Days of Christmas series and Class! The projects have been varied and so much fun to make and share.

So, In the spirit of snowy days and the upcoming holidays…I have a quick little card for you. Although it’s Thanksgiving – here’s a Christmas one. I’ve been having fun playing with Catherine Pooler’s Stamp of Approval Holiday Box (already sold out – but you can get on her list for the next version in January)! These particular snowflakes will be released in 2016 by CAS-ual Friday and I just LOVE stamping and cutting them out – the designs are awesome and very different from what I’ve seen before.

Snowflake Wishes 002

Here’s the how to for this card:

  • Stamp and emboss your greeting. I used a retired one from the Joyful Christmas Set by Stampin Up. First I inked up stamp in Versamark and then went over the word Christmas with an Island Indigo Marker by Stampin Up. I embossed it in Clear Embossing Powder.
  • Sponge your card base with Rumbled Glass. Leave spots more white for a flurry effect.
  • Cut out several snowflakes using the matching dies to the Bring on the Snowflakes stamps in White.

Snowflake Wishes 003

  • Adhere snowflakes to card. I doubled up the largest one and added two sizes of circles over the top right one.
  • Add Sparkling Clear sequins by Pretty Pink Posh.

That’s it! Super fast and easy. The best part – it’s a very cost effective card! You could easily mass produce this one for the holidays sitting in front of a movie.

Hope you enjoyed that! If you’d like more ideas – check out our 12 Days of Christmas class. We’re LIVE and on day 5 – 24 project ideas, 12 videos and PDFs. Find out more here

Snowflake Wishes 005

Have a Happy Thanksgiving with your friends and family! I wish you a memorable day filled with love and laughter!!

Keep those fingers inky –


Signature-24-pt.jpg

[optin_box style=”2″ width=”500″ alignment=”center” email_field=”email” email_default=”Enter your email address” integration_type=”aweber” double_optin=”Y” list=”3846012″ name_field=”name” name_default=”Enter your first name” name_required=”N”][optin_box_field name=”headline”]Learn with our exclusive FREE Video Series[/optin_box_field][optin_box_field name=”paragraph”]PHA+R2V0IHRoZSBmcmVlIENyZWF0aXZlIFRpcHMgRS1sZXR0ZXIgYW5kIGxlYXJuIHdpdGggc3Vic2NyaWJlciBleGNsdXNpdmUgdmlkZW8gYW5kIHBpY3RvcmlhbCBjb250ZW50LiA8ZW0+PHN0cm9uZz48c3BhbiBzdHlsZT0iY29sb3I6ICM4MDAwMDA7Ij5JbmNsdWRpbmc8L3NwYW4+wqA8L3N0cm9uZz48L2VtPm91ciB5ZWFybHkgMTIgRGF5cyBvZiBDaHJpc3RtYXMgc2VyaWVzITwvcD4K[/optin_box_field][optin_box_field name=”privacy”][/optin_box_field][optin_box_field name=”top_color”]undefined[/optin_box_field][optin_box_button type=”1″ text=”Subscribe now!” text_size=”26″ text_color=”#ffffff” text_bold=”Y” text_letter_spacing=”0″ text_shadow_panel=”Y” text_shadow_vertical=”1″ text_shadow_horizontal=”0″ text_shadow_color=”#000000″ text_shadow_blur=”0″ styling_width=”36″ styling_height=”15″ styling_border_color=”#000000″ styling_border_size=”1″ styling_border_radius=”6″ styling_border_opacity=”100″ styling_shine=”Y” styling_gradient_start_color=”#345523″ styling_gradient_end_color=”#68ab46″ drop_shadow_panel=”Y” drop_shadow_vertical=”1″ drop_shadow_horizontal=”0″ drop_shadow_blur=”1″ drop_shadow_spread=”0″ drop_shadow_color=”#ffffff” drop_shadow_opacity=”50″ inset_shadow_panel=”Y” inset_shadow_vertical=”0″ inset_shadow_horizontal=”0″ inset_shadow_blur=”0″ inset_shadow_spread=”1″ inset_shadow_color=”#000000″ inset_shadow_opacity=”50″ location=”optin_box_style_2″ button_below=”Y”]Subscribe now![/optin_box_button] [/optin_box]