Vintage Christmas Star

Vintage Christmas Star 001

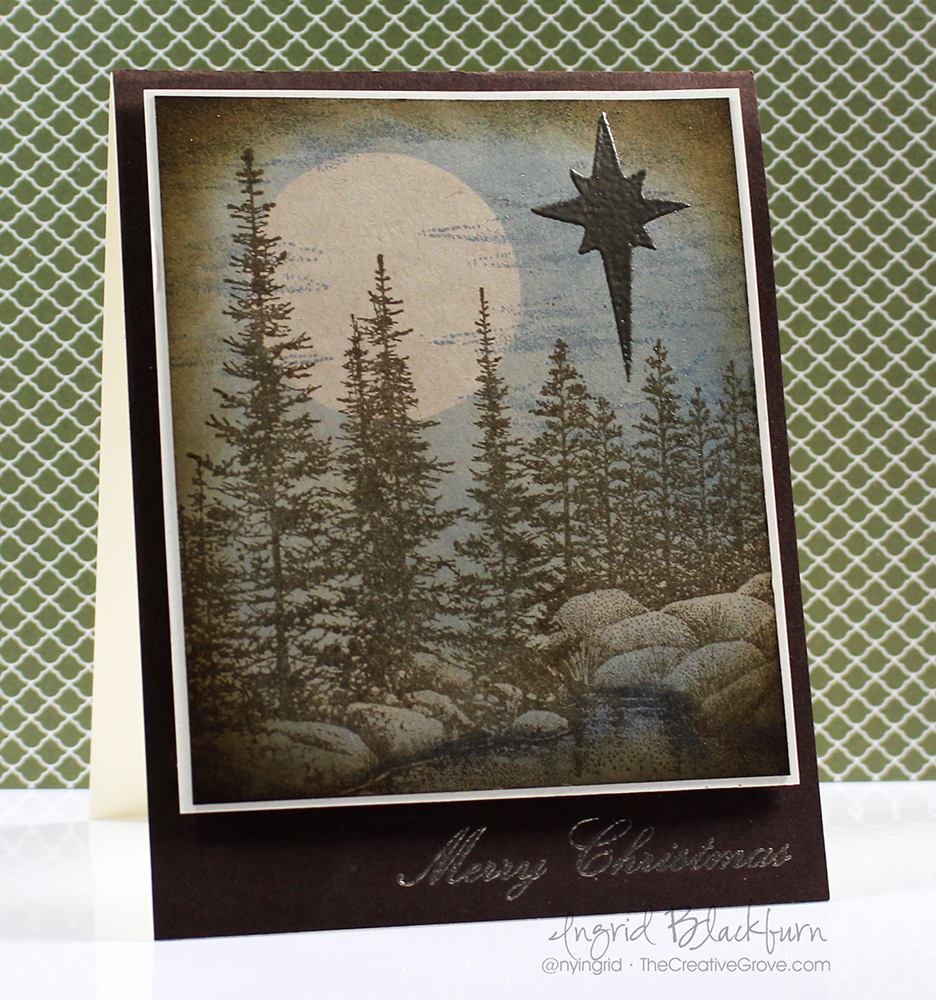
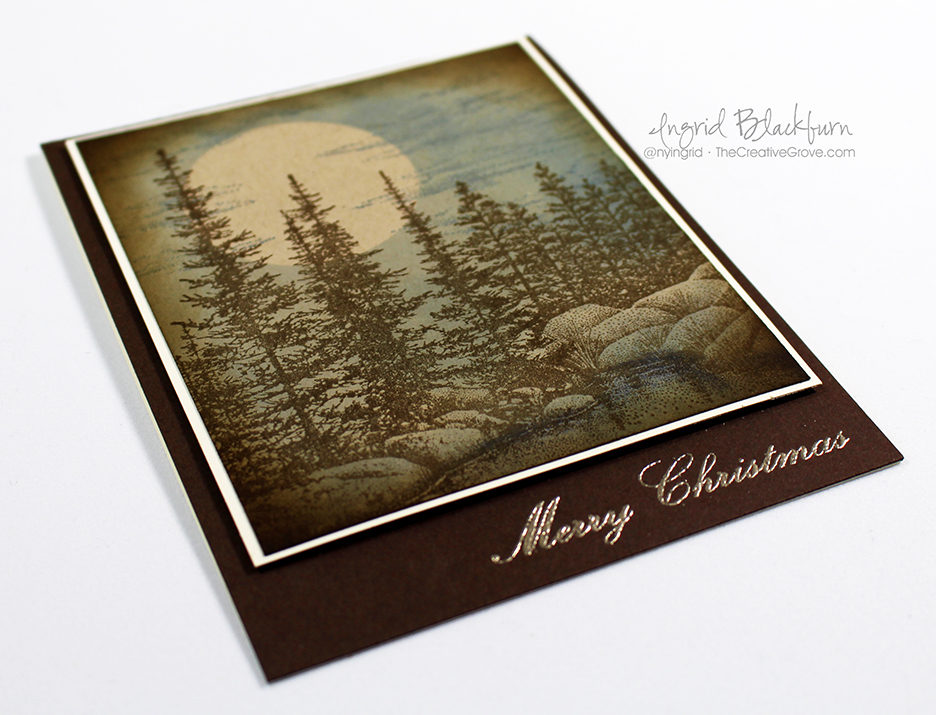
Today’s challenge keyword is star – so let’s learn how to incorporate that into this vintage holiday card. This month’s challenge at Happy Little Stampers is to use a star in some form on your card. I have to admit, I started off in a very different direction…then ultimately decided to create a simple card with a vintage masculine feel that could showcase the ultimate Christmas star.
HLS Christmas Challenge December 2015

I guess I’ve been in a vintage kind of a mood these past few months. At least here on the blog! I don’t know what it is that seems soothing about this color palette to me, but I’m really loving the feel. Maybe it’s because I’ve been injured and not able to walk as much as I would like in the woods…who knows?!! Here’s a quick tutorial for you, and be sure to stop by again next week for the video!

Creating a Quick Vintage Feel to your Holiday Cards –

  • This project was done on kraft colored paper – not white. It helps with the overall look and feel.
  • I find that the brown tone fits this style better than black. So ink your stamps up in a dark brown – something earthy. I used Ground Espresso by Ranger Distress.
  • Stamp the Stampscapes Pines & Rocks Lg on the left and the left side of Lakeside Reflections Lg to the right Tip – use a torn piece of paper towel to mask off the edge and create a seamless scene.
Vintage Christmas Star 002

  • Place two post it notes in copy paper and punch out your moon with a 1 1/4″ circle punch. This will be your mask.
  • Place your moon where you’d like it before adding blues to the sky
  • Use a mini sponge tool and some blue hues to shade in your water and sky.
  • Stamp Cloud Strips Lg by Stampscapes in Stormy Sky Distress. Be sure to overlap the moon slightly.
  • Once you have the look you’d like – add a little shading with s neutral like Weathered Wood Distress to the rocks.
  • Sponge the entire scene around the perimeter with  a brown – I used Gathered twigs for a slightly different feel than the trees.
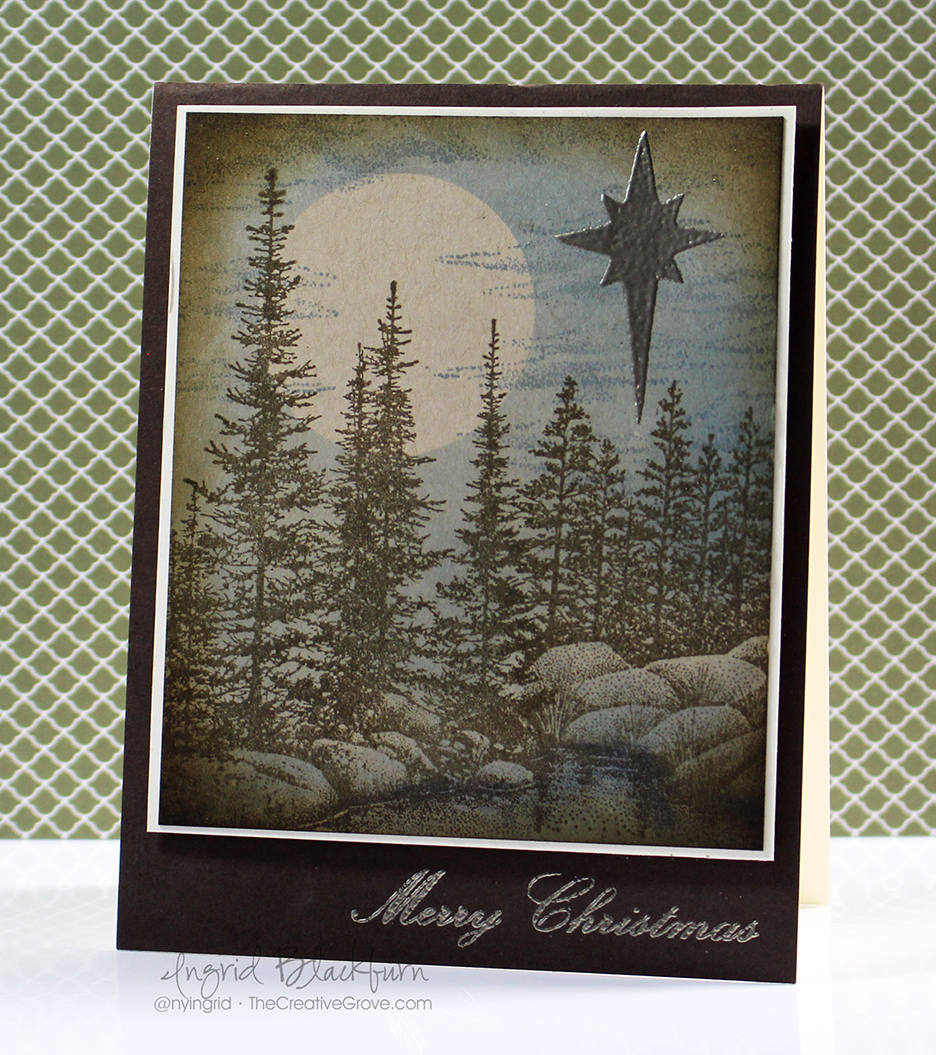
  • Add your star and emboss in Pewter. I used the Nativity Angel Stencil by Stamplorations.
Vintage Christmas Star 004

  • The perfect sentiment makes this card and nails the vintage feel. Here you see one of the many sentiments from Mixed Christmas Sentiments by Happy Little Stampers. Emboss it in Pewter for a great look, rather than something bright.
  • The scene is matted onto Vanilla card stock for contrast before being popped up on fun foam onto an Espresso card base.

I do hope you like this card – it’s actually a great one to mass produce and goes much faster than you think! I hope this inspired you to create something special with a star for your cards. Be sure to enter them into the Christmas Challenge at Happy Little Stampers!

Keep those fingers inky –


Signature.jpg

[optin_box style=”2″ width=”500″ alignment=”center” email_field=”email” email_default=”Enter your email address” integration_type=”aweber” double_optin=”Y” list=”3846012″ name_field=”name” name_default=”Enter your first name” name_required=”N”][optin_box_field name=”headline”]Learn with our exclusive FREE Video Series[/optin_box_field][optin_box_field name=”paragraph”]PHA+R2V0IHRoZSBmcmVlIENyZWF0aXZlIFRpcHMgRS1sZXR0ZXIgYW5kIGxlYXJuIHdpdGggc3Vic2NyaWJlciBleGNsdXNpdmUgdmlkZW8gYW5kIHBpY3RvcmlhbCBjb250ZW50LiA8ZW0+PHN0cm9uZz48c3BhbiBzdHlsZT0iY29sb3I6ICM4MDAwMDA7Ij5JbmNsdWRpbmc8L3NwYW4+wqA8L3N0cm9uZz48L2VtPm91ciB5ZWFybHkgMTIgRGF5cyBvZiBDaHJpc3RtYXMgc2VyaWVzITwvcD4K[/optin_box_field][optin_box_field name=”privacy”][/optin_box_field][optin_box_field name=”top_color”]undefined[/optin_box_field][optin_box_button type=”1″ text=”Subscribe now!” text_size=”26″ text_color=”#ffffff” text_bold=”Y” text_letter_spacing=”0″ text_shadow_panel=”Y” text_shadow_vertical=”1″ text_shadow_horizontal=”0″ text_shadow_color=”#000000″ text_shadow_blur=”0″ styling_width=”36″ styling_height=”15″ styling_border_color=”#000000″ styling_border_size=”1″ styling_border_radius=”6″ styling_border_opacity=”100″ styling_shine=”Y” styling_gradient_start_color=”#345523″ styling_gradient_end_color=”#68ab46″ drop_shadow_panel=”Y” drop_shadow_vertical=”1″ drop_shadow_horizontal=”0″ drop_shadow_blur=”1″ drop_shadow_spread=”0″ drop_shadow_color=”#ffffff” drop_shadow_opacity=”50″ inset_shadow_panel=”Y” inset_shadow_vertical=”0″ inset_shadow_horizontal=”0″ inset_shadow_blur=”0″ inset_shadow_spread=”1″ inset_shadow_color=”#000000″ inset_shadow_opacity=”50″ location=”optin_box_style_2″ button_below=”Y”]Subscribe now![/optin_box_button] [/optin_box]
HLS Poinsettia Challenge

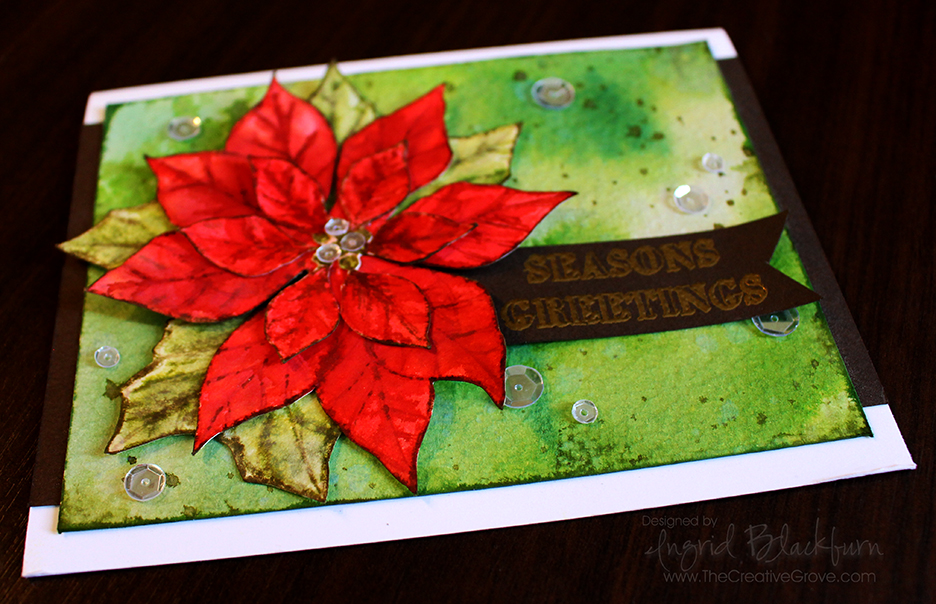
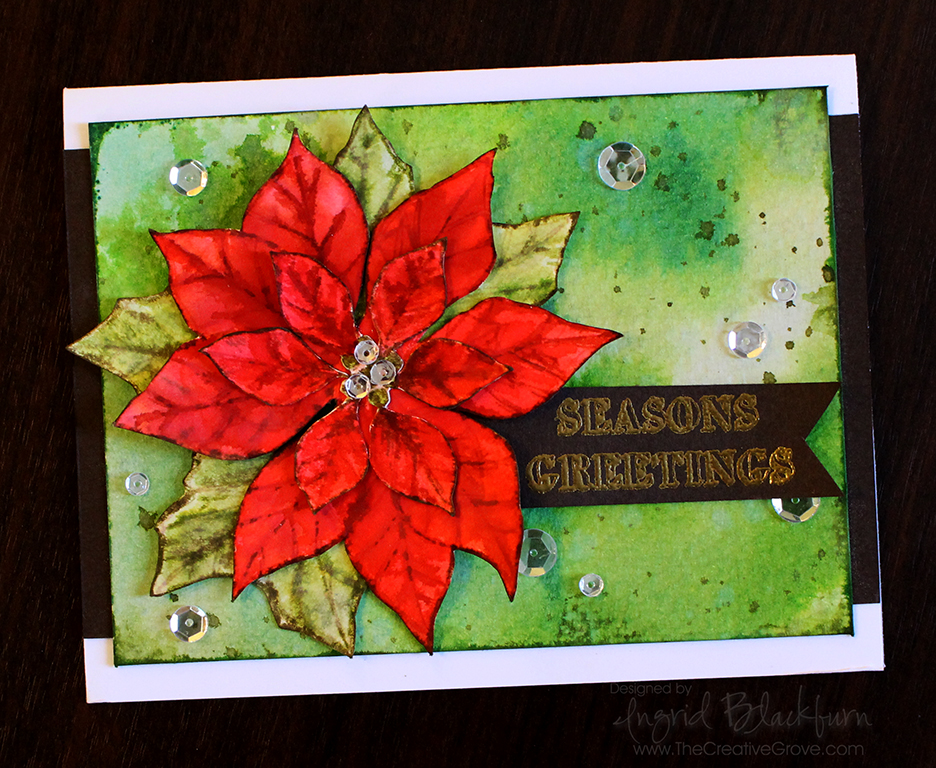
Watercolored Poinsettia 001

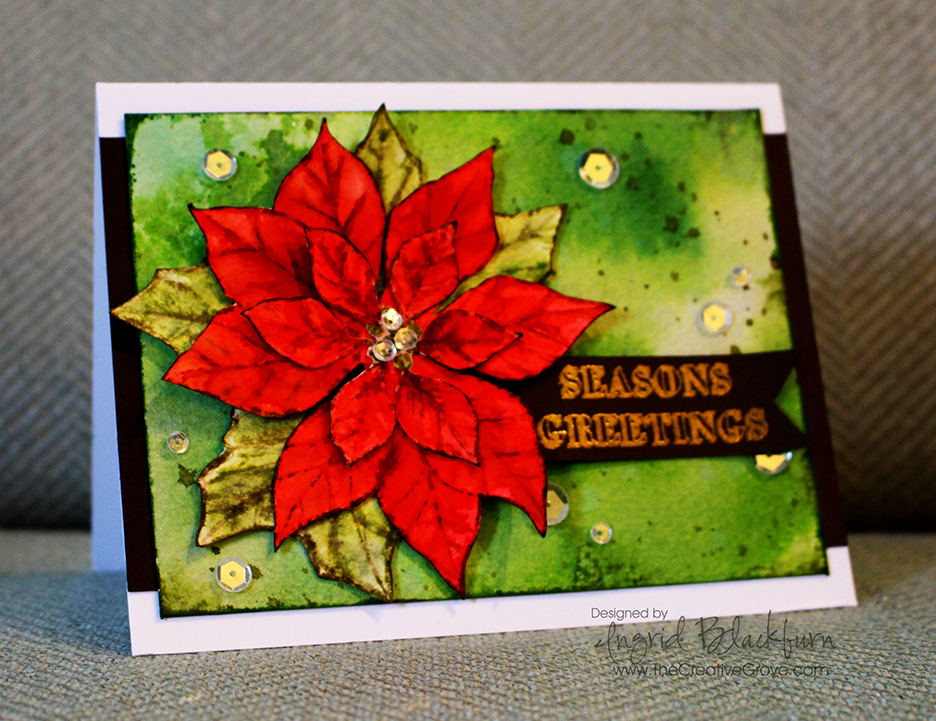
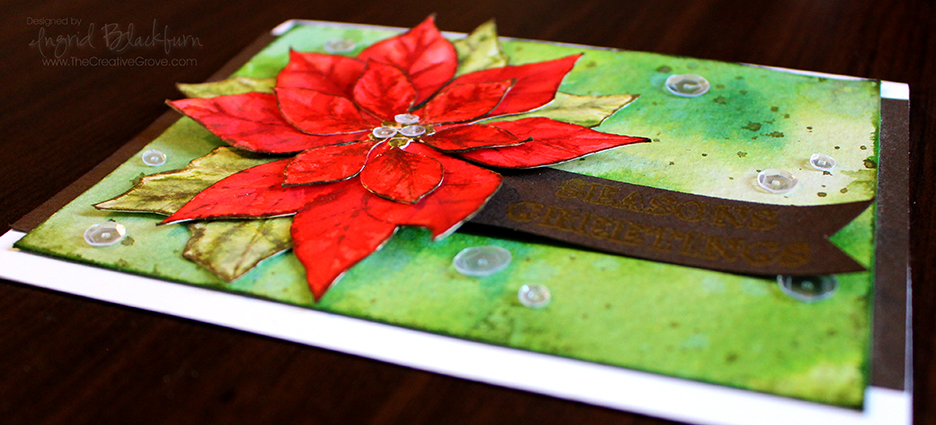
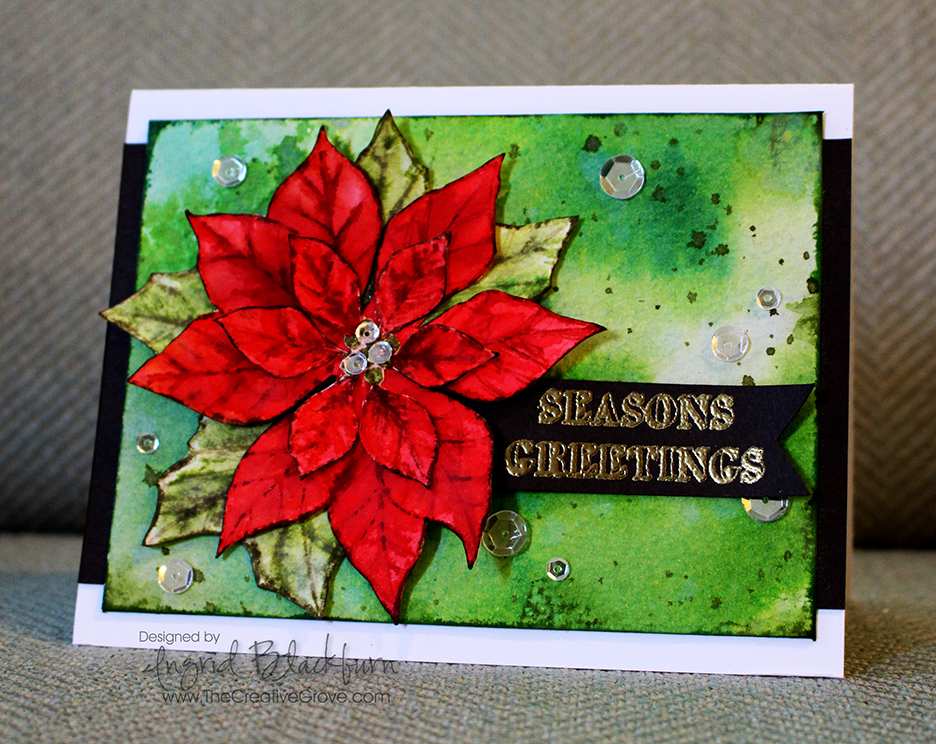
What’s a girl to do to create amazing cards for you from the road – watercolor using distress inks, naturally! I brought a few Christmas sets with me, just in case we weren’t back yet (We’ve been traveling for 9 weeks so far); so when I sat down for this month’s Poinsettia Challenge, I stared at my stamp set and this idea popped in my head.

You know by now that I love to watercolor, especially with distress inks, so I thought a more three dimensional Poinsettia on a cool smooshed background might look cool, and I have to say – even I’m thrilled with how it turned out – and I’m my worst critic! I bet you are your own worst critic too – tell me in the comments – it can’t just be me!

HLS Christmas Challenge October 2015

This month at the Happy Little Stampers Christmas Challenge, the theme is Poinsettia. So I hope this card inspires you in some way to create your own amazing creation and join in the Challenge. Not only does the design team have some amazing projects created for you…we also have a guest designer this month – Pat from Colourful Creations.

You’ll see a tutorial below. I know I normally have a video, but I don’t have a tripod with me – sorry about that! But if you are looking for some great holiday inspiration – later this month my annual 12 Days of Christmas card series is starting – be sure to be on the Creative Tips E-Letter to get those – they won’t be on the blog!!

To join me this month, use any element of this or the design teams cards as inspiration, just make sure it has a poinsettia in some way on your card and is Christmas themed. I can’t wait to see your creations – now for the good stuff!

Watercolored Poinsettia 003

Creative Tips on Watercolor using Distress Inks

Here was my thought process for choosing the colors for the card. Originally I was going to do a no line watercolor white poinsettia, but then I was in the mood for red. I knew a deeply watercolored red 3D poinsettia would look awesome, but needed an equally awesome background. So what do you choose? On the color wheel, the complimentary color (opposite on the wheel) to red  is green. So while the leaves would be green, I thought maybe a more vibrant version with lighter bleached out in spots along with great texture created with deeper flicks and edges might just do the trick!

  • To start, you’ll want to smoosh a few greens into your craft mat or work surface. I used Bundled Sage, Peeled Paint and Mowed Lawn. Bundled Sage helped me with the lighter bleached out spots, Mowed Lawn was my bright vibrant contrast to that, Peeled Paint married the two.
  • Generously spritz your colors. Make sure you lay down enough to cover your background piece. While spritzing, you want to have enough water down without overdoing it. To gauge the amount of water, when you press your watercolor card front down and it comes up dry or not glistening, you don’t have enough water. On the other hand if all your color runs right off your watercolor paper, you have too much! It’s a science, so play around. Don’t worry if you don’t get it right, just go right back with another layer adjusted with more or less water. Layers is what makes this piece awesome! So it’s very forgiving.

Watercolored Poinsettia 002

  • Don’t over do the smooshing – get just enough to cover your piece. This way you keep the light areas light. If you have too much light, strategically smoosh more vibrant spots over some without pressing it into the whole card.
  • Set your background aside to dry before moving onto the next step.
  • Next – create the splatter. I did this in two ways – flicked water, then colored splatter.
  • First spritz your hand and flick your colored surface. Here’s a video on this technique (at the 2:59 mark)
  • Smoosh some Forest Moss into your craft mat. Spritz with water to get it into a liquid state – just add enough, you don’t want it too diluted in hue. Load up a paint brush and splatter it hard with your finger on the opposite hand creating splatter onto your card. If you hold it closer to your project it will be more condensed. I held mine about 10 inches from my card to get it to splatter outward.
  • Edge your watercolor paper directly with your ink pad – a little more generously at the corners to complete your background.
  • Set it aside to try. Now you can move onto the Poinsettia!

Watercolored Poinsettia 006

  • To get a more painted look to your Poinsettia. you’ll want to use a few shades of red and create layers. Stamp your image in a lighter shade twice on a larger piece of 140# cold pressed watercolor paper. I used Tattered Rose and stamped it off so that it was really light. This will give you an outline to work with without defining the edges. This allows you to control the look of the flower, rather than painting in the lines of an outlined image.
  • You will color one flower completely and another just the smaller inner flower. When painting the larger flower – ignore the lines of the smaller flower – just extend the leaf as if it’s a large petal. Look really close at mine and you’ll see the smaller outline slightly – but you have to really look for it!

Watercolored Poinsettia 005

  • Color your berries on the smaller flower in using Peeled Paint. Your larger flower you’ll color the berries with Festive Berries to match the flower better.
  • Next create a light wash of Worn Lipstick by spritzing it generously with water. Test it out on a scrap piece to make sure it’s light. It’s easier to start lighter and add darker layers for depth – you can’t go so easily dark to light.
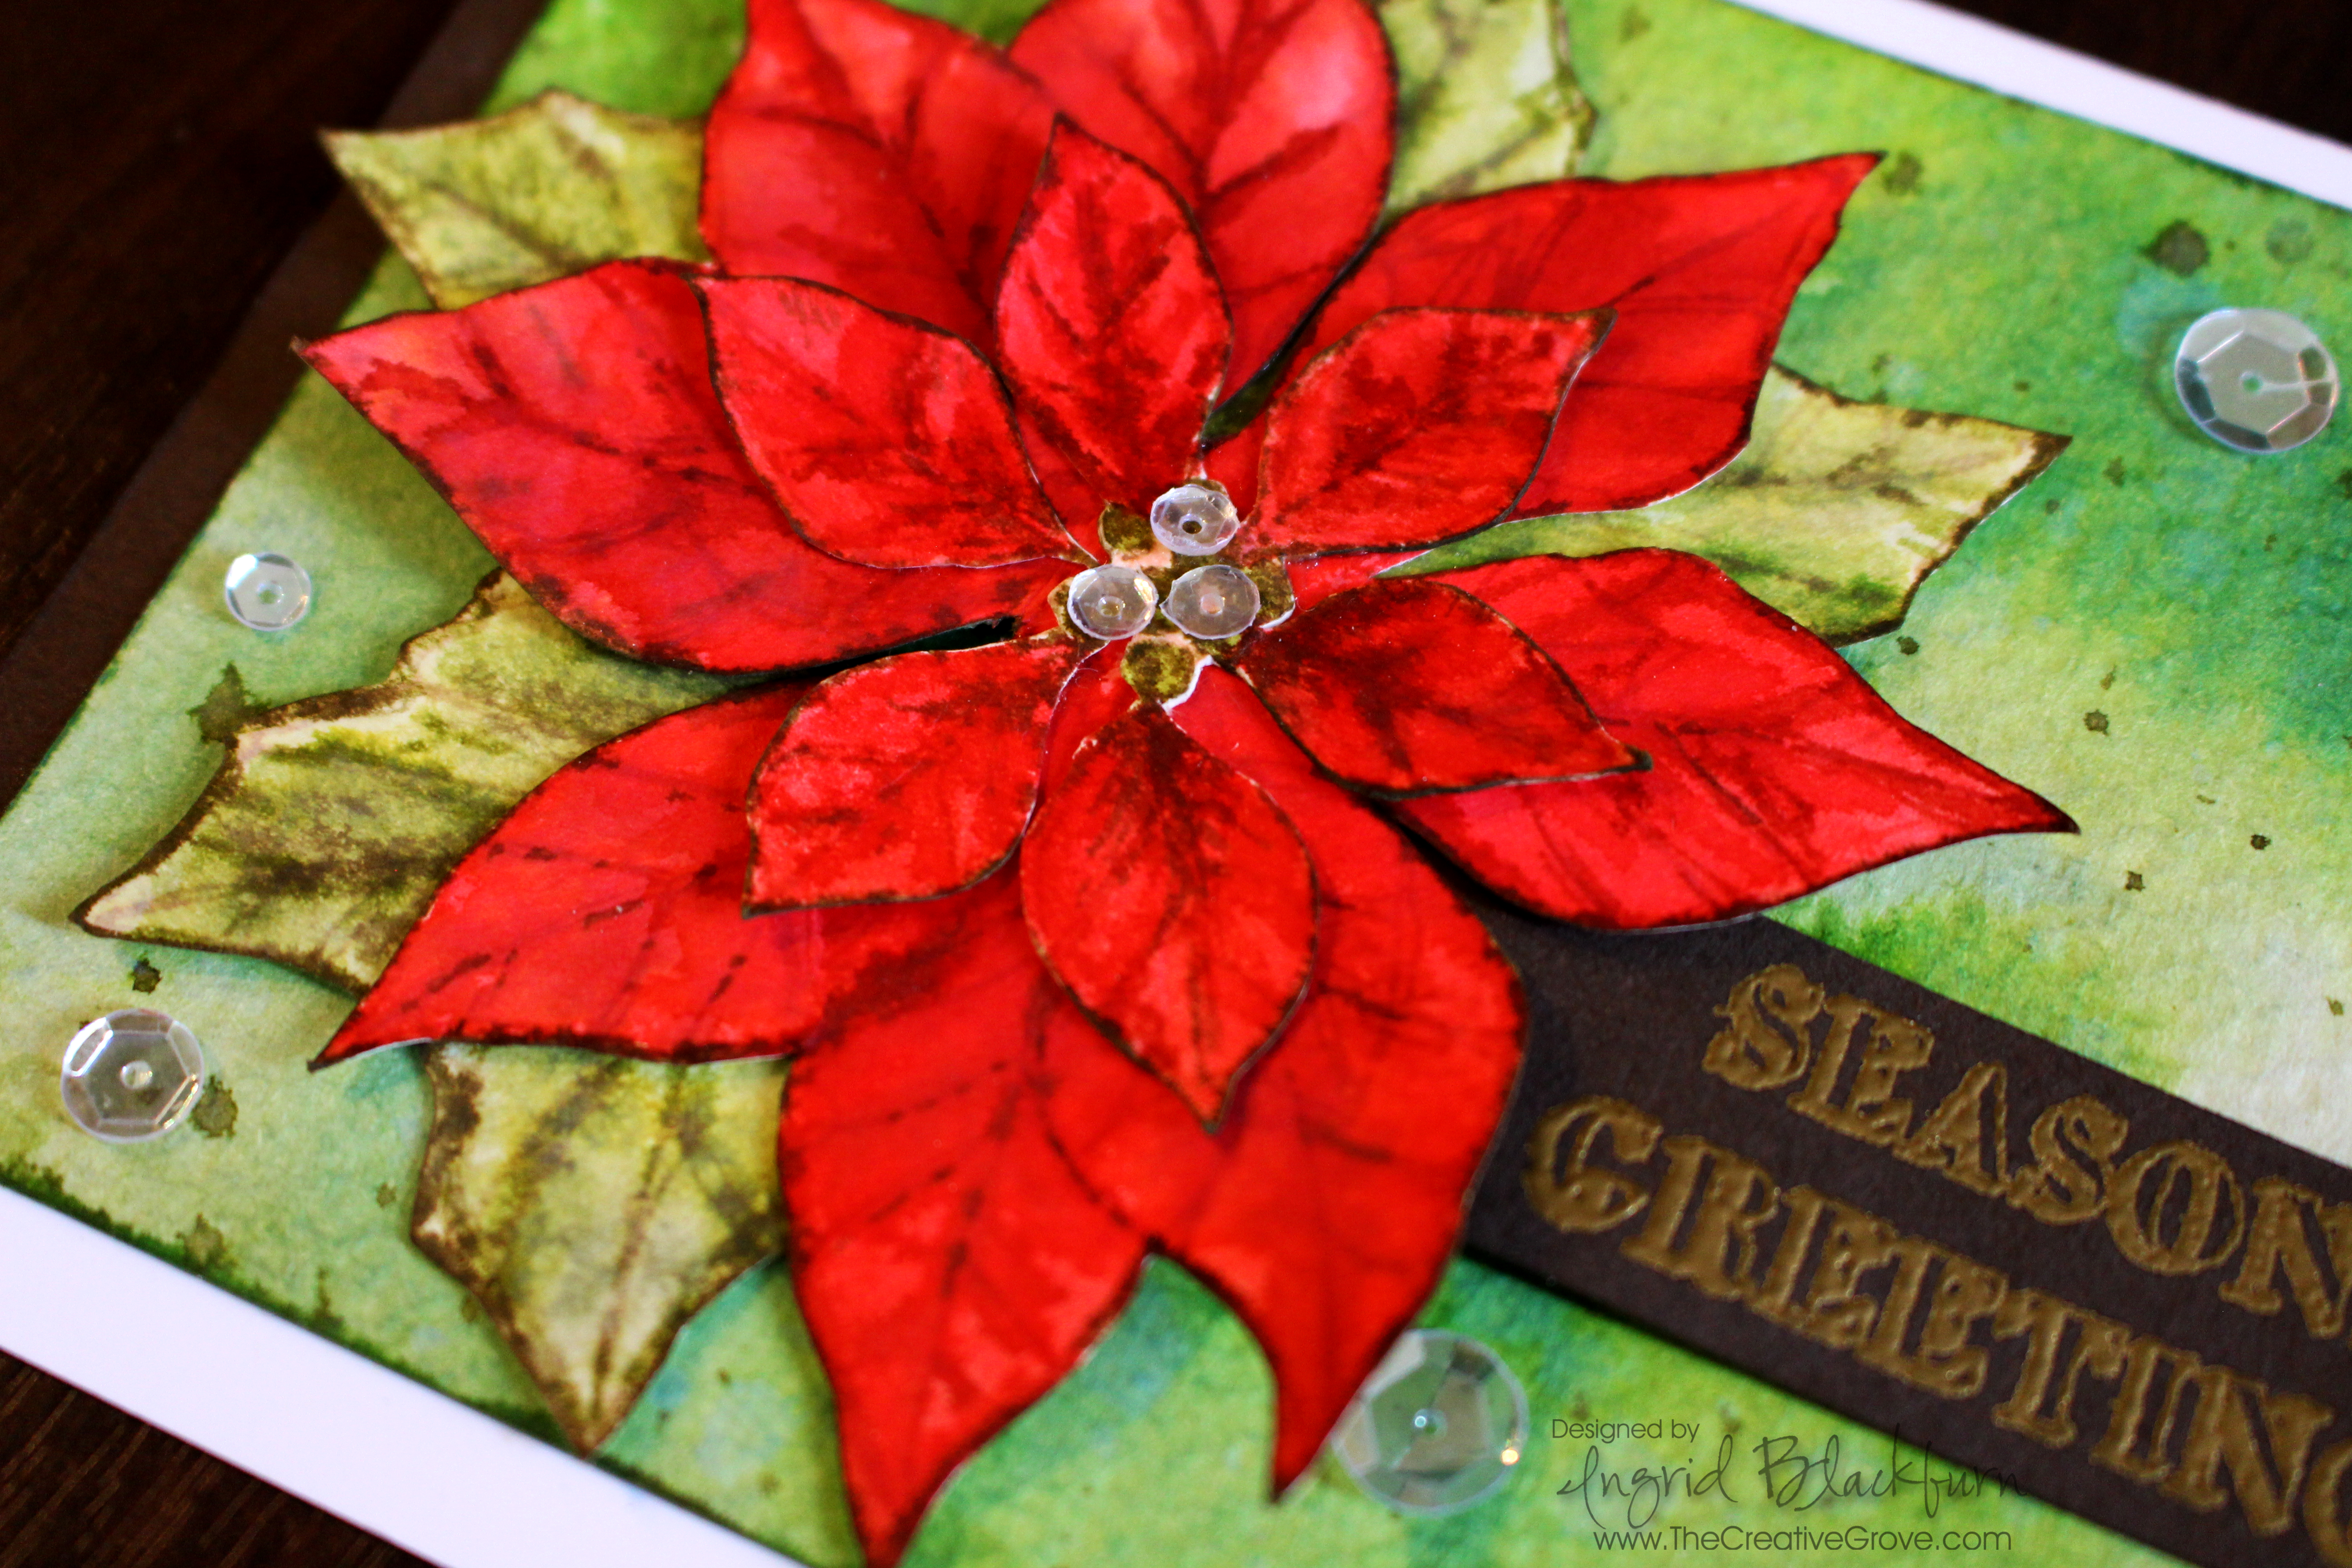
  • Add a spritzed version of Festive Berries, keeping some light areas. Apply your color using the veins of the flower as a guide and spread the color outward with wet brush – I used a Pentel AquaBrush.
  • Repeat using Barn Door and add a little detail to the veins with Fired Brick. With each layer, add the color in different spots – some heavier and lighter. This will help you to develop texture in  your flower.
  • Fussy cut both of your flowers out right at the line image – don’t leave any excess white. You should have a large and smaller flower.
  • Edge your petals in Gathered Twigs. Be careful to just get the very edge and not onto the flower if possible. Use a Distress marker if you’re more comfortable.

Watercolored Poinsettia 004

  • Stamp your leaves in Bundled Sage and Paint them in a similar manner using a light wash of Bundled Sage and add a little Peeled Paint  and an even smaller amount of Forest Moss at the veins. Keep them really light to help as a contrast from the background.
  • Fussy cut them out. Glue your leaves to the larger flower, and then your smaller flower on top.
  • Emboss your greeting onto Espresso card stock – I used the set Mixed Christmas Sentiments by Happy Little Stampers. I then created a banner and attached it to the back of my flower.
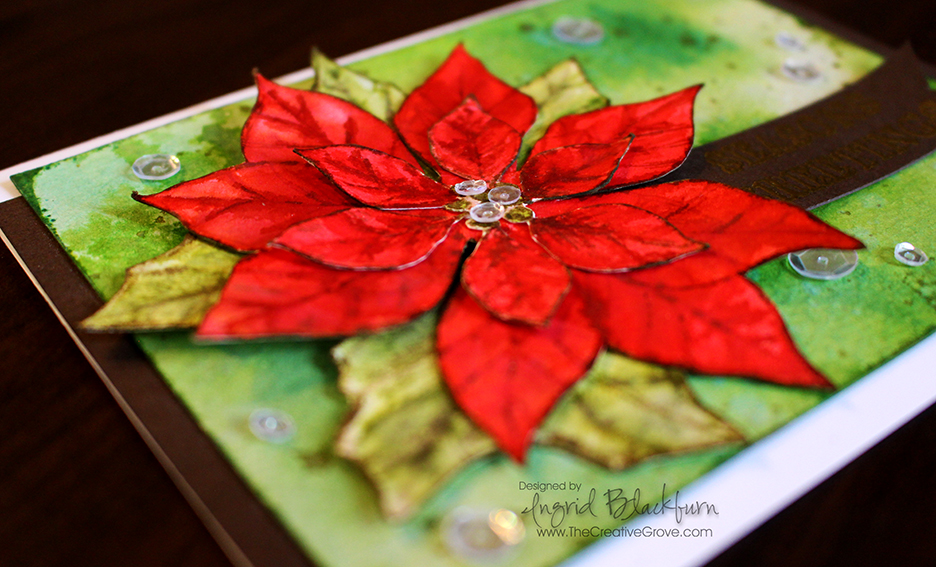
  • Before using liquid glue to attach the flower and banner to the card, I gently bent up s few of the petals and the banner to give a better 3D look.
  • Add some sparkling clear sequins by pretty pink posh for a final touch.

Watercolored Poinsettia 007

Here are the card dimensions:

  • Card – Top folding 8 1/2 x 5 1/2″ White
  • Card front – 140# water color paper by Canson – 3 3/4 x 5″
  • Espresso – Matte – 5 1/2 x 3 1/2″, banner – scrap

I hope you enjoyed this little tutorial on watercolor using distress inks, okay – not so little. You can use watercolor paints as well, or any dye based inks that blend well with water. In my experience, the distress are the most transparent of the dye inks out there. Have fun with it, and I can’t wait to see what you create. And don’t forget – if you want the 12 Days of Christmas series, be sure to sign up for the Creative Tips E-letter.

Signature-24-pt_thumb.jpg

HLS Texture & Layered Holly

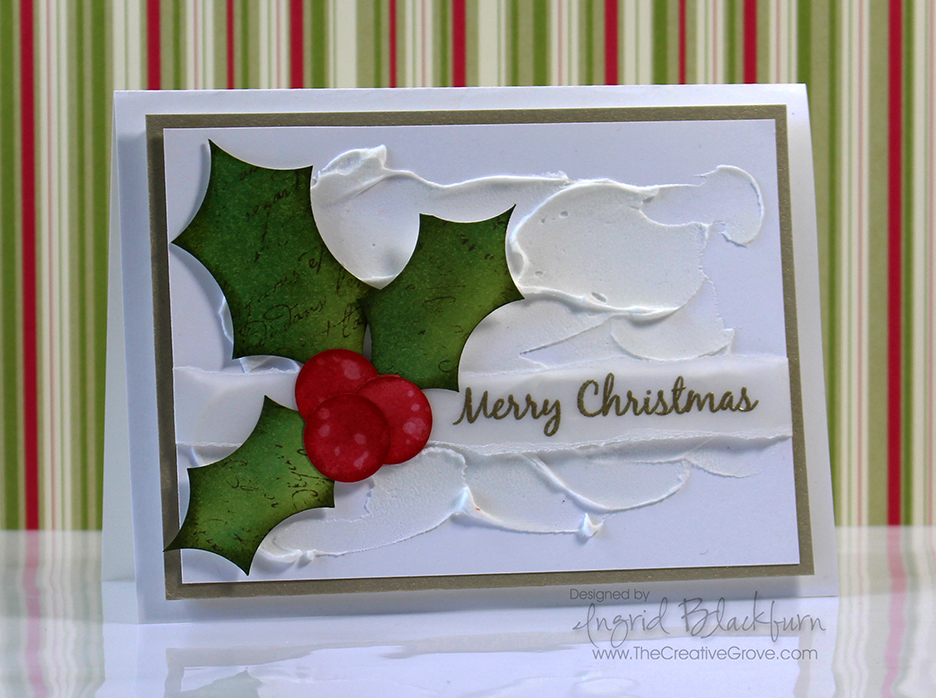
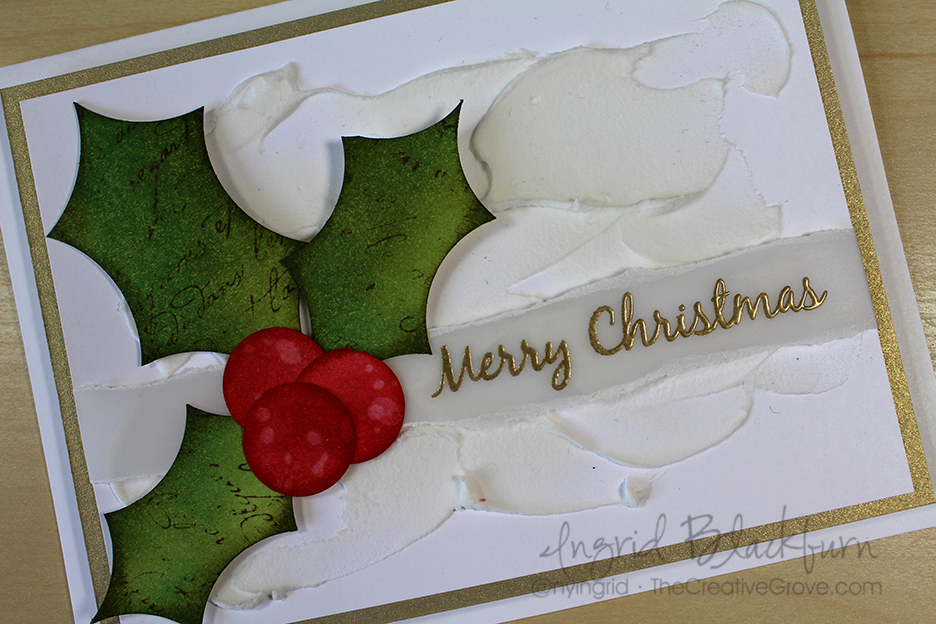
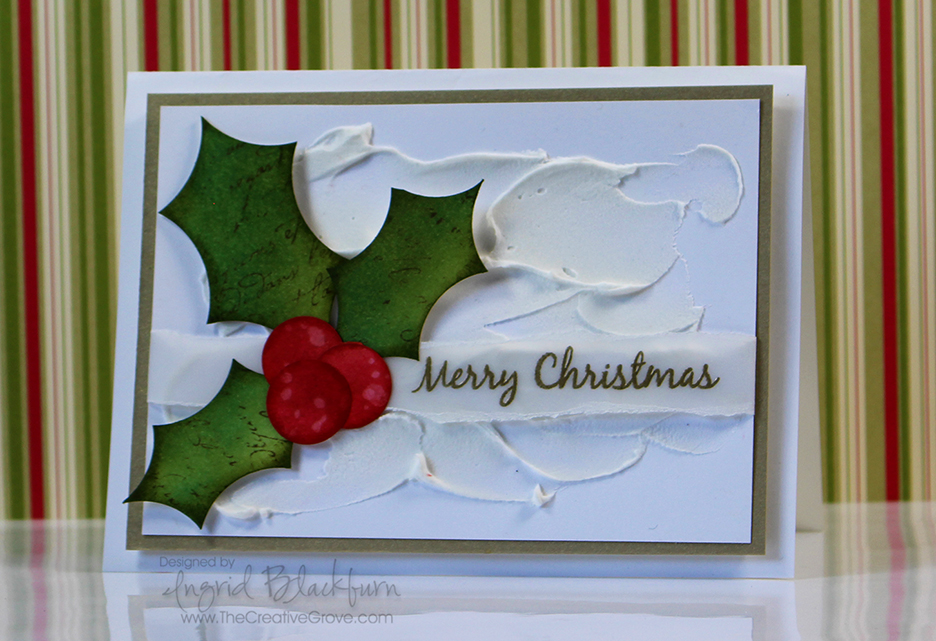
This month at Happy Little Stampers there is a new Christmas Challenge and I thought you would like to get a little creative with some DIY Holly since that’s the theme – Holly! You will have SO much fun making this project – it’s different, has great texture, and is by far one of my favorite Christmas Cards I’ve made all year.

HLS Christmas Challenge September 2015

If you’ve visited my blog before, it’s no secret that I love to create Christmas Cards all year long. Even before being on the design team for HLS! Once I started entering Christmas Challenges a few years ago, I started to send out different cards to all my friends and loved ones. I had always mass produced one or two designs be fore, but I LOVE sending unique individual cards out!

Gone are the days of mass production for me, and it’s kind of nice not having that big work day/week looming over my shoulders. One of the fun processes I go through is picking which card for which person – it’s a tough one sometimes, but the cards speak to me…I know I must sound nuts. If you do this, I’d love to know in the comments that I’m not alone!

Well, onto the cool tutorial and video – yes, of course there’s a video!

Happy Little Stampers Christmas Challenge

I broke out the embossing paste for this project – and used it in an unconventional way. I usually use it with stencils, but for this project, I just thought I’d slather it on – and what a cool look! Here’s the video – I know it’s a bit longer than my normal tutorials, but it’s jam packed with how to’s, tips and lots of various techniques – so enjoy!

So what did you think? Here are a few Creative Tips for you as well. Be sure to play along with us at the Happy Little Stampers Christmas Challenge.

Did you know…HLS put out their own stamps just recently? The sentiment I used on my project is from the Mixed Christmas Sentiments set – it’s awesome – high quality photopolymer that stamped beautifully. (And no, I didn’t get it for free – I paid for it – so that’s an honest opinion!)

Creative Tips –

  • To get an abstract look with the embossing paste – use a rounded short palette knife. This way you can easily slather it on allowing it to create a random look. It spreads like buttercream frosting.
  • When sponging your scrap pieces for your embellishments, don’t worry about getting it perfectly blended. The rough edges of the sponge tool and random spots will give you great texture in your holly leaves.

DIY Holly and Berries

  • Try using different colors to get depth in your leaves and berries
    • Leaves – Mowed Lawn, Peeled Paint, Pine Needles, Forest Moss (edge)
    • Berries – Worn Lipstick, Festive Berries, Barn Door, Fired Brick (edge)
  • To create the layered torn edge, tear a piece of vellum card stock towards you – tearing away puts the texture on the back.
  • Use liquid glue to get the pieces to stick to unfriendly surfaces like vellum and embossing paste.

CAS - clean and simple christmas cards

  • To create your holly leaves – use circle punches – larger are a bit easier. Create your top point as in the video, and continue around the edge.
  • Add water spots to your berries by adding water to your hand then flicking or dripping it onto your distress piece just as in the video. Distress works with water and it creates an amazing look – perfect for the berries.
  • The wider base makes it easier to glue your leaves together. You won’t see it with the berries over it.
  • Be sure to edge your berries and leaves – it helps to create a border that gives you a little interest.

Distress Ink Techniques and Embossing Paste

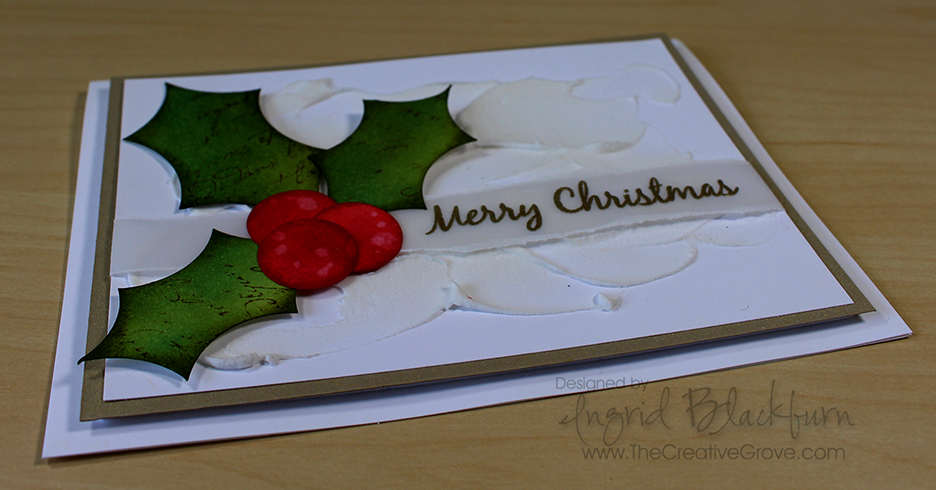
  • To pop up the entire panel, use fun foam to keep it up through the mail – it’s rather large and that will help ensure you get the same effect once the card is delivered.

Dimensions – 

  • Card Base – White card stock 4 1/2 x 6″
  • Card Front:
    • White – 3 3/4 x 5 3/8″
    • Brushed Gold Matte – 4 1/8 x 5 5/8″
  • Vellum Card Stock – 1 1/2 x 8 1/2″
  • White scraps :
    • Leaves – one at least 2 1/4″ wide the other 2″ wide strips
    • Berries – at least 1″ wide strip

Overall, this projects has lots of techniques in it. They are all simple and that’s what I love about this card so much – it’s clean and simple style with all that white space. Creating your own embellishments is also a great accent – adding little touches like different shades, edging, water spots and partially stamped script just gives your pieces dimension and character.

Christmas Cards with embossing paste

I hope you join me and the talented design team over at Happy Little Stampers for a great Holly Christmas Challenge!

I thought I’d enter this card in another fun challenge –  Merry Monday for their holly challenge this week. Must be a holly week! 🙂

Merry Monday Holly Challenge

I can’t wait to see what YOU create!

ingrid signature

[optin_box style=”13″ width=”500″ alignment=”center” action=”https://www.aweber.com/scripts/addlead.pl” disable_name=”Y” method=”post” email_field=”email” email_default=”Enter your email address” integration_type=”aweber” double_optin=”Y” list=”3846012″ name_field=”name” name_default=”Enter your first name” name_required=”Y”][optin_box_field name=”headline”]If you enjoyed this tutorial…[/optin_box_field][optin_box_field name=”paragraph”]PHA+4oCmeW914oCZbGwgbG92ZSBvdXIgPGVtPjxzdHJvbmc+PHNwYW4gc3R5bGU9ImNvbG9yOiAjMjQ0YzVlOyI+ZnJlZTwvc3Bhbj4gPC9zdHJvbmc+PC9lbT5zdWJzY3JpYmVyIG9ubHkgdmlkZW8gc2VyaWVzLiDCoExlYXJuIG5ldyB0ZWNobmlxdWVzIHRocm91Z2ggb3VyIDxzcGFuIHN0eWxlPSJjb2xvcjogIzI0NGM1ZTsiPjxlbT48c3Ryb25nPmV4Y2x1c2l2ZTwvc3Ryb25nPjwvZW0+wqA8L3NwYW4+Q3JlYXRpdmUgVGlwcyBlLWxldHRlcsKgYW5kIHN1YnNjcmliZXIgb25seSB2aWRlbyBhbmQgcHJvamVjdCB0dXRvcmlhbHMhPC9wPgo=[/optin_box_field][optin_box_field name=”privacy”][/optin_box_field][optin_box_field name=”top_color”]undefined[/optin_box_field][optin_box_button type=”1″ text=”Send me exclusive tips!” text_size=”32″ text_color=”#000000″ text_bold=”Y” text_letter_spacing=”0″ text_shadow_panel=”Y” text_shadow_vertical=”1″ text_shadow_horizontal=”0″ text_shadow_color=”#f6fefb” text_shadow_blur=”0″ styling_width=”50″ styling_height=”19″ styling_border_color=”#000000″ styling_border_size=”1″ styling_border_radius=”6″ styling_border_opacity=”100″ styling_shine=”Y” styling_gradient_start_color=”#a3b640″ styling_gradient_end_color=”#80902c” drop_shadow_panel=”Y” drop_shadow_vertical=”1″ drop_shadow_horizontal=”0″ drop_shadow_blur=”1″ drop_shadow_spread=”0″ drop_shadow_color=”#000000″ drop_shadow_opacity=”50″ inset_shadow_panel=”Y” inset_shadow_vertical=”0″ inset_shadow_horizontal=”0″ inset_shadow_blur=”0″ inset_shadow_spread=”1″ inset_shadow_color=”#80902c” inset_shadow_opacity=”50″ location=”optin_box_style_13″ button_below=”Y”]Send me exclusive tips![/optin_box_button] [/optin_box]
 

Sparkly Moonlit Evening

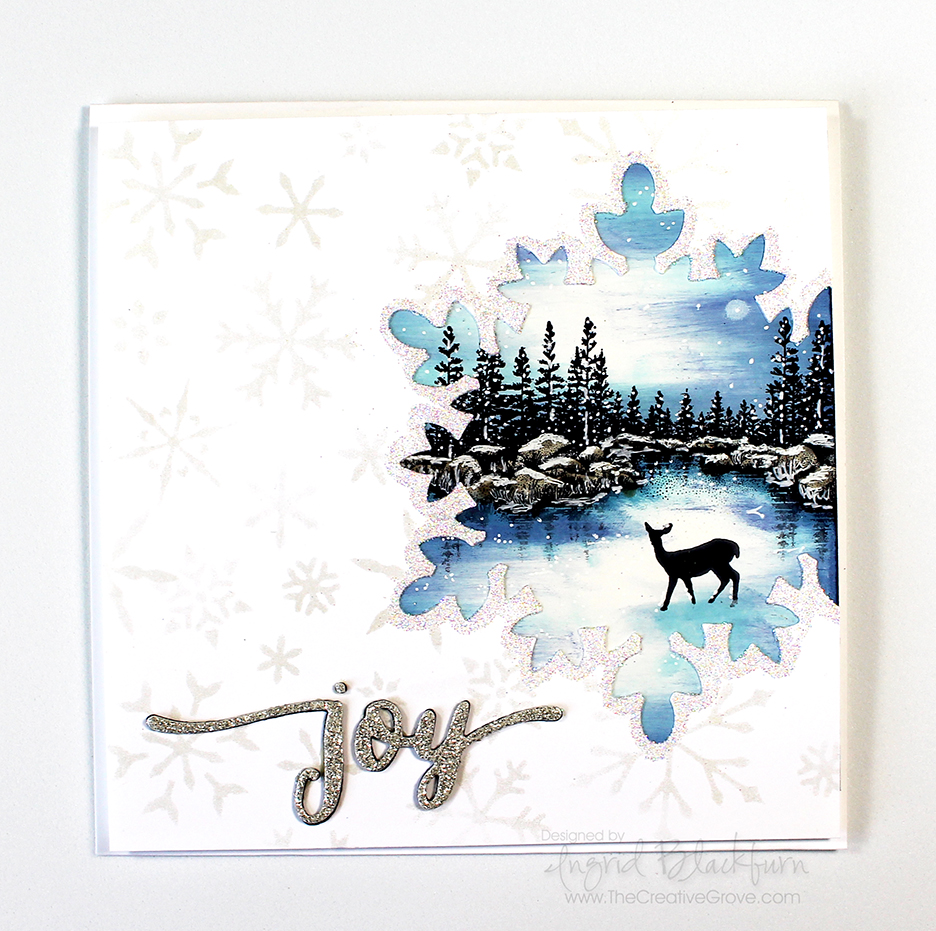
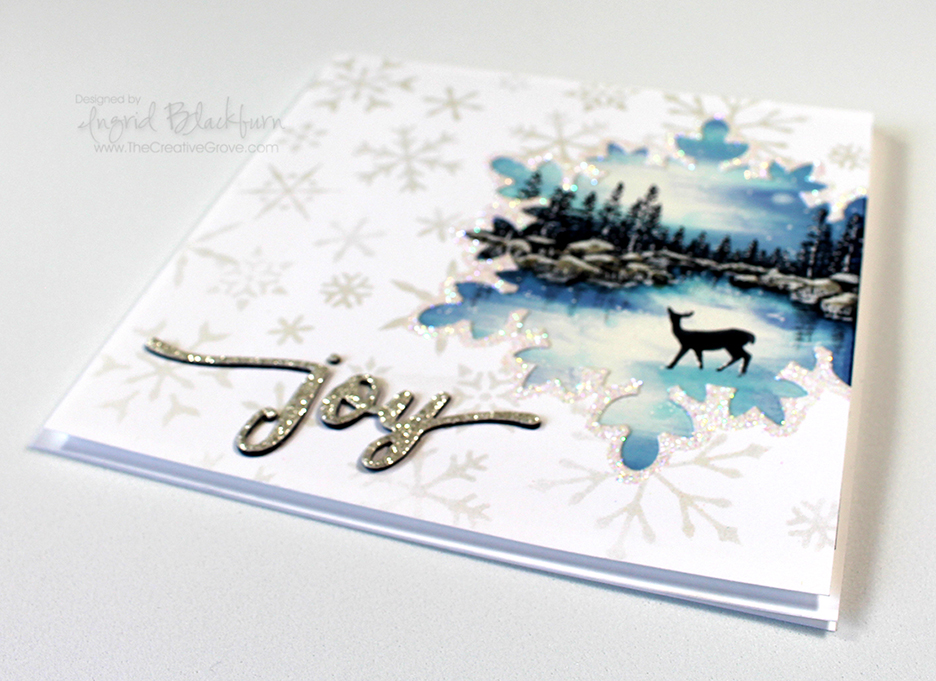
Stampscapes Scenic Card

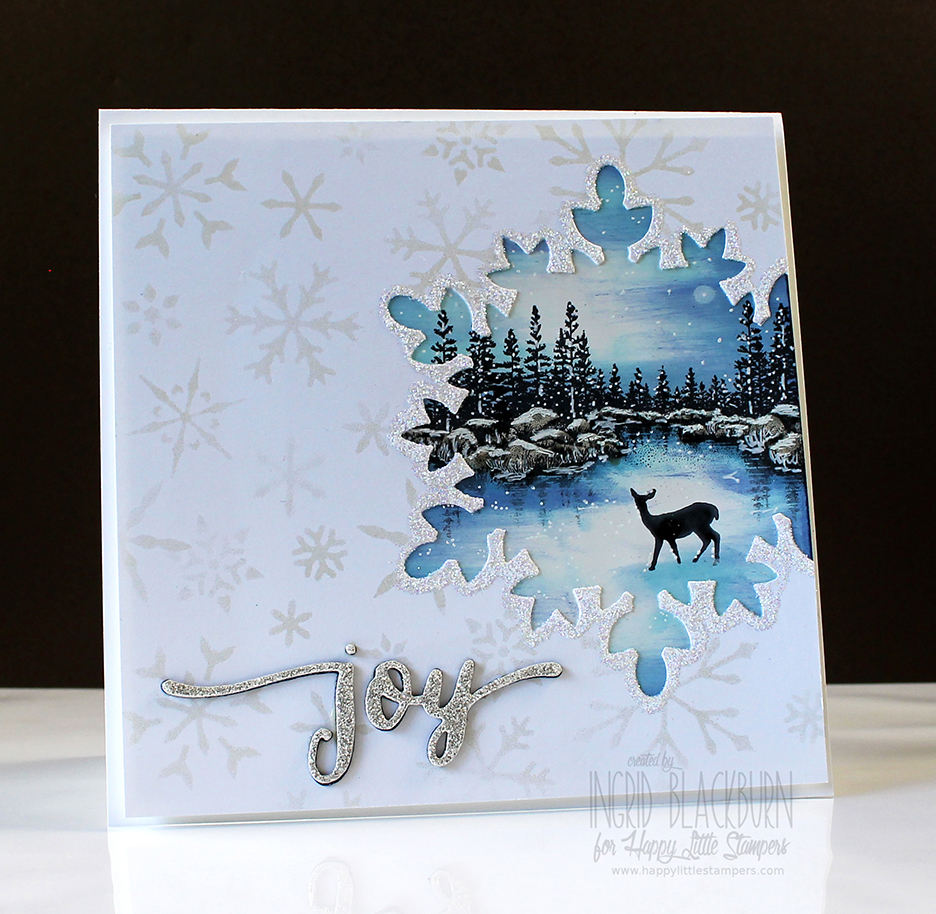
We had a fun first month with the new Christmas Challenge at Happy Little Stampers – well the fun isn’t stopping there! This month the theme is Sparkle, so I figure what’s more sparkly than Snow?

HLS Christmas Challenge August 2015

I whipped out some of my favorite stamps for this beauty – Stampscapes. And I have a treat for you today  – I filmed it too! The first video is about the Ink Swipe technique using a Colorbox Stylus and Sponge Applicator. I’ve always admired Kevin Nakagawa’s (Artist and Owner of Stampscapes) videos and creations, so I hope I do his technique some justice! It’s quite a bit longer than my regular videos, so grab a beverage, and enjoy all the creative tips along the way!

The Second video shows you how to put the Sparkle in your card  – that’s the Christmas Challenge theme after all…and how to create the snowflake window with your scene. That one’s a bit more normal length…lol! Both showcase a very cool idea, so have fun with them. They are completely step by step.

View Scenic Card Portion on YouTube

View Snowflake cutout card portion on YouTube

The videos will teach you how to use the Colorbox Stylus tool on glossy card stock for a mystical moonlit scene. It’s loaded with tips and how to’s so enjoy! And I can’t wait to see YOUR creations at Happy Little Stampers for the Christmas Challenge – be sure to play along!

And if you didn’t get a chance to visit any of the challenges at Happy Little Stampers…be sure to stop by to see the new Stamps! What???!! Yes, there is a new stamp company in town – get your hands on the first series. Definitely check out the shop here.

Measurements:

  • Card Base – 11 x 5 1/5″ top folding card
  • Card Front – White – 5 1/4 x 5 1/4″
  • Glossy Card Stock for Scene – 4 3/4 x 4″
  • Glimmer Paper, Navy Card Stock – Stampin Up

Supplies:

  • Stamps – Small Lakeside Cove, Doe – Stampscapes
  • Stencils – Winter – Memory Box
  • Dies – Handlettered Holiday – WPlus9, Festive Flurry – Stampin Up (Retired)
  • Inks – Tuxedo Black – Memento; Ranger Distress –  Tumbled Glass, Broken China, Stormy Sky, Chipped Sapphire, Pumice Stone; Illuminate – Stampin Up, Frost White – Colorbox
  • Other – Colorbox Stylus Tool with Sponge Applicator, Fun Foam, 2 Way Glue Pen, Dazzling Diamonds Glitter – SU, White Gel Pens, Q-Tips, Mini Sponge Tool, Liquid Glue

Ink Swipe Technique

Creative Tips – 

  • Be sure to add a light layer of ink (Distress, Adirondack Lights) to your glossy card stock first to help the rest glide with the stylus tool.
  • To keep your scene elevated evenly use fun foam to mount it for a bit of elevation off the main card.
  • Sponge lightly but thoroughly. Try not to press too hard through your stencil to avoid unsightly marks from your sponge tool.
  • If you don’t have a pearlescent pigment ink like Illuminate – try silver, white or even versamark.
  • If you’re not into scenic cards – throw a photo in that spot!

Snowflake Stampscape 002

I also love to play along with other challenges – another one of my favorites is Muse Christmas Visions – and this week the inspired card had snowflakes in it. Even though the stars spoke out to me too, it was the snowflakes that ended up on my card to provide the sparkle. Cool how it all tied in!

I also played along with these challenges too this month:

So, now that you’ve learned a little here – be sure to check out all the other great inspirational projects at the Christmas Challenge at Happy Little Stampers! I can’t wait to see what you come up with.

Signature-24-pt_thumb.jpg

[optin_box style=”13″ width=”500″ alignment=”center” action=”https://www.aweber.com/scripts/addlead.pl” disable_name=”Y” method=”post” email_field=”email” email_default=”Enter your email address” integration_type=”aweber” double_optin=”Y” list=”3846012″ name_field=”name” name_default=”Enter your first name” name_required=”Y”][optin_box_field name=”headline”]If you enjoyed this tutorial…[/optin_box_field][optin_box_field name=”paragraph”]PHA+4oCmeW914oCZbGwgbG92ZSBvdXIgPGVtPjxzdHJvbmc+PHNwYW4gc3R5bGU9ImNvbG9yOiAjMjQ0YzVlOyI+ZnJlZTwvc3Bhbj4gPC9zdHJvbmc+PC9lbT5zdWJzY3JpYmVyIG9ubHkgdmlkZW8gc2VyaWVzLiDCoExlYXJuIG5ldyB0ZWNobmlxdWVzIHRocm91Z2ggb3VyIDxzcGFuIHN0eWxlPSJjb2xvcjogIzI0NGM1ZTsiPjxlbT48c3Ryb25nPmV4Y2x1c2l2ZTwvc3Ryb25nPjwvZW0+wqA8L3NwYW4+Q3JlYXRpdmUgVGlwcyBlLWxldHRlcsKgYW5kIHN1YnNjcmliZXIgb25seSB2aWRlbyBhbmQgcHJvamVjdCB0dXRvcmlhbHMhPC9wPgo=[/optin_box_field][optin_box_field name=”privacy”][/optin_box_field][optin_box_field name=”top_color”]undefined[/optin_box_field][optin_box_button type=”1″ text=”Send me exclusive tips!” text_size=”32″ text_color=”#000000″ text_bold=”Y” text_letter_spacing=”0″ text_shadow_panel=”Y” text_shadow_vertical=”1″ text_shadow_horizontal=”0″ text_shadow_color=”#f6fefb” text_shadow_blur=”0″ styling_width=”50″ styling_height=”19″ styling_border_color=”#000000″ styling_border_size=”1″ styling_border_radius=”6″ styling_border_opacity=”100″ styling_shine=”Y” styling_gradient_start_color=”#a3b640″ styling_gradient_end_color=”#80902c” drop_shadow_panel=”Y” drop_shadow_vertical=”1″ drop_shadow_horizontal=”0″ drop_shadow_blur=”1″ drop_shadow_spread=”0″ drop_shadow_color=”#000000″ drop_shadow_opacity=”50″ inset_shadow_panel=”Y” inset_shadow_vertical=”0″ inset_shadow_horizontal=”0″ inset_shadow_blur=”0″ inset_shadow_spread=”1″ inset_shadow_color=”#80902c” inset_shadow_opacity=”50″ location=”optin_box_style_13″ button_below=”Y”]Send me exclusive tips![/optin_box_button] [/optin_box]
Watercolor Christmas Cones

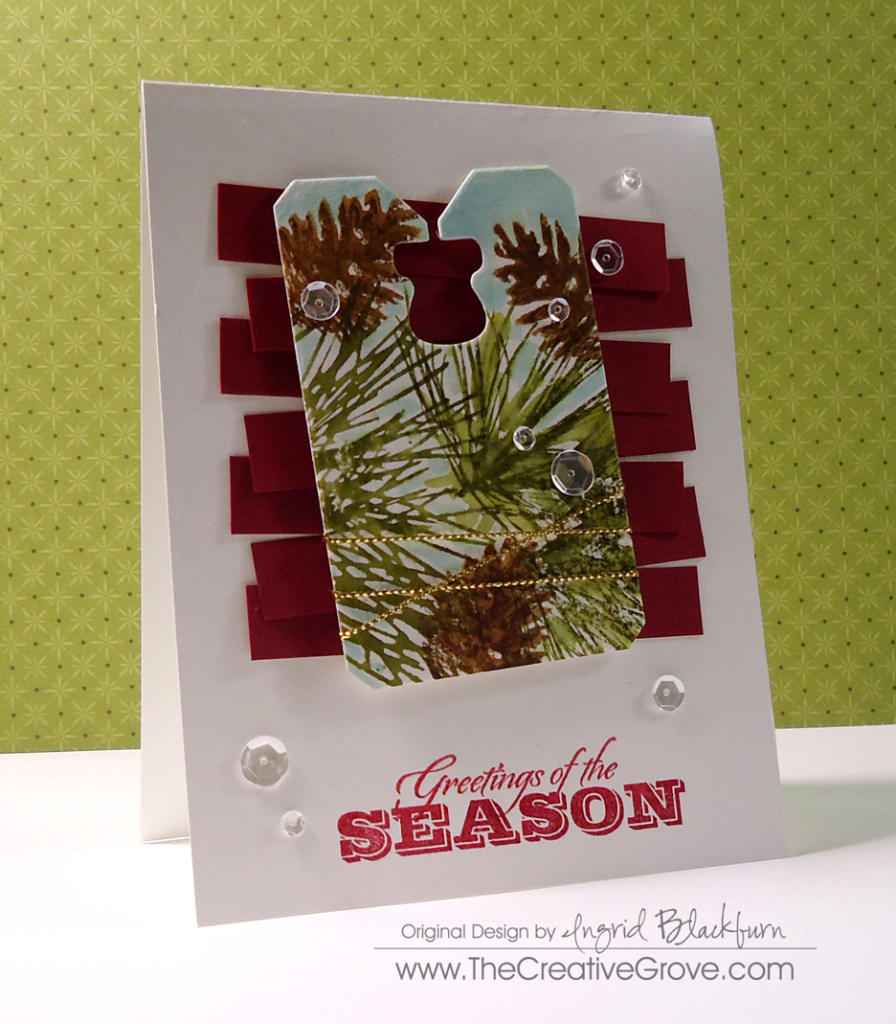
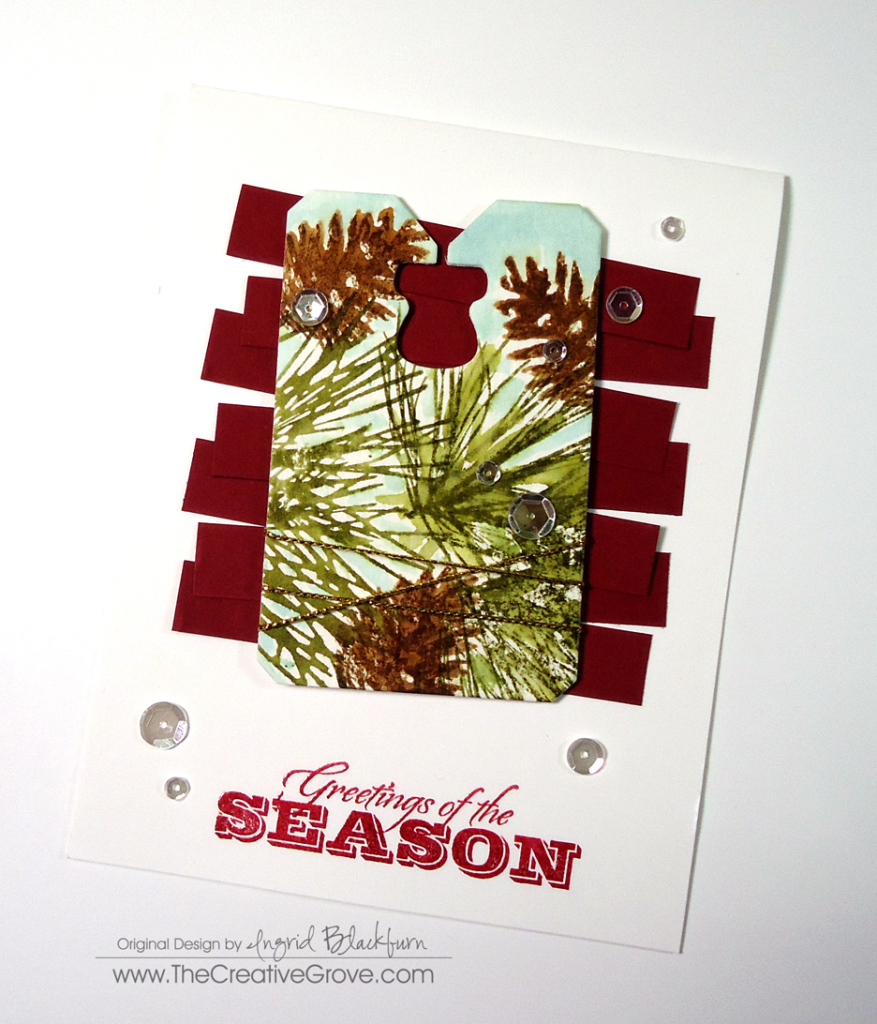
Don’t you just love watercolor and Distress Inks?   This tag card was actually an after thought believe it or not.  The main card was sent full tutorial and all to the Creative Tips List as part of the free 12 Days of Christmas series.  If you’re not on it – what are you waiting for – it’s free?

Watercolor Pine Cones 009

Back to this tag…I usually test stuff out when stamping with a new set and watercoloring, so this was my text swatch…thankfully it was just big enough for this tag die from Chalk Talk Framelit set by Stampin Up.  I wrapped it with some gold string, popped it up over some 1/2 strips – you know you have those lying at the bottom of your Cherry Cobbler folder with other scraps…added an embossed sentiment, some sequins and wallah – not sure on the spelling there!  Don’t you just LOVE the look?  Can you believe it’s made using Distress Inks?  You can use any dye based inks…but I just LOVE the result I get when I use Distress by Ranger.

Watercolor Pine Cones 010

It turned out so SUPER cute, I can’t stand it – this one is sitting on my desk at the moment…I just love the colors.  For all the details on how to do the watercolor stamping…be sure to get on the Creative Tips E-letter list.  I’ll be sure to get you the link for the tutorial…I promise! 🙂

Interested in the class instead?  We have all 12 projects + step by step videos + PDF’s as a class.  Take your time – it’s an online class with lifetime access 24/7!  

Get Instant Access Here

I also wanted to enter this card in a fabulous challenge that I just love – Distress.  I’ve participated in a few this past year…be sure to join in on all the fun – Virginia’s View is a fabulous way to get inky!

Virginias View challenge distressed

And one of my favorite stamp company’s challenge too – Simon Says Stamp Wednesday Challenge for Sparkly Creations.  They’re featuring Kaisercraft products, but I don’t have any!  So here are some fun sparkling clear sequins – my go to jewels of late by Pretty Pink Posh:

sss-wednesdayblog-logo


If you love the look Distress Inks can give a project – be sure to check out this fun technique – Vibrant Flicked Accents!

Happy Watercoloring!!

Signature_thumb.jpg

Polka Dot Christmas

Clean and simple Christmas card 001

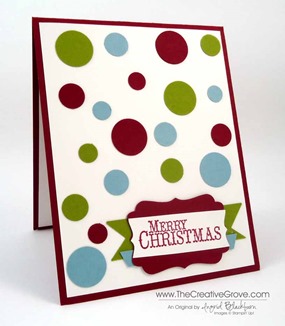
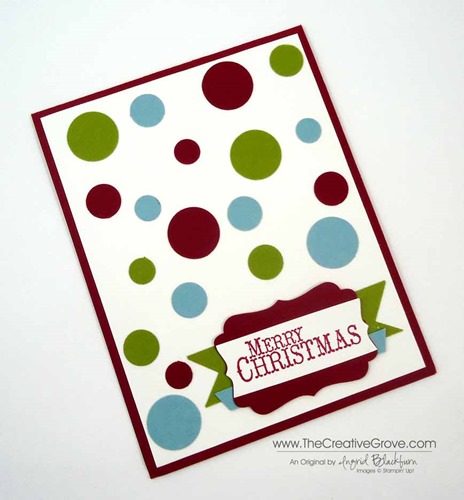
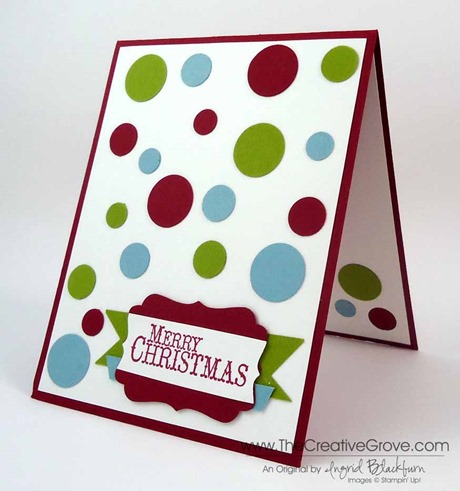
Since we’re packing all weekend, I thought I would dig into the archives and share one on my first Christmas cards that I blogged about on my old blog.  It’s a classic and you can substitute any greeting here.  Hope you enjoy it! SmileClean and simple Christmas card 003

The circles were punched using a 3/4”, 1/2”, and the circle punch from the Itty Bitty Shapes Punch Pack.  The banner was made using a Square Punch, and Decorative label Punch.  It’s a fairly simple card that has a classic contemporary look to it.

The colors are Cherry Cobbler and retired – Baja Breeze and Lucky Limeade. 

Clean and simple Christmas card 002

Moving Special

Don’t miss out – this special ends today!  Everyone who order a minimum $25 before shipping and handling and uses the hostess code – VWCWVJ34 will get 15 – 6×6” sheets of Designer Paper sent to them directly in the mail from me! Smile

Signature Snowflake 001

To shop 24/7 – click here

Mojo Color Me Christmas

Color Me Christmas 001 Main R

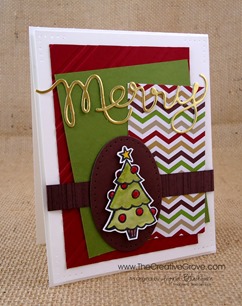
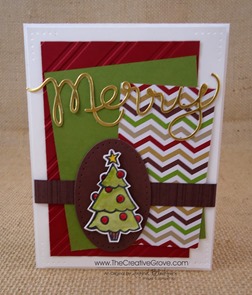
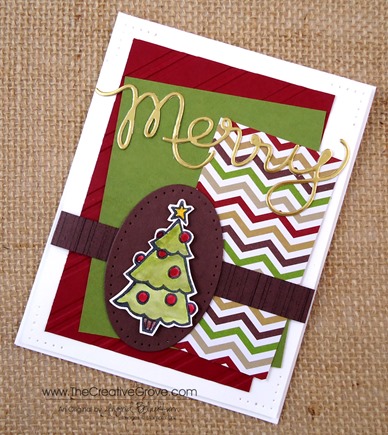
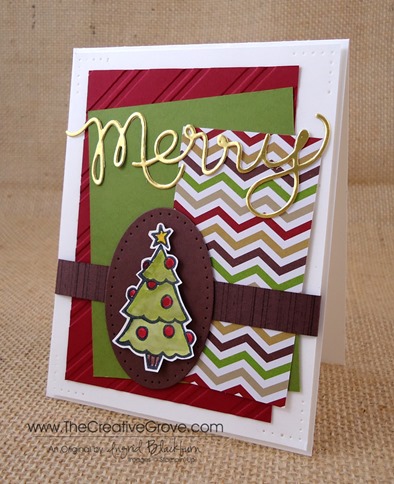
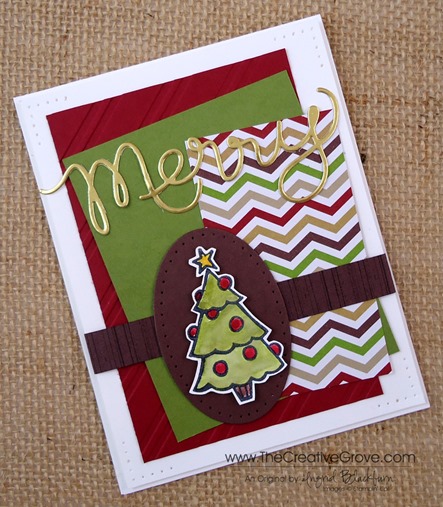
Do you like to color?  Then the Color me Christmas set is for you!  Today for the Mojo Monday challenge I played with some of my favorite new items from the new Holiday Catalog that went live last Thursday.  Did you get your free copy?

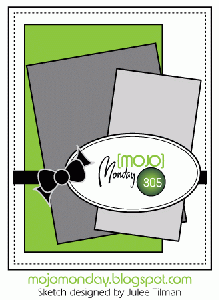
This weeks sketch had some simple elements that came together rather quickly.  I think you will find that you can use this design for any card situation and will  use this go to sketch quite frequently.  Here is the sketch and my result.  Enjoy the Creative Tips for you on these products below.

Color Me Christmas 001 Front Mojo305Sketch

Creative Tips –

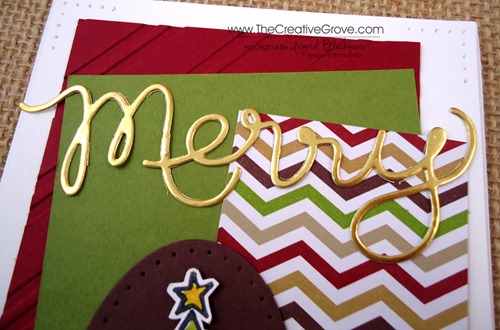
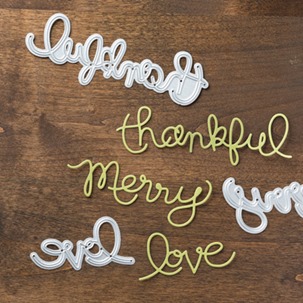
  • One of my top 5 items from the Holiday Catalog are the new Expressions Thinlits Dies.  Here you can see how I made the word Merry with the new Gold Foil paper that you will absolutely love!Color Me Christmas 001 CU2
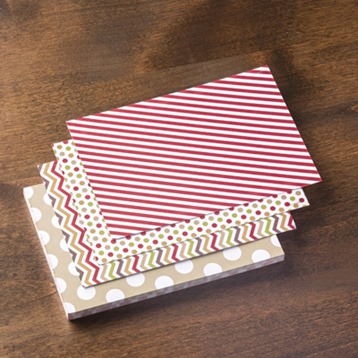
  • For some fun backgrounds, you can see that I paired the Cherry Cobbler card stock that was run through the Big Shot with the new Stylish Stripes Embossing Folder and the fun Designer Series Paper (DSP) from the Season of Style DSP Stack.
  • You will love the Two new Season of Style DSP Stacks because you finally have 24 – 4 1/2” x 6 1/2” sheets each of two designs.  That’s 48 sheets total!  Perfect for your Holiday Cards!!
  • To pull all the colors together you can see that I chose to work with the two most basic neutrals in the DSP stack – Chocolate Chip and Whisper White.  These neutrals help to make this card pop for you visually.Color Me Christmas 001 Side (1)
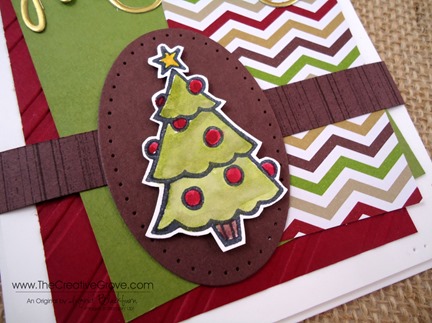
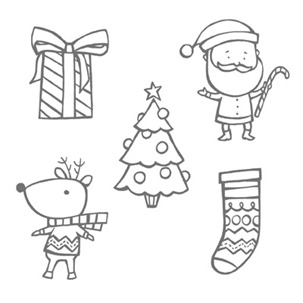
  • The Color me Christmas stamp set was stamped in StazOn Jet Black before being water colored with Old Olive, Cherry Cobbler, Chocolate Chip and Crushed Curry.  To make this go by quicker, you will want to use the Aqua Pens.
  • You will find that you do not need Watercolor Paper for small little items like this if you control how wet your brush is.  Of course if you have difficulty doing that, definitely try the watercolor paper out!  I used Whisper White for my little tree.
  • The tree was cut out using Paper Snips and you will want to make sure to leave a little white on the edge .  This will help pop the image on it’s background as it provides your eye with the color contrast it needs to be seen.Color Me Christmas 001 CU1
  • At first I had a piece of retired Chocolate Chip Grosgrain Ribbon that I was going to use.  Then I thought – where are you going to find that?  So I made my own Faux Grosgrain using – yup, you guessed it – the Gorgeous Grunge Stamp Set!  I am going to make sure that each and every one of you have this must have stamp set before you know it!
  • Isn’t this tree look just like a purchased die cut?  Can you believe that you can make this over and over again customizing it exactly how you want it?  I just love this set.
  • For a little character and finishing touch to the card, you can see that I added some paper piercing.  You will want to use both the Essentials and Occasions Paper Piercing Packs.Color Me Christmas 001 Main L
  • And of course for some drama, the tree and card front are popped up on Stamping Dimensionals.

It’s cute, right?  That tree is really becoming one of my favorite new images.  I can’t wait to stamp now with the rest of this set.  Be sure that you tune in tomorrow!  Have a great start to your week.


Signature Snowflake 001

Color Me Christmas 001 Angle

To Shop 24/7 in the Creative Store – Click here!

Stamp Sets – Color Me Christmas (131745c, 131742w), Gorgeous Grunge(130517c, 130514w) Paper – Old Olive, Cherry Cobbler, Chocolate Chip, Whisper White, Season of Style Designer Series Paper Stack, Gold Foil Ink –Cherry Cobber, Old Olive, Chocolate Chip, Crushed Curry, StazOn Jet Black Cool Tools – Stylish Stripes TIEF Folder, Paper Piercing Tool, Essentials Mat Pack, Stampin’ Pierce Mat , Occasions Mat Pack, Expressions Thinlits Dies, Aqua Painters The Perfect Finish – Stampin’ Dimensionals

Expressions ThinlitsColor Me ChristmasSeason of Style Paper Stack

Expressions Thinlits Sneak Peek

Expressions Thinlits 001 001

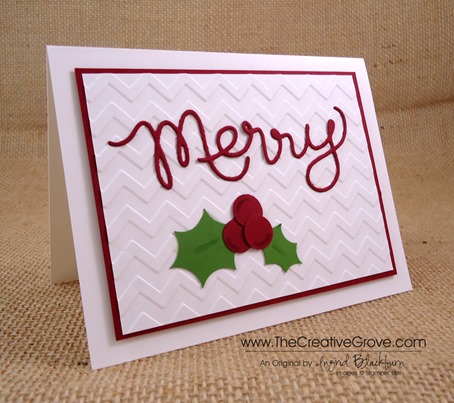
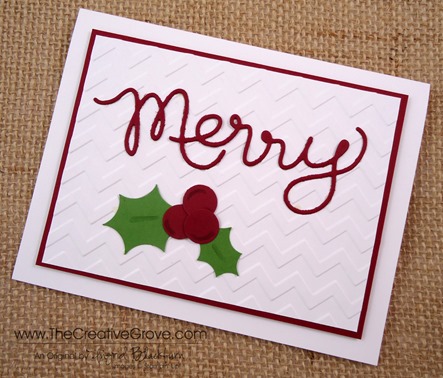
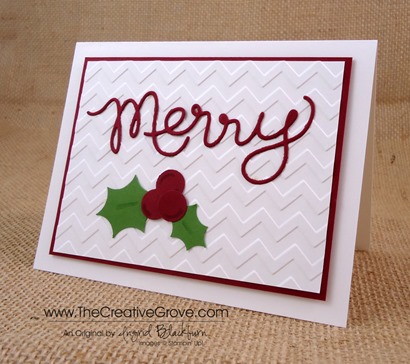
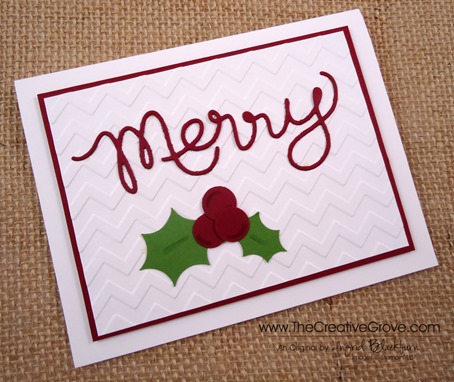
I’m in love with the new Expressions Thinlits.  What an awesome new product!  Starting August 1st, you will be able to cut cute little words just like this one with the new Expressions Thinlits – available in the new Holiday Catalog.  My mother always taught me it was rude to tease, but I thought you would love a little Sneak Peek of this fun and quick little card.  It literally came together in a matter of minutes.Expressions Thinlits 001 005

Creative Tips –

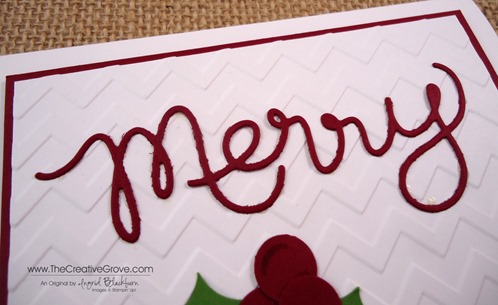
  • Definitely put a piece of wax paper between the word Thinlit and your cardstock.  It will help to pop it out after.
  • I used my paper piercer to help guide my word out from the back of the Thinlit.  It was super easy.Expressions Thinlits 001 007
  • Two spots didn’t punch through on my word – the loop in the second R and the Y.  I didn’t worry about it, because it gave me a place to drop a little multi-liquid glue.  It really is thin – you have to use the Multi-Liquid Glue.
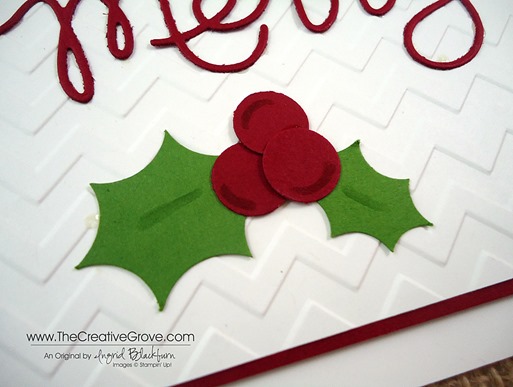
  • To make my holly leaves I used a 3/4” and 1/2” circle punch.  I don’t own a thinlit to punch those out, so why not make your own.  It was super easy.Expressions Thinlits 001 006
  • I wanted to accent my holly and berries, but didn’t want it to focus too much on that, so I used a blender pen and the ink from my ink pads.  I squeezed my ink pad – love that you can do that with Stampin’ Up! inks, and the ink collected in the lid. I then picked some up with my blender pen and added some subtle highlights.
  • The background was made with the Chevron Embossing Folder and I popped the panel up on Stampin’ Dimensionals for some interest.

This card literally took 4 minutes to make, so if you need a great go to holiday card in a pinch in December – make sure you have the Expressions Thinlits.  You can use them with any embossing folder for a quick and easy card! Always a great thing.

Expressions Thinlits 001 002

Learn a new technique in the Online Brayer Class

      Would you like to learn how to make Creative Scenery cards?  Have you been frustrated when trying to use your brayer?  Creative Scenery classes using a brayer have by far been my biggest hit with stampers.  Learn how to create gorgeous gradual transitions with 100+ minutes of step by step detailed video instruction teaching you how to master this technique.  The end result – You will feel like an artist.  Best of all, you will look at your stamps in a whole new way, make amazing projects and try things you never would have thought to do before.  This class is in its introductory period – get it while you can for less! Find out more here

      Signature Snowflake 001

      Expressions Thinlits 001 004

    To Shop 24/7 in the Creative Store – Click here!