Stampscapes: Sunrise Canoe Ride

Stampscapes 004 Main R

Are all of your clothes from the same store?  Probably not, so why would your crafting supplies be?  The world of rubber stamping is vast and varied.  So take what you already have – inks, paper, tools, and incorporate a little nature from Stampscapes into it! 

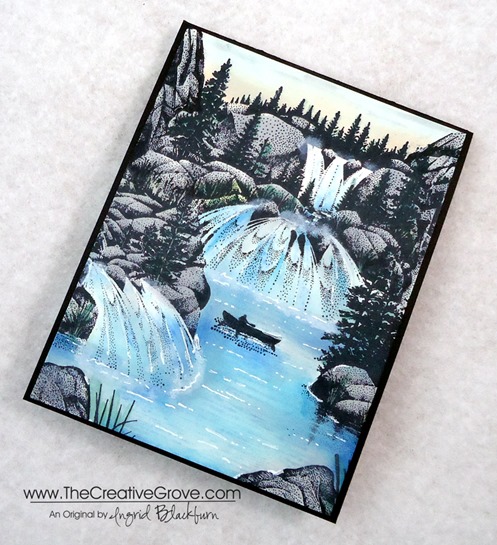
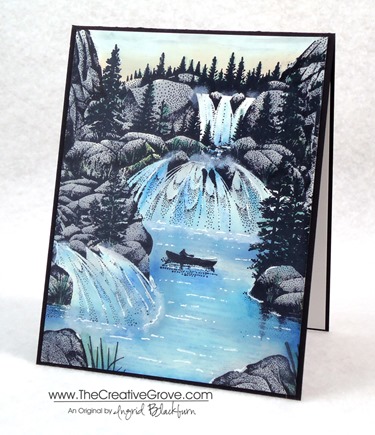
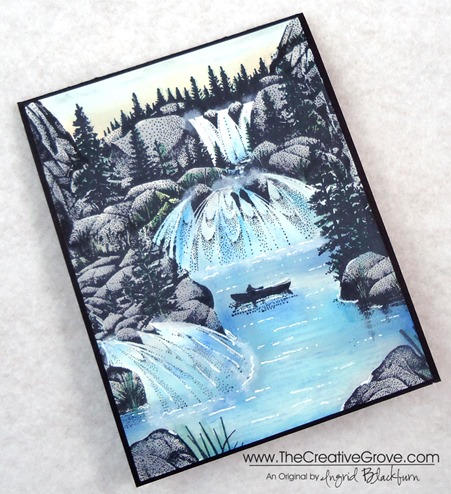
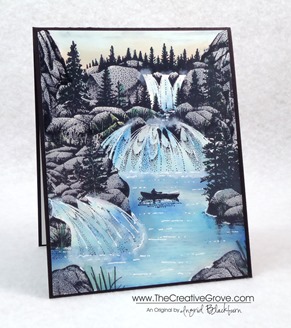
If I had my way, I’d live at the base of this scene.  Well, pretty close to it at least, the falls might be too loud!  About six months ago I came upon a scene built with these amazing outdoor scenery stamps.  You already know how I love to create brayer scenes, so these stamps really jumped out at me. 

Stampscapes stamps were first created by Kevin Nakagawa in 1993.  They are individual nature stamps that you can very easily combine together to create a seamless scene.  The designs are tonal in nature which allows them to overlap seamlessly.  Here I used 9 different stamps to build this scene.  I know, you’re probably saying, what?  I’ve become quite the addict, and have loved incorporating them into my stamping passion.  If you love creative scenery and scenes with depth, I know you will too.  Enjoy the steps to how I made this card.Stampscapes 004 Front
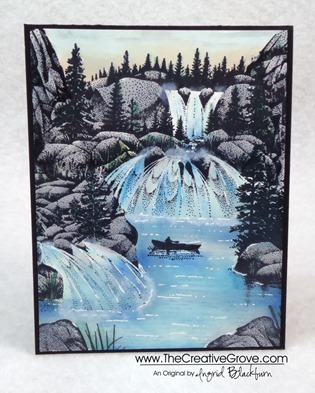
Creative Tips –

  • This scene was stamped in Black Dye ink on Glossy cardstock.  You can use a dye based ink pad like Memento Tuxedo Black or Marvy Black.  You will want an ink that will dry, that’s why you want a dye based ink.  The Stampin’ Up! Basic Black has had it’s issues since they’ve been working to perfect the formula, so I wouldn’t recommend it for a project on glossy paper at this point.
  • The Cascading Falls is the main image, so to build around that, you’ll want stamps that can accentuate it, not take away from it. 
  • The other images you will want to use for this scene are:  The right side of Side Falls, the left side of Lakeside Reflections, both the right and left side of Tall Rock with Falls, Rock 1 and 2, Reeds, Shimmering Water, and Solo Canoeist.  All stamps are in the large format with the exception of Reeds.
  • When building the scene, you want to overlap about 1/4” of the edge with your new image to create a seamless blend of images without any gaps.  Use a torn piece of paper towel rather than an actual cut out mask.  Since these stamps are tonal in nature, they blend seamlessly with each other.  The added bonus … this method is so much faster that traditional masking!
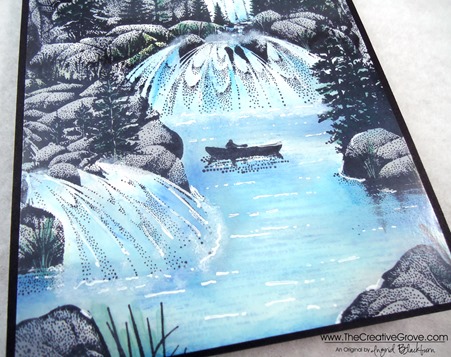
  • To add color, you will want to carefully place color with your Colorbox Stylus tool using various shades of blue.  Remember to always start with the lightest shade working into darker ones.  Keep some white space to keep the scene light.Stampscapes 004 CU Pool
  • Add a slightly darker shade around the rocks, building up a shadow underwater.  You might want to do the same at the base of your three falls.
  • Be careful not to add too much blue to your falls, waterfalls reflect light and they are primarily white.  I added three shades of blue in streaks in the general same areas. 
  • Use a grey ink color to shade your rocks with your stylus tip.  You will want to be careful as you edge your rocks near the water.  Try also adding a few grey streaks into your pool of water for some shadowing, but not much!Stampscapes 004 Side
  • You can add some green to your trees with a more precise applicator such as a Brushtix Mixed Media Brushes by Tsukineko or use markers.  When using markers, be careful not to add too much color as the images are quite fine.
  • The ripples in the water were stamped with Marvy Salvia Blue.  This gives the water a little depth and movement without taking away from the scene.  Use a light/medium blue for this.
  • To highlight your scene, add some movement in the water with streaks and dots using a Uni-ball Signo White Gel Pen.  Also add random streaks to your waterfalls.  Be sure to add texture along the rocks and base of the falls.  Stampscapes 004 CU Falls
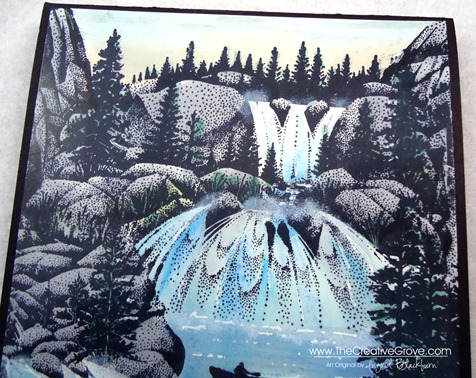
  • To give the look of water mist that you see on waterfalls, you will want to loosen the end of a Q-tip to give it a lighter texture and dab it into the Whisper White White Craft Ink Pad.  It’s a pigment ink that is sticky and will give you the lightness and movement that you are looking for.  Be careful not to press to hard – practice on scrap paper first. 
  • For the sunrise, you can add a little Peach Bellini by Adirondack Lights at the top of your forest line. 
  • I got a little blob of black in my sky on the left, so I dabbed my Q-tip into my grey and lightly added some streaks for clouds in my sky.  You can quickly and easily overdo this, so make sure to use gentle pressure and less is more.
  • Stampscapes 004 Main L

    Creative Scenery Classes

    If you love creative scenes, check out the online Brayer 101: Introduction to Creative Scenery class.  In this class, you will learn how to master the use of your brayer to build scenes using Stampin’ Up! stamps and layering ink in a seamless way.  For more information, click here.

Signature-Snowflake-001_thumb1

To Shop 24/7 in the Creative Store – Click here!

Stampscapes 004 Angle

Stamp Sets – Stampscapes Stamps Ink – Marvy – Black, Prussian Blue, Salvia Blue, Light Blue, Bottle Green, Grey; Adirondack Lights – Cloudy Blue, Aqua, Peach Bellini; Stampin’ Up! – Whisper White Craft Pad  Paper –Glossy White, Basic Black Tools – Colorbox Stylus, Brushtix Mixed Media Brushes Finishing Touch – Uni-ball Signo White Gel Pen, Q-tip
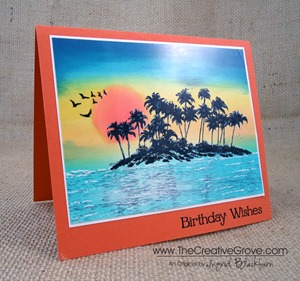
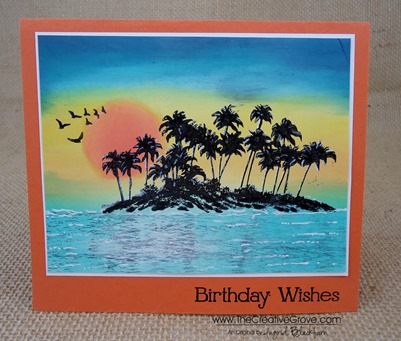
Tropical Sunset Stampscape

Stampscapes 002 006

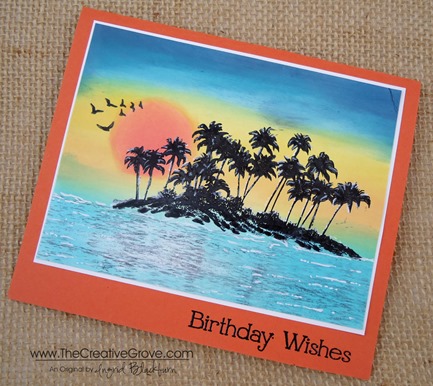
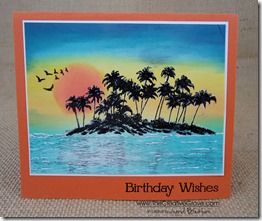
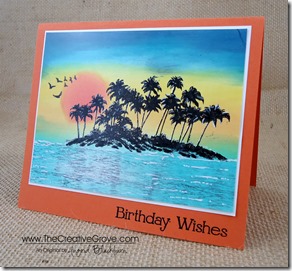
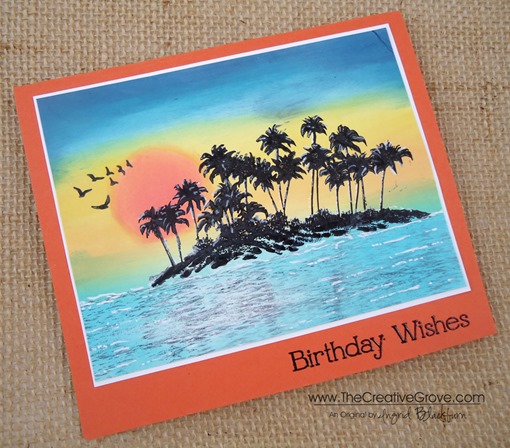
If you hadn’t noticed, I love creating sunset scenery.  Today I have a tropical sunset using a great image from Stampscapes.  This is the perfect birthday card for someone who would love a little of the tropics to escape to.  For me – I’m sending this to my mom for her Birthday this week.  I know she’ll love it.

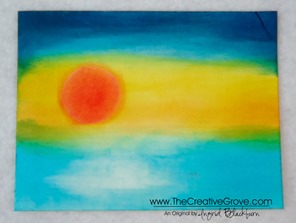
I worked on glossy paper with a colorbox sylus tool for this scene and Stampscapes 002 008

Creative Tips –

    • I used the now retired Stampin’ Up! glossy paper as my base.
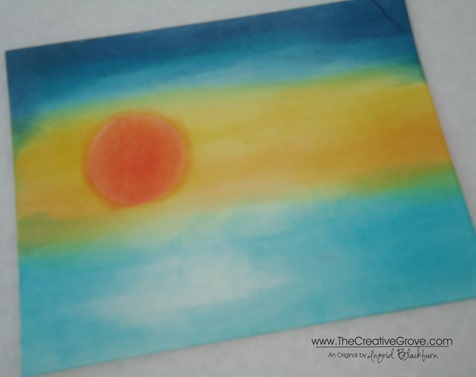
    • To keep my paper wet so that my stylus could move a bit better, I worked in sections.
    • I gave the middle of my paper a good coat of So saffron in the middle, followed by Daffodil Delight and Crushed Curry.  I had masked the sun, so I had a white sun when done.
    • Next I layered a small amount of Tangerine Tango towards my horizon line.  Stampscapes 002 002
    • I created my sun first with a light coating of Crushed Curry followed by Real Red.  I worked my stylus just outside the white lined border to not have such a defined line, but have that white outline that you see in the sun.
    • For my sea, I began with a light coat of Soft Sky.
    • Next I layered Pool Party, Bermuda Bay and a little Tempting Turquoise into my water in a streaking motion.  I kept a little white area off to the left just below the sun.
    • For the sky I started with Soft Sky, followed by Tempting Turquoise, Marina Mist and Island Indigo.Stampscapes 002 010
    • I stamped my tropical island, birds and water texture stamp in Black.  I wanted the island in a particular spot, so I used a Stamp-a-Majig to position my stamp.  Of course I dropped it as I lifted it, so I had to stamp it twice since on the glossy, the Black ink was still wet and smeared.  I was able to save the image!
    • I used a White Gel Pen to accent my trees and water.

 Stampscapes 002 008

My colored base was so pretty – I almost didn’t want to stamp on it!  Something unexpected happened to me – This scene made me want to paint.  So I have a feeling the more I do these types of scenes on paper – the more I will definitely venture into the art of painting.  Do any of you paint?  If so, what is your favorite medium?Stampscapes 002 007

Try our Online Brayer Class

Creative Scenery classes using a brayer have by far been my biggest hit with stampers.  Learn how to create gorgeous gradual transitions with 100+ minutes of step by step detailed video instruction teaching you how to master this technique.  The end result – You will feel like an artist.  Best of all, you will look at your stamps in a whole new way, and try things you never would have thought to do before.  Find out more here

Signature-Snowflake-001_thumb1


[optin_box style=”14″ alignment=”center” action=”http://www.aweber.com/scripts/addlead.pl” disable_name=”Y” method=”post” email_field=”email” email_default=”Enter your email address” email_order=”1″ integration_type=”custom” double_optin=”Y” name_default=”Enter your first name”][optin_box_hidden][/optin_box_hidden][optin_box_code]

[/optin_box_code][optin_box_field name=”headline”]If you enjoyed this tutorial…[/optin_box_field][optin_box_field name=”paragraph”]PHA+PHNwYW4gc3R5bGU9ImNvbG9yOiAjNjQ2MzVlOyI+TGV04oCZcyBzdGF5IGluIHRvdWNoISBNeSBvY2Nhc2lvbmFswqA8L3NwYW4+PHNwYW4gc3R5bGU9ImNvbG9yOiAjNjY2Njk5OyI+PHN0cm9uZz48ZW0+ZXhjbHVzaXZlPC9lbT48L3N0cm9uZz7CoDwvc3Bhbj48c3BhbiBzdHlsZT0iY29sb3I6ICM2NDYzNWU7Ij5DcmVhdGl2ZSBUaXBzIGUtbGV0dGVyIHdpbGwgdGVhY2ggeW91IHRvIG1ha2UgcHJvamVjdHMgdGhhdCB5b3UgbG92ZeKApjwvc3Bhbj48L3A+Cg==[/optin_box_field][optin_box_field name=”privacy”][/optin_box_field][optin_box_field name=”top_color”]undefined[/optin_box_field][optin_box_button type=”0″ button_below=”Y”]Send me exclusive tips![/optin_box_button] [/optin_box]

Stampscapes 002 009

Stamp Sets – Four You (130538c, 130535w), Stampscapes Stamps Ink – Memento Tuxedo Black, Soft Sky, Pool Party, Tempting Turquoise, Bermuda Bay, Marina Mist, Island Indigo, So Saffron, Daffodil Delight, Crushed Curry, Tangerine Tango, Real Red, Versamark Paper –Glossy White,Whisper White, Tangerine Tango Tools – Colorbox Stylus Finishing Touch – Black Embossing Powder, Signo White Gel Pen


Evergreen Snowy Hillside Redo

Evergreen 005 Main R

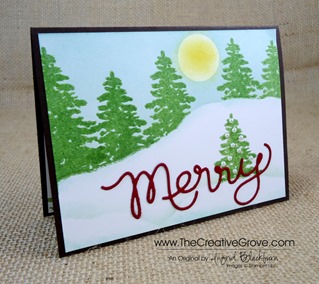
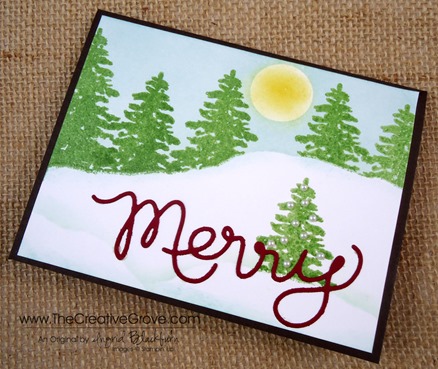
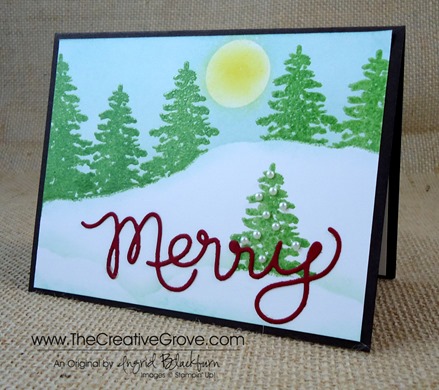
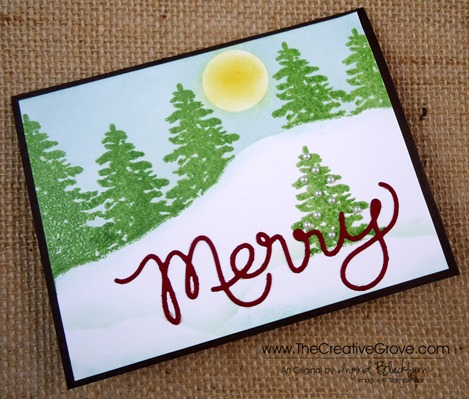
My friend and fellow CG Crew member Aleida was over yesterday for a much needed afternoon of stamping.  She wanted to make a fun card that would teach her a little something, yet give her a great Christmas card that wasn’t too difficult to mass produce.  We had the new Expressions Thinlits in our hands and this card popped into my head.  Off we went with a slightly new take on this fun snowy card.

Creative Tips –

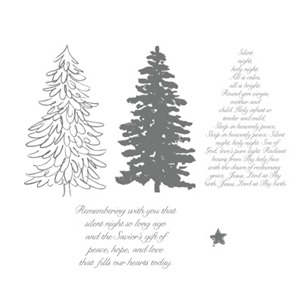
  • I stamped the large Evergreen solid image in various heights using a torn mask for my hillside.  First I stamped in Versamark ink and then I used Wild Wasabi. 
  • To give my trees a glossy look and protect them from the brayer, I embossed all my trees in Clear Embossing powder. Evergreen 005 Side
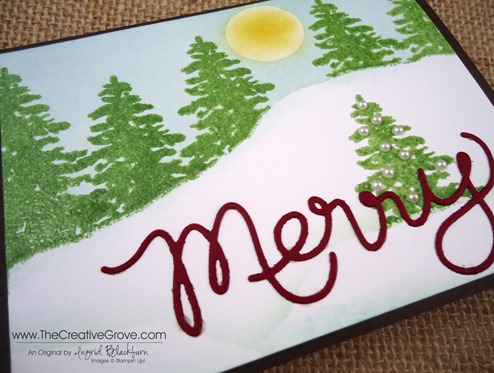
  • Once I had my skyline done I wanted a larger trees up close that I could decorate.  I tore another mask and stamped one more Wild Wasabi Tree.
  • I created a mask for the sun.  Then I used the skyline mask and sponged over my trees in Soft Sky. 
  • To accentuate the ridge, I used the reverse mask to sponge a light edge for the snow in Pool Party.
  • To create the snow drifts, I used the same mask, but alternated it’s direction.
  • I sponged in the sun using Crushed CurryEvergreen 005 CU
  • For my tree decorations, I used Pearl Basic Jewels.
  • I cut out the word Merry in Cherry Cobbler using the new Expressions Thinlit Framelits – available in the new Holiday Catalog on August 1st.
  • I matted the entire scene on a piece of Early Espresso card stock.
  • For a finishing touch I stamped a tree on the inside panel as well.
  • Evergreen 005 Main L

Aleida LOVED the card, it was fun to make and actually much faster than I anticipated.  Maybe because it was like my first, view that post here, but a bit different.  I could easily mass produce these, and their cost effective too!

Free DSP_edited-1

Don’t miss out on this great special!  Order six? You’ll get two for free. Nine? You’ll get three for free. Check out our Designer Series Papers in the annual catalog pages 151, 153, and 154.

Signature Snowflake 001

To Shop 24/7 in the Creative Store – Click here!

Evergreen 005 Angle

Stamp Sets – Evergreen (127973) Paper –Whisper White (107330), Early Espresso Ink – Wild Wasabi (126959), Soft Sky (131181), Crushed Curry,  Pool Party, Versamark (102283) Cool Tools – New Heat Tool (129053), Clear Embossing Powder (109130), Stampin’ Sponges  The Perfect Finish – Pearl Basic Jewels(119247), Expressions Thinlit Framelits

Evergreen 127973L

Expressions Thinlits Sneak Peek

Expressions Thinlits 001 001

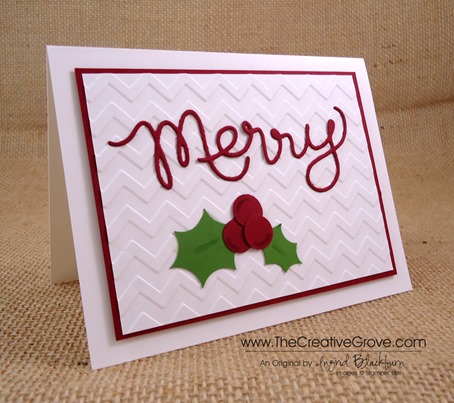
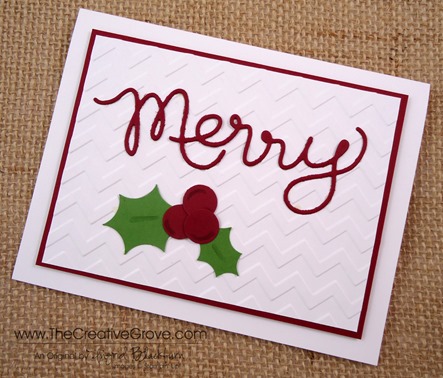
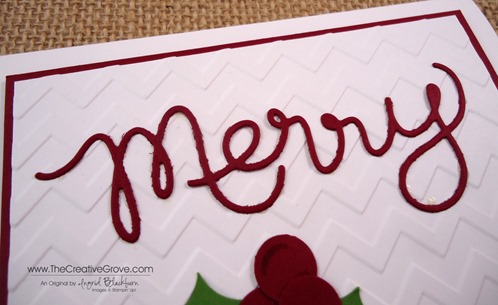
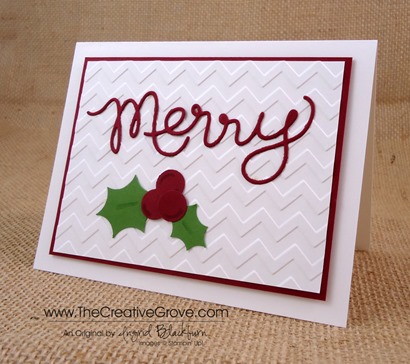
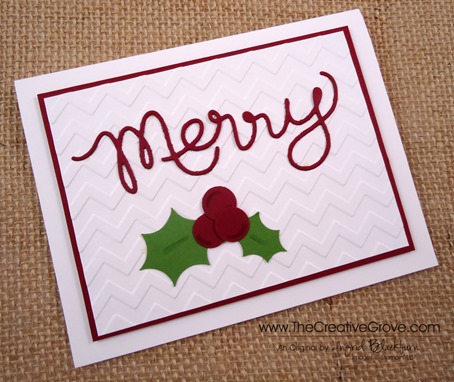
I’m in love with the new Expressions Thinlits.  What an awesome new product!  Starting August 1st, you will be able to cut cute little words just like this one with the new Expressions Thinlits – available in the new Holiday Catalog.  My mother always taught me it was rude to tease, but I thought you would love a little Sneak Peek of this fun and quick little card.  It literally came together in a matter of minutes.Expressions Thinlits 001 005

Creative Tips –

  • Definitely put a piece of wax paper between the word Thinlit and your cardstock.  It will help to pop it out after.
  • I used my paper piercer to help guide my word out from the back of the Thinlit.  It was super easy.Expressions Thinlits 001 007
  • Two spots didn’t punch through on my word – the loop in the second R and the Y.  I didn’t worry about it, because it gave me a place to drop a little multi-liquid glue.  It really is thin – you have to use the Multi-Liquid Glue.
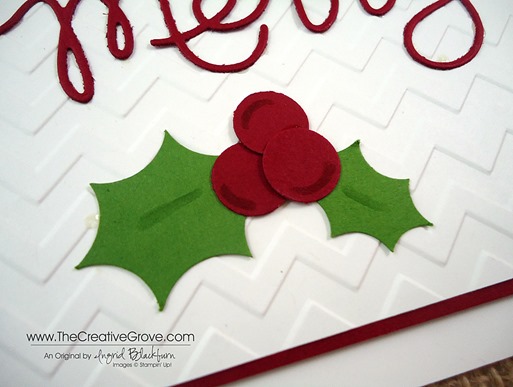
  • To make my holly leaves I used a 3/4” and 1/2” circle punch.  I don’t own a thinlit to punch those out, so why not make your own.  It was super easy.Expressions Thinlits 001 006
  • I wanted to accent my holly and berries, but didn’t want it to focus too much on that, so I used a blender pen and the ink from my ink pads.  I squeezed my ink pad – love that you can do that with Stampin’ Up! inks, and the ink collected in the lid. I then picked some up with my blender pen and added some subtle highlights.
  • The background was made with the Chevron Embossing Folder and I popped the panel up on Stampin’ Dimensionals for some interest.

This card literally took 4 minutes to make, so if you need a great go to holiday card in a pinch in December – make sure you have the Expressions Thinlits.  You can use them with any embossing folder for a quick and easy card! Always a great thing.

Expressions Thinlits 001 002

Learn a new technique in the Online Brayer Class

      Would you like to learn how to make Creative Scenery cards?  Have you been frustrated when trying to use your brayer?  Creative Scenery classes using a brayer have by far been my biggest hit with stampers.  Learn how to create gorgeous gradual transitions with 100+ minutes of step by step detailed video instruction teaching you how to master this technique.  The end result – You will feel like an artist.  Best of all, you will look at your stamps in a whole new way, make amazing projects and try things you never would have thought to do before.  This class is in its introductory period – get it while you can for less! Find out more here

      Signature Snowflake 001

      Expressions Thinlits 001 004

    To Shop 24/7 in the Creative Store – Click here!