CAS – Ghosting Technique

Have you ever tried the ghosting technique before? A ghosted look is an image that appears either as a light or double image. You can actually achieve this look in several ways, I’m going to talk about three today.

I personally love this technique, it gives a great look and added emphasis to a stamped or stenciled image. You’ll need to use one of three mediums – water, white pigment ink or a clear watermark ink like Versamark.

This is my first month playing along with a fun challenge over at Happy Little Stampers, and I’m quite excited to be a new member of the CAS team! The challenge for the month of June is to use Ghosting on your card in a CAS (Clean and Simple) style. Here’s what I came up with:
Ghost Stamping

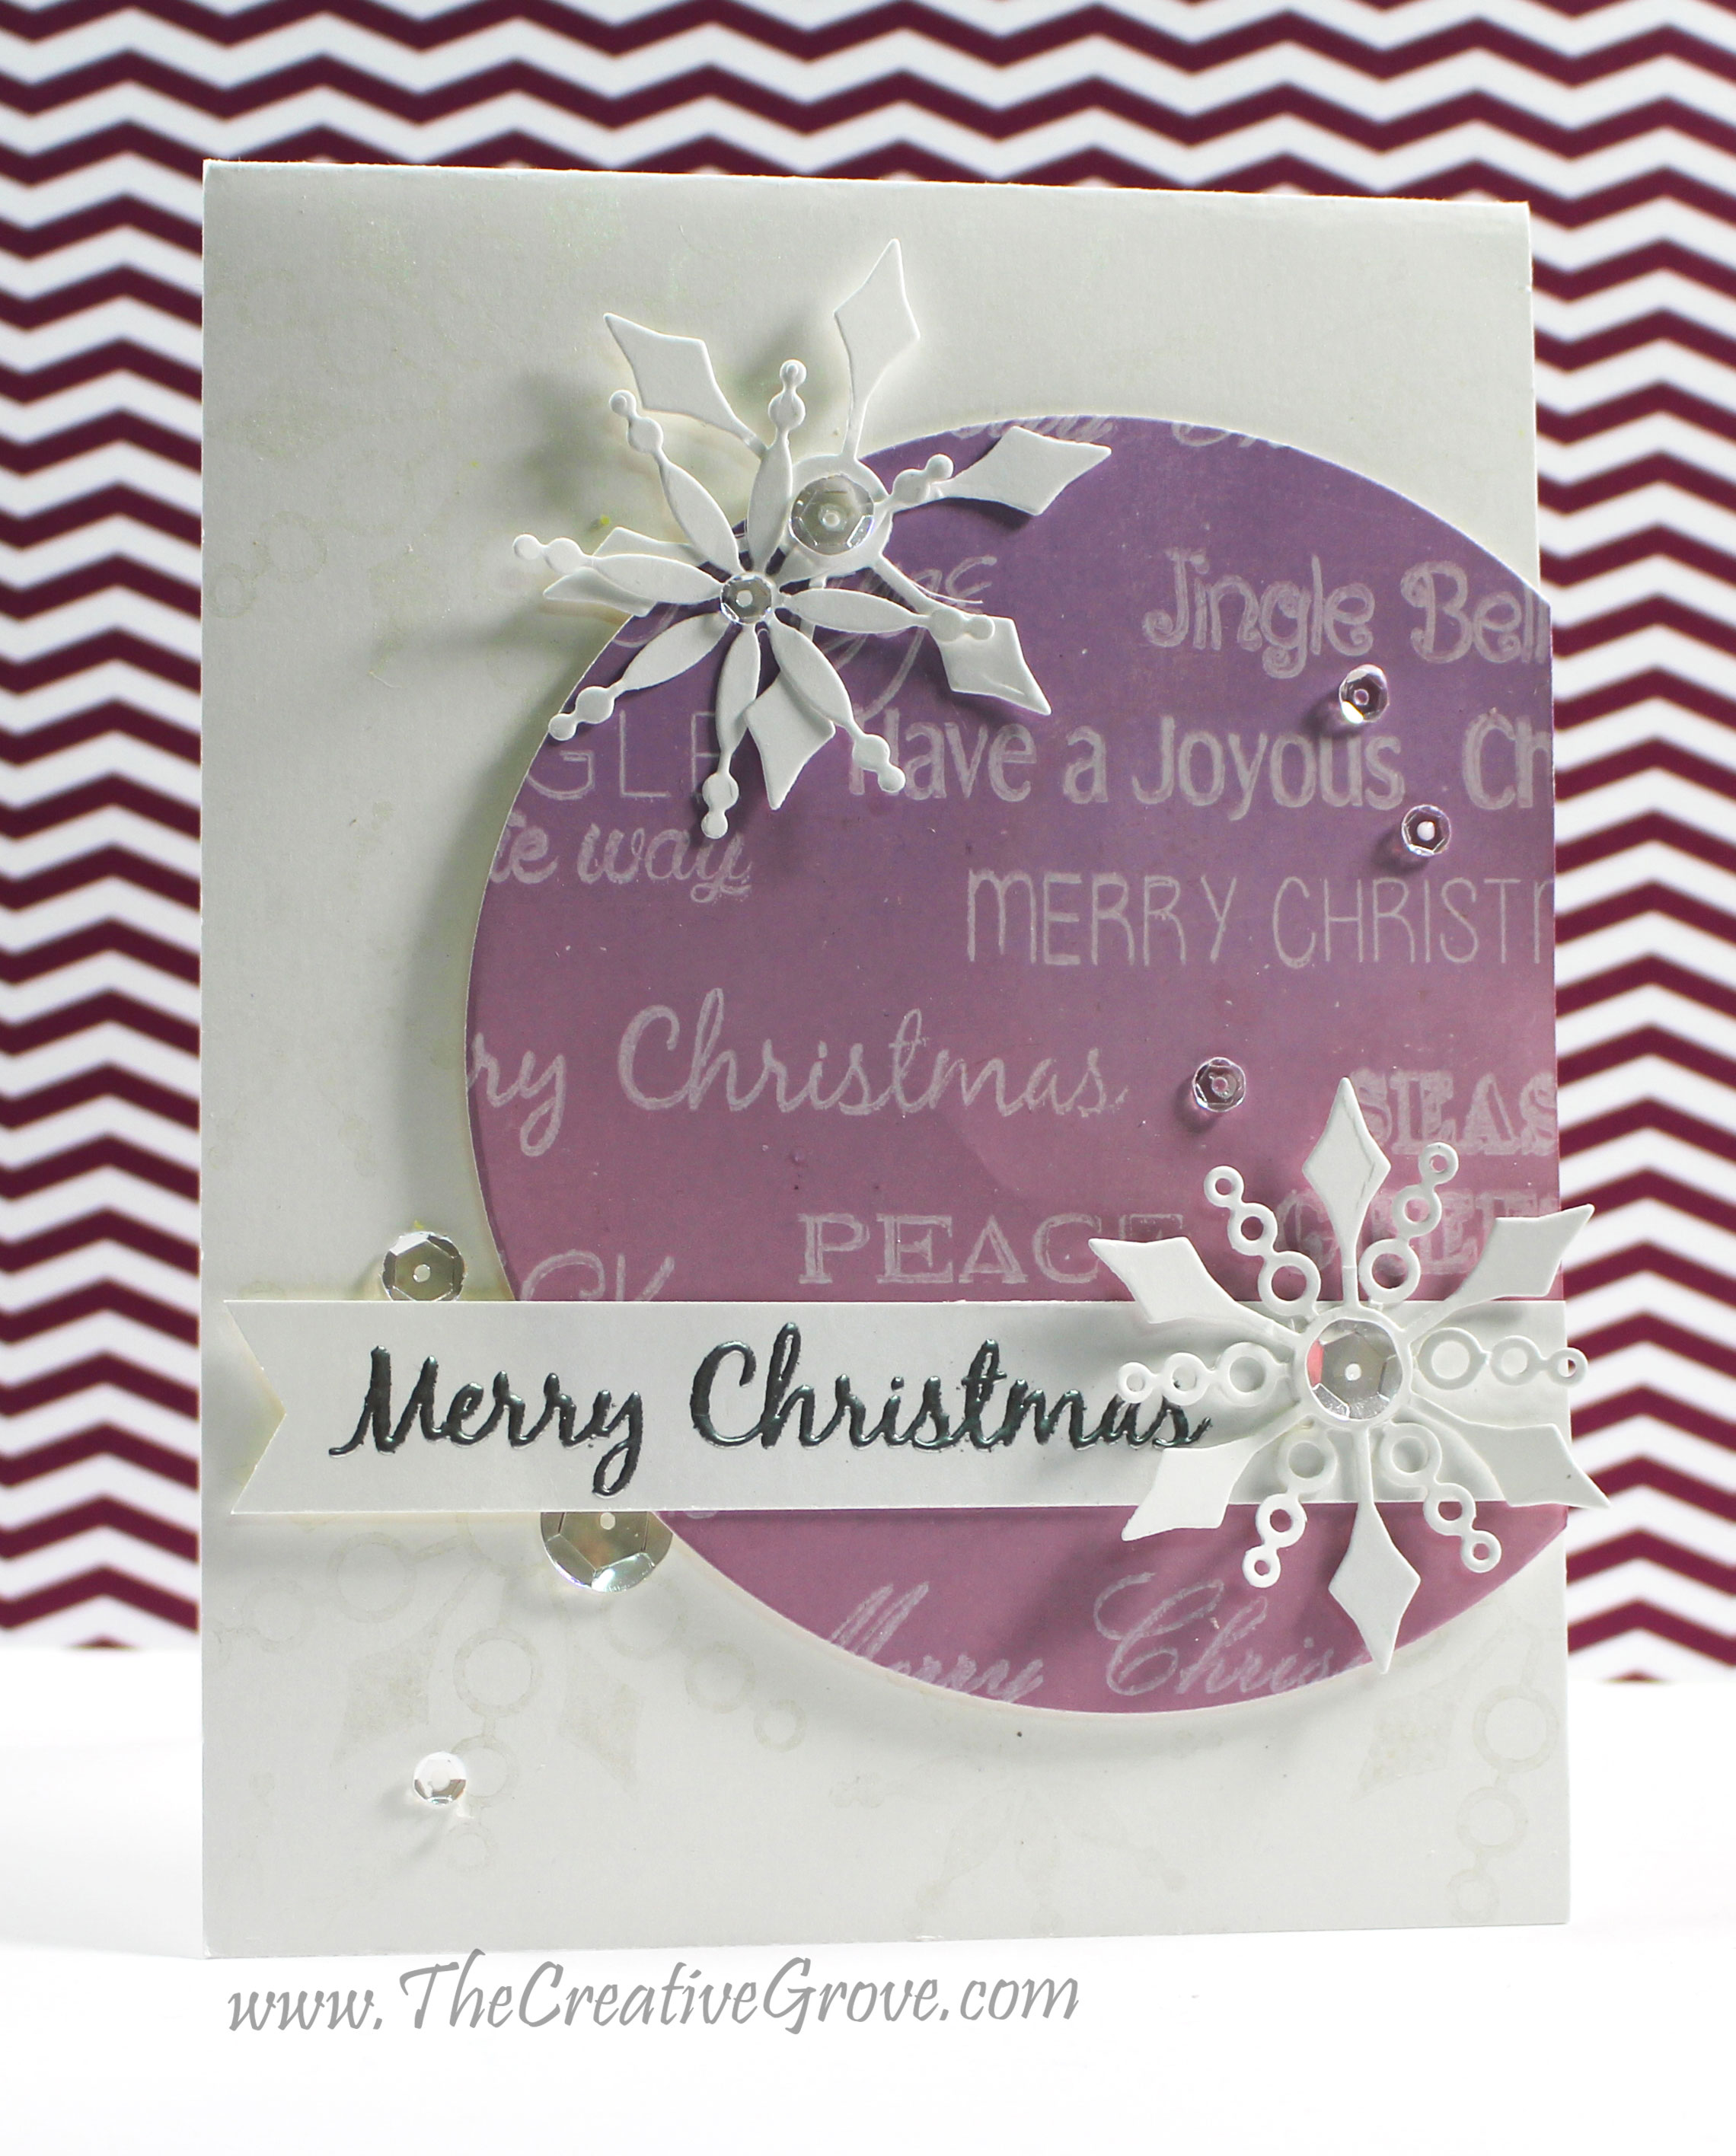
Now I’ll be honest – I’m fresh off a transatlantic trip and have been a little jet lagged! We were in New York for my grand daughter’s Christening – little Lylah is SO cute! It was a short trip, but a long one on the way back. I was excited when I remembered that I created this word cluster using this very technique several months ago for a Christmas challenge and went another way. Even better – I had the snowflakes left over from another project too – I love it when I get to use things from my scrap bin!

Ghosting Technique Tutorials

Technique #1 – Emerging Images (Stamp/Stencil)

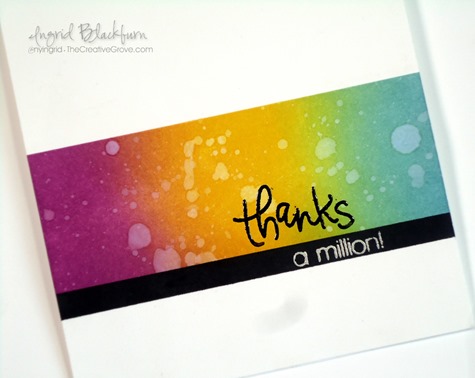
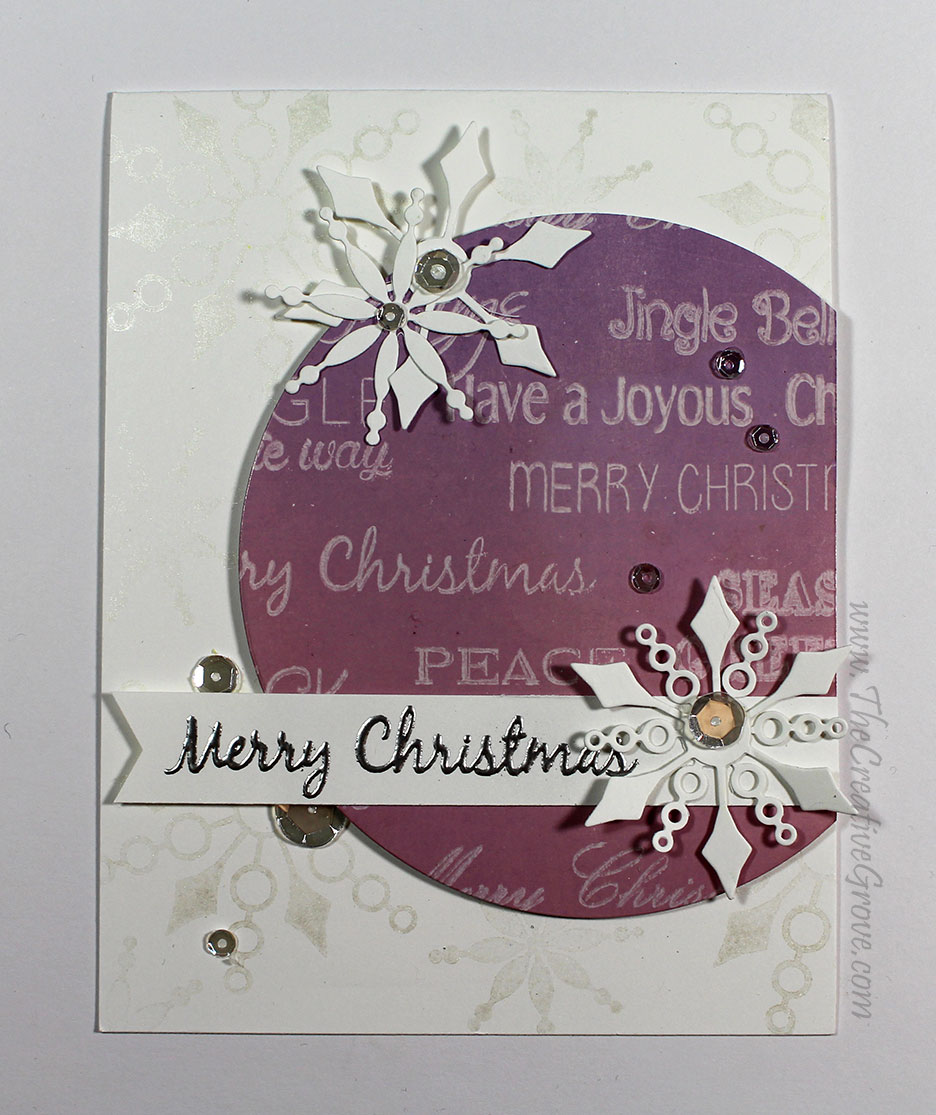
To create the ghost image, stamp a word cluster with various greetings from the Happy Little Stampers set Mixed Christmas Greetings in Versamark ink on glossy card stock.  Next brayer colored dye inks, covering your card stock. I used the Distress inks Victorian Velvet and Dusty Concorde for a slight ombre look. The versamark ink resists the dye ink and shows up as a ghost image.
Ghosting-Technique-003

Another way to get the same result, but not quite as sharp is to use Watercolor paper, cover it well with Distress Ink and stamp with water. That’s the water stamping technique which can produce a ghosted result.

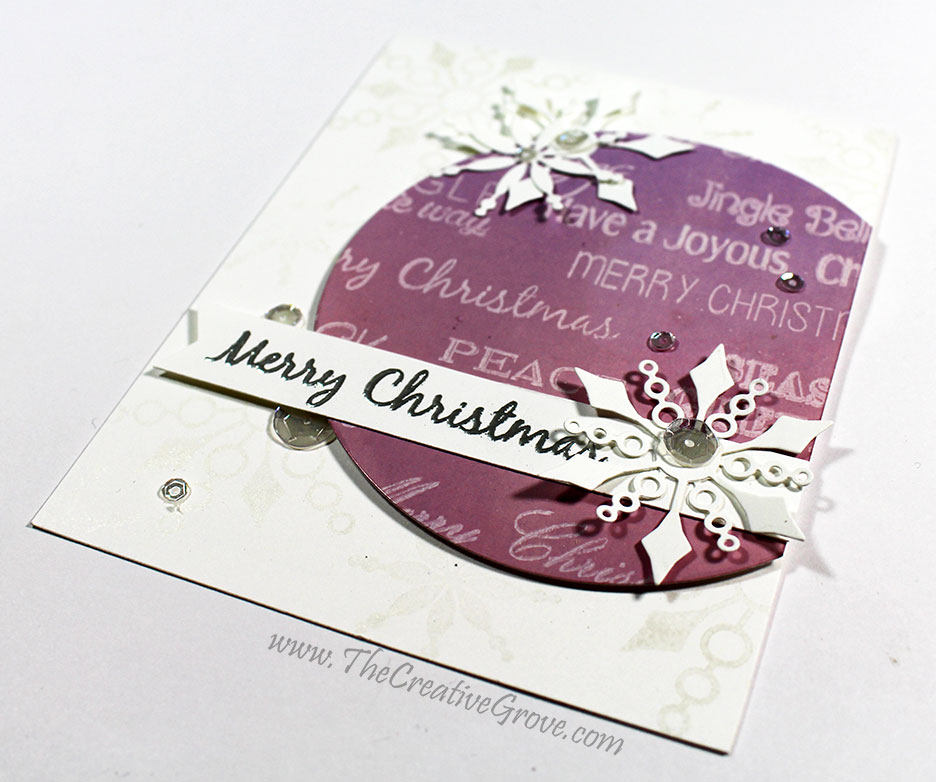
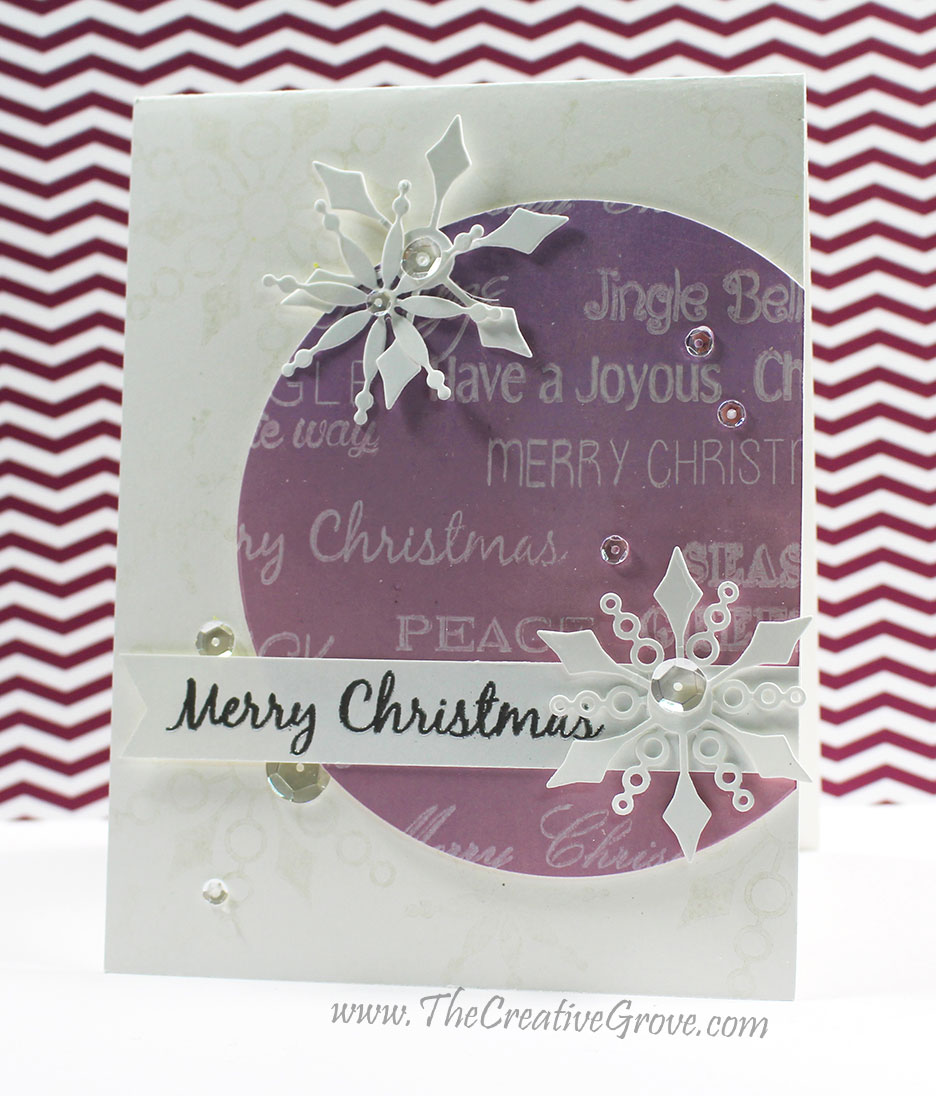
For the background, stamp snowflakes from Bring on the Snowflakes by CAS-ual Fridays in Illuminate ink for a subtle pearl look. Add a few white snowflake dies from the companion die set along with ta few sequins and you have a great look.

Although I probably didn’t need an additional sentiment, I added one in embossed silver on a banner. The ghosted circle is popped up for a little drama to the card and the sparkling clear sequins by Pretty Pink Posh for the perfect sparkling effect.
Ghosting-Technique-002

Technique #2 – Double Stamp/Stencil

This technique is my favorite way to achieve a ghosted image.  Click here to see another written & video tutorial on how to use white pigment ink to get a great ghosted image with stamps or a stencil. This is also known as the double stamping technique.

Technique #3 – Water Stamping/Stenciling

The third way to create a great ghosted image is to stamp or lift with water. This can be applied to stamps or stencils. I have another written and video tutorial for this concept in the simplest of manners – the flicked distress technique.  Click here to view the video and written tutorial for this technique.
Ghosting-Technique-005

So that’s three tutorials on how to use this very technique – have fun with it! If you’re a Just Cards online student – you have even more tutorials on various ways to create this technique in your classroom too!

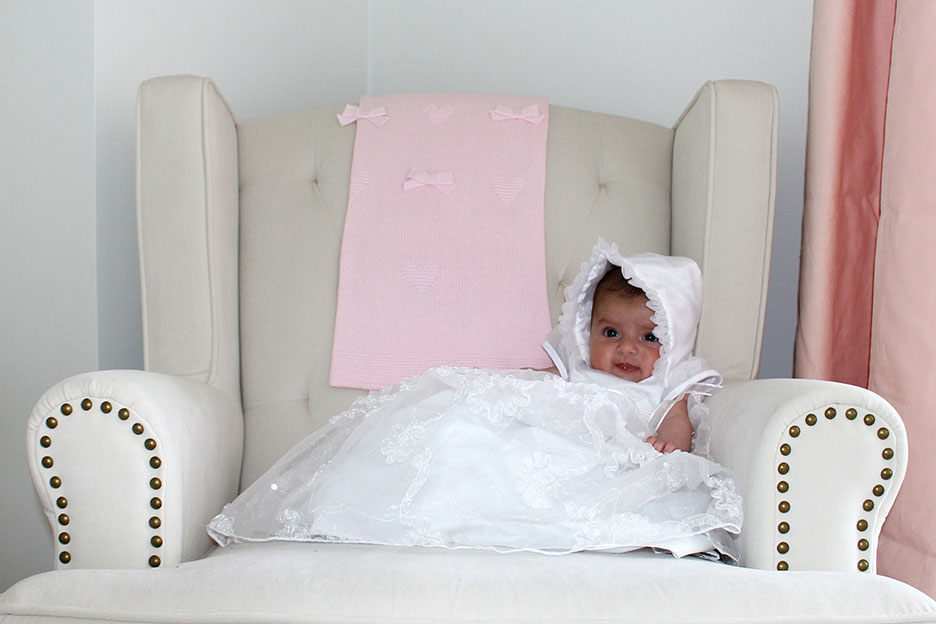
Thanks for joining me today, I don’t share many personal photos, but couldn’t resist with these – here are a few pictures of our sweet little grand daughter Lylah, and the family!
IMG_4647-edit-2

IMG_4554-edit-2

IMG_4789-edit-2

Lylah, Allyson and a rare photo of me – I’m always BEHIND the camera!

Isn’t she cute?!! We miss them already! I hope you have a great start to June…and I can’t wait to see what you create this month in the CAS Ghosting challenge over at Happy Little Stampers – I challenge you to try out the ghosting technique – have fun!

🙂

Ingrid

[optin_box style=”12″ alignment=”center” email_field=”email” email_default=”Enter your email address” integration_type=”aweber” double_optin=”Y” list=”3846012″ name_field=”name” name_default=”Enter your first name” name_required=”Y” opm_packages=””][optin_box_field name=”headline”]Learn more with our exclusive FREE video series:[/optin_box_field][optin_box_field name=”paragraph”]PHA+UGx1cyB5b3XigJlsbCBiZSBhZGRlZCB0byBteSBGUkVFIENyZWF0aXZlIFRpcHMgRS1sZXR0ZXIgd2hlcmUgSSBzaGFyZSBleGNsdXNpdmUgcHJvamVjdHMsIHZpZGVvcyAmYW1wOyB0aGUgMTIgRGF5cyBvZiBDaHJpc3RtYXMgUHJvamVjdCBTZXJpZXM8L3A+Cg==[/optin_box_field][optin_box_field name=”privacy”][/optin_box_field][optin_box_field name=”top_color”]undefined[/optin_box_field][optin_box_button type=”0″ button_below=”Y”]Get Instant Access![/optin_box_button] [/optin_box]
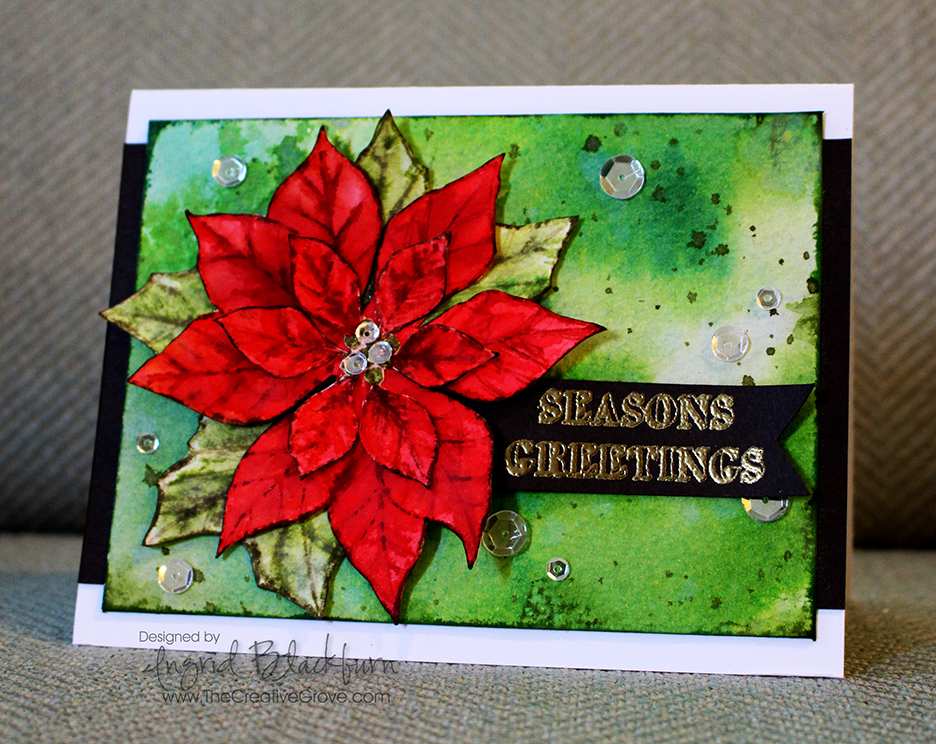
HLS Poinsettia Challenge

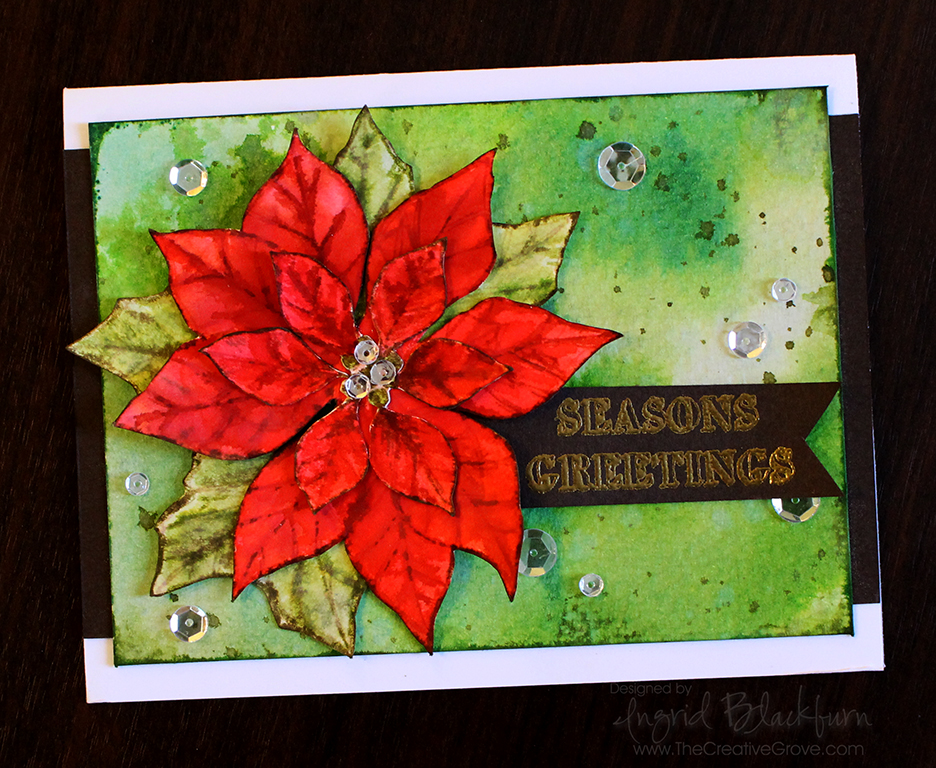
Watercolored Poinsettia 001

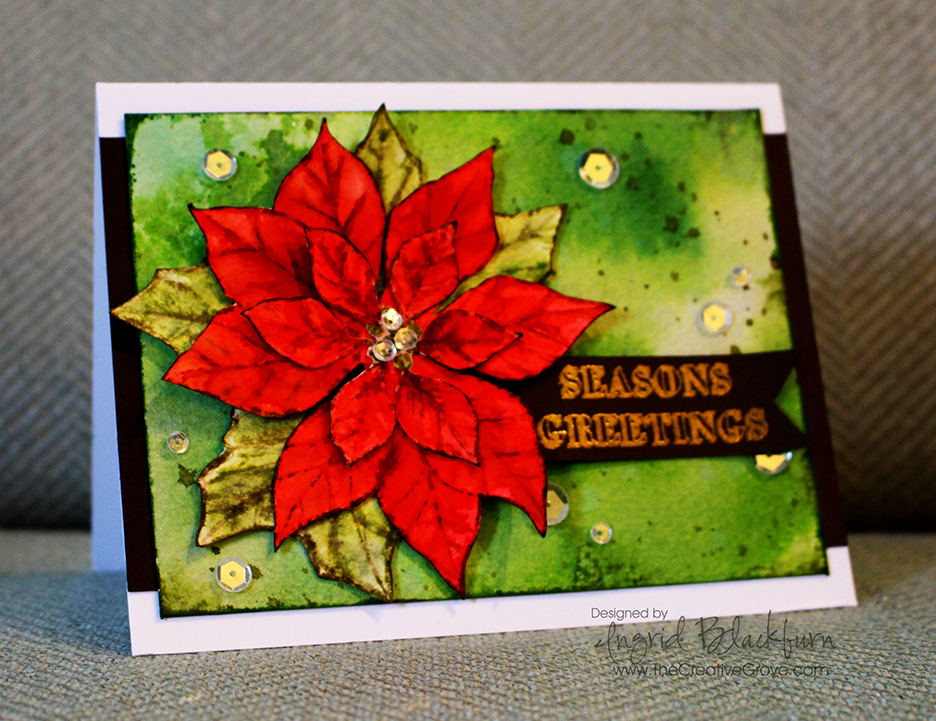
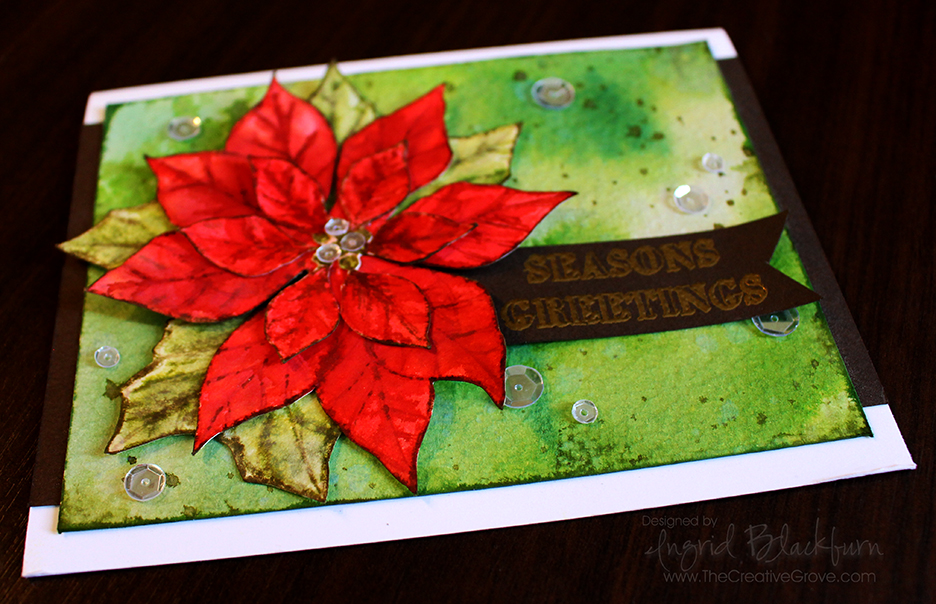
What’s a girl to do to create amazing cards for you from the road – watercolor using distress inks, naturally! I brought a few Christmas sets with me, just in case we weren’t back yet (We’ve been traveling for 9 weeks so far); so when I sat down for this month’s Poinsettia Challenge, I stared at my stamp set and this idea popped in my head.

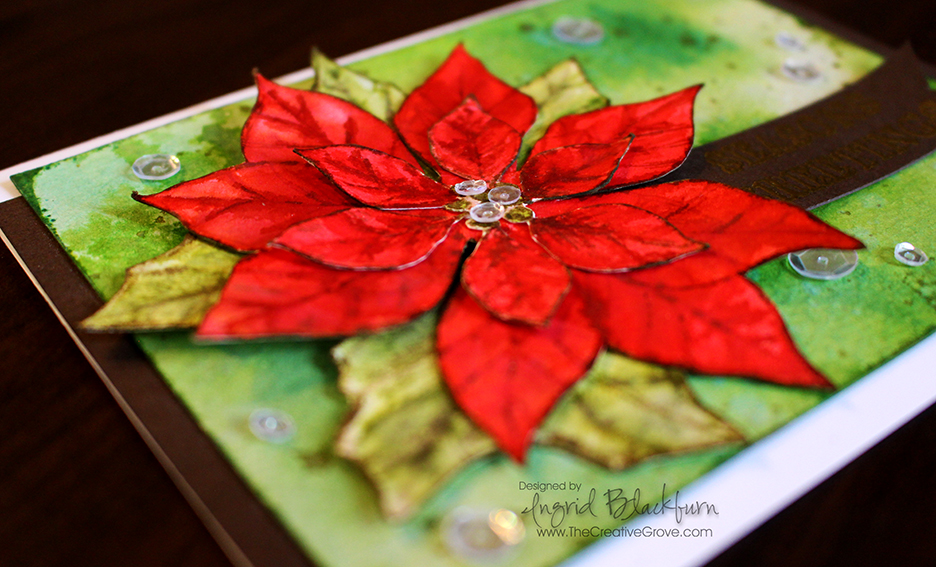
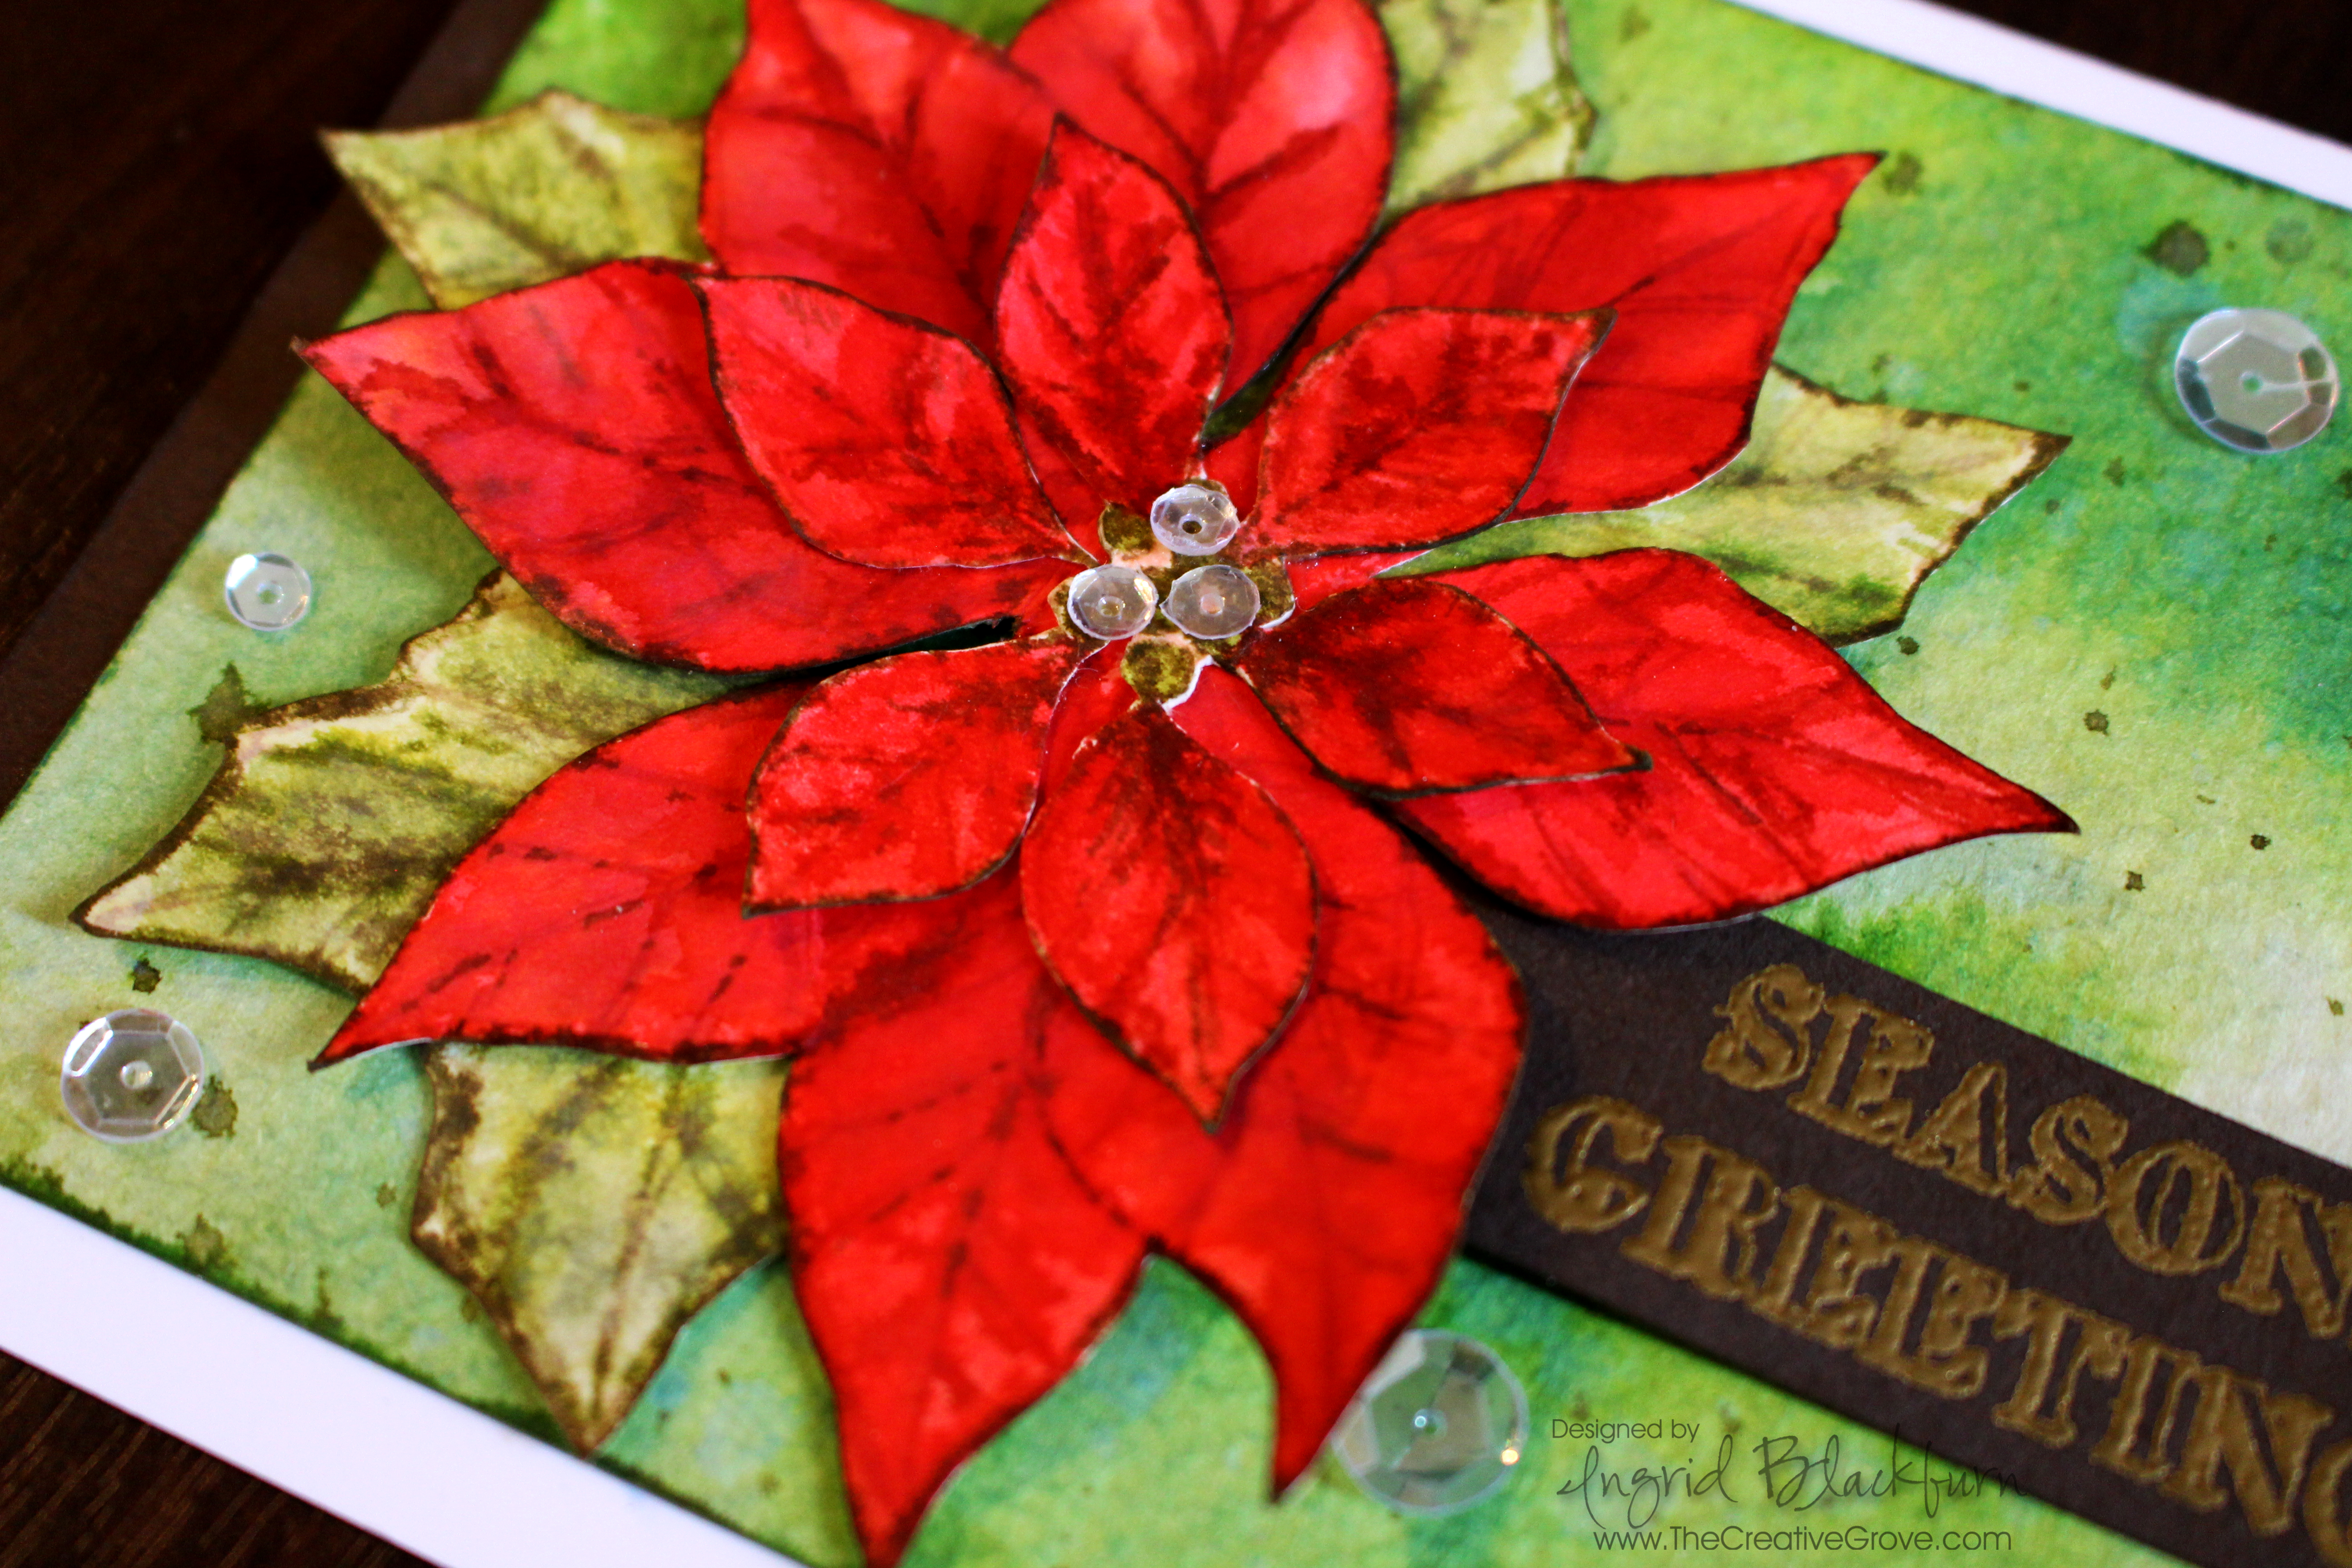
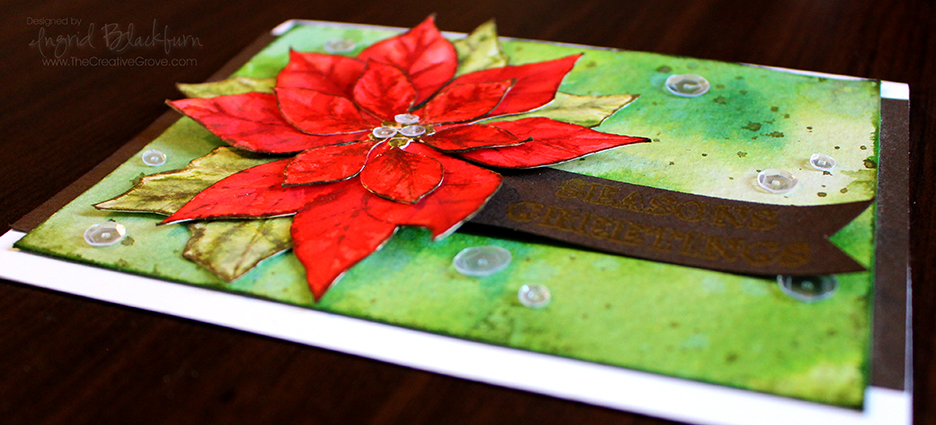
You know by now that I love to watercolor, especially with distress inks, so I thought a more three dimensional Poinsettia on a cool smooshed background might look cool, and I have to say – even I’m thrilled with how it turned out – and I’m my worst critic! I bet you are your own worst critic too – tell me in the comments – it can’t just be me!

HLS Christmas Challenge October 2015

This month at the Happy Little Stampers Christmas Challenge, the theme is Poinsettia. So I hope this card inspires you in some way to create your own amazing creation and join in the Challenge. Not only does the design team have some amazing projects created for you…we also have a guest designer this month – Pat from Colourful Creations.

You’ll see a tutorial below. I know I normally have a video, but I don’t have a tripod with me – sorry about that! But if you are looking for some great holiday inspiration – later this month my annual 12 Days of Christmas card series is starting – be sure to be on the Creative Tips E-Letter to get those – they won’t be on the blog!!

To join me this month, use any element of this or the design teams cards as inspiration, just make sure it has a poinsettia in some way on your card and is Christmas themed. I can’t wait to see your creations – now for the good stuff!

Watercolored Poinsettia 003

Creative Tips on Watercolor using Distress Inks

Here was my thought process for choosing the colors for the card. Originally I was going to do a no line watercolor white poinsettia, but then I was in the mood for red. I knew a deeply watercolored red 3D poinsettia would look awesome, but needed an equally awesome background. So what do you choose? On the color wheel, the complimentary color (opposite on the wheel) to red  is green. So while the leaves would be green, I thought maybe a more vibrant version with lighter bleached out in spots along with great texture created with deeper flicks and edges might just do the trick!

  • To start, you’ll want to smoosh a few greens into your craft mat or work surface. I used Bundled Sage, Peeled Paint and Mowed Lawn. Bundled Sage helped me with the lighter bleached out spots, Mowed Lawn was my bright vibrant contrast to that, Peeled Paint married the two.
  • Generously spritz your colors. Make sure you lay down enough to cover your background piece. While spritzing, you want to have enough water down without overdoing it. To gauge the amount of water, when you press your watercolor card front down and it comes up dry or not glistening, you don’t have enough water. On the other hand if all your color runs right off your watercolor paper, you have too much! It’s a science, so play around. Don’t worry if you don’t get it right, just go right back with another layer adjusted with more or less water. Layers is what makes this piece awesome! So it’s very forgiving.

Watercolored Poinsettia 002

  • Don’t over do the smooshing – get just enough to cover your piece. This way you keep the light areas light. If you have too much light, strategically smoosh more vibrant spots over some without pressing it into the whole card.
  • Set your background aside to dry before moving onto the next step.
  • Next – create the splatter. I did this in two ways – flicked water, then colored splatter.
  • First spritz your hand and flick your colored surface. Here’s a video on this technique (at the 2:59 mark)
  • Smoosh some Forest Moss into your craft mat. Spritz with water to get it into a liquid state – just add enough, you don’t want it too diluted in hue. Load up a paint brush and splatter it hard with your finger on the opposite hand creating splatter onto your card. If you hold it closer to your project it will be more condensed. I held mine about 10 inches from my card to get it to splatter outward.
  • Edge your watercolor paper directly with your ink pad – a little more generously at the corners to complete your background.
  • Set it aside to try. Now you can move onto the Poinsettia!

Watercolored Poinsettia 006

  • To get a more painted look to your Poinsettia. you’ll want to use a few shades of red and create layers. Stamp your image in a lighter shade twice on a larger piece of 140# cold pressed watercolor paper. I used Tattered Rose and stamped it off so that it was really light. This will give you an outline to work with without defining the edges. This allows you to control the look of the flower, rather than painting in the lines of an outlined image.
  • You will color one flower completely and another just the smaller inner flower. When painting the larger flower – ignore the lines of the smaller flower – just extend the leaf as if it’s a large petal. Look really close at mine and you’ll see the smaller outline slightly – but you have to really look for it!

Watercolored Poinsettia 005

  • Color your berries on the smaller flower in using Peeled Paint. Your larger flower you’ll color the berries with Festive Berries to match the flower better.
  • Next create a light wash of Worn Lipstick by spritzing it generously with water. Test it out on a scrap piece to make sure it’s light. It’s easier to start lighter and add darker layers for depth – you can’t go so easily dark to light.
  • Add a spritzed version of Festive Berries, keeping some light areas. Apply your color using the veins of the flower as a guide and spread the color outward with wet brush – I used a Pentel AquaBrush.
  • Repeat using Barn Door and add a little detail to the veins with Fired Brick. With each layer, add the color in different spots – some heavier and lighter. This will help you to develop texture in  your flower.
  • Fussy cut both of your flowers out right at the line image – don’t leave any excess white. You should have a large and smaller flower.
  • Edge your petals in Gathered Twigs. Be careful to just get the very edge and not onto the flower if possible. Use a Distress marker if you’re more comfortable.

Watercolored Poinsettia 004

  • Stamp your leaves in Bundled Sage and Paint them in a similar manner using a light wash of Bundled Sage and add a little Peeled Paint  and an even smaller amount of Forest Moss at the veins. Keep them really light to help as a contrast from the background.
  • Fussy cut them out. Glue your leaves to the larger flower, and then your smaller flower on top.
  • Emboss your greeting onto Espresso card stock – I used the set Mixed Christmas Sentiments by Happy Little Stampers. I then created a banner and attached it to the back of my flower.
  • Before using liquid glue to attach the flower and banner to the card, I gently bent up s few of the petals and the banner to give a better 3D look.
  • Add some sparkling clear sequins by pretty pink posh for a final touch.

Watercolored Poinsettia 007

Here are the card dimensions:

  • Card – Top folding 8 1/2 x 5 1/2″ White
  • Card front – 140# water color paper by Canson – 3 3/4 x 5″
  • Espresso – Matte – 5 1/2 x 3 1/2″, banner – scrap

I hope you enjoyed this little tutorial on watercolor using distress inks, okay – not so little. You can use watercolor paints as well, or any dye based inks that blend well with water. In my experience, the distress are the most transparent of the dye inks out there. Have fun with it, and I can’t wait to see what you create. And don’t forget – if you want the 12 Days of Christmas series, be sure to sign up for the Creative Tips E-letter.

Signature-24-pt_thumb.jpg

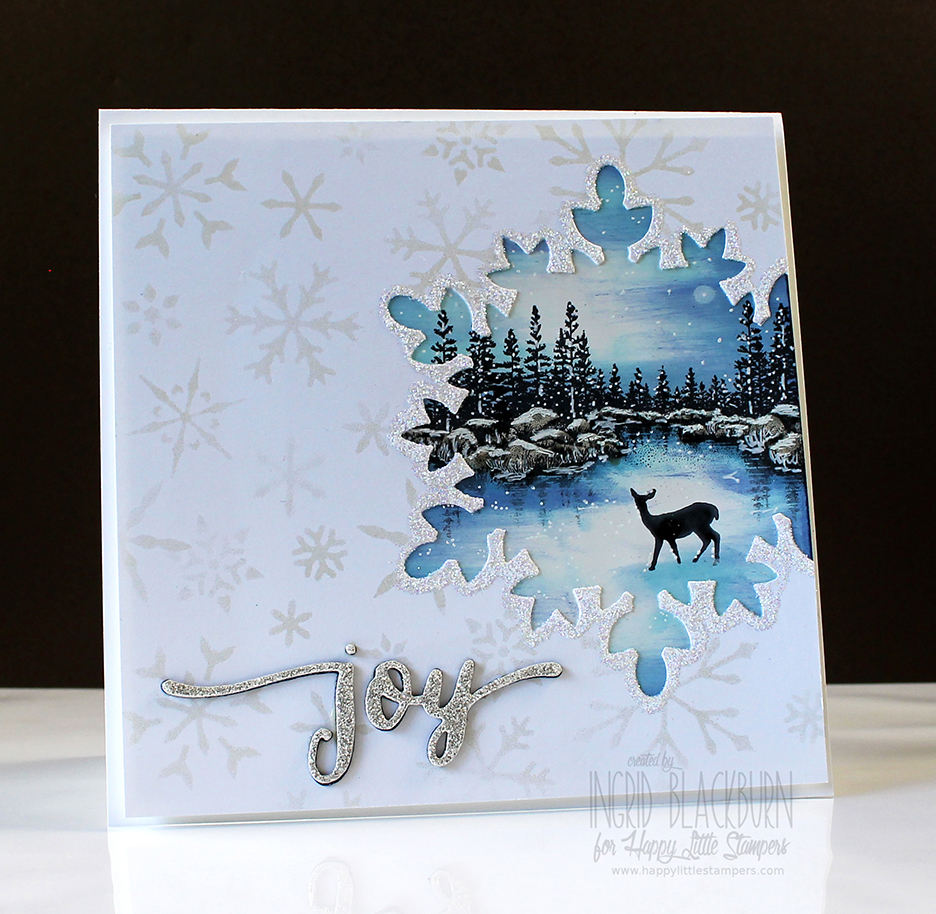
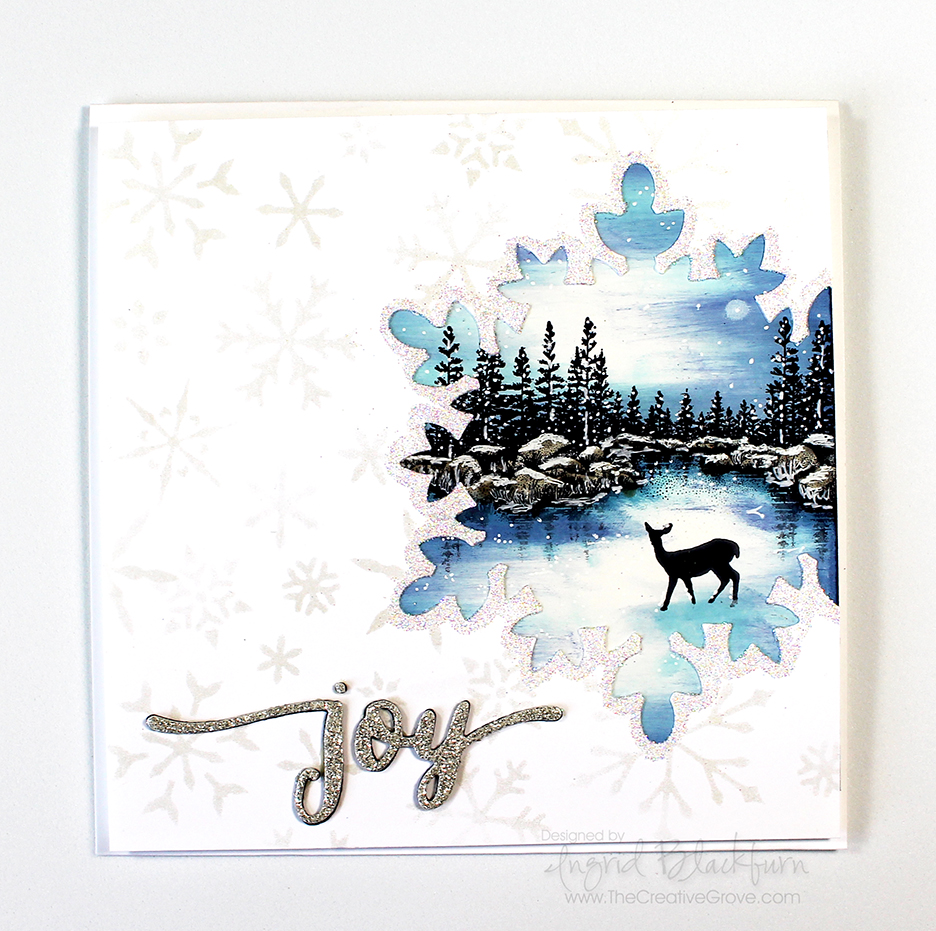
Sparkly Moonlit Evening

Stampscapes Scenic Card

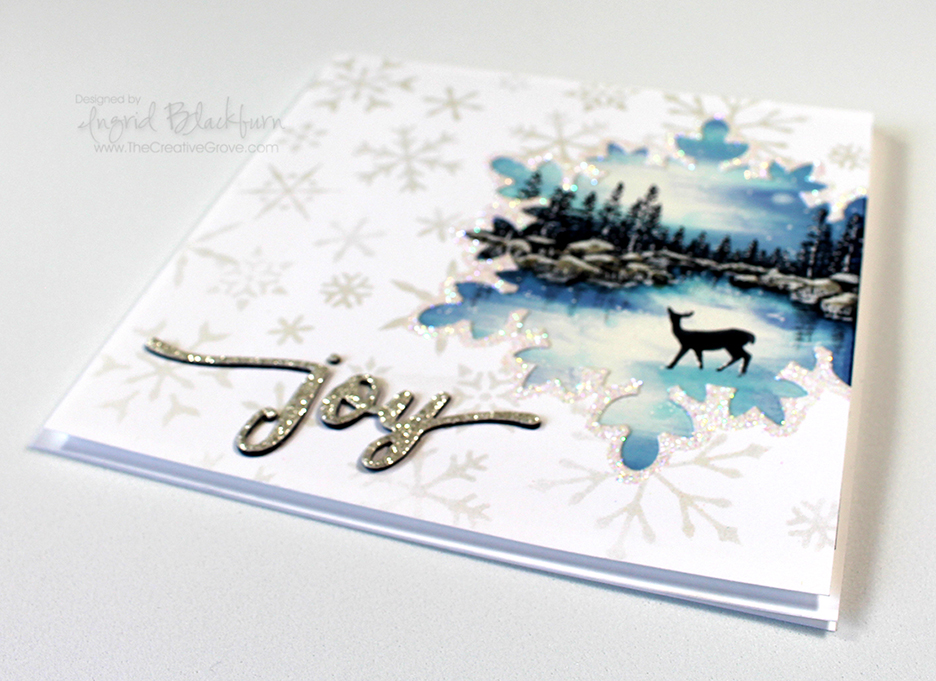
We had a fun first month with the new Christmas Challenge at Happy Little Stampers – well the fun isn’t stopping there! This month the theme is Sparkle, so I figure what’s more sparkly than Snow?

HLS Christmas Challenge August 2015

I whipped out some of my favorite stamps for this beauty – Stampscapes. And I have a treat for you today  – I filmed it too! The first video is about the Ink Swipe technique using a Colorbox Stylus and Sponge Applicator. I’ve always admired Kevin Nakagawa’s (Artist and Owner of Stampscapes) videos and creations, so I hope I do his technique some justice! It’s quite a bit longer than my regular videos, so grab a beverage, and enjoy all the creative tips along the way!

The Second video shows you how to put the Sparkle in your card  – that’s the Christmas Challenge theme after all…and how to create the snowflake window with your scene. That one’s a bit more normal length…lol! Both showcase a very cool idea, so have fun with them. They are completely step by step.

View Scenic Card Portion on YouTube

View Snowflake cutout card portion on YouTube

The videos will teach you how to use the Colorbox Stylus tool on glossy card stock for a mystical moonlit scene. It’s loaded with tips and how to’s so enjoy! And I can’t wait to see YOUR creations at Happy Little Stampers for the Christmas Challenge – be sure to play along!

And if you didn’t get a chance to visit any of the challenges at Happy Little Stampers…be sure to stop by to see the new Stamps! What???!! Yes, there is a new stamp company in town – get your hands on the first series. Definitely check out the shop here.

Measurements:

  • Card Base – 11 x 5 1/5″ top folding card
  • Card Front – White – 5 1/4 x 5 1/4″
  • Glossy Card Stock for Scene – 4 3/4 x 4″
  • Glimmer Paper, Navy Card Stock – Stampin Up

Supplies:

  • Stamps – Small Lakeside Cove, Doe – Stampscapes
  • Stencils – Winter – Memory Box
  • Dies – Handlettered Holiday – WPlus9, Festive Flurry – Stampin Up (Retired)
  • Inks – Tuxedo Black – Memento; Ranger Distress –  Tumbled Glass, Broken China, Stormy Sky, Chipped Sapphire, Pumice Stone; Illuminate – Stampin Up, Frost White – Colorbox
  • Other – Colorbox Stylus Tool with Sponge Applicator, Fun Foam, 2 Way Glue Pen, Dazzling Diamonds Glitter – SU, White Gel Pens, Q-Tips, Mini Sponge Tool, Liquid Glue

Ink Swipe Technique

Creative Tips – 

  • Be sure to add a light layer of ink (Distress, Adirondack Lights) to your glossy card stock first to help the rest glide with the stylus tool.
  • To keep your scene elevated evenly use fun foam to mount it for a bit of elevation off the main card.
  • Sponge lightly but thoroughly. Try not to press too hard through your stencil to avoid unsightly marks from your sponge tool.
  • If you don’t have a pearlescent pigment ink like Illuminate – try silver, white or even versamark.
  • If you’re not into scenic cards – throw a photo in that spot!

Snowflake Stampscape 002

I also love to play along with other challenges – another one of my favorites is Muse Christmas Visions – and this week the inspired card had snowflakes in it. Even though the stars spoke out to me too, it was the snowflakes that ended up on my card to provide the sparkle. Cool how it all tied in!

I also played along with these challenges too this month:

So, now that you’ve learned a little here – be sure to check out all the other great inspirational projects at the Christmas Challenge at Happy Little Stampers! I can’t wait to see what you come up with.

Signature-24-pt_thumb.jpg

[optin_box style=”13″ width=”500″ alignment=”center” action=”https://www.aweber.com/scripts/addlead.pl” disable_name=”Y” method=”post” email_field=”email” email_default=”Enter your email address” integration_type=”aweber” double_optin=”Y” list=”3846012″ name_field=”name” name_default=”Enter your first name” name_required=”Y”][optin_box_field name=”headline”]If you enjoyed this tutorial…[/optin_box_field][optin_box_field name=”paragraph”]PHA+4oCmeW914oCZbGwgbG92ZSBvdXIgPGVtPjxzdHJvbmc+PHNwYW4gc3R5bGU9ImNvbG9yOiAjMjQ0YzVlOyI+ZnJlZTwvc3Bhbj4gPC9zdHJvbmc+PC9lbT5zdWJzY3JpYmVyIG9ubHkgdmlkZW8gc2VyaWVzLiDCoExlYXJuIG5ldyB0ZWNobmlxdWVzIHRocm91Z2ggb3VyIDxzcGFuIHN0eWxlPSJjb2xvcjogIzI0NGM1ZTsiPjxlbT48c3Ryb25nPmV4Y2x1c2l2ZTwvc3Ryb25nPjwvZW0+wqA8L3NwYW4+Q3JlYXRpdmUgVGlwcyBlLWxldHRlcsKgYW5kIHN1YnNjcmliZXIgb25seSB2aWRlbyBhbmQgcHJvamVjdCB0dXRvcmlhbHMhPC9wPgo=[/optin_box_field][optin_box_field name=”privacy”][/optin_box_field][optin_box_field name=”top_color”]undefined[/optin_box_field][optin_box_button type=”1″ text=”Send me exclusive tips!” text_size=”32″ text_color=”#000000″ text_bold=”Y” text_letter_spacing=”0″ text_shadow_panel=”Y” text_shadow_vertical=”1″ text_shadow_horizontal=”0″ text_shadow_color=”#f6fefb” text_shadow_blur=”0″ styling_width=”50″ styling_height=”19″ styling_border_color=”#000000″ styling_border_size=”1″ styling_border_radius=”6″ styling_border_opacity=”100″ styling_shine=”Y” styling_gradient_start_color=”#a3b640″ styling_gradient_end_color=”#80902c” drop_shadow_panel=”Y” drop_shadow_vertical=”1″ drop_shadow_horizontal=”0″ drop_shadow_blur=”1″ drop_shadow_spread=”0″ drop_shadow_color=”#000000″ drop_shadow_opacity=”50″ inset_shadow_panel=”Y” inset_shadow_vertical=”0″ inset_shadow_horizontal=”0″ inset_shadow_blur=”0″ inset_shadow_spread=”1″ inset_shadow_color=”#80902c” inset_shadow_opacity=”50″ location=”optin_box_style_13″ button_below=”Y”]Send me exclusive tips![/optin_box_button] [/optin_box]

Using the Watercolor Stamping Technique with the Swallowtail Stamp

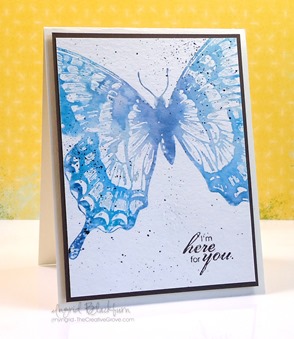
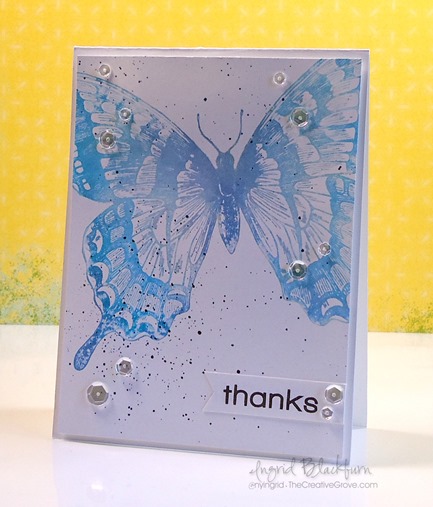
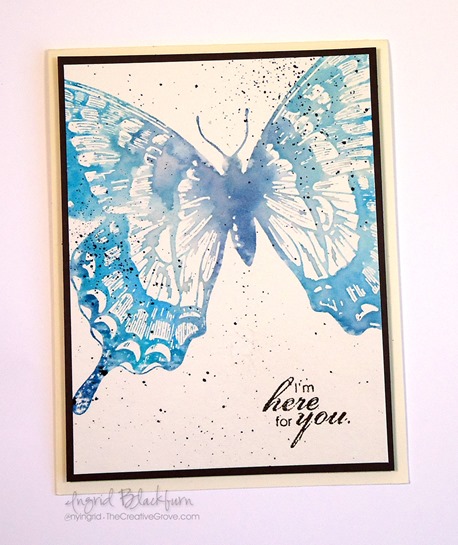
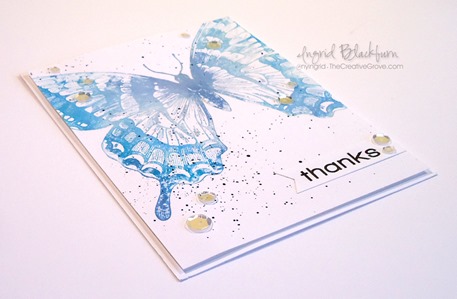
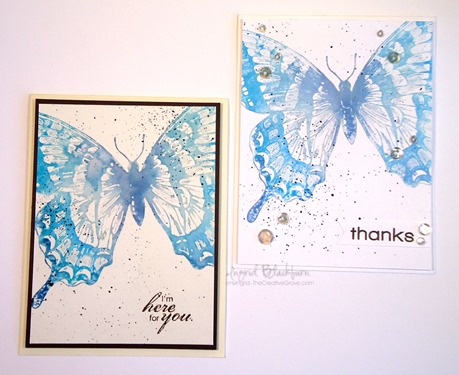
Have you tried watercolor stamping yet? This clean and simple quick project uses a great background stamp, the Swallowtail stamp by Stampin Up, and a simple – yet creative watercolor technique.

Watercolor stamping technique

The best part about this technique is that you can get more than one card with just one inking! To help showcase just how easy the watercolor stamping technique is, I made a video just for you!  If you like the video, be sure to give it a thumbs up on You Tube and subscribe to my YouTube channel for continued technique inspiration.

View video on YouTube

As you saw in the video above, this is a super easy stamping technique that gives you the look of watercolor, but with stamping and detail you’d never be able to achieve on your own.  Here’s a breakdown of just how to do it.

Creative Tips for the Watercolor Stamping Technique

First, pick a large image – this doesn’t work too well with tiny images as they get lost.  This particular project uses a rather large stamp – yours doesn’t have to be so big! We chose the Swallowtail stamp by Stampin Up.

Next, ink up your stamp – we chose Ranger Distress Inks for two reasons – translucency and how well they react with water.  The specific colors are Tumbled Glass, Broken China, Salty Ocean, Peacock Feathers and Faded Jeans.  Be sure to pay attention to the little tricks of how and the sequence we use them in, in the video!

Watercolor Stamped Swallowtail Stamp by Stampin Up

Spritz your stamp with a fine mister.  You’ll want a fine spray rather than too strong a spray – think of a garden hose Jet Spray vs. a Shower Spray…there’s a big difference.  You want to coat your stamp, not spray your ink away.  The amount is important too – too much water will leave you with an inky splotch, vs true watercolor stamping.  You want to be able to still see some detail mixed with watercolor.  I used the Stampin Up mister, Ranger has one too.

Stamp onto 140 pound cold pressed watercolor paper.  Choose the smooth side vs. the toothy side.  You’ll want to use watercolor paper.  This particular technique uses quite a bit of water, and that amount will degrade the fibers of regular card stock into an unattractive mess that will take away from your project.

Watercolor Stamping with Distress Inks

Hold your stamp down and with this particular stamp, put a fair amount of pressure on it – it’s big!  If you can put your project onto a foam pad, you’ll get an even better impression with ease.

Distress Swallowtail 008

You can immediately stamp a second time onto regular card stock for a second impression.  You’ll get another impression just fine.  The reason you don’t need watercolor paper the second time is that the watercolor paper the first time around took most of the water away allowing you to safely stamp onto regular card stock for your second image.

Matte and add embellishments as you want.  You can see here that I created two very different project with slight adjustments.  Both have the color spritzing for a little added effect.  I love them both – hopefully you do too!

Distress Swallowtail 010

If you liked this tutorial and learned something – be sure you’re on our exclusive e-letter list – Creative Tips for a great video series you won’t see anywhere else!

Have fun creating your own watercolor stamping projects – be sure to share them with us on our facebook page!

Signature


[optin_box style=”14″ alignment=”center” disable_name=”Y” email_field=”email” email_default=”Enter your email address” email_order=”1″ integration_type=”aweber” double_optin=”Y” list=”2841626″ name_field=”name” name_default=”Enter your first name” name_required=”Y”][optin_box_field name=”headline”]If you enjoyed this tutorial…[/optin_box_field][optin_box_field name=”paragraph”]PHA+Li4ueW914oCZbGwgbG92ZSBvdXIgPHNwYW4gc3R5bGU9ImNvbG9yOiAjMjQ0YzVlOyI+PGVtPjxzdHJvbmc+ZnJlZSA8L3N0cm9uZz48L2VtPjwvc3Bhbj5zdWJzY3JpYmVyIG9ubHkgdmlkZW8gc2VyaWVzISDCoEdldCB0aGXCoDxzcGFuIHN0eWxlPSJjb2xvcjogIzI0NGM1ZTsiPjxlbT48c3Ryb25nPmV4Y2x1c2l2ZTwvc3Ryb25nPjwvZW0+PC9zcGFuPsKgQ3JlYXRpdmUgVGlwcyBlLWxldHRlciB3aGljaCB3aWxsIHRlYWNoIHlvdSBuZXcgdGVjaG5pcXVlcyB0byBhZGQgdG8geW91ciBzdGFtcGluZyBza2lsbCBzZXQuIMKgTGVhcm4gaG93IHRvIG1ha2UgcHJvamVjdHMgeW91J2xswqBsb3ZlITwvcD4K[/optin_box_field][optin_box_field name=”privacy”][/optin_box_field][optin_box_field name=”top_color”]undefined[/optin_box_field][optin_box_button type=”1″ text=”Send me exclusive tips!” text_size=”26″ text_color=”#000000″ text_bold=”Y” text_letter_spacing=”-1″ text_shadow_panel=”Y” text_shadow_vertical=”1″ text_shadow_horizontal=”0″ text_shadow_color=”#a3b640″ text_shadow_blur=”0″ styling_width=”100″ styling_height=”10″ styling_border_color=”#000000″ styling_border_size=”1″ styling_border_radius=”6″ styling_border_opacity=”100″ styling_shine=”Y” styling_gradient_start_color=”#a3b640″ styling_gradient_end_color=”#5b661e” drop_shadow_panel=”Y” drop_shadow_vertical=”1″ drop_shadow_horizontal=”0″ drop_shadow_blur=”1″ drop_shadow_spread=”0″ drop_shadow_color=”#000000″ drop_shadow_opacity=”50″ inset_shadow_panel=”Y” inset_shadow_vertical=”0″ inset_shadow_horizontal=”0″ inset_shadow_blur=”0″ inset_shadow_spread=”1″ inset_shadow_color=”#a3b640″ inset_shadow_opacity=”50″ location=”optin_box_style_14″ button_below=”Y”]Send me exclusive tips![/optin_box_button] [/optin_box]

One Layer Flicked Distress Technique

Have you ever just loved a card or technique and wanted to duplicate it, but in a different way?  This project shows you just how to do that!  A few months back, I made a great card using the Flicked Distress Technique.  Well, after seeing the challenge for blending on the challenge blog One Layer Simplicity Challenge, I decided to re-create this card, but this time – I’d do it completely in one layer!

OLC Flicked Distress 001

This card re-created in one layer would not be an easy task, or so I thought – it turned out to be quite simple, and what a cool impact card this is – all for the price of half a sheet of white cardstock!  I even filmed a step by step tutorial for you, so grab a beverage, sit back and enjoy!

Watch this video on You Tube

Did you like that?  If so, be sure to subscribe to our Creative Tips E-List for more exclusive videos and projects.  It’s free – Be sure to sign up to the right or below!

OLC Flicked Distress 006

Here’s a link to the original project in case you wanted to see the layered version! Thanks for stopping by today, see you next time!

Signature

OLC Flicked Distress 004

[optin_box style=”12″ alignment=”center” email_field=”email” email_default=”Enter your email address” integration_type=”aweber” double_optin=”Y” list=”3846012″ name_field=”name” name_default=”Enter your first name” name_required=”Y” opm_packages=””][optin_box_field name=”headline”]Learn more with our exclusive FREE video series:[/optin_box_field][optin_box_field name=”paragraph”]PHA+UGx1cyB5b3XigJlsbCBiZSBhZGRlZCB0byBteSBGUkVFIENyZWF0aXZlIFRpcHMgRS1sZXR0ZXIgd2hlcmUgSSBzaGFyZSBleGNsdXNpdmUgcHJvamVjdHMsIHZpZGVvcyAmYW1wOyB0aGUgMTIgRGF5cyBvZiBDaHJpc3RtYXMgUHJvamVjdCBTZXJpZXM8L3A+Cg==[/optin_box_field][optin_box_field name=”privacy”][/optin_box_field][optin_box_field name=”top_color”]undefined[/optin_box_field][optin_box_button type=”0″ button_below=”Y”]Get Instant Access![/optin_box_button] [/optin_box]
Silent Night…Merry Monday

Midnight Snow Drifts 004

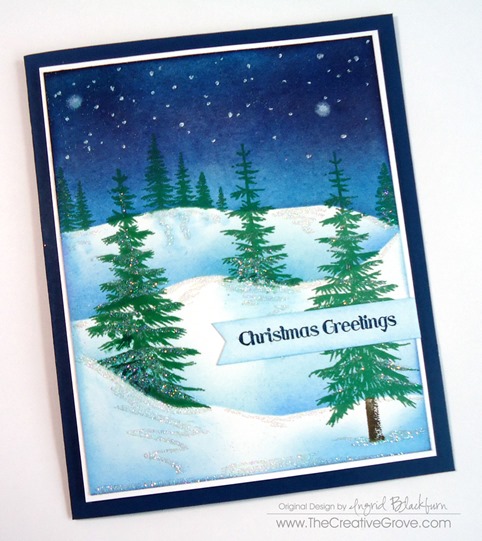
It’s well into the fall season here in Germany, and I love that the Christmas Season is approaching.  Making card for the Merry Monday challenge has been a bright spot to my crafting week on Mondays.  This week, the task is to create a card that evokes the feel of a Silent Night before Christmas.  I think this card works, hope you enjoy it!

130

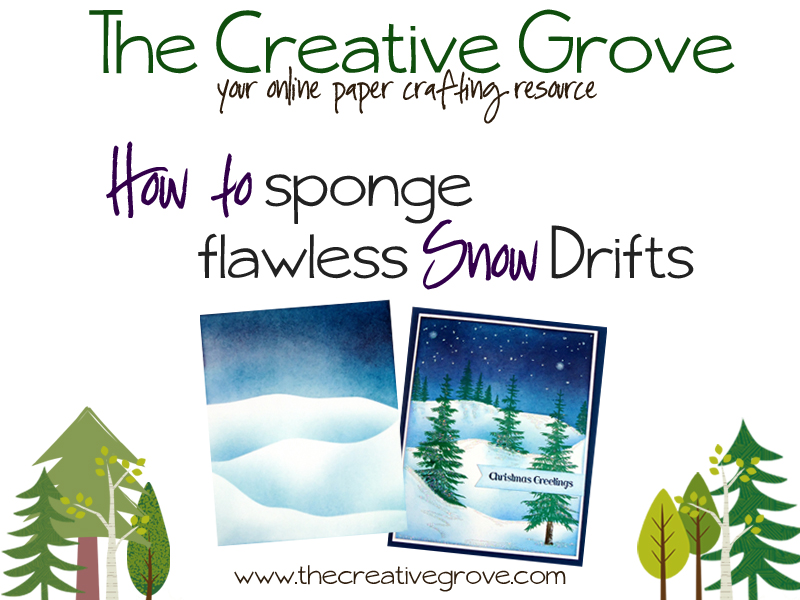
For a tutorial this week, I thought I would show you exactly how I create these snow drifts, so I filmed a step by step video tutorial and put it onto my You Tube channel.  If you are interested in watching the tutorial How to sponge flawless snow drifts, please click here to see it.

Midnight Snow Drifts 010

Thanks for stopping by today!  And in case you missed my YouTube link above…be sure to check out my step by step tutorial here.  Just click this image:

Video Screenshot Title

Creatively yours –

Signature

12 Days of Christmas starts soon!

CLICK HERE to sign up for Creative Tips and get the 12 Days of Christmas sent directly to your inbox free starting Tuesday October 28th!

CAS Dahlia Mojo Monday

DSC01372

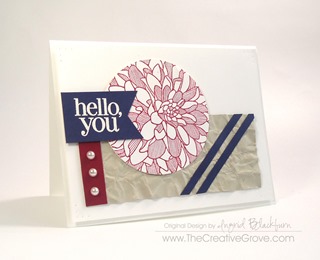
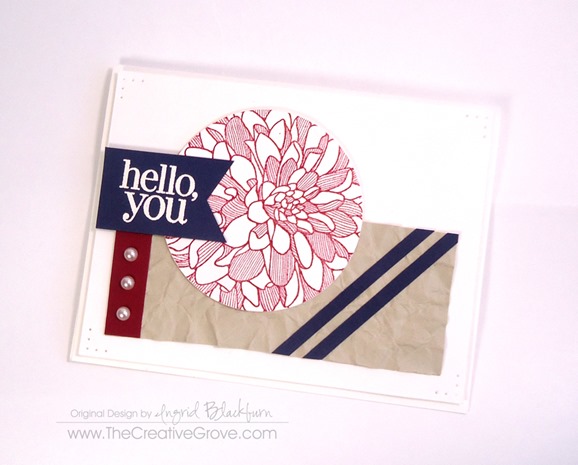
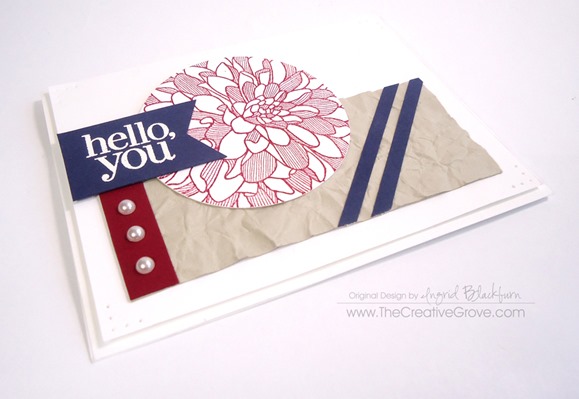
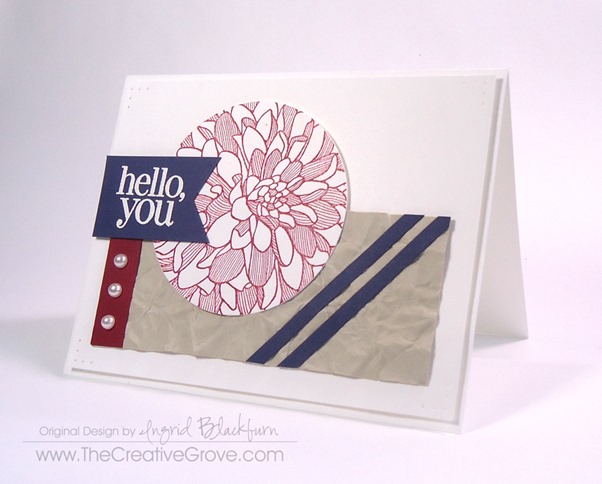
It’s been a while since I played along with the Mojo Monday challenge.  I have to admit, I’ve missed it!  I’ve been in a technique zone creating our new VIP Community here at the Grove (click here to find out more), so I threw a fun simple one into this project.  Sometimes when you have a cool texture that you’ve created for your card, making the rest clean and simple really allows it to stand out.

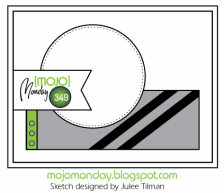
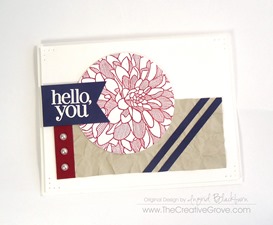
Here’s the sketch and my version.  You can see, I stayed pretty true this time.

Mojo349SketchDSC01375

Here are some tips on how to make this card, and join our Creative Tips list (on the right) to see exclusive free videos on how to make cards just like this:

  • Crumple your paper to create a faux leather look to your cardstock.  If you find it’s hard to do this, spritz it lightly with water.  Use the sweat from your palms to aid you in crumpling this up really well.
  • Cut your solid Navy strips thin – just 3/8” wide.
  • Adhere a thin strip of Cherry Cobbler and your Navy strips with Tombo Multi Liquid Glue.  When you alter cardstock, as with the crumpling, it becomes hard to work with.

DSC01376

  • Snip off the edges of all your strips and adhere your Sahara Sand cardstock to a 5 1/4” x 4” piece of white cardstock.
  • When adhering your large piece down, keep the same amount of space to the right, left and bottom.  It becomes an extended mat.
  • Cut a 2 1/2” circle with a circle punch, framelits or nestibilities. Stamp your Dahlia image in Cherry Cobbler.  Attach to your card front, leaving the same amount of space at the top as the bottom white to balance it out.  Use Liquid Glue on textured cardstock, dimensionals or foam tape to attach to the white to adjust for the height variance.

DSC01377DSC01378

  • Stamp your greeting and emboss in white on Navy cardstock.  Create a banner with your snips or hexagon punch (see video here on how to do that).  Attach with dimensionals onto the white, glue onto other parts.
  • Pierce edges of your card with a paper piercer and a template.
  • Add large pearls to Cherry Cobbler cardstock to finish your card.
  • Pop your card front up onto your card base.

DSC01373

You’re done!  It’s a fun little project, isn’t it?  Let me know what you think!  Leave me a comment below.  Happy Creating!

Signature-Blog

Interested in learning stamping techniques each month?  Check out our new VIP Community!


Happy Day Mojo

Happy Day 001 Main 1

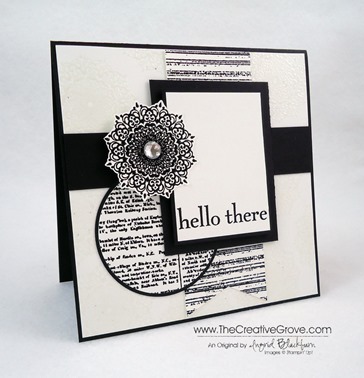
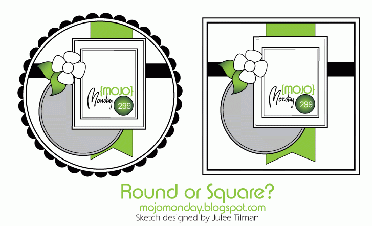
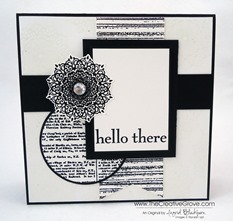
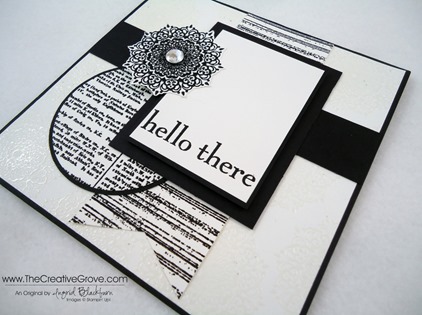
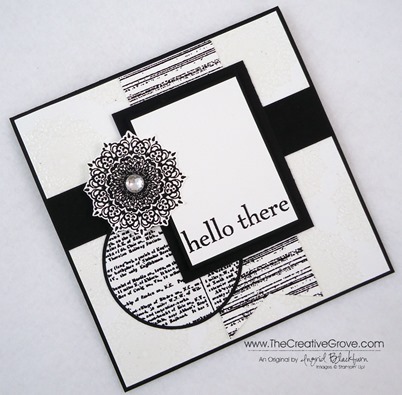
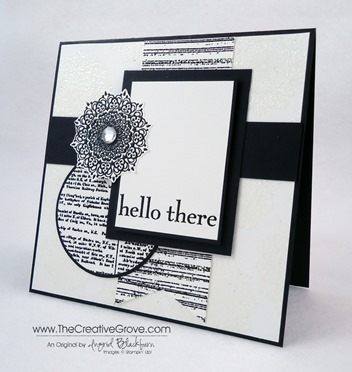
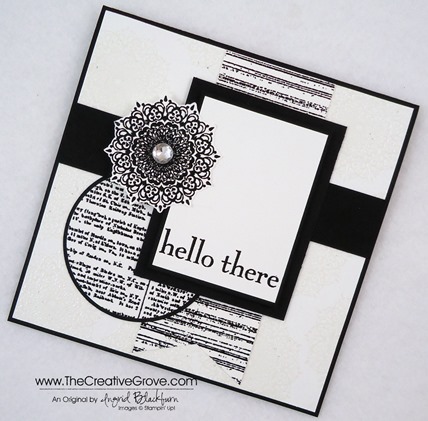
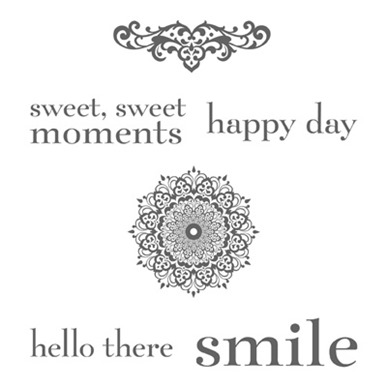
Hello there new Happy Day stamp set.  Doesn’t that just sound like a fun sentence?  I started off using the Modern Medley paper because I wanted to try a black and white card, and lo and behold – it’s black and vanilla!  So I whipped out some of my favorite new stamps and created my own fun papers today!  I hope you enjoy all the creative tips that resulted in this Mojo Monday card!  Here’s the original sketch and my result.

Mojo299SketchHappy Day 001 Front

Creative Tips –

  • I wanted a striking look so I embossed each element of this card.Happy Day 001 Medallions
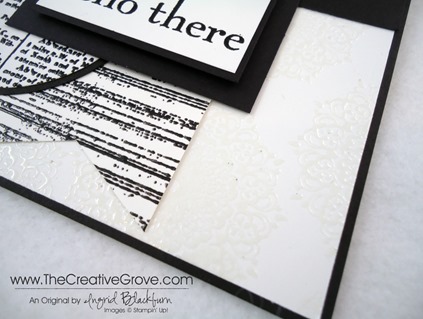
  • For a subtle background for my white card front I embossed the medallion in clear embossing powder to create a designer paper look.  Happy Day 001 Circle CU
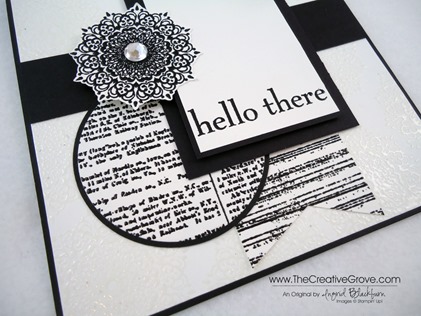
  • The new Dictionary Background stamp is perfect to use for that little piece of designer paper.   I’ve used it several times already and can see that it will definitely become a staple.  I punched a Basic Black matte with my 2 1/2” Circle Punch and the dictionary circle was cut out using the fourth circle in the new Circle Framelits Collection. 
  • To bring a little emphasis to the rectangle I matted the white rectangle (2” x 2 3/4”) on a piece of Basic Black (2 1/8” x 2 7/8”)that had a 1/16” matte.  I popped that black rectangle onto a larger one (2 1/2” x 3 1/4”) with a 3/16” matte.  The smaller Basic Black rectangle was popped up using Stampin’ Dimensionals.Happy Day 001 Elements
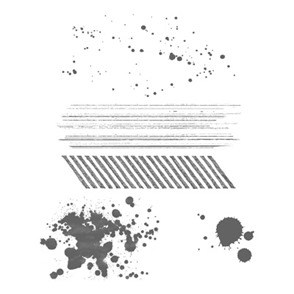
  • For the banner I used the Gorgeous Grunge stamp set.  It’s a cool look and you can easily over stamp it for tighter lines if you want to.  Because the banner is so wide, I couldn’t use a square punch for the end, so I cut up and far as I wanted and brought each corner to the point.  View my video on how to make banner flagsHappy Day 001 Height
  • Once I embossed the Medallion in black embossing powder I cut it out leaving a slight Whisper White border.  I popped it up on double dimensionals stacked on top of each other for the side not adhered to the white rectangle.  I needed to do this so that it didn’t sag to the left.Happy Day 001 Side
  • For a finishing touch, I added an extra large Rhinestone to my medallion.  Since I have so much embossing on the card I didn’t want to over do it by adding more rhinestones.  I started too, and then took them away as it was just enough too far.  My rule is when you want to add one more, stop.  That’s enough. Smile

Happy Day 001 Main 2

I hope you like the elegance of the card.  I think this one will definitely brighten someone’s day!


Signature Snowflake 001

To Shop 24/7 in the Creative Store – Click here!

Happy Day 001 Angle

Stamp Sets – Happy Day (130297c, 130294w), Dictionary (130351c, 130348w), Gorgeous Grunge (130517c, 130514w) Ink – Versamark (102283)  Paper – Whisper White (100730), Basic Black (121045) Cool Tools – Paper Snips (103579), 2 1/2” Circle Punch (120906), Circles Collection Framelits (130911) Finishing Touch – Stampin’ Dimensionals (104430), Large Rhinestone Basic Jewels (129324), Clear Embossing Powder (109130), Black Embossing Powder (109133)

Gorgeous GrungeDictionary Background StampHappy Day Stamp Set