Fall Creations

So what exactly have you been creating this past month?  We’ve been quite busy, behind the scenes in our Community here at The Creative Grove!  Here’s just a quick little peek into our little creative world:

Sept-2014-The-Creative-Grove-Projects

It’s been class mania with both our Brayer 101 and 102 classes being added to the project and resource libraries.  That’s a HUGE savings off the individual cost!  And well worth it.  While the 102 class is still being added this month, it’s been six weeks of creative scenery inspiration fun.  Plus of course lots of clean and simple and watercolor madness also being added.

So if you haven’t checked us out yet, what are you waiting for?  We’re approaching 70 project videos in just a little over three months – crazy, right?  Plus we have lots just waiting to be added.

So come stamp with us in the VIP Community – join in on the conversation in our private members only facebook group and get a craftin’!

See you on the inside.

xoxo –

Signature

To find out more about The Creative Grove Community, click here!
VIP Community

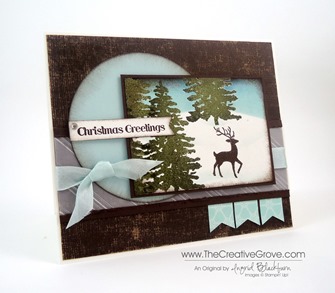
Warmth and Wonder: Just out of the woods

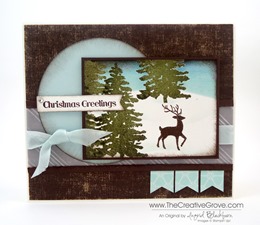
Warmth & Wonder Christmas Brayer Card 008

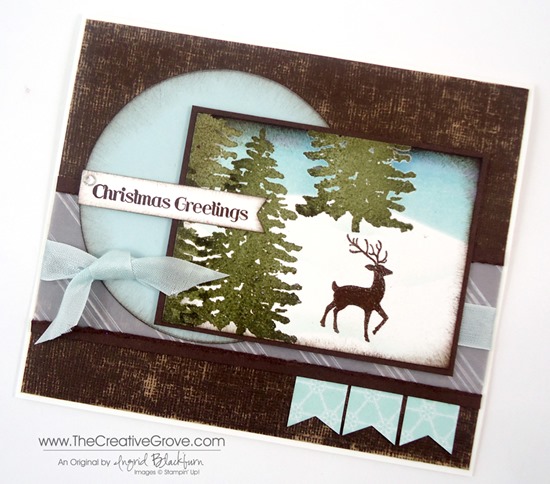
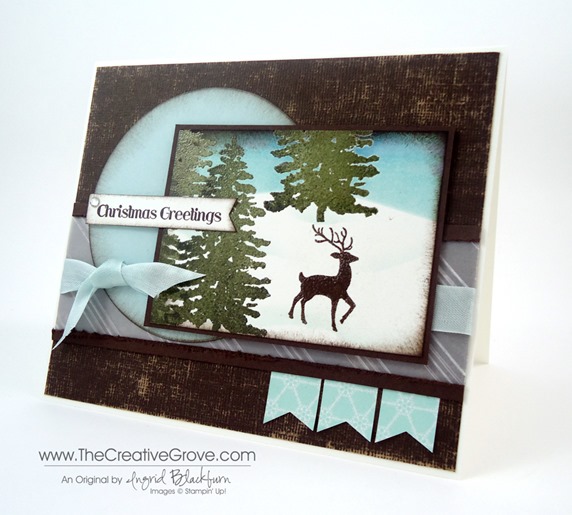
Today, I wanted to make a simple Creative Scene using advanced Brayer techniques and the Holiday Hostess Set Warmth and Wonder.  I have to confess, I slept in today.  Usually I start Mojo Monday at 5 am, that’s what time the sketch goes up!  So as I began to wake up and saw the sketch, I knew this would take me a while.  I’ve been dying to make this card, and today’s sketch was perfect for it!

Many of you have wondered how to make amazing scenes like this.  They look so simple, but actually aren’t.  They involve many different techniques and steps, but every person can make this card – regardless of your stamping ability.  In our classroom, we have a few Brayer classes that teach you step by step with precise videos to help bring the inner artist out in each of you.  The advanced class is in pre-release, save $10 until 10/24 here.  Similar Brayer Cards:

      Evergreen 003 005Plant Hope 002 Side

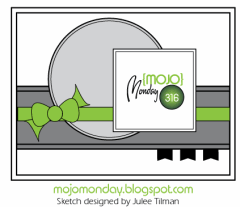
I needed a custom size card and envelope for this card.  I didn’t want the creative scene to be too small.  So I started out by deciding how big my scene should be and built my card around that.  With the Envelope Punch Board I can make any size envelope I need, so I didn’t have to worry about that!  What a stress relief!  Click here for a quick video on how to make a custom sized envelope.  Here’s the Mojo Monday sketch and my project.

            Warmth & Wonder Christmas Brayer Card 011Mojo316Sketch

Creative Tips –

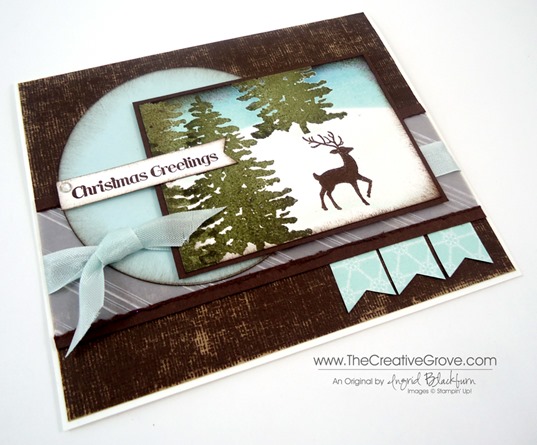
  • Create the scene using Early Espresso, Always Artichoke, Soft Sky and Marina Mist, embossing powders, masks, a brayer and some sponges.  You will want to pop it up on dimensionals to help set it apart from the rest of the card.Warmth & Wonder Christmas Brayer Card 013
  • Sponging the various pieces of the card tied it together.  Sponging the creative scene draws the reader into it.
  • The background was sanded using the Stampin’ Sanding System in a random fashion. 
  • The circle was cut out with the Circle Collections Framelits – it’s the 3rd largest.Warmth & Wonder Christmas Brayer Card 014
  • To get the diagonal stripe on the vellum, use the Stylish Stripes Embossing Folder.
  • The ribbon is Soft Sky 1/2” Seam Binding Ribbon Warmth & Wonder Christmas Brayer Card 020
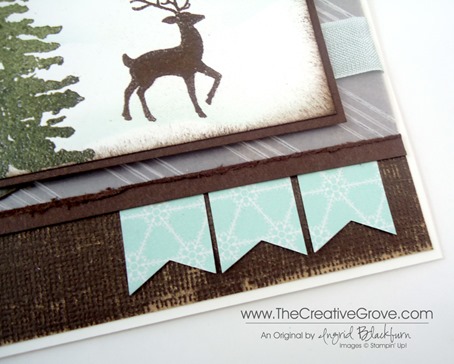
  • The little banner flags are made with paper from the Winter Frost Designer Series Paper Stack and the hexagon punch.  View a video to see how to make banner flags here
  • It was hard to figure out how to incorporate a greeting.  You don’t want to take away from the scene too much, so a simple banner with a greeting from this very set brought out to the circle worked well.Warmth & Wonder Christmas Brayer Card 007
  • Here is the card height so you can see the height of the various elements.
    Warmth & Wonder Christmas Brayer Card 010
    If you’d like to learn how to use your brayer along with many other tools to create little works of art like this one, check out all the classes we have.  We even have a bundle here at a huge savings!
    Have a creative day!
    Signature Snowflake 001

Shop 24/7 in the Creative Online Store – click here

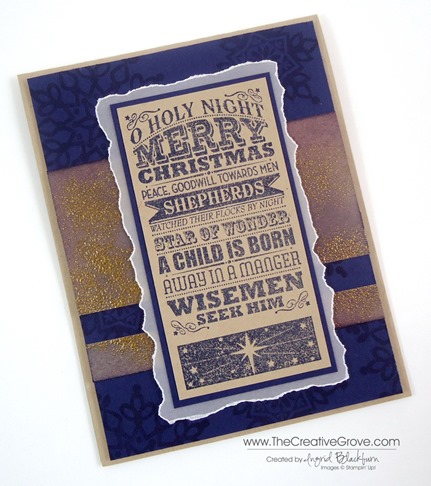
O Holy Night Masterpiece

O Holy Night 001 004

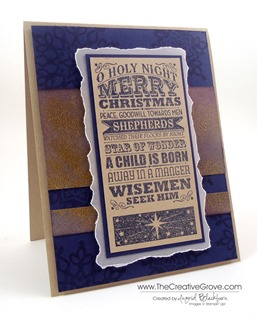
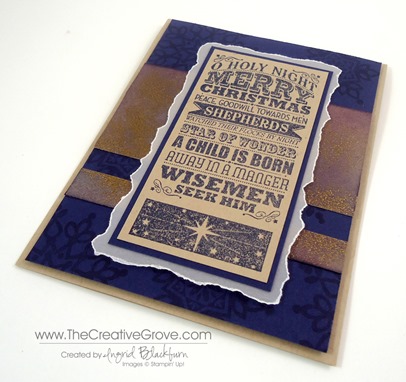
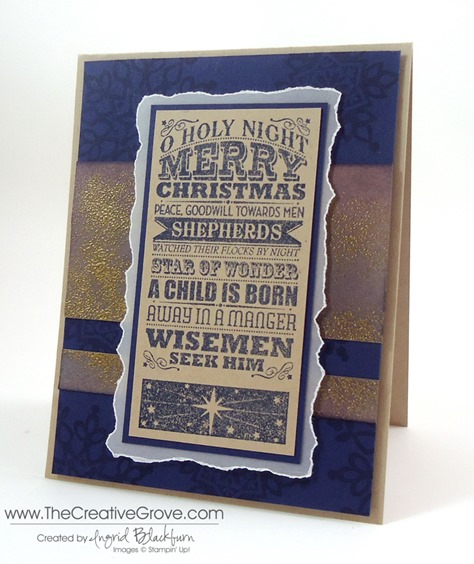
Have you ever set out to create a simple card and end up creating a little piece of art?  That’s how I feel about this project.  My goal was to just create a clean and simple card.  If you look a bit closer, you’ll see some cool techniques come together to make a little piece of artwork.  These are the kind of techniques you’ll learn in the creative cards classes taught in the online classroom.  After all, not everything can just be cut, assemble and create, right?

Creative Tips –

  • The O Holy Night stamps together are striking.  I love the mixture of fonts to create this great image.  Be careful not to mix it with too much in the background, as it will take away from the cool font look.O Holy Night 001 011
  • Night of Navy is always a great choice for a striking card.  Here you will pair it with Elegant Eggplant to create your background along with gold embossing powder.
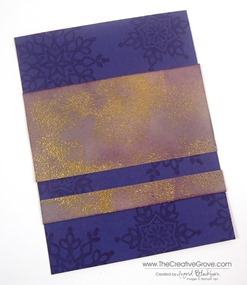
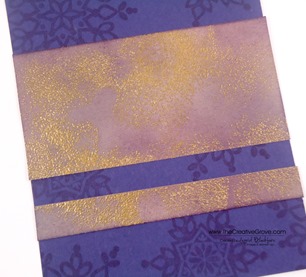
  • The background is sponged lightly using the two colors onto a piece of Crumb Cake.  You will then use a sponge to randomly add some versamark ink and then Gold Embossing powder.  Don’t overdo the gold.  I blew and tapped off some.  It’s meant to be an added look, not overtake it.O Holy Night 001 001O Holy Night 001 002
  • The piece I made was a bit too wide, so I cut off a strip 1/2” wide, and separated it for some interest to the background.  This broke up the dominant look and allows you to focus on the stamped image instead.  Don’t be afraid to try separating your backgrounds if it’s not working for you.
  • The Night of Navy front needed a little bit, so you can add a little interest with the Festive Flurry set as pictured here, or try Gorgeous Grunge.
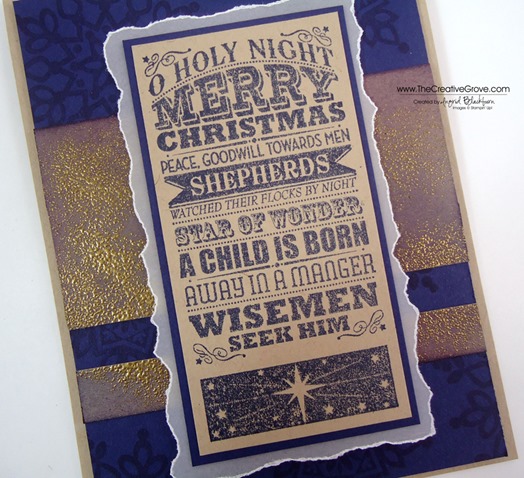
  • You’ll want to matte your stamped image, Night of Navy was the only real choice here, but it got lost on the Night of Navy card front, and white would have been too much.  So, I matted it onto a piece of our Vellum cardstock and tore the edge for a little texture.  The outcome was stunning. O Holy Night 001 010O Holy Night 001 013
  • To give it a little more drama, pop it up on Stamping Dimensionals along with the card front.
  • Using card stock like Crumb Cake or Brown Sugar along with rich colors like Night of Navy, sometimes look like gold as here. O Holy Night 001 005

Free Exclusive Content

Are you on the Creative Tips list?  If so, then you are getting exclusive projects, videos, tool tips, specials, discounts and things like the 12 weeks of Christmas.  So much more happens here at The Creative Grove, but not everything is on the blog.  Don’t miss out, sign up today! Click Here to get Creative Tips sent directly to you.

Brayer 102 – Advanced Creative Scenery Pre-Release savings!

Do you love to create Creative Scenery?  Then don’t miss out on the Advanced Techniques class.  Brayer 101 was a huge online hit, and we’re continuing the series by taking these creative pieces of artwork to a whole other level.  The class is slated to go live Thursday October 24th, but you can save during the Pre-release!  Check it out here.  And if you missed the 101 class, get caught up in the 101/102 bundle!  Check out the bundle here.

Signature Snowflake 001

Shop in the Online Store 24/7 – click here

O Holy Night 001 007

Stamps – O Holy Night, Festive Flurry Ink – Night of Navy, Eggplant Envy, Versamark Paper – Crumb Cake, Night of Navy, Vellum Cardstock Cool Tools – Gold Embossing Powder, Heat Tool, Sponges Finishing Touch – Stamping Dimensionals

Evergreen Stamp Silhouette: Forest Evening Sky

Stampin Up Evergreen Stamp Set (1)

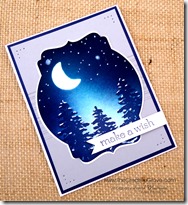
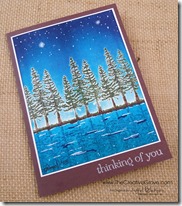
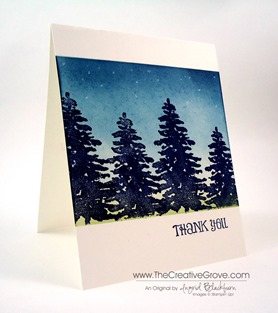
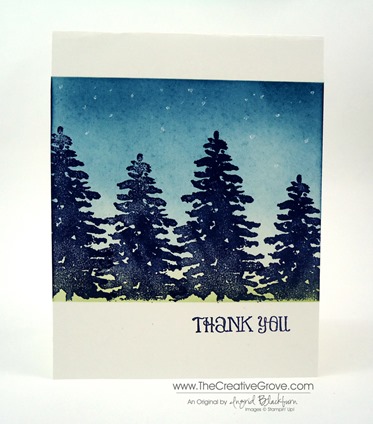
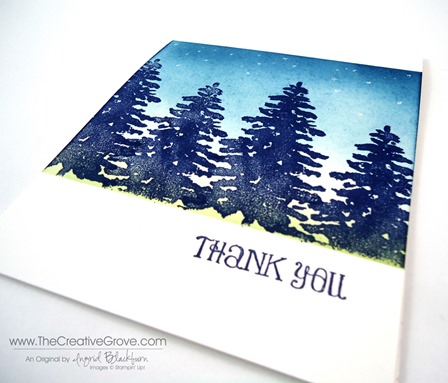
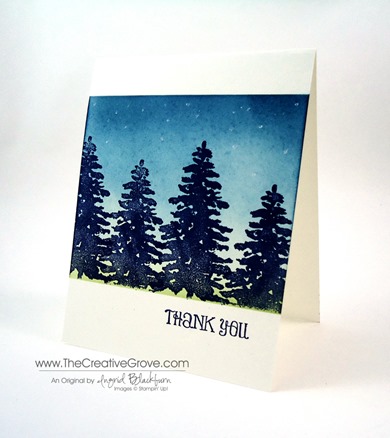
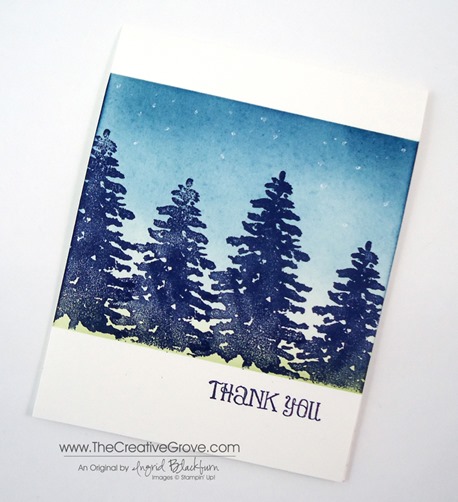
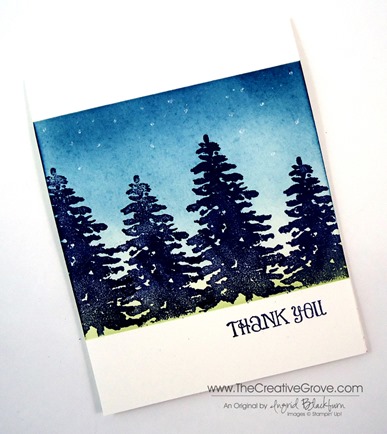
Have you used the Evergreen stamp set as a silhouette image yet?  The filler tree is the perfect stamp to create an Evergreen filled night sky.  Here you see a clean and simple one layer card that is quickly made, but looks great with the ease of color transition and forest underneath a starry sky. 

One layer cards are not only cost effective, but their simplicity is quite striking.  I think you will find that the more you give one layer cards a try, the more you will make.  For me the key to a successful one layer card is lots of white space.  You want the eye to gravitate toward your focal point, not random images.  Stampin Up Evergreen Stamp Set (3)

In this card, I was going for a forest feel underneath an early evening sky.  You know, just when the stars are starting to come out.  Can you hear the crickets?  I’d love to be in this place right now!  That’s the emotion I was going for with this simple but creative scenic card using the Evergreen stamp set.  So, now it’s your turn to give it a try!

Supplies Needed –

  • Stamps – Evergreen (online only), Lots of Thanks
  • Ink – Night of Navy, Pear Pizzazz, Soft Sky, Marina Mist, Midnight Muse
  • Paper – Whisper White, Post-it Notes
  • Tools – Sponge, Signo White Gel Pen

To learn how to make more creative scenery cards, be sure to check out the online Brayer Classes we have focused on this style of card.  Create amazing artistic works of art and master the techniques for those cards.  Click here to find out more information.

Creative Tips –

  • First you will want to mask your upper and lower card areas.  Tip – I use my grid paper to line up my post it notes on the left and right to make sure I’m straight.
  • Next, start with the earth.  Here you see Pear Pizzazz as a light green color for the forest brush.  Stampin Up Evergreen Stamp Set (6)
  • When adding the color with a sponge you will want to start off your paper and lightly sponge it on in a circular motion.  This way you will have an even color rather than splotchy.  Don’t start directly on your project.  Use your grid paper or the post it note as a starting point.
  • Once you have a light coating of green, switch to soft sky.  You don’t need to worry too much about adding a lot of color to the top of your sky, as you will layer darker colors there, but have a little. 
  • Next, add a little Marina Mist.  Keep it at the top to the top half.  As the sun goes down in the sky, most of the light is at the horizon, leaving a darker sky up top.  That’s the effect you are going for here.Stampin Up Evergreen Stamp Set (5)
  • Lastly, add a little Midnight Muse ever so lightly to the uppermost part of the sky.  Be careful when bringing it down into the main portion of your sky, as it will overtake the lighter colors rather quickly and before you know it, your sky is all dark!
  • To get a solid evergreen silhouette image, you will want to stamp your Evergreen tree in Night of Navy – Stampin’ Up!’s darkest shade of blue.  Vary the height of the tree for a little contrast.
  • For a starry sky, use the Signo White Gel Pen to create different sized stars in the sky.  Group a few together and vary the height in your project.Stampin Up Evergreen Stamp Set (2)

This project is a quick one, I think you’ll be amazed at how fast you can actually make it!  The end result is so beautiful.  Feel free to sign it like artwork too!  You created that sky.  Add a sentiment or leave it blank – it’s up to you.  I think you will love using this evergreen stamp set for a silhouette tree image, now it’s your turn!Stampin Up Evergreen Stamp Set (4)

Signature Snowflake 001

To shop 24/7 – click here!
Dog Days of Summer: Tropical Lagoon

Stampscapes Tropical Lagoon 9.5.13  (12)_thumb[2]

Is your creative process for a project always perfect?  I know mine sometimes is not.  Yesterday I worked on a project for my friend Trish in Australia.  What you see above is the final result.  Here’s the creative process it took me this time around.  I hope this helps some of you!

Stampscapes-Tropical-Lagoon-9.5.13--[3]

This time, I began with the following project. My  lagoon stamp was larger than my intended project size, so I wanted to only use part of it with still having room for a palm tree in the forefront for perspective.  It didn’t work out as I intended. 

Stampscapes Tropical Lagoon 1 CU_thumb[3]

My original project is at the bottom.  The grass didn’t blend with the palm tree well enough, I didn’t care for the extra grass and so much real estate at the bottom.  By accident I swiped red right over my sun, the card stock had divot’s  at the top that wouldn’t take in any ink, and the bungalows were stamped strangely.  Now, you may be saying I’m being nit-picky, but that’s a whole lot of things wrong for me, so I created a plan to fix my scene.

I began by taking a piece of scrap paper and stamping my scene on a larger card – 3 3/4” x 9” instead.  Here you see my beginning project, my test scene and the final project all next to each other.  I think you’ll agree with me – it’s MUCH better!Stampscapes Tropical Lagoon 9.5.13  (3)_thumb[7]

I used several colors of Marvy, Adirondack Lights, and Stampin’ Up! inks to get my desired look with a Colorbox Stylus Sponge Tool  Now I’m going to have to make one for myself!  Stampscapes Tropical Lagoon 9.5.13  (16)_thumb[2]

Creative Tips –

  • I stamped the entire scene in Early Espresso rather than Black.
  • I stamped the lagoon and then masked the sky.  I colored in my water – Aqua Adirondack Lights, Caribbean and Turquoise Blue.  I kept the color in streaks so to leave a little light in it.
  • For the sand, I used Sahara Sand Stampin’ Up! ink.  I then masked the water and my sun.  The sky is made of Yellow, Brilliant Yellow, Crushed Curry, Peach Bellini, Crisp Cantaloupe, Tangerine Tango, Cloudy Blue and Oriental Blue.Stampscapes Tropical Lagoon 9.5.13  (18)_thumb[3]
  • The huts were stamped after the horizon masks were removed and right on the horizon line.  The roofs were colored in using a Brushtix Sponge Tip applicator and Jungle Green with Early Espresso Marker accents.
  • You can extend the dots that make up the surrounding scene with the fine tip of the Early Espresso Marker.
  • The reeds and tropical plant are stamped with Jungle Green.  It was necessary to mask the tree with a little bit from a paper towel.Stampscapes Tropical Lagoon 9.5.13  (17)_thumb[3]
  • Three of the birds were colored with the Early Espresso Marker and stamped in the sky.
  • The Palms extend off the page and I stamped the lower parts of the leaves in Jungle Green.
  • To brighten up the scene and give it some life, you can use a Uniball Signo White Gel Pen.  You may want to go over some of the natural waves from the stamp if you’ve gotten color on them like I did.  Add some dots in the sand for the foam left behind the wave that rolls onto the shore.
  • Highlight the trees, huts and birds, keeping in mind where you light source is coming from.Stampscapes Tropical Lagoon 9.5.13  (10)_thumb[3]Stampscapes Tropical Lagoon 9.5.13  (14)_thumb[3]
  • Here you see the difference between sponging the edge of the scene in Early Espresso and leaving the canvas as is.Stampscapes Tropical Lagoon 9.5.13  (13)_thumb[2]

I love the end result – it’s by far the best Stampscapes tropical scene I’ve done.  In the end, I used 9 various stamps to create this scenery.  I hope you love it too!  It’s a fitting end to the summer.

Online Brayer Class

Do you want to learn how to make creative scenery cards?  Try our Brayer 101 – Introduction to Creative Scenery online class.  You’ll learn how to master this technique using a brayer to create unbelievable scenes that will leave you feeling like an artist.  Find out more here.

Signature-Snowflake-001_thumb1

To Shop 24/7 in the Creative Store – Click here!
Stamp Sets – Stampscapes Stamps Ink – Marvy – Oriental Blue, Turquoise, Caribbean Blue, Jungle Green, Yellow, Brilliant Yellow; Adirondack Lights – Cloudy Blue, Aqua, Peach Bellini; Stampin’ Up! – Early Espresso, Crushed Curry, Tangerine Tango, Sahara Sand, Crisp Cantaloupe, Early Espresso Marker Paper –Glossy White, Early Espresso Tools – Colorbox Stylus, Brushtix Mixed Media Brushes Finishing Touch – Uni-ball Signo White Gel Pen

The Creative Process and a Sneak Peek!

Stampscapes Tropical Lagoon 9.5.13  (6)

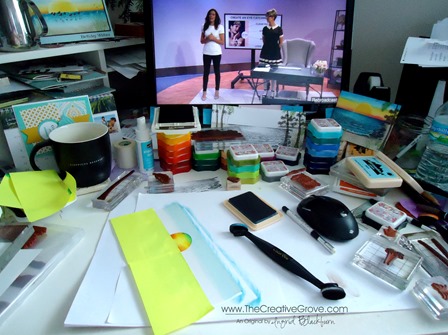
Do you ever feel like it is a definite process to get to your desired project result?  Do you hit a home run each time you start a new creative project?  I certainly do not!  I hope this post will help you to realize that it’s okay to re-do a project, or take it in steps.  Today, I thought it might be helpful for you to see what my desk looks like when I’m right in the middle of a project.  I took a break from packing to get a little creative for you!  Here’s a snapshot of my process – notice a not completed project in the upper right, a middle project template  in the center and then my actual finished project in process.

Stampscapes Tropical Lagoon 9.5.13  (5)

This is actually not that bad.  I cut my paper in a different space or it’s just too much!  Today you see that I’m using various types of ink pads – four different brands actually!  And to get some business inspiration at the same time, I was taking a class – that’s what’s on the computer monitor.  My space started to get a little overwhelming, and I had to put some stuff in it’s place so that I felt like I had some elbow room, but my end result worked out awesome!

To the left, you see a sneak peek of tomorrow’s project with the end result at the top, my middle test project that became my creative process, and my beginning project that went all wrong in several ways.  I know it doesn’t look like it, but trust me, it did!

I began a project for a friend and wanted it to be just right.  It didn’t quite turn out the way I had planned.  So what I did was take a piece of scrap paper and work the project out so that I felt a bit more confident and now I LOVE the end result.  Please tune in tomorrow to see it!

Update – Packing up the Stamping Studio – It’s been quite a task to pack up the studio.  We’ve been here for nine years and my craft room is 28’ x 14’ – it’s loaded with open spaces and shelves filled with projects, cards, and supplies.  And that’s not even my classroom.  Yes, I’m lucky – when I first started in this industry, I had a 4’ x 2’ folding table, chair and one plastic set of drawers – in the corner of our family room.  I couldn’t stand putting things away each time I scrapbooked or made cards – I vowed to have a room all to myself with a door someday!

I didn’t get it until we purchased our home nine years ago, and now I’m leaving my dream space.  It’s okay – we’re on to a fun adventure – but I now have the experience of knowing how much space I truly need to be creative and productive.  While my huge room (rooms if you include my even larger classroom), will be missed – I know I will be fine in a smaller space.  Actually – I’m looking forward to it.  You see, I ended up collecting way too much stuff with such a huge space (makes sense – we just have to fill it, don’t we!) – it made for a nice downsizing sale for my local customers though!  Thanks for bearing with me as I continue to pack and purge!

See you tomorrow – you’ll want to tune in…this card is my most impressive Creative Scenery project to date.  I’m going to have to make myself one to keep!  Have fun stamping!

Signature Snowflake 001

To Shop 24/7 in the Creative Store – Click here!

Stamp Sets – Stampscapes Stamps Ink – Marvy – Oriental Blue, Turquoise, Caribbean Blue, Jungle Green, Yellow, Brilliant Yellow; Adirondack Lights – Cloudy Blue, Aqua, Peach Bellini; Stampin’ Up! – Early Espresso, Crushed Curry, Tangerine Tango, Sahara Sand, Crisp Cantaloupe, Early Espresso Marker; Memento – Black Paper –Glossy White, Early Espresso Tools – Colorbox Stylus, Brushtix Mixed Media Brushes Finishing Touch – Uni-ball Signo White Gel Pen

Finding Inspiration

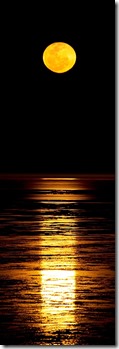
Where do you look for creative inspiration?  For me, I usually head to Pinterest or look in magazines.  I love to look at photographs and generally a color palate or random organization of shapes will strike up an idea.  I thought today I would take you on a journey for a simple CASE (copy and steal everything) of a photo for me. Smile

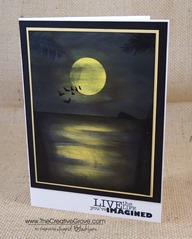
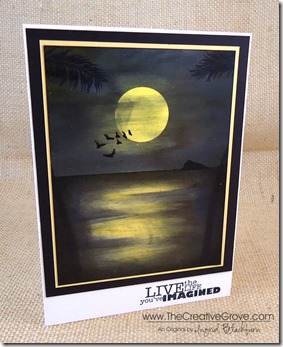
When you see a photo online, do you sometimes shift in your chair, or move your head?  That to me is the sign that I’ve found something.  Here is the photo I found on Pinterest and my final project:

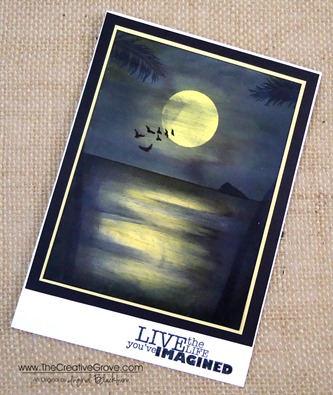
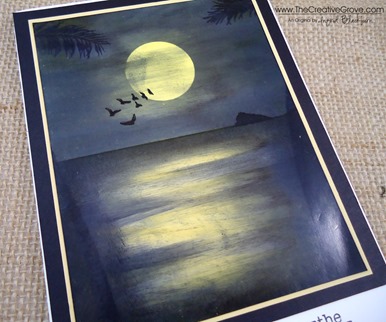
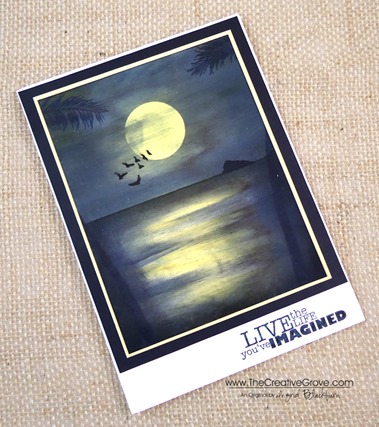
Cable-Beach-Broome-North-Western-Australia Moonlit Waters 004

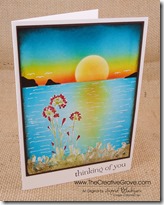
While it’s not exact, it was my first attempt at making a mostly all black scenery.   I immediately thought, I can do that.  I’ll challenge myself and try something totally new.  I have to admit – it felt all wrong…lol!

Creative Tips –

  • You will want to start by masking a horizon line and beginning with your sky.
  • Give a good coat of various shades of yellow.  Here I used Glossy paper and a stylus tool to layer several coats of ink.Moonlit Waters 007
  • Mask your moon and continue layering ink, switching to Black.  You’ll want to leave a little faint yellow showing through around your moon for the glow.
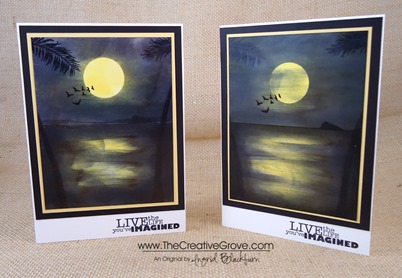
  • My edge of my mask lifted up, so I got a splotch of black on my moon on the left side.  To cover that mistake up, I lifted my mask completely and dragged my stylus across a little to create whispy clouds.  Here is my friend Amy’s who didn’t get any on hers – see the difference? Moonlit Waters 001
  • When done with your sky, fully dry and switch your mask to reveal the water and cover the sky.
  • Layer color from the sides across your water being careful to leave the middle showing the moonlight reflection.
  • To create the feel of water, you will want to bring in a little black into your yellow.  Do this a little at a time so that you don’t cover up too much at once.  If you feel like you aren’t sure if you want to add more, stop.Moonlit Waters 008
  • Once you have the desired look, stamp your palm trunks and leaves at the top to give the viewer’s perspective.
  • Stamp the birds, layering a few over your moon.
  • Create a mask for the island and add into the horizon opposite your birds with a sponge in black ink.
  • Pick a saying that fits your scene.
  • This card is finished 5 x 7 and the scenery layer is 4 1/4 x 5 1/2”

It’s a fun scene and looks so striking in person.  I can’t wait to try it in purples next!

If you loved this card…

Be sure to subscribe to the creative tips e-letter & FREE video series. There’s a great scenic project in our first video series that I think you’ll love. And if you want to learn more about scenic cards, be sure to check out our Brayer 101 & 102 classes in addition to our upcoming Stampscapes class where we’ll make this similar project: Find out more HERE

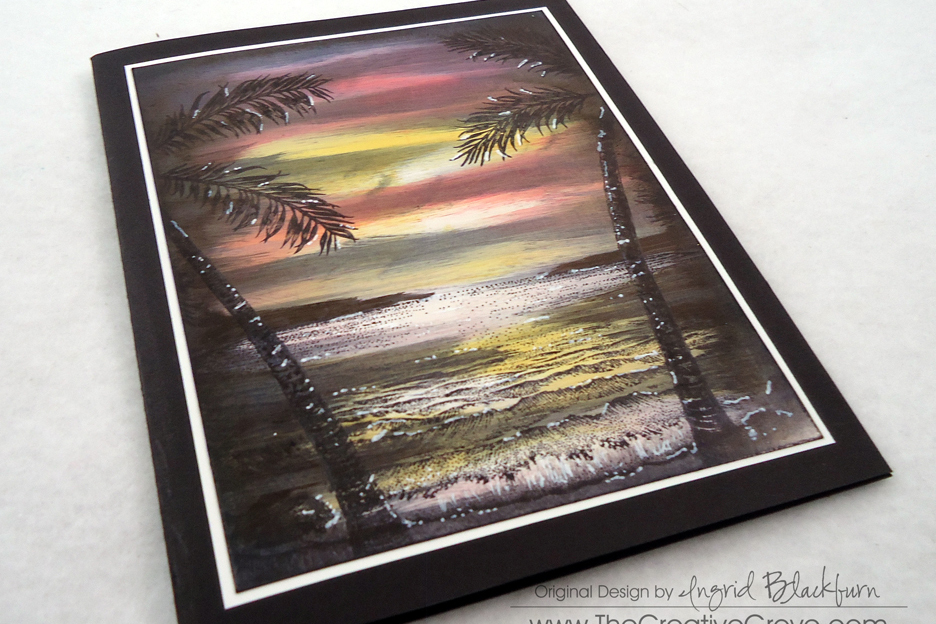
Eveing Sunset Palm Cove Thumbnail

Signature_thumb.jpg

[optin_box style=”2″ alignment=”center” email_field=”email” email_default=”Enter your email address” email_order=”2″ integration_type=”aweber” double_optin=”Y” list=”3846012″ name_field=”name” name_default=”Enter your first name” name_order=”1″ name_required=”Y” opm_packages=””][optin_box_field name=”headline”]Learn more with our exclusive FREE video series:[/optin_box_field][optin_box_field name=”paragraph”][/optin_box_field][optin_box_field name=”privacy”]Plus you’ll be added to my FREE Creative Tips E-letter where I share exclusive projects, videos & the 12 Days of Christmas series[/optin_box_field][optin_box_field name=”top_color”]undefined[/optin_box_field][optin_box_button type=”0″ button_below=”Y”]Get Instant Access![/optin_box_button] [/optin_box]

Stamp Sets – Stampscapes Stamps, Really Good Greetings (130333c, 130330w) Ink – Marvy – Black, Yellow, Brilliant Yellow  Adirondack Lights – Sandal Paper –Glossy White, So Saffron, Basic Black Tools – Colorbox Stylus

Moonlit Waters 006

Stampscapes Creative Scene

Stampscapes 001 001

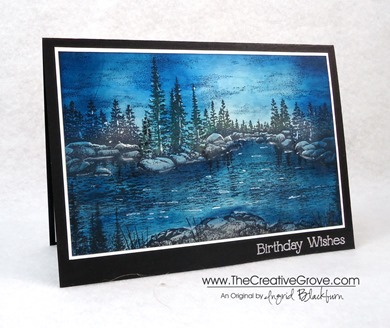
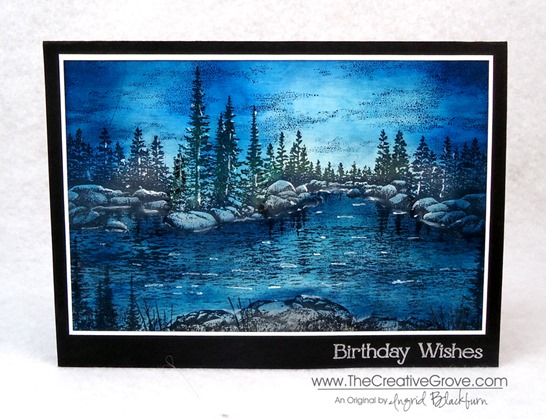
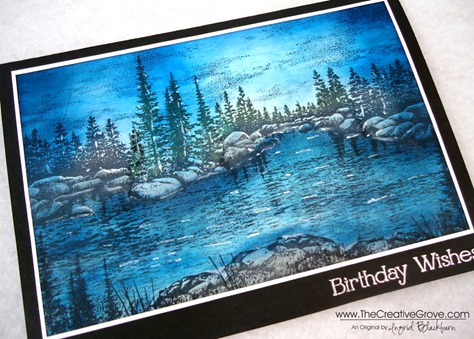
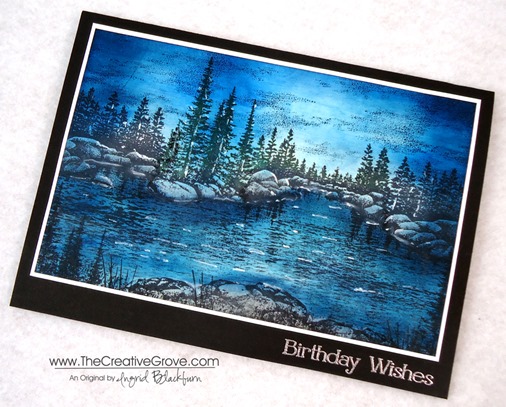
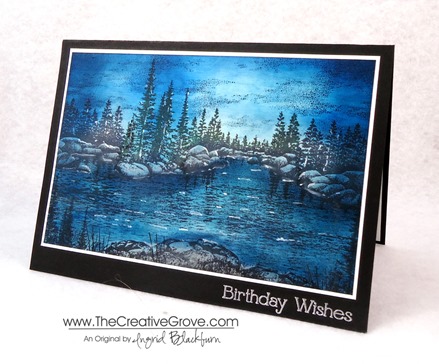
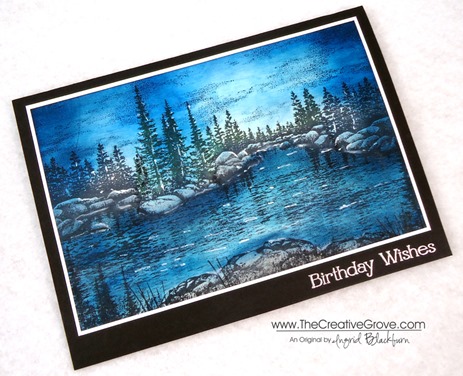
Today is my brother’s birthday, and I wanted to make him something special.  Matt and I love the mountains, we spent most of our down time in the summers in the outdoors together.  So, for him today I broke out my Stampscapes scene building stamps and created this lakeside evening scene.  Stampscapes stamps can be used to build scenes with seemless blending images. 

Creative Tips –

  • I stamped out my scene first layering several lakeside tree and rock stamps. 
  • To keep the scene matte in nature, I used our Ultrasmooth White cardstock.
  • My first two I actually colored over the trees with my Always Artichoke and Garden Green markers, but I didn’t like the result.  The rest of the scene, I continued to use my Basic Black ink pad.  Stampscapes 001 003
  • For a little focal point at the bottom edge, I stamped the boulders at various angles and a few of the trees on the edge.  I really needed a bigger tree, but didn’t have one.  I wouldn’t use the stamp I used in this one for that again – it’s too small.
  • I added a few of the small reeds and used the grass filler for some texture at the bottom. 
  • Next I filled in the empty space using my small water texture stamp.  I think I went a bit overboard, but it still works.  Remember, when you want to add one more – stop!
  • Once the scene was built I could start coloring.  I used a Colorbox stylus to apply my Stampin’ Up! Classic Inks.
  • I began layering a base of Soft Sky in the sky and near the rocks in the water.  Next I used some Pool Party in the lake followed by Tempting Turquoise.
  • For a little added color I added Baja Breeze and then Marina Mist to the both the lake and the sky.  My water was pretty much how I wanted it so I moved on to the sky.  Stampscapes 001 006
  • I tried to keep a few spots off the horizon going upward more white in nature for some contrast.
  • To brighten the scene up I added some Pacific Point across and in the middle of the night sky followed by some Not Quite Navy.
    • I wanted to have some shadows in the water, so I used the side of the stylus and some Not Quite Navy to the edge of the boulders and the edge of the card. 
    • The boulders were filled in with Basic Grey and some Early Espresso was added to the edge of the center bottom for a little earth.
    • Midnight Muse gave a finishing touch around the perimeter of the card followed by Basic Grey.
    • I stamped the cloud space in Midnight Muse once the card had been completed.Stampscapes 001 005
    • For some highlighting and detailing, I used a Signo White Gel Pen.  I went over the edges in the water along the rocks after with a paper towel to dull the look a little.
    • To help pop the card, I matted it on a 1/16” border of Whisper White and then on a larger piece of Basic Black
    • The greeting uses the Four You stamp set.  I used a embossing buddy to ensure that I would not have little silver straggler powder on the Basic Black cardstock before embossing the greeting in Silver Embossing Powder.

I love the result.  The Stampin’ Up! inks give just the right depth of color.  Next, I’m going to try some brayering with these scenes.  I can’t wait!Stampscapes 001 002

    Learn a new technique in the Online Brayer Class

    This class is still available at the introductory price – it’s going up next week!  Creative Scenery classes using a brayer have by far been my biggest hit with stampers.  The Brayer has stumped many crafters over the years, well actually more.  Learn how to create gorgeous gradual transitions with 100+ minutes of step by step detailed video instruction teaching you how to master this technique.  The end result – You will feel like an artist.  Best of all, you will look at your stamps in a whole new way, and try things you never would have thought to do before.  Find out more here

      Signature-Snowflake-001_thumb1

    To Shop 24/7 in the Creative Store – Click here!

    Stampscapes 001 004

    To view the details or see close ups of any products used in the above project, just click on the green link to view it in my store 24/7.

    Stamp Sets – Four You (130538c, 130535w), Stampscapes Stamps Ink – Stampin’ Write Markers –Always Artichoke, Garden Green, Classic Ink Pads – Basic Black, Soft Sky, Pool Party, Tempting Turquoise, Marina Mist, Pacific Point, Midnight Muse, Early Espresso, Basic Gray, Retired – Not Quite Navy, Baja Breeze Paper –Whisper White, Basic Black, Versamark Tools – Colorbox Stylus Finishing Touch – Silver Embossing Powder, Signo White Gel Pen