The Creative Process and a Sneak Peek!

Stampscapes Tropical Lagoon 9.5.13  (6)

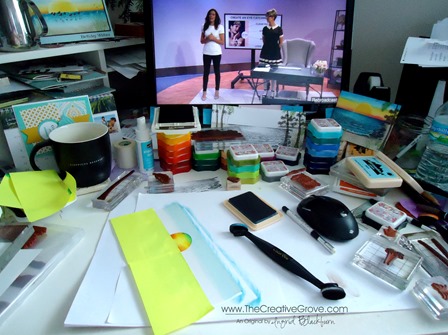
Do you ever feel like it is a definite process to get to your desired project result?  Do you hit a home run each time you start a new creative project?  I certainly do not!  I hope this post will help you to realize that it’s okay to re-do a project, or take it in steps.  Today, I thought it might be helpful for you to see what my desk looks like when I’m right in the middle of a project.  I took a break from packing to get a little creative for you!  Here’s a snapshot of my process – notice a not completed project in the upper right, a middle project template  in the center and then my actual finished project in process.

Stampscapes Tropical Lagoon 9.5.13  (5)

This is actually not that bad.  I cut my paper in a different space or it’s just too much!  Today you see that I’m using various types of ink pads – four different brands actually!  And to get some business inspiration at the same time, I was taking a class – that’s what’s on the computer monitor.  My space started to get a little overwhelming, and I had to put some stuff in it’s place so that I felt like I had some elbow room, but my end result worked out awesome!

To the left, you see a sneak peek of tomorrow’s project with the end result at the top, my middle test project that became my creative process, and my beginning project that went all wrong in several ways.  I know it doesn’t look like it, but trust me, it did!

I began a project for a friend and wanted it to be just right.  It didn’t quite turn out the way I had planned.  So what I did was take a piece of scrap paper and work the project out so that I felt a bit more confident and now I LOVE the end result.  Please tune in tomorrow to see it!

Update – Packing up the Stamping Studio – It’s been quite a task to pack up the studio.  We’ve been here for nine years and my craft room is 28’ x 14’ – it’s loaded with open spaces and shelves filled with projects, cards, and supplies.  And that’s not even my classroom.  Yes, I’m lucky – when I first started in this industry, I had a 4’ x 2’ folding table, chair and one plastic set of drawers – in the corner of our family room.  I couldn’t stand putting things away each time I scrapbooked or made cards – I vowed to have a room all to myself with a door someday!

I didn’t get it until we purchased our home nine years ago, and now I’m leaving my dream space.  It’s okay – we’re on to a fun adventure – but I now have the experience of knowing how much space I truly need to be creative and productive.  While my huge room (rooms if you include my even larger classroom), will be missed – I know I will be fine in a smaller space.  Actually – I’m looking forward to it.  You see, I ended up collecting way too much stuff with such a huge space (makes sense – we just have to fill it, don’t we!) – it made for a nice downsizing sale for my local customers though!  Thanks for bearing with me as I continue to pack and purge!

See you tomorrow – you’ll want to tune in…this card is my most impressive Creative Scenery project to date.  I’m going to have to make myself one to keep!  Have fun stamping!

Signature Snowflake 001

To Shop 24/7 in the Creative Store – Click here!

Stamp Sets – Stampscapes Stamps Ink – Marvy – Oriental Blue, Turquoise, Caribbean Blue, Jungle Green, Yellow, Brilliant Yellow; Adirondack Lights – Cloudy Blue, Aqua, Peach Bellini; Stampin’ Up! – Early Espresso, Crushed Curry, Tangerine Tango, Sahara Sand, Crisp Cantaloupe, Early Espresso Marker; Memento – Black Paper –Glossy White, Early Espresso Tools – Colorbox Stylus, Brushtix Mixed Media Brushes Finishing Touch – Uni-ball Signo White Gel Pen
Stampscapes Creative Scene

Stampscapes 001 001

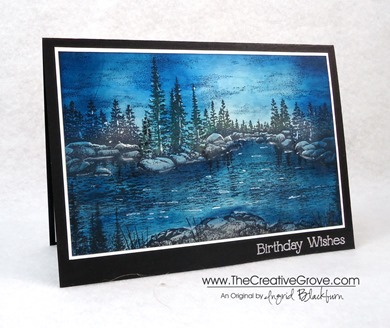
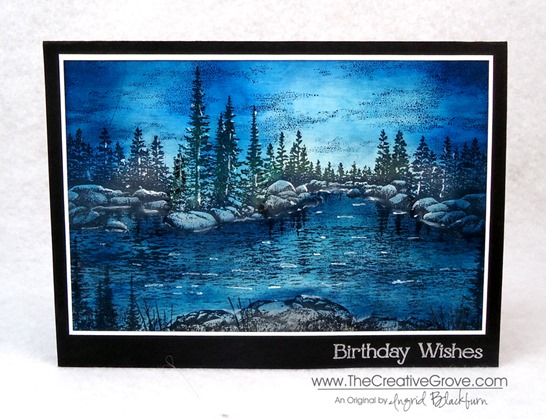
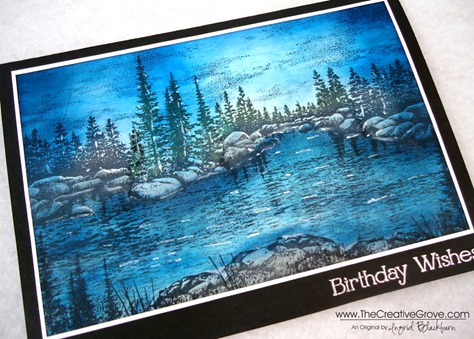
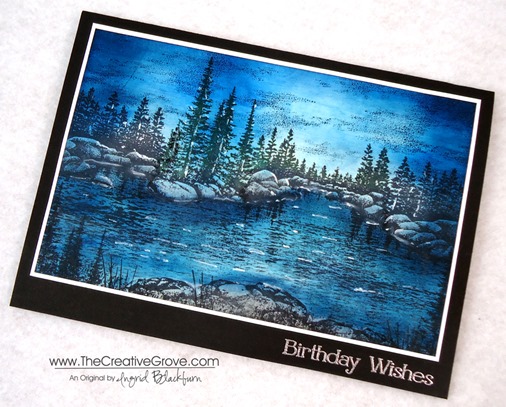
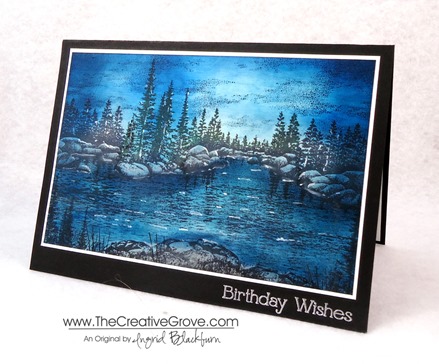
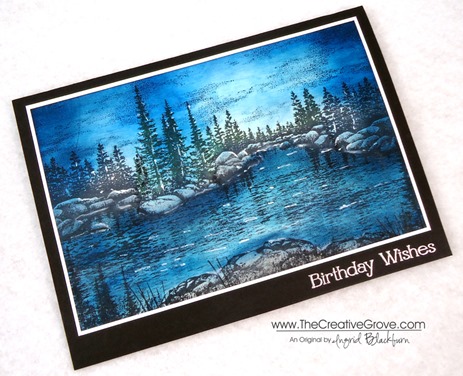
Today is my brother’s birthday, and I wanted to make him something special.  Matt and I love the mountains, we spent most of our down time in the summers in the outdoors together.  So, for him today I broke out my Stampscapes scene building stamps and created this lakeside evening scene.  Stampscapes stamps can be used to build scenes with seemless blending images. 

Creative Tips –

  • I stamped out my scene first layering several lakeside tree and rock stamps. 
  • To keep the scene matte in nature, I used our Ultrasmooth White cardstock.
  • My first two I actually colored over the trees with my Always Artichoke and Garden Green markers, but I didn’t like the result.  The rest of the scene, I continued to use my Basic Black ink pad.  Stampscapes 001 003
  • For a little focal point at the bottom edge, I stamped the boulders at various angles and a few of the trees on the edge.  I really needed a bigger tree, but didn’t have one.  I wouldn’t use the stamp I used in this one for that again – it’s too small.
  • I added a few of the small reeds and used the grass filler for some texture at the bottom. 
  • Next I filled in the empty space using my small water texture stamp.  I think I went a bit overboard, but it still works.  Remember, when you want to add one more – stop!
  • Once the scene was built I could start coloring.  I used a Colorbox stylus to apply my Stampin’ Up! Classic Inks.
  • I began layering a base of Soft Sky in the sky and near the rocks in the water.  Next I used some Pool Party in the lake followed by Tempting Turquoise.
  • For a little added color I added Baja Breeze and then Marina Mist to the both the lake and the sky.  My water was pretty much how I wanted it so I moved on to the sky.  Stampscapes 001 006
  • I tried to keep a few spots off the horizon going upward more white in nature for some contrast.
  • To brighten the scene up I added some Pacific Point across and in the middle of the night sky followed by some Not Quite Navy.
    • I wanted to have some shadows in the water, so I used the side of the stylus and some Not Quite Navy to the edge of the boulders and the edge of the card. 
    • The boulders were filled in with Basic Grey and some Early Espresso was added to the edge of the center bottom for a little earth.
    • Midnight Muse gave a finishing touch around the perimeter of the card followed by Basic Grey.
    • I stamped the cloud space in Midnight Muse once the card had been completed.Stampscapes 001 005
    • For some highlighting and detailing, I used a Signo White Gel Pen.  I went over the edges in the water along the rocks after with a paper towel to dull the look a little.
    • To help pop the card, I matted it on a 1/16” border of Whisper White and then on a larger piece of Basic Black
    • The greeting uses the Four You stamp set.  I used a embossing buddy to ensure that I would not have little silver straggler powder on the Basic Black cardstock before embossing the greeting in Silver Embossing Powder.

I love the result.  The Stampin’ Up! inks give just the right depth of color.  Next, I’m going to try some brayering with these scenes.  I can’t wait!Stampscapes 001 002

    Learn a new technique in the Online Brayer Class

    This class is still available at the introductory price – it’s going up next week!  Creative Scenery classes using a brayer have by far been my biggest hit with stampers.  The Brayer has stumped many crafters over the years, well actually more.  Learn how to create gorgeous gradual transitions with 100+ minutes of step by step detailed video instruction teaching you how to master this technique.  The end result – You will feel like an artist.  Best of all, you will look at your stamps in a whole new way, and try things you never would have thought to do before.  Find out more here

      Signature-Snowflake-001_thumb1

    To Shop 24/7 in the Creative Store – Click here!

    Stampscapes 001 004

    To view the details or see close ups of any products used in the above project, just click on the green link to view it in my store 24/7.

    Stamp Sets – Four You (130538c, 130535w), Stampscapes Stamps Ink – Stampin’ Write Markers –Always Artichoke, Garden Green, Classic Ink Pads – Basic Black, Soft Sky, Pool Party, Tempting Turquoise, Marina Mist, Pacific Point, Midnight Muse, Early Espresso, Basic Gray, Retired – Not Quite Navy, Baja Breeze Paper –Whisper White, Basic Black, Versamark Tools – Colorbox Stylus Finishing Touch – Silver Embossing Powder, Signo White Gel Pen