Santa’s List

Santas List 001 Main R

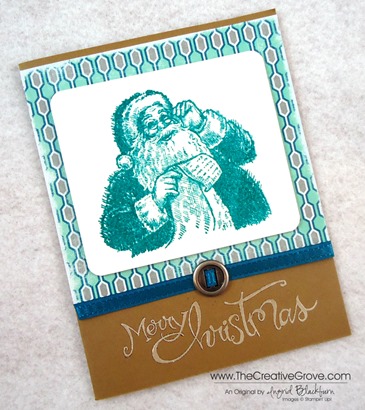
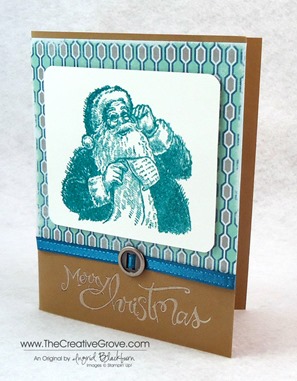
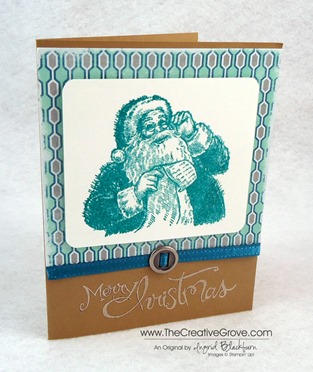
Santa’s List is a cute little three stamp set with an awesome jolly image. Here’s a quick Christmas card that uses non-traditional colors for a classic card.  It was designed by fellow CG Crew member Amy Seigler, and I loved making it!  Check out her blog here.

Creative Tips –

  • To get the main image to pop, you’ll want to emboss it.  Here Santa was stamped first in Versamark ink and then in Bermuda Bay.  You will want to used clear embossing powder to get that glossy sheen.
  • You can add some texture and character to your designer paper quickly by just sanding the edges with your Stampin’ Sanding System.  It’s quick, easy and has a great distressed and weathered look.  Santas List 001 CU
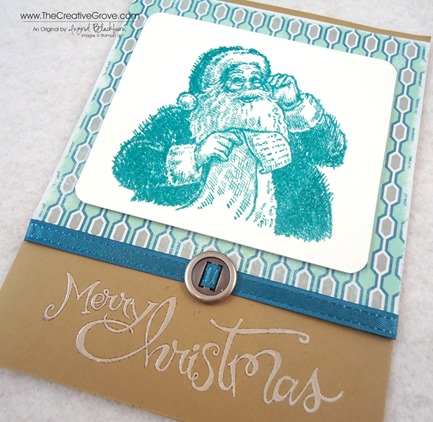
  • This card uses one of four designs in the 48 page Winter Frost Paper Stack.
  • If you want your greeting to have the look of icing or wet snow, stamp it in Whisper White Craft Ink and emboss it with Clear embossing powder rather than white.  This way it doesn’t take over the card with that bright white look.  Santas List 001 Embossing
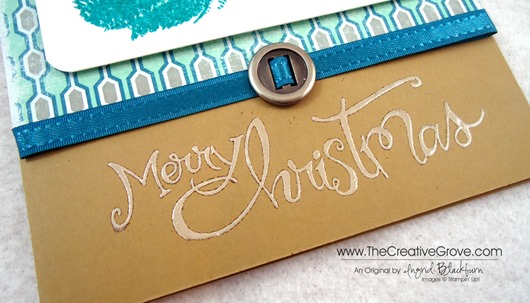
  • Isn’t this ribbon slide the perfect compliment to the big guy?  It’s the perfect belt buckle for all your Santa cards.  You get sixteen pieces for only $1.99 for an entire package – that’s 60% off the original price!  But hurry, they are in the clearance rack and when they’re gone, they are gone. Santas List 001 Main L
  • CG rewards

       Don’t forget to print up your CG Reward Tracker to track your earned pinecones!  Not sure what I’m talking about?  Check out the new Reward program that just started yesterday.  You earn free stamps for your online purchases!  Remember…there are still 31 hours left in your double reward points special!

    Signature Snowflake 001
    Santas List 001 Angle

To Shop 24/7 in the Creative Store – Click here!

Stamp Sets – Santa’s List (131811c, 131808w), Sassy Salutations (126707c, 132070w) Paper – Brown Sugar, Whisper White, Winter Frost Designer Series Paper Stack Ink – Versamark, Bermuda Bay, Whisper White Craft Cool Tools – 3/16” Corner Rounder, Clear Embossing Powder, Stampin’ Sanding System The Perfect Finish – Stampin’ Dimensionals, Island Indigo Satin Ribbon (retired), Ribbon Slide
  Santa's ListUntitled-12

CAS Regarding Dahlias

Regarding Dahlias 003 Main

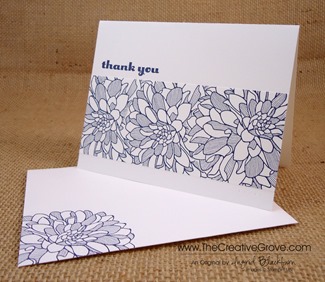
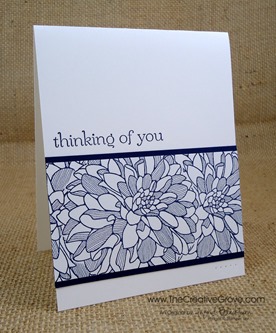
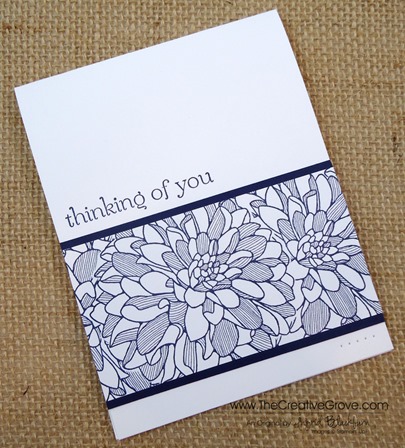
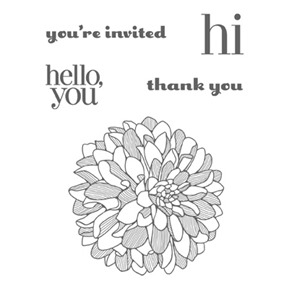
Clean and Simple (CAS) cards are always great.  They’re quick, easy and striking!  The Regarding Dahlias stamp set has several greetings and one very powerful floral image.  Perfect for clean and simple cards. 

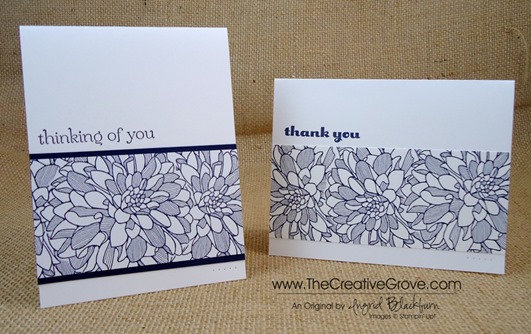
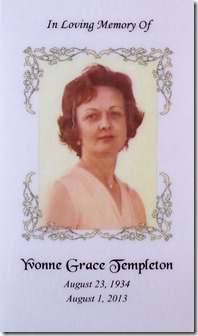
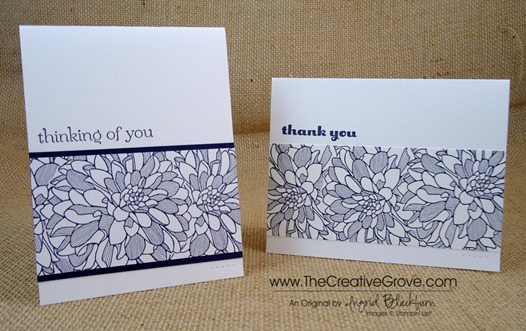
Do you ever have an image remind you of someone?  That happens to me, and today I’m using flowers because I’m thinking of Yvonne.  Regarding Dahlias 003 Main  Duo

I teach card and scrapbooking classes locally here in my home and in various communities.  I’ll never forget the day I met Yvonne.  It was at a vendor event when she made her way to my table with her walker and oxygen tank.  Yvonne could not stop looking at my scrapbooks and cards – I could tell she was definitely an avid paper crafter!  She quickly arranged for me to teach scrapbooking in her community with a few of her friends religiously every month.  Each one became stampers in addition to scrapbookers, and I’ve loved every class that I taught there.  The friendships these ladies have with each other, in addition to just really loving every crafting moment together has always been special to be a part of for me. 

Yvonne has been one of my die hard stampers who never let anything get in the way of her trying all the paper crafting techniques she could – not even a broken shoulder or arm.  I have truly admired her zest for life and not letting the little things get to her (As if those are little things!). 

Yvonne was unable to make the trip up the stairs to my stamping studio for my stamping classes in my home, so one day I decided to bring class to her.  It was an awesome fun afternoon, stamping with a friend.  We made several projects using various techniques and to this day is one of my fondest memories of a private one on one class.  Yvonne never missed a class, and over time, I noticed that she gravitated toward the floral images.  So, today this card is for you Yvonne.  You will be greatly missed and I know that wherever you are, you are most definitely living life to the fullest and certainly stamping and scrapbooking!

                DSC00891 002

Creative Tips –

  • To create the floral design, you will want to make a mask out of printer paper.  Card stock will be too thick, and you will find that you have a white gap at the edge of your masked images, which I know will frustrate you!
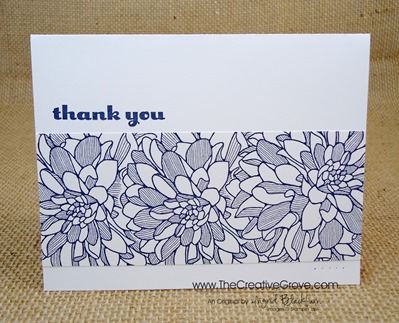
  • Turn your stamp as you stamp the other images.  This way you have variety and not a repetitive look.Regarding Dahlias 003 Main Front 1
  • This image above has two stamped identically and then one not – can you see the difference?  My other sample has the flower at a slightly different angle.  It’s a bit easier on the eye.
  • You can see that I chose to matte the strip two ways, white strip on white and white strip on matching Night of Navy card stock.  Both are lovely, and have very different looks.Regarding Dahlias 003 Main  Duo
  • You might want to try stamping a long strip that you can cut to the size you need – that way you will have it for multiple cards.
  • Remember the law of 1/3rds when you are placing your images.  In CAS cards, you want to have a lot of white space, so placing your strip and greeting in the top or bottom third will be visually appealing to the reader.
  • For a finishing touch, add some paper piercing to the the opposite side of your strip. 
    2013 Holiday Catalog
    Have you taken a peek at the new Holiday Catalog yet?  The projects are awesome, the new products, well many are quite addictive!  My personal favorite is the new Expressions Thinlits Dies.  How about you?  View all our Catalogs here

Regarding Dahlias 003 Main Angle 2

To Shop 24/7 in the Creative Store – Click here!

Stamp Sets – Regarding Dahlias (130327c, 130324w), Sweet Essentials (126457c, 132085w) Paper – Whisper White, Night of Navy Ink – Night of Navy  Cool Tools – Paper Piercing Tool, Essentials Mat Pack, Stampin’ Pierce Mat

  Regarding DahliasUntitled-12

Mojo Color Me Christmas

Color Me Christmas 001 Main R

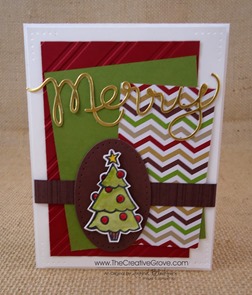
Do you like to color?  Then the Color me Christmas set is for you!  Today for the Mojo Monday challenge I played with some of my favorite new items from the new Holiday Catalog that went live last Thursday.  Did you get your free copy?

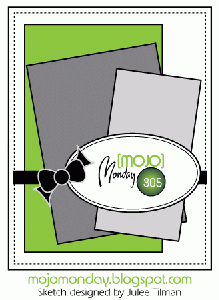
This weeks sketch had some simple elements that came together rather quickly.  I think you will find that you can use this design for any card situation and will  use this go to sketch quite frequently.  Here is the sketch and my result.  Enjoy the Creative Tips for you on these products below.

Color Me Christmas 001 Front Mojo305Sketch

Creative Tips –

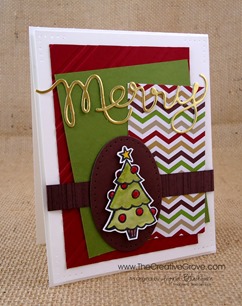
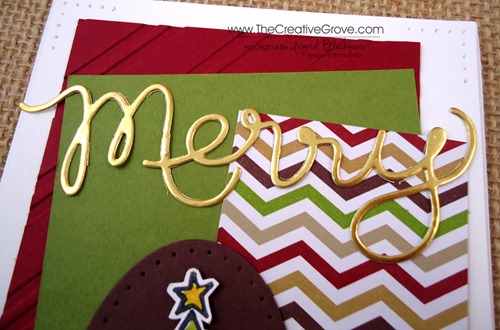
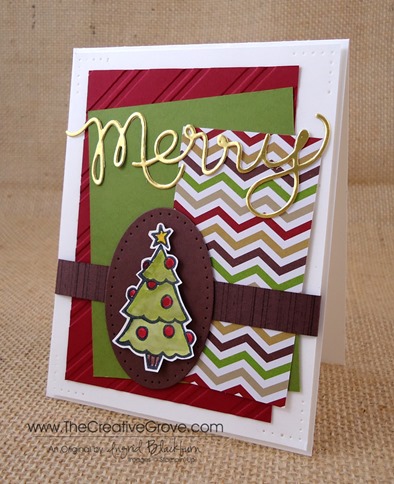
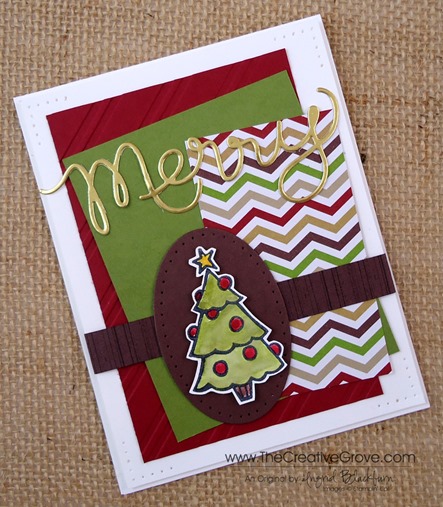
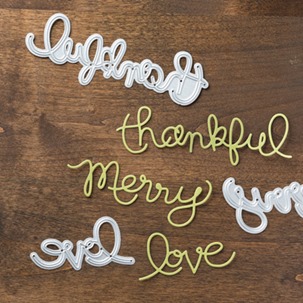
  • One of my top 5 items from the Holiday Catalog are the new Expressions Thinlits Dies.  Here you can see how I made the word Merry with the new Gold Foil paper that you will absolutely love!Color Me Christmas 001 CU2
  • For some fun backgrounds, you can see that I paired the Cherry Cobbler card stock that was run through the Big Shot with the new Stylish Stripes Embossing Folder and the fun Designer Series Paper (DSP) from the Season of Style DSP Stack.
  • You will love the Two new Season of Style DSP Stacks because you finally have 24 – 4 1/2” x 6 1/2” sheets each of two designs.  That’s 48 sheets total!  Perfect for your Holiday Cards!!
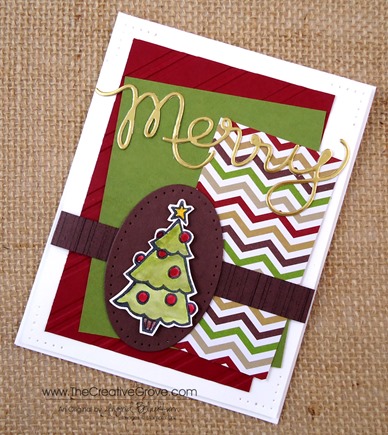
  • To pull all the colors together you can see that I chose to work with the two most basic neutrals in the DSP stack – Chocolate Chip and Whisper White.  These neutrals help to make this card pop for you visually.Color Me Christmas 001 Side (1)
  • The Color me Christmas stamp set was stamped in StazOn Jet Black before being water colored with Old Olive, Cherry Cobbler, Chocolate Chip and Crushed Curry.  To make this go by quicker, you will want to use the Aqua Pens.
  • You will find that you do not need Watercolor Paper for small little items like this if you control how wet your brush is.  Of course if you have difficulty doing that, definitely try the watercolor paper out!  I used Whisper White for my little tree.
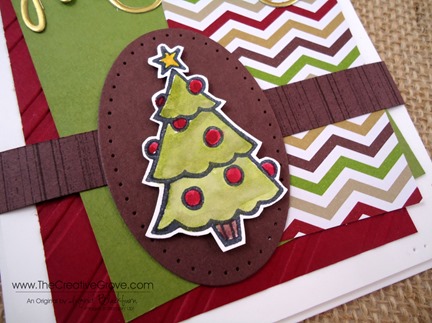
  • The tree was cut out using Paper Snips and you will want to make sure to leave a little white on the edge .  This will help pop the image on it’s background as it provides your eye with the color contrast it needs to be seen.Color Me Christmas 001 CU1
  • At first I had a piece of retired Chocolate Chip Grosgrain Ribbon that I was going to use.  Then I thought – where are you going to find that?  So I made my own Faux Grosgrain using – yup, you guessed it – the Gorgeous Grunge Stamp Set!  I am going to make sure that each and every one of you have this must have stamp set before you know it!
  • Isn’t this tree look just like a purchased die cut?  Can you believe that you can make this over and over again customizing it exactly how you want it?  I just love this set.
  • For a little character and finishing touch to the card, you can see that I added some paper piercing.  You will want to use both the Essentials and Occasions Paper Piercing Packs.Color Me Christmas 001 Main L
  • And of course for some drama, the tree and card front are popped up on Stamping Dimensionals.

It’s cute, right?  That tree is really becoming one of my favorite new images.  I can’t wait to stamp now with the rest of this set.  Be sure that you tune in tomorrow!  Have a great start to your week.


Signature Snowflake 001

Color Me Christmas 001 Angle

To Shop 24/7 in the Creative Store – Click here!

Stamp Sets – Color Me Christmas (131745c, 131742w), Gorgeous Grunge(130517c, 130514w) Paper – Old Olive, Cherry Cobbler, Chocolate Chip, Whisper White, Season of Style Designer Series Paper Stack, Gold Foil Ink –Cherry Cobber, Old Olive, Chocolate Chip, Crushed Curry, StazOn Jet Black Cool Tools – Stylish Stripes TIEF Folder, Paper Piercing Tool, Essentials Mat Pack, Stampin’ Pierce Mat , Occasions Mat Pack, Expressions Thinlits Dies, Aqua Painters The Perfect Finish – Stampin’ Dimensionals

Expressions ThinlitsColor Me ChristmasSeason of Style Paper Stack

Simple One Layer Wetlands

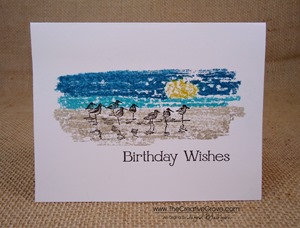
Wetlands 005 001

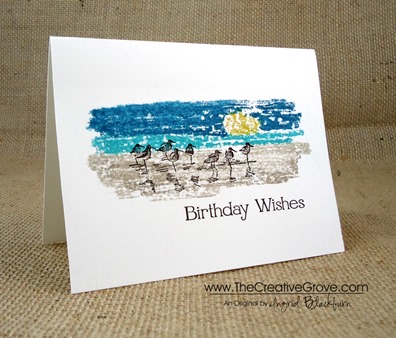
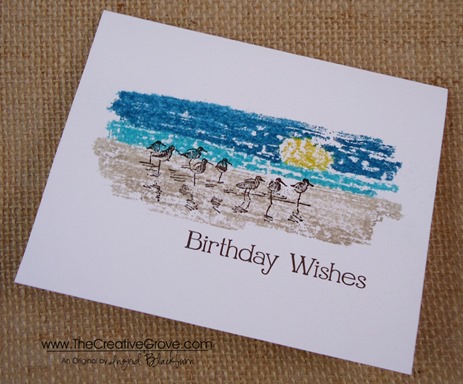
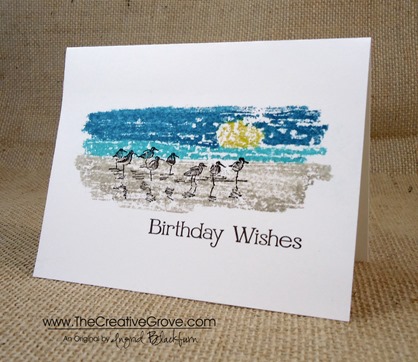
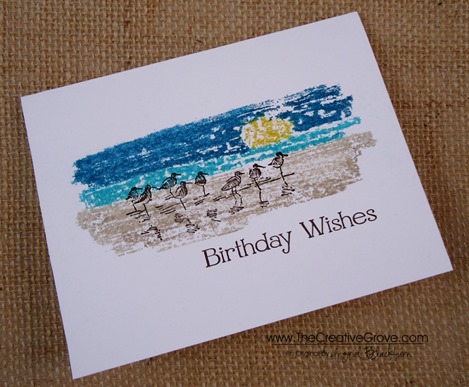
I needed a super quick birthday card the other day and decided to try some acrylic block stamping.  The sandpiper image from the Wetlands stamp set is the perfect image for a beach scene. 

Creative Tips –

  • I used my Stampin’ Write markers to create my own scene on one of my larger acrylic blocks. 
  • For my sand, I used Crumb Cake, and then created my water with Bermuda Bay.  Next I drew a sun in Crushed Curry and colored my sky in Island Indigo around it.  Wetlands 005 009
  • I spritzed my block with a light mist of water and stamped onto a folded piece of card stock.
  • My sandpiper birds were then stamped in Early Espresso as was my greeting from Four You.
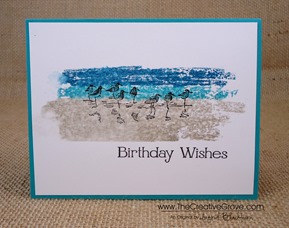
  • Here is a similar card done and matted onto Bermuda Bay for a contrasting look, which do you like better – one layer or matted?  Let me know if the comment section.

   Wetlands 005 003 Wetlands 005 006

This card literally takes minutes and is a cute simple watercolor of a fun beach scene.  It’s yet again just one more reason you want to have the Wetlands stamp set in your arsenal – it’s versatile, and easy to use!

Wetlands 005 002


Signature-Snowflake-001_thumb1

To Shop 24/7 in the Creative Store – Click here!

Wetlands 005 010

Stamp Sets – Wetlands (126697c, 126695w), Four You (130538c, 130535w) Ink – Early Espresso, Stampin’ Write Markers: Island Indigo, Crumb Cake, Bermuda Bay, Crushed Curry Paper –Whisper White (100730)

Untitled-12

Expressions Thinlits Sneak Peek

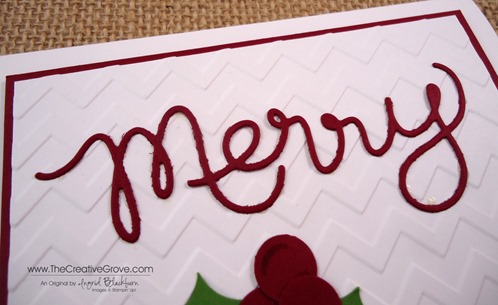
Expressions Thinlits 001 001

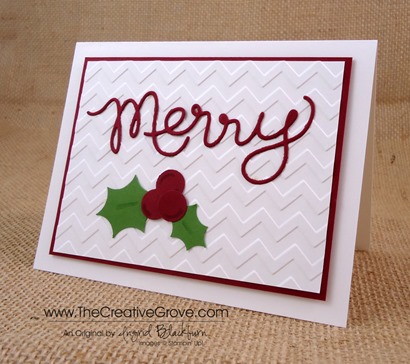
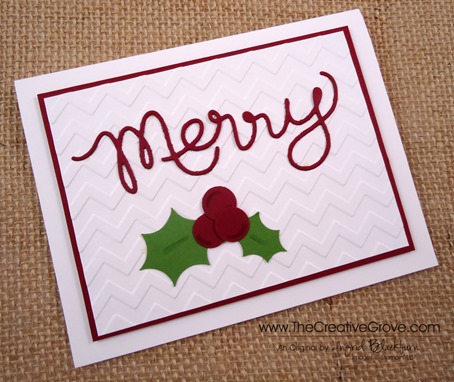
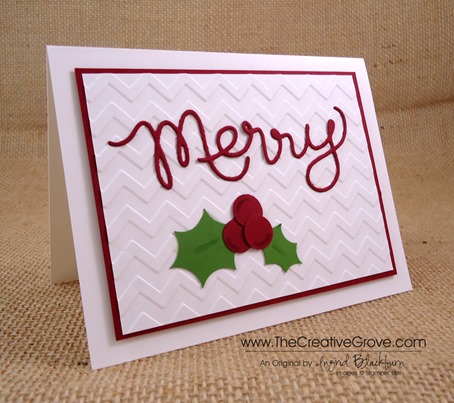
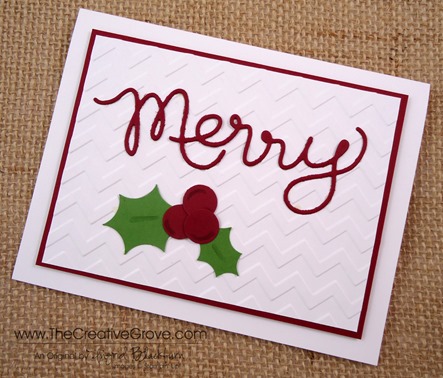
I’m in love with the new Expressions Thinlits.  What an awesome new product!  Starting August 1st, you will be able to cut cute little words just like this one with the new Expressions Thinlits – available in the new Holiday Catalog.  My mother always taught me it was rude to tease, but I thought you would love a little Sneak Peek of this fun and quick little card.  It literally came together in a matter of minutes.Expressions Thinlits 001 005

Creative Tips –

  • Definitely put a piece of wax paper between the word Thinlit and your cardstock.  It will help to pop it out after.
  • I used my paper piercer to help guide my word out from the back of the Thinlit.  It was super easy.Expressions Thinlits 001 007
  • Two spots didn’t punch through on my word – the loop in the second R and the Y.  I didn’t worry about it, because it gave me a place to drop a little multi-liquid glue.  It really is thin – you have to use the Multi-Liquid Glue.
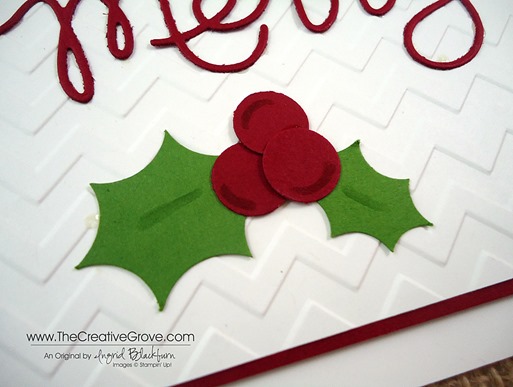
  • To make my holly leaves I used a 3/4” and 1/2” circle punch.  I don’t own a thinlit to punch those out, so why not make your own.  It was super easy.Expressions Thinlits 001 006
  • I wanted to accent my holly and berries, but didn’t want it to focus too much on that, so I used a blender pen and the ink from my ink pads.  I squeezed my ink pad – love that you can do that with Stampin’ Up! inks, and the ink collected in the lid. I then picked some up with my blender pen and added some subtle highlights.
  • The background was made with the Chevron Embossing Folder and I popped the panel up on Stampin’ Dimensionals for some interest.

This card literally took 4 minutes to make, so if you need a great go to holiday card in a pinch in December – make sure you have the Expressions Thinlits.  You can use them with any embossing folder for a quick and easy card! Always a great thing.

Expressions Thinlits 001 002

Learn a new technique in the Online Brayer Class

      Would you like to learn how to make Creative Scenery cards?  Have you been frustrated when trying to use your brayer?  Creative Scenery classes using a brayer have by far been my biggest hit with stampers.  Learn how to create gorgeous gradual transitions with 100+ minutes of step by step detailed video instruction teaching you how to master this technique.  The end result – You will feel like an artist.  Best of all, you will look at your stamps in a whole new way, make amazing projects and try things you never would have thought to do before.  This class is in its introductory period – get it while you can for less! Find out more here

      Signature Snowflake 001

      Expressions Thinlits 001 004

    To Shop 24/7 in the Creative Store – Click here!

Clean and Simple Chalk Talk Birthday

Chalk Talk 001 Main R

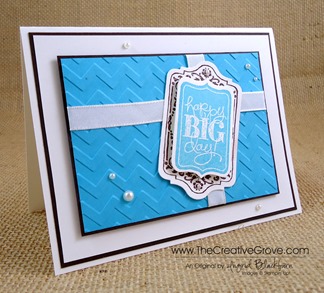
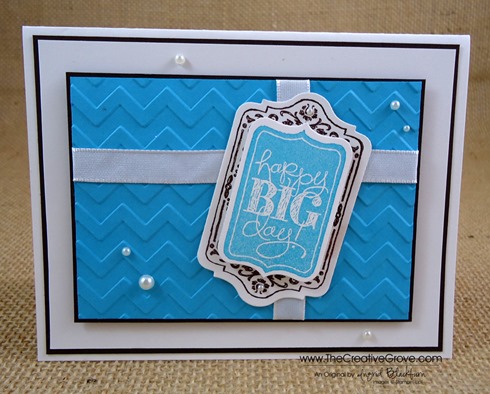
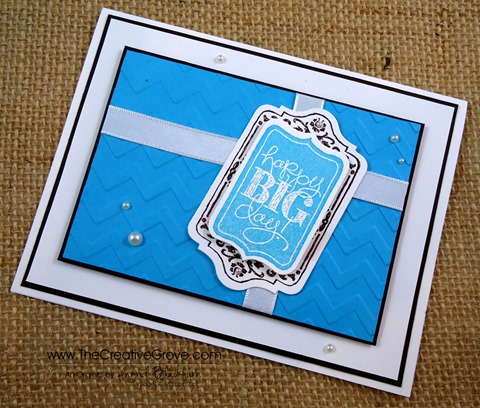
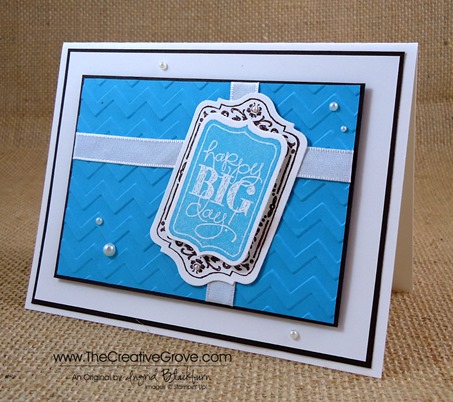
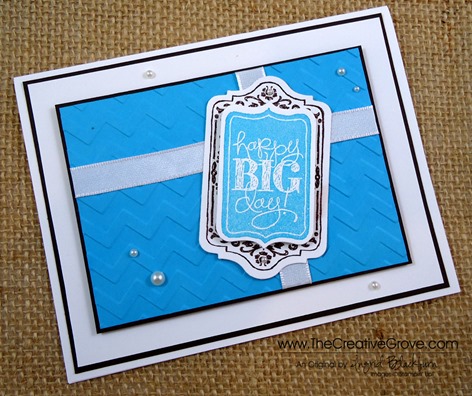
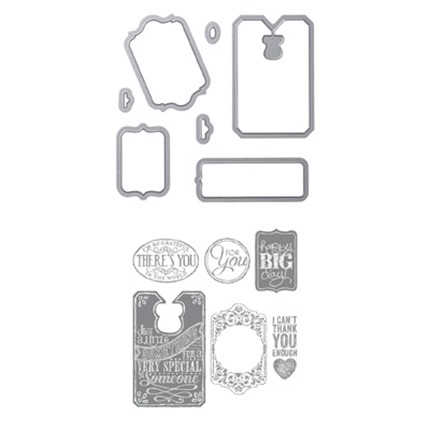
This week is always a big Birthday week for everyone I know, this month actually.  So why not keep with the celebration theme?  Chalk Talk has not only this awesome stamp set, but a great tag framelit set that anyone can use.  Today I made a very simple, but elegant card that actually fits any celebration, not just birthdays.  I have to admit, it was a little simple to me, until I put the Pearl Basic Jewels on.  Then it all came together and worked.  I wish I actually had taken a before and after photo, it made that much of a difference!

Chalk Talk 001 Front

Creative Tips –

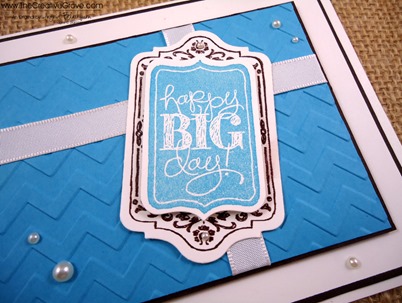
  • I actually made this little tag for all of Michael’s birthday presents on Saturday.  They completely worked – and best thing – I didn’t even have to write on it!  Once I whipped these little guys up, this card popped in my head.Chalk Talk 001 CU
  • Obviously it’s a present, but the Chevron Embossing Folder really adds a nice touch to what would be the wrapping paper.
  • If you didn’t have ribbon, you could easily substitute strips of card stock.  I would still wrap them around the edge of the gift for that gift wrapped look.Chalk Talk 001 Height
  • To emphasize the gift, I popped it up with dimensionals, along with the greeting portion of the tag. 
  • The Happy Big Day tag is actually two tags from this set.  Chalk Talk 001 Side
  • Proportions made the difference on this card.  I have the full 1/8” border at the base, so I needed any other Mattes to be 1/16”. 

I love this card – and I think I’m going to make a bunch, they serve so many occasions – birthday, wedding, promotion, any firsts, etc…  What other occasions do you think it would fit?  Let me know if the comment section and I’ll send one to one random winner!  Who wouldn’t want one of these in the mail – I know I love mail…other than bills, right?

Chalk Talk 001 Main L

    Online Brayer Class now Available

    You’ve patiently waited…it’s finally here!  Creative Scenery classes using a brayer have by far been my biggest hit with stampers in class.  Now you too can learn from the comfort of your very own craft room.  The Brayer has stumped many crafters over the years, well actually more.  Over three varied step by step video projects, you will master how to create gradual transitions than stun the card recipient.  You will feel like an artist.  Best of all, you will look at your stamps in a whole new way, and try things you never would have thought to do before.  Take part of the series, take the whole series, or get the class for free – you choose. Find out more here

    Signature-Snowflake-001_thumb1

To Shop 24/7 in the Creative Store – Click here!

Chalk Talk 001 Angle

To view the details or see close ups of any products used in the above project, just click on the green link to view it in my store 24/7.

Stamp Sets – Chalk Talk (130634c, 130631w),  Chalk Talk Bundle (132730c, 132731w) Ink – Tempting Turquoise, Early Espresso Paper –Whisper White, Tempting Turquoise, Early Espresso Cool Tools – Chalk Talk Framelits, Chevron Embossing Folder, Big Shot, Magnetic Platform Finishing Touch –Stampin’ Dimensionals,Pearl Basic Jewels, Whisper White 3/8” Taffeta Ribbon

Chalk Talk Bundle

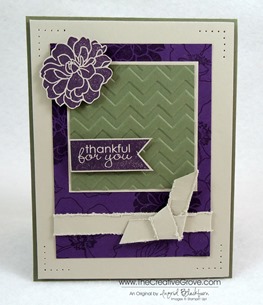
Fabulous Florets Mojo

Fabulous Florets 001 Main R

It’s a fabulous Mojo Monday morning!  I thought I’d have some fun with the Fabulous Florets stamp set – which is a new one for me.  The flower images in this set are super easy to stamp with – and just gorgeous.  I can see that this will quickly become a favorite, especially when doing any kind of wedding ideas!

I’ve been working hard on my online class as you know and think I almost have the membership portion worked out!  I decided to release the class and email the links until I can get the rest figured out – that way you can still have some fun learning how to brayer – so check that out at the bottom!

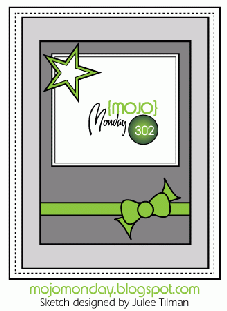
Here is this weeks Mojo Monday sketch and my interpretation – pretty literal this week, and I just love this card – especially the colors.I hope you do to – let me know what you think in the comments!

            Fabulous Florets 001 FrontMojo302Sketch

Creative Tips –

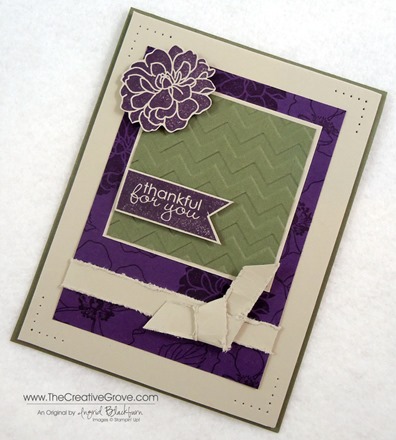
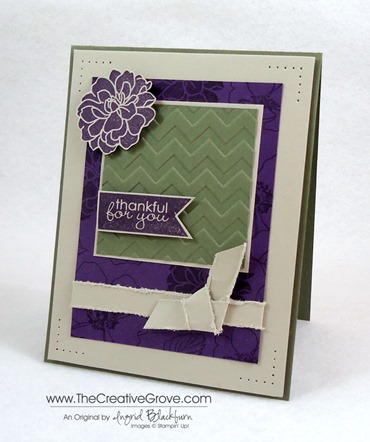
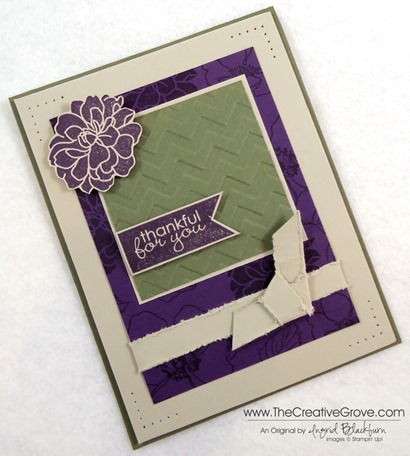
  • I did something different with my color coach today.  Usually I just thumb through it and find a main color I like.  Today, I looked only at the combinations on the back until one spoke to me.  I chose the Elegant Eggplant, Always Artichoke, Sahara Sand combo.Fabulous Florets 001 Angle
  • I played with arranging how my colors were going to be layered – I have to admit, it took me at least 5 minutes to decide!  I finally went with Always Artichoke as the card base and the then the rest fell into line.
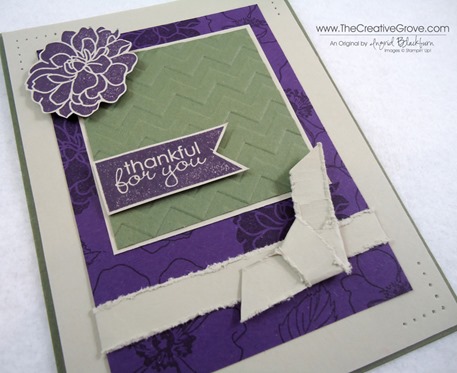
  • I was lucky, I had the Sahara Sand card front already pierced from another project, so that was easy this morning!Fabulous Florets 001 CU
  • For a little contrast, I stamped my Elegant Eggplant in various images using all the flowers and the leaf stamp.  I stamped the bold image on Sahara Sand and cut that out to pop up as an embellishment.
  • I just wanted something simple in the foreground, so I ran my Always Artichoke though my Big Shot using the Chevron Embossing Folder.
  • For a greeting I used the new Hostess set – Banner Greetings.  Isn’t it cute?!Fabulous Florets 001 Faux Ribbon
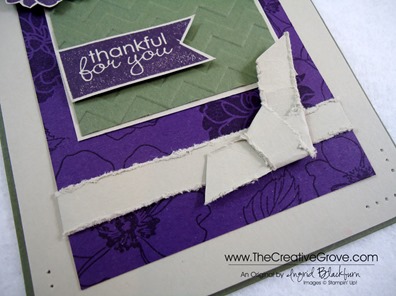
  • I did not have any ribbon in any of these three colors – which honestly was surprising!  I must have used up all my Always Artichoke – I know I had some.  So, I made my own.  I distressed the edges of a piece of Sahara Sand and made a knot to resemble ribbon.  Here a video on how to make Faux Ribbon Fabulous Florets 001 Height
  • For some depth in my card, I popped up the Sahara Sand card base, Flower and Banner.
  • It’s a good looking card – I love the color combination.  I think it would work for anyone, and for a total masculine look, you could substitute the flowers for a general image – I’m thinking the Lacy & Lovely stamp set. SmileFabulous Florets 001 Main L

    Online Brayer Class now Available

    You’ve patiently waited…it’s finally here!  Learn the fundamentals on how to create amazing and beautiful Creative Scenery cards using a brayer.  The Brayer has stumped many, well no more.  Over three varied projects, you will master how to create gradual transitions than stun the card recipient.  You will feel like an artist.  Best of all, you will look at your stamps in a whole new way, and try things you never would have thought to do before.  Take part of the series, take the whole series, or get the class for free – you choose. Find out more here

Signature Snowflake 001

To Shop 24/7 in the Creative Store – Click here!

Fabulous Florets 001 Side

Stamp Sets – Fabulous Florets (123027c, 128574w), Banner Greetings (Hostess) Ink – Elegant Eggplant  Paper – Elegant Eggplant (105126), Always Artichoke (105119), Sahara Sand (121043) Cool Tools –Paper Snips (103579), Chevron Embossing Folder, Distressing Tool (127562) Finishing Touch –Stampin’ Dimensionals (104430), Paper Piercing Tool(126189),Stampin’ Pierce Mat (126199), Essentials Paper Piercing Pack (126187)


    Chalk Talk Birthday Wishes

    Chalk Talk 003 Main R

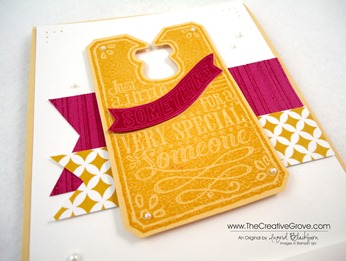
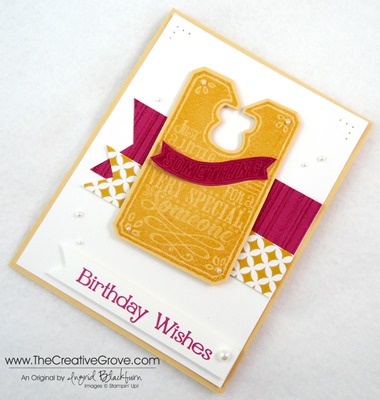
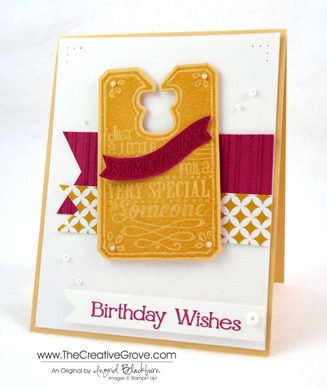
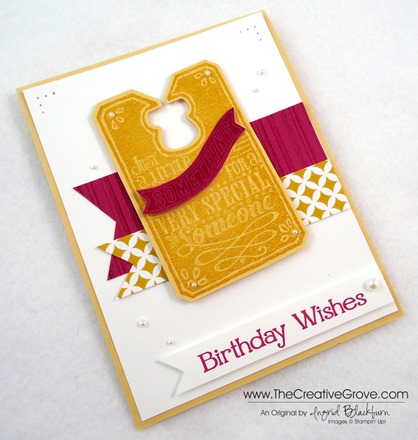
    Who doesn’t love a bright and cheery Birthday card?  Today I’ve combined the new Chalk Talk stamp set and framelit collection with some of our new Eastern Elegance Designer Series Paper and the Gorgeous Grunge stamp set for a fun little Birthday for someone special.  I needed a quick and easy birthday card, I’ve been stamping, filming and editing my Brayer 101 – Introduction the Creative online video class series the last few days.  It’s almost ready – look for it tomorrow!  If you’ve taken the live class with me, you’ll love this class too – the projects are all different!

    Creative Tips –

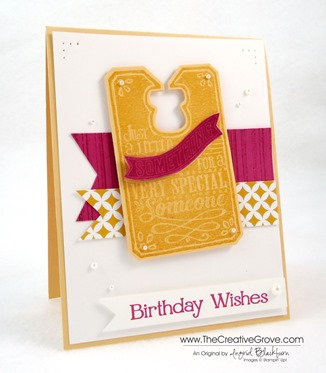
    • I stamped the large tag in So Saffron and cut it out using the Chalk Talk Collection Framelits.  If you get the stamp set and the framelits together – it’s a bundle and you save 15%!  I’m all about savings. Chalk Talk 003 CU
    • To give a little variety to my tag, I stamped it again in Rose Red and cut out the banner within the tag.  I tried it on white, but it didn’t look right.
    • I wanted to add a little splash of design behind my tag, but I didn’t want to take away from it, so I picked a simple design and then created another with my stripe stamp from the gorgeous grunge set.
    • To make my banner ends I used the 1” square punch for the smaller banner and cut the large one with my paper snipsCheck out this video on how to make Banner Flags Chalk Talk 003 Side
    • I used the Greeting from the new Four You stamp set, it covers all bases without breaking the bank!
    • I popped my greeting banner and Chalk Talk tag up on Stamping Dimensionals for some depth to the card.
    • For finishing touches, I added a little piercing to the extra white space at the top of the card and some Pearl Basic Jewels on the tag, banner and card.
      Chalk Talk 003 Main L

    It’s a fun card that is bright, cherry and simple.  Best of all it took me under 10 minutes to make!  My kind of birthday card. Smile

    Announcing a new Online Video Class

    It’s coming – Saturday July 13th!!  Brayer 101 – Introduction to Creative Scenery will be available as an online class.  Be sure to stop by to check it out.  You will want to learn how to make these amazing projects.  Get step by step video instruction and access to a private blog just for this class. 


    Signature-Snowflake-001_thumb1

    To Shop 24/7 in the Creative Store – Click here!

    Chalk Talk 003 Angle

    To view the details or see close ups of any products used in the above project, just click on the green link to view it in my store 24/7. 

    Stamp Sets – Chalk Talk (130634c, 130631w),  Chalk Talk Bundle (132730c, 132731w), Gorgeous Grunge (130517c, 130514w), Four You (130538c, 130535w) Ink – So Saffron, Rose Red Paper –Whisper White, So Saffron, Rose Red Cool Tools – 1” Square Punch, Chalk Talk Framelits,Stampin’ Sponges Finishing Touch – Stampin’ Dimensionals,Pearl Basic Jewels

    Gorgeous GrungeFour You

    Chalk Talk Bundle