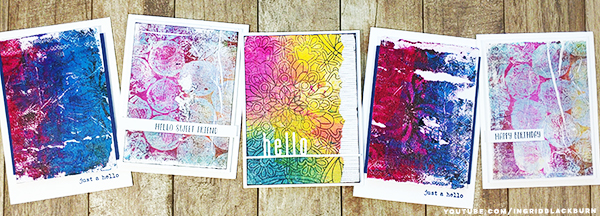
Be different – Make amazing PAPER NAPKIN CARDS with a Gelli Plate

Paper Napkin Cards aren’t what they used to be. Have you ever used napkins or other frail papers in your art? Ever had the thinnest of papers fall apart on you? Tear as you separate them?

I’m just a girl (got gwen stefani stuck in your head now?) who LOVES that look you can get from a Gelli Arts® Gel Plate – (affectionately called Gelli Plate), a brayer, acrylic paints and a few stencils. Seriously – if you’ve never tried printing with a Gelli Plate, or used paper napkins on cards, keep reading…
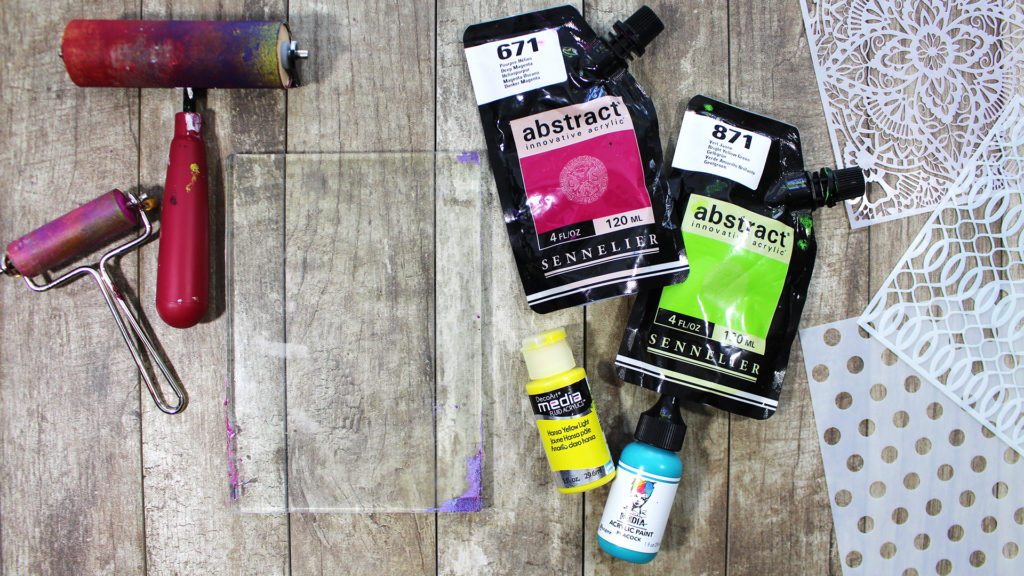
I’m not talking about your everyday prints. I’m talking about those layered prints, that have the positive, negative and a whole lotta grungy colored goodness going on. So what in the world does that have to do with Paper Napkins you might ask? Well, let me start at the beginning…

Paper Napkin Cards

A few weeks ago I showed in this video exactly how I make cards quickly using the top layer of paper napkins. I always find paper napkin patterns that I LOVE. It’s become a little bit of an addiction. And forget about it around the holidays….that’s a great idea by the way…a stack of Christmas Cards made from an inexpensive pack ($3 for 80 focal images!) of Paper Napkins! It’s a no-brainer…

That video shows just how easy it is to make cards from a pack of paper napkins. Spoiler alert – they don’t even use adhesive to make the panels! Now you REALLY want to see how to make cards from paper napkins, huh?

Almost always, you’re only going to use the top layer for cards. That means that you are usually left with 2 blank layers unused. I told my youtube subscribers that I’d have some fun ideas for what to do with those left over layers, and that’s where we’re at today!

So, since today we’re making happy cards, I thought why not make THREE for you! The first two use layer 2 & 3 from the napkin – you know, the left over pieces.

I have a video coming on my youtube channel in the next few weeks, and you’re getting a sneak peek at the final projects. Are you a subscriber? If so, definitely tell me in the comments!

Here’s a little something to help you GET inspired and GET creating today with your gel plate.

If you want to know how to use one…I’ve got a great how to use a gelli plate video here and this one shows a fun multi layered print that showcases 11 ways to improve your card design.

The Prints

Now you’re going to need the unprinted layers from when you separated your napkin – it’s okay if they have some ghost imaging on them. I’m going to show you two ways of getting some COOL pieces for your cards and mixed media projects.

If when making your cards, you run up against needing an easy way to separate the layers, I have a way to do that. It’s quick, easy and works every time. And the video is only 2 minutes…even better:

CLICK HERE to watch in HD on YouTube

Now that you have your layers separated, our first two projects use white, plain, layers. This is perfect for those prints that still have a ghost image on them too.

Did you subscribe to my youtube channel? I post weekly videos on a variety of card making and mixed media projects. Hope you pop by!
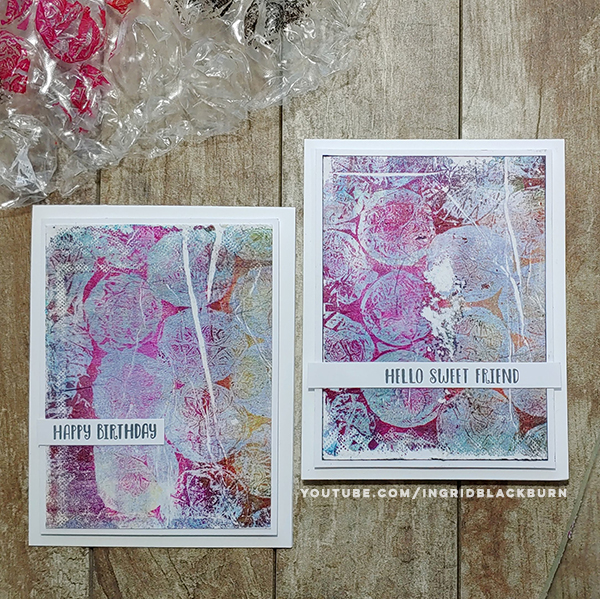
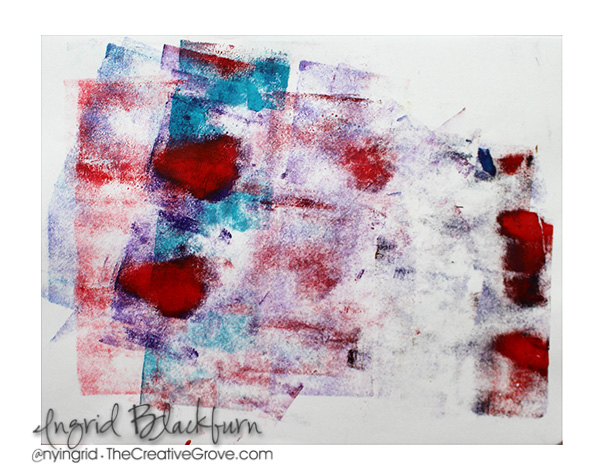
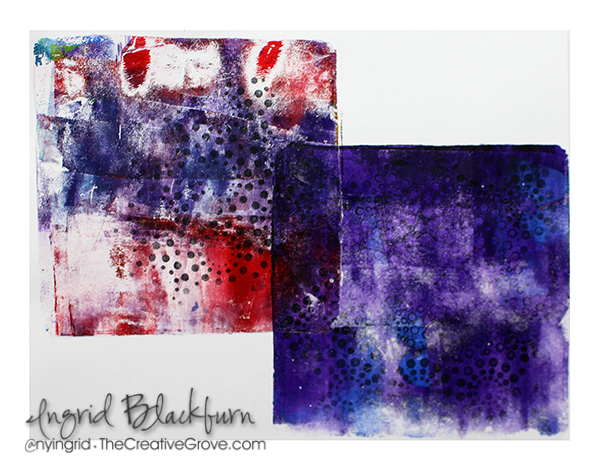
For these two Paper Napkin Layers, you’ll need to create a fun pattern on your gel plate with whatever medium you want. I used a Gelli Arts® Gel Plate, a Brayer, Acrylics, stencils and items that create texture – like the above one – large bubble wrap.

Don’t leave your napkin down too long, pull your print right away. Be careful, as it’ll be wet and napkins can tear easily. This one below tore. To fix it, I adhered it next to each other. It ended up creating this cool torn look.

Notice the cool texture from the napkins? The pattern from the embossed edge? I’m telling you – it’s the COOLEST textured look.
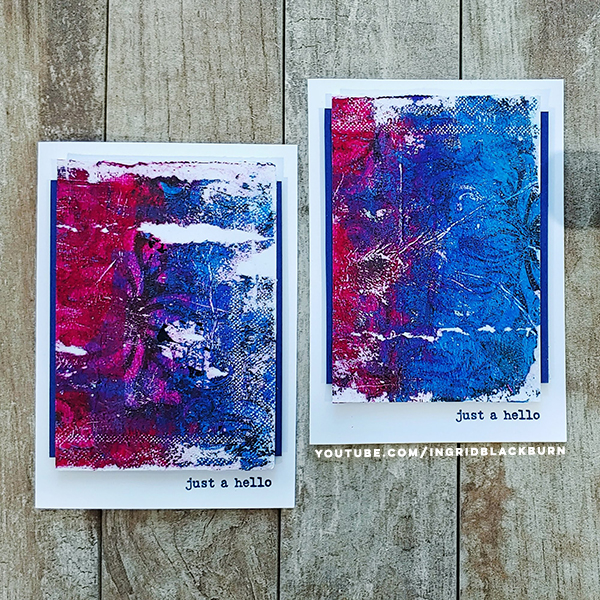
And you don’t need anything complex for a sentiment. I used some go to sentiments like the ones from the stamp set Fluttering Friends.

Custom Gloss Spray Prints

For the third project, get a little creative and create your own papers – who needs to buy those?!! USE WHAT YOU HAVE. First up, try stamping with your favorite background image in archival ink on the napkin layers or tissue paper.

I had the need to be a little creative for about 20 minutes one day. Look at all these you can create! I used LOTS of backgrounds by Catherine Pooler, some Unity stamps (see those flying keys…love a good nod to Harry Potter) and a few other favorite stamps.

This way, when you need something interesting for a project, you have a cool stash. Best part, you’re using what you already have – doesn’t get better than that! Isn’t that cottage garden background by Catherine amazing!

For this project, I thought it would be fun to use one of my favorites (not pictured above) – Rondi’s Window Background Stamp. I love this background stamp. You can create some of the most gorgeous cards with this stamp. Now, I got a little creative here, and didn’t use a gelli plate! GASP!
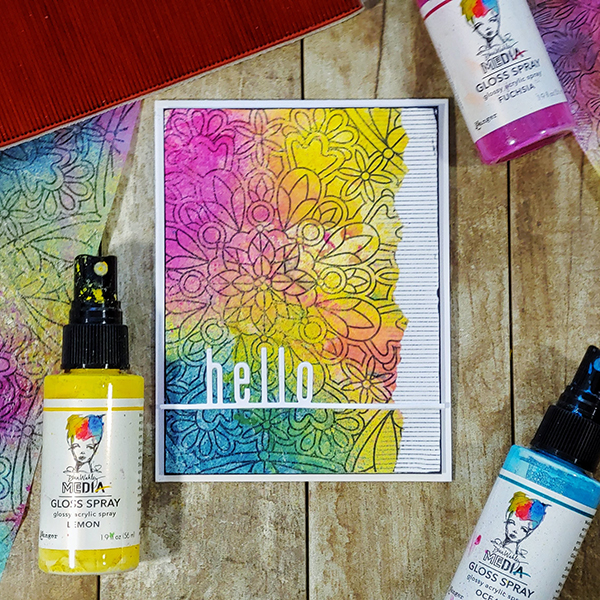
Instead, I thought it would be fun to break out some of my new Dina Wakely Gloss Sprays and see how well they color fragile papers. Isn’t that tie dye effect just gorgeous?!! I love that hello die by Catherine Pooler, it’s the perfect compliment to backgrounds!

And speaking of the PERFECT compliment. Like those super THIN stripes? That’s the single best background stamp you could EVER own! It’s by The Ton and Effie outdid herself on that one. They are thin, perfectly thin and the best compliment to any background. Enough to hold interest, yet not steal the show.

Hope you enjoyed those!!

The Happy Hop

It’s been quite an interesting few months, and we all have been cooped up in our homes! A few companies decided that we all need a little joy and happiness.

Can you believe there are 146 stops on the hop – seriously…can you believe THAT?!! Crazy, right?

Be sure to hop on next to the incredibly talented Kevin Bray Here!

Happy hopping, be sure to subscribe to my youtube channel for weekly inspiration, and stay safe!

Easy DIY Mixed Media Christmas Cards + Video

Save the Crafty YouTuber Video Hop

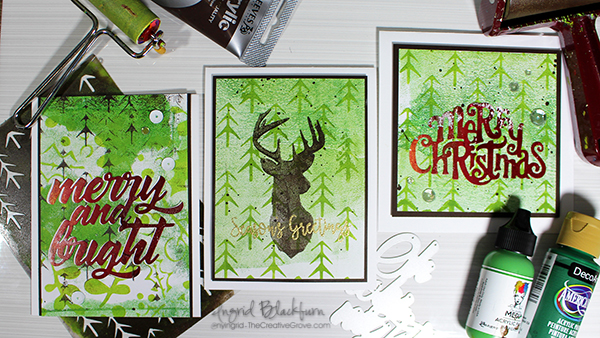
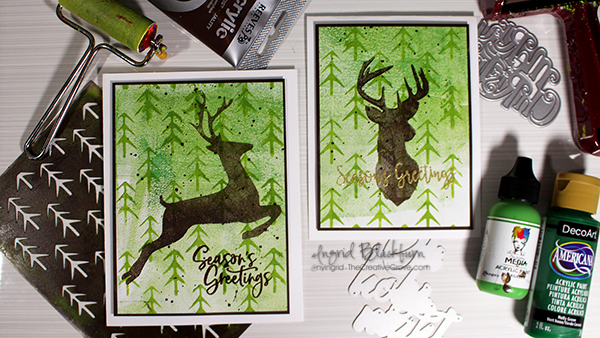
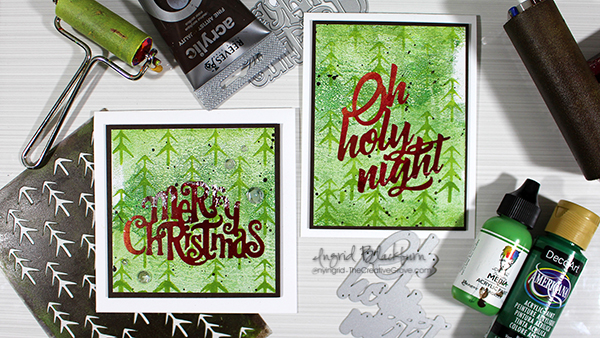
Have you ever wanted to quickly produce some fun and artistic Mixed Media Christmas Cards? Are you tired of sending bulky cards that require extra postage? What if I gave you the formula for how to create a whole stack of cards that have layered texture and character to them, but are pretty much flat, easy to put together and will have all your friends and family thinking you are quite the artist?!! Interested?

Now what if on top of that I told you that you could have a chance to win over 100 prizes – bet THAT sold ya!

Mixed Media Christmas Cards Video Tutorial

It’s that time of year again – my good friend Justine Hovey has organized the second Save the Crafty YouTuber Video Hop, and I decided to play along with 90 of my crafty friends – mixed media style! And I even have my OWN giveaway that I’m doing….so be sure to actually WATCH the video. I give the details along the way…
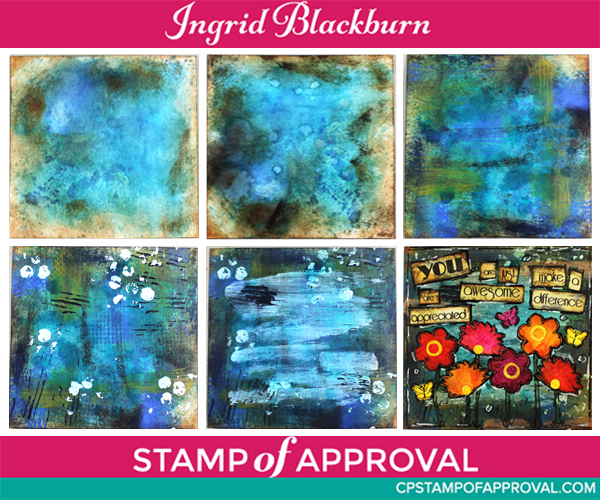
Click HERE to watch in HD on my YouTube Channel

Aren’t they FUN and super simple cards to make?!! Seriously – I’m going to be teaching this exact project (and so much more) in person in a few weeks in the Orlando, Florida area. If you’d like to come learn from me in person – be sure to email me at ingrid (at) thecreativegrove.com and I’ll send you all the details!!
For the specifics and Details to be entered for over 100 prizes – seriously…it’s more like 125+ prizes….GOOD ones too – read about those on my YouTube Channel in the section below the video!

The Save the Crafty YouTuber Video hop is a celebration of cardmaking video tutorials created by a group of talented crafters of all different styles and levels. We are coming together over 5 days to give our viewers a chance to discover other amazing cardmakers and help reach monetization goals!

Mixed Media Christmas Cards

All you have to do is watch, like the video, consider subscribing, and click the link in the video description below to hop to the next video. Let yourself be inspired! Don’t forget to comment (on the video hop over at YouTube) because we have tons of prizes to give away. Please indicate if you are located in the USA or International so that prizes can be awarded appropriately as some prizes (not all!) have restrictions on them.

To be entered in for MY giveaway (closed) – watch the video – I give details on what you need to put in the comment section (USA only for that one).

Monoprinting Christmas Cards

Don’t forget to check back every day this week since there are 5 themed days of video hops! You never know when you’ll discover your next favourite YouTuber! Hop Links are below.

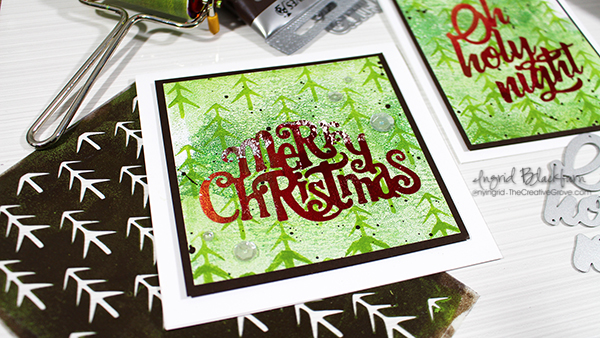
I hope you enjoyed this tutorial. Here are a few close up photos for you and the supply list. Be sure to come back to this post on November 10th to see who won the prize pack – I’m giving away Dies, Stencils and ink pads – it’s worth over $40!!! That Merry Christmas Die is one of them!!! 🙂 Happy Hopping!!!

Mixed Media Monoprint Christmas

Aren’t those the prettiest cards?!! These photos do not do them justice!! Interested in seeing more Mixed Media Christmas Card possibilities? Check out this tutorial – just adjust for the Christmas Season

Sponsors & Hop Links (Giveaways closed)

Here are all those sponsors….and SO many channels in each of the five hops are giving away additional prizes – this is an AWESOME hop!

Here are links to all five hop days:

  1. Day One Hop Beginning
  2. Day Two Hop Beginning
  3. Day Three – Start on MY YouTube Channel
  4. Day Four Hop Beginning
  5. Day Five Hop Beginning

Good luck on winning all those great prizes – over 100!!! Leave me a comment below if you liked these cards – I’d LOVE to know.

Thanks for watching – till next time…

Supply List

Affiliate Links used if available

Mixed Media Christmas Cards

Hailey’s Shower Photo Supply List – https://ldli.co/e/jpxx6p

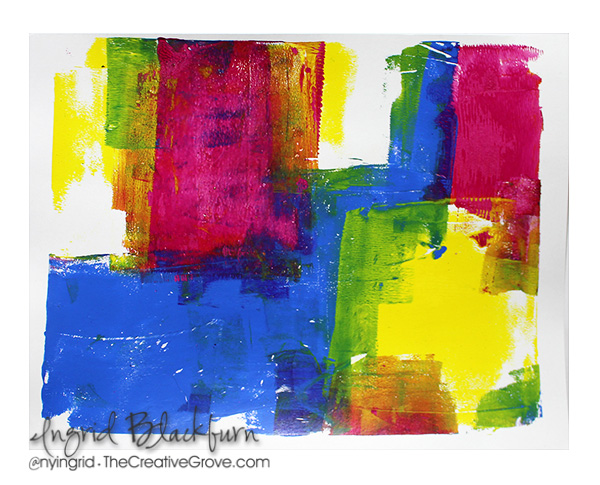
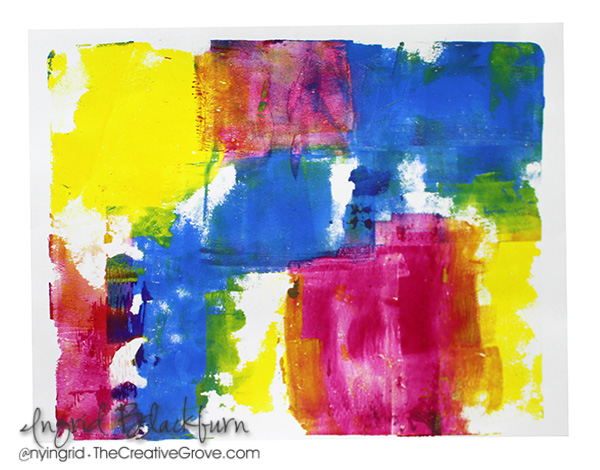
Creating Bright & Colorful Monoprint Backgrounds with a Gel Plate

Colorful Bright Monoprint Backgrounds

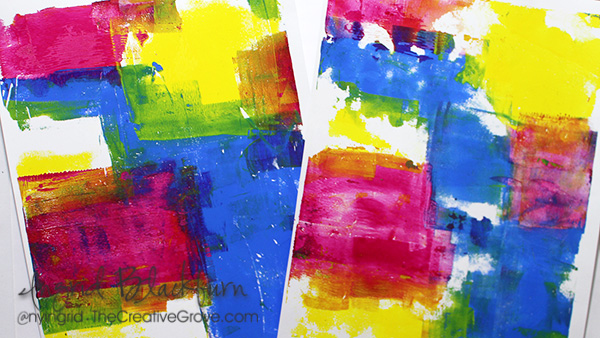
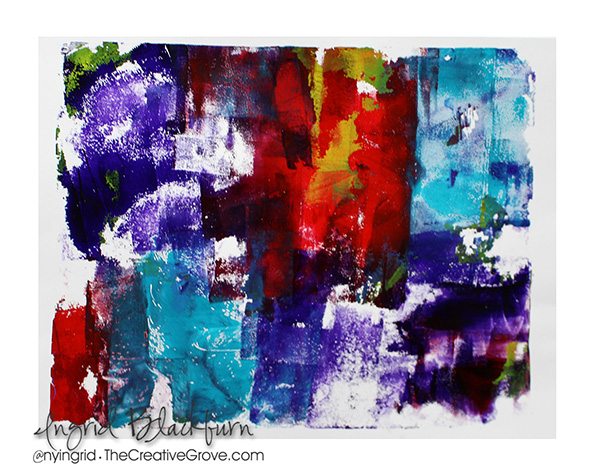
Have you ever used a gel plate to create bright colorful monoprint backgrounds? It’s so super easy, I think you’ll be shocked at how you quickly you can create a ton of vibrant colorful pieces to use on your cards, in your art journal or just create a fun piece of artwork!

To make this even easier for you – I filmed a little video for you. And there’s SO much more you can do with a gel plate, you’ll definitely want to add one (preferably two) to your tool arsenal.

Monoprint Backgrounds Tutorial

Click this link to see video on YouTube

If you aren’t subscribed to my YouTube channel, definitely consider it. I have many more videos headed your way – you won’t want to miss them. You can even hit the little bell to be notified!

Abstract looking monoprint backgrounds

Here are a few tips you’ll want to keep in mind when playing around with this fun technique:

  • Avoid muddy colors – Use colors that work well together. Remember that you’re going to be overlapping several, so you don’t want to use complimentary colors (opposite sides of the color wheel) when wet. You can layer those once one layer is dry – but not while wet.

bright and colorful monoprint backgrounds made with a gel plate bright and colorful monoprint backgrounds made with a gel plate

  • Use a second gel plate to help clean off your brayer – you’d be surprised how fast you can create multiple prints with just one application of paint!
  • Use good paper for your scrap clean up piece. (9/10 times, I turn that piece into a print.) The colors work amazing together, and it usually becomes a great base for a layered print

scrap piece from a monoprint gel plate session

  • Try to be patient when pulling your prints. Allow the paint to dry a bit so that you are able to lift those left behind layers underneath your newest paint application
  • Remember to lift your brayer when applying your paint. If you just keep it on the surface of your gel plate, you are only really staying in that one section. Lifting it allows for better rotation and coverage.

  • Don’t stress if just a little pulls off the plate. You can always add more – or use it as that little something in the background of a card!

bright and colorful monoprint backgrounds made with a gel plate

I use a 4″ and 2″ brayer when creating monoprint backgrounds. Sometimes that small brayer is quite helpful to get into those little spaces. And sometimes having a larger brayer is just oh so much easier!

Don’t you just LOVE these? Next up I’m going to show you what to do with some of these fun backgrounds, and just how easy it is to create a whole set of cards.

Till next time –

Supplies

To make finding the supplies I used in these projects a bit easier for you, here are a few clickable links. Compensated Affiliate Links are used when possible. Click here for disclosure. Happy Shopping!


Art Happens – New Craft Stash Blog Hop: Day Three + Giveaways

Art Happens

One thing I’ve learned over the past few years is that Art Happens. It truly does. Today I’m kicking off Day Three of the New Craft Stash Blog Hop with some of my crafty friends. We’ve all collected & hoarded craft supplies…come on – I know you’re one of us! Several of us were chatting a few weeks ago and decided – let’s just hop for fun and made the rule that we had to use something new. Now that means – literally new or just new as in it’s been in the drawer for a bit and it’s finally time to break it out! Today I’m using several products just like that…and I can’t wait to show you what I’ve done.

Be sure to hop on to all three days worth of hops. Get inspired to use your “new” stash, leave a comment and be entered for prizes! You’ll have until the 23rd to leave a comment. I’d love to know what new item you’re going to play with next!

Gorgeous Art Happens Tutorial

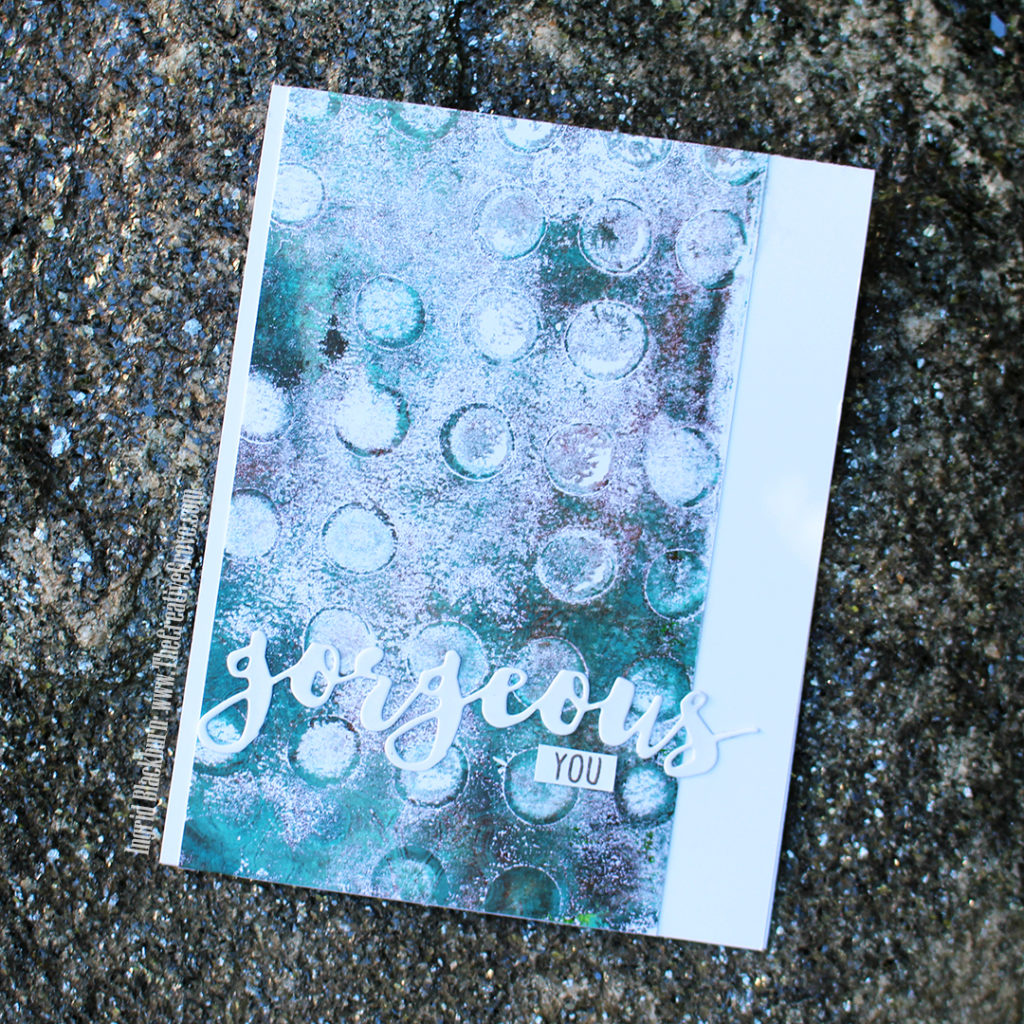
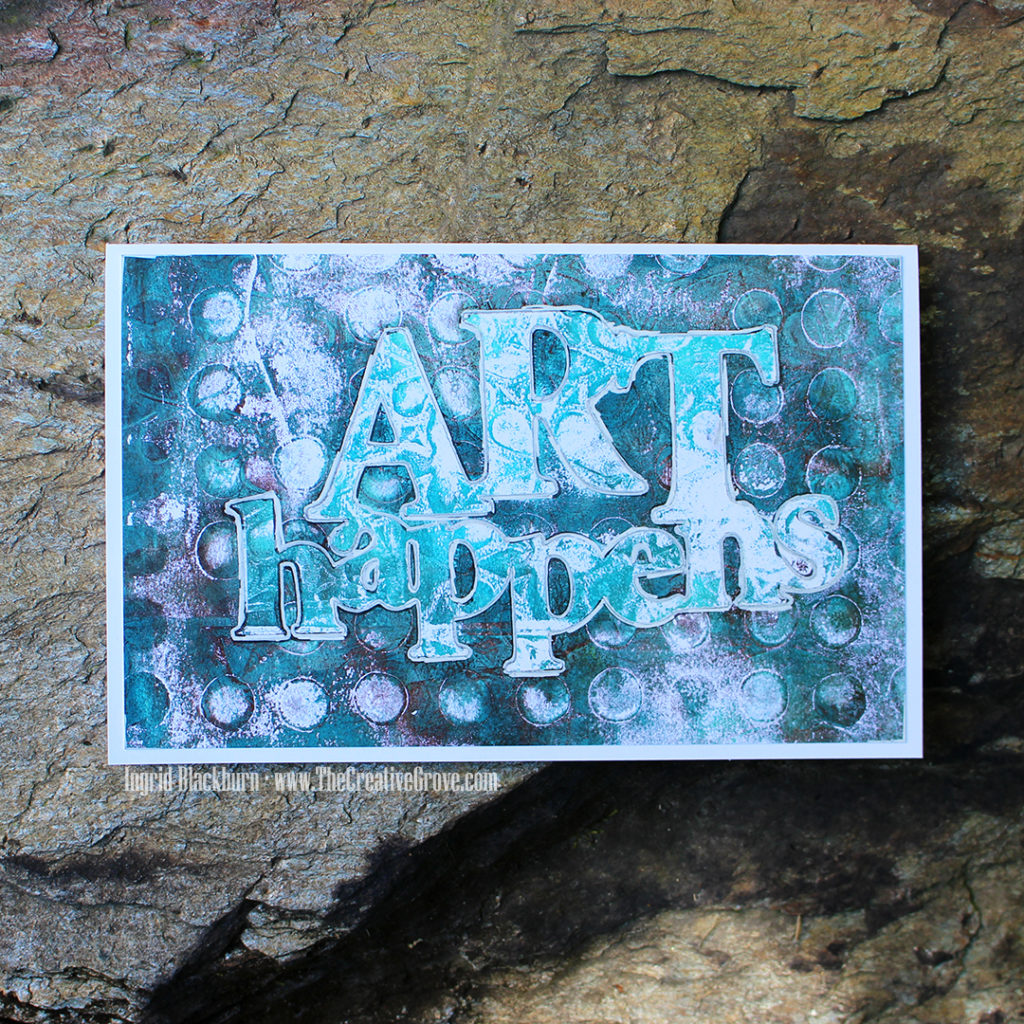
It’s no secret that I’m in love with mixed media supplies. I love to create simple mixed media projects, AND real mixed media. Well I have a treat for you today. Today’s projects are the result of a fun little gel printing session I had the other day. I wanted to use some of my newer acrylics and some new Stamplorations masks (Art Happens) and word dies. I’ll post a time lapse video later with my entire printing session, so today’s video just showcases the print I made for these two beauties…enjoy!

Click Here to view video in HD on YouTube

What do you think? It’s actually quite fun. When I first started, I’ll admit…I was quite intimidated. But the more I got into that session, and the more art that just literally poured off the plate…I kept saying things like WOW, I can’t believe I just made that and Ooh that’s gorgeous. Seriously…I was quite impressed with myself! And I think I’ll always keep that first fabulous card – cause it literally is one of those where I still say – I can’t believe I made that! You know that feeling, right?

Well, this gel printing session didn’t disappoint. I ended up with 8 art journal pages and 34 prints. Yup! Gel Printing goes so fast, and more you get into the session – little bits are left behind on the plate – Tip:  do not clean your gel plate in-between. The work you create will do that for you. Today’s print that I used came about 4/5 prints into the session. Some of the beauty on the print is from prior prints. I love the patina kind of feel. That weathered look that you usually only get with time and exposure to the elements.

Art Happens by Stamplorations

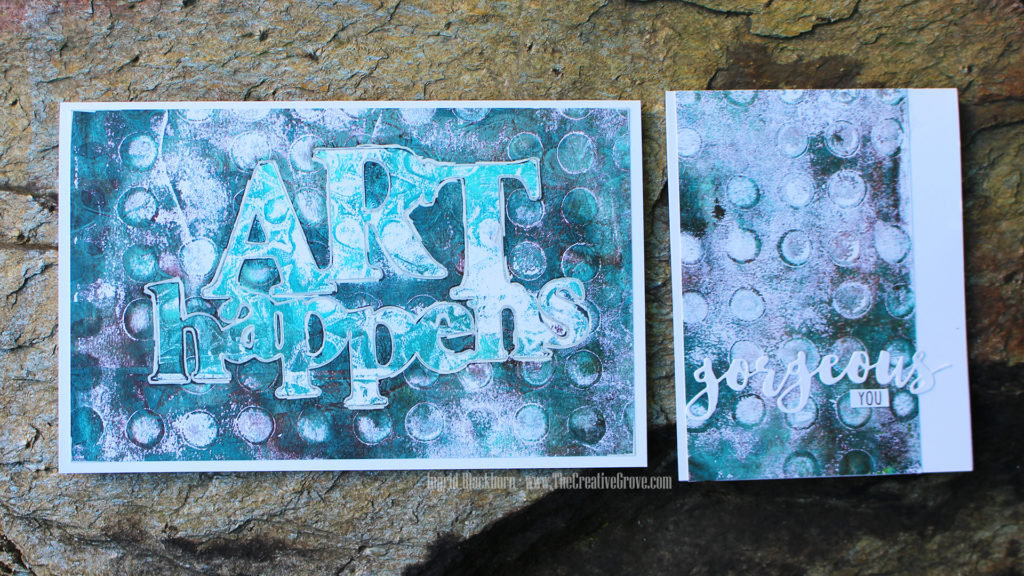
Here are the two cards – one is a traditional A2 sized card – and it needs so little to complete it. Just the Gorgeous die, cause…well hello, it’s gorgeous! And a simple little You to complete the sentiment. The die is one of the MANY fabulous word dies from Stamplorations – I am such an addict of Shery Russ dies and stencils – stamps too! She’s got some ah-mazing stuff. She’s a one woman operation, has phenomenal customer service and I swear the woman doesn’t sleep. Want to see her stuff? Click Here and use the code STAMPINGRID for 20% off orders of $15+. Hey, every little bit helps, right?!

The second project uses the mask Art Happens. I have this same sentiment from Stamplorations in a smaller sized die. WAIT till you see the mixed media project coming up using that – it’s a beauty! Using masks in gel printing is a great way to preserve colors in layers and really allow them to pop as in this project. I wanted to emphasize it a bit more, so I outlined it using a Pitt pen and Posca paint pen. I was going for a sloppy look, cause let’s be honest – there’s nothing perfect about monoprinting.

Art Happens Monoprint

Here’s a funny fact – ask any of my crafty friends who really know me – in card making, perfection is kind of one of my OCD things. Everything has to be lined up right, matted properly, etc…so mixed media nearly gave me convulsions at first. I tried to control everything – until I realized that the magic happens when you let go and just let the art actually happen.

So I hope you’re encouraged to give monoprinting a go. It’s SO relaxing, you’ll have a crazy amount of prints to create cards with, and I know you’ll just fall in love with it like I did. Hey, if this OCD papercrafter can become a mixed media artist – there’s hope for all of us, right?

Thanks for stopping by, be sure to visit all my friends’ blogs on today’s hop, and if you missed the first two days – hop on over to those too. I have the full list below. We have incredible prizes and I’m giving away a prize pack myself! Thanks for joining us on this fun little Summer journey. I hope you’re inspired now that you know Art Happens!

Comment to Win Prizes

We have some amazing sponsors & Prizes:

PLUS….

I’m giving away a prize pack to one lucky commenter from one of my blog posts! So be sure to leave comments on all the blogs – all three days for your chance to win!! Just comment on all the blog hop stops by 7/23/18.

So now it’s YOUR turn to hop along and be inspired by some of my crafty friends. Thanks for taking the time to hang a bit with me today. I’ll be back in a few days with a mixed media project for you. And stop by tomorrow as well – I’ll post that hop list too!

Today’s Hop List – Day Three

  1. Ingrid Blackburn <— You are here!
  2. Ardyth Percy-Robb <— Hop here next!!
  3. Josefine Fouarge 
  4. Tracie Pond 
  5. Nanette Tracy 
  6. Lisa Harrolle  
  7. Justine Hovey 
  8. Susan Powell
  9. Jennifer Cerizo

Did you miss Day one or Two? Get caught up here:

Day One Blog Hop List:

  1. Ingrid Blackburn  – Yup that’s me with a different post & project!
  2. Jenny Colacicco
  3. Ashlea Cornell
  4. Karen Baker
  5. Ali Farmer
  6. Catherine Pooler
  7. Allison Cope
  8. Veronica Zalis

Day Two Blog Hop List:

  1. Melissa Miller
  2. Tracey McNeely
  3. Kelly Martin
  4. Amy Seigler
  5. Michelle Wallace
  6. Ilina Crouse
  7. Maureen Merritt
  8. Nance Salkeld
  9. Deepti Stephens

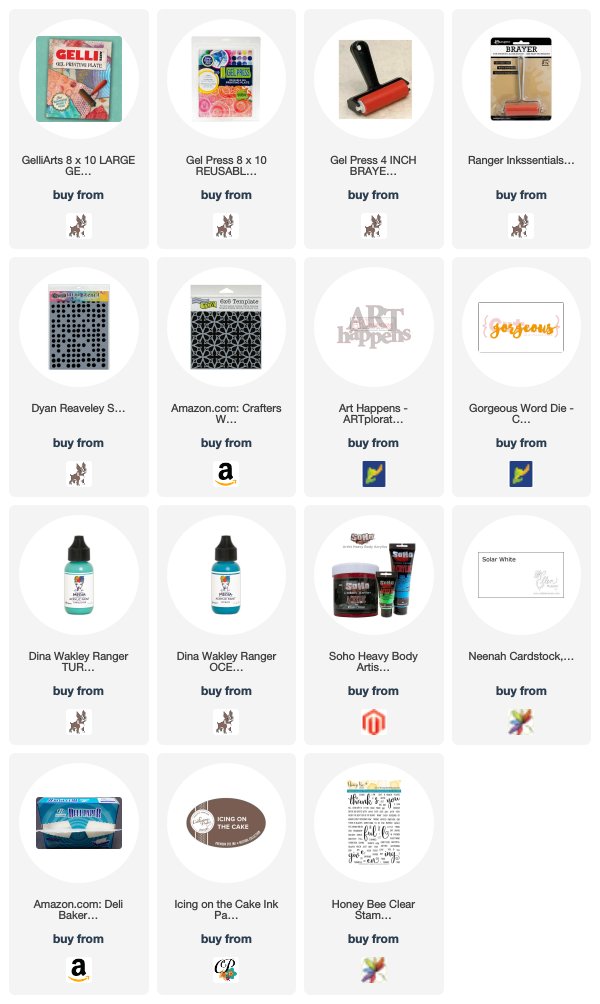
To make finding the supplies I used in these projects a bit easier for you, here are a few clickable links. Compensated Affiliate Links are used when possible. Click here for disclosure. Happy Shopping!


Mixing CAS & Monoprinting

Have you ever mixed a monoprint with clean and simple design? Monoprinting is not only super easy, it’s fun, quick and I’m always amazed at the results. I highly encourage you to give it a try. And most of us LOVE clean and simple, so why not mix them together?

It’s snowing here today in the Black Forest – hard to believe it’s almost May! Seems like a good day to work with my Gelli Plate.

Clean and Simple Mixed Media

In the spirit of creative card making, today we’re going to mix it up a little – for the CAS Mix it Up Challenge. I’m addicted to this challenge, and although it’s in it’s infancy – just two months old…it has a HUGE following already with some amazing card makers.

It’s the brain child of Bonnie Klass and Loll Thompson. You probably have crossed paths with one or both over the years, as they are avid card makers, have designed for numerous teams and both have distinct styles each their own.

april

This challenge is all about mixing clean and simple stamping/design with mixed media. Now the words mixed media get one of two reactions – interest and terror. But today’s project is hoping to not only peak your interest, but dispel the myth that all mixed media is intense, takes a long time and is only for artists who love to art journal.

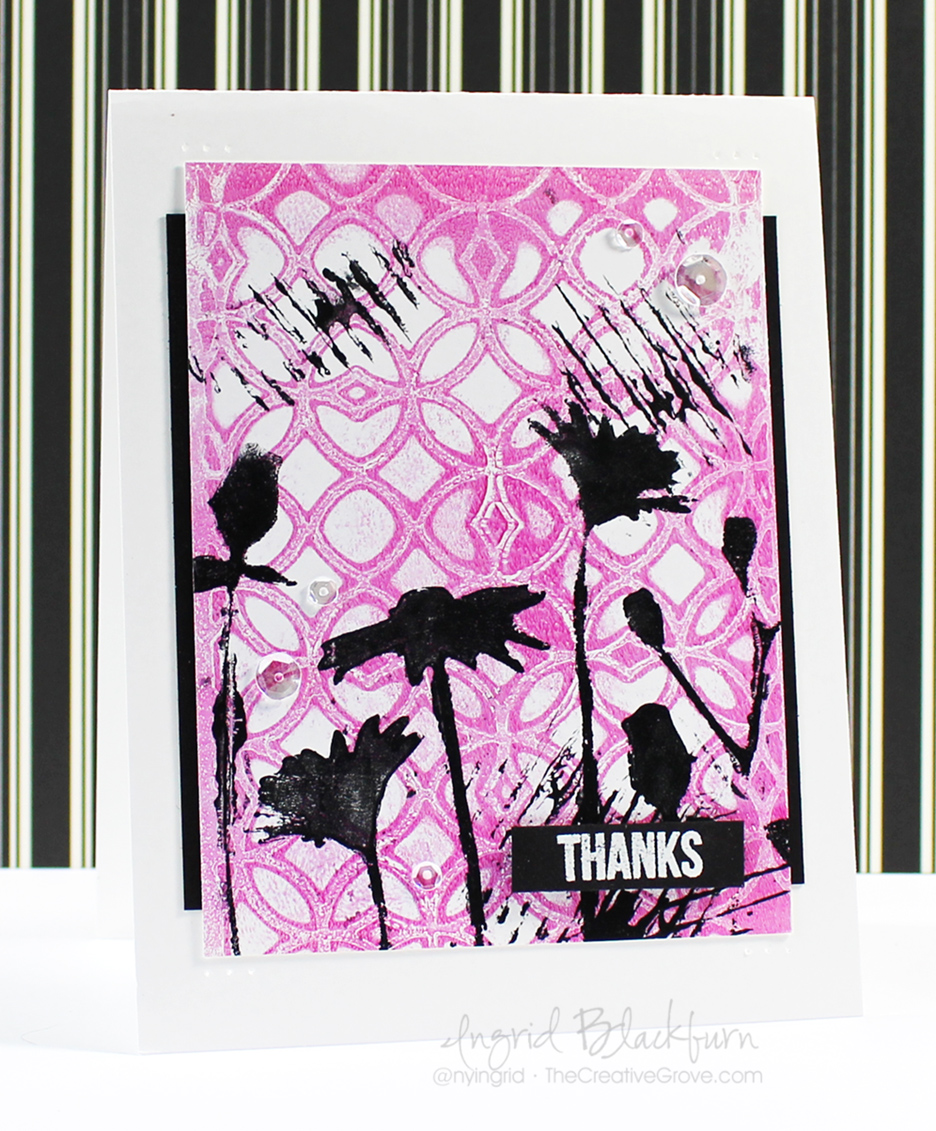
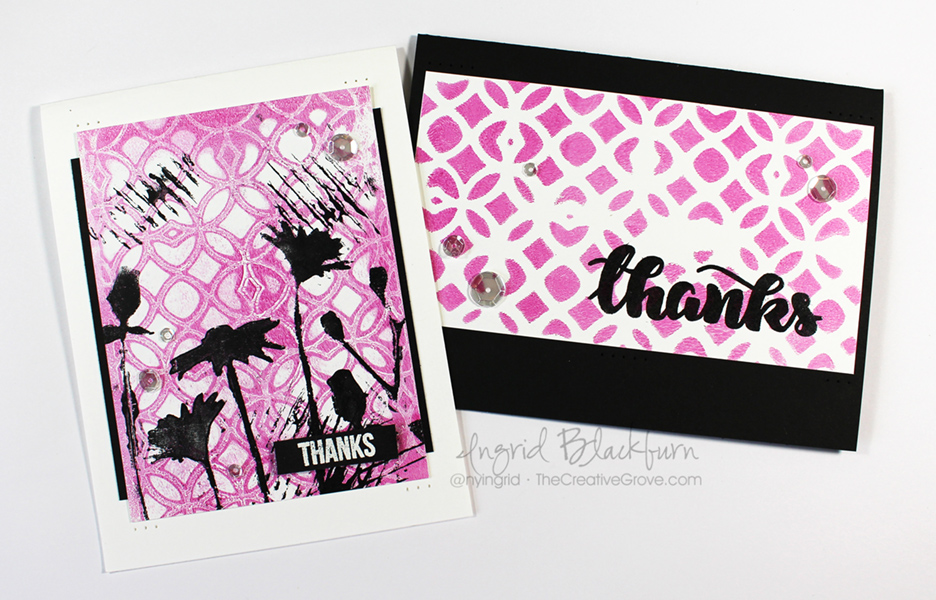
Both projects today were from the creation of one monoprint. To make a monoprint you need three things – a printing plate (I use a gelli plate), some acrylic paint and a tool to spread the paint – I used a brayer.

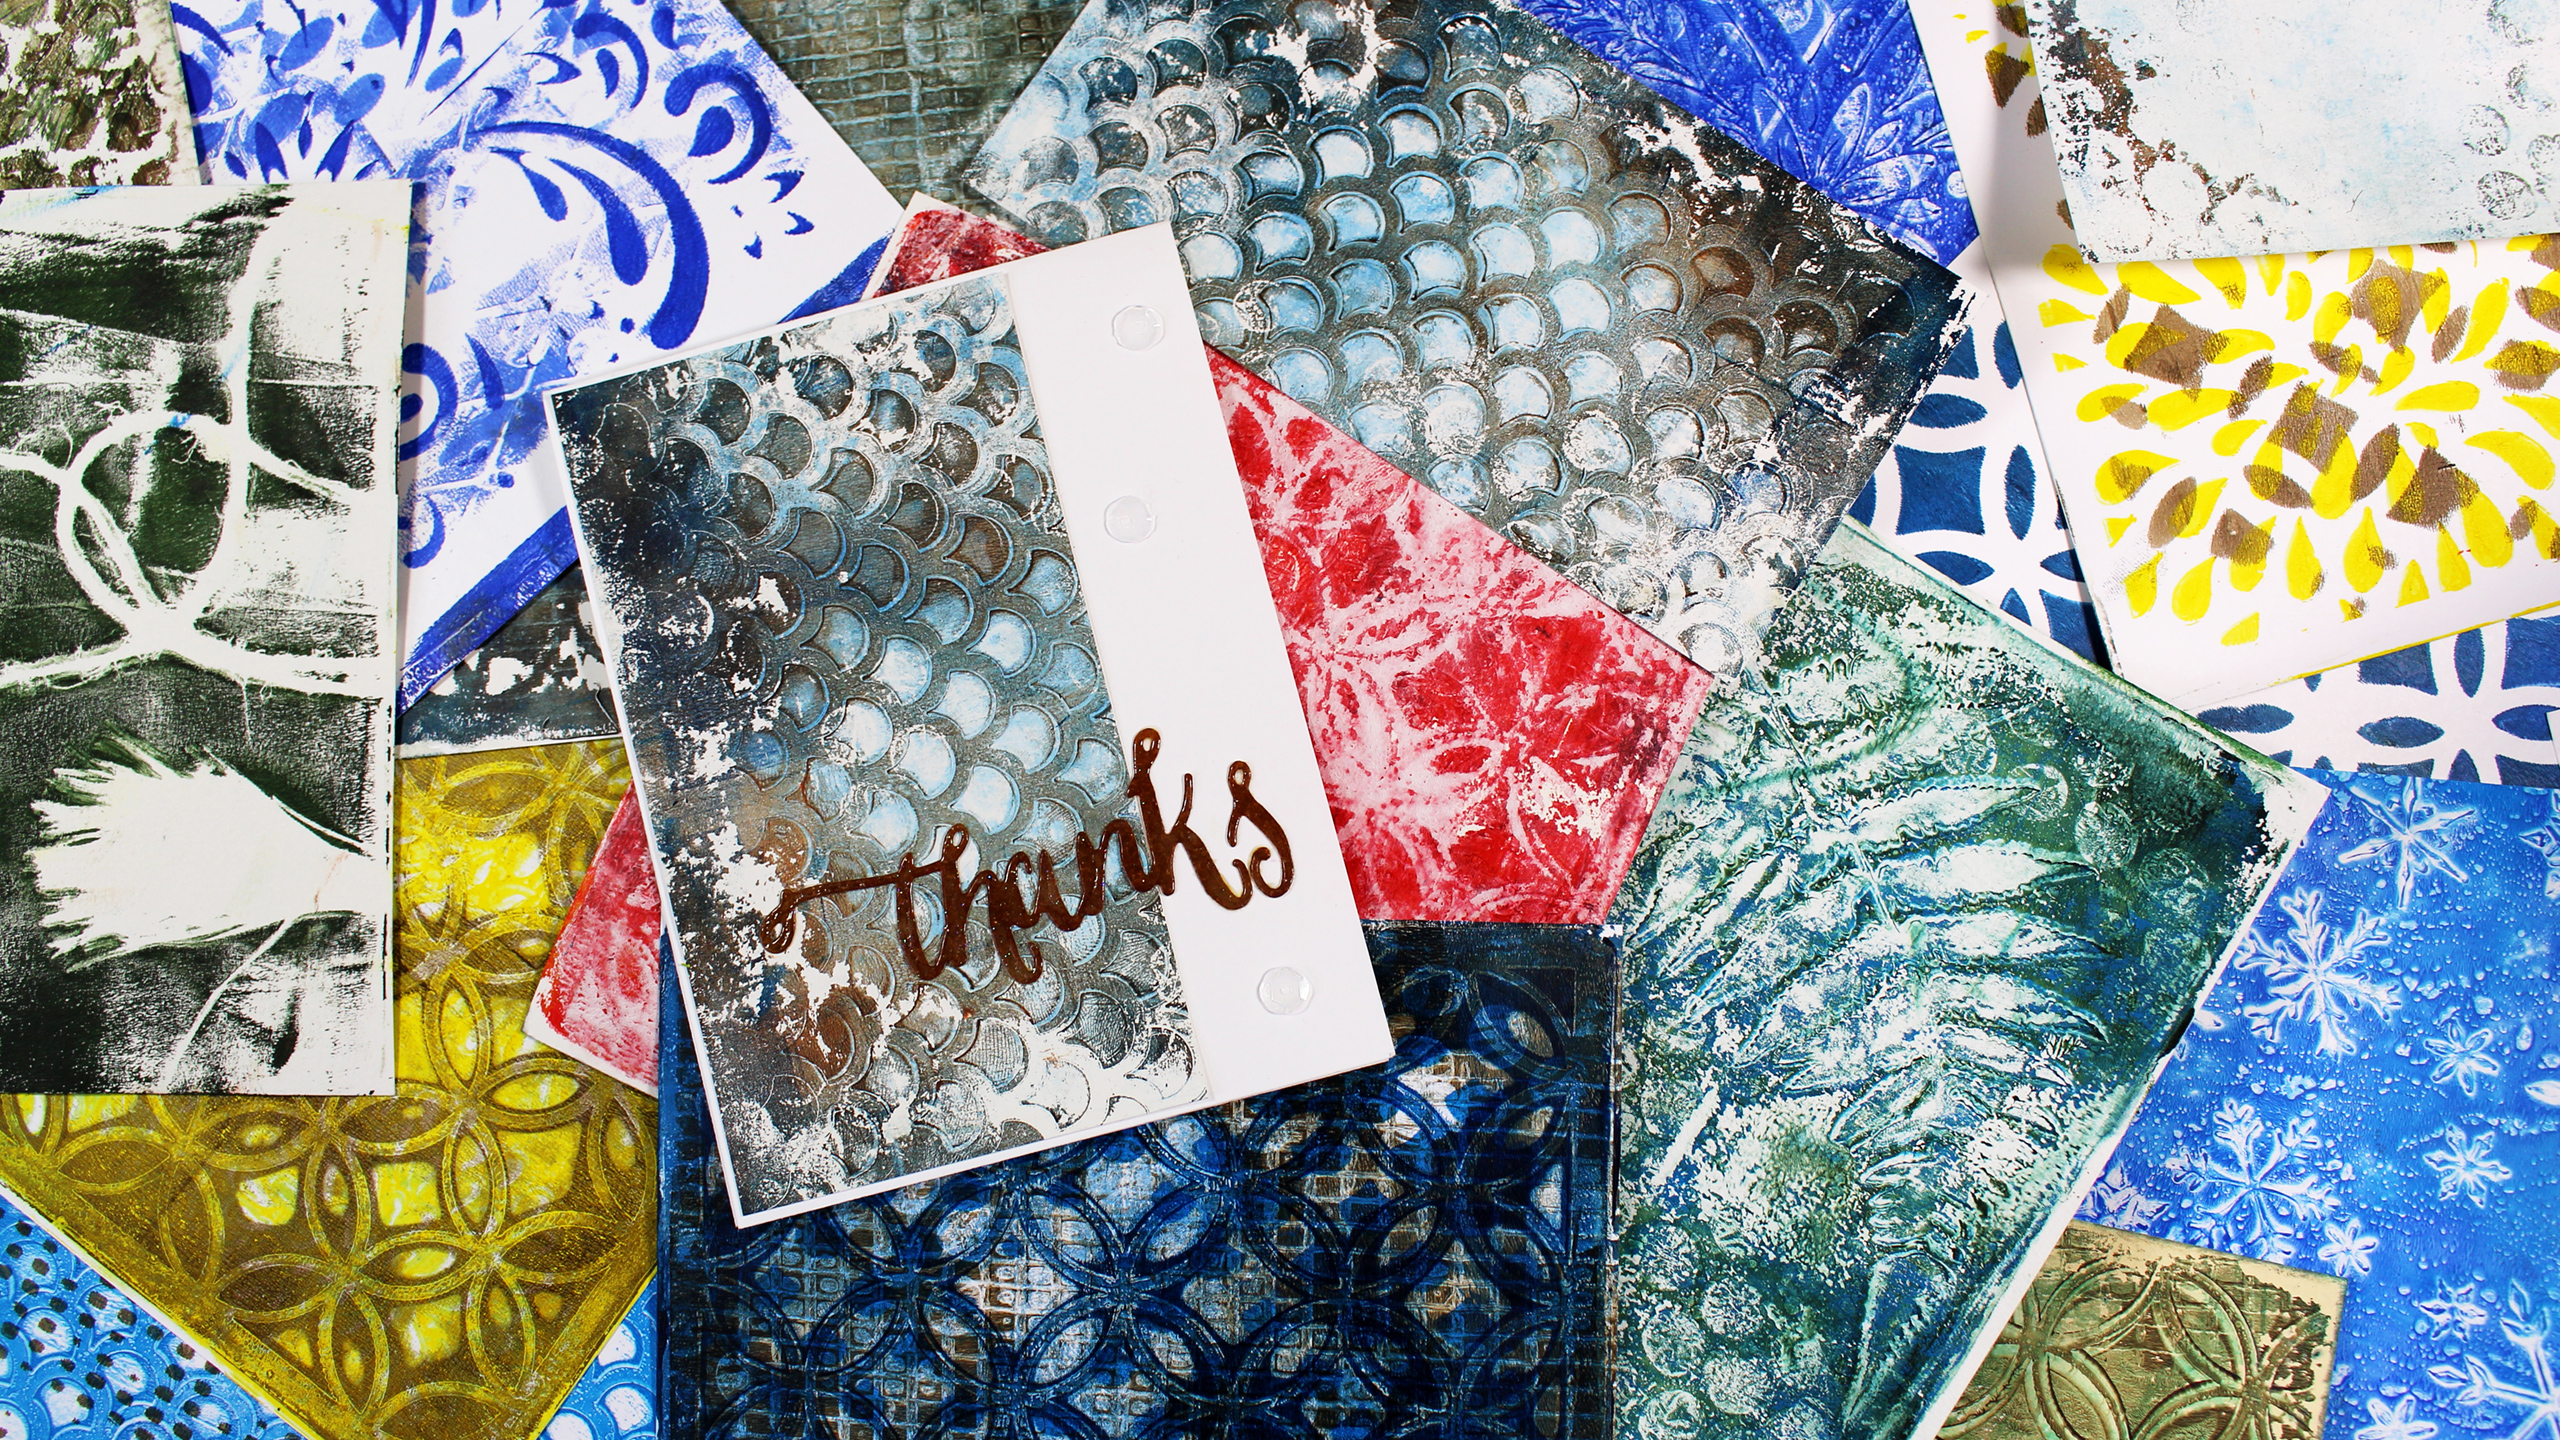
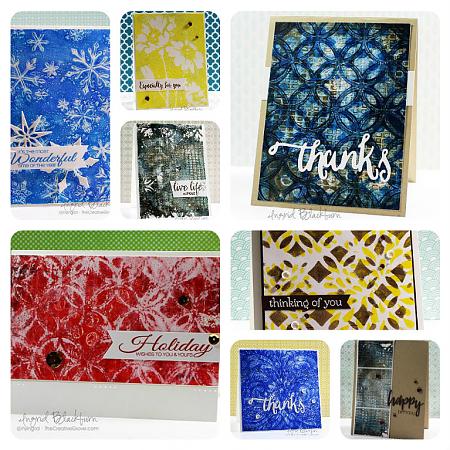
Gelli Plates are inexpensive tools that give you the ability to make your work looks masterful, unique and will definitely leave the recipient of your card wondering…how in the world did you do that?!! Here are just a few prints I made quickly one day to give you an idea of how fun this artform is:

Gelli Arts - Gelli Plate Monoprints for Mixed Media

Today we’re going to use a 6×6 inch plate by Gelli Arts. And for this challenge, we’ll incorporated a few stencils as well – after all, that is the theme of this month’s challenge! I think you’ll be pleasantly surprised to see there’s not much else to it.

Why don’t we get started. I filmed the process for you, wrote a step by step tutorial below and added some detailed pictures. The video has three distinct parts – the monoprinting (first five minutes – yup…that’s it), card specifics and why, and lastly (final 2 1/2 minutes) – all about clean and simple design and the rules I live by – don’t miss that part!

Click Here to watch in HD on YouTube

What do you think? Of course you can always use stencils in the traditional way too – I just thought it would be fun to bring a little monoprinting into the mix.

[divider style=”10″]

[optin_box style=”12″ alignment=”center” email_field=”email” email_default=”Enter your email address” email_order=”2″ integration_type=”aweber” double_optin=”Y” list=”3846012″ name_field=”name” name_default=”Enter your first name” name_order=”1″ name_required=”Y” opm_packages=””][optin_box_field name=”headline”]Learn more with our exclusive FREE video series:[/optin_box_field][optin_box_field name=”paragraph”]PHA+UGx1cyB5b3XigJlsbCBiZSBhZGRlZCB0byBteSBGUkVFIENyZWF0aXZlIFRpcHMgRS1sZXR0ZXIgd2hlcmUgSSBzaGFyZSBleGNsdXNpdmUgcHJvamVjdHMsIHZpZGVvcyAmYW1wOyB0aGUgMTIgRGF5cyBvZiBDaHJpc3RtYXMgUHJvamVjdCBTZXJpZXM8L3A+Cg==[/optin_box_field][optin_box_field name=”privacy”][/optin_box_field][optin_box_field name=”top_color”]undefined[/optin_box_field][optin_box_button type=”0″ button_below=”Y”]Get Instant Access![/optin_box_button] [/optin_box]

[divider style=”10″]

CAS Monoprint Tutorial

  • Start out by gathering up all your supplies. Monoprinting goes fast – and there’s nothing worse than not having your paper right there and your paint drying up on you!
  • Spread out your background color with a brayer and the rubber attachment.
  • Clean off your brayer on a piece of scrap paper and immediately roll over your gelli plate to “lift” some of the paint you just laid down. You want to get the look in the video – lots of color still, but a bit subdued. TIP – Don’t “lift” more than twice – you’ll remove too much paint.

Gelli Plate Mixed Media

  • Place your Latticeworks stencil by Tim Holtz over your paint and pull the positive print. TIP – if you want it to be a bit random, only pat the back of your paper in random spots. Try to leave a little paint behind, I chose to pull most of it.
  • Lift your stencil, and place your white card stock on the pattern left behind. Burnish the back of your paper with your hand (I like to add a piece of copy paper if my paper is shorter than my plate as in the video) to transfer as much of your print as possible.
  • Lift your print and try and pull a ghost print with copy paper if you can – I was unable to.

Monoprints and monoprinting

  • Clean your gelli plate in-between if you desire, for me that always depends on how much is left behind and what my goal with the project is.
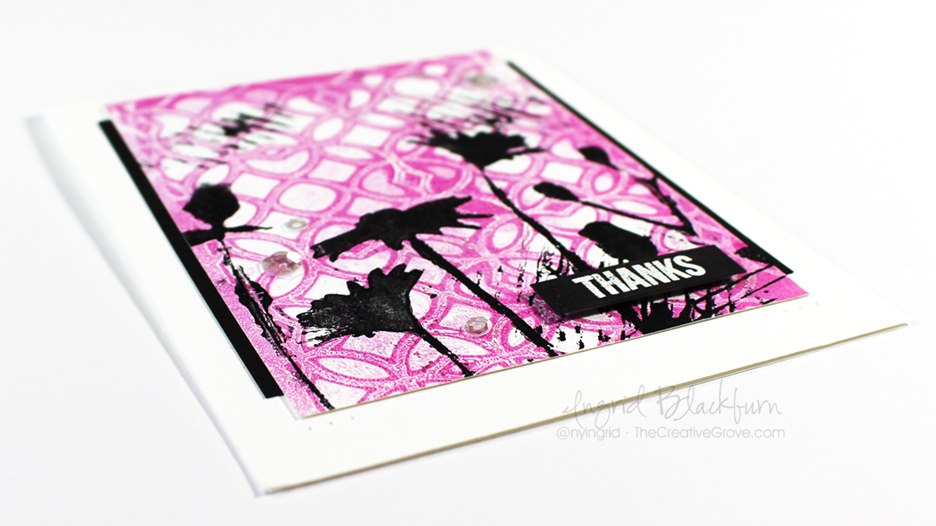
  • Add the Bloom Silhouette stencil by Artplorations to your plate and add a dark color with a brayer to the desired flowers. I chose to add Paynes Grey. You want a contrasting color to your first color. Brown or Dark Purple with Yellow, Black with Blue or Red, etc…
  • Lift your stencil and pull the print onto your second print (the negative), if you have a ghost print – pull that as well onto another piece.

Mixed Media and CAS Monoprints - Ingrid Blackburn

  • Add some marks to your Gelli Plate with more Paynes Grey and the inside of a Starbucks Cup Wrapper. The corrugated inside is great for texture.
  • Add the lines in three spots – if I could do mine again, I’d add the last one a bit higher. I remember thinking not too high, but my original spot in my mind would have been better. TIP – Lesson learned – go with instinct in art, not the mind.
  • Trim your positive and negative prints down. Measurements are below.

Clean and Simple Mixed Media CAS

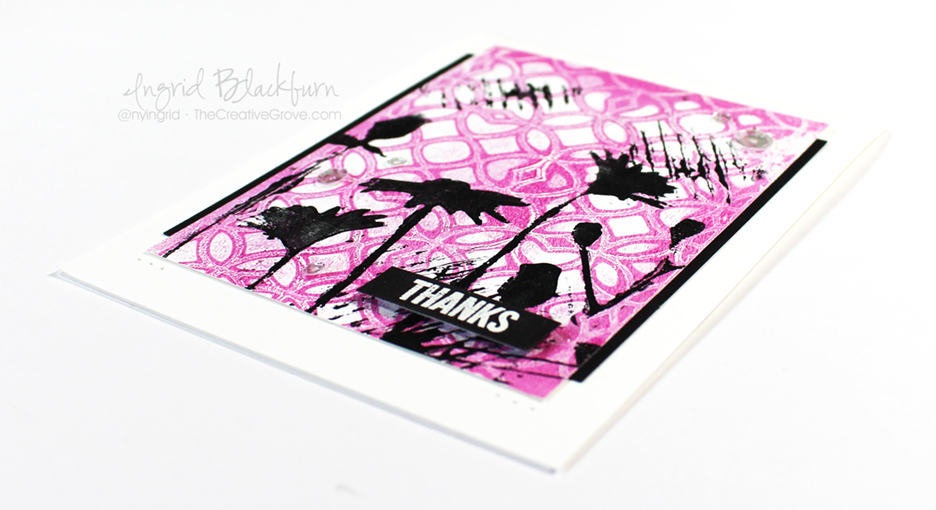
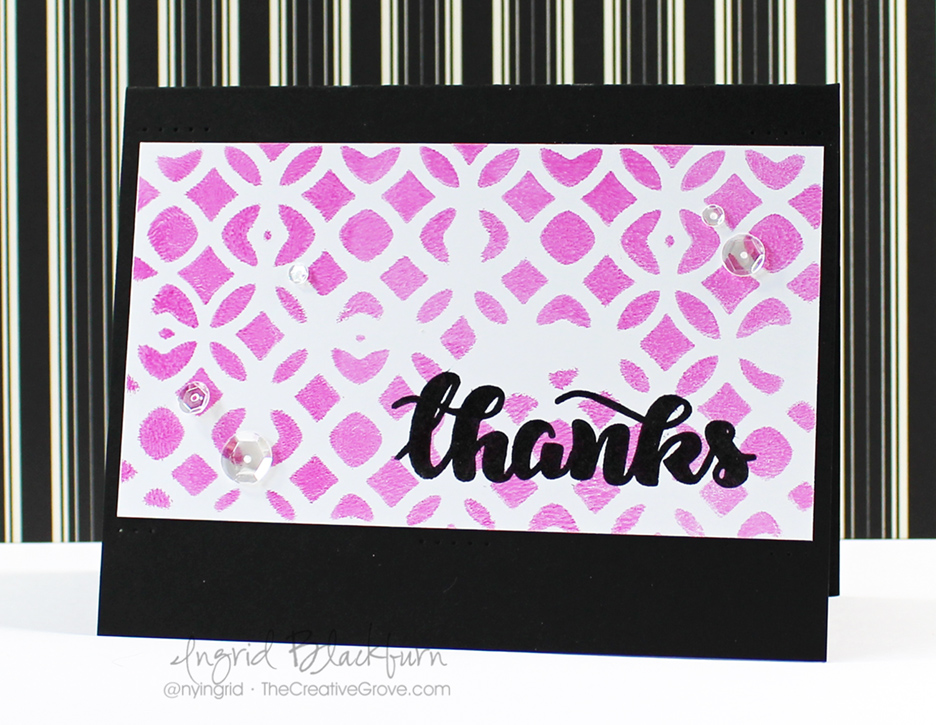
CAS Monoprint Card #1 – Black

  • Stamp Thanks from Mini Thanks (Create a Smile) in bold with Versafine Black ink (Tsukeniko) and emboss in clear.
  • Add the negative print to black card stock leaving more space on the bottom than the top (Rule of thirds). Add five sparkling clear sequins.
  • Add a little paper piercing to the top and bottom around your print and you’re set with Card #1

Dimensions:

  • Black card base – 5 1/2 s 4 1/4″ Folded
  • Monoprint –  5 1/4 x 2 7/8″ (trimmed down)

Gelli Plate Prints - Ingrid Blackburn

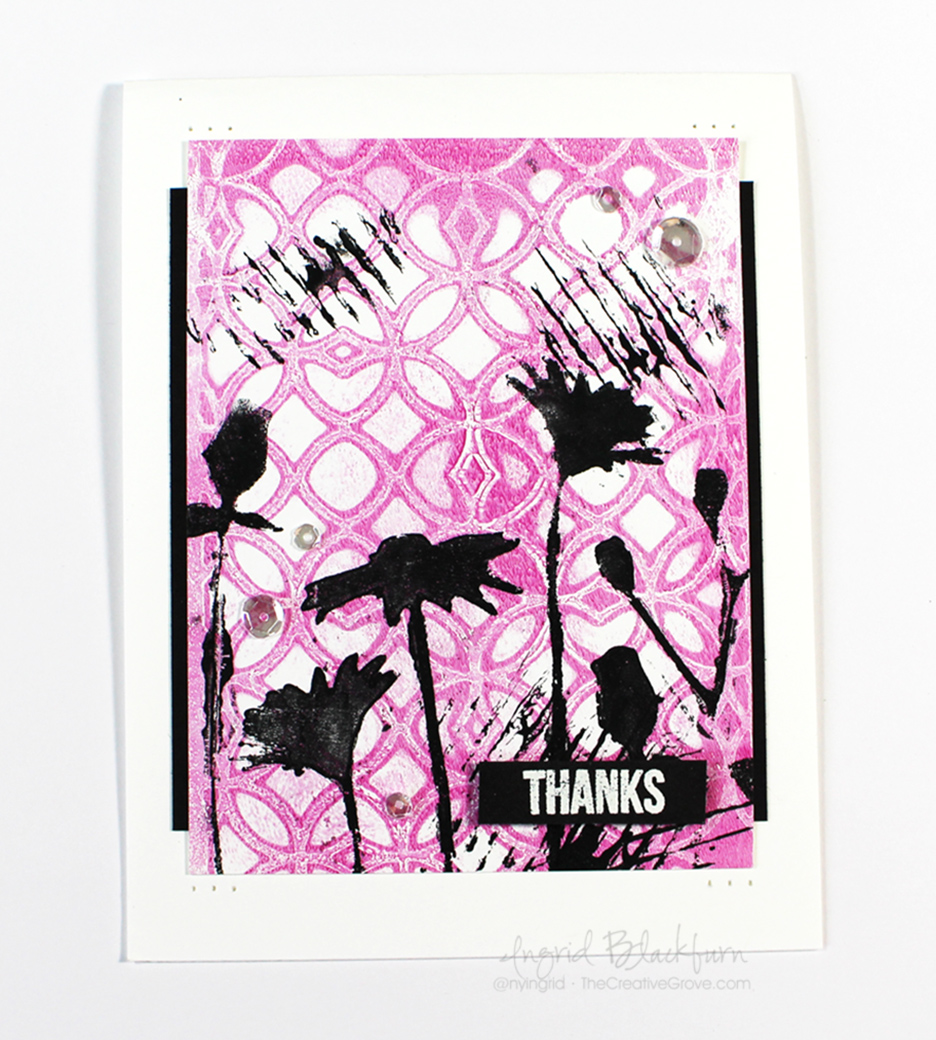
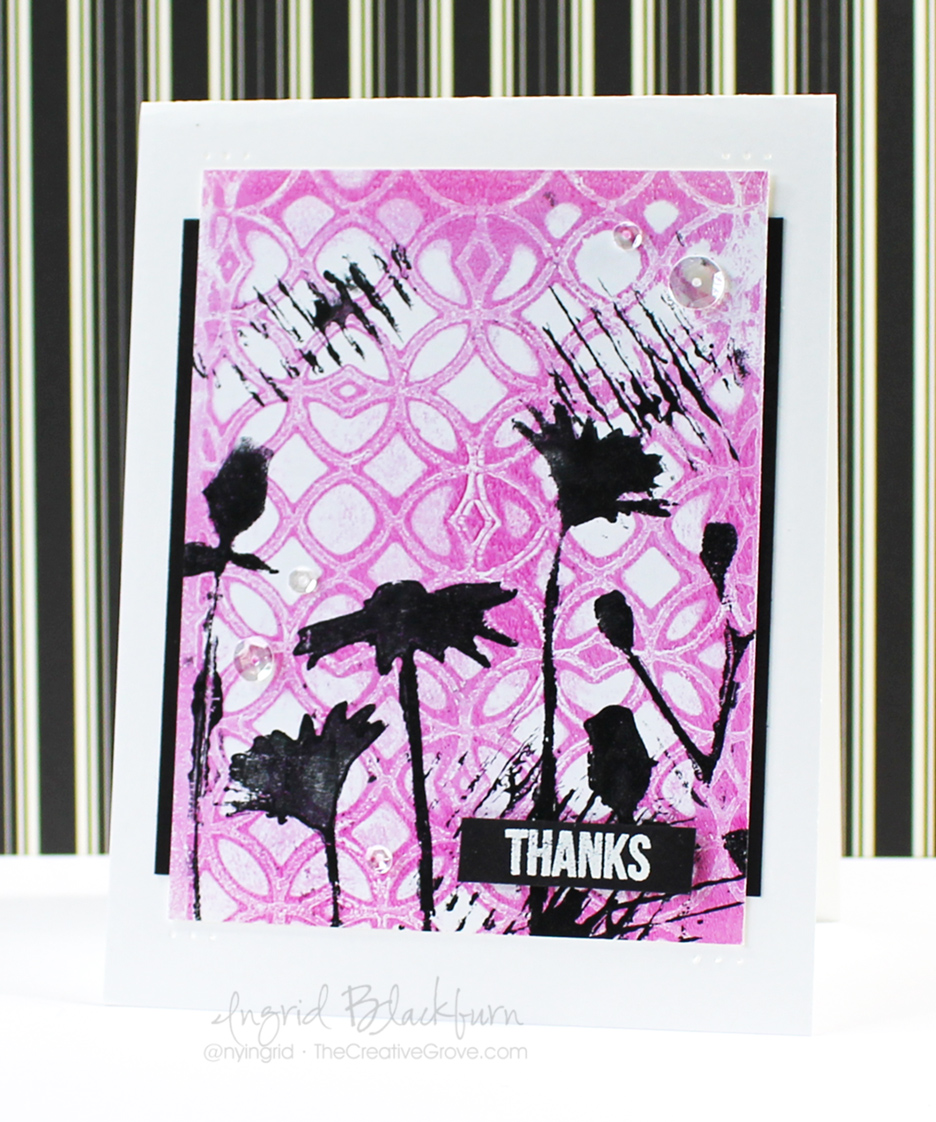
CAS Monoprint Card #2 – White

  • Stamp Thanks from Mini Thanks (Create a Smile) onto a scrap piece of black card stock with Versamark (Tsukeniko) and emboss in White. Trim it down as in the photo leaving more space to the right and left and just a hair top and bottom.
  • Adhere print to black card stock, making sure it’s centered and the black comes out left/right.
  • Adhere to white card base.
  • Add greeting, popping it up with fun foam.
  • Add five sparkling clear sequins.
  • Paper Pierce three holes top and bottom as in the photo.

Dimensions:

  • White card base – 4 1/4 x 5 1/2″ Folded
  • Monoprint – 3 1/2 x 4 1/2″
  • Black Matte – 3 5/8 x 4″

In the video at the end, I go over my rules for design and clean and simple cards. It’s the last 2 1/2 minutes.

Creative Cards - The Creative Grove

That’s it! What do you think? Don’t let mixed media scare you. It’s just combining different mediums on a project. This project used Acrylic Paint, Stencils, textured surfaces, stamping and heat embossing. We added a little sequins for bling and you’re all set – easy peasy!

Now it’s your turn to get those fingers a little inky. The challenge is coming to an end today, but there will be a new one on the 1st. There’s still time to get one last project in though!I’m also going to play along in some never ending challenges as well…I love all the companies products I used today, and can’t say enough about them. I purchased them all on my own….they are products that I use over and over again.

Playing along with – Stamplorations Anything Goes Challenge for my Bloom Silhouette Stencil, April’s Project Share over at Create a Smile , and Happy Little Stampers Stencil Monoprint challenge – how perfect is that!

Stamplorations and Artplorations Happy Little Stampers CAS Challenge

Leave me a comment and let me know what you think! Have you tried a little Mixed Media before? I’d love to know!

Till next time –

Signature

[optin_box style=”12″ alignment=”center” email_field=”email” email_default=”Enter your email address” email_order=”2″ integration_type=”aweber” double_optin=”Y” list=”3846012″ name_field=”name” name_default=”Enter your first name” name_order=”1″ name_required=”Y” opm_packages=””][optin_box_field name=”headline”]Learn more with our exclusive FREE video series:[/optin_box_field][optin_box_field name=”paragraph”]PHA+UGx1cyB5b3XigJlsbCBiZSBhZGRlZCB0byBteSBGUkVFIENyZWF0aXZlIFRpcHMgRS1sZXR0ZXIgd2hlcmUgSSBzaGFyZSBleGNsdXNpdmUgcHJvamVjdHMsIHZpZGVvcyAmYW1wOyB0aGUgMTIgRGF5cyBvZiBDaHJpc3RtYXMgUHJvamVjdCBTZXJpZXM8L3A+Cg==[/optin_box_field][optin_box_field name=”privacy”][/optin_box_field][optin_box_field name=”top_color”]undefined[/optin_box_field][optin_box_button type=”0″ button_below=”Y”]Get Instant Access![/optin_box_button] [/optin_box]

Mixing it all up…SOA Style

So, you’ve probably seen the five projects I posted in the last two days, right? All clean and simple, great, fun projects. Now I’m going to mix and shake it all up! I’m going to take the dies from yesterday’s feature – Enchanted Garden and several of the same greetings you saw from All about You on Day One…and we’re going to create some Mixed Media fun today!

Now mixed media may or may not be your thing, but read along with me. My good friend Kylie asked me to be on a mixed media team a few months ago. I’ll be honest – I was scared to death. BUT, not one to be afraid to try something new…I found myself saying yes…feel familiar? Do you also have a problem saying no…lol?!! Well let me tell you – it was the single best decision I’ve made, as it opened an entire new art form to me and allowed me to put my creative juices to work. Many more than I even realized I had.

You may think you’re not an artist – but I have the same doubts and questions about myself that you do – trust me! So when I decided to make a few mixed media projects for the Stamp of Approval collection, I thought…okay – I’ll stretch myself. The point I’m working toward is that you can take any kind of image or die and turn it into any kind of art form you want. Just let the creativity flow. With that in mind…here’s what I have for you today:

Mixed Media SOA – Day Three

Project One – Enchanted Monoprint

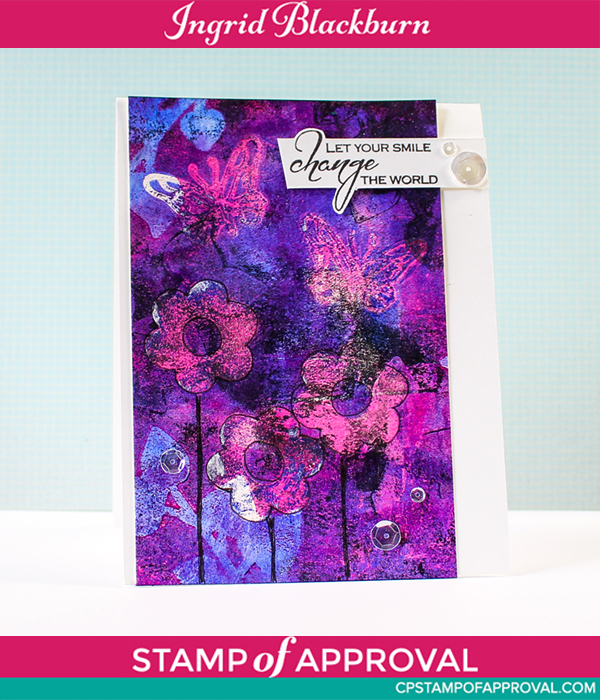
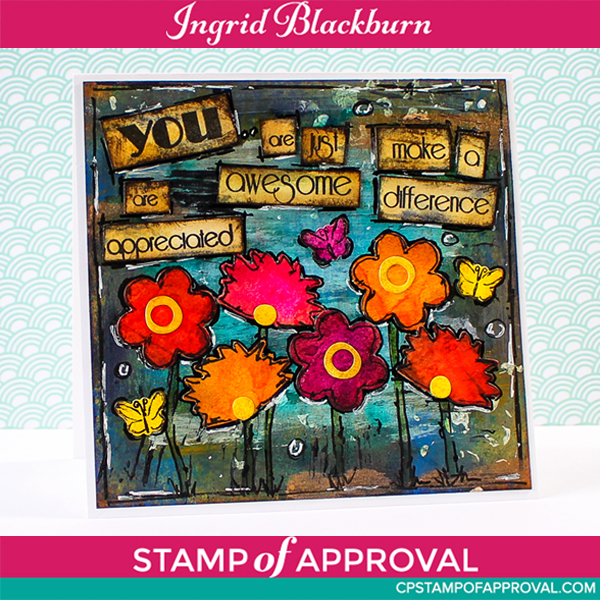
I’m not ashamed to admit that I’m addicted to monoprinting – a print that can only be made once. I started off by brayering my Gelli Arts plate with some various colors of Acrylic paint, laid down some paper die cut images from the Enchanted Garden collection and the Enchanted Butterfly and then went to work pulling layers of prints and ghost prints. I then layered some of the heart vine die cuts from the same collection with a little Cobalt acrylic paint mixed in with a little Paynes Grey. the end result was just stunning. I trimmed it down and added one of the awesome saying fromt he Beautiful World stamp set, a few sequins and there you have it!

This was a quick little project that is just so cool to look at. I love how the paint colors when layered took on some very cool tones. Now wait till you see the next one!

Gelli Plate Monoprint

Project Two – Mixed Media Garden

I’ve been playing around with simple mixed media techniques, just building my base of knowledge until I let loose on this project. I was finally ready to dive right in. This card measures 5 3/4 x 5 1/2″ tall, and the photo doesn’t do it justice. To give you an idea of what the layers looked like leading into the final piece, I put a six step shot below.

SOA Mixed Media Garden

I started with several distress layers – inks and stains, followed by some acrylic paints in the corners, applied with a fan brush. Once I had the layers looking like I wanted, I began to layer some textures on using things we all have hanging around – bubble wrap, the inside of a starbucks cup holder, some drywall mesh. Okay – not everyone has that last one, but my dad’s garage has a treasure box of cool textured items I use in mixed media…lol. I added each with more acrylic paint and distress inks.

Before moving on to the dies, I added a little white gesso randomly in the middle to give me a light source in the distance. Then you’ll want to go to work on some deeply layered wrinkle free distress pieces in the most vibrant colors you have. Die cut them out using the Enchanted Garden Dies and grunge them up with some Tea Dye and Ground Espresso inks.

Add them along with the greetings from All About You, add a little doodling around the edges with a pigment liner and white gel pen and you’re all done! Okay, that made it sound like it takes just a few minutes. Not quite, but it was a relaxing time and this is a special project that anyone would just love.

SOA Mixed Media Garden Six

So what did you think? Do you see projects like these when you see the stamps sets I’m talking about? Now go look at your stash, what can YOU use for cool projects?!!

You’ve heard me talk about Stamp of Approval for the past few days…if you aren’t sure what it is, be sure to check this page out – Click Here to find out More.

When you decide to get the Stamp of Approval Beautiful World collection – April 20th is coming up quickly, you’ll also get a PDF with more projects than you can imagine. Included…are full written tutorials on both of these projects, my first five and the rest from the next two days! 🙂

Stamp of Approval Beautiful World

So be sure you’re on the wait list for Stamp of Approval – that’s the only way to get the link first before the public. It sells out quick! To see what all the products look like, visit Catherine’s Blog and check out her videos. And don’t forget to keep checking the other great designers blogs too. Here are some quick links for you:

And just in case you missed them – there are the first five projects from the first two feature days – just click which day you want to see.

Day One                        Day Two

See you tomorrow with more!

Signature

[optin_box style=”12″ alignment=”center” email_field=”email” email_default=”Enter your email address” email_order=”2″ integration_type=”aweber” double_optin=”Y” list=”3846012″ name_field=”name” name_default=”Enter your first name” name_order=”1″ name_required=”Y” opm_packages=””][optin_box_field name=”headline”]Learn more with our exclusive FREE video series:[/optin_box_field][optin_box_field name=”paragraph”]PHA+UGx1cyB5b3XigJlsbCBiZSBhZGRlZCB0byBteTxzdHJvbmc+IEZSRUU8L3N0cm9uZz4gQ3JlYXRpdmUgVGlwcyBFLWxldHRlci4gRnJvbSB0aW1lIHRvIHRpbWUgeW914oCZbGwgZ2V0IGV4Y2x1c2l2ZSBwcm9qZWN0cywgdmlkZW9zICZhbXA7IHRoZSAxMiBEYXlzIG9mIENocmlzdG1hcyBzZXJpZXMuPC9wPgo=[/optin_box_field][optin_box_field name=”privacy”][/optin_box_field][optin_box_field name=”top_color”]undefined[/optin_box_field][optin_box_button type=”0″ button_below=”Y”]Get Instant Access![/optin_box_button] [/optin_box]

Mixed Media Challenge: Paint

Mixed-Media-Gelli-Plate-Monoprint-2.1016-001

We’re playing around with Paint over at Happy Little Stampers this month for the Mixed Media Challenge. I thought I would re-visit my Gelli Plate and create a cool monoprint using some Acrylic paint for you. I hope this project inspires you in some way! I’d love for you to join us, the prize is a gift certificate this month, so you have nothing to lose!

HLS Mixed Media challenge February 2016

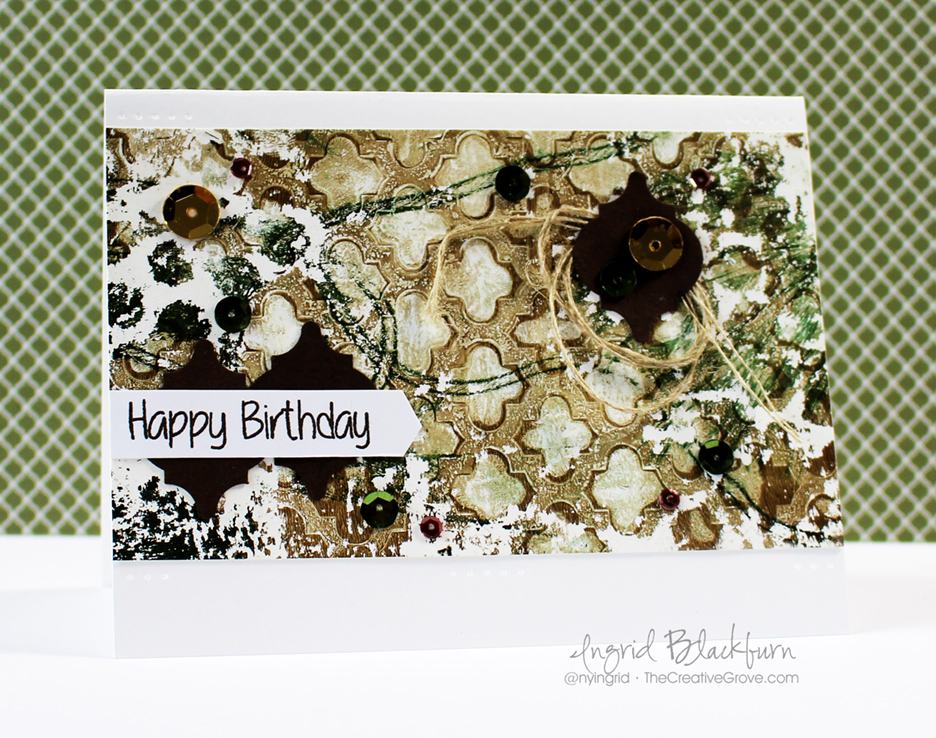
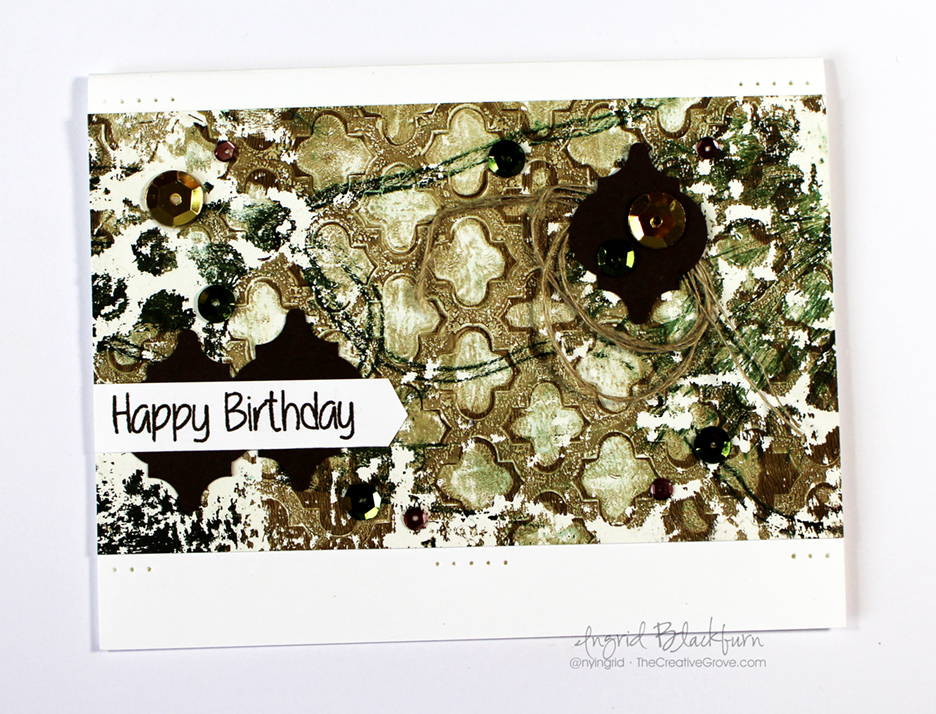
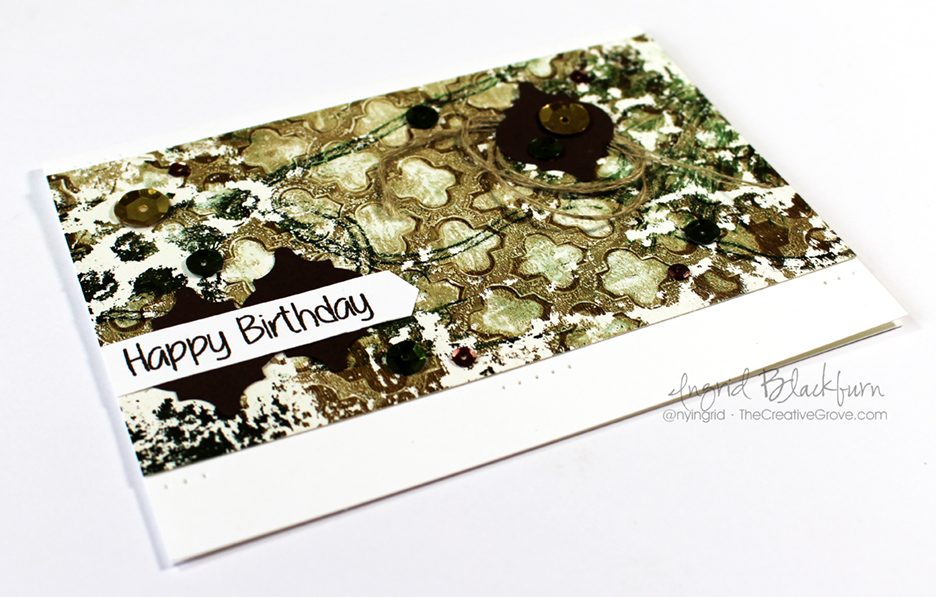
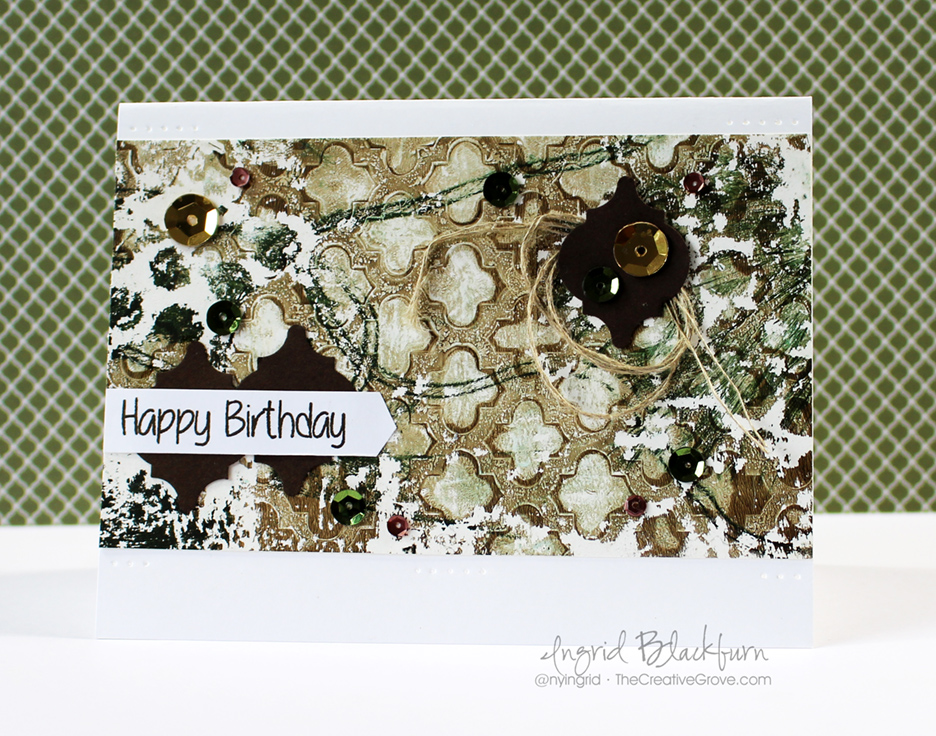
To create this fun card, I used several layers of acrylic paint, some left over Christmas tree branches, bubble wrap, a stencil and some twine. I pulled prints from each layer, and layered each one on this piece. The end result is a varied project with deep character. You’ll notice the Phthalo Green, Burnt Umber and white acrylic paint layers. I love the distressed look it took toward the end. My Umber dried a bit so I only was able to pull a partial in those spots, but that left me with some awesome character.

Mixed-Media-Gelli-Plate-Monoprint-003

To finish the card, I punched a few pieces of Espresso card stock, used a little linen thread and some sequins. I thought a simple banner with the greeting from the HLS Butterfly Birthday set would be perfect. Rather than create a traditional banner edge, I pulled my card stock through half a hexagon punch and punched the reverse for the point. I thought it went a bit better with the image from the Moroccan Simon Says Stamp stencil. The card needed something, so a little paper piercing rounded it all out.

Mixed-Media-Gelli-Plate-Monoprint-002b

I think it turned out pretty cool, I love that I can paint with several layers on a monoprint and it still is just like a piece of printed paper – that’s so cool! So how are you going to paint your creation?

Mixed-Media-Gelli-Plate-Monoprint-004

Remember, Mixed Media can be simple like this card – all you need is stamps, ink, and a way to develop texture with another element like a stencil, or paste, or paint. Quite simple!

So get those fingers inky – mine were for this one!

Signature

[optin_box style=”2″ alignment=”center” email_field=”email” email_default=”Enter your email address” email_order=”2″ integration_type=”aweber” double_optin=”Y” list=”3846012″ name_field=”name” name_default=”Enter your first name” name_order=”1″ name_required=”Y”][optin_box_field name=”headline”]Learn with our exclusive FREE video series[/optin_box_field][optin_box_field name=”paragraph”]PHA+R2V0IHRoZSBmcmVlIENyZWF0aXZlIFRpcHMgRS1sZXR0ZXIgYW5kIGxlYXJuIHdpdGggc3Vic2NyaWJlciBleGNsdXNpdmUgdmlkZW8gYW5kIHBpY3RvcmlhbCBjb250ZW50LsKgPGVtPjxzdHJvbmc+SW5jbHVkaW5nwqA8L3N0cm9uZz48L2VtPm91ciB5ZWFybHkgMTIgRGF5cyBvZiBDaHJpc3RtYXMgc2VyaWVzITwvcD4K[/optin_box_field][optin_box_field name=”privacy”][/optin_box_field][optin_box_field name=”top_color”]undefined[/optin_box_field][optin_box_button type=”0″ button_below=”Y”]Get started now![/optin_box_button] [/optin_box]


Video, 2 Tutorials, Blog Hop & Prizes

Gelli-Plate-Monoprinting-tutorials

I have all sorts of goodness for you today! Towards the bottom of this über long post, I have two – yes TWO tutorials for you – one in video form and another after.

First I wanted to tell you about an exclusive collection of stamping stuff just coming available – yup…it’s brand spankin new – not on the market yet! There’s a blog hop filled with awesome projects – great to inspire you this morning, plus at the bottom, I have a new video for you and more crafty goodness!

Normally I would be participating alongside these great card makers for a great blog hop showcasing the new Stamp of Approval collection – Young at Heart. But alas, customs has benched me. They’ve kept my supplies – secretly I think they’re having too much fun making birthday cards and have decided to keep all the fun for themselves! Not to worry, I still have all the information you need, plus I have some fun inspiration for you too!

SOA Feb 2016

Stamp of Approval (SOA) is an exclusive box of Stamps, Dies and Stencils designed by Catherine Pooler and some of your favorite stamp companies. Available quarterly, and only till they sell out – and let me be the first to tell you, it’s quick – the first SOA sold out in hours!

This year, StampNation celebrated it’s 5th Birthday, so naturally a box about birthdays makes sense – it’s called the Young at Heart Collection. I would think that birthday cards are probably the #1 card type made – so I’m sure you’ll find something in it for you. But don’t think just birthdays – after seeing the products myself in the videos, I have all sorts of ideas for non-birthday cards too! Here are some links to the three videos highlighting product from the box:

The stamps, dies and stencils designed for this collection are first only available through the SOA box. They will eventually be released by their stamp companies sometime later in 2016/2017, so this is your chance to get your hands on some great products before everyone else – I’m all about that! 🙂

Here’s how it works – you have to be on the waitlist to get the information and link about when the box goes on sale! And it goes quick. If you are a StampNation member – you’ll get the link an hour before the public on February 3rd! This box has products by CAS-ual Fridays, Sugar Pea Designs and Winnie & Walter – three of the hottest stamp companies out there today!!

And to give you some incredible inspiration, hop along with this talented blog hop. Be sure to leave a comment on everyone’s blog – Catherine is giving away two boxes!! And not to worry, if you purchase one and end up a winner – you’ll be reimbursed. The boxes are stuffed with over $100 worth of brand new product…that’s a pretty awesome prize!!!

Neutral Tone Stenciling Video Tutorial

So, are you on creative inspiration overload yet? I hope not, because I have some crafty goodness to share with you too! The other day I released a new video on my YouTube channel. It’s a great birthday card that is quick, easy and has some great neutral tones in it – perfect for a masculine card. Here it is:

Watch video on YouTube

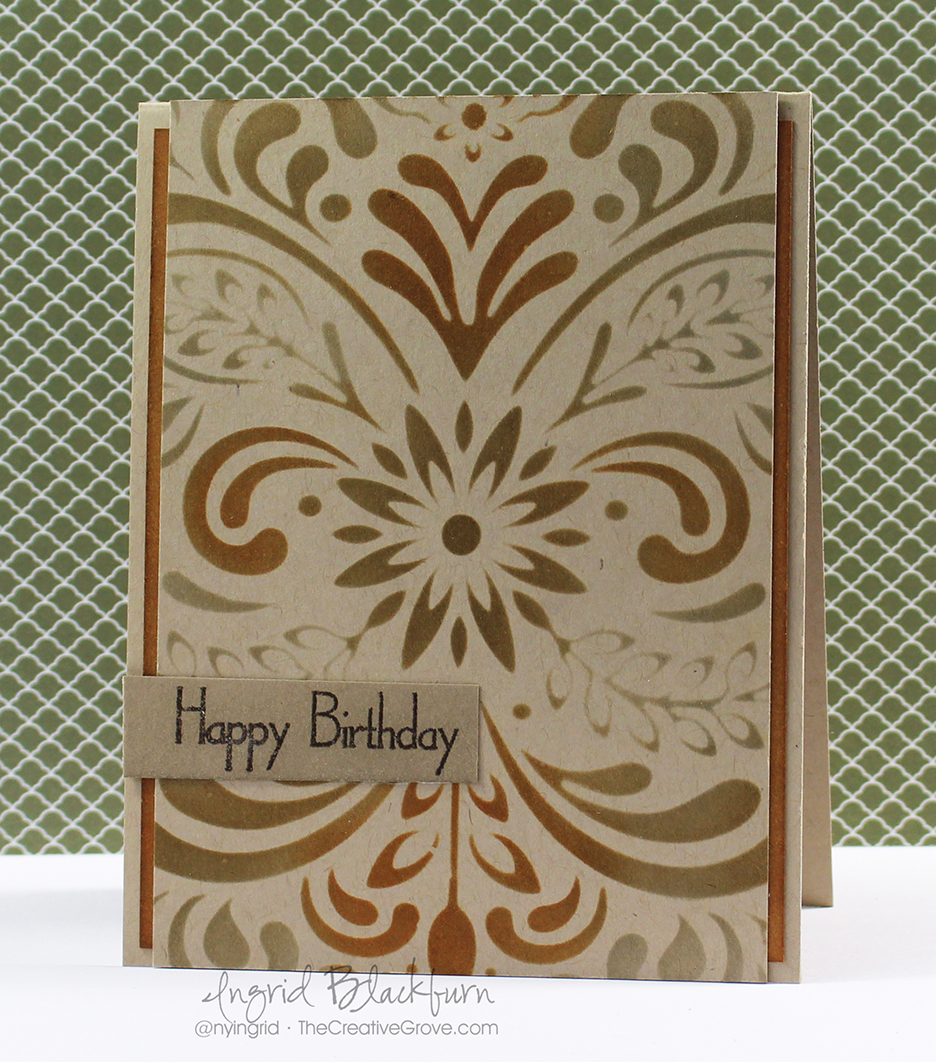
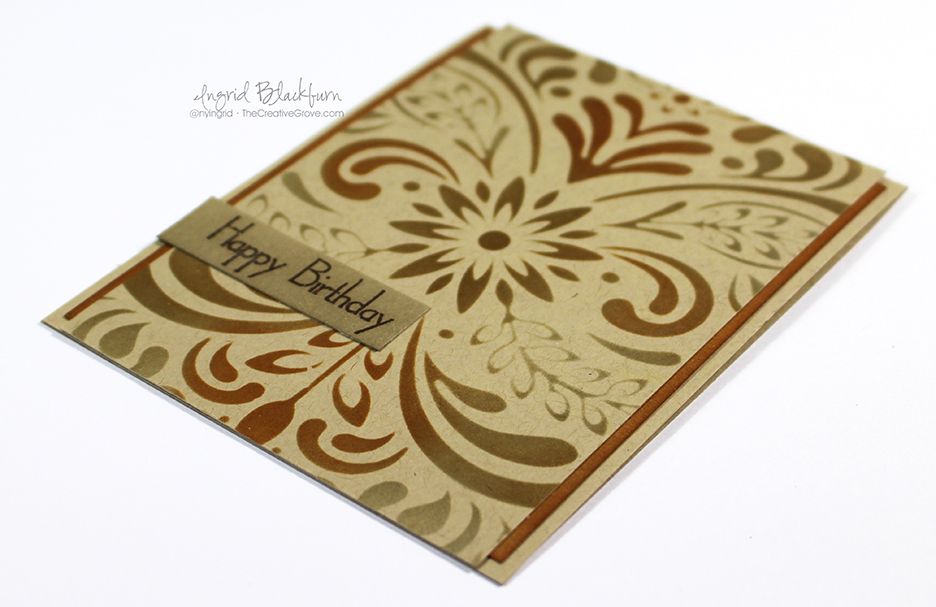
It’s a pretty straight forward card and the stencil really is the star here.

Masculine Birthday Stencil 004

Don’t you just love that stencil from Hero Arts! I love all the neutral tones. It’s simple, and kind of reminds me of New Mexico/Arizona a bit. What do you think?

Masculine Birthday Stencil 002


I’ve been playing around with stencils for the past month on overdrive. Mostly because I’ve been creating content for the Stencil Class over at StampNation that’s been going on for the past 2 1/2 weeks!

CSM 14

You may remember my Gelli Plate creation from last month, well, I filmed a video for the stencil class at SN and put up many more samples.

Gelli Plate Monoprinting in Layers Tutorial

Here’s a new one for you though. I have been having SO much fun with my Gelli Plate – it’s an amazing tool that really allows my inner artist to break out. Do you have one, or are you thinking about getting one? Let me know in the comments below!

Gelli-Plate-Monoprinting-1-001

Working with a gelli arts printing plate has been truly an eye opening experience. While I won’t say I’m and expert, I have learned a ton along the way! For instance, paper and paint do matter. You want a paint that will give you time to work, acrylics dry so quickly, the longer your paint remains open, the more flexibility you have. And when you’re new to something like this – that’s key. That doesn’t mean you can’t use your cheap acrylics, just work quickly!

Gelli-Plate-Monoprinting-1-002

  • For this project, I started by layering on some Phthalo Blue. I cleared my brayer of any paint and promptly brayered some back off. leaving only some around the edge and a little in the center.
  • The key to creating a monoprint in layers on your Gelli Plate, is to allow the layers to dry inbetween.
  • Next you’ll want to add another color – I chose Cobalt Blue. Repeat the process pulling up a lot of the blue.
  • Add your stencil – I added the Tula stencil by Memory Box. Pull a positive print to use on another project. That leaves a lot open space.
  • Finally, add your lightest color – I chose Ochre for a contrast.
  • I pulled the entire print up at this point. The Ochre allowed the dried layers enough moisture to pull the print up in it’s entirety. If your paint isn’t open enough, this can be a frustrating process and you won’t pull up all your colors. Sometimes that can look cool, other times it can just be frustrating. You’ll find that sweet spot for yourself.

Gelli-Plate-Monoprinting-1-003

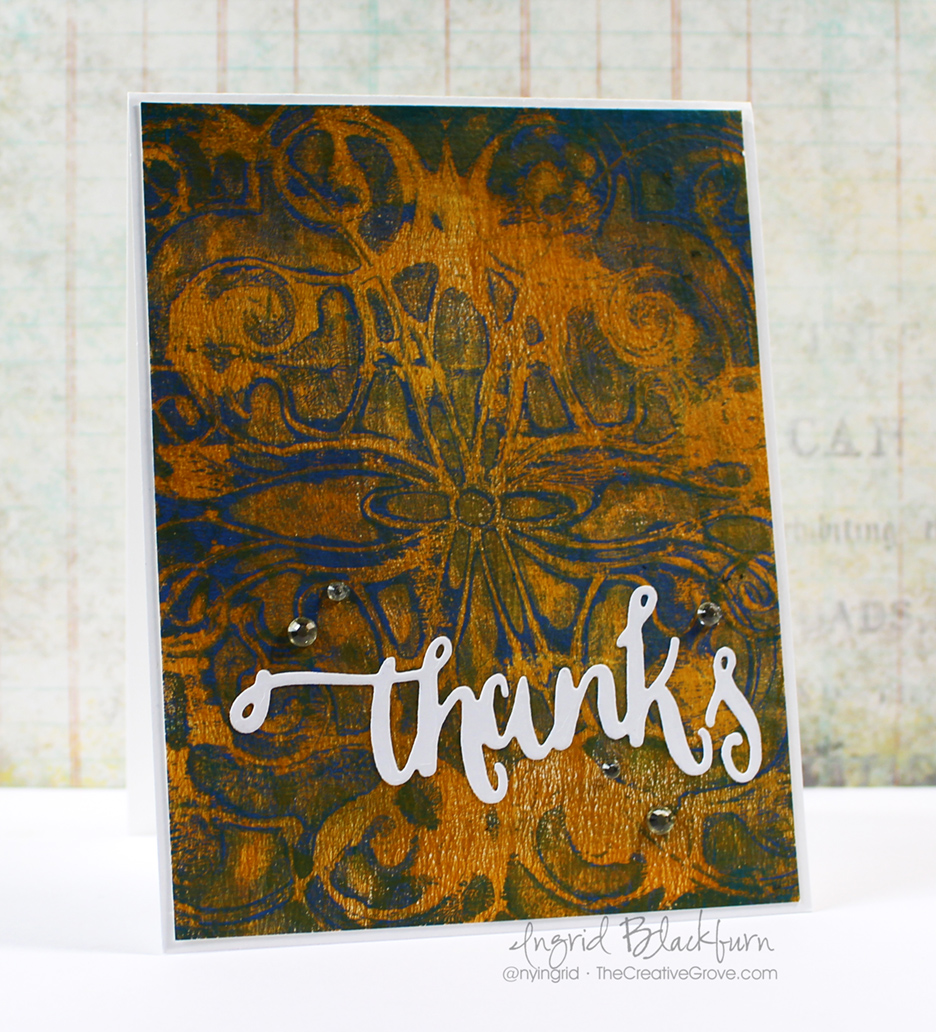
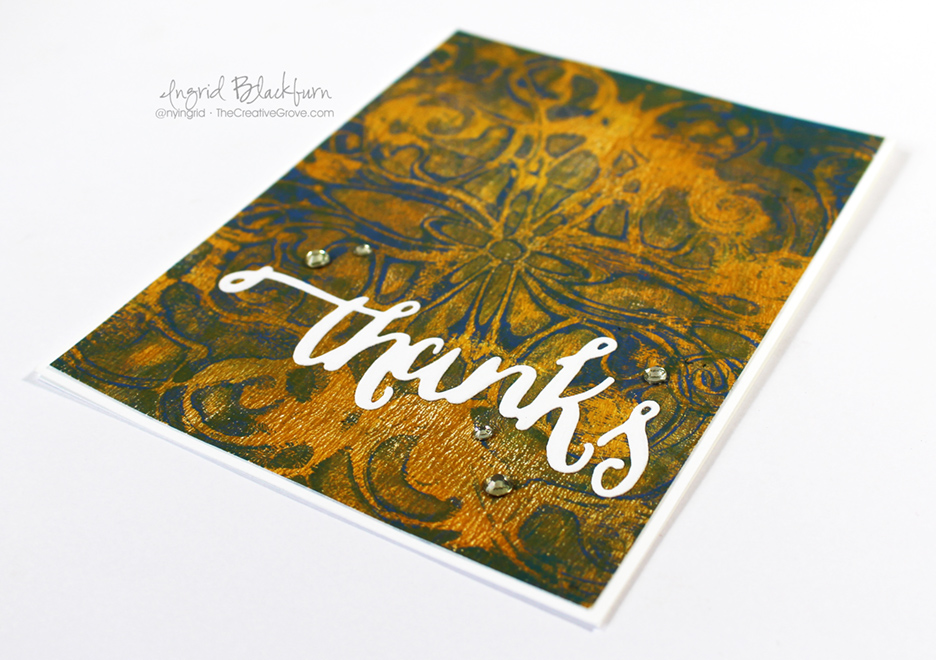
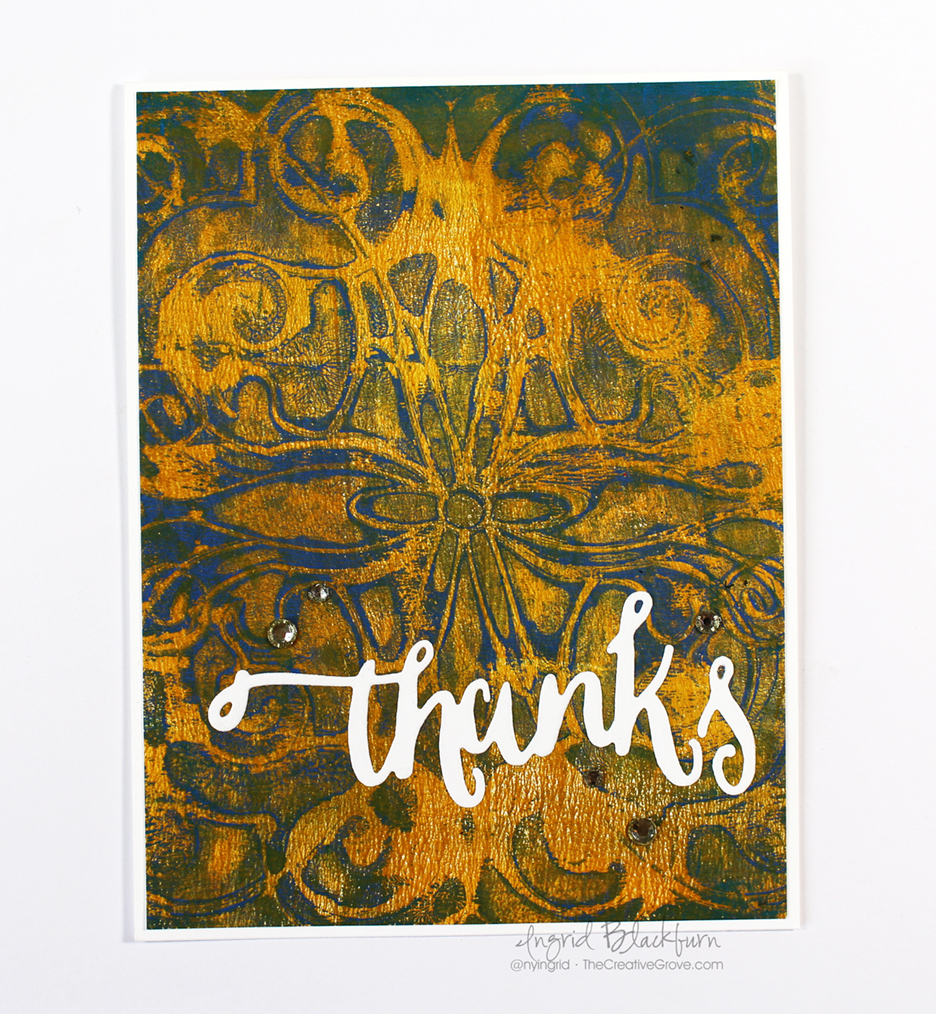
The interesting thing with this print is that in some spots the blue and yellow blended to form a slight green – that only gives this a more worn and aged look. The background naturally is the star, so keep the rest of the card simple. I added the Handlettered Thanks die by WPlus9 and a few Rhinestones.

Thanks for stopping by today. I hope you enjoyed these couple of projects – can you tell I have stenciling on the brain? Be sure to check out the new SOA box, or hop on over the StampNation and check it out along with the free stenciling class. I have a few videos in lessons #5 & #14.

See you next time, till then, keep those fingers inky!

Signature

[optin_box style=”2″ alignment=”center” email_field=”email” email_default=”Enter your email address” email_order=”2″ integration_type=”aweber” double_optin=”Y” list=”3846012″ name_field=”name” name_default=”Enter your first name” name_order=”1″ name_required=”Y”][optin_box_field name=”headline”]Learn with our exclusive FREE video series[/optin_box_field][optin_box_field name=”paragraph”]PHA+R2V0IHRoZSBmcmVlIENyZWF0aXZlIFRpcHMgRS1sZXR0ZXIgYW5kIGxlYXJuIHdpdGggc3Vic2NyaWJlciBleGNsdXNpdmUgdmlkZW8gYW5kIHBpY3RvcmlhbCBjb250ZW50LsKgPGVtPjxzdHJvbmc+SW5jbHVkaW5nwqA8L3N0cm9uZz48L2VtPm91ciB5ZWFybHkgMTIgRGF5cyBvZiBDaHJpc3RtYXMgc2VyaWVzITwvcD4K[/optin_box_field][optin_box_field name=”privacy”][/optin_box_field][optin_box_field name=”top_color”]undefined[/optin_box_field][optin_box_button type=”0″ button_below=”Y”]Send me exclusive tips now![/optin_box_button] [/optin_box]