Back home and a Mojo Monday card for you!

Christmas Messages 002 Main R 2

Welcome home – Oh, that’s me!  In case you’ve been wondering where I’ve been, I’ve spent the last 2 weeks on the road in New York.  We had a fun family wedding, spent quality time with several members of our family in upstate and Western NY, and even had fun in New Jersey too!  Of course, Michael and I had fun driving up and down the eastern coast!  No, seriously, Michael and I love getting on the road together.  We leave late at night and drive all through the night.  We can usually make it to NY in 17 hours, though we took a leisure trip this time.  We’re rather good in the car and love playing games, chatting and just seeing where the road takes us.  We love to hit Farm Stands, go to new places and visit friends or memorable places along the way if we have the time.  Thankfully both our businesses are mostly virtual and we have the freedom to do this – especially since we added 4 extra days while on the road!

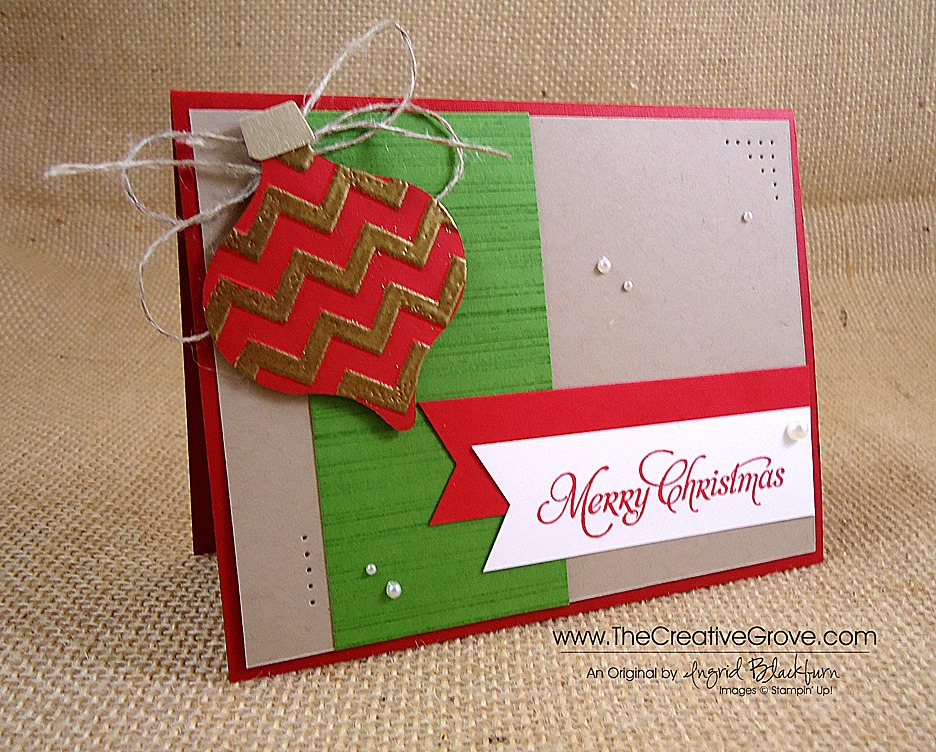
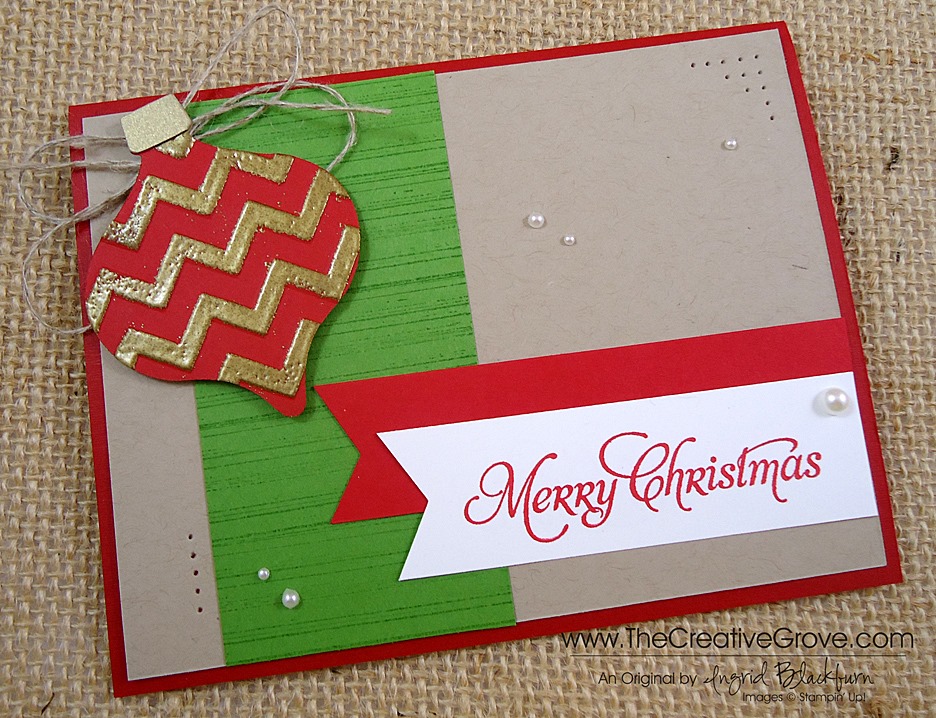
After seeing the beginning of the color change all through the northeast, I thought I’d give you a fall-ish card for my Mojo Monday Challenge card today.  I actually made a killer Christmas version that looks nothing like this one, but thought I’d save it for one of my 12 weeks of Christmas cards instead – so if you’re on the Creative Tips list – you’ll see that this week – it’s so cool, that I think I’m going to use it as one of my own Christmas cards this year!  If you’d like to get my 12 weeks of Christmas projects free and more click here to subscribe today.  So far you’ve only missed one week!

Supplies –

  • Stamps – Christmas Wishes, Gorgeous Grunge
  • Ink – Chocolate Chip, Crumb Cake
  • Paper – Chocolate Chip, Tangerine Tango, Sweater Weather Designer Series Paper, Very Vanilla
  • Tools – Circle Collection Framelits, 1 1/4” Square Punch, Bone Folder
  • Finishing Touches – Chocolate Chip Grosgrain Ribbon (retired), Stamping Dimensionals

    Shop 24/7 in the Creative Store – Click Here!Christmas Messages 002 Main L

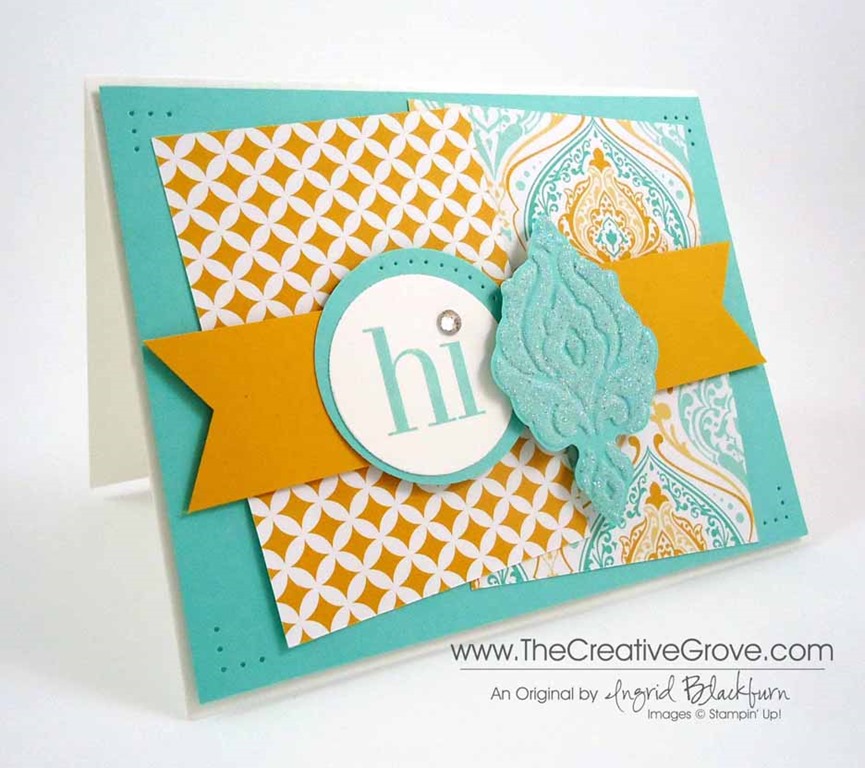
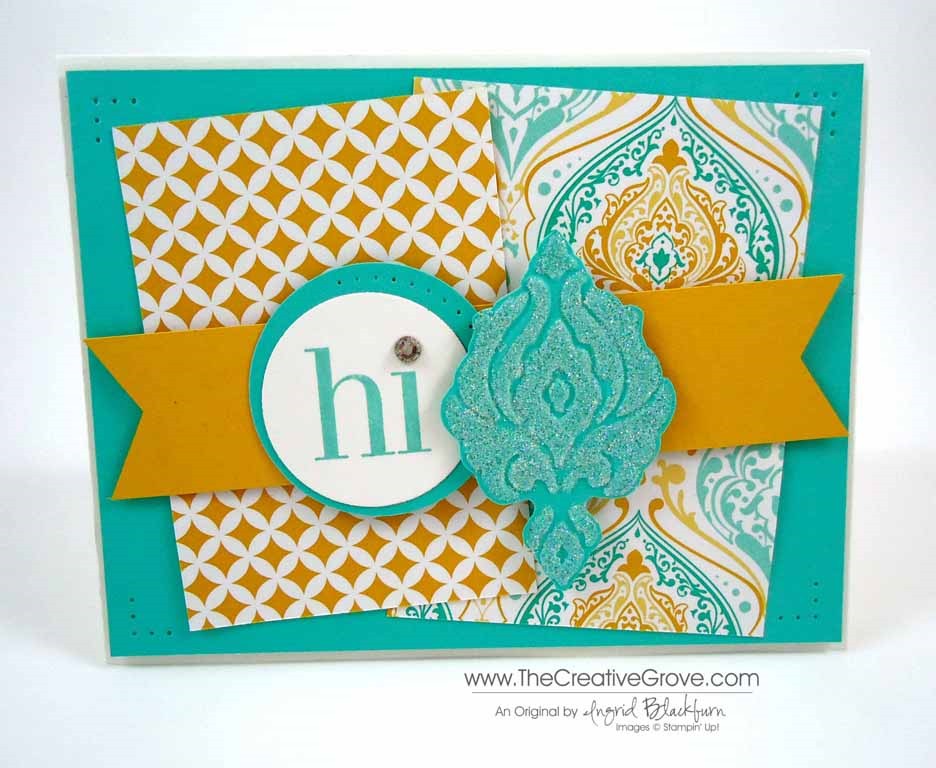
    Here is the Mojo Monday sketch and my fall version.  Enjoy the tips below!

Mojo314SketchChristmas Messages 002 Front

Creative Tips –

  • I wanted to use this great plaid from the Sweater Weather Designer Series Paper Collection, so the rest of the card kind of fell into place.
  • If you want to add a little something to brighten the card up – try the Gorgeous Grunge stamp set as I did here.  The lines (my all time favorite stamp) are stamped in Tangerine Tango and the splats are stamped in Crumb Cake stamped off to make it more of the background.Christmas Messages 002 Side
  • The greeting is from a Christmas set, but honestly – it works for Thanksgiving too!  Gotta love versatility, right?
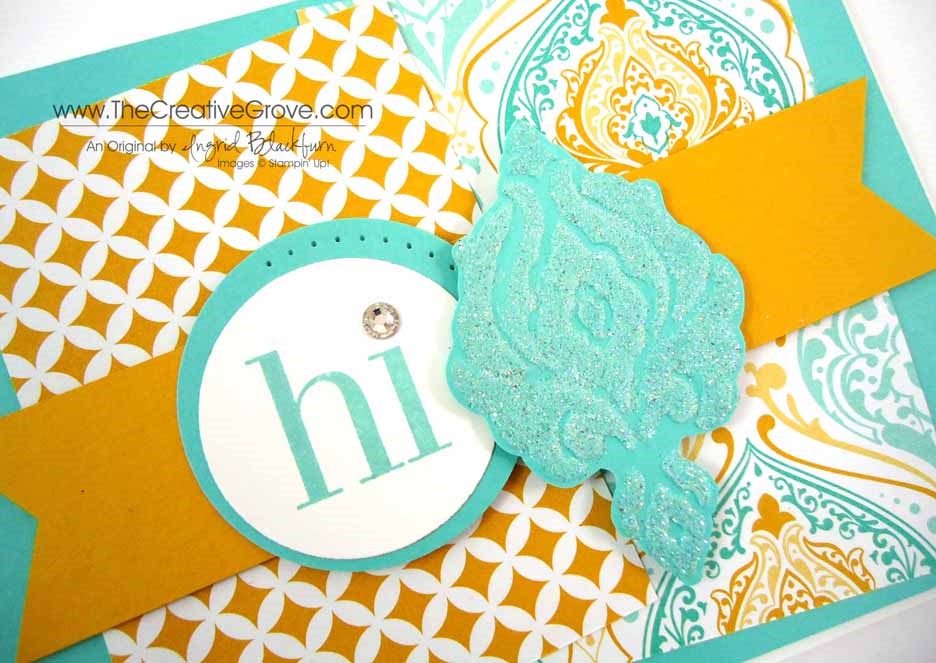
  • I wanted a larger ribbon for the knot, so I broke out a retired spool – I miss this collection, try anything you have!
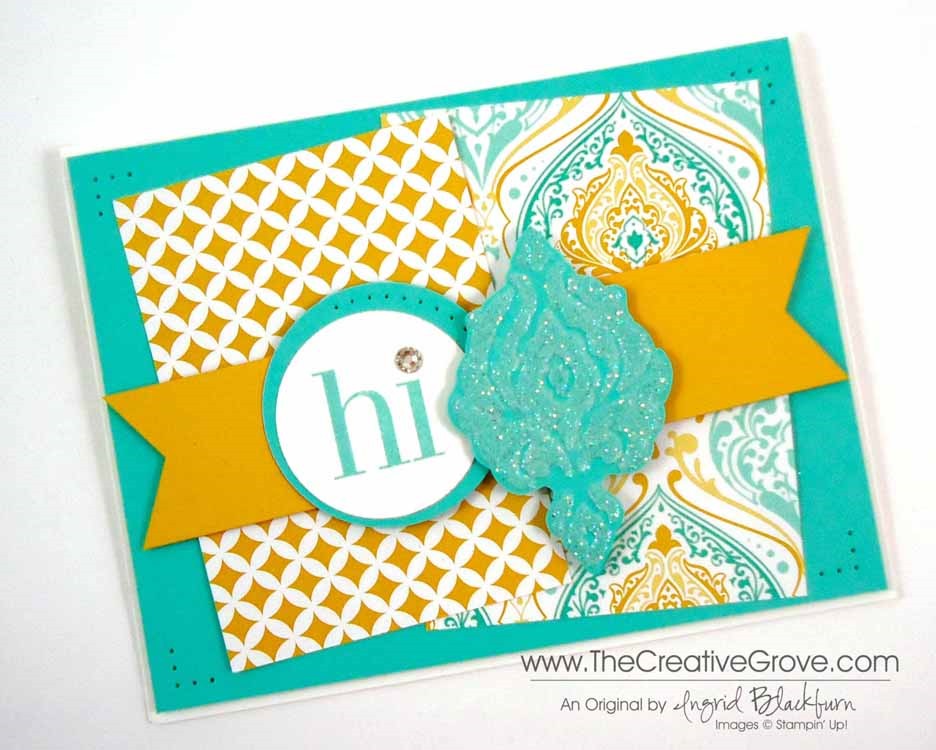
  • To make the Banner Flag, you will want to use a square punch or some paper snips.  To get the end to curl up a bit, lightly curl your DSP upward using your bone folder.  The trick is not to over-work it.  View my video on how to make banner flagsChristmas Messages 002 Height
  • To add a little interest, try popping up the card front and greeting with Stamping Dimensionals.


        I hope you all enjoyed this fun project!

    Signature Snowflake 001Christmas Messages 002 Angle

    Shop 24/7 in the Creative Store – Click Here!

    Gorgeous GrungeChristmas MessagesSweater Weather Designer Series Paper

    Stampin’ Up! Gently Falling

    Gently Falling 003 001

    I hope you had a fabulous weekend  – are ready to get to a great Mojo start!  Today, we have another go to sketch for your arsenal.  This sketch will give you a great card every time.  It’s quick and easy to put together – all the things I love!  I looked at about 20 stamp sets this morning, and remembered the Sweater Weather Designer Series Paper and thought…can I really give them another card with Gently Falling?  But I knew you’d love it in the end, so here it is!

    Mojo311SketchGently Falling 003 003

    Creative Tips –

    • I think you will notice that this will work with just about any stamp set, but the plaids in this pack of paper scream fall.
    • You will only want to use the filler images if you are using them as a background as here.  The point was to allow the greeting to pop – that’s why it’s embossed in Early Espresso.Gently Falling 003 009
    • To add a little umph to the card (is that a word?), a little paper piercing goes a long way on the Tangerine Tango circle.
    • All the matting and stabilizing part of the card is in Chocolate Chip, so the accent with the Scallop Trim Border Punch is in the same.  Gently Falling 003 006
    • Rather than use some Chocolate Chip Ribbon, I wanted the stamping to really shine, so I enlarged that portion (4” x 2”), popped it up on Stamping Dimensionals, and just added a card stock strip in place of a bow or knot.
    • To give the card a little finishing touch, some Pearl Basic Jewels were added. Gently Falling 003 002

    It’s a classic, Julee Tilman did it again.  I love this sketch.  So, now it’s your turn – what are you going to make?

    Are you one of my VIP’s?

    If you love this card and creative tips, then be sure to sign up for my Creative Tips list!  You’ll get VIP project videos and projects, special list only sales and discounts, and stay on top of all the cool and great things not only available at Stampin’ Up!, but also here at The Creative Grove. Be in the know, first on the list!  I don’t like excess email or stuff I don’t want, so know that your email address is something sacred to me.  I would never abuse that trust!  Click here if You love creative tips and want to be one of my VIP’s! Smile

    Signature Snowflake 001

    To order 24/7 – Click Here!

    Gently Falling 003 005

    Stamp Sets – Gently Falling, Seasonal Sayings Ink – Crushed Curry, Wild Wasabi, Early Espresso, Tangerine Tango Paper – Whisper White, Early Espresso, Tangerine Tango, Sweater Weather Designer Series Paper (132184) Tools – Scallop Trim Border Punch, 1 3/4” Circle Punch, Early Espresso Embossing Powder, Paper Piercing Tool, Stampin’ Pierce Mat, Essentials Paper Piercing Pack Finishing Touch – Stamping Dimensionals, Pearl Basic Jewels

    Seasonal Sayings 128009LGently Falling

    Sweater Weather Designer Series Paper

    Mojo Monday Gently Falling Thanks

    Gently Falling 001 004

    Do you ever just need a go to sketch?  Well this week’s Mojo Monday sketch is perfect for you then!  It’s simple, straightforward and would look awesome with Designer Series Paper or just card stock.  You really can’t go wrong. 

    Try out some bright color combinations, play with your favorite stamp sets, or just make it all one color.  Either way, you’ll have a striking card that you and the recipient will love.  Here’s the sketch and my interpretation:

                            Gently Falling 001 006Mojo310Sketch

    Creative Tips –

    • If you decide to focus on the Gently Falling stamp set like I did, you may want to keep your color palate in the season.  This is great for men or women, which is great – don’t you just love versatile cards?
    • To give the real sense of fall, rock and roll the filler image of this two step stamp set.  That way you can get that change of color look you’re striving for.  Here you see Crushed Curry, Gumball Green and Cherry Cobbler with Early Espresso as the lined image.Gently Falling 001 010
    • Follow that up with a fun embossing folder and your big shot for the background – here you see Woodgrain.  Why not – it’s a tree!
    • The Pearl Basic Jewels complete the card with the perfect finishing touch to highlight the banner.
    • Rather than keep it to Thanksgiving, you can choose any sentiment you’d like!  Here you see the Thank You from Lots of Thanks. Gently Falling 001 008
    • Tip – to make quick and simple banner flags, use punches – like the Hexagon Punch or Square Punches.  To see a quick video on how to do this, click here.
    • The card front is popped up on Stamping Dimensionals to compliment the banner and leaf popped up as well.Gently Falling 001 009
    • To extend the matte and give it a little somethin’ somethin’, add some paper piercing!  You can quickly take a project from cute, to wow by just adding some piercing.  And you’ve heard me say it before – it’s the most inexpensive way to embellish a card.  All you need is a one time purchase – Stampin’ Pierce Mat, Paper Piercing Tool, and templates like the Essentials Paper-Piercing Pack.Gently Falling 001 005

    Are you one of my VIP’s?

    If you love this card and creative tips, then be sure to sign up for my Creative Tips list!  You’ll get VIP project videos and projects, special list only sales and discounts, and stay on top of all the cool and great things not only available at Stampin’ Up!, but also here at The Creative Grove. Be in the know, first on the list!  I don’t like excess email or stuff I don’t want, so know that your email address is something sacred to me.  I would never abuse that trust!  Click here if You love creative tips and want to be one of my VIP’s!   Smile

      Signature Snowflake 001

    To Shop 24/7 in the Creative Store – Click here!

      Gently Falling 001 007

    Beautifully Baroque Eastern Elegance

    Don’t you just love light and fun designs?  Cool colors prevail in today’s Mojo Monday sketch; which is a simple go to sketch that you will definitely want to try.  You can see the Eastern Elegance paper plays well with the Beautifully Baroque Embossing Folder.  Here’s the sketch and my interpretation.  Don’t forget about my special that’s running till Wednesday!  It’s at the end. Smile

            Mojo309Sketch

    Personal Note – I’m in the process of moving.  Yup, today I’m actually packing up the Stampin’ Studio – and that’s quite a task!  So over the next few weeks, you’ll see a few current and some fun projects from the past.  Don’t worry – I’m finding projects that I just loved – but never blogged…so I hope that’s exciting for you too!  And the only good thing about moving – purging!  So thanks for stopping by!

    Creative Tips –

    • You will want to choose two complimentary but completely different pieces of Designer Paper if you go that route.  This way they won’t compete with each other. 
    • For the designs you see in this project – it was necessary to flip the larger rectangle with the smaller one due to the patterns.  It worked better this way.
    • If you don’t like the size of your matte with your circles – try off-setting them like shown here.  Add some piercing to really accentuate it.
    • To help make the baroque medallion stand out, emboss it with the Beautifully Baroque Textured Embossing Folder, then add Dazzling Diamonds glitter to 2-way glue on the raised image portions.
    • Pop the medallion up further than the banner to really give it a little depth.
    • The card front, banner and medallion are all popped up on Stamping Dimensionals.

    The Creative Grove Envelope Special

    Everyone who orders and Envelope Punch Board (133774) using this hostess code – VWCWVJ34 through me by Wednesday September 4th will get a special packet of 20 sheets of – 6”x6” Designer Series Paper (that’s a value of $5.50!) mailed to them to use for liners or even your own 3” x 4” card sized envelopes!!  And don’t forget about The Creative Grove Rewards Program for free stamps too!

    Signature Snowflake 001

    To Shop 24/7 in the Creative Store – Click here!

    Stamp Sets – Regarding Dahlias (130327c, 130324w) Ink – Coastal Cabana Paper – Whisper White, Eastern Elegance Designer Series Paper, Crushed Curry, Coastal Cabana  Cool Tools – Beautifully Baroque TIEF, Circles Collection Framelits, Two Way Glue, Dazzling Diamonds, Hexagon Punch, 1 3/4” Circle Punch, Paper Piercing Tool, Essentials Mat Pack, Stampin’ Pierce Mat Finishing Touch – Rhinestone Basic Jewels, Stamping Dimensionals

    Mojo World Map Thank You

    Zoo Review 002 Main R

    Happy Monday!  Today I am taking you to Africa for our Mojo Monday challenge via the new World Map Stamp and Zoo Review Stamp Set.  The World Map background stamp was at the top of my list when the new catalog came out and its release was delayed until just recently – it’s another must have! 

    I struggled for about a minute this morning and then I saw the Zoo Review set and it all fell into place.  All my Brayer 102 students will be thrilled as this set is one of the ones we use in that class.  And this card was so simple to put together.  I really like the masculine feel of it, I hope you do to.  Here is what the Mojo Sketch looked like:

           Mojo304Sketch Zoo Review 002 Main Front

    Creative Tips –

    • I wanted an easy feel to this card and for the lion to be the stand out.
    • I used the #6 and #7 Circle Framelits for the circle part.  I didn’t want a 1/4” matte, so I took the #6 and used my xacto knife to cut around the outer edge.  It gave me a 1/8” border which is what I was looking for.  The #7 I ran through my Big Shot.Zoo Review 002 Main CU
    • The World Map is stamped tone on tone in Pear Pizzazz.
    • Of course the color combination came straight out of the Color Coach!
    • I added one of the Antique Brads for some texture and interest along with some paper piercing in the top corners.Zoo Review 002 Main Side
    • The Lion is the stand out of the card, so I embossed him and the greeting in Early Espresso Embossing Powder.

    It’s a quick and easy card, but I love the feel.  The world map is the perfect accent and feels more like Designer Paper.  I hope you’ve enjoyed another fun Mojo Monday card!  Zoo Review 002 Main L

    Ornament Mojo

    Happy Monday to you!  This morning I decided to break out my Holiday Ornaments Framelits and More Merry Messages for the Mojo Monday Challenge.  The sketch for today is a straightforward one that got me stamping right away.  I hope you love the design!

                    More Merry Messages 001 FrontMojo303Sketch

    Creative Tips –

    • I wanted to emboss my ornament and run it through the Big Shot, so I cut the ornament shape using my framelits.  This set has a matching stamp set too – Ornament Keepsakes.  I embossed the ornament with the Chevron Embossing Folder, and lightly rubbed Versamark on the raised chevron lines to add gold embossing powder to it.  I love the end result – it really looks like an ornament!  To finish that off, I added a touch of our Brushed Gold  Card Stock for the top.More Merry Messages 001 CU
    • I wanted to add a little flair to the ornament, so I used some Linen Thread for a fun little accent behind the ornament. 
    • To add a subtle accent under the ornament, I used the Gorgeous Grunge stamp set to add some simple stripes.  More Merry Messages 001 Side
    • A Chevron Punch made perfect banner flags for the greeting and accent banner.
    • For a little finishing touch, some Pearl Basic Jewels give just a little something to the card along with a little decorative Paper Piercing in a few spots.
      More Merry Messages 001 Main L

    It’s a simple little card, but captures the spirit of the holidays.  For some quick, easy and straightforward Christmas Cards, use the Ornament Keepsakes and More Merry Messages stamp sets.  Both can be found online only and not in any catalog – so you’d easily miss them.  I’ve made several easy and great looking card with both sets.  You can’t go wrong with them!

    Learn a new technique in the Online Brayer Class

        Would you like to learn how to make Creative Scenery cards?  Have you been frustrated when trying to use your brayer?  Creative Scenery classes using a brayer have by far been my biggest hit with stampers.  Learn how to create gorgeous gradual transitions with 100+ minutes of step by step detailed video instruction teaching you how to master this technique.  The end result – You will feel like an artist.  Best of all, you will look at your stamps in a whole new way, make amazing projects and try things you never would have thought to do before.  Find out more here

        Signature Snowflake 001

    To Shop 24/7 in the Creative Store – Click here!

    Stamp Sets – More Merry Messages (126402c, 126400w), Gorgeous Grunge (130517c, 130514w) Paper – Crumb Cake, Real Red, Gumball Green  Ink –Real Red, Versamark Cool Tools – Holiday Ornaments Framelits ,  Paper Piercing Tool, Essentials Mat Pack, Stampin’ Pierce Mat , Gold Embossing Powder The Perfect Finish – Stampin’ Dimensionals, Linen Thread, Pearl Basic Jewels 

    Holiday Ornaments FramelitsUntitled-12

    Fabulous Florets Mojo

    Fabulous Florets 001 Main R

    It’s a fabulous Mojo Monday morning!  I thought I’d have some fun with the Fabulous Florets stamp set – which is a new one for me.  The flower images in this set are super easy to stamp with – and just gorgeous.  I can see that this will quickly become a favorite, especially when doing any kind of wedding ideas!

    I’ve been working hard on my online class as you know and think I almost have the membership portion worked out!  I decided to release the class and email the links until I can get the rest figured out – that way you can still have some fun learning how to brayer – so check that out at the bottom!

    Here is this weeks Mojo Monday sketch and my interpretation – pretty literal this week, and I just love this card – especially the colors.I hope you do to – let me know what you think in the comments!

                Fabulous Florets 001 FrontMojo302Sketch

    Creative Tips –

    • I did something different with my color coach today.  Usually I just thumb through it and find a main color I like.  Today, I looked only at the combinations on the back until one spoke to me.  I chose the Elegant Eggplant, Always Artichoke, Sahara Sand combo.Fabulous Florets 001 Angle
    • I played with arranging how my colors were going to be layered – I have to admit, it took me at least 5 minutes to decide!  I finally went with Always Artichoke as the card base and the then the rest fell into line.
    • I was lucky, I had the Sahara Sand card front already pierced from another project, so that was easy this morning!Fabulous Florets 001 CU
    • For a little contrast, I stamped my Elegant Eggplant in various images using all the flowers and the leaf stamp.  I stamped the bold image on Sahara Sand and cut that out to pop up as an embellishment.
    • I just wanted something simple in the foreground, so I ran my Always Artichoke though my Big Shot using the Chevron Embossing Folder.
    • For a greeting I used the new Hostess set – Banner Greetings.  Isn’t it cute?!Fabulous Florets 001 Faux Ribbon
    • I did not have any ribbon in any of these three colors – which honestly was surprising!  I must have used up all my Always Artichoke – I know I had some.  So, I made my own.  I distressed the edges of a piece of Sahara Sand and made a knot to resemble ribbon.  Here a video on how to make Faux Ribbon Fabulous Florets 001 Height
    • For some depth in my card, I popped up the Sahara Sand card base, Flower and Banner.
    • It’s a good looking card – I love the color combination.  I think it would work for anyone, and for a total masculine look, you could substitute the flowers for a general image – I’m thinking the Lacy & Lovely stamp set. SmileFabulous Florets 001 Main L

      Online Brayer Class now Available

      You’ve patiently waited…it’s finally here!  Learn the fundamentals on how to create amazing and beautiful Creative Scenery cards using a brayer.  The Brayer has stumped many, well no more.  Over three varied projects, you will master how to create gradual transitions than stun the card recipient.  You will feel like an artist.  Best of all, you will look at your stamps in a whole new way, and try things you never would have thought to do before.  Take part of the series, take the whole series, or get the class for free – you choose. Find out more here

    Signature Snowflake 001

    To Shop 24/7 in the Creative Store – Click here!

    Fabulous Florets 001 Side

    Stamp Sets – Fabulous Florets (123027c, 128574w), Banner Greetings (Hostess) Ink – Elegant Eggplant  Paper – Elegant Eggplant (105126), Always Artichoke (105119), Sahara Sand (121043) Cool Tools –Paper Snips (103579), Chevron Embossing Folder, Distressing Tool (127562) Finishing Touch –Stampin’ Dimensionals (104430), Paper Piercing Tool(126189),Stampin’ Pierce Mat (126199), Essentials Paper Piercing Pack (126187)


      Mojo Textures and Prints

      Oh Hello 002 Main R

      Card making can be clean and simple yet at the same time rich in texture and print.  For this weeks Mojo Monday challenge, I broke out my Oh, Hello stamp set that has this awesome Chevron oval in it.  The patter is tight, precise and really does a number on your eyes when you stare at – it’s an optical illusion – it moves!  Since this weeks sketch focused on an oval, I thought why not give it some texture, or at least the illusion of it.

            Oh Hello 002 FrontMojo301Sketch

      Creative Tips –

      • I started out using my color coach and the top combination from Soft Suede – using Bermuda Bay and Blushing Bride.
      • To go along with that great stamp, I brought in my two favorites – Gorgeous Grunge for my striped pattern and the Dictionary Background stamp for a simple print. 
      • I distressed the Blushing Bride piece for some contrast using my Distress Tool.Oh Hello 002 CU
      • To compliment the Dictionary print, I embossed my Bermuda Bay card stock to give it some texture using the new Alphabet Press Textured Impressions Embossing Folder.
      • After stamping the Chevron oval, I cut it out using the #4 Oval in my Oval Collection Framelits.  Rather than matte it with a larger oval, I just edged it in a darker shade using Early Espresso.Oh Hello 002 Height
      • To give a little distinction to the oval, I popped it up on Stamping Dimensionals.
      • I created a banner using my 1” Square Punch and one of the three greetings in the Oh, Hello set.  I love it when stamp sets have greetings!Oh Hello 002 Banner
      • For the wave in the banner, I adhered the ends down and popped up the middle using two Stamping Dimensionals.  I curled up the ends of the banner using my Bone Folder.
      • The flower was created with Blushing Bride and Early Espresso card stocks using the Blossom Party Originals BigZ die.  For the center I used the circle from the Itty Bitty Punch Pack and Crushed Curry card stock.  The leaves were punched out using the retired Blossom Petals Builder Punch. Oh Hello 002 Flower
      • I added a few Pearl Basic Jewels for a finishing touch to the Oval, Banner, main card and Flower center. 
      • For a final finishing touch, I added a little piercing using the Essentials Paper Piercing Pack. Oh Hello 002 Main L

      It’s a fun color combination and this card is great for just any occasion.  I hope you like it and have fun making your own! 

      Free DSP_edited-1

      We’re celebrating this summer!!  This month – buy any three Designer Series Papers and get one free!  Here’s the scoop on this awesome special!

      Signature Snowflake 001

      To Shop 24/7 in the Creative Store – Click here!

      Oh Hello 002 Angle

      All of the supplies used to make this project are Stampin’ Up! unless I specifically note otherwise.  To view the details or see close ups of any products, just click on the green link to view it in my store 24/7. 

      Stamp Sets – Oh Hello (130733c, 131931w), Dictionary (130351c, 130348w),Gorgeous Grunge (130517c, 130514w) Ink – Soft Suede, Early Espresso, Blushing Bride Paper – Whisper White, Crushed Curry, Soft Suede, Early Espresso, Bermuda Bay, Blushing Bride, Wild Wasabi Cool Tools – Itty Bitty Shapes Punch Pack, Oval Collection Framelits, Blossom Party Originals BigZ Die, Big Shot, Alphabet Press TIEF, 1” Square Punch Finishing Touch –Stampin’ Dimensionals, Pearl Basic Jewels, Paper Piercing Tool, Stampin’ Pierce Mat, Essentials Paper Piercing Pack

      Gorgeous GrungeDictionary Background StampOh Hello