Mixed Media Watercolor

Mixed-Media-Watercolor-March-2016-HLS

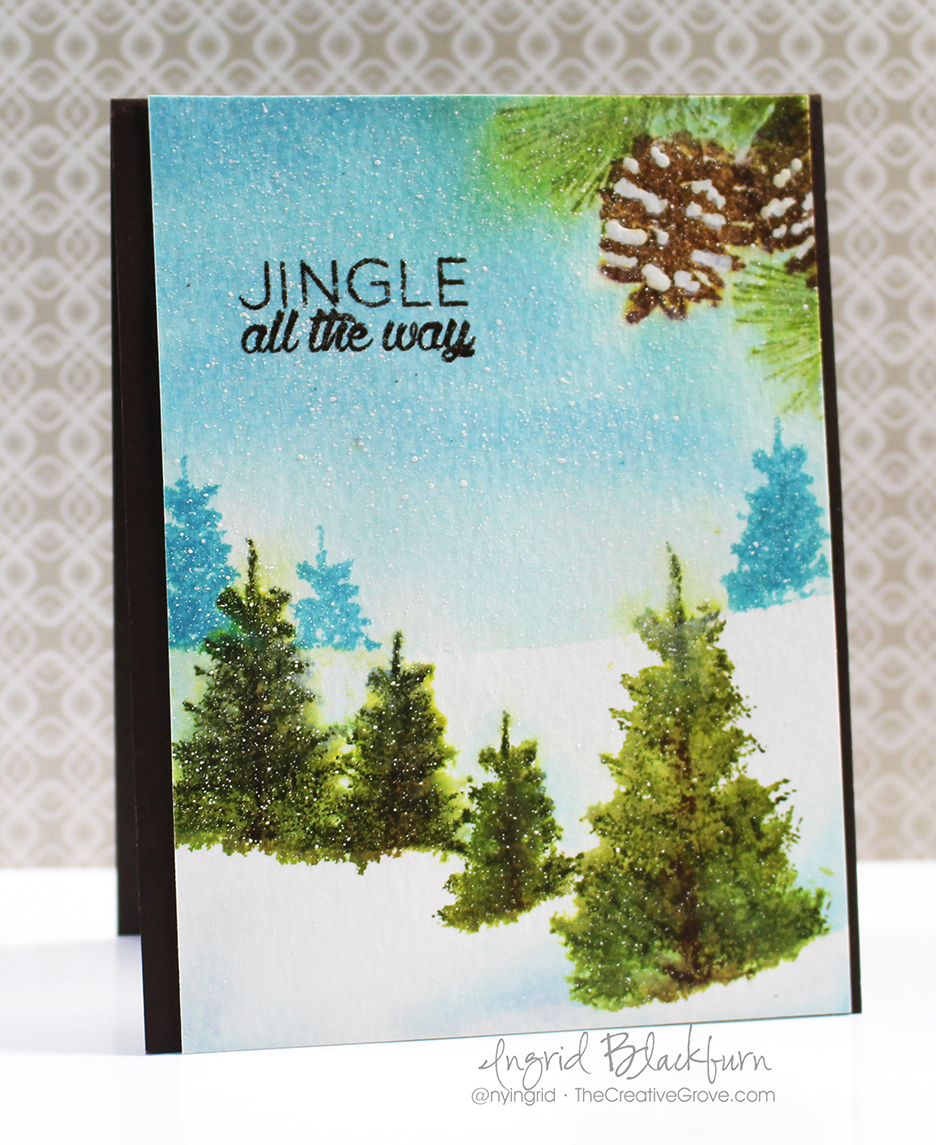
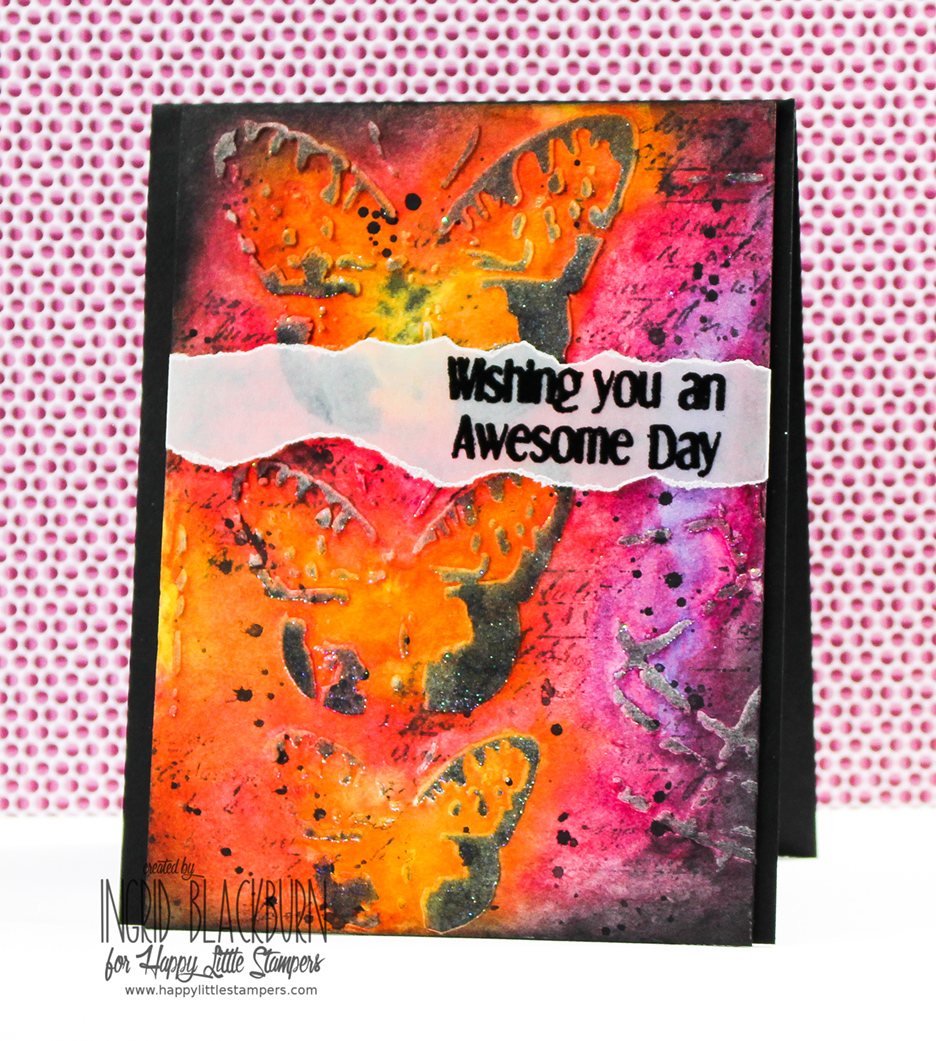
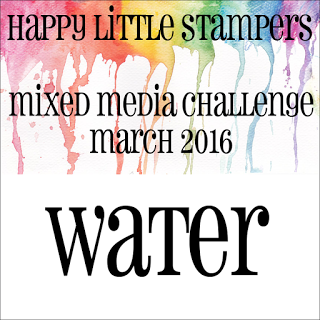
If I were to say Textured Watercolor to you, what would you think of? Mixed Media? Embossing Paste? I have to admit, this month I felt a little challenged when I saw the theme over at the Mixed Media Challenge at Happy Little Stampers – Water. Now you can take this a few ways – water based  techniques or literally create a water scene (Usually what I’d do). SO, I thought I’d give a little Textured Watercolor a shot.

HLS Mixed Media challenge March 2016

To get the water flowing on my mixed media piece, and have a little fun – I whipped out some bright colors, stencils, stamps and a few different mediums. I even shot a real time video for you too – so if you want to see how I watercolored Embossing Paste to create a beautiful textured card, just watch here – or click the link below to watch in HD on YouTube.

Watch in HD on YouTube

The snow is falling as I write this blog post, so it was fun to work on a project that gave me a spring/summer feel. That’s what I love about art, it takes you away to some cool places! Here’s a written tutorial for you too – but the video has much more detail.

Mixed Media: Creating Textured Watercolor

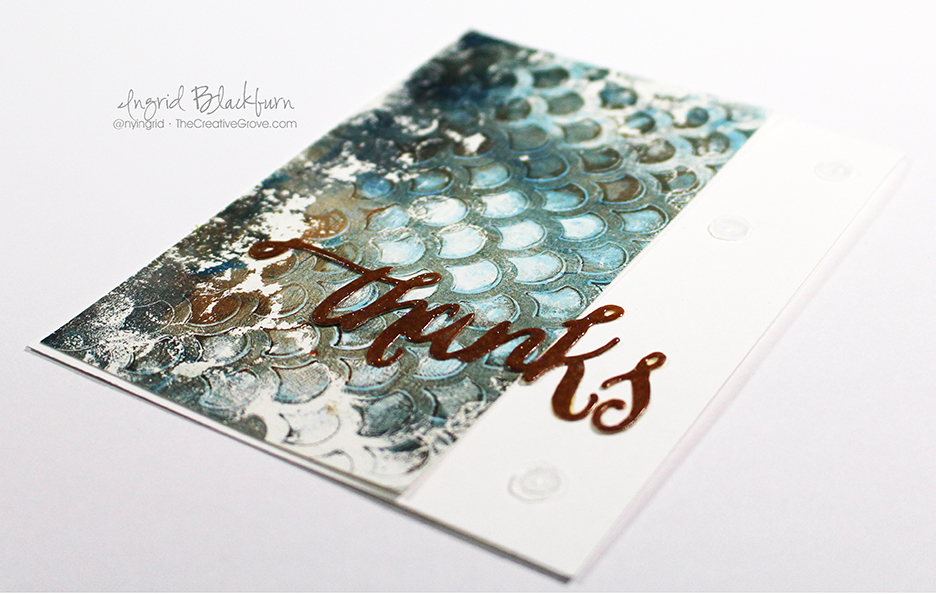
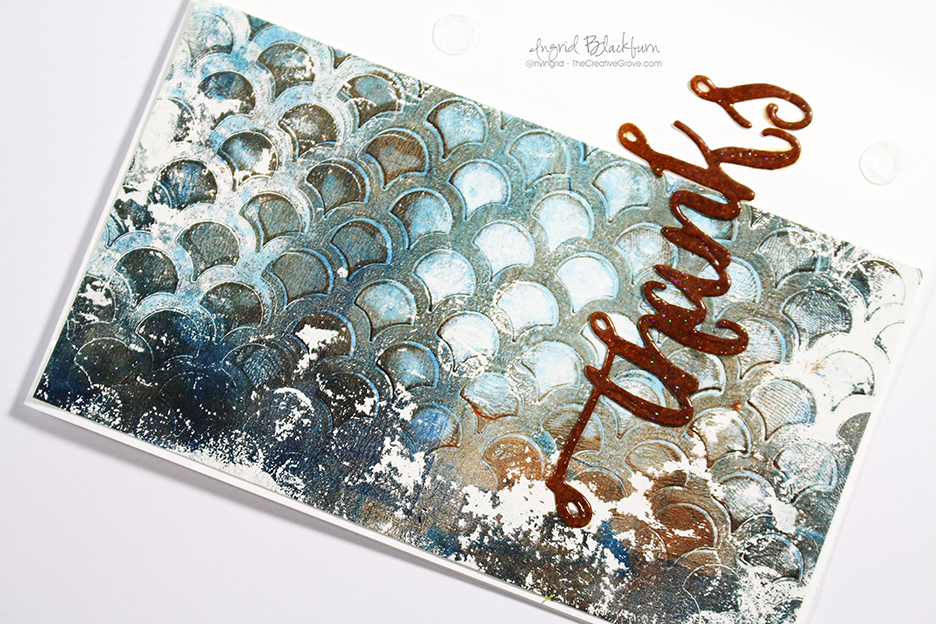
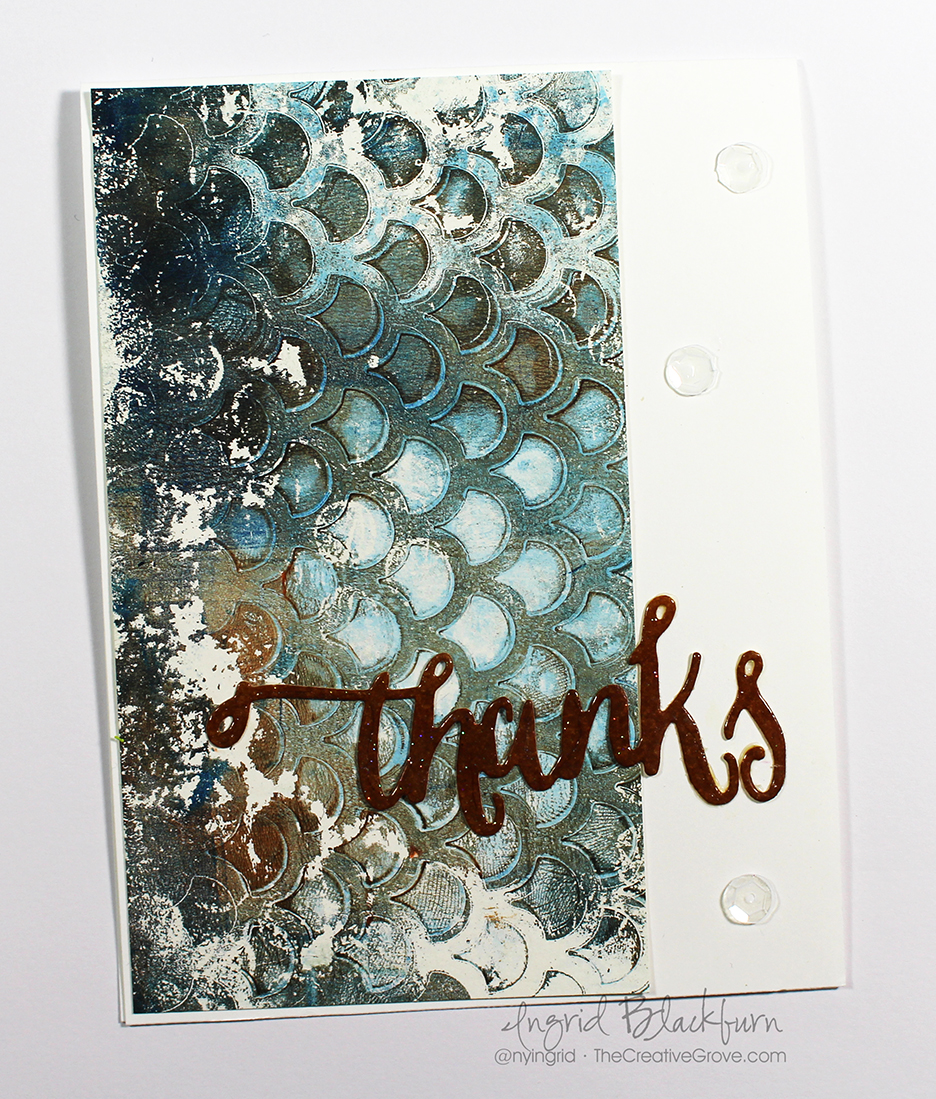
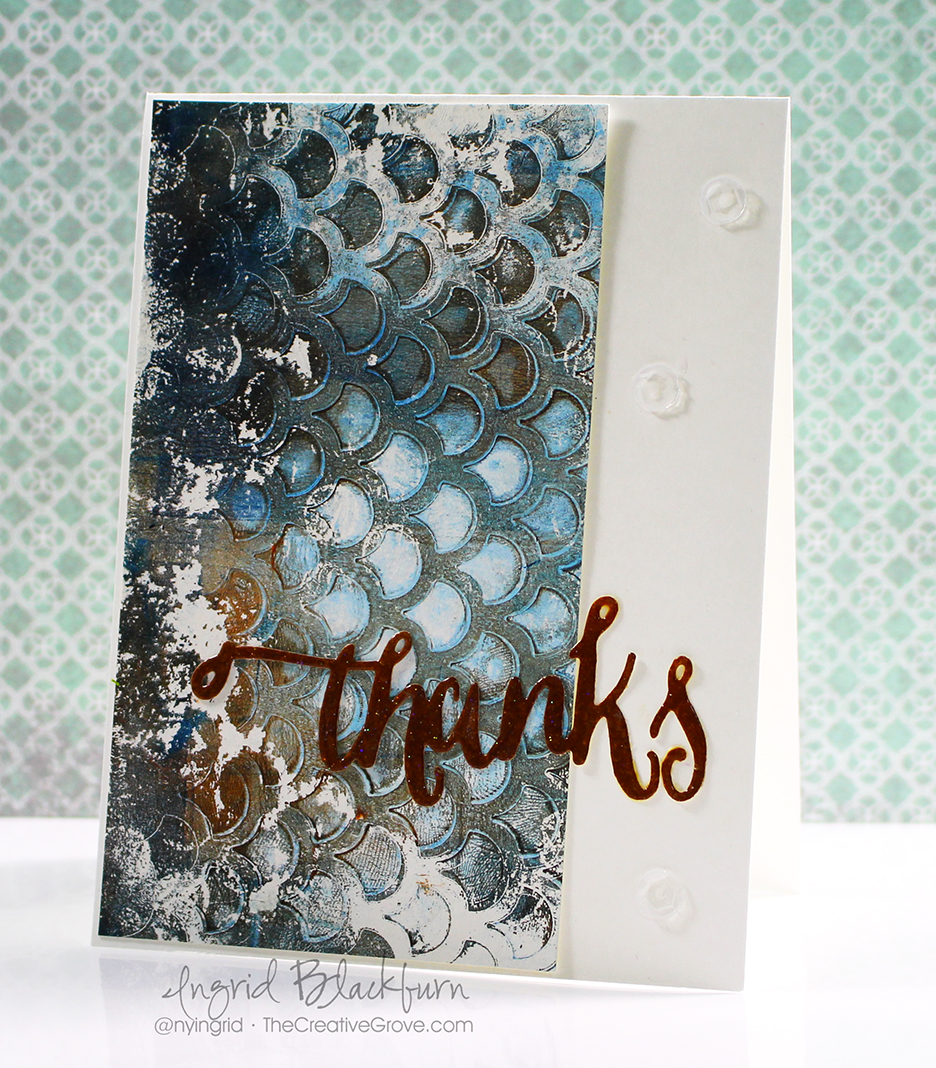
  • Add embossing paste  through a stencil where you want to on 140# cold pressed watercolor or mixed media paper. I used Specimens 12×12″ by The Crafters Workshop. Set aside to dry.
  • Paint over your dried piece with bright vibrant watercolors as in the video. I used Lemon Yellow, Translucent Orange, Magenta, Quinacrodone Violet, Cobalt, Paynes Grey (Schminke) and Permanent Rose (Mission).

Mixed Media Watercolor-002

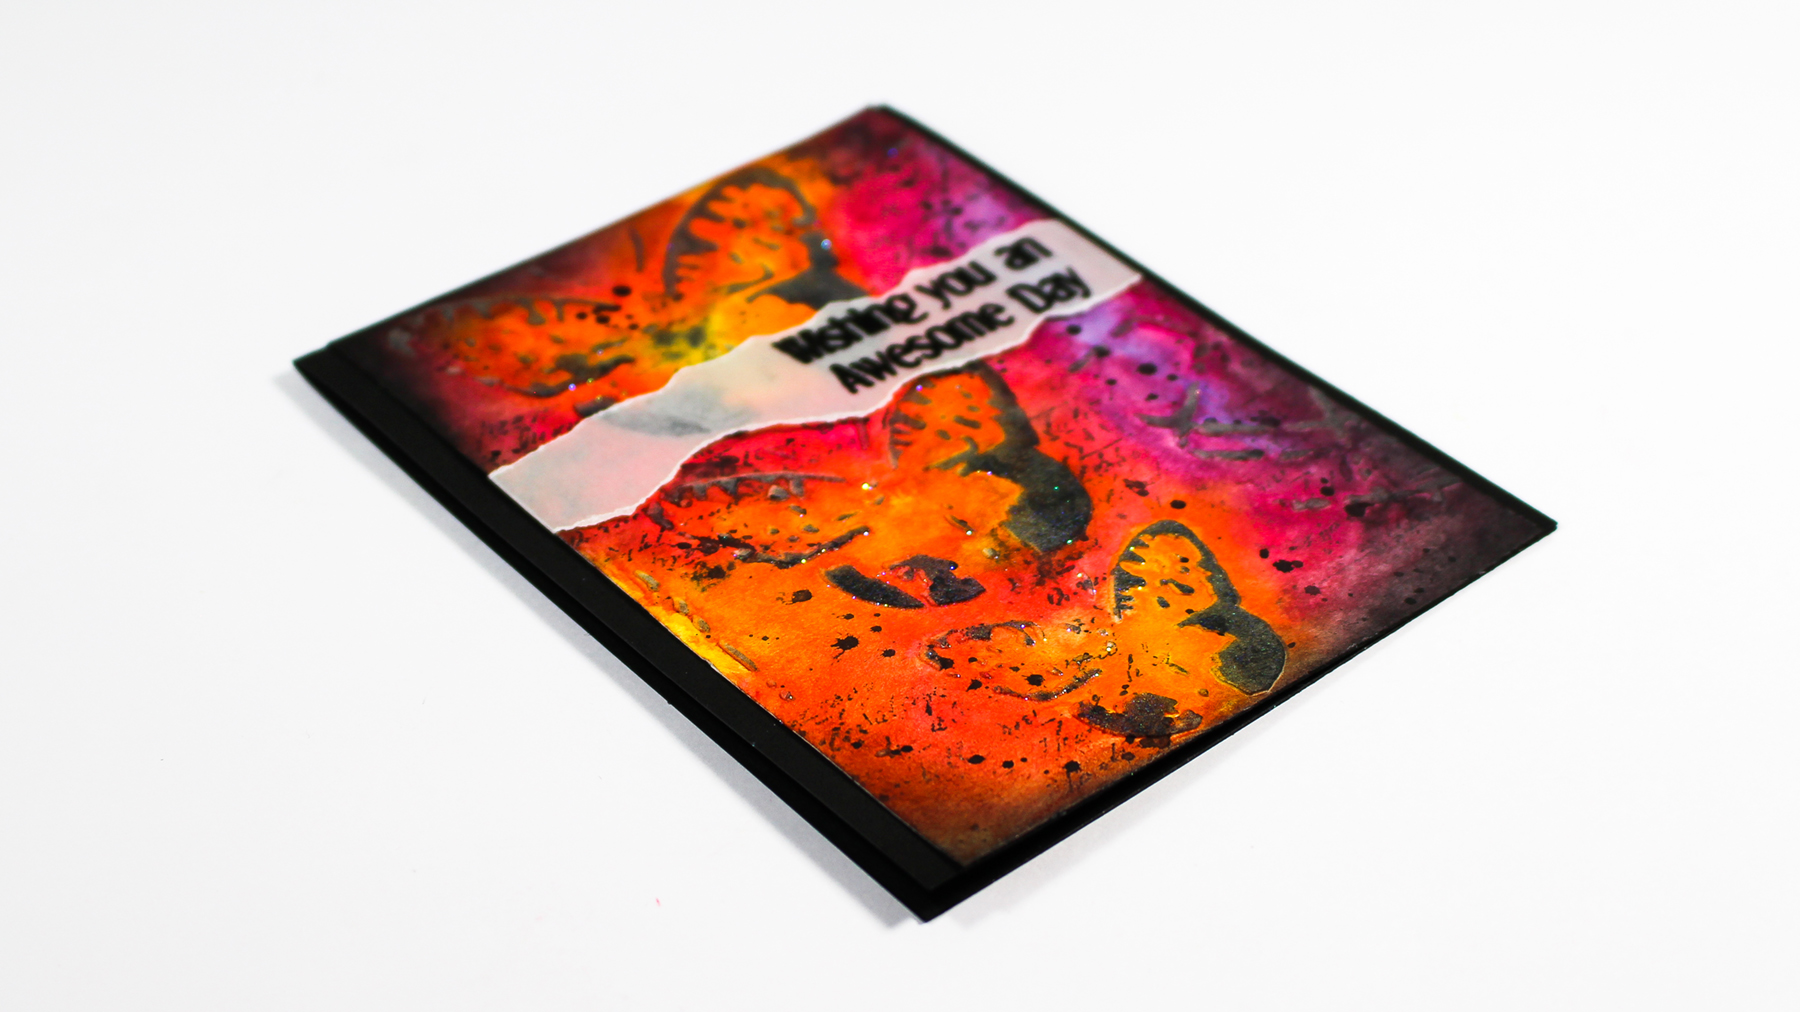
  • Keep your watercolor loose and bright, adding dimension through layers and depth by keeping the darker areas balanced with the light.
  • Allow to dry thoroughly.
  • Stamp Script stamp in Soot Black Distress Ink in random spots, touching up in spots with water to keep it loose and imperfect.
  • Add splats with a watery Paynes Grey and a paint brush.

Textured Mixed Media

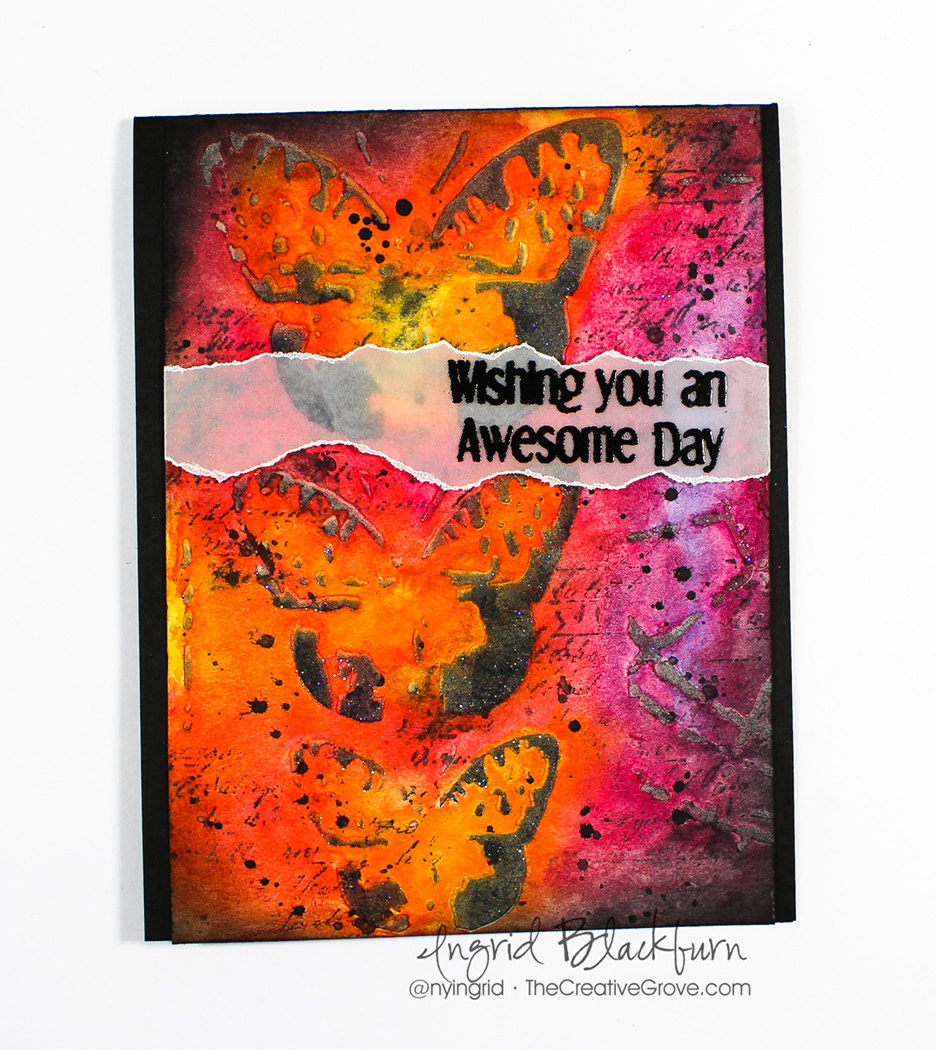
  • Once dry, add a little sponging to the edges and lightly on the sides with Hickory Smoke and Soot Black Distress inks.
  • Secure your project and stencil over it again. Sponge your embossing paste in Hickory Smoke and Soot Black. If not dark enough to your liking, use your Distress Inks in the direct to paper method.
  • Cover your project with a destatic tool.
  • Place your stencil over top your project again and smoosh a versamark pad over your embossed images.

Mixed Media Watercolor

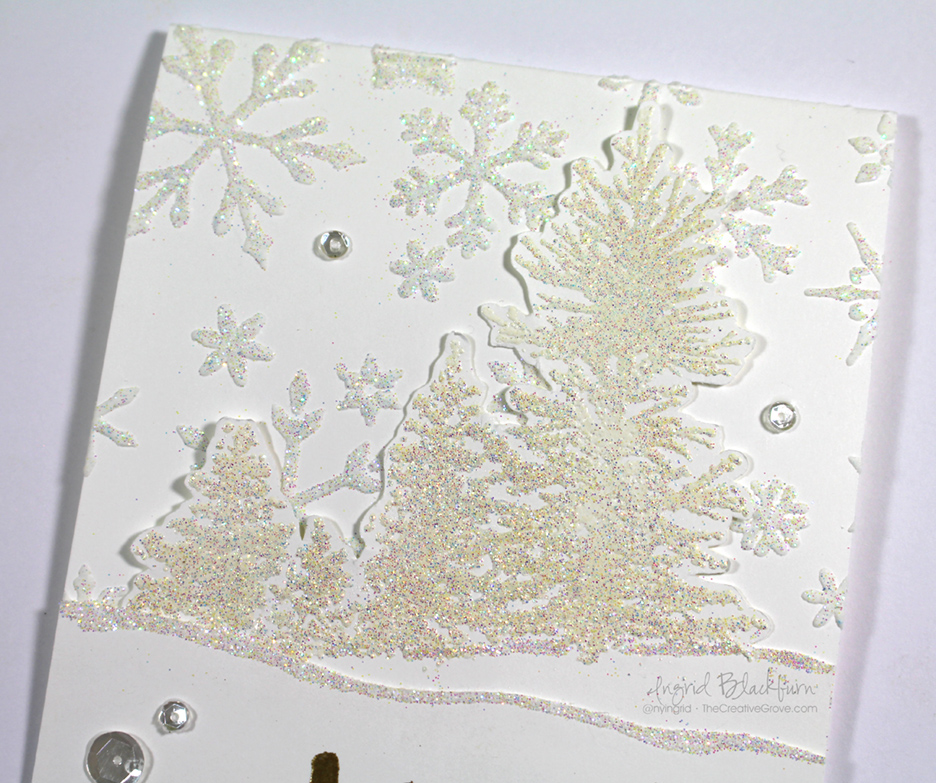
  • Add glitter, then a little clear embossing powder. Heat set
  • Rub over your project with a cloth or paper towel to remove the destatic powder and some of the glitter.
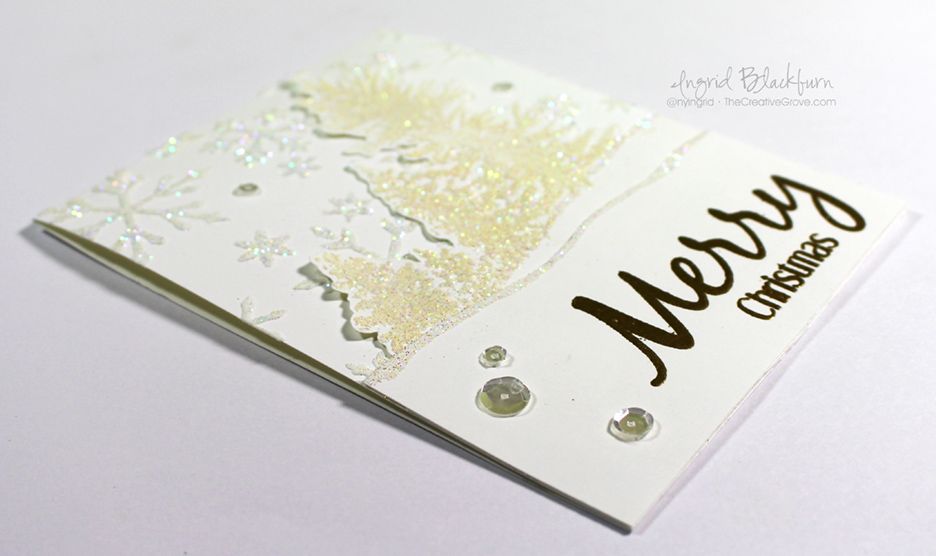
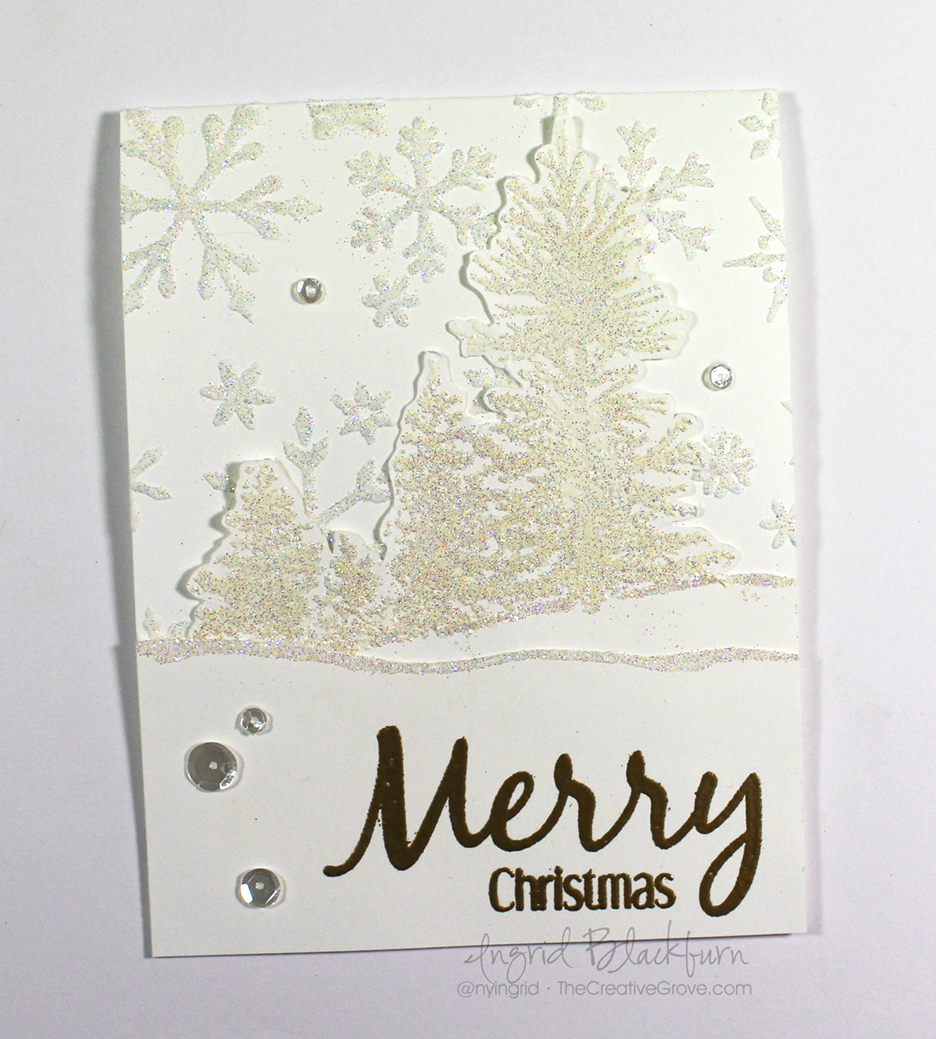
  • Emboss a greeting on a piece of Vellum card stock, tear and add to your project as in the video. I used Everyday Sentiments (Happy Little Stampers)
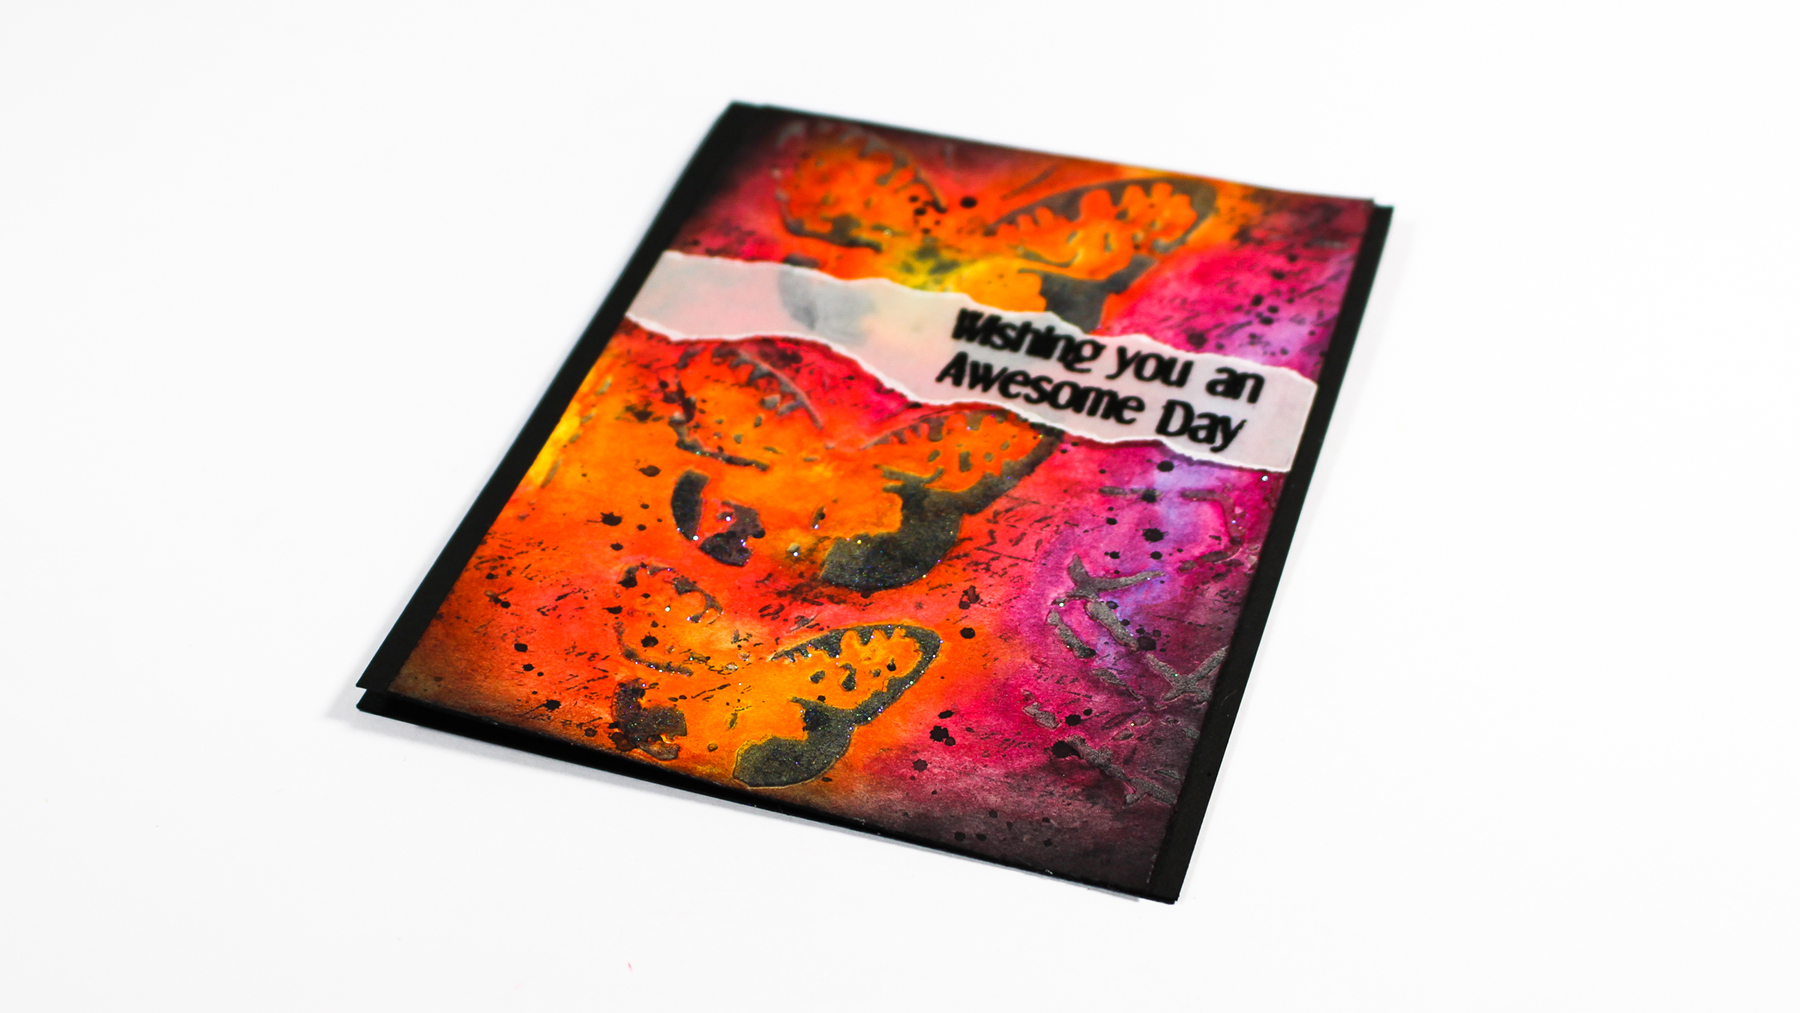
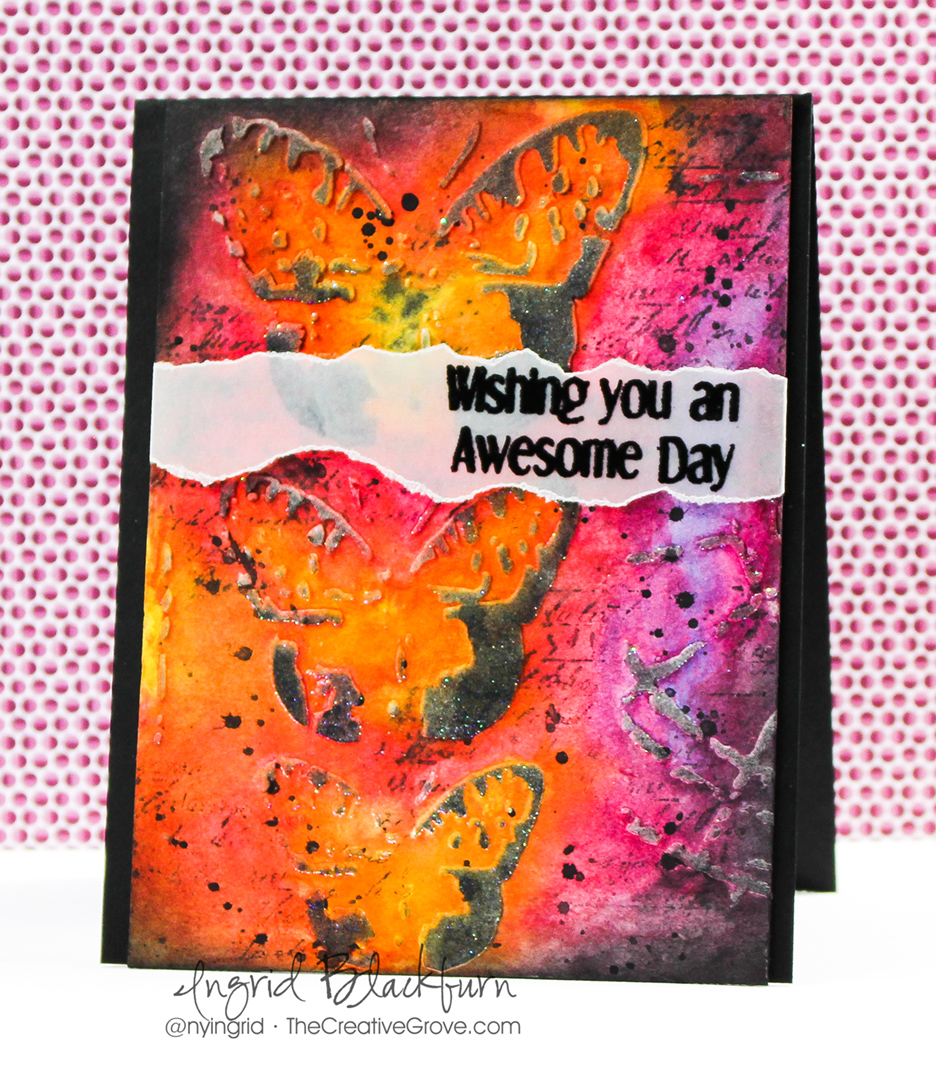
  • Add piece to black card stock and trim if needed. If you do trim, add a little black to the bottom as in the video and touch up your sponging.

Mixed-Media-Watercolor-007

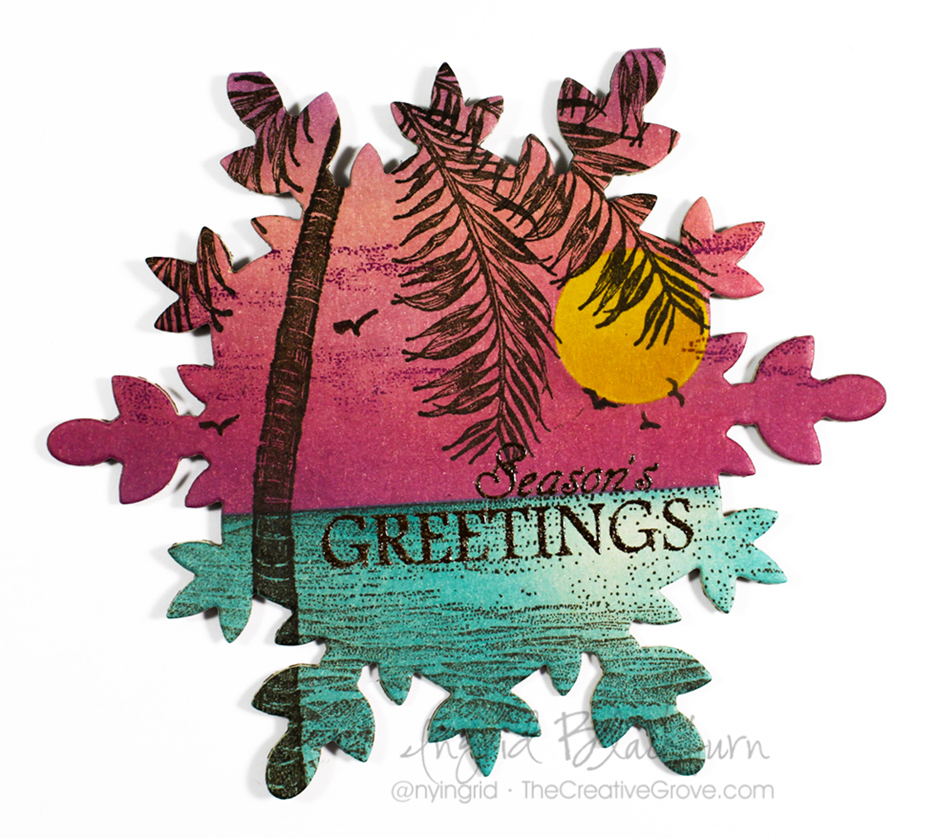
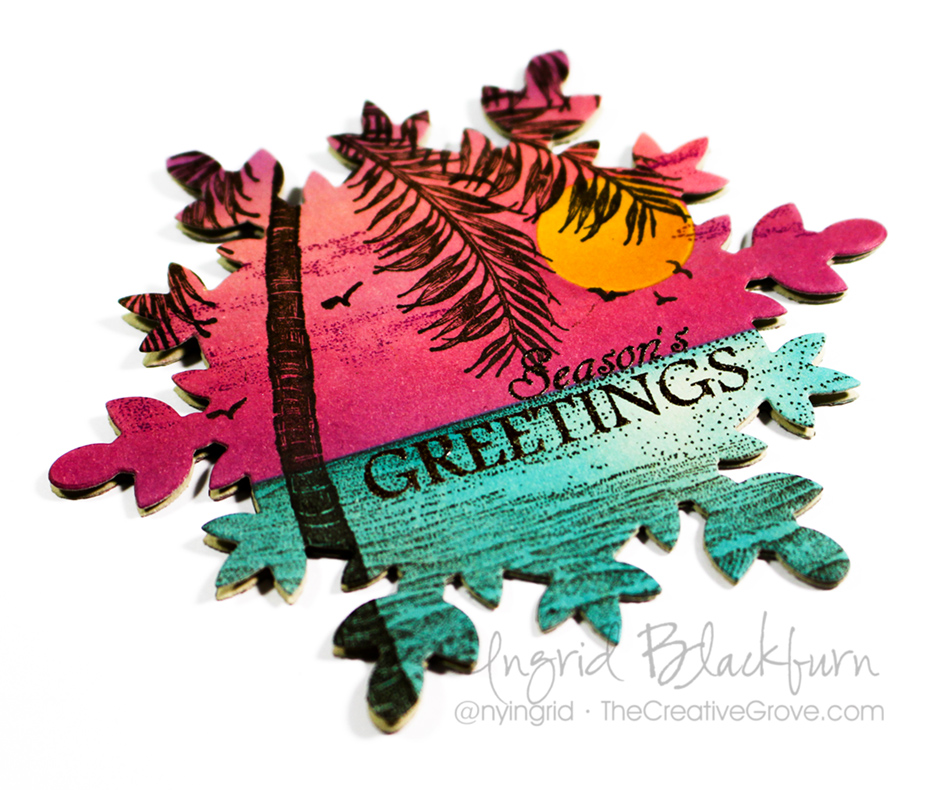
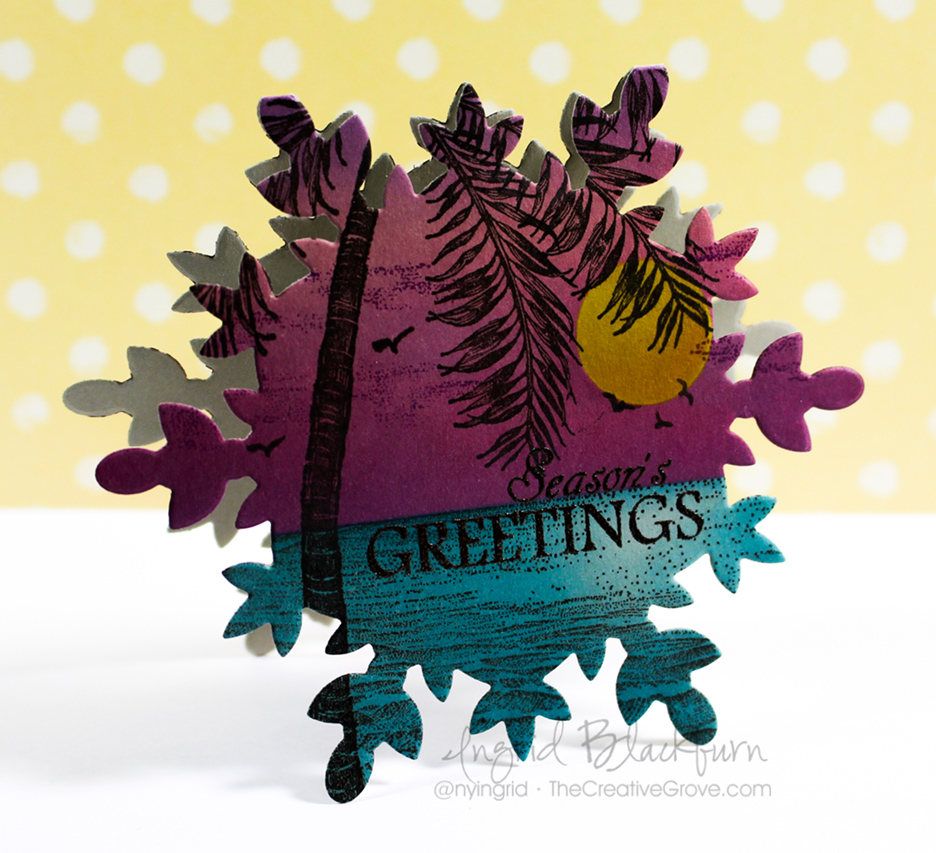
And come to think of it – I created another Watercolor Mixed Media piece earlier in the week for my friends Loll & Bonnie’s new challenge too – CAS Mix Up. See that card here. I decided to play along with two other challenges today – Anything but Cute – Color and Mixed Media Mojo – Springtime/Watercolor.

abc-badge-crazy-for-color  Graphic to copy 3

So grab those bright watercolors, and have fun creating your own Mixed Media piece! I’m sure you’ll get just as lost in it as I did. Till next time –

Signature

[optin_box style=”2″ alignment=”center” email_field=”email” email_default=”Enter your email address” email_order=”2″ integration_type=”aweber” double_optin=”Y” list=”3846012″ name_field=”name” name_default=”Enter your first name” name_order=”1″ name_required=”Y” opm_packages=””][optin_box_field name=”headline”]Learn with our exclusive FREE video series[/optin_box_field][optin_box_field name=”paragraph”]PHA+R2V0IHRoZSBmcmVlIENyZWF0aXZlIFRpcHMgRS1sZXR0ZXIgYW5kIGxlYXJuIHdpdGggc3Vic2NyaWJlciBleGNsdXNpdmUgdmlkZW8gYW5kIHBpY3RvcmlhbCBjb250ZW50LiBJbmNsdWRpbmcgb3VyIHllYXJseSAxMiBEYXlzIG9mIENocmlzdG1hcyBzZXJpZXMhPC9wPgo=[/optin_box_field][optin_box_field name=”privacy”][/optin_box_field][optin_box_field name=”top_color”]undefined[/optin_box_field][optin_box_button type=”0″ button_below=”Y”]Get Instant Access![/optin_box_button] [/optin_box]

Shaped Cards – Snowflake Tropics


DIY Shape Cards

Creating shaped cards just takes a little imagination and a large die. I thought this week I would put a little spin on my snowflake Christmas card and create a tropical scene – why not?!! After all, I did just spend 10 years in Florida!

This month at Happy Little Stampers, the Christmas Challenge focuses on Shaped Cards. Since it’s been snowing a little every day here in the forest, I thought a snowflake card would be perfect!

HLS Christmas Challenge March 2016

We also have a great guest designer this month – Rahmat – Cards & Cooking Corner  Be sure to check out her blog and project too!

Tomorrow I’ll have  a video to show you for this card as well, so stop on by!

How to create Shaped Cards – Tropical Snowflake

  • Measure your snowflake die and cut a card base slightly larger. Mine measured 3 3/4 tall by 4 1/4 wide folded.  (7 1/2 x 4 1/4″)
  • Score your card at 3 3/4″ and mask off the back flap with a post it note.

Tropical Christmas Cards

  • Stamp your water using 139H Seaside Cove by Stampscapes in Early Espresso. Tip – you want to have the glistening part somewhere on your card.
  • Mask off the horizon line at the top of your stamped image (the sky) and sponge in your bottom. Try to keep the glisten part light. I used Broken China, Mermaid Lagoon and Peacock Feather Distress Inks and Mini Sponge Tools by Ranger.
  • Add a little extra color to the horizon line.Flip your mask so that the water is hidden.
  • Cut a sun mask using a 3/4″ circle punch and post it note. Tip – if you can’t get the mask to punch cleanly, place your post it note in between a folded piece of copy paper and punch.
  • Sponge your sky in your desired colors. I used Tattered Rose, Worn Lipstick & Seedless Preserves Distress Inks.

Shaped Cards

  • Create a stencil by punching the same punch in the center of a square post it note.
  • Remove the sun mask and replace it with a sun stencil. Sponge with Fossilized Amber, Mustard Seed and a tiny bit of Spiced Marmalade at the bottom.
  • Stamp your Palm Tree (Palm Stalks 123F [Stampscapes] – cut apart) & Palm Fronds – Stampscapes fronds #2 & #3 in Espresso.
  • Add the birds either with a stamp or draw by hand. I used a partial stamping of Gulls #302A with an Espresso Marker, and free hand drew a few more.
  • Stamp your greeting – I needed a small stacked greeting, so I used this one from Christmas Bell Medley by Stamplorations.
  • Now that your scene is done, we can create the shaped card.
  • Keep your card folded as you run it through your Big Shot or other die cutting machine.

Snowflake Shaped Card for Christmas

  • Be sure to slightly mis-align the top so that the card fold remains intact – meaning you have a flat edge at the uppermost top two snowflake arms (for lack of a better word!)
  • Cut your die, make sure it cuts through both pieces!
  • And there you have it – a snowflake shaped card.

Now this card is rather small, but it’s cute and would actually make a super cute tag or ornament – you could even pop a photo on the inside in the shape of a circle.

So I hope that inspired you a bit. I’m looking forward to seeing what you create. Don’t forget to check out the design teams cards too – we all have different shapes! Enter the Happy Little Stampers Christmas Challenge here.

Earlier this week, I saw my super talented friends Kristie and Bonnie play along with tropical themed Christmas cards for Merry Monday, so I thought I’d join them by combining the two challenges for this project! Be sure to check out those amazing cards too!

194

Hope you give both challenges a try. I’ll be back in a few days with a Mixed Media one!

Keep those fingers inky –

Signature

[optin_box style=”2″ alignment=”center” email_field=”email” email_default=”Enter your email address” email_order=”2″ integration_type=”aweber” double_optin=”Y” list=”3846012″ name_field=”name” name_default=”Enter your first name” name_order=”1″ name_required=”Y” opm_packages=””][optin_box_field name=”headline”]Learn with our exclusive FREE video series[/optin_box_field][optin_box_field name=”paragraph”]PHA+R2V0IHRoZSBmcmVlIENyZWF0aXZlIFRpcHMgRS1sZXR0ZXIgYW5kIGxlYXJuIHdpdGggc3Vic2NyaWJlciBleGNsdXNpdmUgdmlkZW8gYW5kIHBpY3RvcmlhbCBjb250ZW50LiBJbmNsdWRpbmcgb3VyIHllYXJseSAxMiBEYXlzIG9mIENocmlzdG1hcyBzZXJpZXMhPC9wPgo=[/optin_box_field][optin_box_field name=”privacy”][/optin_box_field][optin_box_field name=”top_color”]undefined[/optin_box_field][optin_box_button type=”0″ button_below=”Y”]Get Instant Access![/optin_box_button] [/optin_box]

CAS Mix Up

Skinny-Watercolor-Stenciled-Chevron-001

March 1st was a great day! Two exciting things happened – we welcomed little Lylah into the world – more about that below….and my super creative and very CAS styled friends Bonnie Klass and Loll Thompson launched their new challenge – CAS Mix Up – a clean and simple mixed media challenge. So, naturally I created a birthday card to welcome little Lylah – after all – it literally was her birthday!

The new CAS Mix Up challenge is dedicated to clean and simple cards with a mixed media twist. Now you may think that mixed media can’t be CAS, but at it’s heart, mixed media is just that – mixed mediums. Why can’t it be CAS? That’s the challenge – no pun intended! For the first one this month, we’re challenged to use watercolor, stamping and your choice – I chose watercolor stenciling – and it’s actually a negative image that was stamped from a stencil!

march 2016

Skinny-Watercolor-Stenciled-Chevron-2006

This project is actually a bonus panel from a regularly stenciled project using sponged distress inks. I had all this ink left over on my stencil, so I spritzed it to get it wet with a fine mist spritzer, and stamped the stencil onto a piece of watercolor. Here’s how I did it.

Negative Watercolor Stamped Stencil Technique – 

  • Create a project where you use the stencil in a positive way – or just add ink to your stencil directly without worrying about the “stenciling” part. I used the Skinny Chevron stencil by Create a Smile to give off a skinny positive image like this one I created for a challenge over at StampNation (Of course it’s double stenciled – but you get the point):

Double-Stenciled-Background-Sneak-2

  • For this project, I used More Mustard, Fossilized Amber, Spiced Marmalade, Worn Lipstick, Mermaid Lagoon and Seedless Preserves
  • This will leave lots of color on the negative part of your stencil that you would normally just wash or clean up.  Instead – mist your stencil with a fine mist spritzer to get the ink to bead up on the stencil.

Skinny-Watercolor-Stenciled-Chevron-002

  • Lay a piece of 140# cold pressed watercolor paper onto your stencil to stamp the stenciled image. You can also pick up your stencil and stamp, but I didn’t want the colors to run when I picked it up. Hold your paper there a few seconds to allow the water to soak in.
  • You are left with a negative image – the part you couldn’t stencil!

Skinny-Watercolor-Stenciled-Chevron-003

  • Adhere to an A2 card base, add a stamped greeting and die – both also from Create a Smile – I just LOVE their fonts. This is from the birthday trio dies and the Mini Birthday stamp set.
  • Add a few sparkling clear sequins by Pretty Pink Posh and you’re all set!

I love the way this card turned out. Look at how bold the colors are in the sneak peek image above and how muted the very same colors are with a little water spritzed onto them. Truly amazing! And that’s mixed media at it’s core. Not so scary, huh?!!

I’d love for you all to play along in Loll and Bonnie’s first challenge over at CAS Mix it Up – so head on over and check it out! I’m also playing along in a few other challenges – Laura’s Loft, and NBUS – as this is the first time I’m using this stencil and die by Create a Smile!

Feb.-Challenge-Board button aqua use this the

I can’t wait to see what you create!

Skinny-Watercolor-Stenciled-Chevron-004

On a personal note –

I know this blog is all about paper crafting, but from time to time we all have big moments in our lives. Yesterday was definitely one – our first grandchild! Yes, I’m a grandmother at the tender age of 46! Michael is a bit older than me, and I’ve been blessed to have two beautiful and amazing girls as my bonus daughters for the past 18 years. Our youngest – Allyson and Jeff welcomed their first child into the world yesterday – Lylah RaeAnn.

First Family Photo

Lylah is a character from a book that Allyson read in high school and just fell in love with the name. Raeann is in honor of Rachel and Annie – Allyson & Jeff’s sisters – isn’t that just sweet. I love the name!

Mom & Lylah

We can’t wait to fly to New York and meet our precious little grand daughter Lylah. Feel free to leave me any grandmom (I’m going to go by Omi – German) advice in the comments below!

Thank for stopping by , now go get those fingers inky and have a great day!

Ingrid Blackburn - The Creative Grove

[optin_box style=”2″ alignment=”center” email_field=”email” email_default=”Enter your email address” email_order=”2″ integration_type=”aweber” double_optin=”Y” list=”3846012″ name_field=”name” name_default=”Enter your first name” name_order=”1″ name_required=”Y” opm_packages=””][optin_box_field name=”headline”]Learn with our exclusive FREE video series[/optin_box_field][optin_box_field name=”paragraph”]PHA+R2V0IHRoZSBmcmVlIENyZWF0aXZlIFRpcHMgRS1sZXR0ZXIgYW5kIGxlYXJuIHdpdGggc3Vic2NyaWJlciBleGNsdXNpdmUgdmlkZW8gYW5kIHBpY3RvcmlhbCBjb250ZW50LiBJbmNsdWRpbmcgb3VyIHllYXJseSAxMiBEYXlzIG9mIENocmlzdG1hcyBzZXJpZXMhPC9wPgo=[/optin_box_field][optin_box_field name=”privacy”][/optin_box_field][optin_box_field name=”top_color”]undefined[/optin_box_field][optin_box_button type=”0″ button_below=”Y”]Get Instant Access![/optin_box_button] [/optin_box]

Mixed Media Challenge: Paint

Mixed-Media-Gelli-Plate-Monoprint-2.1016-001

We’re playing around with Paint over at Happy Little Stampers this month for the Mixed Media Challenge. I thought I would re-visit my Gelli Plate and create a cool monoprint using some Acrylic paint for you. I hope this project inspires you in some way! I’d love for you to join us, the prize is a gift certificate this month, so you have nothing to lose!

HLS Mixed Media challenge February 2016

To create this fun card, I used several layers of acrylic paint, some left over Christmas tree branches, bubble wrap, a stencil and some twine. I pulled prints from each layer, and layered each one on this piece. The end result is a varied project with deep character. You’ll notice the Phthalo Green, Burnt Umber and white acrylic paint layers. I love the distressed look it took toward the end. My Umber dried a bit so I only was able to pull a partial in those spots, but that left me with some awesome character.

Mixed-Media-Gelli-Plate-Monoprint-003

To finish the card, I punched a few pieces of Espresso card stock, used a little linen thread and some sequins. I thought a simple banner with the greeting from the HLS Butterfly Birthday set would be perfect. Rather than create a traditional banner edge, I pulled my card stock through half a hexagon punch and punched the reverse for the point. I thought it went a bit better with the image from the Moroccan Simon Says Stamp stencil. The card needed something, so a little paper piercing rounded it all out.

Mixed-Media-Gelli-Plate-Monoprint-002b

I think it turned out pretty cool, I love that I can paint with several layers on a monoprint and it still is just like a piece of printed paper – that’s so cool! So how are you going to paint your creation?

Mixed-Media-Gelli-Plate-Monoprint-004

Remember, Mixed Media can be simple like this card – all you need is stamps, ink, and a way to develop texture with another element like a stencil, or paste, or paint. Quite simple!

So get those fingers inky – mine were for this one!

Signature

[optin_box style=”2″ alignment=”center” email_field=”email” email_default=”Enter your email address” email_order=”2″ integration_type=”aweber” double_optin=”Y” list=”3846012″ name_field=”name” name_default=”Enter your first name” name_order=”1″ name_required=”Y”][optin_box_field name=”headline”]Learn with our exclusive FREE video series[/optin_box_field][optin_box_field name=”paragraph”]PHA+R2V0IHRoZSBmcmVlIENyZWF0aXZlIFRpcHMgRS1sZXR0ZXIgYW5kIGxlYXJuIHdpdGggc3Vic2NyaWJlciBleGNsdXNpdmUgdmlkZW8gYW5kIHBpY3RvcmlhbCBjb250ZW50LsKgPGVtPjxzdHJvbmc+SW5jbHVkaW5nwqA8L3N0cm9uZz48L2VtPm91ciB5ZWFybHkgMTIgRGF5cyBvZiBDaHJpc3RtYXMgc2VyaWVzITwvcD4K[/optin_box_field][optin_box_field name=”privacy”][/optin_box_field][optin_box_field name=”top_color”]undefined[/optin_box_field][optin_box_button type=”0″ button_below=”Y”]Get started now![/optin_box_button] [/optin_box]


White Christmas Cards

White-Christmas-Cards-001

Don’t you just love white on white cards? They make the perfect Christmas cards. This month at the Happy Little Stampers Christmas Challenge, we have a Tic Tac Toe challenge. I chose the classic diagonal path of White, Gold and Sentiment – a classic.

HLS Christmas Challenge February 2016tictactoe badge

This month we have an awesome guest designer for the Christmas Challenge – Ksenija Rizova, you may know her in the blog-o-sphere as Sweet Kobylkin. Be sure to Click Here to check out her blog and creation.

White Christmas Tutorial

  • Create your textured background on the top 2/3 of a folded A2 white card. I used the Large Winter Snowflakes by Memory Box and Dreamweaver white embossing paste.

White-Christmas-Cards-005

  • Sprinkle glitter onto your wet embossing paste snowflakes, and set aside to dry completely.
  • Emboss the Impression Obsession Tree Group in White, then Iridescent Ice.
  • Fussy Cut out and add glitter to the hill line.

White-Christmas-Cards-003

  • Add a second piece of card  stock with a slight downward slope in the opposite direction to overlap over your stamped trees. Add glitter with two way glue to the hill edge.
  • Once your embossing paste is dry. Add trees and front hill to your card, getting the spacing just right. Trim the bottom to fit the front and add a greeting embossed in Gold. I chose one from Everyday Sentiments by Happy Little Stampers.

White-Christmas-Cards-004

  • Add sparkling clear sequins by Pretty Pink Posh.

Now it’s your turn! Which bingo path are you going to take? I can’t wait to see what you enter into this month’s Christmas Challenge.

Keep those fingers inky –

Signature

[optin_box style=”2″ alignment=”center” email_field=”email” email_default=”Enter your email address” email_order=”2″ integration_type=”aweber” double_optin=”Y” list=”3846012″ name_field=”name” name_default=”Enter your first name” name_order=”1″ name_required=”Y”][optin_box_field name=”headline”]Learn with our exclusive FREE video series[/optin_box_field][optin_box_field name=”paragraph”]PHA+R2V0IHRoZSBmcmVlIENyZWF0aXZlIFRpcHMgRS1sZXR0ZXIgYW5kIGxlYXJuIHdpdGggc3Vic2NyaWJlciBleGNsdXNpdmUgdmlkZW8gYW5kIHBpY3RvcmlhbCBjb250ZW50LsKgPGVtPjxzdHJvbmc+SW5jbHVkaW5nwqA8L3N0cm9uZz48L2VtPm91ciB5ZWFybHkgMTIgRGF5cyBvZiBDaHJpc3RtYXMgc2VyaWVzITwvcD4K[/optin_box_field][optin_box_field name=”privacy”][/optin_box_field][optin_box_field name=”top_color”]undefined[/optin_box_field][optin_box_button type=”0″ button_below=”Y”]Send me exclusive tips now![/optin_box_button] [/optin_box]


Mixed Media Stencil Backgrounds

Gelli Plate Stencil Backgrounds 001

I love creating backgrounds for cards – it’s probably one of my favorite things to do…and in the past year, I’ve grown quite addicted to Stencil Backgrounds! This card takes stencils to a whole other level. This month over at Happy Little Stampers Mixed Media Challenge we’re playing around with Stencils. If you’ve taken any class with me in the past year online or watched any of my YouTube Videos – then you KNOW I love stencils.

HLS Mixed Media challenge January 2016

I’m still getting my feet wet in the Mixed Media world, but this Gelli Plate has quickly given me the ability to create some amazing pieces of art. And let’s be honest – that’s exactly what it is – art! I used to spend a crazy amount of money on papers that look like this….now I can create them myself…what? That’s insame!!! Don’t worry – some videos will definitely appear in the future, but for now – just enjoy one of my latest goofing off pieces (I wish every goofing off piece turned out like this!).

Of course for the Mixed Media Challenge, you don’t need a Gelli Plate – just a trusty ol stencil. Use your favorite way to add a medium – gel, embossing paste, ink, sponging, gelli, you name it – they are a tool not just every Mixed Media gal and guy needs – but every stamper!

Gelli Plate Stencil Backgrounds 002

Creative Tips on How to Create Stencil Backgrounds using a Gelli Plate

  • Add some acrylic paint to your Gelli Plate – start off with your darkest shade. I used Phylo Blue. Use a brayer to spread your acrylic paint covering it edge to edge.
  • Roll off on a piece of scrap paper and pull off some paint leaving a blue layer around the edge of your Gelli. It took me a bit to get the hang of this.
  • Allow the blue to completely dry, then add some Raw Sienna and cover in the same manner. Remove a bit of it toward the middle, then place a stencil over – I used My Favorite Things Scallop stencil.

Gelli Plate Stencil Backgrounds 004

  • Place a piece of copy paper over and lightly tap with your fingers to remove a bit here and there. Remove your stencil and allow to completely dry.
  • If you want to get a feel for what it’s starting to look like, lift your Gelli Plate and see it from the bottom. Of course, don’t place your finger in your creation!
  • Next, add a layer of white. Now, I have white acrylic paint – but it’s lost somewhere in my craft room – would you believe that! I knocked my paint box over and now I can’t find that one all important tube…maybe the cat took it away…yeah – I’ll go with that! Of course, that prompted me to clean my work area today – I think Bria still has my tube…lol! So I used the next best thing – white gesso.
  • Lay a sheet of small bubble wrap over the white to get a stamped impression in white. Tap it lightly in random places to create a slightly stamped circular pattern.
  • Quickly place your piece of paper over – I used 138 lb Canson Mixed Media paper.  Firmly rub the back of your paper with your fingers. I didn’t quite do this quick enough and a little of my paint didn’t lift properly around the perimeter, but that was okay because it created this gorgeous distressed look. I bet I couldn’t duplicate that if I tried!

Gelli Plate Stencil Backgrounds 003

  • My Gelli Plate is a 6 x 6 inch one. My piece also measures 6 x 6″. I cut my paper in two (Pained me to do so – it was SO beautiful). This is the left half.
  • I trimmed it down to 5 3/8″ x 3″. That was a happy accident. Originally I intended on 5 1/2 to go top to bottom, but I love the slight 1/16″ border it ended up with.
  • You don’t want to take away from the beauty of the background. So I opted to add a sponged die cut that was embossed in clear. This is the Handlettered Thanks die by WPlus9.
  • To get a similar hue to the Raw Sienna in the project, so I first sponged a piece of white scrap paper with Rusty Hinge, then a bit of Gathered Twigs and Walnut Stain Distress Inks to get a matching hue. Distress inks really helped here, as their translucent nature allowed me to build upon previous layers fro just the right color.

Gelli Plate Stencil Backgrounds 005

A few clear sequins finished it off. I love the simplicity yet complexity that this card has. I have to admit, some of the creations I whipped up with my Gelli Plate really stunned me. Once I got the hang of it, and that creating mono-prints was about layering and pulling it up together, I really started to have fun! I see a ton of “Gelli-ing” in my future!

So whip out those stencils – take what you will from this project, mono-printing, sponging, color combo, layout, anything and get those stencils out. Add fun stuff to the challenge gallery!

Remember our definition of Mixed Media is – stamps + ink, plus two other elements which add texture and/or dimension. Can’t wait to see what you stencil up!

Now go get those fingers inky –

ingrid signature

[optin_box style=”12″ width=”600″ alignment=”center” email_field=”email” email_default=”Enter your email address” email_order=”2″ integration_type=”aweber” double_optin=”Y” list=”3846012″ name_field=”name” name_default=”Enter your first name” name_order=”1″ name_required=”Y”][optin_box_field name=”headline”]If you enjoyed this tutorial…[/optin_box_field][optin_box_field name=”paragraph”]PHA+4oCmeW914oCZbGwgbG92ZSBvdXIgPGVtPjxzdHJvbmc+ZnJlZSA8L3N0cm9uZz48L2VtPnN1YnNjcmliZXIgb25seSB2aWRlbyBzZXJpZXMuIMKgTGVhcm4gbmV3IHRlY2huaXF1ZXMgdGhyb3VnaCBvdXLCoDxlbT48c3Ryb25nPmV4Y2x1c2l2ZTwvc3Ryb25nPjwvZW0+wqBDcmVhdGl2ZSBUaXBzIGUtbGV0dGVywqBhbmQgc3Vic2NyaWJlciBvbmx5IHZpZGVvIGFuZCBwcm9qZWN0IHR1dG9yaWFscyE8L3A+Cg==[/optin_box_field][optin_box_field name=”privacy”][/optin_box_field][optin_box_field name=”top_color”]undefined[/optin_box_field][optin_box_button type=”0″ button_below=”Y”]Get Exclusive Tips![/optin_box_button] [/optin_box]

Watercolored Mountainside

Happy New Year! It’s a new year, and what better way than to kick off with a Challenge?!! This month’s Christmas challenge over at Happy Little Stampers is Jingle. You might be going – Christmas, what? Well, I didn’t create NEAR enough cards last year, so I”m excited to be getting an early start!

I scoured my stash and would you believe it…I don’t have a single jingle bell stamp or die! So I got a little creative. I thought I could draw and watercolor one – well, let’s just say that didn’t go so well….lol!

So, I knew I had this great saying – actually three jingle sayings, so I decided to go with the spirit and place the word prominently instead! After all, the song Jingle Bells does say…Dashing through the snow and Over the Hills we go! Now I know this isn’t a one horse sleigh, but I imagine this to be a little of the scenery that I would see from the sleigh. That’s where this all started from.

I hope my project inspires you in some way to add a little jingle to your Christmas cards and get an early start for your 2016 stash. For more details, be sure to keep reading!

HLS Christmas Challenge January 2016

Watercolor Stamping Technique

Be sure to stop by the challenge over at Happy Little Stampers and see all the amazing creations made by the Design Team! And this month we have a wonderful Guest Designer with us – Sarah from Funky Fossil Designs.

Watercolor Tips & Techniques for Christmas Cards

  • Watercolor cards work well on good quality watercolor paper. I used Canson 140 pound cold pressed paper and a #6 round brush.
  • For this scene, I decided to use some brand new stamps that Santa brought me this past Christmas – Natures Gifts and Prancers by Penny Black. These two sets are perfect to evoke the scene I had envisioned along with my Jingle greeting from the Mixed Christmas Sentiments by Happy Little Stampers.

Prancers Stamp Set - Penny Black

  • To create your snow drifts, add a little water with a #8 round brush where you’d like to have a snow drift. Dropwatered down Broken China and a little Weathered Wood to to base of the line. Paint your snow drift using a clean wet brush to blend it outward creating a light took upwards on your bank. I’d encourage practicing this on scrap paper a bit first. It takes a bit to get the hang of it.
  • Stamp your pine cones and needles at the top right. To get a painted look, use the watercolor stamping technique – ink up your stamp, then spritz a few times to get the ink wet before stamping onto your paper. Move the ink around with a wet paint brush if needed. I used Peeled Paint and Forest Moss for the greenery and Gathered Twigs/Ground Espresso for the Pine cones and trunks.
  • TIP – find a balance between the amount of water and ink.
  • Once you have your snow drifts and pine needles/cones in place, add a top edge to your drifts with a mask – I cut into a piece of Painters Tape. To paint your sky, you’ll first want to wet your area. Try not to touch your needles or pine cones too much to keep the color from bleeding. A little works – too much is a mess.

Natures Gifts by Penny Black

  • Once your sky is wet, add a little Broken China Distress Stain – keeping the darkest of the color at the top and blending it out with a wet paint brush toward your horizon.
  • Stamp your trees using the watercolor stamping technique and the Broken China Stain. I used the two smaller trees from the Prancers Set.
  • Stamp your front trees, masking off the bank with a torn piece of painters tape in the general shape – I didn’t worry about being too perfect. I used the same shades as the pine needles and cones. Watercolor stamp and under layer that gives a great shaded base. Once a bit dry, re-stamp without spritzing for a bit of detail. TIP – if this part is too wet, you’ll lose all your detail.

Watercolored Snow Scenic Cards

  • Allow your project to fully dry.
  • I needed a greet greeting, so I pulled out my trusty Mixed Christmas Sentiments by Happy Little Stampers.
  • Stamp your greeting in Versamark and emboss in Espresso Embossing Powder.
  • Add the snow using Pro White by Daler Rowney and spatter flicking with a toothbrush.

Watercolor Christmas Cards

  • Paint snow onto your pine cones using the Pro White and small paint brush.
  • Cut scene to desired width if necessary – mine is 5 1/2 x 3 7/8″ and mounted onto a top folding A2 card in Early Espresso.

I just love the watercolored snow drift look in this card. I am a huge admirer and personally am always inspired by two great stampers and watercolor artists – Heather Telford and Micheline “Mimi” Jourdain both on the Design Team for Penny Black. I’ve learned a ton from Heather over the years, and have to admit, that I myself have gotten into watercolored cards and flicked snow because of her artistry over the years. So thanks Heather!

Watercoloring techniques for scenic cards

Now if you find any tiny little part of this card inspiring, please hop on along to the Jingle Challenge over at Happy Little Stampers this month and play along with us. The Design Team has some great inspiration for you, and I can’t wait to see what YOU do!

Keep those fingers inky!

Signature.png

If you liked this tutorial and would like to see a similar project that goes into depth and detail including a step by step video and PDF – be sure to Click Here to check out our 12 Days of Christmas 2015 class!

12 Days of Christmas 2015 Button


Vintage Christmas Star

Vintage Christmas Star 001

Today’s challenge keyword is star – so let’s learn how to incorporate that into this vintage holiday card. This month’s challenge at Happy Little Stampers is to use a star in some form on your card. I have to admit, I started off in a very different direction…then ultimately decided to create a simple card with a vintage masculine feel that could showcase the ultimate Christmas star.

HLS Christmas Challenge December 2015

I guess I’ve been in a vintage kind of a mood these past few months. At least here on the blog! I don’t know what it is that seems soothing about this color palette to me, but I’m really loving the feel. Maybe it’s because I’ve been injured and not able to walk as much as I would like in the woods…who knows?!! Here’s a quick tutorial for you, and be sure to stop by again next week for the video!

Creating a Quick Vintage Feel to your Holiday Cards –

  • This project was done on kraft colored paper – not white. It helps with the overall look and feel.
  • I find that the brown tone fits this style better than black. So ink your stamps up in a dark brown – something earthy. I used Ground Espresso by Ranger Distress.
  • Stamp the Stampscapes Pines & Rocks Lg on the left and the left side of Lakeside Reflections Lg to the right Tip – use a torn piece of paper towel to mask off the edge and create a seamless scene.

Vintage Christmas Star 002

  • Place two post it notes in copy paper and punch out your moon with a 1 1/4″ circle punch. This will be your mask.
  • Place your moon where you’d like it before adding blues to the sky
  • Use a mini sponge tool and some blue hues to shade in your water and sky.
  • Stamp Cloud Strips Lg by Stampscapes in Stormy Sky Distress. Be sure to overlap the moon slightly.
  • Once you have the look you’d like – add a little shading with s neutral like Weathered Wood Distress to the rocks.
  • Sponge the entire scene around the perimeter with  a brown – I used Gathered twigs for a slightly different feel than the trees.
  • Add your star and emboss in Pewter. I used the Nativity Angel Stencil by Stamplorations.

Vintage Christmas Star 004

  • The perfect sentiment makes this card and nails the vintage feel. Here you see one of the many sentiments from Mixed Christmas Sentiments by Happy Little Stampers. Emboss it in Pewter for a great look, rather than something bright.
  • The scene is matted onto Vanilla card stock for contrast before being popped up on fun foam onto an Espresso card base.

I do hope you like this card – it’s actually a great one to mass produce and goes much faster than you think! I hope this inspired you to create something special with a star for your cards. Be sure to enter them into the Christmas Challenge at Happy Little Stampers!

Keep those fingers inky –


Signature.jpg

[optin_box style=”2″ width=”500″ alignment=”center” email_field=”email” email_default=”Enter your email address” integration_type=”aweber” double_optin=”Y” list=”3846012″ name_field=”name” name_default=”Enter your first name” name_required=”N”][optin_box_field name=”headline”]Learn with our exclusive FREE Video Series[/optin_box_field][optin_box_field name=”paragraph”]PHA+R2V0IHRoZSBmcmVlIENyZWF0aXZlIFRpcHMgRS1sZXR0ZXIgYW5kIGxlYXJuIHdpdGggc3Vic2NyaWJlciBleGNsdXNpdmUgdmlkZW8gYW5kIHBpY3RvcmlhbCBjb250ZW50LiA8ZW0+PHN0cm9uZz48c3BhbiBzdHlsZT0iY29sb3I6ICM4MDAwMDA7Ij5JbmNsdWRpbmc8L3NwYW4+wqA8L3N0cm9uZz48L2VtPm91ciB5ZWFybHkgMTIgRGF5cyBvZiBDaHJpc3RtYXMgc2VyaWVzITwvcD4K[/optin_box_field][optin_box_field name=”privacy”][/optin_box_field][optin_box_field name=”top_color”]undefined[/optin_box_field][optin_box_button type=”1″ text=”Subscribe now!” text_size=”26″ text_color=”#ffffff” text_bold=”Y” text_letter_spacing=”0″ text_shadow_panel=”Y” text_shadow_vertical=”1″ text_shadow_horizontal=”0″ text_shadow_color=”#000000″ text_shadow_blur=”0″ styling_width=”36″ styling_height=”15″ styling_border_color=”#000000″ styling_border_size=”1″ styling_border_radius=”6″ styling_border_opacity=”100″ styling_shine=”Y” styling_gradient_start_color=”#345523″ styling_gradient_end_color=”#68ab46″ drop_shadow_panel=”Y” drop_shadow_vertical=”1″ drop_shadow_horizontal=”0″ drop_shadow_blur=”1″ drop_shadow_spread=”0″ drop_shadow_color=”#ffffff” drop_shadow_opacity=”50″ inset_shadow_panel=”Y” inset_shadow_vertical=”0″ inset_shadow_horizontal=”0″ inset_shadow_blur=”0″ inset_shadow_spread=”1″ inset_shadow_color=”#000000″ inset_shadow_opacity=”50″ location=”optin_box_style_2″ button_below=”Y”]Subscribe now![/optin_box_button] [/optin_box]