Mixed Media Watercolor

Mixed-Media-Watercolor-March-2016-HLS

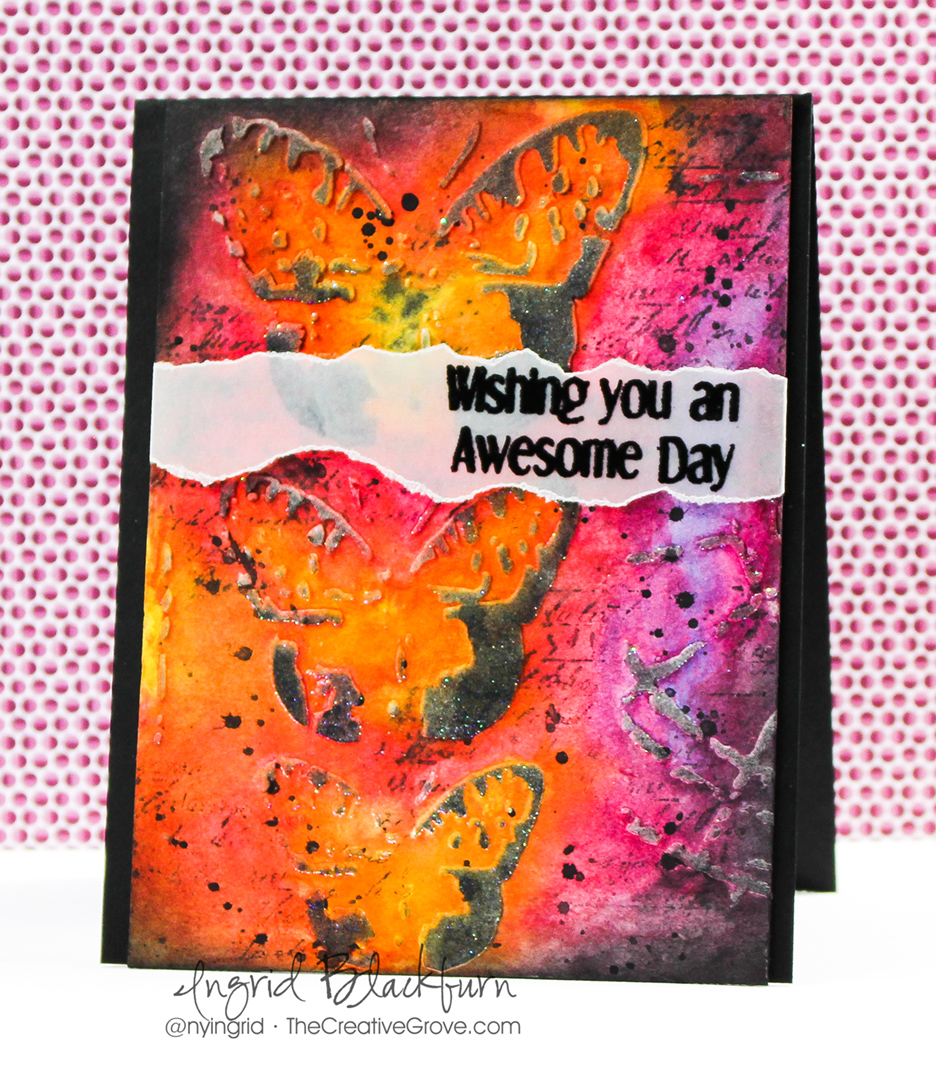
If I were to say Textured Watercolor to you, what would you think of? Mixed Media? Embossing Paste? I have to admit, this month I felt a little challenged when I saw the theme over at the Mixed Media Challenge at Happy Little Stampers – Water. Now you can take this a few ways – water based  techniques or literally create a water scene (Usually what I’d do). SO, I thought I’d give a little Textured Watercolor a shot.
HLS Mixed Media challenge March 2016

To get the water flowing on my mixed media piece, and have a little fun – I whipped out some bright colors, stencils, stamps and a few different mediums. I even shot a real time video for you too – so if you want to see how I watercolored Embossing Paste to create a beautiful textured card, just watch here – or click the link below to watch in HD on YouTube.

Watch in HD on YouTube

The snow is falling as I write this blog post, so it was fun to work on a project that gave me a spring/summer feel. That’s what I love about art, it takes you away to some cool places! Here’s a written tutorial for you too – but the video has much more detail.

Mixed Media: Creating Textured Watercolor

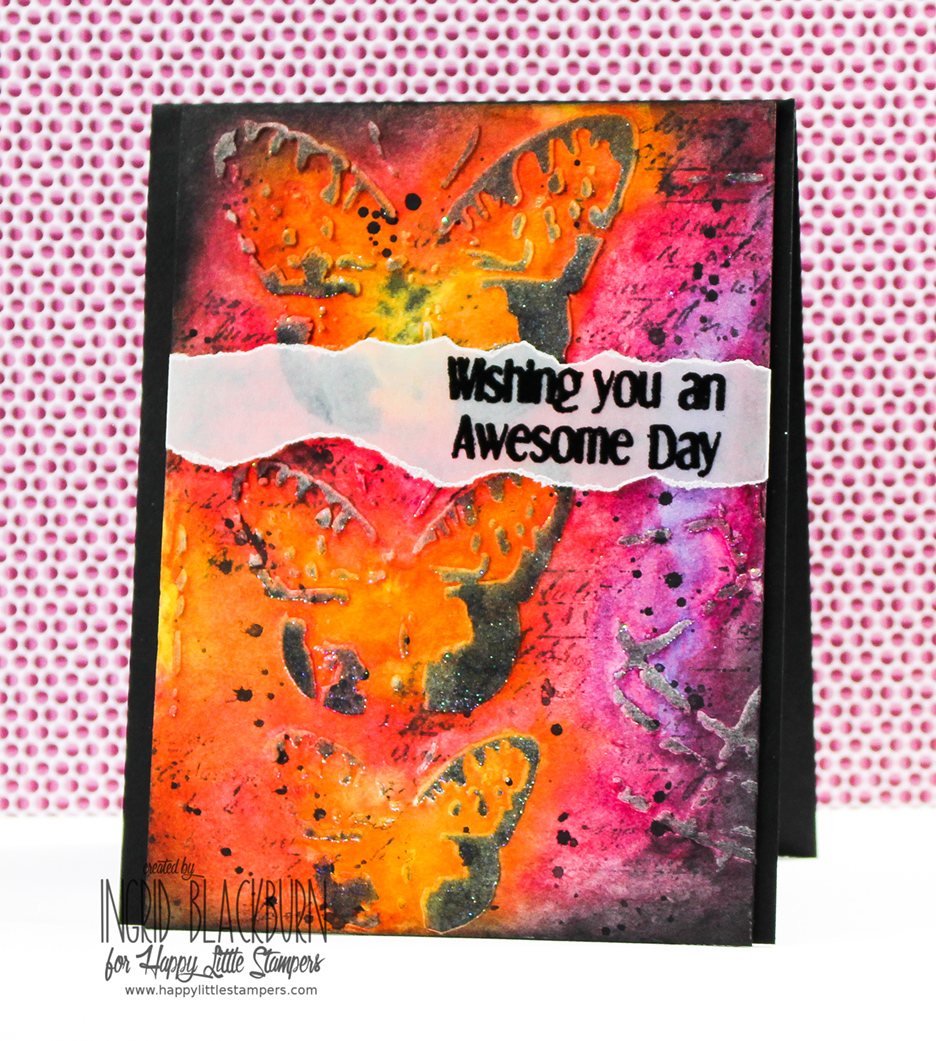
  • Add embossing paste  through a stencil where you want to on 140# cold pressed watercolor or mixed media paper. I used Specimens 12×12″ by The Crafters Workshop. Set aside to dry.
  • Paint over your dried piece with bright vibrant watercolors as in the video. I used Lemon Yellow, Translucent Orange, Magenta, Quinacrodone Violet, Cobalt, Paynes Grey (Schminke) and Permanent Rose (Mission).
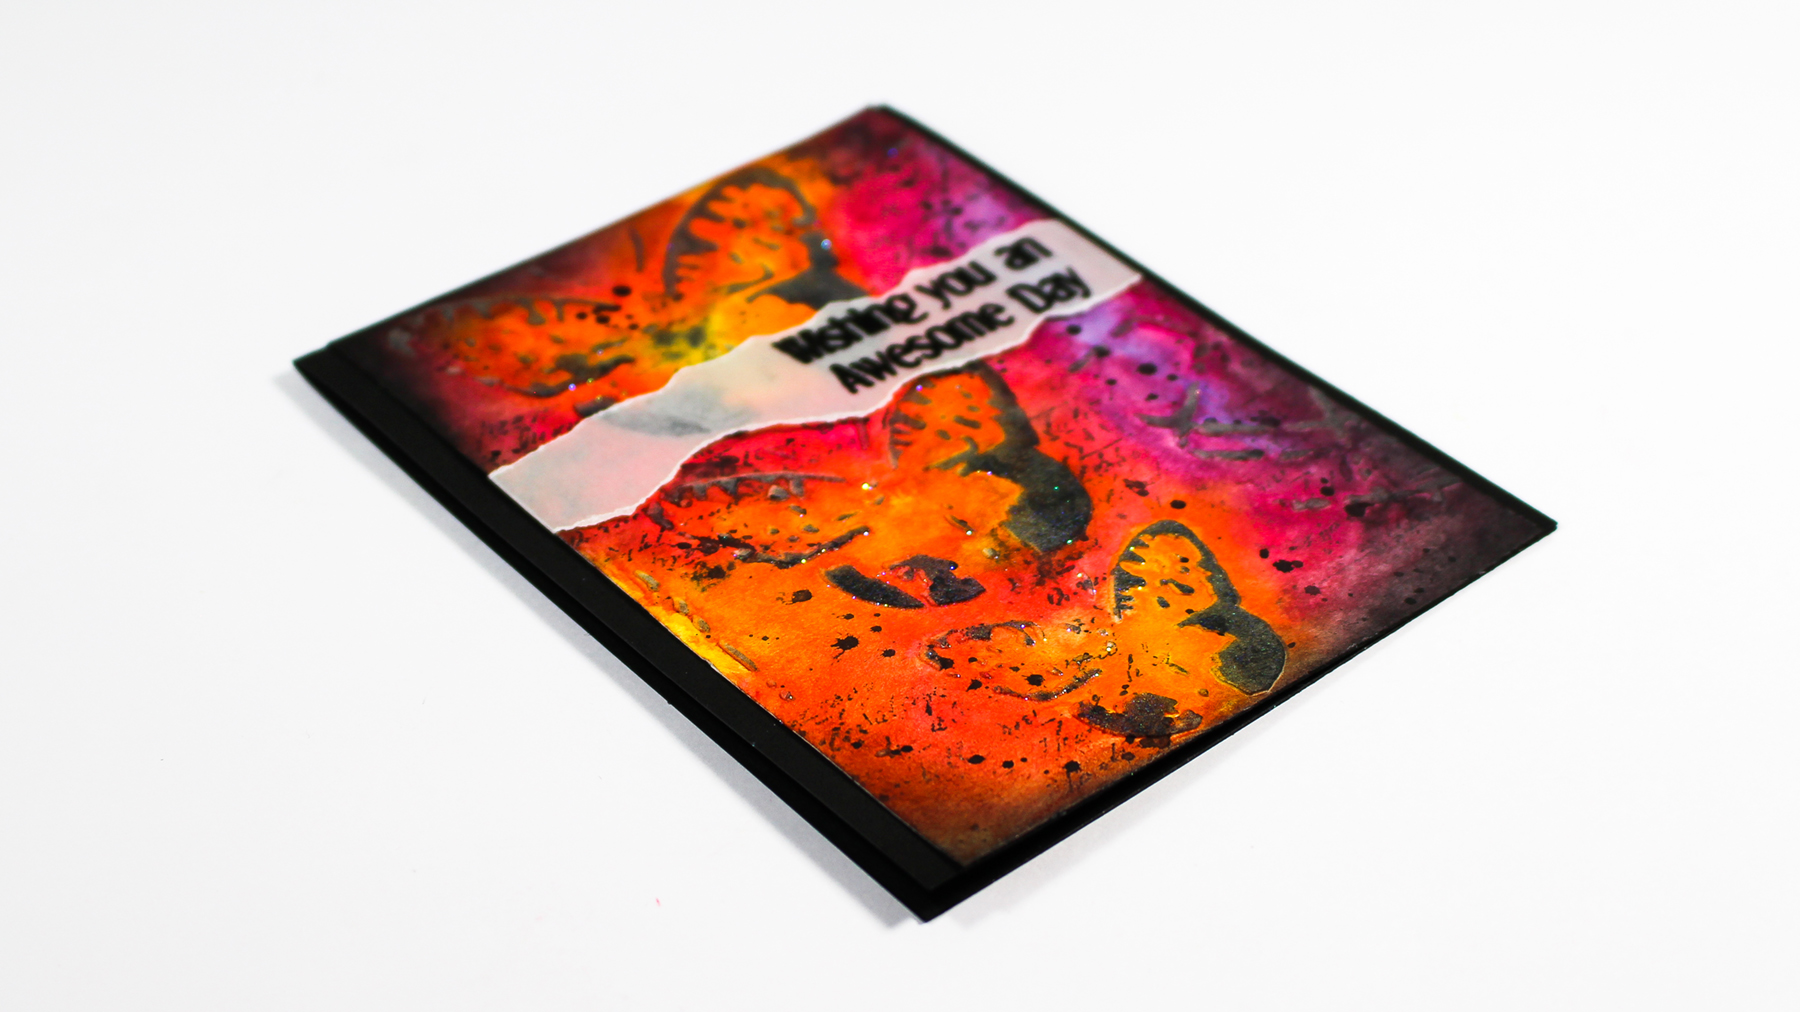
Mixed Media Watercolor-002

  • Keep your watercolor loose and bright, adding dimension through layers and depth by keeping the darker areas balanced with the light.
  • Allow to dry thoroughly.
  • Stamp Script stamp in Soot Black Distress Ink in random spots, touching up in spots with water to keep it loose and imperfect.
  • Add splats with a watery Paynes Grey and a paint brush.
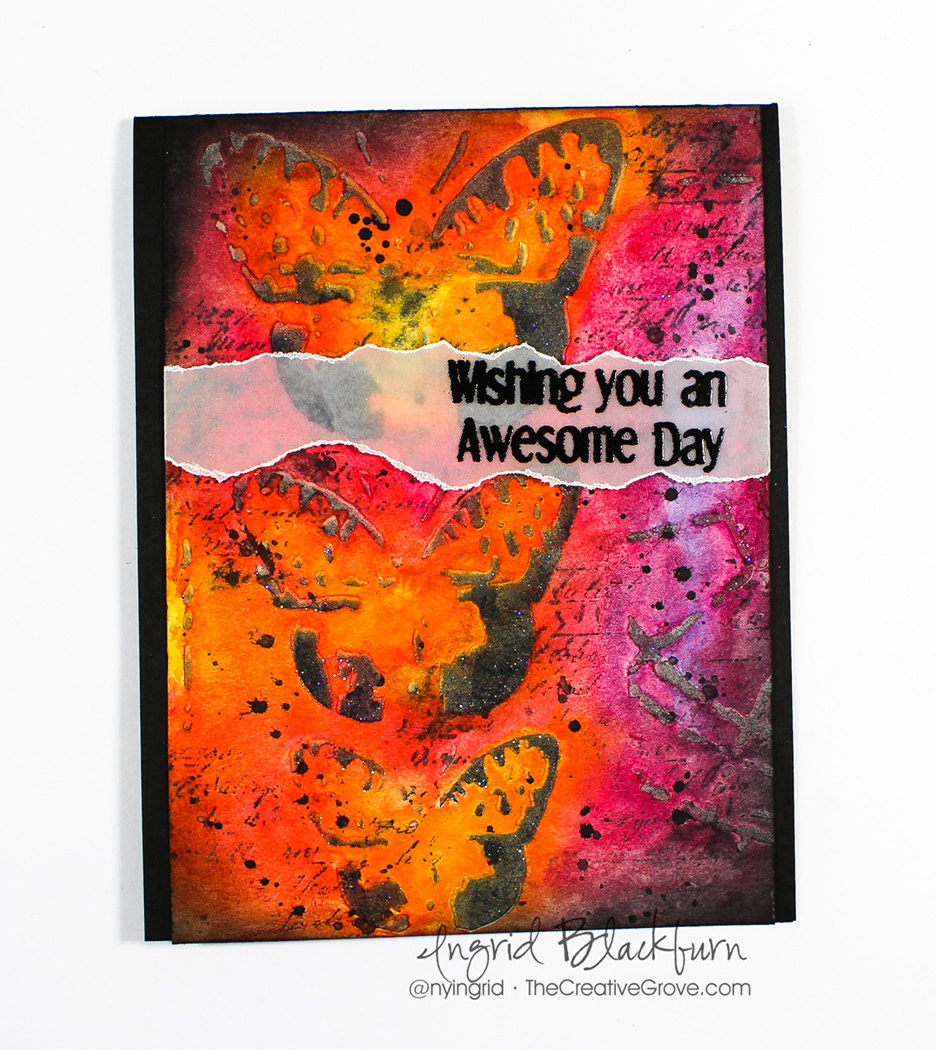
Textured Mixed Media

  • Once dry, add a little sponging to the edges and lightly on the sides with Hickory Smoke and Soot Black Distress inks.
  • Secure your project and stencil over it again. Sponge your embossing paste in Hickory Smoke and Soot Black. If not dark enough to your liking, use your Distress Inks in the direct to paper method.
  • Cover your project with a destatic tool.
  • Place your stencil over top your project again and smoosh a versamark pad over your embossed images.
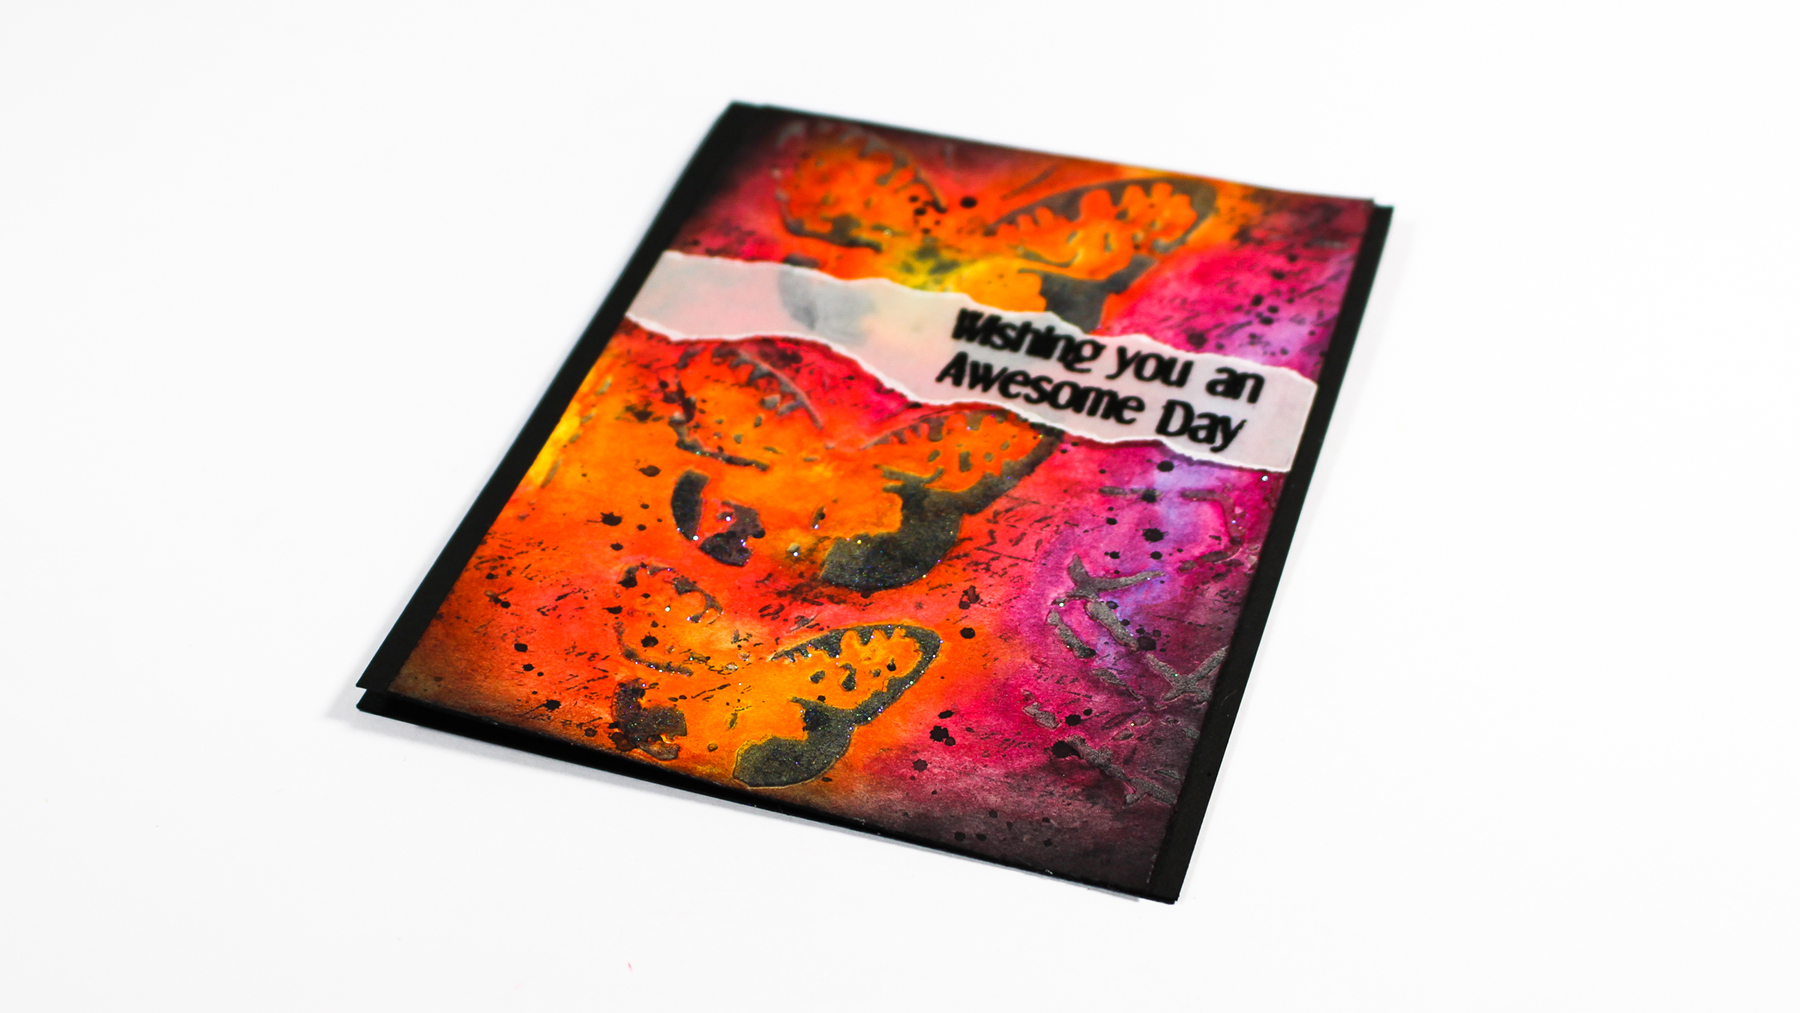
Mixed Media Watercolor

  • Add glitter, then a little clear embossing powder. Heat set
  • Rub over your project with a cloth or paper towel to remove the destatic powder and some of the glitter.
  • Emboss a greeting on a piece of Vellum card stock, tear and add to your project as in the video. I used Everyday Sentiments (Happy Little Stampers)
  • Add piece to black card stock and trim if needed. If you do trim, add a little black to the bottom as in the video and touch up your sponging.
Mixed-Media-Watercolor-007

And come to think of it – I created another Watercolor Mixed Media piece earlier in the week for my friends Loll & Bonnie’s new challenge too – CAS Mix Up. See that card here. I decided to play along with two other challenges today – Anything but Cute – Color and Mixed Media Mojo – Springtime/Watercolor.
abc-badge-crazy-for-color  Graphic to copy 3

So grab those bright watercolors, and have fun creating your own Mixed Media piece! I’m sure you’ll get just as lost in it as I did. Till next time –

Signature

[optin_box style=”2″ alignment=”center” email_field=”email” email_default=”Enter your email address” email_order=”2″ integration_type=”aweber” double_optin=”Y” list=”3846012″ name_field=”name” name_default=”Enter your first name” name_order=”1″ name_required=”Y” opm_packages=””][optin_box_field name=”headline”]Learn with our exclusive FREE video series[/optin_box_field][optin_box_field name=”paragraph”]PHA+R2V0IHRoZSBmcmVlIENyZWF0aXZlIFRpcHMgRS1sZXR0ZXIgYW5kIGxlYXJuIHdpdGggc3Vic2NyaWJlciBleGNsdXNpdmUgdmlkZW8gYW5kIHBpY3RvcmlhbCBjb250ZW50LiBJbmNsdWRpbmcgb3VyIHllYXJseSAxMiBEYXlzIG9mIENocmlzdG1hcyBzZXJpZXMhPC9wPgo=[/optin_box_field][optin_box_field name=”privacy”][/optin_box_field][optin_box_field name=”top_color”]undefined[/optin_box_field][optin_box_button type=”0″ button_below=”Y”]Get Instant Access![/optin_box_button] [/optin_box]
CAS Mix Up

Skinny-Watercolor-Stenciled-Chevron-001

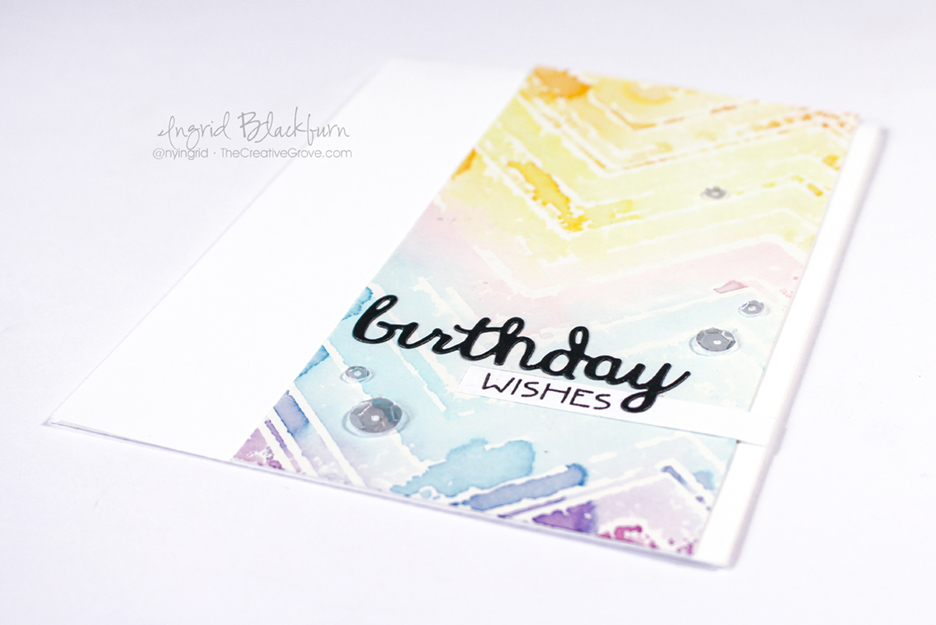
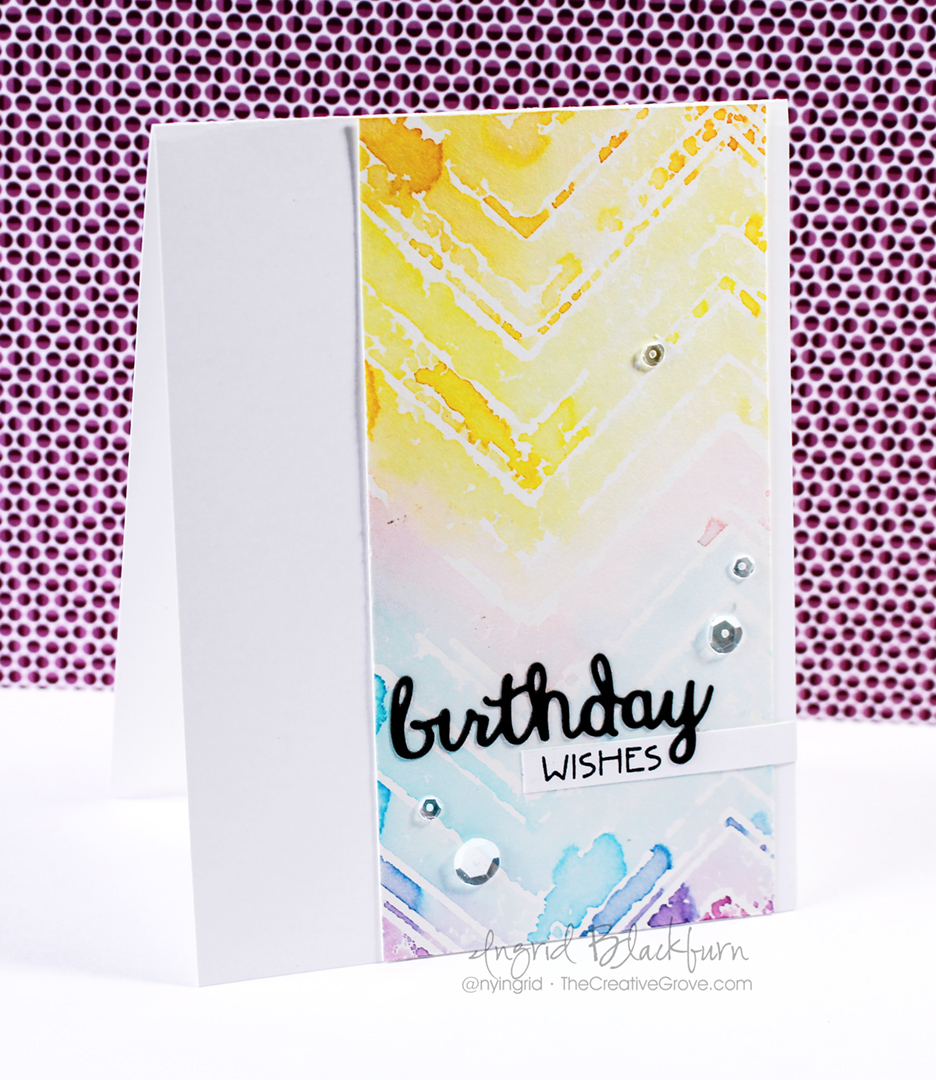
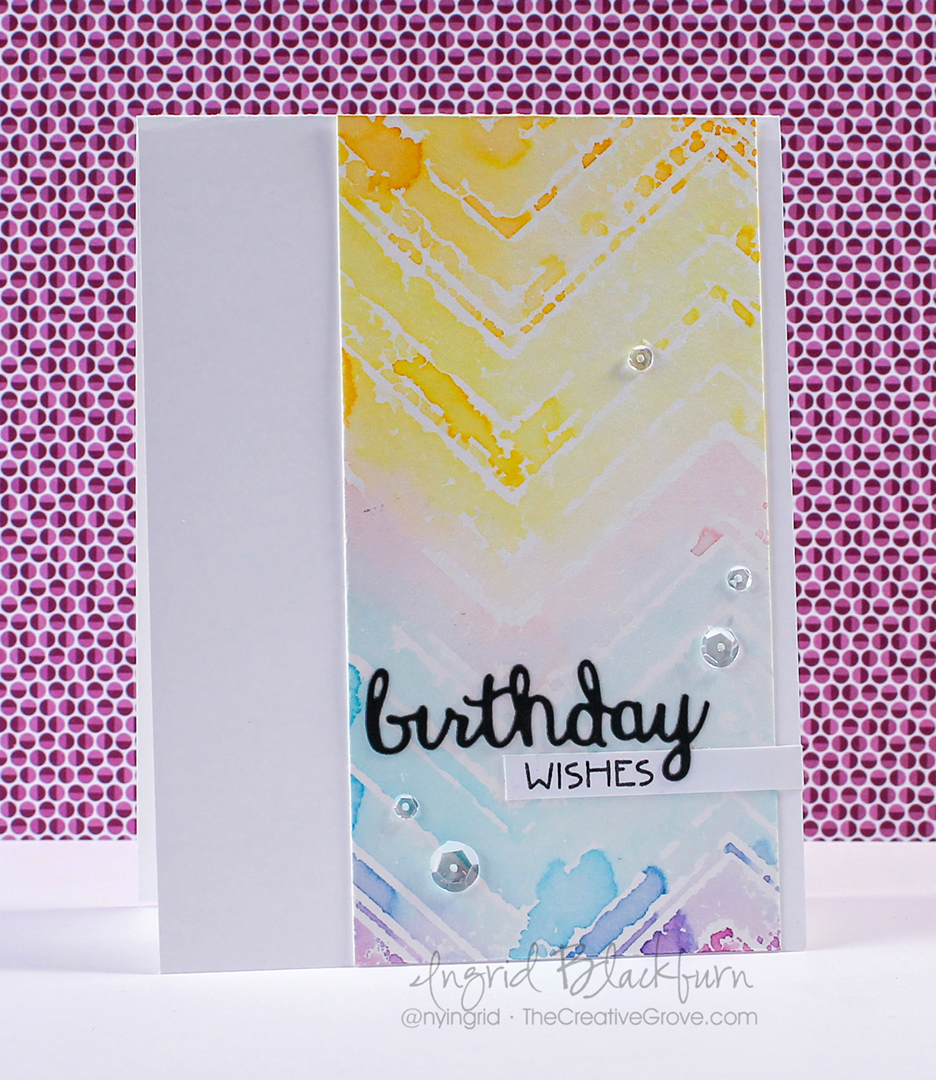
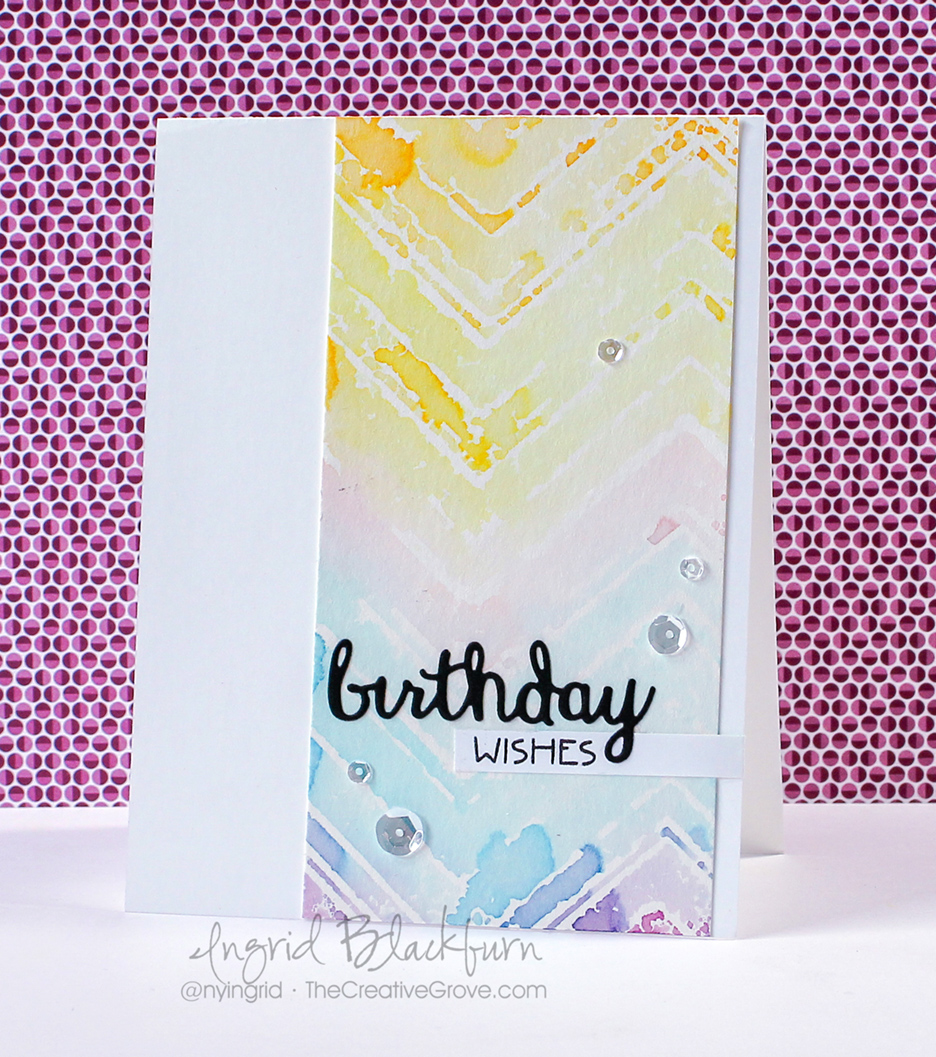
March 1st was a great day! Two exciting things happened – we welcomed little Lylah into the world – more about that below….and my super creative and very CAS styled friends Bonnie Klass and Loll Thompson launched their new challenge – CAS Mix Up – a clean and simple mixed media challenge. So, naturally I created a birthday card to welcome little Lylah – after all – it literally was her birthday!

The new CAS Mix Up challenge is dedicated to clean and simple cards with a mixed media twist. Now you may think that mixed media can’t be CAS, but at it’s heart, mixed media is just that – mixed mediums. Why can’t it be CAS? That’s the challenge – no pun intended! For the first one this month, we’re challenged to use watercolor, stamping and your choice – I chose watercolor stenciling – and it’s actually a negative image that was stamped from a stencil!

march 2016

Skinny-Watercolor-Stenciled-Chevron-2006

This project is actually a bonus panel from a regularly stenciled project using sponged distress inks. I had all this ink left over on my stencil, so I spritzed it to get it wet with a fine mist spritzer, and stamped the stencil onto a piece of watercolor. Here’s how I did it.

Negative Watercolor Stamped Stencil Technique – 

  • Create a project where you use the stencil in a positive way – or just add ink to your stencil directly without worrying about the “stenciling” part. I used the Skinny Chevron stencil by Create a Smile to give off a skinny positive image like this one I created for a challenge over at StampNation (Of course it’s double stenciled – but you get the point):

Double-Stenciled-Background-Sneak-2

  • For this project, I used More Mustard, Fossilized Amber, Spiced Marmalade, Worn Lipstick, Mermaid Lagoon and Seedless Preserves
  • This will leave lots of color on the negative part of your stencil that you would normally just wash or clean up.  Instead – mist your stencil with a fine mist spritzer to get the ink to bead up on the stencil.

Skinny-Watercolor-Stenciled-Chevron-002

  • Lay a piece of 140# cold pressed watercolor paper onto your stencil to stamp the stenciled image. You can also pick up your stencil and stamp, but I didn’t want the colors to run when I picked it up. Hold your paper there a few seconds to allow the water to soak in.
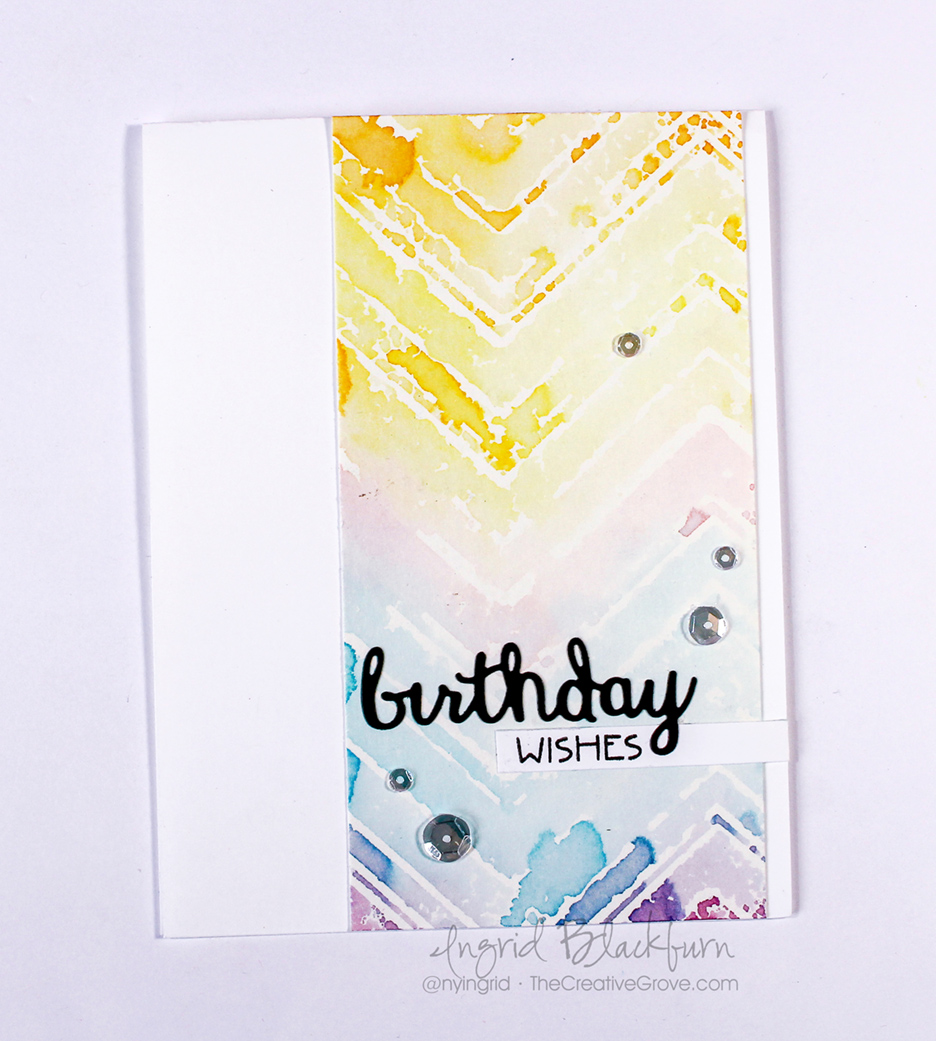
  • You are left with a negative image – the part you couldn’t stencil!

Skinny-Watercolor-Stenciled-Chevron-003

  • Adhere to an A2 card base, add a stamped greeting and die – both also from Create a Smile – I just LOVE their fonts. This is from the birthday trio dies and the Mini Birthday stamp set.
  • Add a few sparkling clear sequins by Pretty Pink Posh and you’re all set!

I love the way this card turned out. Look at how bold the colors are in the sneak peek image above and how muted the very same colors are with a little water spritzed onto them. Truly amazing! And that’s mixed media at it’s core. Not so scary, huh?!!

I’d love for you all to play along in Loll and Bonnie’s first challenge over at CAS Mix it Up – so head on over and check it out! I’m also playing along in a few other challenges – Laura’s Loft, and NBUS – as this is the first time I’m using this stencil and die by Create a Smile!

Feb.-Challenge-Board button aqua use this the

I can’t wait to see what you create!

Skinny-Watercolor-Stenciled-Chevron-004

On a personal note –

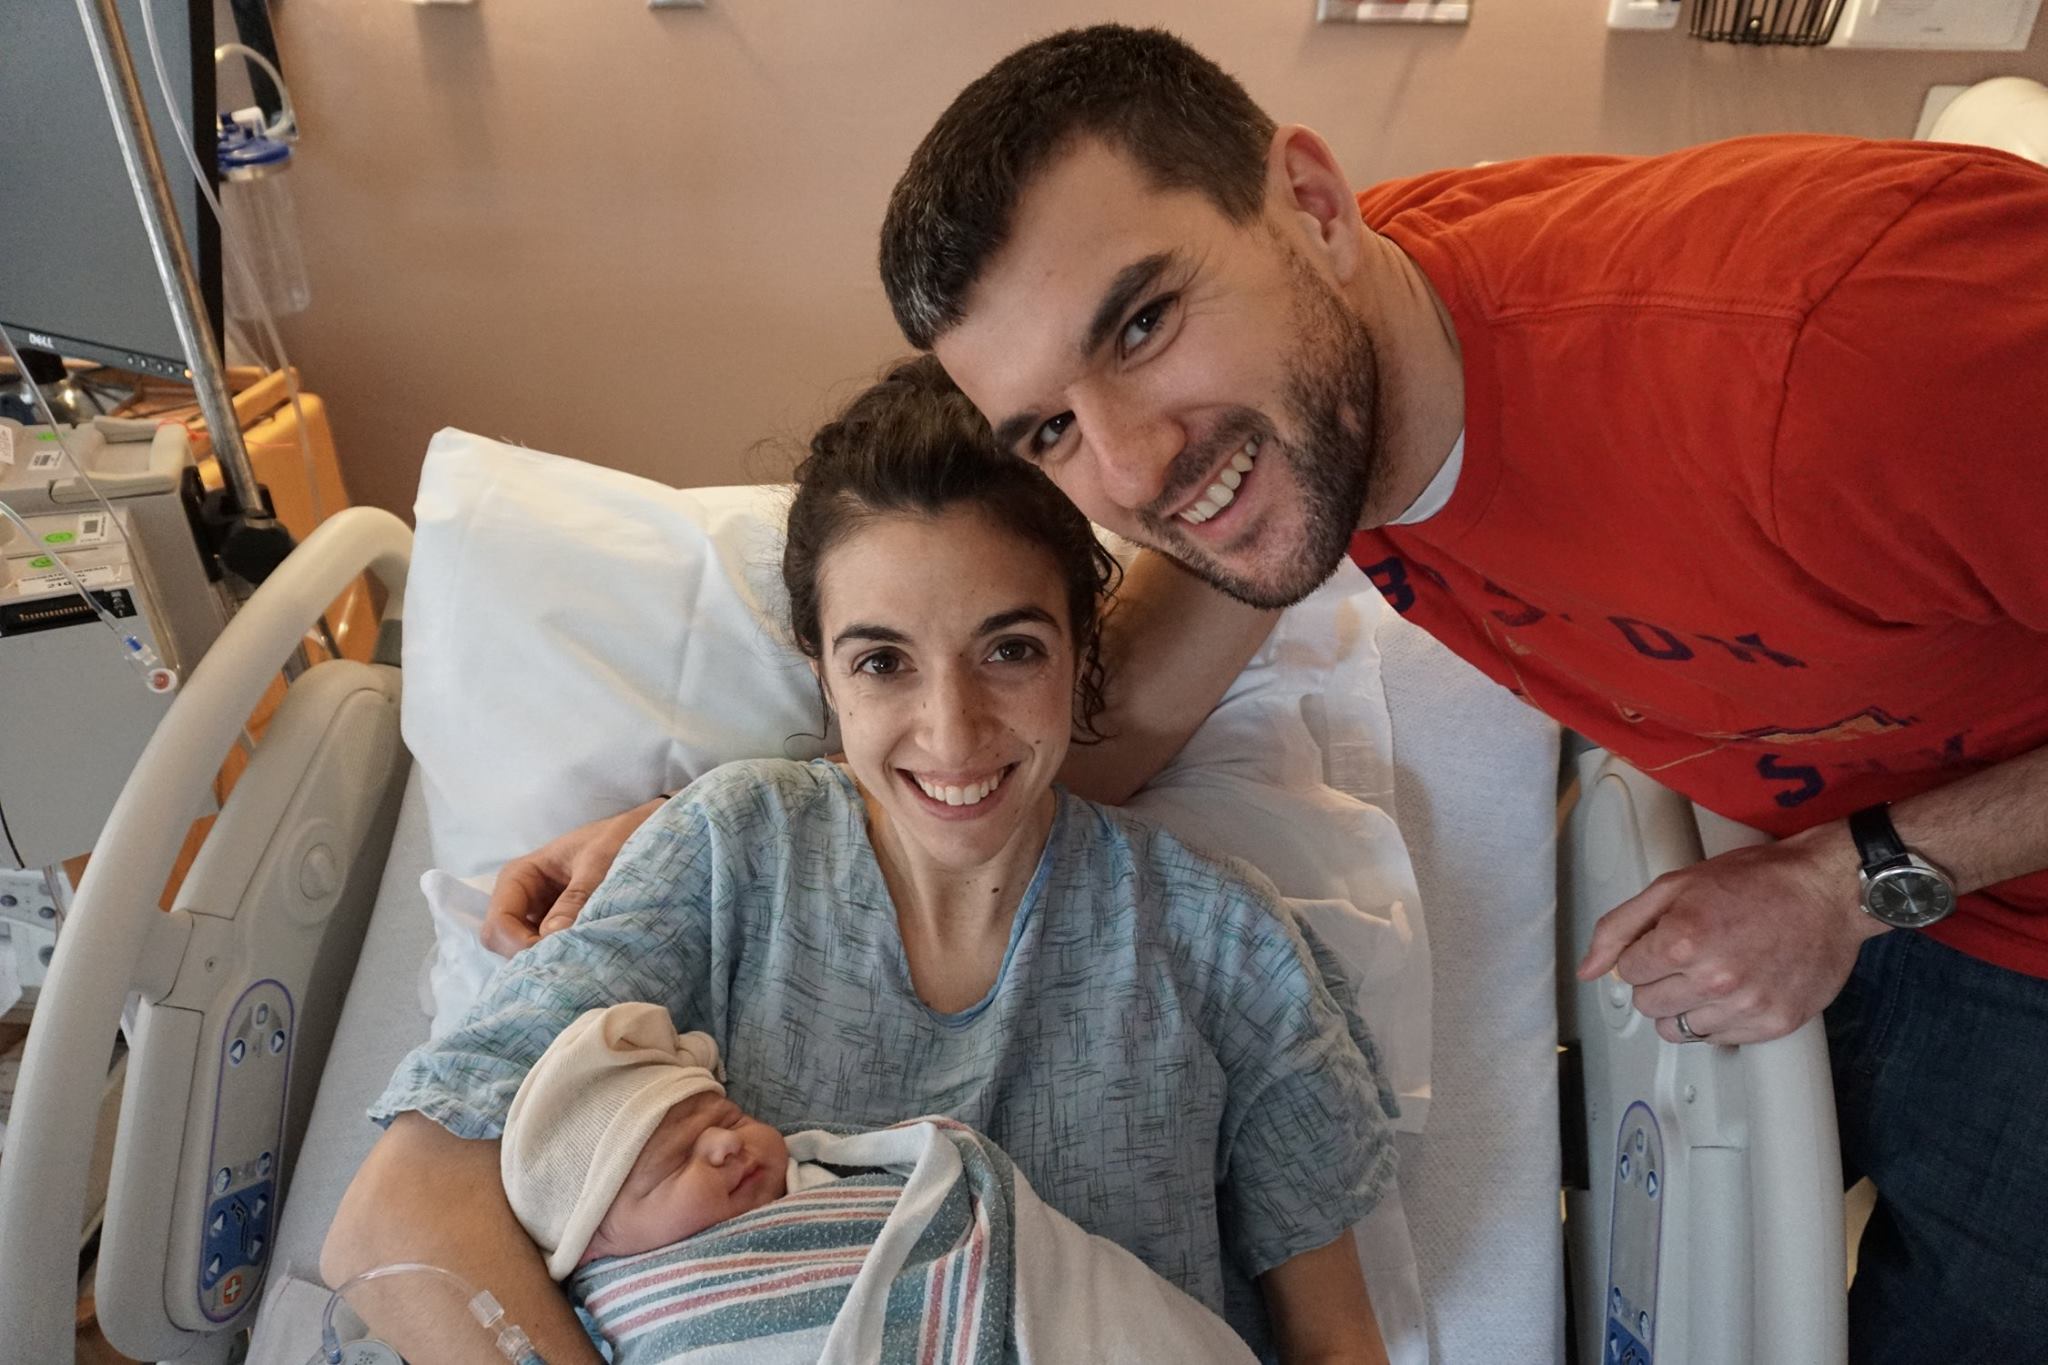
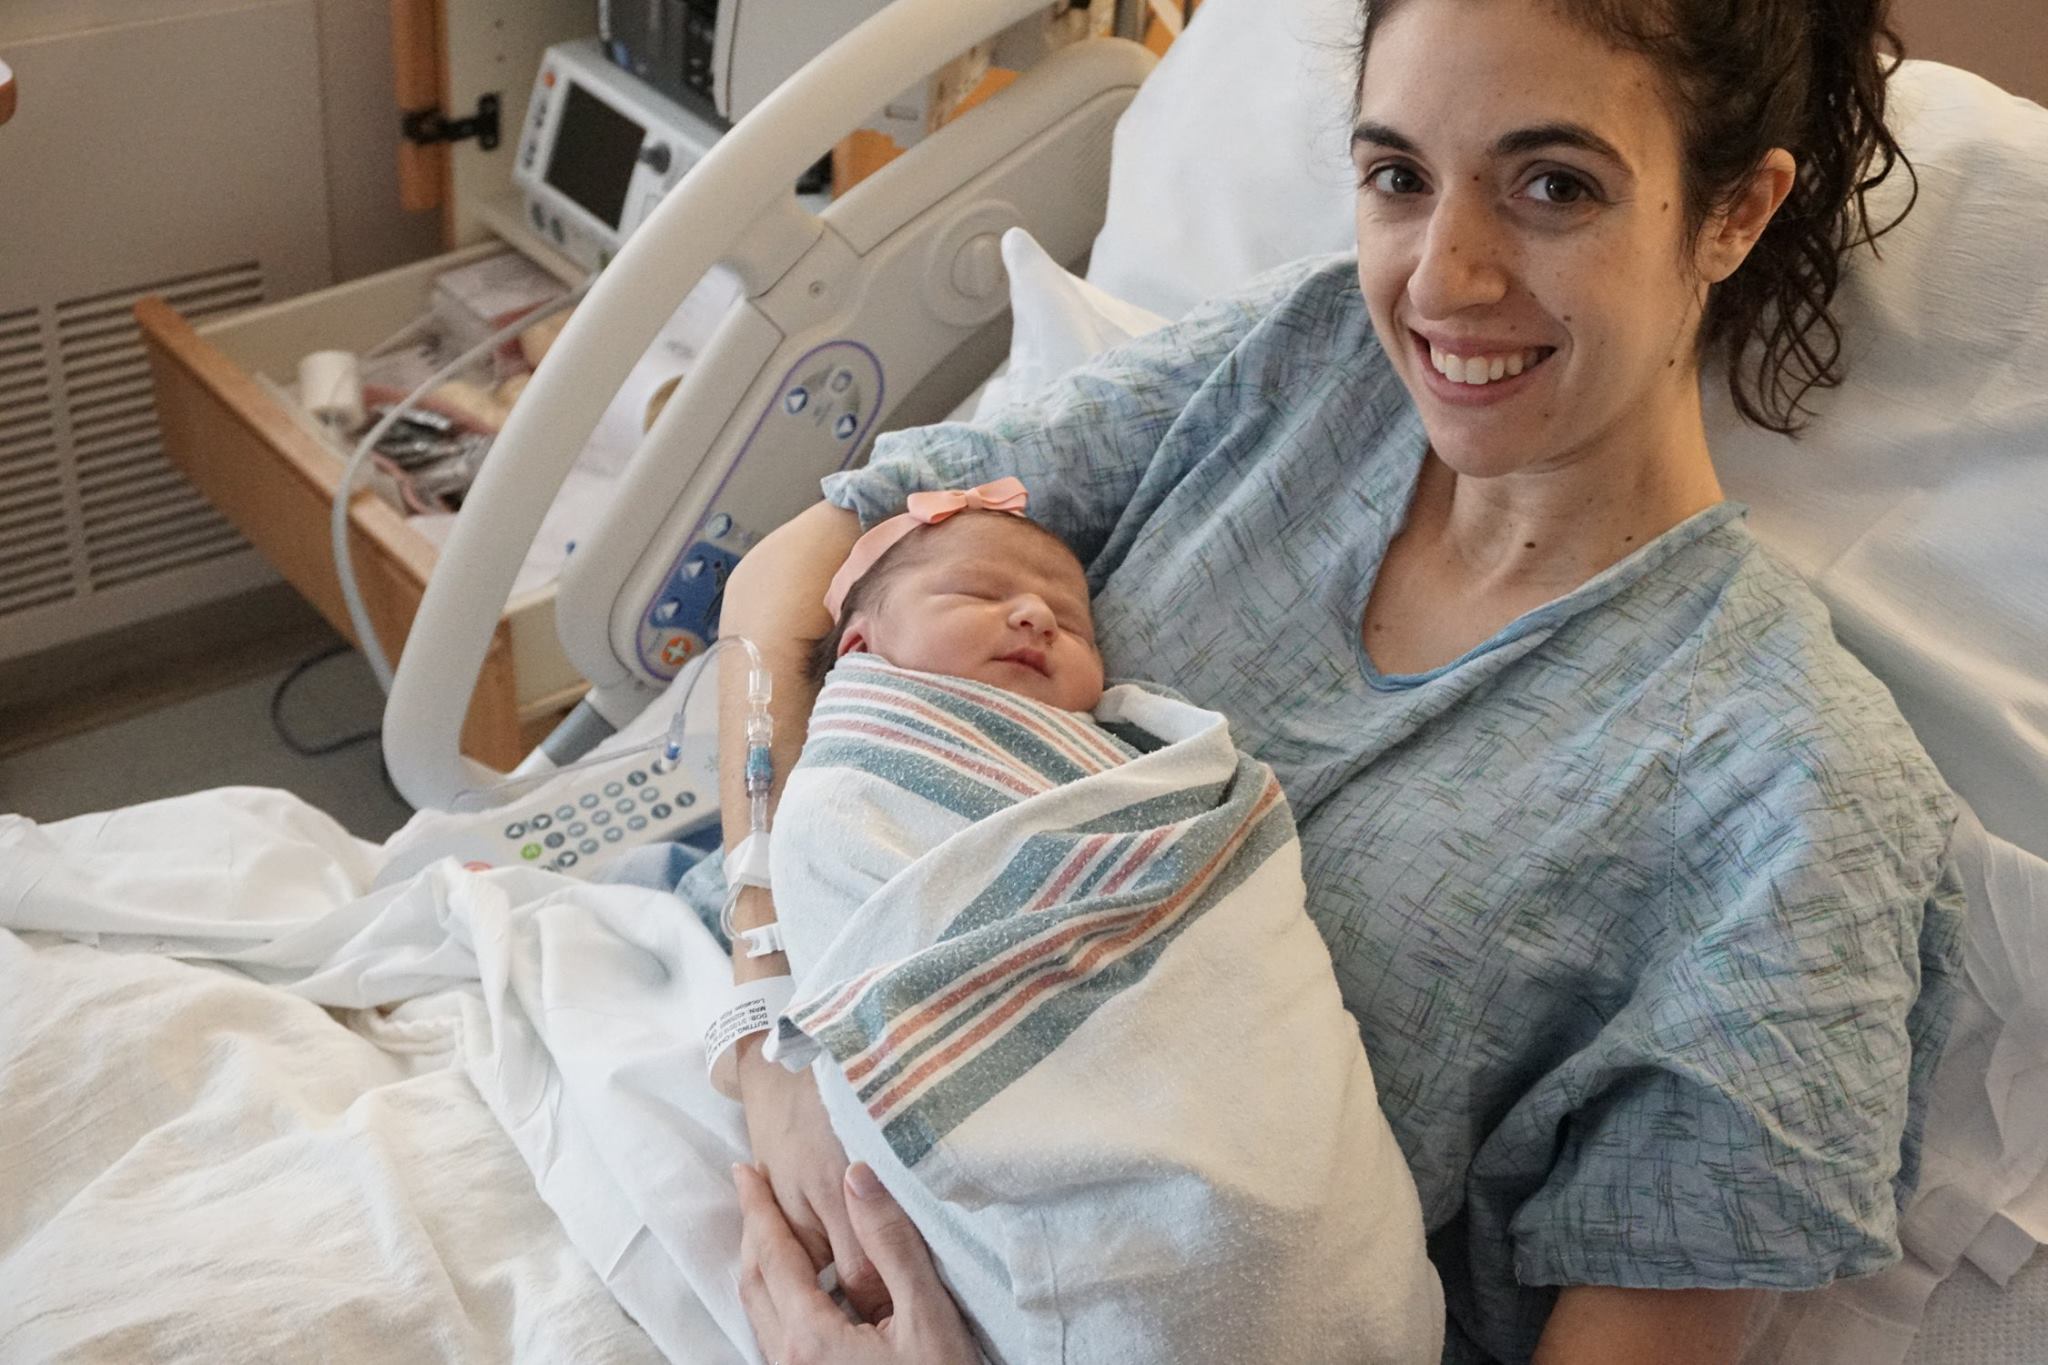
I know this blog is all about paper crafting, but from time to time we all have big moments in our lives. Yesterday was definitely one – our first grandchild! Yes, I’m a grandmother at the tender age of 46! Michael is a bit older than me, and I’ve been blessed to have two beautiful and amazing girls as my bonus daughters for the past 18 years. Our youngest – Allyson and Jeff welcomed their first child into the world yesterday – Lylah RaeAnn.

First Family Photo

Lylah is a character from a book that Allyson read in high school and just fell in love with the name. Raeann is in honor of Rachel and Annie – Allyson & Jeff’s sisters – isn’t that just sweet. I love the name!

Mom & Lylah

We can’t wait to fly to New York and meet our precious little grand daughter Lylah. Feel free to leave me any grandmom (I’m going to go by Omi – German) advice in the comments below!

Thank for stopping by , now go get those fingers inky and have a great day!

Ingrid Blackburn - The Creative Grove

[optin_box style=”2″ alignment=”center” email_field=”email” email_default=”Enter your email address” email_order=”2″ integration_type=”aweber” double_optin=”Y” list=”3846012″ name_field=”name” name_default=”Enter your first name” name_order=”1″ name_required=”Y” opm_packages=””][optin_box_field name=”headline”]Learn with our exclusive FREE video series[/optin_box_field][optin_box_field name=”paragraph”]PHA+R2V0IHRoZSBmcmVlIENyZWF0aXZlIFRpcHMgRS1sZXR0ZXIgYW5kIGxlYXJuIHdpdGggc3Vic2NyaWJlciBleGNsdXNpdmUgdmlkZW8gYW5kIHBpY3RvcmlhbCBjb250ZW50LiBJbmNsdWRpbmcgb3VyIHllYXJseSAxMiBEYXlzIG9mIENocmlzdG1hcyBzZXJpZXMhPC9wPgo=[/optin_box_field][optin_box_field name=”privacy”][/optin_box_field][optin_box_field name=”top_color”]undefined[/optin_box_field][optin_box_button type=”0″ button_below=”Y”]Get Instant Access![/optin_box_button] [/optin_box]
Watercolor Smash in the Mix Mash Forest

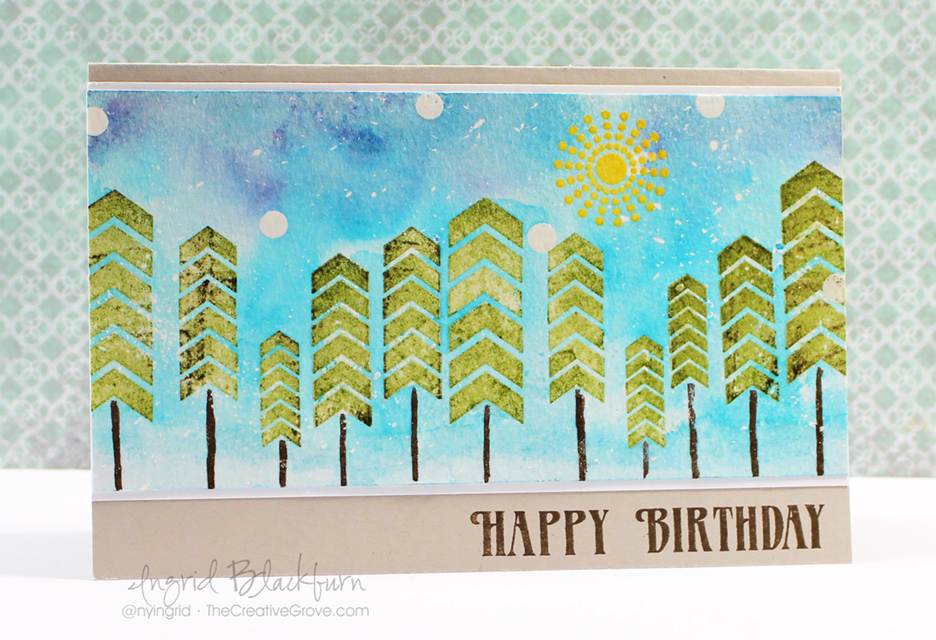
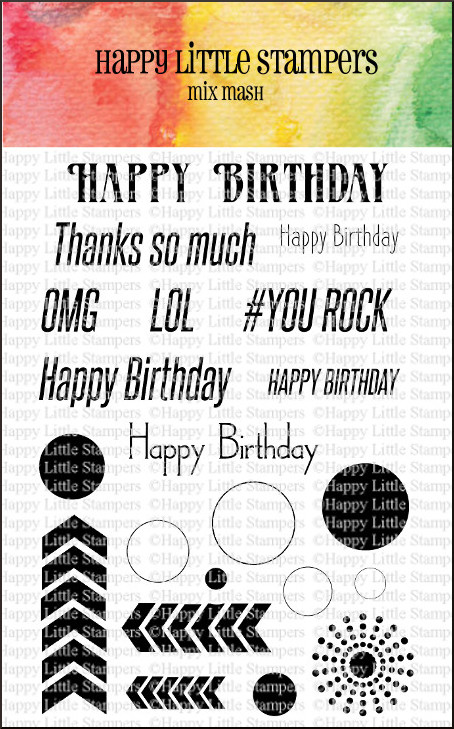
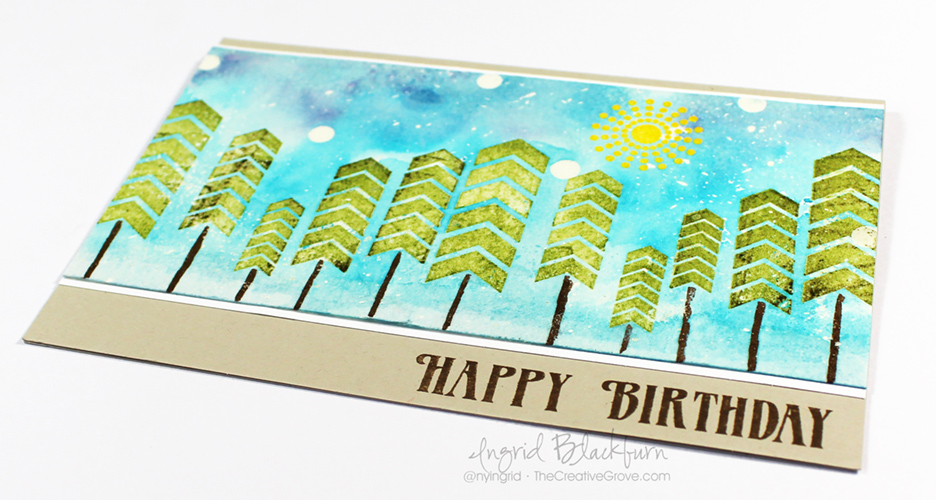
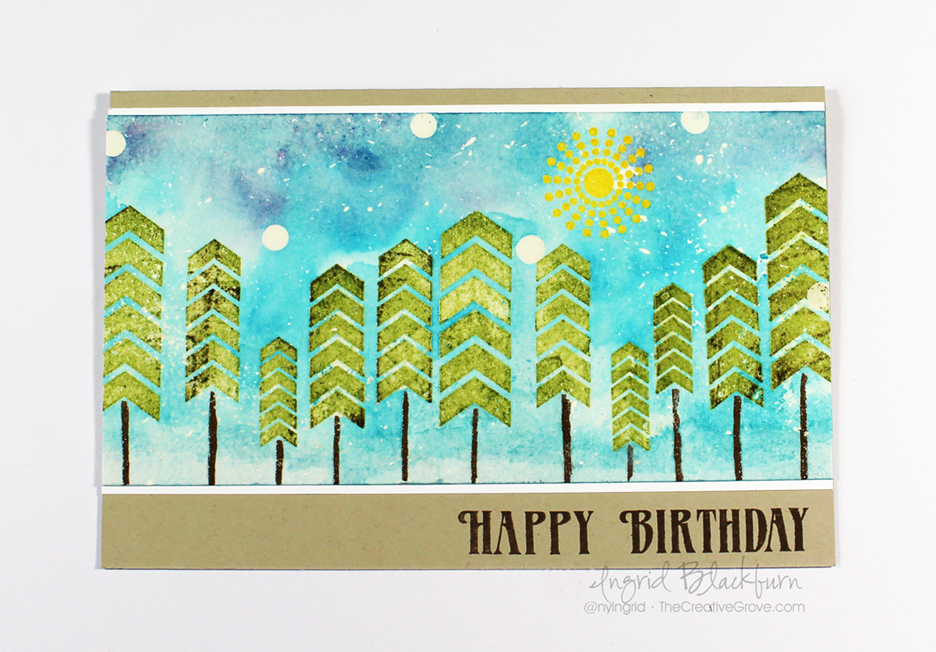
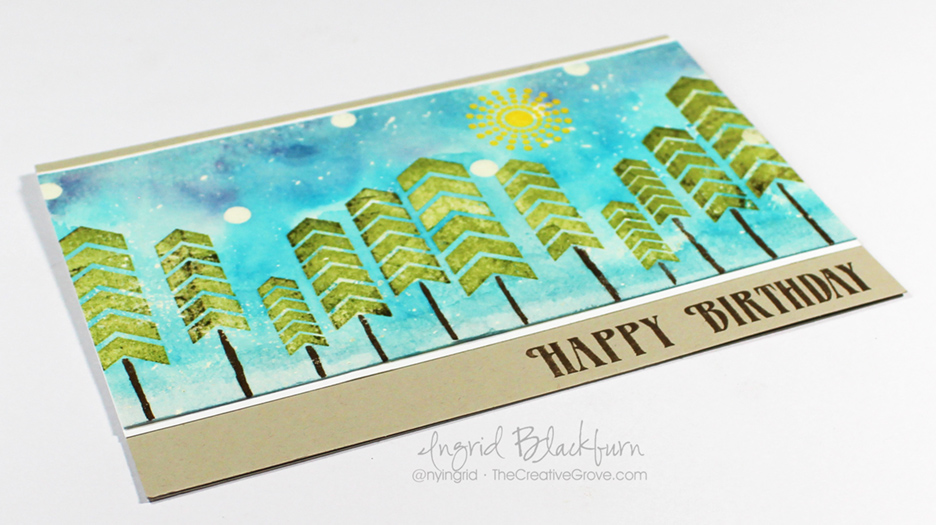
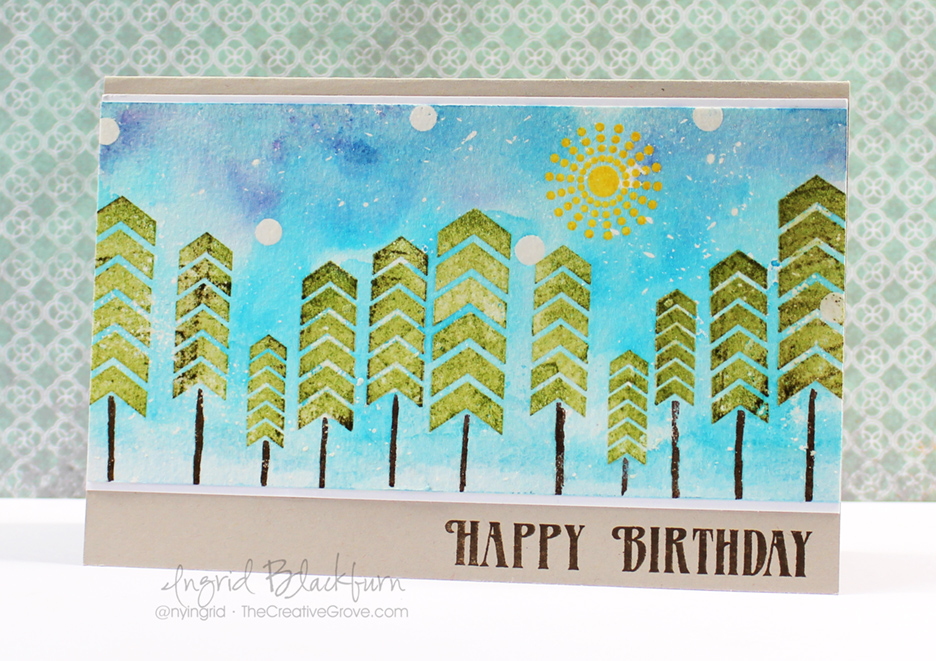
Have you ever tried the Watercolor Smash technique? It’s a super easy one that creates amazing looks. Paired here together with the Mix Mash stamp set by Happy Little Stampers, you get a fun and quirky little scene made out of some graphic elements. Don’t you just love stretching your stamps in ways they weren’t intended?

Distress Techniques SHOP Mix Mash (2)

So you can fully understand all the little tips and ideas that went into creating this card, I filmed a short video tutorial for you. I don’t know how your mind works, but the first time I saw this stamp set, this card idea popped into my head! Enjoy the video:

Watch on YouTube

The Watercolor Smash Technique Tutorial

  • The scene was created on a 6 3/8 x 3 1/4″ piece of 140# cold pressed Hahnnenmuhle watercolor paper. The final card is 4 1/4 x 6 3/8″ folded Sahara Sand card stock by Stampin Up. You’ll also need a white – 6 3/8 x 3 7/16″.
  • I had an idea to create a sunny, snowy day – I know…contradiction…so I wanted to add some flicked masking fluid first with a toothbrush. You have to set it aside to fully dry before beginning – no heat tool!
  • To keep with the quirky theme, add a few of the smallest circles from Mix Mash in the sky portion of the card. Emboss in clear embossing powder.
  • Add the sun by first stamping in Versamark Ink, then Mustard Seed Distress Ink (Ranger).

Watercolor Smash techniques

  • Add the trees in the same manner as the sun, using Peeled Paint and Forest Moss Distress with Versamark. TIP – clean your stamp in between so you don’t get green in your watermark pad! I also varied the size and height of the trees so it wasn’t too uniform.
  • Emboss trees in clear, add trunks using a Ground Espresso Distress Marker. Don’t do too many at once before adding the embossing powder – you don’t want the ink to soak into your watercolor paper to quickly. If it does, run over it with a Versamarker, but be sure to only get the brown!
  • Lay down the colors as in the video – Tumbled Glass, Broken China, Mermaid Lagoon and Chipped Sapphire.
  • Add a fair amount of water with a fine mist spritz bottle.
  • Lay your project – image side to ink over your blue palette and smash, holding your card stock there so the ink and water can grab onto your project. You’ll see the sides of your paper curl up just a bit.

Scenic Cards

  • Don’t worry if you didn’t get it right in one smash. That’s the beauty of this technique. Keep smashing to get the color you want in certain sections. To get a smooth look, be sure not to allow your project to dry in between.
  • Use a Pentel Water brush loaded with Broken China to move color into desired spots. TIP – Be sure your brush has the same amount of water as your paper, if it is too dry, it will pull watercolor from your project.
  • Once you have the look you are going for, dry your project – either naturally, or with a heat tool. I chose to use a heat tool, but don’t hover over your embossed images too much – you’ll over-emboss them! TIP – if your paper is too soaked and bent, your color and water will seep to the outside. To keep that from happening, just dry the edges a bit with a heat tool so that your project flattens out a bit, then continue to dry naturally if so desired.

Create backgrounds with the Watercolor Smash/Smooshing technique

  • When your project is fully dry, rub off your masking fluid.
  • Place the white matte where it will be on the folded card base – do not adhere yet.
  • Stamp greeting from Mix Mash set in Ground Espresso ink to match your trunks. Zap with a heat tool to set.
  • Add Mono liquid glue to the back, adhere to a white matte and then to the stone folded card base.

Mix Mash Stamp Set

That’s it! I hope you enjoyed this tutorial. I love this card – it’s fun nature is what I love about stamping. This technique is so fun, easy and one I use frequently. Once you’ve done a few, you’ll quickly add it to your stamping toolbox. Be sure to subscribe for an exclusive video series with more techniques below!

Keep those fingers inky –

Signature

[optin_box style=”2″ alignment=”center” method=”post” email_field=”email” email_default=”Enter your email address” email_order=”2″ integration_type=”aweber” double_optin=”Y” list=”3846012″ name_field=”name” name_default=”Enter your first name” name_order=”1″ name_required=”Y” opm_packages=””][optin_box_field name=”headline”]Learn with our exclusive FREE video series[/optin_box_field][optin_box_field name=”paragraph”]PHA+R2V0IHRoZSBmcmVlIENyZWF0aXZlIFRpcHMgRS1sZXR0ZXIgYW5kIGxlYXJuIHdpdGggc3Vic2NyaWJlciBleGNsdXNpdmUgdmlkZW8gYW5kIHBpY3RvcmlhbCBjb250ZW50LiBJbmNsdWRpbmcgb3VyIHllYXJseSAxMiBEYXlzIG9mIENocmlzdG1hcyBzZXJpZXMhPC9wPgo=[/optin_box_field][optin_box_field name=”privacy”][/optin_box_field][optin_box_field name=”top_color”]undefined[/optin_box_field][optin_box_button type=”0″ button_below=”Y”]Send me exclusive tips![/optin_box_button] [/optin_box]
Mixed Media Challenge: Paint

Mixed-Media-Gelli-Plate-Monoprint-2.1016-001

We’re playing around with Paint over at Happy Little Stampers this month for the Mixed Media Challenge. I thought I would re-visit my Gelli Plate and create a cool monoprint using some Acrylic paint for you. I hope this project inspires you in some way! I’d love for you to join us, the prize is a gift certificate this month, so you have nothing to lose!

HLS Mixed Media challenge February 2016

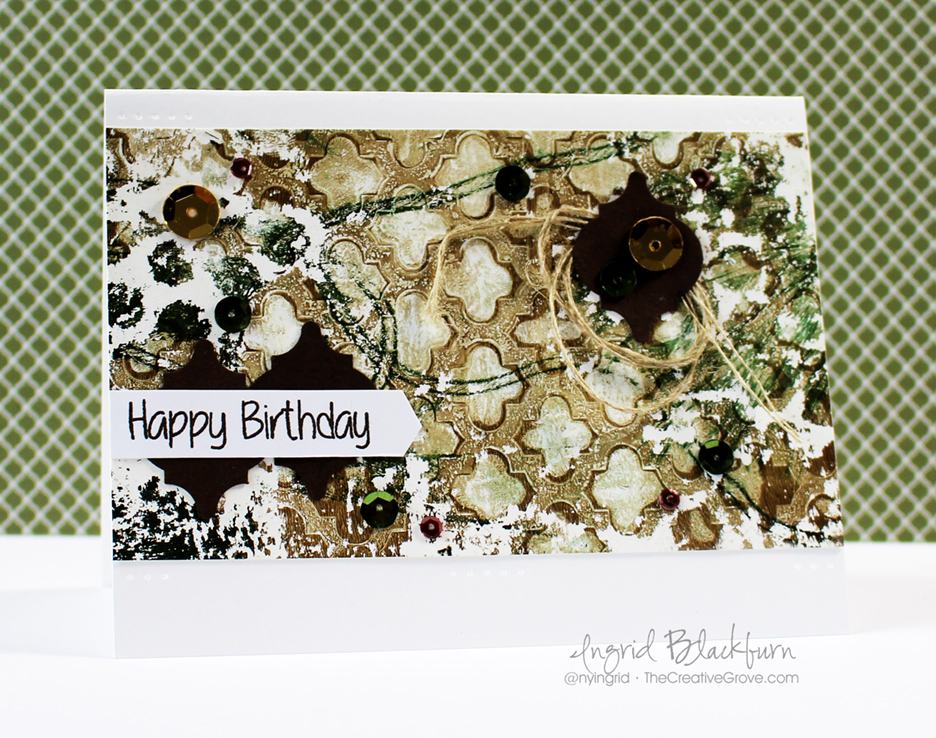
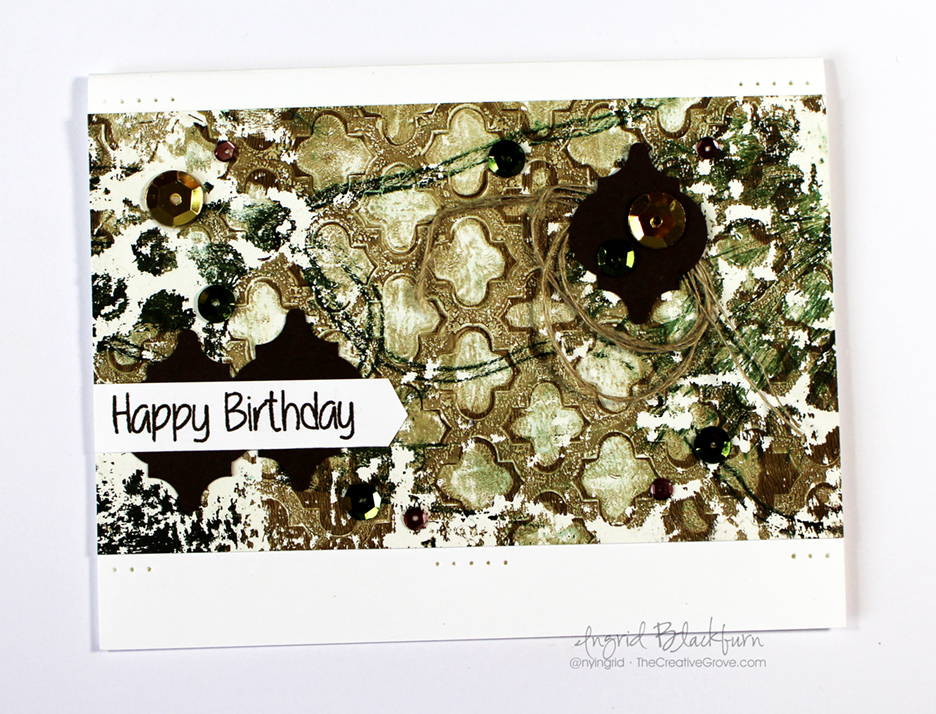
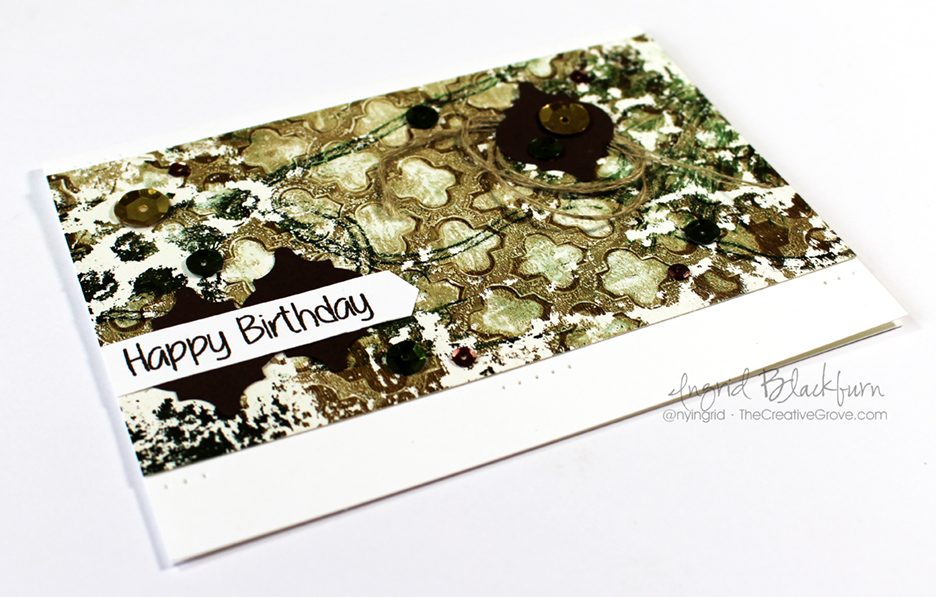
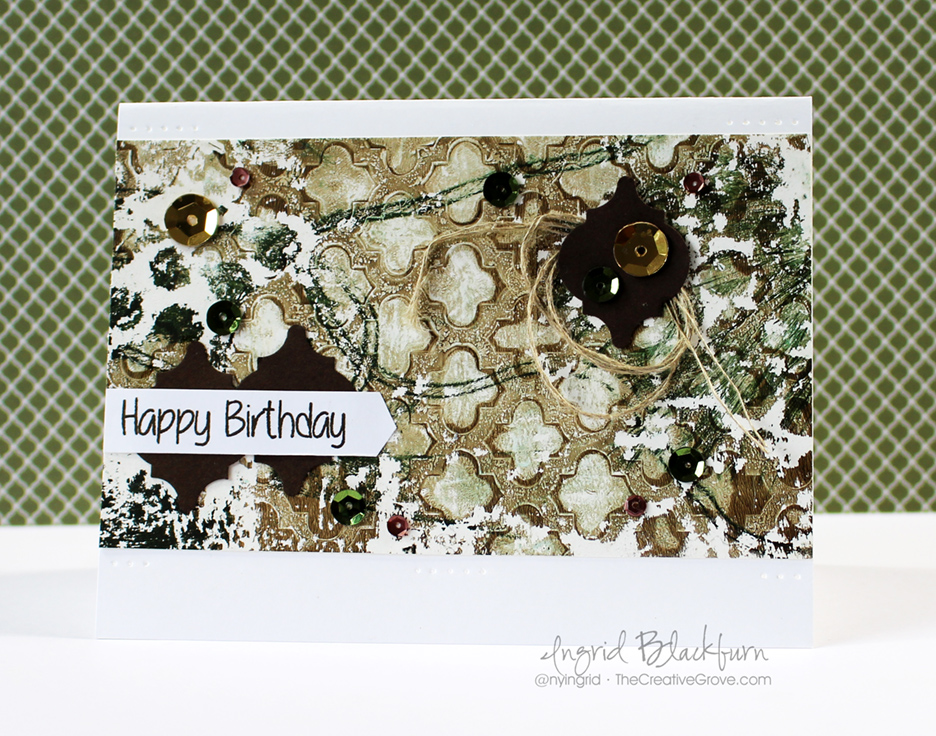
To create this fun card, I used several layers of acrylic paint, some left over Christmas tree branches, bubble wrap, a stencil and some twine. I pulled prints from each layer, and layered each one on this piece. The end result is a varied project with deep character. You’ll notice the Phthalo Green, Burnt Umber and white acrylic paint layers. I love the distressed look it took toward the end. My Umber dried a bit so I only was able to pull a partial in those spots, but that left me with some awesome character.

Mixed-Media-Gelli-Plate-Monoprint-003

To finish the card, I punched a few pieces of Espresso card stock, used a little linen thread and some sequins. I thought a simple banner with the greeting from the HLS Butterfly Birthday set would be perfect. Rather than create a traditional banner edge, I pulled my card stock through half a hexagon punch and punched the reverse for the point. I thought it went a bit better with the image from the Moroccan Simon Says Stamp stencil. The card needed something, so a little paper piercing rounded it all out.

Mixed-Media-Gelli-Plate-Monoprint-002b

I think it turned out pretty cool, I love that I can paint with several layers on a monoprint and it still is just like a piece of printed paper – that’s so cool! So how are you going to paint your creation?

Mixed-Media-Gelli-Plate-Monoprint-004

Remember, Mixed Media can be simple like this card – all you need is stamps, ink, and a way to develop texture with another element like a stencil, or paste, or paint. Quite simple!

So get those fingers inky – mine were for this one!

Signature

[optin_box style=”2″ alignment=”center” email_field=”email” email_default=”Enter your email address” email_order=”2″ integration_type=”aweber” double_optin=”Y” list=”3846012″ name_field=”name” name_default=”Enter your first name” name_order=”1″ name_required=”Y”][optin_box_field name=”headline”]Learn with our exclusive FREE video series[/optin_box_field][optin_box_field name=”paragraph”]PHA+R2V0IHRoZSBmcmVlIENyZWF0aXZlIFRpcHMgRS1sZXR0ZXIgYW5kIGxlYXJuIHdpdGggc3Vic2NyaWJlciBleGNsdXNpdmUgdmlkZW8gYW5kIHBpY3RvcmlhbCBjb250ZW50LsKgPGVtPjxzdHJvbmc+SW5jbHVkaW5nwqA8L3N0cm9uZz48L2VtPm91ciB5ZWFybHkgMTIgRGF5cyBvZiBDaHJpc3RtYXMgc2VyaWVzITwvcD4K[/optin_box_field][optin_box_field name=”privacy”][/optin_box_field][optin_box_field name=”top_color”]undefined[/optin_box_field][optin_box_button type=”0″ button_below=”Y”]Get started now![/optin_box_button] [/optin_box]


Video, 2 Tutorials, Blog Hop & Prizes

Gelli-Plate-Monoprinting-tutorials

I have all sorts of goodness for you today! Towards the bottom of this über long post, I have two – yes TWO tutorials for you – one in video form and another after.

First I wanted to tell you about an exclusive collection of stamping stuff just coming available – yup…it’s brand spankin new – not on the market yet! There’s a blog hop filled with awesome projects – great to inspire you this morning, plus at the bottom, I have a new video for you and more crafty goodness!

Normally I would be participating alongside these great card makers for a great blog hop showcasing the new Stamp of Approval collection – Young at Heart. But alas, customs has benched me. They’ve kept my supplies – secretly I think they’re having too much fun making birthday cards and have decided to keep all the fun for themselves! Not to worry, I still have all the information you need, plus I have some fun inspiration for you too!

SOA Feb 2016

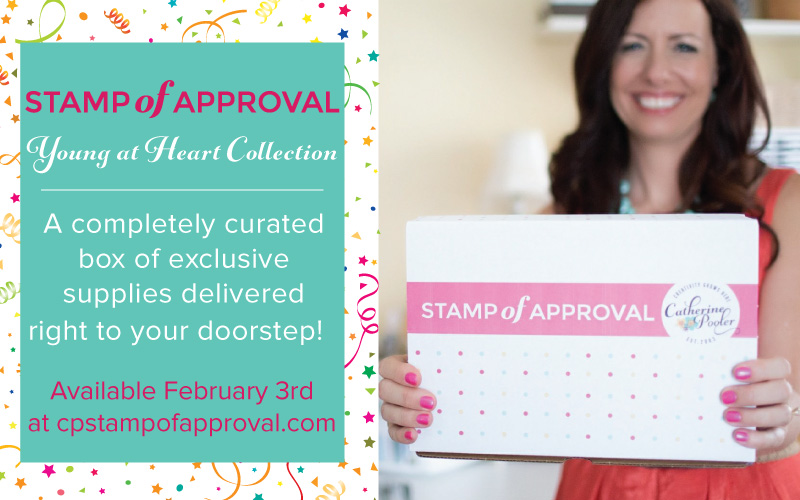
Stamp of Approval (SOA) is an exclusive box of Stamps, Dies and Stencils designed by Catherine Pooler and some of your favorite stamp companies. Available quarterly, and only till they sell out – and let me be the first to tell you, it’s quick – the first SOA sold out in hours!

This year, StampNation celebrated it’s 5th Birthday, so naturally a box about birthdays makes sense – it’s called the Young at Heart Collection. I would think that birthday cards are probably the #1 card type made – so I’m sure you’ll find something in it for you. But don’t think just birthdays – after seeing the products myself in the videos, I have all sorts of ideas for non-birthday cards too! Here are some links to the three videos highlighting product from the box:

The stamps, dies and stencils designed for this collection are first only available through the SOA box. They will eventually be released by their stamp companies sometime later in 2016/2017, so this is your chance to get your hands on some great products before everyone else – I’m all about that! 🙂

Here’s how it works – you have to be on the waitlist to get the information and link about when the box goes on sale! And it goes quick. If you are a StampNation member – you’ll get the link an hour before the public on February 3rd! This box has products by CAS-ual Fridays, Sugar Pea Designs and Winnie & Walter – three of the hottest stamp companies out there today!!

And to give you some incredible inspiration, hop along with this talented blog hop. Be sure to leave a comment on everyone’s blog – Catherine is giving away two boxes!! And not to worry, if you purchase one and end up a winner – you’ll be reimbursed. The boxes are stuffed with over $100 worth of brand new product…that’s a pretty awesome prize!!!

Neutral Tone Stenciling Video Tutorial

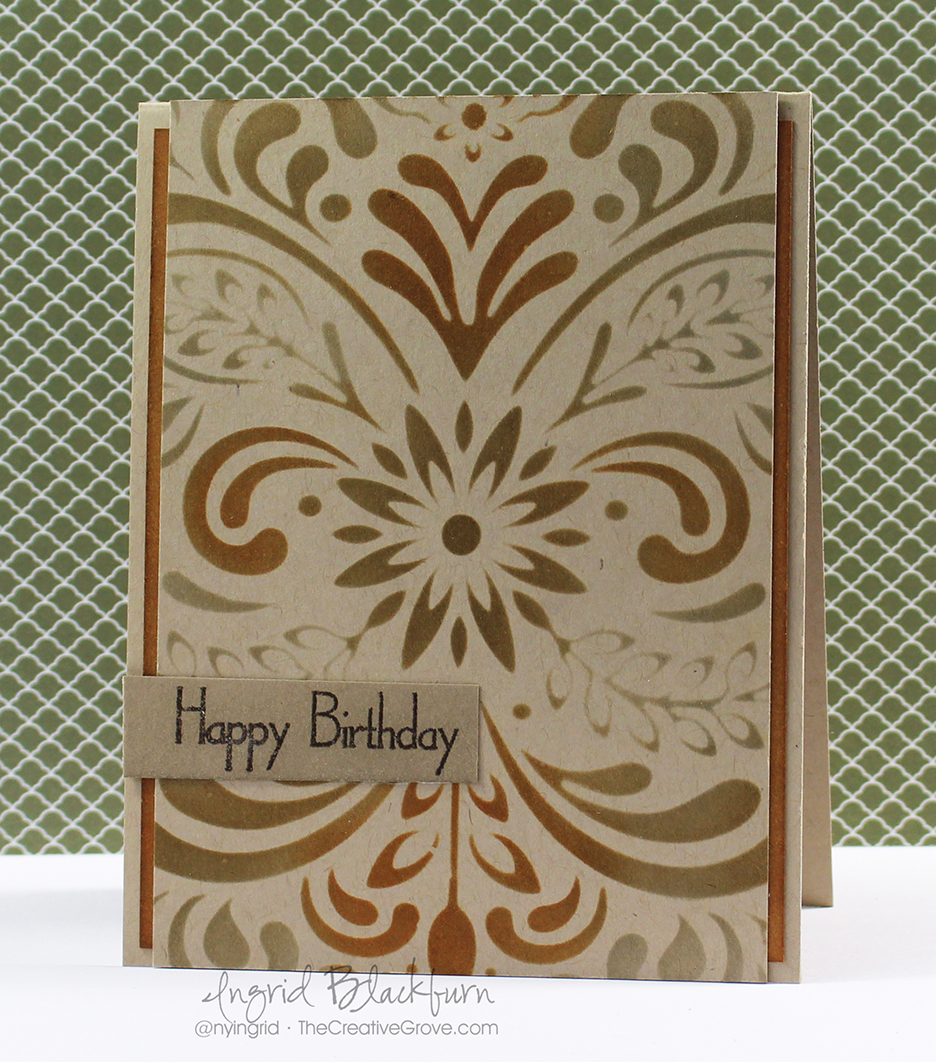
So, are you on creative inspiration overload yet? I hope not, because I have some crafty goodness to share with you too! The other day I released a new video on my YouTube channel. It’s a great birthday card that is quick, easy and has some great neutral tones in it – perfect for a masculine card. Here it is:

Watch video on YouTube

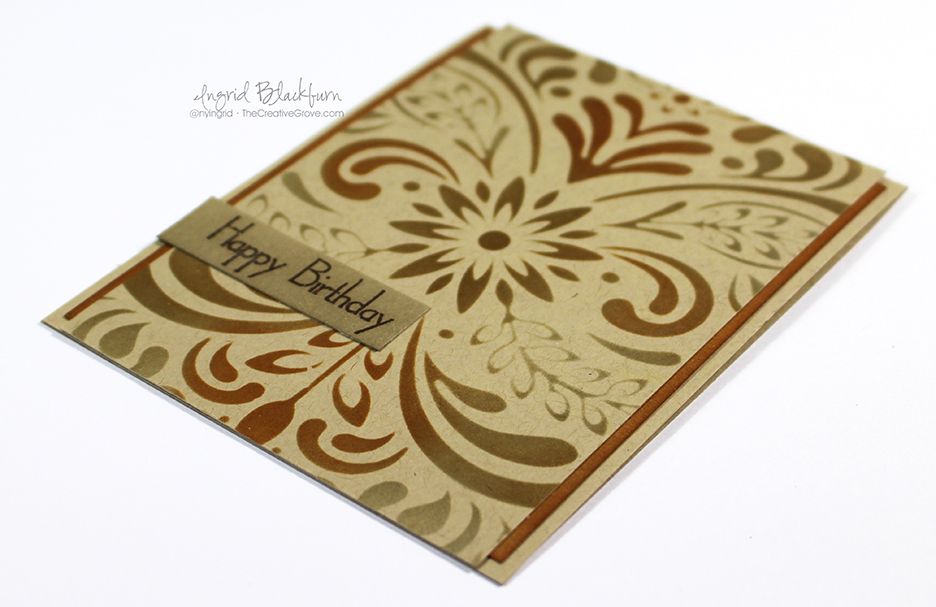
It’s a pretty straight forward card and the stencil really is the star here.

Masculine Birthday Stencil 004

Don’t you just love that stencil from Hero Arts! I love all the neutral tones. It’s simple, and kind of reminds me of New Mexico/Arizona a bit. What do you think?

Masculine Birthday Stencil 002


I’ve been playing around with stencils for the past month on overdrive. Mostly because I’ve been creating content for the Stencil Class over at StampNation that’s been going on for the past 2 1/2 weeks!

CSM 14

You may remember my Gelli Plate creation from last month, well, I filmed a video for the stencil class at SN and put up many more samples.

Gelli Plate Monoprinting in Layers Tutorial

Here’s a new one for you though. I have been having SO much fun with my Gelli Plate – it’s an amazing tool that really allows my inner artist to break out. Do you have one, or are you thinking about getting one? Let me know in the comments below!

Gelli-Plate-Monoprinting-1-001

Working with a gelli arts printing plate has been truly an eye opening experience. While I won’t say I’m and expert, I have learned a ton along the way! For instance, paper and paint do matter. You want a paint that will give you time to work, acrylics dry so quickly, the longer your paint remains open, the more flexibility you have. And when you’re new to something like this – that’s key. That doesn’t mean you can’t use your cheap acrylics, just work quickly!

Gelli-Plate-Monoprinting-1-002

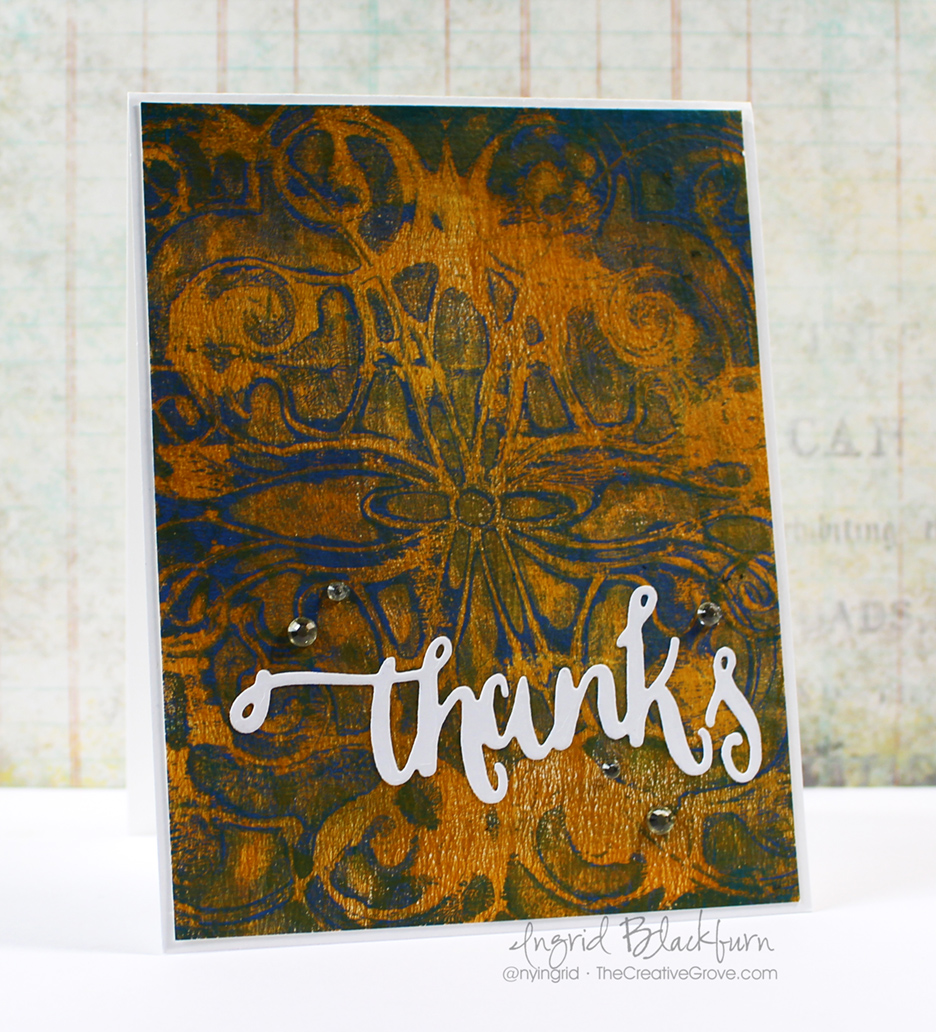
  • For this project, I started by layering on some Phthalo Blue. I cleared my brayer of any paint and promptly brayered some back off. leaving only some around the edge and a little in the center.
  • The key to creating a monoprint in layers on your Gelli Plate, is to allow the layers to dry inbetween.
  • Next you’ll want to add another color – I chose Cobalt Blue. Repeat the process pulling up a lot of the blue.
  • Add your stencil – I added the Tula stencil by Memory Box. Pull a positive print to use on another project. That leaves a lot open space.
  • Finally, add your lightest color – I chose Ochre for a contrast.
  • I pulled the entire print up at this point. The Ochre allowed the dried layers enough moisture to pull the print up in it’s entirety. If your paint isn’t open enough, this can be a frustrating process and you won’t pull up all your colors. Sometimes that can look cool, other times it can just be frustrating. You’ll find that sweet spot for yourself.

Gelli-Plate-Monoprinting-1-003

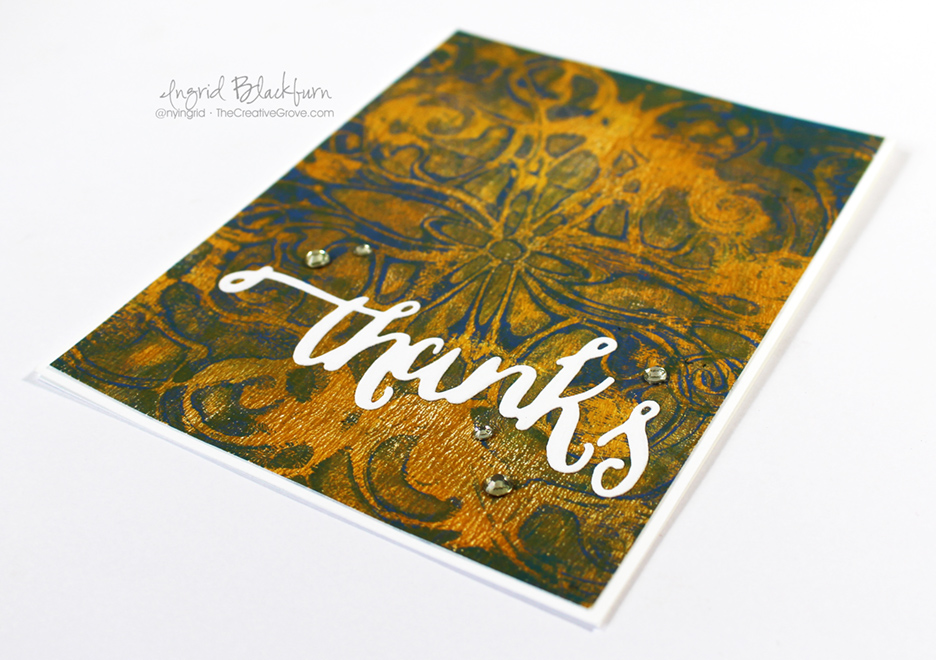
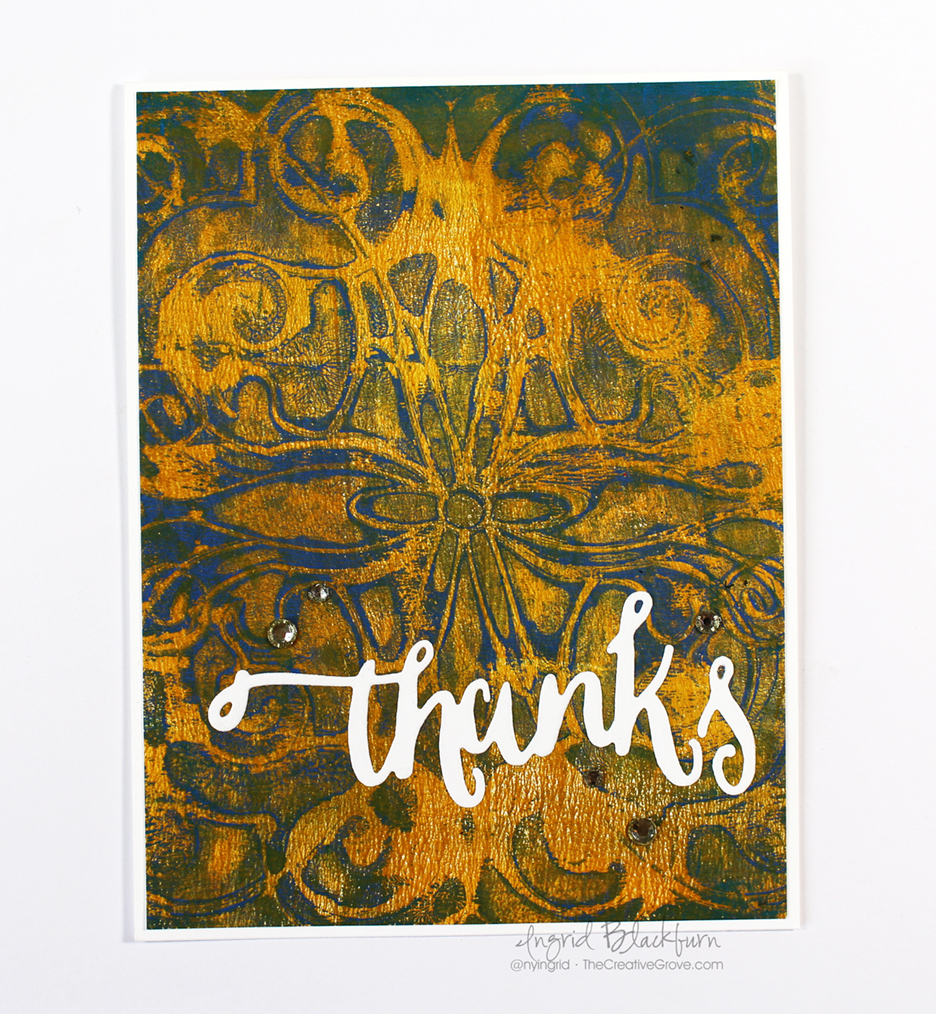
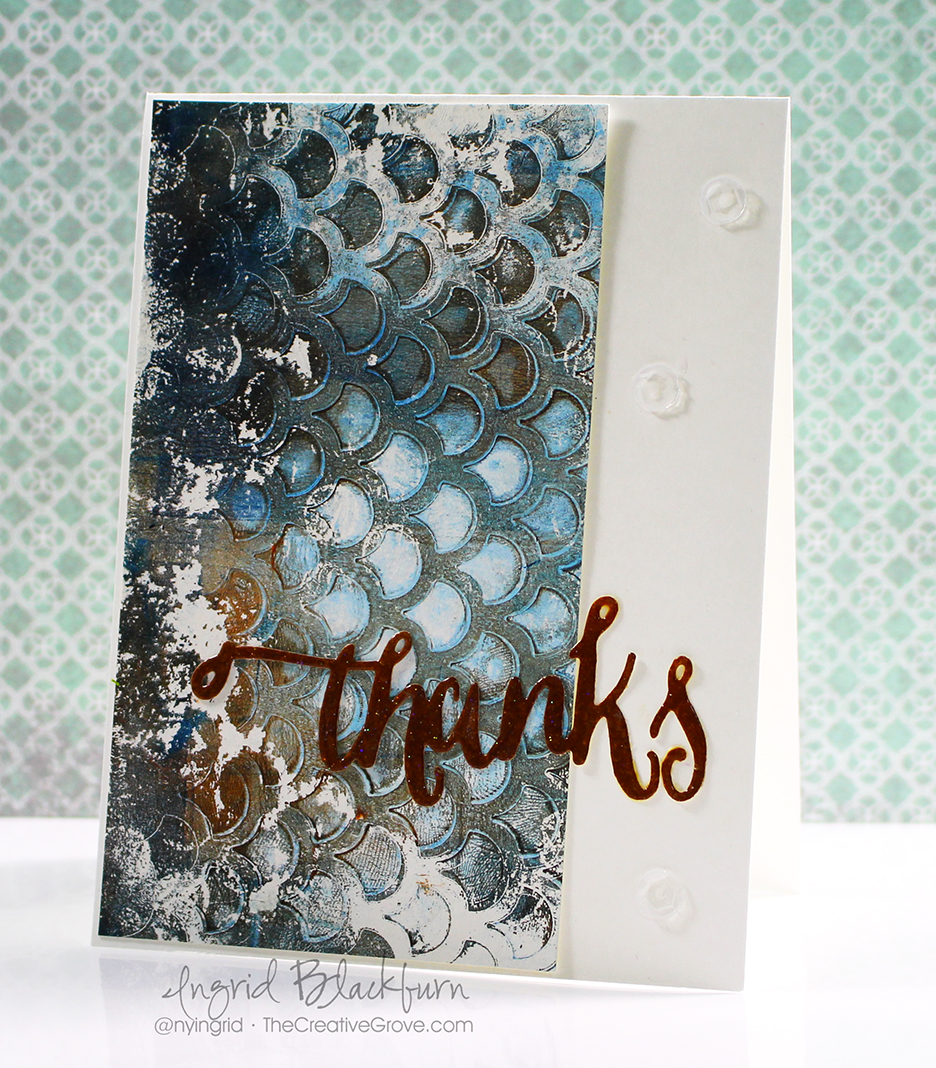
The interesting thing with this print is that in some spots the blue and yellow blended to form a slight green – that only gives this a more worn and aged look. The background naturally is the star, so keep the rest of the card simple. I added the Handlettered Thanks die by WPlus9 and a few Rhinestones.

Thanks for stopping by today. I hope you enjoyed these couple of projects – can you tell I have stenciling on the brain? Be sure to check out the new SOA box, or hop on over the StampNation and check it out along with the free stenciling class. I have a few videos in lessons #5 & #14.

See you next time, till then, keep those fingers inky!

Signature

[optin_box style=”2″ alignment=”center” email_field=”email” email_default=”Enter your email address” email_order=”2″ integration_type=”aweber” double_optin=”Y” list=”3846012″ name_field=”name” name_default=”Enter your first name” name_order=”1″ name_required=”Y”][optin_box_field name=”headline”]Learn with our exclusive FREE video series[/optin_box_field][optin_box_field name=”paragraph”]PHA+R2V0IHRoZSBmcmVlIENyZWF0aXZlIFRpcHMgRS1sZXR0ZXIgYW5kIGxlYXJuIHdpdGggc3Vic2NyaWJlciBleGNsdXNpdmUgdmlkZW8gYW5kIHBpY3RvcmlhbCBjb250ZW50LsKgPGVtPjxzdHJvbmc+SW5jbHVkaW5nwqA8L3N0cm9uZz48L2VtPm91ciB5ZWFybHkgMTIgRGF5cyBvZiBDaHJpc3RtYXMgc2VyaWVzITwvcD4K[/optin_box_field][optin_box_field name=”privacy”][/optin_box_field][optin_box_field name=”top_color”]undefined[/optin_box_field][optin_box_button type=”0″ button_below=”Y”]Send me exclusive tips now![/optin_box_button] [/optin_box]
Mixed Media Stencil Backgrounds

Gelli Plate Stencil Backgrounds 001

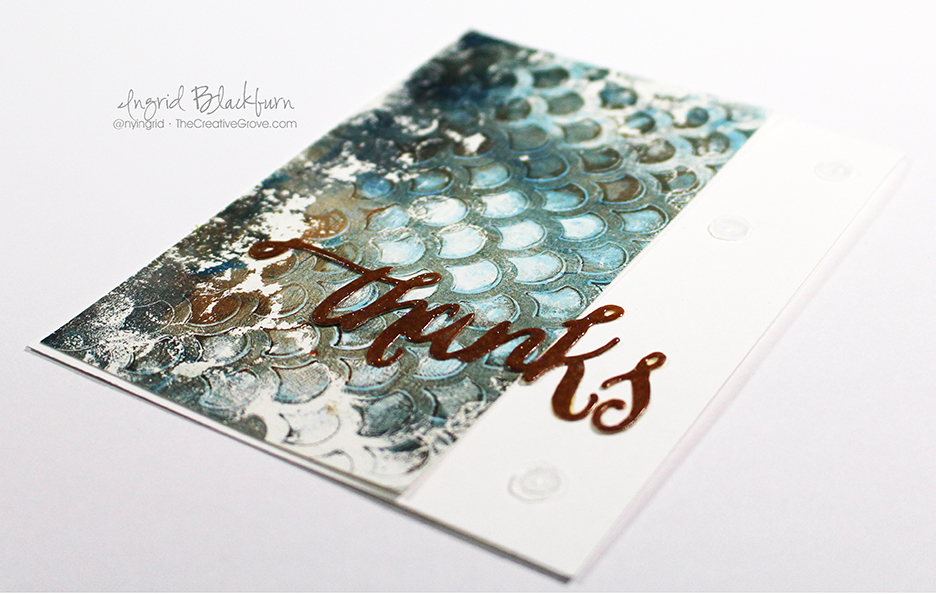
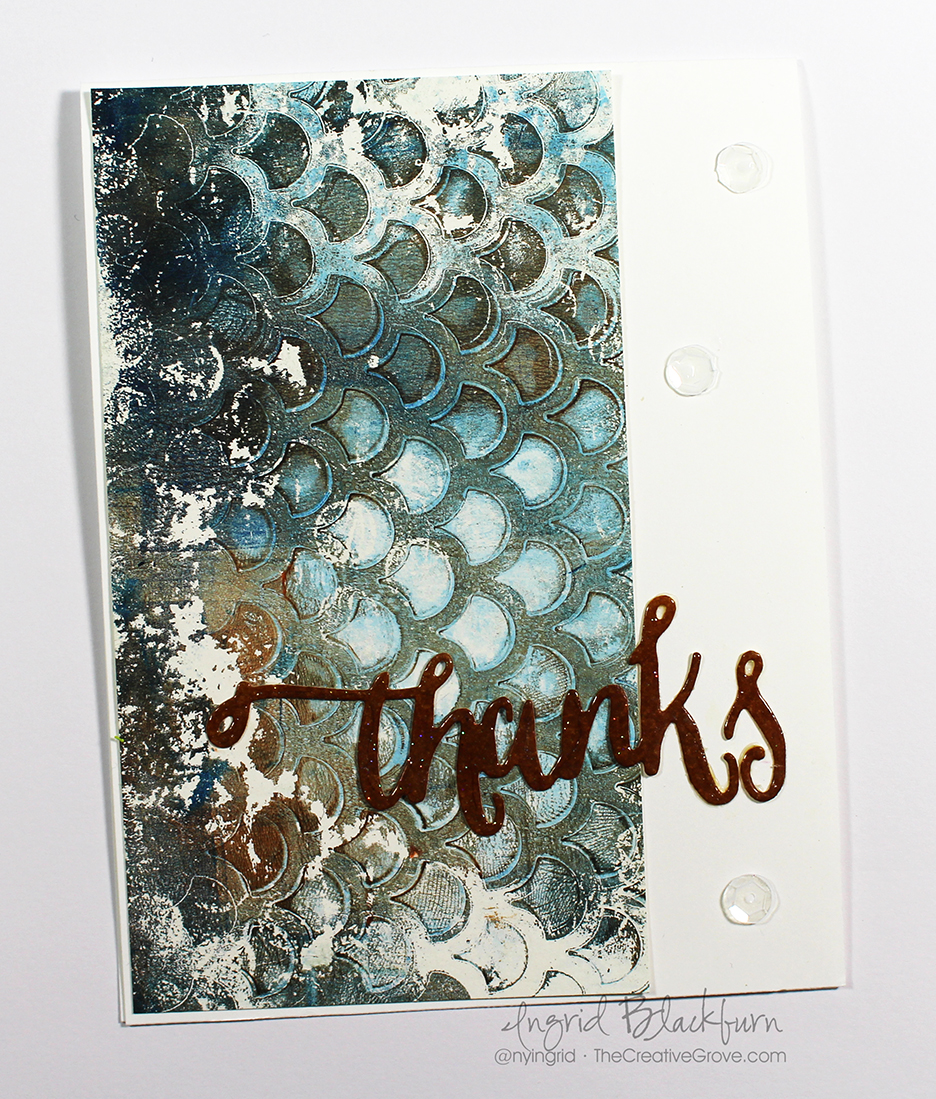
I love creating backgrounds for cards – it’s probably one of my favorite things to do…and in the past year, I’ve grown quite addicted to Stencil Backgrounds! This card takes stencils to a whole other level. This month over at Happy Little Stampers Mixed Media Challenge we’re playing around with Stencils. If you’ve taken any class with me in the past year online or watched any of my YouTube Videos – then you KNOW I love stencils.

HLS Mixed Media challenge January 2016

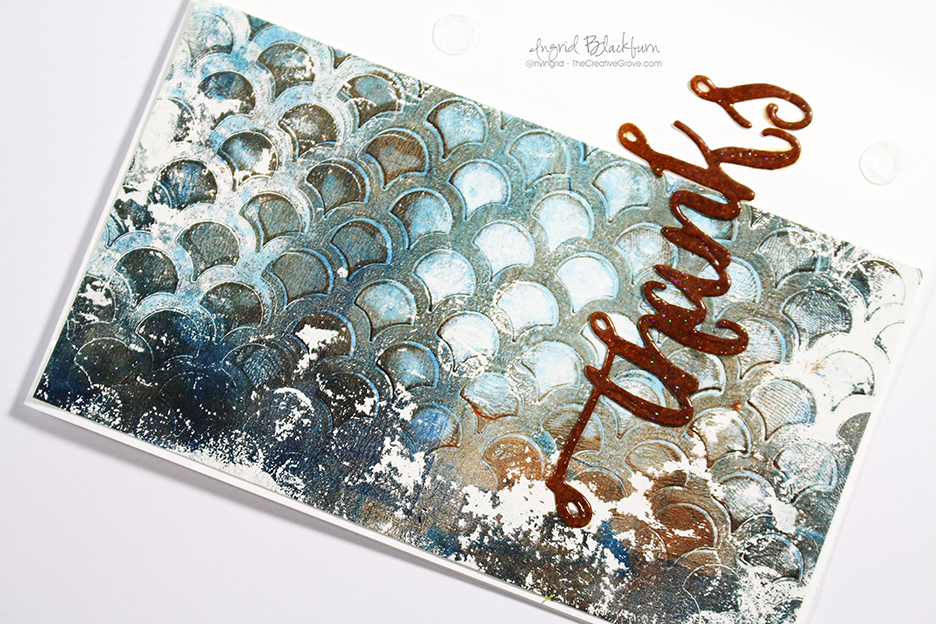
I’m still getting my feet wet in the Mixed Media world, but this Gelli Plate has quickly given me the ability to create some amazing pieces of art. And let’s be honest – that’s exactly what it is – art! I used to spend a crazy amount of money on papers that look like this….now I can create them myself…what? That’s insame!!! Don’t worry – some videos will definitely appear in the future, but for now – just enjoy one of my latest goofing off pieces (I wish every goofing off piece turned out like this!).

Of course for the Mixed Media Challenge, you don’t need a Gelli Plate – just a trusty ol stencil. Use your favorite way to add a medium – gel, embossing paste, ink, sponging, gelli, you name it – they are a tool not just every Mixed Media gal and guy needs – but every stamper!

Gelli Plate Stencil Backgrounds 002

Creative Tips on How to Create Stencil Backgrounds using a Gelli Plate

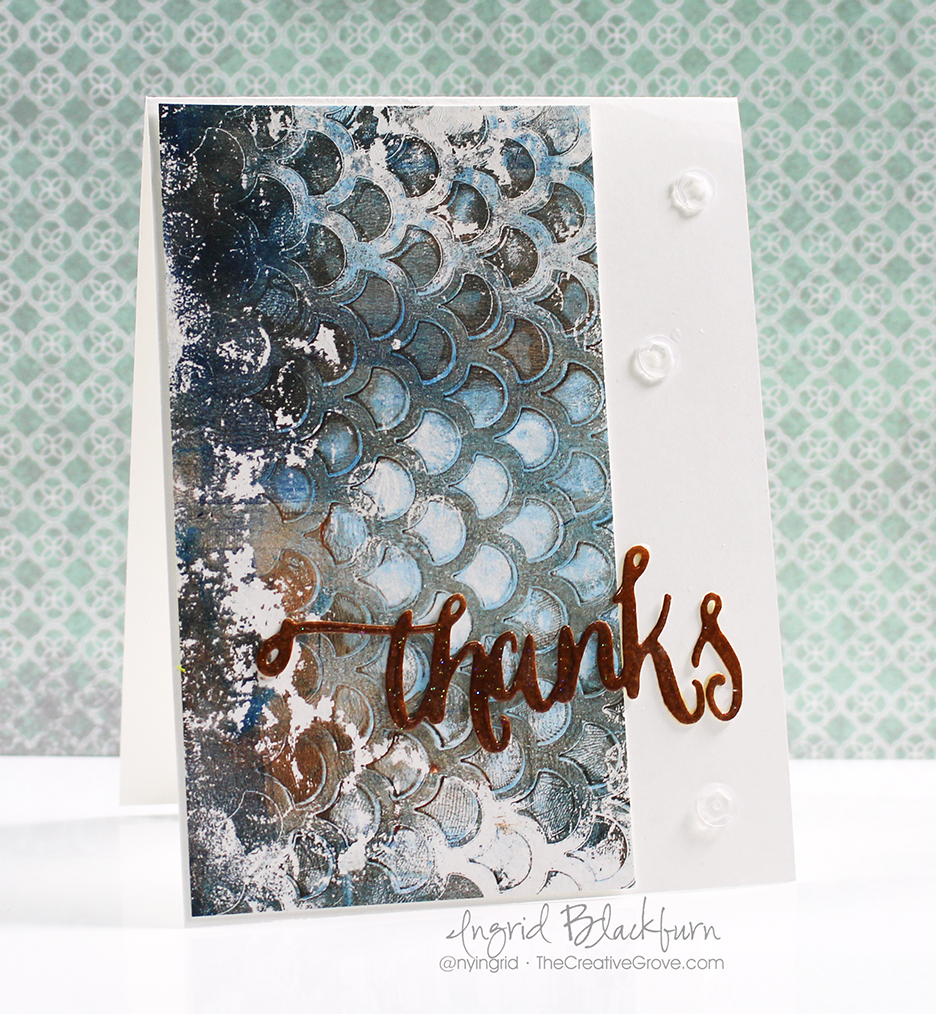
  • Add some acrylic paint to your Gelli Plate – start off with your darkest shade. I used Phylo Blue. Use a brayer to spread your acrylic paint covering it edge to edge.
  • Roll off on a piece of scrap paper and pull off some paint leaving a blue layer around the edge of your Gelli. It took me a bit to get the hang of this.
  • Allow the blue to completely dry, then add some Raw Sienna and cover in the same manner. Remove a bit of it toward the middle, then place a stencil over – I used My Favorite Things Scallop stencil.

Gelli Plate Stencil Backgrounds 004

  • Place a piece of copy paper over and lightly tap with your fingers to remove a bit here and there. Remove your stencil and allow to completely dry.
  • If you want to get a feel for what it’s starting to look like, lift your Gelli Plate and see it from the bottom. Of course, don’t place your finger in your creation!
  • Next, add a layer of white. Now, I have white acrylic paint – but it’s lost somewhere in my craft room – would you believe that! I knocked my paint box over and now I can’t find that one all important tube…maybe the cat took it away…yeah – I’ll go with that! Of course, that prompted me to clean my work area today – I think Bria still has my tube…lol! So I used the next best thing – white gesso.
  • Lay a sheet of small bubble wrap over the white to get a stamped impression in white. Tap it lightly in random places to create a slightly stamped circular pattern.
  • Quickly place your piece of paper over – I used 138 lb Canson Mixed Media paper.  Firmly rub the back of your paper with your fingers. I didn’t quite do this quick enough and a little of my paint didn’t lift properly around the perimeter, but that was okay because it created this gorgeous distressed look. I bet I couldn’t duplicate that if I tried!

Gelli Plate Stencil Backgrounds 003

  • My Gelli Plate is a 6 x 6 inch one. My piece also measures 6 x 6″. I cut my paper in two (Pained me to do so – it was SO beautiful). This is the left half.
  • I trimmed it down to 5 3/8″ x 3″. That was a happy accident. Originally I intended on 5 1/2 to go top to bottom, but I love the slight 1/16″ border it ended up with.
  • You don’t want to take away from the beauty of the background. So I opted to add a sponged die cut that was embossed in clear. This is the Handlettered Thanks die by WPlus9.
  • To get a similar hue to the Raw Sienna in the project, so I first sponged a piece of white scrap paper with Rusty Hinge, then a bit of Gathered Twigs and Walnut Stain Distress Inks to get a matching hue. Distress inks really helped here, as their translucent nature allowed me to build upon previous layers fro just the right color.

Gelli Plate Stencil Backgrounds 005

A few clear sequins finished it off. I love the simplicity yet complexity that this card has. I have to admit, some of the creations I whipped up with my Gelli Plate really stunned me. Once I got the hang of it, and that creating mono-prints was about layering and pulling it up together, I really started to have fun! I see a ton of “Gelli-ing” in my future!

So whip out those stencils – take what you will from this project, mono-printing, sponging, color combo, layout, anything and get those stencils out. Add fun stuff to the challenge gallery!

Remember our definition of Mixed Media is – stamps + ink, plus two other elements which add texture and/or dimension. Can’t wait to see what you stencil up!

Now go get those fingers inky –

ingrid signature

[optin_box style=”12″ width=”600″ alignment=”center” email_field=”email” email_default=”Enter your email address” email_order=”2″ integration_type=”aweber” double_optin=”Y” list=”3846012″ name_field=”name” name_default=”Enter your first name” name_order=”1″ name_required=”Y”][optin_box_field name=”headline”]If you enjoyed this tutorial…[/optin_box_field][optin_box_field name=”paragraph”]PHA+4oCmeW914oCZbGwgbG92ZSBvdXIgPGVtPjxzdHJvbmc+ZnJlZSA8L3N0cm9uZz48L2VtPnN1YnNjcmliZXIgb25seSB2aWRlbyBzZXJpZXMuIMKgTGVhcm4gbmV3IHRlY2huaXF1ZXMgdGhyb3VnaCBvdXLCoDxlbT48c3Ryb25nPmV4Y2x1c2l2ZTwvc3Ryb25nPjwvZW0+wqBDcmVhdGl2ZSBUaXBzIGUtbGV0dGVywqBhbmQgc3Vic2NyaWJlciBvbmx5IHZpZGVvIGFuZCBwcm9qZWN0IHR1dG9yaWFscyE8L3A+Cg==[/optin_box_field][optin_box_field name=”privacy”][/optin_box_field][optin_box_field name=”top_color”]undefined[/optin_box_field][optin_box_button type=”0″ button_below=”Y”]Get Exclusive Tips![/optin_box_button] [/optin_box]
Mixed Media Christmas Tag

Mixed Media Stamping Techniques

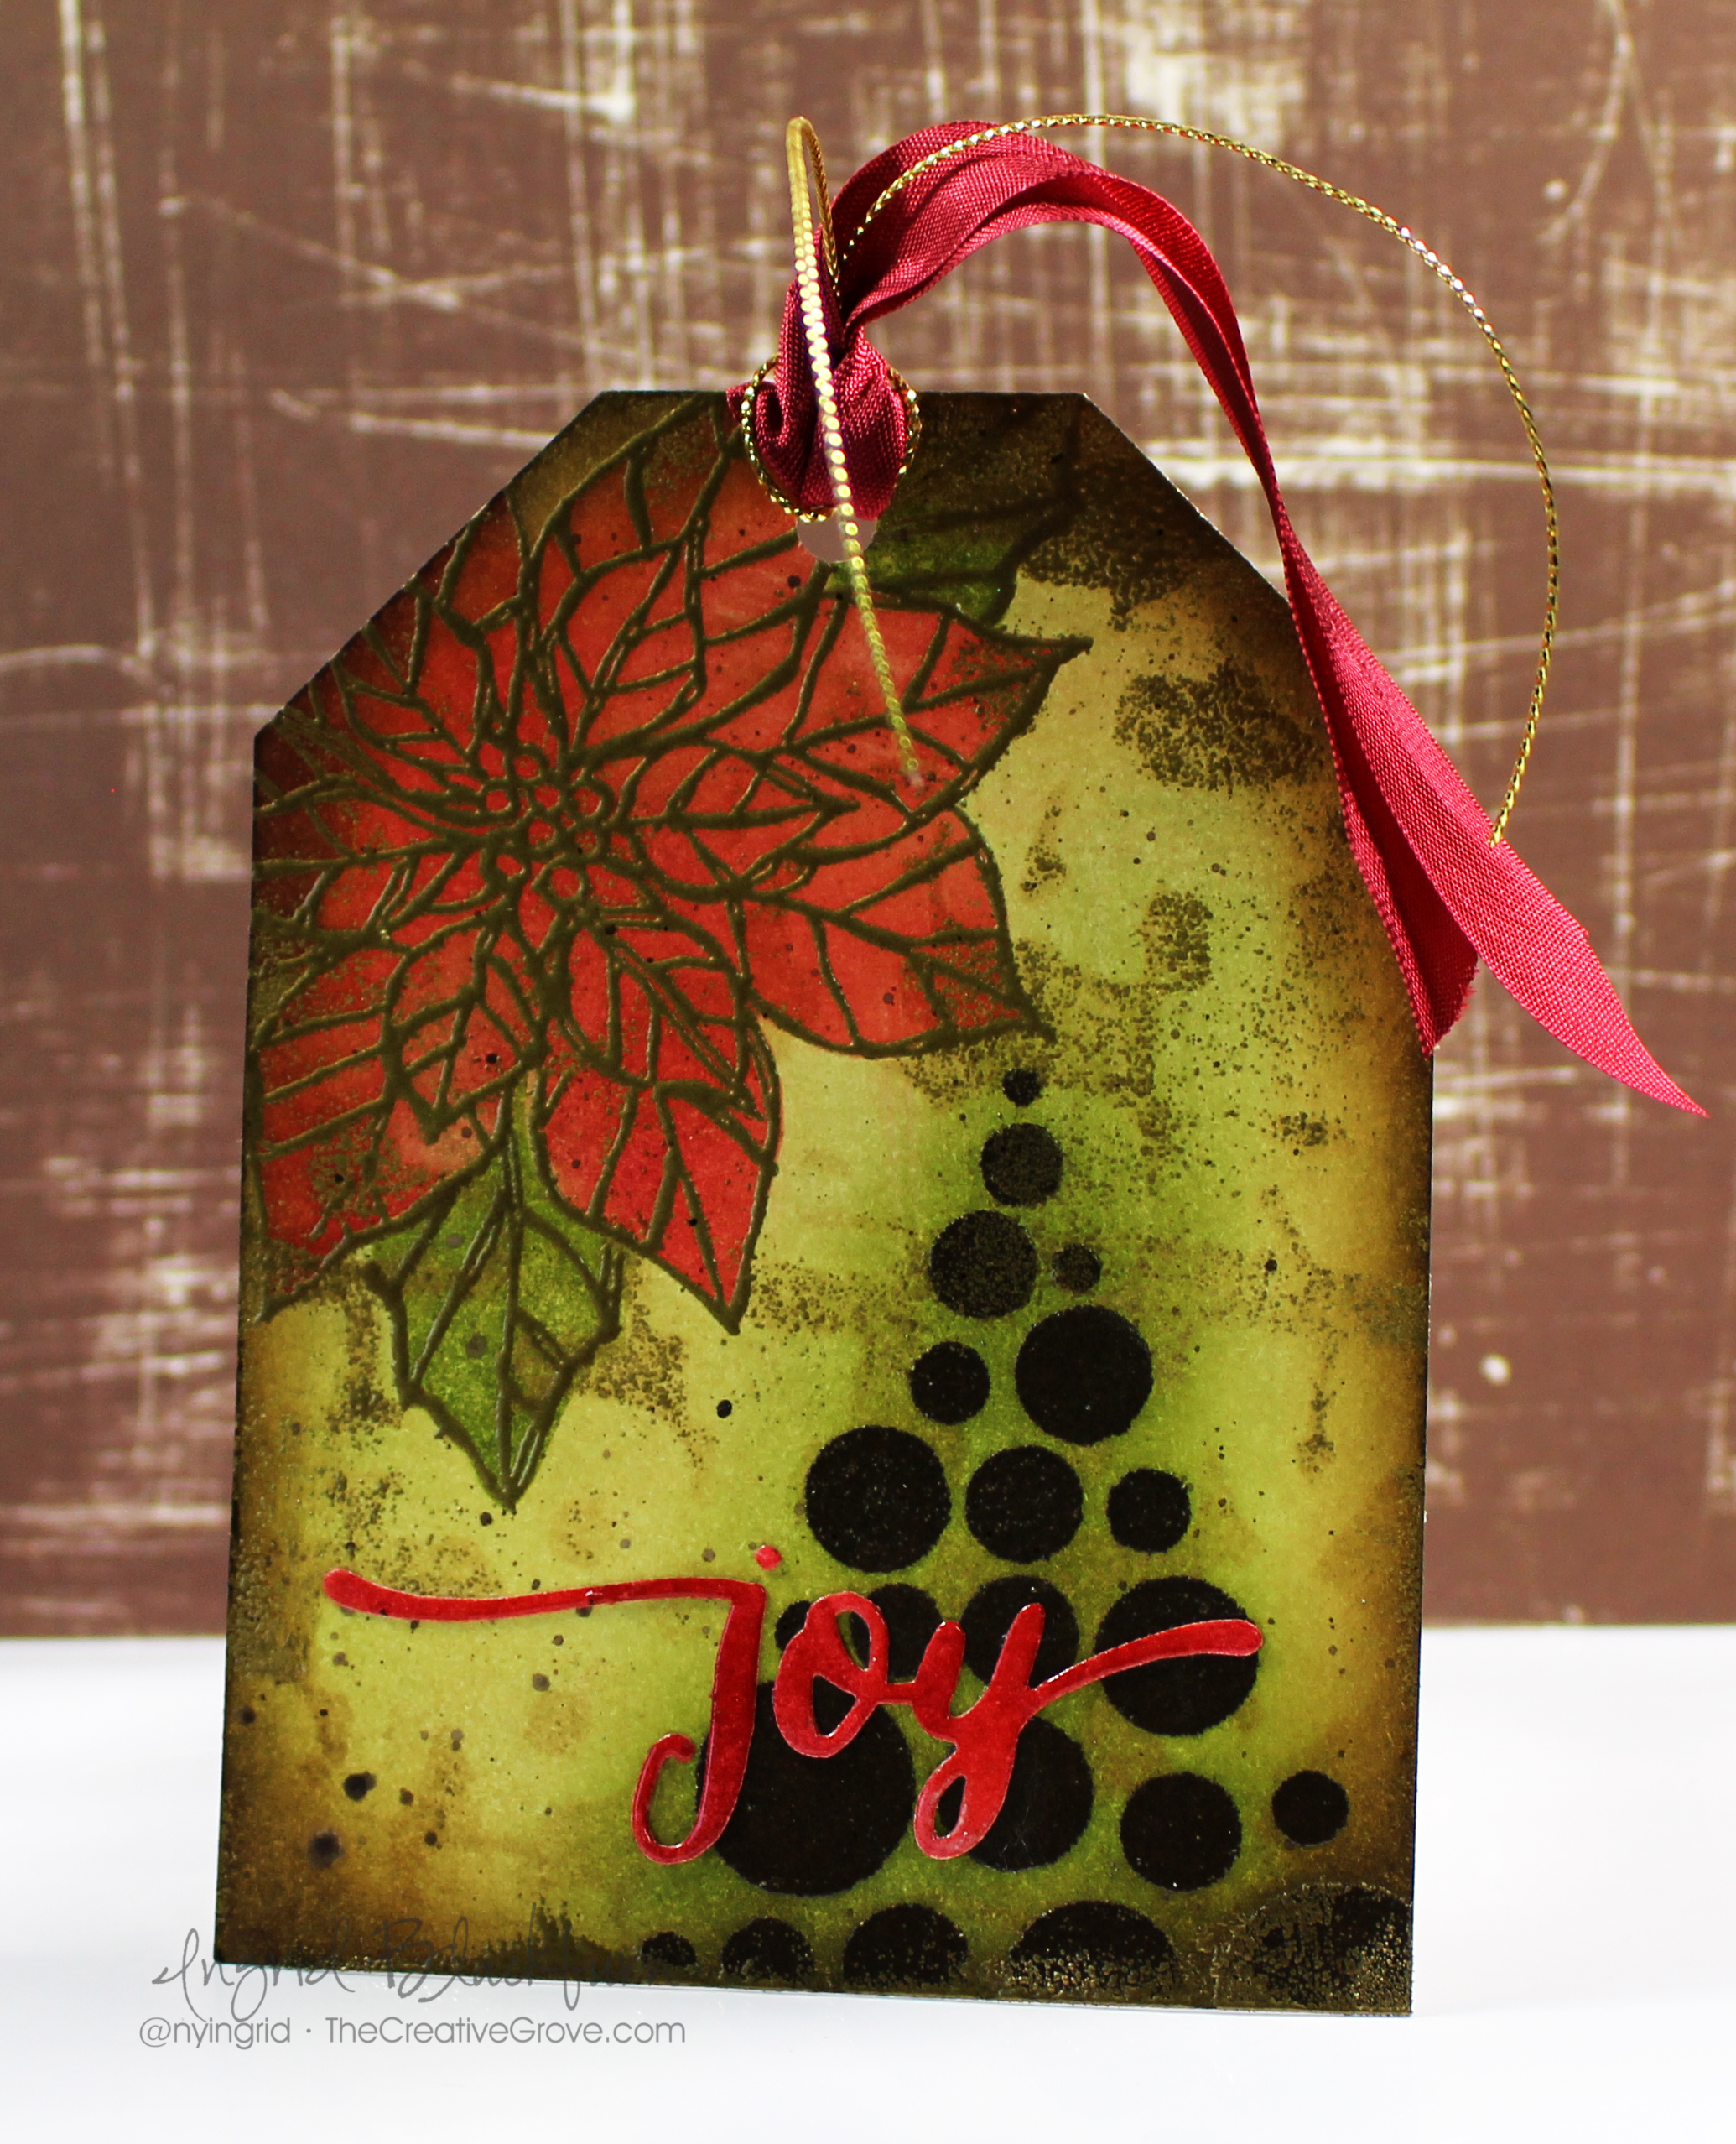
Creating mixed media Christmas tags can be a fun creative exercise that really showcases a fun style that is all your own. When I think of mixed media, I have always thought of those amazing colorful art journal pages we see so often. I’ve always been an admirer, but I have to admit, a bit scared to start. Well, when Kylie at Happy Little Stampers asked me if I wanted to be on the mixed media team, I was a bit apprehensive. I thought two things – 1 – I know nothing about mixed media other than it looks so cool and 2 – Is this style biting off a little more than I can chew?! Well, I never do anything the easy way, so when she told me most of what I do is by definition mixed media already, I figured, it was time to jump into the deep end and figure this mixed media thing out! – I was in!

HLS Mixed Media challenge

So today’s tutorial is the beginning of a journey into the art of Mixed Media for me. I hope you’ll join me for this fun ride! We’re going to start out with the 1st Mixed Media challenge at Happy Little Stampers – there’s even a prize! If you’ve ever wanted to try something new, or just give it a go – join me this month – the theme is TAG. Now that can be literally anything tag related – Card with a tag, and actual tag, etc… Here’s a video to show you some of my thought process into this project. I hope you love it, I have to say – I had no idea where this project was going, I enjoyed the path and definitely the end result.

Watch on YouTube

Leave me a comment with your thoughts – about this project, on the mixed media style, anything really! I’ll randomly select one commenter to get this beauty in the mail! 🙂

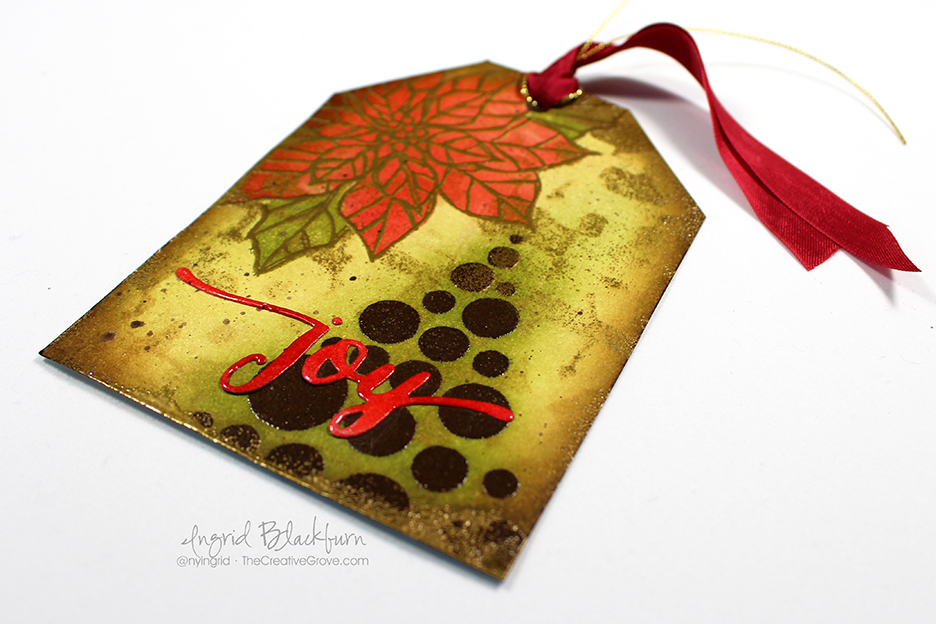
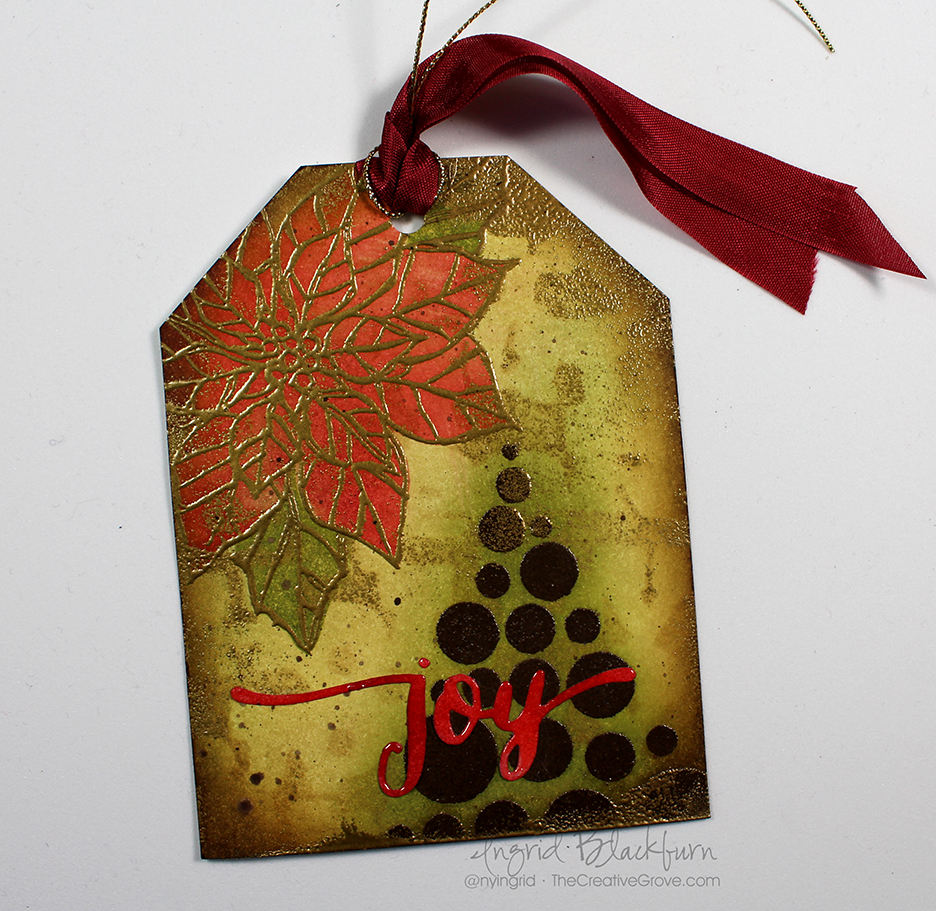
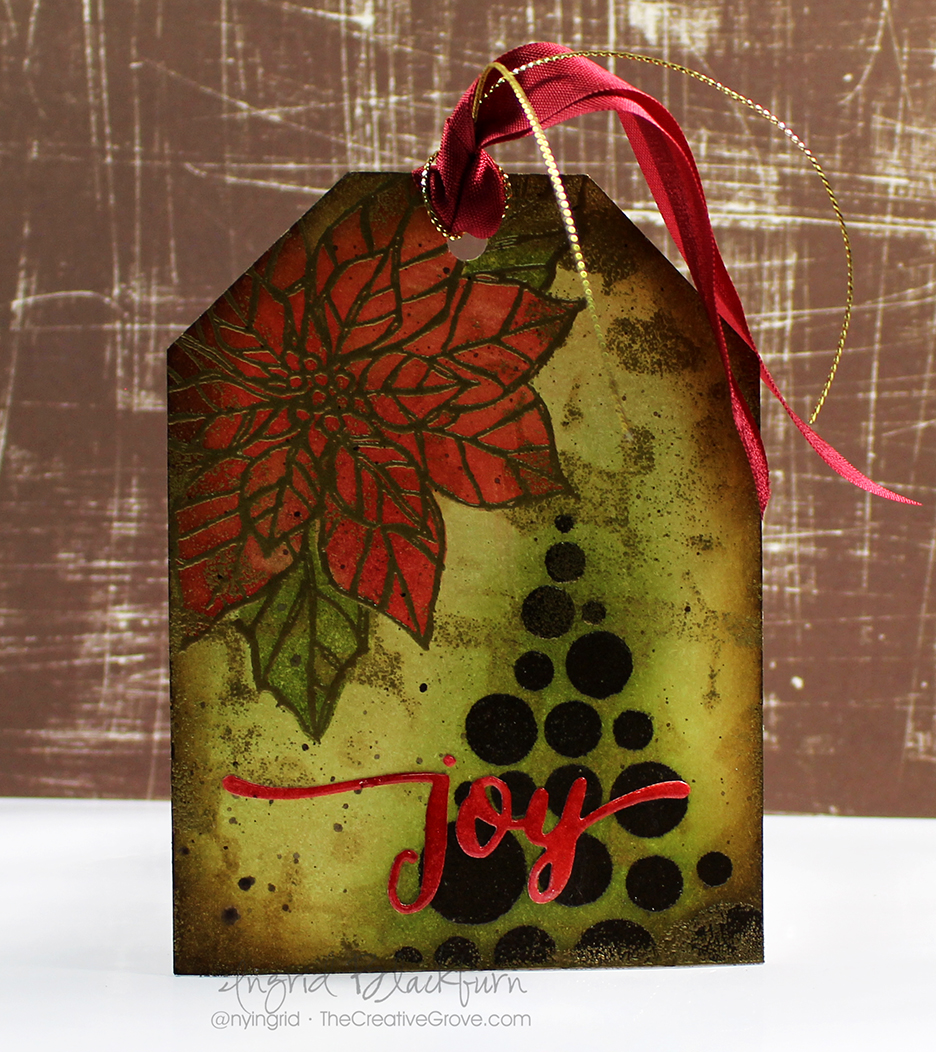
Creating your own Mixed Media poinsettia tag

  • Start with a white piece of card stock – 3 3/4 x 5″. Cut your tag corners as in this video (0:00 min)
  • Create a Vintage background for your project using distress inks – Antique Linen, Scattered Straw, Old Paper, Vintage Photo, Ground Espresso and sponge tools  Click Here for a step by step tutorial

mixed media video tutorials

  • Layer stencil over and add more Antique Linen and a little Vintage Photo to bring it out
  • Zap a bit with a heat tool, but not completely. Test in Gold embossing powder and emboss any strays to project
  • Dry with heat tool again. Emboss Tree with stencil and espresso embossing powder
  • Add a little green to your tag – Bundled Sage, Peeled Paint and Forest Moss
  • Add gold poinsettia and color using festive berrries distress ink and a negative image mask.
  • Add leaves in same manner as in the video.

How to create a mixed media project

  • Edge tag with Vintage Photo and Ground Espresso
  • Add a little gold embossing powder to random spots – after I shot the video, I did this at the bottom of the tag by dragging my versamark pad directly to to the edge.
  • Sponge a piece of white scrap with festive berries and fired brick distress – cut out using hand lettered holiday by WPlus9
  • Emboss greeting in clear and add to tag.
  • Punch 1/4″ circle at top and add ribbon as in video

Mixed Media Christmas Tags

This tag was so much fun to make and would look exquisite on a gift or wine bottle. I would LOVE to see your interpretation of a mixed media tag in the challenge! And be sure to enter your creation into my friend Loll’s Christmas Tag Challenge too – I did:

Loll Thompson's Tag Challenge

And in case you haven’t seen yet – here’s the talented line up of  the new Mixed Media Team – be sure to check out their creations from the HLS blog too!

stamping design teams

Have fun getting those fingers inky!

Signature-24-pt_thumb.jpg

[optin_box style=”8″ width=”500″ alignment=”center” disable_name=”Y” email_field=”email” email_default=”Enter your email address” email_order=”Enter your email address” integration_type=”aweber” double_optin=”Y” list=”3846012″ name_field=”name” name_default=”Enter your first name” name_order=”1″ name_required=”N” extra_field_1_name=”name” extra_field_1_title=”Enter your first name” extra_field_1_order=”1″ extra_field_1_required=”N”][optin_box_field name=”headline”]If you enjoyed this tutorial…[/optin_box_field][optin_box_field name=”paragraph”]PHA+4oCmeW914oCZbGwgbG92ZSBvdXIgPGVtPjxzdHJvbmc+ZnJlZSA8L3N0cm9uZz48L2VtPnN1YnNjcmliZXIgb25seSB2aWRlbyBzZXJpZXMuIMKgTGVhcm4gbmV3IHRlY2huaXF1ZXMgdGhyb3VnaCBvdXIgPGVtPjxzdHJvbmc+ZXhjbHVzaXZlPC9zdHJvbmc+PC9lbT7CoENyZWF0aXZlIFRpcHMgZS1sZXR0ZXLCoGFuZCBzdWJzY3JpYmVyIG9ubHkgdmlkZW8gYW5kIHByb2plY3QgdHV0b3JpYWxzITwvcD4K[/optin_box_field][optin_box_field name=”privacy”][/optin_box_field][optin_box_field name=”top_color”]undefined[/optin_box_field][optin_box_button type=”1″ text=”Send me exclusive tips!” text_size=”32″ text_color=”#000000″ text_bold=”Y” text_letter_spacing=”0″ text_shadow_panel=”Y” text_shadow_vertical=”1″ text_shadow_horizontal=”0″ text_shadow_color=”#ffffff” text_shadow_blur=”0″ styling_width=”40″ styling_height=”30″ styling_border_color=”#000000″ styling_border_size=”1″ styling_border_radius=”6″ styling_border_opacity=”100″ styling_shine=”Y” styling_gradient_start_color=”#a3b640″ styling_gradient_end_color=”#80902c” drop_shadow_panel=”Y” drop_shadow_vertical=”1″ drop_shadow_horizontal=”0″ drop_shadow_blur=”1″ drop_shadow_spread=”0″ drop_shadow_color=”#000000″ drop_shadow_opacity=”50″ inset_shadow_panel=”Y” inset_shadow_vertical=”0″ inset_shadow_horizontal=”0″ inset_shadow_blur=”0″ inset_shadow_spread=”1″ inset_shadow_color=”#80902c” inset_shadow_opacity=”50″ location=”optin_box_style_8″ button_below=”Y”]Send me exclusive tips![/optin_box_button] [/optin_box]