Mojo Monday Garden Flowers

Mojo Monday Flowers

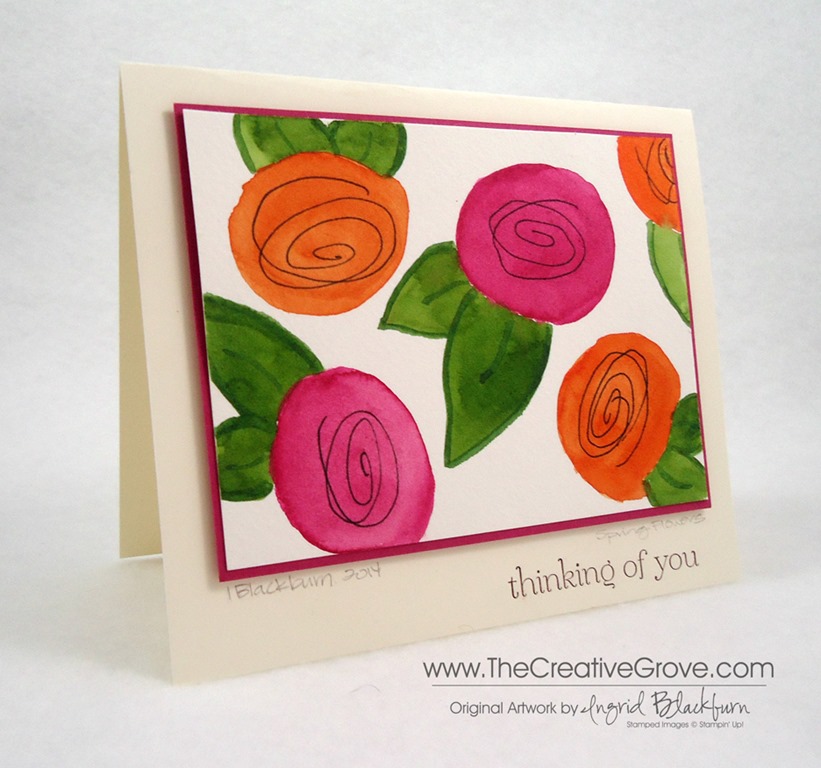
It’s the middle of summer and all the flowers here are in bloom.  I thought I’d bring you a floral card with non-traditional colors today for Mojo Monday. Smile

Today’s sketch had me immediately reach for all my floral stamps.  Did you happen to see my card last week with the amazing floral garden?  If not, check it out here.  But first see all the creative tips listed below.

Here is today’s Mojo Monday sketch from the Challenge Blog and my interpretation:

mojo353DSC01940

As you can see, I strayed a tiny bit and excluded the scallop border.  I planned on including it, but didn’t want to take away any further from the pretty flower background I created.

Creative Tips –

  • Mask various flower stamps that you have to create your own background.  Alternate open images with tighter ones for a filled out look.
  • Don’t feel you need to stick to traditional flower colors.  Here you see Baked Brown Sugar.

DSC01941

  • I kept playing with which colors to put in the background, and finally decided on adding a little texture to Vellum as a subtle piece.  To create this cross-hatch pattern, alternate a striped embossing folder to make the x’s.
  • Do you have stamps that are tucked way in the back and forgotten about?  My filigree background stamp seems to be one of those.  I wanted something with a romantic feel, so I embossed the pattern on a piece of Marina Mist card stock in versamark and clear embossing powder.  It compliments the flowers, yet stands on its own.

DSC01948

  • The greetings from this set are cool.  I love the boldness of chosen words and chose to highlight them.  I didn’t have a baked brown sugar marker, so I inked up the entire image with an ink pad and removed the ink from where I needed with a blender pen.  I then colored those words in with a marker that I did have.

DSC01943DSC01949DSC01947

  • I’m sure you’ve noticed that I rarely use just plain butterflies.  Here you see several stamped with floral images and then punched out.  It gives a little character to the wings and looks pretty cool!
  • For a finishing touch, distress your edge of the greeting, add some pearls and pop up your card front.

Mojo Monday Flowers

This clean and simple project completely works for me.  It’s loaded with various techniques, and works – even with non-traditional garden floral colors!

Signature


[optin_box style=”13″ alignment=”center” action=”http://www.aweber.com/scripts/addlead.pl” disable_name=”Y” method=”post” email_field=”email” email_default=”Enter your email address” integration_type=”custom” double_optin=”Y” name_default=”Enter your first name”][optin_box_hidden][/optin_box_hidden][optin_box_code]


IF YOU ENJOYED THIS POST
Let’s stay in touch! My occasional Creative Tips will teach you to make projects that you love…

[/optin_box_code][optin_box_field name=”headline”]If you enjoyed this tutorial…[/optin_box_field][optin_box_field name=”paragraph”]PHA+PHNwYW4gc3R5bGU9ImNvbG9yOiAjNjQ2MzVlOyI+TGV04oCZcyBzdGF5IGluIHRvdWNoISBNeSBvY2Nhc2lvbmFswqA8L3NwYW4+PHNwYW4gc3R5bGU9ImNvbG9yOiAjNjY2Njk5OyI+PHN0cm9uZz48ZW0+ZXhjbHVzaXZlPC9lbT48L3N0cm9uZz7CoDwvc3Bhbj48c3BhbiBzdHlsZT0iY29sb3I6ICM2NDYzNWU7Ij5DcmVhdGl2ZSBUaXBzIGUtbGV0dGVyIHdpbGwgdGVhY2ggeW91IHRvIG1ha2UgcHJvamVjdHMgdGhhdCB5b3UgbG92ZeKApjwvc3Bhbj48L3A+Cg==[/optin_box_field][optin_box_field name=”privacy”][/optin_box_field][optin_box_field name=”top_color”]undefined[/optin_box_field][optin_box_button type=”0″ button_below=”Y”]Send me exclusive tips![/optin_box_button] [/optin_box]

My type of Floral Garden

Fabulous Florets and Lattice  (3)

Do you have a flower garden?  I won’t lie, I do not have a green thumb.  Much to my parents dismay that I literally can not keep any floral plants alive – just ask my Dad, he asked me to care for 12 of his potted plants including two orchids earlier this year while traveling.  I explained that it wasn’t a good idea and that I was not cut out for this, but he insisted that I could do it.  Sure enough three months later, the one remaining orchid flower literally clinging on trying to prove me wrong, gave up and succumbed to the truth…I do not have a green thumb.  Story aside, today’s floral project I can do.

It’s July 1st and that means two of my favorite challenges went live – Virginia’s View and One Layer Simplicity Challenge – more on the latter tomorrow – it’s a great card (check it out here), you’ll want to stop by!  I wish I could post it today, but how many cards can I post in one day…lol?!  This month, Virginia’s View is about Die Cuts – one of my favorite toys to play with.  You too?

virginias view challenge 5

This one is a bit involved, but I had so much fun stamping, embossing and water coloring all afternoon!  Sometimes I just like to make an involved card, you know?  There are a ton of ideas below, so enjoy the creative tips tutorial!

Creative Tips –

  • I knew I wanted to use the lattice die today.  Try coupling it with an open area such as this one made by the Window Frames Collection by Stampin’ Up!
  • To make the flower garden, use various types of flower images of all sizes.  Here you see the large flowers from Blooming with Kindness, Regarding Dahlia’s, Fabulous Florals and Secret Garden.

Fabulous Florets and Lattice  (5)

  • First create masks out of copy paper and then add a little 2-way glue to the back.  Allow it to properly dry so that you can use it as a post it.
  • Mask several flowers, going around the frame, and filling up the entire card front. Here you see Perfect Plum ink on Elegant Eggplant card stock.
  • Attach your lattice die cut to the back of your frame filling it up evenly and pop it up with foam tape or dimensionals.  This will help create a shadow and give your project depth.

Fabulous Florets and Lattice  (8)

  • To create some whimsy, I used the branch stamp from Simply Sketched.  Emboss it on Vellum card stock with Espresso embossing powder.  Color from behind using Pear Pizzazz and Perfect Plum Markers.
  • Emboss the two flowers from Fabulous Florets in Black on watercolor paper.

DSC01631Fabulous Florets and Lattice  (11)

  • Color using Perfect Plum and Elegant Eggplant reinkers with varying strengths mixed with water.  We have a great tutorial on water coloring in layers in our Watercolor Techniques that Wow online class, along with six other techniques and projects.  Click Here for more Information

Fabulous Florets and Lattice  (9)Fabulous Florets and Lattice  (10)Fabulous Florets and Lattice  (1)

  • Arrange on your project and selectively choose where to place adhesive.  I used Liquid Glue for the branches – mostly on covered areas and tucked behind areas.  The flowers are popped up on dimensionals.
  • Emboss your greeting – this one from Fabulous Florets in Espresso on Vellum.  Vellum gives it a softer look to blend in a bit better with the flowers.  Wrap around the card front and tuck to secure under one of the branches.

Fabulous Florets and Lattice  (2)

Virginia’s View is a great challenge that will challenge your creative juices.  She’s really got some great ideas and I love participating in it!  I was honored to be considered a honorable mention last month for this tag.  A challenge that really put me out of my comfort zone.  So give it a try!

I hope I amused you and inspired you in some small way today.  For more inspiration on a regular basis, be sure to join the Creative Tips List.  Get projects, tips and exclusive videos sent directly to your inbox.

Have fun creating!

Signature-Blog

Fabulous Florets and Lattice  (7)


[optin_box style=”13″ alignment=”center” action=”http://www.aweber.com/scripts/addlead.pl” disable_name=”Y” method=”post” email_field=”email” email_default=”Enter your email address” integration_type=”custom” double_optin=”Y” name_default=”Enter your first name”][optin_box_hidden][/optin_box_hidden][optin_box_code]


IF YOU ENJOYED THIS POST
Let’s stay in touch! My occasional Creative Tips will teach you to make projects that you love…

[/optin_box_code][optin_box_field name=”headline”]If you enjoyed this tutorial…[/optin_box_field][optin_box_field name=”paragraph”]PHA+PHNwYW4gc3R5bGU9ImNvbG9yOiAjNjQ2MzVlOyI+TGV04oCZcyBzdGF5IGluIHRvdWNoISBNeSBvY2Nhc2lvbmFswqA8L3NwYW4+PHNwYW4gc3R5bGU9ImNvbG9yOiAjNjY2Njk5OyI+PHN0cm9uZz48ZW0+ZXhjbHVzaXZlPC9lbT48L3N0cm9uZz7CoDwvc3Bhbj48c3BhbiBzdHlsZT0iY29sb3I6ICM2NDYzNWU7Ij5DcmVhdGl2ZSBUaXBzIGUtbGV0dGVyIHdpbGwgdGVhY2ggeW91IHRvIG1ha2UgcHJvamVjdHMgdGhhdCB5b3UgbG92ZeKApjwvc3Bhbj48L3A+Cg==[/optin_box_field][optin_box_field name=”privacy”][/optin_box_field][optin_box_field name=”top_color”]undefined[/optin_box_field][optin_box_button type=”0″ button_below=”Y”]Send me exclusive tips![/optin_box_button] [/optin_box]


Recycled Pieces into Beauty

DSC01469

Not every project works out.  Do you have that same experience too?  There are often lots of left over pieces.  I used to save it all, and I’m happy to say that I have outgrown that!  But, every now and then, I have a few pieces that I just can’t throw away just yet.

I’ve participated a few times in a new challenge put together by Virginia Lu.  It’s Virginia’s View and this month the challenge was about Tags and Scraplings.  The catch – you have to use a recycled item on your project.  Today’s project is completely made out of pieces that I chose not to use, or were literally in my waste basket (the black strips…lol).

Virginias View June 2014

I’ll be honest – Virginia put together an interesting challenge this month.  Actually, each month they are interesting!  This is one of those challenge blogs that on the 1st – one of the first things I do is go and check out what she’s throwing our way.  I read it and went, huh?  Okay, not my thing and I moved on.  But I decided to go back, and try something that made me uncomfortable.  I read through and thought, why not?  So over to my “left over and junk scraps/not used pieces” I went and here is what I found:

DSC01459

The only non-junk pieces on this tag are the rhinestones, ribbon and black butterfly!  Even the dimensionals are from the outside border that I don’t always use…lol!  The two pieces that I pulled out of the trash for this project were the flower (and the black strips – those were hanging out at the bottom of my little scrap garbage bag on my desk.  I keep scraps up to about 1” x 3”.  Other than the 1/2” x 11” pieces, all else gets tossed.  So here are the details for todays tag.

Creative Tips –

  • Sometimes going with imperfection can be a good thing.  The main focal point on today’s tag is the Dahlia flower in Cherry Cobbler.  It was originally thrown out because the right and bottom side was stamped a little blurred.  But it’s not that bad – I’m just a perfectionist…that’s why it didn’t make the cut the first time!

DSC01468

  • The Love word is cut out of watercolor paper that’s been watercolored with island indigo and smoky slate.  As has the light blue butterfly – can you believe that was done with island indigo?
  • The Basic Grey background was that size, and was run through the big shot with the Lacy Brocade embossing folder by Stampin’ Up!  The texture is the perfect touch for the background.

DSC01473

  • Since the tag is rather large, breaking the color up was the obvious choice for me.  Since I didn’t have any left over string, I pulled out little strips that were at the bottom of my garbage scrap bag.  Criss-cross them to make the appearance of wrapped ribbon,
  • Cut a background that’s a little wider (1/16th on the left, right and bottom).  Run it through the big shot with the largest top edge of the Deco Labels Framelits to form the top of your tag.  Punch a hole with a 1/8” hole punch.

DSC01477

  • Pop your flower and butterflies up with dimensionals.  The butterfly wings are popped up on the edges to simulate flight.

DSC01475DSC01474DSC01476

  • Glue the love down using multi purpose glue.
  • Add Rhinestones to the butterflies and a white ribbon to complete the color pop.

I have to admit, this tag turned out much better than I possibly expected.  And who would have thought something so cute could be made from scrapped pieces?  Well thanks Virginia, I learned to definitely save a few more pieces and go into that stash a little more often!

DSC01470

Hope you enjoyed this.  So what scrapped pieces do you have?  Leave me a comment and let me know!

Creatively Yours –

Signature

PS – stop by tomorrow for my new 1+ 2 = 3 series – one stamp + two colors = three looks!


Faux Leather Technique Video

DSC01381

Yesterday you saw a card based off of the most recent Mojo Monday Sketch.  Today, you’ll get a chance to see the video for this project and how to create paper that has the texture of worn leather.  If you missed the step by step post for this card, be sure to check it out here.

Here’s the video for you and of course I updated the card as well.  Instead of leaving the flower as a circle, I chose to leave the flower cut out with a sliver of white on the edge to help it pop.  What do you think, which way do you like better?  Let me know in the comment section below!


Signature-Blog

[optin_box style=”14″ alignment=”center” action=”http://www.aweber.com/scripts/addlead.pl” disable_name=”Y” method=”post” email_field=”email” email_default=”Enter your email address” email_order=”1″ integration_type=”custom” double_optin=”Y” name_default=”Enter your first name”][optin_box_hidden][/optin_box_hidden][optin_box_code]

[/optin_box_code][optin_box_field name=”headline”]If you enjoyed this tutorial…[/optin_box_field][optin_box_field name=”paragraph”]PHA+PHNwYW4gc3R5bGU9ImNvbG9yOiAjNjQ2MzVlOyI+TGV04oCZcyBzdGF5IGluIHRvdWNoISBNeSBvY2Nhc2lvbmFswqA8L3NwYW4+PHNwYW4gc3R5bGU9ImNvbG9yOiAjNjY2Njk5OyI+PHN0cm9uZz48ZW0+ZXhjbHVzaXZlPC9lbT48L3N0cm9uZz7CoDwvc3Bhbj48c3BhbiBzdHlsZT0iY29sb3I6ICM2NDYzNWU7Ij5DcmVhdGl2ZSBUaXBzIGUtbGV0dGVyIHdpbGwgdGVhY2ggeW91IHRvIG1ha2UgcHJvamVjdHMgdGhhdCB5b3UgbG92ZeKApjwvc3Bhbj48L3A+Cg==[/optin_box_field][optin_box_field name=”privacy”][/optin_box_field][optin_box_field name=”top_color”]undefined[/optin_box_field][optin_box_button type=”0″ button_below=”Y”]Send me exclusive tips![/optin_box_button] [/optin_box]


A Watercolored Poinsettia

Joyful Christmas Watercolored (2)

It’s no secret that you’ve seen lots of watercolor projects at The Creative Grove lately.  To say I’ve fallen in with this medium is putting it mildly!  Today I wanted to share with you a project I made a few days ago, because I just needed a little something fun, light and creative in my day.

We all have them – days that are bogged down with work and stuff that isn’t so much fun.  Lately, mine have been filled with the other side of running a creative classroom and blog – the business end: building websites, connecting them, creating digital images and making sure all the SEO is in place.  If you told me a few years ago that I’d be doing that on a regular basis – I probably would have laughed.  Well, I’ve become quite proficient at it!

We just finished up our latest class – Watercolor Techniques that Wow! a few weeks ago.  The feedback was through the roof.  I had so much fun putting the class together for you, that I guess it really showed.  One of the things I love about our classes here at the Grove is that you don’t have to have anything in particular that we use.  Just use what you have.  Colors, mediums, stamps, etc…  The goal is for you to have fun – play with what you have and above all – learn something new.

That’s why I’m SO excited to announce our latest educational venture – our VIP Community!

TCG-VIP-Wide-Header


This isn’t just any old class – it’s a course.  So what’s the difference?  It’s a monthly course where you learn something new every two weeks.  There are two levels – one that builds as you go, and one that is all access from the get-go.  To learn more about it click here.

Joyful Christmas Watercolored (5)

Bet you thought I forgot about the watercolored Poinsettia card! Smile  Like I was telling you, I was smack dab in the middle of building web pages and I couldn’t see straight or think clearly.  I decided I needed to clear my head, so I whipped out some watercolor paper, clear embossing powder, my two aqua painters, a paint palette and some watercolor pencils.  A little while later…I had this:

Joyful Christmas Watercolored (1)Joyful Christmas Watercolored (6)

To really see exactly how I colored this flower in layer after layer after layer creating depth and dimension, you’ll have to watch my three videos on it in the resource section of our Watercolor Class, or on Project #6 – click here to read about what to expect.

That’s the cool thing about that class, it’s loaded with step by step resource videos explaining techniques before you even get to the project videos!  For example, I show you how to make your own shades of colors – I didn’t have a green pencil this shade – I created my own!  I hope you love this card – I can’t stop looking at it – it’s so much prettier than the photographs even show.

Joyful Christmas Watercolored (3)

To learn seven different techniques with watercolors, brushes, inks and so much more, click here.  I guarantee you will not be disappointed!

Signature Snowflake 001

Looking to learn something new?  Join us in class – here are just a few:

TCG-VIP-Wide-Header     Watercolor Narrow

Spring flowers are in the air

Mojo Monday Feel Goods Stamp Set

Today is Monday, so it’s another Mojo Monday card!  I was feeling in a spring mood with all the flowers out and about.  The fruit trees have blooms on them, the forest has bright spots of green mixed in with the dark evergreens, and tulips are popping up everywhere.  So for today’s card I thought I’d put my touch of spring on my card – a fun little pansy!

Mojo341SketchDSC00182

Here’s this week’s sketch and my interpretation.

Feel Goods Stamp Set Stampin UpFeel Goods stamp set

I love this little flower, I hope you do too!  I layered a few pansy’s, worked the edges and added a few pearls to the center.  Now grab your punches and try a little paper piecing yourself!

Watercolor Narrow low

The next class in our Creative Cards series is Watercolor!  Have you mastered this technique?  Learn various ways of water coloring on your card projects and save today by pre-registering for this fun Watercolor class.  Click here for more information.

Signature Snowflake 001

Spring Flowers Watercolor Card

What did you think about the last watercolored card?  Did you miss it, see it here!  Today you will want to use the same two Schminke colors – Translucent Orange and Magenta, in the same style, but with a totally different look.  Add some free form leaves with Sap Green and Olive Green as well.  To give the card that pop, you will want to use some Stampin’ Up! Rose Red card stock.  For a little drama, add some Dimenionals to help it stand out a bit more!  It was surprising that the Magenta color matched the Rose Red card stock.  But, the deep hue was almost a perfect color. 

See how much different the card looks from the last one without the lemon yellow wash painted as the background?  It’s really surprising to see them side by side and how different they look.

         Watercolor Handmade Card Main L

I know I added a thinking of you greeting, but this would be the perfect blank or mother’s day card!  Since it is an original artwork piece, I also added a title to my little masterpiece – Spring Flowers and signed my name and date.  Definitely add the date – it gives your art value, especially as the years go on!  It’s also to see the progression over time.  The card is 1/4 larger than the traditional A2 sized other card.  It measures 5×6”.

To see the specifics about how to watercolor, technique and supplies used, visit the original post for the other sample here.  To purchase or find out about any of the supplies, click the links below.  I hope you enjoyed this little watercolor, my next is a landscape done mini style!  Be sure to stop by in a few days for that.  Happy watercoloring!

Signature Snowflake 001

Shop 24/7 in my Online StoreHere

For other art supplies, check out these online resources:

Dick Blick and Jerry’s Artarama

For online card classes – be sure to check them out in the classroom under the Online Classes tab above!

Merry Christmas from the Black Forest

052

The rain is making little pitter patter noises on our skylights and the early morning daylight has just begun to rise here in Germany.  The lights on the tree are twinkling as I listen to my Diana Krall, Harry Connick Jr. and Jazz Christmas CD’s this early morning.  The house is quiet as everyone is sleeping.  The fire in the fire place is crackling and the presents are perfectly placed under the tree, that’s all Michael – not me, he has a gift for it!  I’m fighting off some sort a bug and refuse to let it dampen the excitement of this day!  You can hear nothing outside – no cars, no hustle and bustle and it’s nice.  Just the Black Forest, the rain and us!

Last night we went to a Christmas service in the actual Black Forest.  There was a live manger scene with an orchestra and about 800 people came from far and wide to stand out in the cold and listen to the Christmas story (even on big buses!).  A bonfire twenty feet high crackled in the background and you could hear a pin drop as the pastor enthralled the masses with this joyful story as children dressed as angels with massive wings and shepherds also looked on.  It was quite something. 

After, we ventured the 20 minutes back through the Black Forest back to the Bad Wildbad valley to the town center.  We gathered at the town square just outside the Church and sang German Christmas carols with 1000 other town folk while a 60 piece orchestra filled this quaint small village with beautiful music.  It was the perfect way to start our Christmas Eve.

Christmas Eve 2013 007 editedChristmas Eve 2013 015 editedChristmas Eve 2013 033 editedChristmas Eve 2013 039 editedChristmas Eve 2013 023 edited

I would like to wish you a very Merry Christmas.  Thank you for taking the time to visit here and leaving comments this past year.  I hope you have enjoyed all the creative inspiration this past year.  I’m excited for all the great creative inspiration that will be shared in 2014!

055057058

I made this special card just for you today.  The poinsettia flower is embossed and water colored from behind.  It is delicate, just like a stained glass church window.  The small details like just a tiny bit of gold embossing on the raised embossed words in the background really make this card special.  This card is my all time favorite of the 2013 season, and I hope you love it too.Christmas Eve 2013 027 edited_edited-1From my home to yours – I hope you have a safe and happy holiday this year! 

Signature Snowflake 001

051053