Freshly Picked: Layered Watercolor Stamping

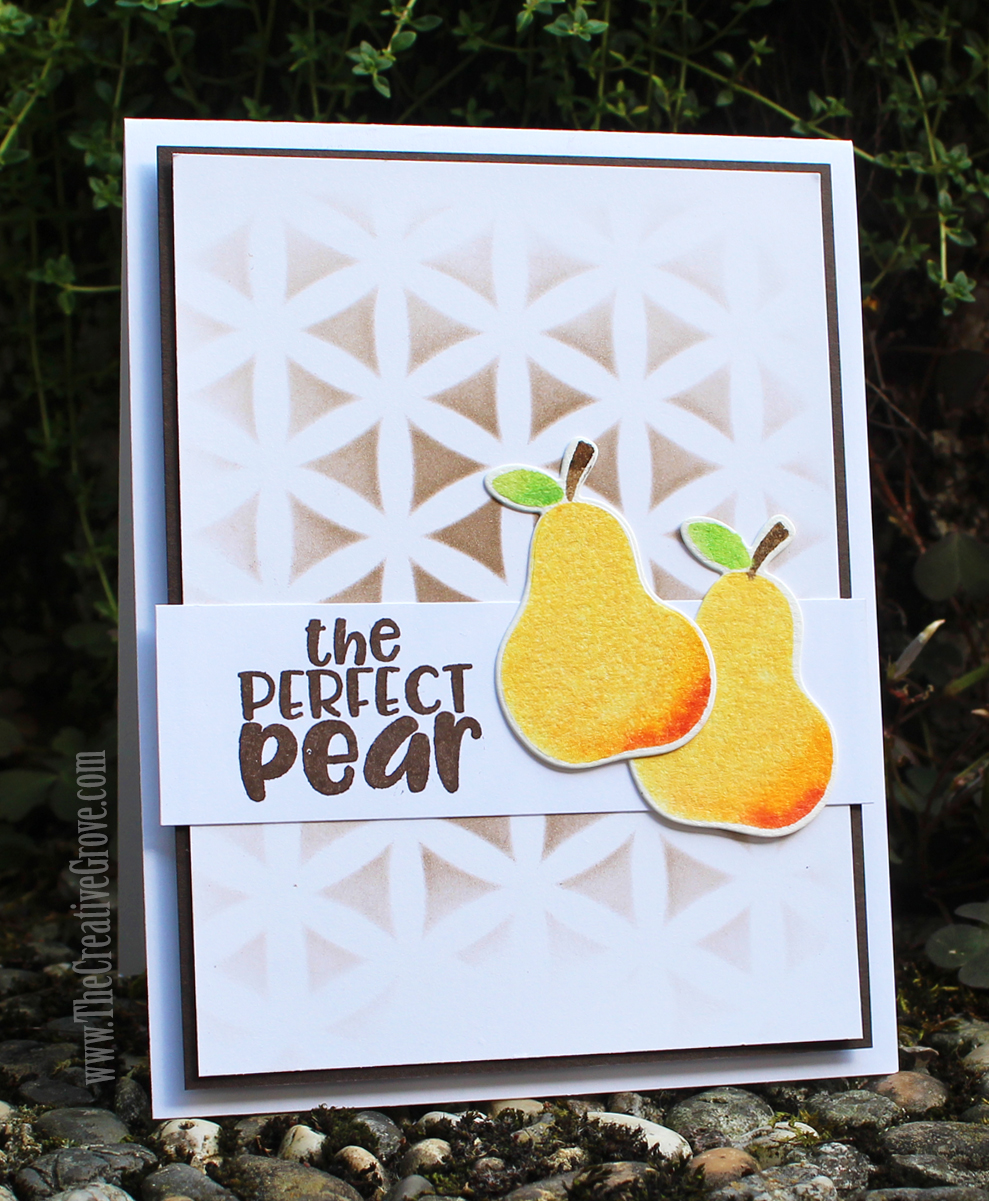
Today I have some fun new cards using products from the latest release by Catherine Pooler Designs – the Freshly Picked collection. The Freshly Picked Collection has four stencils, two new stamp sets, three new die sets and two new ink colors – neutrals!!! I have been waiting for these inks – and you won’t be disappointed – the shades are gorgeous.

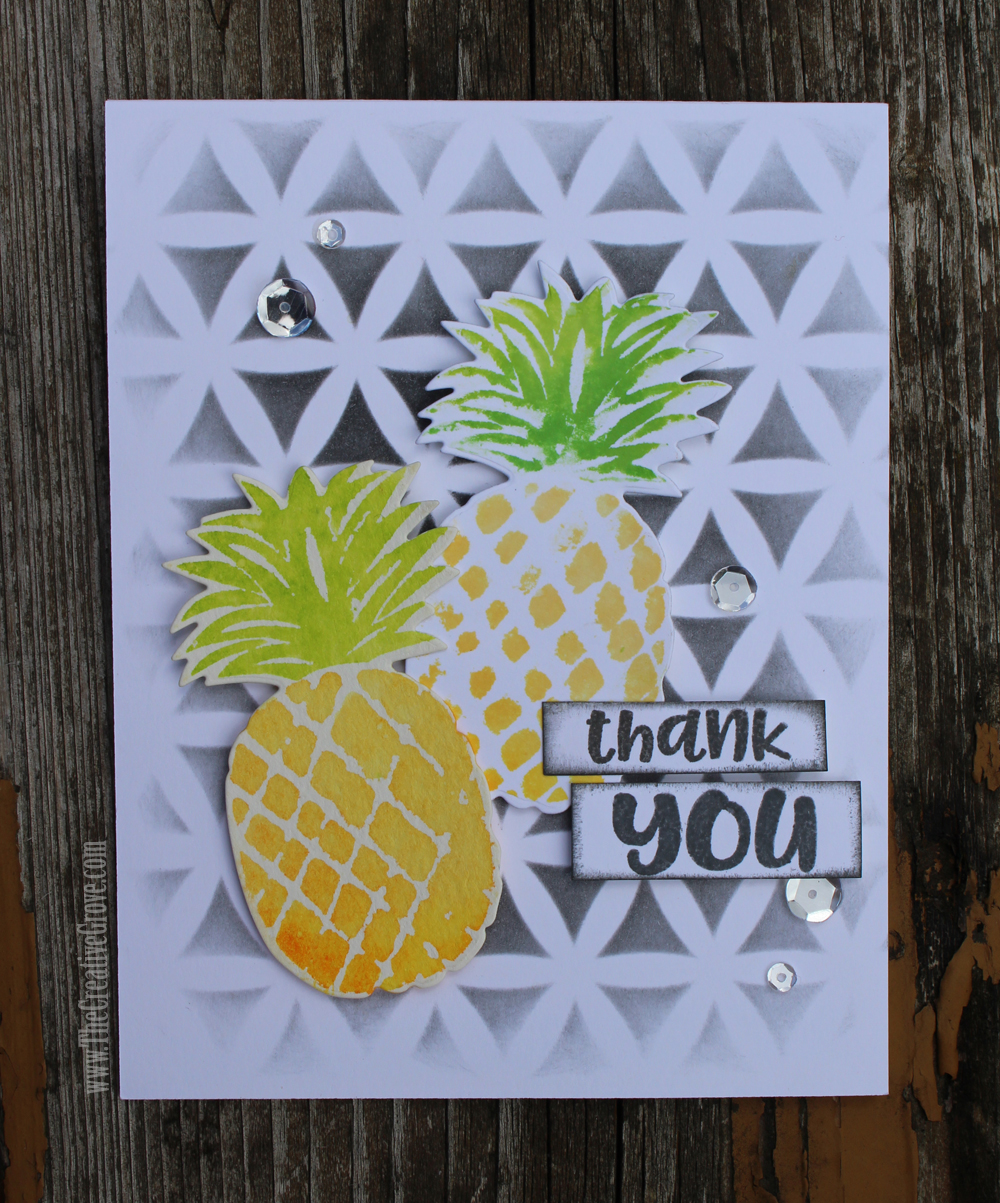
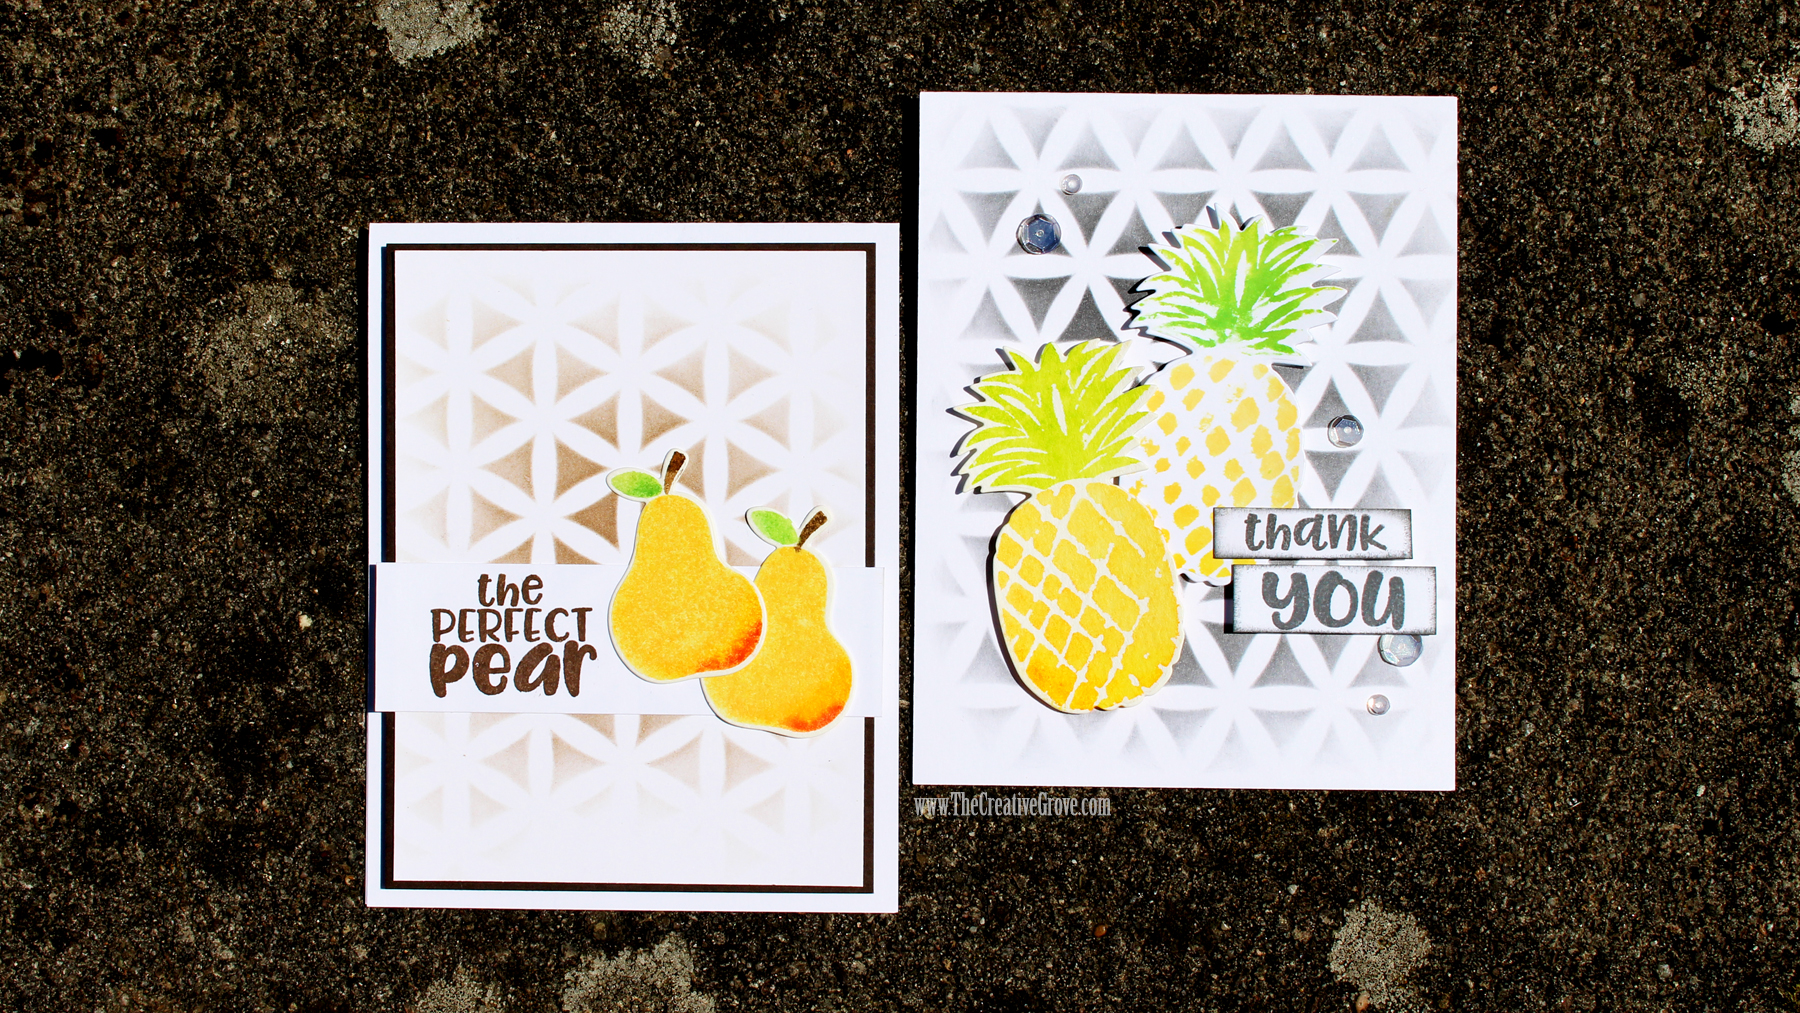
Today I have two cards using the I Pick You stamp/die sets and the Mod Flowers stencil from the Freshly Picked collection. And naturally – we’ll play with a simple little watercolor technique that I love – layered watercoloring.

When you layer multiple colors in watercoloring, you get a little more realism in your works of art. Now, you can also layer the same color over dry layers for more depth, but today we’re going to work with different hues. Adding a different hue gives a little more depth to your image – and that’s perfect for fruit. I even created a quick video tutorial for you here:

Click Here to watch in HD on YouTube

Freshly Picked Watercolor Tutorial

First we’ll create our background. Secure your project and Mod Flowers stencil to your surface. Using a light touch, blend a background from the center outward, fading your pressure as you near the edges. That helps to give you a faded vignette look. Isn’t this color just gorgeous?!!

Next die cut the fruit shapes you wish to use out of 140# cold pressed watercolor paper. The die shapes are together, making it easy to create multi colored images by just stamping the pieces you need – I LOVE the way that is designed!
Freshly Picked Collection by Catherine Pooler Designs

Ink up your Pear in Tiara ink first. Then add a little shading on the bottom with Tiki Torch. Come back over it with your Tiara pad just like in the video to blend the edge out. If you don’t do that, you’ll have a harsher transition that doesn’t always look natural. If you get some of the darker ink on your pad, gently lift it off with a paper towel. As long as your pad comes up the right color – you’re good to go!

Finish the edge off with a little Tutti Fruitti and lightly spritz with a mini mister. Stamp and you’re all set!

You can see how easy it is to create these artsy little creations.

In this one – I had a little too much water on my first stamped image – and the second is a second generation stamped image – thus much more white!
I pick You Stamp set - Freshly Picked Collection

Because the Black Jack background was a bit more prominent, I didn’t want the greeting to get lost – so I edged it with the Black Jack color. I can tell you – this is absolutely my all time favorite deep grey I’ve ever owned. It’s the perfect alternate to black and when watered down is the perfect light grey shade for grounding images in watercolor.

Both the new neutrals are a must have in my opinion. They are deep, rich and flawless colors – you will not be disappointed!

So, now it’s your turn. There are awesome new stencils in this Freshly Picked release – so check them all out…and I’ll have some more projects for you soon.
Mod Flowers Stencil - Freshly Picked

And if you’re a StampNation member – check out the new challenge that went live today for the Concord & 9th Masterclass. There’s even a live class with the owners of Concord & 9th today. Don’t miss out – if you’re not a member…you have no idea what you’re missing!
Be sure to stop by tomorrow…I have a special video featuring Concord & 9th products! Now it’s your turn – get inky!

Till tomorrow –

[optin_box style=”27″ alignment=”center” email_field=”email” email_default=”Enter your email address” integration_type=”aweber” double_optin=”Y” list=”3846012″ name_field=”name” name_default=”Enter your first name” name_required=”Y” opm_packages=””][optin_box_field name=”headline”]Want to LEARN with more exclusive videos?[/optin_box_field][optin_box_field name=”paragraph”]PHA+UGx1cyB5b3XigJlsbCBiZSBhZGRlZCB0byBteTxzdHJvbmc+wqBGUkVFPC9zdHJvbmc+wqBDcmVhdGl2ZSBUaXBzIEUtbGV0dGVyIHdoZXJlIEkgc2hhcmUgZXhjbHVzaXZlIHByb2plY3RzLCB2aWRlb3MgJmFtcDsgdGhlIDEyIERheXMgb2YgQ2hyaXN0bWFzPC9wPgo=[/optin_box_field][optin_box_field name=”privacy”][/optin_box_field][optin_box_field name=”top_color”]undefined[/optin_box_field][optin_box_button type=”0″ button_below=”Y”]Get Instant Access![/optin_box_button] [/optin_box]

Supplies

To make finding the supplies I used in this project a bit easier for you, here are a few clickable links. Those that have multiple shopping options are indicated with letters – EH – Ellen Hutson, SSS – Simon Says Stamp. Compensated Affiliate Links are used when possible. Click here for disclosure. Happy Shopping!


Naturally Inspired Stamp of Approval Collection – 2 videos!

Naturally Inspired Stamp of Approval Blog Hop - Ingrid Blackburn

Welcome to Day 3 of The Naturally Inspired Stamp of Approval Blog Hop! You probably hopped on over from Lydia Evans’ blog – she’s uber talented, isn’t she? I’m such a fan of hers. The whole hop list is at the end, but first here are a few projects to showcase just how amazing this curated collection inspired me.

If you’re new to Stamp of Approval – click here to check out everything you need to know about this amazing collection of Stamps, Dies and Stencils.

And make sure you are on the wait list so you get access to the collection at 9:00 am tomorrow June 7th before the public. The Add-ons are limited – especially the Wild Garden Dies, you don’t want to miss out.

Of course, If you are a StampNation member – you not only get to order hours earlier…but I’ll see you at the exclusive Slumber Party release tonight – I’ll be participating live – so come stamp with me, Catherine and many others from the Design Team.

Stamp of Approval

How I’m Naturally Inspired

If you’ve followed me for a while you know nature is my thing – in case you haven’t noticed – I love trees, the mountains, flowers – and especially greenery! I’m 100% at home walking in the mountains, woods, among trees & flowing water – I’m a born and raised northern California girl after all. Growing up in San Francisco, I’m partial to the ocean – and having lived 10 years in Florida…I never tire of these sunsets:

My true inspiration for my work is nature around me – it brings me the peace I need to think clearly and allow the creativity to flow. So much so, that I even have a few little Christmas trees all around me on my desk…lol!

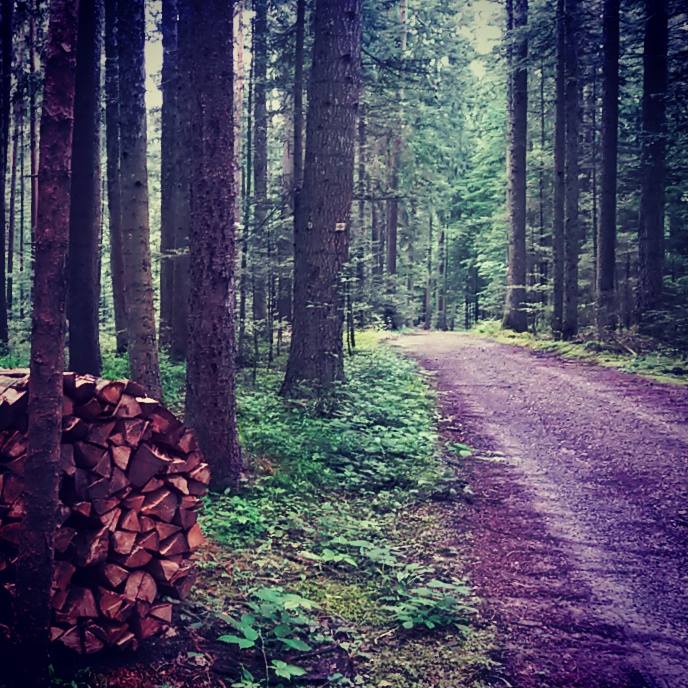
In a few weeks, I’m heading back to the Black Forest for the Summer – and I can’t wait to just be in my element again (I spent the last three years there). Here’s a little sneak into my world – sadly it’s the wrong time of year for the snow, but you will definitely find me shortly wandering along one of thousands of paths and trails daily:

I love the textures and colors of nature. It drives my creations. Today I have a few colorful pieces (and videos) for you too! And wouldn’t you know…I even managed two scenic cards – very different from each other as well. Enjoy!

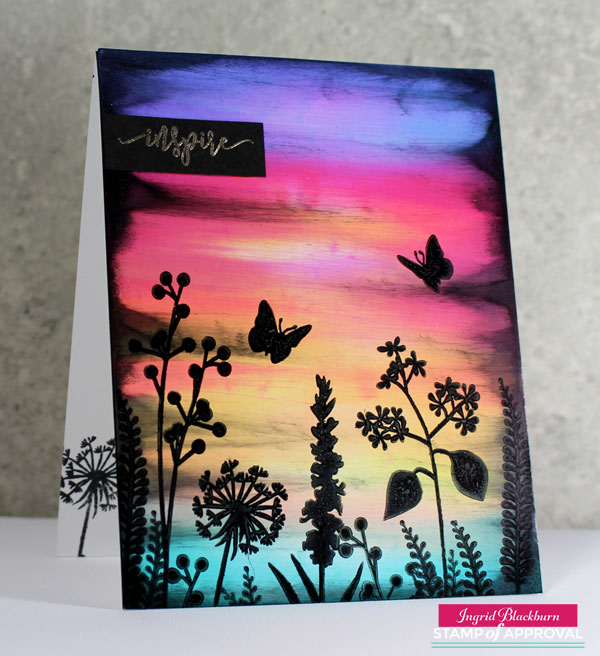
Project One – Naturally Inspired Sunset Silhouettes

I love scenic cards – and when I first saw the Wild Garden stamp set designed by Lisa Kirkbride, this card literally popped into my head. Paired up with Catherine Pooler Designs vibrant inks, I just knew the ink swipe technique was calling. Here’s a video on how I created this colorful layered sunset on glossy paper.

Click Here to view the video tutorial in HD on YouTube

Aren’t those colors just amazing. And with this fun technique, the possibilities are unlimited. In addition to the SOA collection, the Wild Garden set also has add-on dies which are perfect to cut out those intricate shapes.

Ink Swipe Technique on Scenic Cards

Project Two – Medallions

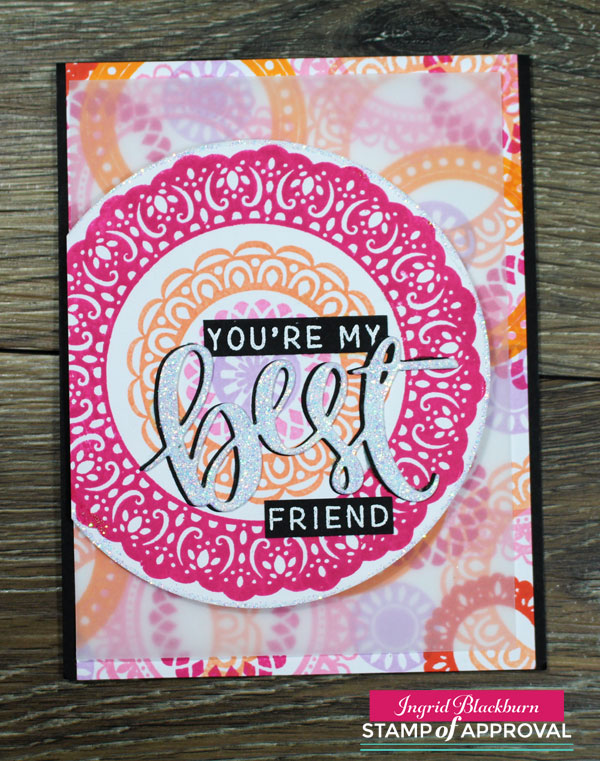
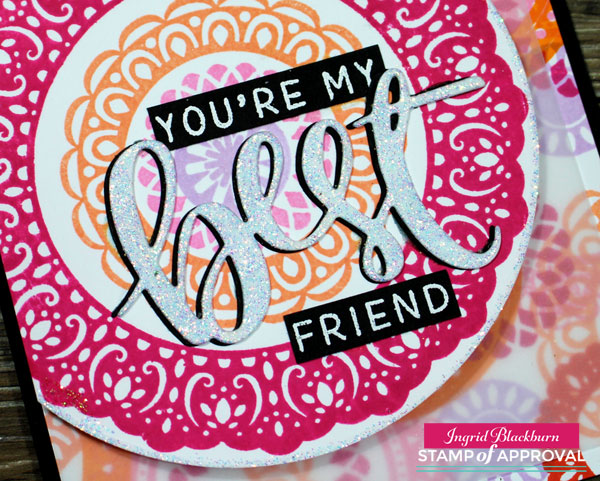
One of my favorite parts of this box is the surprise elements. Usually you’ll have some awesome stamps, dies and maybe even a stencil – but Catherine really outdid herself this time. Especially with the Wanderlust exclusive embossing glitter by WOW! It’s an exclusive mix just for this Collection and let me tell you – it sparkles! I think I was able to capture the sparkle pretty well here – it’s super cool on black too, becomes sparkly yellow – like a yellow diamond.

The Medallions are so versatile – I’ve just scratched the surface with them. If you didn’t see the sneak peek Catherine let you in on for my Navy Metallic card in the Facebook Live the other day – stop by in a few days, I’ll have that project right here along with a few more.

This project showcases Catherine Pooler Designs Inks: Party Dress, Bellini, It’s a Girl, Sweet Sixteen and Tiki Torch.

Medallion Mix Up by Catherine Pooler Designs

This project keeps the Medallion Mix Up images stamped as a nest within each other – but then uses the same colors in an overlapped pattern in the back. While I love the look, it was a bit busy – so to tone it down just a smidge and allow the focal piece to jump out a bit – try adding a simple sheet of vellum. You still see all that colorful goodness, without allowing it to overtake your project.

But today it’s all about some fun colorful medallions mixed with all that sparkly goodness. I won’t lie, I’m addicted to the Best Die – I LOVE Shawna Clingerman’s (the illustrator) hand scripted font – who wouldn’t, right?

And then glitter that baby up – WOW! Literally.

WOW! Wanderlust Embossing Glitter

But don’t think to just keep the glitter to just there – add it to the edge of your circle or card front for a truly special look. And just imagine this card in Blues & browns for a great Masculine look!

Project Three – Colorful Feathers

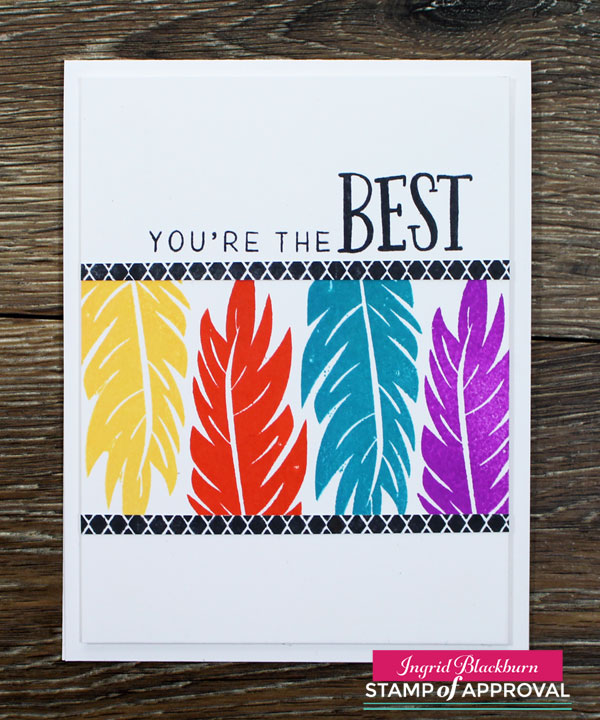
The Naturally Inspired Collection lends itself quite well to great clean and simple design, here’s a super quick and fun one. The Feather stamp is amazing – did you see that all the little birds in the set that can be stamped as if they are transformed out of the tip?!! How clever is that!

I kept things colorful and simple here – some great ink colors…a little mystery too! I’m in LOVE with the Simply the Best stamp set – you can create so many amazing sentiments with this set. And I just love the various ways to stamp Best – quirky, scripty – just LOVE that.

Quick Clean and Simple Cards by Ingrid Blackburn

But I have to admit – my favorite stamp in the entire collection is that diamond pattern. It’s only about 1 1/2 inches long – but look at how cool it looks stamped in a row?!! You will find that it is SUPER easy to layer end to end – I did this one by hand – no Misti needed here.

Pretty cool huh? NOW…see how I used that very same feather – and colors in the next project. Yes, this next project was made with all those colorful bright colors – honest!

Project Four – Watercolored Landscape

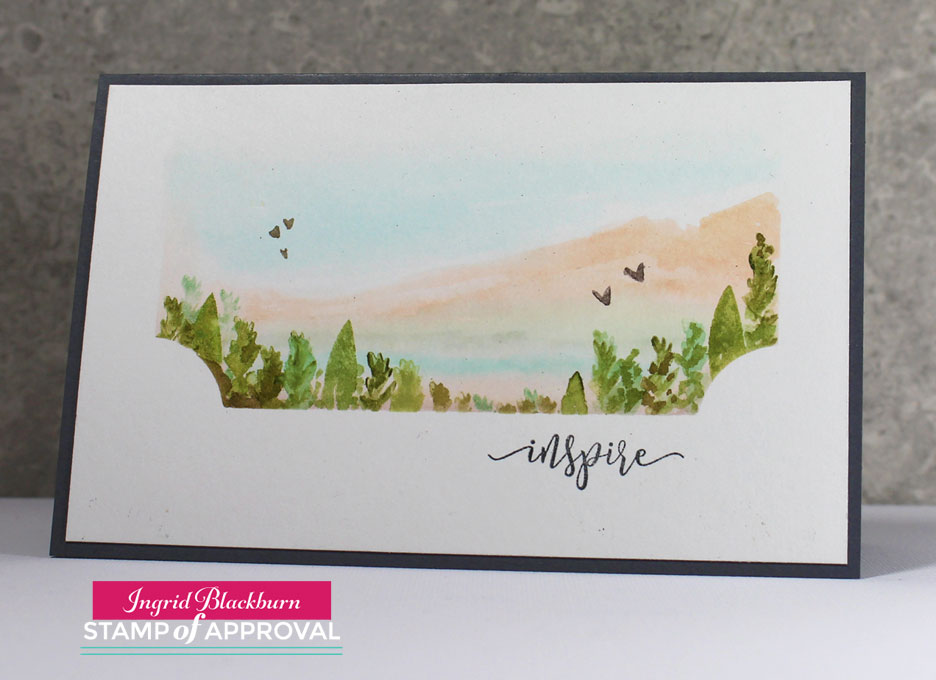
I love both my scenic cards today for very different reasons. The techniques couldn’t be any farther apart from one another. This one is an effortless watercolor that combines the vibrant colors from the first into the muted subtle shades that you see here. The moment I saw the little birds from Birds of a Feather, I was on a mission to see how I could take the stamps from this collection and stretch them into something different – trees!

Here’s a detailed video on how to recreate just that. And if you loved this, definitely subscribe to my YouTube channel too:

Click Here to see this video tutorial in HD on YouTube

Kind of cool, huh? I love creating something new and unique from existing supplies – versatility in my products is SO important. Plus being a fan and DT team mate of Kristie Goulet – the queen of uniquely stamped cards will do that to you!

Watercolor Landscape Cards using the Naturally Inspired Collection

I have detailed supplies and instructions on both scenic cards in the Naturally Inspired SOA PDF Guide – it’s jam packed with great projects to get you started – definitely one of my favorite components of each collection – detailed how to instructions!

So I encourage you to think outside the box with this collection. It won’t be hard. You’ll get such varied results which is just awesome.

These four projects believe it or not – uses almost every item in the box. I love it when I can create 10 different projects and no two are the same – I can’t wait to show you the rest. That’s the sign of a home run to me! So let’s get you entered in to win one of these amazing Naturally Inspired collections yourself!

Naturally Inspired Stamp of Approval Collection by Catherine Pooler Designs

To win one, just hop along and leave some love on all my team mates blogs. All the blogs from the last two days too – the Design Team inspirational line up is epic! Tell us what inspires you too.

Here’s the talented line up for today:

1. Catherine Pooler
2. Taheerah Atchia
3. Laurel Beard
4. Lydia Evans
5. Ingrid Blackburn You are here!
6. Heather North < Hop here Next!
7. Cynde Whitlow

Hope you enjoyed these projects and videos. Was I was able to inspire you to get creating yourself? I want to know what inspires you – tell me in the comments below! You never know – you may just win a Naturally Inspired Collection yourself.

Till next time –

[optin_box style=”31″ alignment=”center” email_field=”email” email_default=”Enter your email address” integration_type=”aweber” double_optin=”Y” list=”3846012″ name_field=”name” name_default=”Enter your first name” name_required=”Y” opm_packages=””][optin_box_field name=”headline”]LEARN MORE WITH OUR EXCLUSIVE FREE VIDEO SERIES[/optin_box_field][optin_box_field name=”paragraph”]PHA+TG9yZW0gaXBzdW0gZG9sb3Igc2l0IGFtZXQsIGNvbnNlY3RldHVyIGFkaXBpc2NpbmcgZWxpdC4gRG9uZWMgdmVsIG51bmMgbm9uIGxhY3VzIHZlbmVuYXRpcyBjb21tb2RvLjwvcD4K[/optin_box_field][optin_box_field name=”privacy”][/optin_box_field][optin_box_field name=”top_color”]undefined[/optin_box_field][optin_box_button type=”0″ button_below=”Y”]Get Instant Access![/optin_box_button] [/optin_box]


Combining Stencils & Background Stamps

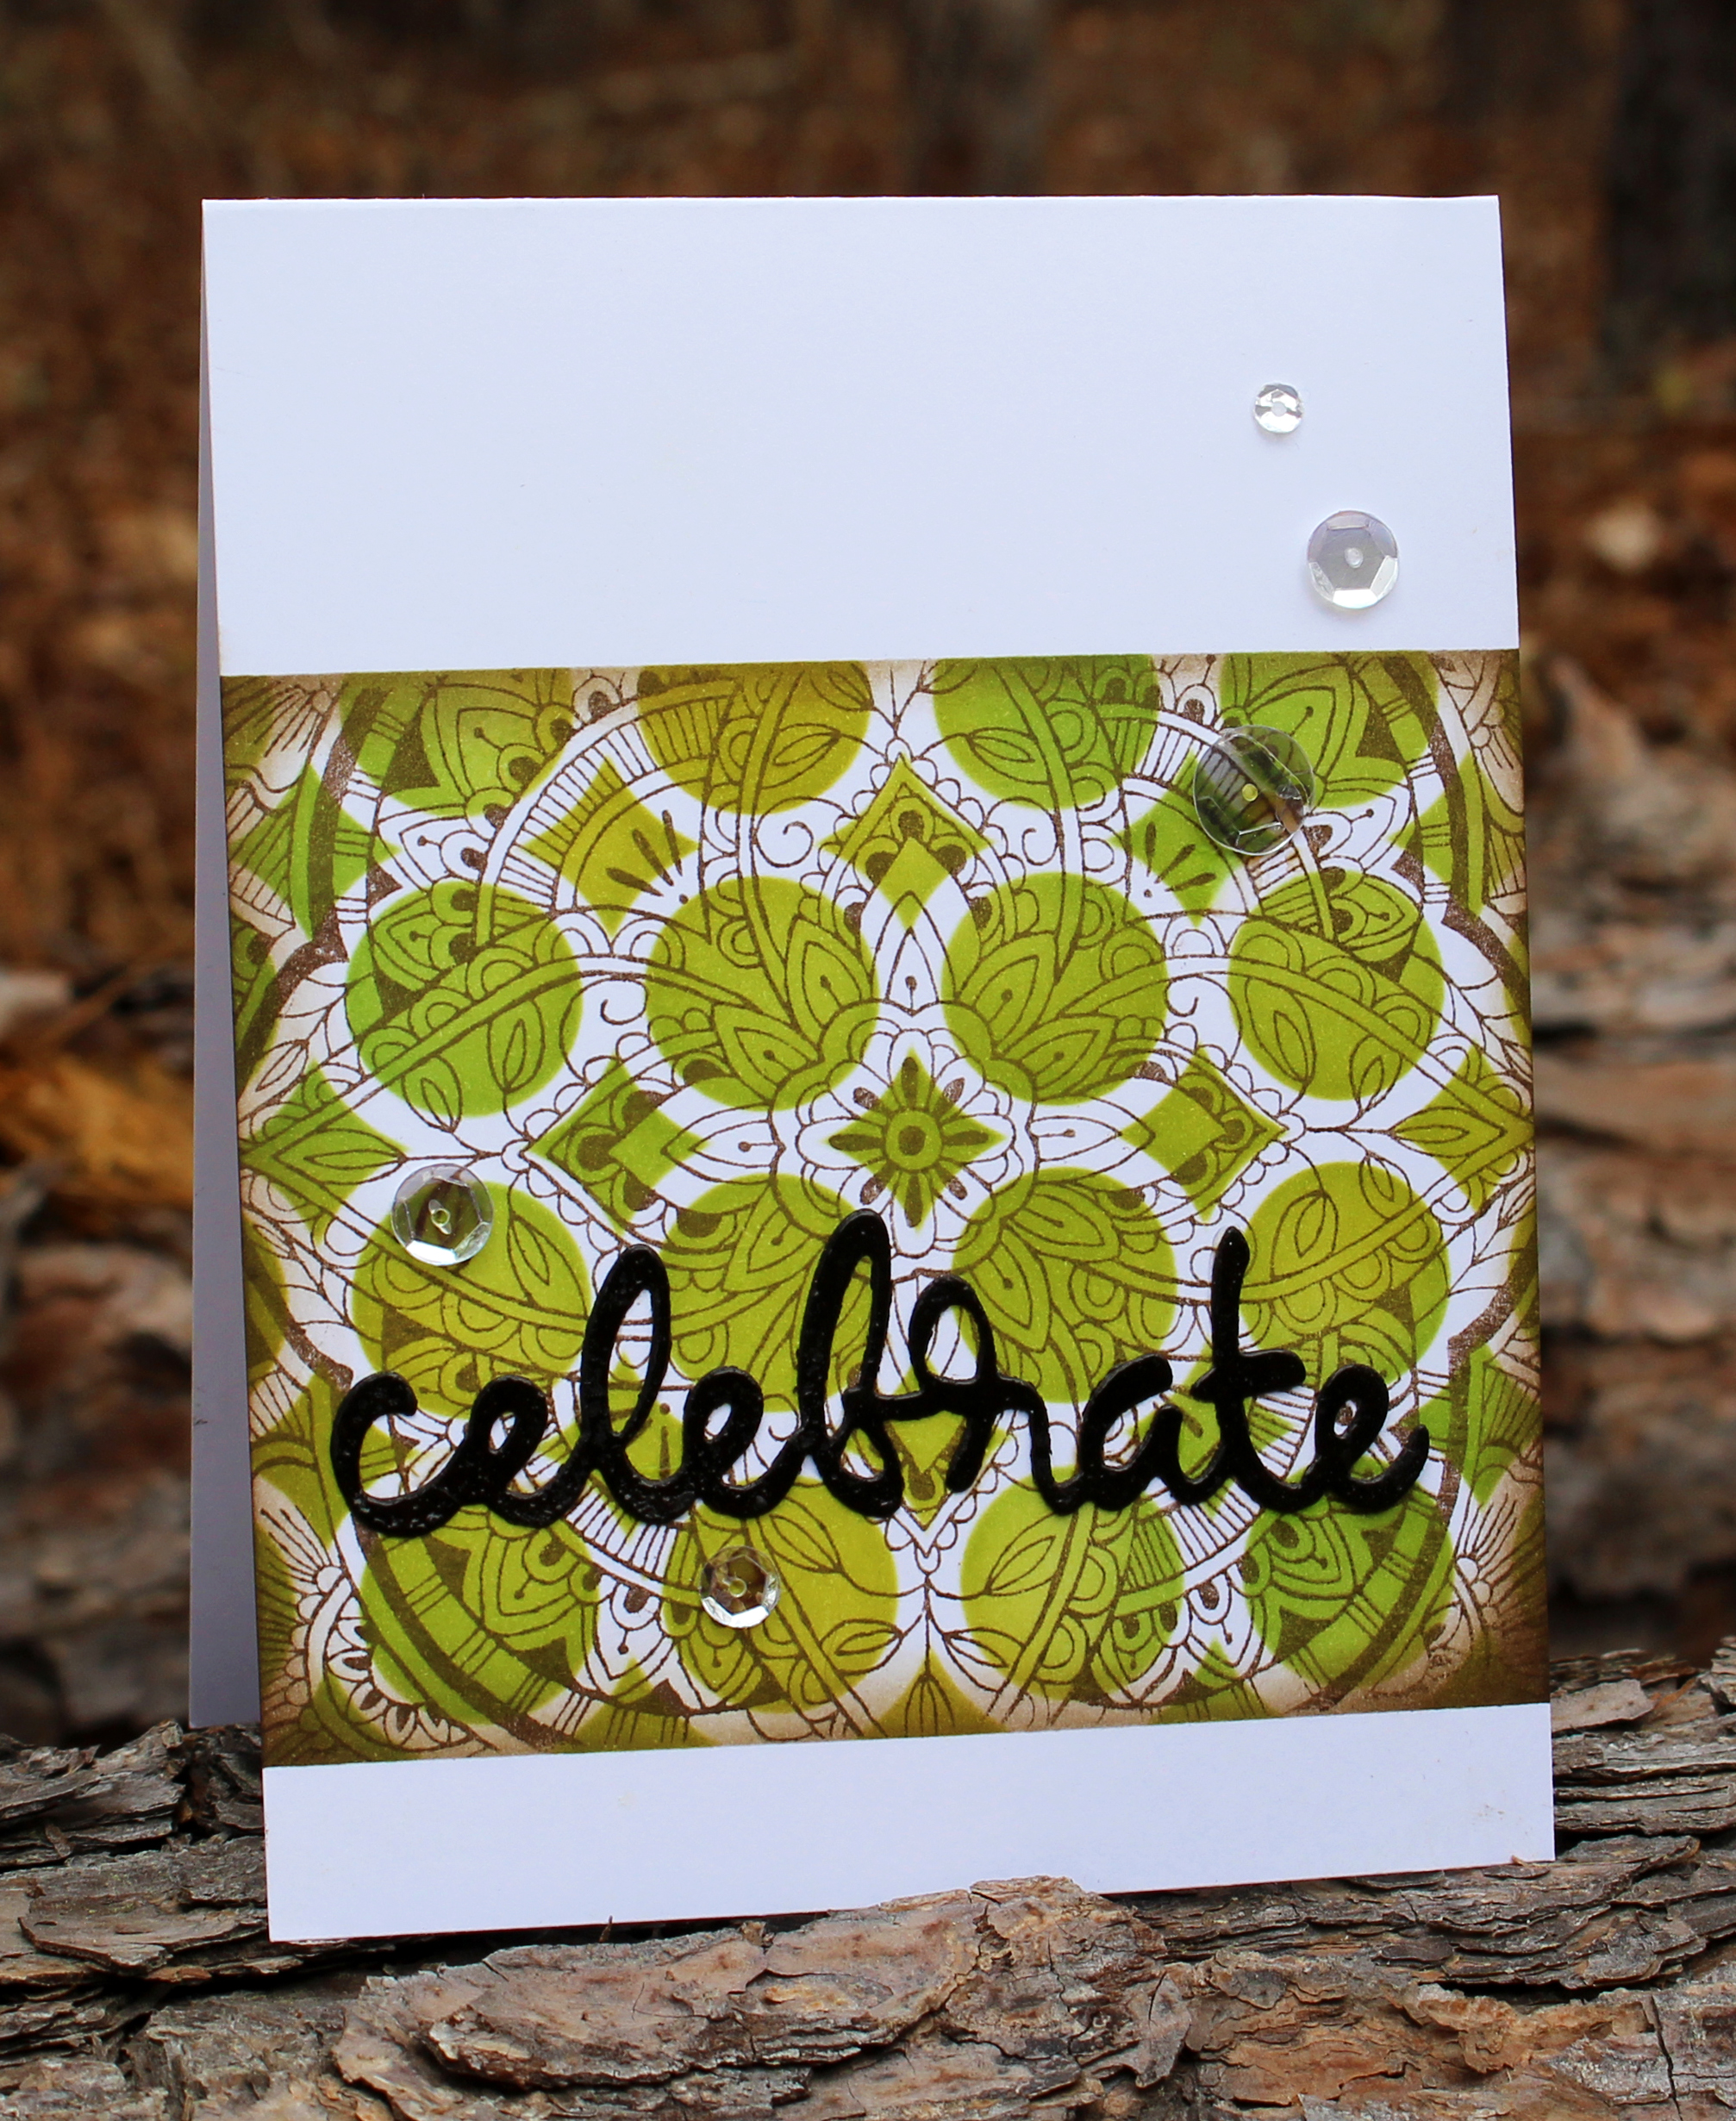
Don’t you just love taking things that you already have and using them in new ways? Today I thought it would be fun to show you how to combine stencils & background stamps for an unexpected look! So dust them off, and let today’s video inspire you to create something fun.

I’m honored to be participating in a video hop today to celebrate my friend Justine Hovey’s 1 Million views on her YouTube channel! WOW – she’s worked hard over the years to create something special, and I’m so excited to celebrate alongside her and some good friends.

Justine will be posting new videos all month long and giving away tons of prizes too. So definitely check her blog out here for all the details. She’s doing something fun with the video hop – each video along the hop has a secret word somewhere in it. Make sure to collect all of them to enter! And I think you’ll find plenty of fun YouTube channels to subscribe to along the way.

Combining Stencils & Background Stamps Tutorial

The theme for the video hop today is Celebrate, so my mind instantly went to putting on a party and getting out my fun colorful serving dishes. Michael and I love to entertain! I have several in the color Olive, and the Spice Market stamp design reminded me of fun entertaining dishes – so I just HAD to combine the two in some way for you over on my YouTube Channel. And inspiration struck.

Here are all the details and exactly how you can create this fun project:

Click here to view in HD on YouTube

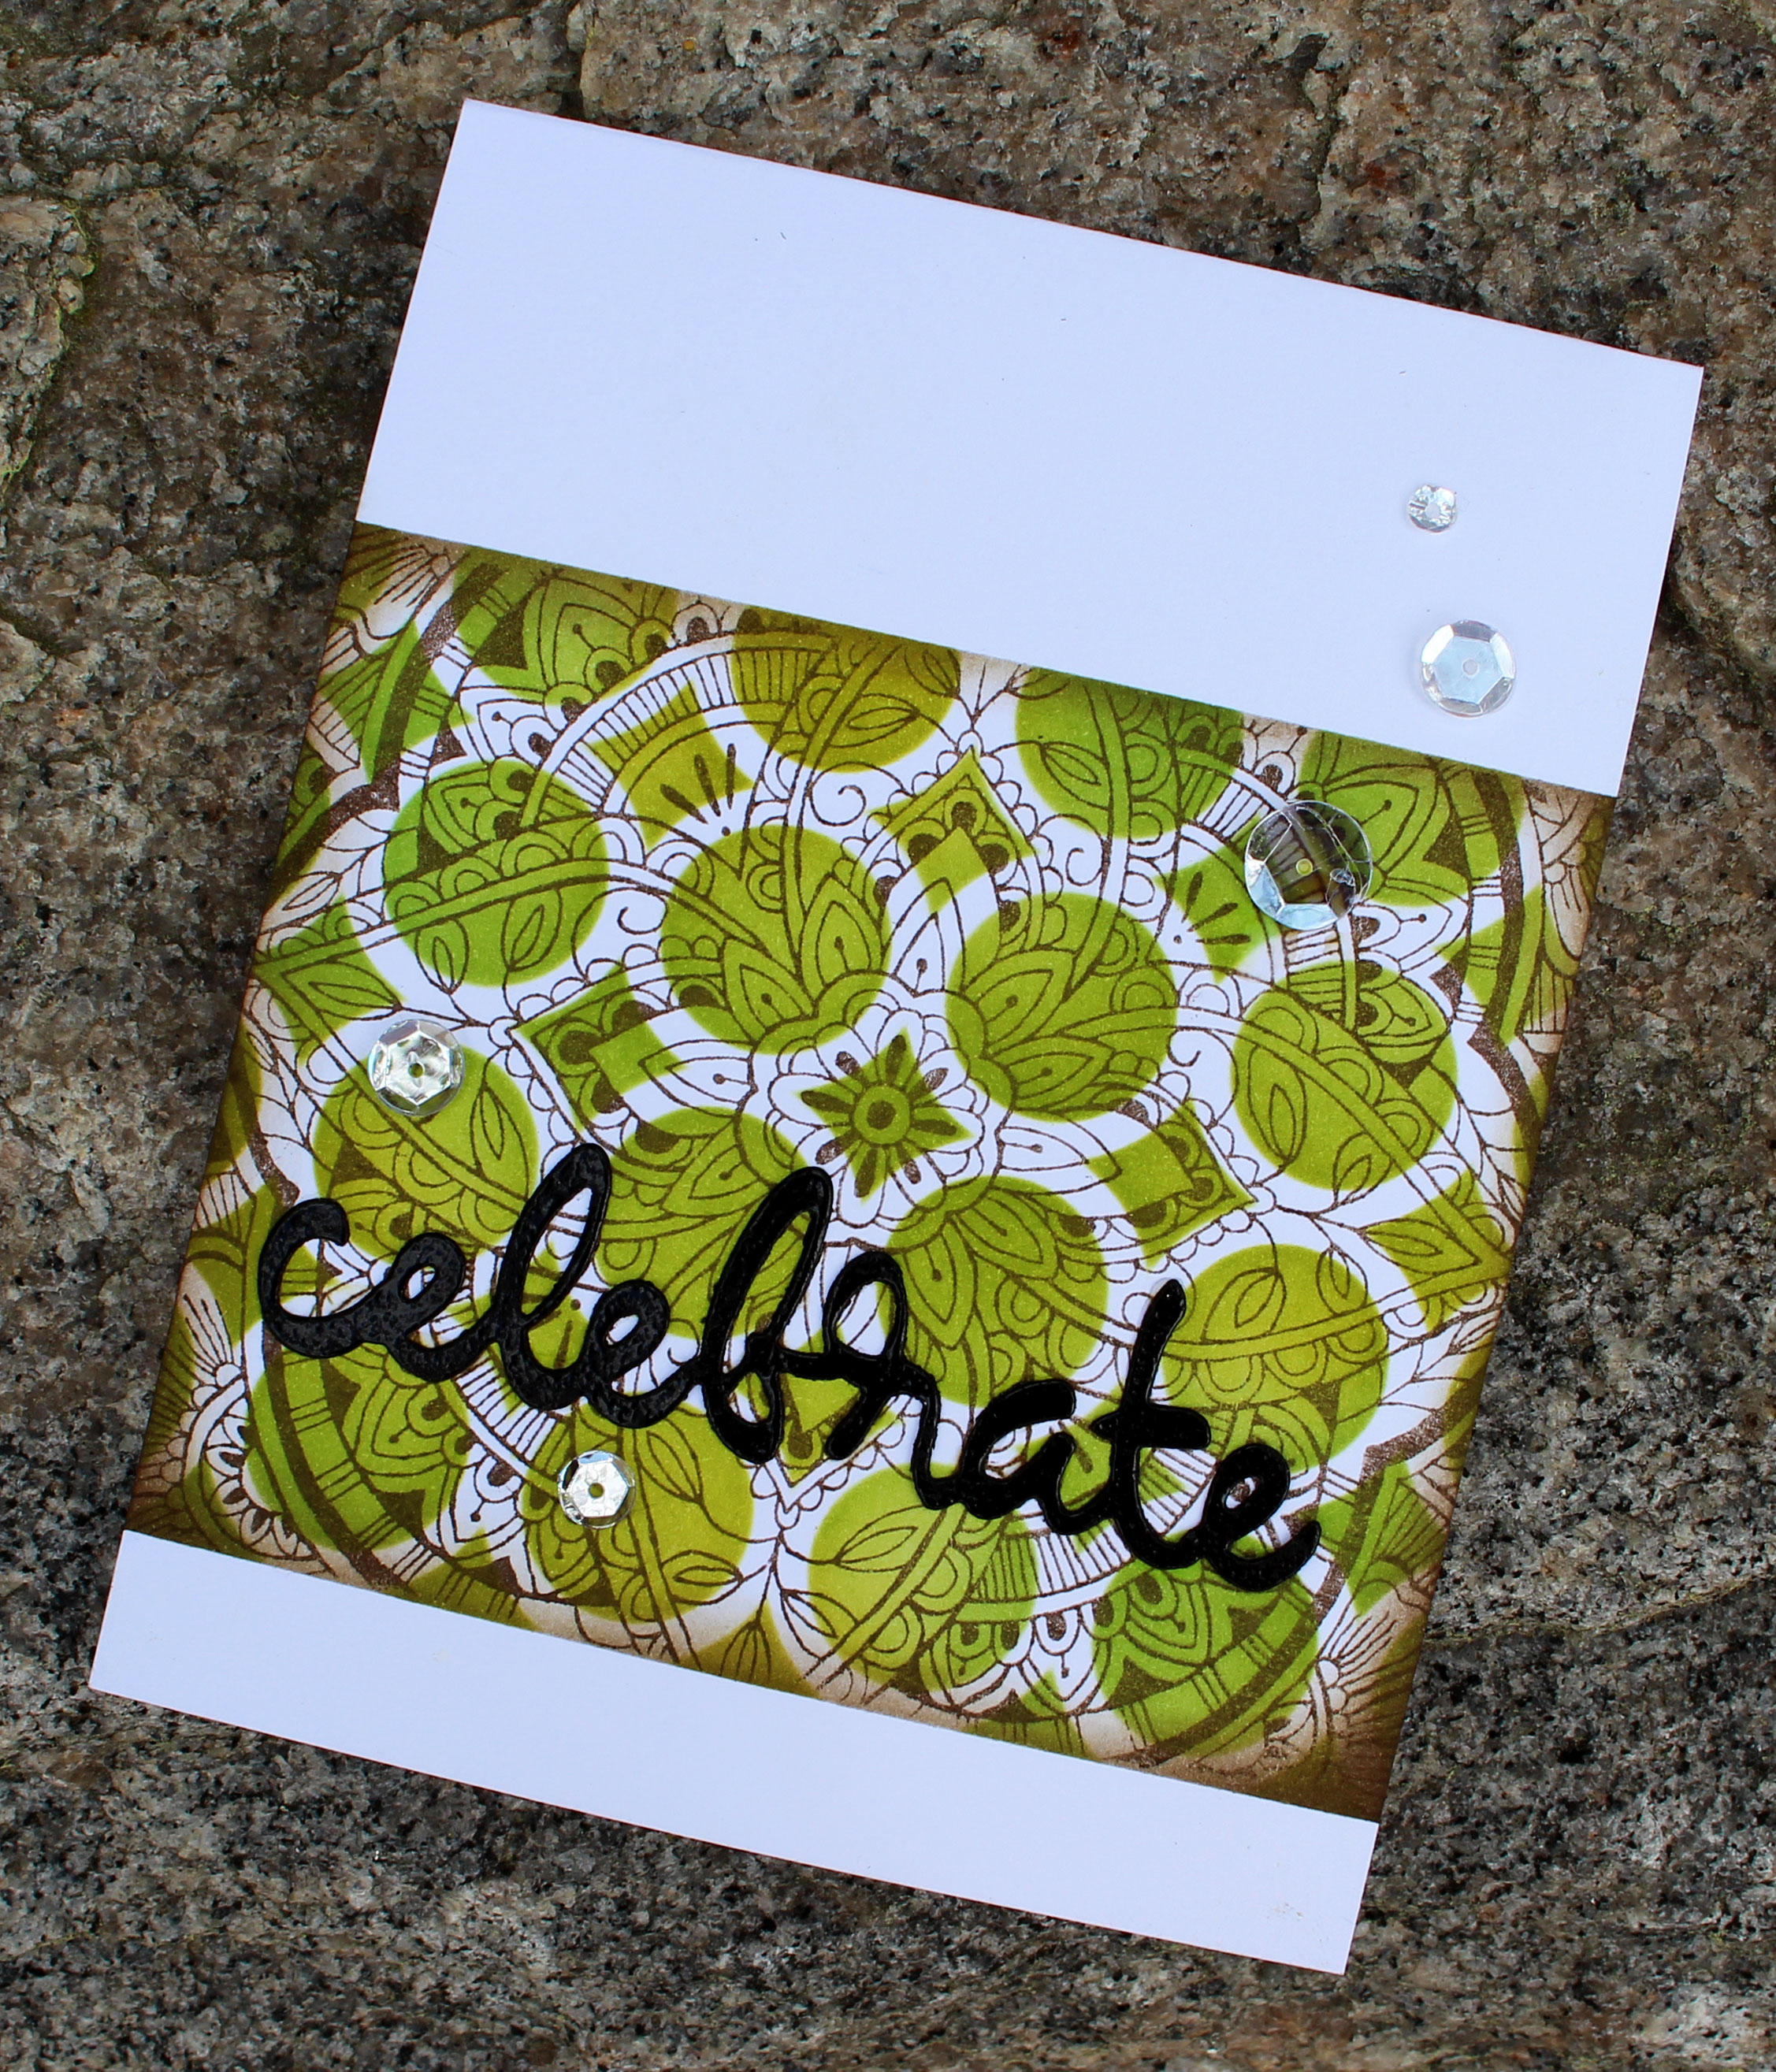
I used the Pattern of Rings stencil designed by Winnie & Walter for the Friendship Stamp of Approval Collection and combined it with one of my favorite background stamps – Spice Market by Hero Arts. And you can see – it’s a totally new look!

When combining stencils & background stamps yourself, look at recurring patterns. I chose the Pattern of Rings stencil because it was circles and there were lots of circular designs in the Spice Market stamp, so I thought they’d play well together.

Combining Stencils & Background Stamps

So now it’s your turn – raid your stash of stencils and background stamps and start to create some amazing patterns!

Till next time –

[optin_box style=”31″ alignment=”center” email_field=”email” email_default=”Enter your email address” email_order=”0″ integration_type=”aweber” double_optin=”Y” list=”3846012″ name_field=”name” name_default=”Enter your first name” name_order=”0″ name_required=”Y” opm_packages=””][optin_box_field name=”headline”]Learn more with our exclusive FREE video series[/optin_box_field][optin_box_field name=”paragraph”]PHA+TG9yZW0gaXBzdW0gZG9sb3Igc2l0IGFtZXQsIGNvbnNlY3RldHVyIGFkaXBpc2NpbmcgZWxpdC4gRG9uZWMgdmVsIG51bmMgbm9uIGxhY3VzIHZlbmVuYXRpcyBjb21tb2RvLjwvcD4K[/optin_box_field][optin_box_field name=”privacy”][/optin_box_field][optin_box_field name=”top_color”]undefined[/optin_box_field][optin_box_button type=”0″ button_below=”Y”]Get Instant Access![/optin_box_button] [/optin_box]


Supplies

To make finding the supplies I used in this project a bit easier for you, here are a few clickable links. Those that have multiple shopping options are indicated with letters – EH – Ellen Hutson, SSS – Simon Says Stamp. Compensated Affiliate Links are used when possible. Click here for disclosure. Happy Shopping!

Stamp of Approval: The Perfect Reason – Release Day

The Perfect Reason Collection - Stamp of Approval

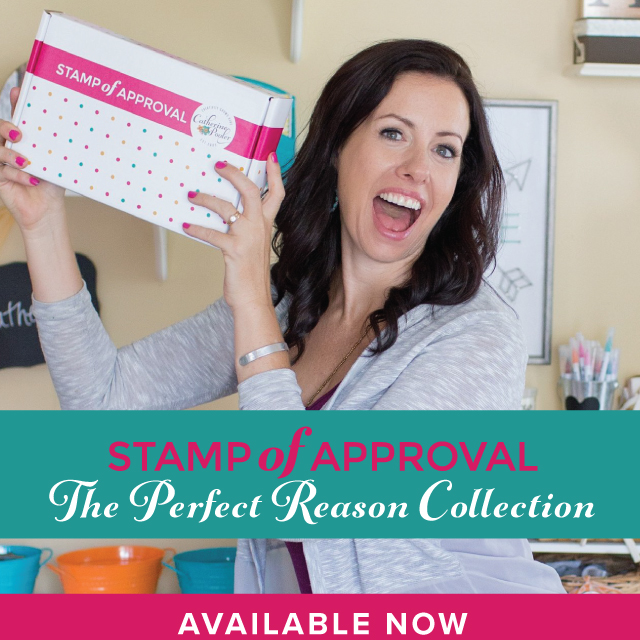
It’s release day over at Catherine Pooler Designs! Stamp of Approval – The Perfect Reason Collection is now available to the public! Yup – you’ve probably already hopped along on our three day Blog Hop – if not, I have links for you at the end.
We had a Midnight Release PJ Party last night over on StampNation – boy was that fun. Many of the Design Team members jumped on live to create (including me!) with the collection, there was tons of chat, a newly released challenge and just an overall fun time.

Stamp of Approval

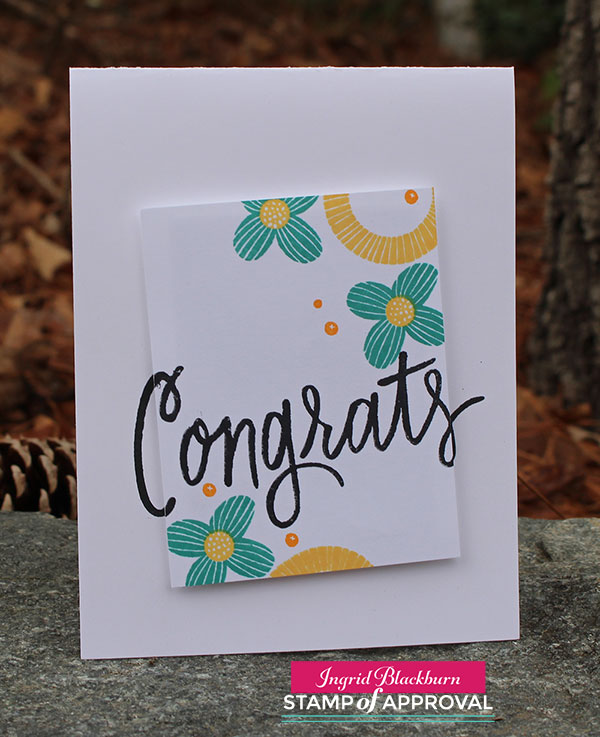
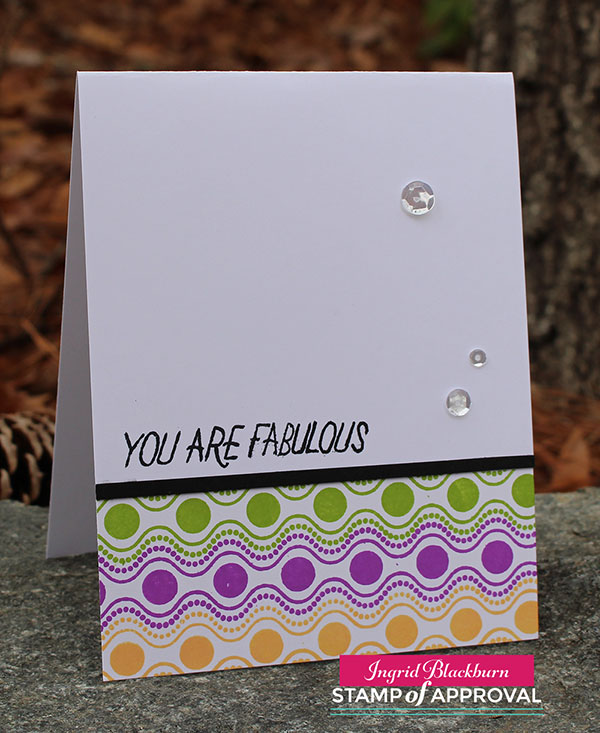
I have a few more projects for you today! I thought I’d channel my inner DT Clean and Simple gurus – Maureen Merritt and Kristie Goulet. These gals have clean and simple down, and I always just smile at all their creations. So this one is for you Maureen and Kristie!

White space is the key to Clean & Simple design – evident in these three projects:

Project One: CAS Pop

You can always pop up a panel like this and stamp under and on top – easily match them up for a cool look. This card uses the Perfect Reason & the You Did It stamp sets.

Perfect Reason Stamp Set

Project Two: CAS Mod

Complimentary colors (from the color wheel) are the name of the game for the project above and below. I’m in love with these combinations. You can not go wrong if you stick to complimentary colors (opposites on the color wheel). This project uses the Everyday Mod & You Did It stamp sets – I’m in LOVE with the Everyday Mod set – it has great geometric shapes and greetings.

Everyday Mod Stamp Set

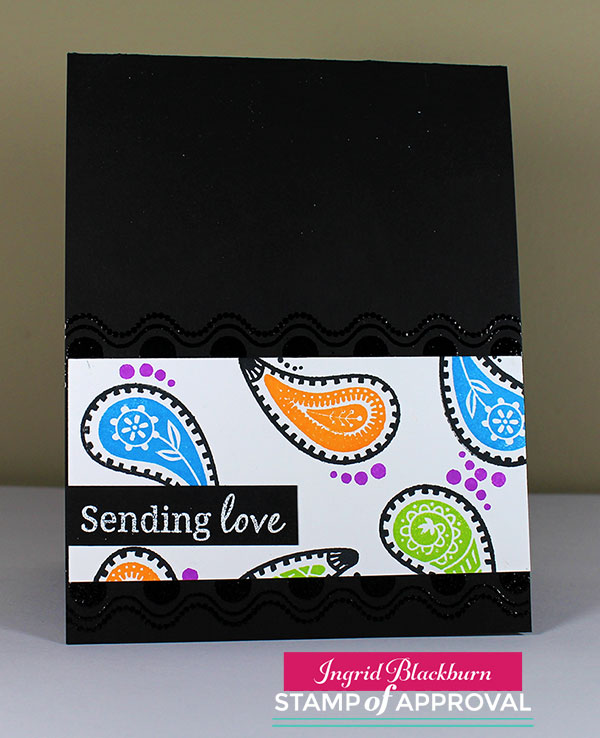
Project Three: Midnight Paisleys

And finally – I thought I’d show you one of the three projects I made last night at our Midnight Release Party. Details on the card are over at StampNation here. That was such a great time – to be online with 1000+ of our closest sistahs from StampNation was FUN!

Paisley Peacock Stamp Set

I stamped the black outlines for the paisleys, and they told me what colors to use. I cut my panel down and my other card is over at StampNation, along with my version of a case of DT Member Melissa Miller’s Blog Hop card here.

PLUS, the StampNation weekly challenge was released during the party too – here’s a peek at what I created for it – inspired by the challenge mood board. SO much fun.

The Perfect Reason Stamp of Approval Collection

So if you haven’t gotten your hands on The Perfect Reason collection yet – don’t wait. It’s going to go fast! To see all the products in this new Stamp of Approval Collection – check out Catherine’s blog/video post right here.

And hop along the three days of Blog Hops. Comment along the way – Catherine is giving away three Perfect Reason Collections! You’ll LOVE creating with it. Click here to see the hops:

Day One                      Day Two                       Day Three

Thanks for stopping by today!

[optin_box style=”27″ alignment=”center” email_field=”email” email_default=”Enter your email address” email_order=”0″ integration_type=”aweber” double_optin=”Y” list=”3846012″ name_field=”name” name_default=”Enter your first name” name_order=”0″ name_required=”Y” opm_packages=””][optin_box_field name=”headline”]Learn more with our exclusive FREE video series:[/optin_box_field][optin_box_field name=”paragraph”]PHA+UGx1cyB5b3XigJlsbCBiZSBhZGRlZCB0byBteTxzdHJvbmc+IEZSRUU8L3N0cm9uZz4gQ3JlYXRpdmUgVGlwcyBFLWxldHRlciB3aGVyZSBJIHNoYXJlIGV4Y2x1c2l2ZSBwcm9qZWN0cywgdmlkZW9zICZhbXA7IHRoZSAxMiBEYXlzIG9mIENocmlzdG1hczwvcD4K[/optin_box_field][optin_box_field name=”privacy”][/optin_box_field][optin_box_field name=”top_color”]undefined[/optin_box_field][optin_box_button type=”0″ button_below=”Y”]Get Instant Access![/optin_box_button] [/optin_box]


The Perfect Reason: Stamp of Approval Blog Hop – Day 3

Welcome to Day 3 of The Perfect Reason Stamp of Approval Blog Hop! You probably hopped on over from the crazy talented blog of Chrissie Tobas . I’m always amazed at what she creates. The whole hop list is at the end, but first here are a few projects to showcase just how amazing this curated collection inspired me.

If you’re new to Stamp of Approval – click here to check out everything you need to know about this amazing collection of Stamps, Dies and Stencils.

And make sure you are on the wait list so you get access to the collection at 10:00 am tomorrow. If any are still left at 3 pm, it will be released to the public.

Of course, If you are a StampNation member – you not only get to order a whole 10 hours early…but I’ll see you at the exclusive Midnight release party tonight – I’ll be participating live! We’re going to have FUN! 🙂

This collection has some incredible products in it that were a dream to create with. Let me show you just a few!

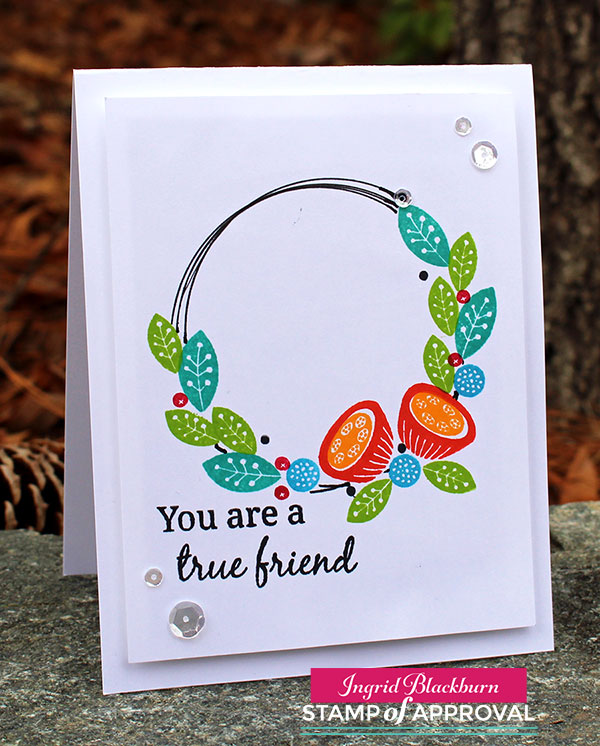
Project One: The Perfect Wreath

I love funky fun flowers and the Perfect Reason stamp set doesn’t disappoint. The flowers, foliage and greetings are not only easy to stamp with, but quirky & fun to work with. Oh, and it has a matching die set too!

Don’t you just love these shapes?!! And I LOVE little stamps like the teeny circle stamps – look at the Rockin Red ones – love that little detail in the middle. The greeting on this card is from the Everyday Mod stamp set.

The Perfect Reason Wreath

Be sure to check out The Perfect Reason Collection for detailed instructions on how to recreate this project.

Inks: Tutti Frutti, Tiki Torch, Aquatini, Lime Rickey, Rockin Red, Midnight, Fiesta Blue

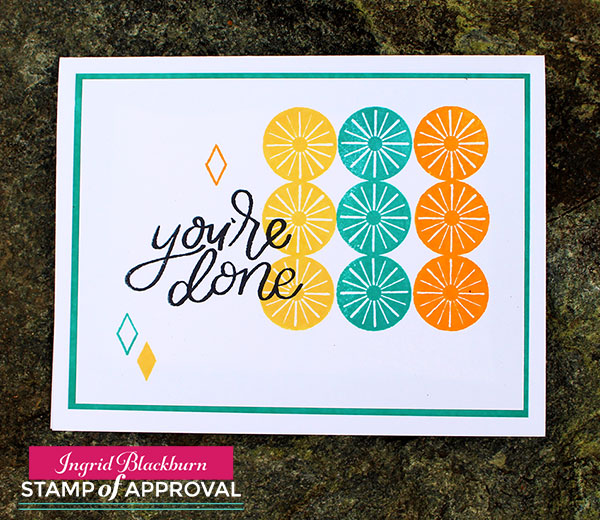
Project Two: Clean & Simple Mod

You will be able to create several Clean & Simple projects with this collection too. Here is one of my favorite stamps from the Everyday Mod stamp set – an AWESOME geometric set with great greetings. Seriously – I can’t STOP creating with it!

The greeting is from the You Did It stamp set – it’s a fun one, right? I love the range in this sentiment stamp set – to see all the products in detail…be sure to check out Catherine’s blog right here.

CAS The Perfect Reason - Everyday Mod

TIP – If you want coordinating paper to go with your inks, just swipe the edge with your ink pad for a perfect look.

Colors: Aquatini, Tiara, Tiki Torch, Midnight (Catherine Pooler Designs)

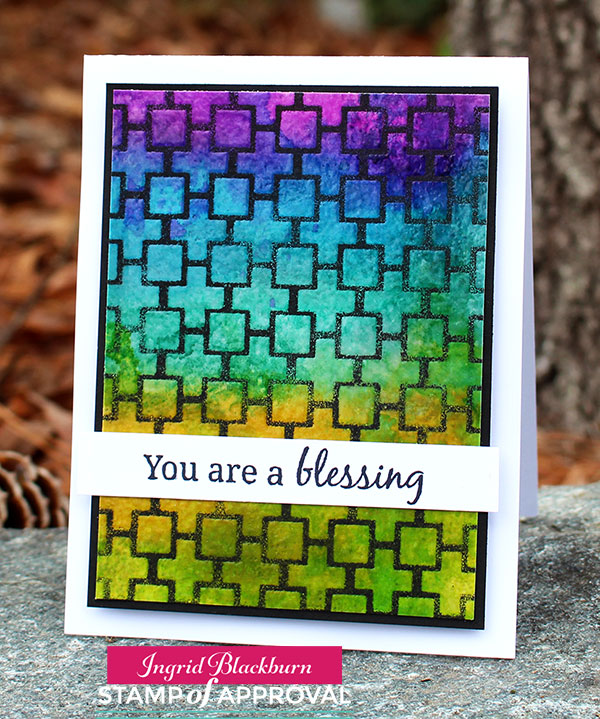
Project Three: Stained Glass Blessing

If you’ve ever stopped by my blog, taken a class with me or seen one of my tutorials on YouTube – you KNOW I’m a stencil girl. And I LOVE to watercolor with vibrant colors – hello – Catherine Pooler Designs inks!!

I took all that goodness and wanted to make the Mod Squared Stencil shine – literally.

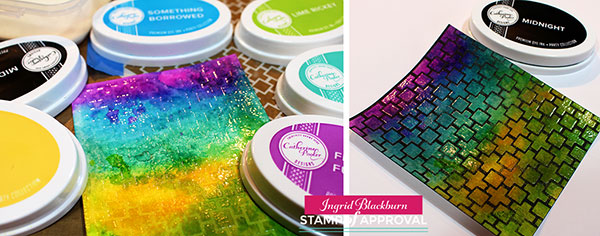
Josephs Coat Technique

Aren’t these colors just fabulous? We have a little stained Glass Josephs Coat Technique action going on here. Isn’t it amazing how the Midnight just transforms this piece into something really special?

My goal was to have my earth colors at the bottom going skyward to a celestial heaven. I hope that translates! The greetings are from the Everyday Mod Stamp Set.

The Perfect Reason - Stained Glass Technique

Step by step instructions can be found in the PDF that comes with The Perfect Reason Stamp of Approval Collection.

Colors: Tiara, Lime Rickey, Aquatini, Something Borrowed, Flirty Fushia & Midnight – all Catherine Pooler Design inks + Versamark (Tsukeniko).

Stamp of Approval - The Perfect Reason

So now it’s your turn. Hop along to Taheerah’s blog – I’m SUCH a huge fan of hers, I just know you will be too. And if you haven’t seen the first two days of hops yet…what are you waiting for? Check them out – you can start right from Catherine’s Blog here. Leave a comment along the way for your chance to win one of three collections!

1. Catherine Pooler
2. Lisa Harrolle
3. Lydia Evans
4. Chrissie Tobas
5. Ingrid Blackburn You are here now
6. Taheerah Atchia – Hop on here next!

Have fun hopping, and I hope to see you at the live release party at StampNation tonight or right back here tomorrow for more inspiration!

[optin_box style=”27″ alignment=”center” email_field=”email” email_default=”Enter your email address” integration_type=”aweber” double_optin=”Y” list=”3846012″ name_field=”name” name_default=”Enter your first name” name_required=”Y” opm_packages=””][optin_box_field name=”headline”]Learn more with our exclusive FREE video series:[/optin_box_field][optin_box_field name=”paragraph”]PHA+UGx1cyB5b3UnbGwgYmUgYWRkZWQgdG8gbXk8c3Ryb25nPiBGUkVFPC9zdHJvbmc+IENyZWF0aXZlIFRpcHMgRS1sZXR0ZXIgd2hlcmUgSSBzaGFyZSBleGNsdXNpdmUgcHJvamVjdHMsIHZpZGVvcyAmYW1wOyB0aGUgMTIgRGF5cyBvZiBDaHJpc3RtYXM8L3A+Cg==[/optin_box_field][optin_box_field name=”privacy”][/optin_box_field][optin_box_field name=”top_color”]undefined[/optin_box_field][optin_box_button type=”0″ button_below=”Y”]Get Instant Access![/optin_box_button] [/optin_box]

Kylie’s 12 Days of Christmas Card Challenge – Day Seven

There are two things I’m grateful for this year – my online friends and a good ole Christmas Card Challenge. Okay there are lots of other things too, but today is about a sweet friend of mine – Kylie Purtell and her 12 Days of Christmas Card Challenge with friends.

12-days-of-christmas-graphic

I’ve had a wonderful last few years participating in many online card challenges – most of them Christmas! Yes, I’m a sucker for Christmas. And I normally have my own 12 Days of Christmas Series myself…but between a move from Europe back to the USA (we’re settling in the Raleigh, North Carolina) area, and purchasing a new home unexpectedly – my November/December got turned upside down – please forgive me!

So I was elated when Kylie asked me to participate in her 12 Days of Christmas with Friends Challenge. And I encourage you to enter too – pick any inspiration from any day….today is Day 7 – and just jump on in. The prizes are from three of my favorite stamp stores – all small businesses owned by amazing women.

To Salute these three creative women – Kylie, Shery & Christine, I thought it would be fun to put together a little Christmas fun using products from all three – from where else…my hotel room…lol!

ingrid-blackburn-candy-cane-holly-001

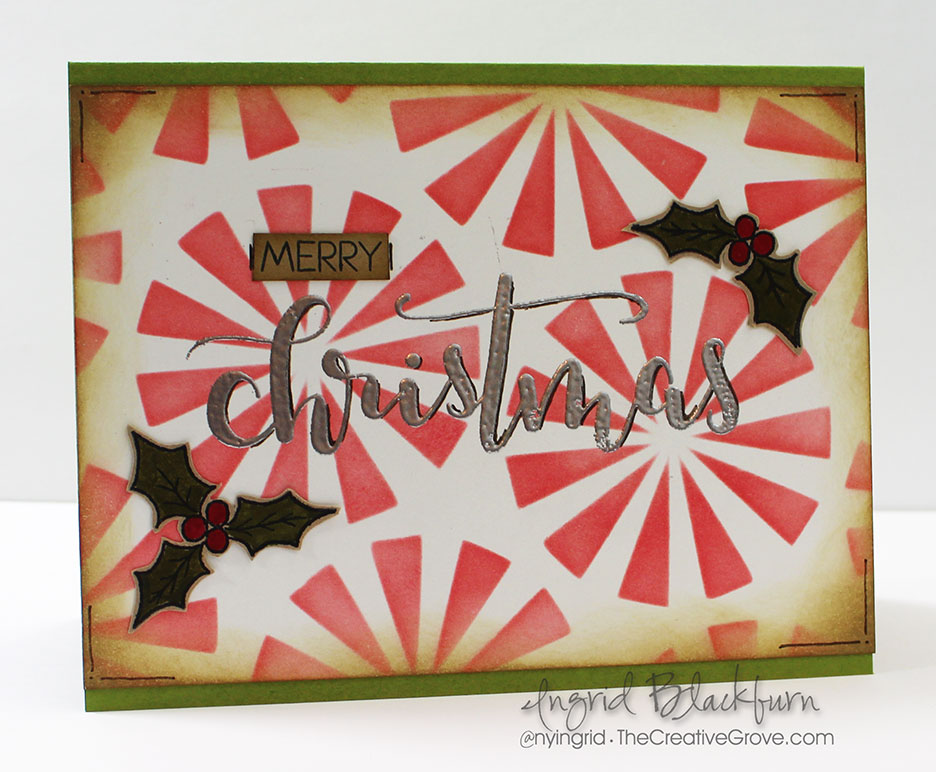
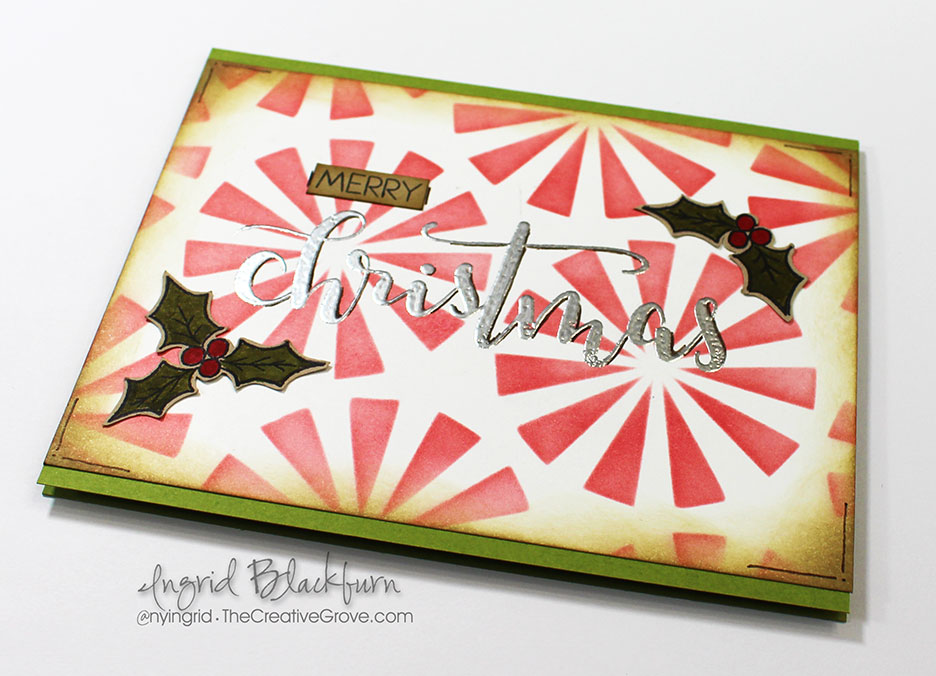
I went for a little rustic look with some toned down colors here.

  • To create it you’ll want to sponge a little Festive Berries through the ARTplorations by STAMPlorations Merry Go Round Stencil  – keep it light to have it look effortless.
  • Next sponge around the perimeter with a little Tea Dye Distress Ink lightly and add a few lines and dots to the corners with an Early Espresso Distress Marker.
  • Next Stamp the Holly & Berry images from the Christmas Joy stamp set by Happy Little Stampers in Black Archival Ink on Kraft colored card stock.

ingrid-blackburn-candy-cane-holly-002

  • Color in your images using Zig Clean Color Markers and cut out leaving a little edge to allow the images to pop.
  • Once your background is fully dry (I zapped mine with a Heat Tool), test it to see if any embossing powder sticks, and then stamp the gorgeous Christmas greeting in Versamark ink from the Christmas Surprise stamp set by Create a Smile Stamps.
  • Emboss it in Silver powder and stamp the coordinating greeting onto a little strip of Kraft in Black. Adhere to your background and edge with an Early Espresso Distress Marker.
  • Edge the greeting a bit with the same Early Espresso Distress Marker – keeping it uniform – mine is slightly to the right and underside of the letters. This helped to pop the image off the busy background.
  • Add your panel to a folded piece of Olive card stock and there you have it! My card front measures 5 1/2 x 4″.

ingrid-blackburn-candy-cane-holly-001

Don’t you just love how the background looks like little peppermint candies…I love all these elements, and these three companies are some of my favorites – I’ve spent my fare share at each this past year – just don’t tell Michael! 😉

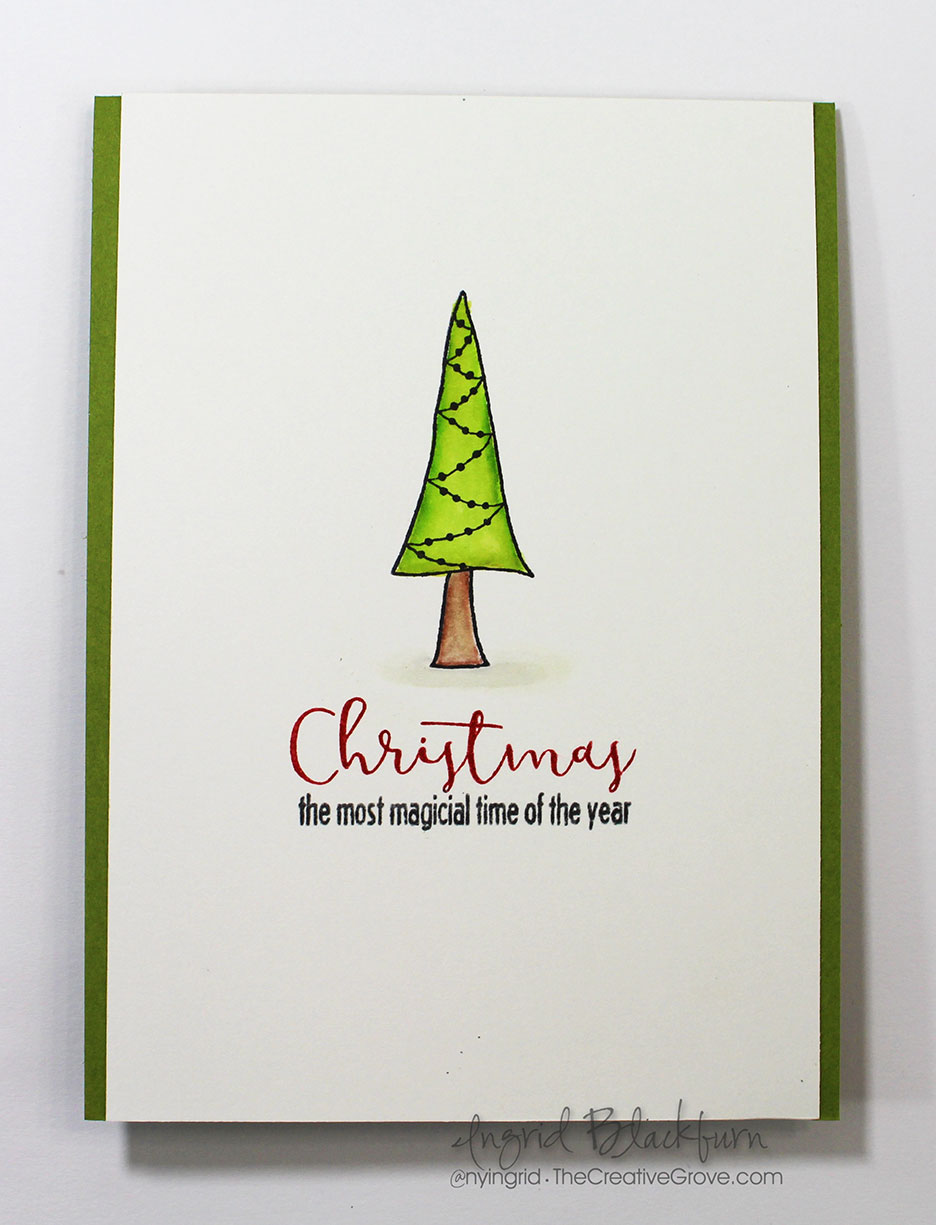
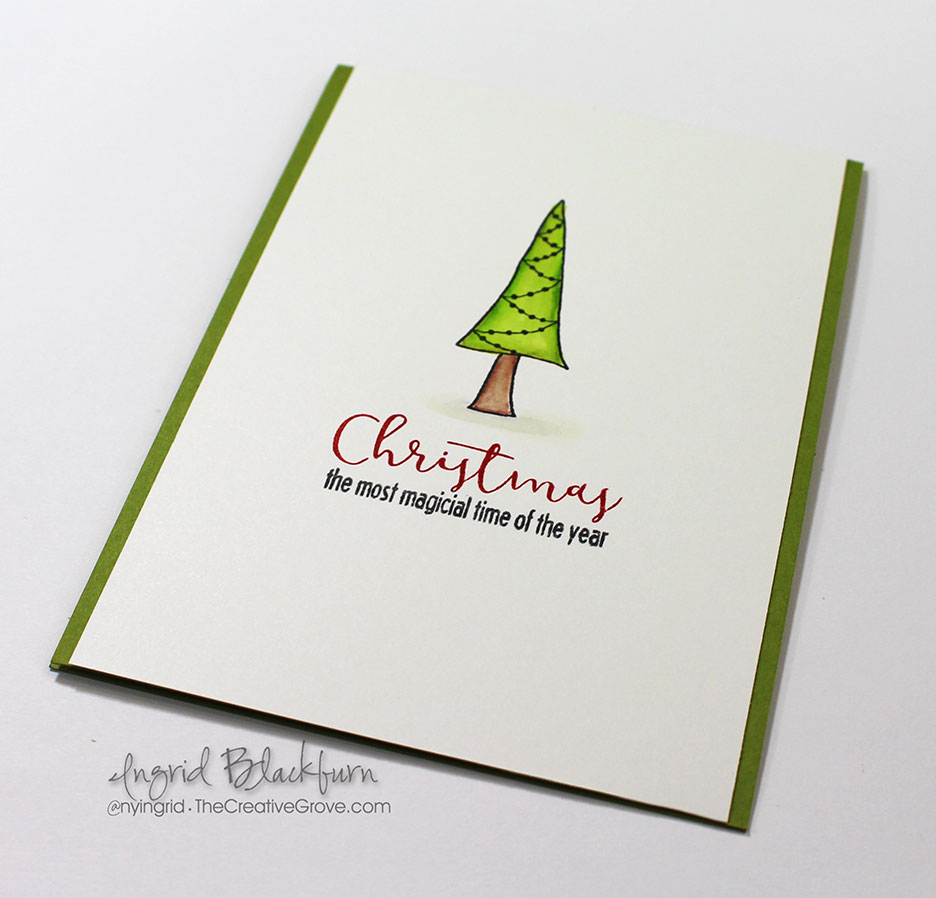
And for another fun little card for some inspiration…I kept it Clean and Simple using Kylies super cute newest Christmas set – Christmas Joy. I’m in love with the little trees in it and the sentiments. Be sure to stop by the Happy Little Stampers video channel this week for lots of Christmas inspiration too…

ingrid-blackburn-cas-tree-002

I used Strathmore Bristol paper for a super smooth finish that works effortlessly with Zig Clean Color Markers. If you have these awesome watercolor markers – you NEED this paper! Lower quality papers just don’t get the same blend.

  • Use several shades of green to blend the perfect tree after stamping it in Archival Ink (Ranger), and a few browns for the trunk.
  • Add a light shadow underneath the tree in a warm grey for a simple shadow which grounds your tree for a realistic look.
  • Use a MISTI stamp tool to position your greeting, then ink up the Christmas in Red, stamp…clean and repeat using black on the bottom. It was so easy to do. I used Catherine Pooler’s new ink pads – Polka Dot Red and Midnight Black.

ingrid-blackburn-cas-tree-003

  • Originally I thought a one layer card would be perfect…but the little Olive borders added so much – I just HAD to trim it and layer.

It’s cute though, right? I just love these little trees – seriously…I can’t stamp enough with them!

So now it’s up to you! Enter the challenge to win gift certificates from Happy Little Stampers, STAMPlorations and Create a Smile! If not just to enter to finish off those cards – and if you’re done…start on next year!

Click Here to visit Kylie’s blog and enter in the Linky contest – run, don’t walk!!! You have until 12 pm – December 17th (AEST) Winners will be chosen at random. for a $20 gift certificate to one of the following sponsors:

createasmile stamplorations1-webhls-shop-badge

Thanks for stopping by and saying hi! It’s been a little bit, I’m happy to have had the opportunity to actually stamp again! Be sure to stop by the Happy Little Stampers Video Channel to see our Christmas Series – we’re live right now! Notice some of those cute little trees?


Happy Little Stampers YouTube Channel

Hope to see you very soon – and if we don’t cross paths until 2017 – Merry Christmas and Happy New Year!

Signature


Embossing on Christmas Cards

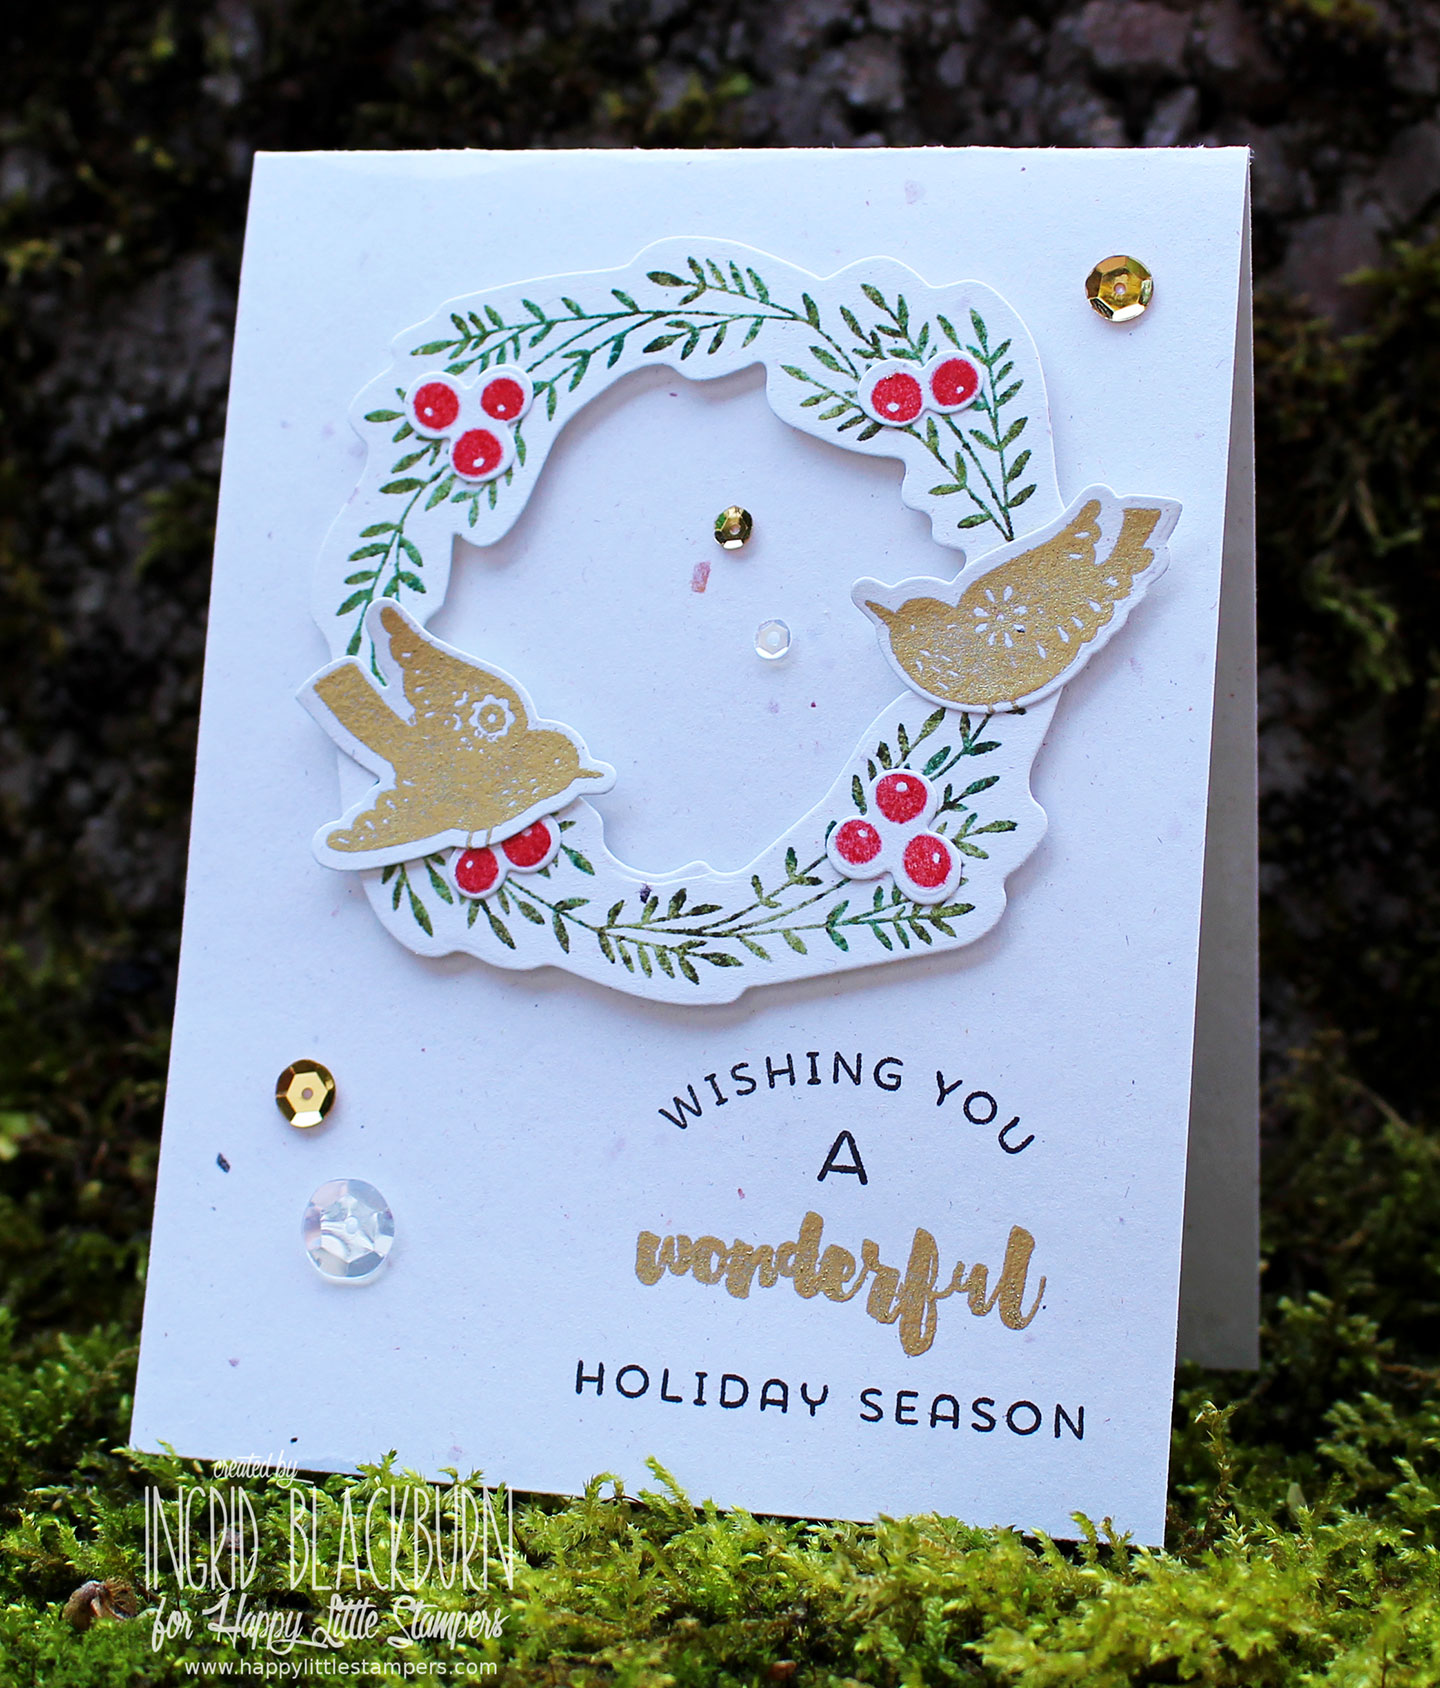
Today I have a Christmas card for you that would make a wonderful mass produced card. The theme over at the Happy Little Stampers Christmas Challenge this month is embossing – and this card is loaded with embossed pieces.

hls-christmas-challenge-october-2016

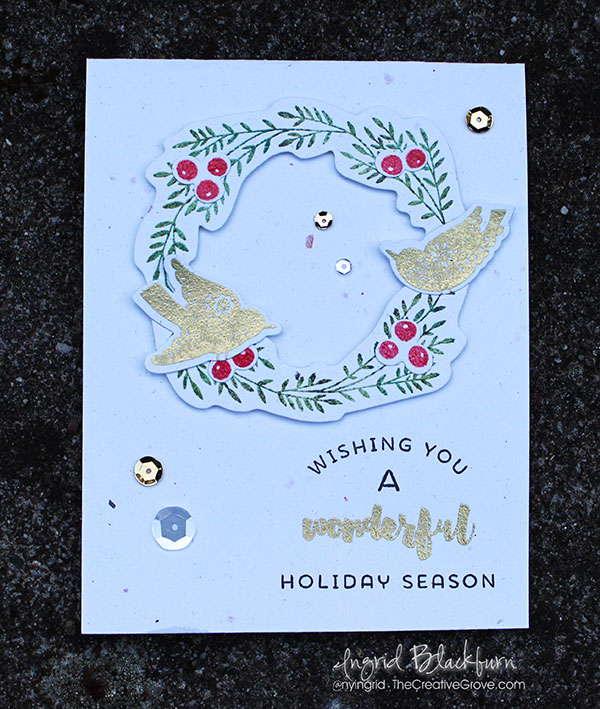
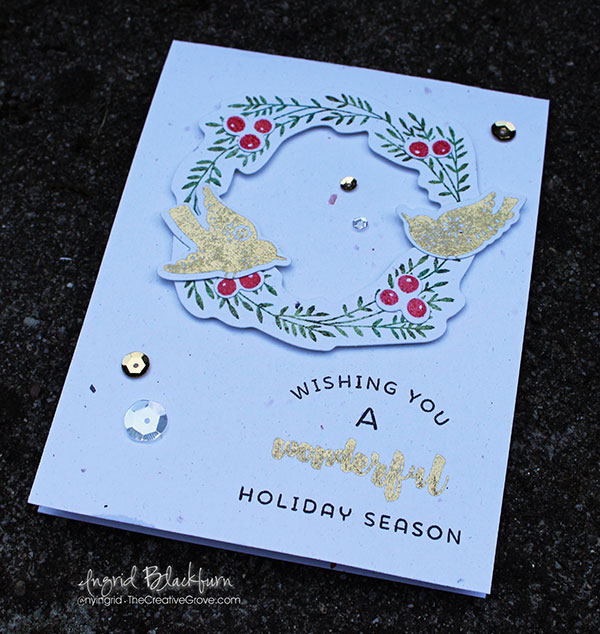
I”m using my favorite new wreath and stamped embellishments by Wonderful Wreath by Catherine Pooler Designs. And let me tell you, with the matching die cuts it’s SUPER easy to get nice cut out pieces – love that!

christmas-embossing-ingrid-blackburn-hls

First stamp & emboss the wreath in a few greens. I inked it up in Versamark, then Peeled Paint, Forest Moss & Evergreen Bough Distress inks. Then just emboss in clear and you have your own custom embossed color! Pretty awesome, right? I’ve been doing this technique for years – that way you don’t need to buy all those colors that you’ll only use once – use what you have!

christmas-embossing-ingrid-blackburn-003

Emboss your berries the same way, using Barn Door. Next, emboss the birds and scripty greeting from this set in Gilded Gold by Brutus Monroe – my go to gold. TIP – Keep in mind that the Gilded Gold looks so much like a foil – it’s a true metallic. Because of it’s metallic properties, it embosses in a flash, literally. If you do over emboss it, it will start to bubble – and that happens quick. I just LOVE this embossing powder.

The Wishing you….Holiday Season is stamped in Early Espresso by Stampin Up and is the only non-embossed image on here!

christmas-embossing-ingrid-blackburn-002

The finish off your card, pop up the wreath and add a few sequins. I think one of the things I love about this project is that it’s just 1/2 a sheet of card stock folded – and it’s a naturals type card stock with neutral flecks. The neutral quality adds to the card a bit – of course bright white would be great too!

Now it’s your turn to check out what the Design Team has done and join in on all the fun for this month’s Christmas Challenge. I KNOW you emboss!

Till next time –

Signature

[optin_box style=”12″ alignment=”center” email_field=”email” email_default=”Enter your email address” integration_type=”aweber” double_optin=”Y” list=”3846012″ name_field=”name” name_default=”Enter your first name” name_required=”Y” opm_packages=””][optin_box_field name=”headline”]Learn more with our exclusive FREE video series:[/optin_box_field][optin_box_field name=”paragraph”]PHA+UGx1cyB5b3XigJlsbCBiZSBhZGRlZCB0byBteSBGUkVFIENyZWF0aXZlIFRpcHMgRS1sZXR0ZXIgd2hlcmUgSSBzaGFyZSBleGNsdXNpdmUgcHJvamVjdHMsIHZpZGVvcyAmYW1wOyB0aGUgPHN0cm9uZz4xMiBEYXlzIG9mIENocmlzdG1hczwvc3Ryb25nPiBQcm9qZWN0IFNlcmllczwvcD4K[/optin_box_field][optin_box_field name=”privacy”][/optin_box_field][optin_box_field name=”top_color”]undefined[/optin_box_field][optin_box_button type=”0″ button_below=”Y”]Get Instant Access![/optin_box_button] [/optin_box]

CAS – Embossing on Vellum

cas-embossing-on-vellum-ingrid-blackburn-hls

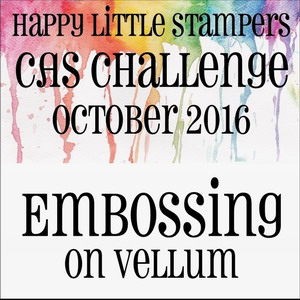
Chances are if you love to emboss, you’ve tried embossing on vellum before. Embossing really gets a pop when laid on top of the slick vellum surface. Today I’m playing along with the Clean and Simple challenge over at Happy Little Stampers. And the technique is yup, you guessed it –  embossing on vellum.

oct-2016-cas-badge

Embossing on Vellum Tutorial

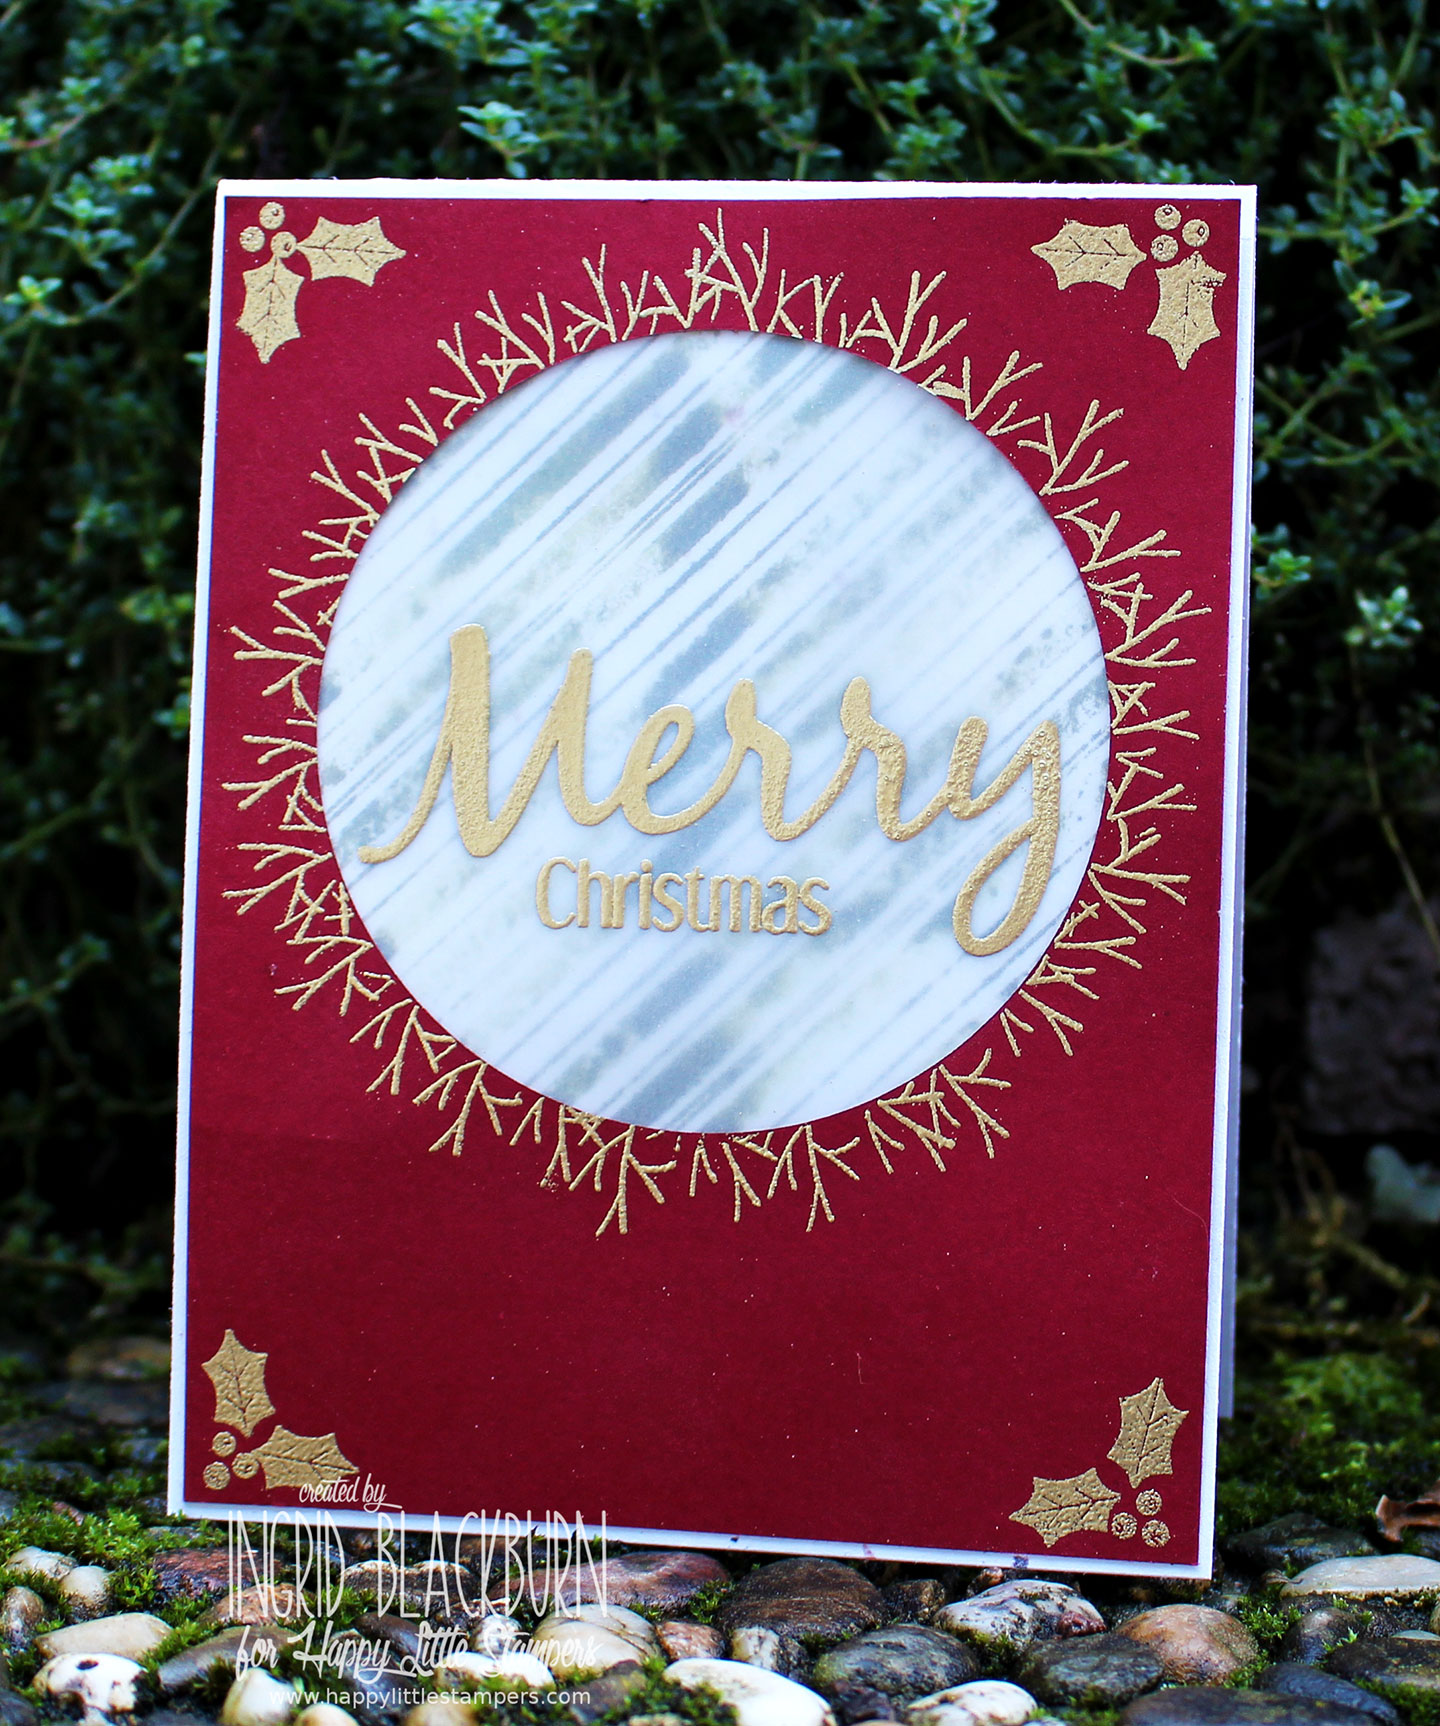
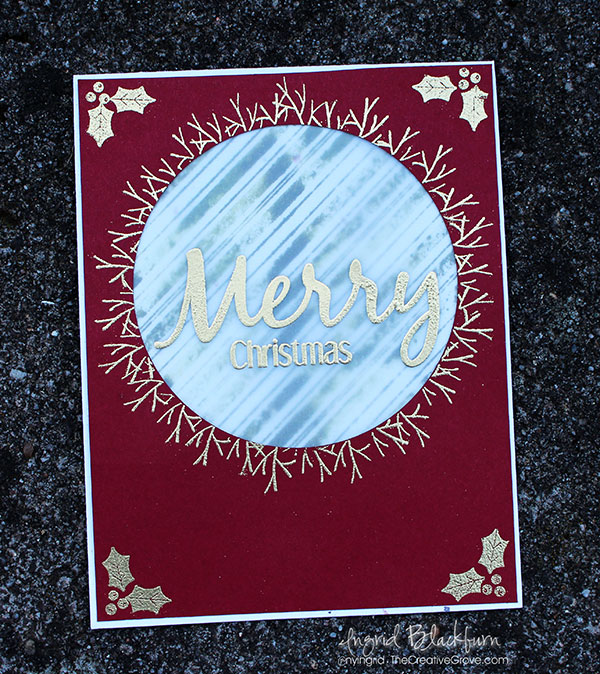
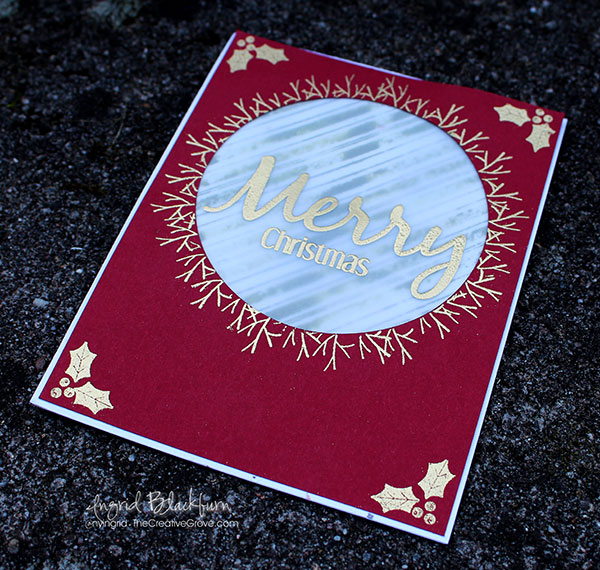
Clean and simple cards need a focal point. This project uses embossing on vellum not just to highlight the focal point, but to soften a busy background as well. To bring more attention to that focal point, emboss a golden twig wreath around.

Embossing on Vellum - DIY Christmas Cards

The focal point. One of the brilliant properties of vellum is that it is translucent. So I took a busy stamped off Peppermint Stick background in green and placed it behind my vellum window. With the golden twigs – it really worked.

But the card needed a tiny bit more. The clean and simple look was what I was after, so I didn’t want to clutter it up too much. I ended up choosing to add some golden holly leaves & berries in the corner.

Embossing on Vellum Technique

All the little touches seem to pull it together. The vellum cuts down the strong stamped background just the right amount….now it adds something rather than dominating. The golden accents added to the card, without pulling your eye from the dominant focal point – just what you’re looking for in clean and simple design.

When working on your clean and simple cards – don’t be afraid to stray from a white card. White space – which is what CAS design needs doesn’t literally mean white!

Now it’s your turn – head on over to Happy Little Stampers and join in the Embossing on Vellum Challenge fun!

Till next time –

Signature

[optin_box style=”12″ alignment=”center” email_field=”email” email_default=”Enter your email address” integration_type=”aweber” double_optin=”Y” list=”3846012″ name_field=”name” name_default=”Enter your first name” name_required=”Y” opm_packages=””][optin_box_field name=”headline”]Learn more with our exclusive FREE video series:[/optin_box_field][optin_box_field name=”paragraph”]PHA+UGx1cyB5b3XigJlsbCBiZSBhZGRlZCB0byBteSBGUkVFIENyZWF0aXZlIFRpcHMgRS1sZXR0ZXIgd2hlcmUgSSBzaGFyZSBleGNsdXNpdmUgcHJvamVjdHMsIHZpZGVvcyAmYW1wOyB0aGUgPHN0cm9uZz4xMiBEYXlzIG9mIENocmlzdG1hczwvc3Ryb25nPiBQcm9qZWN0IFNlcmllczwvcD4K[/optin_box_field][optin_box_field name=”privacy”][/optin_box_field][optin_box_field name=”top_color”]undefined[/optin_box_field][optin_box_button type=”0″ button_below=”Y”]Get Instant Access![/optin_box_button] [/optin_box]