Stampin’ Up! Best of Flowers

Best of Flowers 003 Main

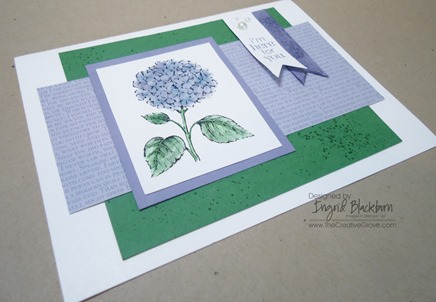
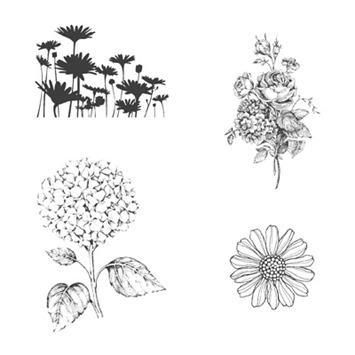
Stampin’ Up!’s 25th Anniversary collection continues with the Best of Flowers set this past month.  This is a great collection of some of the most popular flower stamps from the past quarter of a century.  The images are smaller than the original ones (which makes me sad, but it’s new!  And of course there is a new image too – we can’t forget that!

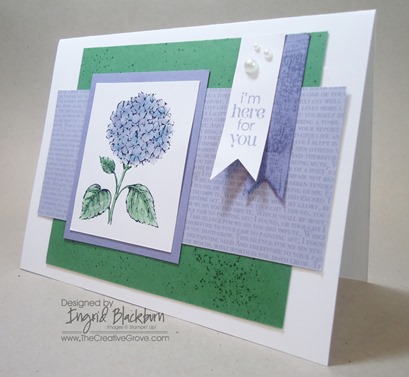
Today I wanted to showcase the hydrangea stamp from this set.  When I grew up in San Francisco, we had two huge bushes that bloomed so beautifully with these large gorgeous blue/lavender colored flowers.  So this card takes me back to my childhood.

Best of Flowers 003 Side

Creative Tips:

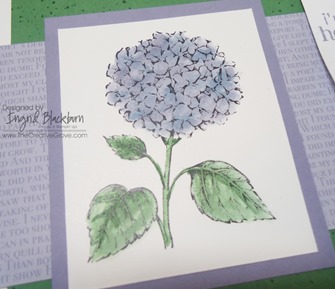
  • I wanted the flower to take center stage here, so I stamped it in Jet Black StazOn ink and watercolored it using my Aqua Painters and the Wisteria Wonder, Marina Mist, and Garden Green Classic Ink Pads.
  • When Watercoloring, I was careful not to use too much water as I stamped directly on my Ultrasmooth Whisper White paper rather than our Watercolor Paper.  I began by coloring the entire flower with the Wisteria Wonder and then highlighted a few flowers – mostly around the black centers with the Marina Mist.
  • Best of Flowers 003 CU

  • For the leaves, I colored the entire leaf, from the center out and then highlighted the veins and center to add a little depth.
  • I paired my image with some of the Wisteria Wonder Designer Paper from the 2011-2012 In Color Paper Stack.
  • I added a panel of Garden Green Cardstock but wanted a little more depth, so I used my Color Spritz Tool and a Garden Green Stampin’ Write Marker to give a little splash of color so that it did not seem so plain.Best of Flowers 003 Banners
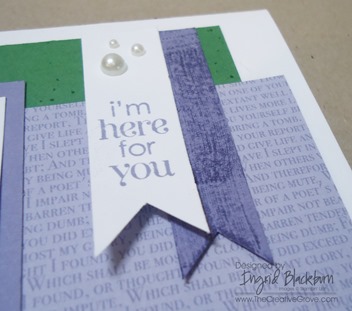
  • For my greeting, I wanted to add a few vertical banners, so I chose a great saying from Petite Pairs – a quite versatile set.  I think I’m here for you is a fitting saying for my hydrangea.
  • I added a little Wisteria Wonder banner behind my greeting banner but it was too loud just plain.  To subdue it I ran my ink pad directly over it a few times for a little texture. 
  • And as a finishing touch, I added three different sized Pearl Basic Jewels as an accent. 
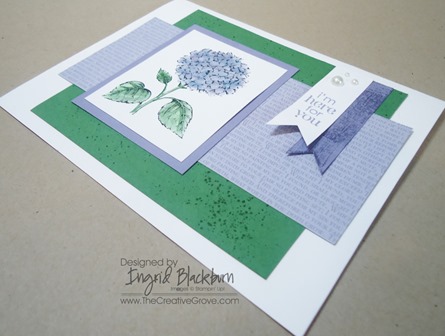
  • I love the final result.  It’s clean, simple and to the point.  This flower used to be close to the size of the Garden Green panel, but I rather like it’s new size.  It’s an update on a classic.  I hope you love the Best of Flowers set – get it while you can!

Be sure to stop by tomorrow for another project with this set and then Sunday for…
    blogtour-25years-aprilDon’t miss a fun Blog Tour of the RemARKable Stampers team this Sunday with this very set!  Get more than 20 fresh ideas.  Be sure to stop back by here on Sunday April 21st!!

Signature Snowflake 001

To Shop 24/7 in the Creative Store – Click here!

Best of Flowers 003 Angle

Stamp Sets – Best of Flowers (133342c),  Petite Pairs (122495w, 122497c) Ink – Wisteria Wonder (126984), Garden Green (126973), Marina Mist (126962), Jet Black StazOn (101406), Garden Green Stampin’ Write Marker – Regal Collection (119701)  Paper – Whisper White (100730), Wisteria Wonder (119683), Garden Green (102584), 2011-2012 DSP Stack (122384) Cool Tools – 1” Square Punch (124094), Color Spritzer Tool (107066), Aqua Painters (103954)  Finishing Touch – Rhinestone Basic Jewels (119246)
Best of Flowers 133342L

Free Shipping April 6-8th

Free-Shipping_eCard_NA Crop

Who doesn’t like a good bargain.  And let’s be honest, I’ll take something for free any day!  Stampin’ Up! has offered their first Free Shipping promotion ever for this Saturday April 6th – 8th.  And the best part about it, there are no limitations – so any order size, large or small and you save big!  Expedited shipping is excluded, and your orders must be in by 11:50 pm MT on April 8th. 

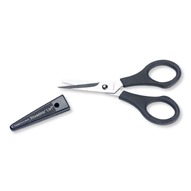
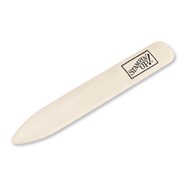
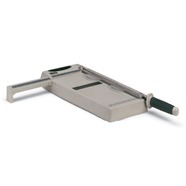
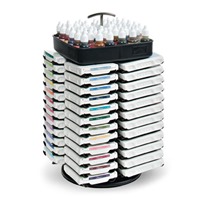
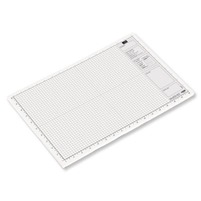
So, what are you going to get?  Here are my Top 12 must have’s for every stamper.  The first six are tools I use each and every day when I paper craft – Paper Snips, Bone Folder, Tabletop Paper Trimmer, Stampin’ Scrub & Mist, Stampin’ Up Inkpads & Refills stored in the Color Caddy and my #1 must have to stamp and create with – Grid Paper.

 I103579FI102300FI106959F126200LColor CaddyGrid Paper

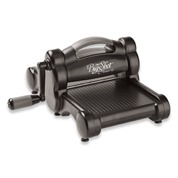
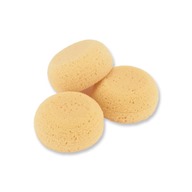
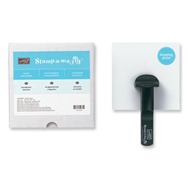
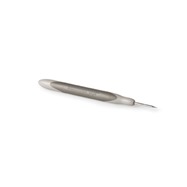
These next six are tools that I use quite frequently and most stampers can not live without – Big Shot die cutting system, Apothecary Accents Framelits, Stampin’ Sponges, Stamp-a-Majig, Paper Piercing Tool (I use it with the Essentials Paper Piercing Pack and Stampin’ Pierce Mat) and last, but definitely not least, my #1 used punch – 1” Square Punch.

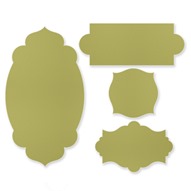
Big ShotApothecary Accents FramelitsStamping SpongesStamp-a-MajigPaper Piercer1 inch square punch 124094S

Be sure to take advantage of this awesome special!  And don’t forget to sign up for my Creative Tips Newsletter to get my special project tips on the last project – Sunset Boardwalk this Saturday at 12 noon!  Happy Stamping.

Signature Snowflake 001

To Shop 24/7 in the Creative Store – Click here!

Home Sweet Home

SF Day 1 009 edited

This week I’m spending time in San Francisco, California to visit my family and celebrate my dad’s 80th birthday, spend some quality time with my mom, and brother.  I was born and raised in San Francisco and it’s a beautiful place to visit.  Plus I’m super excited to meet my new niece – Aubrey.

I would never change a thing about growing up in San Francisco.  We had amazing culture, I grew up in a melting pot of people, culture, excellent food, and more physical sports and outdoor activities than you can think of.  I’m quite proud to say I’m a California girl – even if I don’t live here anymore.  

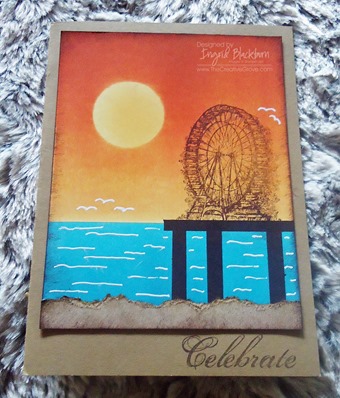
One of the things we loved about being in the Bay Area was going to our old family cabin in the Santa Cruz Mountains.  I loved being surrounded by the towering Redwoods (hummm, wonder where my love of redwoods came from?)  We would go on hikes, walk through the Basins, and go to the Boardwalk in Santa Cruz.  The Boardwalk had the scariest (well as a kid) rollercoaster, because it was all wood!  I loved it.  So when we had the free Sale-a-bration Stamp set Feeling Sentimental, I had to do a sunset boardwalk scene – it just reminded me of the Boardwalk in Santa Cruz. 

This card was one of the projects in my Brayer 101 – Introduction to Creative Scenery class that I taught the past few months.  The stamp set is now gone (but I know several of you have it!), so I’ve come up with a great new project to replace it, but wanted to share this beautiful card with you.  I hope you like it!

I will be sharing how I made this card in a detailed post filled with Creative Tips to anyone subscribed to my Creative Tips mailing list!  I’m going to share it on Saturday at 12 noon – the day of my Dad’s party, so you have plenty of time to subscribe still! 

Have a great day – enjoy your families – I’m going to enjoy spending quality time with mine.  I’ll be sure to report back all week so that you can see all the fun places and things I’m doing.

For information about taking Brayer classes as part of my Creative University series in person, check out my upcoming events page by clicking here.

Signature Snowflake 001

To Shop 24/7 in the Creative Store – Click here!

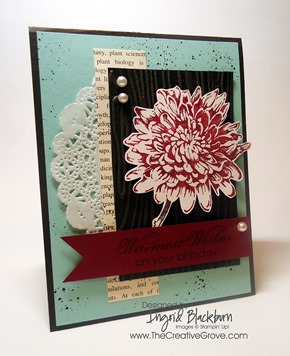
Blooming with Kindness Birthday

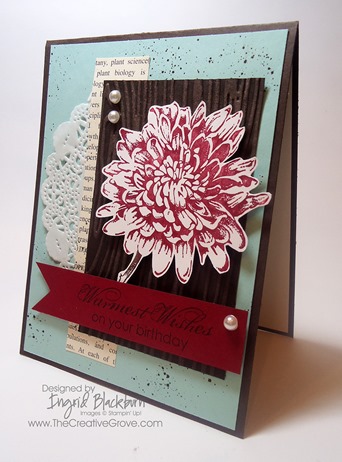
Blooming with Kindness 002 Side

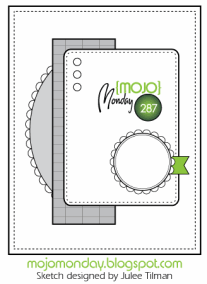
This morning I couldn’t sleep!  So what’s the cure – stamping, of course.  It certainly helped that my insomnia came on the same morning of the Mojo Monday challenge.  I hoped up to my office, and wouldn’t you know it, it was so early (3:45 am…yikes!), that the challenge wasn’t even posted yet!  I read some email, got caught up from all the friends and family Easter fun yesterday on facebook and twitter, and finally the challenge was up.  Here’s what the sketch looked like:   Mojo287SketchBlooming with Kindness 002 Tilt

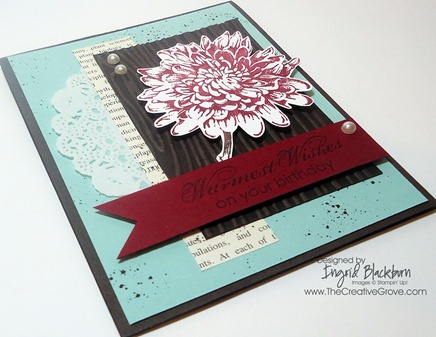
I thought about it for a second, and finally settled in with Blooming with Kindness .  I grabbed some extra pieces of cardstock that I had prepped for a previous project (nothing like using already cut cardstock!) and grabbed my color coach to pick my remaining colors.  I’ve been in this white/vanilla kick lately and have decided that it’s my new favorite thing – so naturally it’s on this card too!  I hope you love the end result just as much as I do.  I’m excited, because my good friend Sherry’s birthday is coming up and I just know she’ll love to get this card in the mail. 

Blooming with Kindness 002 Main

Creative Tips:

  • I wanted the stamp to be the star along with the color combination, so I chose a neutral backdrop for the Flower to be stamped and popped up. 
  • I stamped my flower in Cherry Cobbler first, but it wasn’t dramatic enough so I added a little highlighting with my Cherry Cobbler Stampin’ Write Marker on top of my rubber image to really add some depth in the same shade.
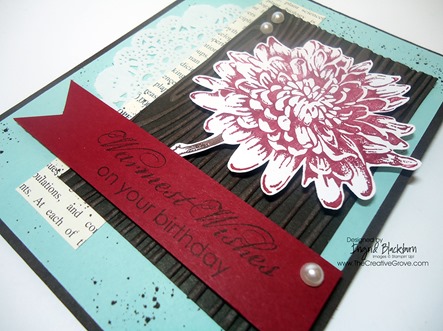
  • Before I stamped my flower, I used my Blender Pen to remove the red that had gotten onto the stem.  I then added the Early Espresso color with a Stampin’ Write Marker.  I LOVE this process – you can alter any stamp with a Blender Pen! Blooming with Kindness 002 CU
  • I ran the Early Espresso cardstock (2.5” x 4”) through my Big Shot using the Woodgrain TIEF folder and enhancing the depth of the color by using the Bisque Pottery Technique.  Be sure to stop by later this week for a video on how to do this technique!
  • I added a little strip of First Edition DSP and a partial Doily for a little feminine flair in addition to the Pearl Basic Jewels
  • I made my banner flag for my greeting with a 1” Square punch and popped that in addition to the flower up on Stampin’ DimensionalsBlooming with Kindness 002 Height
  • The card needed a little something so I added something I haven’t used in forever – my Color Spritzer Tool!  I just love this tool and can’t believe how long it’s been since I picked it up. 
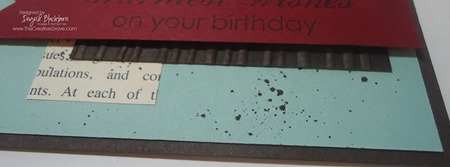
  • To perfectly get just the right splat, make sure you like up your Stampin’ Write Marker completely up with the plastic end.  Be sure to hold the marker straight and play with the height of the marker end to the project.  Give it a firm squeeze. Blooming with Kindness 002 Splat
  •  Best tip – And always, always, always do a few on your grid paper first – it doesn’t matter how good you are at it.  I’ve been using one for 11 years and still do this.  It’s about whether or not the marker is aligned properly.
  • Be careful with the splat too, sometimes a lot of ink gets deposited and you will need to place it to the side to dry or run a Heat Tool over it so that it doesn’t smear. I just love this end result.  I hope you do too.  Have fun making yours and see you back here soon for some more Mojo!
  •   Signature Snowflake 001

To Shop 24/7 in the Creative Store – Click here!

Blooming with Kindness 002 Angle

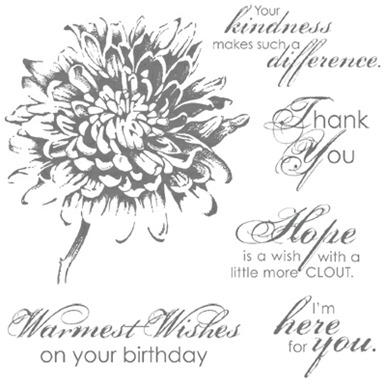
Stamp Sets – Blooming with Kindness (126422) Paper – Whisper White (100730), Early Espresso (119686), Pool Party (122924), Cherry Cobbler (119685), First Edition Specialty Designer Series Paper (DSP) (121878), Paper Doilies (129399) Ink – Cherry Cobbler (126966), Early Espresso (126974), Early Espresso Stampin’ Write Marker (119680), Cherry Cobbler Stampin’ Write Marker (119681) Cool Tools – 1” Square Punch (124094), Stampin’ Trimmer (126889), Paper Snips (103579), Stamp-a-Majig (101049), Woodgrain TIEF (127821), Brayer (102395), Blender Pen (102845) Color Spritzer Tool (107066) The Perfect Finish – Pearl Basic Jewels (119247), Stampin’ Dimensionals (104430)
Blooming with Kindness126422L

Swallowtail Sparkle

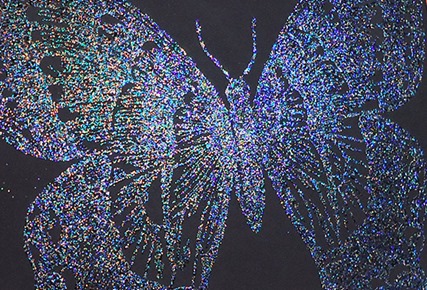
Swallowtail 004 Main

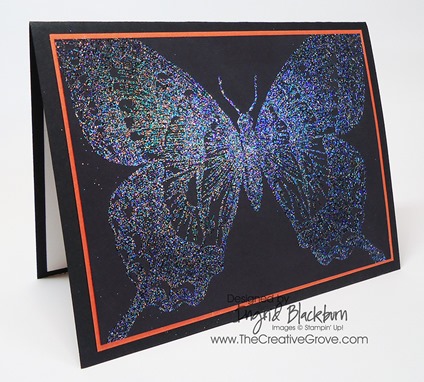
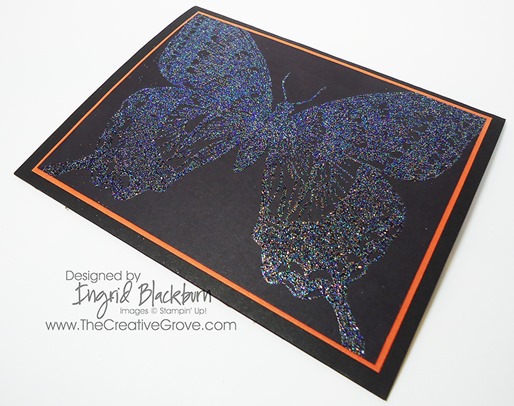
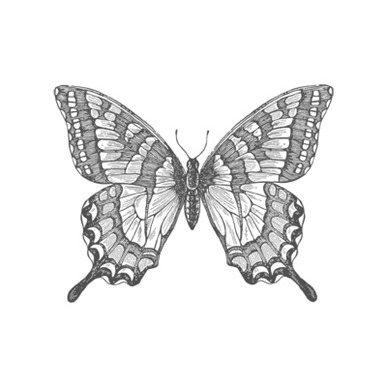
I can not stop using the Swallowtail Stamp this spring.  I’ve used it every which way I know how and now I thought I’d make it sparkle and shimmer.  This card comes together in a matter of minutes and looks like a work of art.  You have to try it yourself!

Creative Tips:

  • I always use an embossing buddy to keep all those little stray Embossing Powder pieces from sticking, but forgot on this one.  I’m sure you can see where little bits stuck!  Usually it’s not such a big deal, but on a black background it really shows.  See, even I mess up too!
  • The camera captured the luminosity and amazing colors of this cool Embossing Powder pretty well.  It still looks better in person – you’ll have to trust me on that.Swallowtail 004 CU
  • This card is great for special occasions or just that friend you have that always has to bling it up!
  • I didn’t want to take away from the beauty of the EP with the stamp, so I didn’t add a greeting.  I don’t think it really needed one.
  • So what do you think of my new website?  It’s starting to come together!  Be sure to sign up for my Creative Tips mailings.  You’ll get creative tips that won’t be posted anywhere else, special videos, promotions and be the first to be in the know!

    Be sure to check back frequently – I have a lot more in store for The Creative Grove.  It’s evolving every day!  Have a happy Easter weekend!

Signature Snowflake 001

To Shop 24/7 in the Creative Store – Click here!

Swallowtail 004 Angle

Stamp Sets – Swallowtail (129213w, 129216c) Ink – Versamark (102283)  Paper – Whisper White (100730), Tangerine Tango (111349), Basic Black (121045)  Cool Tools – Heat Tool (129053), Embossing Buddy (103083), Iridescent Ice Embossing Powder (101930) 

Swallowtail Stamp 129216L

Stampin’ Up! 25th Anniversary Best of Love Blog Tour

blogtour-25years-march

Welcome to the RemARKable Best Of Love Blog Tour!  I’m stop #3 on the RemARKable Blog Tour!  You probably came from my good friend Linda’s blog Ink Stamp and Scrap – What did you think of her card?

Best of Love 001 Main

Today I wanted to use these two images from this great stamp set.  This heart is so detailed, that it just screams – put me on a card!!  And I just LOVE this saying.  Who wouldn’t love the loops in it?  I wanted to add a little quilting to the background, so I decided to add panels and do a little faux stitching.

Best of Love 001 Angle

Creative Tips  –

  • I did a little faux stitching with a basic black marker on the background strips.
  • To get a little texture without taking away from the gorgeous heart, I used a simple background  – the Argyle Folder.
  • I wanted to add a little something to the card without over doing it, so I paper pierced a little something in each corner around my quilted background.
  • The colors of Midnight Muse, Bashful Blue and Cherry Cobbler were chosen from the Color Coach – love that tool!
  • For a little punch, I embossed the greeting in Pewter Embossing Powder – my new fav!

I certainly hope you enjoyed my simple but fun card today!  I know you’ll love what Melissa has for you next.  Here’s her blog address or just click the button below – http://www.stampinup.net/blog/2089191 Enjoy the tour!

blogtour-25years-next

Signature Snowflake 001

Best of Love 001 Side

Creative Supplies Used:

Stamp Sets – Best of Love Ink – Versamark, Cherry Cobbler, Basic Black Marker  Paper – Whisper White, Midnight Muse, Bashful Blue and Cherry Cobbler  Cool Tools –Argyle EF, Pewter Embossing Powder, Heat Tool The Perfect Finish – Stampin’ Dimensionals, Cherry Cobbler 1/2” Seam Binding Ribbon

25th Anniversary Blog Tour Team

1. Nancy Amato

2. Linda Bartolucci

3. Ingrid Blackburn <– You are here!!

4. Melissa Bolinger

5. Jackie Bottomley

6. Lee Bradford

7. Susan Carlson

8. Tamra Davis

9. Connie Deibler

10. Sherri Eddleblute

11. Lynn Embrey

12. Becky Evans

13. Kathy Hamrick

14. Crystal Kondo

15. Deb Lehigh

16. Debbie Lever

17. Lynn Marshall

18. Anne Matasci

19. Robin Merriman

20. Andi Potler

21. Michele Reynolds

23. Sharon Tisdale

24. Janet Wakeland

25. Kat Zarlengo

Emerald Pool Creative Scenery

In Dominica, we took a tour to the Emerald Pool.  After a short walk through the rain forest, the trail opened up revealing this beauty.  I took some photos from above and then walked down to the pool itself.  As we approached, the water was this amazing turquoise blue with slabs of grey rocks peaking out.  The walls were lush with green foliage and amazing chocolate brown ropes hanging down from above. 

I took several pictures from the grey rock steps, then took a dip into the pool itself.  The water was, shall we say refreshing, but after a few minutes surprisingly comfortable.  I grabbed my camera and took a few shots of the waterfall from the view of the pool and ended up with this shot.  I digitally enhanced the colors to try and capture the vibrant nature of this beautiful spot hidden deep in the rain forest. 

I woke up this morning at 4 am, I know – I’m on a beautiful ship well into the Caribbean Sea and what am I doing up?  Well, I was thinking about this pool and how much I wanted to try to re-create it with my Brayer, Ink and Sponges.  After lying awake for an hour I finally took all my ink pads and tools up to the pool deck to create while watching the sun rise over the ocean.  Here is the final result. 

Creative Tips:

  • I started out creating the pool.  I wasn’t sure which colors would do it justice and finally settled on brayering pure Tempting Turquoise.  I added a little Pacific Point with a sponge and ultimately a little Basic Gray for the underwater rocks in the center and at the waterfall line.
  • I next went to work on the structure of the cavern.  First I created a mask for my rocks.  I then brayered River Rock on an angle from both sides.  I made sure to keep the center top v a little white for my sky.

  • I then tore a little area for my sky.  I left my Bashful Blue at home, so I had to settle for some Baja Breeze.  It seemed to do the job just fine.  I sponged a tiny bit of Tempting Turquoise to brighten it up a bit.
  • I then sponged some more River Rock in my cavern to blend it and darken spots. 
  • Next I sponged Soft Suede along the base of my cavern and in spots along the waterline.  The color was really starting to come together.
  • To add the lush foliage, I lightly sponged Old Olive first and then spotlighted a few areas in Wild Wasabi with a few dabs of Gumball Green.  Once I was happy with how that looked, I moved on to the rocky area.
  • To create the rocks, I brayered Basic Gray lightly from the pool upward.  Be sure to keep your masks in place over the water and at the line of the rocks.  I added a small amount at the mouth of the falls as well.
  • I used both a Basic Black marker and Basic Grey sponge to create the separation of the rocks and shadows. 

  • To create the plants, I used the brush side of an Old Olive Marker.  I worked in sections using a sponge to blend it as I went.  Once happy with the Old Olive, I went over it in sections again using a Garden Green Marker.  I spotlighted a few areas using a Summer Starfruit marker which has a great green tone to it.
  • I added my vines using the pointed part of a Chocolate Chip and Early Espresso Marker.  Start with an Old Olive Marker until you are comfortable – it will blend in underneath and allow you to make a mistake.
  • I added my moss on the rocks using the same colors, but did not blend them with a sponge.
  • To make the waterfall, I used a White Gel Pen.  I had a lot of layers of ink by now on my card, and I think this process would have gone easier had I let my project dry a bit.  I was so excited to get it done though!  The gel pen doesn’t work so great for a complete stream of this length, so I did it in stages. 
  • First I created the pool waterline so I wouldn’t go too far.  If you do, just take a little Tempting Turquoise sponge over it and you can correct that. 

  • Next, I created my two outermost streams and worked to fill it in from there.  I used my finger to blend it a little, and it would have been nice to have my Whisper White Craft Pad, but alas – that’s in Orlando!
  • I took my time with it and when I thought I wanted to keep going, I did what I always advise my students – I stopped.
  • I created a few ripples, didn’t like how they turned out, so I went over them with a Tempting Turquoise Sponge and started over.  I didn’t add too many as I didn’t want to take away from the beauty of the pool.
  • I chose to mat my finished project on Whisper White and then put it on a White Card to let the beauty of it stand alone.

I hope you like my finished card.  I signed it with the location, my initials and year.  I had several guests and crew members stop by to see what I was creating and one even asked if I was selling my work!  I told him no, but what do you think?  If I sold this, how much would you ask for (tell me in the comment section)? 

I bumped into another Stampin’ Up! addict as she put it – Gail from South Carolina.  I certainly enjoyed speaking to her, and it was good to know that I was in good company on board this ship.  Gail saw my card in its beginning stages, be sure to leave me a comment when you see it on the blog Gail!

I’m sure several of you are wondering how long it takes me to create these projects.  Each one differs.  My last one of St. Barts I was able to do in one hour.  I had created beach scenes before, so the basic knowledge and direction I was going was already in my mind.  This project was quite different.  I tested several colors out first on scrap paper as my project is 5” x 7” and I wanted to get it just right.  With some breaks so that I could capture the slate blue sun rise this morning from several points on the ship (look for that project later), this project took me three hours.  Okay – pick yourselves up off the floor!  Yes, you can’t rush art as I told Michael when I came back to the room.  If I were to do this a second time, I know I would cut that down to just over one hour.  It takes time to conceptualize a project initially and break it down into steps.

I’m thrilled with the end result and I know if you venture on to tackle this on your own – you’ll love it too.

If you are in the Orlando, Florida area and would like to take my Creative University Brayering Creative Scenery classes – check out my schedule on the Upcoming Events page or my Events page from my Online Store Website.  If you would like me to travel to you to teach a class, contact me for details. To learn more about my University Class series click here

Signature Snowflake 001

To Shop 24/7 in the Creative Store – Click here!

Stamp – none Ink – Tempting Turquoise (126952), Pacific Point (126951), Old Olive (126953), Wild Wasabi (126959), Basic Gray (126981), River Rock (126977), Soft Suede (126978), Garden Green Marker (119701 – Regals Marker Collection), Old Olive Marker (100079), Summer Starfruit Marker (2012-2014 In Color Marker Collection 126856), Basic Black Marker (100082) Paper – Whisper White (100730) Cool Tools – Stamping Sponges (101610), Brayer (102395), White Gel Pen (105021)

Ciao Baby from St. Barts

St Barts Columbier Point

Ciao from St. Barts!  I’m loving my trip through the Caribbean, and thought I’d pull a little inspiration for this month’s featured RemARKable Stamp Set Blog Tour from my actual surroundings today here on St. Bart’s in the French West Indies.  I’m sure you enjoyed your creative inspiration on Linda’s blog Ink Stamp and Scrap and are ready for a little brayer and sponging creativity.

blogtour-stampmonth-Mar

When I thought about what to do for today’s Blog Tour, the first thing that sprang to mind was the word Ciao.  In Europe that could be hello or goodbye, so it was entirely appropriate for my project today.  I’m saying hello from the French West Indies and goodbye to St. Barts as we’re on our way to St. Maarten.  Here is a little of what I did today.

Gouverneur Beach St Barts

Today, I spent the day on Gouverneur Beach on the south side of St. Barts.  This was the most highly recommended beach by every local we spoke to, and it was quite an experience driving there.  The narrow roads that wound around the island at several steep points was so worth every frightful turn as we ended up here.  This is my inspiration photo for my card today.  I hope you love it as much as I enjoyed making it.

Ciao Baby 001 Main

Creative Tips:

  • I brayered River Rock and Crumb Cake for my sand and used a sponge for the contouring.
  • I brayered Tempting Turqoise and Island Indigo for my Caribbean Sea.  I used a sponge for contouring and spotlighting.
  • My sky was done out of Tempting Turqoise and Baja Breeze.
  • For the land, I masked two islands in Crumb cake, Soft Suede, Old Olive and Gumball Green.

  • I used a Garden Green Marker for the shrubbery.
  • I used a White Gel Pen to create my foam, clouds, seagulls and water movement.

Ciao Baby 001 PortA little St. Barts with some luxury inspiration in the backdrop – mega yachts!

  • St. Barts is a luxury French island with unbelievable white sand beaches, and luxury properties as a playground for the rich and famous – it’s a literal who’s who and who has the biggest yacht here.  To capture that spirit I used the Ciao Stamp and matching punch (a SAB freebie – get yours while you still can!).  I stamped it in Early Espresso and adhered it to an Island Indigo banner.

Ciao Baby 001 CU Banner

  • I blinged up my banner which I cut with a 1” Square punch.

Brayering cards like this are little pieces of artwork.  I encourage you to sign them like I did, with the year and location.  My card is sitting in my stateroom and I’m going to leave it for my Stateroom attendant at the end of my cruise with a tip.

Ciao Baby 001 CU

I hope you enjoyed my brayering piece today.  I loved my inspiration just as much as I do this little work of art.  Enjoy Melissa’s creative inspiration on her blog http://www.stampinup.net/blog/2089191.  See you next week for the 25th Anniversary Blog Tour or next month for another featured stamp set!

blogtour-stampmonth-next

Signature Snowflake 001

Ciao Baby 001 Angle

Ciao Baby 129648S