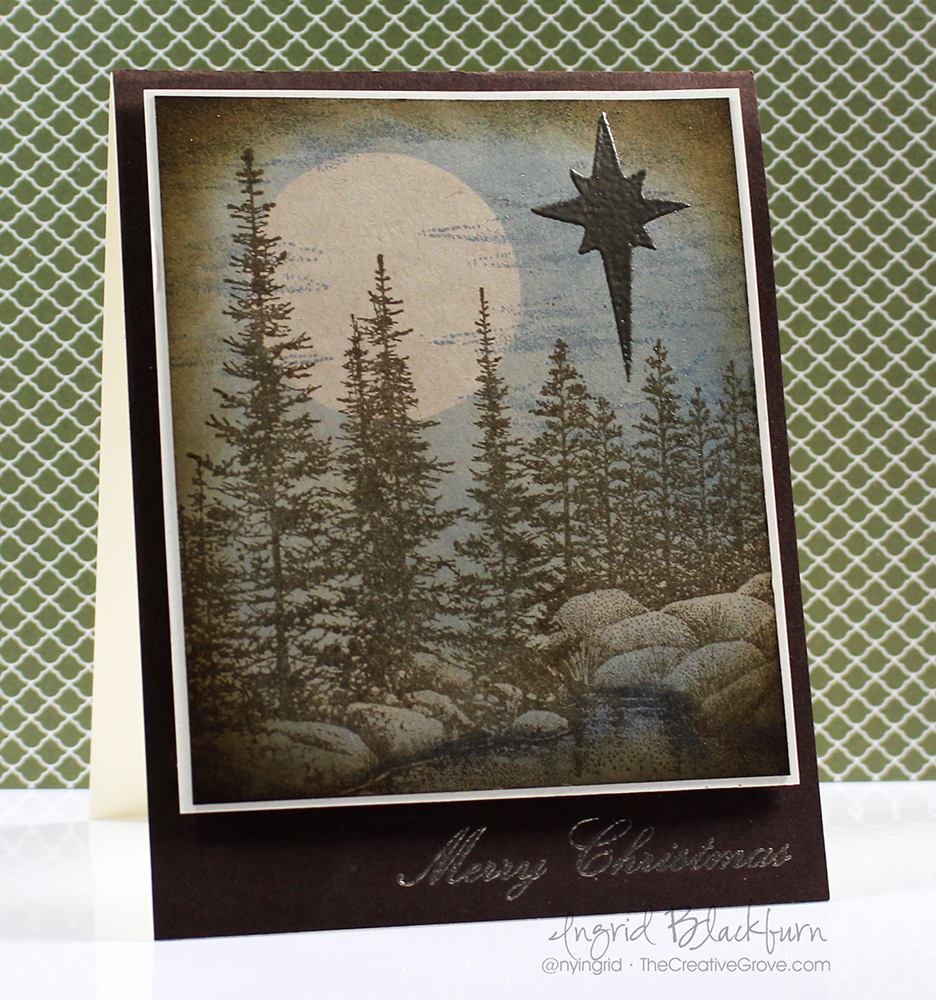
Vintage Christmas Star

Vintage Christmas Star 001

Today’s challenge keyword is star – so let’s learn how to incorporate that into this vintage holiday card. This month’s challenge at Happy Little Stampers is to use a star in some form on your card. I have to admit, I started off in a very different direction…then ultimately decided to create a simple card with a vintage masculine feel that could showcase the ultimate Christmas star.

HLS Christmas Challenge December 2015

I guess I’ve been in a vintage kind of a mood these past few months. At least here on the blog! I don’t know what it is that seems soothing about this color palette to me, but I’m really loving the feel. Maybe it’s because I’ve been injured and not able to walk as much as I would like in the woods…who knows?!! Here’s a quick tutorial for you, and be sure to stop by again next week for the video!

Creating a Quick Vintage Feel to your Holiday Cards –

  • This project was done on kraft colored paper – not white. It helps with the overall look and feel.
  • I find that the brown tone fits this style better than black. So ink your stamps up in a dark brown – something earthy. I used Ground Espresso by Ranger Distress.
  • Stamp the Stampscapes Pines & Rocks Lg on the left and the left side of Lakeside Reflections Lg to the right Tip – use a torn piece of paper towel to mask off the edge and create a seamless scene.
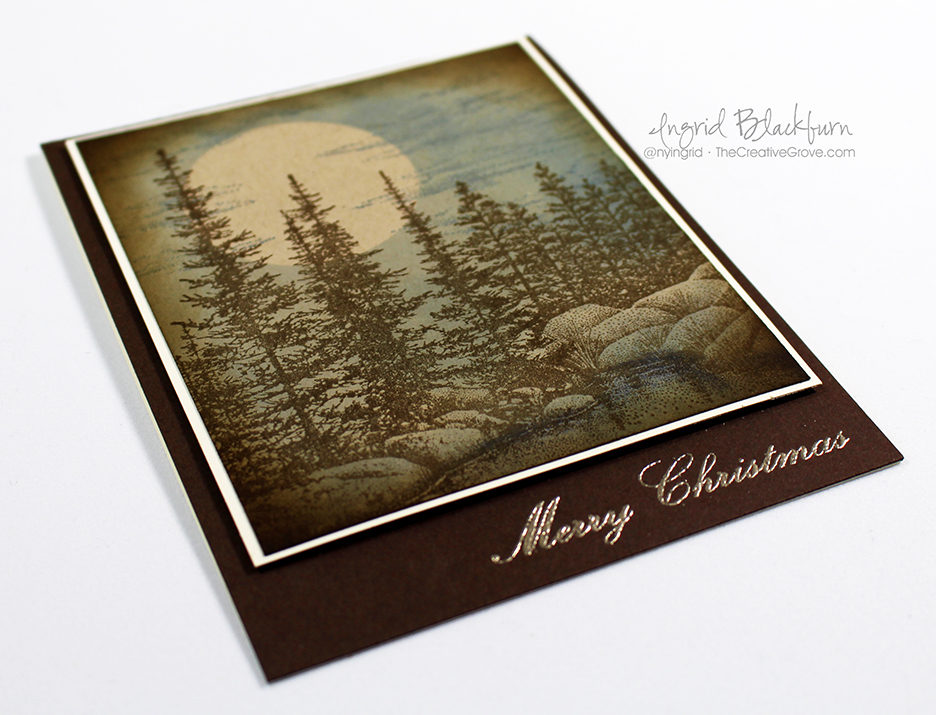
Vintage Christmas Star 002

  • Place two post it notes in copy paper and punch out your moon with a 1 1/4″ circle punch. This will be your mask.
  • Place your moon where you’d like it before adding blues to the sky
  • Use a mini sponge tool and some blue hues to shade in your water and sky.
  • Stamp Cloud Strips Lg by Stampscapes in Stormy Sky Distress. Be sure to overlap the moon slightly.
  • Once you have the look you’d like – add a little shading with s neutral like Weathered Wood Distress to the rocks.
  • Sponge the entire scene around the perimeter with  a brown – I used Gathered twigs for a slightly different feel than the trees.
  • Add your star and emboss in Pewter. I used the Nativity Angel Stencil by Stamplorations.
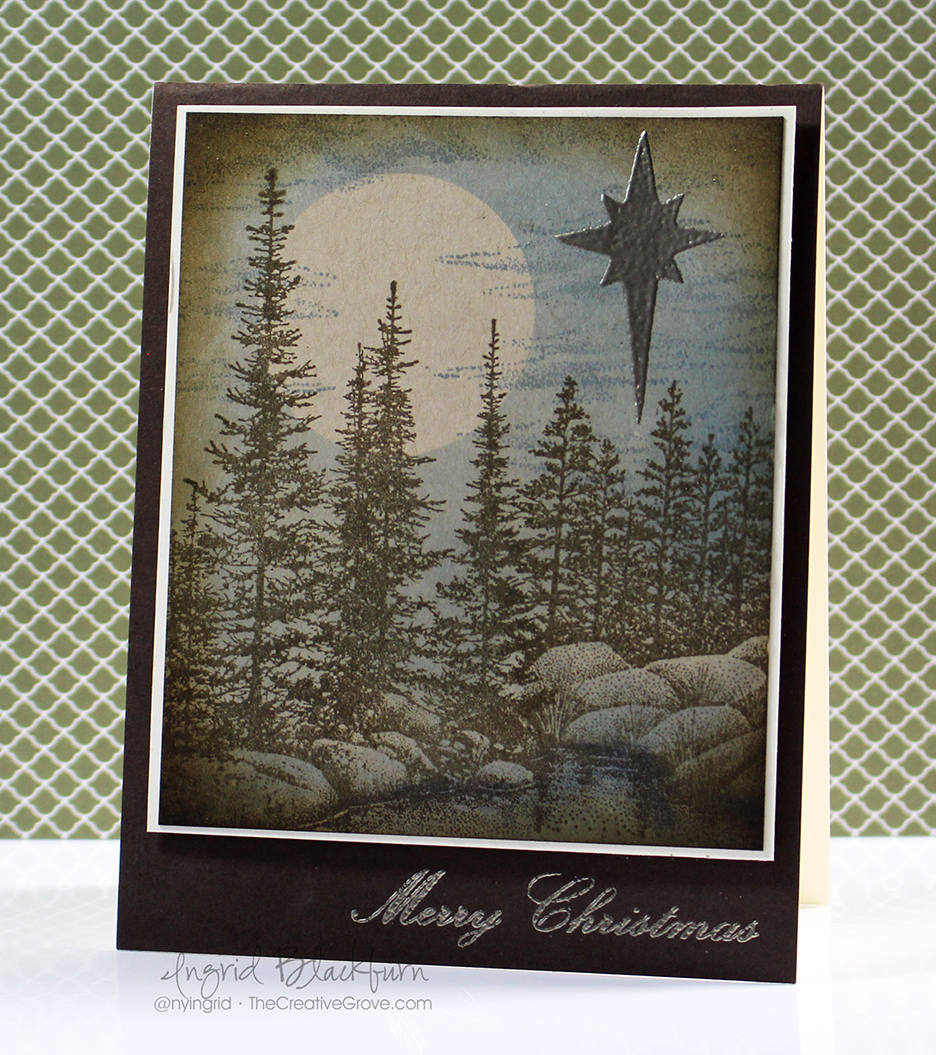
Vintage Christmas Star 004

  • The perfect sentiment makes this card and nails the vintage feel. Here you see one of the many sentiments from Mixed Christmas Sentiments by Happy Little Stampers. Emboss it in Pewter for a great look, rather than something bright.
  • The scene is matted onto Vanilla card stock for contrast before being popped up on fun foam onto an Espresso card base.

I do hope you like this card – it’s actually a great one to mass produce and goes much faster than you think! I hope this inspired you to create something special with a star for your cards. Be sure to enter them into the Christmas Challenge at Happy Little Stampers!

Keep those fingers inky –


Signature.jpg

[optin_box style=”2″ width=”500″ alignment=”center” email_field=”email” email_default=”Enter your email address” integration_type=”aweber” double_optin=”Y” list=”3846012″ name_field=”name” name_default=”Enter your first name” name_required=”N”][optin_box_field name=”headline”]Learn with our exclusive FREE Video Series[/optin_box_field][optin_box_field name=”paragraph”]PHA+R2V0IHRoZSBmcmVlIENyZWF0aXZlIFRpcHMgRS1sZXR0ZXIgYW5kIGxlYXJuIHdpdGggc3Vic2NyaWJlciBleGNsdXNpdmUgdmlkZW8gYW5kIHBpY3RvcmlhbCBjb250ZW50LiA8ZW0+PHN0cm9uZz48c3BhbiBzdHlsZT0iY29sb3I6ICM4MDAwMDA7Ij5JbmNsdWRpbmc8L3NwYW4+wqA8L3N0cm9uZz48L2VtPm91ciB5ZWFybHkgMTIgRGF5cyBvZiBDaHJpc3RtYXMgc2VyaWVzITwvcD4K[/optin_box_field][optin_box_field name=”privacy”][/optin_box_field][optin_box_field name=”top_color”]undefined[/optin_box_field][optin_box_button type=”1″ text=”Subscribe now!” text_size=”26″ text_color=”#ffffff” text_bold=”Y” text_letter_spacing=”0″ text_shadow_panel=”Y” text_shadow_vertical=”1″ text_shadow_horizontal=”0″ text_shadow_color=”#000000″ text_shadow_blur=”0″ styling_width=”36″ styling_height=”15″ styling_border_color=”#000000″ styling_border_size=”1″ styling_border_radius=”6″ styling_border_opacity=”100″ styling_shine=”Y” styling_gradient_start_color=”#345523″ styling_gradient_end_color=”#68ab46″ drop_shadow_panel=”Y” drop_shadow_vertical=”1″ drop_shadow_horizontal=”0″ drop_shadow_blur=”1″ drop_shadow_spread=”0″ drop_shadow_color=”#ffffff” drop_shadow_opacity=”50″ inset_shadow_panel=”Y” inset_shadow_vertical=”0″ inset_shadow_horizontal=”0″ inset_shadow_blur=”0″ inset_shadow_spread=”1″ inset_shadow_color=”#000000″ inset_shadow_opacity=”50″ location=”optin_box_style_2″ button_below=”Y”]Subscribe now![/optin_box_button] [/optin_box]
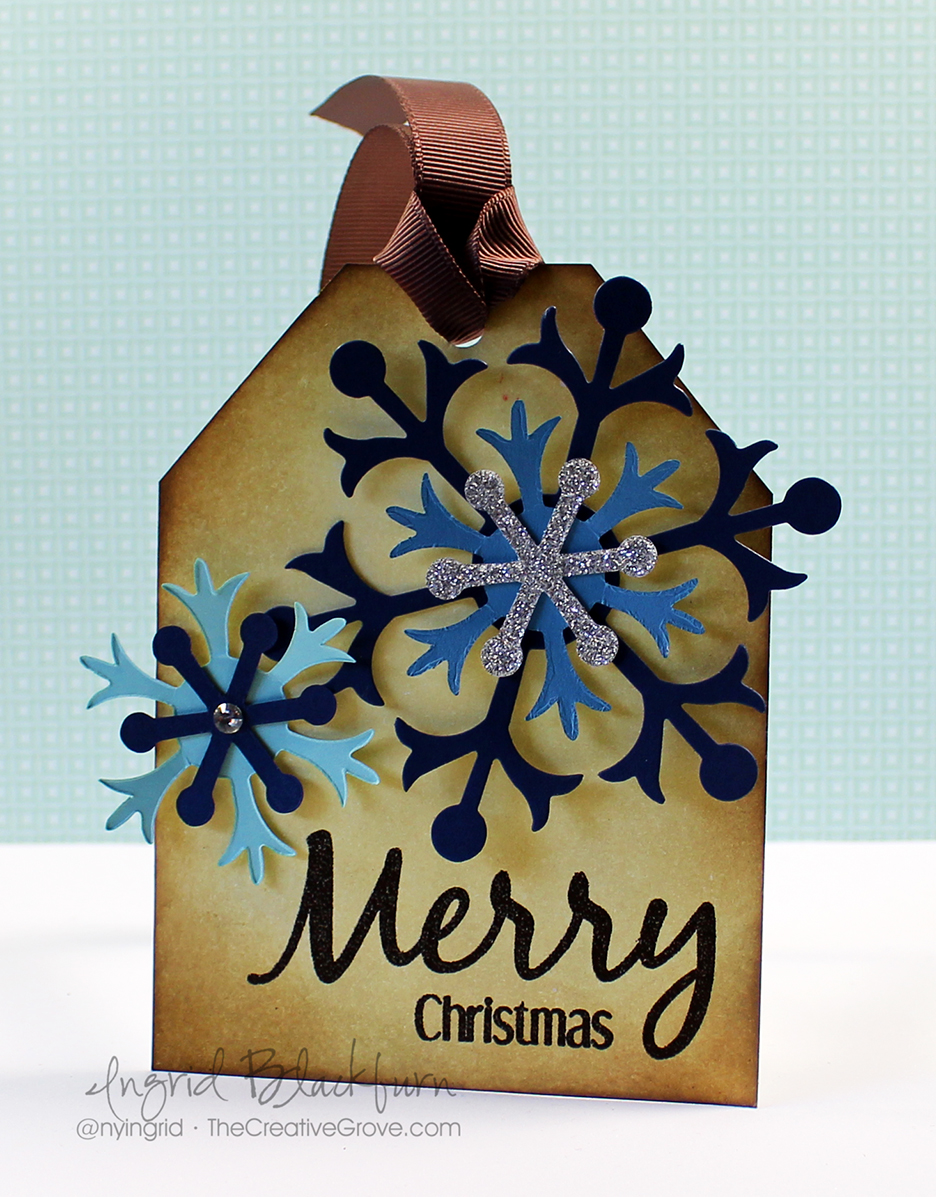
Blended Distress Christmas Tags

DIY Vintage Christmas Tags

Christmas Tags is how my stamping journey began…many, many years ago.  I would spend hours stamping cute large Santas and Snowmen by DJ Inkers and coloring them in with pencils and markers. I spent so much time on these tags, I would save them all and reuse them for years to come – I still even have most of them! The kids new the wrapping paper was toast – but not the tags – I know…sad, but true!

So today I have a different version of a tag for you. More of my style today – not as much coloring anymore, I’m more into backgrounds, and clean & simple designs now – well, you may just see some mixed media or watercoloring the next few months from me too! So to kick off this month, I thought I’d film a tutorial on how to create an antique or vintage background for you.

HLS Christmas Challenge November 2015

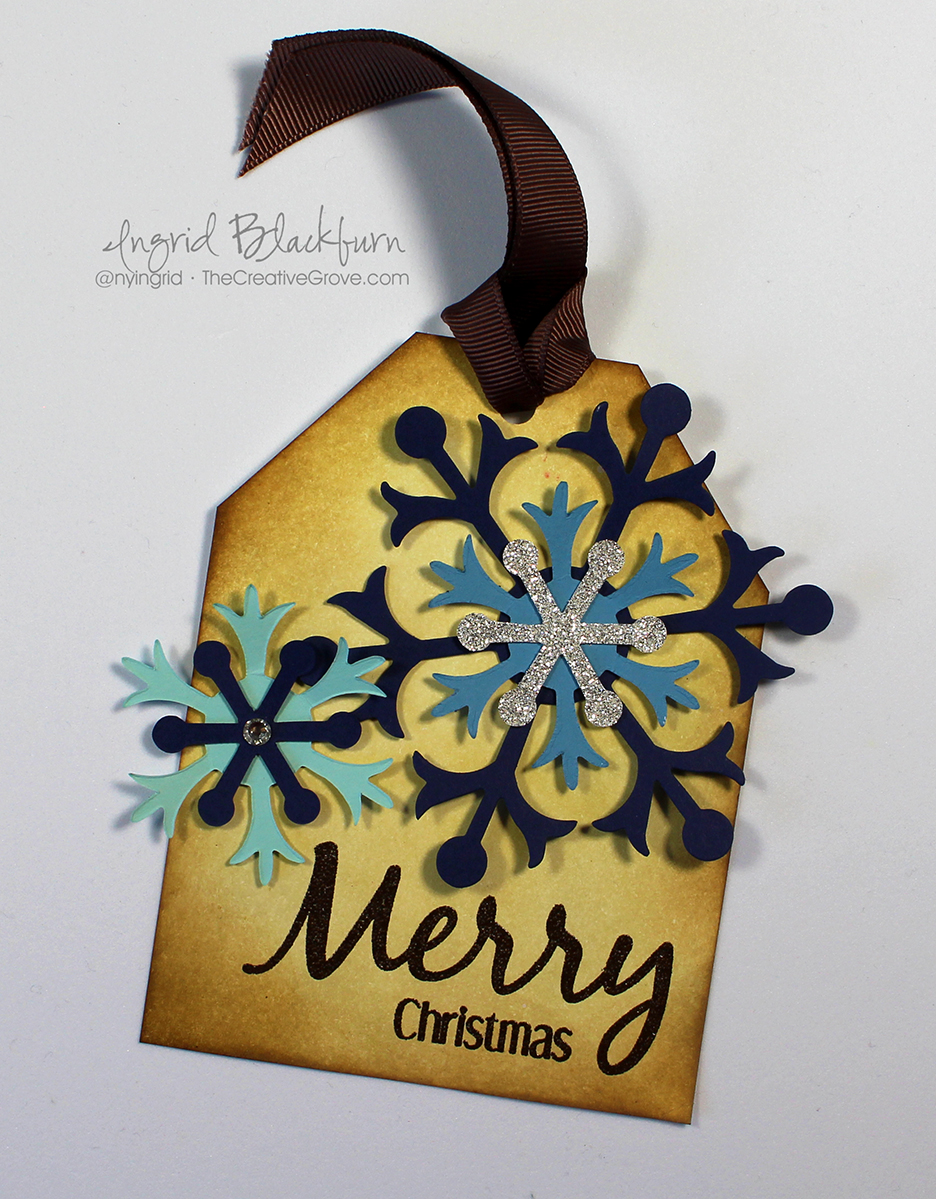
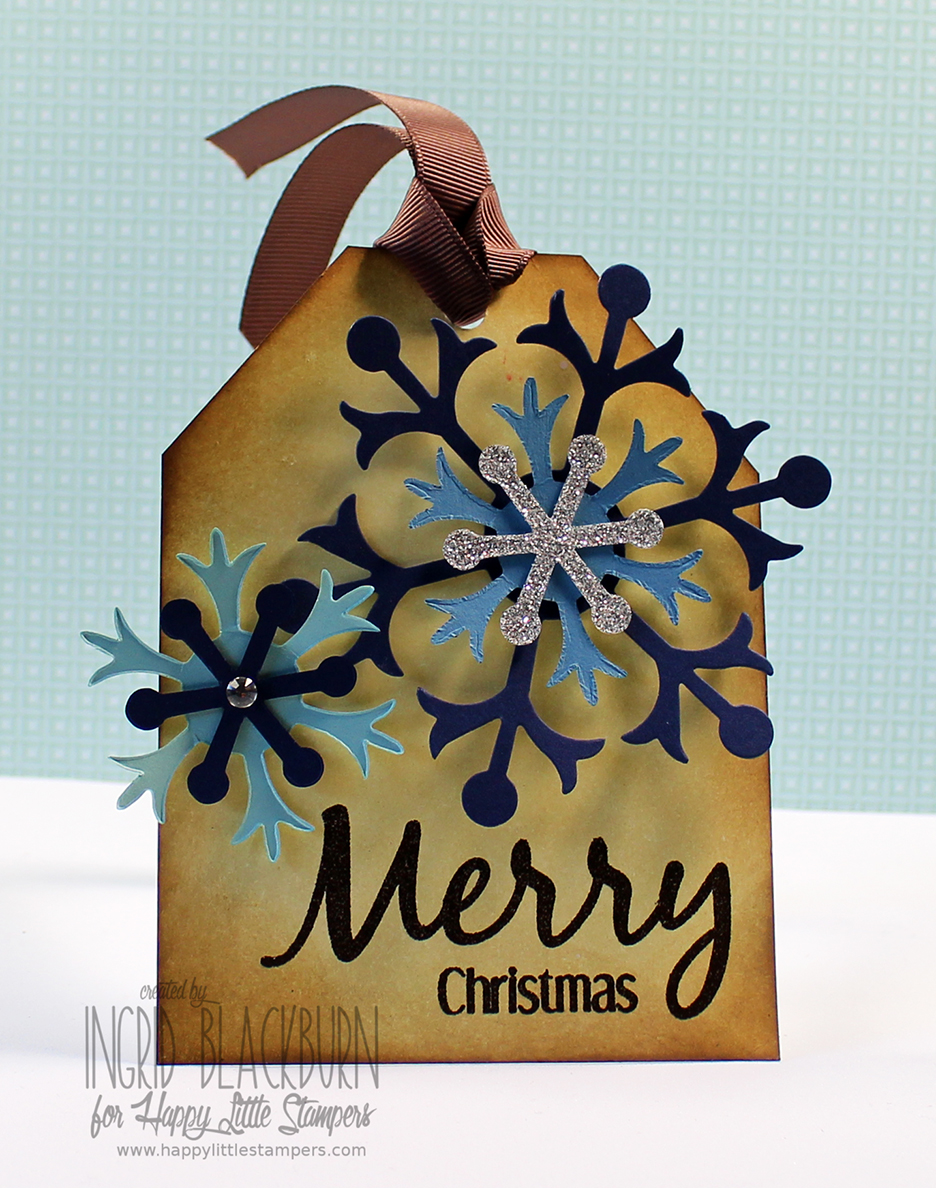
This month at Happy Little Stampers, the theme is Tags, so for today’s project, I designed a clean and simple tag that has some simple paper piecings, and a great bold font greeting – courtesy of the new Everyday Sentiments stamp set.  Have fun with this tutorial! See you in a few days with another. 🙂

And be sure to check out our guest designer – Bonnie Klass’s blog for her cool project as well. I’ve been a huge fan of Bonnie’s work for a few years now – she’s a very talented stamper. 🙂

Creating a Vintage look for your Christmas Tags

  • Start with a piece of white card stock. I used a scrap piece that was 3 3/4 x 4″. Sponge Distress Inks to create your background as in the video – Old Paper, Antique Linen, Scattered Straw. Be sure to go over the colors to get a smooth antique look
  • Don’t worry about funky marks left initially by the sponge tools – they’ll work themselves out the more layers of distress ink you layer over them.

How to create an Antique Look

  • The key to achieving the antique finish or vintage look is adding a light edging around the antique finish you’ve created. I used Vintage Photo.
  • Cut your tag corners as in the video if you haven’t already.
  • As in the video, the majority of your sponge tool will be off your project, not on. Light is key here.
  • You can even add some of the lighter colors such as Scattered Straw or Antique Linen inside to smooth the Vintage Photo edging out.
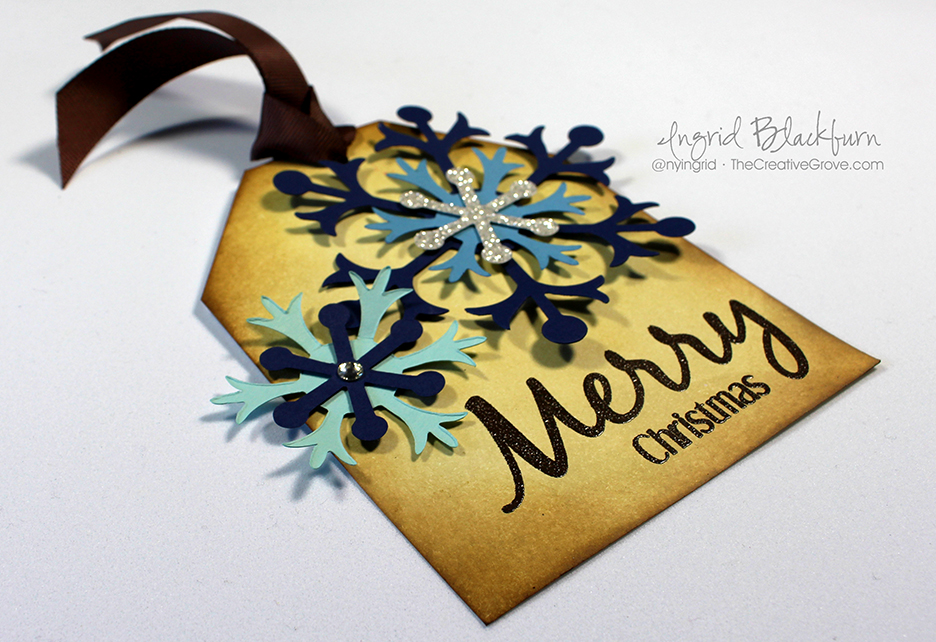
  • Assemble your snowflakes and add them to your project. I used the Snowflake BigZ die by Sizzix designed for Stampin Up. Use any Snowflake dies you have. Layer to create a 3D look with different colors and sparkly embellishments.

Distress Ink Blending to create a vintage feel

  • Make sure your vintage background is fully dry – I used a heat tool, as I”m quite impatient. But if you’re making several at a time, you can dry them naturally.
  • Test the tag out as in the video to see if it’s ready to be embossed.
  • Ink up the Merry & Christmas with Versamark, stamp and emboss in Espresso Powder. I used the Everyday Sentiments set by HLS – they are bold and large stamps which works well with this project. You’ll want something that can stand out from the Snowflakes.
  • Attach your snowflakes with a strong adhesive as in the video.
  • Punch a 1/4″ hole and add some ribbon.

Vintage Christmas Tags using Distress Ink Blending

I hope you liked this tutorial! I love the end result of this tag. I’ve made several for various packages this Christmas. It’s quite easy to mass produce actually. Sponge a larger sheet, cut it down, edge and mass assemble. Work smarter – not harder! 🙂

Stay tuned in a few days for another great tag tutorial, and if you want to see more, be sure you’re on the Creative Tips E-letter! Sign up below, it’s free and has exclusive content.

I’m also entering this tag is a fun Christmas Tag event over at my good friend Loll’s blog. I encourage you to enter yours as well!

twelve_tags_badge_2015

Until next time – now go get those fingers inky, make some Christmas Tags and join us for the challenge over at Happy Little Stampers!

Signature-24-pt_thumb.jpg

[optin_box style=”8″ width=”500″ alignment=”center” disable_name=”Y” email_field=”email” email_default=”Enter your email address” email_order=”Enter your email address” integration_type=”aweber” double_optin=”Y” list=”3846012″ name_field=”name” name_default=”Enter your first name” name_order=”1″ name_required=”N” extra_field_1_name=”name” extra_field_1_title=”Enter your first name” extra_field_1_order=”1″ extra_field_1_required=”N”][optin_box_field name=”headline”]If you enjoyed this tutorial…[/optin_box_field][optin_box_field name=”paragraph”]PHA+4oCmeW914oCZbGwgbG92ZSBvdXIgPGVtPjxzdHJvbmc+ZnJlZSA8L3N0cm9uZz48L2VtPnN1YnNjcmliZXIgb25seSB2aWRlbyBzZXJpZXMuIMKgTGVhcm4gbmV3IHRlY2huaXF1ZXMgdGhyb3VnaCBvdXIgPGVtPjxzdHJvbmc+ZXhjbHVzaXZlPC9zdHJvbmc+PC9lbT7CoENyZWF0aXZlIFRpcHMgZS1sZXR0ZXLCoGFuZCBzdWJzY3JpYmVyIG9ubHkgdmlkZW8gYW5kIHByb2plY3QgdHV0b3JpYWxzITwvcD4K[/optin_box_field][optin_box_field name=”privacy”][/optin_box_field][optin_box_field name=”top_color”]undefined[/optin_box_field][optin_box_button type=”1″ text=”Send me exclusive tips!” text_size=”32″ text_color=”#000000″ text_bold=”Y” text_letter_spacing=”0″ text_shadow_panel=”Y” text_shadow_vertical=”1″ text_shadow_horizontal=”0″ text_shadow_color=”#ffffff” text_shadow_blur=”0″ styling_width=”40″ styling_height=”30″ styling_border_color=”#000000″ styling_border_size=”1″ styling_border_radius=”6″ styling_border_opacity=”100″ styling_shine=”Y” styling_gradient_start_color=”#a3b640″ styling_gradient_end_color=”#80902c” drop_shadow_panel=”Y” drop_shadow_vertical=”1″ drop_shadow_horizontal=”0″ drop_shadow_blur=”1″ drop_shadow_spread=”0″ drop_shadow_color=”#000000″ drop_shadow_opacity=”50″ inset_shadow_panel=”Y” inset_shadow_vertical=”0″ inset_shadow_horizontal=”0″ inset_shadow_blur=”0″ inset_shadow_spread=”1″ inset_shadow_color=”#80902c” inset_shadow_opacity=”50″ location=”optin_box_style_8″ button_below=”Y”]Send me exclusive tips![/optin_box_button] [/optin_box]


Black and White Emboss Resist Poppies

Pleasant Poppies Background Stamp

The emboss resist technique is one that you probably use in card making so often that you don’t even give it a thought. It can be used in several ways; today we’re going to feature it with a little coloring using markers and the Pleasant Poppies background stamp.

Embossing techniques are probably some of my favorites. And embossing in general was probably one of the biggest wow techniques you first saw when learning how to stamp, am I right? I’d love to know what it was for you…tell me in the comments below!

Emboss Resist + Markers Video Tutorial

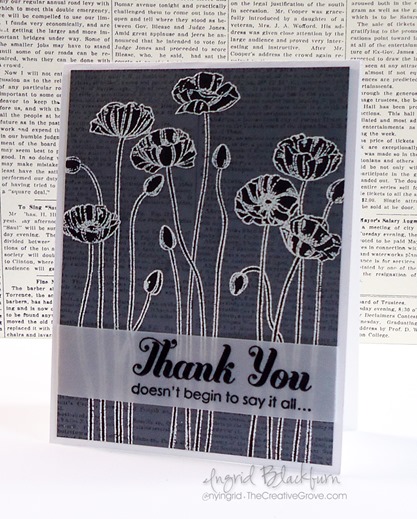
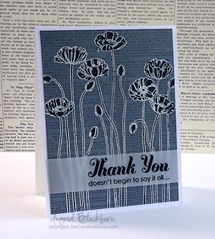
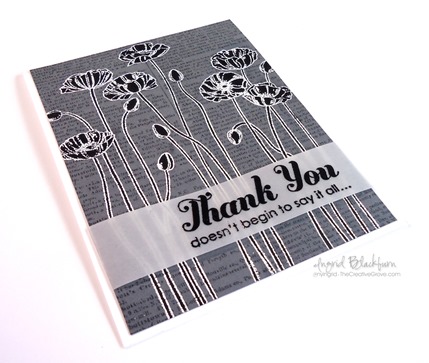
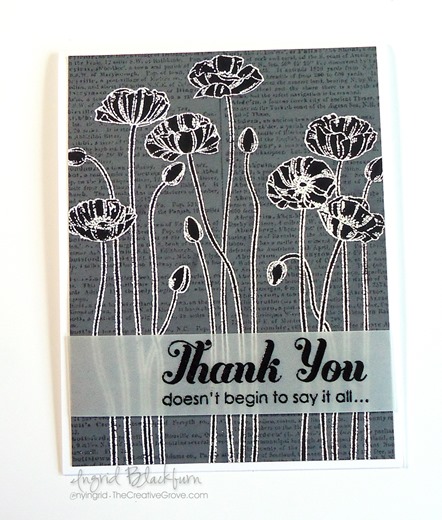
This project tutorial uses emboss resist to create monochromatic poppies for a truly striking card. Like I say in the video, creating black flowers is kind of weird for me, but I have to admit, the card is gorgeous! Here’s the step by step tutorial:

View on YouTube

Now that you’ve seen the video, I listed some instructions for this project. If you haven’t had a chance to see the video, it gives a lot more detail than the tutorial below.

Emboss Resist Technique

Creative Tips –

  • You’ll want to create your background first. Stamp the Dictionary stamp in tone on tone ink (Basic Gray). The Basic Gray card front measures 4 x 5 1/4”.
  • Be sure the background is completely dry as in the video.
  • Use a de-static tool like an embossing buddy on your card front.
  • Emboss the Pleasant Poppies stamp using White Pigment Ink and embossing powder.
  • Color your flowers in using a Basic Black marker.

Embossing Techniques

    • The embossed poppy outline will “resist” the dye ink – that’s the emboss resist technique! Simple, right?
    • Color your images in sections.
    • Lightly dampen a paper towel by spritzing it with a fine mist mini-spritzer. I can not stress lightly enough. You don’t want to add water to your project, just use it as a tool to remove the ink that the embossed image resisted.
    • Wipe lightly over your emboss resisted image. I first pat it, then wipe, being careful not to push my towel into my cardstock. You want to just stay on the raised surface.
    • Add a greeting embossed on Vellum card stock and adhere your card front to the white base. The card base measures 4 1/4 x 11”.

How to embossing tutorials

That’s it! You can try this technique with any colors, but you’ll want to make sure that your marker is darker than your background image (the dictionary stamp). Otherwise you’ll see the background image through your colored flower.

I entered this card in the following challenges:  Happy Little Stampers and Virginia’s View.

HLS March Sketch Challenge   Virginias View March 2014

So what did you think? Are the emboss resist flowers Weird or Striking for you – tell me in the comments – I’d love to know!

Signature

[optin_box style=”14″ alignment=”center” disable_name=”Y” email_field=”email” email_default=”Enter your email address” email_order=”1″ integration_type=”aweber” double_optin=”Y” list=”2841626″ name_field=”name” name_default=”Enter your first name” name_required=”Y”][optin_box_field name=”headline”]If you enjoyed this tutorial…[/optin_box_field][optin_box_field name=”paragraph”]PHA+Li4ueW914oCZbGwgbG92ZSBvdXIgPHNwYW4gc3R5bGU9ImNvbG9yOiAjMjQ0YzVlOyI+PGVtPjxzdHJvbmc+ZnJlZSA8L3N0cm9uZz48L2VtPjwvc3Bhbj5zdWJzY3JpYmVyIG9ubHkgdmlkZW8gc2VyaWVzISDCoEdldCB0aGXCoDxzcGFuIHN0eWxlPSJjb2xvcjogIzI0NGM1ZTsiPjxlbT48c3Ryb25nPmV4Y2x1c2l2ZTwvc3Ryb25nPjwvZW0+PC9zcGFuPsKgQ3JlYXRpdmUgVGlwcyBlLWxldHRlciB3aGljaCB3aWxsIHRlYWNoIHlvdSBuZXcgdGVjaG5pcXVlcyB0byBhZGQgdG8geW91ciBzdGFtcGluZyBza2lsbCBzZXQuIMKgTGVhcm4gaG93IHRvIG1ha2UgcHJvamVjdHMgeW91J2xswqBsb3ZlITwvcD4K[/optin_box_field][optin_box_field name=”privacy”][/optin_box_field][optin_box_field name=”top_color”]undefined[/optin_box_field][optin_box_button type=”1″ text=”Send me exclusive tips!” text_size=”26″ text_color=”#000000″ text_bold=”Y” text_letter_spacing=”-1″ text_shadow_panel=”Y” text_shadow_vertical=”1″ text_shadow_horizontal=”0″ text_shadow_color=”#a3b640″ text_shadow_blur=”0″ styling_width=”100″ styling_height=”10″ styling_border_color=”#000000″ styling_border_size=”1″ styling_border_radius=”6″ styling_border_opacity=”100″ styling_shine=”Y” styling_gradient_start_color=”#a3b640″ styling_gradient_end_color=”#5b661e” drop_shadow_panel=”Y” drop_shadow_vertical=”1″ drop_shadow_horizontal=”0″ drop_shadow_blur=”1″ drop_shadow_spread=”0″ drop_shadow_color=”#000000″ drop_shadow_opacity=”50″ inset_shadow_panel=”Y” inset_shadow_vertical=”0″ inset_shadow_horizontal=”0″ inset_shadow_blur=”0″ inset_shadow_spread=”1″ inset_shadow_color=”#a3b640″ inset_shadow_opacity=”50″ location=”optin_box_style_14″ button_below=”Y”]Send me exclusive tips![/optin_box_button] [/optin_box]
Snowflakes – Ghost Stamping Technique

Ghost Stamping 003

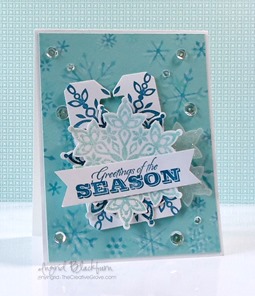
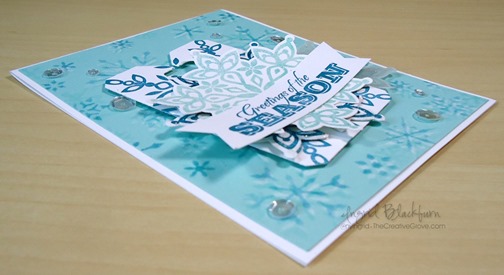
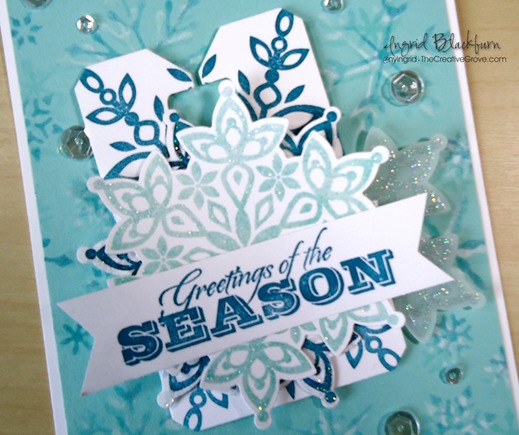
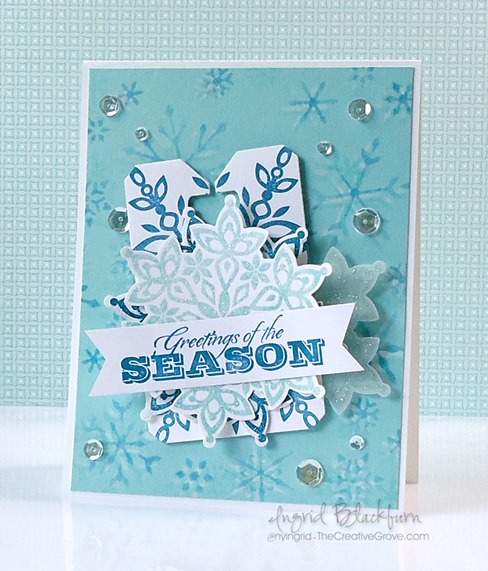
I thought I’d highlight a creative technique today – ghost stamping. Today’s theme seems to be blue, so what better than snowflakes!  So why not participate in a few challenges.  It’s already March, so I better get a jump on my Christmas cards for the year…I know, What?!!  Believe me, it’s MUCH easier to get them done a little at a time rather than in bulk during my busiest time of the year!

The Ghost Stamping Technique

So what is Ghost Stamping anyway? Well, when you think of a ghost, you think of transparent, or white see through object.  That’s the basic premise in the ghost stamping technique – see through by using white.  It’s rather easy actually.  I made a little video for you to showcase it, so why don’t we get started.


View on YouTube

What did you think?  Not that bad – basically, you want to pounce your white pigment ink through your stencil using a sponge dauber.  Then re-align your transparency to slightly off-set your images.  Use a clean sponge dauber to add dye ink, overlapping your original pigment white images.

Well, that’s the technique used with Stencils – of course it’s a little different when you do straight embossing, but it’s the same principle.  We have several videos showcasing that in our 2014 12 Days of Christmas Class and in our Project and Resource Library in the VIP Community – our online paper crafting educational all inclusive site.

Ghost Stamping 002Ghost Stamping 001

The key is to make sure the white is dry before adding your dye base ink.  If you don’t dry it, the dye ink won’t soak into your paper, and you will not get the full ghosting effect. I used two colors in a monochromatic style Pool Party (matches my card stock) and Island Indigo.

To add to the background, I added a few just pool party snowflakes, keeping to the smaller sizes to fill in the background.

Ghost Stamping 005

Once you have that done, you can move onto the tag as in the video.  I added some Sparkling Clear sequins to keep it sparkly as that’s what snow does.

If you liked this video tutorial and want to see more, be sure to get our Creative Tips E-letter delivered to your inbox!  It’s free and there are exclusive videos that you won’t see anywhere else. You can get that right here:

[optin_box style=”12″ alignment=”center” email_field=”email” email_default=”Enter your email address” integration_type=”aweber” double_optin=”Y” list=”3846012″ name_field=”name” name_default=”Enter your first name” name_required=”Y” opm_packages=””][optin_box_field name=”headline”]Learn more with our exclusive FREE video series:[/optin_box_field][optin_box_field name=”paragraph”]PHA+UGx1cyB5b3XigJlsbCBiZSBhZGRlZCB0byBteSBGUkVFIENyZWF0aXZlIFRpcHMgRS1sZXR0ZXIgd2hlcmUgSSBzaGFyZSBleGNsdXNpdmUgcHJvamVjdHMsIHZpZGVvcyAmYW1wOyB0aGUgMTIgRGF5cyBvZiBDaHJpc3RtYXMgUHJvamVjdCBTZXJpZXM8L3A+Cg==[/optin_box_field][optin_box_field name=”privacy”][/optin_box_field][optin_box_field name=”top_color”]undefined[/optin_box_field][optin_box_button type=”0″ button_below=”Y”]Get Instant Access![/optin_box_button] [/optin_box]
I combined both the snowflake stencil from Memory Box with Stampin’ Up’s Festive Flurry stamp and framelit sets. The tag is cut from the Chalk Talk Framelit set, and the banner was made using a Chevron Punch.  I combined Pool Party, Whisper White and Vellum Cardstocks to keep this light and airy.

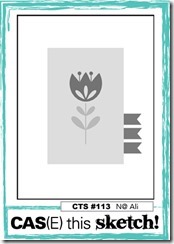
I just love the color blue – that’s the challenge both at Simon Says Stamp Monday Challenge (Well…anything that begins with B) this week AND Merry Monday – go figure! And I just love the sketch from CAS(e) this Sketch – super cute, huh?!!

If you’re a VIP Community member, here’s a sneak peek into an exclusive video we have for you in the project and resource library!

CTS_Sketch_113149Ghosting Technique Peek

I wanted to use snowflakes, so to keep up with the sketch from CAS(e) this Sketch, I added the vellum partial snowflake peeking out from the tag – I’m sure I’m the only winter one in that challenge, as everyone seems to have moved onto spring…lol!

If you haven’t already – be sure to get the Creative Tips video series – it’s free and you can only see those tutorials through the e-letter! Thanks for stopping by today and checking out our Ghost Stamping Technique video and project!

Signature

Ghost Stamping 004

[optin_box style=”12″ alignment=”center” email_field=”email” email_default=”Enter your email address” integration_type=”aweber” double_optin=”Y” list=”3846012″ name_field=”name” name_default=”Enter your first name” name_required=”Y” opm_packages=””][optin_box_field name=”headline”]Learn more with our exclusive FREE video series:[/optin_box_field][optin_box_field name=”paragraph”]PHA+UGx1cyB5b3XigJlsbCBiZSBhZGRlZCB0byBteSBGUkVFIENyZWF0aXZlIFRpcHMgRS1sZXR0ZXIgd2hlcmUgSSBzaGFyZSBleGNsdXNpdmUgcHJvamVjdHMsIHZpZGVvcyAmYW1wOyB0aGUgMTIgRGF5cyBvZiBDaHJpc3RtYXMgUHJvamVjdCBTZXJpZXM8L3A+Cg==[/optin_box_field][optin_box_field name=”privacy”][/optin_box_field][optin_box_field name=”top_color”]undefined[/optin_box_field][optin_box_button type=”0″ button_below=”Y”]Get Instant Access![/optin_box_button] [/optin_box]
Silent Night…Merry Monday

Midnight Snow Drifts 004

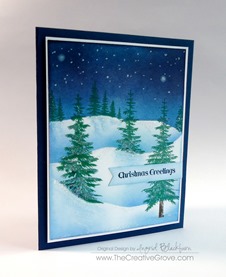
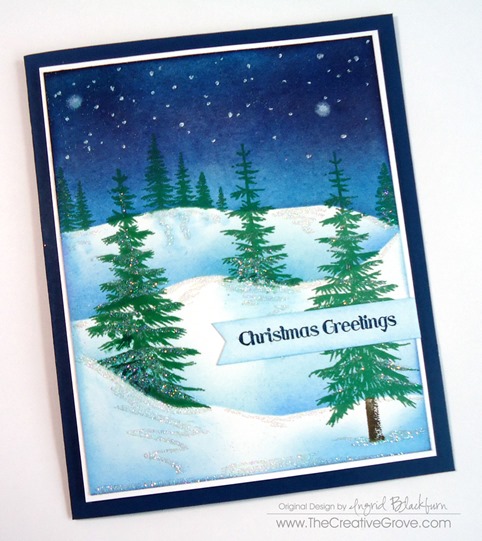
It’s well into the fall season here in Germany, and I love that the Christmas Season is approaching.  Making card for the Merry Monday challenge has been a bright spot to my crafting week on Mondays.  This week, the task is to create a card that evokes the feel of a Silent Night before Christmas.  I think this card works, hope you enjoy it!

130

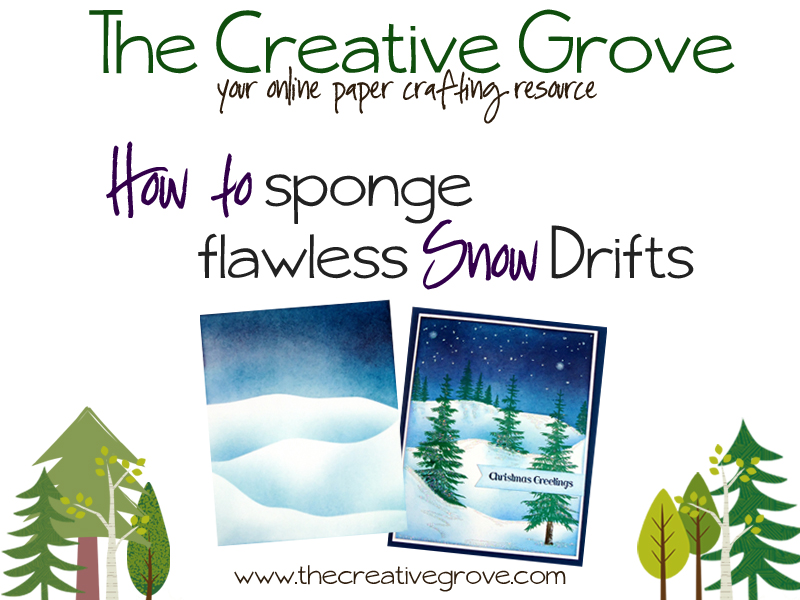
For a tutorial this week, I thought I would show you exactly how I create these snow drifts, so I filmed a step by step video tutorial and put it onto my You Tube channel.  If you are interested in watching the tutorial How to sponge flawless snow drifts, please click here to see it.

Midnight Snow Drifts 010

Thanks for stopping by today!  And in case you missed my YouTube link above…be sure to check out my step by step tutorial here.  Just click this image:

Video Screenshot Title

Creatively yours –

Signature

12 Days of Christmas starts soon!

CLICK HERE to sign up for Creative Tips and get the 12 Days of Christmas sent directly to your inbox free starting Tuesday October 28th!

A Watercolored Poinsettia

Joyful Christmas Watercolored (2)

It’s no secret that you’ve seen lots of watercolor projects at The Creative Grove lately.  To say I’ve fallen in with this medium is putting it mildly!  Today I wanted to share with you a project I made a few days ago, because I just needed a little something fun, light and creative in my day.

We all have them – days that are bogged down with work and stuff that isn’t so much fun.  Lately, mine have been filled with the other side of running a creative classroom and blog – the business end: building websites, connecting them, creating digital images and making sure all the SEO is in place.  If you told me a few years ago that I’d be doing that on a regular basis – I probably would have laughed.  Well, I’ve become quite proficient at it!

We just finished up our latest class – Watercolor Techniques that Wow! a few weeks ago.  The feedback was through the roof.  I had so much fun putting the class together for you, that I guess it really showed.  One of the things I love about our classes here at the Grove is that you don’t have to have anything in particular that we use.  Just use what you have.  Colors, mediums, stamps, etc…  The goal is for you to have fun – play with what you have and above all – learn something new.

That’s why I’m SO excited to announce our latest educational venture – our VIP Community!

TCG-VIP-Wide-Header


This isn’t just any old class – it’s a course.  So what’s the difference?  It’s a monthly course where you learn something new every two weeks.  There are two levels – one that builds as you go, and one that is all access from the get-go.  To learn more about it click here.

Joyful Christmas Watercolored (5)

Bet you thought I forgot about the watercolored Poinsettia card! Smile  Like I was telling you, I was smack dab in the middle of building web pages and I couldn’t see straight or think clearly.  I decided I needed to clear my head, so I whipped out some watercolor paper, clear embossing powder, my two aqua painters, a paint palette and some watercolor pencils.  A little while later…I had this:

Joyful Christmas Watercolored (1)Joyful Christmas Watercolored (6)

To really see exactly how I colored this flower in layer after layer after layer creating depth and dimension, you’ll have to watch my three videos on it in the resource section of our Watercolor Class, or on Project #6 – click here to read about what to expect.

That’s the cool thing about that class, it’s loaded with step by step resource videos explaining techniques before you even get to the project videos!  For example, I show you how to make your own shades of colors – I didn’t have a green pencil this shade – I created my own!  I hope you love this card – I can’t stop looking at it – it’s so much prettier than the photographs even show.

Joyful Christmas Watercolored (3)

To learn seven different techniques with watercolors, brushes, inks and so much more, click here.  I guarantee you will not be disappointed!

Signature Snowflake 001

Looking to learn something new?  Join us in class – here are just a few:

TCG-VIP-Wide-Header     Watercolor Narrow