Banner Flag Video Tutorial

Blooming with Kindness 003 Main

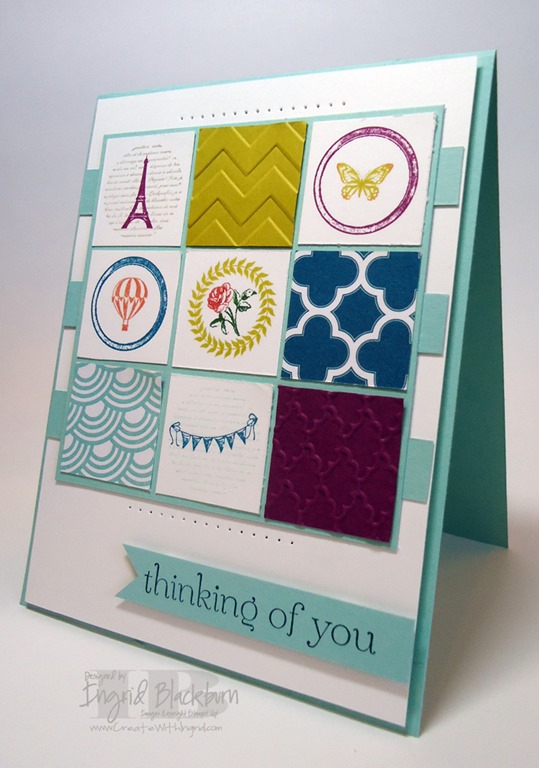
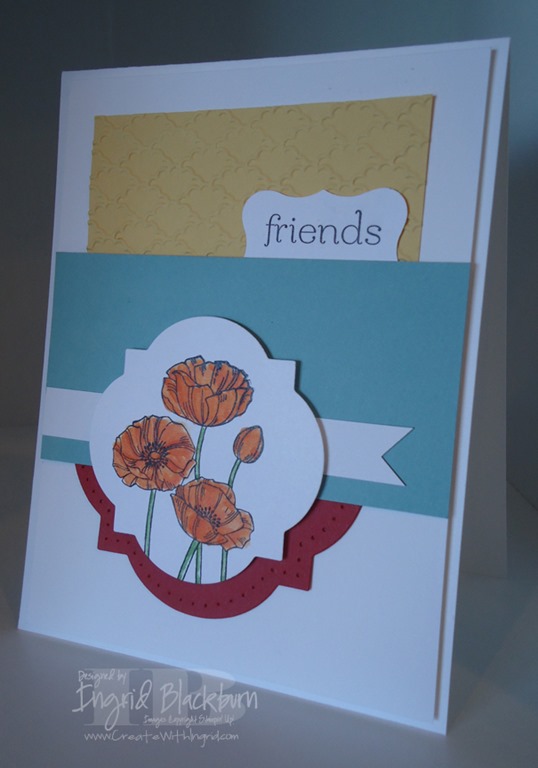
Have you ever wondered how to make a perfect banner flag?  I love adding these to a card for an embellishment, greeting or just that little something that the project needs.

Yesterday I showed you a card that had five banners on it.  To see all the creative tips and details to that project, just Click Here.  Of course, I have banners in almost all my projects it seems over the last year.  Banners have seemed to become one of my signatures in my cards and scrapbook pages, so for today, I made a video to show you exactly how I make this simple little detail.

I think you’ll find that you too can make a perfect banner flag without driving yourself crazy!  I hope you enjoyed this video, have fun creating today.

Signature Snowflake 001

Check out the Retired Lists!  Get all your favorites while you still can.

Retired Stamp Sets Retired Accessories List

To Shop 24/7 in the Creative Store – Click here!

Vintage Mojo Monday

Blooming with Kindness 003 Main

Vintage looking cards don’t have to be difficult to make.  I find that sometimes I struggle with this look, but a few elements really help make this card come together quickly.  It’s Mojo Monday again and I have to admit, I’m never round – always square!  Maybe someday I’ll step outside of my comfort zone and attempt the round, but not today.

      Mojo291SketchBlooming with Kindness 003 Front

I immediately went to my Fan Fair Designer Series Paper when I saw this sketch.  I tried it with three banners, but just had to put five on instead.  It’s ironic that today’s card is about banners, as I just filmed a video on just how to make banners yesterday.  I’ll be editing it today, so look for it tomorrow! Click Here to see the Video

Creative Tips:

  • My dimensions on this card are 5.5”x5.5” for the base.  I cut the Chocolate Chip 5”x5” and the Very Vanilla 4 7/8”x4 7/8”. 
  • After choosing the Fan Fair Designer Series Papers that  I wanted as the banners, I altered the height and width of each one for a little variety.  To make my banners, I used a 1 3/8” Square Punch.  I wanted the peak to be the same in each one, so I used it on all five banners.Blooming with Kindness 003 Banners
  • For the greeting, I have to admit that I first did two ovals with our new Oval Framelits.  But I don’t like having too much of a matte and since they are round, trimming them just isn’t an option.  So instead I used the small Apothecary Accents Framelits for the Matte.  It evokes a Spanish Inquisition feel for me – not sure why, but it does. 
  • I wanted to do a little stamping and add some texture to the backdrop of my greeting.  I went to the gorgeous flower in Blooming with Kindness.  I stamped it off once in Crumb Cake to lighten it a bit and then added my greeting from Lacy and Lovely in Early Espresso for contrast.  Of course I popped it up too.Blooming with Kindness 003 CU
  • For my ribbon accent I used our 5/8” Victoria Crochet Trim.  It’s my first time using this delicate but gorgeous ribbon, you have got to try it, the photos do not do it any justice and it’s perfect for any vintage looking card! Blooming with Kindness 003 Side
  • I needed to fill the white space up a little on the project, so I went to my good ‘ol stand by – paper piercing with the Essentials Paper Piercing Pack.  Since there was so much space at the bottom, I added 5 holes in each direction rather than my usual three.  And at the top I only did two.  It really turned out nice – grab your paper piercer any time you feel like it needs something.  The best part – it’s a one time inexpensive purchase. Overall, I just love the way this project turned out.  It’s not my normal style or color combination, but there’s just something about it that is striking and it’s definitely a vintage look.  Have fun making your own Mojo Monday creation!

Signature Snowflake 001

Check out the Retired Lists!  Get all your favorites while you still can.

Retired Stamp Sets                      Retired Accessories List

To Shop 24/7 in the Creative Store – Click here!

Blooming with Kindness 003 Angle

Stamp Sets – Lacy and Lovely (122885w, 122887c), Blooming with Kindness (126420w, 126422c) Paper – Fan Fair DSP (126918), Very Vanilla (101650), More Mustard(100946), Chocolate Chip (102128) Ink – Crumb Cake (126975), Early Espresso (126974) Cool Tools – Oval Framelits (129381), Apothecary Accents Framelits (127003), 1 3/8” Square Punch (119877), Essentials Paper-Piercing Pack (126187), Paper-Piercing Tool (126189), Stampin’ Pierce Mat (126119) The Perfect Finish – Stampin’ Dimensionals (104430), 5/8” Victoria Crocheted Trim (118481)

Blooming with Kindness126422LLacy and Lovely

Creative Notebook Covers

Notebook Cover 001 Main

Who doesn’t love a great notebook and a handmade gift?  I had the privilege to help a good friend and fellow CG Crew team mate out with a fun little project she was doing – personalized notebooks for Admin Day this past week as one of their gifts.  Isn’t she a cool boss?  I’ve never had a boss make me something before – if that doesn’t say “I value you”, I don’t know what does!  Here is one of the notebooks that were made that day.

Notebook Cover 001 Front Notebook Cover 001 Inside

Amy got these cool Notebook covers that had a place to do something fun and creative in the cover. They came in a cute box and were just screaming to be personalized.  She had to make a few, so I just let the creative juices start flowing and this is what we ended up with for one of them.

Creative Tips:

  • We was going to make polka dots using sponge daubers, but then decided on a cleaner look and punched out polka dots with the 1” circle punch instead.
  • To give a little more emphasis to the name plate – we ran the Basic Black card stock through the big shot first with the Labels Framelits Collection and then through the Chevron TIEF folder.Notebook Cover 001 Name CU2
  • To really make it pop – we created a banner display behind it in the Tempting Turquoise, Tangerine Tango and Whisper White. 
  • The initial was made using the Typeset Alphabet Bigz dies and the Silver Glimmer Paper.
  • We wanted to add a little flair, so we created hanging banners in the corner with Basic Black and Whisper White cardstock.  We added a Tangerine Tango striped Designer Series Paper from the Sycamore Street DSP Collection that was available during Sale-a-bration (now Retired). 
  • To make the hanging banners we used a 1” Square punch.  It make the larger banner, we used a 1 3/8” Square Punch.
  •               Notebook Cover 001 Button CU Notebook Cover 001 Button Height

  • We added a little flair to the banners by putting one of the Silver Basic Designer Buttons from the Spring Catalog. 
  • We threaded it with some Basic Black Baker’s Twine.  You might be asking  – wait Stampin’ Up! doesn’t carry that?  You would be correct – we made it from the Whisper White Baker’s twine – something that everyone should have.  What we did was run my Classic Basic Black ink pad over it on our Grid Paper and voila, Basic Black Baker’s Twine!
  • We then popped one of our Large Rhinestone Basic Jewels to the top for a little bling!
  • This project turned out super cute and I know the recipient will love it.  According to Amy, it totally fits her personality, and the fact that it was handmade will certainly make her feel appreciated.

Signature Snowflake 001

Be sure to check out the Retired Lists!  Get all your favorites while you still can.

Retired Stamp Sets                      Retired Accessories List

To Shop 24/7 in the Creative Store – Click here!

Notebook Cover 001 Angle

Stamp Sets – none! Paper – Whisper White (100730), Certainly Celery (105125), Tempting Turquoise (102067), Tangerine Tango (111349), Basic Black (121045), Silver Glimmer Paper (124005), Sycamore Street DSP (retired) Ink – Basic Black (126980) Cool Tools – Big Shot (103954), Chevron Embossing Folder (127749), 1 3/8” Square Punch (119877), 1” Circle Punch (119868)  The Perfect Finish – Silver Basics Designer Buttons (129325), Large Rhinestone Basic Jewels (129324), Whisper White Baker’s Twine (124262)

    Large Rhinestone Silver Basics Buttons

Zoo Review Bookmarks

Zoo Review 001 Bookmarks Main

Everyone loves a good bookmark.  I love being able to take a stamp set that I use for one purpose and doing something unexpected with it.  I had fun stamping with some second graders and their moms and needed a good project that would hold everyone’s attention – enter the bookmark! 

I have more fun with the Zoo Review Stamp Set than I ever expected.  I initially got it to use it when I teach Brayer 102 – Advanced Creative Scenery.  But to my surprise, I just wanted to keep stamping with it!  The images aren’t too cutesy, and they work for any occasion – that’s a great stamp set. 

                        Zoo Review 001 Polar Main      Zoo Review 001 Giraffe

Creative Tips:

  • My bookmarks measure 2 1/4” x 5 1/2”.  I actually used two stamp sets – Zoo Review and the great set – Every Little Bit.
  • To color, I used our Watercolor Pencils – but you could use any color medium.

          Zoo Review 001 Polar CUZoo Review 001 Giraffe CU

  • I used the Aqua Painters to blend my colors and honestly, this project went rather quick for me.  I just wanted to keep making more and more!
  • One of the most unique bookmarks that were made that day was the world and universe.  We just made a curved line and free hand drew the rest.  It was rather easy and didn’t her bookmark turn out super cute?!

SU Workshop 002SU Workshop 004

See, bookmarks are for everyone, not just kids!  Have a creative weekend. Smile

Signature Snowflake 001

Check out the Retired Lists!  Get all your favorites while you still can.

Retired Stamp Sets                      Retired Accessories List

To Shop 24/7 in the Creative Store – Click here!

Zoo Review 001 Polar Side

Stamp Sets – Zoo Review (122197w, 122199c) Paper – Whisper White (100730), Not Quite Navy (Retired), Night of Navy (100867) Ink – Jet Black StazOn (101406) Cool Tools – Aqua Painters (103954), Watercolor Pencils (101879)  The Perfect Finish – Not Quite Navy 3/8” Taffeta Ribbon (122978)

new stamp

Every Little Bit 120558L

Lovely as a Tree Simplicity

Lovely as a Tree 003 Main

Lovely as a Tree is an institution in the Stampin’ Up! world.  No one is quite sure why it has never retired, but there is something beautiful about a consistent stamp set that you can count on.  I never ordered this stamp set for 10 years because I thought it would just retire, so last year I finally broke down and got it.  I’m sure you heard a crack in the universe that day!  And all I can say is that I deprived myself of something absolutely beautiful.

Lovely as a Tree 003 Angle

Sometimes the best idea is a simple one.  And that’s what this card is.  I can’t take credit for the idea, I saw a similar one made by Jayne Mercer online somewhere, but just HAD to make one of my own with my added flair!  So here’s my take on what I saw. 

Lovely as a Tree 003 CU

Of course if you have subscribed to my Creative Tips List on the right at the top, then you’re going to get the video (yes you read that right!) showing you just how easy it is to make something so artistic and beautiful.  The video is loaded with all the creative tips for how to make this project!  I’m putting the finishing touches on it, and will be emailing it out tomorrow, so be sure to sign up for an exclusive step by step look into my card making process!  Click here to sign up for my Creative Tips Mailing List!

I hope you love my card today.  It’s one of those cards that just makes me happy! We’re going to make 5 of these in Just Cards class tonight – I think the ladies will be shocked how quickly they can make several little pieces of artwork.  And that’s right before my Creative Cards class – can’t wait for everyone to come over and stamp with this classic stamp set and several others!

Signature Snowflake 001

To Shop 24/7 in the Creative Store – Click here!

Lovely as a Tree 003 SIde

Stamp Sets – Lovely as a Tree (115026w, 127793c), Made for You (126340w, 126342c) Paper – Whisper White (100730) Ink – Jet Black StazOn  (101406), Early Espresso (126974), Bashful Blue (126961), Garden Green (126973) Cool Tools – Paper Snips (103579), Stampin’ Sponges (101610), Aqua Painters (103954)  The Perfect Finish – Stampin’ Dimensionals (104430)

Lovely as a Tree

Mojo Artistic Etchings

Artistic Etchings 003 Main

I just love the set Artistic Etchings, it gives me the sense of being in Paris at a sidewalk café sipping a cappuccino and people watching.  I just love it when paper crafting takes me somewhere else.  This morning I went to check out the Mojo Monday sketch and have to tell you, I struggled.  The Mojo just wasn’t flowing.  Then I decided to go to one of my favorite stamp sets – Artistic Etchings.  The card then quickly came together – the stamping not so much…lol!

This morning I had to repeat the crown literally…NINE times!!!  The sad thing is that was even using a Stamp-a-Majig!  I know, you’re saying…I’m so glad it’s not just me sometimes!  (Okay, I should stop using exclamation marks so much in the morning…but that’s how I feel!)  The sad thing is that my first go at the crown was perfect, till as I put the whole card together, some Basic Gray ink got on my fingernail and (can you see where this is going) ultimately my perfectly stamped square.  Normally I don’t care too much, but it was squarely in the white area and just didn’t make the cut anymore.

Okay – on to the creative tips part of this card…

Mojo290SketchArtistic Etchings 003 Front

Creative Tips:

  • When I pull the Eiffel Tower stamp out I immediate gravitate toward my Basic Gray Ink Pad.  I know, cliché, but I can’t help it, any other color to me just isn’t right (it’s a total personal choice) Smile
  • I knew I wanted the Eiffel Tower in the center, long and popped up, so the other two main images were easy to choose.  The dimensions just kind of happened.  I used my Grid Paper (can’t live without it), to help me perfect the size.  I wanted to have just a pop of Basic Gray Cardstock, so I knew I wanted a 1/16th border.  My dimensions settled on 1 5/8” x 1 3/8” for the smaller white and 1 5/8” x 2 7/8” for the Tower.  Increase your Basic Gray dimensions by 1/8” width and height for the 1/16” border – 1 3/4” x 1 1/2” and 1 3/4” x 3”.Artistic Etchings 003 Side
  • I decided to use a Cherry Cobbler backing of 5 1/4” x 4”.  I put a 2” x 5 1/4” piece of Designer Series Paper from the Fan Fair collection on the bottom.  It had some Basic Gray and Cherry Cobbler in it that added some great character to the card.  I love this collection, it feels worldly to me.
  • I used some 1/2” Seam Binding Ribbon in Cherry Cobbler and tied a flat knot.  Artistic Etchings 003 CU
  • I went back and forth on whether to even put a greeting on the card, but ultimately decided on the Amour stamp that comes with this set.  I think it was the use of Cherry Cobbler in my project that swayed me – this card screams love to me – maybe it’s the whole Eiffel Tower/Paris connection.Artistic Etchings 003 Height
  • As finishing touches I added the three sizes of Pearl Basic Jewels as an accent to my greeting and popped both the greeting banner (made with a 1” Square Punch) and the Eiffel Tower up on Stampin’ Dimensionals.
  • Ultimately I love the final result, but I have to say it was a little difficult this morning…lol!  I do love this challenge and I encourage you to take the Mojo Monday sketch above and give it a shot!  Have a great week and be sure to check back Wednesday – our retiring list is coming out!!

Signature Snowflake 001

To Shop 24/7 in the Creative Store – Click here!

Artistic Etchings 003 Angle

Stamp Sets – Artistic Etchings (118517w, 120573c) Paper – Whisper White (100730), Basic Gray (121044), Cherry Cobbler (119685), Fan Fair Designer Series Paper (DSP) (126918) Ink – Basic Gray (126981) Cool Tools – 1” Square Punch (124094), Stampin’ Trimmer (126889), Craft Scissors (108360), Stamp-a-Majig (101049), Grid Paper (102787)  The Perfect Finish – Pearl Basic Jewels (119247), Stampin’ Dimensionals (104430), Cherry Cobbler 1/2” Seam Binding Ribbon (120992)

Artistic Etchings 120573L

Best of Flowers Blog Tour

blogtour-25years-april

Today we’re continuing to stamp with Stampin’ Up!’s 25th Anniversary stamp set – Best of Flowers.  Welcome to the RemARKable Blog Tour!  I’m stop #3 and you’ve just come from my friend Linda’s blog Ink Stamp and Scrap.  I love Linda’s style – she stamps like me – clean and simple! 

Best of Flowers 001 Main

This is the third day of samples with this great stamp set.   Our anniversary sets have several images that are retired but were quite popular and one brand spankin’ new one!  I’m so glad they brought them back in this exclusive limited edition set!  I thought today I’d stamp with the rose bouquet as I’ve never stamped with this one before.

It also marks my first time using the Dress Up Framelits.  I just love these little framelits, they’re so cute!  And you can do SO much with them.  The limits are endless.

Best of Flowers 001 Side

Creative Tips:

  • I took our First Edition DSP and cut that out with the dress form, stamped directly on it using Jet Black StazOn and the Rose Bouquet stamp.  Best of Flowers 001 CU
  • I squeezed my ink pads to collect the ink in the lid and water colored my images using the Aqua Painters.  I colored the image using Riding Hood Red and Garden Green.
  • I stamped color on color for the banner in Soft Suede using the Blooming in Kindness stamp set for my greeting.  I just LOVE that set!Best of Flowers 001 Banner
  • I added a Vintage Faceted Buttons with Linen Thread tied through them and two Pearl Basic Jewels to complete my banner. Best of Flowers 001 Height
  • I cut the end of the banner using a 1” Square Punch and popped it up on dimensionals for some drama to my simple card.
  • My Garden Green panel needed a little something so I created a vintage looking wallpaper by stamping the Rose Bouquet stamp several times from different angles in Garden Green.
  • I popped two Riding Hood Red panels on either edge.  It completed my card.
  • For my base, I chose Very Vanilla.
  • I just love the end result, I hope you do too.  It’s a classic card and really pops. To see my other card with this set from earlier in the week, click here.  To see my candle also done with this set, click here.

Next up is Melissa Bollinger’s blog – http://www.stampinup.net/blog/2089191.  Enjoy the rest of the tour and see you back next month!

blogtour-25years-next

Signature Snowflake 001

Best of Flowers 001 Angle

Stamp Sets – Best of Flowers (133342c), Blooming with Kindness (126420w, 126422c) Ink – Riding Hood Red (126968), Garden Green (126973), Soft Suede (126978) Jet Black StazOn (101406)  Paper – Riding Hood Red (111348), Garden Green (102584), Soft Suede (115318), Very Vanilla (101650), First Edition DSP (121878)  Cool Tools – Aqua Painters (103954), Dress Up Framelits (130101), 1” Square Punch (124098) Finishing Touch Vintage Faceted Buttons (127555), Pearl Basic Jewels (119247) , Linen Thread (104199), Stampin’ Dimensionals (104430)

Best of Flowers 133342L_thumb[2]

Best of Flowers Candle

Best Of Flowers 002 Main

Stampin’ Up!’s 25th Anniversary exclusive stamp set Best Of Flowers can be used in many versatile ways – don’t just think in 2D for cards!  I wanted a little pop for these cute flowers on this stamp which is quite smaller than it’s original.  But the change is worth it – at least for my cute little votive candles!

Creative Tips:

  • Normally I would stamp with the ink pads, but since this stamp is so detailed, I used Stampin’ Write Markers – Melon Mambo and Garden Green. 
  • I took my time to color in my stamp and then huffed it – remoistened the ink with the warmth of my breath by huffing of my stamp.
  • I stamped several images on white tissue paper, and then cut around the whole image leaving a little space for my glue.
  • I glued each image directly to my candle using the two way glue stick.   I had to trim a few flowers off since they were taller than my candle.

Best Of Flowers 002 Angle 3

  • I wrapped the candle tightly with wax paper, leaving an excess amount for me to hold on to.
  • I used my Heat Tool to carefully melt the wax from the candle through the tissue paper and wax paper.  I then quickly roll it onto a hard surface covered with grid paper so not to get any wax on the surface.  This rolls the candle flat again. 
  • Once my image is translucent and I can’t see any of the white tissue paper, I knew it was done.  TIP – don’t over do it as your candle will be bumpy then.  It goes quick.
  • Be patient, pull your wax paper off slowly…let me say that again – Slowly!  Check it and spot melt any other sections with new wax paper. 
  • I get my wax paper at the $1 store – that way I’m not skimpy with it!
  • Best Of Flowers 002 Angle 1

The end result is a fun personable candle that dresses up any occasion!  Have fun using this versatile stamp set for so much more than just cards!

Tune in tomorrow for the RemARKable Stampers Blog Tour!  Have a great Saturday!!

Signature Snowflake 001

To Shop 24/7 in the Creative Store – Click here!

Best Of Flowers 002 Angle 2

Stamp Sets – Best of Flowers (133342c) Ink – Melon Mambo Stampin’ Write Marker – Brights Collection (119702),  Garden Green Stampin’ Write Marker – Regal Collection (119701)  Paper – White Tissue Paper, Wax Paper  Cool Tools – Heat Tool (129053), 2 way glue (100425) 

Best of Flowers 133342L