Gently Falling One Layer Card

Gently Falling 2 001

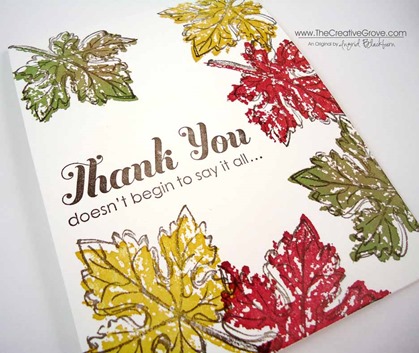
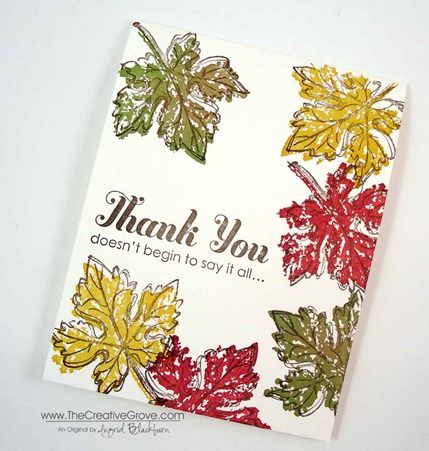
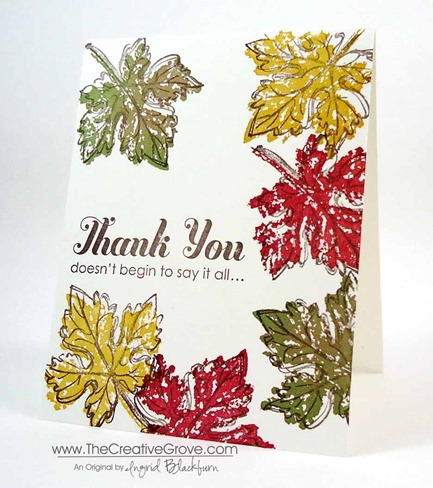
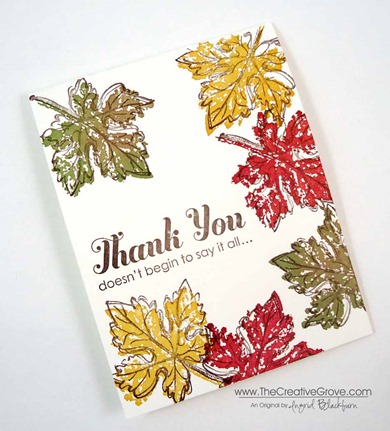
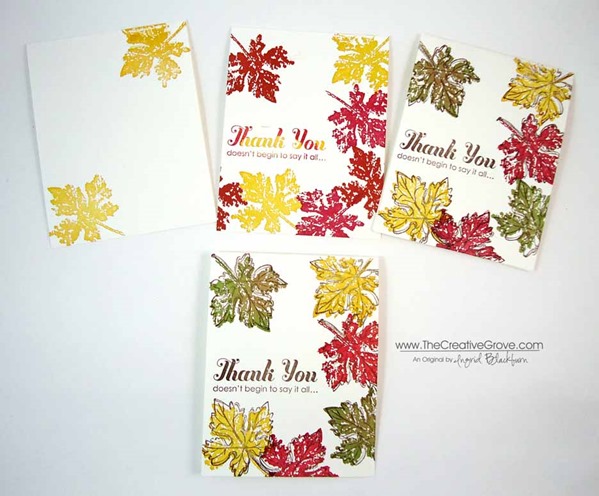
Don’t you just love one layer cards sometimes?  I was inspired this morning by a simple photo of some fall leaves.  I thought, I not create that same feeling on a simple and classic one layer card! 

Sometimes you just need a go to quick card for someone without getting all the papers out, you know? Here’s how you can achieve this exact result.

Creative Tips –

  • Bold images are great for cards like this.  Pick something that will really pop.  I chose the largest leaf from the Gently Falling stamp set.  Does anyone know what kind of leaf this is?  Let me know if the comment section below!Gently Falling 2 006
  • To keep with the falling leaves in fall theme, you can choose a trio of classic colors like Crushed Curry, Cherry Cobbler and Wild Wasabi.  For the outline, the color Early Espresso with tie it all together.
  • The colors are a bit brighter until you put the Early Espresso on it.  Then it mutes it right down.Gently Falling 2 005
  • To tie it all together, stamp your greeting in Early Espresso.
  • That’s it!  You’re done – wasn’t that fast?

And for those of you who think I knock it out of the park on the first turn, I thought I’d show you how many I had to go through before I got it just right!!  Do you appreciate this?  Let me know in the comment section, and I’ll include more of this kind of stuff in the future.  Consider it my photo form of bloopers – I’m just human too, right?

Gently Falling 2 008

Do you want to want more one layer cards?  Clean and Simple cards?  Brayer cards?  Let me know – I’m always curious what my readers want to see!  Let me know below.  Have a great day! SmileGently Falling 2 002

Are you one of my VIP’s?

If you love this card and creative tips, then be sure to sign up for my Creative Tips list!  You’ll get VIP project videos and projects, special list only sales and discounts, and stay on top of all the cool and great things not only available at Stampin’ Up!, but also here at The Creative Grove. Be in the know, first on the list!  I don’t like excess email or stuff I don’t want, so know that your email address is something sacred to me.  I would never abuse that trust!  Click here if You love creative tips and want to be one of my VIP’s! Smile

Signature Snowflake 001

To shop 24/7 for any of the above projectclick here

Gently Falling 2 004

Stamp Sets – Gently Falling Ink – Crushed Curry, Wild Wasabi, Cherry Cobbler, Early Espresso Paper – Whisper White
Too Kind Stamping Video

Too Kind 001 Main Espresso

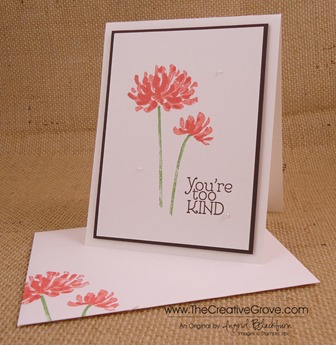
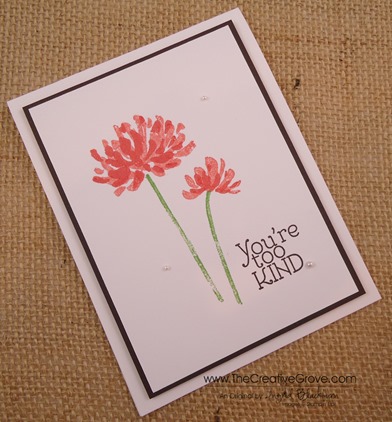
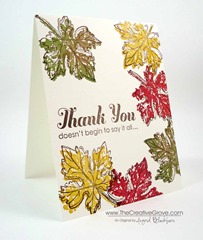
I thought today I would do a technique video for you.  The new Too Kind stamp set is a great simple stamp set to make wonderful quick and easy cards.  Here I chose a fun color combination using my new color coach for a great little card set.  Enjoy!

Two Step Stamping Technique Video


Measurements –

  • Whisper White card front – 3 5/8” x 4 7/8”
  • Early Espresso – 3 3/4” x 5”
  • Whisper White Card Base – 4 1/4” x 5 1/2”

Signature-Snowflake-001_thumb1

To Shop 24/7 in the Creative Store – Click here!

Too Kind 001 Angle

Stamp Sets – Too Kind (130450c, 130447w)  Ink – Early Espresso (126974), Calypso Coral (126983), Wild Wasabi (126959) Paper – Whisper White (100730), Early Espresso (119686) Finishing Touch – Stampin’ Dimensionals (104430), Pearl Basic Jewels (119247)

    Lovely as a Tree Simplicity

    Lovely as a Tree 003 Main

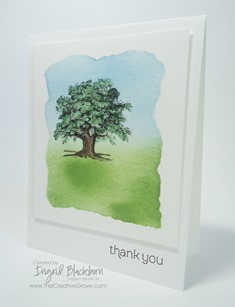
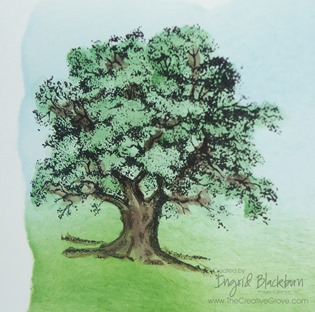
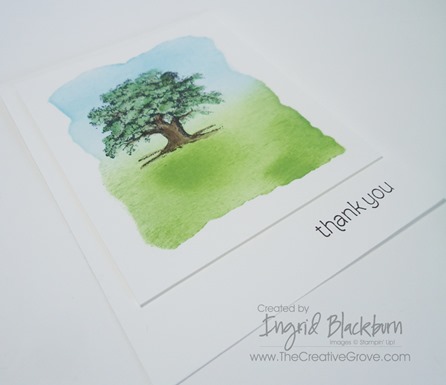
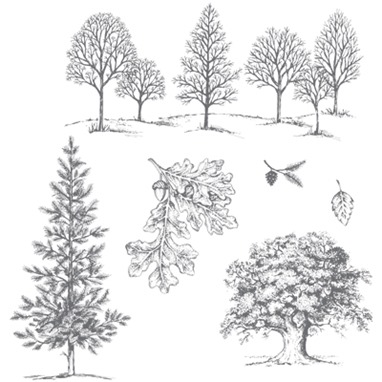
    Lovely as a Tree is an institution in the Stampin’ Up! world.  No one is quite sure why it has never retired, but there is something beautiful about a consistent stamp set that you can count on.  I never ordered this stamp set for 10 years because I thought it would just retire, so last year I finally broke down and got it.  I’m sure you heard a crack in the universe that day!  And all I can say is that I deprived myself of something absolutely beautiful.

    Lovely as a Tree 003 Angle

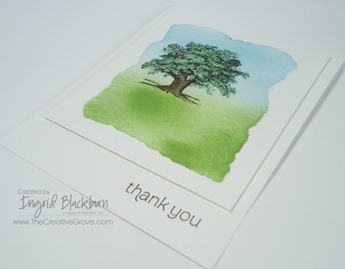
    Sometimes the best idea is a simple one.  And that’s what this card is.  I can’t take credit for the idea, I saw a similar one made by Jayne Mercer online somewhere, but just HAD to make one of my own with my added flair!  So here’s my take on what I saw. 

    Lovely as a Tree 003 CU

    Of course if you have subscribed to my Creative Tips List on the right at the top, then you’re going to get the video (yes you read that right!) showing you just how easy it is to make something so artistic and beautiful.  The video is loaded with all the creative tips for how to make this project!  I’m putting the finishing touches on it, and will be emailing it out tomorrow, so be sure to sign up for an exclusive step by step look into my card making process!  Click here to sign up for my Creative Tips Mailing List!

    I hope you love my card today.  It’s one of those cards that just makes me happy! We’re going to make 5 of these in Just Cards class tonight – I think the ladies will be shocked how quickly they can make several little pieces of artwork.  And that’s right before my Creative Cards class – can’t wait for everyone to come over and stamp with this classic stamp set and several others!

    Signature Snowflake 001

    To Shop 24/7 in the Creative Store – Click here!

    Lovely as a Tree 003 SIde

    Stamp Sets – Lovely as a Tree (115026w, 127793c), Made for You (126340w, 126342c) Paper – Whisper White (100730) Ink – Jet Black StazOn  (101406), Early Espresso (126974), Bashful Blue (126961), Garden Green (126973) Cool Tools – Paper Snips (103579), Stampin’ Sponges (101610), Aqua Painters (103954)  The Perfect Finish – Stampin’ Dimensionals (104430)

    Lovely as a Tree

    Secret Garden Simplicity

    Sometimes the simplest ideas are just the best.  Today I wanted to make a few quick cards to send to members of The Creative Grove for their awesome achievements this past month.  I ended up loving the result so much that I made a few more for my recent party hostesses!  I know they’ll love getting these cards in the mail as a heartfelt thank you from me for supporting my small local business.

    Here are the specifics for you to whip up a few of your own!

    Creative Tips:

    • I settled on a combination of yellows – So Saffron, More Mustard and Daffodil Delight with a pop of Tangerine Tango.
    • I wanted the leaves to show and not the stem of the leaves, so I stamped on strips that were 2.25” x 11” or 8.5” (depending on what size card I was making).   The best part – I just grabbed strips out of my scrap bin!
    • I created a master strip by stamping my four images together than working across my strip to get the spacing down.  I then used the same pattern to quickly mass produce the others – using one stamp at a time.
    • I wanted to add a little color to the lined flower stamp which I stamped in Tangerine Tango, so I stamped it over the So Saffron solid image of the daisy.  So Saffron is such a light color that the combination really worked together.
    • The great part about this card is that less is more.  Because the images are so striking, I didn’t want to clutter up my card with a ton of cardstock.  I made sure my stamped strip went end to end.
    • These cards are traditional sizes – 5.5”x8.5” and 4.25”x11”.
    • I stamped my greeting from my go to set – Sweet Essentials in Tangerine Tango.

    You will be able to whip up several of these in minutes! I made six cards in 20 minutes.  

    Signature Snowflake 001

    To Shop 24/7 in the Creative Store – Click here!

    Stamp Sets – Secret Garden (129141w, 129144c), Sweet Essentials (126455w, 126457c) Ink – Daffodil Delight (126944), Tangerine Tango (126946), So Saffron (126957), More Mustard (126964)  Paper – Whisper White (100730), Daffodil Delight (119683)  Cool Tools – Essentials Paper Piercing Pack (126187), Stampin’ Pierce Mat (126199), Paper-Piercing Tool (126189)  Finishing Touch – Rhinestone Basic Jewels (119246)

    Secret GardenUntitled-12

    Mojo Monday Lacy & Lovely Hello

    I never knew that I would come to love Monday mornings so much.  That’s right, it’s Mojo Monday time again!  This first full week of December is cram packed and I was hoping for a sketch that would come together quickly, and I was not disappointed.  When I saw the trio of hearts in the Mojo sketch, my mind immediately went to the stamp set Lacy & Lovely.  This is a stamp set that is perfect for all occasions and one set that every stamper needs.  If you don’t have it yet, let me know and I’ll be sure to contact Santa to make sure that you get it under the tree this year!

    Mojo270Sketch

    Creative Tips:

    • I chose a background paper that wasn’t going to dominate the card.  The Designer Series Paper Stacks in each color family gave me the perfect simple design.  I chose the 2011-2013 In Color collection and used Pool Party.
    • To make sure that my Large Scallop Edgelit cut straight, I held it in place on top of my card stock with a post it note.
    • I kept the border of my greeting from the Lacy & Lovely set only 1/16” so that it wouldn’t dominate that space.
    • Pearl Basic Jewels are just the right finishing touch for the three stamped circles.
    • I used the 1”, 1 3/8” and 1 3/4” circle punches to cut out my images.

    This card came together really quickly and the color combination makes a statement.  I absolutely love the look and I think anyone who gets this card will immediately smile, since that’s what it makes me do!

    InkPromo_DBWS_Nov12_NA

    There is still time to get a free color family collection of ink pads – a $50 value!  You can choose from the Brights, Subtles or Regal collections.  This great special ends Sunday, December 16th!  How do you get a free collection of ink pads?  there are three ways – 1) Have your friends over for a stamping party,  2) Get your holiday shopping done with a $450 order or 3) Join my Creative Crew team for $99. Click Here to Join the Creative Crew or Click here to Order 

    When you join the Creative Crew you will instantly become part of the Stampin’ Up! family – get daily inspiration, participate in live and online events, make new stamping friends, get creative techniques training or even make money with the business opportunity if you want.  There is no further obligation if you want even!  You will get your choice of $125 in product and get free shipping! So don’t wait – take advantage of this great promotion!

    Signature Snowflake 001

    To Shop 24/7 in the Creative Store Click here!

    Stamp Sets – Lacy & Lovely (122887) Paper – Whisper White (100730), So Saffron (105118), Certainly Celery (105125), Island Indigo (122974), 2011-2013 In Color Designer Series Paper Stack (122384) Ink – Wild Wasabi (126959), Island Indigo (126986), Pool Party (126982) Cool Tools –Large Scallop Edgelits (127019), Big Shot (113439) The Perfect Finish – Stampin’ Dimensionals (104430), Pearl Basic Jewels (119247)

    Lacy and Lovely

    Color Inspiration

    I love to pull inspiration from everything in life.  Lately I’ve been saving pictures and color swatches to one of my boards on Pinterest.  (Click here if you want to follow my Pinterest Color Inspiration board)

    I found this striking picture of the Serengeti while going through the photography boards.  The colors jumped out at me right away.  I like the drama of the deep sky and dark grey Elephants against the freshness of the green and neutral grasses.  I immediately went to my cardstock and began pulling colors.

    02.12.12 elephants-serengeti-nichols

    I still only have my one image stamp set, so I pulled out my Baroque Motifs and went to work with tone on tone images.  The only one that varies is the Basic Grey I used to stamp the Sincere Salutations saying – Thinking of You.

    02.12

    To me it’s a classic and simple card that can be done in minutes.  I hope you enjoy!

    Happy Creating –

    Ingrid

    To Shop 24/7 in the Creative Store – Click here!

    Stamp Sets – Baroque Motifs (113490) Sincere Salutations (115068); Paper – Sahara Sand (121043), Basic Grey (121044), Not Quite Navy (101722), Garden Green (102584); Ink – Basic Grey (109120), Garden Green (102272), Sahara Sand (105208); Cool Tools – Stamping Sponges (101610), Paper Piercing Tool (116631) Mat Pack (105826); The Perfect Finish – Stamping Dimensionals (104430)

    Elephant Photo by Michael Nichols – National Geographic

    Click here if you want more information about visiting the Serengeti, Africa

    A Clean Slate

    I love to create.

    There is not other way to put it – at my core…I’m a creative person.  By day I blog and plan travel for Elite Travel Planners, and by night I sell Silpada sterling silver jewelry.  While I can call Travel one of my passions, I have found that recently I’ve been missing another one of my passions – stamping and scrapbooking.  You see, I worked in the crafts industry – specifically teaching scrapbooking and then adding the art of stamping when I became a Stampin’ Up! independent consultant in 2002.  After 6 1/2 years, I needed a change.  So I walked away to pursue other interests.  And I stayed away for 3 1/2 years.  What I found was that although I do love many other industries – I am a crafter.  There, I’ve said it.  I love to create, inspire and most of all – share.  Ironic that that is Stampin’ Up’s tag line.

    So… I’m starting this blog to share my love of stamping and scrapbooking with you.  I’ve been scrapbooking since the mid 90’s and stamping for the past 11 years.  And today I’ve discovered that I love digital scrapbooking – and I think I’m going to quickly become an addict!

    Here are a few projects that I’ve been working on lately.  This is a simple card (very Ingrid), but I love the effect the stipple brushes give over the image.  The depth it creates (hard to see) is magical.  I love this set – it was a hostess set years ago, but this image works for just about any occasion.  Of course – if you know my work, you’ll recognize one of my trademarks – the strip (Tip #1).  I can’t stand all that white space – to me the cards usually need something breaking all that space up!  Simple, but elegant.

    Europe Sympathy Card 2

    This next 3D project was a fun one – and super easy.  I’m sad that Stampin’ Up! doesn’t carry these chipboard clipboards anymore, but you can use any clip board.  The key is to sand down the edges for a worn look, and layer all the papers first before attaching to the board.  I just love these colors together.  What’s better than Christmas!

    I used mod podge over it to protect the paper from wear and tear.  To get the cardstock perfectly tucked behind, I make a 1/2 inch slit in the center at the top of my cardstock and cut out to the distance of the clip.  I cut two small openings in the shape of the clip and tuck the rest underneath once I have it around the clip.  Another Ingrid Tip – and that one’s a keeper! 🙂

    I will add more projects and tips as I keep digging out all my favorite supplies.  I hope you enjoy the creative path with me!

    Happy crafting! 🙂

    Ingrid

    These are original projects of mine.  I’d love your feedback!  And feel free to share! If you are interested in ordering any of these products, let me know!  I know a ton of people who can help you out…lol! 🙂

    If you would like help with any upcoming travel – even just advice – contact me!