Farewell Kindness Matters

Kindness Matters 002 Main

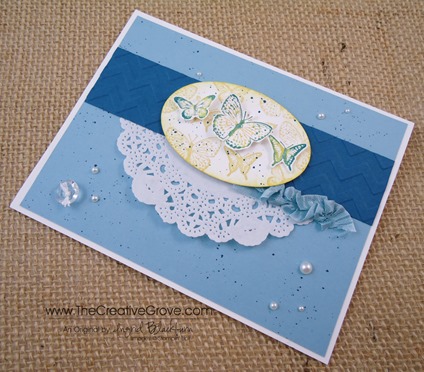
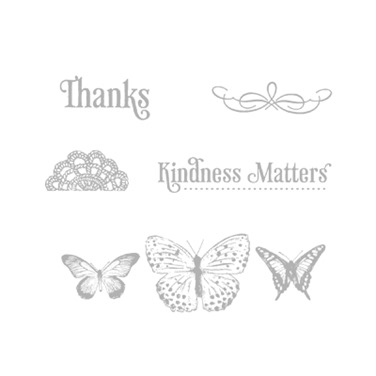
Do you ever just have those go to kind of stamp sets?  Kindness Matters has definitely been one for me. I probably use the Thanks greeting from this set more than any other, and I know I have a guaranteed great card every time I use the butterflies.  It’s a fabulous set that if you don’t have, don’t miss out.  Best part – it’s one of our least expensive sets, so there’s great value too!

Today I’ve paired this fun stamp set with a few of our retiring colors.  Yesterday you read how Not Quite Navy has been my #1 favorite color for 11 1/2 years (still…sniff…sniff), but this year, one of my go to colors has definitely been Baja Breeze.  I was is complete shock when this color retired.  And quite sad, as I have so many cool things in Baja Breeze.  It was such a great color to work with.  It’s sad that I’m speaking of it in the past tense, but this is my grieving week, and then Friday I’ll move on! Smile

Kindness Matters 002 Side

Creative Tips –

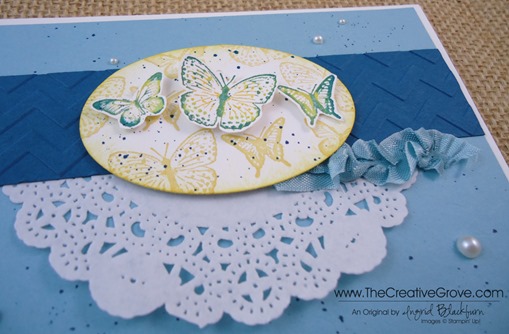
  • I always want to use the Rock n Roll technique when I use this stamp.  The butterflies to me just need that multi color.  Perhaps it’s because most butterflies are multi colored.  I stamped the main image randomly and from various angles on an oval that I cut out using the new Ovals Collection Framelits and my Big Shot.  It’s the second smallest one.  I used So Saffron, but didn’t want the butterflies to take away from my main ones, so I stamped them off once to decrease their vibrancy. Kindness Matters 002 Butterflies
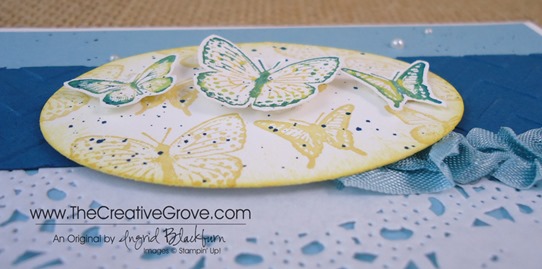
  • Next I stamped my main images on a piece of scrap paper.  I used the new color Crushed Curry.  I really wanted my yellow to stand out from the So Saffron.  I rocked my image in Baja Breeze and then slightly on the edges in Not Quite Navy.  To get a good outline on my images in Not Quite Navy, I touched up my image with my Stampin’ Write Marker in the same color.  I also thumped the marker along the center of each butterfly.
  • Of course blue and yellow make green, but I think since this blue is so much darker, it stands on its own.
  • I cut out my rock n rolled butterflies with my paper snips and ran some Snail adhesive down each center.  I curls and popped up the wings with some Stampin’ Dimensionals that I trimmed down to fit.  This way the butterflies look like they are in flight.Kindness Matters 002 CU
  • I took a piece of our retiring Baja Breeze 1/2” Seam Binding Ribbon and pulled a few of the middle fibers to ruffle the ribbon a bit.  Once I had it how I wanted, I adhered it using Glue Dots – the single best way to attach fibers to anything!
  • I ran a piece of Not Quite Navy through my Big Shot using the Chevron Embossing Folder for a little contrast and added half of one of our new Paper Doilies.  Together the combination has a collage feel, yet also looks contemporary.
  • I try to apply the law of thirds to just about all my projects in the design aspect.  You’ll see that my main image is in the top third of the space, while my Pearl Basic Jewels accents are also in threes, within three.  You always want to add your embellishments in odd numbers.  Kindness Matters 002 Front
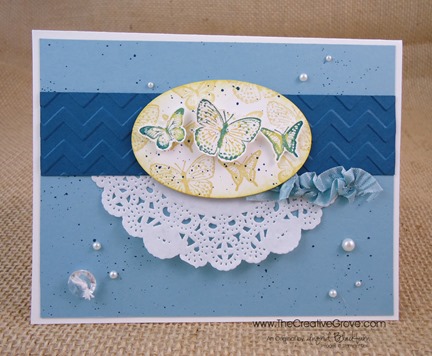
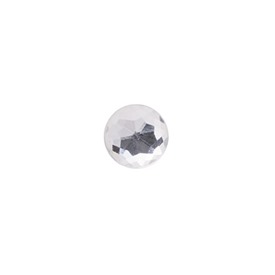
  • Since the Seam Binding Ribbon is such a large accent, I balanced it out on the other side with one of our Vintage Faceted Buttons on the opposite side.  I used Pearls to complete my triangle, and used some of our White Bakers Twine for the knot.  Of course I attached it using Glue Dots.Kindness Matters 002 Height
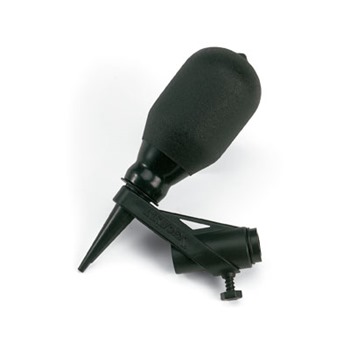
  • One tool that I will keep on using, and if you don’t have one I encourage you to get it right away – that’s the Color Spritzer Tool.  Combined with any of our Stampin’ Write Markers, you can fill any space in just the right way.  I used my Not Quite Navy Marker to add the speckling to both my oval and main project.  Don’t hold it too close, as the dots will be highly concentrated together. 
  • You may be wondering where my greeting is, well…after playing around with several banners, tags to be attached with vintage trinkets like our safety pins and staples, I decided to just put the greeting on the inside.  Although, there’s nothing wrong with a blank card too! 🙂
    As this week quickly winds down, I’m trying to use all my favorite things one last time for you before moving on.  It’s not so easy!  You many be wondering why move on at all?  Well, in my Stampin’ Up! world, if it’s not current, then use it sparingly.  That’s okay, believe me when I tell you I have a secret stash of Not Quite Navy card stock in both sizes…lol! 
    There are a handful of stamp sets that will make the cut and remain on the shelves of the Creative Studio.  But not many!  I find that I think I’m going to stamp with them, and then I don’t.  So I’ve gotten quite good at purging.  Which is to your benefit – look next week for all my “retired” sets on here.  Some go back 10 years! Have a creative day today – and most of all, have fun!

    Come Stamp with Me!

    f you are in the Orlando area and want to come to the Creative Studio to stamp – be sure to check out the classes tab above.  I have Just Cards and Creative Cards classes on Monday June 3rd!  And of course, don’t miss my free but fully loaded with fun New Catalog Kick Off Thursday June 6th. Smile

Signature Snowflake 001

To Shop 24/7 in the Creative Store – Click here!

Kindness Matters 002 Angle

Stamp Sets – Kindness Matters (122902c, 122900w) Ink – So Saffron (126957), Baja Breeze (126960), Crushed Curry, Not Quite Navy (126971), Not Quite Navy Stampin’ Write Marker (Regals Collection – 119701) Paper – Whisper White (100730), Not Quite Navy (101722), Baja Breeze (111352)  Cool Tools – Paper Snips (103579), Color Spritzer Tool (107066) Finishing Touch – Stampin’ Dimensionals (104430), Pearl Basic Jewels (119247),  Baja Breeze 1/2” Seam Binding Ribbon (122331)

new stampColor Spritzer Tool I107066

A great Tip for Edgelits

Lacy & Lovely 01w Main

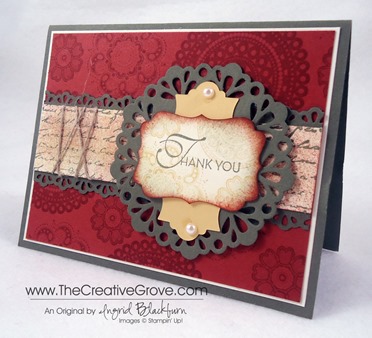
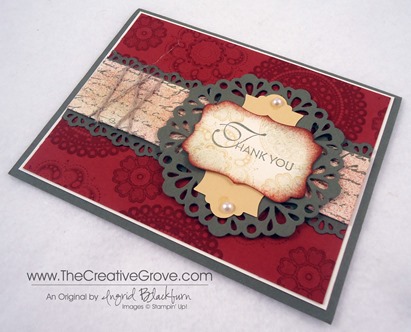
One of my customers was recently going through one of my many basket of cards for ideas here in my classroom.  She stumbled upon this card and I happened to tell her that I made 100 of these last summer.  She said there was no way she would ever cut out that many of those Finishing Touches Edgelits because she didn’t like to pop out the little pieces (notice there are two on this card – so that’s 200!).  I told her I’d show her a little trick I learned along the way and thought I’d share that with you today too!

001

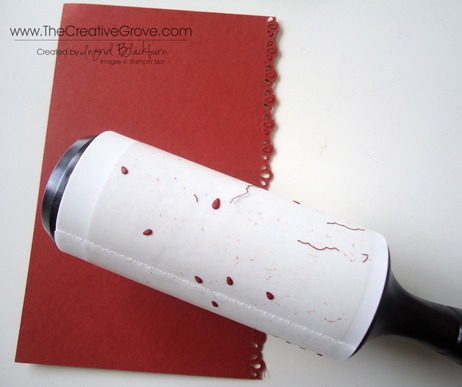
Anytime I’m using the Doilies or Edgelits, I use a lint brush to help me get out those little pesky pieces.  It does most of the work for me and I then can quickly pop the remaining ones out with my Paper Piercing Tool.  It goes so quickly, I think you’d be absolutely amazed!

Another little tip I have for when you are mass producing them is to run two through your Big Shot at the same time.  While it’s not recommended to do more than that (you can actually break your machine if you force anything through), what’s great about doing two is that on one all the little pieces come completely out!  Then on the second I just whip out my lint brush & Paper Piercer and finish it off. 

If you’d like to see all the details of how I made this card Click Here.

Try it, I think you’ll be amazed!

Signature Snowflake 001

To Shop 24/7 in the Creative Store – Click here!

Lacy & Lovely 01w Angle

Stamp Sets – Lacy and Lovely, Travel Journal Script Builder Wheel Paper – Very Vanilla, Cajun Craze, Always Artichoke, So Saffron Ink – Cajun Craze, Always Artichoke, So Saffron Cool Tools – Big Shot, Finishing Touches Edgelits, Apothecary Accents Framelits, Delicate Doilies Sizzlits, Decorative Label Punch    Finishing Touch – Stampin’ Sponges, Stampin’ Dimensionals,  Pearl Basic Jewels, Linen Thread

Lacy and Lovely

Collage Curios Bottle Caps

Collage Curios 002 Main

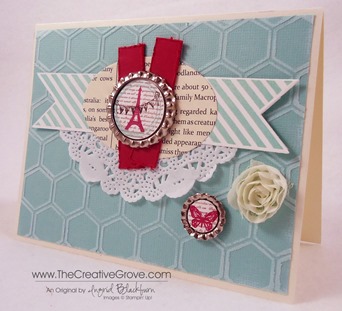
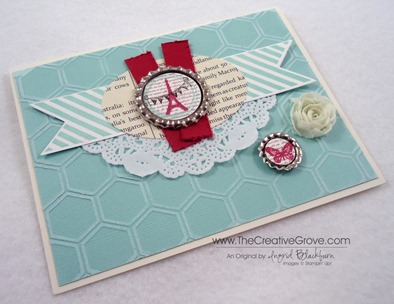
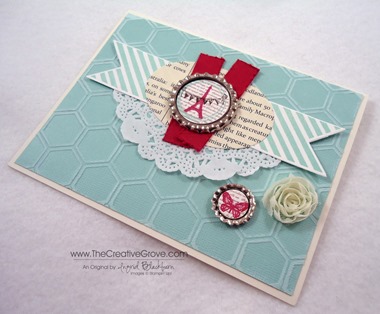
Have you tried out the Soda Pop Tops (Bottle Caps) out yet?  This was my first attempt at making a way cool card with them. This project was one of our make n takes at the CG Crew team meeting in March.  We also made a very cool necklace pendant with this set as well. Click Here to find out more about the CG Crew

I love how all the elements come together on this project.  It’s fun, has a little of a modern vintage flair, does that even make sense?

Creative Tips –

  • We started with a Pool Party base in our Core’dination’s card stock run through the Big Shot with the Honeycomb Textured Impressions Embossing Folder (TIEF).  We then sanded it down to reveal the cool pattern in a distressed look using the new Stampin’ Sanding System. (You can get the Pool Party Core’dinations card stock in a package until 5/31, next year it’s in a combo pack – so stock up while you can!)Collage Curios 002 Side
  • The banners are stamped and cut out with the Hearts a Flutter Bundle that includes the Stamp Set and Framelits. 
  • One of the Paper Doilies was cut in half and angled so that it fit behind the banners.
  • I love the whole Very Vanilla/Whisper White thing that’s very on trend today, this card shows it off very well.  What do you think?  Do you like it, or does it just look wrong to you?  Let me know!
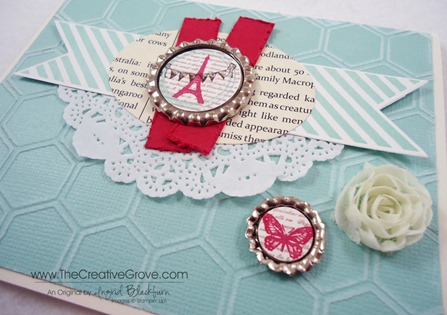
  • The new 5/8” Flower Trim is an awesome accessory.  I cut just one off and added it with a few glue dots.  I always leave the netting on the back, some of the CG Crew just couldn’t leave it on and had to trim it away, I guess to each her own, right?!Collage Curios 002 CU
  • For a little color pop, I added a few strips of Riding Hood Red that were distressed using our new Distressed Tool.
  • The oval was cut out of our First Edition DSP using our new Oval Framelits.
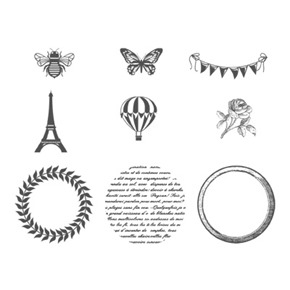
  • Collage Curios is an awesome stamp set to use with the bottle caps.  I love layering the different stamps in this set.   Here I used Crumb Cake, Pool Party, Riding Hood Red and Early Espresso.
  • To flatten the bottle caps (Soda Pop Tops), you just run them through the big shot.  It’s so super easy, and you have a really cool little embellishment. I love this little card.  It’s fun, flirty and a good blend of some of my favorite things from the Spring Catalog – ending next week (sniff…sniff).  I hope you love it too!

Are you getting my Exclusive Video Series?

    Be sure to sign up for my Creative Tips Newsletter and get the latest Creative Grove news in addition to my free Creative Techniques Video Series!  Don’t miss out on our creative community – the only way to get this exclusive content is to sign up in the box on the upper right or click here.

    Signature-Snowflake-001_thumb1_thumb[1]

    To Shop 24/7 in the Creative Store – Click here!

    Collage Curios 002 Angle

    Stamp Sets – Collage Curios (129102c, 129099w), Hearts a Flutter (129252c, 129249w) Bundle (131097c, 131098w) Ink – Pool Party (126982), Early Espresso (126974), Crumb Cake (126975), Whisper White (100730), Riding Hood Red (111348) Paper – Very Vanilla (101650), Pool Party Core’dinations Card Stock (129321), Riding Hood Red (111348), First Edition DSP (127821), Paper Doilies (129399) Cool Tools – Oval Framelits (129381), Hearts a Flutter Framelits (130159), Stampin’ Distress Tool (127562) Big Shot (113439), Honeycomb TIEF (129378), Stampin’ Sanding System (129367), 1” Circle Punch (119868), 1/2” Circle Punch (119869) Finishing Touch – Glue Dots (103683), 5/8” Flower Trim (126869), Soda Pop Tops (129388)

    Collage Curios 129102L

    131097L

    Mojo Patina Feel Goods

    Feel Goods 001 Main

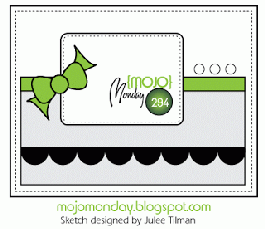
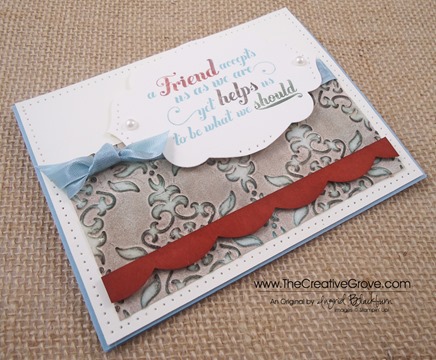
    Surprise…it’s Mojo Monday on Tuesday today!  Have you ever had a stamp set that you passed on just keep showing up all around you till you HAVE to have it?  Well that is the case with Feel Goods for me.  I have always had this set on a short list, but it kept being left off and finally, I just HAD to have it.  So, this morning when I looked at the new Mojo Monday sketch, I thought this is the perfect time for me to break out my brand spanking new Feel Goods set! 

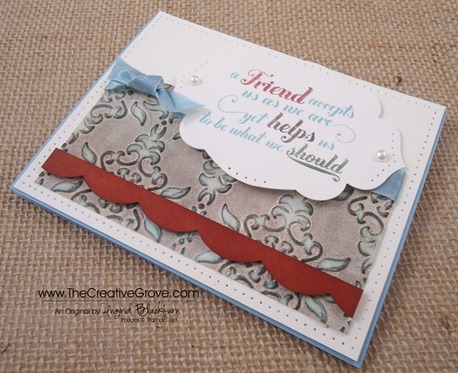
    I wrestled with which paper to highlight in the panel, and almost settled on two Designer Series Papers when I thought, wait a minute – why don’t I make my own cool paper with the retiring Vintage Wallpaper Textured Impressions Embossing Folder!  Enjoy all the creative tips with this card – there are some cool ones today.

     Feel Goods 001 FrontMojo294Sketch

    Creative Tips –

    • I picked my colors out first.  I knew I wanted to use the retiring color Baja Breeze, so I whipped out my trusty color coach and settled on the combo with Cajun Craze and Basic Gray.  I quickly decided not to use the Gray and swapped it with Early Espresso.  Don’t feel you can’t make changes!!Feel Goods 001 Side
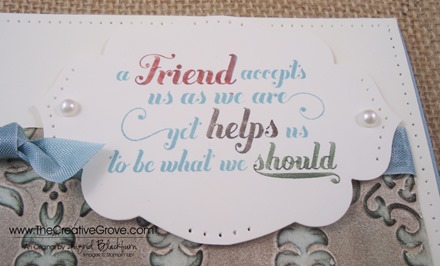
    • I chose this saying because it reminded me of my friend Dawn.  This saying captures her great heart and spirit.  The stamp made it easy to decide with words to highlight.  I inked it up in Baja Breeze (so sad that’s retiring), and used markers to just go over the enlarged words.  I didn’t worry about getting rid of the blue like I normally would since the faux patina paper is a blend itself of these colors.  Plus the blue is much lighter than these three, so it all worked well!Feel Goods 001 CU Accent
    • Rather than just cut a rectangle to highlight my stamp, I used my Big Shot to cut the large accent with my Apothecary Accents Framelits (they are a must have for me!).  I needed a smaller accent, so I cut my shape a second time bringing the end up as far as I wanted to make it smaller.  I used my scissors to round the top and bottom parts that became pointed.
    • I added some paper piercing using the Essentials Paper Piercing Pack.  I followed the guides of a few shapes.
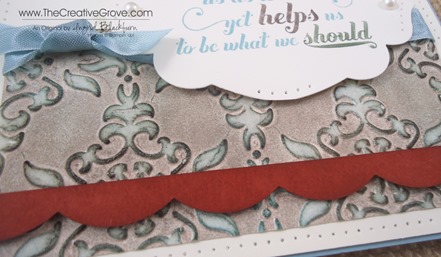
    • I ran a Very Vanilla piece of card stock through the Big Shot with the Vintage Wallpaper embossing folder that had been brayered on one side in Crumb Cake.Feel Goods 001 CU Faux Patina
    • I then sponged Marina Mist, Always Artichoke and Early Espresso over to create my background.
    • Because I had such depth in my main piece, I sponged the strip of Really Rust in the same color that I had cut using the Large Scallop Edgelit.  Leaving it plain was too large of a contrast.
      • I added Paper Piercing around the entire card front for a little detail as in the sketch.  Tip – our new ergonomic Paper Piercer is awesome.  My finger never hurts like it did with the previous metal ones!  Especially if you make several cards at once.
      • For my ribbon, I added a flat knot using the 1/2” Seam Binding Ribbon in Baja Breeze (get it while you can – it’ll be gone next week!)Feel Goods 001 Height
      • I popped up both my accents – the large scallop and greeting to add some dimension to my project. 
      • For a finishing touch , I added two large Pearl Basic Jewels.  Now it was all complete!

    Overall, I’ve fallen in love with this card.  I absolutely love the stamp set and can’t wait to use it again!  Think about adding Paper Piercing to your project next time – the way I look at it is that it’s a small investment at the beginning (Paper Piercing Tool, Piercing Mat, and Essentials Paper Piercing Pack) of $17 that over time will become the cheapest way to embellish cards.  You won’t need to replace anything! Smile  Let me know what you think in the comment section below – I hope you love it!

    Are you getting my Exclusive Video Series?

    Be sure to sign up for my Creative Tips Newsletter and get the latest Creative Grove news in addition to my free Creative Techniques Video Series!  Don’t miss out on our creative community – the only way to get this exclusive content is to sign up in the box on the upper right or click here.

    Signature-Snowflake-001_thumb1_thumb

    To Shop 24/7 in the Creative Store – Click here!

    Feel Goods 001 Angle

    Stamp Sets – Feel Goods (129684c, 129681w) Ink – Marina Mist (126962), Always Artichoke (126972), Baja Breeze (126960), Early Espresso (126974), Early Espresso Marker (119680), Always Artichoke and Cajun Craze Markers (Regals Collection – 119701) Paper – Very Vanilla (101650), Baja Breeze (111352), Cajun Craze (119684) Cool Tools – Paper Piercing Tool (126189), Stampin’ Pierce Mat (126199), Essentials Paper Piercing Pack (126187) Big Shot (113439), Apothecary Accents Framelits (127003) Vintage Wallpaper TIEF (120175), Large Scallop Edgelit (127019), Brayer (102395) Finishing Touch – Stampin’ Dimensionals (104430), Pearl Basic Jewels (119247), Baja Breeze 1/2” Seam Binding Ribbon (122331)
    Feel Goods 129684L

    Creative Notebook Covers

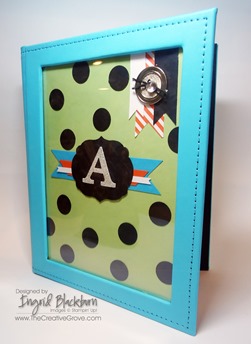
    Notebook Cover 001 Main

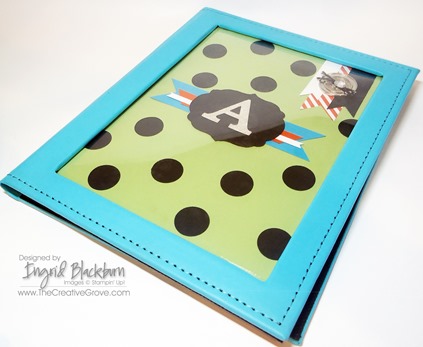
    Who doesn’t love a great notebook and a handmade gift?  I had the privilege to help a good friend and fellow CG Crew team mate out with a fun little project she was doing – personalized notebooks for Admin Day this past week as one of their gifts.  Isn’t she a cool boss?  I’ve never had a boss make me something before – if that doesn’t say “I value you”, I don’t know what does!  Here is one of the notebooks that were made that day.

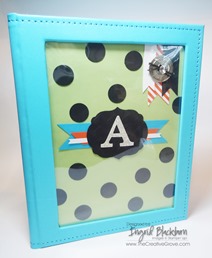
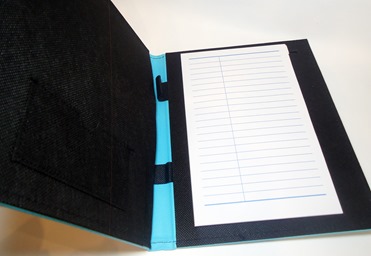
    Notebook Cover 001 Front Notebook Cover 001 Inside

    Amy got these cool Notebook covers that had a place to do something fun and creative in the cover. They came in a cute box and were just screaming to be personalized.  She had to make a few, so I just let the creative juices start flowing and this is what we ended up with for one of them.

    Creative Tips:

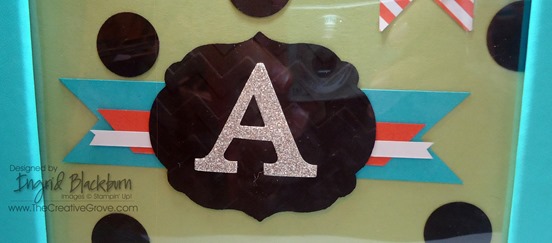
    • We was going to make polka dots using sponge daubers, but then decided on a cleaner look and punched out polka dots with the 1” circle punch instead.
    • To give a little more emphasis to the name plate – we ran the Basic Black card stock through the big shot first with the Labels Framelits Collection and then through the Chevron TIEF folder.Notebook Cover 001 Name CU2
    • To really make it pop – we created a banner display behind it in the Tempting Turquoise, Tangerine Tango and Whisper White. 
    • The initial was made using the Typeset Alphabet Bigz dies and the Silver Glimmer Paper.
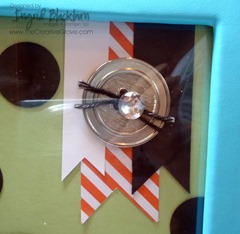
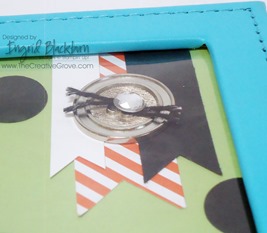
    • We wanted to add a little flair, so we created hanging banners in the corner with Basic Black and Whisper White cardstock.  We added a Tangerine Tango striped Designer Series Paper from the Sycamore Street DSP Collection that was available during Sale-a-bration (now Retired). 
    • To make the hanging banners we used a 1” Square punch.  It make the larger banner, we used a 1 3/8” Square Punch.
    •               Notebook Cover 001 Button CU Notebook Cover 001 Button Height

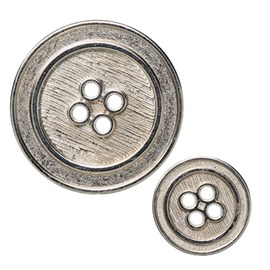
    • We added a little flair to the banners by putting one of the Silver Basic Designer Buttons from the Spring Catalog. 
    • We threaded it with some Basic Black Baker’s Twine.  You might be asking  – wait Stampin’ Up! doesn’t carry that?  You would be correct – we made it from the Whisper White Baker’s twine – something that everyone should have.  What we did was run my Classic Basic Black ink pad over it on our Grid Paper and voila, Basic Black Baker’s Twine!
    • We then popped one of our Large Rhinestone Basic Jewels to the top for a little bling!
    • This project turned out super cute and I know the recipient will love it.  According to Amy, it totally fits her personality, and the fact that it was handmade will certainly make her feel appreciated.

    Signature Snowflake 001

    Be sure to check out the Retired Lists!  Get all your favorites while you still can.

    Retired Stamp Sets                      Retired Accessories List

    To Shop 24/7 in the Creative Store – Click here!

    Notebook Cover 001 Angle

    Stamp Sets – none! Paper – Whisper White (100730), Certainly Celery (105125), Tempting Turquoise (102067), Tangerine Tango (111349), Basic Black (121045), Silver Glimmer Paper (124005), Sycamore Street DSP (retired) Ink – Basic Black (126980) Cool Tools – Big Shot (103954), Chevron Embossing Folder (127749), 1 3/8” Square Punch (119877), 1” Circle Punch (119868)  The Perfect Finish – Silver Basics Designer Buttons (129325), Large Rhinestone Basic Jewels (129324), Whisper White Baker’s Twine (124262)

        Large Rhinestone Silver Basics Buttons

    Best of Flowers Blog Tour

    blogtour-25years-april

    Today we’re continuing to stamp with Stampin’ Up!’s 25th Anniversary stamp set – Best of Flowers.  Welcome to the RemARKable Blog Tour!  I’m stop #3 and you’ve just come from my friend Linda’s blog Ink Stamp and Scrap.  I love Linda’s style – she stamps like me – clean and simple! 

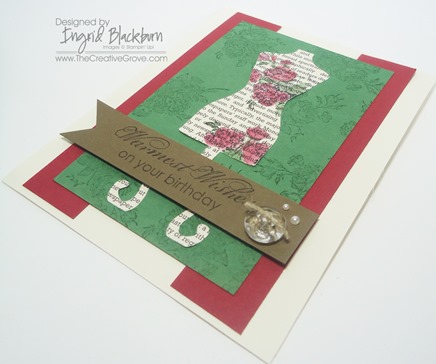
    Best of Flowers 001 Main

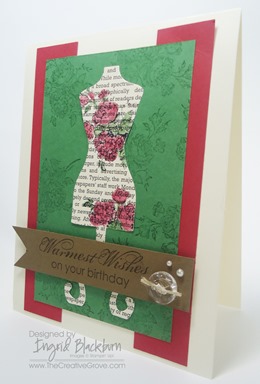
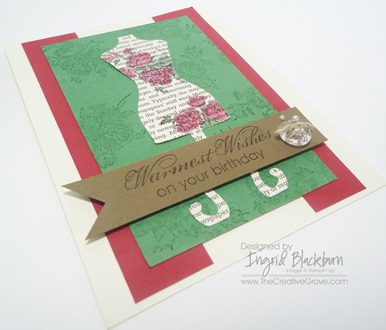
    This is the third day of samples with this great stamp set.   Our anniversary sets have several images that are retired but were quite popular and one brand spankin’ new one!  I’m so glad they brought them back in this exclusive limited edition set!  I thought today I’d stamp with the rose bouquet as I’ve never stamped with this one before.

    It also marks my first time using the Dress Up Framelits.  I just love these little framelits, they’re so cute!  And you can do SO much with them.  The limits are endless.

    Best of Flowers 001 Side

    Creative Tips:

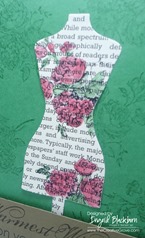
    • I took our First Edition DSP and cut that out with the dress form, stamped directly on it using Jet Black StazOn and the Rose Bouquet stamp.  Best of Flowers 001 CU
    • I squeezed my ink pads to collect the ink in the lid and water colored my images using the Aqua Painters.  I colored the image using Riding Hood Red and Garden Green.
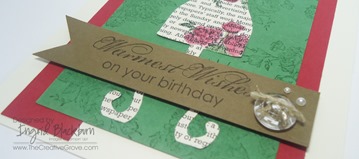
    • I stamped color on color for the banner in Soft Suede using the Blooming in Kindness stamp set for my greeting.  I just LOVE that set!Best of Flowers 001 Banner
    • I added a Vintage Faceted Buttons with Linen Thread tied through them and two Pearl Basic Jewels to complete my banner. Best of Flowers 001 Height
    • I cut the end of the banner using a 1” Square Punch and popped it up on dimensionals for some drama to my simple card.
    • My Garden Green panel needed a little something so I created a vintage looking wallpaper by stamping the Rose Bouquet stamp several times from different angles in Garden Green.
    • I popped two Riding Hood Red panels on either edge.  It completed my card.
    • For my base, I chose Very Vanilla.
    • I just love the end result, I hope you do too.  It’s a classic card and really pops. To see my other card with this set from earlier in the week, click here.  To see my candle also done with this set, click here.

    Next up is Melissa Bollinger’s blog – http://www.stampinup.net/blog/2089191.  Enjoy the rest of the tour and see you back next month!

    blogtour-25years-next

    Signature Snowflake 001

    Best of Flowers 001 Angle

    Stamp Sets – Best of Flowers (133342c), Blooming with Kindness (126420w, 126422c) Ink – Riding Hood Red (126968), Garden Green (126973), Soft Suede (126978) Jet Black StazOn (101406)  Paper – Riding Hood Red (111348), Garden Green (102584), Soft Suede (115318), Very Vanilla (101650), First Edition DSP (121878)  Cool Tools – Aqua Painters (103954), Dress Up Framelits (130101), 1” Square Punch (124098) Finishing Touch Vintage Faceted Buttons (127555), Pearl Basic Jewels (119247) , Linen Thread (104199), Stampin’ Dimensionals (104430)

    Best of Flowers 133342L_thumb[2]

    Secret Garden Blog Tour

    blogtour-stampmonth-Apr

    Welcome to the RemARKable Stamp of the Month Blog Tour!  I’m stop #3 on the RemARKable Blog Tour!  You probably came from Linda’s blog Ink Stamp and Scrap – she’s a great stamper, isn’t she!  Today we are stamping with one of my favorite stamp sets out of the Spring Catalog – Secret Garden.

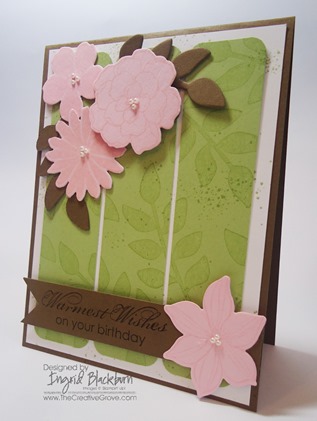
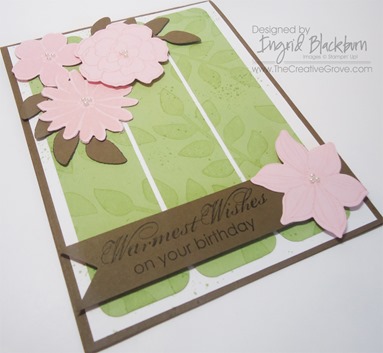
    Secret Garden 002 Main B

    One of the reasons this set is my favorite, is that it has matching Framelits to use with your Big Shot.  I settled on a fun color combination using my Color Coach.  I chose the color Certainly Celery (I still can’t believe it’s retiring…what are we going to do!!) as my main color. 

    Secret Garden 002 Side

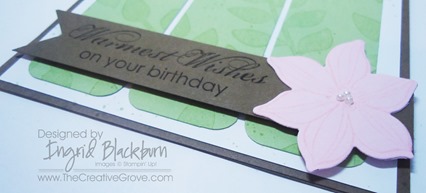
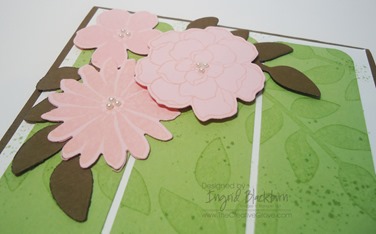
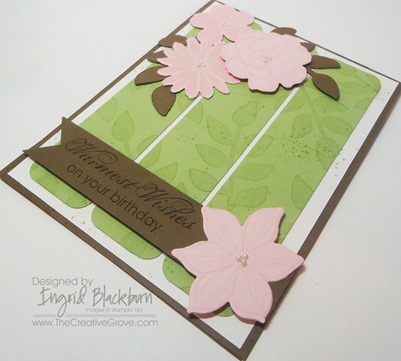
    I stamped the background image and then cut it into three equal strips.  To bring a little femininity to the card I rounded the corners of each strip.  Originally I had the main card as just white, but felt it needed a little pop – so I added more Soft Suede as the main card piece.  The flowers are stamped in Pink Pirouette and then cut out using the matching Framelits for this awesome stamp set. 

    Secret Garden 002 Banner CU

    I added a little splash of color using my Color Spritzer tool and Certainly Celery Marker.  To make the banner, I used a 1” Square Punch and one of the sayings from Blooming with Kindness. 

    Secret Garden 002 Flowers CU

    I wanted to add a little detail to the flowers, so I put three of the smallest Pearl Basic Jewels on each center for a finishing touch.  For a little drama, I popped the greeting and one of the flowers up on Stampin’ Dimensionals. 

    I find this set super easy to use and have made several various cards with it.  I think you’ll love stamping with it and find that the Framelits give a great versatility to this stamp set that really sets it apart.  You’ll like using them by themselves and with the stamped images.  For more samples with this set, be sure to use the search box on the right. And of course, head on over to Melissa’s blog next – http://www.stampinup.net/blog/2089191 Enjoy the tour!

    blogtour-stampmonth-next

    Signature Snowflake 001

    Secret Garden 002 Angle

    Creative Supplies Used:

    Stamp Sets – Secret Garden Ink – Certainly Celery, Pink Pirouette, Certainly Celery Marker  Paper – Whisper White, Soft Suede, Certainly Celery, Pink Pirouette  Cool Tools –Secret Garden Framelits, Corner Rounder, Color Spritzer The Perfect Finish – Stampin’ Dimensionals, Pearls

    Blooming with Kindness Birthday

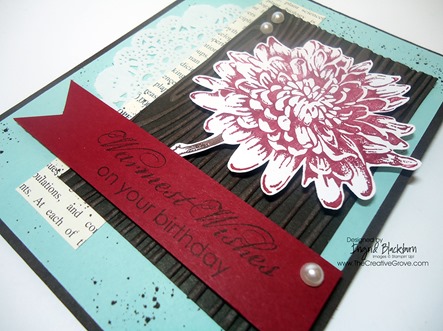
    Blooming with Kindness 002 Side

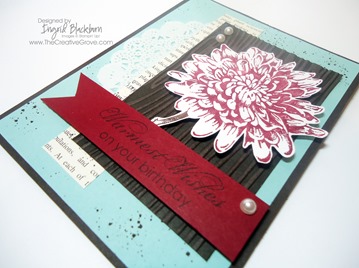
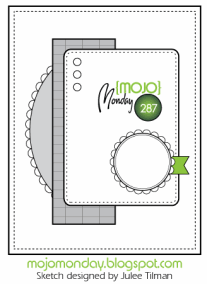
    This morning I couldn’t sleep!  So what’s the cure – stamping, of course.  It certainly helped that my insomnia came on the same morning of the Mojo Monday challenge.  I hoped up to my office, and wouldn’t you know it, it was so early (3:45 am…yikes!), that the challenge wasn’t even posted yet!  I read some email, got caught up from all the friends and family Easter fun yesterday on facebook and twitter, and finally the challenge was up.  Here’s what the sketch looked like:   Mojo287SketchBlooming with Kindness 002 Tilt

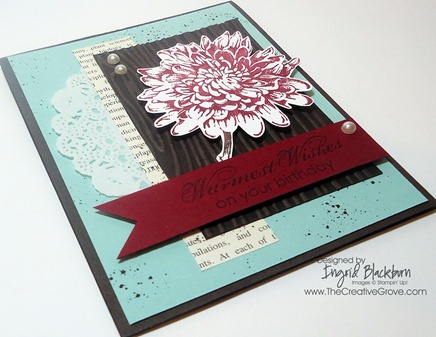
    I thought about it for a second, and finally settled in with Blooming with Kindness .  I grabbed some extra pieces of cardstock that I had prepped for a previous project (nothing like using already cut cardstock!) and grabbed my color coach to pick my remaining colors.  I’ve been in this white/vanilla kick lately and have decided that it’s my new favorite thing – so naturally it’s on this card too!  I hope you love the end result just as much as I do.  I’m excited, because my good friend Sherry’s birthday is coming up and I just know she’ll love to get this card in the mail. 

    Blooming with Kindness 002 Main

    Creative Tips:

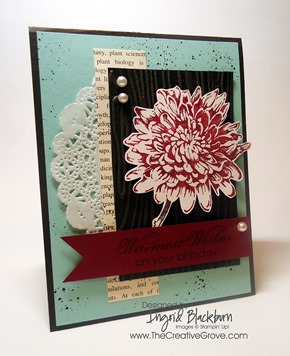
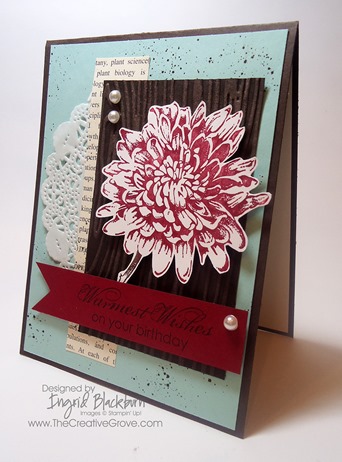
    • I wanted the stamp to be the star along with the color combination, so I chose a neutral backdrop for the Flower to be stamped and popped up. 
    • I stamped my flower in Cherry Cobbler first, but it wasn’t dramatic enough so I added a little highlighting with my Cherry Cobbler Stampin’ Write Marker on top of my rubber image to really add some depth in the same shade.
    • Before I stamped my flower, I used my Blender Pen to remove the red that had gotten onto the stem.  I then added the Early Espresso color with a Stampin’ Write Marker.  I LOVE this process – you can alter any stamp with a Blender Pen! Blooming with Kindness 002 CU
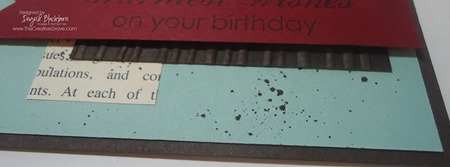
    • I ran the Early Espresso cardstock (2.5” x 4”) through my Big Shot using the Woodgrain TIEF folder and enhancing the depth of the color by using the Bisque Pottery Technique.  Be sure to stop by later this week for a video on how to do this technique!
    • I added a little strip of First Edition DSP and a partial Doily for a little feminine flair in addition to the Pearl Basic Jewels
    • I made my banner flag for my greeting with a 1” Square punch and popped that in addition to the flower up on Stampin’ DimensionalsBlooming with Kindness 002 Height
    • The card needed a little something so I added something I haven’t used in forever – my Color Spritzer Tool!  I just love this tool and can’t believe how long it’s been since I picked it up. 
    • To perfectly get just the right splat, make sure you like up your Stampin’ Write Marker completely up with the plastic end.  Be sure to hold the marker straight and play with the height of the marker end to the project.  Give it a firm squeeze. Blooming with Kindness 002 Splat
    •  Best tip – And always, always, always do a few on your grid paper first – it doesn’t matter how good you are at it.  I’ve been using one for 11 years and still do this.  It’s about whether or not the marker is aligned properly.
    • Be careful with the splat too, sometimes a lot of ink gets deposited and you will need to place it to the side to dry or run a Heat Tool over it so that it doesn’t smear. I just love this end result.  I hope you do too.  Have fun making yours and see you back here soon for some more Mojo!
    •   Signature Snowflake 001

    To Shop 24/7 in the Creative Store – Click here!

    Blooming with Kindness 002 Angle

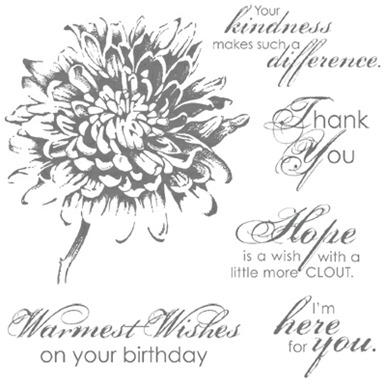
    Stamp Sets – Blooming with Kindness (126422) Paper – Whisper White (100730), Early Espresso (119686), Pool Party (122924), Cherry Cobbler (119685), First Edition Specialty Designer Series Paper (DSP) (121878), Paper Doilies (129399) Ink – Cherry Cobbler (126966), Early Espresso (126974), Early Espresso Stampin’ Write Marker (119680), Cherry Cobbler Stampin’ Write Marker (119681) Cool Tools – 1” Square Punch (124094), Stampin’ Trimmer (126889), Paper Snips (103579), Stamp-a-Majig (101049), Woodgrain TIEF (127821), Brayer (102395), Blender Pen (102845) Color Spritzer Tool (107066) The Perfect Finish – Pearl Basic Jewels (119247), Stampin’ Dimensionals (104430)

    Blooming with Kindness126422L