Using the Watercolor Stamping Technique with the Swallowtail Stamp

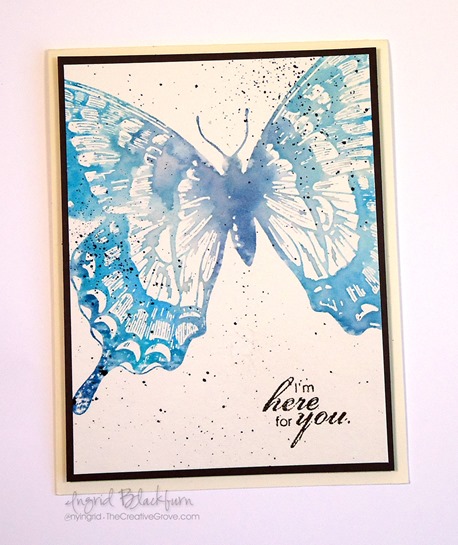
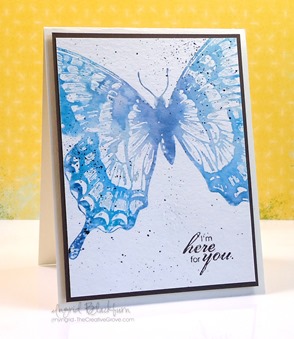
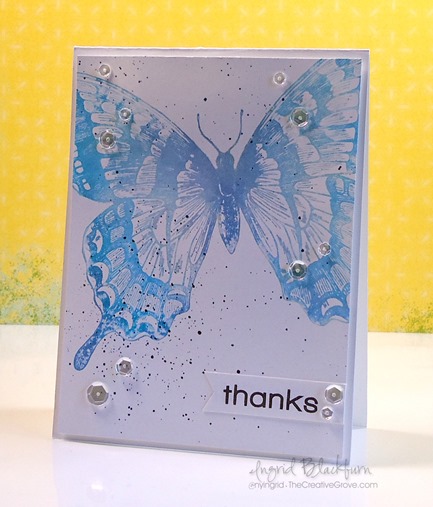
Have you tried watercolor stamping yet? This clean and simple quick project uses a great background stamp, the Swallowtail stamp by Stampin Up, and a simple – yet creative watercolor technique.

Watercolor stamping technique

The best part about this technique is that you can get more than one card with just one inking! To help showcase just how easy the watercolor stamping technique is, I made a video just for you!  If you like the video, be sure to give it a thumbs up on You Tube and subscribe to my YouTube channel for continued technique inspiration.

View video on YouTube

As you saw in the video above, this is a super easy stamping technique that gives you the look of watercolor, but with stamping and detail you’d never be able to achieve on your own.  Here’s a breakdown of just how to do it.

Creative Tips for the Watercolor Stamping Technique

First, pick a large image – this doesn’t work too well with tiny images as they get lost.  This particular project uses a rather large stamp – yours doesn’t have to be so big! We chose the Swallowtail stamp by Stampin Up.

Next, ink up your stamp – we chose Ranger Distress Inks for two reasons – translucency and how well they react with water.  The specific colors are Tumbled Glass, Broken China, Salty Ocean, Peacock Feathers and Faded Jeans.  Be sure to pay attention to the little tricks of how and the sequence we use them in, in the video!

Watercolor Stamped Swallowtail Stamp by Stampin Up

Spritz your stamp with a fine mister.  You’ll want a fine spray rather than too strong a spray – think of a garden hose Jet Spray vs. a Shower Spray…there’s a big difference.  You want to coat your stamp, not spray your ink away.  The amount is important too – too much water will leave you with an inky splotch, vs true watercolor stamping.  You want to be able to still see some detail mixed with watercolor.  I used the Stampin Up mister, Ranger has one too.

Stamp onto 140 pound cold pressed watercolor paper.  Choose the smooth side vs. the toothy side.  You’ll want to use watercolor paper.  This particular technique uses quite a bit of water, and that amount will degrade the fibers of regular card stock into an unattractive mess that will take away from your project.

Watercolor Stamping with Distress Inks

Hold your stamp down and with this particular stamp, put a fair amount of pressure on it – it’s big!  If you can put your project onto a foam pad, you’ll get an even better impression with ease.

Distress Swallowtail 008

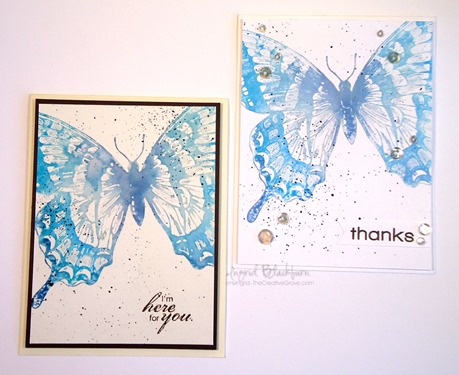
You can immediately stamp a second time onto regular card stock for a second impression.  You’ll get another impression just fine.  The reason you don’t need watercolor paper the second time is that the watercolor paper the first time around took most of the water away allowing you to safely stamp onto regular card stock for your second image.

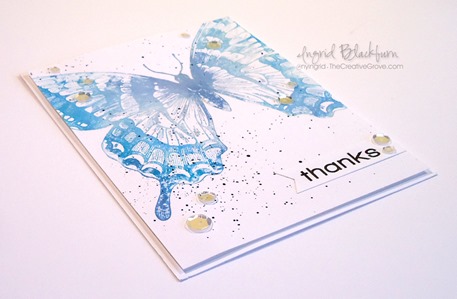
Matte and add embellishments as you want.  You can see here that I created two very different project with slight adjustments.  Both have the color spritzing for a little added effect.  I love them both – hopefully you do too!

Distress Swallowtail 010

If you liked this tutorial and learned something – be sure you’re on our exclusive e-letter list – Creative Tips for a great video series you won’t see anywhere else!

Have fun creating your own watercolor stamping projects – be sure to share them with us on our facebook page!

Signature


[optin_box style=”14″ alignment=”center” disable_name=”Y” email_field=”email” email_default=”Enter your email address” email_order=”1″ integration_type=”aweber” double_optin=”Y” list=”2841626″ name_field=”name” name_default=”Enter your first name” name_required=”Y”][optin_box_field name=”headline”]If you enjoyed this tutorial…[/optin_box_field][optin_box_field name=”paragraph”]PHA+Li4ueW914oCZbGwgbG92ZSBvdXIgPHNwYW4gc3R5bGU9ImNvbG9yOiAjMjQ0YzVlOyI+PGVtPjxzdHJvbmc+ZnJlZSA8L3N0cm9uZz48L2VtPjwvc3Bhbj5zdWJzY3JpYmVyIG9ubHkgdmlkZW8gc2VyaWVzISDCoEdldCB0aGXCoDxzcGFuIHN0eWxlPSJjb2xvcjogIzI0NGM1ZTsiPjxlbT48c3Ryb25nPmV4Y2x1c2l2ZTwvc3Ryb25nPjwvZW0+PC9zcGFuPsKgQ3JlYXRpdmUgVGlwcyBlLWxldHRlciB3aGljaCB3aWxsIHRlYWNoIHlvdSBuZXcgdGVjaG5pcXVlcyB0byBhZGQgdG8geW91ciBzdGFtcGluZyBza2lsbCBzZXQuIMKgTGVhcm4gaG93IHRvIG1ha2UgcHJvamVjdHMgeW91J2xswqBsb3ZlITwvcD4K[/optin_box_field][optin_box_field name=”privacy”][/optin_box_field][optin_box_field name=”top_color”]undefined[/optin_box_field][optin_box_button type=”1″ text=”Send me exclusive tips!” text_size=”26″ text_color=”#000000″ text_bold=”Y” text_letter_spacing=”-1″ text_shadow_panel=”Y” text_shadow_vertical=”1″ text_shadow_horizontal=”0″ text_shadow_color=”#a3b640″ text_shadow_blur=”0″ styling_width=”100″ styling_height=”10″ styling_border_color=”#000000″ styling_border_size=”1″ styling_border_radius=”6″ styling_border_opacity=”100″ styling_shine=”Y” styling_gradient_start_color=”#a3b640″ styling_gradient_end_color=”#5b661e” drop_shadow_panel=”Y” drop_shadow_vertical=”1″ drop_shadow_horizontal=”0″ drop_shadow_blur=”1″ drop_shadow_spread=”0″ drop_shadow_color=”#000000″ drop_shadow_opacity=”50″ inset_shadow_panel=”Y” inset_shadow_vertical=”0″ inset_shadow_horizontal=”0″ inset_shadow_blur=”0″ inset_shadow_spread=”1″ inset_shadow_color=”#a3b640″ inset_shadow_opacity=”50″ location=”optin_box_style_14″ button_below=”Y”]Send me exclusive tips![/optin_box_button] [/optin_box]
Simply Sketched Watercolor

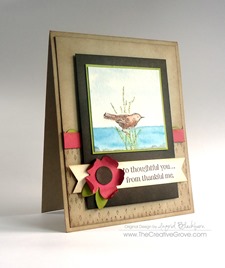
Watercolor Bird Mojo Mon 001

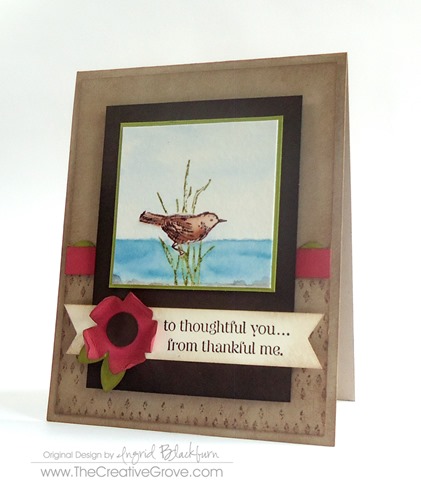
Today is my 52nd Mojo Monday challenge!  Wow – that’s enough to fill up a WHOLE year!  Now, it is over the course of not quite two, but still…quite a few.  To say I love this challenge is an understatement.

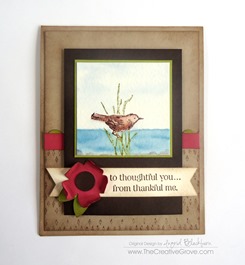
For today’s challenge, I pulled out my watercolor pencils, aqua painter and was a little creative with my background.  There are so many techniques in this one card, that I had to just film a video for our VIP Community.  Below are the steps in a nutshell.  Enjoy!

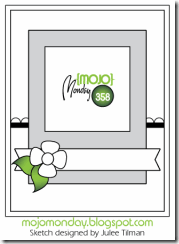
Today’s Mojo sketch and my interpretation:

                               Mojo358SketchWatercolor Bird Mojo Mon 008

Creative Steps –

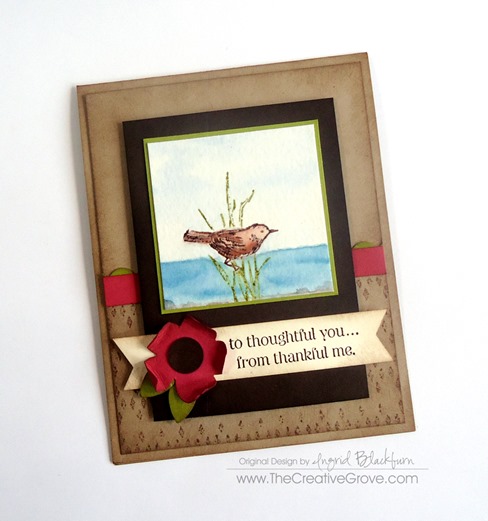
  • I watercolored this image from Simply Sketched.  I pulled color from some Faber Castell Watercolor Pencils with my Aqua Painter in a unique way, rather than color directly on my paper.  We have a watercolor class on this and many other techniques here if you’re interested in watercolor.

Watercolor Bird Mojo Mon 004

  • I wanted to keep the watercolor as the star, so I lightly sponged every background piece. 
  • To keep the card light, fun and neutral, I chose Crumb Cake, Early Espresso, Very Vanilla, Old Olive and Primrose Petals by Stampin’ Up!.
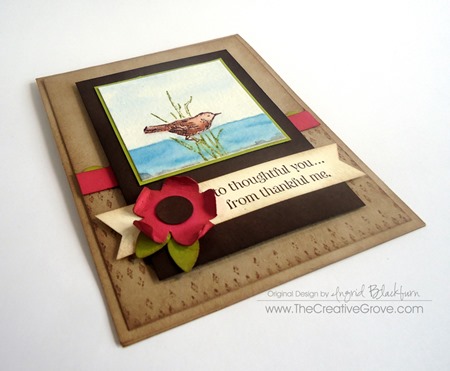
  • The flower was cut using the spring garden framelits, then sponged and bent up at the edges. 

Watercolor Bird Mojo Mon 006Watercolor Bird Mojo Mon 007

  • The greeting was placed on a banner, made with a hexagon punch (see this video for tips on how) and is from the set Lots of Thanks
  • I wanted a subtle background, so I stamped argyle using the Argle Embossing Folder and some Crumb Cake ink.
  • Watercolor Bird Mojo Mon 003

I love how it turned out.  There’s just the right amount of pop with color to compliment the watercolored piece.

Here’s to another 52 Mojo Mondays! Smile

Signature

Want exclusive tutorials and videos – get the Creative Tips E-letter

Want access to 4-5 stamping video tutorials each week?  Learn techniques, projects and get access to our classes!  Check out our VIP Community here.

Watercolor Landscape Card

DSC09941

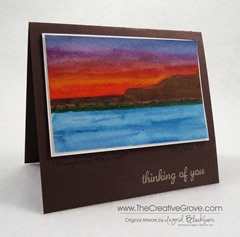
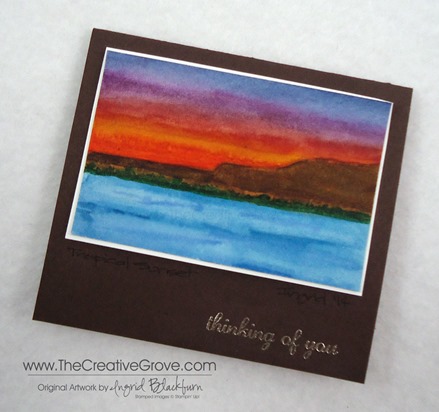
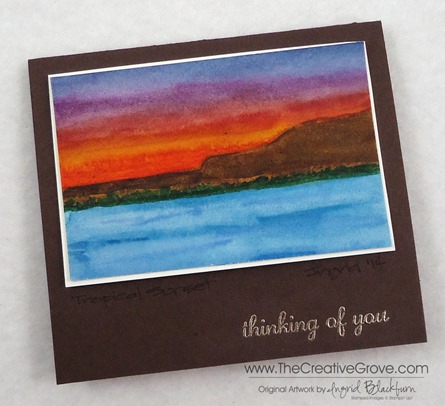
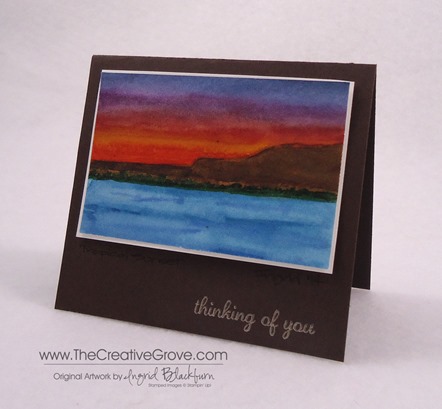
So have you tried your hand at a watercolor card yet?  Here is my third very different look for a quick, easy and totally artistic card – a watercolor landscape.  But this photo may do this card a little injustice – it’s a mini!  This is the perfect little gift card to really make you stand out from the rest.  Here is my first watercolor that has a graphic look to it  and here you will find my second – similar, yet completely different.

DSC09946

Of course, you could make this type of card in any size, I just wanted to get two out of the watercolor piece of paper I had, so I only used half the sheet and flipped it around to make a second.  The fun part is that this card literally took me about 5 minutes to make.  And that’s only because I had to let it dry in-between a few layers.

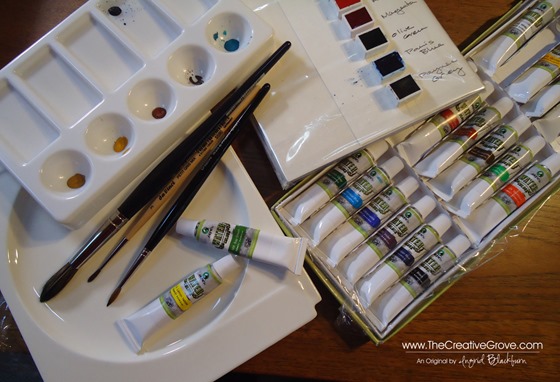
I used Schminke artist watercolor pans in the following colors: Paris Blue, Olive Green, Translucent Orange, Cadmium Red Deep and in Marie’s Tubes: Burnt Umber, Ultramarine, and Gambouge.  For the violet, I combined Paris Blue, Paynes Grey and Cadmium Red Deep.  For the greeting, I didn’t want it to stand out too much, so I used Pewter embossing powder rather than silver.

DSC09945

It’s fun to play with your colors.  I use a white flat China Plate as my Palette (round flat plate picture on bottom left).  If I’m using tubes, I squeeze a tiny bit on the edges and even allow them to dry.  I then treat it like the pans.  I’m come to the conclusion that I want all pans.  Although I have yet to watercolor anything larger than 10 inches.  I may feel different if I’m working on something large…lol!

DSC09930

I used my DaVinci Cosmotop blend #14 brush for the entire scene (large brush above).  I love that with the tip I can make the finest of details – although if I was going to need a ton of detail, I would definitely grab my smaller brushes!

Watercolor Landscape Cards Main L

I hope you have enjoyed this little series of watercolors, they are quite different from each other, but I made them all in one sitting in about 30 minutes.  It was fun to be varied, but yet also carry the theme of water coloring.

In case you need some more inspiration, head on over to a new challenge blog – Virginia’s View Challenge.  Her first challenge is about watercoloring and there are 250+ entries which give great inspiration.  Enjoy! 🙂

Now you give it a try!

Signature Snowflake 001

Shop 24/7 in my Online Store – Here

For other art supplies, check out these online resources:

Dick Blick and Jerry’s Artarama

For online card classes – be sure to check them out in the classroom under the Online Classes tab above!

Watercolor Polka Dots

Watercolor Handmade Card Main L

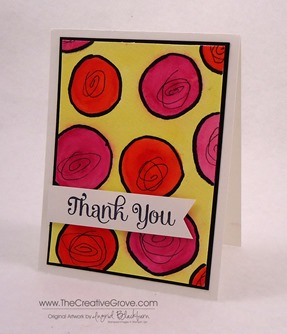
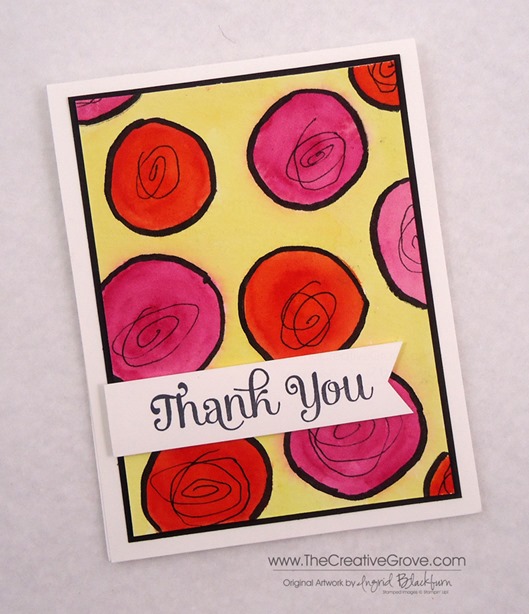
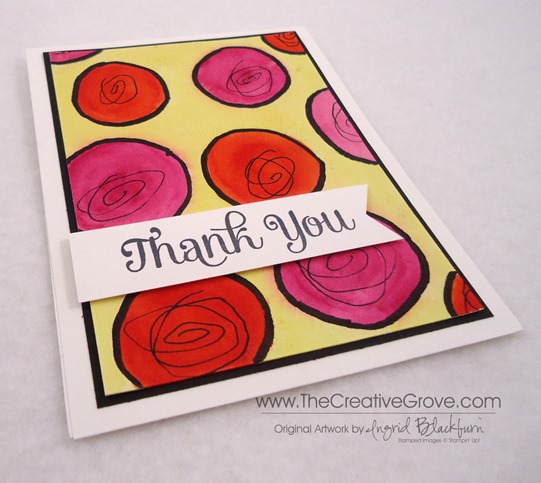
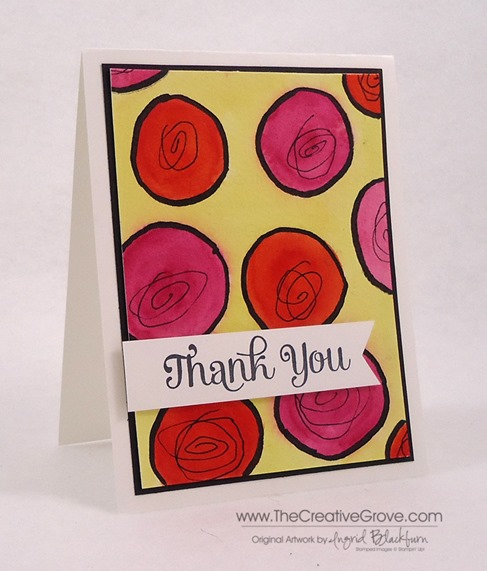
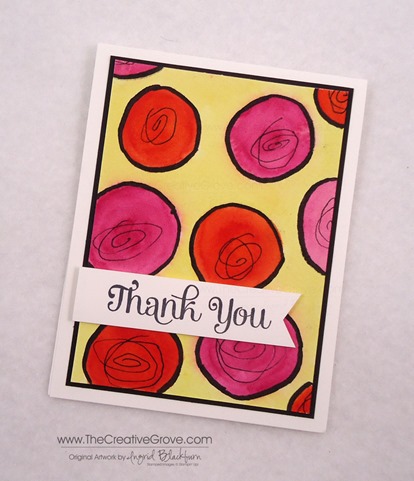
Have you just sometimes wanted a fun card?  Well that’s what todays project is all about – just plain old fun.  Lord knows we all need more of it in life, right?  Here’s your recipe for a fun energetic card – take a few vibrant colors, paint alternating circles – don’t worry so much about the size and shape or getting it perfect.  This is all about just letting go and letting your imagination take control. 

Tools and Colors –  I went with Schminke Hordam Aquarell Half Pans (Artists Watercolors) in Transluscent Orange and Magenta, and used my starter set made by Marie’s in Lemon Yellow.  You can use whatever watercolors your have, or even Stampin’ Up! inks – just use the refills.  Paint brushes – I used a Da Vinci Cosmo Top Mix B in a size 14 and a Da Vinci Kolinsky Rotmarder in size 3 and 5 for smaller touches.   These are out of my painting brush supplies, but use anything you have, Aqua Painter or other ones you have lying around. 

Paper – I used the Stampin’ Up! watercolor paper, which works fine for these purposes.  Since I’ve been painting a bit lately, I’ve been using higher quality papers.  The Stampin’ Up! paper, while 140 pound cold pressed paper, I found it to be a bit rough.  For the black in the project I used the Basic Black Stampin’ Write Marker – both ends.  The stamp is from the set Four You by Stampin’ Up!

Watercolor Handmade Card Angle R

Tip – I first wet my piece of Stampin’ Up! Watercolor Paper completely and then made my circles.  After doing it this way, I would recommend to paint on dry paper instead.  Especially if you are brand new to watercolor, as it’s very easy to be heavy handed with water.  And in this case – your colors will run and expand – which is what you’re looking to achieve with wet on wet.  If you look closely at mine, you’ll see some bleed beyond the black – that’s because I added the black to minimize this look, but I couldn’t get rid of it all.

I added the black also for a point of interest to help the dots stand out.  This is a fun and easy way to fix your card, but also adding contrast with the ultimate dark color against the fun, vibrant bolds.  For the yellow, I chose a watered down wash of Lemon Yellow, applied once my watercolor paper was dry.  This is an important step – and one of the hardest to do – allow your paper to dry in between!  Just make another and by the time you’re done, you should be good to go.

Watercolor Handmade Card Angle

Tip – Don’t crop your paper first – it’s better to go larger and then have the ability to edit down in case you make any mistakes!  And it goes without saying – think like wrapping paper – your design does not end before the edge.  Give your project that continuous look that is more natural.

Scribbles – I didn’t have a stamp to use that I liked on the dots, so I just scribbled a continuous circle using the finer point of my Marker.  Here’s the biggest tip with this – don’t try and be precise.  Just be sure to cross at least one line at some point.  It creates a little nest and looks a bit more whimsical.  Practice on scrap paper if you’re nervous.

Watercolor Handmade Card Main R

I wanted my print to stand out as that’s the real star here, so the banner is white with just black ink, and the color is matted on black cardstock with a wider white base.  Just the banner is popped up on dimensionals.

I hope you liked this fun little project.  It would be a fun birthday card for anyone!  While they aren’t totally perfect, the best part – I totally let myself go and just let the art flow.  Be sure to stop by again this week for more fun ways to watercolour your cards!

Signature Snowflake 001

Watercolor Handmade Card Angle L

Shop 24/7 in my Online Store – Here

For other art supplies, check out these online resources:

Dick Blick and Jerry’s Artarama

For online card classes – be sure to check them out in the classroom under the Online Classes tab above!