Mixed Media Cards | Backgrounds, Elements and Finishing Touches

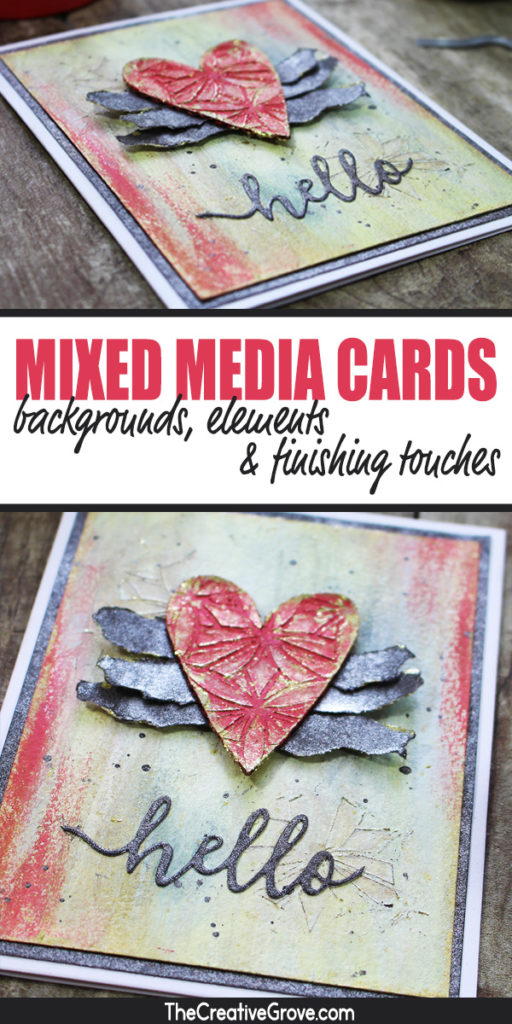
Today I have a cool mixed media cards tutorial for you. Even if you aren’t necessarily into mixed media, or the thought of it scares you – there are LOTS of little golden nuggets in this tutorial. You’ll find little techniques that you can adapt for any project. Let’s dive right in.
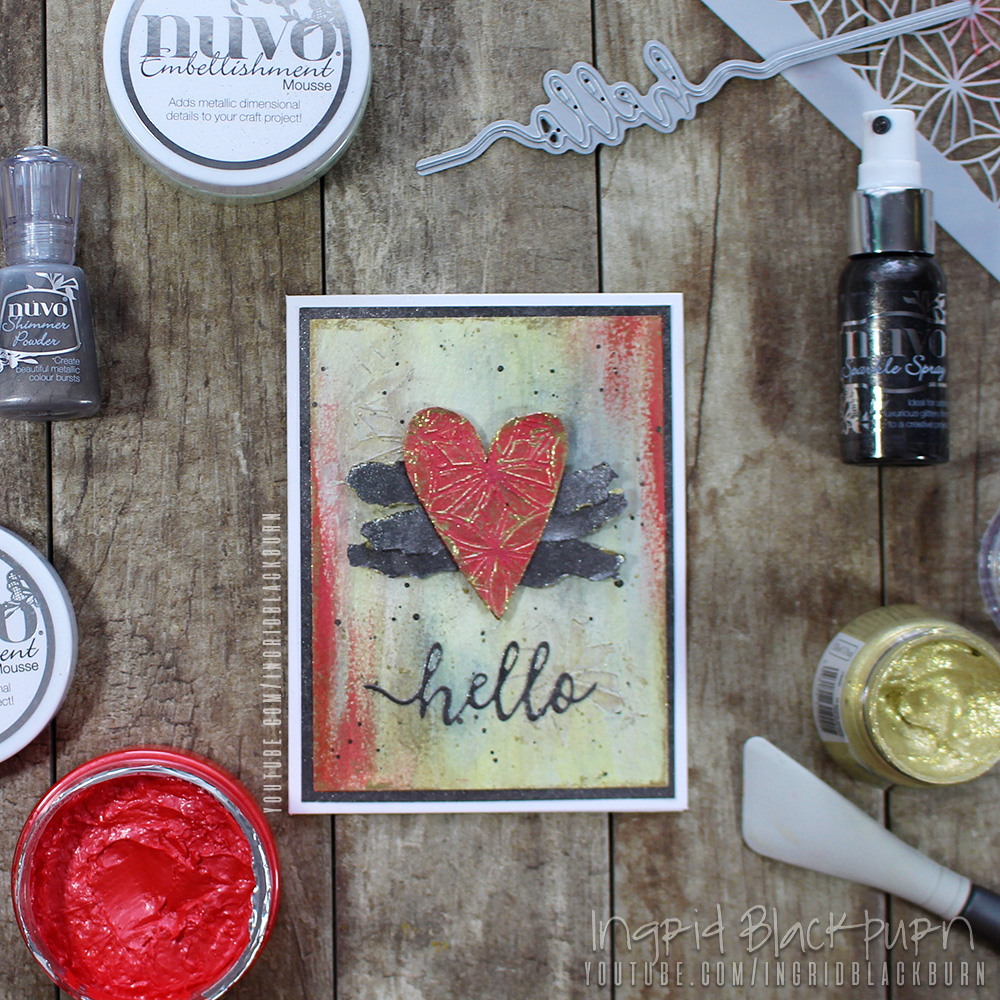
Mixed Media Cards Tutorial Tips, Elements and Techniques

Today we’re going to play with some Nuvo mediums.

I’ll be honest – Nuvo makes some insanely versatile products. If you’ve never had a chance to try them, by the end of this tutorial – you’ll definitely be itching to add them to your stash.

I’m going to break this project into sections for you. We’re going to play with:

  • Embellishment Mousse
  • Glacier Paste
  • Shimmer Powders
  • Sparkle & Mica Sprays
  • Stencils & Dies

CLICK HERE to view on YouTube in HD and Full Screen

The Background

For the background, we’re going to use several products. So, together they are going to make a cool, textured abstract which would also be great on it’s own.

You’ll want to use a piece of 140# Cold Pressed watercolor paper. Because we’re going to use a little water, and you’ll need your paper to absorb that. I always use the rougher side, because it helps with texture and holds water beautifully.

Watercolor Paper works beautifully for mixed media cards, mixed media paper too, though it is a bit thinner than 140# cold pressed paper.
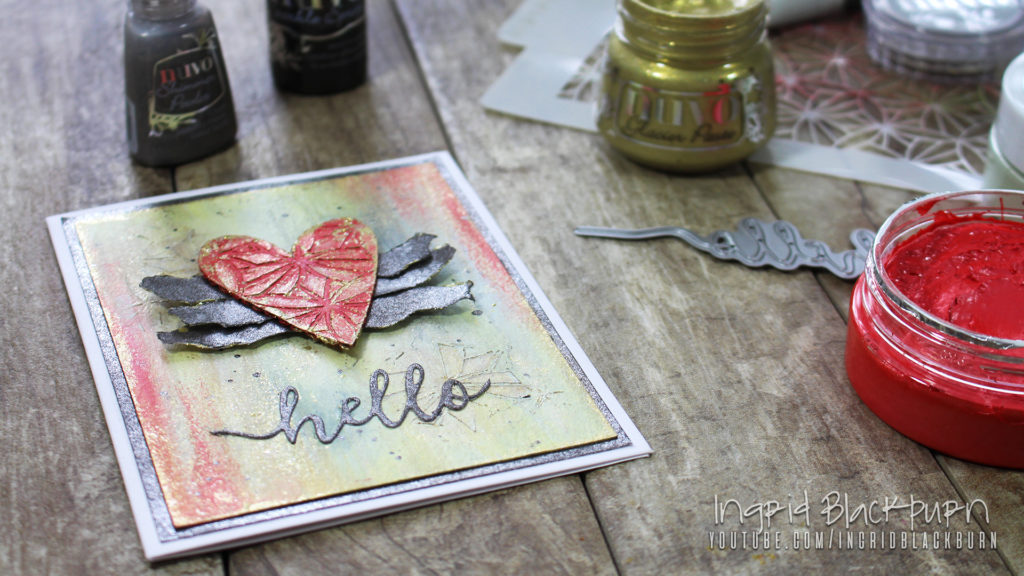
How to create DIY Mixed Media Cards and Elements

Using a spatula or palette knife, spread a little embellishment mousse onto your glass mat surface. TIP – You don’t want to put your fingers into your mousse. If you do, you might leave behind oils that can contaminate your medium, which can result in a little mold to grow.

I used Honeydew (super pale green), and mixed it with custard cream (light yellow). Randomly spread the mousse over your piece – you can leave areas empty for the custard cream to fill. I personally find it spreads the best with your finger.
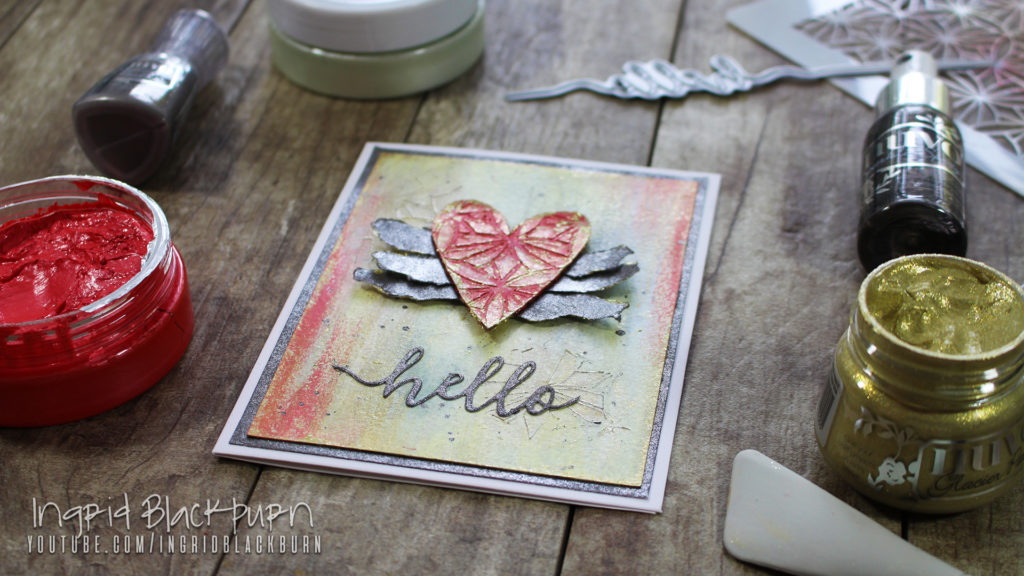
How to create DIY Mixed Media Cards and Elements

Once you have the look you want, add some light stenciling with an embellishment mousse using the Tonic Studios Linking Circles Stencil and your finger. This way you get a light stenciled pattern with raised edges along the pattern. This will help to trap color and create an interesting complimentary design in the background.

Heat set, then add some light watercolor using Nuvo Shimmer Powders. I started with Lunar Rocket and then added some Storm Cloud in small areas. This one is quite intense – so start small. Heat set again.
How to create DIY Mixed Media Cards and Elements

Add balanced color to opposite edges using Fusion Red Embellishment Mousse. The result will help to pull the project together once the heart is adhered.

Spray some Antique Gold Mica Mist onto your Glass Media Mat, and go over your background from the edges inward by painting it on. The result i s just a subtle shimmery effect. Heat set your background.

Easy Embellishments for Mixed Media Cards

Cut a heart from some scrap cardboard – I used a thin corrugated cardboard on one side – smooth on the other – from a box. You can always gently tear apart a shipping box. That way you will get a thinner piece of cardboard with texture and smoothness.

Color your heart with Fusion Red Mousse and then stencil the Linked Circles pattern with more Embellishment Mousse and Nuvo Spatulas. That way you’ll have a nice thick application that is raised and holds the pattern well. Heat set.
How to create DIY Mixed Media Cards and Elements

Use Thinner Cardstock

Spray a piece of Neenah 110# Exact Index Paper with Morning Fog Sparkle Spray. I use it for monoprinting and it is much more lightweight than traditional cardstock. And, you’ll find that it’s easier to tear.

Mixed Media cards can have many layers, so sometimes you need to use a thinner cardstock.

Coat your paper thoroughly. That way you won’t have any blank splotches. You’ll want your cardstock to be large enough to matte your background, and have excess for your word die and torn strips. That way you’ll have enough to go around – 5.5 x 8.5 inch worked for me.
How to create DIY Mixed Media Cards and Elements

Cut out your hello and trim for your project using the Tonic Hello Stentiment Strips. I also cut some extra words out of the center of my background matte – why waste all that gorgeous sparkly paper you created, right?!! Do you do that? Tell me in the comments.

Tear your strips so that the rough side is away from the front. You’ll tear away from you. You’ll want them to be about 3/4 – 1″ wider than your heart. So that they proportionately support the heart.

Go To Finishing Touches for Mixed Media Cards

Edging

Using your finger – add some Golden Era Glacier Paste to the background edges, lightly over your background, the edges and lightly over your stenciled heart.

Edging is one of my all time favorite ways to punch up mixed media cards.
How to create DIY Mixed Media Cards and Elements

Water down some glacier paste on your media matte with your Tonic Light Mist spray bottle. Edge a few spots of your torn Morning Fog Sprayed pieces for some dark grey/gold contrast, and you’ll notice that it makes those little pieces just pop!

Flicking

Add a little Morning Fog Spray to your glass Mat using the thin plastic tube of the spray bottle (vs. spraying & it’s flying about). Using a paint brush, flick both the watered down Golden Era Glacier Paste and Morning Fog sparkle spray onto your background. The result adds in that little bit of filler the project needs. You’ll notice that it pulls it all together.

How to create DIY Mixed Media Cards and Elements

Seriously, how GORGEOUS is that?!!

Height

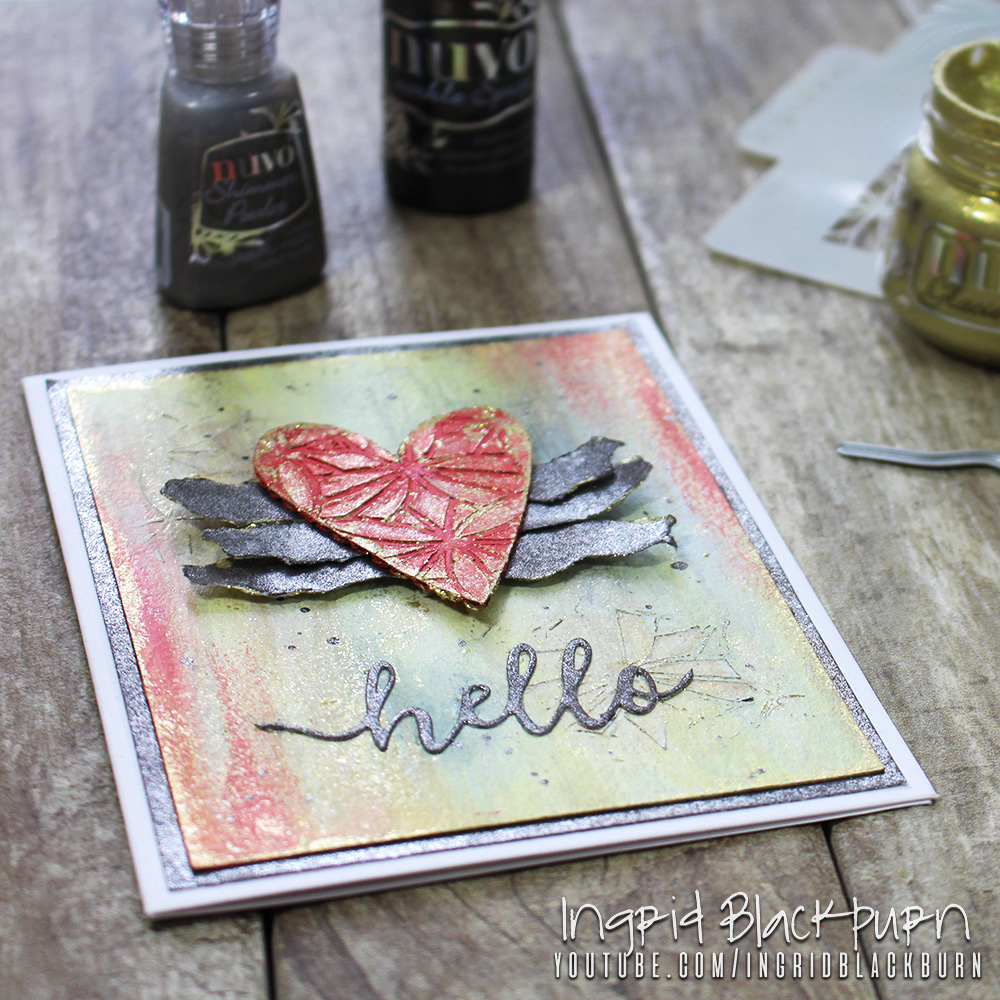
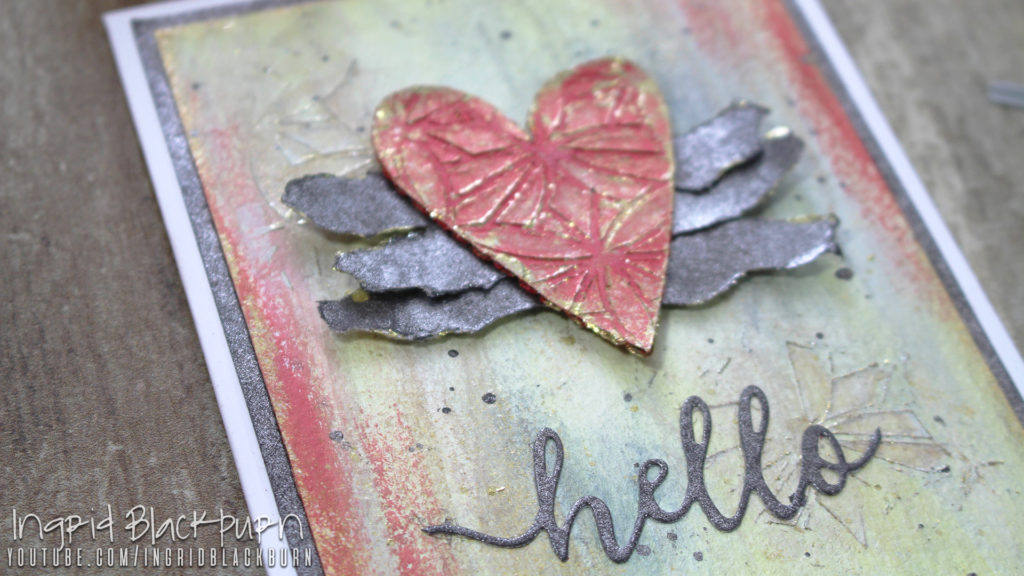
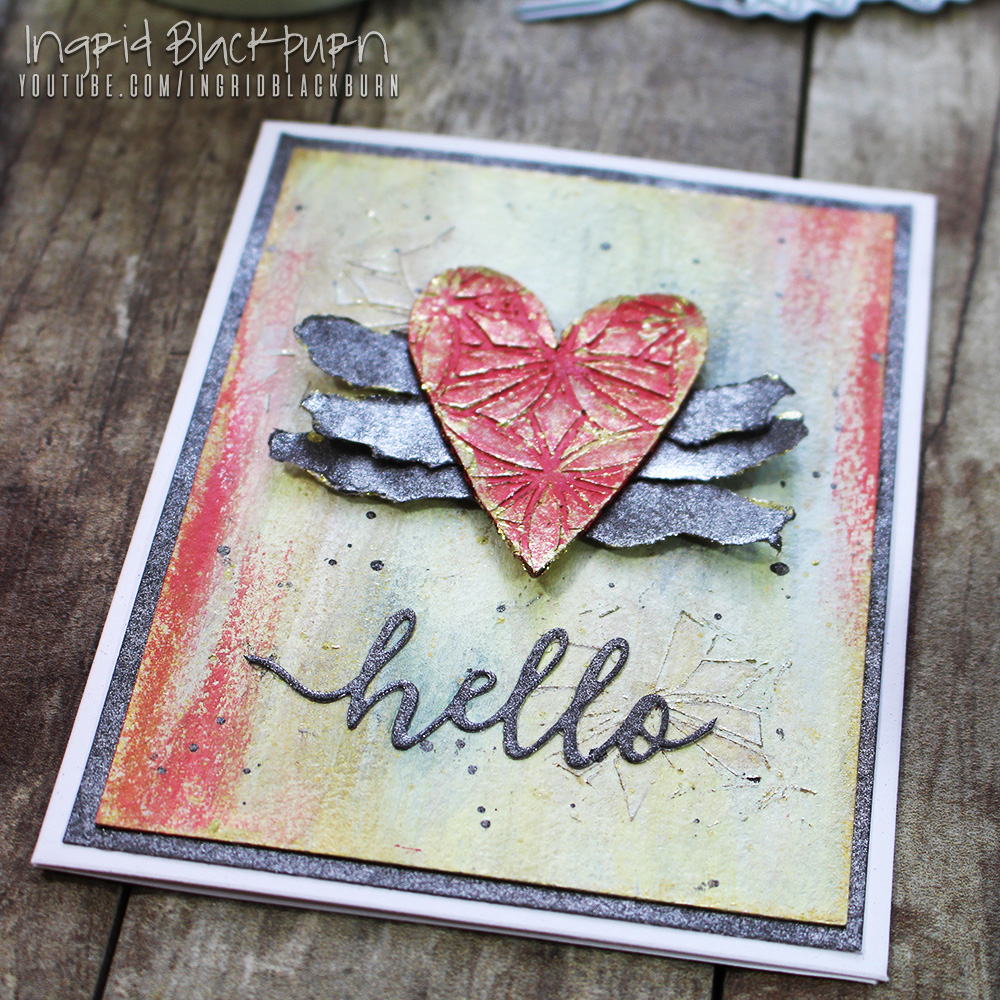
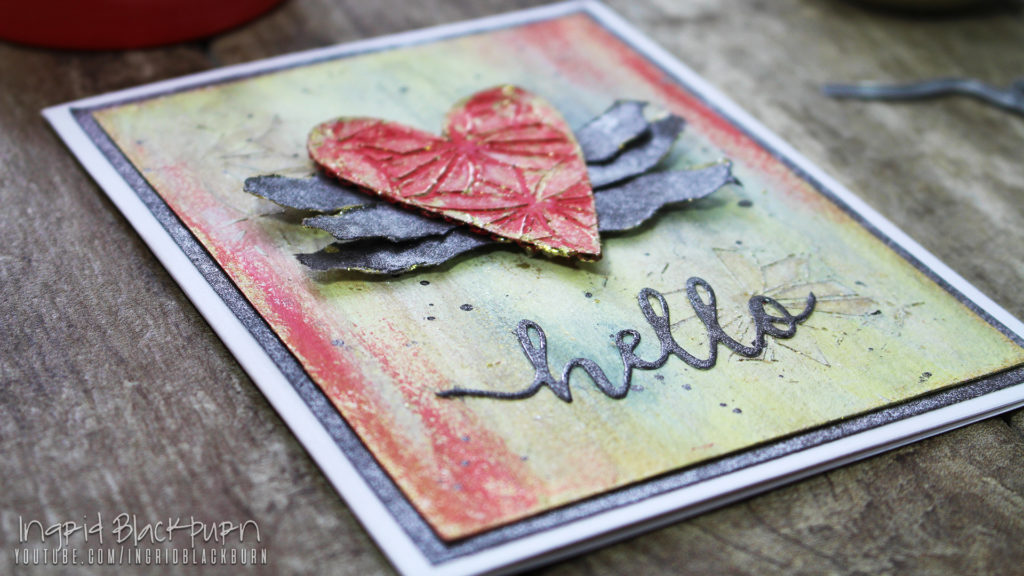
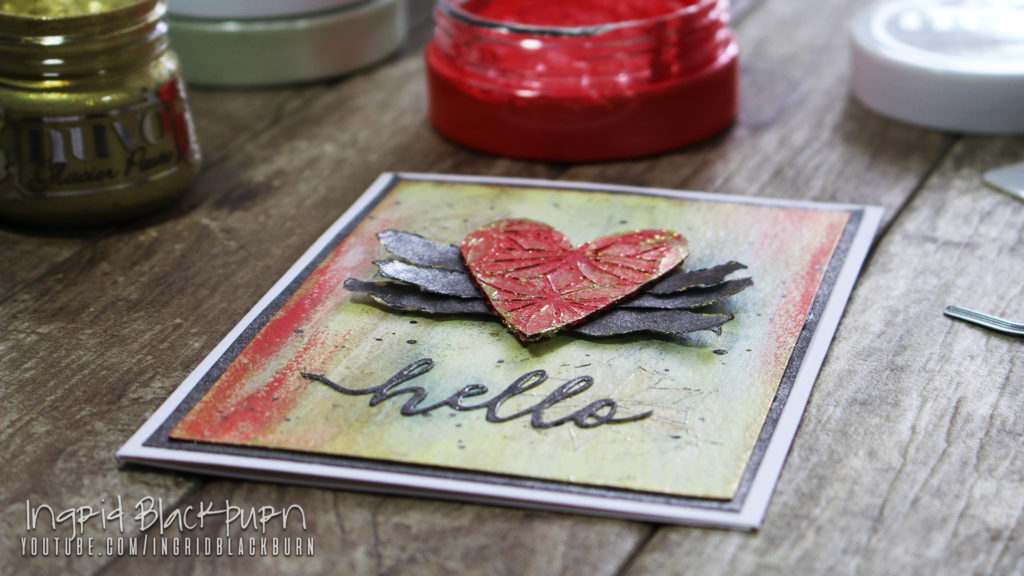
Add some liquid glue to the back of your heart, and arrange your torn pieces. Pop your heart piecing up onto foam tape and add to the top 1/3 of your card. Glue your hello (snipped) onto the background and adhere the card to a white card base. The lifted result adds the necessary drama…Viola!
diy mixed media cards and elements

As you can see, you too can create mixed media cards that are incredibly sparkly – the photos don’t do it justice. I definitely encourage you to try it yourself. Tag me in social media for sure – I’d LOVE to see. Products are linked below – definitely add the mousse and glacier paste to your stash – you’ll be happy you did!

Mixed Media Cards

7 Ways to Use Gelatos

7 ways to use gelatos

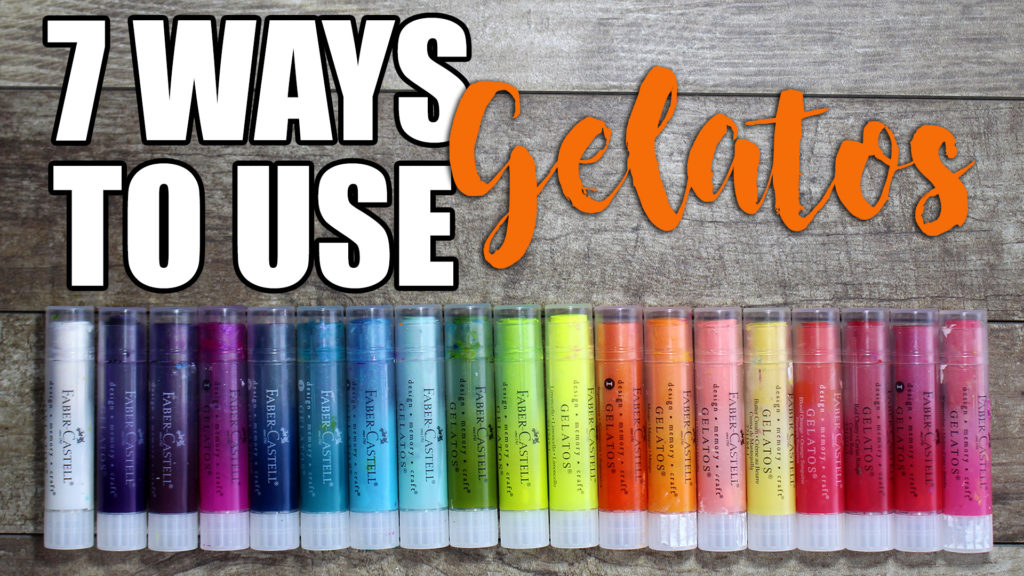
Gelatos by Faber-Castell, are powerfully pigmented creamy sticks that pack a punch. Do you have some sitting in a drawer or in a bin somewhere? My hope is that you will be inspired to break out those awesome pigmented creamy sticks and get creating. Here are 7 Ways you can use Gelatos on your projects!

Let’s dive right in!!

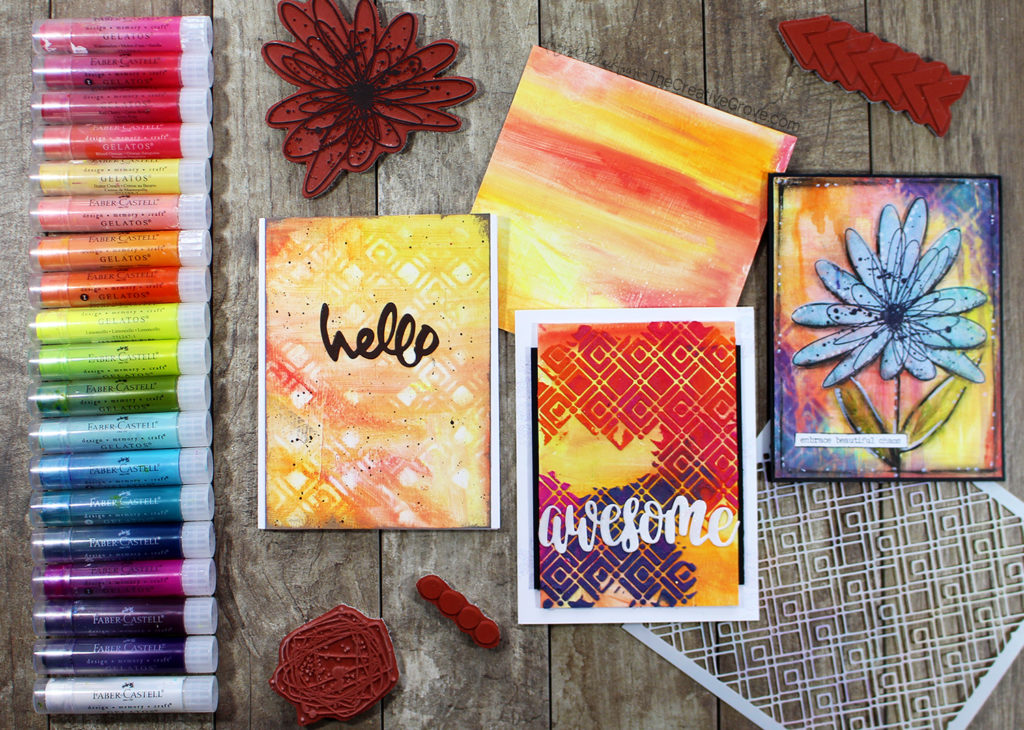
I have three amazing projects to share with you today. To get started, you’ll want to spread some gesso onto an 8 1/2 x 11 sheet of white cardstock. For gelatos to spread properly, they need a base to spread easily. Without that, it can be a challenge!

If you haven’t already – please subscribe to my newsletter (you’ll get an exclusive video series), instagram, youtube channel, and blog (subscribe in the sidebar on the right)!!

I filmed a video for you, but have each one detailed below as well in photos and instructions. Be sure to leave me a comment on the youtube channel too with which one you loved the most!

Click here to watch over on YT.

#1 – Gelato Blending Technique

Our first Gelatos technique is the most basic of them all – blending. You will want to choose colors that go well together and scribble them all over your paper – no need to worry about being neat – the water and that ever so special tool (your fingers) will do all the heavy lifting!

A tool that helps with blending Gelatos is the Ranger spritzer. You will first want to mist your surface lightly by squeezing quickly on your Ranger Spritzer. To blend those amazing colored pigments together, use your fingers or a damp towel, to get the coverage you love. Dry with a heat tool, or set aside and cut up into a few card fronts. I split mine in 1/2 – 5.5 x 8.5. For the card fronts, I cut one into two, and one I cut into a 5″ square and 3.5 x 5.5 with a 1/2″ strip left over. That will give you 4 backgrounds to create with – not bad!
gelato blended backgrounds

#2 – Disappearing Gelato Technique

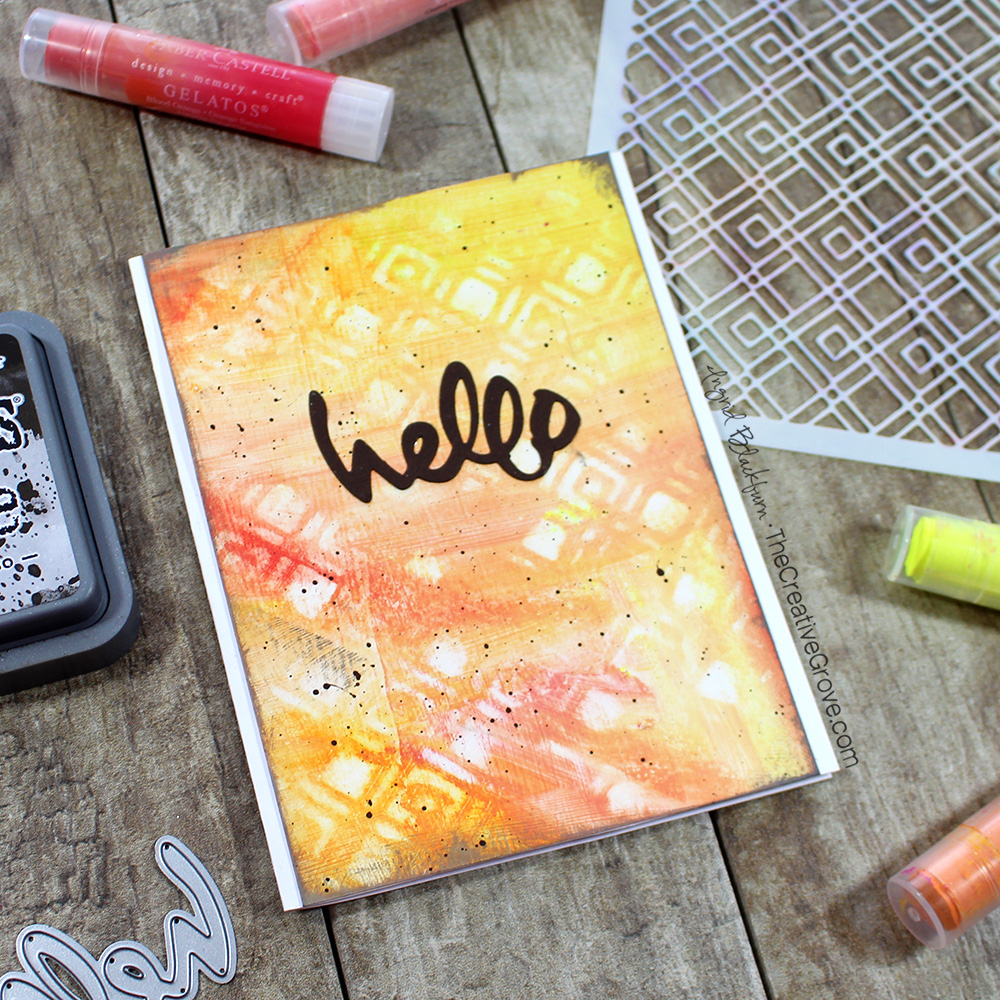
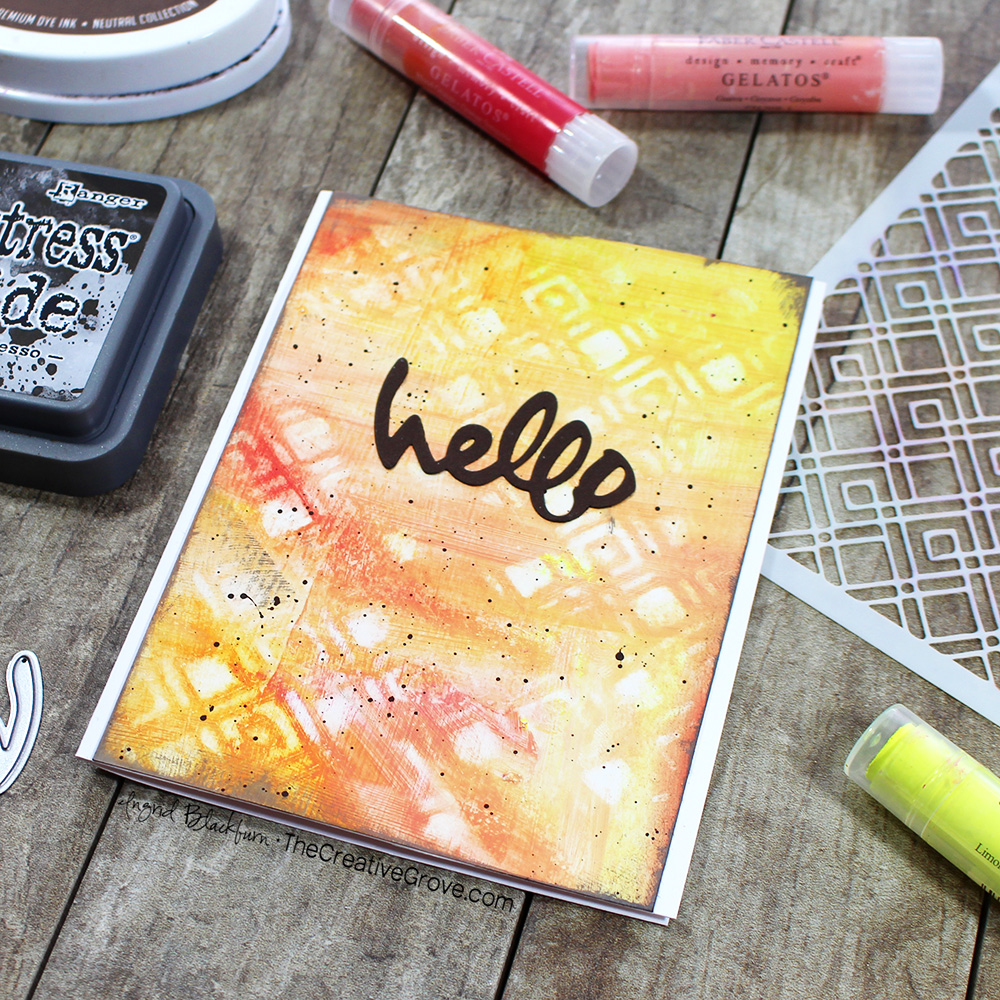
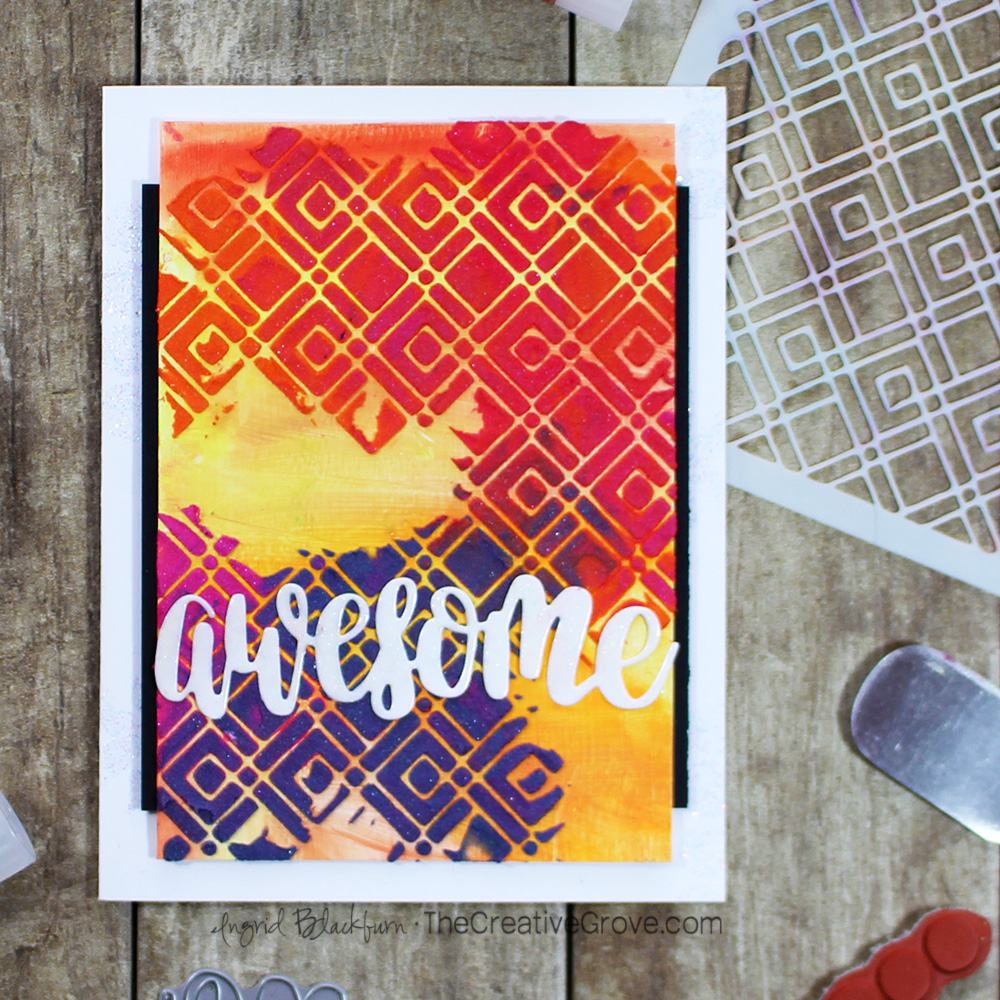
Next, line up your favorite stencil over one of your panels. I’m using the Quadrilaterals Stencil by AALL & Create which has some great space to work with. Grab a Baby Wipe or wet paper towel and twist your wipe through the stencil to wipe away the color – what?!!
Yes, you’re going to remove the gelatos color easily through your stencil. The key – keep alternating to a clean spot on your wipe/towel. I intentionally only removed the color in spots, to give an organic look to my project. The end result gives you an artsy stenciled look!

baby wipe gelatos technique

Add some splatters and edge your piece and all that’s left is to mat it onto a base and use a simple word die. Don’t take away from the background – the disappearing gelatos piece is the star!

#3 – Gelato Colored Paste Technique

Did you know that you can shave off some pigments and do loads of techniques with them?!! Here’s just one of many – Coloring Paste. Now keep in mind – you can do this with just about any medium too!

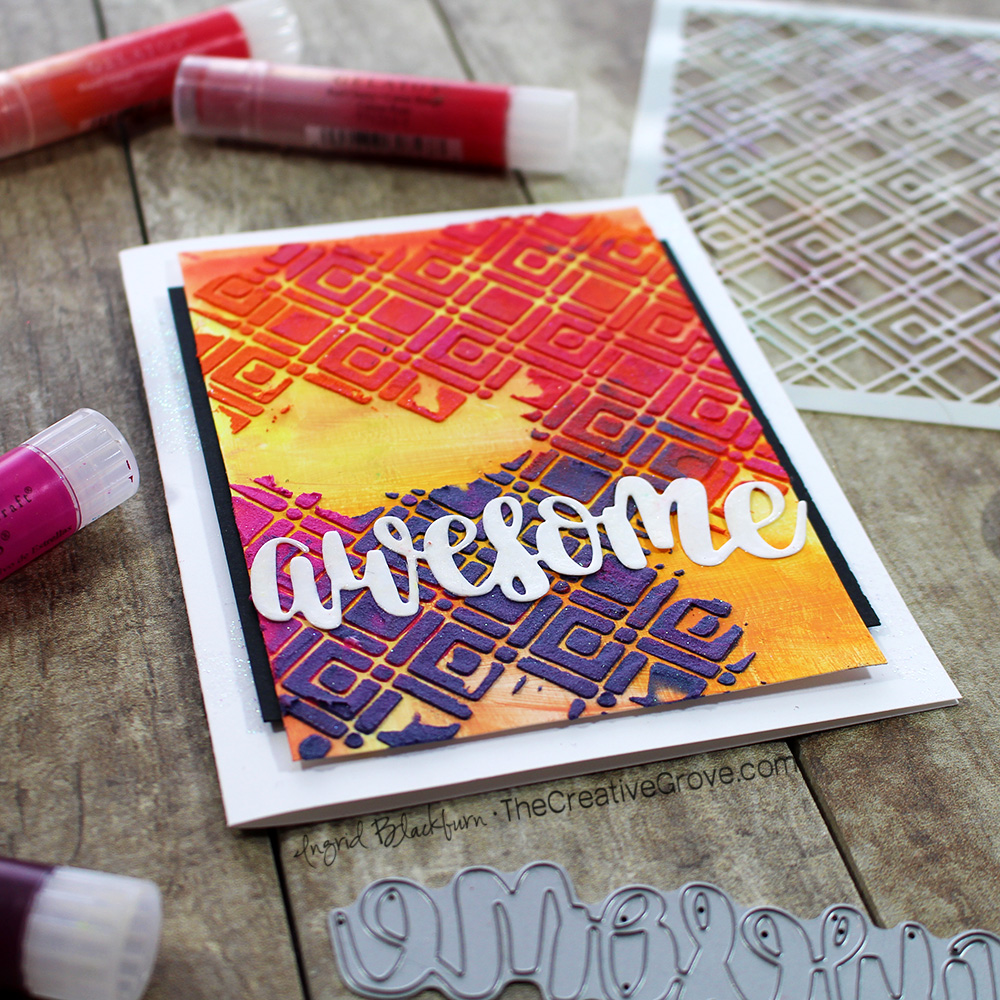
Use a palette knife to scrape off some pigment (a little goes a long way) and mix with some white embossing paste and a palette knife. Mix your gelatos and paste thoroughly. I mixed four gelato colors, each with a tiny amount of paste. Add each color, a small amount at a time, directly through the stencil with a palette knife.

tinting mediums with gelatos

In this project, you’ll notice that I intentionally left some spots without paste. That was so that the rockin’ background can shine through. It makes for some interesting breaks in your project.

Try overlapping your colors a bit too – that creates new ones! Just keep the color wheel in mind – leave complimentary colors apart – blue/orange, red/green, etc… Doesn’t that look stunning through the Quadrilaterals Stencil?!!

stenciling mediums with gelatos

Again, a simple word die and some fun matting and you’re all set. Now I did stamp the Eclectica Tracy Scott 25 stamp set onto the card base in embossing ink and embossed it in Wanderlust Embossing Glitter for a little interest. To keep adding a little sparkle, highlight the awesome word die with a sparkle pen.

#4 Gelato Dripping Technique

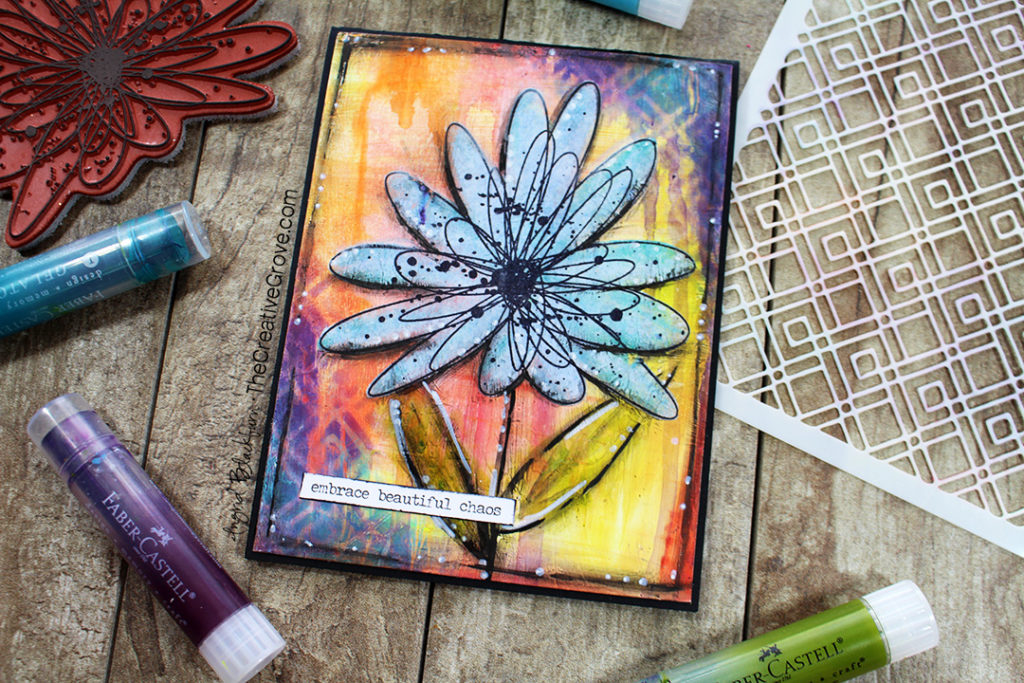
This technique is probably a fan favorite of many! You can try this on plain or colored backgrounds. I decided to add more of the same to one of the existing panels. Keep color theory in mind, when using this technique. Gelatos have fugitive properties, so try and stay away from complimentary colors in order to avoid making mud.

Here’s the skinny – rub some gelatos at the top of your panel – nice and concentrated. Spritz or add water with a paint brush and watch the drips!! It’s a very cool look.

The dripping technique gave an awesome depth to the background of our third project – a real mixed media card. This is just he beginning!!

gelatos dripping backgrounds

#5 Gelato Layering Technique

One of the properties of Gelatos is that it is always live and reactive. To set them, you’ll need to seal it. You can use a spray, or if you’d like to flex your mixed media muscles a bit – try matte medium! Pour a little over your background to set those colors.

This helps in two ways – one locks that colored goodness in place, and two – you can layer ANY colors on top of each other!! To use Matte Medium – drip a little onto your project and carefully spread with a palette knife or silicone spatula. Be careful not wipe all that colored goodness away – you are adding a liquid to it! You will find that it is better to start with a little of the matte medium in one place, just until you get the hang of using it. You want only a thin layer. Dry naturally, or with a heat tool.

how to seal gelatos

Gelatos are vibrant in color. To allow the second layer of color to pop, you will need to first lay down a layer of white gelato to give your second layer a neutral base. I used Coconut as a white base underneath a few pops of color in my second layer. I added purple right onto yellow and blue right over orange – normally that would be a muddy mess. Not with Gelato layering!!

That brings us to #6…

#6 Gelato Stenciling Technique

Since Gelatos are SO super creamy and pigmented, I like to avoid rubbing them directly onto my stencil. That way too much pigment doesn’t get stuck in the nooks and crannies of my stencil. Instead, use a makeup sponge!

Scribble some gelato pigment onto your craft mat or a palette and sponge through your stencil onto your project. This way you have a smooth application and can be quite deliberate in where you want to add color. On your Mixed Media card – add a little Stardust, Galaxy and Blue Moon for a nice little accent in both corners. The Quadrilaterals Stencil adds a little lattice look to the corners, don’t you think?

stenciling with gelatos

I love the dark popping off the bright base. None of which would show up without locking the layers and adding the white underneath.

#7 Gelato Coloring Technique

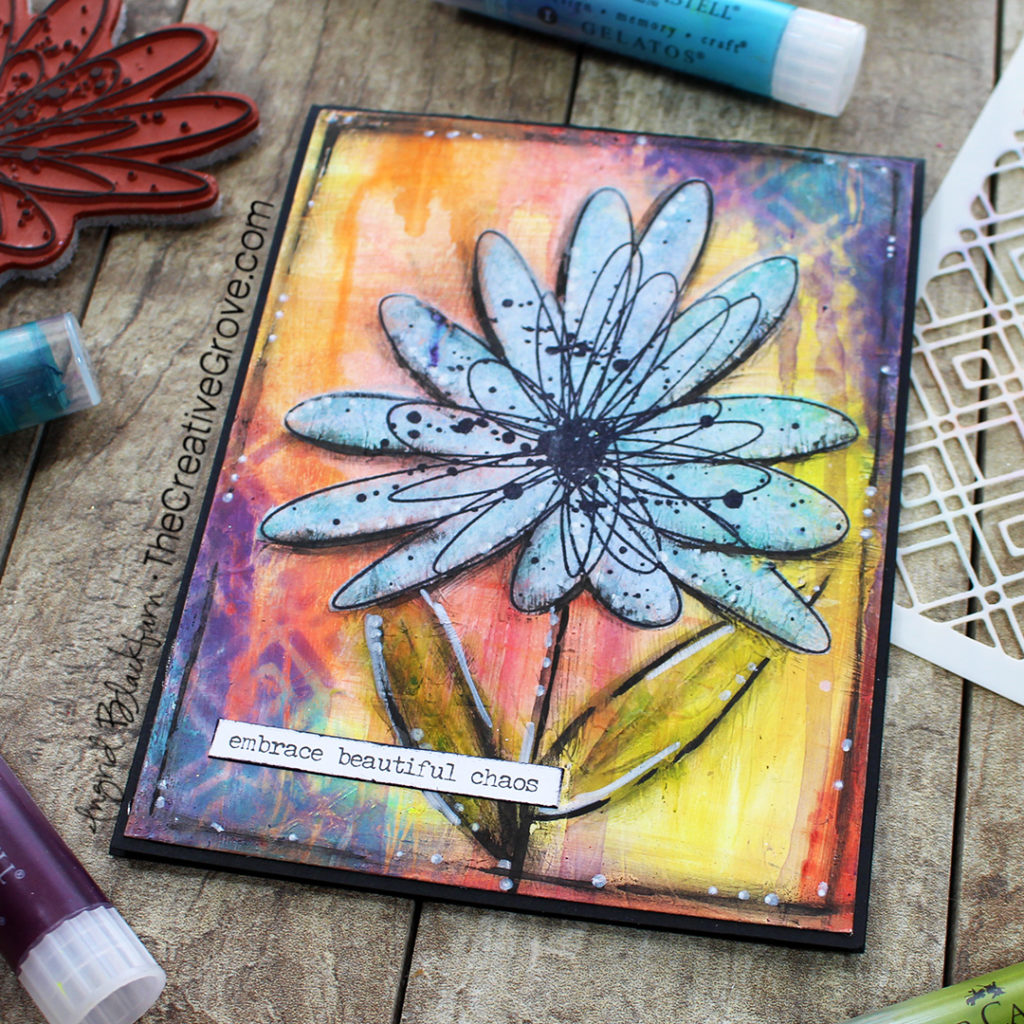
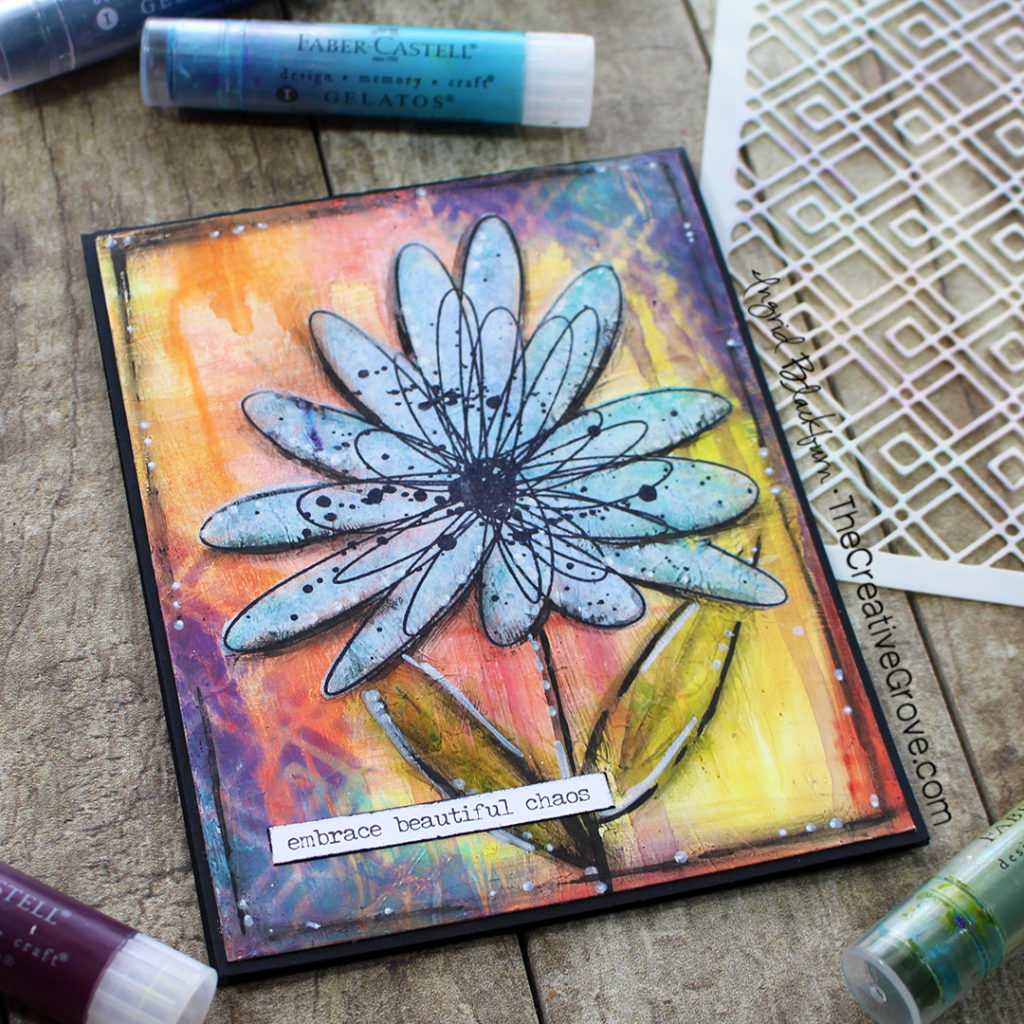
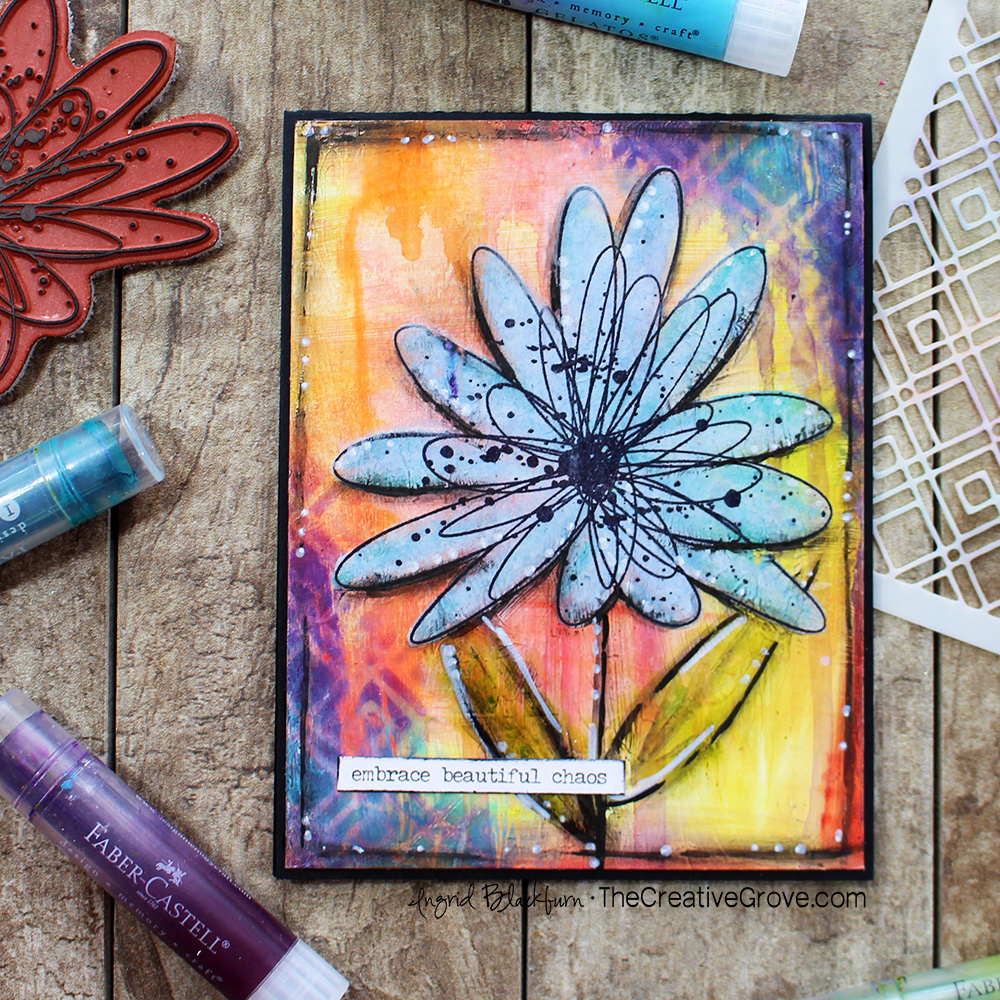
And last, but certainly not least, add color to all your embellishments with Gelatos! A unique way to add color to an embellishment, is to stamp your piece in Archival ink onto Tissue Paper and use the gelatos to color from behind!

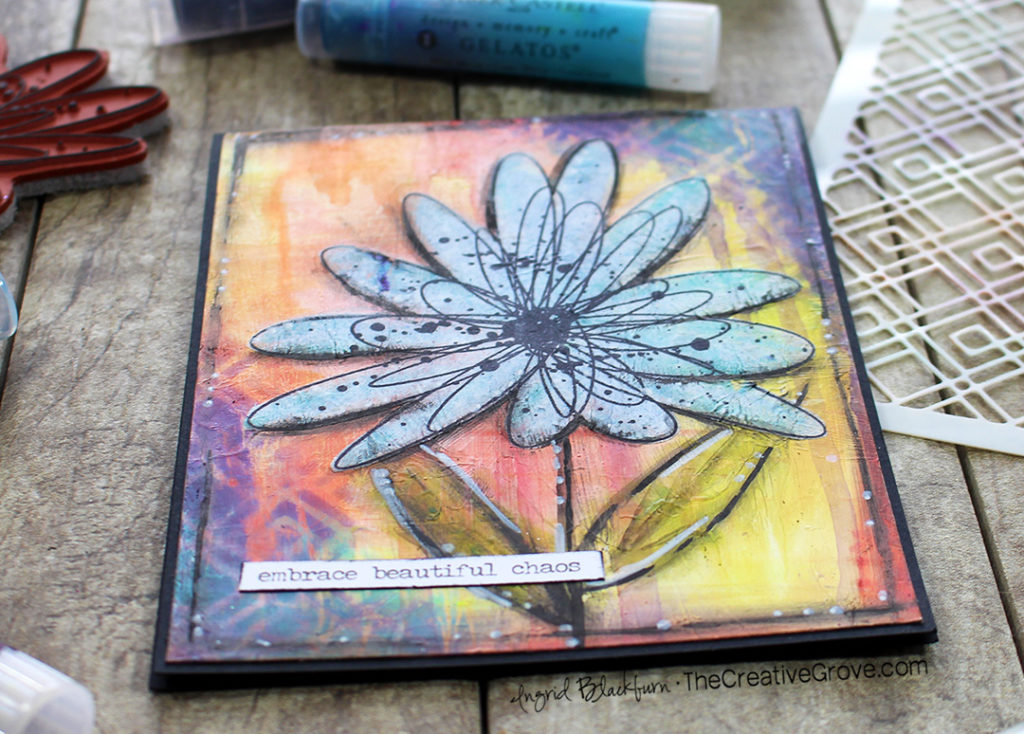
On tissue paper, the gelatos blended super easily. No need for Gesso. Add as much pigment as you’d like – you want it to pop from the other side. I added Aqua Dolce, Nebula and Blue Moon for a fun blue flower. The background has some good orange tones from blending the Blood Orange Gelato over Guava. Can you see the Blood Orange drips on the left side? The blue would be the perfect pop to the project in a complimentary color…

coloring tissue paper with gelatos

To help the blue flower pop even more, hold your fussy cut flower onto your project, lift the edges, and add a little white gelato underneath. Seal the stenciled corners and white flower with some matte medium, giving your flower a base to grab onto. Add matte medium over the top too and dry your entire piece.

Pulling it All Together

To complete your flower, add a little Pistachio green for some leaves and rub it into shape with your fingers. Next add some black charcoal pencil for shading, rub in with your finger, and add some Black Big Brush Pen accents too. Rub and add white where needed. Add a little matte medium over your green leaves and add some finishing touches.

For a sentiment, I used a sticker from Small Talk collection by Tim Holtz Ideology. To help it to stand out, edge your sticker with a Pitt Pen. I love the end result, and now I want to create a two page spread like this in my art journal – it’s TOO pretty!!

Mixed Media Cards using Gelatos

Whoever receives this card in the mail, is certain to cherish it.

Which of the 7 Ways to Use Gelatos is your favorite? Have you tried any? Tell me in the comments!! I’d love to know which projects you liked too! Want to see more with Gelatos?

Did You Know?

I popped all the supplies I used in the list below. This post was written for a fun hop celebrating Top Flight Stamps and their 2nd anniersary. Have you had a chance to check out Topflight Stamps yet? If you have not checked it out yet, then you MUST pop over. It’s one of the best collections of artsy stamps and stencils I’ve seen.

Topflight Stamps differs from most online retailers. You will find an incredibly diverse collection of artistic stamp products from around the world – all under one roof. Don’t you just love the two products I used today, and hope you enjoyed seeing a few ways you too could use them!

7 ways to use Gelatos - easy techniques

But first, keep hopping along. Be sure to leave comments all along the way. There are some INCREDIBLE crafters in this hop – seriously – I’m so honored to have been asked to be a small part of it. So thanks for hanging with my novel of a post. If you haven’t already – please subscribe to my newsletter, blog (subscribe in the sidebar on the right), instagram and youtube channels!!

Till next time, keep those fingers inky…

Blog Hop List

Supplies

To make finding the supplies I used in these projects a bit easier for you, here are a few clickable links. Compensated Affiliate Links are used when possible. Click here for disclosure. Happy Shopping!

Using Recycled Materials on Cards

Have you every thought to use Recycled Materials on your cards before? This month over at Happy Little Stampers, the challenge is just that – Recycle. This one threw me. Yes, I could come up with lots of 3D projects, and that was where my head kept going…but I wanted to challenge myself to a card. So what do you use? Well, you can use anything that your recycling!

HLS Mixed Media challenge July 2016

I’m currently living in Germany – and recycling is a MAJOR thing here. SO big, that it’s the #2 country in the world for diverting 62% of its trash from landfills – second only to Austria which diverts 63% of all trash. And it’s no joke over here – our recycling calendar is insane – almost all garbage is separated. (And in case you were wondering where the US stacks up…34% – toward the end of the middle pack)

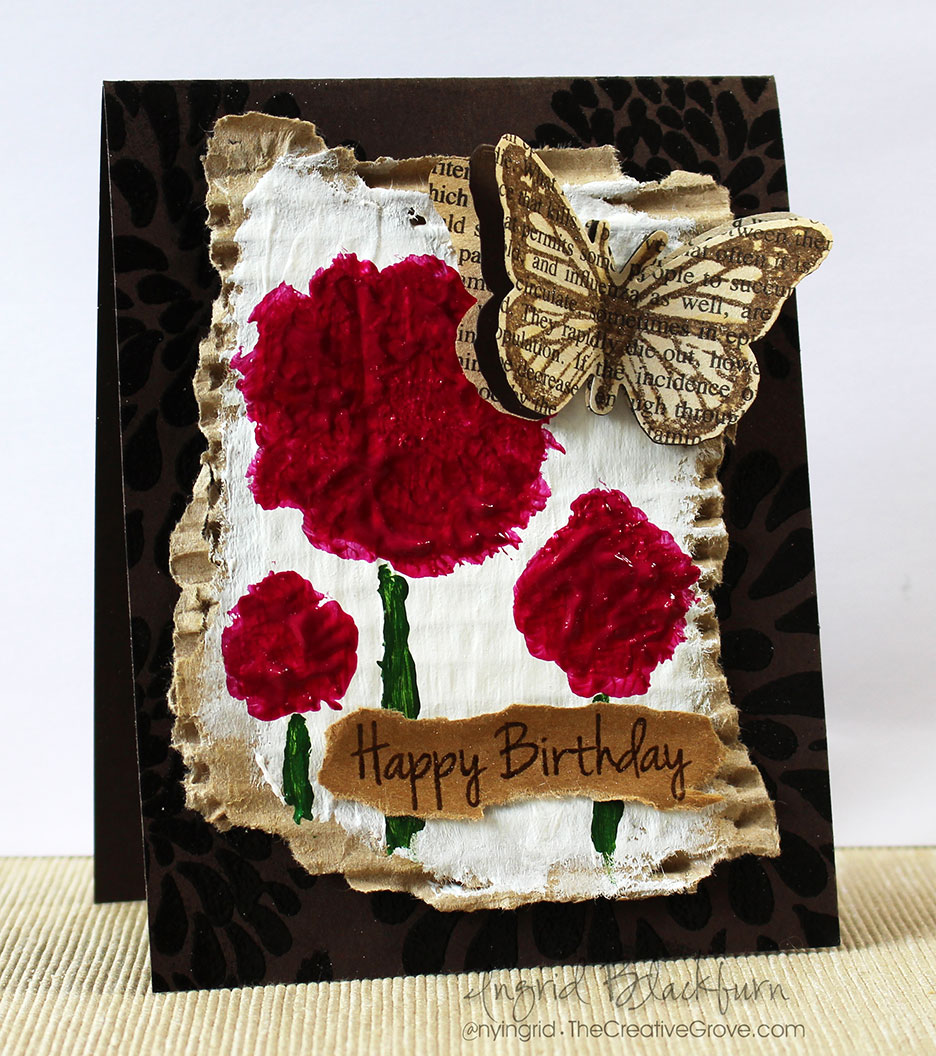
So, I thought it was appropriate that I add my fair share on this project. With the exception of my card base, and one tiny die cut, all my materials (paper) used on this project are…yup, you guessed it – recycled!

Recycle-Mixed-Media-Card-Ingrid-Blackburn---001

Be sure to stop by this month’s guest designer – Stephanie Lanzalotto’s blog as well as the other design team members blogs.

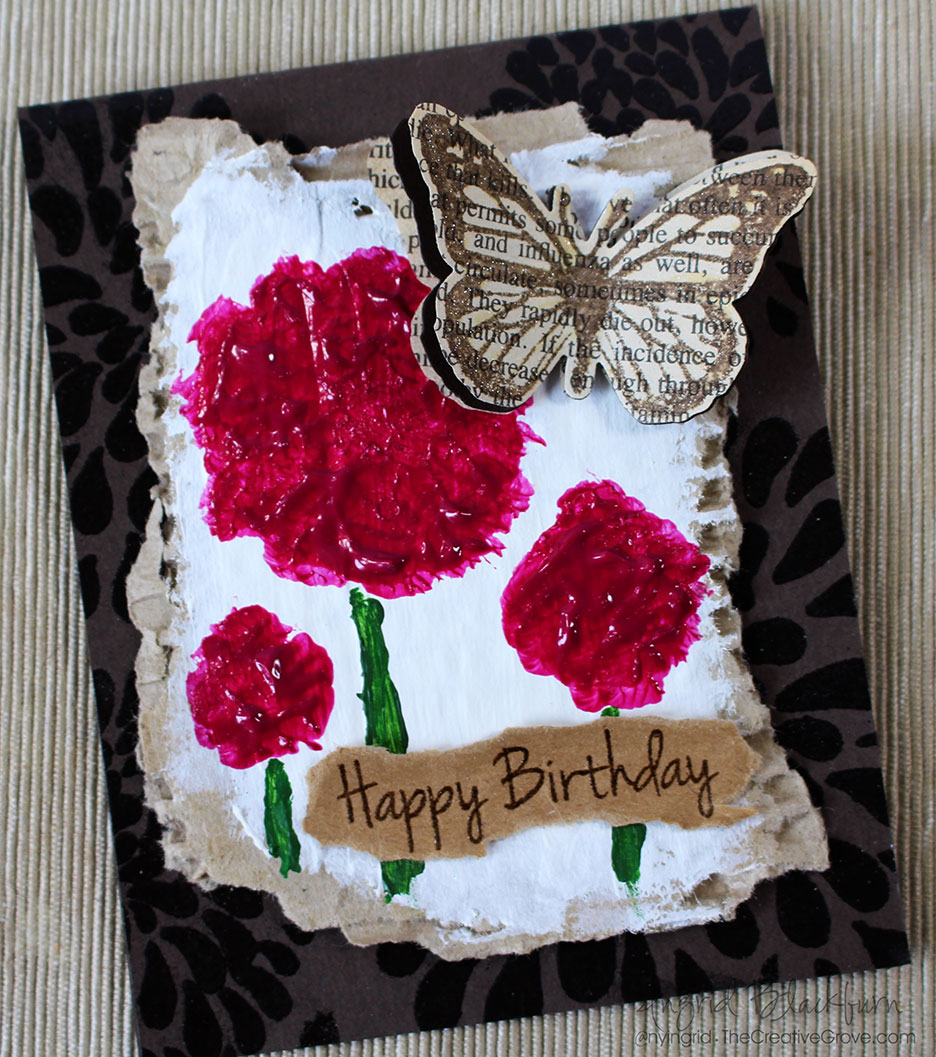
Recycled Birthday Butterfly Tutorial

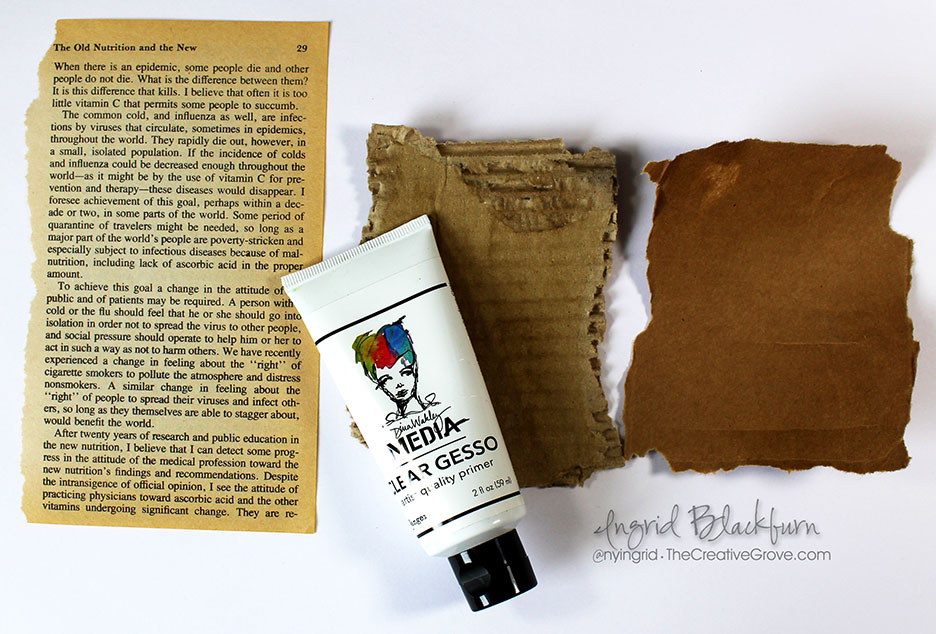
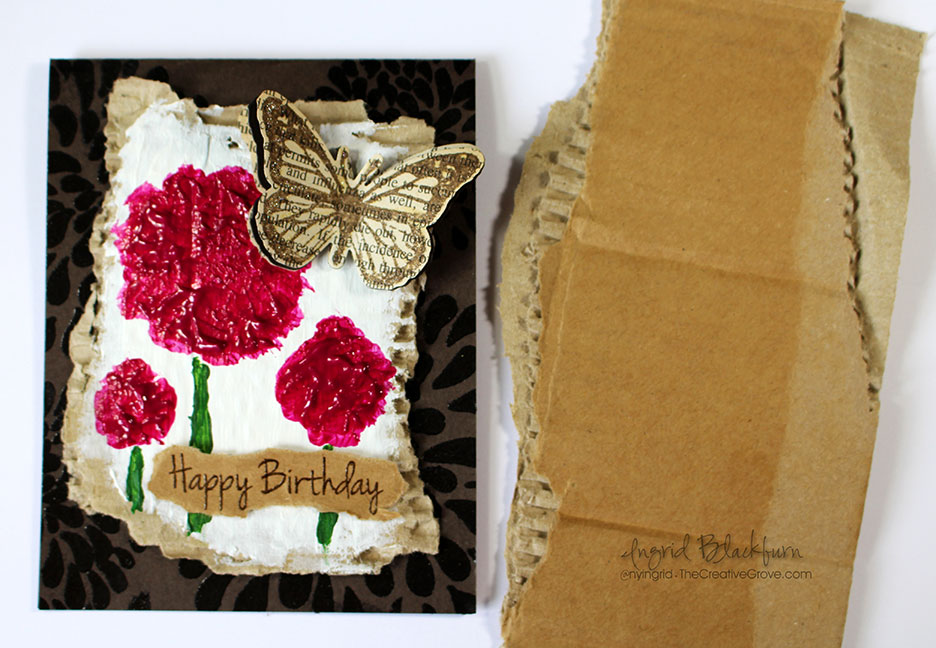
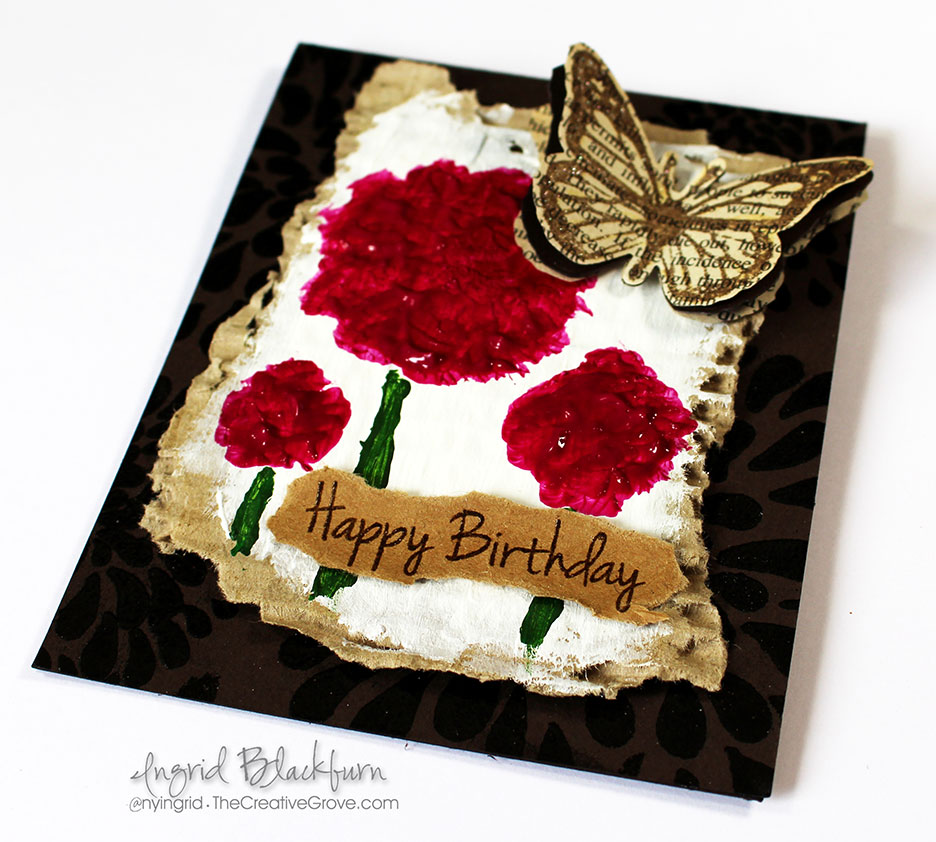
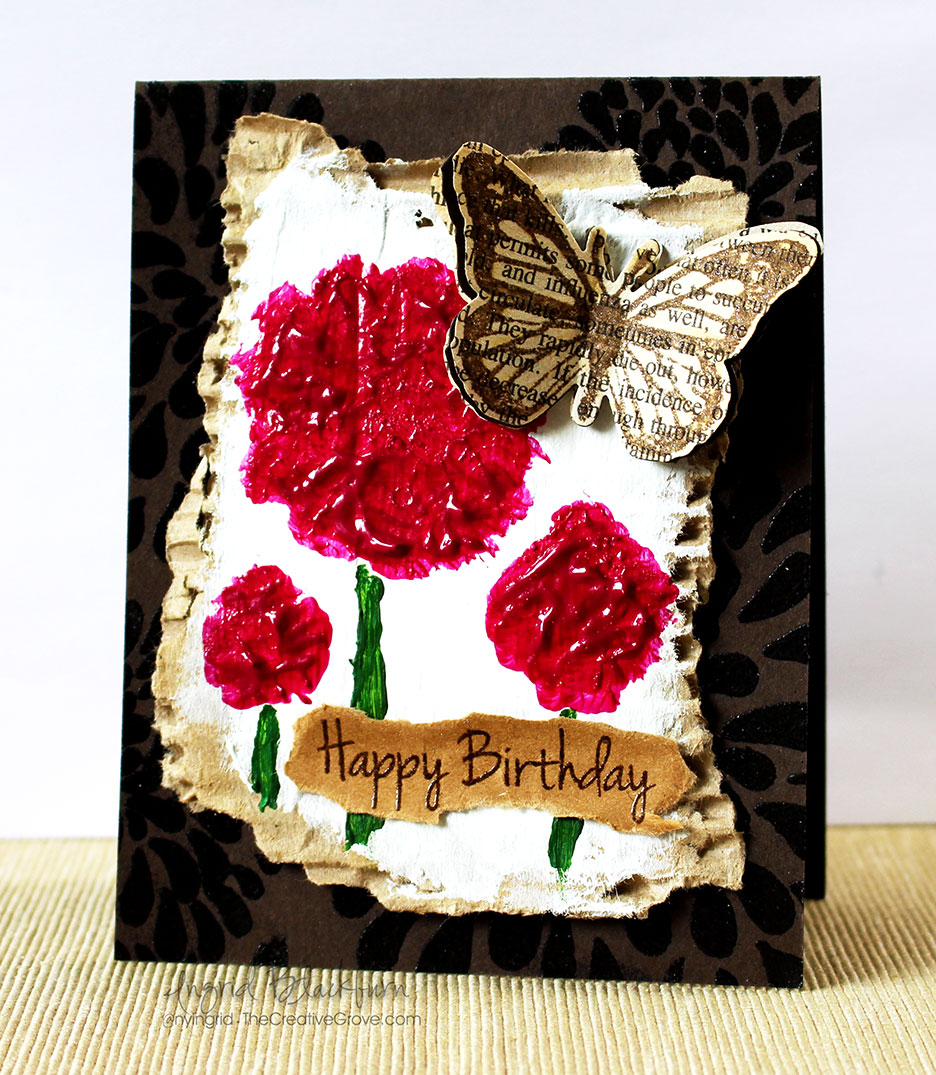
My card front is made of something we ALL have plenty of – a torn up box from Amazon. The base of my painting is the corrugated inside of the box. I tore it so you can see a little more of the texture and character. In order to have the paint really grab onto my cardboard without sinking into it, I first covered it with some clear gesso.

To make the piece lighter, remove one of the slick sides that cover the corrugated part – I used that for the greeting…yup – that’s not card stock – it’s recycled cardboard!

Recycled-Mixed-Media-Card-Ingrid-Blackburn--007

For the butterflies, I used a page from an old book. I definitely wanted to have some discoloration on the pages. If you don’t want to break apart a book, try newspaper!

  • Tear a piece of the box the size you want and remove one of the slick sides for later.
  • Paint some clear gesso onto your recycled cardboard piece.

Recycled Materials in Cards

  • Cover your cardboard in a few coats of white acrylic paint – this will become the background for your painting.
  • While your white is drying (I sped mine up a bit with a heat tool), stamp your butterfly from the HLS Butterfly Birthday set in Ground Espresso onto a page from an old book.
  • Layer your stamped butterfly over a piece of espresso card stock and another piece from the book – die cut at once.
  • Curl up the card stock and stamped layers a bit. Attach to each other using mini glue dots at the butterfly body.
  • Separate the top and middle layer with a foam dot cut in half. This will help to pop up those top wings.

Recycled-Mixed-Media-Card-Ingrid-Blackburn--006

  • Once your white is dry, add some pink flowers by thickly applying some acrylic paint with a rounded brush. To get the texture, just keep dabbing in a push down motion and move to another area. I left it rather thick so that it would give the appearance of petals.
  • Add stems with a little sap green mixed with Burnt Umber for an olive green look. I needed to use a smaller brush to keep the stems from being too thick.
  • Allow your flowers to dry – I used a heat tool a little, and then allowed the flowers to dry over several hours. Once dry, they had a shiny appearance.

Painted Mixed Media Flowers - Recycled

  • Stamp your greeting (HLS Doodled Flowers) using Ground Espresso Distress Ink onto the back piece of card board that you separated from the center & front. I used the slick side as the reverse had the imprint from the corrugated part.
  • Immediately dip your greeting into clear embossing powder and heat set. To see how I use distress inks with embossing powders and other embossing techniques – click here for a great video tutorial.
  • Tear closely around your greeting and adhere to your project using Multi Medium Matte or glue (be sure your stems are dry!)

Happy Little Stampers Mixed Media Challenge - Recycled

  • Smoosh a versamark pad through the Patina stencil by Penny Black so that creates a border on your card base. I didn’t want to add too many layers, as the recycled cardboard was heavy enough.
  • Add clear embossing powder and heat set.
  • Adhere your cardboard card front to the card base using glue on the ridges.
  • Go over your stamped butterfly image with a Spectrum Noir glitter pen & Attach to your painted base using foam dots.

Patina Stencil - Penny Black - Recycle

So what do you think? I bet you think twice about throwing out that Amazon box next time…lol! The best part about this Mixed Media card is that the recycled cardboard has such great texture! And to think I usually use it just to add lines with acrylic paints! Thanks for joining me today, I hope I inspired you in some way to use some recycled materials on your cards. I can’t WAIT to see what you come up with.

Join us over at Happy Little Stampers Mixed Media Challenge – now it’s your turn.

Go get those fingers inky –

Signature

[optin_box style=”12″ alignment=”center” email_field=”email” email_default=”Enter your email address” integration_type=”aweber” double_optin=”Y” list=”4161292″ name_field=”name” name_default=”Enter your first name” name_required=”Y” opm_packages=””][optin_box_field name=”headline”]Learn more with our exclusive FREE video series:[/optin_box_field][optin_box_field name=”paragraph”]PHA+UGx1cyB5b3XigJlsbCBiZSBhZGRlZCB0byBteSBGUkVFIENyZWF0aXZlIFRpcHMgRS1sZXR0ZXIgd2hlcmUgSSBzaGFyZSBleGNsdXNpdmUgcHJvamVjdHMsIHZpZGVvcyAmYW1wOyB0aGUgMTIgRGF5cyBvZiBDaHJpc3RtYXMgUHJvamVjdCBTZXJpZXM8L3A+Cg==[/optin_box_field][optin_box_field name=”privacy”][/optin_box_field][optin_box_field name=”top_color”]undefined[/optin_box_field][optin_box_button type=”0″ button_below=”Y”]Get Instant Access![/optin_box_button] [/optin_box]

Mixed Media Watercolored Butterflies

Mixed-Media-Watercolor-Butterflies-001

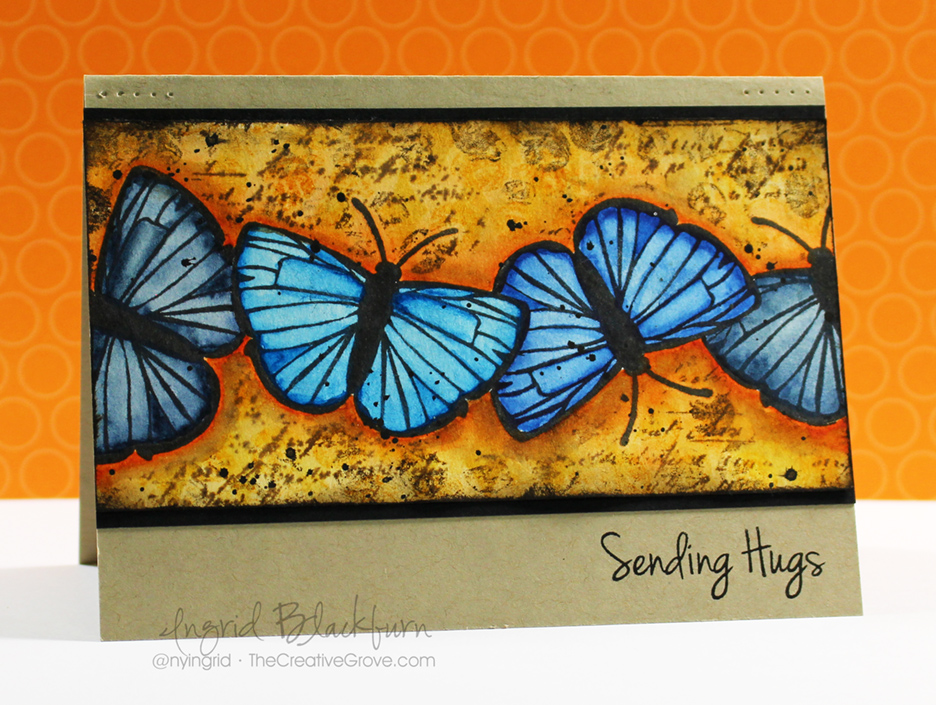
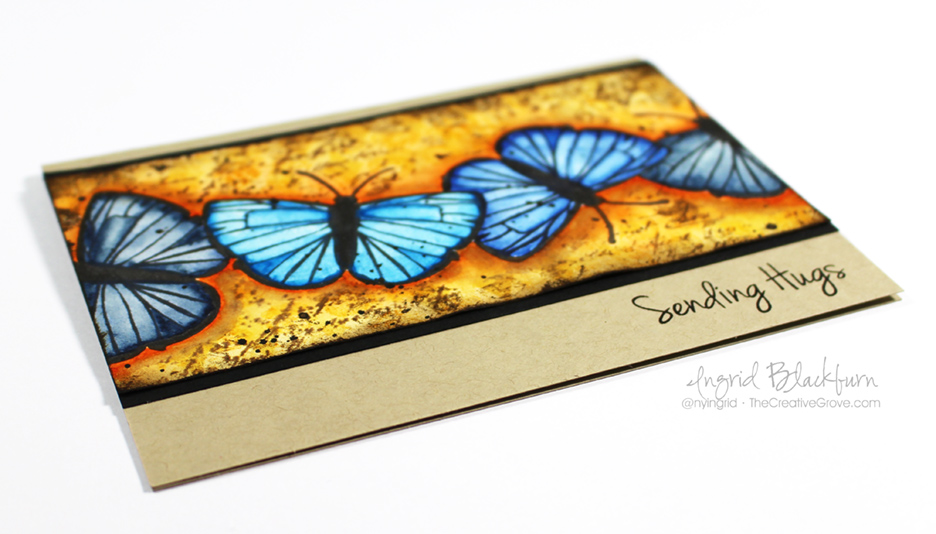
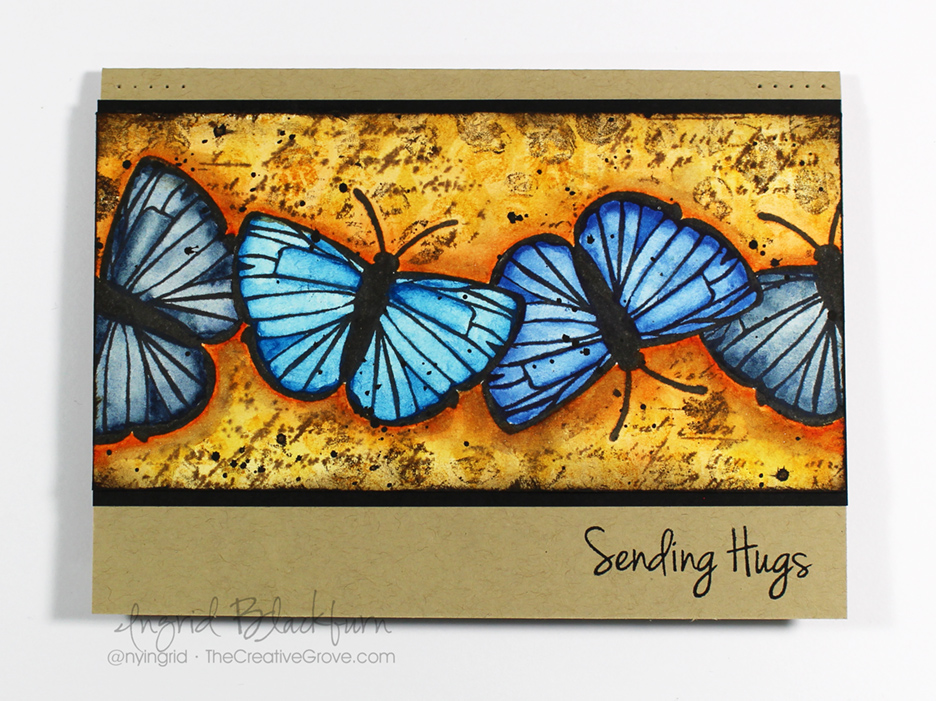
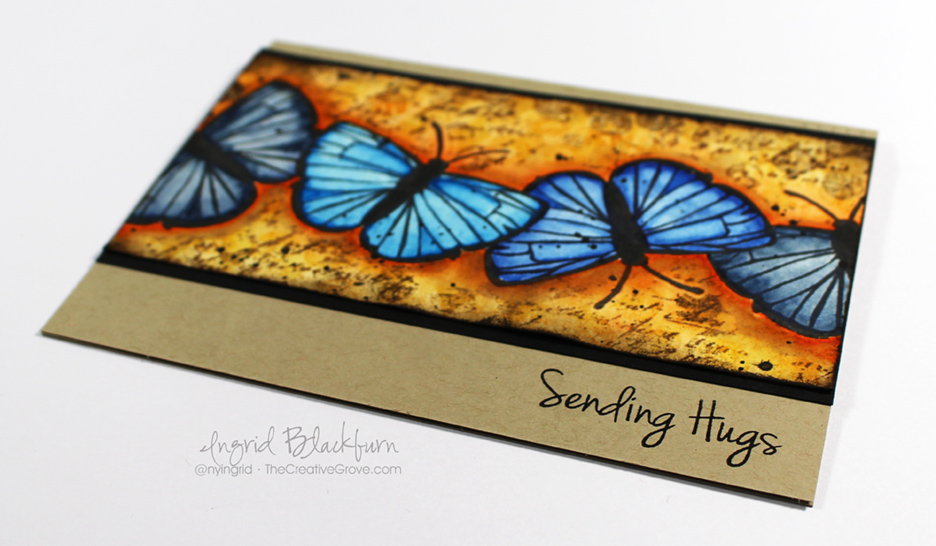
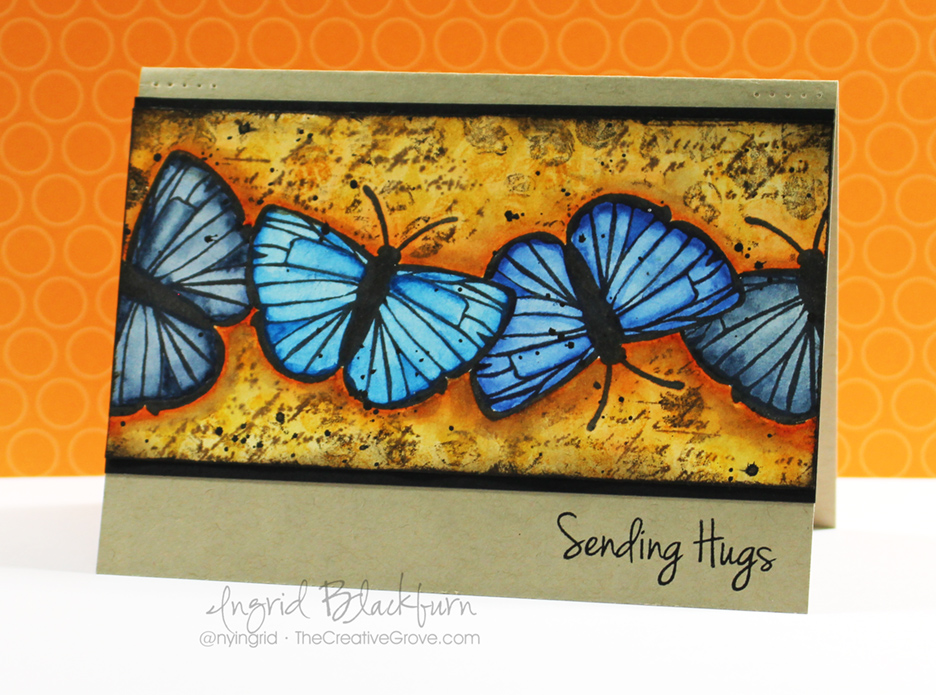
Have you ever wondered how to create depth & texture without bulk? You may find that it’s much easier to do than you think – just grab some watercolor brushes, a few stencils, some distress inks and you may just surprise even yourself! This  month over at the Happy Little Stampers we’re challenging you to play around with Wings in your Mixed Media pieces. That could be any way you interpret it. I chose to use the bold butterfly image from Butterfly Birthday set and see if I could make it feel like it was actually fluttering on the paper with some watercolor magic and stencils in the background. What do you think? Did I hit the mark?

HLS Mixed Media challenge April 2016

Be sure to stop by all the Design Team’s blogs to check out just how they created their own masterpieces. I have a written tutorial for you today, and a video for you! It’s a rather in depth project, so I split it into two videos so you can find your place better. Grab a beverage and enjoy the process! Of course if you want to see it in HD, click the link below to view on YouTube.

View Part One in HD on YouTube

View Part Two in HD on YouTube

This card is actually quite simple to do, it does take a little time, but it’s a great relaxing project – especially if you like to watercolor! Here’s how you can create your very own:

How to Create Depth & Texture without Bulk

  • First you’ll want to cut out a few masks. I used the coordinating Butterfly Dies for the Butterfly Birthday stamp set. I knew I was going to be watercoloring right up to the edge, so I found a way around the ‘edge’ you get when using dies as masks – you’ll see it in the video. Cut several masks – I stacked four post it notes and ran it through once since they were so thin – super easy!
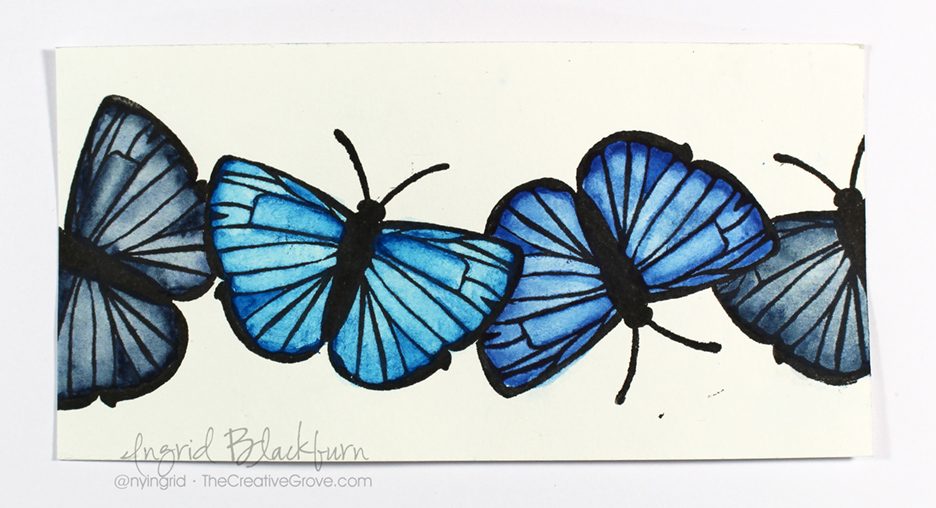
  • Stamp your butterfly pattern in a border along your paper. Be sure to overlap them using your masks so that they are on top of each other. I used an image from the Butterfly Birthday stamp set from Happy Little Stampers. I stamped mine in Versafine Onyx Black Pigment Ink on a 12 x 3″ scrap piece of Canson 138# Mixed Media paper. That way I could make two or three projects – depending on how I cut it down.
  • Heat set your pigment ink before going to the next step!

Mixed-Media-Watercolor-Butterflies-004

  • Watercolor your butterflies in similar colors – some vibrant, others more matte. That will allow them to pop and compliment each other. I chose the following watercolors by Schminke – Hordam Aquarelle Artist: Cobalt, Phthalo Blue, Indigo, Paris and Winsor Newton Cotman Ultramarine and Turquoise.
  • Watercolor a light base coat in a watered down wash, then once dry come back to add darker highlights allowing for lightness in your wings. This helps your images to really pop!
  • Once your butterflies are dry, cut your border down.
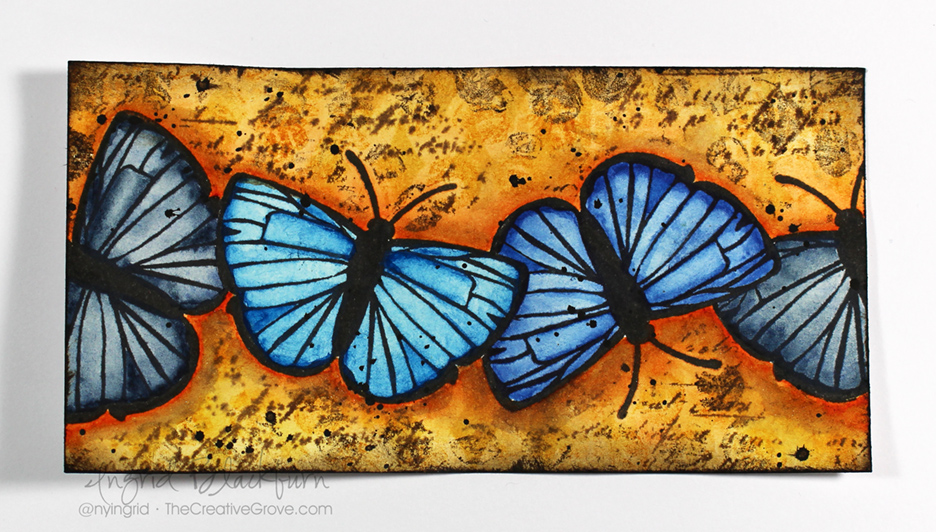
  • Add a light watercolor wash of Schminke Translucent Orange framing your butterflies. First wet your paper on the half you’re painting, add your darkest color to the border and lighten outward. Try and keep the bulk of the color around your winged creatures.

Mixed-Media-Watercolor-Butterflies-007Mixed Media Textures

  • Once dry, add a light wash of Ochre from the border inward. Try and keep some lightness to the outer border if possible. You want your wings to be the star.
  • While your piece is still damp and drying, ink up a script stamp in Ground Espresso Distress Ink – I used one by Kaiser Crafts and stamp in random spots. Be sure to have your butterflies covered with your masks. With the paper wet, your Distress Ink will blur a bit. If it’s too wet you will lose all detail.
  • Add various textures with stencils to your outer pieces around your butterflies using Wild Honey, Antique Linen and Espresso Distress Inks. I added texture with some bubble wrap & a diamond stencil (Harleen by Winnie & Walter).

CAS mixed media cards

  • Smoosh some Ground Espresso Distress Ink on your craft mat and spritz with water. Use a light wash over your orange at the edge of your butterflies. This will dirty it up a bit, tone down the orange, and help give life and depth to your winged creatures. It helps to make them seem as if they are fluttering. Keep your shadow a bit thicker on the bottom than the top. It’s okay if some touches the script, but you don’t want to wash away all the great texture you created.
  • Lightly Sponge a frame in Ground Espresso Distress Ink and edge your piece in Soot Black.
  • Splatter some Paynes Grey watercolor with a brush.

Depth & Texture in Bulk

  • Allow it to completely dry.
  • Matte onto a black strip and add to a kraft colored base.
  • Stamp your greeting – I used the fun quirky ones from the new HLS set Doodled Flowers – I LOVE these sentiments. They are the perfect size and looks as if I just wrote it myself.

Part of what makes this project work are the complimentary colors. Not just the butterflies, but blue and orange. Other combinations that are great are purple and yellow or red and green. Basically any two colors that are on the opposite of the color wheel from one another. The black really makes it pop and I love the brown and black together. It works!

Well, there you go, not too many steps. Okay – I’ll be honest, this project did take me over an hour to do – closer to two, but don’t let that scare you. It was fun, relaxing and is truly a piece of artwork. I don’t know if the photos relay it well, but the butterflies look as if they’re about to leap off the page or twirling from one side to the other. It turned out better than I could have imagined. So I encourage you to jump on in and try it yourself. Use whatever you have – hearts, Circles, Snowmen, Butterflies – we all have butterflies! Just have fun.

Mixed-Media-Watercolor-Butterflies-006

I can’t wait to see your Winged Mixed Media creations – use texture, embossing, whatever you have. I chose Watercolor, Distress, stamping, and stenciling. The sky is the limit. Jump on into the Mixed Media April Challenge – Wings. I can’t wait to see what you do!

I’m also going to play along with one of my new favorite Mixed Media challenges – CAS Mix Up challenge – if you haven’t checked this one out, don’t wait! This month it’s all about stamping & stenciling – LOVE that!

april

Now go get those fingers inky –

Signature

[optin_box style=”2″ alignment=”center” email_field=”email” email_default=”Enter your email address” email_order=”2″ integration_type=”aweber” double_optin=”Y” list=”3846012″ name_field=”name” name_default=”Enter your first name” name_order=”1″ name_required=”Y” opm_packages=””][optin_box_field name=”headline”]Learn more with our exclusive FREE video series:[/optin_box_field][optin_box_field name=”paragraph”]PHA+UGx1cyB5b3UnbGwgYmUgYWRkZWQgdG8gbXk8c3Ryb25nPiBGUkVFPC9zdHJvbmc+IENyZWF0aXZlIFRpcHMgRS1sZXR0ZXIuIEZyb20gdGltZSB0byB0aW1lIHlvdSdsbCBnZXQgZXhjbHVzaXZlIHByb2plY3RzLCB2aWRlb3MgJmFtcDsgdGhlIDEyIERheXMgb2YgQ2hyaXN0bWFzIHNlcmllcy48L3A+Cg==[/optin_box_field][optin_box_field name=”privacy”][/optin_box_field][optin_box_field name=”top_color”]undefined[/optin_box_field][optin_box_button type=”0″ button_below=”Y”]Get Immediate Access![/optin_box_button] [/optin_box]


Mixed Media Watercolor

Mixed-Media-Watercolor-March-2016-HLS

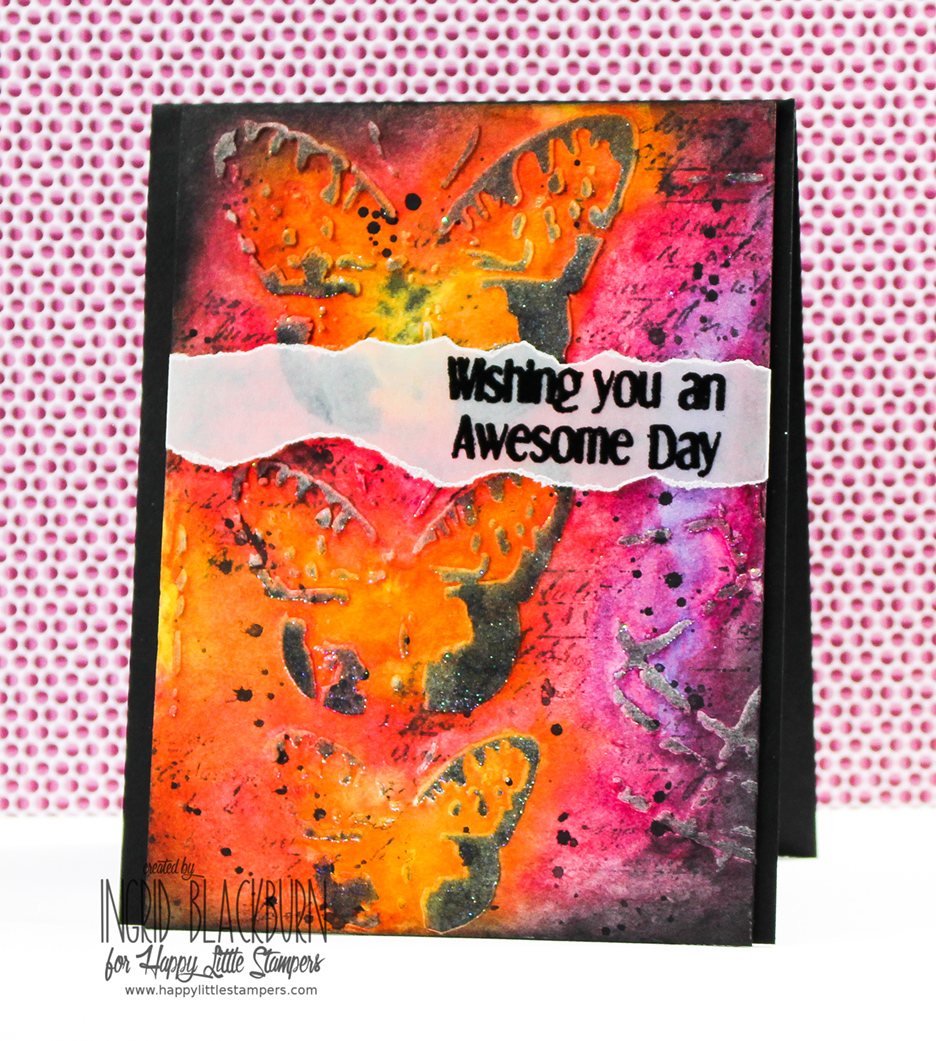
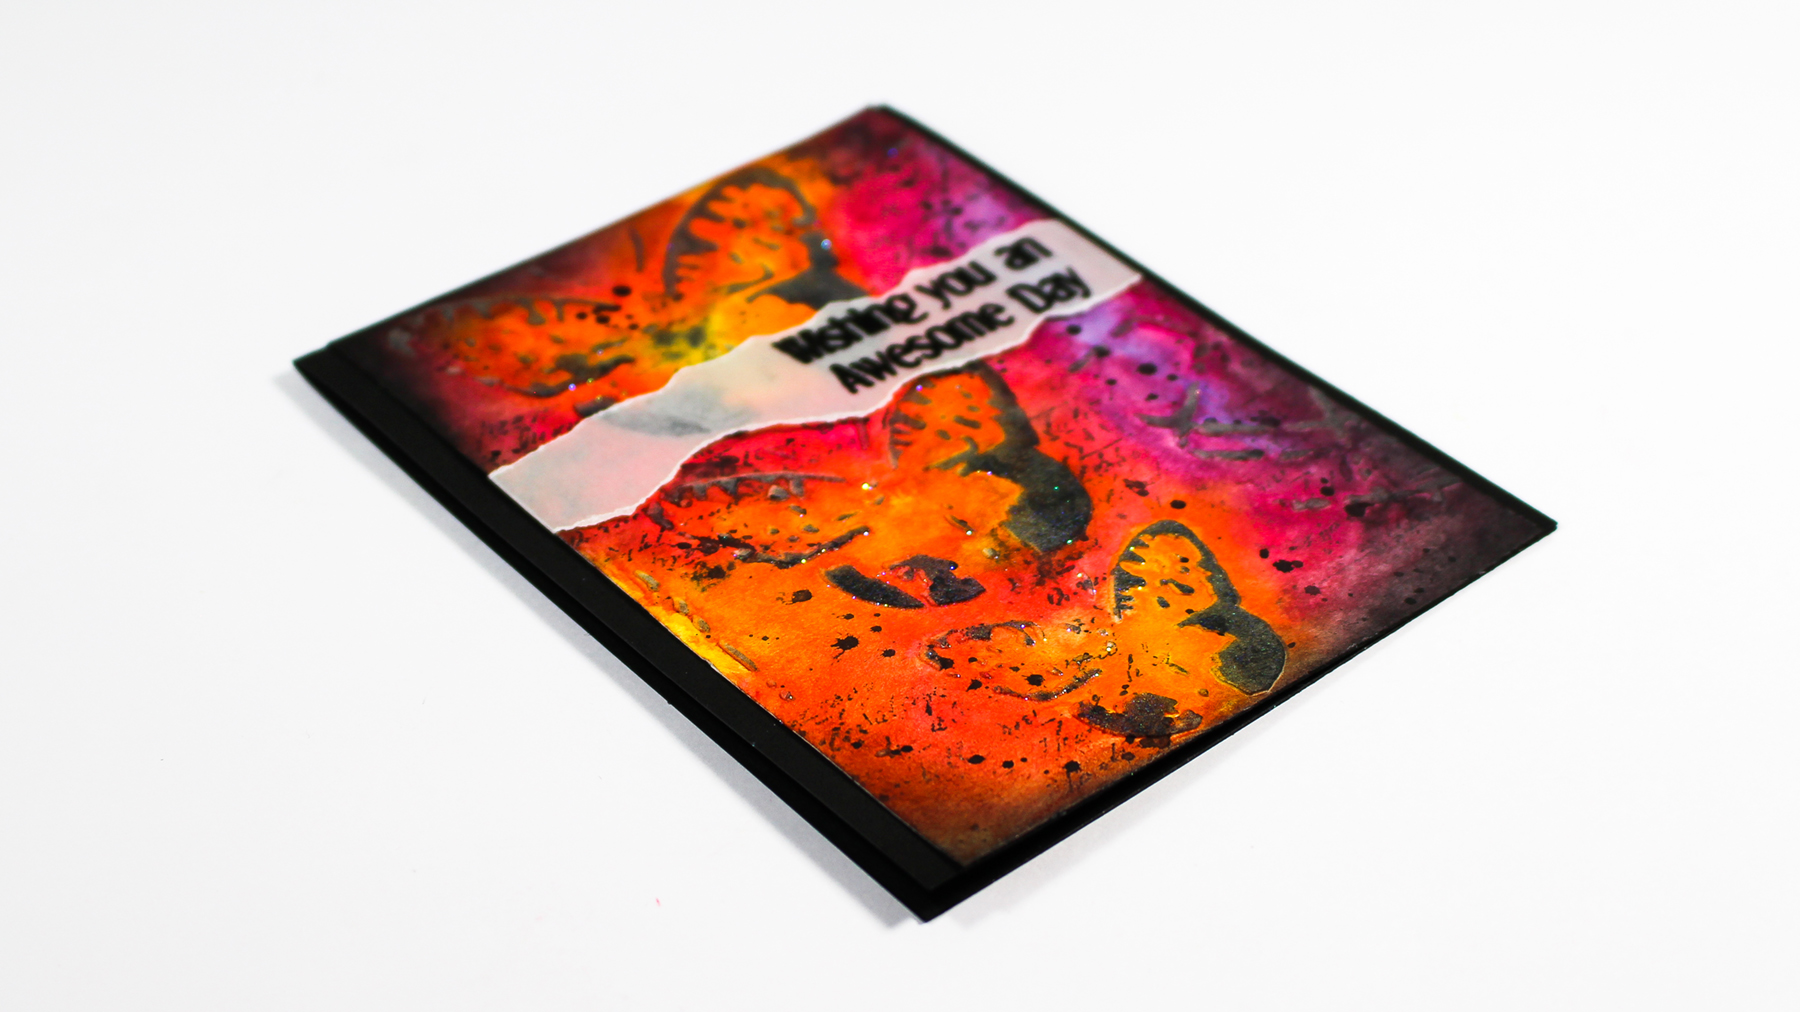
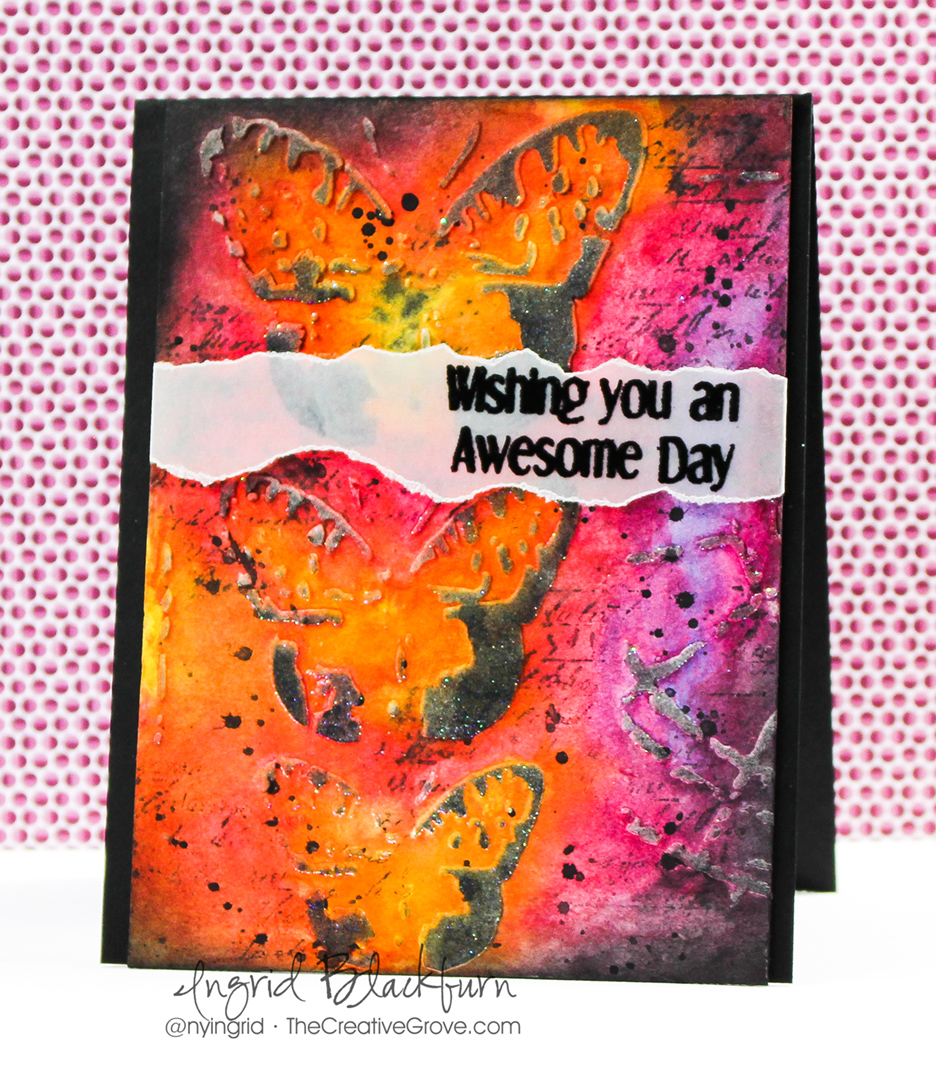
If I were to say Textured Watercolor to you, what would you think of? Mixed Media? Embossing Paste? I have to admit, this month I felt a little challenged when I saw the theme over at the Mixed Media Challenge at Happy Little Stampers – Water. Now you can take this a few ways – water based  techniques or literally create a water scene (Usually what I’d do). SO, I thought I’d give a little Textured Watercolor a shot.

HLS Mixed Media challenge March 2016

To get the water flowing on my mixed media piece, and have a little fun – I whipped out some bright colors, stencils, stamps and a few different mediums. I even shot a real time video for you too – so if you want to see how I watercolored Embossing Paste to create a beautiful textured card, just watch here – or click the link below to watch in HD on YouTube.

Watch in HD on YouTube

The snow is falling as I write this blog post, so it was fun to work on a project that gave me a spring/summer feel. That’s what I love about art, it takes you away to some cool places! Here’s a written tutorial for you too – but the video has much more detail.

Mixed Media: Creating Textured Watercolor

  • Add embossing paste  through a stencil where you want to on 140# cold pressed watercolor or mixed media paper. I used Specimens 12×12″ by The Crafters Workshop. Set aside to dry.
  • Paint over your dried piece with bright vibrant watercolors as in the video. I used Lemon Yellow, Translucent Orange, Magenta, Quinacrodone Violet, Cobalt, Paynes Grey (Schminke) and Permanent Rose (Mission).

Mixed Media Watercolor-002

  • Keep your watercolor loose and bright, adding dimension through layers and depth by keeping the darker areas balanced with the light.
  • Allow to dry thoroughly.
  • Stamp Script stamp in Soot Black Distress Ink in random spots, touching up in spots with water to keep it loose and imperfect.
  • Add splats with a watery Paynes Grey and a paint brush.

Textured Mixed Media

  • Once dry, add a little sponging to the edges and lightly on the sides with Hickory Smoke and Soot Black Distress inks.
  • Secure your project and stencil over it again. Sponge your embossing paste in Hickory Smoke and Soot Black. If not dark enough to your liking, use your Distress Inks in the direct to paper method.
  • Cover your project with a destatic tool.
  • Place your stencil over top your project again and smoosh a versamark pad over your embossed images.

Mixed Media Watercolor

  • Add glitter, then a little clear embossing powder. Heat set
  • Rub over your project with a cloth or paper towel to remove the destatic powder and some of the glitter.
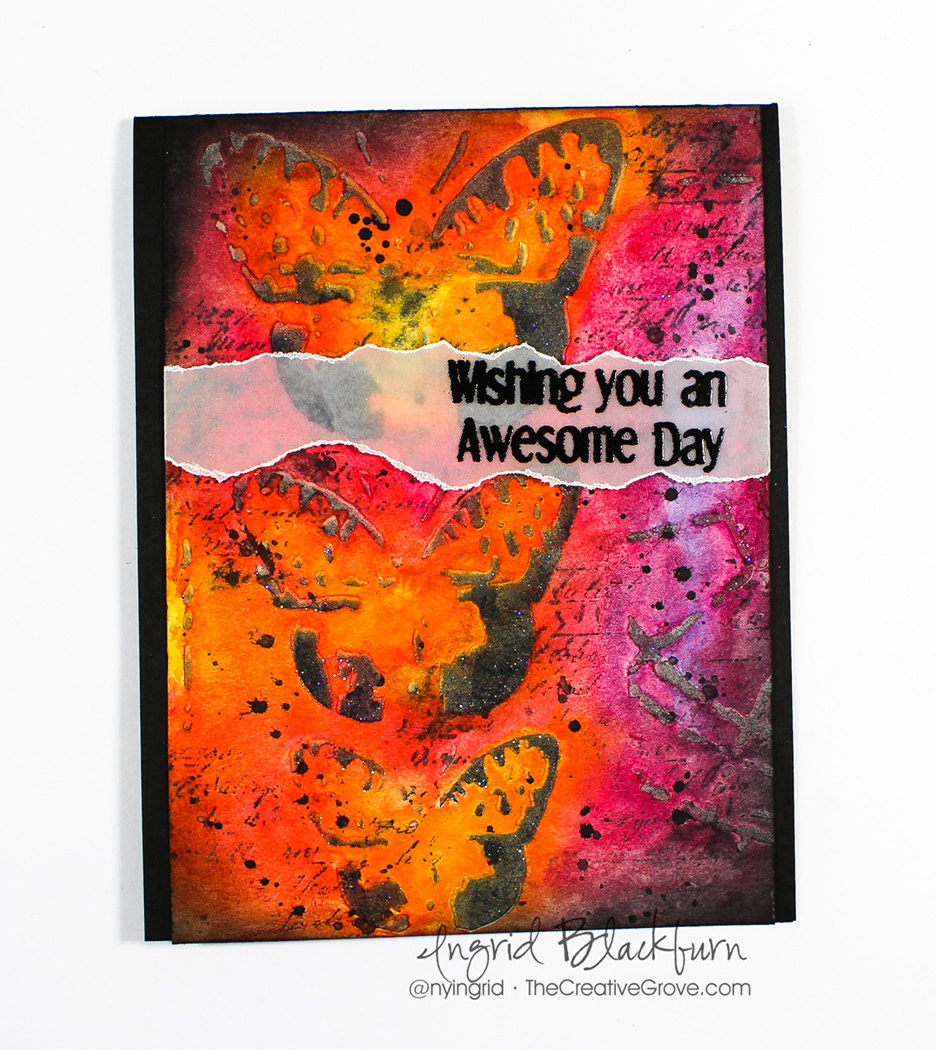
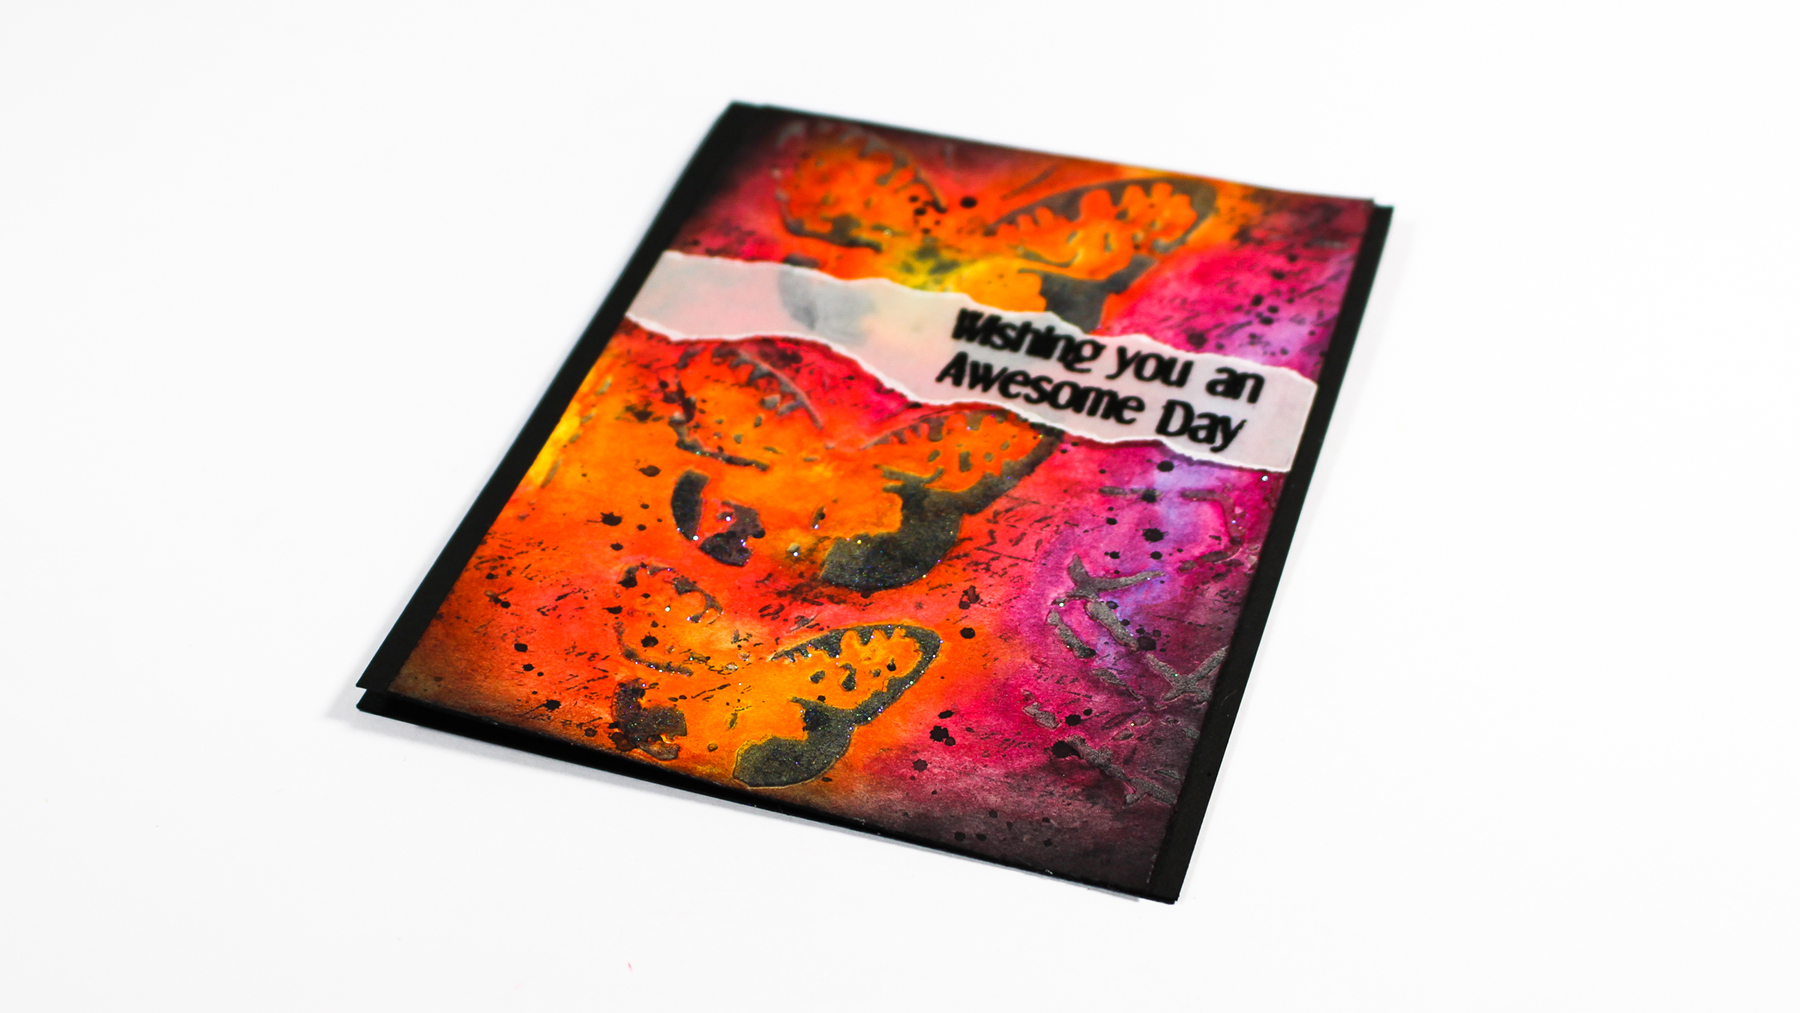
  • Emboss a greeting on a piece of Vellum card stock, tear and add to your project as in the video. I used Everyday Sentiments (Happy Little Stampers)
  • Add piece to black card stock and trim if needed. If you do trim, add a little black to the bottom as in the video and touch up your sponging.

Mixed-Media-Watercolor-007

And come to think of it – I created another Watercolor Mixed Media piece earlier in the week for my friends Loll & Bonnie’s new challenge too – CAS Mix Up. See that card here. I decided to play along with two other challenges today – Anything but Cute – Color and Mixed Media Mojo – Springtime/Watercolor.

abc-badge-crazy-for-color  Graphic to copy 3

So grab those bright watercolors, and have fun creating your own Mixed Media piece! I’m sure you’ll get just as lost in it as I did. Till next time –

Signature

[optin_box style=”2″ alignment=”center” email_field=”email” email_default=”Enter your email address” email_order=”2″ integration_type=”aweber” double_optin=”Y” list=”3846012″ name_field=”name” name_default=”Enter your first name” name_order=”1″ name_required=”Y” opm_packages=””][optin_box_field name=”headline”]Learn with our exclusive FREE video series[/optin_box_field][optin_box_field name=”paragraph”]PHA+R2V0IHRoZSBmcmVlIENyZWF0aXZlIFRpcHMgRS1sZXR0ZXIgYW5kIGxlYXJuIHdpdGggc3Vic2NyaWJlciBleGNsdXNpdmUgdmlkZW8gYW5kIHBpY3RvcmlhbCBjb250ZW50LiBJbmNsdWRpbmcgb3VyIHllYXJseSAxMiBEYXlzIG9mIENocmlzdG1hcyBzZXJpZXMhPC9wPgo=[/optin_box_field][optin_box_field name=”privacy”][/optin_box_field][optin_box_field name=”top_color”]undefined[/optin_box_field][optin_box_button type=”0″ button_below=”Y”]Get Instant Access![/optin_box_button] [/optin_box]

Mixed Media Stencil Backgrounds

Gelli Plate Stencil Backgrounds 001

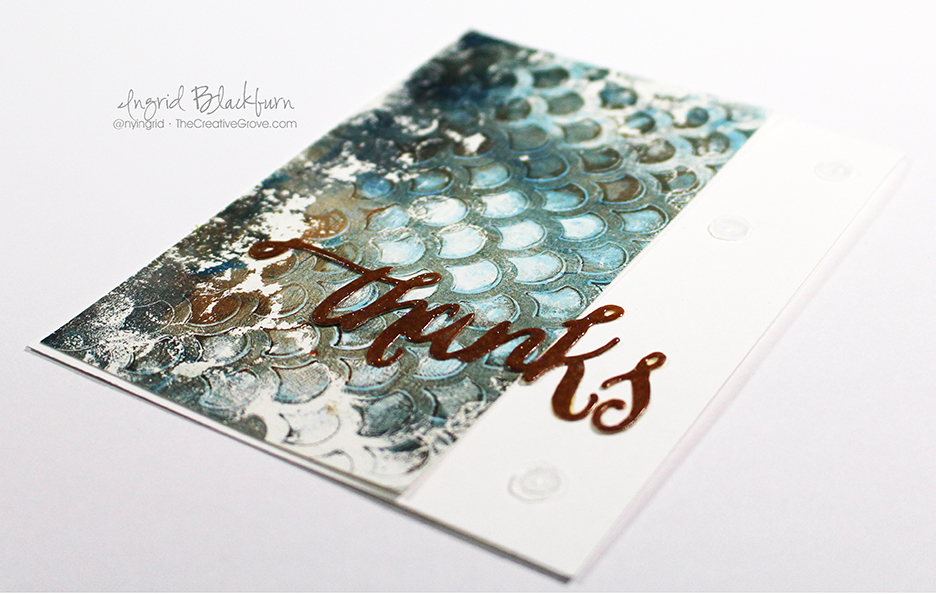
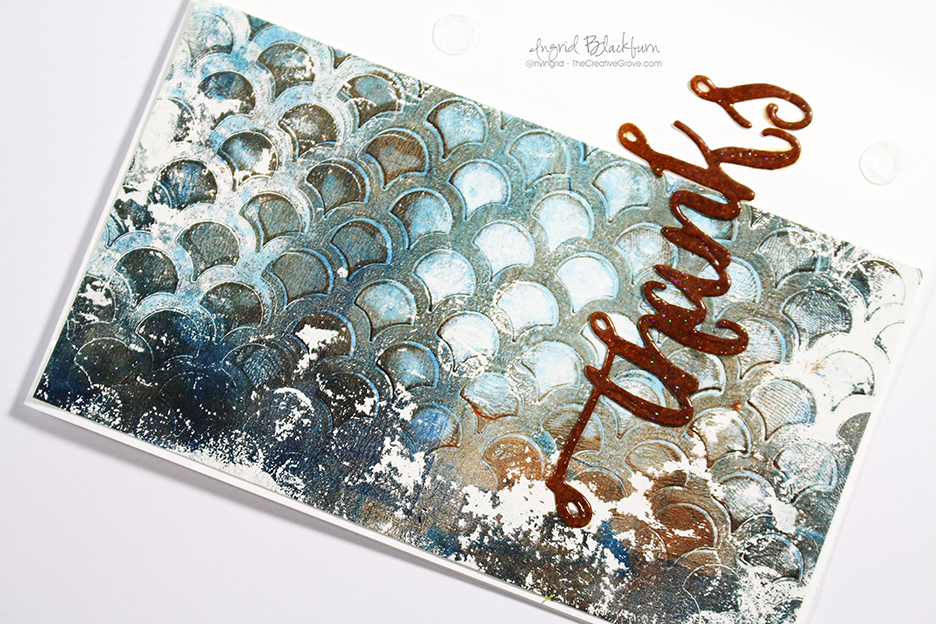
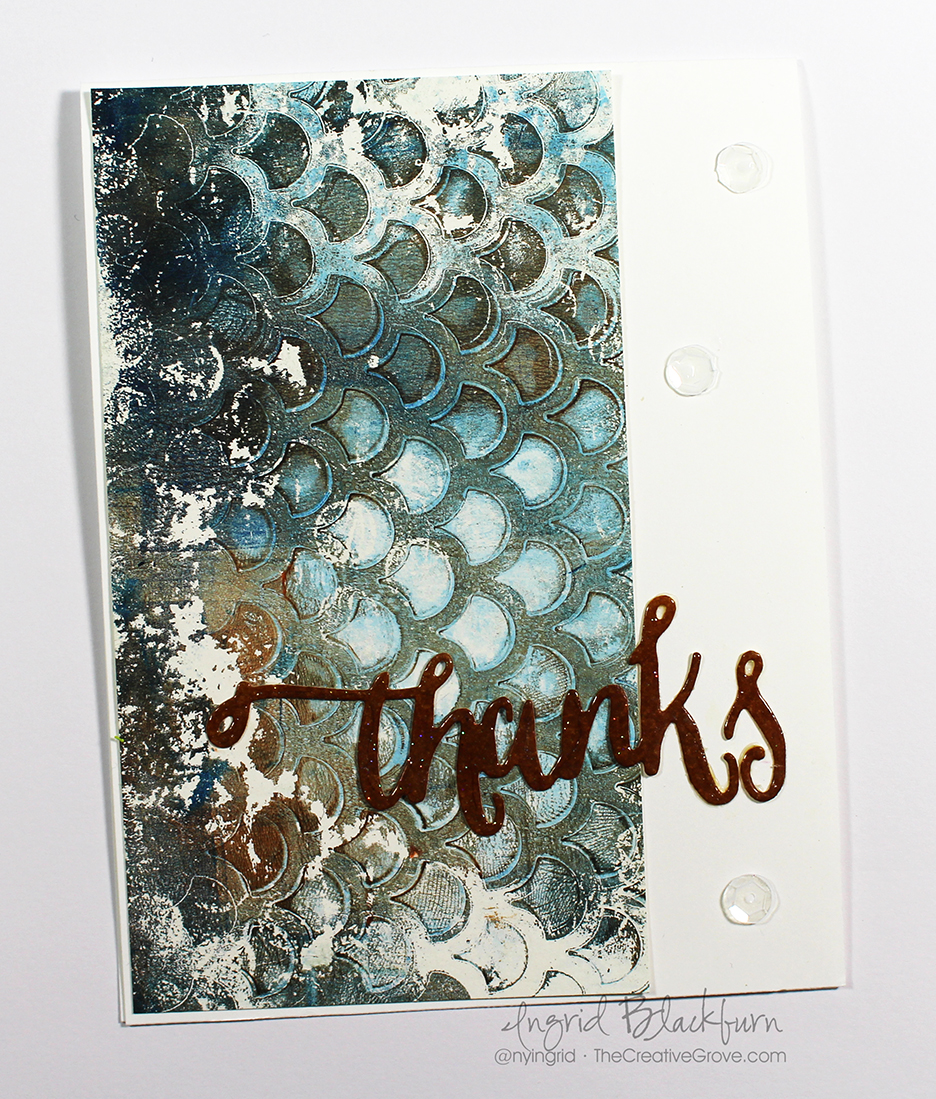
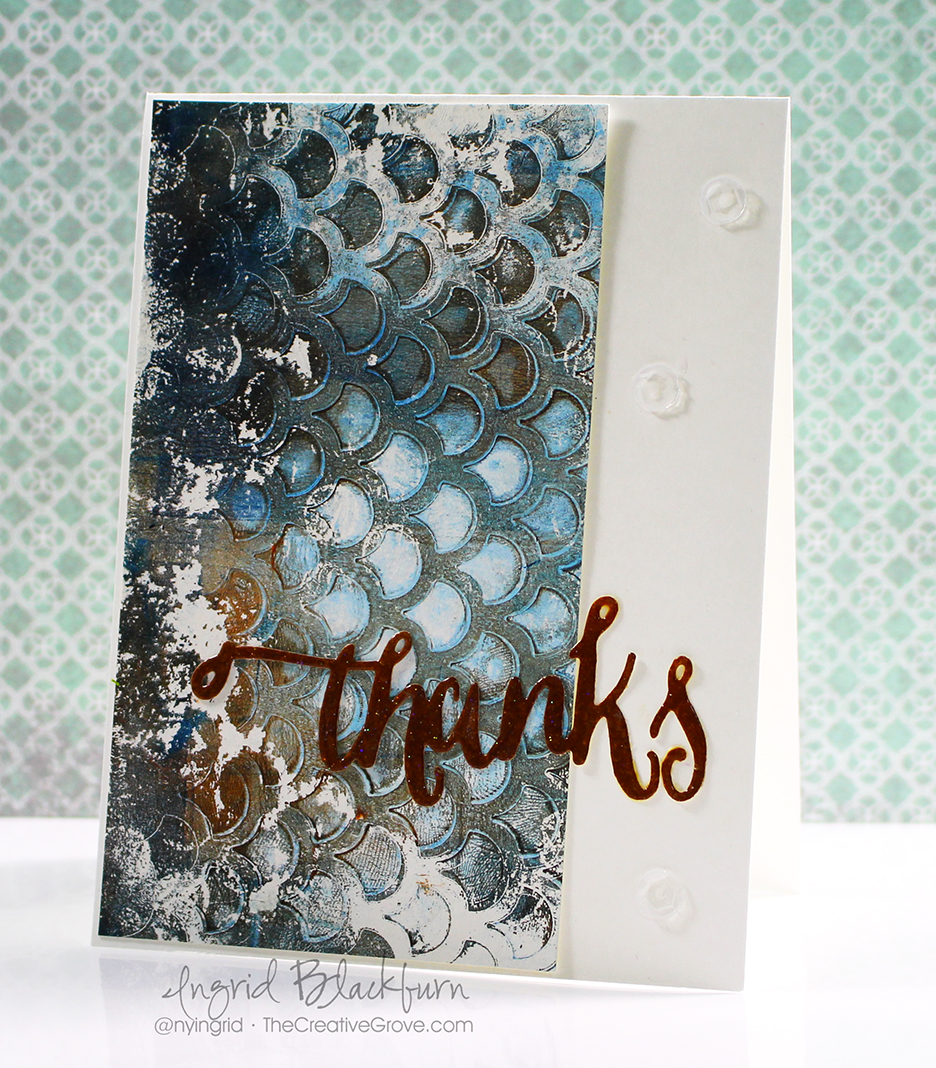
I love creating backgrounds for cards – it’s probably one of my favorite things to do…and in the past year, I’ve grown quite addicted to Stencil Backgrounds! This card takes stencils to a whole other level. This month over at Happy Little Stampers Mixed Media Challenge we’re playing around with Stencils. If you’ve taken any class with me in the past year online or watched any of my YouTube Videos – then you KNOW I love stencils.

HLS Mixed Media challenge January 2016

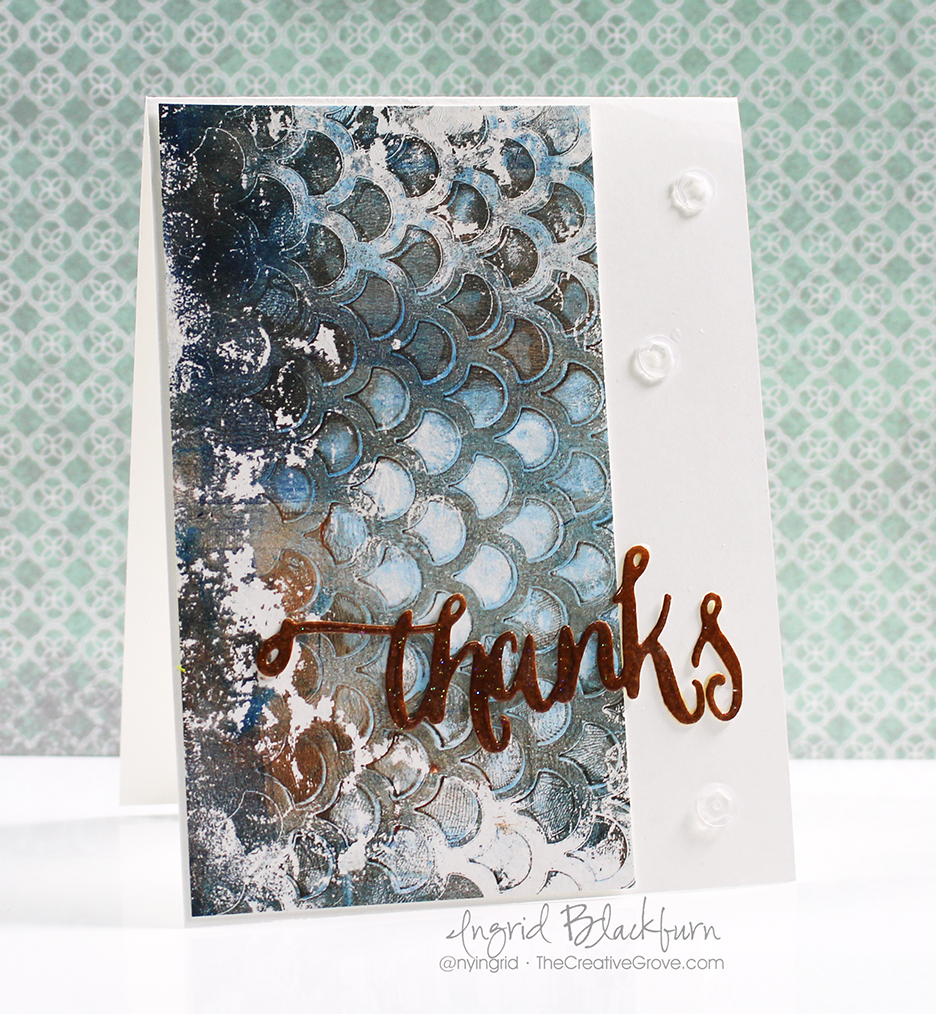
I’m still getting my feet wet in the Mixed Media world, but this Gelli Plate has quickly given me the ability to create some amazing pieces of art. And let’s be honest – that’s exactly what it is – art! I used to spend a crazy amount of money on papers that look like this….now I can create them myself…what? That’s insame!!! Don’t worry – some videos will definitely appear in the future, but for now – just enjoy one of my latest goofing off pieces (I wish every goofing off piece turned out like this!).

Of course for the Mixed Media Challenge, you don’t need a Gelli Plate – just a trusty ol stencil. Use your favorite way to add a medium – gel, embossing paste, ink, sponging, gelli, you name it – they are a tool not just every Mixed Media gal and guy needs – but every stamper!

Gelli Plate Stencil Backgrounds 002

Creative Tips on How to Create Stencil Backgrounds using a Gelli Plate

  • Add some acrylic paint to your Gelli Plate – start off with your darkest shade. I used Phylo Blue. Use a brayer to spread your acrylic paint covering it edge to edge.
  • Roll off on a piece of scrap paper and pull off some paint leaving a blue layer around the edge of your Gelli. It took me a bit to get the hang of this.
  • Allow the blue to completely dry, then add some Raw Sienna and cover in the same manner. Remove a bit of it toward the middle, then place a stencil over – I used My Favorite Things Scallop stencil.

Gelli Plate Stencil Backgrounds 004

  • Place a piece of copy paper over and lightly tap with your fingers to remove a bit here and there. Remove your stencil and allow to completely dry.
  • If you want to get a feel for what it’s starting to look like, lift your Gelli Plate and see it from the bottom. Of course, don’t place your finger in your creation!
  • Next, add a layer of white. Now, I have white acrylic paint – but it’s lost somewhere in my craft room – would you believe that! I knocked my paint box over and now I can’t find that one all important tube…maybe the cat took it away…yeah – I’ll go with that! Of course, that prompted me to clean my work area today – I think Bria still has my tube…lol! So I used the next best thing – white gesso.
  • Lay a sheet of small bubble wrap over the white to get a stamped impression in white. Tap it lightly in random places to create a slightly stamped circular pattern.
  • Quickly place your piece of paper over – I used 138 lb Canson Mixed Media paper.  Firmly rub the back of your paper with your fingers. I didn’t quite do this quick enough and a little of my paint didn’t lift properly around the perimeter, but that was okay because it created this gorgeous distressed look. I bet I couldn’t duplicate that if I tried!

Gelli Plate Stencil Backgrounds 003

  • My Gelli Plate is a 6 x 6 inch one. My piece also measures 6 x 6″. I cut my paper in two (Pained me to do so – it was SO beautiful). This is the left half.
  • I trimmed it down to 5 3/8″ x 3″. That was a happy accident. Originally I intended on 5 1/2 to go top to bottom, but I love the slight 1/16″ border it ended up with.
  • You don’t want to take away from the beauty of the background. So I opted to add a sponged die cut that was embossed in clear. This is the Handlettered Thanks die by WPlus9.
  • To get a similar hue to the Raw Sienna in the project, so I first sponged a piece of white scrap paper with Rusty Hinge, then a bit of Gathered Twigs and Walnut Stain Distress Inks to get a matching hue. Distress inks really helped here, as their translucent nature allowed me to build upon previous layers fro just the right color.

Gelli Plate Stencil Backgrounds 005

A few clear sequins finished it off. I love the simplicity yet complexity that this card has. I have to admit, some of the creations I whipped up with my Gelli Plate really stunned me. Once I got the hang of it, and that creating mono-prints was about layering and pulling it up together, I really started to have fun! I see a ton of “Gelli-ing” in my future!

So whip out those stencils – take what you will from this project, mono-printing, sponging, color combo, layout, anything and get those stencils out. Add fun stuff to the challenge gallery!

Remember our definition of Mixed Media is – stamps + ink, plus two other elements which add texture and/or dimension. Can’t wait to see what you stencil up!

Now go get those fingers inky –

ingrid signature

[optin_box style=”12″ width=”600″ alignment=”center” email_field=”email” email_default=”Enter your email address” email_order=”2″ integration_type=”aweber” double_optin=”Y” list=”3846012″ name_field=”name” name_default=”Enter your first name” name_order=”1″ name_required=”Y”][optin_box_field name=”headline”]If you enjoyed this tutorial…[/optin_box_field][optin_box_field name=”paragraph”]PHA+4oCmeW914oCZbGwgbG92ZSBvdXIgPGVtPjxzdHJvbmc+ZnJlZSA8L3N0cm9uZz48L2VtPnN1YnNjcmliZXIgb25seSB2aWRlbyBzZXJpZXMuIMKgTGVhcm4gbmV3IHRlY2huaXF1ZXMgdGhyb3VnaCBvdXLCoDxlbT48c3Ryb25nPmV4Y2x1c2l2ZTwvc3Ryb25nPjwvZW0+wqBDcmVhdGl2ZSBUaXBzIGUtbGV0dGVywqBhbmQgc3Vic2NyaWJlciBvbmx5IHZpZGVvIGFuZCBwcm9qZWN0IHR1dG9yaWFscyE8L3A+Cg==[/optin_box_field][optin_box_field name=”privacy”][/optin_box_field][optin_box_field name=”top_color”]undefined[/optin_box_field][optin_box_button type=”0″ button_below=”Y”]Get Exclusive Tips![/optin_box_button] [/optin_box]