Today I have a cool mixed media cards tutorial for you. Even if you aren’t necessarily into mixed media, or the thought of it scares you – there are LOTS of little golden nuggets in this tutorial. You’ll find little techniques that you can adapt for any project. Let’s dive right in.
Today we’re going to play with some Nuvo mediums.
I’ll be honest – Nuvo makes some insanely versatile products. If you’ve never had a chance to try them, by the end of this tutorial – you’ll definitely be itching to add them to your stash.
I’m going to break this project into sections for you. We’re going to play with:
- Embellishment Mousse
- Glacier Paste
- Shimmer Powders
- Sparkle & Mica Sprays
- Stencils & Dies
CLICK HERE to view on YouTube in HD and Full Screen
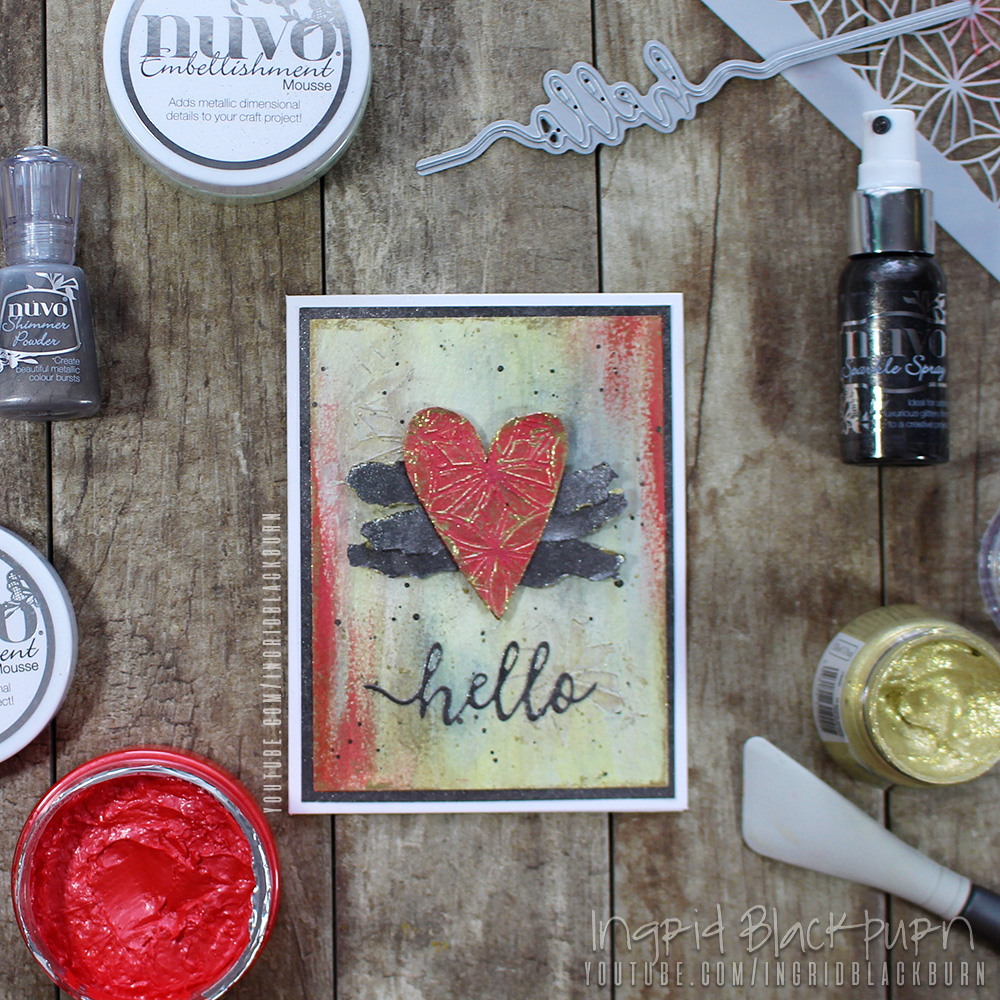
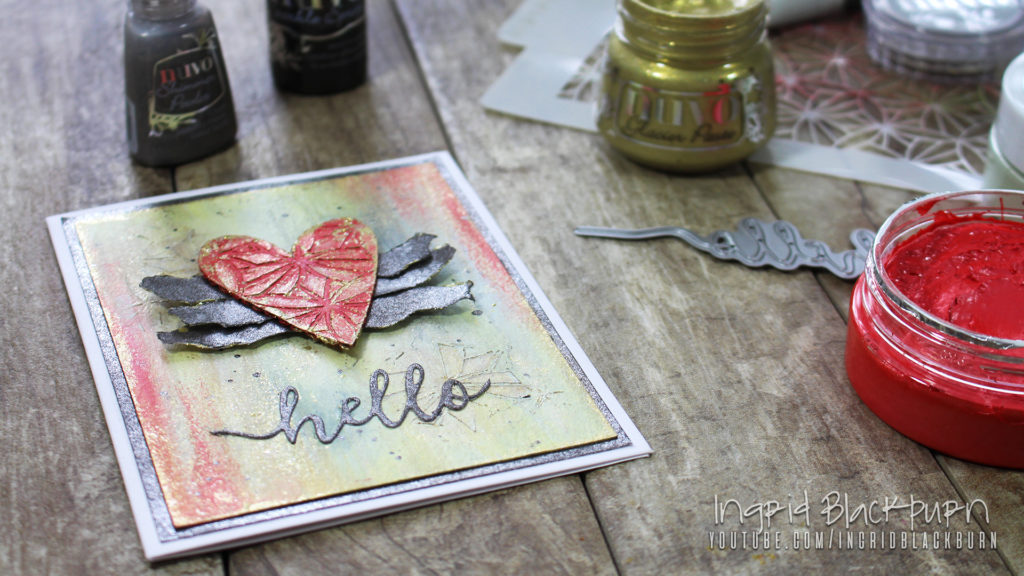
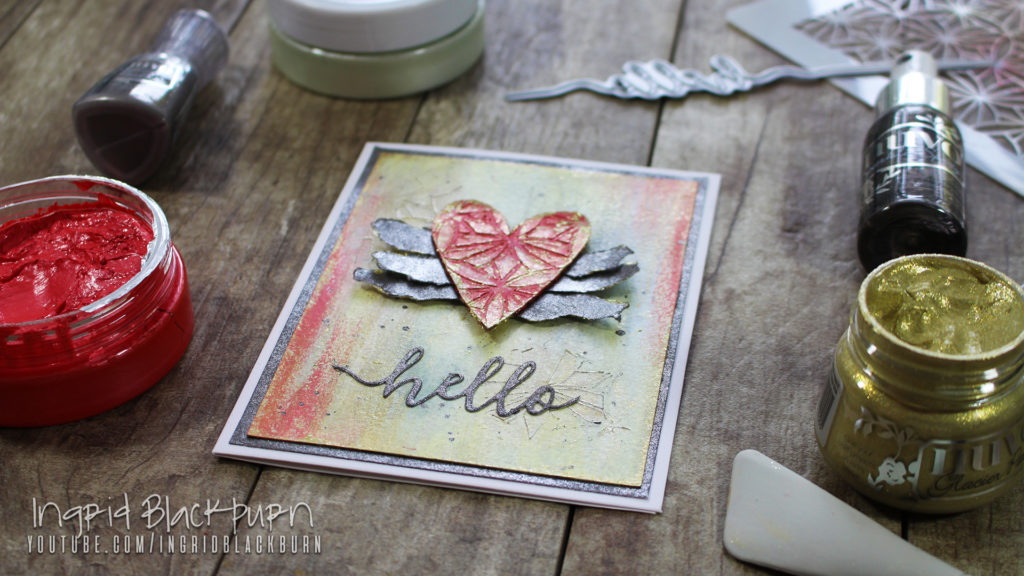
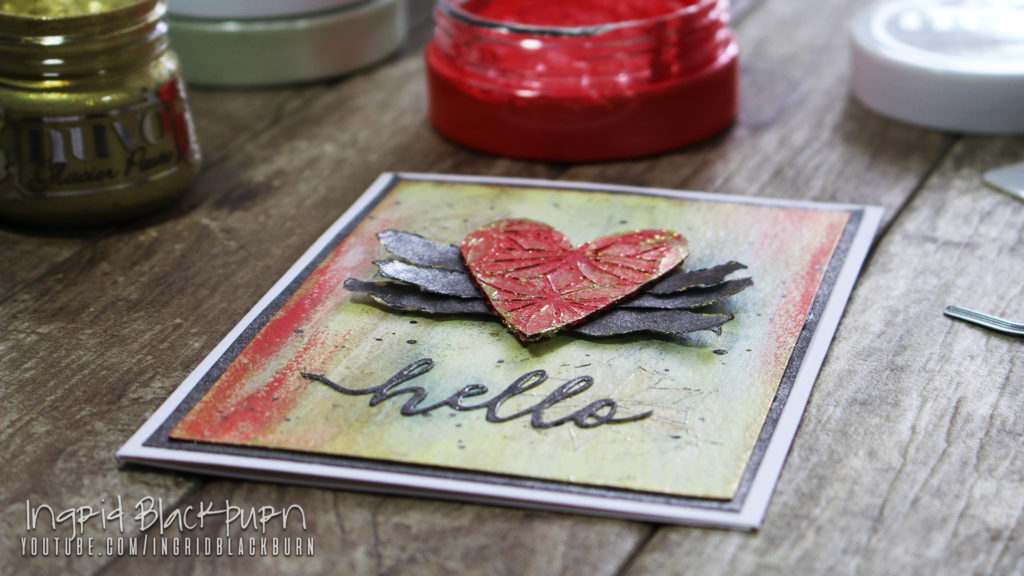
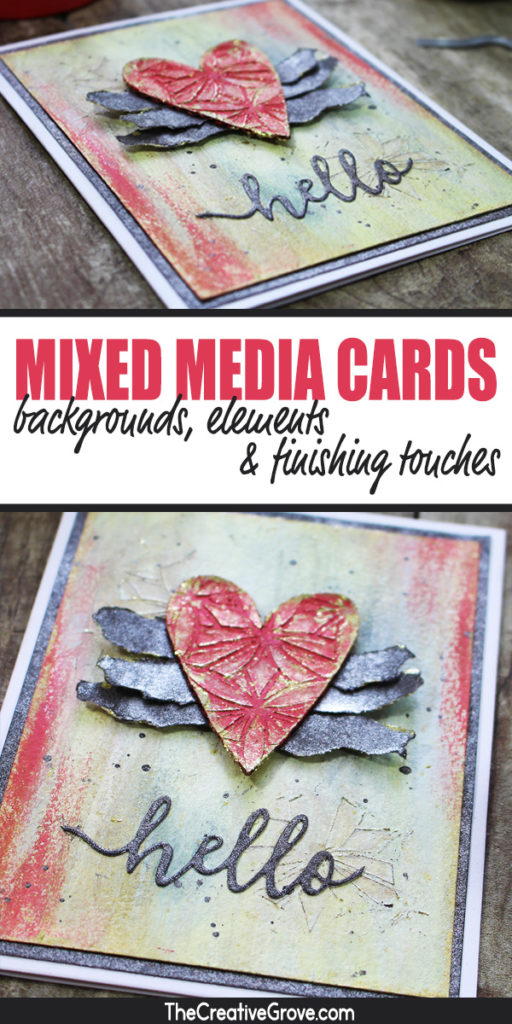
The Background
For the background, we’re going to use several products. So, together they are going to make a cool, textured abstract which would also be great on it’s own.
You’ll want to use a piece of 140# Cold Pressed watercolor paper. Because we’re going to use a little water, and you’ll need your paper to absorb that. I always use the rougher side, because it helps with texture and holds water beautifully.
Watercolor Paper works beautifully for mixed media cards, mixed media paper too, though it is a bit thinner than 140# cold pressed paper.
Using a spatula or palette knife, spread a little embellishment mousse onto your glass mat surface. TIP – You don’t want to put your fingers into your mousse. If you do, you might leave behind oils that can contaminate your medium, which can result in a little mold to grow.
I used Honeydew (super pale green), and mixed it with custard cream (light yellow). Randomly spread the mousse over your piece – you can leave areas empty for the custard cream to fill. I personally find it spreads the best with your finger.
Once you have the look you want, add some light stenciling with an embellishment mousse using the Tonic Studios Linking Circles Stencil and your finger. This way you get a light stenciled pattern with raised edges along the pattern. This will help to trap color and create an interesting complimentary design in the background.
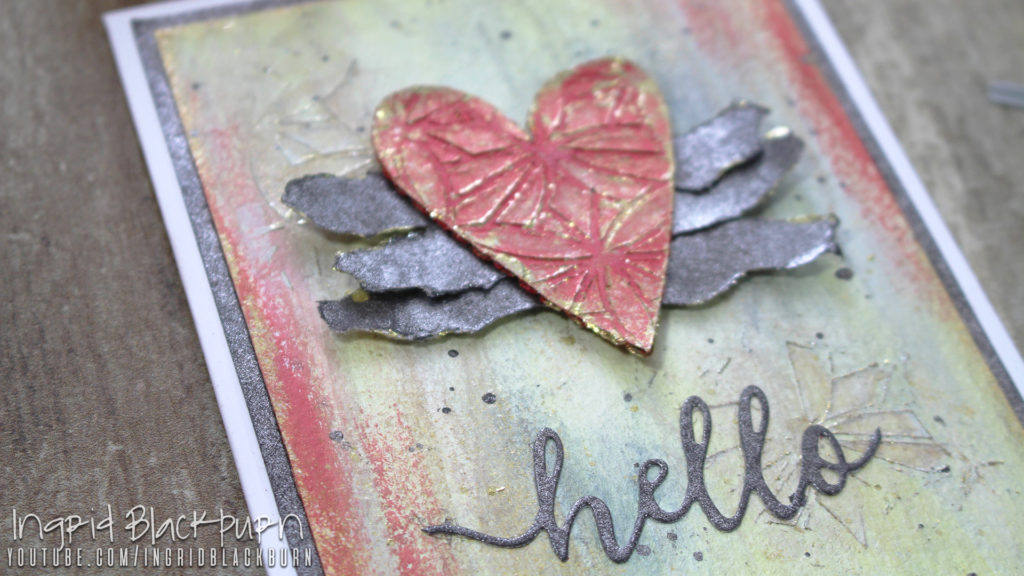
Heat set, then add some light watercolor using Nuvo Shimmer Powders. I started with Lunar Rocket and then added some Storm Cloud in small areas. This one is quite intense – so start small. Heat set again.

Add balanced color to opposite edges using Fusion Red Embellishment Mousse. The result will help to pull the project together once the heart is adhered.
Spray some Antique Gold Mica Mist onto your Glass Media Mat, and go over your background from the edges inward by painting it on. The result i s just a subtle shimmery effect. Heat set your background.
Easy Embellishments for Mixed Media Cards
Cut a heart from some scrap cardboard – I used a thin corrugated cardboard on one side – smooth on the other – from a box. You can always gently tear apart a shipping box. That way you will get a thinner piece of cardboard with texture and smoothness.
Color your heart with Fusion Red Mousse and then stencil the Linked Circles pattern with more Embellishment Mousse and Nuvo Spatulas. That way you’ll have a nice thick application that is raised and holds the pattern well. Heat set.
Use Thinner Cardstock
Spray a piece of Neenah 110# Exact Index Paper with Morning Fog Sparkle Spray. I use it for monoprinting and it is much more lightweight than traditional cardstock. And, you’ll find that it’s easier to tear.
Mixed Media cards can have many layers, so sometimes you need to use a thinner cardstock.
Coat your paper thoroughly. That way you won’t have any blank splotches. You’ll want your cardstock to be large enough to matte your background, and have excess for your word die and torn strips. That way you’ll have enough to go around – 5.5 x 8.5 inch worked for me.
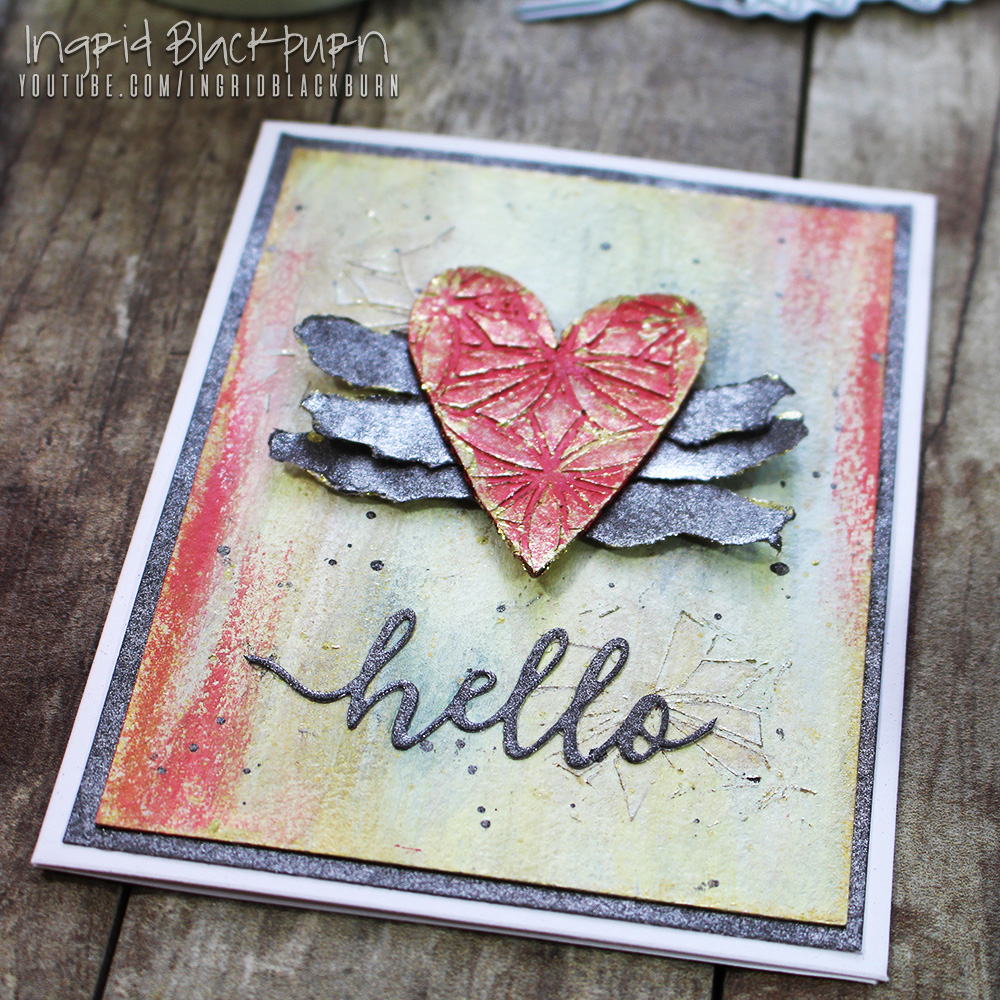
Cut out your hello and trim for your project using the Tonic Hello Stentiment Strips. I also cut some extra words out of the center of my background matte – why waste all that gorgeous sparkly paper you created, right?!! Do you do that? Tell me in the comments.
Tear your strips so that the rough side is away from the front. You’ll tear away from you. You’ll want them to be about 3/4 – 1″ wider than your heart. So that they proportionately support the heart.
Go To Finishing Touches for Mixed Media Cards
Edging
Using your finger – add some Golden Era Glacier Paste to the background edges, lightly over your background, the edges and lightly over your stenciled heart.
Edging is one of my all time favorite ways to punch up mixed media cards.
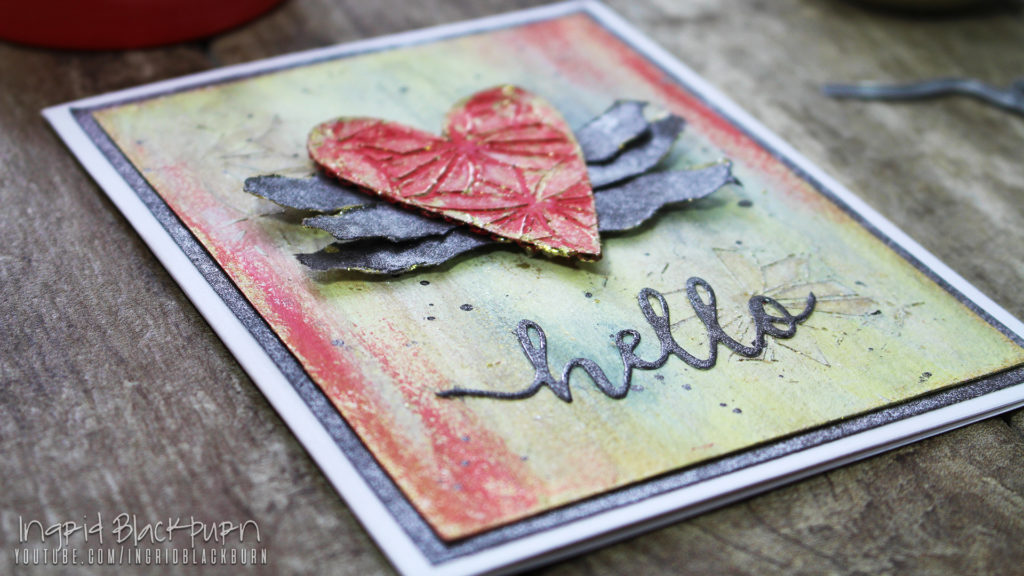
Water down some glacier paste on your media matte with your Tonic Light Mist spray bottle. Edge a few spots of your torn Morning Fog Sprayed pieces for some dark grey/gold contrast, and you’ll notice that it makes those little pieces just pop!
Flicking
Add a little Morning Fog Spray to your glass Mat using the thin plastic tube of the spray bottle (vs. spraying & it’s flying about). Using a paint brush, flick both the watered down Golden Era Glacier Paste and Morning Fog sparkle spray onto your background. The result adds in that little bit of filler the project needs. You’ll notice that it pulls it all together.
Seriously, how GORGEOUS is that?!!
Height
Add some liquid glue to the back of your heart, and arrange your torn pieces. Pop your heart piecing up onto foam tape and add to the top 1/3 of your card. Glue your hello (snipped) onto the background and adhere the card to a white card base. The lifted result adds the necessary drama…Viola!
As you can see, you too can create mixed media cards that are incredibly sparkly – the photos don’t do it justice. I definitely encourage you to try it yourself. Tag me in social media for sure – I’d LOVE to see. Products are linked below – definitely add the mousse and glacier paste to your stash – you’ll be happy you did!

Be sure to leave me a comment if you liked this and tell me if you wish to see more!!