WOW Embossing Glitter & Powder Blog Hop

Let’s kick off our Monday morning with some Sparkly inspiration…it’s all about WOW Embossing Glitter today! (okay – a few embossing powders too…) Thanks for stopping by – you’ve probably hopped on over from the incredibly talented Ilina Crouse’s blog. We have quite a hop for you today, so let’s get to it!

SO what exactly is WOW Embossing Glitter? The geniuses behind the incredible powders decided to mix their regular embossing powders with some sparkly glitter and voila! And let me tell you – no one does embossing powder or embossing glitters like WOW. If you haven’t tried them yet – don’t wait, don’t pass go – RUN…you’ll thank me for sure.

If you’ve followed me for a bit, you know that glitter and I are not exactly on the best of terms. Oh, don’t get me wrong – I LOVE the look, I just seem to always get more on me (and ultimately my hubby) than my project?!! Enter Embossing Glitter. The sheer fact that the glitter melts into that gorgeous embossing powder and stays put had me at hello!

Now, I’ll admit, I do still get glitter on me, don’t ask me how – it just happens. I’m quite sparkly as I write this, but the cool thing is, I have six super sparkly cards all ready to hit the mailbox. I had so much fun making these cards, and I know each one will definitely brighten up each person’s day – what’s better than that!

So let me show you too can create!

WOW Embossing Glitter Tutorials

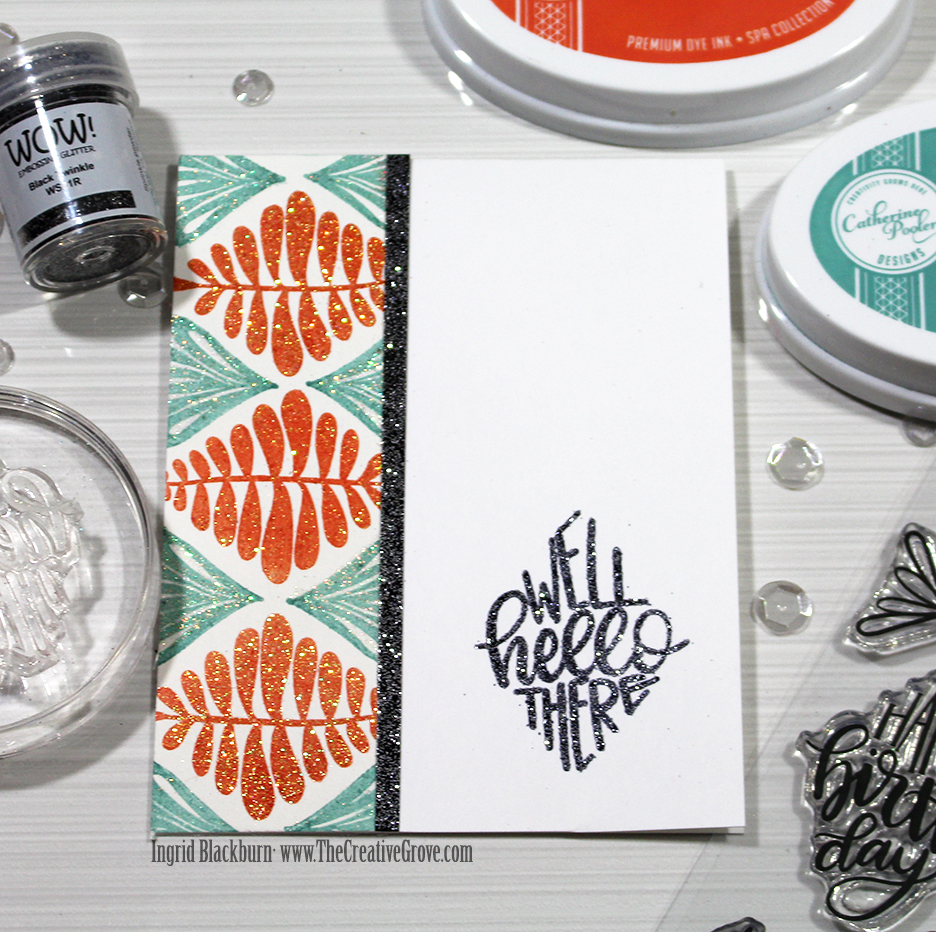
No. 1 – Well Hello There

My original project ended up being #1 and #2 on the same piece. It didn’t quite turn out as I expected – so I could do one of two things – toss and start over, or split and create two cards! Obviously the only one that made sense was to create two, right? Have you ever had that happen to you? Come on, I know you have!

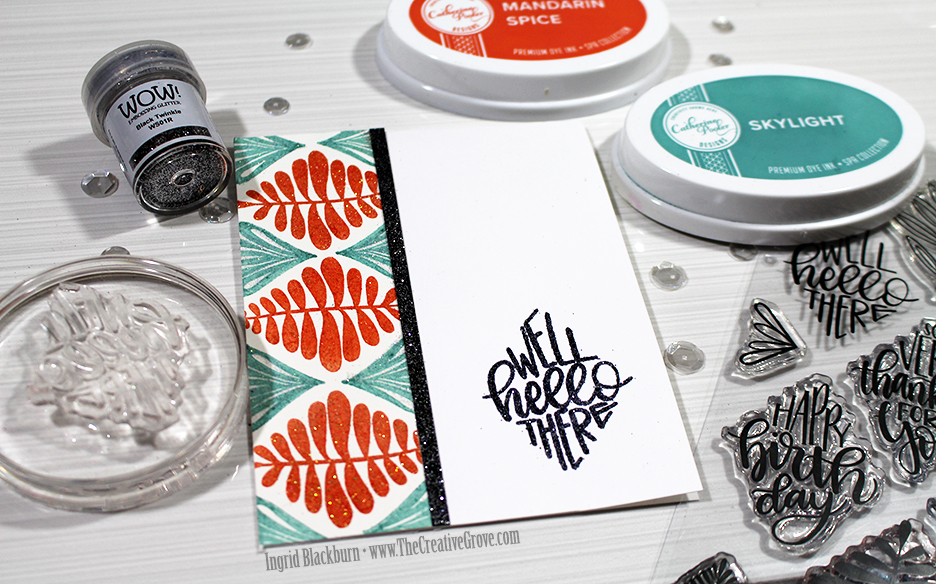
This one is simple, straightforward and quite honestly – striking! The beauty of using Catherine Pooler Ink…it stays wet for a few seconds. The key to this is to be completely ready. Have everything you need out. If not, once you’ve stamped in your desired colors, you’ll just need to stamp over it with versamark and then add your WOW Embossing Glitter. Here, I used Wanderlust. Wanderlust is a special blend inspired by Catherine Pooler. It’s drop dead gorgeous. Just like a little jar of diamonds!

WOW Embossing Glitter

Mask of a border, stamp your Say it in Diamonds pattern alternating in Mandarin Spice and Skylight. The key is to stamp and image or two, and add the powder. Don’t get too ahead of yourself – you want to get excellent coverage. Emboss and repeat, it’s that simple!

Smoosh your versamark ink pad onto a scrap piece of Midnight cardstock, add Black Twinkle and voila – you have your own glitter paper!! Stamp and emboss your sentiment from Say it in Diamonds in Black Twinkle, adhere your strip and that’s it! Super quick, VERY sparkly, and perfect for any occasion.

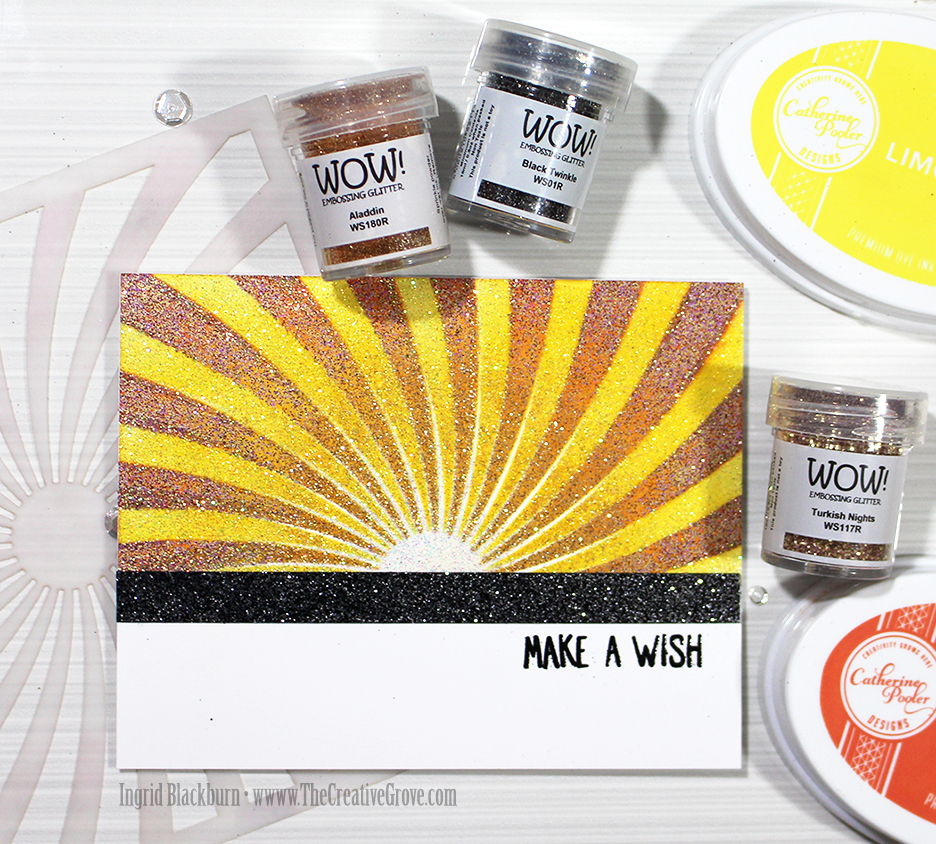
No. 2 – Make a Wish

The other half of my original project was a sunburst. I wanted to sponge some colors, glitter them up and then create my border. What I didn’t account for, was adding the wrong Embossing Glitter…lol! Whoops! I was supposed to add Sunset Boulevard, but added Turkish Nights. It was a happy accident for me, as I ended up with two projects instead of one!

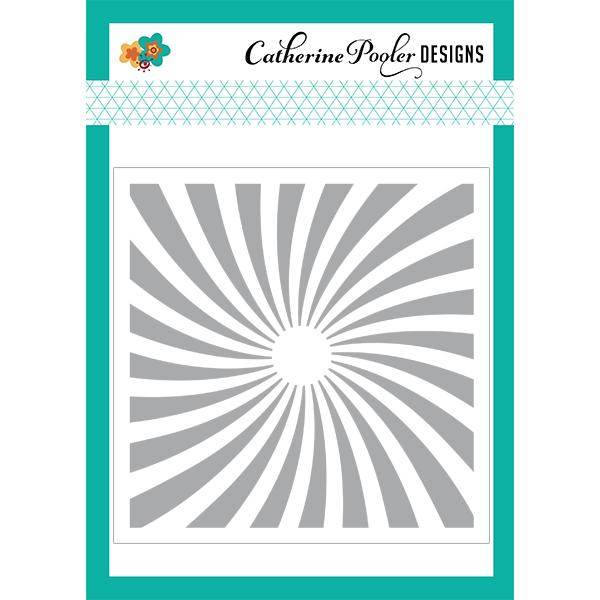
Mask off a few inches, and sponge Limoncello rays through your Twisted Sunburst stencil – this stencil ROCKS! Shift and sponge Mandarin Spice in the open space. It’s okay if a tiny bit overlaps. You will get a bonus while highlight to the rays.

Place your stencil over your Limoncello rays. Smoosh a Versamark pad through your stencil. Lift and add Aladdin Embossing Glitter to half your rays from the sun outward. Tap the excess off and add Turkish Nights (or better yet, Sunset Boulevard). Emboss. The different between Turkish Nights and Sunset Boulevard is Purple vs. Orange hues.

WOW Embossing Powder

Shift your stencil to cover your embossed areas, and smoosh a versamark pad through your stencil onto the Limoncello Rays. Smoosh a little versamark from the corner of your pad onto the white sun. Add Wanderlust Embossing Glitter and heat set.

Create your own glitter strip using Midnight cardstock and Black Twinkle. Adhere over seam on card and emboss a sentiment in your remaining white space. I used a few from the new Starlights stamp set with some Primary Ebony Embossing Powder. It’s that simple. You can create this with just glitters, or sponge and glitter like I did. The result is pretty darn eye-catching!

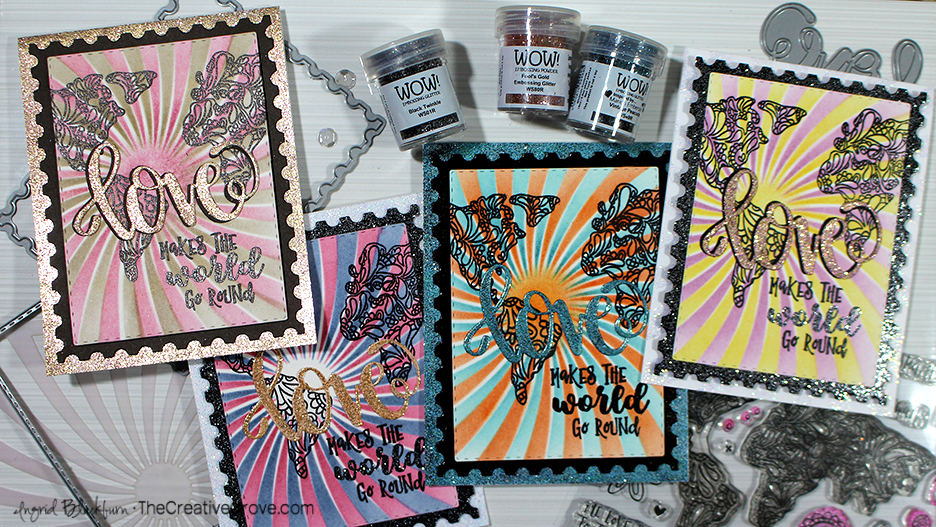
No. 3 – Love Makes the World Go Round

I had a little fun with this one. And I have to say – it ended up being quite relaxing! The fun part, seeing all the WOW Embossing Glitter sparkle to life.

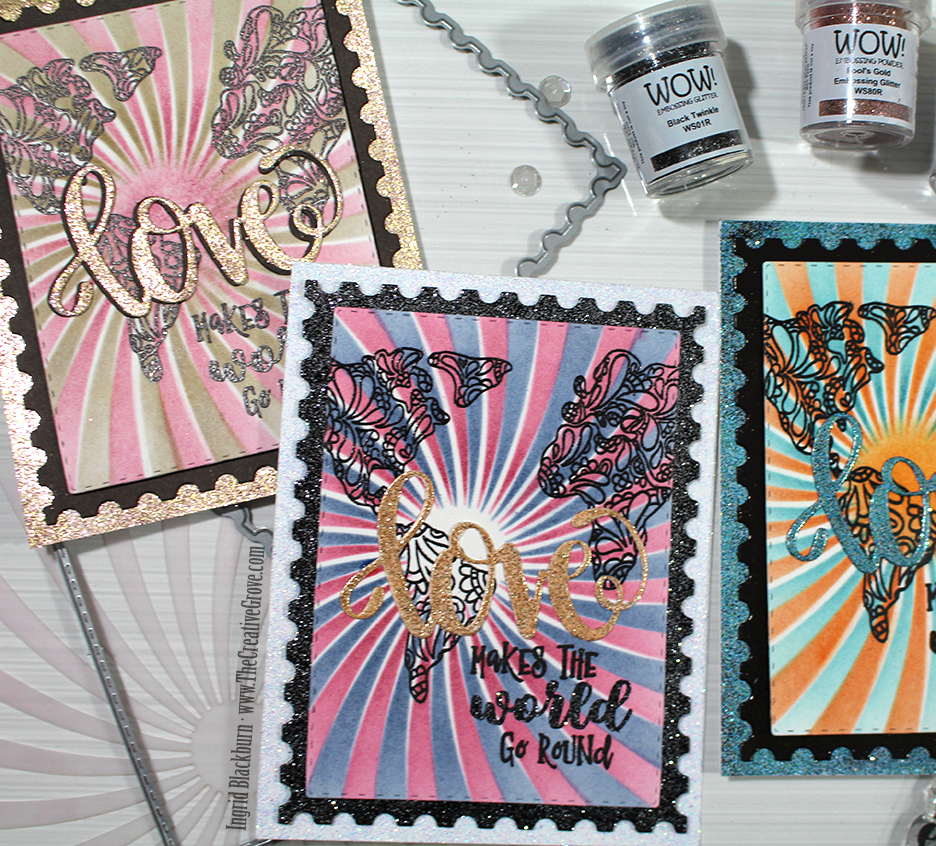
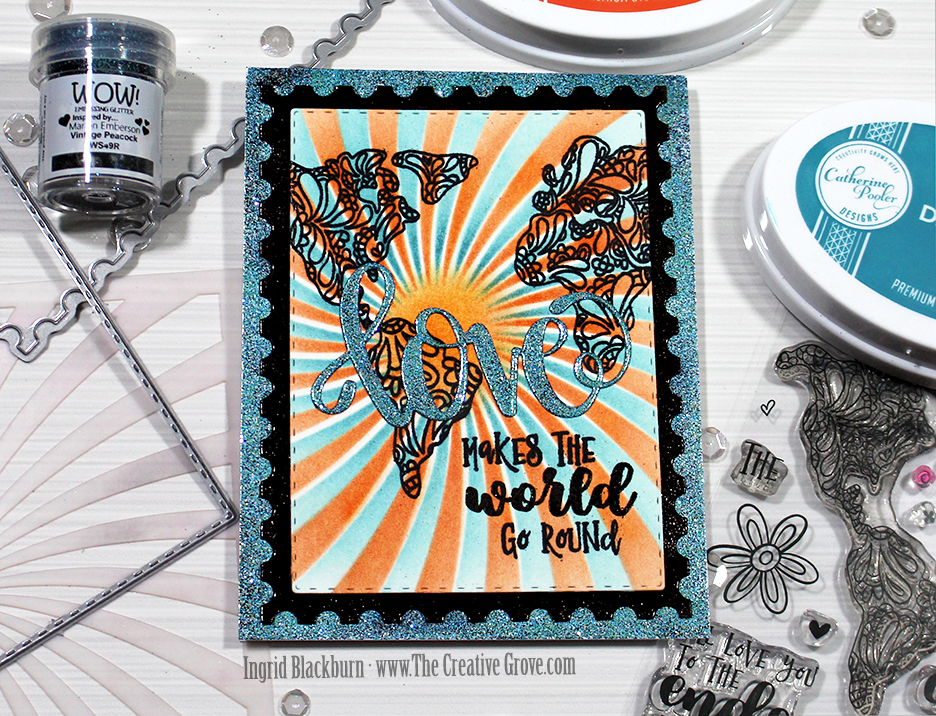
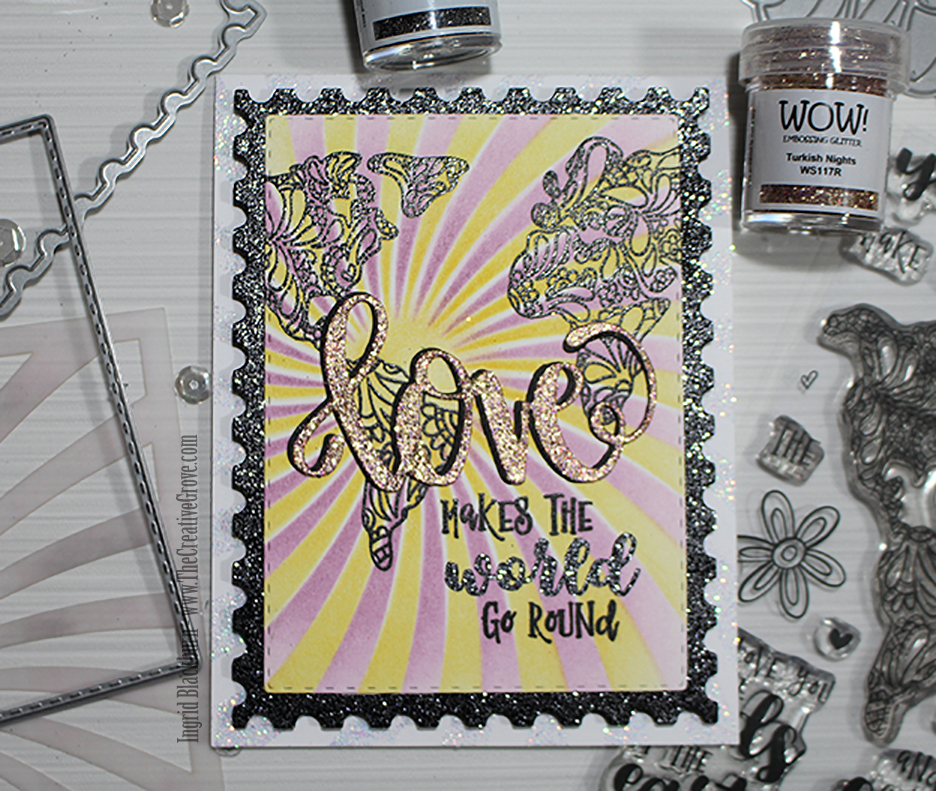
Start out by smooshing versamark over several word dies. I used the Love Word Die with (Left to right) Fools Gold, Aladdin, Vintage Peacock, and Turkish Nights. Once you have your word dies – pick some ink colors that will compliment the sparkle! Here are the combinations that spoke to me:

Fools Gold – World embossed in WOW Earthtone Pepper, Rose Petals and Icing on the Cake inks and Chocolate cardstock. Fools Gold has an earthy gold quality to it with a dark reddish undertone to it. So Rose Petals seemed like a fun pairing. I love the look of pink and brown, so this ended up being one of my favorites!

Aladdin – Emboss the world in Ebony, and give a nod to our British hosts from WOW today. I thought it would be fun to honor not only the UK, but it’s the 4th next week, so red, white & blue it is! Aladdin was the perfect compliment. It wasn’t gold – but has a little gold in it. This one uses Peppermint Scrub, Juniper Mist and white to its advantage. The Postage Stamp Die edges are embossed in Black Twinkle and the card base is surrounded with Wanderlust – it’s a beauty!

WOW Embossing Glitter

Vintage Peacock – This one was my all time favorite of the day. I’m a sucker for the complimentary colors – Blue and Orange together. The Vintage Peacock has some gorgeous teal in it mixed with deep black and silvery sparkle. For an added twist, the world and postage die border is embossed in my favorite brown by WOW – Primary Bark. Done on Chocolate cardstock or with Black ink underneath, it’s super deep. The edge of the card base is embossed in more Vintage Peacock – this card is a STUNNER!

Turkish Nights – This one is a bit different than the bunch. Turkish Nights has this deep Lavender hue mixed with Gold, so naturally – Sugared Lavender and Shea Butter were my ink choices, right? The world is stamped in black and embossed in Clear Regular powder. The postage die edge is embossed in Black Twinkle and the card base has a perimeter of the Twisted Sunburst stencil embossed in Wanderlust. It isn’t too visible, so I switched to just smooshing the edge of the base in later cards.

WOW Embossing Powder and Glitters

Each one has it’s own personality and character. It was fun to mix and match powders with embossing glitters. Ultimately I kept the palette more to the Spa side, which seemed to work well with the glitters. I love the variation in the die cut rectangles from the Postage Dies – the alternating Stamp/Stitched look. And The World Awaits is the perfect stamp set. It’s fun, has endless sentiment options and is totally unique on the market.

Prizes and Hop List

So I hope you enjoyed these couple of projects! Be sure to comment on everyone’s blogs. We have prizes!!! WOW is giving away 6 powders of your choice along with a carry case, and Catherine Pooler is giving away the Life of the Party collection of inks!

Winners will be announced the week of July 2nd on the WOW Blog.

Enjoy all the inspiration. Jaine Drake is up next from here. And then hop on through the list!! If you ever get lost along the way – be sure to start back up at the WOW blog!

Ingrid Blackburn – You are HERE!
Jaine Drake . – Hop here NEXT!!

Now it’s your turn to add a little sparkle to your day!

Supplies

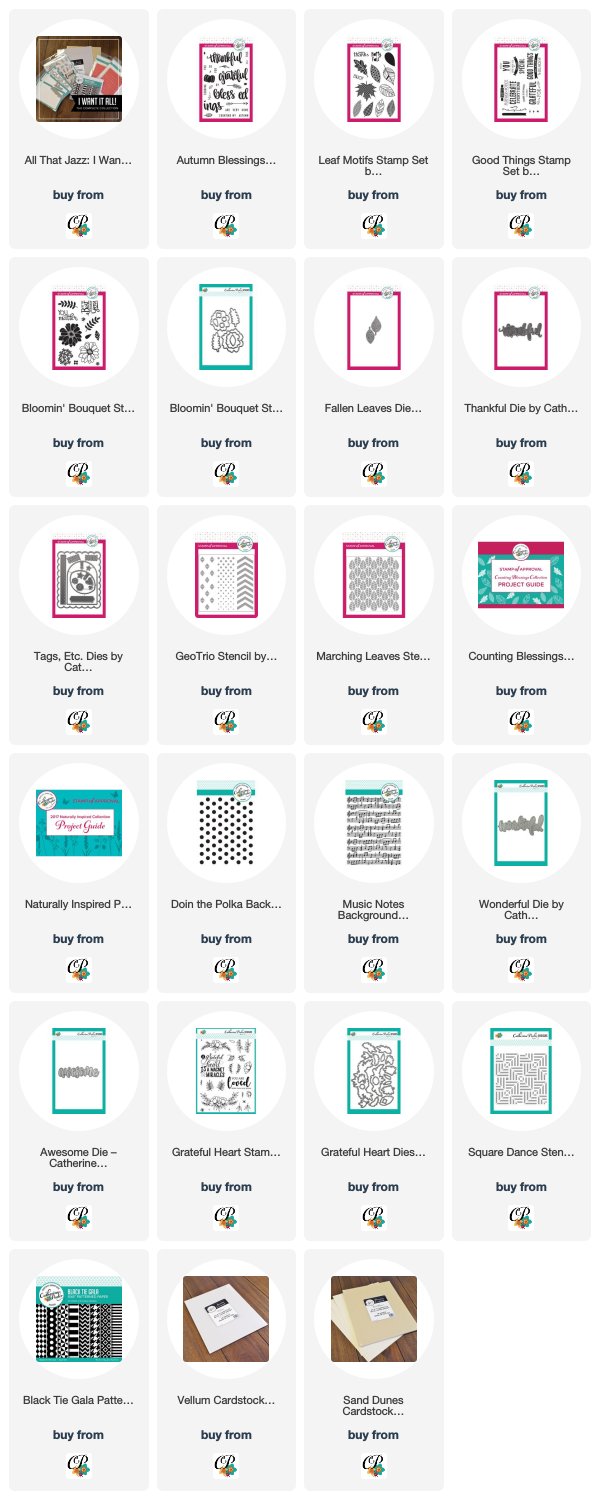
To make finding the supplies I used in these projects a bit easier for you, here are a few clickable links. Compensated Affiliate Links are used when possible. Click here for disclosure. Happy Shopping!


New Release: Catherine Pooler’s Sunny with a Side of Sparkle Blog Hop – Day 3

Catherine Pooler Release

Welcome to the Day 3 blog hop for the new Catherine Pooler release Sunny with a Side of Sparkle! How fun a name is that? You’ve probably just arrived from the talented Ilina Crouse’s blog – I swear, everything she creates makes me want to just head right to my Stamp Studio!

The new Catherine Pooler release went live earlier in the week, so I’m the final stop on three full days of creative hops. Our Creative Team is uber talented – don’t you agree? I hope I get you thinking outside the box a little today!!

The New Catherine Pooler Release

Catherine Pooler Release

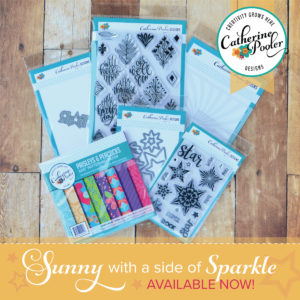
The release is made up of six new items, some fun embossing powders and last January’s SOA collection finally avaiable in the shop – Love is in the Air – that was a beauty. I have four project for you today, SO let’s get right to it..

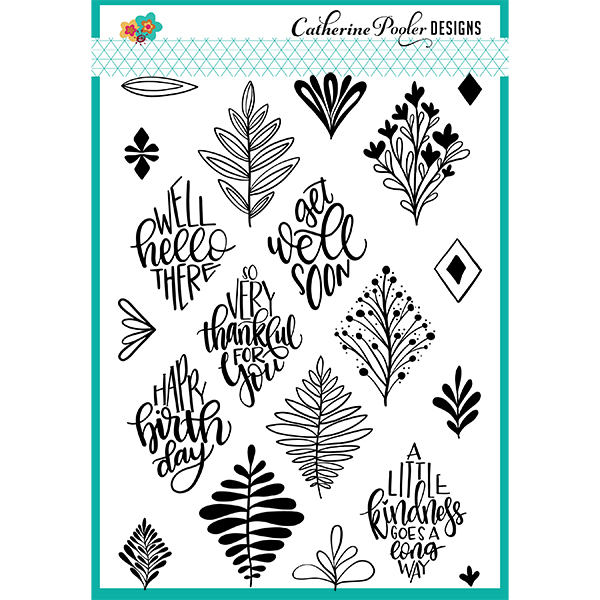
I think my favorite products from the new release are the new Say it in Diamonds Stamp Set and the Twisted Sunburst Stencil. You all know I love a good stencil, and this one doesn’t disappoint! Both are from the creative mind of Shawna Clingerman, who also has some very cool products in the Love is in the Air collection – The World Awaits – hello?!!

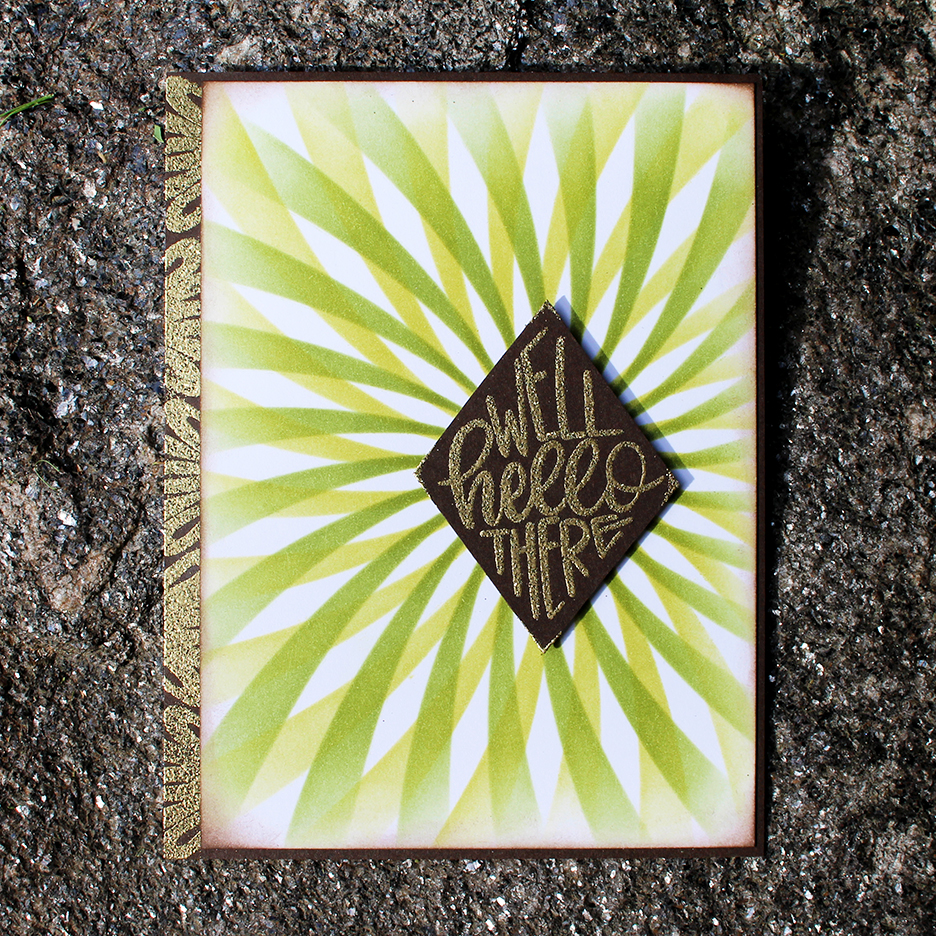
No. 1 – Well Hello There

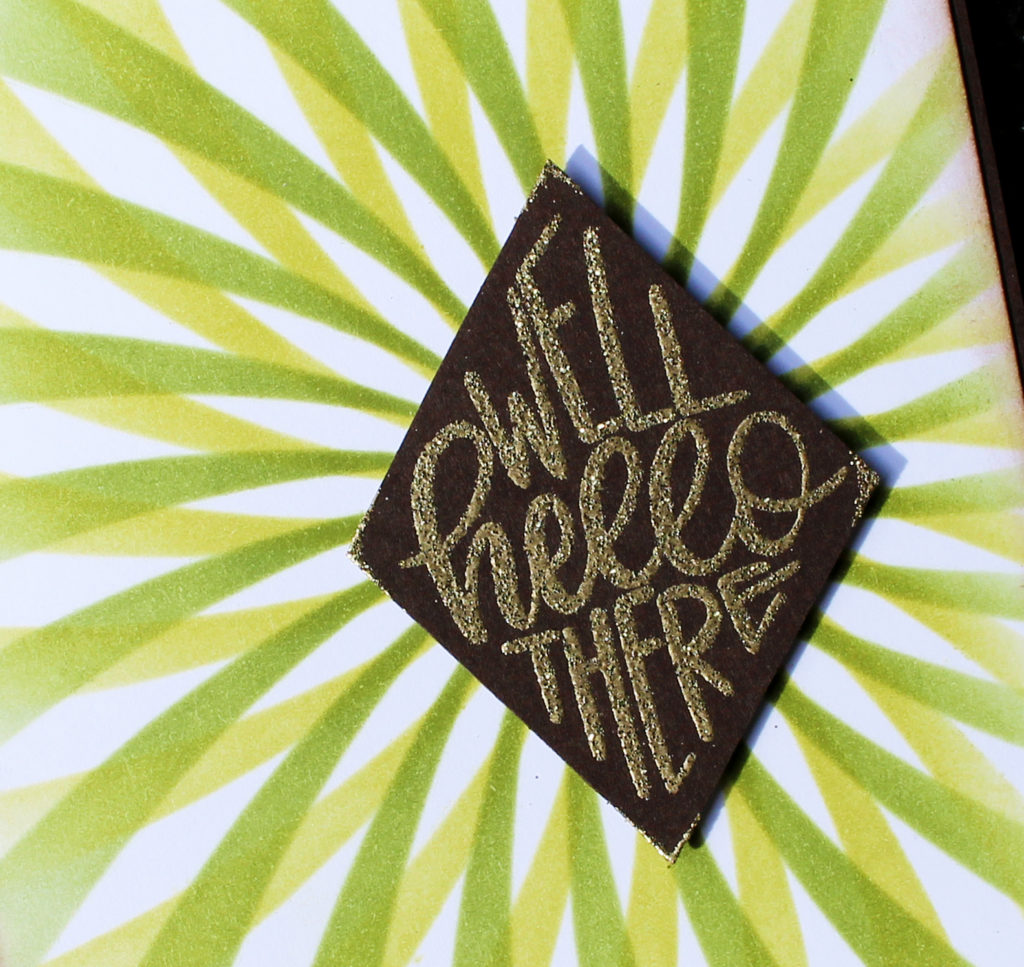
This project is quite simple – sponge your stencil in one direction in Green Tea, then wipe down, flip and sponge in the other direction in Eucalyptus ink – viola! The pattern that it creates is like a Kaleidoscope flower…it’s so cool. I was SO tempted to leave you the flower fully exposed, but I just had to add some of the Say it in Diamonds stamps…it’s one of the more out of the box stamp sets I’ve seen in a long time.

Twisted Sunburst Stencil

Emboss one of the sentiments…I used one of my favorites – WOW Metallic Gold Sparkle Glitter, cut in a Diamond shape, emboss the points and alternate my favorite stamp from the Say it in Diamonds stamp set back and forth along the card base edge. I use this stamp in full in the next project – so you’ll see it really well next. That’s it! Here are the products from the release:

Twisted Sunburst Stencil Say it in Diamonds by Catherine Pooler

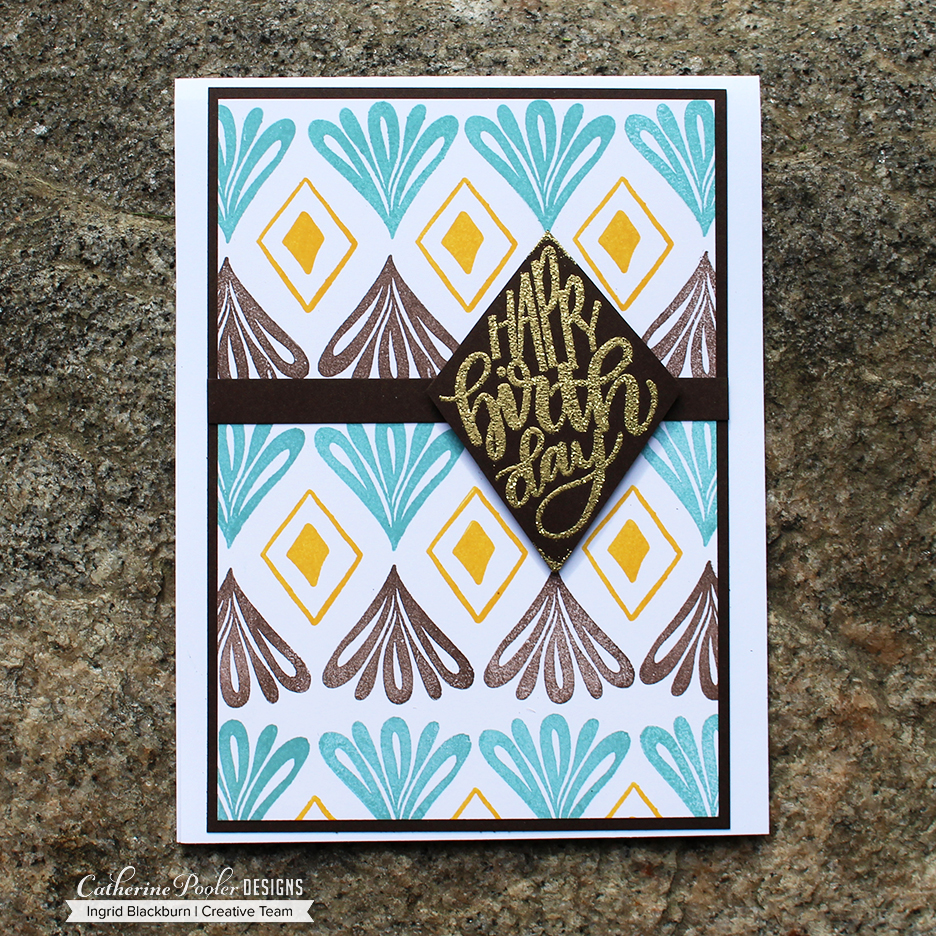
No. 2 – Masculine Happy Birthday

It was literally just Father’s Day, so I’m in a masculine kind of creating mood lately. This project is a quick one, and really showcases just how versatile the Say it in Diamonds stamp set really is. It’s the smaller images that really set the stamp set apart!

Stamp your main swoop image in a repeating pattern, flip the image and stamp it in another color. Fill the gaps with the double triangle in Sauna ink.

Say it in Diamonds - Catherine Pooler Release

The moment I saw Shawna’s illustrations, she had me at hello! I knew all the incredible images in this stamp set were going to make the coolest cards. If you love building with geometrics, this stamp set is for you. Everything on this card is from the Say it in Diamonds Stamp Set:

Catherine Pooler Release - Say it in Diamonds

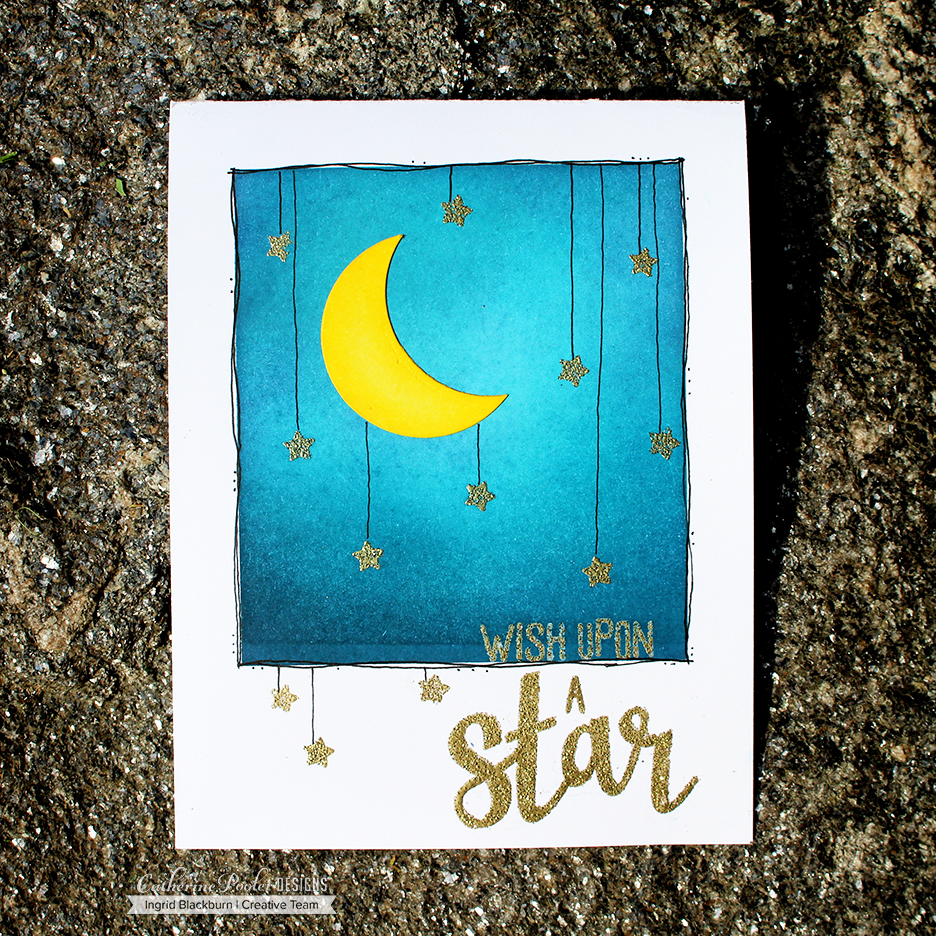
No. 3 – Wish Upon A Star

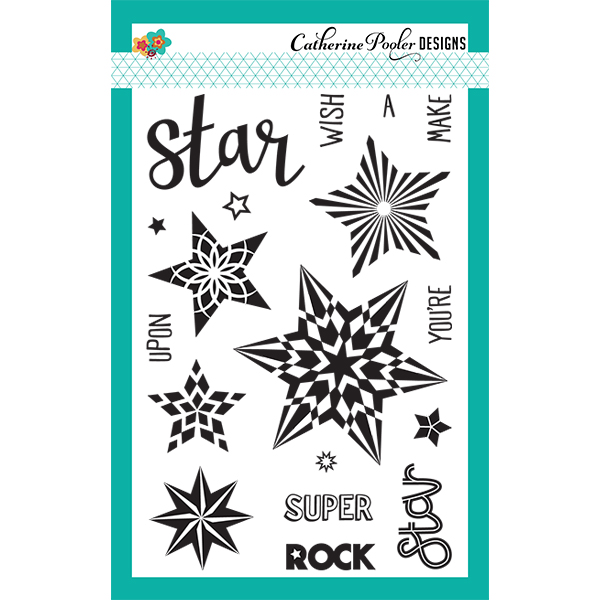
Don’t you just love a starry sky? I thought it would be fun to create a fun sky filled with stars, gorgeous blues and a well lit moon. The key to creating this card is know your spacing! The first thing I did was to emboss my Star sentiment from the Starlights stamp set designed by Lisa Kirkbride in Metallic Gold Sparkle Embossing Glitter. You can add the Wish Upon A before or after – that’s up to you! Just remember to mask below the Wish Upon…

Mask off a rectangle with equal sides left, top and right – I used 1/2″. Then you can start filling your night sky. I used the following inks: It’s a Boy, Fiesta Blue, Stone Blue, Daylight, Daydream, and Juniper Mist. The key when filling a sky in any scene is to leave a little light. So, work light to dark, bring back a little bright, and even out with light. Once I got enough color in the middle, I tried really hard to stay out of there and concentrate more on the perimeter with the darker colors. The bottom got most of the Daydream/Juniper Mist for a little variety.

Catherine Pooler Release

I have a secret…this was supposed to be a one layer card…I forgot to mask my moon off!! Oh well, I glued it on in the end – did you even notice? Make sure your sky is dry, and emboss your stars in the same embossing glitter. But the final touches on your card are the hand drawn character you’ll add with a micron pen.

Use a thin one – I used a .01 and I worked hard on the perimeter to keep it from being a straight line. Yes, that was intentional. My line is imperfect to show that it’s hand drawn. I added a second line and a few tiny dots. It reminds me of my early days in scrapbooking circa 1994…I did a lot of hand doodling back then in my Creative Memory albums.

Okay – confession time – how many of you also started with Creative Memory scrapbooking? Tell me in the comments!!

To create your moon, sponge some white scrap cardstock with Limoncello (do you have this awesome bright yellow yet?). Cut out a small circle with the Circle Dies, then cut out some more with the same die to create your partial moon. Sponge the edges with more Limoncello for dimension to your moon. Adhere and drawn lines from the top/moon or bottom to the top of each star.

It’s a fun project, right?

Catherine Pooler Release

No. 4 – Paisley’s & Peacock Starburst

I saved you the best for last – well…that depends on you I guess?!! I have ALWAYS wanted to make a sunburst card – since I first saw one back in 2006. Yes, it took me 12 years to do it…lol! How long is your I want to make that list?!! Tell me in the comments what you have been dying to make – I’d love to know!!

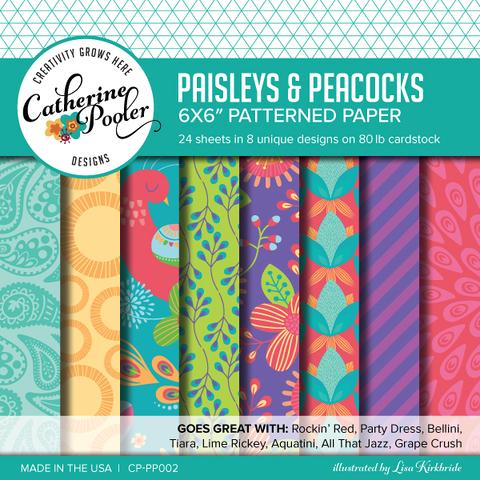
Okay, time to focus now….The new Paisley’s & Peacock Patterned Paper pack has some gorgeous patterns in it. The images are from the Paisley Peacock and Perfect Reason stamp sets – all illustrated by Lisa Kirkbride. I am a sucker for her quirky style. Catherine really outdid herself when creating patterned paper. It’s on 80# cardstock, so it’s thick and is awesome for card bases. That’s very different from most papers out there. This paper (unlike most) is made in the USA. Locally in Raleigh as a matter of fact. I love that. 🙂

This package of 8 patterns – 3 6×6″ sheets of each is a great for that little something, or a full panel. I was just blown away by what the Creative Team did with it!

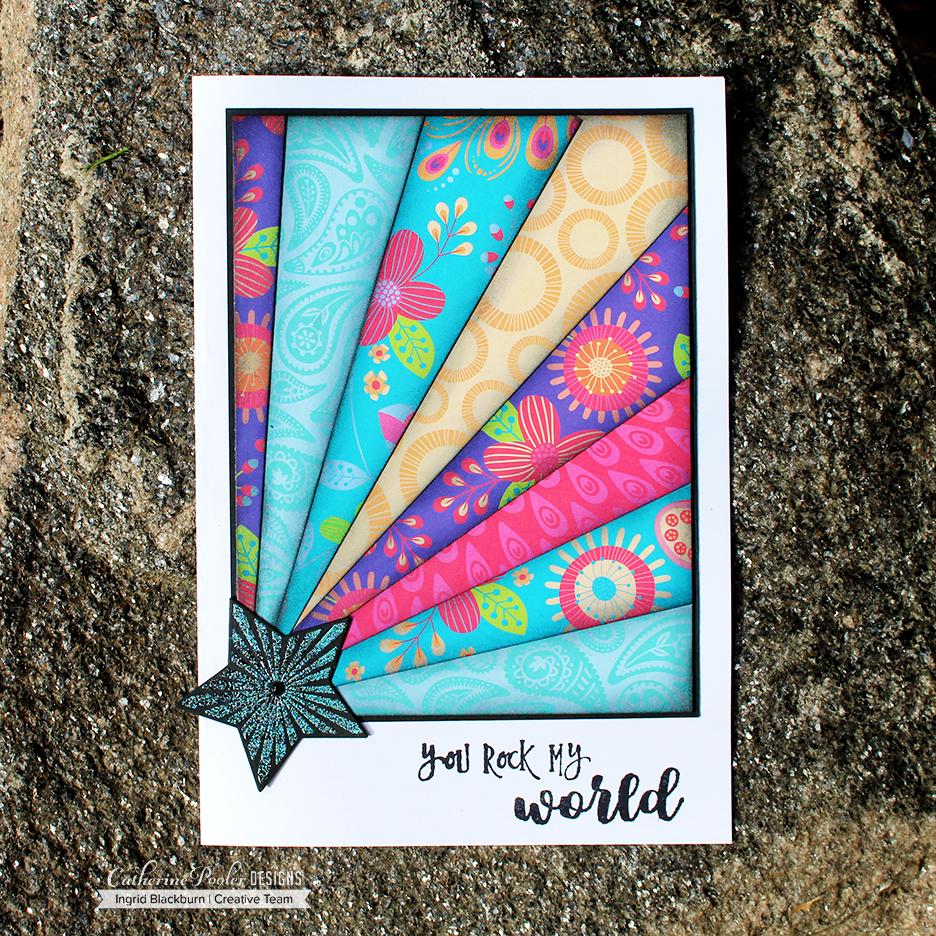
For the Sunburst pattern, chose 5 patterns and cut a 1.5 x 6″ strip of each. Then cut those rectangles in half – corner to opposite corner. You’ll have 10 pieces then. Sponge a slight edge of black or a dark brown (depending on what colors you’re using) along the length. This is a key step – I forgot it on my first one…I’ll show you the difference:

Paisley & Peacock Paper

The rest is pretty simple. Add some liquid glue to a cardstock panel, and adhere from one point across your card. I slightly overlapped mine – ever so slightly. You’ll maneuver them to fit your piece of cardstock. My Yellow piece that goes to the opposite corner is a little short, so I just had the next piece cover a little at the point – you probably would have never known that had I not told you, huh?

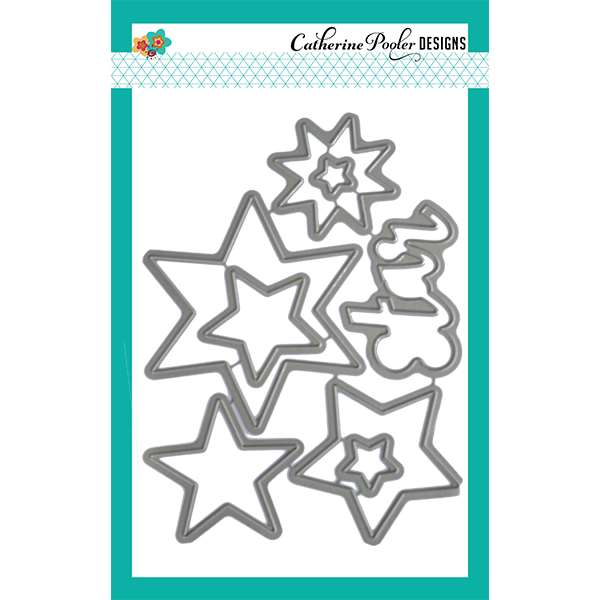
Trim up the overlap and to the size desired. Emboss one of the stars from the Starlight Stamp Set in WOW Vintage Peacock Embossing Glitter and cut out with the Starlight Dies.

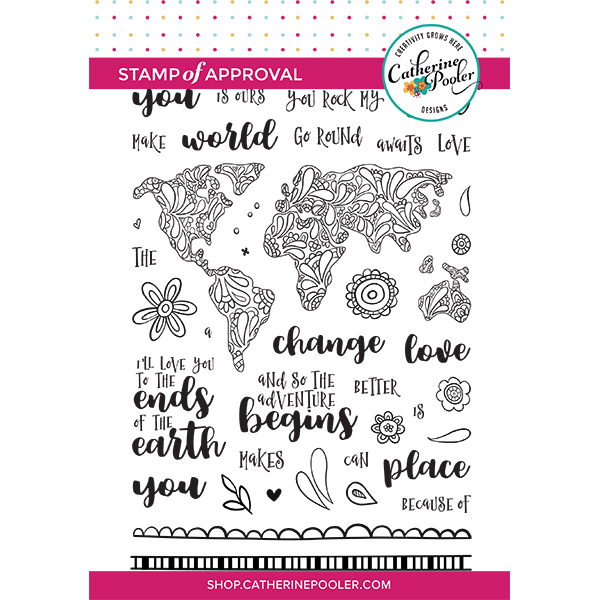
For a sentiment, I went to the awesome and quite unique stamp set The World Awaits. Also designed by Shawna Clingerman – that stamp set is unlike any other out there. If you didn’t get it in the Love is in the Air Stamp of Approval release last January – don’t hesitate. The sheer number of awesome sentiments – let alone great images is SO worth it.

It’s a fun card, right? And I finally got to make a sunburst – check that off the list!

 Catherine Pooler Release   

Catherine Pooler Release

So, did you like those? I hope so. I have loads more coming in the next few days. From this release and some other videos as well. So be sure to stop back by Sunday and Monday for sure – I have videos… Yay!! Now, go hop along if you haven’t finished the hop yet. And be sure to check out Catherine’s blog for a good starting point to all three days of hops.


Blog Hop Prizes

5 random winners will be chosen to receive two free ink pads (and free shipping!)  Announced Friday evening, June 22. Here’s the full list of stops on the hop. And below I have my full Supply Lists. Thanks for hanging with me for a bit!! 

  1. Catherine Pooler  <– Hop here next!!
  2. Josefine Fouarge  
  3. Jenny Colacicco  
  4. Susan Powell  
  5. Justine Hovey  
  6. Laurel Beard  
  7. Tracie Pond  
  8. Ilina Crouse  
  9. Ingrid Blackburn <– You’re Here!!

Thanks for joining me today! See you in a few days. Till then, keep those fingers inky –

Supplies

To make finding the supplies I used in these projects a bit easier for you, here are a few clickable links. Compensated Affiliate Links are used when possible. Click here for disclosure. Happy Shopping!
Ardyth’s 1K: How to Use Card Leftover Scraps – Video

Ardyth's Blog Hop

Do you ever use your card leftover scraps? You know, the scraps or pieces that didn’t make the cut?!! Today I’m participating in a special hop for my sweet crafty friend Ardyth Percy-Robb! Ardyth is celebrating hitting her 1000th subscriber over at YouTube this month – WOOHOO!

SO, I have a fun little video for you with a little me (had to sneak some Mixed Media into there) and some of Ardyth – can we say bright Rainbow? I sure hope you like it. Read on to hear all about the prizes too.

How to Use Card Leftover Scraps Tutorial

Here’s my fun little creation for you:

To watch in HD over at YouTube…Click Here

Here are some close up shots for you. I go into much more detail about all the cool products and why I did what I did. My scraps on this project are a not so perfect bonus print of the new Brick Poetry stencil with Black Modeling Paste (both by The Crafters Workshop). By accident, I put my stencil paste side down after my project the other day on my craft mat – GASP! Luckily when I quickly yanked it up, there was still lots of paste on it – so I quickly threw a spare piece of cardstock down and got this extra print.

How to use card leftover scraps

To give it some interest, I grabbed a leftover piece of deli paper from a gel printing session – I had all these cool prints, and sure enough – I went with the plain deli paper that was used to clean off my pinked up brayer…lol! Nuts – right? Why I saved that…is beyond me. I guess I’m a craft hoarder…lol! How about you? Tell me in the YouTube or Blog comments if you are too?!!

I think you’ll agree with me…together they make a cool background, right?! So I hooked them up with those super cute Rustic Botanical cut outs by Ellen Hutson, stamped with CPD ink of course in Rainbow color – nod to Ardyth!

How to use Card Leftover Scraps

Thanks for hanging out here on my blog. Now – off to YouTube to go watch the video. Carly Tee is next up in the hop – be sure to keep hopping along. And if you lose your spot – Ardyth has a whole list of hoppers over on her channel. And what are you going to do along the way – yes…comment! Now hop along….

Ardyth Percy-Robb

There are over 20+ prizes to be won, Ardyth lined up some VERY cool sponsors for this event – Catherine Pooler Designs (um…inks – hello!), Ellen Hutson (shopping – yes, please!) and A Gillian Vance Design (a whopping $100 value prize pack – wow!) PLUS, today is Ardyth’s birthday – Happy Birthday…so she’s going to pick three random commenters on her video to win an additional $25 gift certificate to all three sponsors from her. SO, grab your favorite beverage and settle on in. Watch the inspired projects (you have till the 11th of June to comment), leave comments along the way, like all the videos – yes, a thumbs up please, and if you liked what you saw – subscribe to some crafty channels!

Till next time –


Supplies

To make finding the supplies I used in these projects a bit easier for you, here are a few clickable links. Compensated Affiliate Links are used when possible. Click here for disclosure. Happy Shopping!

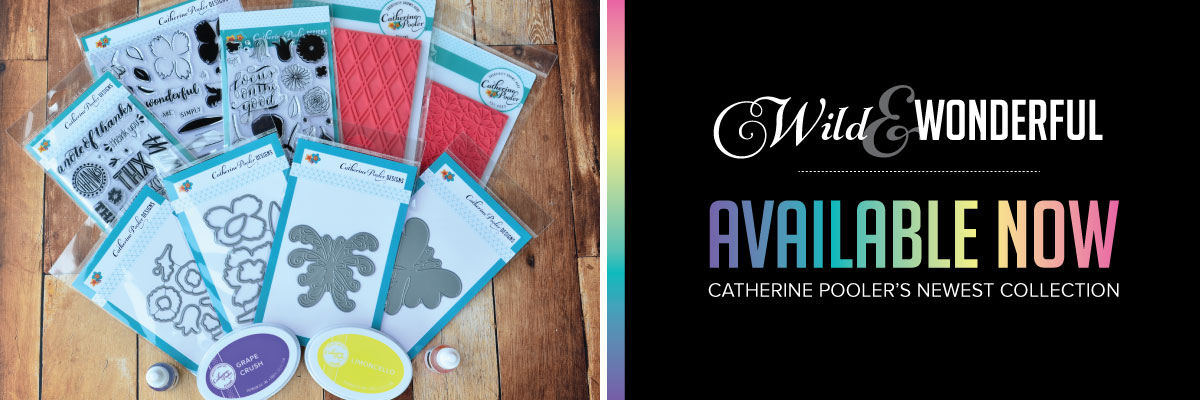
Wild & Wonderful Catherine Pooler Release

Catherine Pooler Ink

Welcome to the Wild & Wonderful blog hop…did anyone say new Catherine Pooler Ink? Yes, you’ve been waiting for these colors – they have probably been the two most requested colors and it’s SO exciting that they are finally available!! I hope you don’t mind…I have a few projects to share with you today, and some of my crafty friends have put together an amazing blog hop, so let’s get started!!

Catherine has created a fun new product release for you this month, you won’t be disappointed. I LOVE this release. Seriously – there isn’t one thing about it I don’t absolutely love. Flowers, thanks sentiments, butterfly dies and can we say background stamps – one of my weaknesses! I got a little creative with one of the sets for a truly out of the box idea for you as well.

If you want to get your hands on these great products first before hopping – don’t wait – Click Here. But come back and leave a comment all along the hop to be entered for some prizes and to be inspired! So…let’s get to it!

Catherine Pooler Ink - Wild and Wonderful

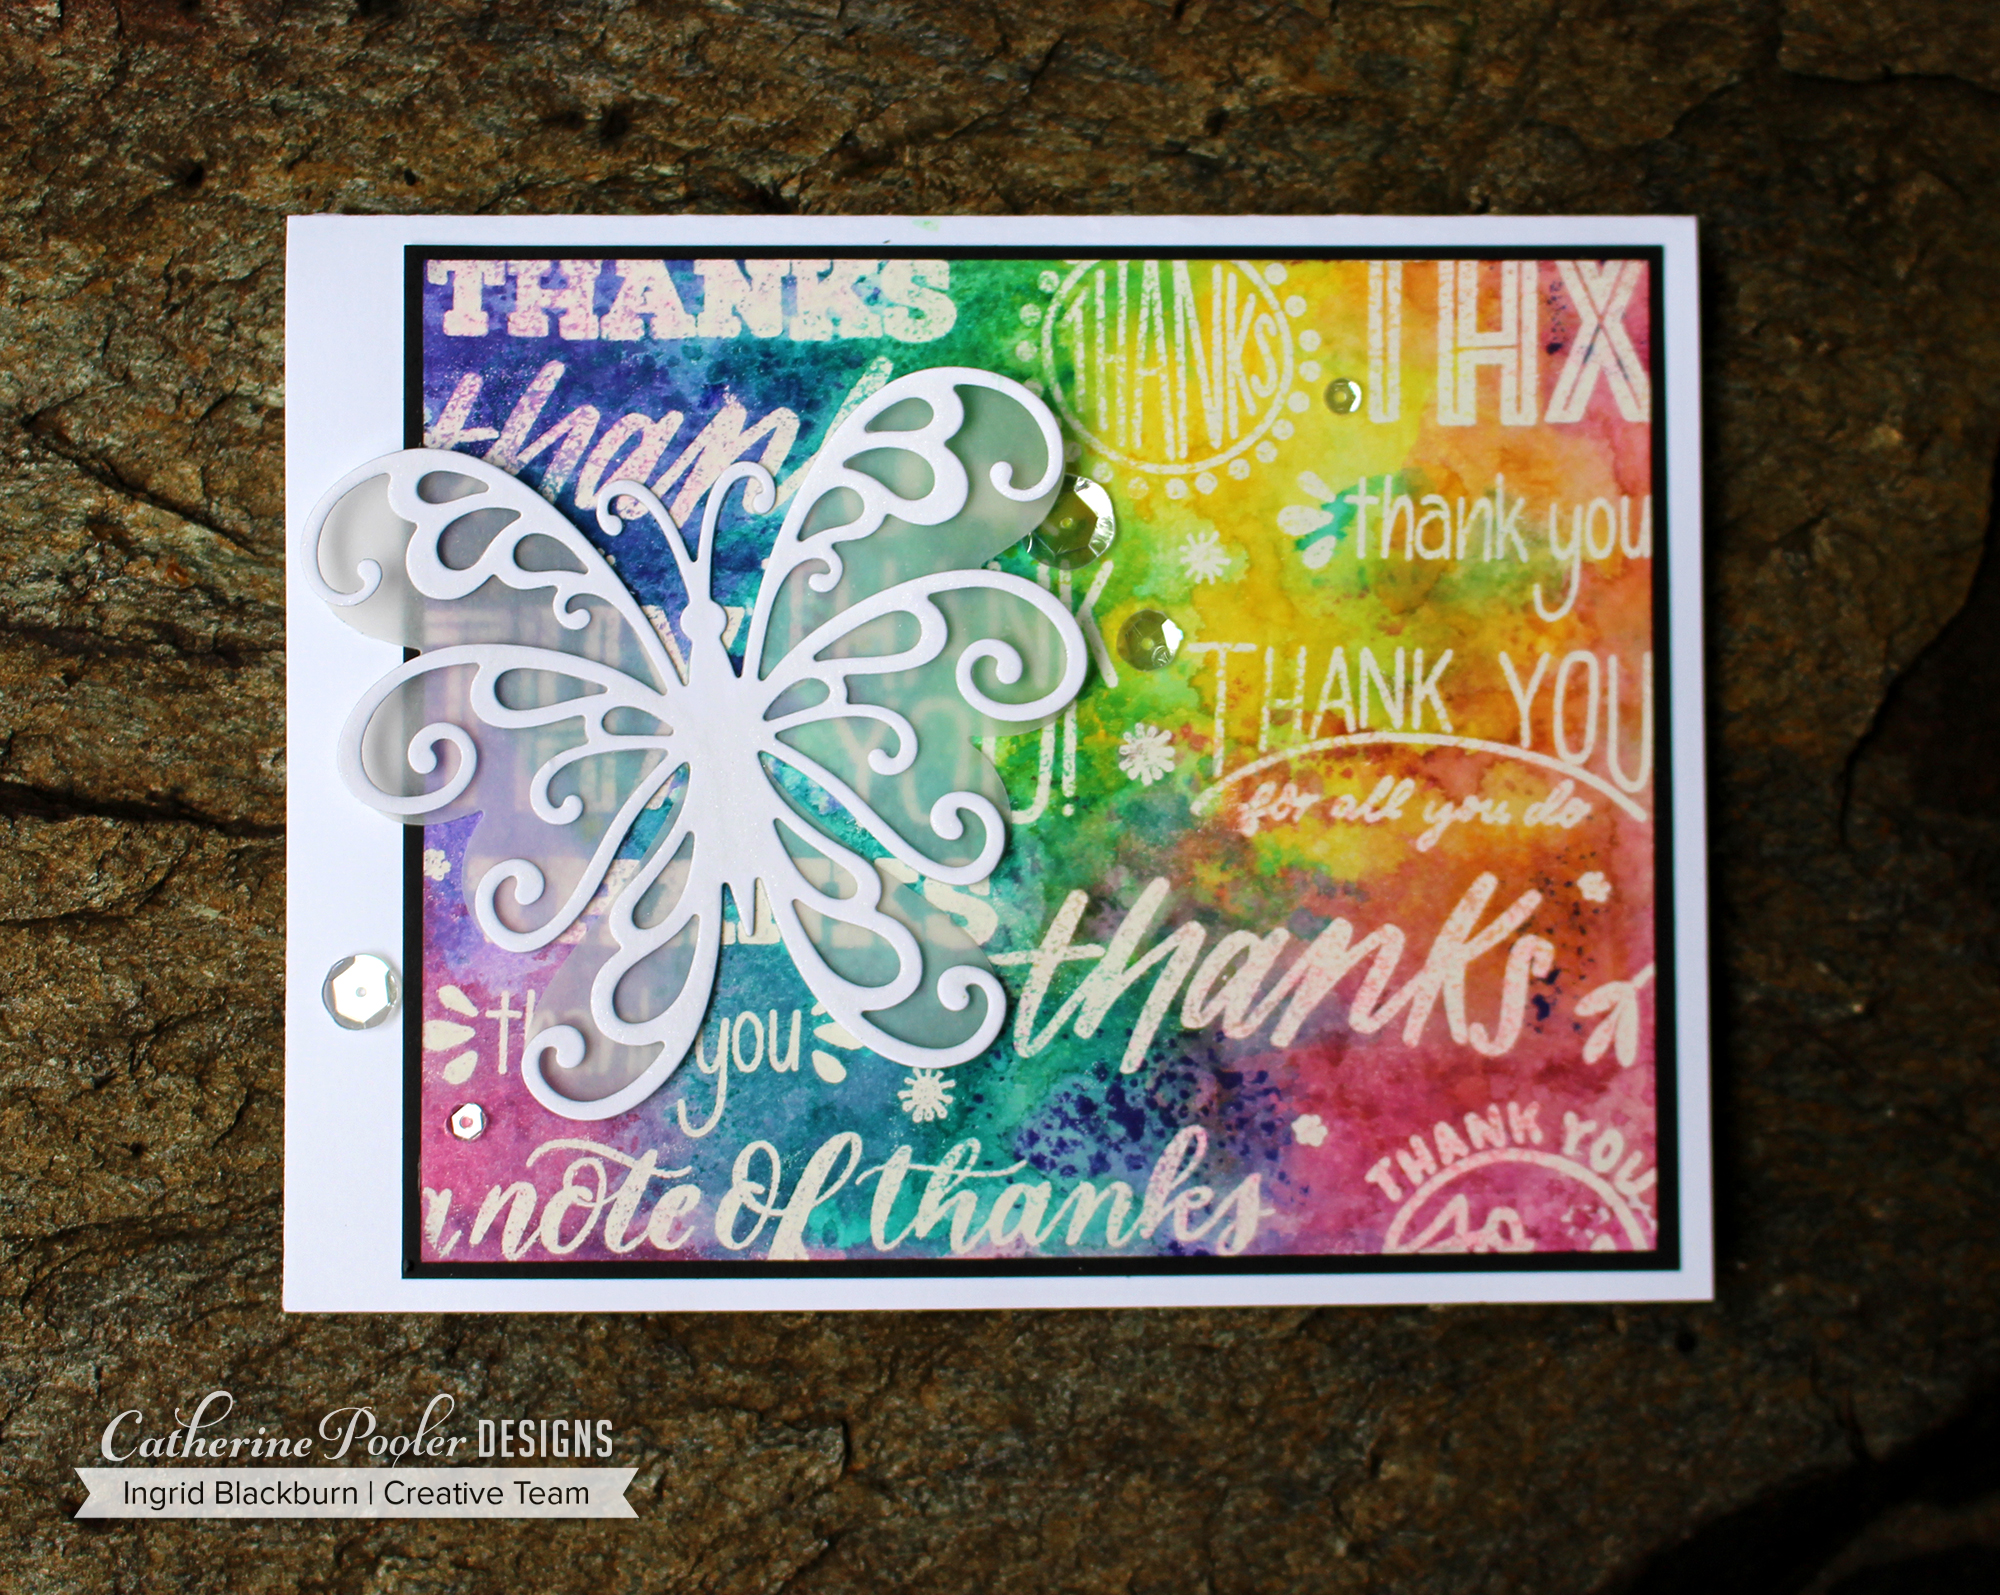
Project #1 – Carnivale Butterfly – New Catherine Pooler Ink

Carnivale in Rio is a party, and that’s the perfect way to describe the latest additions to the Party Line of Catherine Pooler Ink – the Carnivale Collection: All that Jazz (recently released), Be Mine (previously only available in the Love is in the Air SOA Collection), and the two newest inks – Grape Crush and Limoncello! I put all four to work here on this project. Isn’t it amazing how they work flawlessly together?

Limoncello and Be Mine create this beautiful color I call sherbet, Grape Crush and All that Jazz create a gorgeous Navy Blue, All that Jazz and Limoncello make a deep Emerald Green, and Be Mine and Grape Crush just intensifies the purple into something truly amazing.

Carnivale Ink Collection

First I stamped and embossed nearly all the Thanks images from A Note of Thanks. Next, to get that cool watercolor look, smoosh and spritz your inks with the Wrinkle Free Watercolor Technique. Then, get rid of the embossing powder by ironing it off inbetween phone book pages to remove it. You’ll be left with a gorgeous flat one layer that will truly stump whomever gets this card as to how all that amazing color and white wording is so perfectly flat all on one layer!

Next, Cut out the two new butterfly dies – In Flight Butterfly in vellum cardstock and Scroll Butterfly in 100# Premium Bright White and you’ve got a very cool embellishment for your card!

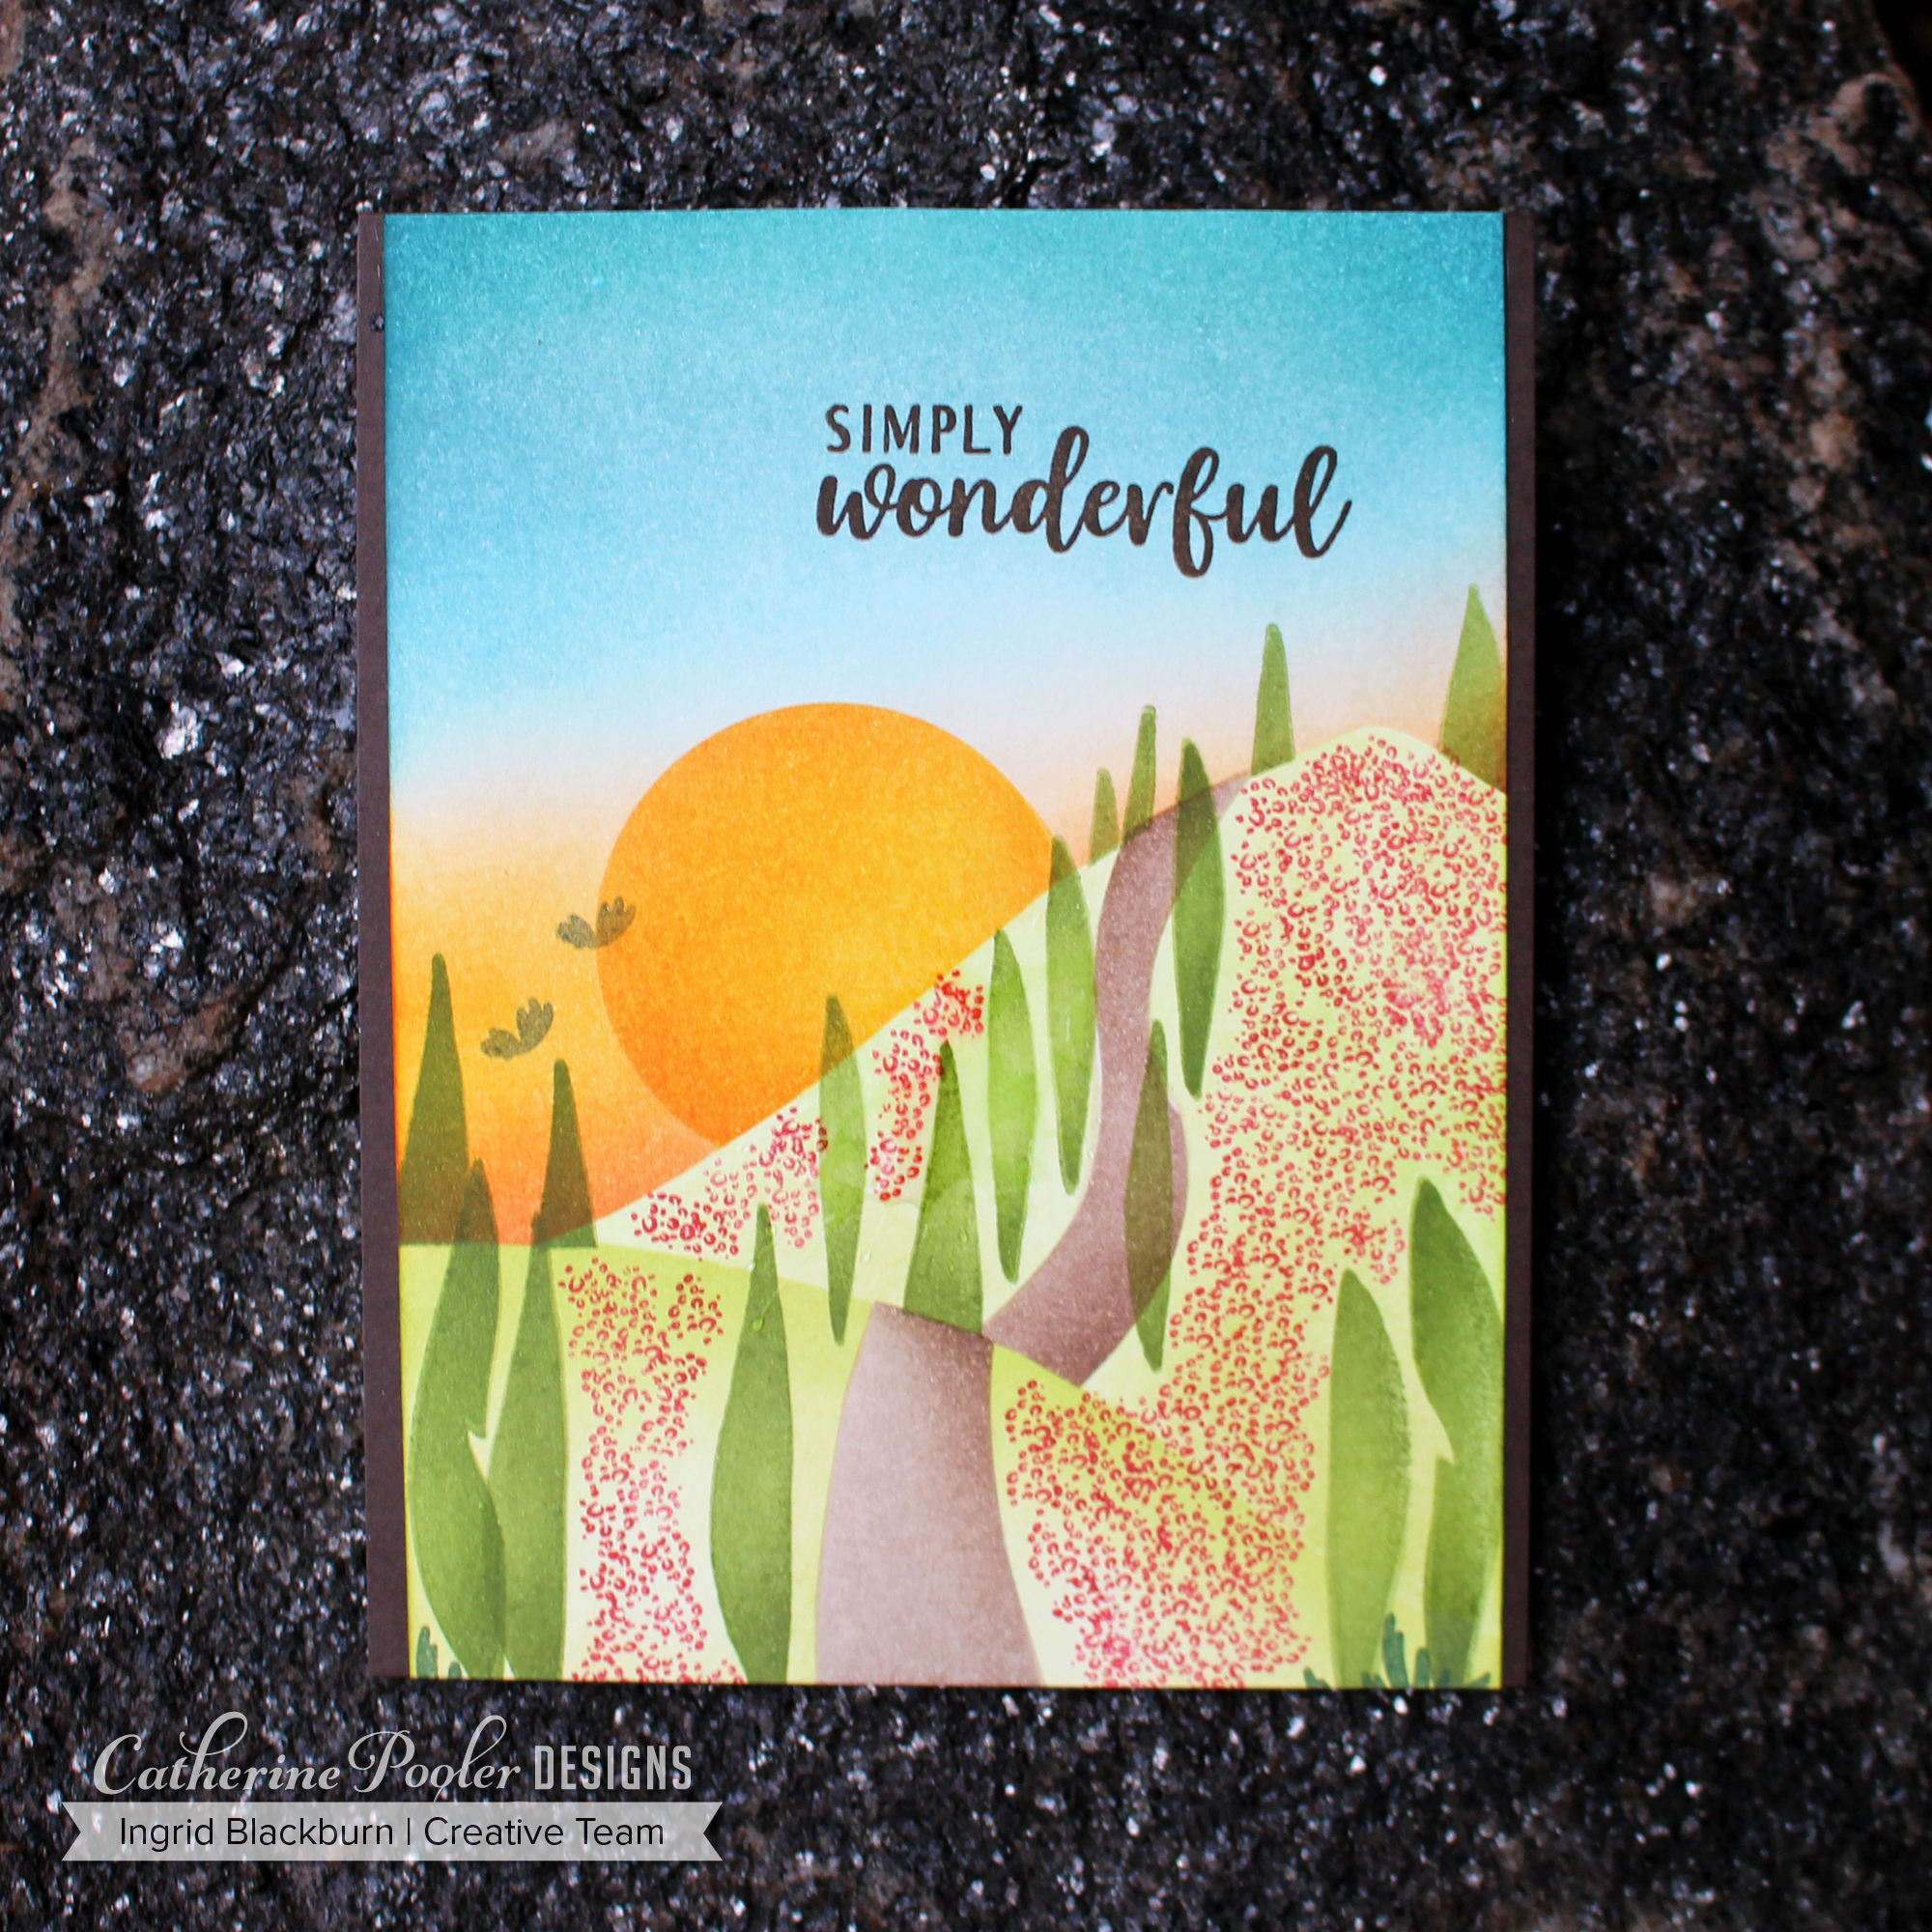
Project #2 – Simply Wonderful Tuscan Sunset

A few years ago Michael and I spent a week in the Chianti region of Tuscany. I was on a mission to find the curvy road from one of the scenes in Under the Tuscan Sun. We hit that road just as the sun was setting over the hillside near Pienza, Italy. The sun was this incredible hue of tangerine as it set that day over the Tuscan hillsides. This card is my interpretation of that moment – it was literally Simply Wonderful, the sentiments from that set couldn’t have stated it any better.

I knew the moment I saw the Wonderful Wildflowers stamp set designed by Lydia Evans I would create this card. Those leaves were just screaming Cypress Trees to me. And, well you know me…I do love a good scenic card!

Catherine Pooler Ink

So many stamps in this collection work for out of the box ideas – I have the little layering bits as birds, and the center of the flowers as fields of poppies too. It was fun to mask off the hills, road and setting sun. I feel like I’m right back there.

Be sure to hop along to see many more traditional floral versions of this set – it’s a gorgeous one! I hope you love my little off the wall creation.

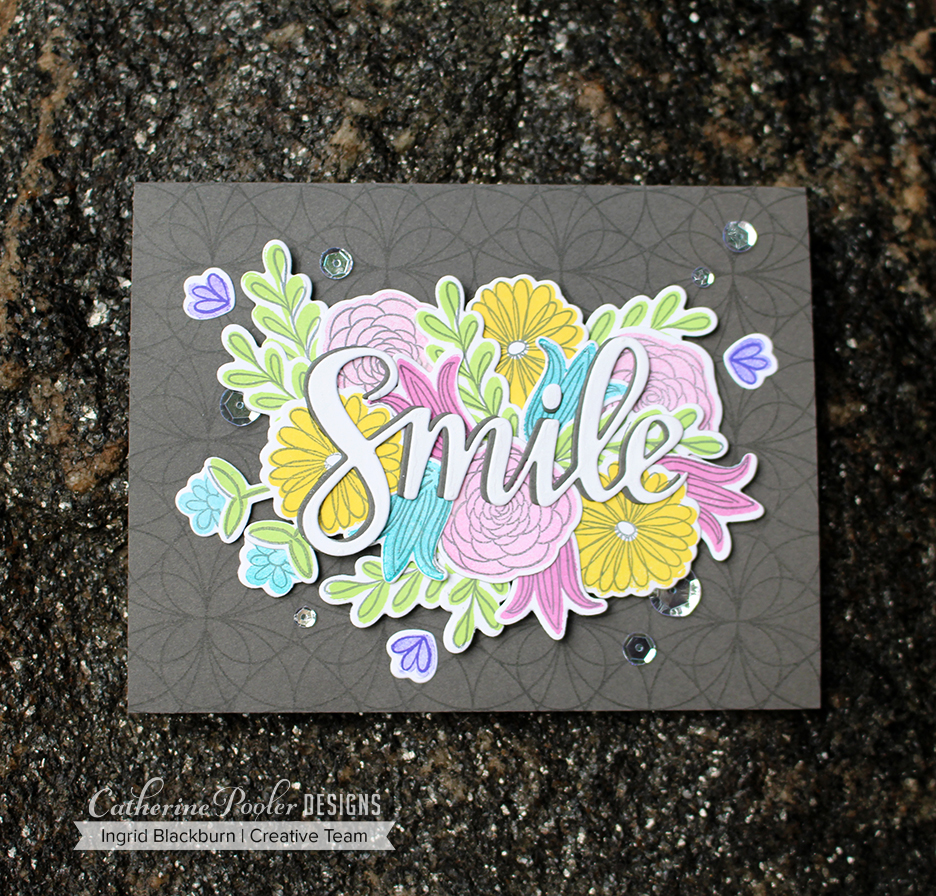
Project #3 – Smile Bouquet

This card was so much fun to put together. The Focus on the Good stamp set started with the incredible sentiment illustrated by Ilana Griffo (not pictured here). Then Catherine tasked the brilliantly creative mind of Shawna Clingerman to create some fun flowers to go along with it, and the quirky style of this set is pure genius. I mean LOOK at these cute blooms?!!

The combination of the new colors (pictured here) with the deep grey of Catherine’s Smoke and Mirrors Cardstock is just perfect together. To give those blooms a cool look, stamp all the lined images in Black Jack ink for a coordinating look (except the little Grape Crush flowers).

Catherine Pooler Ink

Did you notice the Kaleidoscope Stamp tone on tone background? It’s one of two new background stamps and they are both must haves. This gorgeous creation is by illustrator Julie Mogford (Butterflies above and the previously released Stained Glass Coverplate). There is SO much potential in this background stamp. I can’t wait to keep playing with it and showcasing more for you.

I used a few additional party colors, and stamped the Grape Crush and All that Jazz off so that I could get a two tone look when adding the lined images. The light pink is It’s a Girl – darker the new Be Mine, the green is Garden Party, and the yellow Limoncello.

The Smile die from the All that Jazz release was just perfect, don’t you think? I love how those blooms peek through the letters.

Catherine Pooler Ink - Carnivale Collection

Hop Along and Comment to Win

So, what did you think? Tell me which one is your favorite card and color in the comments below.  And be sure to leave a comment on everyone’s blog along the hop for a chance to win. Five random winners will be chosen to win two free ink pads + free shipping on their order – I LOVE free shipping! You have until the 25th – there are three solid days of hops filled with inspiration. So start on Catherine’s blog each day.

  1. Catherine Pooler 
  2. Ardyth Percy-Robb  
  3. Kristie Goulet  
  4. Jen Carter  
  5. Justine Hovey  
  6. Laurel Beard  
  7. Lydia Evans  
  8. Ingrid Blackburn <— You’re here!!
  9. Maureen Merritt <– Click here next!
  10. Ilina Crouse

Thanks for stopping by today. Have an inky kind of a day!

Supplies

To make finding the supplies I used in these projects a bit easier for you, here are a few clickable links. Compensated Affiliate Links are used when possible. Click here for disclosure. Happy Shopping!

Celebrate Friends – Out of the box ideas

Do you ever look at a stamp set and get out of the box ideas? The Celebrate Friends collection that just went live in the Catherine Pooler Designs shop screams out of the box ideas to me. I am not exactly sure why – but they keep flooding my mind…lol! Here are two for you today…

out of the box ideas - celebrate friends soa

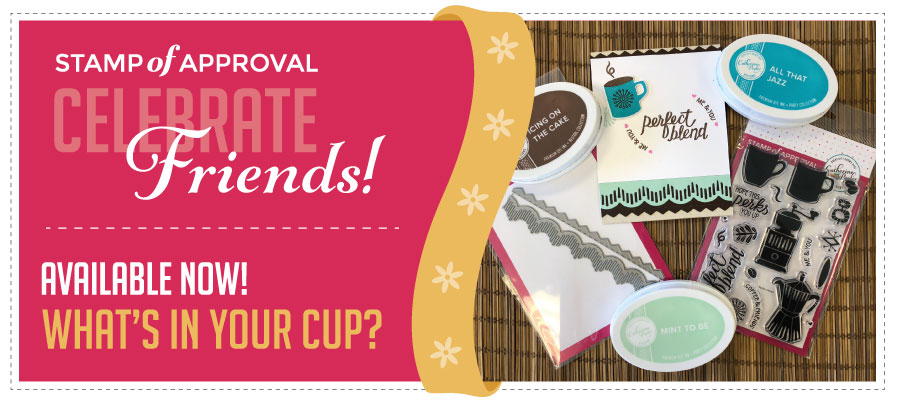
First off, if you haven’t checked out the current release – it’s LIVE in the shop! There are four options:

I gave some more detail in my post yesterday right here. Check out my three projects if you haven’t already…

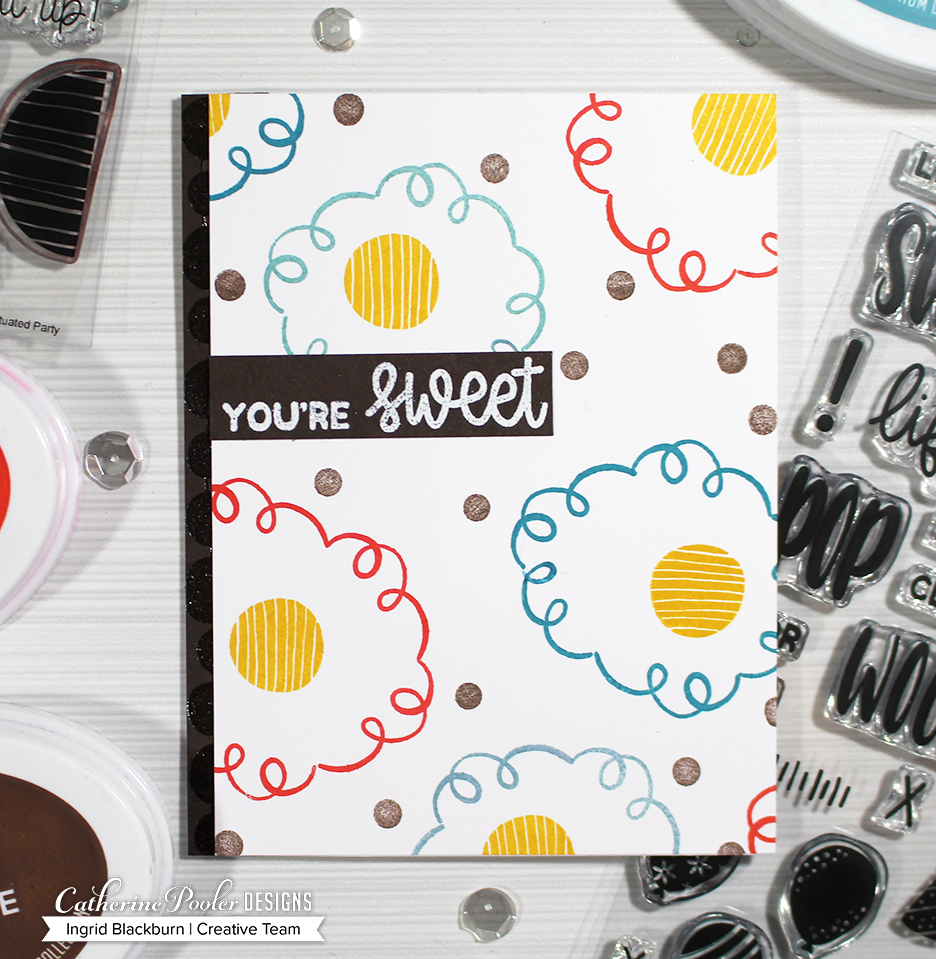
Out of the Box Flowers – Idea #1

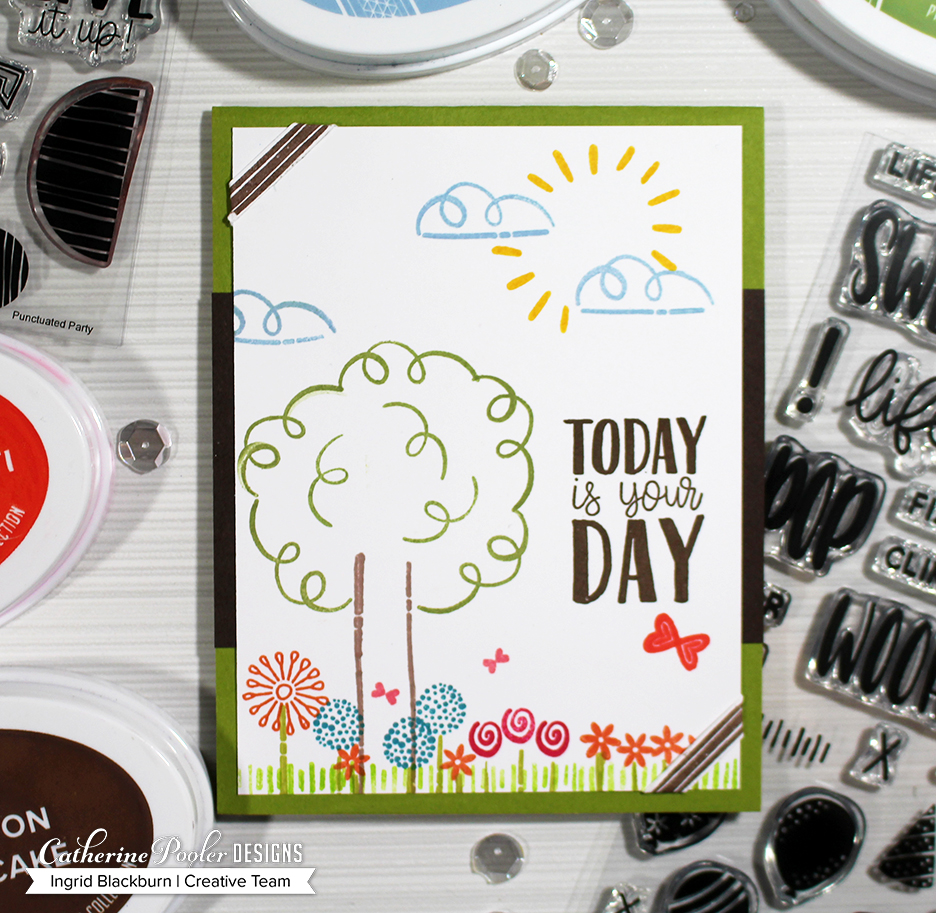
Here’s a simple idea for any small party like streamer stamps you may have. The two curly streamer stamps in Woohoo were just begging to be put in a round to create flowers on this card. The centers are that fun stamp from Punctuated Party. Can you see the fun pom pom border stamp embossed in clear on the chocolate cardstock on the left edge too? I love little additions like that.

woohoo out of the box card idea catherine pooler designs

After making it, I also thought it could also make some fun eggs – and another crafty friend said Sheep! Of course! Be sure to scroll down in a second to see what else it makes….If you’re a StampNation member and missed the live PJ Party Monday night, I created a card based off this one live! 🙂

Out of the Box Idea #2

And this one was just so much fun to put together. There are those fun curly cue stamps again – this time as clouds and a tree! Little hearts stamped bottoms together made butterflies, Flowers out of all sorts of stamps, balloon strings for the trunk, bottoms of the cloud, flower stems, and all sorts of other creative fun.

woohoo out of the box card idea

The photo holders are the bracket from Punctuated Party stamped, cut and wrapped around. It’s just a fun light hearted card. What do you think? What else do you see?

To see all the goodness that’s newly released, be sure to check out the shop. And to see the three days of blog hops, check out Catherine’s blog. Or you can see Day three on my post here.

Thanks for stopping by today! Hope to see you soon. Till then, keep those fingers inky!


Supplies

To make finding the supplies I used in these projects a bit easier for you, here are a few clickable links. Compensated Affiliate Links are used when possible. Click here for disclosure. Happy Shopping!

Catherine Pooler Stamp of Approval: Celebrate Friends Blog Hop Day Three

Celebrate Friends SOA

Welcome, thanks for joining me today for the Celebrate Friends Stamp of Approval Blog Hop – Day 3!! Chances are you’ve been hopping along for three days and I’m the very last stop on the hop! You probably came over from Tracie Pond’s blog – I love her creative talents, and she did some pretty cool cards, right? I promise to make it worth your while. I just made myself my morning latte and thought I sip along while I write you a little about all the fun contained in this great box.

This Stamp of Approval is a bit different than the 12 before, in that you have a choice. Yup, you read that right – you get your choice between Tea and Coffee. And if you just can’t choose, then you can get both too! Here’s how the collection works:

There’s a base collection of the following:

Then here’s what you get to choose from:

 Celebrate Friends with CoffeePerfect Blend Stamp Set & Morning Joe Border Dies

OR…

 Cuppa Tea Stamp Set & Bordering Sweet Border Dies

There are also 4 add-on die sets for those of you who LOVE cookie cutter craft dies plus the refill for the Mystery Ink (you’ll want that for sure)

If you are one that has to have it all, there’s a box option for just that too – yup – coffee + tea + add-ons.

If you would like to see all the pieces, be sure to stop by Catherine’s YouTube channel – she’s got them all in one video so you can see the sets.

So when can you get all this caffeinated goodness? StampNation members will get the first chance to buy the collection in the LIVE Pajama Party online tonight – it starts at 9 pm EST! If you aren’t a StampNation member, then be sure to get on the waitlist HERE if you haven’t already. Tomorrow morning, for the remaining SOA boxes, the purchase link will be sent by email to all waitlist members. If any are left (sometimes it sells out in just a few hours), the public will be able to order directly from the shop at 6 PM EST, Tuesday the 24th.

So, now that you know all the specifics…how about some creative inspiration?

I thought it would be fun to dive right in…

My love affair with Coffee

My parents are tea drinkers mostly, and the occasional cup of coffee. My brother is addicted to coffee – his love affair started at age 12. My first taste of coffee goes all the way back to the summer of 1986 in Cefalu, Italy, and is firmly etched in my memory.

My little brother had been sneaking coffee after church for years, and I always thought it was, well to be honest, gross!  So I had to find out what was so mystical about the coffee there in Italy, and if it was different. After all, drinking coffee seemed like such an adult thing to do, and I couldn’t wait to grow up.

We were finishing out three weeks in Italy by spending a week at a beach resort in Sicily.  One afternoon I was determined to try coffee – Italian Coffee. I’d been watching Italians for two weeks now sip this curiously dark brown beverage and it seemed like the thing to do.

It was a gorgeous mid-afternoon in July, and everyone was either out at the pool or laying down by the rocky beach. I wandered up to the empty hotel bar, and confidently ordered myself un Caffe in Italian. I watched in amazement as deep dark brown fluid filled a little bone colored china cup. I offered a grazie to the bartender as he reached across the bar and delivered my gorgeous beverage. It was topped with the most creamy medium brown crema (froth) and you could just smell the deep roast of the beans fill the air.

Well, first off here’s a tip for when you’re in Italy – Caffe really means espresso.  Of course, I was expecting a regular cup of coffee, but I was the only one in the bar, and the bartender was looking right at me. I didn’t want to seem like that wasn’t what I meant, so I confidently sat there like I knew what I was doing.

I took a sip from the small espresso cup, and tried to hide what I really thought. It was incredibly bitter to me, but I was determined to sit there and drink every last drop. So what would any teenager do? Add 4 sugar cubes! Stop laughing, I am actually chuckling as I write this.

I’ve never forgotten that afternoon, and my first real taste of coffee. I thanked the bartender and went back to the beach proudly telling my little brother I just had my first Espresso! When we got home and my brother got his next contraband coffee drink after church, I remember telling him, that’s not coffee, at least not how it’s supposed to taste! And from that moment on, I couldn’t bring myself to drink regular “coffee”, only espresso based drinks. Oh, I’ve tried – as recently as a year ago, and I just can’t drink the “watered down” version!

A few years later while I was in college at the University of Utah, my love affair with espresso continued. My best friend Jen and I would jump into her little white Mazda Rx7 every time it rained and grab a Cappuccino or Mocha. I shortly thereafter bought my first Espresso Machine, and I haven’t looked back since. Today, I’m on my 5th machine, start every morning with a latte and every time it rains I do still want a Cappuccino – and of course I always think of Jen.

Friends and coffee – it’s a great thing. I always meet friends over coffee – well, lattes & Cappuccinos for me. I actually love to go to little mom & pop cafe’s – there aren’t enough around! I start every morning off with my latte (Italian Beans of course). And when I’m in Italy, I always have my little Caffe or Macchiatos (between a Caffe and Cappuccino) – and I’ve finally gotten to the point where I don’t need sugar there.

Be sure to tell me in the comments when YOU first tasted coffee, I’d love to know. Now that I’ve made you all want a Cappuccino, how about a little creative inspiration? Here are a few fun little cards…

Celebrate Friends Project #1

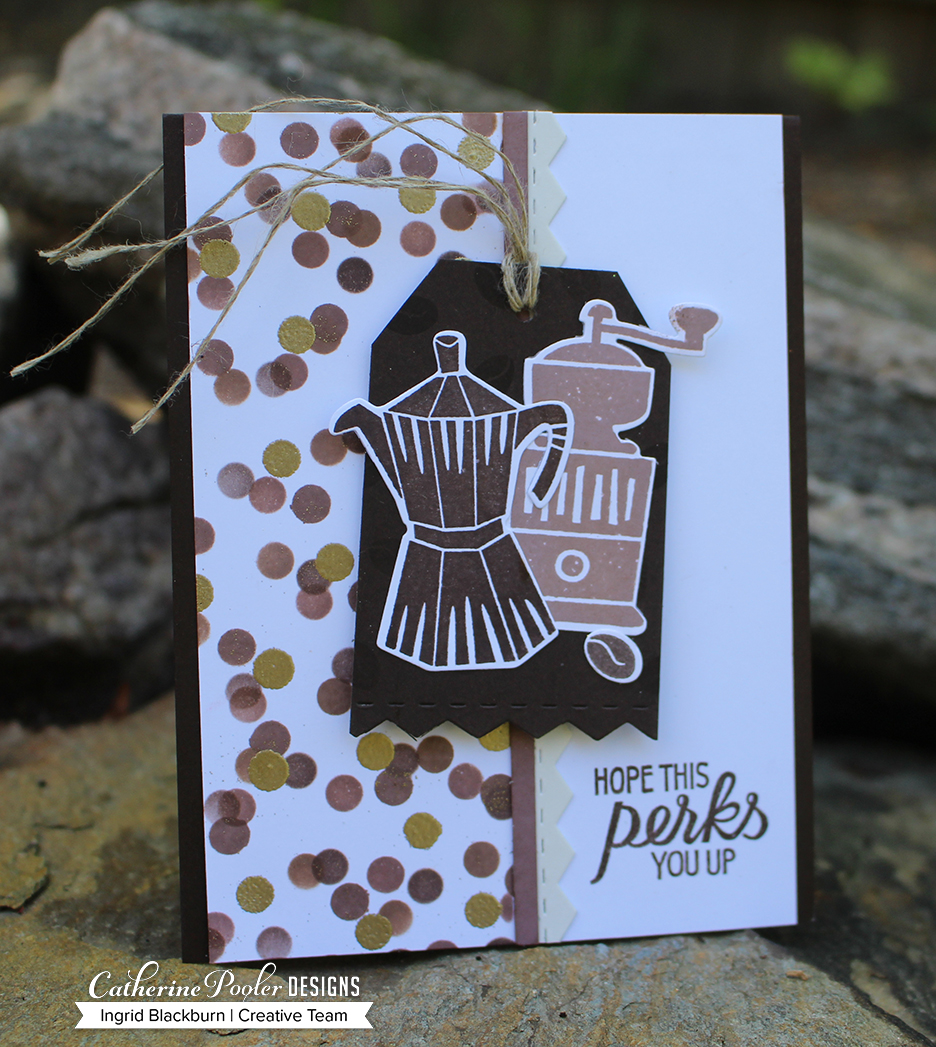
As you know from my little story above, I’m all about espresso. So when I saw this little espresso Perkolator, this set had my heart. This card features the Perfect Blend Stamp set, Add-on Dies set, Morning Joe Border Dies (LOVE those), and the perfect little accent – Scattered Circles Stencil.

Celebrate Friends Stamp of Approval

Celebrate Friends Project #2

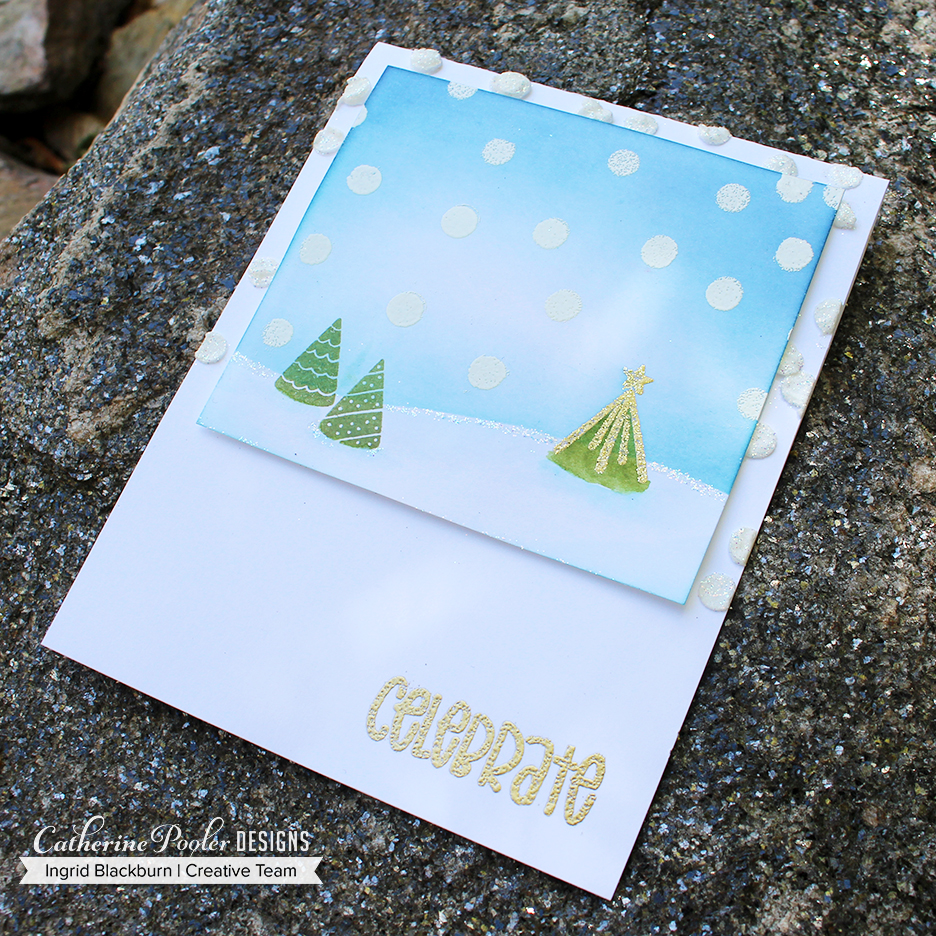
If you’ve been hopping along the past three days – you’ve seen lots of party cards using the Woohoo stamp set. Well, here’s one to show you that those little party hats and fun extra stamps can be used for Christmas too! Bet you didn’t think you’d see a Christmas card today, huh?

Celebrate Friends Coffee Stamp of Approval Woohoo stamp set

The scattered circles stencil offers the perfect random amount of circles for embossed snow or to add texture in the background. I used Whipped Spackle and Wanderlust Embossing Powder for a cool glittery snowy texture to the back behind the scene. I just love this fun little card. And the amount of sentiment options in the woohoo stamp set are just insane!

Celebrate Friends Project #3

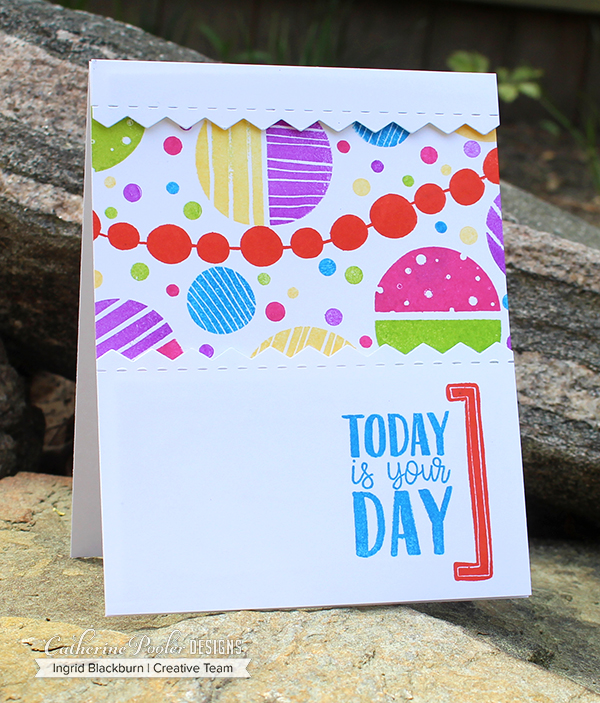
I’ll admit – this stamp set – Punctuated Party – has my heart too. These circles and just overall feel to this set is SO much fun. It’s totally a party, so that’s where this card came from.

Celebrate Friends Stamp of Approval

Isn’t that pom-pom banner just fun? I love all the colors of the Party Collection Inks too – they go so well together. The edges are one of the Morning Joe border dies.

I hope that peeked your interest in the collection a little bit! I have more to share with you tomorrow at 6 pm, so be sure to stop back by.

Catherine Pooler Celebrate Friends Collection

Blog Hop List & Prizes

Be sure to comment on each blog by 6 PM today!!! Prizes will be announced on Catherine’s blog at 6. You have a chance for three – $97 gift certificates – that’s a free collection!! Cool!!


  1. Catherine – Click Here NEXT
  2. Kelly Martin  
  3. Laurel Beard  
  4. Ardyth Percy-Robb  
  5. Kristie Goulet  
  6. Justine Hovey  
  7. Cynde Whitlow  
  8. Tracie Pond  
  9. Ingrid Blackburn – You are HERE

Thanks for stopping by! Till tomorrow –


Supplies

To make finding the supplies I used in these projects a bit easier for you, here are a few clickable links. Compensated Affiliate Links are used when possible. Click here for disclosure. Happy Shopping!

Essentials by Ellen April Pinsights Challenge

I’m so excited to have been invited to play along today with the Essentials by Ellen April Pinsights Challenge over at the Ellen Hutson blog! Each month a new fun challenge is put together, not just to inspire you, but also give one lucky random participant a chance to win a $50 gift certificate to the Ellen Hutson Store! How cool is that?

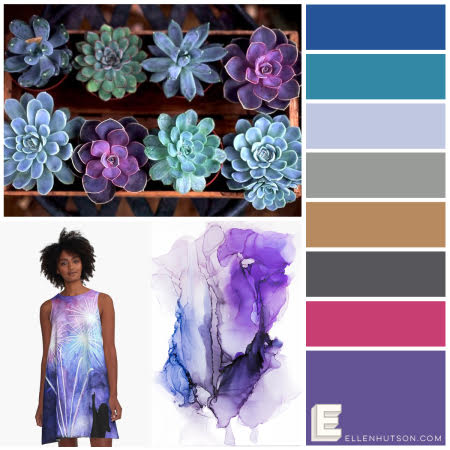
This month, the creative minds over at Ellen Hutson are paying homage to the Panetone color of the year – Ultra Violet. Just check out how inspiring this board is:

Ellen HutsonEssentials by Ellen Pinsights Challenge

I was so excited to get playing. Here’s how you can play along and be entered for the chance at the $50 Gift Certificate! The rules are pretty simple when making your card:
  1. Find your own inspiration from these pinned photos and colors – work it into your project.
  2. Be sure to use some Essentials by Ellen products in your creation. Don’t have any yet, no worries – you have a month to enter!
  3. Head on over to the Ellen Hutson Pin-sights challenge  – it’s over on the CLASSroom blog and link your card up to the challenge gallery.  You have until May 16th to enter to win!
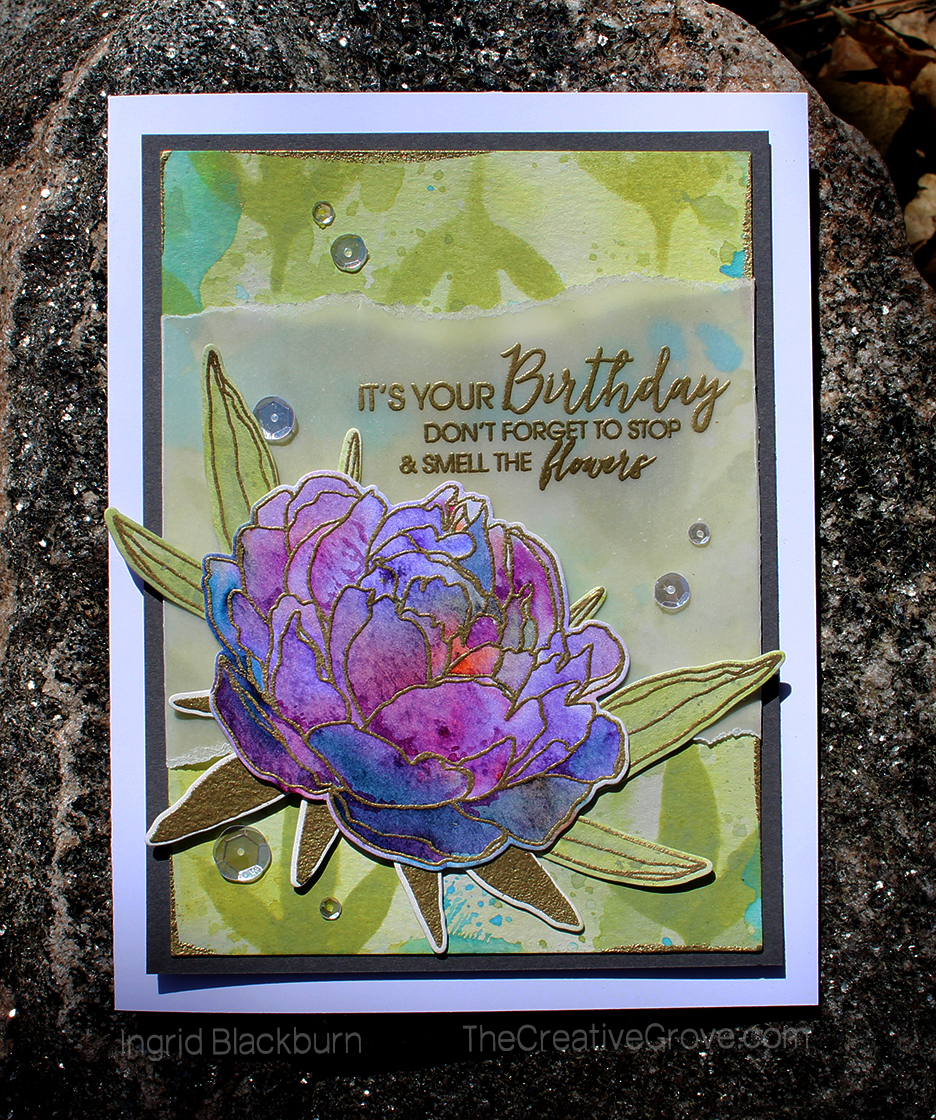
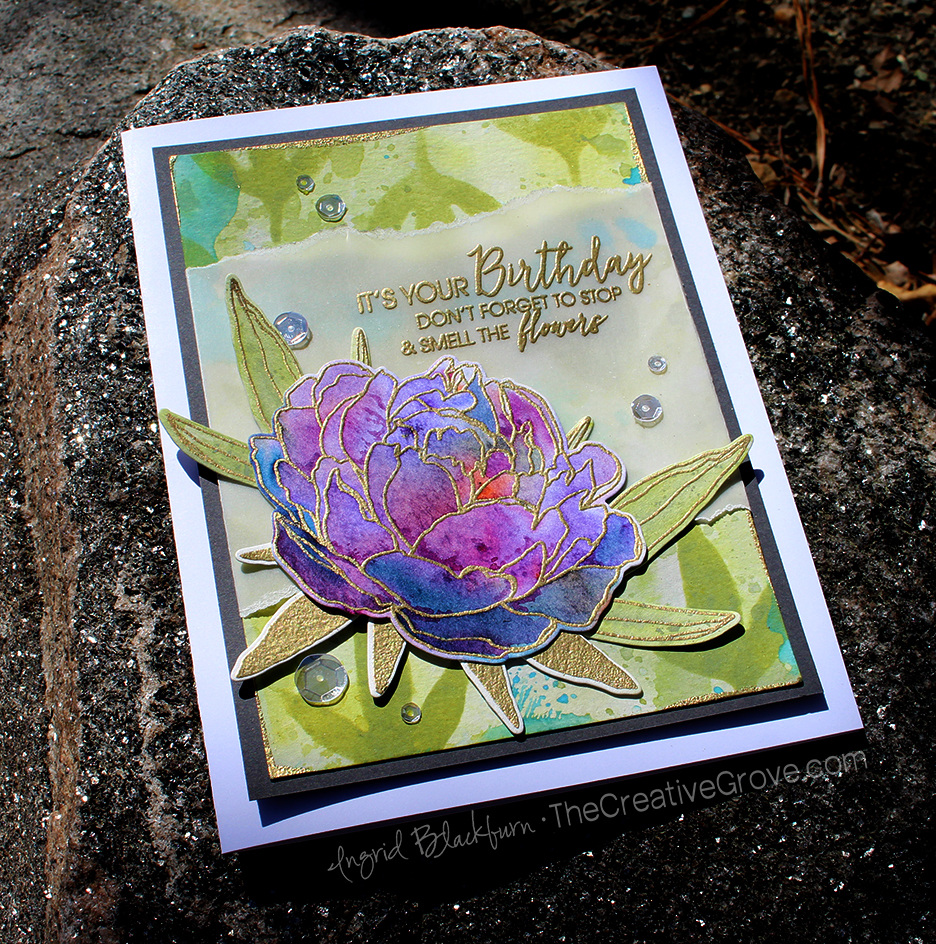
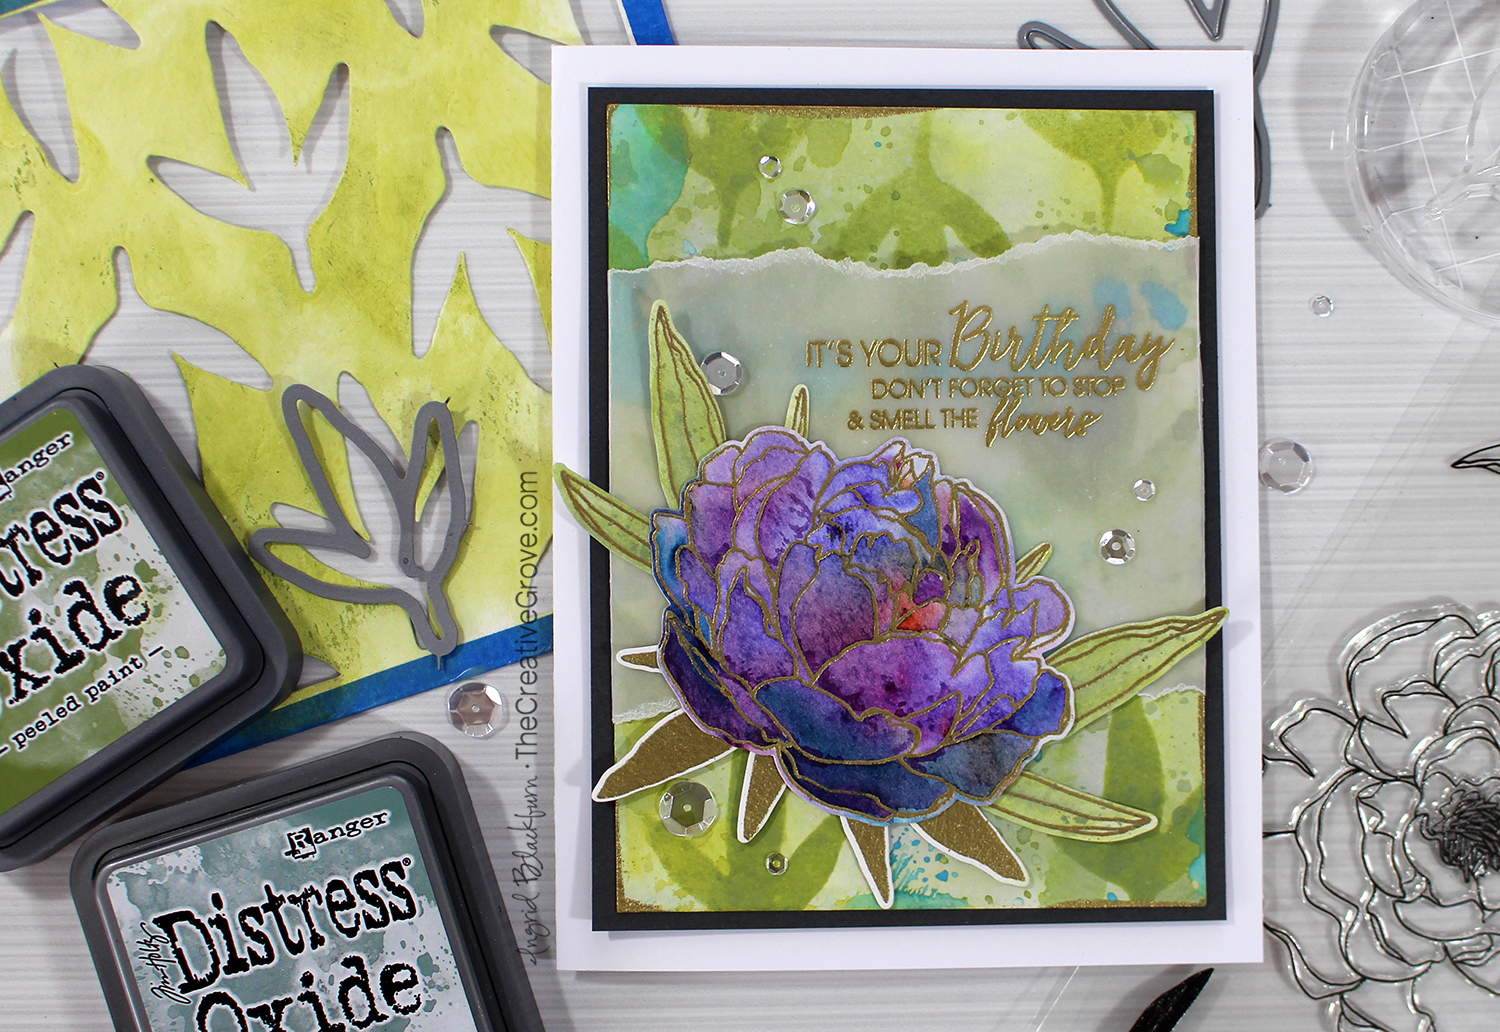
I had a lot of fun getting my inner watercolor artist going with this one. I knew that I wanted to play with the gorgeous, did I mention…GORGEOUS Mondo Peony stamps. Aren’t you a sucker for any of the Mondo stamps by Julie Ebersole too?!! I hope you enjoy this project, here are a few tips on how I created this beauty!

Mondo Peony Watercolor Tutorial

Stamp and emboss your outlined Peony image and the leaves in Gilded by Brutus Monroe onto 140# Cold Pressed watercolor paper. Arrange and stamp your sentiments from the Lovely stamp set (also by Julie Ebersole) onto the vellum and emboss with the same powder for an elegant look. I combined two for a larger sentiment.

Sprinkle a little Brusho onto your leaves and peony flower. lightly spritz with the Distress Spritzer to get a fine mist. Watch the color explode! The beauty of Brusho is that you get several colors when activated. To get that color, they combine various pigments, and I love the end result it gives. In this flower, you see several hues. Cut out your images using the coordinating Mondo Dies and arrange with a little glue.

Tear your vellum to the size you desire. Mine was an extra 3/4″ on both sides so I could easily overlap and adhere to the back. To create this fun background. Start off by smooshing Iced Spruce, Broken China and Peeled paint Distress Oxide inks onto your craft mat. Use the wrinkle free technique to build up your background. I love to layer lightly, then add those random dots of various sizes from my mat. It always give a cool look to your project. Randomly edge your background and emboss with gilded embossing powder.

You can watercolor stamp the smaller leaves to create a pattern in Peeled Paint, or create a stencil like below. I created one out of heavy duty watercolor paper and sealed it with Gel Medium to help it last. I stenciled my homemade stencil pattern over my oxide background with mini ink blending tools, and assembled my card. Pop up the grey base with foam tape to create a little drama.

To give it a finished look, add some sparkling clear sequins and it’s an elegant card for that special person in your life. I’m earmarking this one for my mom for sure! Do you think she’ll like it?

Thanks for joining me today, be sure to check out the challenge and play along. I can’t wait to see what you create!


Supplies

To make finding the supplies I used in these projects a bit easier for you, here are a few clickable links. Compensated Affiliate Links are used when possible. Click here for disclosure. Happy Shopping!

All That Jazz: New Release from Catherine Pooler – Blog Hop

Catherine Pooler All That Jazz Ink

Welcome to the All That Jazz release blog hop – Day One! I’ll be honest, every time I type All That Jazz, I hear a broadway chorus sing it and see jazz hands…lol! Now you will too, sorry about that! So, it’s only fitting that we have that singing around in our heads while looking over all the gorgeous inspiration the Creative Team came up with, right?

Today marks the first day of three amazing project inspired days for the next release over at Catherine Pooler Designs. And what a release it is. It’s literally packed with new cool products (many of which I’ve used today), the previous Stamp of Approval Counting Blessings Collection (one of my all time favorites) and drumroll….you’ve been waiting….the ink color All That Jazz.

If you were lucky enough to nab a Naturally Inspired SOA last June, then you have this deep Teal that’s part of the Party Collection of Inks. If not, it’s finally here!!

Catherine Pooler All That Jazz Ink

All that Jazz Tutorial #1

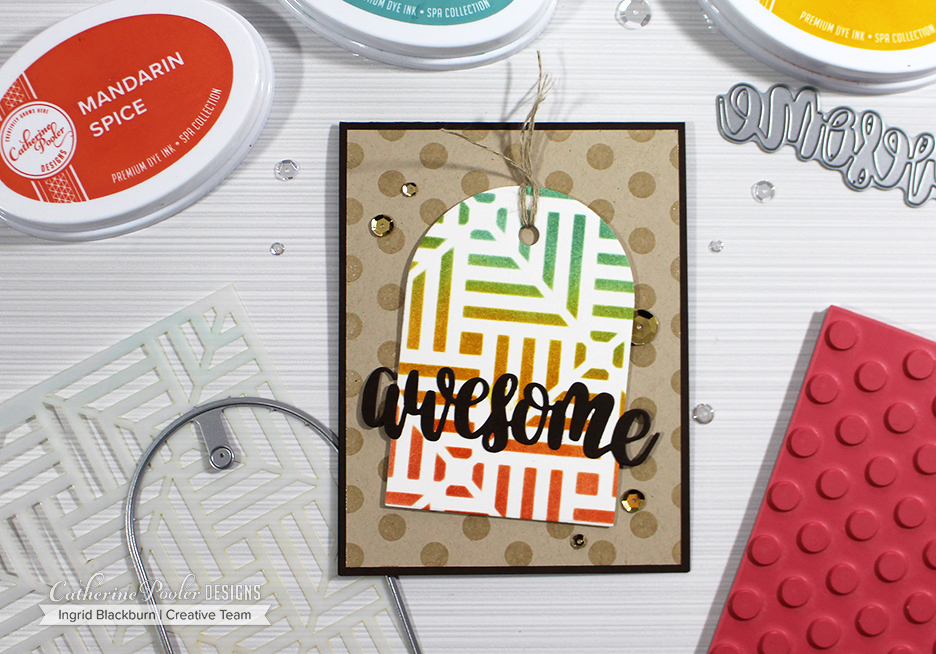
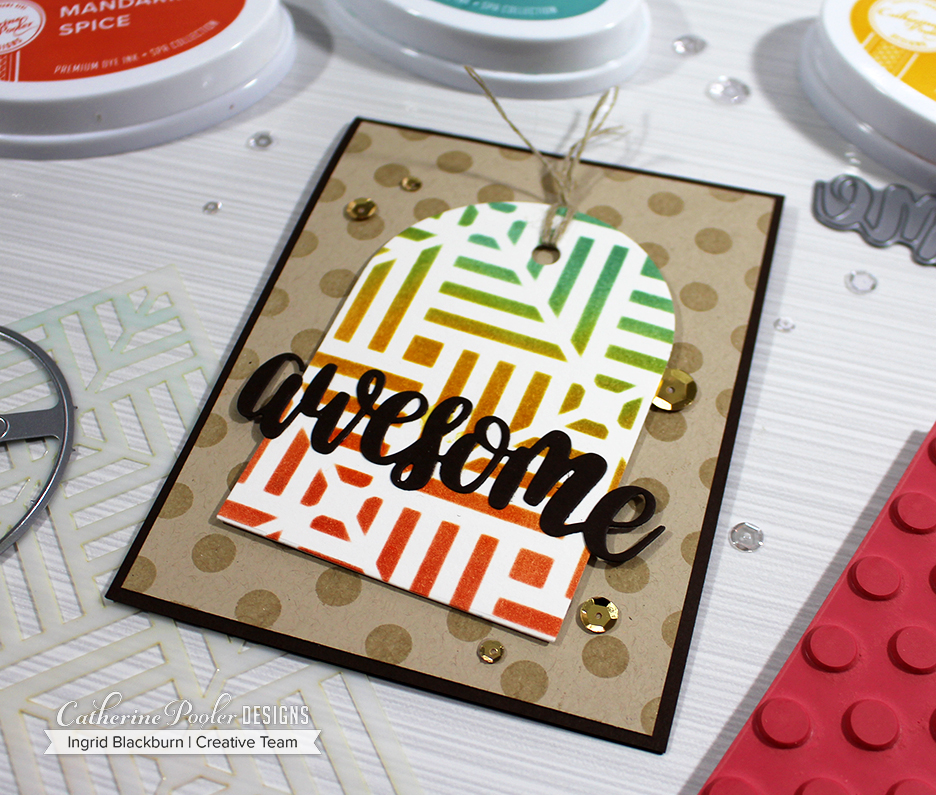
So let’s dive right in. First up is a quick, fun little project that works for just about any occasion….I was tempted to pop a have a…birthday on there, but then decided to leave it just Awesome.

Catherine Pooler Designs Stencils - All that Jazz

Isn’t that stencil pattern just WAY cool? It’s called Square Dance and you can get it on the 20th in the stencil section over at Catherine Pooler Designs. This stencil has SO many possibilities. I’m just getting started. WAIT till you see what I have up my sleeve for it later this week!

To get this look – sponge some Sauna, over lap it with Mandarin Spice and Daylight and voila! I used watercolor paper to get a smooth blend, and then cut out the tag using the Tags, Etc. Dies set. That’s an awesome collection of shapes and embellishment dies that everyone should have.

Pop it up onto a fun simple embossed in clear background using the new Doin’ the Polka Background stamp. Who doesn’t need a fabulous Polka Dot background stamp. They are just the right size – there, but not over powering, you know?

Catherine Pooler Ink - All that Jazz

To keep the muted theme going cut out the new hand lettered awesome die and you’re all set. I just LOVE that Chocolate cardstock. Oh speaking of cardstock….um…did you notice the Sand Dunes? YUP – it’s NEW. The perfect shade of sandy goodness.

All That Jazz Tutorial #2

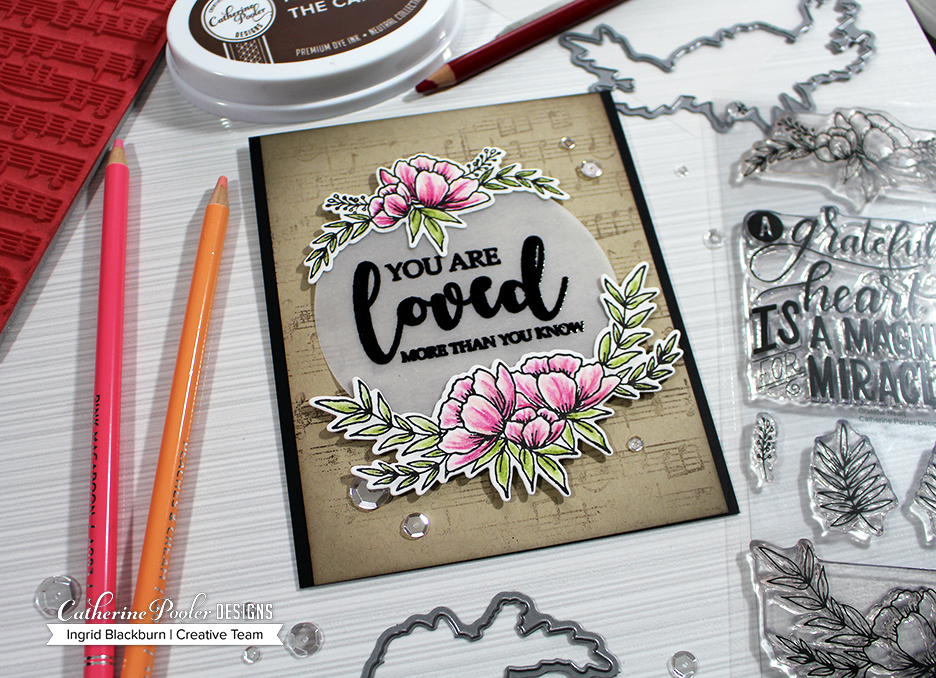
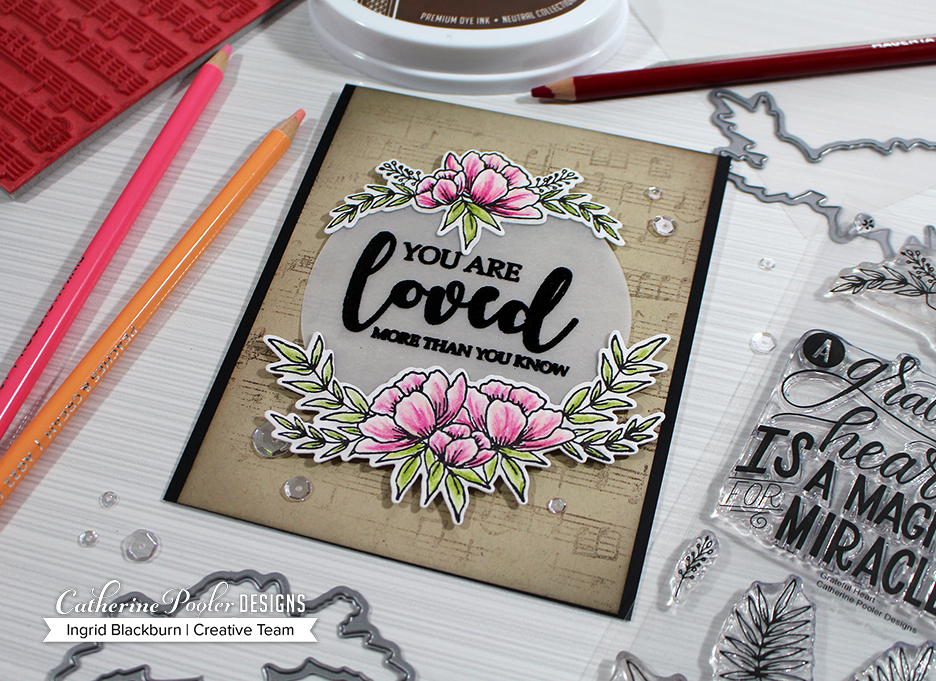
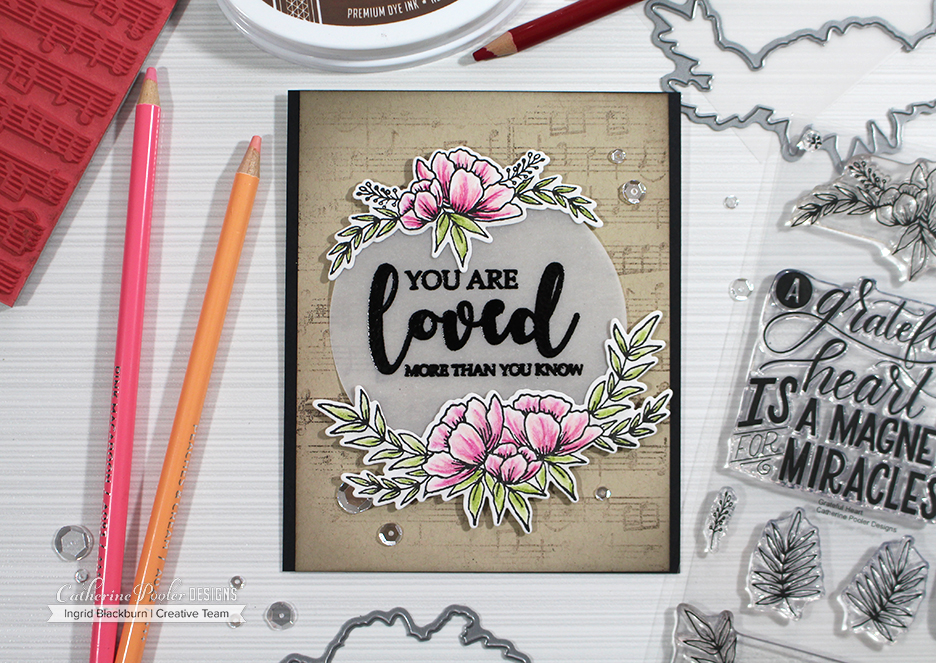
Next up, I have to admit, it’s one of my favorites. When Catherine showed me the Grateful Heart stamp set designed by our very own Creative Team member Lydia Evans, I nearly fell over. True story. This stamp set is SO unbelievably gorgeous it’s crazy! What I love about it the most is that you have all the images as singles AND two huge floral sprays. So masks your own creation, or just stamp – brilliant, right?

All That Jazz Ink Release - Grateful Heart Ingrid Blackburn

First, stamp the two floral sprays in Midnight ink and then use some pretty colored pencil shades to bring then to life. First add some green to the leaves, I used some colored pencils from Arteza, then create some shadows around the images in light grey keeping in mind where your light source is. You’re going to cut them out, so do the shading first.

Now it’s time to color. Start with your darkest shade for your petals, keeping your strokes light. Feather in some light pink and then blush. Blend your colors with some gamsol and a blending stump and you’ve got a beautiful little creation. Cut each spray out with the coordinating dies from the Grateful Heart Dies Collection. Since it’s so intricate, I used some washi tape to hold them in place.

All that Jazz - Catherine Pooler Ink

Next use the Circles Dies to cut a large circle out of the new Vellum Cardstock – YES, another new paper. I’m a sucker for Vellum cardstock. This one is 48# weight and just gorgeous. It’s heavy enough to hold up to techniques, yet you can still see through it. Emboss one of the two sentiments in the set onto your circle and glue your spray keeping them off-centered.

Using that gorgeous Sand Dunes cardstock, imperfectly ink up the new Music Notes background stamp in Icing on the Cake. Take a paper towel and dab a little away. Stamp onto scratch paper and then stamp onto your Sand Dunes cardstock. You want that stamped off look so it doesn’t overpower your card. It’s background music support, the flowers are the main show.

To give the card a soft look, try adding some super light sponging around the border with the icing on the cake. I wanted to keep it not just brown, so I used my black sponge tool. That way whatever was on there from last time, mixed with my brown Icing on the Cake and I got this gorgeous aged look.

TIP – put the pressure on your tool that is off your project, kind of angling it so that you keep the pressure SUPER light.

Grateful Heart Stamp Set and Dies - Ingrid Blackburn

Pop up your flowers and mount onto a black base. My card measures 4.5 x 5.5″. I wanted it a bit wider so it wasn’t too skinny on the sides. I’m sending this card to my mom. I know it’ll make her smile. 🙂

What did you think? I’d love to hear which one is more your style! In addition to the previously released items (counting blessings collection and all that jazz ink pad), there’s also a new hand lettered wonderful die just like the awesome die, and some fun new 6×6 patterned paper – more on that Tuesday ;).

All That Jazz Blog Hop Prizes

Here’s the full hop in case you missed any on the way here. Be sure to comment along the way. There will be five lucky winners that get two free ink pads & free shipping on their order!! 🙂

  1. Catherine Pooler   <– Go Here Next!
  2. Josefine Fouarge   
  3. Melissa Miller  
  4. Jenny Colacicco  
  5. Karen Baker 
  6. Justine Hovey  
  7. Ilina Crouse  
  8. Maureen Merritt  
  9. Allison Cope  
  10.  Ingrid Blackburn  You are here. 🙂

Thanks so much for stopping by today! I hope you loved these couple of projects. Of course if you’re a StampNation member, you’ll get to order early tomorrow – perks of membership! Everything goes on sale Tuesday March 20th over at Catherine Pooler Designs. Be sure to hop along the next two days too. Just start over on Catherine’s blog.

All That Jazz - Catherine Pooler Designs

And stop by here too. I’ll have some more creative fun for you! See you then.

Supplies

To make finding the supplies I used in these projects a bit easier for you, here are a few clickable links. Compensated Affiliate Links are used when possible. Click here for disclosure. Happy Shopping!


FULL Release – Available now!!