It’s the Welcome Home Release! You’ve probably arrived from Daniel Wests’ blog – Welcome! Today I have some fun quick little projects for you using some of my favorite pieces from the Catherine Pooler Welcome Home collection. Let’s jump right in!
This collection first premiered at the Creativation show in Arizona. And I have been just waiting to show you some of these amazing pieces.
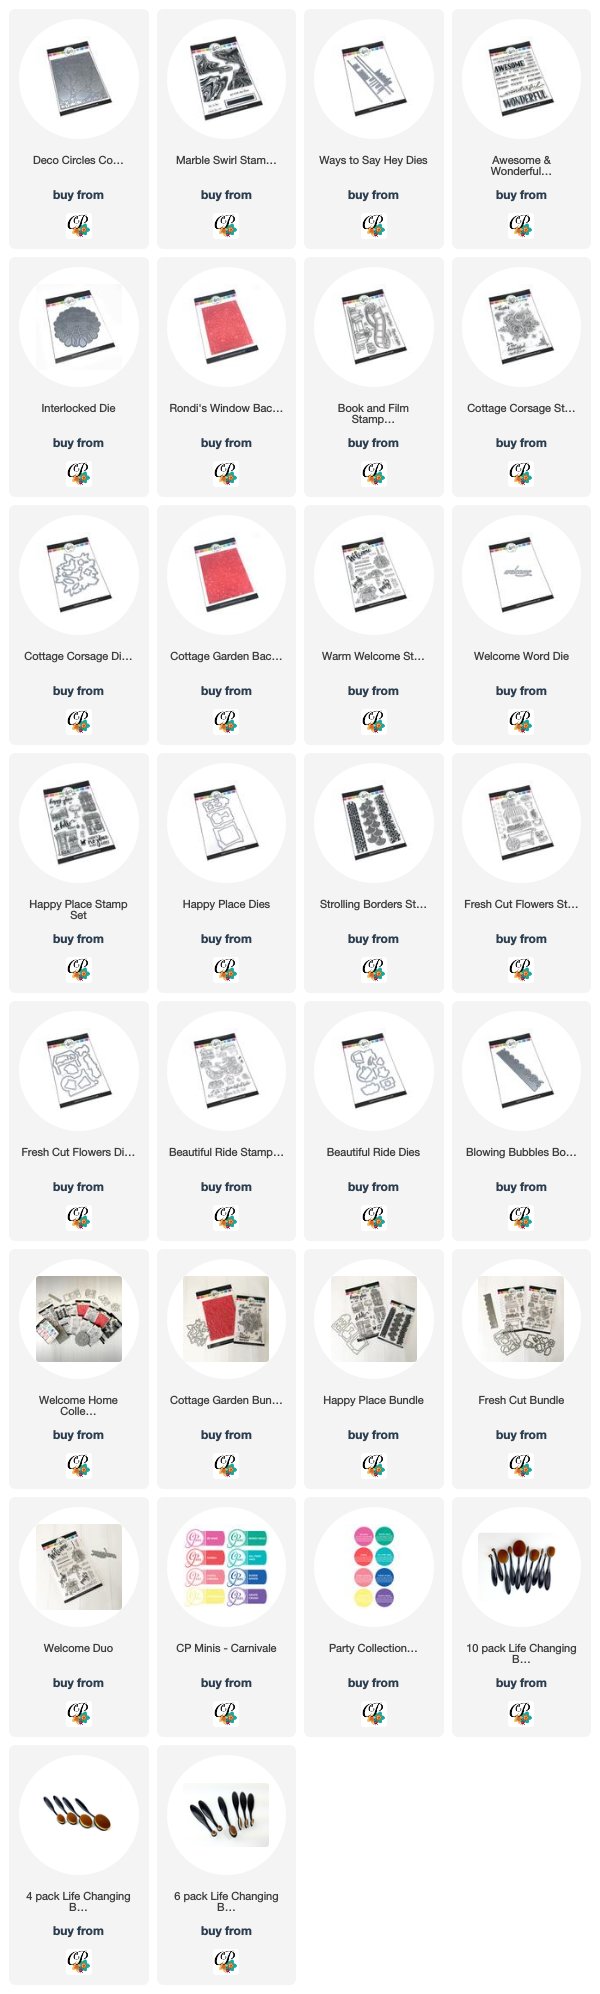
Here are the new Stamps and Dies that are in the Welcome Home Collection:
- Deco Circles Cover Plate Die
- Marble Swirl Stamp Set
- Ways to Say Hey Dies
- Awesome and Wonderful Stamp Set
- Interlocked Die
- Rondi’s Window Background Stamp
- Book and Film Stamp Set
- Cottage Corsage Stamp Set
- Cottage Corsage Dies
- Cottage Garden Background Stamp
- Warm Welcome Stamp Set
- Welcome Word Die
- Happy Place Stamp Set
- Happy Place Dies
- Strolling Borders Stamp Set
- Fresh Cut Flowers Stamp Set
- Fresh Cut Flowers Dies
- Beautiful Ride Stamp Set
- Beautiful Ride Dies
- Blowing Bubbles Border Die
PLUS…these amazing new must have products:
I’ve been using the Life Changing Brushes for a few months now. I thought it would be fun if we played with the Carnivale minis as well today. Let’s see how they work with some of the stamps and dies in action…
Welcome Home Release – Project No 1
Nothing makes an impact like the Interlocked Die. To say I was over the moon excited the first time I saw this die by Julie Mogford is putting it mildly! This is not your average cover plate – this die measures 5 1/8″ around, and today we’re going to use it as a stencil.
That’s what I love about Cover Plates – using them as stencils! So that you can get as much use from yours as possible, cut it out of heavy weight cardstock and embossed it in clear on both sides. You can also seal it with gel medium.
To get that light airy look in a quick way – you’ll definitely want to try out the Life Changing Brushes. Last November I purchased some of the inexpensive make up brush counterparts, and let me tell you – the Life Changing Brushes are the real deal. They are made for Paper Crafting. Let me say that again – that’s the biggest difference – these are made for Paper Crafting! They are designed to release ink without soaking the ink up.
Another big difference is that with the Life Changing Brushes, I have not had the little hairs come loose, unlike their cheaper counterparts. You do get what you pay for! Just like anything else in life. So which size do you need? Definitely the larger four, and if you want to use them with stencils and get a bit more precise, you may want the Full 10 set. That way you can get into the nooks and crannies of those intricate stencils or background stamps.
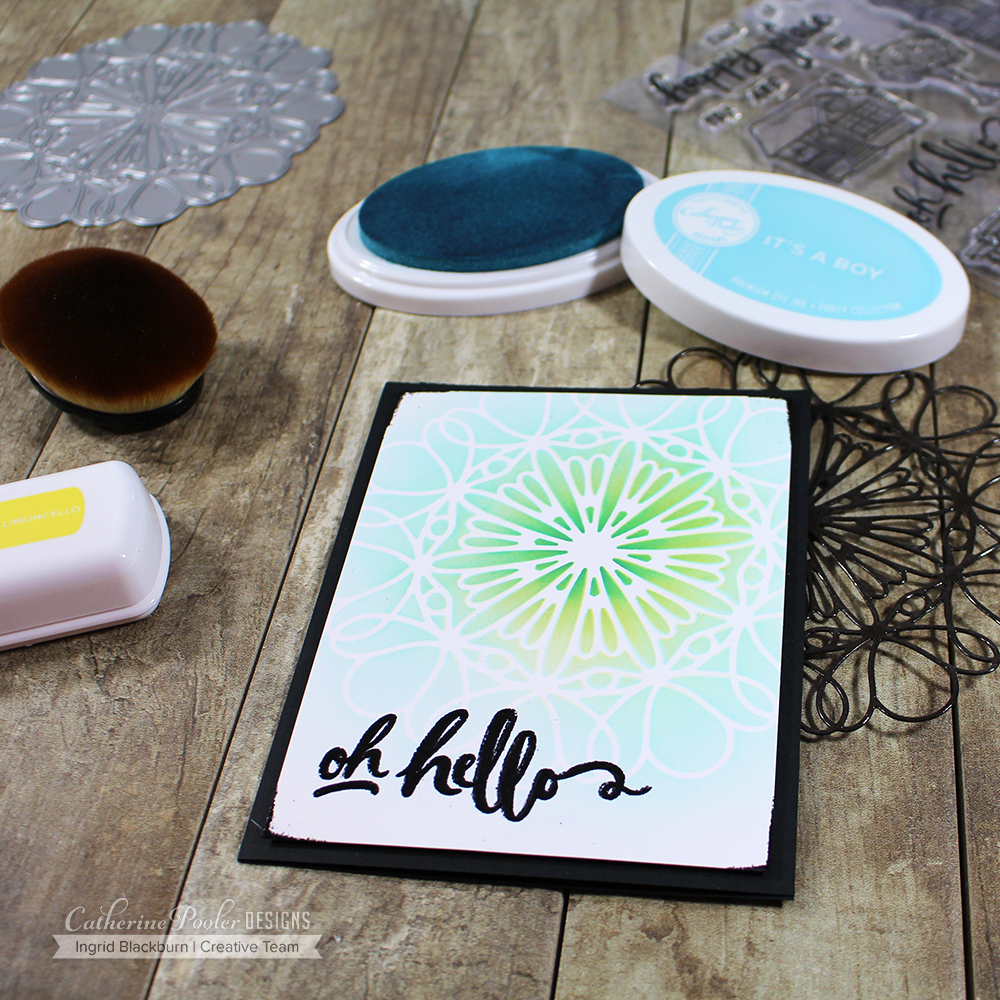
So I wanted a fun masculine feel to my card today. I quickly layered some It’s a boy down, keeping my pressure light as I went outward. To get the full stenciled effect of this amazing die, be sure to go beyond the edge of the Interlocked Die. For some pop – use Limoncello (CP Minis – Carnivale Collection), from the center outward – just look at this AMAZING green it creates!!
So that your sentiment from the Happy Place stamp set makes an impact, emboss it in WOW Black Embossing Powder. I also ran my WOW Embossing Pad along the corners and added a little powder there too – it’s a bit hard to tell, with the card front adhered to the Midnight cardstock, but you really notice it in real life (shiny vs. the matte cardstock).
This card was so quick to make, you can really made several in the whole rainbow and literally use any sentiment on it! Do you use dies as stencils ever? If so, tell me in the comments what your favorite is?!!
Project No 2 (and 3)
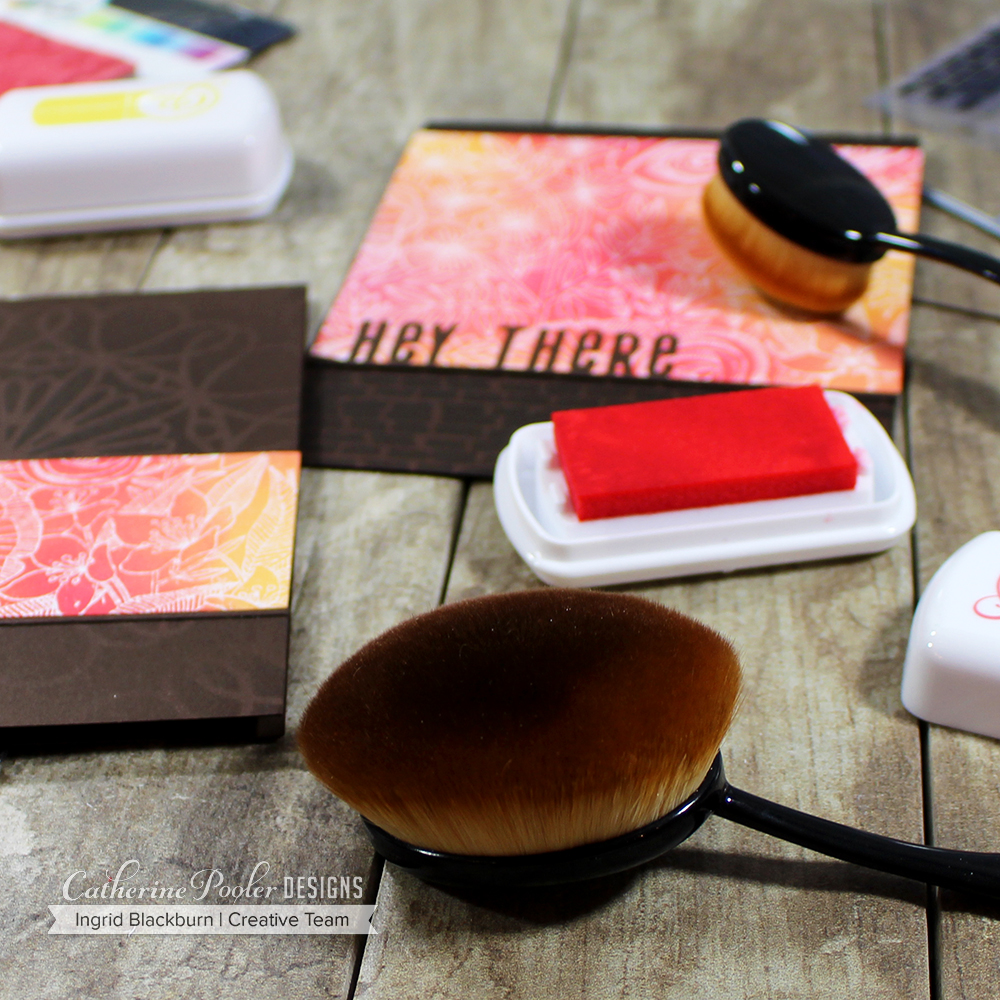
Next up we’re going to use the same Life Changing Brushes to get a flawless look, but over an embossed image – the Cottage Garden Background Stamp.
Emboss your image in Opaque Bright White Embossing Powder on CPD 100# Bright White Cardstock. Did you know that WOW! puts antistatic product right into their powders? On an intricate image like the Cottage Garden Background, that really matters! It helps so that your powders don’t stick to the non-embossed parts.
I embossed one card front panel – 5 1/2 x 4 1/4″, and then blended Limoncello, Coral Cabana, a little Be Mine and some Samba inks from the CP Minis – Carnivale Collection. That’s what is so great about Catherine Pooler ink – the amount of ink it releases. Even Picket Fence Studios who designed the Life Changing Brushes recommends CPD ink for it’s brushes!
The key to getting a light blended look on your project is the same as with the Ranger Mini Sponge Tools – light even pressure. The difference between the tools – there is no rounded edge, so you’re more likely to get a smoother application with the brushes. And they are ergonomic in design – quite flexible and easy to hold. All that makes a difference if you love to ink blend.
I recommend having a brush dedicated to a color family – that way you don’t have to constantly clean them. But you will want to clean them from time to time – just rinse in the sink with soap (any will do) and let air dry. Do not use a heat tool – the little hairs are made of a plastic material!
Once you have your background how you want it, cut a 1 3/4″ section off from the top or bottom (I chose the part with mostly flowers). This card is relatively simple to put together.
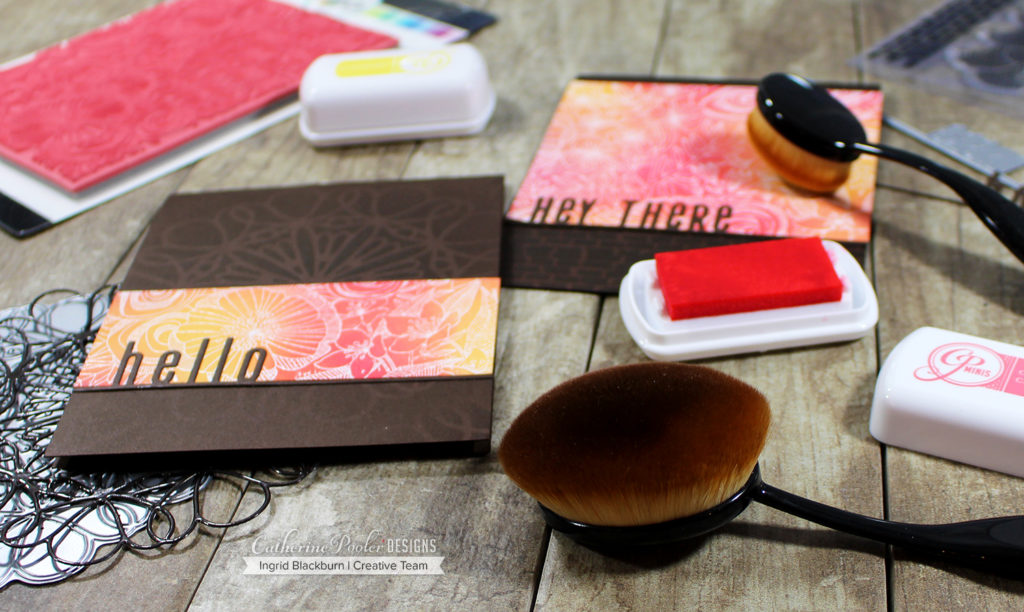
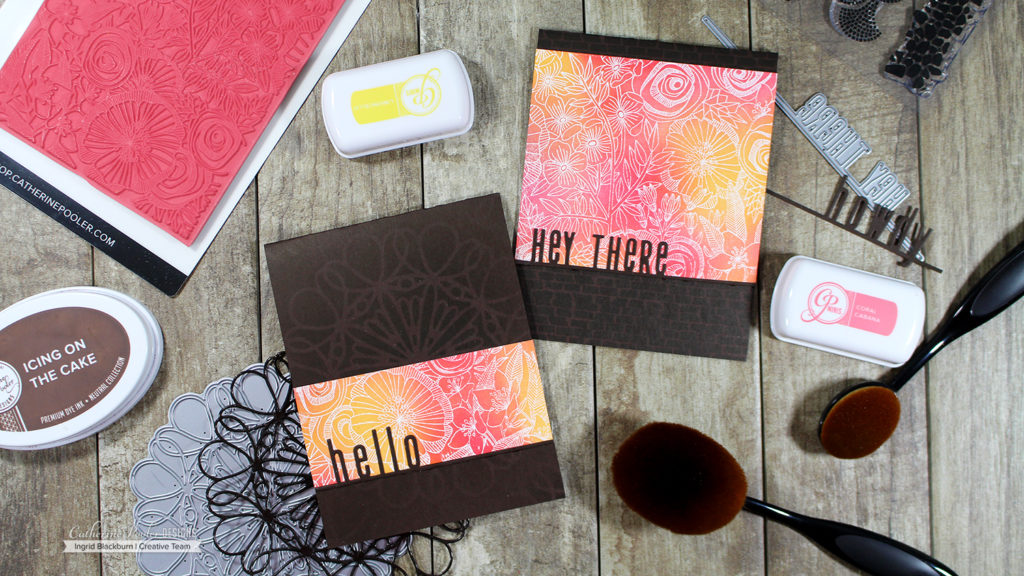
First ink blend a background using your Interlocked Die as a stencil with Icing on the Cake on the card base for the skinnier piece. On the other – stamp the brick border from the Strolling Borders Stamp Set in Icing on the Cake.
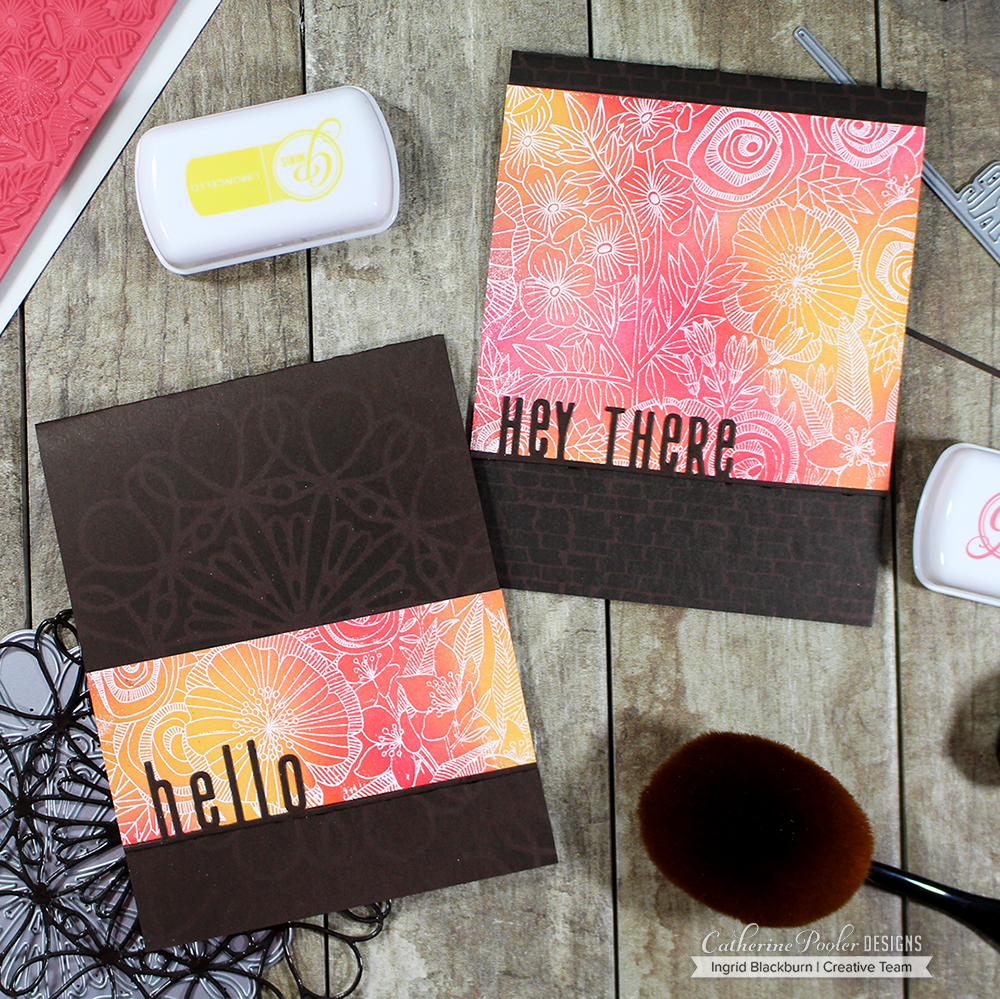
Adhere your backgrounds to the bottom and top third of your folded card base. Cut out the Ways to Say Hey Dies for your sentiments out of Chocolate cardstock with your die cutting machine and glue both your sentiments to the bottom – just off the edge (to the card base), but with the sentiment part on your background.
That’s it! Quick and easy, and the best part – you get two cards from every Background. I love how they look and mixing the fun, vibrant nature of the Carnivale inks with the deep dark Icing on the Cake ink and Chocolate cardstock. What do you think? What would YOUR color choices be?
Now it’s time for you to be inspired! Hop along the hop – and be sure to leave comments along the way to be entered in for some gift certificates! Definitely let Julie Mogford know when you get to her stop if you love her Interlocked Die!! Be sure to stop by my Instagram channel too on Wednesday for another inspiring hop as well. Have an awesome day!
Catherine Pooler – Hop Here Next!!
Tracie Pond
Jen Carter
Karen Baker
Susan Powell
Kristie Goulet
Ilina Crouse
Lisa Harrolle
Nanette Tracy
Kelly Martin
Maureen Merritt
Julie Mogford
Daniel West
Ingrid Blackburn – You’re HERE!
Keep those fingers inky!! Below you’ll find a supply list for each project.

Ingrid your cards are beautiful. I love how you used the interlocking die as a stencil. I am going to give that a try.
Love your concise instructions on your tecniques.
Thanks so much for your concise instructions on the use of the inks and brushes.
I love these! I never thought about making the die cuts into stencils. I can’t wait to try it.
Stunning creations seriously!! I really, really love that chocolate cardstock with those bright colors on top!!
Beautiful cards Ingrid! I love your use of the brushes to create those gorgeous cards. I have those, I guess I need to pull them out and use them lol.
These. Are. Gorgeous! Ingrid, you sold me on those brushes.
Ingrid, your cards are stunning. I love the window background stamp and can’t wait to order it. I am also glad to know about the brushes, and how they might help me with my blending. TFS 🙂
I love the homes stamp set too !
Ingrid you did a fabulous job showing off these new products!
Your examples are so great and it’s wonderful that you take the time to explain the process. These brushed look pretty cool!
LOVE your projects! Thanks for sharing how beautiful those brushes work, too!!
OMG they’re all amazing cards such inspiration
A nice job on these. Bravo!!!!
Gorgeous designs and colors!
So pretty. I like the ink blending.
Awesome cards and such pretty colors.
These are lovely.
Oh my goodness, your blending. . . don’t think I will ever get the hang of it. So very pretty, well done.
Oh my goodness, your blending is outstanding. Sigh, will I ever get the hang of it? Beautiful cards.
These are so fun, Ingrid! I love your explanations throughout as well. What an exciting release!
Oh, Wow! Oh WOW!! That brown with the yellow and red… I MUST try that!!! Soooo strikingly lovely!
Thanks for focusing on the use of the blender brushes. I just bought a set but haven’t used them, and I did buy the real thing, not a knock-off so I’m glad to hear your endorsement of them. Your colors and blending technique are lovely!
Thanks Priscilla, you’ll love them. I learned a lot about why they are different from Nicole at Picket Fence Studios. You will be glad you bought the ones made for papercrafting. 🙂
Beautiful as always! I got a set of those new brushes. Love this set.
Beautiful cards! Amazing blending and I love how your designs pop against the black.
Gorgeous colors. Love that you focused on stenciling. =)
Awe, thanks my friend!!! LOVED your projects. 🙂
I love how you can make “flowers” feel masculine, and yet still be gorgeous!
Thank you Linda!!! THAT’S the ultimate compliment. 🙂
wow your cards are gorgeous – love the color blending:)
Your ink blending and using the die as a stencil is outstanding! Your cards are beautiful. I do love this background die.
Very nice cards! I like how you made 2 cards out of one background piece that you made–both cards look great!
love the pop of color on the dark card.
Wonderful projects! Love them all.
Love all of your fabulous cards!! Thank you for your inspiration, it is greatly appreciated.
Omg- I love how soft your colors were- I need to get some of those brushes
You will LOVE them. They are worth every penny.
Beautiful Cards! So many great ideas in this hop!
Those life changing brushes look amazing!
They truly are. I love mine…
Beautiful cards. I’m going to have to try using my dies as stencils. Great technique.
Thanks for sharing such beautiful cards! I’m going to have to try using my dies as stencils. Great technique.
Beautiful cards Ingrid. I love chocolate card stock almost as much as I love chocolate 😉. I never even thought to use a die as a stencil. Thank you for showing me that I can.
Such beautiful cards! Love how you did these!
Gorgeous cards and great techniques!
I love the blending of Its a Boy and Limoncello on your Oh Hello card. How can one resist everything in this New Release Plus? Thanks for making it look so simple and beautiful!
I love everything about these cards! Fantastic!
I always enjoy seeing your beautiful cards.
Love your cards and the colors!
Gorgeous! I love how the warm colors pop from the black!!
Love your cards – especially the color combinations!
Great cards and great tips, thank you for sharing them! This release is a really great one!
Ingrid these are stunning. I need to get some of those brushes. Thank you for sharing.
Lovely cards, great tips for the blending brushes.
Love the tone on tone on the brown card. That’s such an elegant look, as well as the masculine card.
Ingrid your cards are so creative. Thanks for sharing
Wonderful cards! I love all of them, especially the first one.
Thanks for sharing…
As usual your cards amaze me. I love your colors.
Beautiful cards. The last two are
colorful and warming.
thanks for sharing
txmlhl(at)yahoo(dot)com
Beautiful cards. I love the blending. I have the Clarity brushes and really like them. These look very interesting. Thanks for sharing
Love your cards, Ingrid. Loved watching your stencil class today! Thanks for sharing
OH YAY!!! I’m so glad you loved them. There are some fun tutorials headed your way!!! 🙂
Gorgeous cards, Ingrid you are so very creative and I love seeing your amazing cards cause just be seeing what you have done I learned a lot. Colours choices are awesome, really love this new collection and have to say Catherine Pooler has done it once again. Thank you for sharing and nice to see that you are back.
Thanks for always stopping by Sharon!! 🙂
Stunning sponging and love how you used that die as a stencil.
Beautiful Ingrid!!! You are always so creative with CP products!
These are beautiful cards. 🙂
Beautiful cards. This is the first I have seen the Life saving brushes, I am intrigued.
Hi Eileen, I’ve been using the brushes since last November, I absolutely LOVE them. It makes ink blending SO much easier to get that flawless look.
Beautiful! I do love using dies as stencils – but I cut the die out of my usual Neenah cardstock and create two backgrounds at one time – one with the inked die cut, and one with the stenciled panel!
Stunning, Ingrid! Love the contrast of the bright colored panels on the brown stenciled/stamped bases.
Thanks Nance!!! LOVED your pictures out west. Aren’t those colors out there amazing!!! 🙂
Ingrid – I love both of your cards. What a great idea to emboss a die to use it as a stencil over and over. Also I love that Cottage Garden Background stamp and the idea to make 2 cards from 1 background. Love that.
Love how you used that die as a stencil. Fabulous
This is a great release. I really love how subtle your colors are on these cards!
Love your cards, thank you for sharing them.
Just love your cards! Thanks for all the tips when using the life changing brushes. Can’t wait to try them!
Wow Ingrid. Loving your cards.
I REALLY want to try out the Catherine Pooler inks. They look amazing on blogs, but I would love to try them out myself. NICE WORK!
Thanks Sharon – you’ll love them. By far the most translucent inks out there. And if you love ink blending, they are a dream to work with!
You’re cards are always so pretty. Love your blending.
Beautiful blended backgrounds! Love using brushes to get the best blending too.
I absolutely love that brown with the colors!! It really brings out the pinkand orangey yellow!! Beautiful!!
Beautiful cards, I love your ink blending.
Wow Ingrid you always do an amazing design job! I love that you used the new picket fence brushes too! Can’t wait to try them!
Great cards Ingrid! The Life Changing Brushes, are in fact life changing. Can’t wait to receive some of this new release.
Ingrid I love your cards! These make it very hard to resist buying any of the new products.
Love the color combinations of brown and coral!
Thank you so much for all your ideas and details on the products you use.
Love the color combinations of browns and corals…gonna try these!
Love your cards as always. So creative. Thanks for the tip on making your own stencils. Will certainly try this. Looking forward to today’s stencil class.
You are absolutely the sweetest! I’m in love with what you created with the die. I’m going to make them stencils too after reading what you did – great idea! I’m kinda love that die too 😉 I also see those brushes in my future. Love Love Love your cards.
OH Julie, you MUST get the brushes – they play SO beautifully with your amazing dies. Thank you for creating my favorite dies, they make my creative world so much easier!!! 🙂