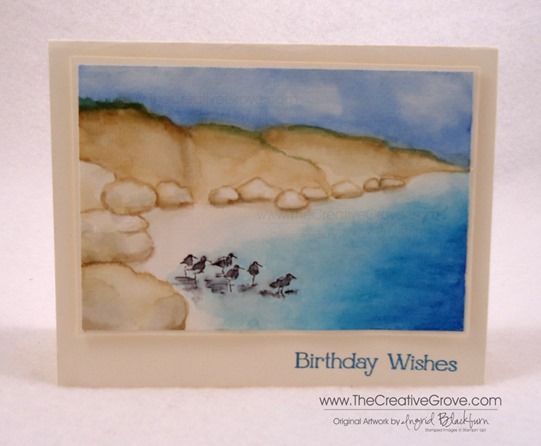
I was feeling artistic last night and wanted to bring my watercolor experience this past few weeks full circle by combining my first ever landscape with one of my favorite Stampin’ Up! stamp sets – Wetlands. Here are all the details to this journey plus several tips on supplies at the end that I like to use for this medium. I know it’s long, but it’s quite in depth! Enjoy this tutorial. For the complimentary article on tools and supplies click here.
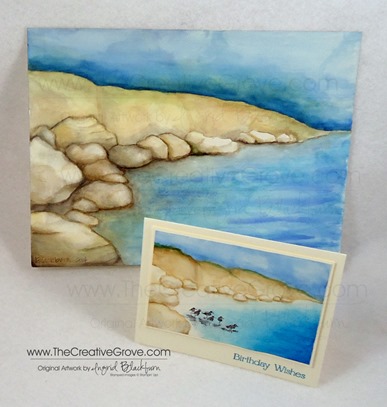
As you may have read a few weeks ago, I took a local art class in watercolor. If you didn’t see my first ever landscape, it’s pictured below, but I’ve detailed the process here – you have to see what it started out as to appreciate the end result. Check it out here. I still can’t believe I turned my beginning mess into something beautiful that I’m actually quite proud of. (that’s hard to do, I’m quite hard on myself with my own artwork) Since my original had more mistakes than imaginable, I thought it might be fun to try it again, just in a smaller version that I could use stamps on as well to combine two artistic passions.
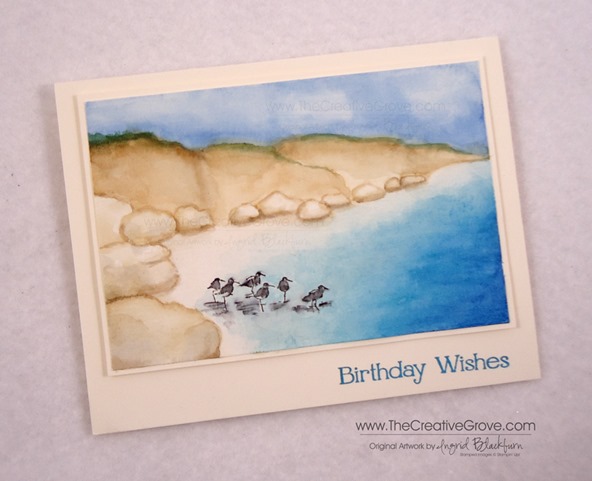
I was undecided on size, so I took out the stamp I wanted to use – the sandpipers from Wetlands. It’s a rather long stamp and to get the perspective right, I realized my card was going to have to be much larger than the traditional A2 size (5 1/2 x 4 1/4). I held the stamp up to my grid paper and settled on a 4 x 6” size for my watercolor image with a final card of 5 1/4 x 6 3/4”. Now that I have the Envelope Punch Board, I never worry about fitting my card to an envelope – I can just make whatever size I need!
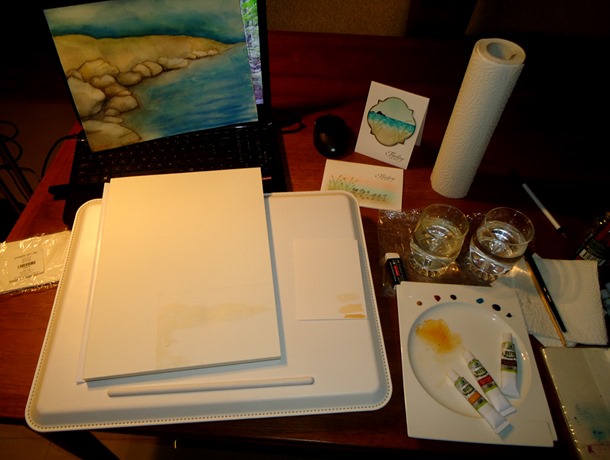
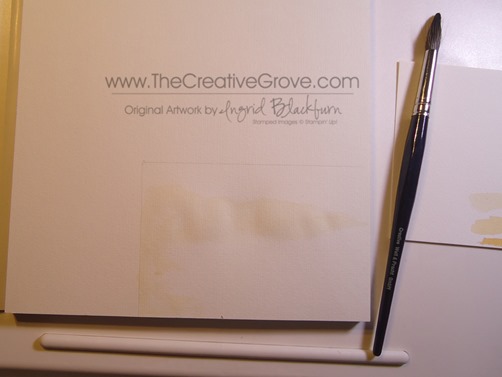
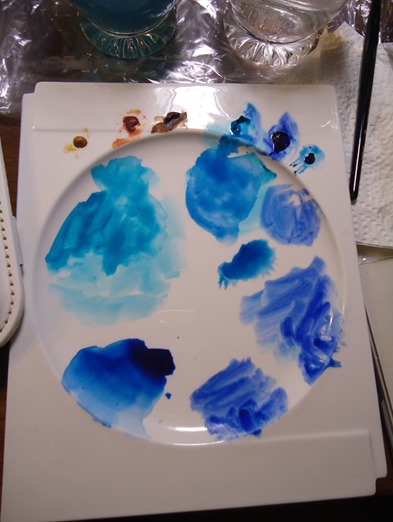
I used my painting and other similar cards as inspiration. I used my 100 pound rough watercolor block which is 9.4 x 12.6 inches. I wanted to work with something that was secured and wouldn’t warp. Of course, I wasn’t paying attention, and used the side which wasn’t glued – so that kind of worked against me in the end at the bottom – oh well! I won’t make that mistake a second time…lol! Here’s my workspace:
Creating this seascape comes over several stages. To begin, you don’t need to worry too much about being too precise, just throw down some yellow ochre wash (really light – really watered down) in the general area and let the painting form from there. I used a size 14 brush.
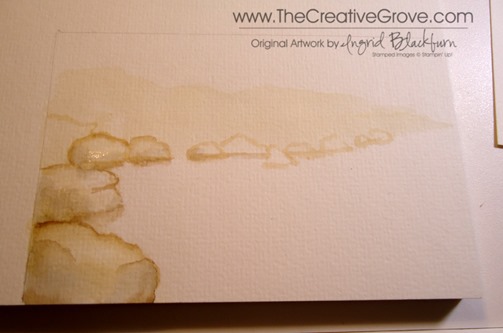
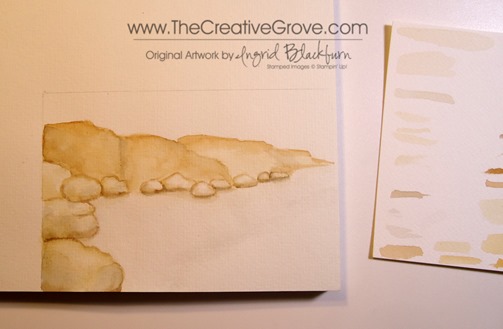
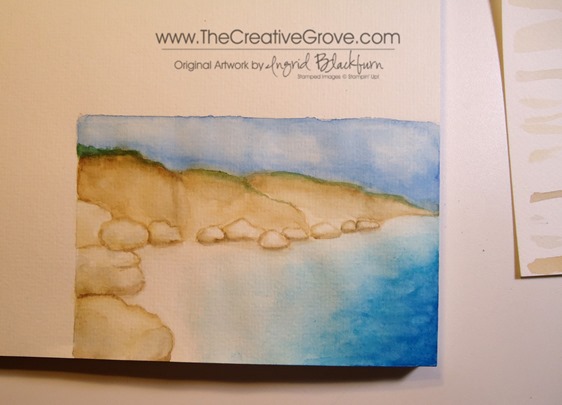
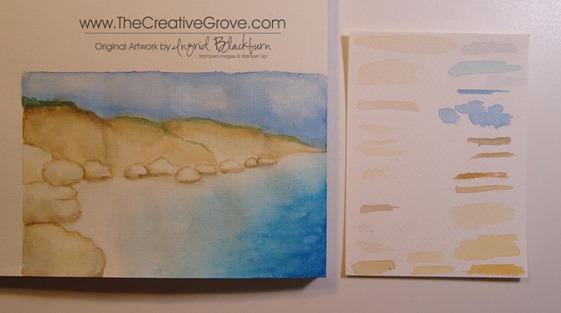
Using Yellow Ochre in a variety of consistencies from water, milk and cream – create your rocks from the edge of your negative space. To give them definition, decide where the light is coming from and start to shadow the rocks with a rather light wash of paynes grey or yellow ochre or a mixture of both with some burnt sienna in them. Keep it on the light side and build up your color.
Add some more definition to the bottom of your rocks with a variety of consistencies of Burnt Umber and Paynes Grey as shadows under and between. Use that also to define your cliffs and crevices. Use your imagination or photos as inspiration for tone.
I went rather light in my card because it was small, you see much more depth in the full watercolor painting of my original. I used several images of water colored rocks that I found online as inspiration as I found rocks quite difficult to attempt. But after a few, I got the hang of them.
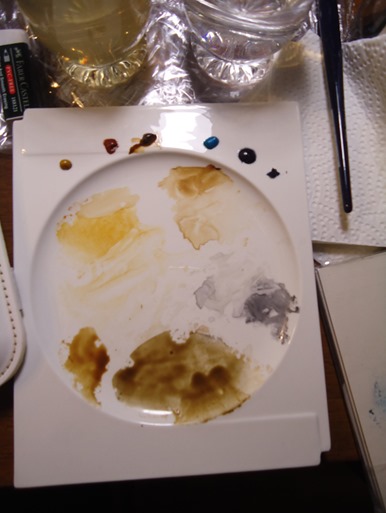
Use a variety of washes and mixtures in a milk consistency of Yellow Ochre, Burnt Sienna, Burnt Umber and Payne’s Grey as you can see here. TIP – Paint a quick swatch on a scrap piece of watercolor paper so that you know if you need to go heavier or more than likely – lighter with water. This is a great habit to get into rather than practicing on your painting.
Next I added the blues to create the sea and sky. I used Cerulean, Ultramarine, Prussian and Paris Blues in addition to Paynes Grey to darken any up if needed.
I started with the water. Begin with a very light wash of Paynes Grey – super light for the boundry of where you want your water to go. Then layer a really light wash of Cerulean Blue over that. Don’t worry if you get too much color on the beach part. I went back and forth getting it just right. While that area is wet, use a clean watercolor brush to push the color from the beach back into the sea.
Add a light ultramarine/cerulean wash to the darker areas of the sea. Once you have it the depth you want, let it dry. Once dry, add some highlights in pure Ultramarine, but keep it minimal – just a highlight to show variety in your water depth and character. I also added three small strands of a light watered down Prussian Blue after.
Go over it with a clean wet watercolor brush to soften up and blend in the colors. Play around with it, I guarantee you – you will mess it up, but while it’s wet, you can adjust it. It’s quite forgiving, and that’s the beauty of water coloring! Take note of the sea above and in this photo. You can see how I blended it out a bit using a clean wet brush.
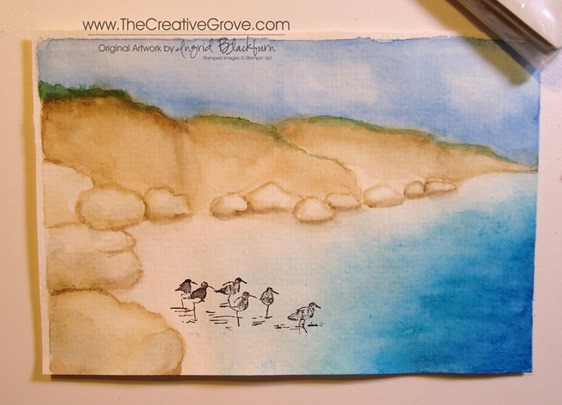
For the sky, start with a rather light wash of Paris Blue. Choose a blue that is a bit more sky color rather than the bright sea colors. They relate, but you can see the difference in hue between the two. As it was still wet, I brought the intensity of the color closer to the cliff line. I was a bit over-zealous and crossed over into my brown, but fixed that with a little Olive/Burnt Sienna mixture. It added some color break and interest too – a happy accident.
For the clouds, while the sky was wet, I took a clean wet brush and removed some of the blue by gently moving my brush around in spots. It creates a nice natural look of billowy clouds.
If you make a mistake, don’t fret – go over that area first with a clean wet brush and work the color back to where you want it with a light scrubbing motion. If that doesn’t work, just adapt! TIP – Work in light color washes first, that way you can always bring the intensity up or adjust as needed. It’s harder to take away – not impossible, but harder.
To stamp, I removed my piece by cutting it off the block (for more on my watercolor block, read below). I needed to use a stamp-a-majig, so I wanted to have a flat surface. The birds were a bit long, so I left off the last two. I inked the image up and wiped away the reflections and last two birds with a wet paper towel. Position your transparent piece to exactly where you want it. If you don’t have a stamp-a-majig, use a piece of transparency, or plastic to get a feel for where the birds need to be. There’s nothing worse than spending all that time on a masterpiece only to mis-place your stamped image!
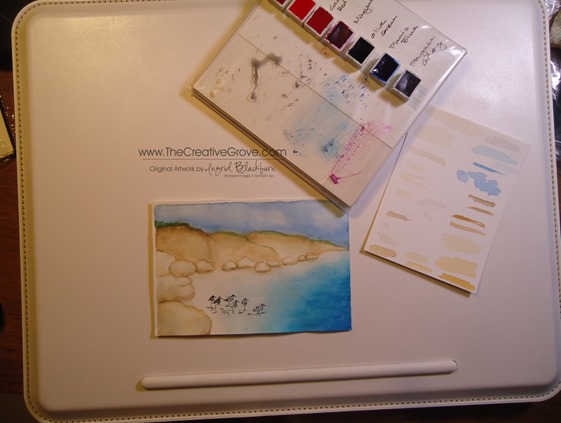
Once your scene is dry – I can’t stress that enough – do not attempt this with a wet scene. A hairdryer will dull your colors, so air drying is the best option. Clean up, work on your sky, something so that your sea dries. Lightly go over your birds with a small watercolor brush (I used a size 1) in a very light Paynes Grey wash. Be careful not to add too much water, you don’t want your image to run. You can use Staz-On Permanent…I used Memento Tuxedo Black Dye Ink. I have a good result with that black ink pad. Be sure to let it dry after stamping. I added a bit too much grey to the shadows in the water, try using a light cerulean wash instead.
With your small watercolor brush, add a very light Cerulean wash around your stamped images to fill in the water where needed. Be careful not to touch your birds if you’ve used Dye Ink! This really finished my oncoming water on the shoreline and added just the right amount of color. Remember with layers you can bring your scene to just the right color level. You also create interest with under layers. Just be careful not to wash away your underwork when doing this, a light touch is key.
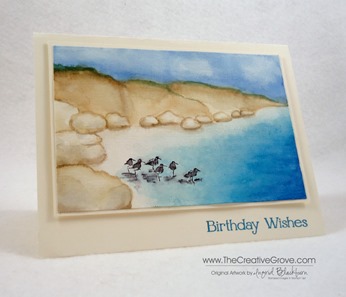
The birds give the scene a human interest. It’s important to put something there – a house, boat, people, something. It helps to balance the scene and make the reader connect with the painting. TIP – Notice that I placed the birds in the forefront of the painting. The stamp that I used was large in comparison to the scene, so it’s important to have the perspective just right. That’s why the rocks are larger in the foreground and get smaller as the scene goes back.
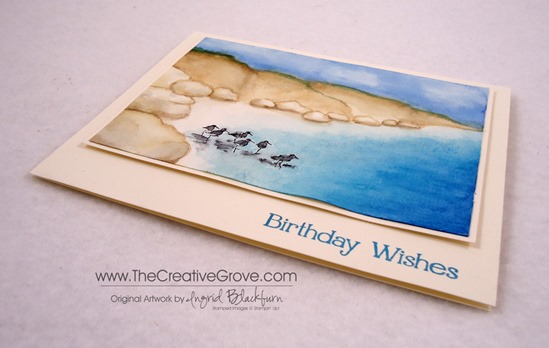
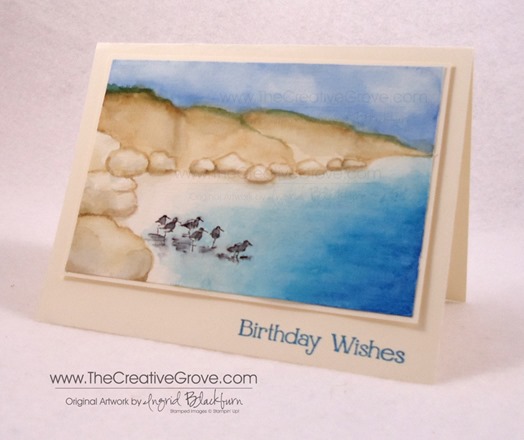
To finish your project, matte your cut out painting onto Very Vanilla leaving a 1/8” border. Pop that up on several stamping dimensionals (I used 12!) to really keep it elevated. Matte onto another piece of Very Vanilla cardstock for the card base. I used a greeting from the Four You stamp set by Stampin’ Up. I inked that up first in Stampin’ Up!’s Island Indigo, stamped off then in Marvy Light Blue for just the right blue.
Note – there is no white on my card at all. I think it’s best when your painting is completely painted! My beach area has a super light wash of Yellow Ochre/Burnt Sienna and in spots Paynes Grey.
I have some great tips and DIY solutions for supplies and tools for getting started in a complementary article to this post here. I hope you enjoyed this tutorial on this scene. It’s super fun, is quite satisfying and I know the recipient of this card will love it, especially when they realize you pretty much created it yourself – Be sure to sign and date it!


That is absolutely beautiful, Ingrid! I am very guilty of not trying a project because it looks too difficult or time consuming for me or for the ladies in my Stamp Club. Even now, looking at this project, I don’t feel I have the artistic ability to work with the watercolors and shading techniques, but I will give it a try. Thank you for your inspiration.
I’m so glad you’re inspired to try Susan!! Know this was not my first attempt at this scene…lol! Make sure you look closely at my larger version – there were TONS of mistakes that I learned through to get to this card. It’s the only way I learn – experience. Start small and keep going. Watercolors are fun and quick – probably why I love them so much! Thanks for stopping by and commenting. I’d love to hear how YOUR watercolor experiment goes!
Ingrid, your scene is serene and lovely. I am so impressed that you recreated your watercolour painting as a mini-masterpiece card.
Thanks so much Heather! I love your work so much, it’s quite inspiring for me. I’m honored you stopped by today! I love this scene, it was so much fun to make again as a card. 🙂
Such a beautiful scene and card Ingrid, thanks for the great tutorial too 🙂 Viv xx
Thanks Viv! I’m glad you enjoyed the tutorial…have fun creating your own. 🙂
This is pure genius! Stamps after the watercolor. I own that stamp set and it never dawned on me to use it that way! You’re the greatest!
I’m so glad you like it Pam! Enjoy exploring all the possibilities of your stamps in your own collection now. Don’t you just love versatility?!! Thanks for stopping by. 🙂
Wow, Ingrid! I am so blown away by your talent!! You really embrace the challenge and rise above it! Your birthday card should be FRAMED! I love how you worked with such details and showed us how you achieved the depth with the water-colors! That blue is particularly gorgeous….Wish I can just DIVE right into that beach! Thanks SO much for linking to Virginia’s View Challenge!
Thanks for stopping by Virginia! I agree – the water does look dive right in worthy…lol! You know I had fun, I’ve never entered so many times, ever…just had too much fun. I’m thrilled you have so many entries into the challenge – over 320 so far…wow! Today’s post of course turned into two with a lot of tutorial stuff, which was fun for me. I only wish I’d filmed it and made a video…next time! Thanks for having me play! Looking forward to your next one. 🙂
A real work of art! Wetland’s is one of my favorite SU sets, lovely to see it with your watercolor scene. If I received this in the mail it would go into a frame and on my wall.
Me too Carol! I love this set. I can do just about any creative scene with This stamp set. The images are so great! I’m so glad you like it!! Thanks for stopping by today. 🙂
Beautiful water color painting!!
Thanks Cindy! I love how it turned out too! Thanks so much for stopping by. 🙂