Three videos – Why Use Gesso, How to Seal Paper Stencils & 3 Ways to Use Gelatos

Today I have three videos for you – 3 Gelato techniques, How to Seal Paper Stencils, & a How To & Why use Gesso. It’s a mediums kind of a day today. YAY!

Over at StampNation, we’re right in the middle of a live Masterclass with Faber-Castell. Last week the coverage was all about Gelato techniques – those super richly pigments little sticks of colorful joy. I’ll be honest – I have had Gelatos on my wishlist for three years (a girl can’t buy it all…and Santa kept skipping over them…guess I wasn’t nice enough…lol).

Faber-Castell Gelato Techniques

I finally got my hands on two of the 15 piece sets – Iridescents and Pastels. Plus last week I was showcasing at a Trunk Show over at Betty’s Creative Studio in Greensboro, NC with Catherine Pooler…and Betty had this WHOLE WALL of Faber-Castell goodness. (Insert Heavenly music and cherubs here…okay – no cherubs).

Seriously – all the colors individually, in sets, stencils, mediums, tools – you name it! Well, I had to quickly snap up 8 more colors. There are 68 gorgeous colors available, and I want them all after this last week. I seriously can’t put them down – I have gelato techniques on the brain. I’m surprised I haven’t put them on my lips yet…lol. OKAY – be honest – who has? Tell me in the comments!

Here’s the skinny…Gelato’s are a little chapstick like tube that is super richly pigmented and creamy. They literally (no joke) go on like butter – and yes, I’m saying that in a thick Long Island, NY voice. There are so many quick, simple techniques you can do with these little sticks from heaven. Today I’m teaching you three simple ones.

Faber-Castell Gelato Techniques

But first…a little prep is required for our project and tools. I thought I’d film two 1 minute tool tip videos for you – whoohoo!

How and Why to Use Gesso

Before we can even talk about Gelato techniques, we have to talk about Gesso. To spread like butter – you need to prep your work surface a bit with Gesso. This video talks about how to do this, and WHY:

Click Here to watch in HD on YouTube

Now that your paper is prepped – you can always use watercolor paper too, but regular cardstock works just fine with gesso. I do several full sheets at once and set them aside to dry – it’s great having those cut down and ready to use when I need to!

Gesso also comes in clear and black. I’ve been using Gesso for a while now in Mixed Media projects. Another great use for it is to go right over a mistake – it’s a blank slate…love that! (And I’ll admit…I’ve had to use that before)

How to Seal Paper Stencils

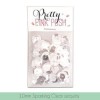
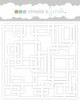
Faber-Castell makes these awesome paper stencil packs. For about $7 you can get TEN 6×6 stencils – seriously!!! When a regular stencil costs $5-$8, I’ll take $.70 any day! Plus the packs are themed – there are some Mixed Media ones, patterns – you have five packets to choose from.

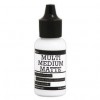
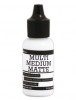
But the dilemma for me was…I like to use wet mediums with my stencils – so why have to replace something? Regular stencils are made out of a plastic material, thus can take wet mediums and abuse. Paper, not so much. SO…seal them! This is where Glaze medium comes in handy. Plus you can use it for other things too (semi gloss look, collages, etc).

Here’s a quick little 1 minute video to show you just how to seal your stencils:

http://https://youtu.be/fDjPgBrBeC4

Click Here to watch on YouTube in HD

Okay – so we’ve got our stencils sealed, and our paper is prepped. Here’s the big tutorial you’ve been waiting for.

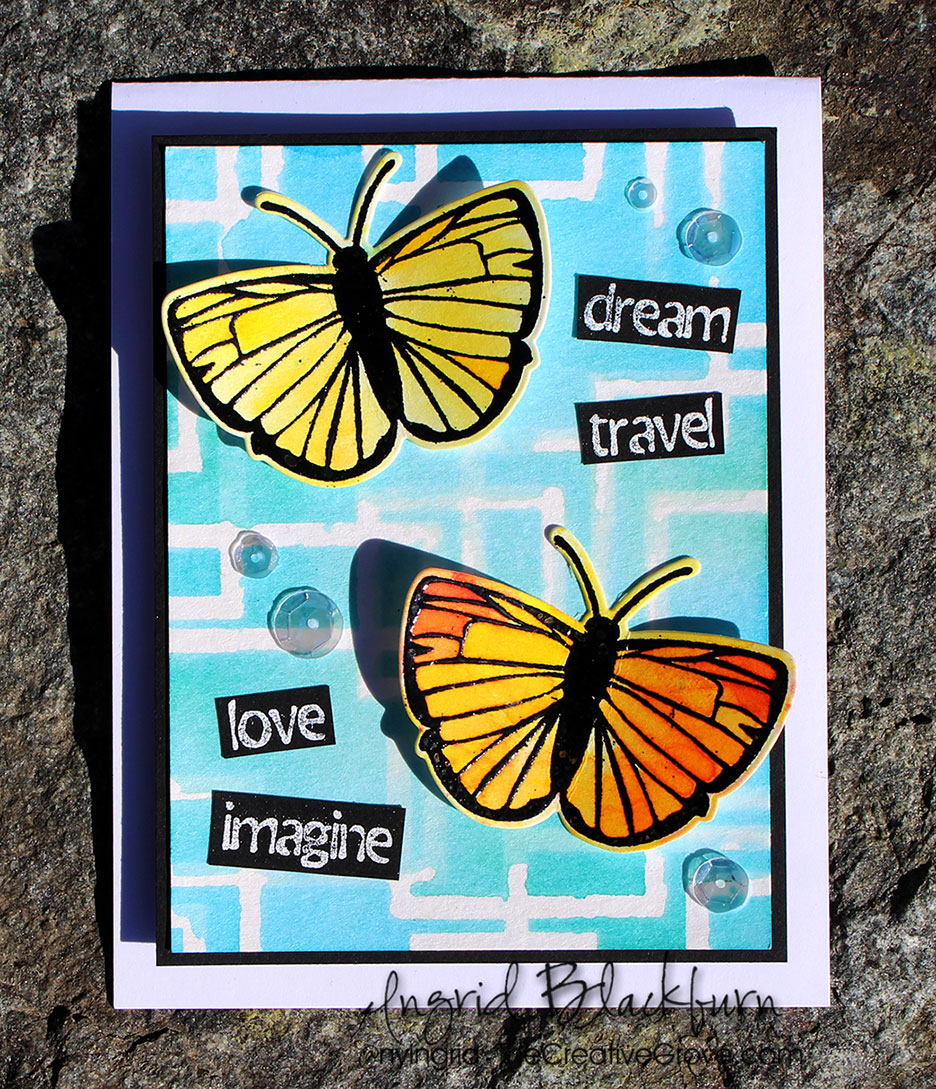
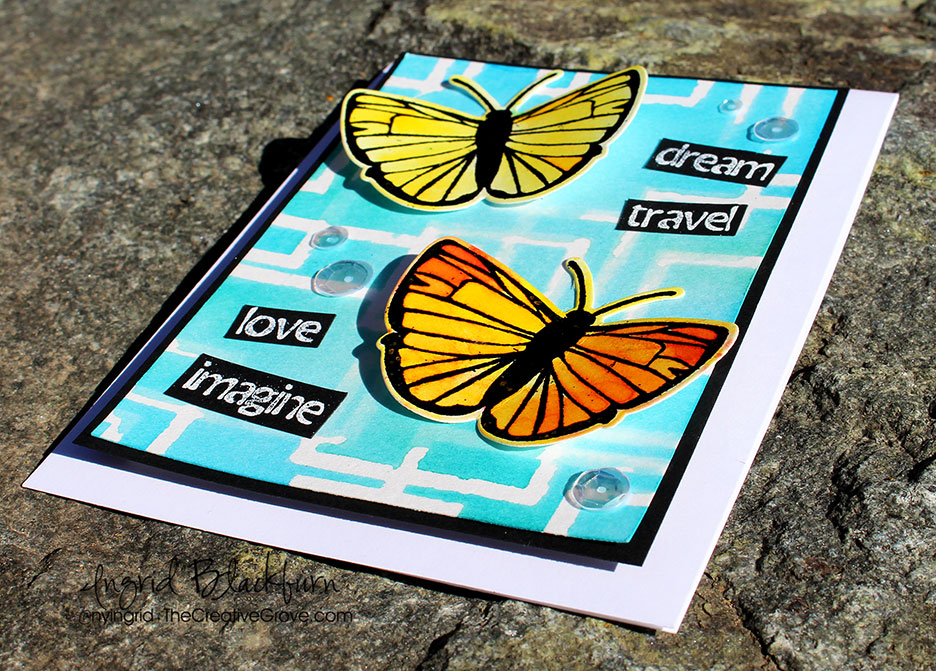
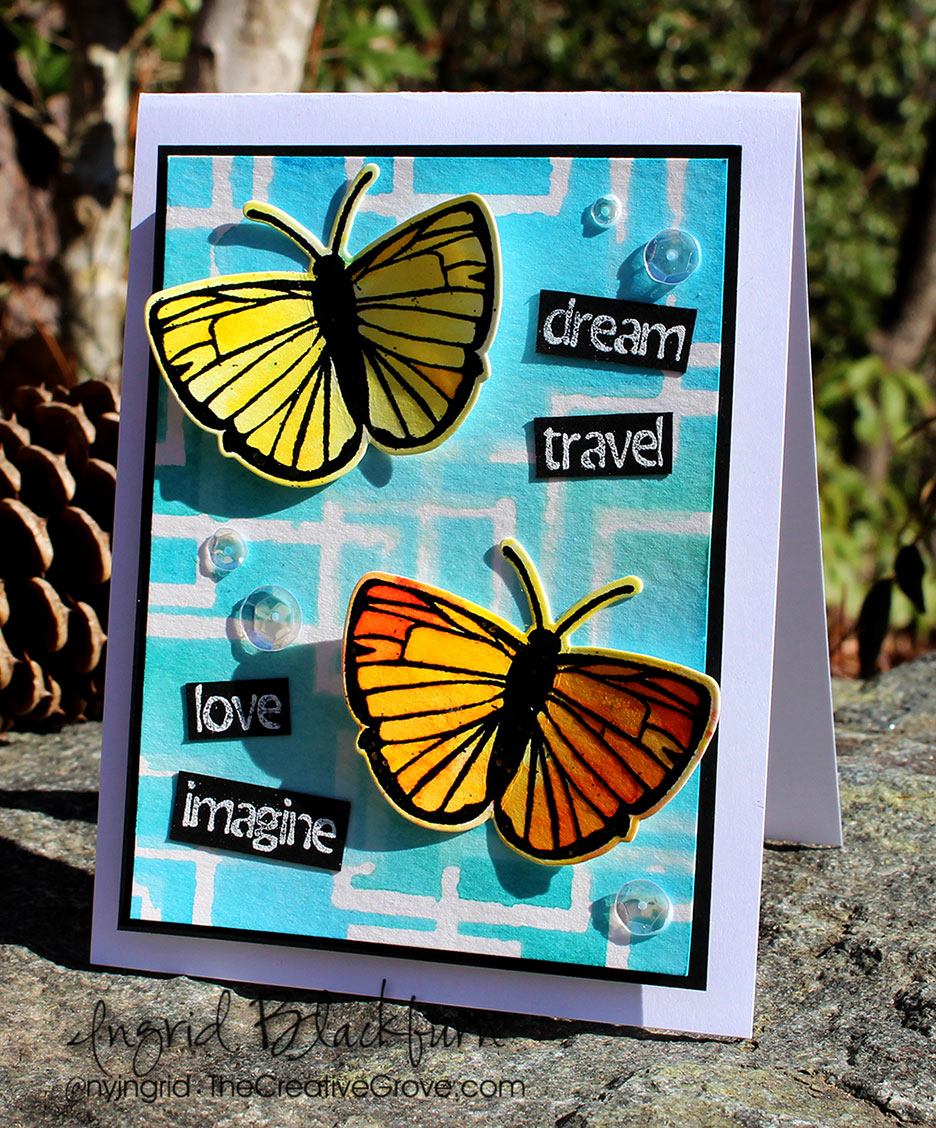
Three Gelato Techniques

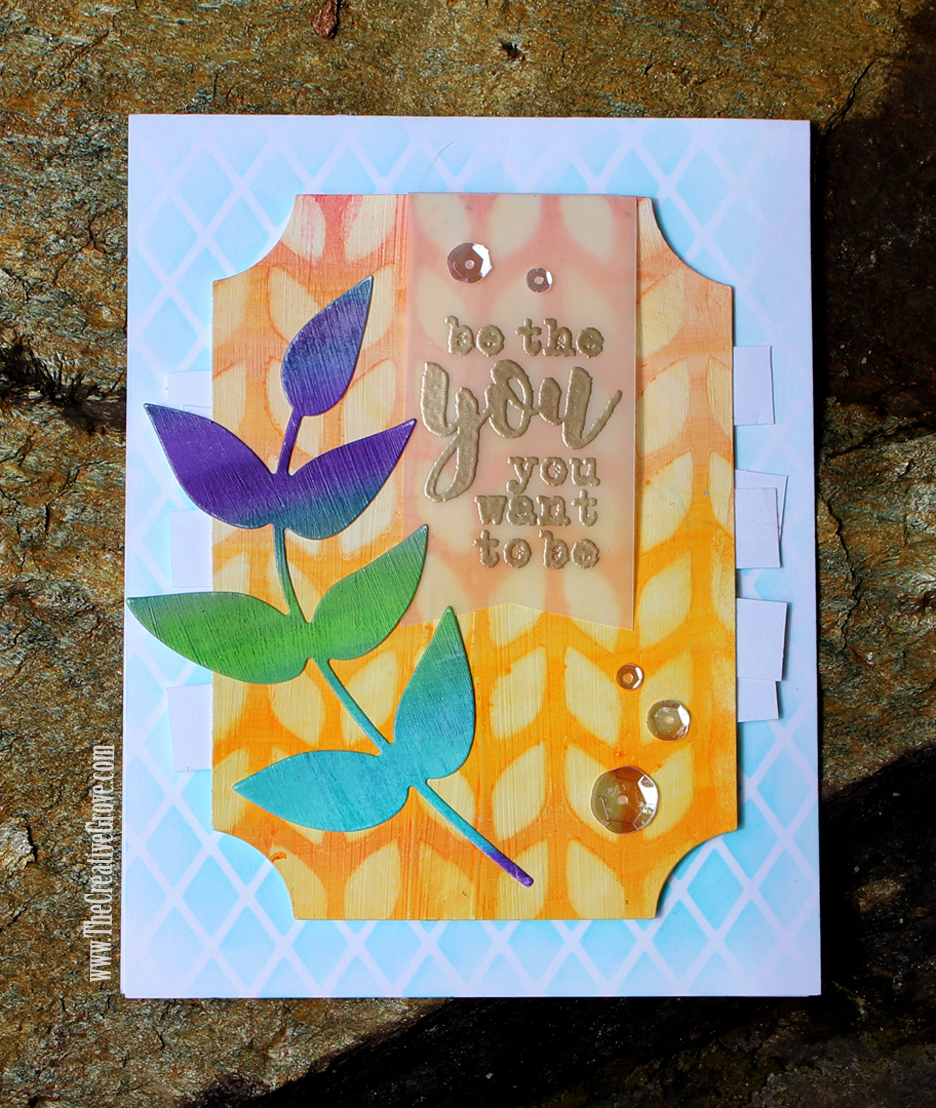
At its core – a Gelato is a colored medium. Just like an ink pad – it’s a medium you can manipulate in several ways to add vibrant color to your projects. If you think of it like that, it’s not so scary – you use ink pads every day?!!

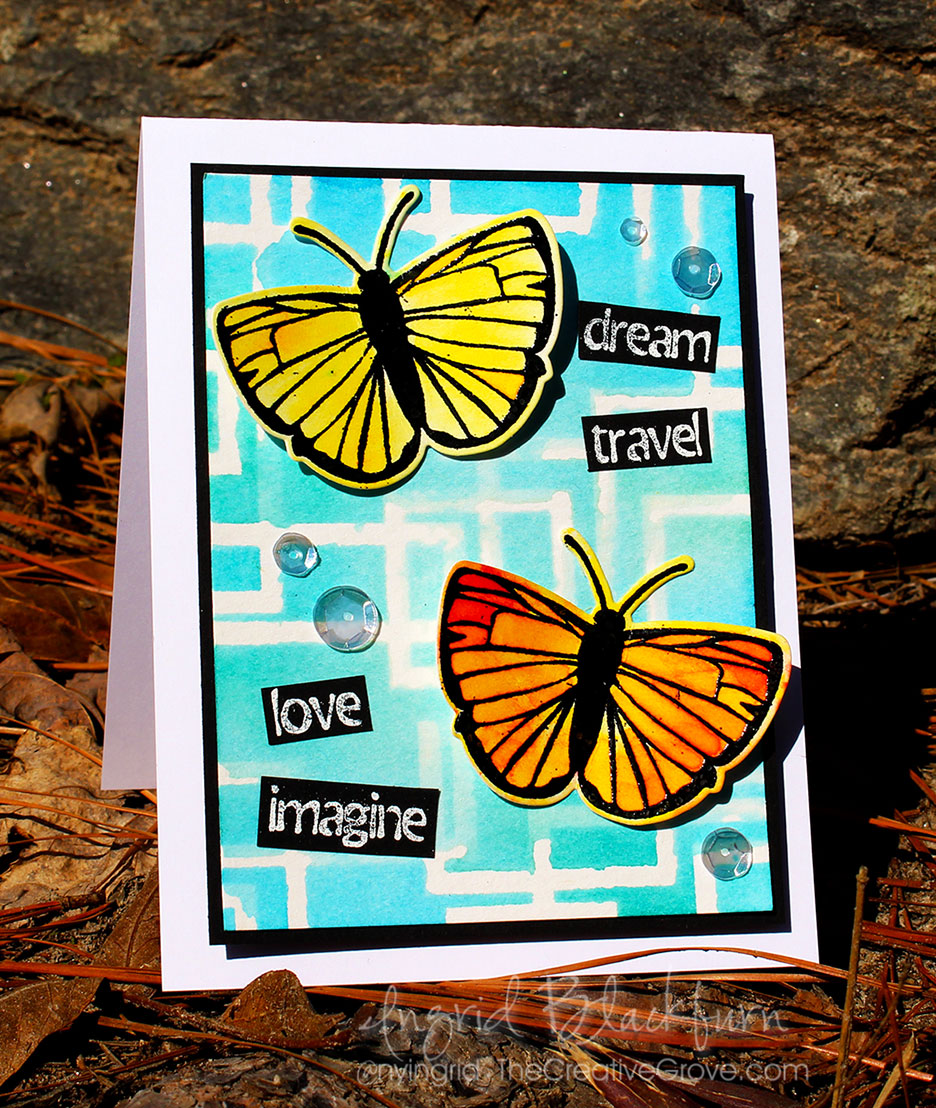
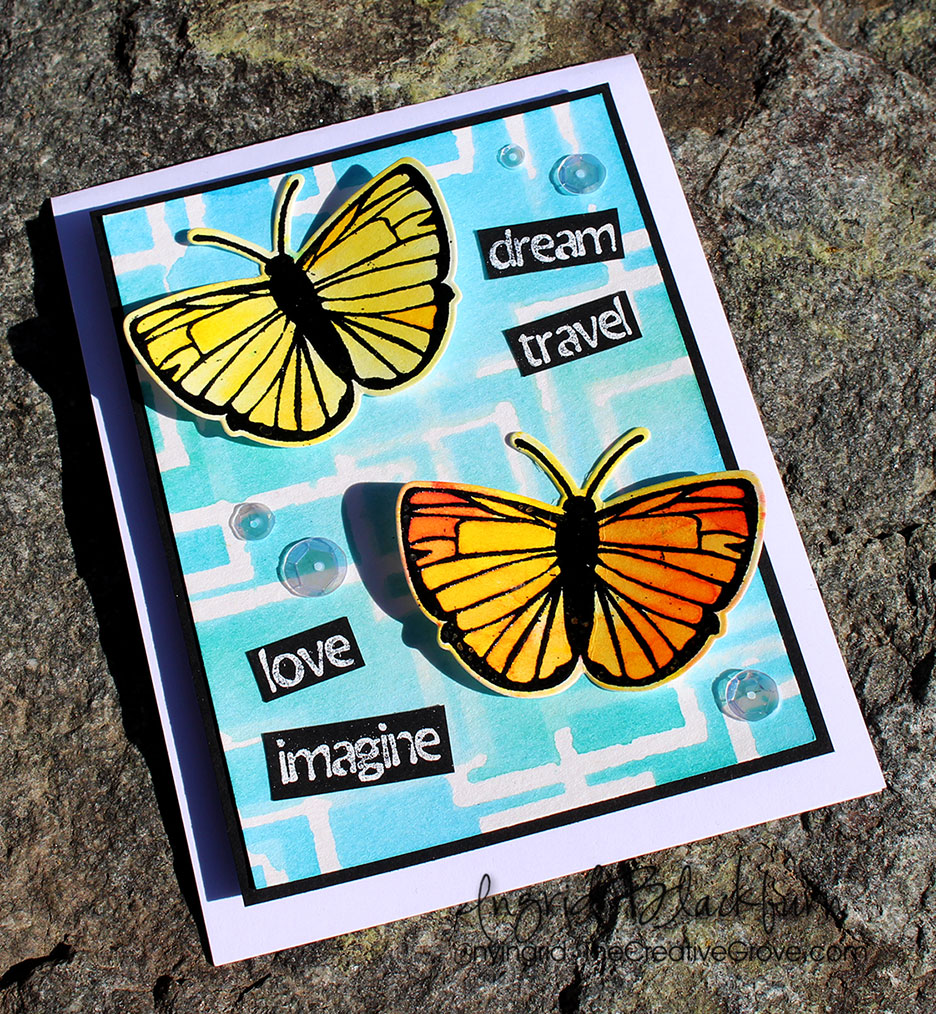
You’re going to learn how to use gelatos to do three techniques today: Seamless Wet Blending, the Vanishing Stencil Technique, and how to stamp with Gelatos.

Here’s a video to show you exactly how:

Click Here to watch on YouTube in HD

Blending is the most basic Gelato techniques. If you’ve rubbed your gelatos over cardstock that hasn’t be gesso’d, it’s not going to blend well. And forget about using water. To use water – you need watercolor paper or gesso’d cardstock. It’s just frustrating without the proper set up – set yourself up for success!

Regular blending and water blending is a very different look. Try them both and see which one you like more!

Tips for Seamless Wet Blending

  • To get that seamless look, use your finger or a paint brush. I like to use my fingers, as I can really control what and where the medium flows.
  • Control your water – don’t add too much at the start – go gradual, better to need to add, than have to take away
  • Spray a little water onto your craft mat or acrylic block for a quick place to draw just a little H2O
  • Choose colors that blend well – stay away from complimentary colors that will create mud
  • Keep going – if you feel it needs a pop of color – directly add your gelato for a little pop

I’m a stencil addict – and the vanishing stencil is a huge wow for me. Usually I’m always adding color through a stencil – so to remove it is fun.

Tips for the Vanishing Stencil Technique

  • Pull away with a clean part of your baby wipe, twist and rotate it to get a clean piece. You don’t want to transfer right back down
  • Keep your stencil steady – if you aren’t confident you can hold it in place, secure it with tape
  • Your gelato base can’t be set. The best result is to create your background color then remove while still slightly wet even.

Once you’ve removed the color – try adding a new one in the newly blank space! Tip for adding color through a stencil – add it to your stencil and wick it to your project with a tool or fingers. It’s much easier than jamming that creamy stick through the stencil!

Gelato Techniques

Tips for Stamping with Gelatos

While I didn’t end up using that piece in the project – it did turn out super cool. Be sure to properly remove your gelato from your stamp when done. A baby wipe or water should do the trick.

  • Add an even layer of color to your stamp
  • Lightly spritz with a fine mist spritzer. Try not to over water your stamp – you will lose a lot of the crispness in your image the more you add

So how was that? Now it’s YOUR turn! Seriously, don’t be afraid of this medium. It’s super easy to get crafty with.

Do you have Gelatos? Do you have favorite Gelato techniques? If so – tell me what you think in the comments below. If they are in a drawer – get them out and have some colorful fun.

Faber-Castell Masterclass

I’m looking forward to experimenting with more Gelato techniques and if you’re not a StampNation member – be sure to check it out. We had a Gelatos challenge this week (with a prize – still time to enter) Here is a little of the inspiration from the Dream Team:

There are over 700 videos, and several classes. There’s a live chat with Faber-Castell directly answering your questions this Thursday – hope you stop by there!

Till next time –

[optin_box style=”27″ alignment=”center” email_field=”email” email_default=”Enter your email address” email_order=”0″ integration_type=”aweber” double_optin=”Y” list=”3846012″ name_field=”name” name_default=”Enter your first name” name_order=”0″ name_required=”Y” opm_packages=””][optin_box_field name=”headline”]Want to LEARN with more exclusive videos?[/optin_box_field][optin_box_field name=”paragraph”]PHA+UGx1cyB5b3UnbGwgYmUgYWRkZWQgdG8gbXk8c3Ryb25nPsKgRlJFRTwvc3Ryb25nPsKgQ3JlYXRpdmUgVGlwcyBFLWxldHRlciB3aGVyZSBJIHNoYXJlIGV4Y2x1c2l2ZSBwcm9qZWN0cywgdmlkZW9zICZhbXA7IHRoZSAxMiBEYXlzIG9mIENocmlzdG1hczwvcD4K[/optin_box_field][optin_box_field name=”privacy”][/optin_box_field][optin_box_field name=”top_color”]undefined[/optin_box_field][optin_box_button type=”0″ button_below=”Y”]Get Instant Access![/optin_box_button] [/optin_box]


Spring Fling Blog Hop

It’s release day over at Catherine Pooler Designs, and we’re kicking it off with a creative packed Blog Hop – it’s the Spring Fling Release!

Today, the shop has some brand spanking new Inks! Yes, the Party Collection just got 8 new colors…and I even managed to use them all on one project below.

In addition to the new ink pads & refills – there is a great floral stamp set – Beautiful You, a fun sentiment set – Simply Stated, my favorite new background stamp – Modern Damask and that’s just the stamps! Catherine also released two circle die sets – one with embossed dots (Dotted Circles), a go to regular set (Circles) – that matches many stamps, and three word dies – Spot on Sentiments.

I have to say, the Party Collection of Catherine Pooler Inks is quickly becoming a necessary go to for me. I’m in love with the vibrant fully saturated colors, and although today’s release looks more on the pastel side…let me tell you – they really pack a punch! Just take a look at all this color goodness:

I found it interesting that the colors I wouldn’t normally gravitate toward, I keep reaching for – they are just that cool! Check them out yourself in the store here.

Now for the creative fun, as I mentioned this is a Blog Hop, so after you check out my projects, be sure to see the amazing projects the rest of the Dream Team made!

Beautiful You

I thought I’d keep this one simple for you – three slightly masked flowers from the Beautiful You stamp set – I LOVE this set, and can’t wait to show you SO much more with this (yes, you’ll have to keep coming back…lol).

You’ll want to use Sweet Sixteen and Pixie Dust to color the smaller flowers, and then layered both colors using an Aqua Brush for a little more depth in the larger flower.

The leaves are colored with Garden Party, and for a little background interest – use It’s a Boy – it’s PERFECT for sky, and around flowers. I kept it quite diluted the further out I went, but stronger right up against the flowers.

Stamp a few of the filler images (can’t have enough of those), add your sentiment and draw a border to tie it all together with a micron pen.

To use the ink pads – just smoosh them on an acrylic block and you have a quick watercolor palette.

To give this set an elegant garden look – pair it with the Lovely Lattice background stamp – it’s perfect for this card. I love it black on black, don’t you? So simple, yet it really finishes the card off.

Spring Fling Rainbow Congrats

I wanted to really see what these new colors could do, so I created a Wrinkle Free Distress technique piece with each one. Let me tell you, they didn’t disappoint. I was actually quite surprised at how vibrant they actually were. And here they are all together – how could you not love these?

I am going to use the majority of these pieces for a few projects coming up in the next few days, but for today – I wanted to see what all 8 would look like on one card. How fun is this card – it’s happy, colorful and just fun.

Once you have your technique pieces – click here for a video on how to do the wrinkle free distress technique that I used to create those, trim off a 3/8 or 1/2″ strip of each. Overlap them onto a card base and adhere your sentiment right over.

To add a little bling – run a Spectrum Noir Sparkle Pen over your sentiment and add a few Sequins.

That’s it! You can see how quickly you can make several of these.

Thanks for hanging with me for a bit – now you’re off to the VERY talented Lydia Evans – I know you’re jaw will drop when you see what she’s created for you!

Be sure to comment along the way too. Catherine is going to draw three winners from the blogs – you may just find yourself with an ink collection of your own! 🙂

Blog Hop List:

And stop by in the next few days for more creative fun with this collection! Happy Hopping!!

[optin_box style=”31″ alignment=”center” email_field=”email” email_default=”Enter your email address” integration_type=”aweber” double_optin=”Y” list=”3846012″ name_field=”name” name_default=”Enter your first name” name_required=”Y” opm_packages=””][optin_box_field name=”headline”]LEARN MORE WITH OUR EXCLUSIVE FREE VIDEO SERIES[/optin_box_field][optin_box_field name=”paragraph”]PHA+TG9yZW0gaXBzdW0gZG9sb3Igc2l0IGFtZXQsIGNvbnNlY3RldHVyIGFkaXBpc2NpbmcgZWxpdC4gRG9uZWMgdmVsIG51bmMgbm9uIGxhY3VzIHZlbmVuYXRpcyBjb21tb2RvLjwvcD4K[/optin_box_field][optin_box_field name=”privacy”][/optin_box_field][optin_box_field name=”top_color”]undefined[/optin_box_field][optin_box_button type=”0″ button_below=”Y”]Get Instant Access![/optin_box_button] [/optin_box]


HLS Watercolor Challenge – Mixed Media Butterflies

Have you ever watercolored with stencils before? Today I’m guest designing for a new watercolor challenge over at Happy Little Stampers. I don’t know of many watercolor challenges out there, so if watercolor is one of your loves, I encourage you to check it out! The design team is pretty talented over there, and I’m loving what they are creating every month.

I thought you would love a video in addition to a written tutorial, so here you have it. The watercolor challenge is always anything goes, and if you need a little structure – there’s always a little twist. You can play along or not, up to you – this month it’s dies.

Happy Little Stampers Watercolor Challenge

Happy Little Stampers challenges are always a lot of fun, and I encourage you to enter. This month there’s a prize too, you have nothing to lose!

HLS Challenge

I have been undergoing a massive move from Germany back to the US (plus all our things out of storage up from Florida), hunting for a new home, and living in a hotel for three months – yes, it’s been interesting to say the least! So, I haven’t been able to film much the past few months…boy did it feel good to FINALLY get to film in my new stamping studio in my new home. I’m still buried under boxes and the contractor is still doing work in our home (though we’re in the home stretch….finally).

Here’s a video for you of how I created this month’s project – step by step. You’ll learn to watercolor with stencils, and create some fun vibrant die cut embellishments with Brusho Crystals – which I’m totally addicted to!

Click Here to watch the video in HD on YouTube & Subscribe to my Channel

How to Watercolor with Stencils & Brusho

So, my original thought was to create cool watercolored die cuts – enter a little embossing and Brusho for the pop in color. It’s SO easy to watercolor with Brusho and you always look like a watercolor master.

To compliment it, I thought you’d enjoy seeing how I sometimes watercolor with stencils – a not so perfect technique, but it really adds a lot to the background. My thought was to create a cool lattice for the butterflies from the Butterfly Birthday stamp set.

watercolor with stencils

And I’ve been just dying to use my new Mixed Media Fun stamp set – I just love all the components and words – it’s the perfect card for my niece.

  • First – secure your 140# Cold Pressed Watercolor paper to your work surface, and your stencil over that.
  • Apply your color, I used several shades of Distress inks and created a varied Blue background
  • I didn’t do this in the video, but next remove your tape securing your stencil down so you can lift it after the next step a bit easier.

watercolor with stencils - ingrid blackburn

  • To truly get a watercolor with stencils look, spritz with a mini mister and get the water going. Be careful of adding TOO much water. If you overdo it – water will run everywhere – especially under your stencil design.
  • Carefully lift up your stencil – straight up.
  • You can blot off any excess water with a paper towel – but be careful to lift it from your pattern – you’ll pull all the color. I use this mostly for the sides where the water is pooling. Dry immediately with a heat tool or naturally.

Watercoloring with Brusho

  • Next, on another piece of scrap watercolor paper, stamp two butterflies from Butterfly Birthday in Versafine Onyx Black ink. I love this ink to emboss with – it’s a pigment ink and is super crisp and deep in color.
  • Emboss in black and heat set.
  • Sprinkle some brusho powders over your butterflies and spritz as in the video to activate the pigments.
  • Dry with a heat tool or naturally
  • Cut out using the co-ordinating Butterfy Dies & a Die Cut Machine
  • Emboss some of the greetings from Mixed Media Fun in white on Black card stock
  • Cut them out using long handled scissors – this helps to give you a straighter edge.

Watercolor with Stencils & Brusho

  • Adhere your pieces like the card. TIP – use Mono Liquid Glue to adhere the watercolor to the black, bend straight or place something heavy on to help straighten your card stock. You may also want to pop up the main watercolor panel onto fun foam for a little drama.
  • Bend up the sides of your butterflies and pop the sides up with some dimensional foam. I have the tops of the wings higher than the bottom (doubled the foam) and adhered with some glue in the center. This gives the illusion of flight.
  • Add some sparkling clear sequins from Pretty Pink Posh with Rangers Multi Matte Medium (dries clear).

Watercoloring with Stencils

Ultimately, my watercolor got a little into the pattern, but I don’t let stuff like that get me down anymore. You can cover a lot of it up with the die cuts and words, and it gives it a more organic feel anyway. It’s art, don’t stress over it, have fun!

Let me know what you think in the comment section below. I hope now, you’ll try to watercolor with stencils yourself, and that you enjoyed this tutorial!

Now head on over to the Happy Little Stampers Watercolor Challenge to see what the Design Team whipped up for you. I can’t wait to see what you create – I’ll visit your blog and definitely check it out! 🙂

HLS Watercolor Challenge

And if you liked this tutorial, subscribe to my YouTube channel and newsletter list for more exclusive tutorials. See you very soon!

[optin_box style=”28″ alignment=”center” disable_name=”Y” email_field=”email” email_default=”Enter your email address” email_order=”1″ integration_type=”aweber” double_optin=”Y” list=”3846012″ name_field=”name” name_default=”Enter your first name” name_order=”0″ name_required=”N” extra_field_1_name=”Name” extra_field_1_order=”0″ extra_field_1_required=”Y” extra_field_1_hidden=”N” extra_field_1_title=”Enter Your Name” opm_packages=””][optin_box_field name=”headline”]Learn more with exclusive video tutorials…[/optin_box_field][optin_box_field name=”paragraph”]PHA+UGx1cyB5b3UnbGwgYmUgYWRkZWQgdG8gbXk8c3Ryb25nPiBGUkVFPC9zdHJvbmc+IENyZWF0aXZlIFRpcHMgRS1sZXR0ZXIgd2hlcmUgSSBzaGFyZSBleGNsdXNpdmUgcHJvamVjdHMsIHZpZGVvcyAmYW1wOyB0aGUgMTIgRGF5cyBvZiBDaHJpc3RtYXM8L3A+Cg==[/optin_box_field][optin_box_field name=”privacy”][/optin_box_field][optin_box_field name=”top_color”]undefined[/optin_box_field][optin_box_button type=”1″ text=”Click For Immediate Access” text_size=”24″ text_color=”#ffffff” text_font=”Lato;google” text_bold=”Y” text_letter_spacing=”-1″ text_shadow_panel=”Y” text_shadow_vertical=”1″ text_shadow_horizontal=”0″ text_shadow_color=”#000000″ text_shadow_blur=”0″ styling_width=”75″ styling_height=”20″ styling_border_color=”#666666″ styling_border_size=”1″ styling_border_radius=”8″ styling_border_opacity=”99″ styling_gradient_start_color=”#86c833″ styling_gradient_end_color=”#3f8e30″ drop_shadow_panel=”Y” drop_shadow_vertical=”1″ drop_shadow_horizontal=”0″ drop_shadow_blur=”0″ drop_shadow_spread=”0″ drop_shadow_color=”#000000″ drop_shadow_opacity=”50″ inset_shadow_panel=”Y” inset_shadow_vertical=”1″ inset_shadow_horizontal=”0″ inset_shadow_blur=”0″ inset_shadow_spread=”0″ inset_shadow_color=”#c2ee80″ inset_shadow_opacity=”100″ location=”optin_box_style_28″ button_below=”Y”]Click For Immediate Access[/optin_box_button] [/optin_box]


[op_advanced_headline style=”1″ effect=”type” align=”left” accent=”#244C5E” headline_tag=”h2″ line_height=”” highlight=”” top_margin=”0″ bottom_margin=”0″]U3VwcGxpZXM=[/op_advanced_headline]

To make finding the supplies I used in this project a bit easier for you, here are a few clickable links. Those that have multiple shopping options are indicated with letters – EH – Ellen Hutson, SSS – Simon Says Stamp. Compensated Affiliate Links are used when possible. Click here for disclosure. Happy Shopping!


MM Watercolor Butterflies Video

Yesterday I posted a very cool, fun and quirky butterfly card for the Wings Mixed Media challenge over at Happy Little Stampers. It was such a fun project to create, rather relaxing actually, I’m so glad that I filmed it for you! I won’t lie – the project took me two hours to create, so I had to majorly edit the video down for you. I even split it up so that you can find your way easier around the two distinct different components of this card – watercoloring the butterflies and creating the mixed media background that allows them to literally fly off the page.

Mixed-Media-Watercolor-Butterflies-001

Enjoy the process – grab a beverage and have fun – I’d LOVE to see your cards when you create them! And if you haven’t subscribed to my YouTube channel yet – be sure to do so so you see them as they first come out.

Part One focuses on the masked border used to create this card and the actual watercoloring process for keeping the light and darker tones in the butterflies.

Click Here to watch Part One in HD on YouTube

Part two focuses on the Mixed Media portion of this card used to literally pop the butterflies off the page.

Click Here to see Part Two in HD on YouTube

If you want to see the written tutorial and close up photos, be sure to check out the original post right HERE.

See you soon –

Signature

[optin_box style=”2″ alignment=”center” email_field=”email” email_default=”Enter your email address” email_order=”2″ integration_type=”aweber” double_optin=”Y” list=”3846012″ name_field=”name” name_default=”Enter your first name” name_order=”1″ name_required=”Y” opm_packages=””][optin_box_field name=”headline”]Learn more with our exclusive FREE video series:[/optin_box_field][optin_box_field name=”paragraph”]PHA+UGx1cyB5b3XigJlsbCBiZSBhZGRlZCB0byBteTxzdHJvbmc+IEZSRUU8L3N0cm9uZz4gQ3JlYXRpdmUgVGlwcyBFLWxldHRlci4gRnJvbSB0aW1lIHRvIHRpbWUgeW914oCZbGwgZ2V0IGV4Y2x1c2l2ZSBwcm9qZWN0cywgdmlkZW9zICZhbXA7IHRoZSAxMiBEYXlzIG9mIENocmlzdG1hcyBzZXJpZXMuPC9wPgo=[/optin_box_field][optin_box_field name=”privacy”][/optin_box_field][optin_box_field name=”top_color”]undefined[/optin_box_field][optin_box_button type=”0″ button_below=”Y”]Get Immediate Access![/optin_box_button] [/optin_box]

Winter Berries

WInter-Berries-001

It’s been a while since I’ve had a chance to play along with the girls over at Merry Monday. This week Bonnie challenged us to use Berries on a Christmas Card. I was in a watercolor stamping mood, so I pieced this quick little card together.

192

First I did a light wash using Broken China and Tumbled Glass Distress inks in the background, keeping the darker colors toward the top. Next I inked up my Berry Bevy stamp by Penny Black in Ground Espresso and Barn Door Distress Markers, gave it a good light spritz and stamped onto my watercolor background. I added a sponged and embossed greeting using the Handlettered Holiday dies by WPlus9.

WInter-Berries-002

It’s a quick and simple card, okay there are a few steps in there, but I love the CAS style. To finish the card I added a little paper piercing up top after matting my watercolored berries on espresso card stock.

Berries on branches are some of my favorite things, I’m always fascinated by them. Here’s another Christmas card done for this year…I’m running a bit behind…have to play along a little more with Merry Monday’s – hope to see you there too!

WInter-Berries-003

Thanks for stopping by today –

Signature

[optin_box style=”2″ alignment=”center” email_field=”email” email_default=”Enter your email address” email_order=”2″ integration_type=”aweber” double_optin=”Y” list=”3846012″ name_field=”name” name_default=”Enter your first name” name_order=”1″ name_required=”Y” opm_packages=””][optin_box_field name=”headline”]Learn with our exclusive FREE video series[/optin_box_field][optin_box_field name=”paragraph”]PHA+R2V0IHRoZSBmcmVlIENyZWF0aXZlIFRpcHMgRS1sZXR0ZXIgYW5kIGxlYXJuIHdpdGggc3Vic2NyaWJlciBleGNsdXNpdmUgdmlkZW8gYW5kIHBpY3RvcmlhbCBjb250ZW50LiBJbmNsdWRpbmcgb3VyIHllYXJseSAxMiBEYXlzIG9mIENocmlzdG1hcyBzZXJpZXMhPC9wPgo=[/optin_box_field][optin_box_field name=”privacy”][/optin_box_field][optin_box_field name=”top_color”]undefined[/optin_box_field][optin_box_button type=”0″ button_below=”Y”]Send me exclusive videos![/optin_box_button] [/optin_box]

Watercolor Smash in the Mix Mash Forest

Have you ever tried the Watercolor Smash technique? It’s a super easy one that creates amazing looks. Paired here together with the Mix Mash stamp set by Happy Little Stampers, you get a fun and quirky little scene made out of some graphic elements. Don’t you just love stretching your stamps in ways they weren’t intended?

Distress Techniques SHOP Mix Mash (2)

So you can fully understand all the little tips and ideas that went into creating this card, I filmed a short video tutorial for you. I don’t know how your mind works, but the first time I saw this stamp set, this card idea popped into my head! Enjoy the video:

Watch on YouTube

The Watercolor Smash Technique Tutorial

  • The scene was created on a 6 3/8 x 3 1/4″ piece of 140# cold pressed Hahnnenmuhle watercolor paper. The final card is 4 1/4 x 6 3/8″ folded Sahara Sand card stock by Stampin Up. You’ll also need a white – 6 3/8 x 3 7/16″.
  • I had an idea to create a sunny, snowy day – I know…contradiction…so I wanted to add some flicked masking fluid first with a toothbrush. You have to set it aside to fully dry before beginning – no heat tool!
  • To keep with the quirky theme, add a few of the smallest circles from Mix Mash in the sky portion of the card. Emboss in clear embossing powder.
  • Add the sun by first stamping in Versamark Ink, then Mustard Seed Distress Ink (Ranger).

Watercolor Smash techniques

  • Add the trees in the same manner as the sun, using Peeled Paint and Forest Moss Distress with Versamark. TIP – clean your stamp in between so you don’t get green in your watermark pad! I also varied the size and height of the trees so it wasn’t too uniform.
  • Emboss trees in clear, add trunks using a Ground Espresso Distress Marker. Don’t do too many at once before adding the embossing powder – you don’t want the ink to soak into your watercolor paper to quickly. If it does, run over it with a Versamarker, but be sure to only get the brown!
  • Lay down the colors as in the video – Tumbled Glass, Broken China, Mermaid Lagoon and Chipped Sapphire.
  • Add a fair amount of water with a fine mist spritz bottle.
  • Lay your project – image side to ink over your blue palette and smash, holding your card stock there so the ink and water can grab onto your project. You’ll see the sides of your paper curl up just a bit.

Scenic Cards

  • Don’t worry if you didn’t get it right in one smash. That’s the beauty of this technique. Keep smashing to get the color you want in certain sections. To get a smooth look, be sure not to allow your project to dry in between.
  • Use a Pentel Water brush loaded with Broken China to move color into desired spots. TIP – Be sure your brush has the same amount of water as your paper, if it is too dry, it will pull watercolor from your project.
  • Once you have the look you are going for, dry your project – either naturally, or with a heat tool. I chose to use a heat tool, but don’t hover over your embossed images too much – you’ll over-emboss them! TIP – if your paper is too soaked and bent, your color and water will seep to the outside. To keep that from happening, just dry the edges a bit with a heat tool so that your project flattens out a bit, then continue to dry naturally if so desired.

Create backgrounds with the Watercolor Smash/Smooshing technique

  • When your project is fully dry, rub off your masking fluid.
  • Place the white matte where it will be on the folded card base – do not adhere yet.
  • Stamp greeting from Mix Mash set in Ground Espresso ink to match your trunks. Zap with a heat tool to set.
  • Add Mono liquid glue to the back, adhere to a white matte and then to the stone folded card base.

Mix Mash Stamp Set

That’s it! I hope you enjoyed this tutorial. I love this card – it’s fun nature is what I love about stamping. This technique is so fun, easy and one I use frequently. Once you’ve done a few, you’ll quickly add it to your stamping toolbox. Be sure to subscribe for an exclusive video series with more techniques below!

Keep those fingers inky –

Signature

[optin_box style=”2″ alignment=”center” method=”post” email_field=”email” email_default=”Enter your email address” email_order=”2″ integration_type=”aweber” double_optin=”Y” list=”3846012″ name_field=”name” name_default=”Enter your first name” name_order=”1″ name_required=”Y” opm_packages=””][optin_box_field name=”headline”]Learn with our exclusive FREE video series[/optin_box_field][optin_box_field name=”paragraph”]PHA+R2V0IHRoZSBmcmVlIENyZWF0aXZlIFRpcHMgRS1sZXR0ZXIgYW5kIGxlYXJuIHdpdGggc3Vic2NyaWJlciBleGNsdXNpdmUgdmlkZW8gYW5kIHBpY3RvcmlhbCBjb250ZW50LiBJbmNsdWRpbmcgb3VyIHllYXJseSAxMiBEYXlzIG9mIENocmlzdG1hcyBzZXJpZXMhPC9wPgo=[/optin_box_field][optin_box_field name=”privacy”][/optin_box_field][optin_box_field name=”top_color”]undefined[/optin_box_field][optin_box_button type=”0″ button_below=”Y”]Send me exclusive tips![/optin_box_button] [/optin_box]

Watercolor Stamped Butterflies Video

Today I have a fun little video tutorial for you. You may remember this card from a few months back. Well, I was finally able to get the video uploaded. I created it as a tutorial for the Happy Little Stampers YouTube channel. I’m on their video crew and will be contributing every month to that channel as well. Be sure to subscribe to it to see the rest of the teams creations each week. 🙂

Now for some crafty goodness. Watercolor stamping is so much fun, easy to do and really looks artistic. This stamp set lends itself well to this technique as the images are quite detailed and have great space in-between the lines. Enjoy the video and be sure to subscribe to my YouTube channel if you haven’t already!

Click Here to Watch on YouTube

I hope you enjoyed that! It’s a super fun technique and I love that it works well with clean and simple design! Click Here to see the original blog post.

Watercolor Stamped Birthday Butterflies 002

Till next time. Keep those fingers inky –

Signature.png