Spring Fling Sneak Peek

Today I have a sneak peek into the new Spring Fling release over at Catherine Pooler Designs tomorrow! Yup, you get a glimpse into some fun new products – and new ink colors!!! Gotta love that.

For the last few weeks, Catherine has been revealing the new ink colors and products on her blog. And the entire Design Team has been sneaking projects yesterday and today, getting ready for the big day tomorrow.

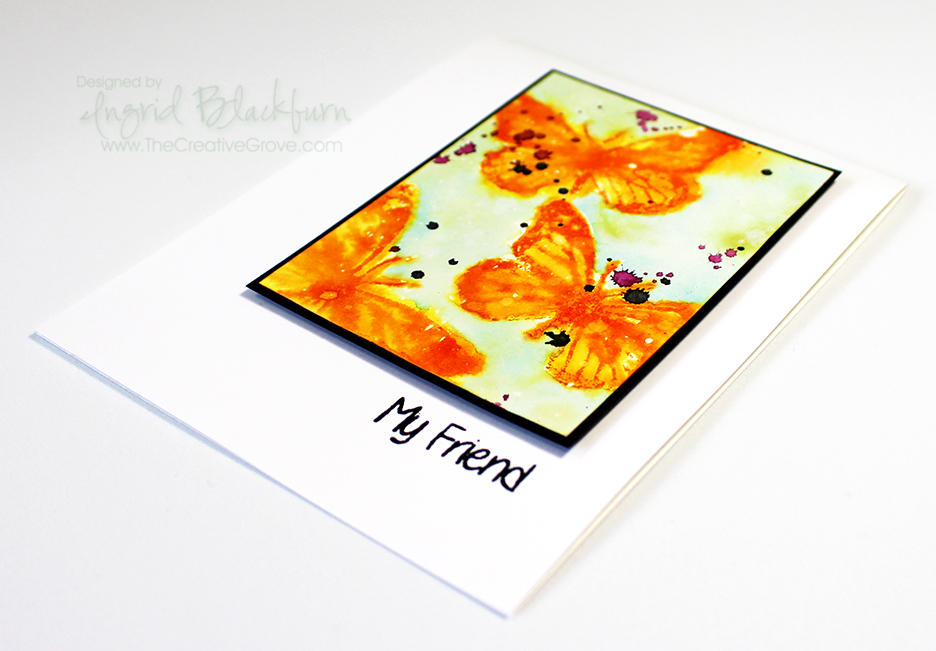
I thought it would be fun to see how a few of the new colors played with the old today – so here’s how to create a cool, simple ombre look for my Sneak Peek!

Spring Fling Ombre Wishes Tutorial

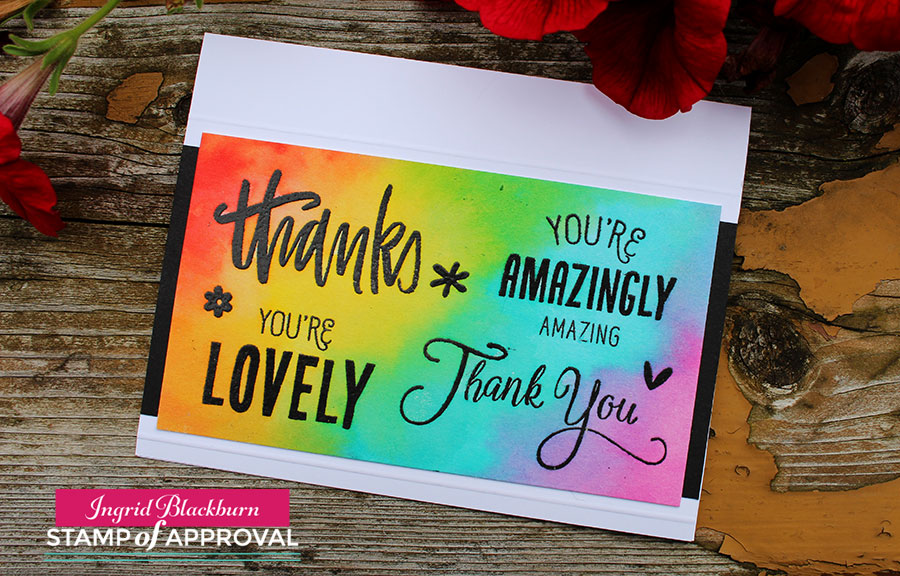
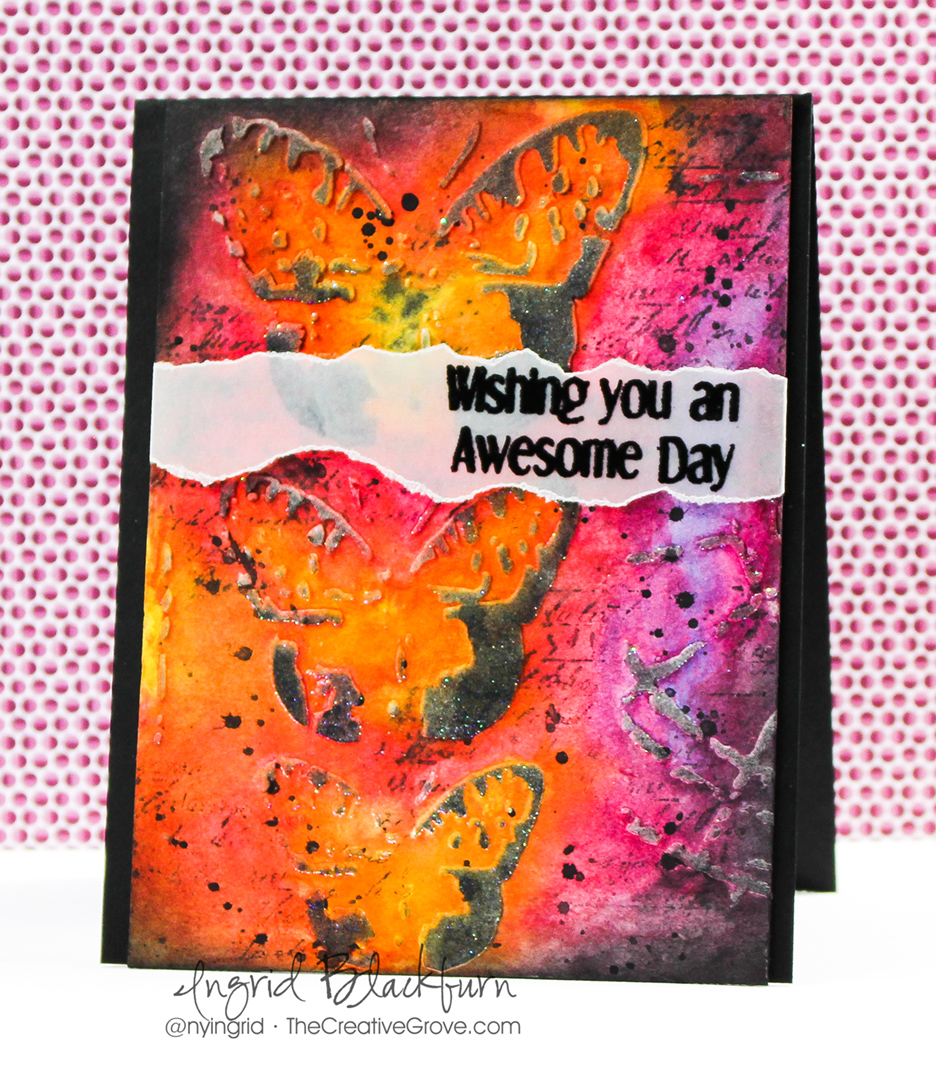
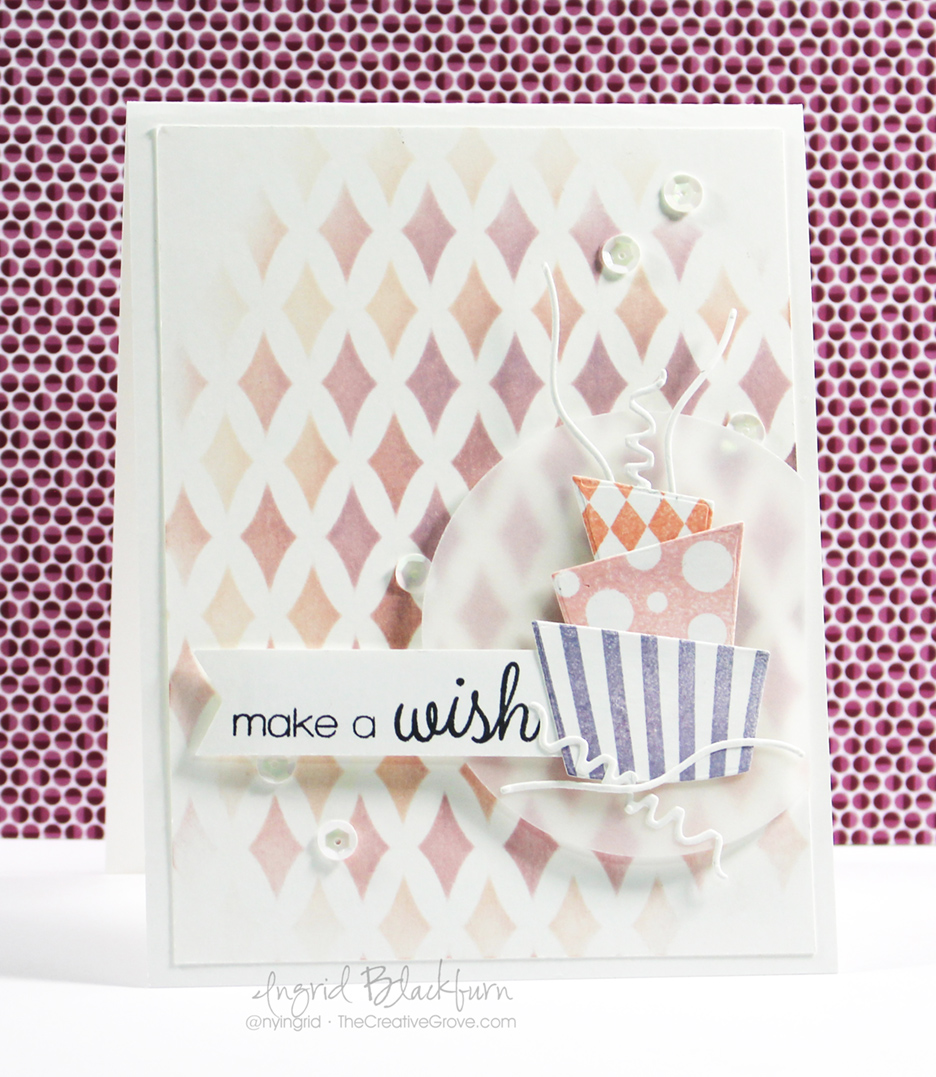
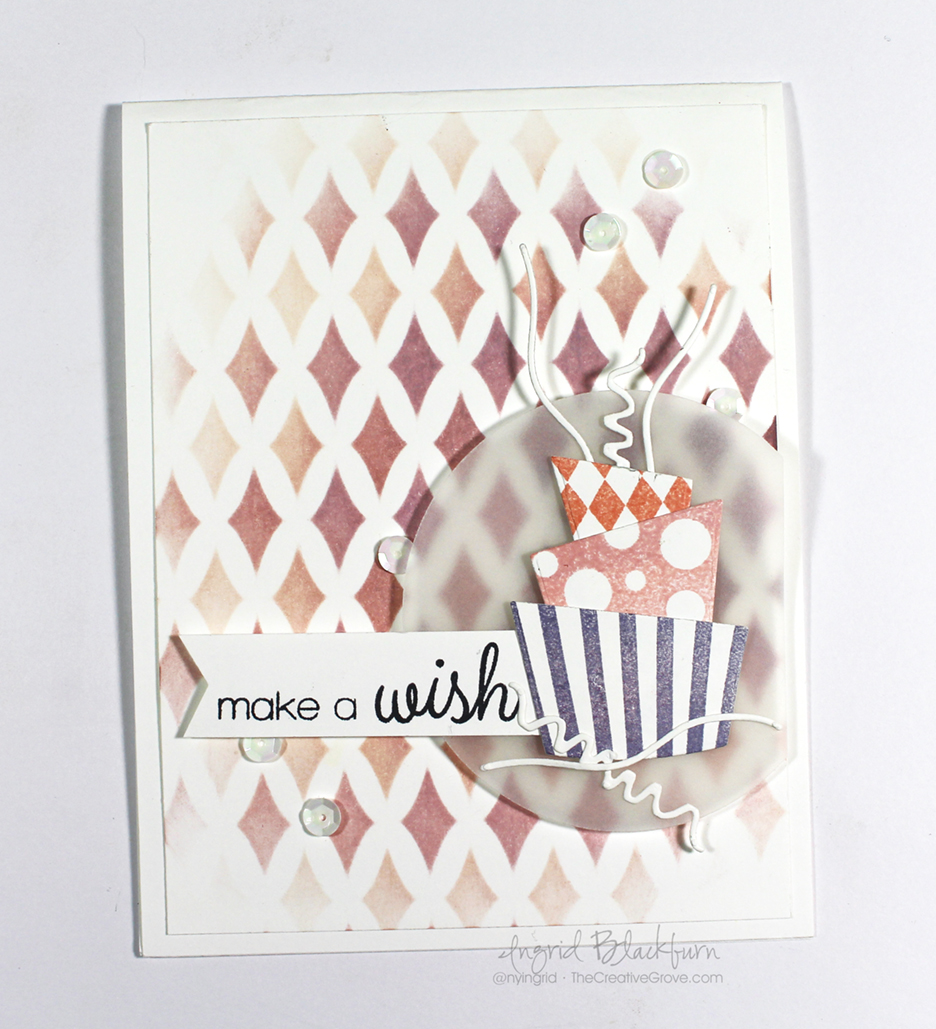
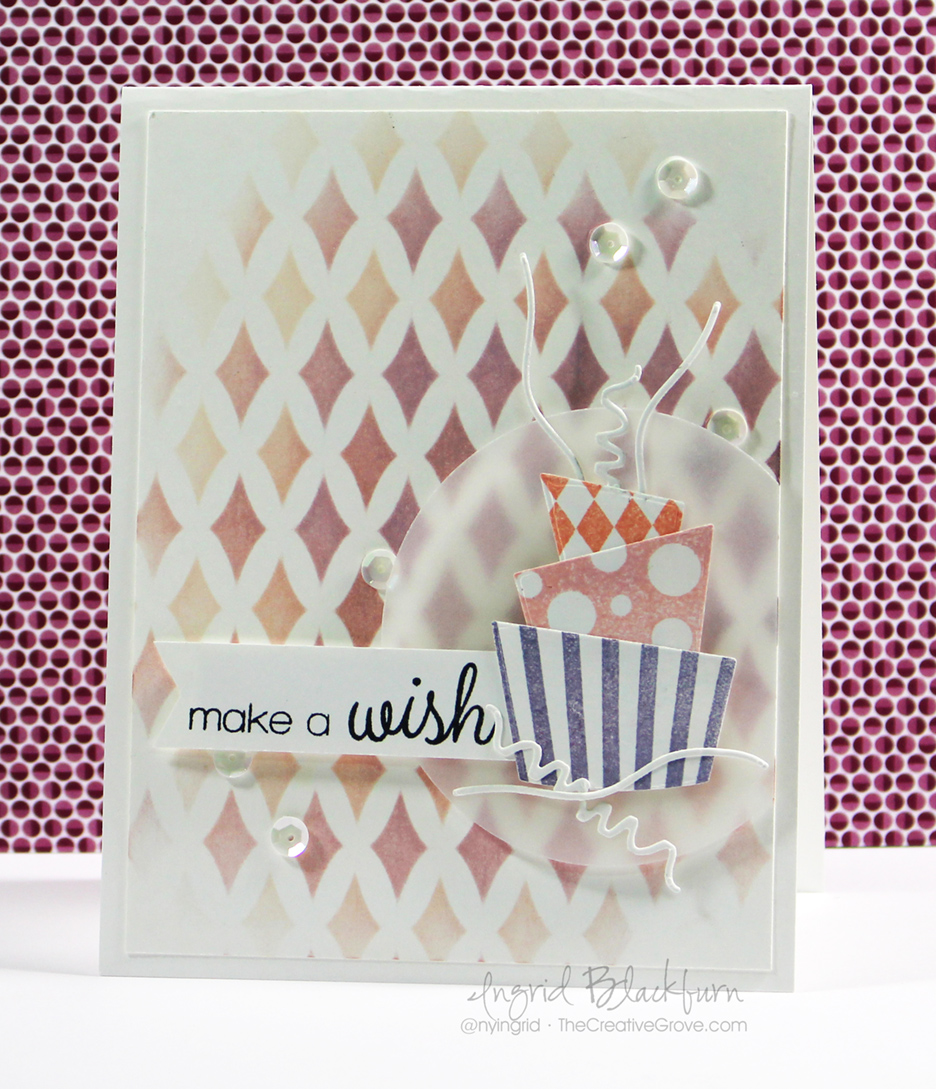
First you’ll want to emboss the new Modern Damask Background Stamp in white onto some Catherine Pooler Designs Bright White 100# card stock (it’s great for ink blending). Can I just say I’m in LOVE, LOVE, LOVE with this background stamp. The pattern is fabulous, and it has a lot of negative space – perfect for coloring, if you’re into that like me!

Spring Fling Inks by Catherine Pooler Designs

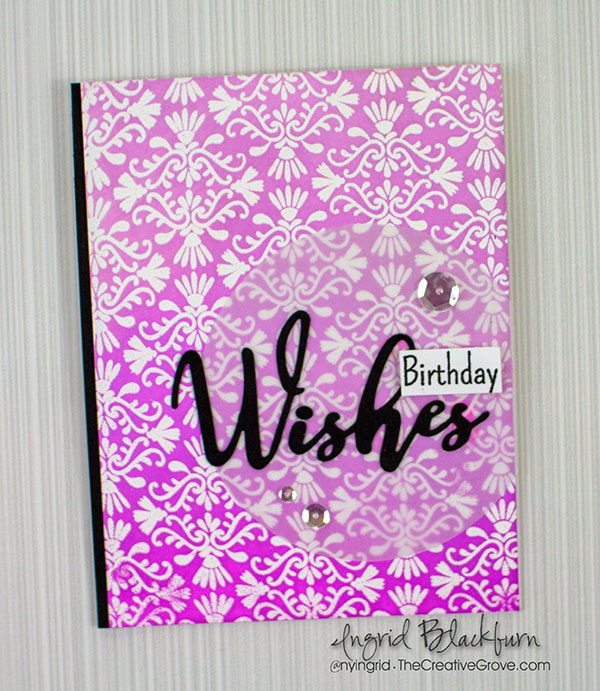
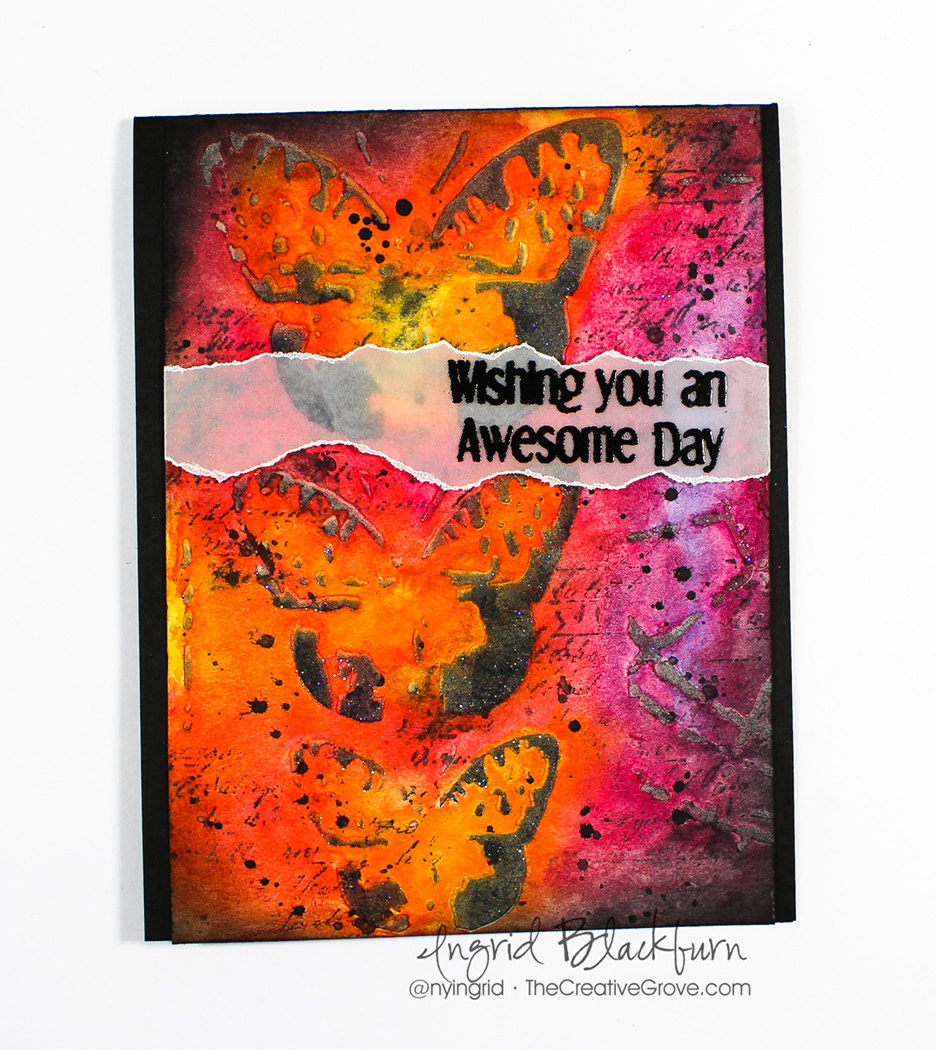
To get the ombre look, you’ll always want to start out with your lightest shade of ink. Here I used the new Sweet Sixteen – at the top. Use a mini sponge tool to evenly add it to the top 1/3 of your project. I went maybe a little over that, as I wanted it to blend effortlessly with my next new ink color – Pixie Pink.

Isn’t the Pixie Pink gorgeous. It’s the perfect blend heading between Sweet Sixteen and Flirty Fuchsia – my last shade, and one from the last Party Collection release.

The look is gradual, but really cool. Each color has its own unique character, and creates a beautiful background.

Spring Fling Ombre

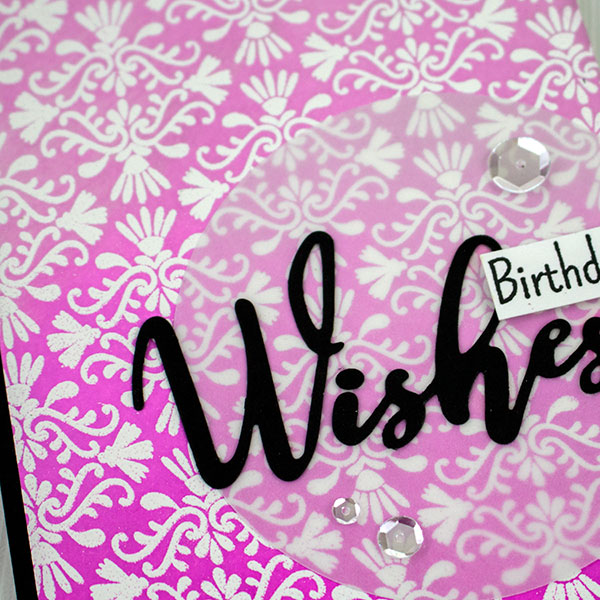
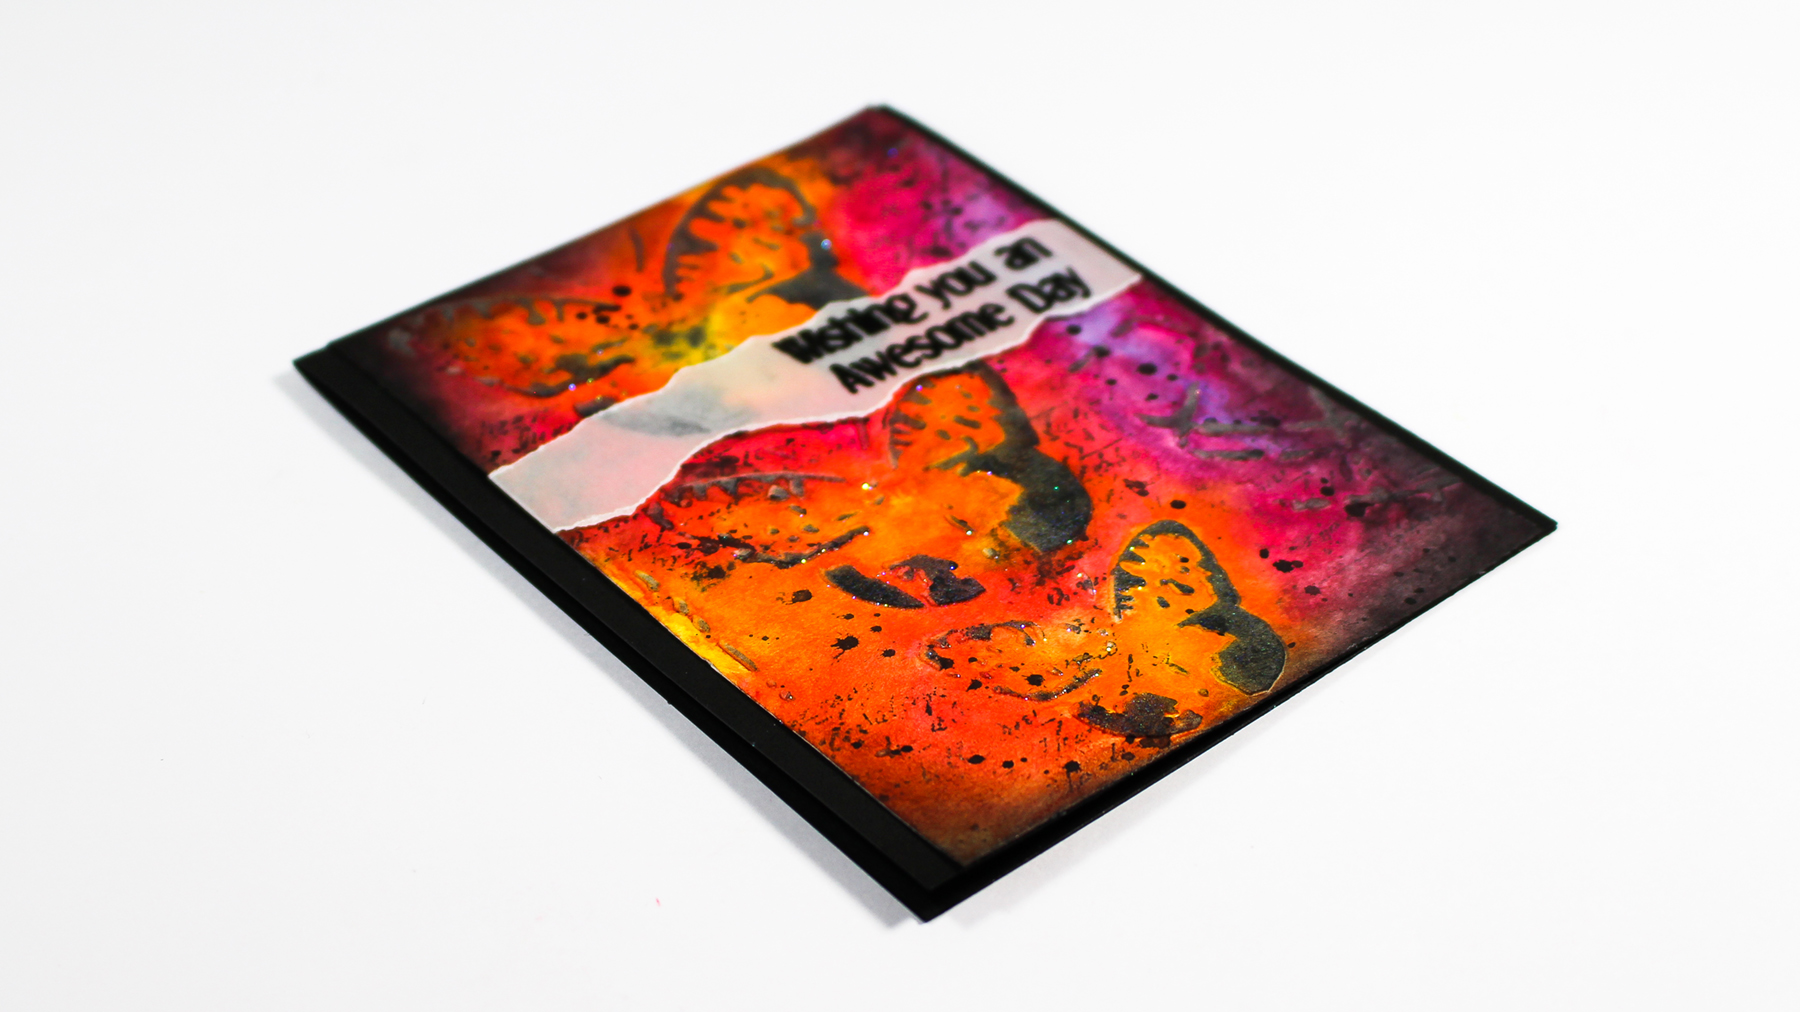
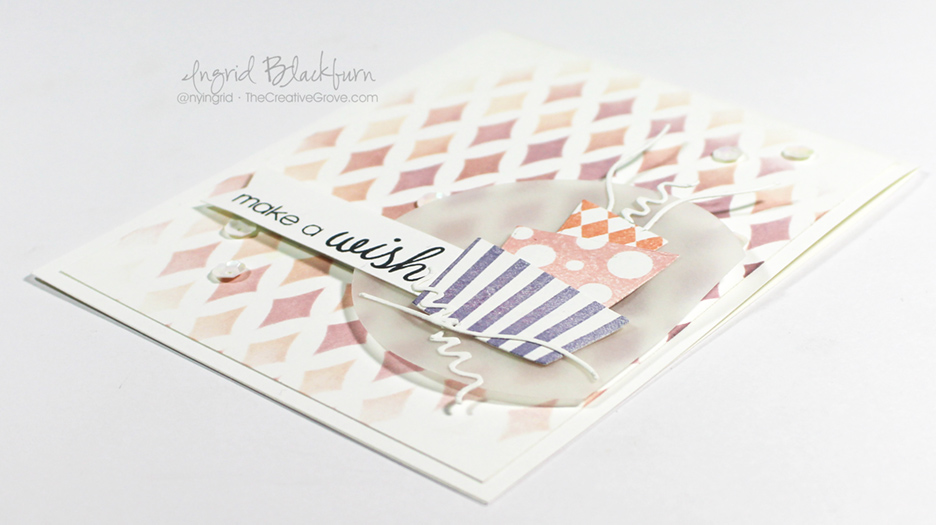
To finish off your card, stamp Birthday from the Hello World Stamp Set. Pop it up over the new Spot on Sentiments word die – Wishes. If you want it to stand out just a bit more, add a vellum circle – cut with my new Circles Dies – they’re coming out tomorrow too!

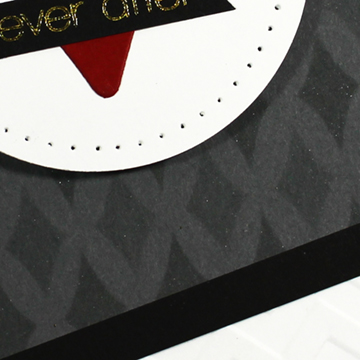
I love adding vellum over bright backgrounds to tone them down if you need to – or just for a little accent. Some sequins are the perfect finishing touch along with a 1/8″ black edge to balance my card.

I hope you liked it – be sure to pop on by tomorrow. At 9 am, we have a Spring Fling Blog hop with the Dream Team – it should be pretty amazing. And of course…there are prizes, why not!

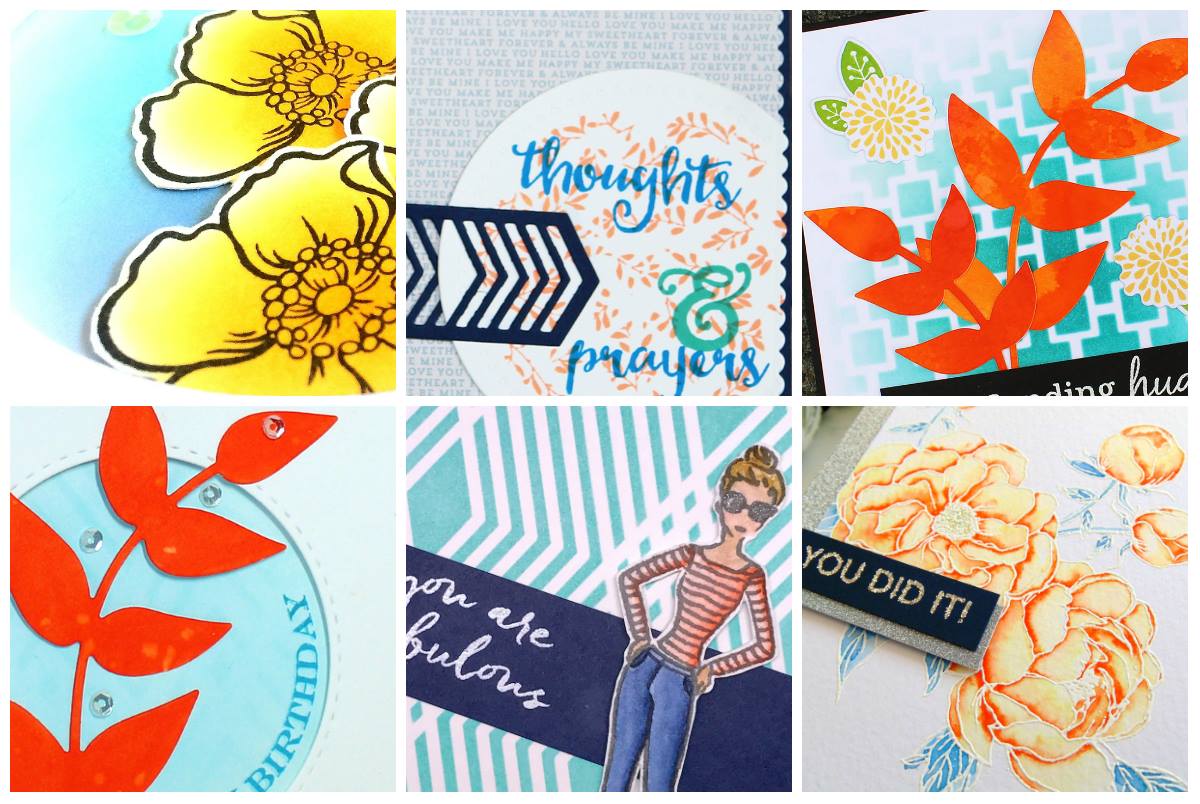
If you’re a StampNation member, be sure to check out today’s challenge too. My card is the upper right one – I LOVE it when Maureen Merritt puts Mood Boards together as inspiration – it’s the perfect way to jump right into a card.

StampNation

See you tomorrow!

SOA Lovely Notes Blog Hop

Lovely Notes SOA Blog Hop

Welcome to the Lovely Notes Collection Blog Hop – Day 3! What do you think so far…pretty amazing, right? Well I hope to add a little creative inspiration for you today with a few projects. I’ve been sharing a few projects over the past few days – this collection is so easy to create with, and I have so much more to keep sharing with you this week.

The Stamp of Approval Lovely Notes Collection is a curated collection of stamps and dies that work fabulously together or alone. Not only do you get a box FULL of amazing stamps and dies, but you’ll get a downloadable PDF Project Guide (for free!) with tons of project tutorials using them!

The stamps and dies in the Stamp of Approval Collections are brand new on the market and won’t be released for individual sale for several months. To find out how to get a box, you have to be on the wait list! Yes, these boxes sell out so fast – the last one was gone in 33 hours….so don’t wait. The wait list will find out before the public will. Click Here to sign up for the wait list and find out more.

Today I’m going to inspire you with several of the components of this collection. Specifically the Lovely Flowers, Lovely Flowers & Banners Dies, Lovely Lattice Background, Butterfly Notes, Wonderful Wreath – all by Catherine Pooler Designs, and Handpainted Thanks by Neat & Tangled. So let’s get right to it with a little Christmas in July, here are your tutorials!

Lovely Notes Project Tutorials

Wonderful Wreath

I was in love with this wreath the moment I saw it. It reminds me of olive branches – delicate and whimsical. To get this clean and simple look, stamp your wreath on white in Stampin Up Pear Pizzazz, the berries in Primrose Petals, hang some ornaments in Baja Breeze and tie it all up with an Early Espresso bow. It was that simple. This is a GREAT mass produced card.

Lovely-Notes-SOA-Project-2---Ingrid-Blackburn-001


For an elegant touch, emboss your greeting in Gilded Gold by Brutus Monroe – my new favorite gold. Add a few sparkling clear sequins by Pretty Pink Posh and a little simple paper piecing in the corners finishes it off.

I’m addicted to the tilt for the matte in the background (thanks Maureen!) – a little Early Espresso on a Pear Pizzazz card base. It’s that simple.

Thanks Friend

This awesome handpainted Thanks stamp by Neat & Tangled is my new favorite greeting – I love bold scripty greetings. I used this stamp just one way – did you know there are two others that layer for a multi tone effect! How cool is that?

You’ll want to stamp some of the Lowely Flowers and cut them using the coordinating Dies. I used the Stampin Up colors – Marina Mist, Wisteria Wonder, Rose Red & Garden Green. On a large piece of white scrap paper – at least card front size, stamp the thanks towards the bottom center/right. Repeatedly stamp thanks in a light neutral tone, I used River Rock. TIP – alter where the word starts on each line so that it flows.

Lovely Notes SOA Collection - Ingrid Blackburn


Stamp the dots from Lovely Flowers in the middle 2/3 of the Soft Suede card base. I stamped it completely across so that the left and right side were even.

Cut your tag out using the large banner die from the Lovely Flowers & Banners Dies set. Try to place the Rose Red Thanks a bit off centered to the right at the bottom. You definitely want some neutral below as well. Stamp the word Friend from the Lovely Flowers Stamp set in Soft Suede on a piece of scrap and attach to your tag.

Pop the tag up using Foam Tape or Fun Foam and adhere your embellishments. TIP – The leaf branch has three sprigs – I cut mine apart to get it just right – sometimes just one or two.

That’s it – it’s a cute card – I had way too much fun with the Lovely Flowers stamps & dies as you’ll see tomorrow!

Bold Watercolor Greetings

If you’ve followed me for a while here, on YouTube or in an online class – you know I love to watercolor! This project takes some of the various greetings in this collection and puts them to good use. I wanted greetings that would stand out, so I used two from Lovely Flowers, one from Butterfly Notes and one of my new favorite Thanks from Handpainted Thanks. Here’s a video tutorial for you:

Click Here to watch video in HD on YouTube

To get this outline look, first stamp your images in versamark. Go back over them with a de-static tool and stamp again in Versafine Onyx Black Ink. Emboss in Black and heat set. Once cool, secure your project down with low tack painters tape on the upper and lower edges.

Smoosh some Distress Ink onto your craft mat or acrylic block – I used Rusty Hinge, Ground Espresso, Gathered Twigs and Vintage Photo. Grab some ink with a large wet brush and start painting onto your dry watercolor paper. You want your watercolor to flow together without getting out of control.

Handpainted Thanks - Lovely Notes Collection - Ingrid Blackburn

TIP – if your paper accumulates too many puddles or your colors blend out of control, gently dip the edge of a dry paper towel into a puddle to sop it up without removing color. Or use a thirsty brush (Not dripping wet). Water will naturally be attracted to a dry surface.

Once you have the look you want, heat set or allow to dry on it’s own. TIP – keep some lighter areas along with dark for a balance.

Stamp the Lovely Lattice Background stamp in Ground Espresso onto a folded Espresso card base. I just inked up the top and bottom. Quickly dip into clear embossing powder and heat set for a tone on tone look. If using a vanilla or white background, use Versamark ink for a watermark look. The key is not to compete with your watercolor, but rather support it.

It’s a pretty quick and easy project. I made four as I wasn’t sure of the look I wanted. Here’s a rainbow one too:

Lovely Notes Stamp of Approval Ingrid Blackburn


I added a little dry embossed line to the top and bottom for a simple embellishment. No matter what color combination you choose, you’ll love this technique.

Now that you have some inspiration…time to find out just how you can win a free box!

Lovely Notes SOA Win

It’s your turn to hop along and check out what the uber talented Amy Tsutura has in store for you next! Here’s the blog hop list:

Catherine Pooler

Neat and Tangled

Kristie Goulet

Yoonsun Hur

Ingrid Blackburn – That’s Me * You are here*

Amy Tsuruta You’re next stop!

Justine Hovey

Be sure to leave a comment on each designers blog for a chance to win a Lovely Notes Collection of your own! There’s a giveaway for all three days of the hop! If you missed out on any of the Blog Hops – start at the beginning with Catherine’s Blog and Day 1.

And stop by tomorrow for more inspiration –

Signature

[optin_box style=”12″ alignment=”center” email_field=”email” email_default=”Enter your email address” integration_type=”aweber” double_optin=”Y” list=”3846012″ name_field=”name” name_default=”Enter your first name” name_required=”Y” opm_packages=””][optin_box_field name=”headline”]Learn more with our exclusive FREE video series:[/optin_box_field][optin_box_field name=”paragraph”]PHA+UGx1cyB5b3XigJlsbCBiZSBhZGRlZCB0byBteSBGUkVFIENyZWF0aXZlIFRpcHMgRS1sZXR0ZXIgd2hlcmUgSSBzaGFyZSBleGNsdXNpdmUgcHJvamVjdHMsIHZpZGVvcyAmYW1wOyB0aGUgMTIgRGF5cyBvZiBDaHJpc3RtYXMgUHJvamVjdCBTZXJpZXM8L3A+Cg==[/optin_box_field][optin_box_field name=”privacy”][/optin_box_field][optin_box_field name=”top_color”]undefined[/optin_box_field][optin_box_button type=”0″ button_below=”Y”]Get Instant Access![/optin_box_button] [/optin_box]

MM Watercolor Butterflies Video

Yesterday I posted a very cool, fun and quirky butterfly card for the Wings Mixed Media challenge over at Happy Little Stampers. It was such a fun project to create, rather relaxing actually, I’m so glad that I filmed it for you! I won’t lie – the project took me two hours to create, so I had to majorly edit the video down for you. I even split it up so that you can find your way easier around the two distinct different components of this card – watercoloring the butterflies and creating the mixed media background that allows them to literally fly off the page.

Mixed-Media-Watercolor-Butterflies-001

Enjoy the process – grab a beverage and have fun – I’d LOVE to see your cards when you create them! And if you haven’t subscribed to my YouTube channel yet – be sure to do so so you see them as they first come out.

Part One focuses on the masked border used to create this card and the actual watercoloring process for keeping the light and darker tones in the butterflies.

Click Here to watch Part One in HD on YouTube

Part two focuses on the Mixed Media portion of this card used to literally pop the butterflies off the page.

Click Here to see Part Two in HD on YouTube

If you want to see the written tutorial and close up photos, be sure to check out the original post right HERE.

See you soon –

Signature

[optin_box style=”2″ alignment=”center” email_field=”email” email_default=”Enter your email address” email_order=”2″ integration_type=”aweber” double_optin=”Y” list=”3846012″ name_field=”name” name_default=”Enter your first name” name_order=”1″ name_required=”Y” opm_packages=””][optin_box_field name=”headline”]Learn more with our exclusive FREE video series:[/optin_box_field][optin_box_field name=”paragraph”]PHA+UGx1cyB5b3XigJlsbCBiZSBhZGRlZCB0byBteTxzdHJvbmc+IEZSRUU8L3N0cm9uZz4gQ3JlYXRpdmUgVGlwcyBFLWxldHRlci4gRnJvbSB0aW1lIHRvIHRpbWUgeW914oCZbGwgZ2V0IGV4Y2x1c2l2ZSBwcm9qZWN0cywgdmlkZW9zICZhbXA7IHRoZSAxMiBEYXlzIG9mIENocmlzdG1hcyBzZXJpZXMuPC9wPgo=[/optin_box_field][optin_box_field name=”privacy”][/optin_box_field][optin_box_field name=”top_color”]undefined[/optin_box_field][optin_box_button type=”0″ button_below=”Y”]Get Immediate Access![/optin_box_button] [/optin_box]

Mixed Media Watercolor

Mixed-Media-Watercolor-March-2016-HLS

If I were to say Textured Watercolor to you, what would you think of? Mixed Media? Embossing Paste? I have to admit, this month I felt a little challenged when I saw the theme over at the Mixed Media Challenge at Happy Little Stampers – Water. Now you can take this a few ways – water based  techniques or literally create a water scene (Usually what I’d do). SO, I thought I’d give a little Textured Watercolor a shot.

HLS Mixed Media challenge March 2016

To get the water flowing on my mixed media piece, and have a little fun – I whipped out some bright colors, stencils, stamps and a few different mediums. I even shot a real time video for you too – so if you want to see how I watercolored Embossing Paste to create a beautiful textured card, just watch here – or click the link below to watch in HD on YouTube.

Watch in HD on YouTube

The snow is falling as I write this blog post, so it was fun to work on a project that gave me a spring/summer feel. That’s what I love about art, it takes you away to some cool places! Here’s a written tutorial for you too – but the video has much more detail.

Mixed Media: Creating Textured Watercolor

  • Add embossing paste  through a stencil where you want to on 140# cold pressed watercolor or mixed media paper. I used Specimens 12×12″ by The Crafters Workshop. Set aside to dry.
  • Paint over your dried piece with bright vibrant watercolors as in the video. I used Lemon Yellow, Translucent Orange, Magenta, Quinacrodone Violet, Cobalt, Paynes Grey (Schminke) and Permanent Rose (Mission).

Mixed Media Watercolor-002

  • Keep your watercolor loose and bright, adding dimension through layers and depth by keeping the darker areas balanced with the light.
  • Allow to dry thoroughly.
  • Stamp Script stamp in Soot Black Distress Ink in random spots, touching up in spots with water to keep it loose and imperfect.
  • Add splats with a watery Paynes Grey and a paint brush.

Textured Mixed Media

  • Once dry, add a little sponging to the edges and lightly on the sides with Hickory Smoke and Soot Black Distress inks.
  • Secure your project and stencil over it again. Sponge your embossing paste in Hickory Smoke and Soot Black. If not dark enough to your liking, use your Distress Inks in the direct to paper method.
  • Cover your project with a destatic tool.
  • Place your stencil over top your project again and smoosh a versamark pad over your embossed images.

Mixed Media Watercolor

  • Add glitter, then a little clear embossing powder. Heat set
  • Rub over your project with a cloth or paper towel to remove the destatic powder and some of the glitter.
  • Emboss a greeting on a piece of Vellum card stock, tear and add to your project as in the video. I used Everyday Sentiments (Happy Little Stampers)
  • Add piece to black card stock and trim if needed. If you do trim, add a little black to the bottom as in the video and touch up your sponging.

Mixed-Media-Watercolor-007

And come to think of it – I created another Watercolor Mixed Media piece earlier in the week for my friends Loll & Bonnie’s new challenge too – CAS Mix Up. See that card here. I decided to play along with two other challenges today – Anything but Cute – Color and Mixed Media Mojo – Springtime/Watercolor.

abc-badge-crazy-for-color  Graphic to copy 3

So grab those bright watercolors, and have fun creating your own Mixed Media piece! I’m sure you’ll get just as lost in it as I did. Till next time –

Signature

[optin_box style=”2″ alignment=”center” email_field=”email” email_default=”Enter your email address” email_order=”2″ integration_type=”aweber” double_optin=”Y” list=”3846012″ name_field=”name” name_default=”Enter your first name” name_order=”1″ name_required=”Y” opm_packages=””][optin_box_field name=”headline”]Learn with our exclusive FREE video series[/optin_box_field][optin_box_field name=”paragraph”]PHA+R2V0IHRoZSBmcmVlIENyZWF0aXZlIFRpcHMgRS1sZXR0ZXIgYW5kIGxlYXJuIHdpdGggc3Vic2NyaWJlciBleGNsdXNpdmUgdmlkZW8gYW5kIHBpY3RvcmlhbCBjb250ZW50LiBJbmNsdWRpbmcgb3VyIHllYXJseSAxMiBEYXlzIG9mIENocmlzdG1hcyBzZXJpZXMhPC9wPgo=[/optin_box_field][optin_box_field name=”privacy”][/optin_box_field][optin_box_field name=”top_color”]undefined[/optin_box_field][optin_box_button type=”0″ button_below=”Y”]Get Instant Access![/optin_box_button] [/optin_box]

Watercolor Smash in the Mix Mash Forest

Have you ever tried the Watercolor Smash technique? It’s a super easy one that creates amazing looks. Paired here together with the Mix Mash stamp set by Happy Little Stampers, you get a fun and quirky little scene made out of some graphic elements. Don’t you just love stretching your stamps in ways they weren’t intended?

Distress Techniques SHOP Mix Mash (2)

So you can fully understand all the little tips and ideas that went into creating this card, I filmed a short video tutorial for you. I don’t know how your mind works, but the first time I saw this stamp set, this card idea popped into my head! Enjoy the video:

Watch on YouTube

The Watercolor Smash Technique Tutorial

  • The scene was created on a 6 3/8 x 3 1/4″ piece of 140# cold pressed Hahnnenmuhle watercolor paper. The final card is 4 1/4 x 6 3/8″ folded Sahara Sand card stock by Stampin Up. You’ll also need a white – 6 3/8 x 3 7/16″.
  • I had an idea to create a sunny, snowy day – I know…contradiction…so I wanted to add some flicked masking fluid first with a toothbrush. You have to set it aside to fully dry before beginning – no heat tool!
  • To keep with the quirky theme, add a few of the smallest circles from Mix Mash in the sky portion of the card. Emboss in clear embossing powder.
  • Add the sun by first stamping in Versamark Ink, then Mustard Seed Distress Ink (Ranger).

Watercolor Smash techniques

  • Add the trees in the same manner as the sun, using Peeled Paint and Forest Moss Distress with Versamark. TIP – clean your stamp in between so you don’t get green in your watermark pad! I also varied the size and height of the trees so it wasn’t too uniform.
  • Emboss trees in clear, add trunks using a Ground Espresso Distress Marker. Don’t do too many at once before adding the embossing powder – you don’t want the ink to soak into your watercolor paper to quickly. If it does, run over it with a Versamarker, but be sure to only get the brown!
  • Lay down the colors as in the video – Tumbled Glass, Broken China, Mermaid Lagoon and Chipped Sapphire.
  • Add a fair amount of water with a fine mist spritz bottle.
  • Lay your project – image side to ink over your blue palette and smash, holding your card stock there so the ink and water can grab onto your project. You’ll see the sides of your paper curl up just a bit.

Scenic Cards

  • Don’t worry if you didn’t get it right in one smash. That’s the beauty of this technique. Keep smashing to get the color you want in certain sections. To get a smooth look, be sure not to allow your project to dry in between.
  • Use a Pentel Water brush loaded with Broken China to move color into desired spots. TIP – Be sure your brush has the same amount of water as your paper, if it is too dry, it will pull watercolor from your project.
  • Once you have the look you are going for, dry your project – either naturally, or with a heat tool. I chose to use a heat tool, but don’t hover over your embossed images too much – you’ll over-emboss them! TIP – if your paper is too soaked and bent, your color and water will seep to the outside. To keep that from happening, just dry the edges a bit with a heat tool so that your project flattens out a bit, then continue to dry naturally if so desired.

Create backgrounds with the Watercolor Smash/Smooshing technique

  • When your project is fully dry, rub off your masking fluid.
  • Place the white matte where it will be on the folded card base – do not adhere yet.
  • Stamp greeting from Mix Mash set in Ground Espresso ink to match your trunks. Zap with a heat tool to set.
  • Add Mono liquid glue to the back, adhere to a white matte and then to the stone folded card base.

Mix Mash Stamp Set

That’s it! I hope you enjoyed this tutorial. I love this card – it’s fun nature is what I love about stamping. This technique is so fun, easy and one I use frequently. Once you’ve done a few, you’ll quickly add it to your stamping toolbox. Be sure to subscribe for an exclusive video series with more techniques below!

Keep those fingers inky –

Signature

[optin_box style=”2″ alignment=”center” method=”post” email_field=”email” email_default=”Enter your email address” email_order=”2″ integration_type=”aweber” double_optin=”Y” list=”3846012″ name_field=”name” name_default=”Enter your first name” name_order=”1″ name_required=”Y” opm_packages=””][optin_box_field name=”headline”]Learn with our exclusive FREE video series[/optin_box_field][optin_box_field name=”paragraph”]PHA+R2V0IHRoZSBmcmVlIENyZWF0aXZlIFRpcHMgRS1sZXR0ZXIgYW5kIGxlYXJuIHdpdGggc3Vic2NyaWJlciBleGNsdXNpdmUgdmlkZW8gYW5kIHBpY3RvcmlhbCBjb250ZW50LiBJbmNsdWRpbmcgb3VyIHllYXJseSAxMiBEYXlzIG9mIENocmlzdG1hcyBzZXJpZXMhPC9wPgo=[/optin_box_field][optin_box_field name=”privacy”][/optin_box_field][optin_box_field name=”top_color”]undefined[/optin_box_field][optin_box_button type=”0″ button_below=”Y”]Send me exclusive tips![/optin_box_button] [/optin_box]

Faded Double Stenciling Video + Sneak Peek

It’s Wednesday, and that means a sneak peek into the fun new challenge over at StampNation, but first I have the Crooky Cake video I promised. This video highlights the faded double stenciling technique, which is awesome for any background. If you recall, a few days ago I posted this card:

Frosted-Crooky-Cake-001

If you want a glimpse into how I created this frosted look, here you go!

Watch on YouTube

So what did you think? It’s a fun, cute frosted looking card. Here’s a written tutorial for you as well!

Faded Double Stenciling Technique

  • As with any stenciling work, you first want to secure both your work piece and your stencil to ensure they don’t move around on you.
  • To achieve a faded look, keep the darkest part central on your project and sponge outward, varying the depth of color as you move outward. To accentuate this, I kept my lightest of three shades to the outside – Tattered Rose. I also made sure to leave the corners practically white.

Frosted-Crooky-Cake-003

  • Sponge your colors from lightest to darkest – Tattered Rose, Victorian Velvet and Dusty Concord. Once you have the look you want, lift your stencil and shift to move the diamonds into the oval negative space left by the stencil. Repeat your pattern and perhaps vary your color – maybe the first set you kept lighter, and the second darker. This will help provide a visual difference and interest.
  • Next stamp your cake pieces using similar inks – I used Stampin Up Classics – Crisp Cantaloupe, Blushing Bride and Wisteria Wonder. Cut them out using the coordinating Dies along with a few streamers in white. To make the long squiggle at the bottom, I connected two smaller pieces. The bottom pieces I cut out using a white card stock that has Stick It on it.

Frosted-Crooky-Cake-002

  • Stamp the greeting from the set in black and create a banner with a hexagon punch or scissors.
  • Attach the cake together using a scrap piece of card stock and some liquid glue as in the video.
  • Attach the cake and banner to a trimmed circle cut from vellum card stock.

Frosted-Crooky-Cake-005

  • Pop your circle and banner up using fun foam or foam tape, add some sequins using Matte Medium and attach your card front to a white card base.
  • The card front measures 4 x 5 1/4″, card base – 4 1/4 x 5 1/2″

Supplies:

  • Stamps – Bring on the Cake stamp set and coordinating dies by SugarPea Designs for Stamp of Approval Young at Heart Collection
  • Ink – Ranger Distress -Tattered Rose, Victorian Velvet, Dusty Concord; Memento – Tuxedo Black; Stampin Up – Crisp Cantaloupe, Blushing Bride and Wisteria Wonder.
  • Paper – White, Vellum Card Stock (Stampin Up)
  • Accessories – Bring on the Cake Dies (SugarPea Designs), Harleen Stencil (Winne & Walter for SOA Young at Heart Collection), Hexagon Punch (Stampin Up), White Sequins (Rico Designs), Mini Sponge Tools (Ranger), Fun Foam

Frosted-Crooky-Cake-004

The Stamp of Approval Collection is almost sold out, but don’t fret. If you miss out, these products will be available through their companies later in 2016/2017. And definitely check out my other fun project made with this collection here.

And if that wasn’t enough for you, be sure to check out this week’s challenge over at StampNation. Here’s a sneak peek at my challenge project for this week – notice a little more double stenciling? And the Stenciling class is still going on in the classroom there – over 16 individual lessons so far.

Queen of Hearts Sneak

StampNationGeneralBlogPost

Hope you enjoyed that! Be sure to stop by for more crafty goodness later this week. Till then, keep those fingers inky –

Signature

[optin_box style=”2″ alignment=”center” email_field=”email” email_default=”Enter your email address” email_order=”2″ integration_type=”aweber” double_optin=”Y” list=”3846012″ name_field=”name” name_default=”Enter your first name” name_order=”1″ name_required=”Y”][optin_box_field name=”headline”]Learn with our exclusive FREE video series[/optin_box_field][optin_box_field name=”paragraph”]PHA+R2V0IHRoZSBmcmVlIENyZWF0aXZlIFRpcHMgRS1sZXR0ZXIgYW5kIGxlYXJuIHdpdGggc3Vic2NyaWJlciBleGNsdXNpdmUgdmlkZW8gYW5kIHBpY3RvcmlhbCBjb250ZW50LsKgPGVtPjxzdHJvbmc+SW5jbHVkaW5nwqA8L3N0cm9uZz48L2VtPm91ciB5ZWFybHkgMTIgRGF5cyBvZiBDaHJpc3RtYXMgc2VyaWVzITwvcD4K[/optin_box_field][optin_box_field name=”privacy”][/optin_box_field][optin_box_field name=”top_color”]undefined[/optin_box_field][optin_box_button type=”0″ button_below=”Y”]Get Instant Access![/optin_box_button] [/optin_box]

Watercolor Stamped Butterflies Video

Today I have a fun little video tutorial for you. You may remember this card from a few months back. Well, I was finally able to get the video uploaded. I created it as a tutorial for the Happy Little Stampers YouTube channel. I’m on their video crew and will be contributing every month to that channel as well. Be sure to subscribe to it to see the rest of the teams creations each week. 🙂

Now for some crafty goodness. Watercolor stamping is so much fun, easy to do and really looks artistic. This stamp set lends itself well to this technique as the images are quite detailed and have great space in-between the lines. Enjoy the video and be sure to subscribe to my YouTube channel if you haven’t already!

Click Here to Watch on YouTube

I hope you enjoyed that! It’s a super fun technique and I love that it works well with clean and simple design! Click Here to see the original blog post.

Watercolor Stamped Birthday Butterflies 002

Till next time. Keep those fingers inky –

Signature.png

New Technique Spotlight Video – Faux Ribbon

Yesterday I posted a project I whipped up using the Every Little Bit stamp set.  I promised you a video on how I turn the smallest of scraps into faux ribbon and here it is!  You can also read my post on this card with all the specifics and tips too. Click here to read card post

[youtube=http://www.youtube.com/watch?v=vGRJDg5DvvE]

Creative Tips:

  • My scraps are 3/16” wide and I give myself about 5 inches to work with.  It’s much more than I need, but easier to work with.
  • I use a bone folder to break up the fibers in the card stock.  While this isn’t a necessary step, I highly recommend it!  It makes the paper much more pliable.
  • I water colored my pumpkins with our Watercolor Crayons and the Aqua Painter.  You’ll love playing with these colorful crayons that are yours, not your kids!

I know you’ll love making your own little faux ribbon to match your project – at least you’ll never need to worry if you do run out of ribbon!

I’d love for you to share your projects with me – post them on our facebook community page! Click here to visit our facebook community

B1_ChristmasGift_demo_Oct0112_NA

New this October 1 – 31, 2012! Get a FREE Festive Paper Piercing Pack when you order one of the Ornament Bundles this month only!  Click here for more details on this limited time offer.

SignatureSnowflake001_thumb1

To Shop 24/7 in the Creative Store Click here!

Stamp Sets – Every Little Bit (120558), Teeny Tiny Wishes (127802) Paper – Whisper White (100730), Pumpkin Pie (105117), Chocolate Chip (102128) Ink – StazOn Jet Black (101406), Pumpkin Pie (126945), Chocolate Chip (126979) Cool Tools –Aqua Painter (103954), Argyle TIEF Embossing Folder (127750), Neutrals Watercolor Crayons (119805), Brights Watercolor Crayons (119804) The Perfect Finish – Stampin’ Dimensionals (104430)