Today is about color. I have to admit, I struggled with a project today…let’s just say that I can procrastinate with the best of them if I put my mind to it, how about you? This is why I usually create between the hours of 5 and 9 am! Well, if this is the result of a little procrastination every now and then, I guess it’s not that bad! Today I focused on starting with three of the retiring colors as no other stamp set struck me with inspiration. So it’s all about River Rock, Bashful Blue and Riding Hood Red today.
Once I knew what colors wanted, I went looking for inspiration on Pinterest and I happened to see a card with Serene Silhouettes and the rest is shall we say history. Thankfully this stamp set isn’t going away, and I thought, humm….it’s been a few weeks since I whipped out my brayer. I’m sure my friend and CG Crew member Amy has been wondering if my brayer got locked up in a drawer somewhere…she and I seem to text each other a new brayer project we’ve created almost every week it feels like…lol!
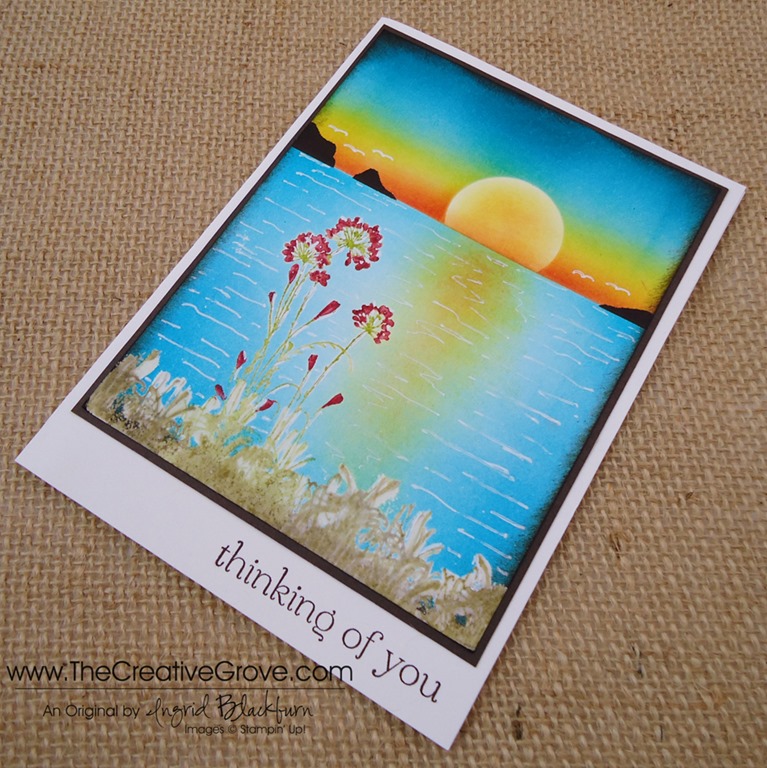
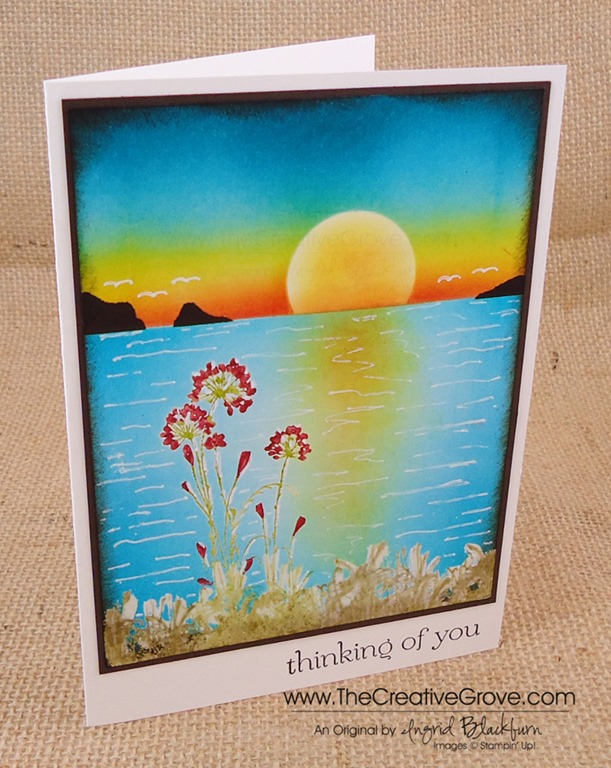
As I sat in front of my blank piece of 5.5” x 4.25” Whisper White paper, I thought of my Dad. I grew up in San Francisco and we had a view of the Pacific Ocean from my house. I’m lucky, I’ve seen my fair share of amazing sunsets over Ocean Beach. And on a good day, you can even see the Farallon Islands in the distance. My dad used to always tell us stories about the firemen who would dive for abalone there in the shark infested waters. This card is paying homage to my roots back home in San Francisco, California. The grass in the sand dunes, gorgeous blue waters, an amazing sunset and sea gulls flying around with islands in the distance. Here’s to you Dad, I miss seeing you more often, I’m thinking of you and hope your day is filled with beauty like this!
Creative Tips –
- I started out by stamping my main image in Versamark and then coloring it with all retiring colors – Lucky Limeade, River Rock and Riding Hood Red with Classic Ink Pads and Stampin’ Write Markers. (They’ll be gone for good on June 3rd – if even available still)
- I then embossed my image in Crystal Clear Embossing Powder.
- I repeated the grass portion of the same stamp set several times along the bottom.

- Once my stamped images were cooled and set, I masked my horizon and began to brayer my ocean in Bashful Blue. I went across in a horizontal motion and then focused from the left and then the right in a vertical motion, leaving my middle a bit white.
- I went over it with Tempting Turquoise to brighten it up a bit and then focused on the horizon line both with my brayer and a sponge.
- I switched my mask and placed a sun on my paper under my mask in the area where the sun sinks into the water.
- I brayered the top 2/3 of my sky, in this order, with Bashful Blue, Tempting Turquoise and hit the very top with Island Indigo.
- I layered Daffodil Delight next with my brayer from the horizon to the blue to create a little pop of yellow. Where it met the Bashful Blue it created that pop of green that you get.

- I intensified my color with a Daffodil Delight sponge in a circular motion.
- I added a hint of Tangerine Tango first with a brayer and then with a little sponging from the horizon.
- My final color is Riding Hood Red just at the horizon line to add a little drama and intense orange color right at the horizon.
- I removed all my mask and sponged a little color into my sun with Daffodil Delight and then just a hint of Tangerine Tango.
- I lightly sponged some Daffodil Delight in the water where I left the white area. I didn’t over do this as I didn’t want it to turn green from the Bashful Blue. If you don’t leave enough whitish space, you will get too much green – remember yellow and blue make green. I followed up with a hint of Tangerine Tango.

- I created a mask of two islands and sponged them in using Early Espresso.
- For my finishing touch, I used a White Gel Pen to create my seagulls & water ripples . Finally, I used Early Espresso and a sponge to frame my card.


I hope you love this card as much as I do. I just love sunsets, who doesn’t! We’ve had some amazing ones here in Florida this week, maybe I just have them on the brain! I hope your evening is filled with beauty today. I’d love to hear from you – let me know if you whip out your brayer and give some creative scenery a try!
Hands on Creative Scenery Classes
If you’re in the Orlando area on June 21st, I will be teaching Creative Scenery 101! For more information on this fun class click here. If you would like me to come to you directly, contact me – I’m up for traveling to teach these classes! Be sure to check back here for the online version of this class later this month as well. ![]()
To Shop 24/7 in the Creative Store – Click here!

Stamp Sets – Serene Silhouettes (127324c, 132073w), Sweet Essentials (126455w, 126457c) Ink – Versamark (102283), Tempting Turquoise (126952), Island Indigo (126986), River Rock (126977), Daffodil Delight (126944), Tangerine Tango (126946), Riding Hood Red (126968), Red Riding Hood Marker (119701 – Regals Marker Collection) Paper – Whisper White (100730), Early Espresso (119686) Cool Tools – Stamping Sponges (101610), Brayer (102395), Blender Pen (102845), VersaMarker (retired), Clear Embossing Powder (109130), Heat Tool (129053), 1” Circle Punch (119868) Finishing Touch – White Gel Pen (105021)