Christmas Sugar Cookies Card

Nothing is better than good Christmas Sugar Cookies, right? I have a quick and simple treat for you this evening. It’s the live public release of the new Catherine Pooler Home for the Holidays Stamp of Approval Collection! This fun collection of stamps, dies and brand new exclusive embossing glitters is a dream to create with. I’ve been having fun all week showing you how to create wreaths for your custom doors, mass producing my take on the classic nordic sweater turned Christmas tree cards, and I thought tonight we’d tackle the holiday sweet tooth!

Home for the Holidays Stamp of APproval

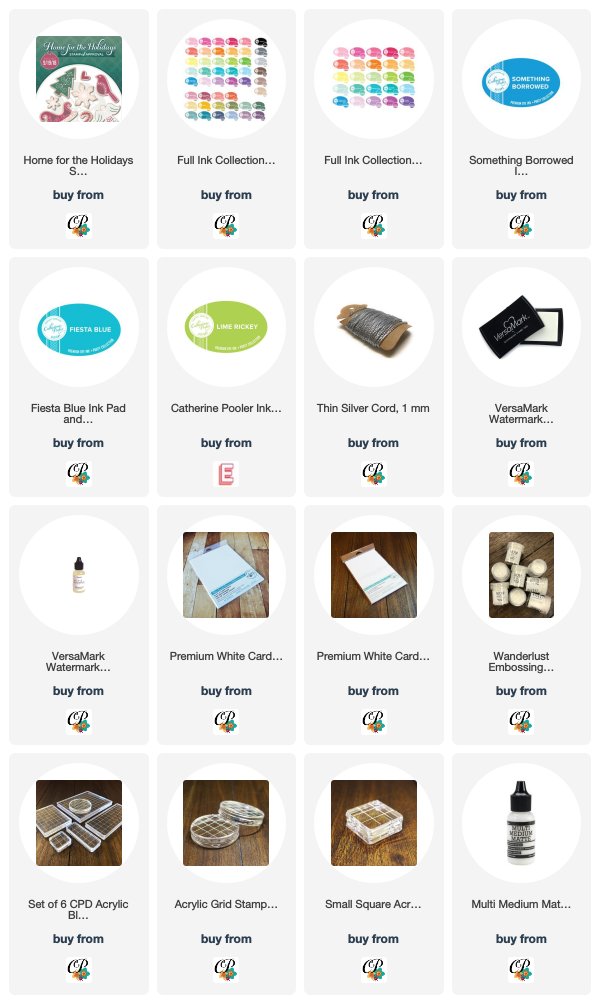
This release has 10 products in it (5 Stamp Sets, 2 Dies, and 3 Embossing Glitters):

In addition to the release, there are a few new products being released as well – including a brand new “colossal” sized block – you probably saw me use it in my video on this post here – it’s the lightest weight block of its size I’ve used yet!

If you aren’t familiar with Stamp of Approval, it’s a curated collection of stamps and dies that work so well together. It’s perfect to help take the guess work out of your holiday cards. These boxes always sell out, and they are going fast, so don’t miss it! To grab one, just go directly to the Shop Here.

Christmas Sugar Cookies Tutorial

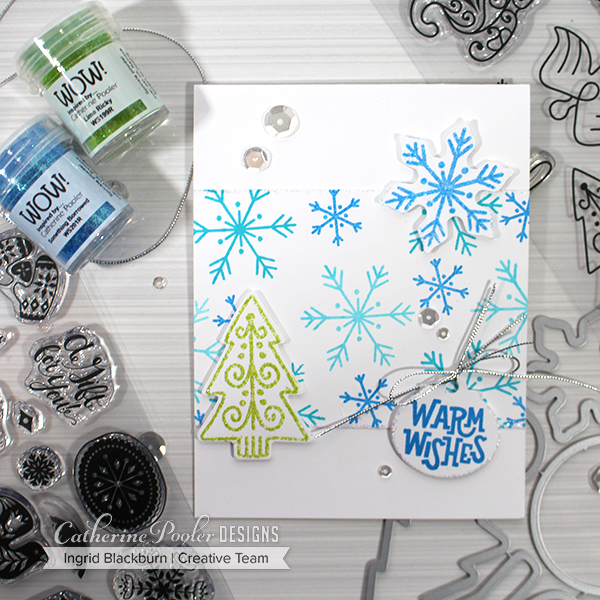
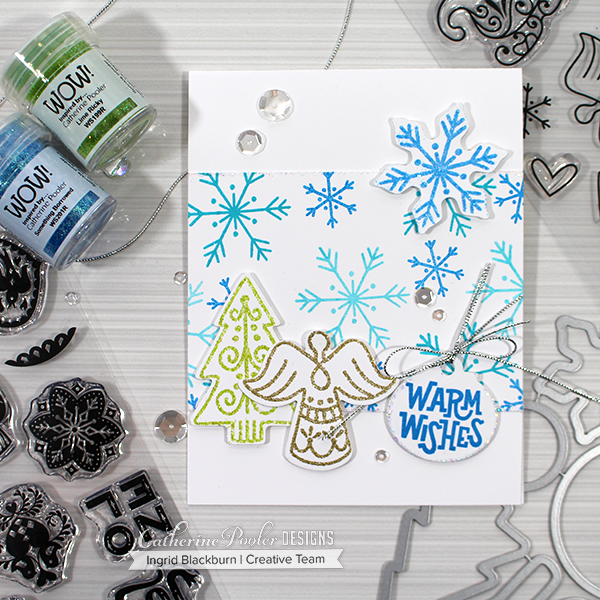
So here’s some fun sugary inspiration for you. This project showcases the Sugar Cookie Dies and Christmas Cookies Stamp Set. The sentiment is from the nordic folk art themed Tiny Wishes Stamp Set using the new Tiny Tags Dies. There’s even a little of the new Thin Silver Cord on there!

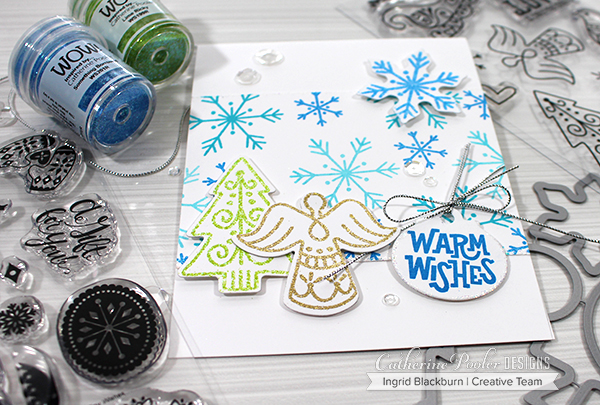
I have similar cards here – you’ll have to tell me which one you prefer – withor without the Angel? I love angels…but it was messing with my need to have odd numbers of elements on my cards. I literally could not decide, so I’m leaving it up to you!!!

TCG Giveaway – Leave me a comment below and I’ll choose three people randomly to send a Christmas Card to this season!! (I did make 12 the other day for the video hop….) 😉 I’ll announce the winners this weekend!

Christmas Sugar Cookie Card #1

Christmas Sugar Cookies Card by Ingrid Blackburn

Christmas Sugar Cookie Card #2

Christmas Sugar Cookies Card

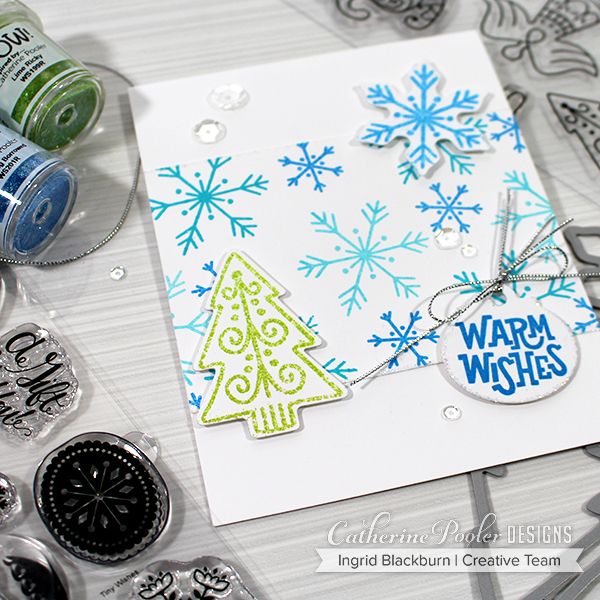
To have some fun with the sugar cookie theme, The large snowflake die is embossed in the new exclusive Something Borrowed Embossing Glitter – what? Yup you read that right – embossing powder in Catherine’s colors – just in time for the holiday season! The Tree is in Lime Rickey Embossing Glitter – my favorite Party Line Green ink, what’s yours? Tell me in the comments below!!

Only one missing is Rockin’ Red, I know I probably should have snuck a peek of it – it’s awesome!

Christmas Sugar Cookies Card

I’m not a big straight glitter fan, but Embossing Glitters I can do! Why you may ask…well, they stick to the paper and don’t rub off! I swear, every time I use glitter, I wear it for days (hubby too), what about you? Do you have that same problem? For the Angel, I used Wow Metallic Sparkle Embossing Glitter and around the Circle Tag, some of Catherine’s exclusive Wanderlust Embossing Glitter – literally the BEST (hands down) sparkly clear glitter. See it in this photo?

Christmas Sugar Cookies Card

I hope you loved these cards. They are pretty straight forward. Stamp the two snowflakes in three colors – It’s a boy, Fiesta Blue and Something Borrowed. Stamp your dies in Versamark or WOW embossing ink and heat set with your desired embossing glitters. The warm wishes was stamped in Something Borrowed. The snowflake panel is also edged with Versamark and embossed in Wanderlust Embossing Glitter.  Tie a little Thin Silver Cord and you’re all set! I popped the dies up on a little foam tape and it’s a simple, cost effective card. VERY easy to mass produce.

Catherine Pooler Stamp of APproval

Thanks for joining me this week. There are still prizes up for grabs in the three hops – don’t miss out!! Here are the three hops, be sure you like, comment and subscribe all along the hops! There are three ways to win 7 prizes. You can always start on Catherine’s channels too.

  • Instagram Hop – 3 $25 gift certificates as Prizes
  • Blog Hop – 3 $25 gift certificates as Prizes
  • Video Hop – Stamp of Approval Collection as a Prize

You have through Thursday 9/20 to enter, winners will be announced on Catherine’s blog on Monday 9/24.

Have a great night!


Supplies

To make finding the supplies I used in these projects a bit easier for you, here are a few clickable links. Compensated Affiliate Links are used when possible. Click here for disclosure. Happy Shopping!


Adoring You SOA Collection – Blog Hop + Giveaway

Welcome to the Adoring You Blog Hop – isn’t a Stamp of Approval collection a great way to kick off the new 2019 year?!! And you’re in for a treat – this collection has some incredible products. Let’s dive right in…

Hopefully you’ve been hopping along the blog hop – if this is your first stop, you have some incredibly talented stampers that will knock your socks off today! If I’m your last stop, I hope you love my take on one layout – two cards.

I’ve been in Europe traveling (and doing a little work) for several weeks now. This collection comes to my mind everywhere I look. I got some real inspiration for my projects over the next several days.

Since I’m traveling – I was limited to how much I could bring with me – so I’m doing everything with just the Life of the Party, Foundations, Midnight, Icing on the Cake, Twilight and Black Jack! That was a challenge for me – I’m so used to having my spa collection, but those were the minis I had – so off we went!

Adoring You Stamp of Approval

Stamp of Approval is a curated box put together by Catherine Pooler. It has stamps/dies and even sometimes stencils and ink in it! The products work effortlessly together, and this box is no exception. SOA is sold while supplies last, and I wouldn’t be surprised if this one sold out.

StampNation members will get to order first (perk of being a member) the night before. They also get a special kick off party live with Catherine and the CPD staff from the clubhouse. Then the next morning at 9 am, if anything is left – the waitlist will get a secret link to shop! It’s free to be on the waitlist – if you’re not on it – what are you waiting for?

The remaining boxes and add-ons will go live to the public at 6 pm on Wednesday January 9th. Seriously – at least get on the waitlist – have I mentioned that it’s free?

Here’s what’s in the collection:

Add Ons:

The Key – One Layout, Two Ways

I’m gonna play a little with a stamp set that literally stopped me in my place the first time I saw it – The Key. If you’ve followed me on social media or my travels over the years – you know that I LOVE to take photos of doors, locks and interesting textures. Over here in Europe, there are SO many interesting doors, locks and each one feels like it has an amazing story to tell.

The basic design for the cards today was to feature a long tall card front 3 1/2 inch wide. Use those amazing locks and keys in fun ways – both in the foreground and background. Plus don’t you just want to pop some of these incredible locks up? Here are two different looks:

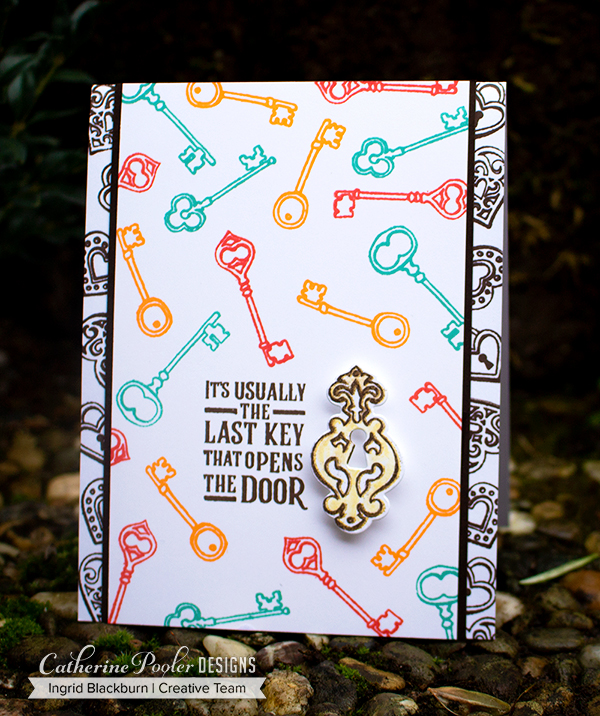
The Last Key – Project No. 1

The Key Stamp Set - Adoring You SOA

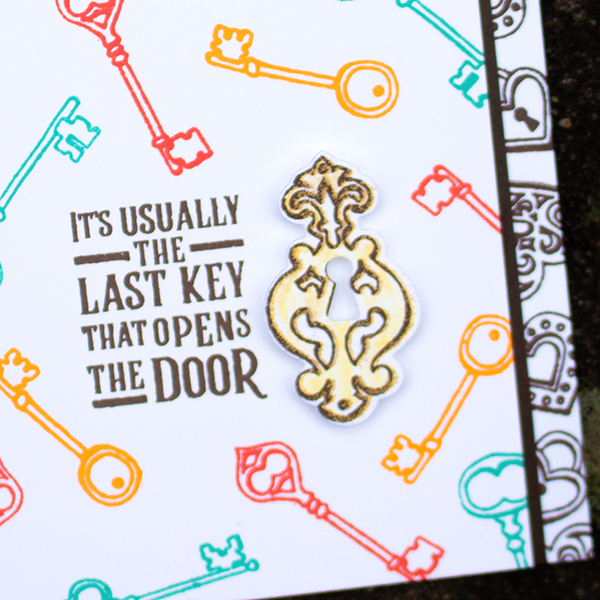
A good color palette is always key to a great project (do you like that play on the stamp set name…lol?!!). When you need something eyecatching that will work for men and women, try the combo – Tutti Fruitti, Tiki Torch, Aquatini and Icing on the Cake. I wanted a warm golden look to the lock, so I used Tiara and a Zig Blender to color it in.

Don’t you just love the sentiments in this set – Love is the Key to Happily Ever After, If it doesn’t open, It’s not your door? And that’s just two! There are four.

The Key Stamp set - Adoring You SOA

The locks are absolutely stunning. Such detail, character and charm. This card has all the heart locks in the background, the four keys on the card front and the next features the remainder of the locks.

You’ll want the coordinating The Key Dies set too – look how perfectly those locks are cut out on the inside!!

Simple thin Matte in Chocolate cardstock is the perfect accent. You don’t need much!

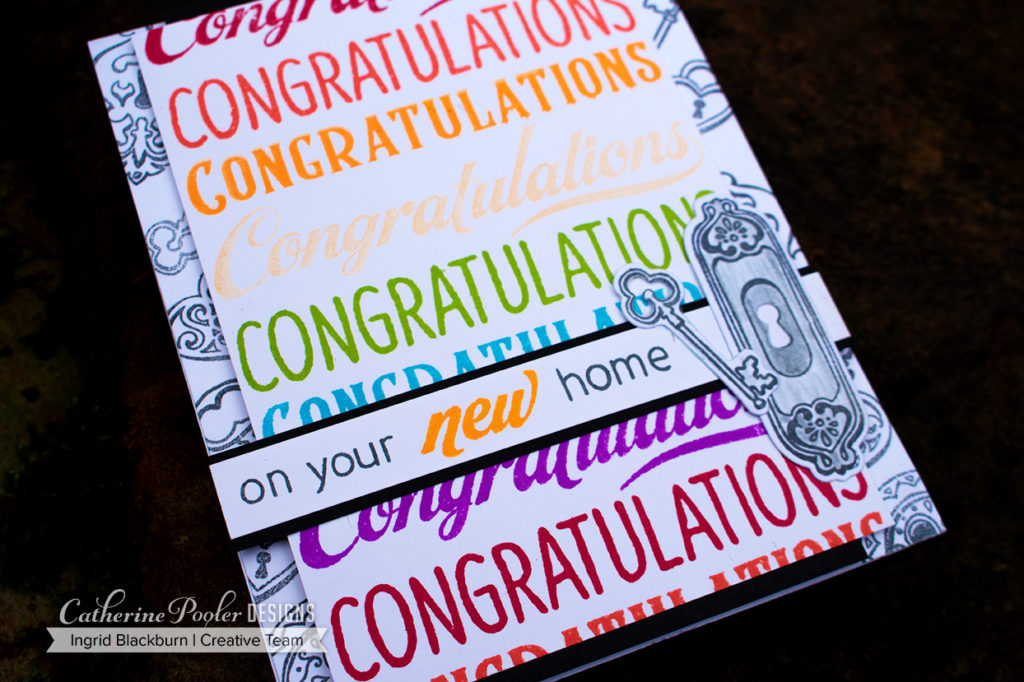
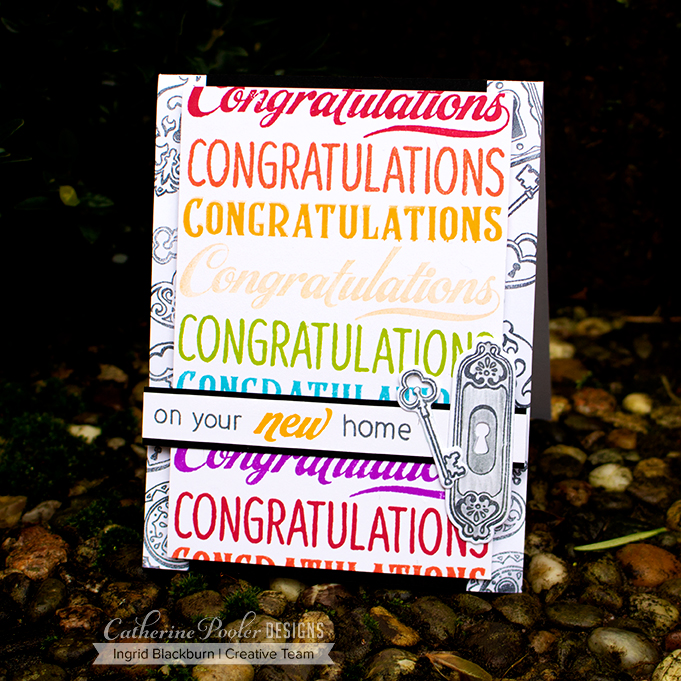
Congratulations Lock & Key – No 2

In addition to the gorgeous curves of all those locks and keys, this collection boasts an incredible Congratulations Sentiments Stamp Set. This set not only has many options on how to congratulate someone, but some very cool little pieces. And if you love the little tile pieces, definitely check out their larger die form – Backsplash Dies. I have a cool project with those in the coming days…

Congratulations Sentiments Stamp Set - Adoring You SOA

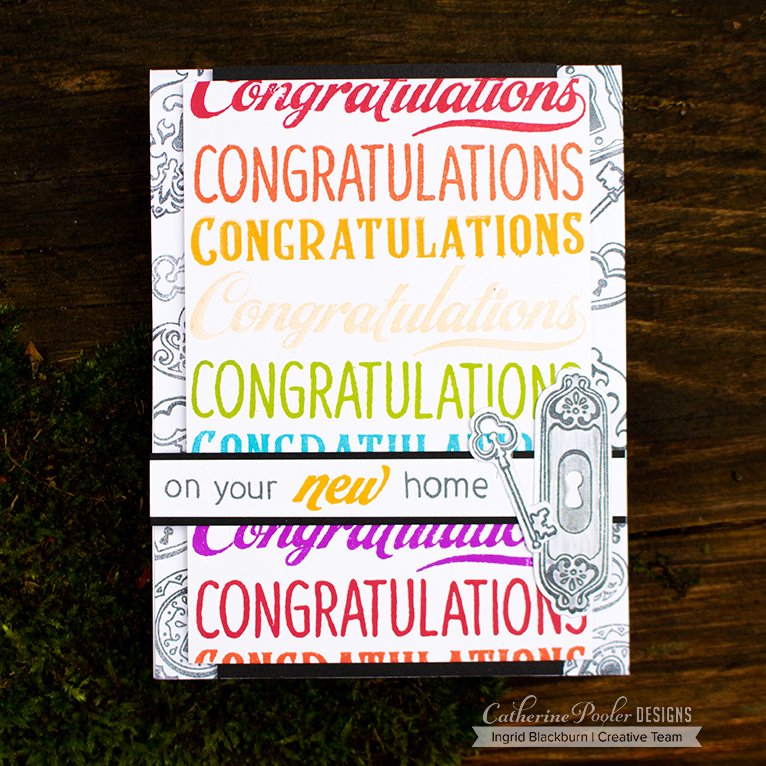
So, as you can see – the basic design of this card is the same, just with a slight little twist! Instead of the card front running the length of the card, shorten it by a quarter of an inch and pop a smaller matte behind it only 3 1/8″ wide. That little gap at the edges adds a fun little look to a traditionally matted piece.

For a fun rainbow look, stamp the three Congratulations Sentiments in rainbow order using the Life of the Party and Foundations ink collections. It’s a fun card, right? Perfect for someone just moving into a new home – or other occasion.

Pop up your matte and add a lock/key done the same way as the first card – only use BlackJack/Twilight and a Zig Blender pen. I love to stamp with Black Jack instead of black. It’s slightly softer and doesn’t overpower the card.

What did you think? I’m totally curious – do you too take photos of locks and doors when you’re traveling? Tell me in the comments below!!

I have to say it was fun to keep my color palette for this release simple. When you are used to using the entire CPD rainbow, you get used to the colors that are your go to colors. I enjoyed picking up colors I don’t normally reach for again. I challenge you to try something similar.

Now it’s your turn. Leave a comment on ALL the blogs in the hop to be entered in for a prize. Hey, it’s a new year – you never know!! And stay tuned to my Instagram channel and come back to the blog in a few days – I have more to share! Below you’ll find the full hop list and product list.

Till then – keep those fingers inky –

Counting Blessings SOA Blog Hop

Welcome to the Counting Blessings Day 3 Blog Hop! Today I have a treat for you – three projects…so let’s dive right in!

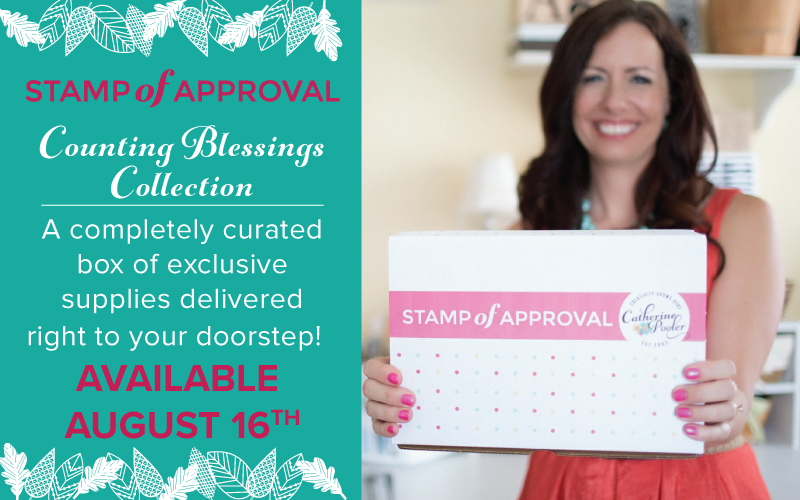
If you are new to Stamp of Approval, Catherine curates a box of stamps/dies/stencils that can be used together for endless hours of fun. This box has a fall theme to it, but I’ll be honest with you – you’ll be able to use the Counting Blessings collection all year long. I’ve seen so many projects in the first two blog hop days that prove that point!

The last collection sold out in just 15 hours, so if you love what you see – do not wait. Make sure you are on the wait list – as you’ll get the chance to grab a collection before anyone else!

The Counting Blessings collection has:

  • Four Stamp Sets
  • Three Dies
  • Two Stencils
  • A free NEW block – seriously – they are my all time favorites (you’ll LOVE the weight, design and feel)
  • A special SURPRISE
  • A Free PDF packed with project ideas ($15 value!)

Be sure to leave comments along the way to get a chance to enter into the drawing for a free Counting Blessings collection yourself.

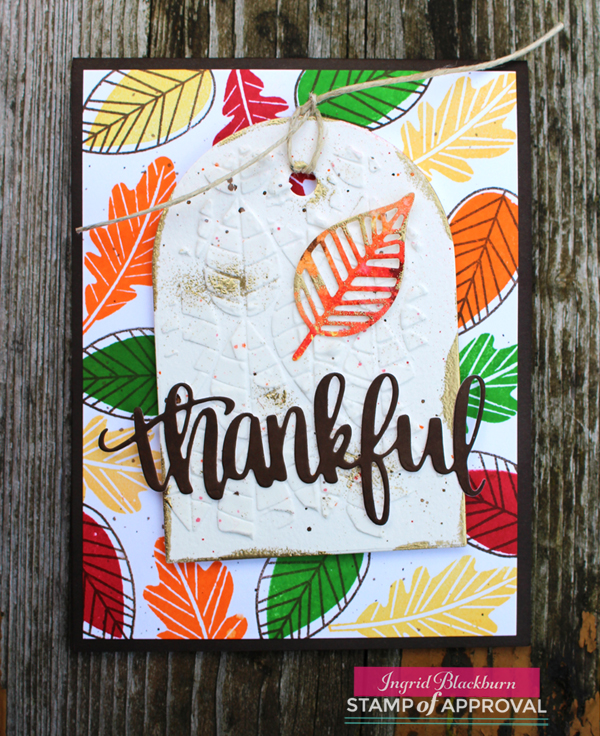
Our first project is a classic take on Fall Foliage. I lived in New York for seven years, and the fall foliage was by far my favorite time of year. I still dream of all those vibrant colors – well, Catherine Pooler Designs Ink is perfect to showcase that! Um, hello Rockin’ Red, Grass Skirt, Tiara, Orange Twist and the new Icing on the Cake!!! You’ll find detailed instructions on this one in the free project packed PDF with the Counting Blessings Collection.

Counting Blessings Stamp of Approval card by Ingrid Blackburn

That background was created with the Leaf Motif stamp set. On the tag – I used a little Whipped Spackle for some texture with the Marching Leaves Stencil on the cool tag using the Tags, Etc. Dies. The fall colored leaf die is one of the two from the Fallen Leaves Dies and how about that Thankful die? I LOVE that hand lettered script by designer and artist Shawna Clingerman. And if you love that one – just wait till you see the next project.

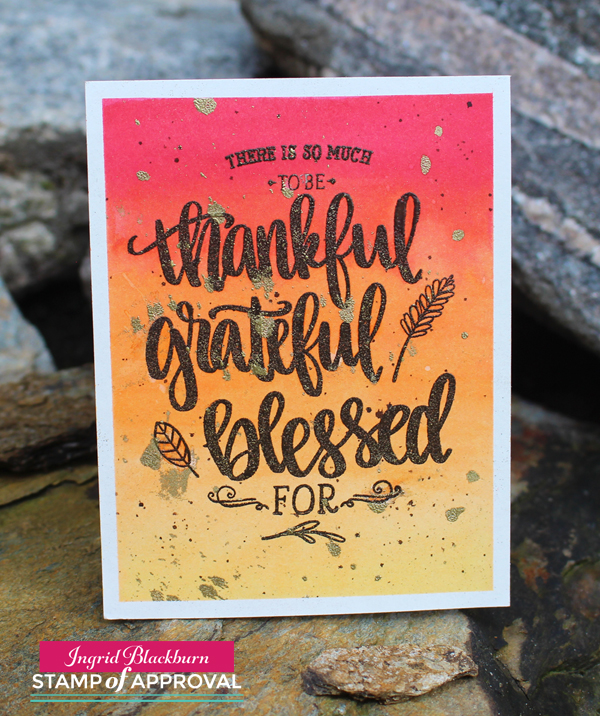
The Autumn Blessings stamp set is beyond fall perfection to me. You’ll get three gorgeous hand lettered sentiments that work for any occasion. Catherine does such an amazing job at making sure there are lots of little extra pieces to really stretch your creativity – that’s one of the reasons I love her projects SO much. It’s the little things that make all the difference.

In this set you’ll find awesome little stamps that give you so much more to just a sentiment set. And how awesome is it that Bless – has two options for endings – LOVE that!

My Personal Favorite – The sentiment add ons in this set that I love the most are the three individual words – You Are Home. How great for military, loved ones, those recovering from a hospital stay, etc… I just love that this set reaches so many more options for card making than just fall and thanksgiving.

Gradient Watercolor Wash by Ingrid Blackburn

Stretch one of the sentiments from the Good Things stamp set by just using the top and bottom of it along with the three main sentiments in the Autumn Blessings set – don’t they just work together flawlessly! Notice all the little bits added – the wheat, leaf and little spray do hickey at the very bottom – don’t you just love my official name for that one. If you know the official name for that one – seriously…tell me in the comments!

A quick little watercolor wash, some flicking and then embossing with water and you’re all set. If you want to learn how to do ALL those techniques – check out StampNation. The library of tutorials there is insane – over 700 to date!

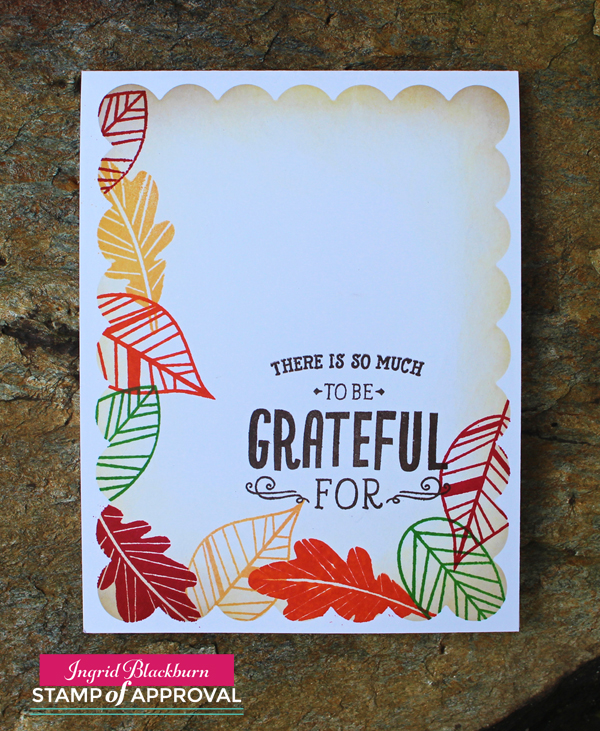
The sentiment in this next project may look familiar – do you recognize the top and bottom from the one above? Pair that up with a simple masked window using the Tags, Etc. Dies set – I LOVE that giant scalloped die – don’t forget to use it as a stencil like here! Stamp the leaves from the Leaf Motif stamp set in those amazing colors using Catherine Pooler inks and you’re all set! A simple one layer card that has amazing interest to it.

Counting Blessings SOA - One Layer by Ingrid Blackburn

Not bad right? Be sure to stop by tomorrow for more – it’s Release Day! Yay! Of course if you are a StampNation member – you can hang with us live in the Pajama Party Release tonight and get your box before everyone on the wait list! Membership has its perks!

Counting Blessings Stamp of Approval

Now hop on along to Kimberly Wiener’s Blog and then everyone else on the Blog Hop today. Leave a comment along with way to be entered in for a free Counting Blessings collection!! And check out Day 1 and 2 as well.

1. Catherine
2. Taheerah 
3. Lydia Evans
4. Ingrid Blackburn – You are Here
5. Kimberly Wiener – Hop here Next!
6. Jill

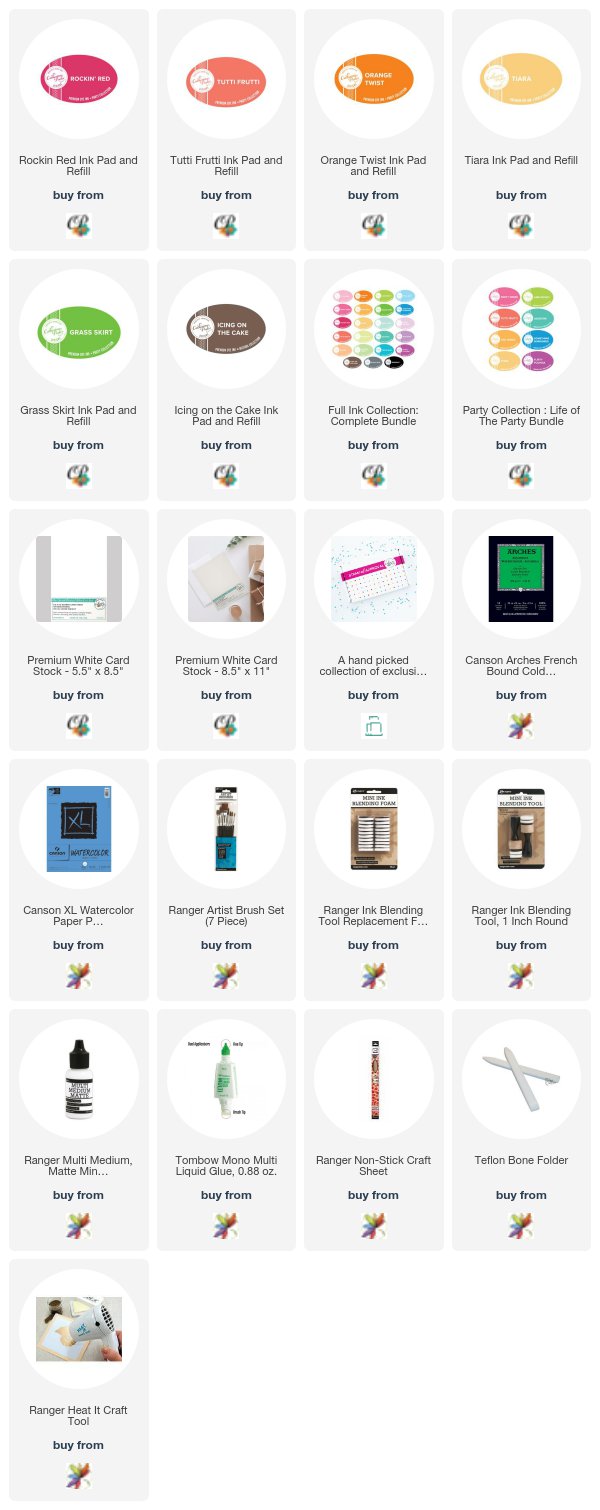
Supplies: To make finding the supplies I used in these projects a bit easier for you, here are a few clickable links. Compensated Affiliate Links are used when possible. Click here for disclosure. Happy Shopping!

The Perfect Christmas Tree

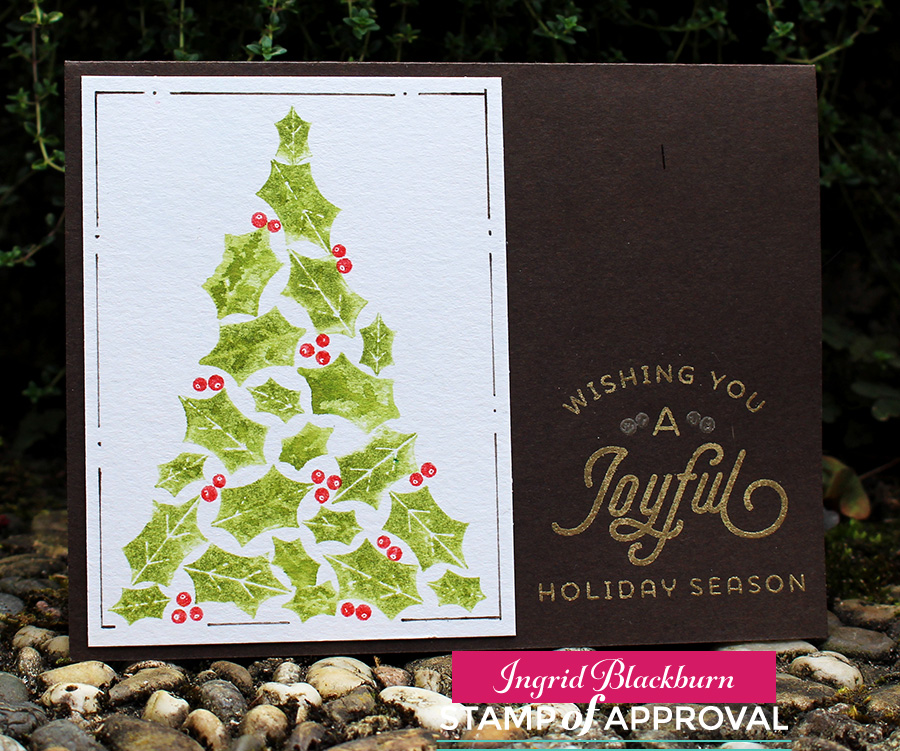
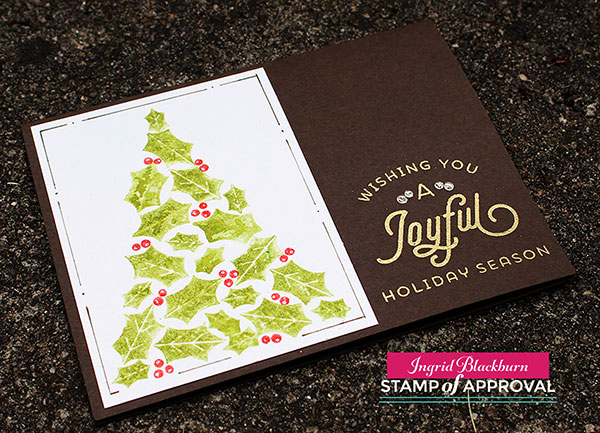
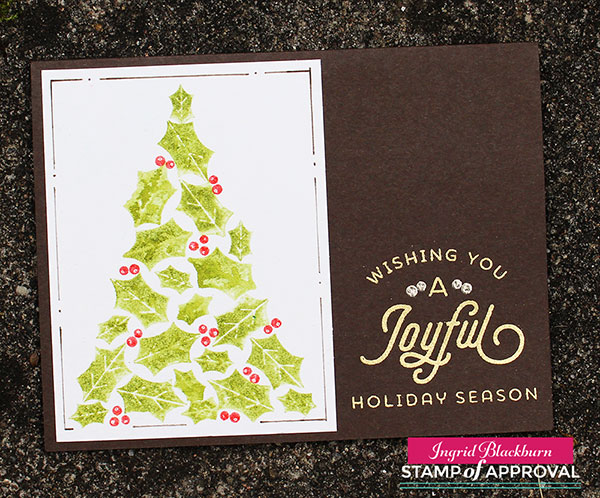
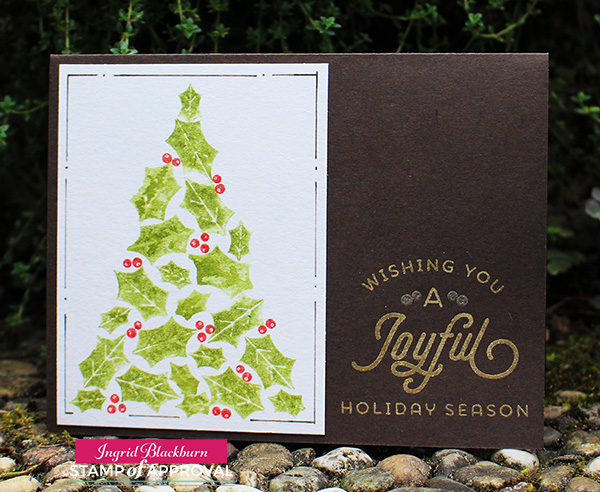
Are you always on the lookout for the perfect Christmas Tree? I am always striving for the perfect Christmas tree on my cards, and I think I’ve finally found it. After all, what’s more Christmas than a tree made of holly leaves and berries?

Today the Stamp of Approval Candy Cane Lane Collection is available to the public (while supplies last). We had three days of blog hops, and many of my fellow dream team members have been posting projects all week long. Click HERE to check mine out from a few days ago. I’ll have links to all three below.

Today everyone – including the guest designers all have another project on their blogs – so be sure to stop by all 16 blogs for more ideas! There was some serious inspiration going on, wasn’t there?

The perfect Christmas Tree - Ingrid Blackburn

Here’s a tutorial for a card that works for anyone – male or female. One of my favorite parts is the two toned embossing in the greeting.

Be sure to click the link to watch it on YouTube in High Definition. And be sure to subscribe to my YouTube channel so you see more in the future!

The Perfect Christmas Tree Video Tutorial

Click HERE to view in HD on YouTube

To get this look, use the watercolor stamping technique. But for a slight difference, I used Distress stain rather than ink pads – at least for the leaves. The result is so cool, the photos and video just don’t do it justice. Because every leaf has its own nuances, it looks like you hand painted it – and that’s really something for a stamped image!

Watercolor Stamping the perfect Christmas tree

The greetings are from the Merry & Bright Boughs stamp set, but for an added little something, use the double holly berries to give it an added touch with pewter embossing powder. That’s a great combination with the gilded gold.

As much as you want to add sequins and something else to complete the card – with a real watercolor, I encourage you to refrain. Allow the watercolor to shine. But the project did need something – that’s where the simple border of dots and lines comes in. It adds to it without taking away from it.

holly-tree-watercolor-ingrid-blackburn-003

I hope you love this one as much as I do. Have you tried watercolor stamping before? I think over the past week you can see I LOVE the technique. Let me know in the comments if you’ve tried it!

DIY Christmas Cards - Ingrid Blackburn

And if you missed my other two videos and four projects, here are some links for you to catch up:

CAS Peppermint Bark Watercolor            Peek-a-Boo & Christmas in a Box          Masculine Christmas Cards

Stamp of Approval - Catherine Pooler

And if you missed all the inspiration, go through all the Blog Hops for some great ideas. Each day features new designers and starts on Catherine’s Blog:

Blog Hop – Day One          Blog Hop – Day Two          Blog Hop – Day Three

Have a great time checking out all the other blogs for creative inspiration. It’s time now for you to get your fingers inky!

Signature

[optin_box style=”12″ alignment=”center” email_field=”email” email_default=”Enter your email address” integration_type=”aweber” double_optin=”Y” list=”3846012″ name_field=”name” name_default=”Enter your first name” name_required=”Y” opm_packages=””][optin_box_field name=”headline”]Learn more with our exclusive FREE video series:[/optin_box_field][optin_box_field name=”paragraph”]PHA+UGx1cyB5b3XigJlsbCBiZSBhZGRlZCB0byBteSBGUkVFIENyZWF0aXZlIFRpcHMgRS1sZXR0ZXIgd2hlcmUgSSBzaGFyZSBleGNsdXNpdmUgcHJvamVjdHMsIHZpZGVvcyAmYW1wOyB0aGUgPHN0cm9uZz4xMiBEYXlzIG9mIENocmlzdG1hczwvc3Ryb25nPiBQcm9qZWN0IFNlcmllczwvcD4K[/optin_box_field][optin_box_field name=”privacy”][/optin_box_field][optin_box_field name=”top_color”]undefined[/optin_box_field][optin_box_button type=”0″ button_below=”Y”]Get Instant Access![/optin_box_button] [/optin_box]


Candy Cane Lane Blog Hop

ccl_bloghop

Candy Cane Lane – Isn’t that name just the best? I loved it the moment I heard the name….I knew cute, versatile stamps were headed my way, and I was right. I seriously sketched project after project when I saw the Candy Cane Lane collection. Many of which I’ve already turned into projects for this release already!

Catherine and her team of designers created stamps & dies that not only work well together just for this collection – but work fabulously with previous Stamp of Approval releases. That’s what I love so much about these collections – they work together. This box was curated to work for you – and let’s be honest – you know I’m about versatility, and that’s what I get each time.

To find out more about Stamp of Approval and how to be the first to get it when it launches on September 21st – you need to be on the waitlist – that way you’ll get an email the moment it’s live! If you’re not already… Click Here to get on the waitlist right now! Otherwise you’ll have to wait till the public sees it the day after – if there are any left!

candy-cane-lane-collection

Today marks the third day of blog hops – and I’m the caboose – yup…the 19th designer with projects for you!!! So if you missed any of the inspiration – I have links to everything at the end.

I’ve already shared a great quick & easy artsy video tutorial with you a few days ago…here is some more Candy Cane Lane goodness to get those creative juices flowing!
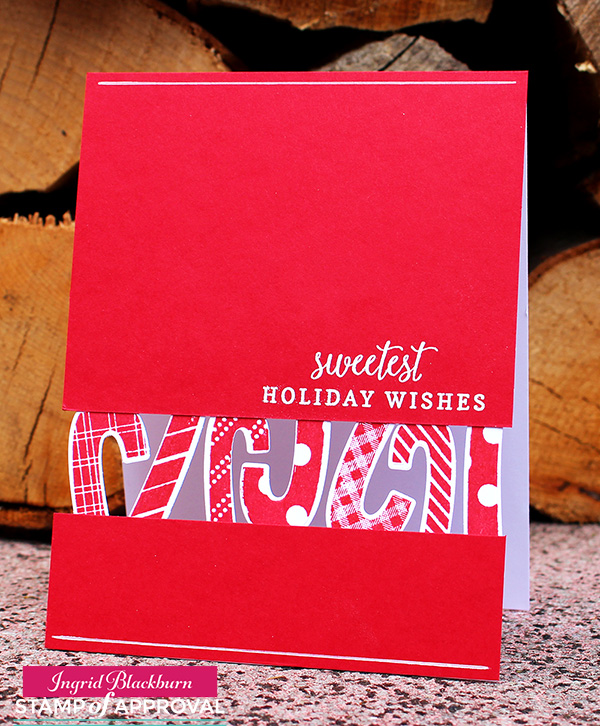
Project One – Peek-a-Boo Candy Canes

I love cards that take me by surprise. This was one of my earlier sketches and seeing it come to life was just oh so cool.

Candy Cane Lane - Peek-a-boo card - Ingrid Blackburn

You’ll have so much fun putting it together – but don’t stop at Candy Canes…think Trees, snowflakes, That cool Stag, Flowers, anything will work. Best part – it’s super easy to create. I even filmed it for you so that you could see how I put this fun project together. And if you haven’t already – be sure to subscribe to my YouTube channel when you’re there! 🙂

Click Here to view video on YouTube in HD

How fun is that? You’ll love it because it’s simple, different and absolutely mass producible! Which let’s be honest is just what I’m looking for every year. I don’t make all the same cards – but I love to do little batches (10-20) – especially of cards I love.

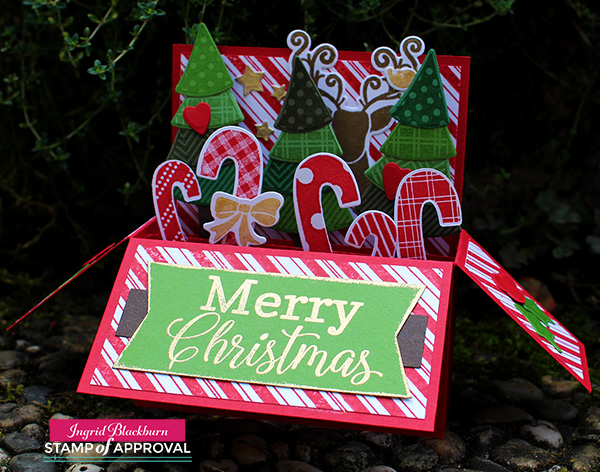
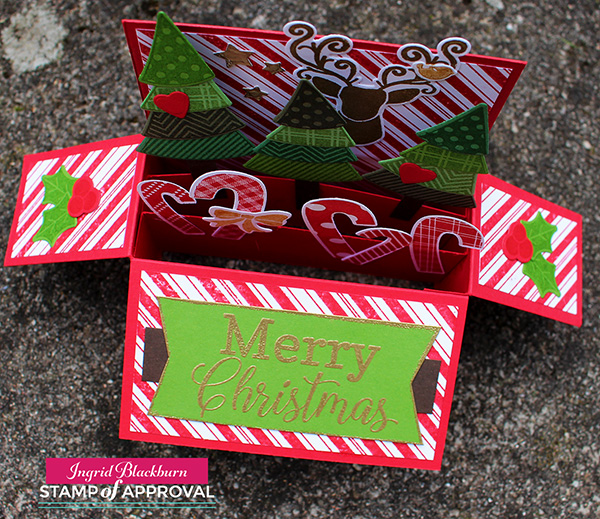
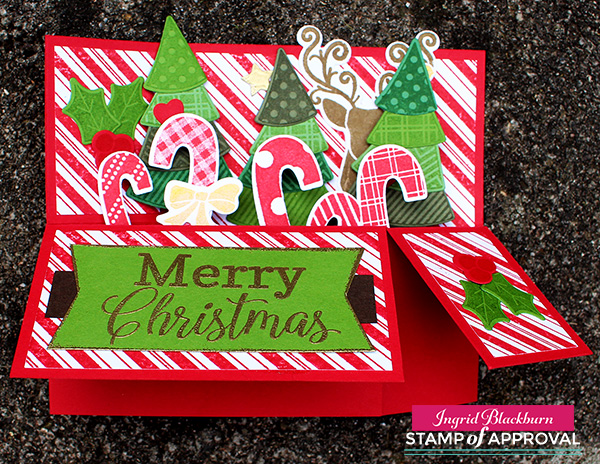
Project Two  – Hip Candy Cane Card in a Box

Have you ever made one of these? They were all the rage in card making a few years ago. I’ve always wanted to try one, and when I saw all these super cute Christmas images with matching dies in the Candy Cane Lane & Hip Holiday Stamp sets….I knew I just HAD to make one finally.

candy-cane-lane-christmas-in-a-box-ingrid-blackburn-001

candy-cane-lane-christmas-in-a-box-ingrid-blackburn-002

Isn’t it super cute? You’ll have fun putting all the pieces together. This project really showcases how well these stamp sets work together. It’s the size of a card and folds flat for mailing like this:

candy-cane-lane-christmas-in-a-box-ingrid-blackburn-003

One of my favorite features of each Stamp of Approval collection is that you also get a PDF with many projects just using the collection. That way you can get started right away with detailed instructions, photos & even a few videos too!  Both of these projects are in there – with detailed instructions, measurements and supply lists.

Now it’s time for you to check it all out – especially if you are just starting here today. Each day of the hop, Catherine is giving away one full collection – so if you haven’t commented along the way each day – be sure to do so – yup, tell me what you think! And when you’re done – check out my first project from a few days ago too.

ccl_commenttowin

Plus the day the collection goes live for the public – that’s s on the 22nd (If you’re on the Wait List – you will get a chance to get the collection the day before on the 21st)….all the designers will have more….I seriously love all this inspiration!

Here’s the full blog hop list. Just click on Catherine’s name at the top if you haven’t been there yet. Since I’m the end, we’ll just go back to the beginning!
If you missed any of the creative goodness from before, just click on the following links:

Blog Hop – Day One          Blog Hop – Day Two          Peppermint Watercolor

And if you want even more creative inspiration, be sure to sign up for my Creative Tips E-Letter for a free video series & coming up 12 Days of Christmas series. Have fun will all the great projects, and see you very soon for more!
Signature

[optin_box style=”12″ alignment=”center” email_field=”email” email_default=”Enter your email address” integration_type=”aweber” double_optin=”Y” list=”3846012″ name_field=”name” name_default=”Enter your first name” name_required=”Y” opm_packages=””][optin_box_field name=”headline”]Learn more with our exclusive FREE video series:[/optin_box_field][optin_box_field name=”paragraph”]PHA+UGx1cyB5b3XigJlsbCBiZSBhZGRlZCB0byBteSBGUkVFIENyZWF0aXZlIFRpcHMgRS1sZXR0ZXIgd2hlcmUgSSBzaGFyZSBleGNsdXNpdmUgcHJvamVjdHMsIHZpZGVvcyAmYW1wOyB0aGUgPHNwYW4gc3R5bGU9ImNvbG9yOiAjYzkxYTFhOyI+PHN0cm9uZz4xMiBEYXlzIG9mIENocmlzdG1hczwvc3Ryb25nPjwvc3Bhbj4gUHJvamVjdCBTZXJpZXM8L3A+Cg==[/optin_box_field][optin_box_field name=”privacy”][/optin_box_field][optin_box_field name=”top_color”]undefined[/optin_box_field][optin_box_button type=”0″ button_below=”Y”]Get Instant Access![/optin_box_button] [/optin_box]


Lovely Thank You

Lovely-Notes-Thank-You---Ingrid-Blackburn-003

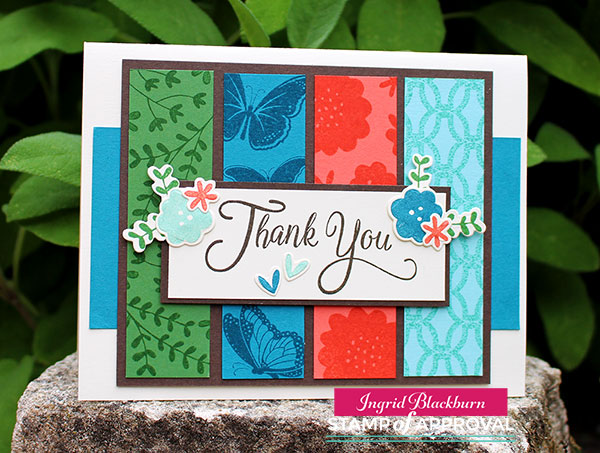
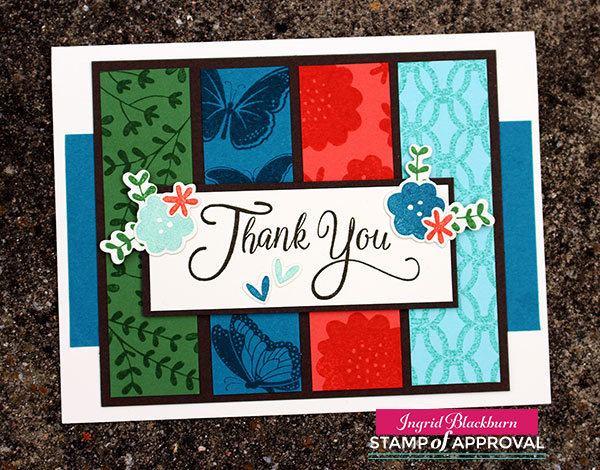
I probably make thank you cards more than any other card, how about you? I thought I’d share a fun little color blocked project with you today using the Lovely Notes Stamp of Approval Collection. This collection has been arriving all over the world and it’s about to sell out, so if you’re on the fence, don’t wait! Find out more here.

Lovely Notes SOA Now

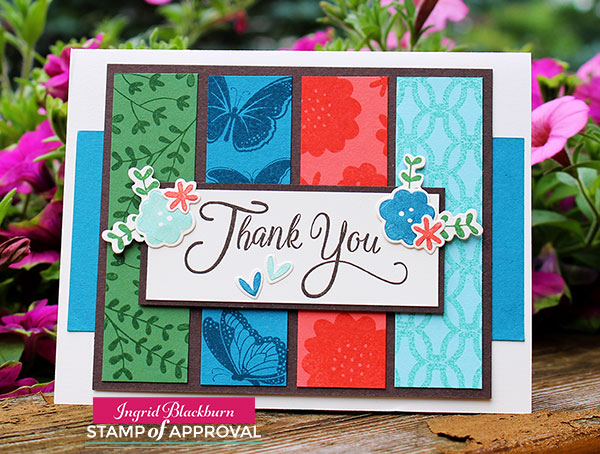
Color blocking is something I’ve been doing long before I started making cards – I get that from my scrapbooking days. But I love the look on cards. For today’s Thank You card you’ll want to use 1 inch pieces that are stamped tone on tone for a subtle but great look.

I used the Lovely Flowers, Butterfly Notes and Lovely Lattice Background stamps (Catherine Pooler Designs) from this collection for this card. Don’t they just go together perfectly! That’s what I love about the Stamp of Approval collections – the versatility. They are so well thought out – not just slapped together like other boxes or kits. You can literally interchange any of the stamp sets and they’d work together – I LOVE that!

Lovely-Notes-Thank-You---Ingrid-Blackburn-002

A simple supporting colorful panel behind my color blocked piece is a great way to finish off the card and allow you to use a smaller color blocked area if you can’t quite figure the spacing out. Love those little tricks! The key is to remember that you need the measurement to the left, right and three more times for inbetween the middle panels.

A simple Thank You greeting (Butterfly Notes) popped up and adorned with die cuts from the Lovely Flowers & Banners Dies (co-ordinating) adds the perfect finishing touch. I love this card and wanted to share it with you. So tell me in the comments – what kinds of cards do you make most?

Lovely-Notes-Thank-You---Ingrid-Blackburn-001

The Lovely Notes collection is still available – but don’t wait…it’ll be sold out soon, and then not available again until later in the fall. To find out more about the collections – visit the Stamp of Approval site here.

See you very soon – I have a few videos coming up next!

Signature

[optin_box style=”12″ alignment=”center” email_field=”email” email_default=”Enter your email address” integration_type=”aweber” double_optin=”Y” list=”3846012″ name_field=”name” name_default=”Enter your first name” name_required=”Y” opm_packages=””][optin_box_field name=”headline”]Learn more with our exclusive FREE video series:[/optin_box_field][optin_box_field name=”paragraph”]PHA+UGx1cyB5b3XigJlsbCBiZSBhZGRlZCB0byBteSBGUkVFIENyZWF0aXZlIFRpcHMgRS1sZXR0ZXIgd2hlcmUgSSBzaGFyZSBleGNsdXNpdmUgcHJvamVjdHMsIHZpZGVvcyAmYW1wOyB0aGUgMTIgRGF5cyBvZiBDaHJpc3RtYXMgUHJvamVjdCBTZXJpZXM8L3A+Cg==[/optin_box_field][optin_box_field name=”privacy”][/optin_box_field][optin_box_field name=”top_color”]undefined[/optin_box_field][optin_box_button type=”0″ button_below=”Y”]Get Instant Access![/optin_box_button] [/optin_box]


Lovely Flowers – Little Touches

Polka Dot Floral Cards

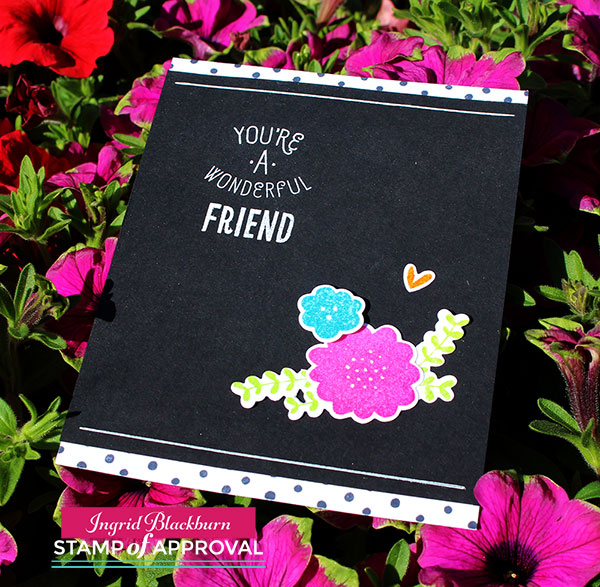
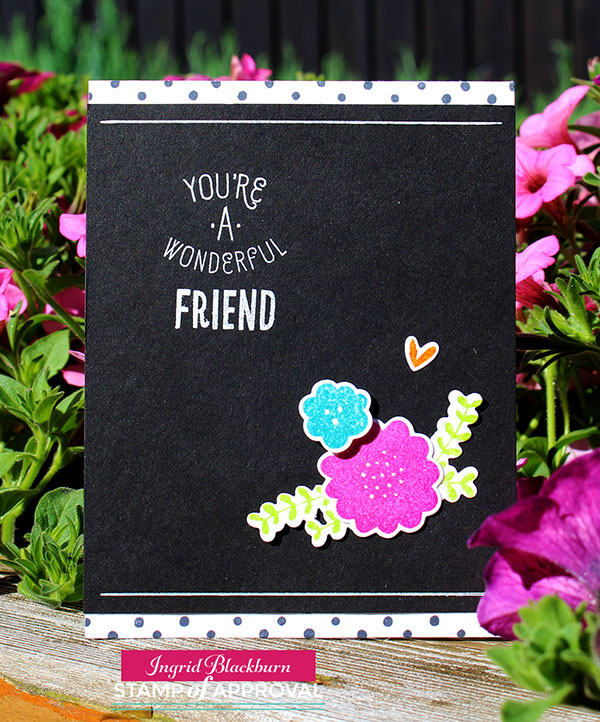
It’s the little touches in cardmaking that make the biggest statements. Today’s project is the perfect case in point. I’m in love with the Lovely Flowers stamp set and matching dies from the Stamp of Approval Lovely Notes Collection.

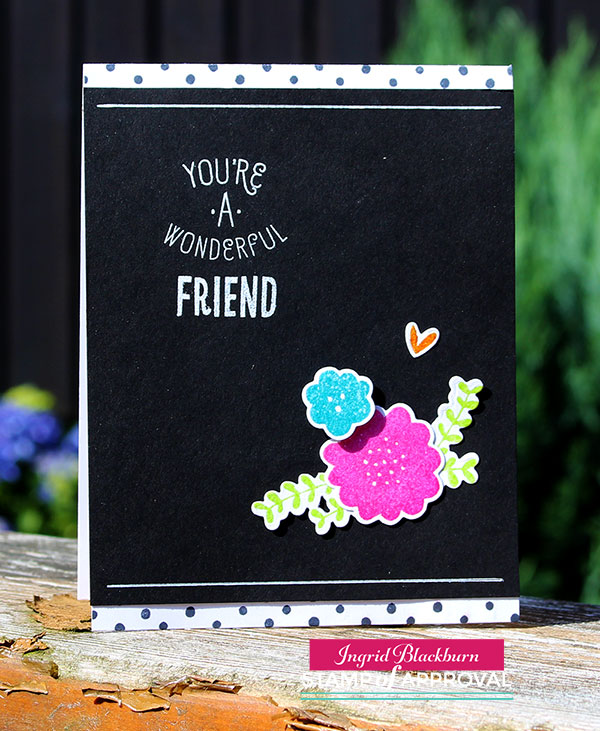
I thought it would be fun to stamp a few simple flowers in bright colors (Distress Picked Raspberry &  Mermaid Lagoon) accent them with some sprigs in Twisted Citron and a little heart in Wild Honey. I LOVE that little heart.

Lovely-Polka-Dots-004


To really make your embellishments pop – try embossing them in clear and then popping them on black like this card! A simple white greeting the opposite corner for balance is all you need.

But that alone isn’t enough. The card was falling a little flat – enter the little touches. Add some polka dots with the dotted stamp from this stamp set (see what I did with it yesterday is a video here) for the top and bottom – or just one. To finish the card off completely – I left off sequins or anything that would clutter it up, and instead try adding a simple white line to the top and bottom. All around would have been too much – remember, little touches.

Lovely-Polka-Dots-005

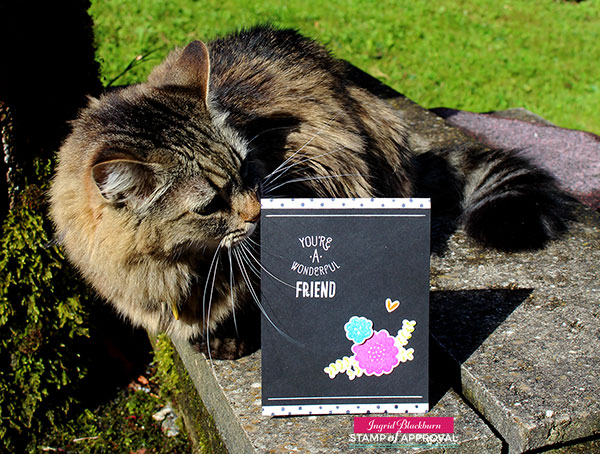
So what do you think? I think Bria likes it…lol! Here’s our gorgeous younger cat – she loves my craft studio…I find her hair everywhere! Do you have a little someone who loves your corner too?

Lovely-Polka-Dots-003

[divider style=”9″]
Lovely Notes SOA Now

If you’ve been hopping along the past few days, the winners were just announce! Head over to Catherine’s Blog to see if you won. 🙂

And if you missed the 18 designers that showcased two-three projects each…here are the links to those Blog Hop days. Have fun!

Day 1               Day 2               Day 3

SO….did you treat yourself to the current Stamp of Approval? Ordering is officially open to the public…don’t wait! It will sell out, and it’s a great collection. To find out more – check out the Stamp of Approval site here.

Those that were on the early notice wait list already are set to ship – check out all this goodness headed all over the world!

Stamp of Approval

I can’t wait to see what you all create with this amazing collection – Till next time!

Signature

[optin_box style=”12″ alignment=”center” email_field=”email” email_default=”Enter your email address” integration_type=”aweber” double_optin=”Y” list=”3846012″ name_field=”name” name_default=”Enter your first name” name_required=”Y” opm_packages=””][optin_box_field name=”headline”]Learn more with our exclusive FREE video series:[/optin_box_field][optin_box_field name=”paragraph”]PHA+UGx1cyB5b3XigJlsbCBiZSBhZGRlZCB0byBteSBGUkVFIENyZWF0aXZlIFRpcHMgRS1sZXR0ZXIgd2hlcmUgSSBzaGFyZSBleGNsdXNpdmUgcHJvamVjdHMsIHZpZGVvcyAmYW1wOyB0aGUgMTIgRGF5cyBvZiBDaHJpc3RtYXMgUHJvamVjdCBTZXJpZXM8L3A+Cg==[/optin_box_field][optin_box_field name=”privacy”][/optin_box_field][optin_box_field name=”top_color”]undefined[/optin_box_field][optin_box_button type=”0″ button_below=”Y”]Get Instant Access![/optin_box_button] [/optin_box]

Lovely Lattice Butterflies – SOA is live!

Lovely Lattice Background - Catherine Pooler Designs

I’ve been creating a lot with the kissing technique lately. I have to say, this simple technique always amazed me!  It’s been a cram packed few days of inspiration here and on the design team blogs. If you’ve missed any of the fun, I have links at the end for you.

Lovely Notes SOA Now

Today the Stamp of Approval Lovely Notes Collection goes live – yup…if you’re on the wait list you’ve received a link to head on over and grab a box. It’s the first release of these six stamp and two dies sets. You’ll also get a loaded PDF with projects and step by step instructions – how’s that for a place to start! Not on the list – no worries – get on it right here and get a head start on the public release tomorrow (if it hasn’t sold out!).

If you’ve seen any of my past three posts, you know I still have more projects for you – yup…today I even have another video! Over at StampNation, there’s a challenge going live today – Meadow Daydreams. I have to say, this challenge is made for me – I LOVE this kind of a color palette and theme. I’m actually shocked that I didn’t do a scenic card! Here’s a sneak peek into the project I created…to see it, you have to be a member of StampNation though.

Meadow-Daydreams-Sneak Peek

New Inspiration for you

So to piggy back on the challenge – I created a few cards with the same color palette, theme and then I loaded them up with techniques – after all, that’s kind of my thing, isn’t it?I have a video tutorial for you here and a written one below.And if you aren’t already – I’d love for you to subscribe to my YouTube channel too – click here.

Click Here to see the video in HD

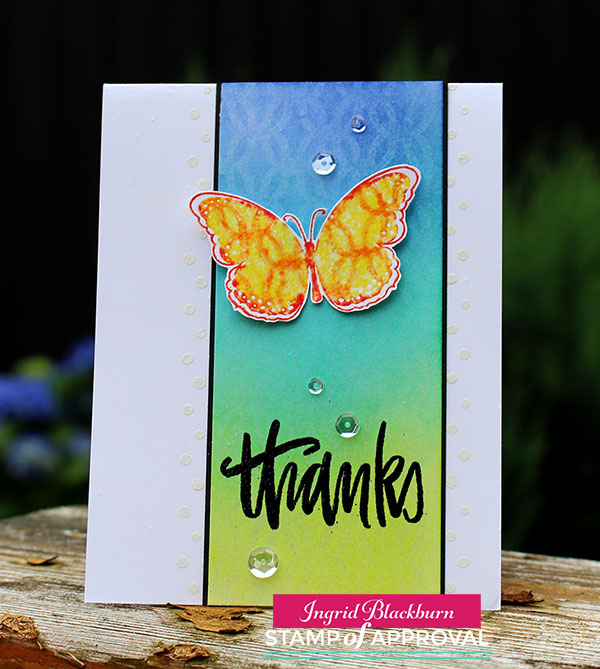
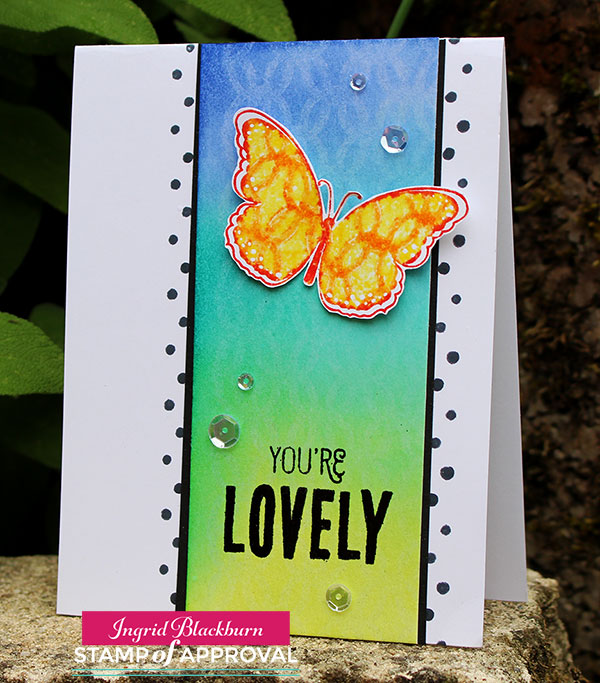
Lattice Butterfly Tutorial – the Kissing Technique + others

  • Ink up your Lovely Lattice Background stamp by Catherine Pooler Designs in Versamark
  • Transfer your image to a piece of 140# Cold Pressed Watercolor Paper (5 1/2 x 4 3/4″) & clean your stamp
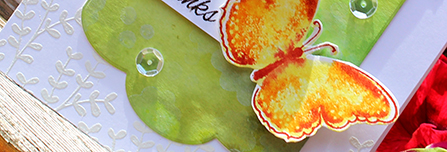
  • Sponge your colors over your image blending the colors Twisted Citron, Peacock Feathers and Blueprint Sketch

Kissing Technique - Stamp of Approval

  • Allow your Distress Ink to fully dry while working on your butterflies
  • Ink up the large butterfly from Butterfly Notes by Catherine Pooler Designs in Squeezed Lemonade & Edge in Barn Door.
  • Ink up your Lovely Lattice Background stamp in Spiced Marmalade (you only need an area as large as your stamp)
  • Kiss your inked up butterfly to your inked up background stamp; thus transferring your image to it – or kissing

Butterfly Notes - Stamp of Approval - Catherine Pooler

  • Stamp on a piece of regular white card stock and heat emboss immediately in clear embossing powder. If your image has dried before your powder sticks, just stamp over your butterfly in versamark. Repeat for a second butterfly.
  • Fussy cut out your images
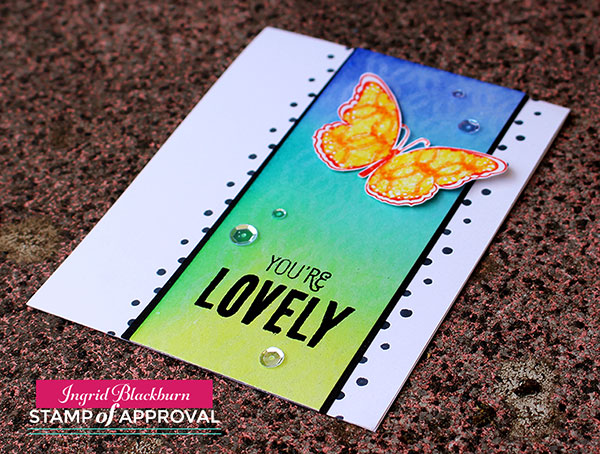
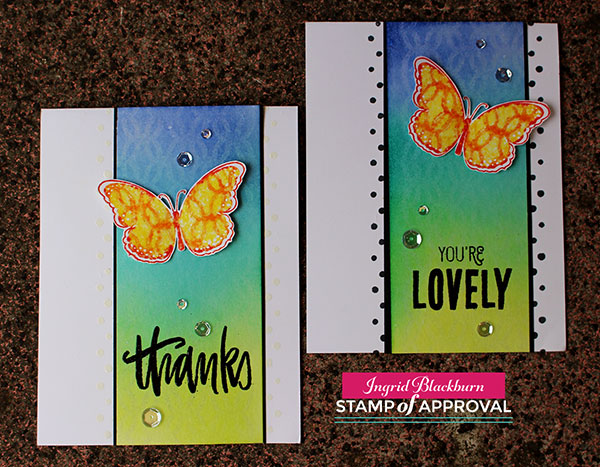
  • Cut your background in half (5 1/2 x 4 3/8″) and rub a de-static bag onto the bottom half. Stamp (Versamark) the greeting Thanks – Handpainted Thanks by Neat & Tangled & You’re Lovely by Catherine Pooler Designs – Lovely Flowers. Emboss in Black.
  • Trace the edges of your strip lightly for a guide where you plan to adhere it to your card base.
  • Stamp the polka dots from Lovely Flowers (landscape so you have the alternating ends) down the side using the line to keep your pattern straight. You’ll need to overlap the bottom dot with the top for an even pattern. I stamped one in Memento Tuxedo Black and the other I embossed with Versamark and white embossing powder.

The Kissing Technique - Versamark - Ingrid Blackburn

  • Matte your background onto black (5 1/2 x 4 1/2″) so that it just has a sliver of black – this will cover your line.
  • Adhere your butterfly with two mini glue dots in the center and place a foam dot under each wing toward the top to help with the illusion of flight.
  • Add Sparkling Clear Sequins by Pretty Pink Posh.

I love how the background stamp just magically appears. This technique has the biggest wow on glossy card stock & with darker inks, but the subtle effect here is lovely and the perfect accent.

Stamp of Approval

Lovely Notes SOA Banner

Thanks for joining me today! I have two more projects headed your way in the days to come, so be sure to stop back by! In the meantime, if you missed any of the six projects I posted this week, or the blog hops for all 18 designers – yup…there were that many – click on the links below for the starting point of each hop:

Day 1               Day 2               Day 3

And don’t forget to check out the Stamp of Approval – Lovely Notes Collection – it’s live right now – but just for those on the wait list!

Now that we’ve given you a ton of inspiration, it’s your turn – take what you learned here today or over the past three days and create your own cards – go get your fingers inky!!!

Signature

[optin_box style=”12″ alignment=”center” email_field=”email” email_default=”Enter your email address” integration_type=”aweber” double_optin=”Y” list=”3846012″ name_field=”name” name_default=”Enter your first name” name_required=”Y” opm_packages=””][optin_box_field name=”headline”]Learn more with our exclusive FREE video series:[/optin_box_field][optin_box_field name=”paragraph”]PHA+UGx1cyB5b3XigJlsbCBiZSBhZGRlZCB0byBteSBGUkVFIENyZWF0aXZlIFRpcHMgRS1sZXR0ZXIgd2hlcmUgSSBzaGFyZSBleGNsdXNpdmUgcHJvamVjdHMsIHZpZGVvcyAmYW1wOyB0aGUgMTIgRGF5cyBvZiBDaHJpc3RtYXMgUHJvamVjdCBTZXJpZXM8L3A+Cg==[/optin_box_field][optin_box_field name=”privacy”][/optin_box_field][optin_box_field name=”top_color”]undefined[/optin_box_field][optin_box_button type=”0″ button_below=”Y”]Get Instant Access![/optin_box_button] [/optin_box]