Merry Monday Bokeh Flurry

DSC01564


Have you tried the Merry Monday Challenge?  I seem to be on a challenge kick lately, and thought I’d have a go at this one this week.

114

This week, the challenge is to add some Sparkle, Shimmer and Shine.  Sounded like fun and I needed to get started on some Christmas Cards! Smile

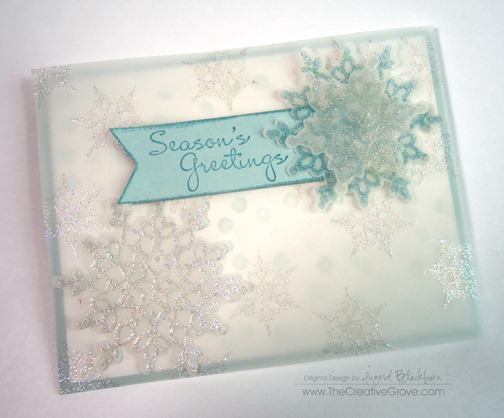
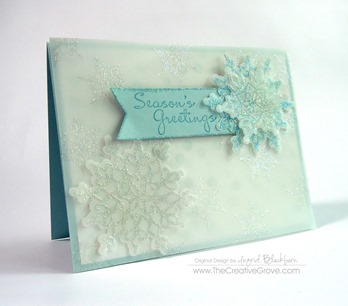
Here at the grove, we have an exclusive step by step video and we’re having fun with a new technique this week – Bokeh.  I promised them I’d try it with some snowflakes along with all the other samples.  Here’s the result – enjoy!
DSC01574

Signature-Blog

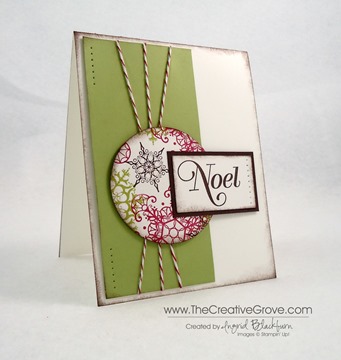
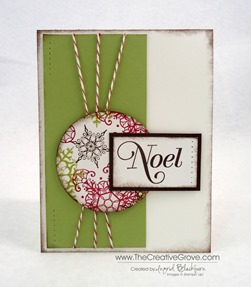
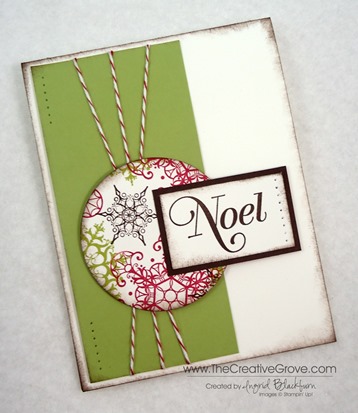
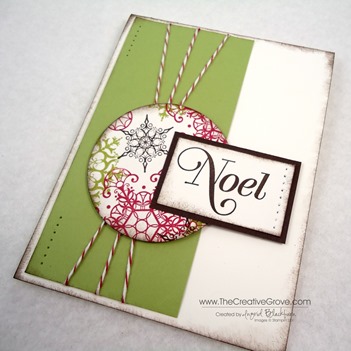
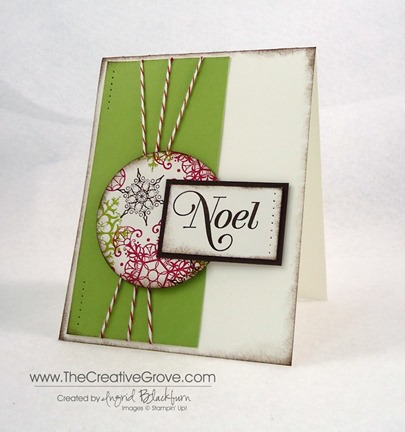
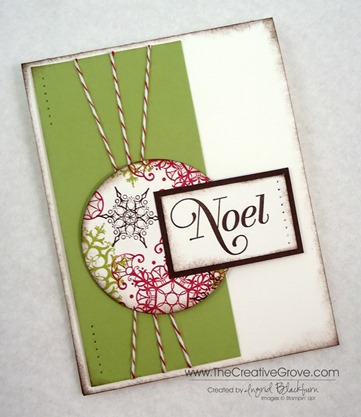
A Mojo Monday Noel

Snowflake Soiree 008 (5)

Hi there paper crafters!  I hope you all are having a fabulous Monday morning!  I thought I’d jump right back into life with a Mojo Monday card.  My how I’ve missed this little challenge and you all!  Smile

In case you’ve been wondering, we’ve been traveling for the past seven weeks, moved out of our home, and visited four countries all in the span of 10 days!  We’ve been getting settled and I’m finally able to get back into the paper crafting groove.  Check back tomorrow for the personal 411.

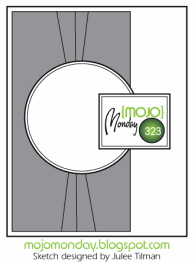
So, here’s today’s Mojo sketch and my interpretation – enjoy the tips!

            Snowflake Soiree 008 (6)Mojo323Sketch

Creative Tips –

  • Since all my really cool tools (Big Shot, templates, etc…) are still making their way over to Europe, I had to go old school and KISS (Keep it sweet and simple) for this project.
  • I stamped the three smallest snowflakes from Snowflake Soiree in Pear Pizzazz, Early Espresso and Cherry Cobbler.  I just LOVE this color trio!
  • You’ll want to punch our your snowflakes with the 2 1/2” Circle Punch
  • Sponge the edge lightly with Early Espresso ink and pop that up on Stamping Dimensionals.Snowflake Soiree 008 (8)
  • Wrap some of the Cherry Cobbler Baker’s Twine around a piece of Pear Pizzazz Cardstock that is 2 1/2” x 4”.
  • Paper Pierce seven holes in the top and bottom of the Pear Pizzazz and attach to a 5 1/2” x 4 1/4” piece of Whisper White card stock that has been sponged in Early Espresso.
  • Next Stamp your greeting in Early Espresso.  I used Noel from Greetings of the Season.  I used a piece of scrap paper and then trimmed it down to the size I needed. 
  • Sponge your greeting and paper pierce some holes on the right of the greeting to add balance to your project.Snowflake Soiree 008 (12)
  • Matte your greeting onto a piece of Early Espresso card stock that leaves a 1/16” border so a not to overwhelm your card.
  • Pop your greeting up on the right side and add regular adhesive to the left so that it matches the height of your popped up circle .Snowflake Soiree 008 (1)
  • TIP – to achieve balance in your project, sponge your matching white pieces, and have the same amount of space to the edge for the greeting and the circle. 
  • I chose to have my circle and greeting slightly offset to the bottom of the card for interest.Snowflake Soiree 008 (4)
    It’s a simple card, but rather cute.  You could easily mass produce this card.  Stamp strips of white card stock and then punch your circles out.  Quite simple!  I hope you enjoyed this!
    Signature Snowflake 001

Snowflake Soiree 008 (8)

To shop in the online store 24/7 – click here

Snowflake Soiree Sparkle

It’s no secret that I love winter.  I know – I must be the only one!  You really start to develop an appreciation for it when you live in Florida.  Don’t get me wrong, I love the palm trees and water, I just love snow more.  So I thought I’d put a little sparkle into my morning with the Snowflake Soiree stamp set and some Silver Glimmer Paper.

This card evolved from a different project of mine that I taught in my Creative Cards class this month and designed for the Stamp Academy Holiday Project Parade.  Click here for Project Parade One of my friends, Linda A, went her own route and this is her version of my card.  The difference was to do the Triple Time Stamping Technique with just the four snowflake stamps.  I loved the simplicity of it.  I wanted to add a little more sparkle, so here is the result!  For me the circles are just additional little flakes. I really like how they give this card some shimmer and sparkle.

Creative tips –

  • I used a few Rhinestone Basic Jewels to add a little bling and glimmer to my card in addition to using the Silver Glimmer Paper.
  • I cut a 1 1/2” square to cut out my snowflake using my Snowflake BigZ die with my Big Shot.  Don’t throw away the scrap – that’s where I punched some of my glimmer circles from.  The rest I punched from the scrap of the medium sized snowflake from another project.  I used the circle from the Itty Bitty Shapes Punch Pack.
  • The technique used to make this card is called the Triple Time Stamping. 
  • Some Baja Breeze Seam Binding Ribbon is the perfect touch to finish this card.

  • Snowflake Soiree is a great set – along with four different sized snowflakes, it has two greetings!
  • I rock n rolled the large snowflake for some variety in Baja Breeze and Not Quite Navy.  The second largest stamp is stamped off once on scratch paper in Baja Breeze for a lighter shade.
  • I popped up my layered snowflakes for a 3D effect.  Since it’s rather large, I added Stampin’ Dimensionals to three of the branches of the snowflake.  I used the edge of my Dimensionals sheet – don’t throw that out!

  • A little snowflake with a Rhinestone Basic Jewel on the inside is perfect to complete the card.
  • The Midnight Muse mattes for the white panels are 1/16th inch so that they don’t overpower the card.

B1_ChristmasGift_demo_Oct0112_NA

New this October 1 – 31, 2012! Get a FREE Festive Paper Piercing Pack when you order one of the Ornament Bundles this month only!  Click here for more details on this limited time offer.

Signature Snowflake 001

To Shop 24/7 in the Creative Store Click here!

Stamp Sets – Snowflake Soiree (127925) Paper – Whisper White (100730), Midnight Muse (126843), Silver Glimmer Paper (124005) Ink – Midnight Muse (126860), Baja Breeze (126960), Not Quite Navy (126971) Cool Tools – Snowflake BigZ die (127813), Itty Bitty Shapes Punch Pack (118309) The Perfect Finish – Stampin’ Dimensionals (104430), Baja Breeze Seam Binding Ribbon (122331), Rhinestone Basic Jewels (119246)

Snowflake Soiree 127925L

One Layer Magic

Sometimes you make a card that you just fall in love with.  The idea or technique is magical, and you want to make more but with a twist.  For me that’s the best time to make a one layer card – especially with a brayer!  When I use I brayer, I feel like an artist with a blank canvas.  Here is the result of my fun playtime in the studio.

This card is the result of a full sized layered card I made a week ago.  I kept going back to my card because I just fell in love with the three colors brayered together – Bashful Blue, Pool Party, and Island Indigo. Each color lent a vibrant layer to this masterpiece.  And that’s really the word to use with brayered cards.  The colors begin to blend together forming a new hue.  The end result can never be duplicated as you’ll never remember exactly how many times you rolled each color and exactly which position – truly creating a one of a kind masterpiece with each new card.

For this simple but elegant card, I tore a piece of scrap paper and used Dotto adhesive to temporarily hold it over the white areas of the card.  I left only the area I wanted color deposited on exposed.

  • Start off your paper with your brayer, slowly moving toward the center.  This way you stay in control of the depth of the color you are working with.
  • By stopping a bit short towards the center, you can give the illusion of light by keeping some of the white there and depositing the least amount of color with your brayer.
  • Keep your brayer on the work surface to get that even watercolor effect, do not lift it – that’s how you get start/stop uneven marks. 
  • Begin with your lightest shade working to the darkest.
  • Experiment with two complimenting colors on the brayer like Pool Party and Island Indigo, start with the lighter and then add a little of the darker.

Here you see my original card from my Artistic Snowflakes post and the one layer card I made to compliment it.  It makes a cool set together!

And one layer cards are nothing if not cost effective.  All you need is a half sheet of White cardstock for your card (I recommend a good cardstock though, like Stampin’ Up!’s Whisper White, don’t use a cardstock that is too porous, you won’t like the end result )– the rest I leave up to your imagination.

Creatively yours –

Ingrid

To Shop 24/7 in the Creative Store – Click here!

Stamp Sets – Snowflake Soiree (127925), Sweet Essentials (128315) Paper – Whisper White (100730), Midnight Muse (126843) Ink – Midnight Muse (126860), Island Indigo (126986), Pool Party (126982), Bashful Blue (126961), Not Quite Navy (126971), Night Of Navy (126970) Cool Tools –Brayer (102395), 1” square punch The Perfect Finish – Stampin’ Dimensionals (104430), Rhinestone Basic Jewels (119246)

SnowflakeSoiree127925L_thumb3

SweetEssentials_thumb13

Simple Snowflakes

Sometimes I just need a quick card.  I’ve found that the stamp set Snowflake Soiree is that go to set for quick and easy cards.  Don’t get me wrong, I can make a complex one with the best of them, but sometimes simpler is best.

This card represents just that.  A quick and easy holiday card that even has a little embossing on it!  I stamped the snowflakes in Midnight Muse – my new favorite winter color, and embossed the saying from the set in Silver.  I popped the banner up with dimensionals and threw a white Decorative Label Punched piece behind for a little contrast.  Of course, snowflakes just wouldn’t be right without a Rhinestone Jewel!

And that’s it!  Just a quick, simple and easy card for the day.  What are you going to make with this great set from our Holiday Catalog?

Creatively yours –

Ingrid

To Shop 24/7 in the Creative Store – Click here!

Stamp Sets – Snowflake Soiree (127925) Paper – Whisper White (100730), Midnight Muse (126843) Ink – Midnight Muse (126860) Cool Tools – 1” square punch The Perfect Finish – Stampin’ Dimensionals (104430), Rhinestone Basic Jewels (119246)

Snowflake Soiree 127925L

Artistic Snowflakes

When I think of winter I think of snow.  Maybe it’s because I feel the most at home in the mountains – especially on a wintery snowy day.  Yes, that’s totally my element.  So why do you live in Florida, you may ask?  Well, my husband is not at home in the snow.  So I will have to make due with a winter vacation each year and the memories of living in New York, Utah and California – well, skiing there.

So what does that have to do with stamping you may ask?  I have fallen in love with the stamp set Snowflake Soiree from the Holiday Catalog.  You can probably tell, I can’t stop using it!  This morning I wanted to have the feel of that crisp chill that you feel on a cold snowy day.  So I took out my brayer and got to work.

First I brayered a quick layer of Bashful Blue.  I tried to keep some of the white in there as well.  I then added a layer of Pool Party, a color that really has the hue of water.  For a little depth I topped it off with a quick coat of Island Indigo.  This is the end result:

I added the three smaller snowflakes from this set in Not Quite Navy, Midnight Muse, and Night of Navy.  I kept quite a bit of distance between the flakes, because snow falls like that – it’s not always clumped together.  To help the background keep its lightness I added a 1 1/16th mat of Whisper White before matting it to Midnight Muse.  I played with a few sayings and ultimately I wanted something thin so that it wouldn’t take away from the beauty of the brayered background.  A quick thin banner popped up on dimensionals is the perfect finishing touch along with a Rhinestone Jewel, snowflakes after all do sparkle!

The Midnight Muse is a bit dark to write on, so I added a quick card front to the inside with a snowflake.  These photos just do not capture the beauty of the background like in real life.  I encourage you to take out your brayers and have a little fun today!

Creatively yours –

Ingrid

To Shop 24/7 in the Creative Store – Click here!

Stamp Sets – Snowflake Soiree (127925), Sweet Essentials (128315) Paper – Whisper White (100730), Midnight Muse (126843) Ink – Midnight Muse (126860), Island Indigo (126986), Pool Party (126982), Bashful Blue (126961), Not Quite Navy (126971), Night Of Navy (126970) Cool Tools –Brayer (102395), 1” square punch The Perfect Finish – Stampin’ Dimensionals (104430), Rhinestone Basic Jewels (119246)

Snowflake Soiree 127925L

Untitled-12

Chit & Chat Challenge

I just love getting the week started off right!  I was sitting at my computer working this morning and saw an email for a Sudsol Chit & Chat Challenge come on the screen.  I thought – why not kick this week off right?!!  Sudsol is a great Stampin’ Up! demonstrator community that I belong to.  If you are a demonstrator and would like to find out more – click here.

So the challenge this morning was to make a card just like the provided sketch.  Here is my result!

I used the set Snowflake Soiree and made my own lace background using the second to smallest snowflake in the set. 

  • Tip – the key to making the lace is to not have any gaps and to actually overlap the snowflake edges.  Stamp in rows, starting at the top.  The next row be sure to overlap as well and have a snowflake placed in the gap from the row above.  It’s a beautiful pattern – especially on a large Christmas Tree on a scrapbook page. 

I just love the end result using Early Espresso, Lucky Limeade and Cherry Cobbler.  The Designer Buttons – Brights Button and Linen Thread are the perfect little embellishment to this simple and quick little card.  The criss cross of the linen thread is a signature of mine.

Ultimately, this will be a featured Holiday Stamp A Stack card this fall – so if you would like to make a stack of these and several more – check out my Upcoming Events Page – or RSVP here

I encourage you to now sit down and make your own version!  Happy Stamping. 🙂

Creatively yours –

Ingrid

To Shop 24/7 in the Creative Store – Click here!

Stamp Sets – Snowflake Soiree (127925), Petite Pairs (122497) Paper – Whisper White (100730), Early Espresso (119686), Cherry Cobbler (119685), Lucky Limeade (122926) Ink –Lucky Limeade (126984), Cherry Cobbler (126966), Early Espresso (126974) Cool Tools – Designer Buttons – Brights Collection (119747), Curly Label Punch (119851) The Perfect Finish – Linen Thread (104999)

Snowflake Soiree 127925L

Untitled-12