Watercolor Christmas Cones

Don’t you just love watercolor and Distress Inks?   This tag card was actually an after thought believe it or not.  The main card was sent full tutorial and all to the Creative Tips List as part of the free 12 Days of Christmas series.  If you’re not on it – what are you waiting for – it’s free?

Watercolor Pine Cones 009

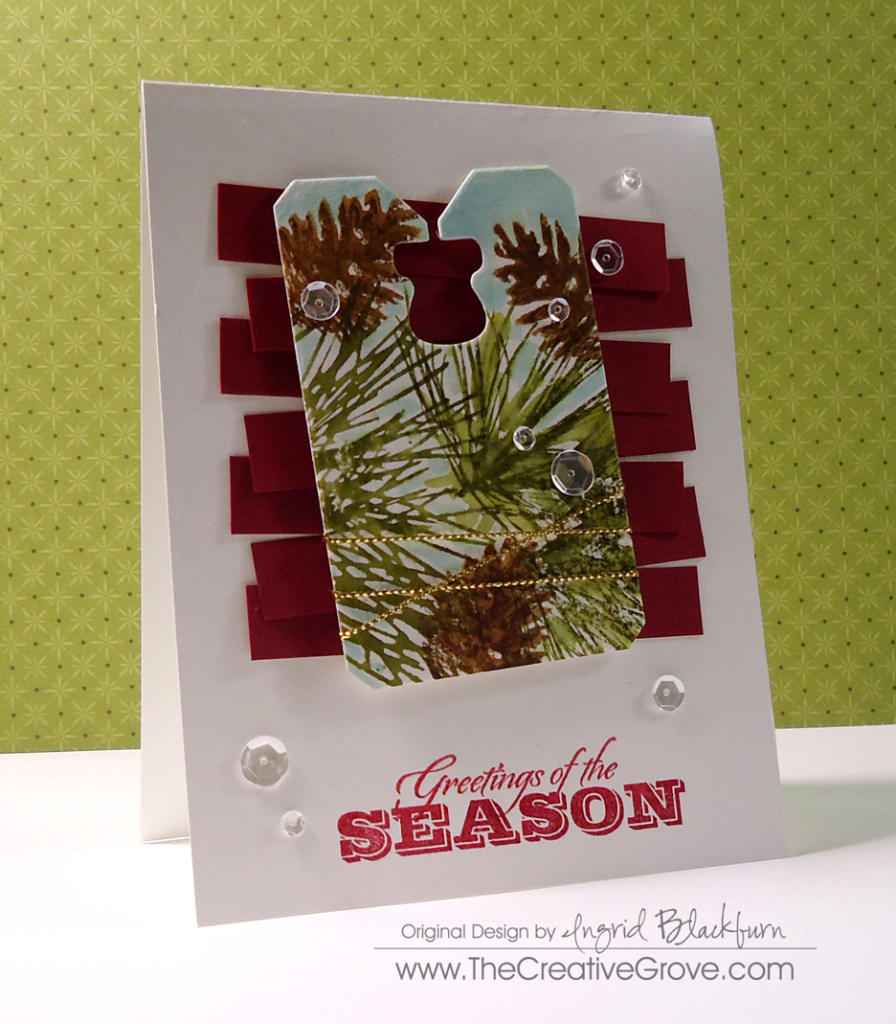
Back to this tag…I usually test stuff out when stamping with a new set and watercoloring, so this was my text swatch…thankfully it was just big enough for this tag die from Chalk Talk Framelit set by Stampin Up.  I wrapped it with some gold string, popped it up over some 1/2 strips – you know you have those lying at the bottom of your Cherry Cobbler folder with other scraps…added an embossed sentiment, some sequins and wallah – not sure on the spelling there!  Don’t you just LOVE the look?  Can you believe it’s made using Distress Inks?  You can use any dye based inks…but I just LOVE the result I get when I use Distress by Ranger.

Watercolor Pine Cones 010

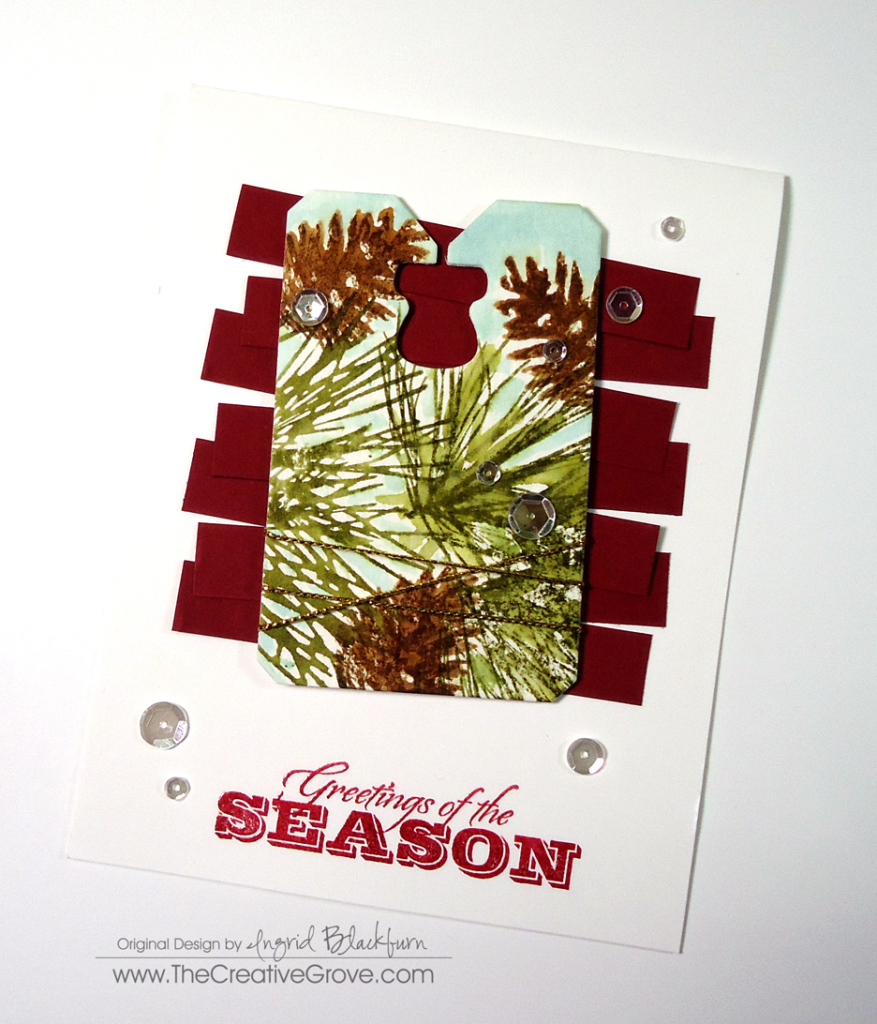
It turned out so SUPER cute, I can’t stand it – this one is sitting on my desk at the moment…I just love the colors.  For all the details on how to do the watercolor stamping…be sure to get on the Creative Tips E-letter list.  I’ll be sure to get you the link for the tutorial…I promise! 🙂

Interested in the class instead?  We have all 12 projects + step by step videos + PDF’s as a class.  Take your time – it’s an online class with lifetime access 24/7!  

Get Instant Access Here

I also wanted to enter this card in a fabulous challenge that I just love – Distress.  I’ve participated in a few this past year…be sure to join in on all the fun – Virginia’s View is a fabulous way to get inky!

Virginias View challenge distressed

And one of my favorite stamp company’s challenge too – Simon Says Stamp Wednesday Challenge for Sparkly Creations.  They’re featuring Kaisercraft products, but I don’t have any!  So here are some fun sparkling clear sequins – my go to jewels of late by Pretty Pink Posh:

sss-wednesdayblog-logo


If you love the look Distress Inks can give a project – be sure to check out this fun technique – Vibrant Flicked Accents!

Happy Watercoloring!!

Signature_thumb.jpg

Sparkly Ornaments

DSC02021

It seems to be a sequin theme this week!  Today’s project combines two great weekly challenges – Mojo Monday and Merry Monday.  Fittingly – both give your week a creative jump start.  I have to admit, if I wasn’t prompted to use them (thanks to Deanne over at Merry Monday), I wouldn’t have used Sequins.  In actually, I had to go out to the store to get some!

I got lucky, there was a 50% off bin, and I quickly grabbed these super rich in color Magenta sequins along with some cool chocolate brown ones + plus three other colors at regular price – a whole 1,15 euros – seriously, that’s pretty cheap – where have these been all my life?

You may have seen my other Merry Monday card too – that one uses clear sequins to perfection – as snowfall!  I have a link to that project right here.  This week I’m a guest designer at the Merry Monday Christmas Challenge Blog.  Both Merry Monday and Mojo Monday challenges are fun, I encourage you to enter both!

Here’s the sketch for Mojo Monday this week and my interpretation:

mojo354DSC02020

Do you ever not know whether or not to put embellishments on your projects?  I have a little trick for what I do in that case below.

Creative Tips –

  • To really let the sequins be the star, choose neutrals as your card elements.  Here you see Basic Black, Whisper White and Basic Gray.
  • Both the darker pieces were run through the big shot with embossing folders, the black with the stylish stripes and the gray with the Mosaic Maddness.
  • To add a little depth to the Gray, sponge it lightly with the same color, then on the edges in black.

DSC02015

  • Cut a circle with framelits or a large punch.  Stamp your ornaments in a pigment based black in and emboss using the heat and stick powder then dazzling diamonds glitter.  To keep that glitter from really staying put – the heat and stick powder works wonders!  And the black ink under the glitter really shows off the various colors of the glitter – very cool!
  • Edge your circle lightly using a sponge and first Gray then black inks.
  • For the subtle background, use Christmas greeting stamps and emboss in Versamark ink, then heat and stick powder then Dazzling Diamonds glitter.  Edge with Gray or Black ink.

DSC02019

  • Adhere the black card stock strip (2 x 4 7/8”) to your background using Tombo Multi purpose glue.
  • Pop up the Gray piece on foam tape.  Glue the half of your ornaments circle to the gray, then add foam tape to the exposed side.  Adhere to your project.

DSC02011DSC02016

  • Wrap silver cord around your project three times.  Create a triple loop with four strings and place in between your stamped, embossed in black and cut out greeting.  Pop it up using foam tape and place over an Artisan Label punch out piece of Basic Black.
  • I wasn’t sure whether to leave it along at this point or use the Magenta Sequins as I planned.  Here are three choices I had.  My trick – take photos and then look at them in my camera or on the computer.  It’s much easier to figure out what to do here.  You can see that you can add sequins, photograph and switch out without having to adhere them.  My choices were none, clear or magenta.

DSC02007DSC02012DSC02015

  • I still couldn’t decide – so I went to my failsafe choice – ask my hubby Michael he quickly said purple and I knew my instincts were right!  Why do we always doubt those?!
  • My final touch was to add a few Rhinestones to the sequins, I know it’s a lot of bling, but why not?

DSC02022

Hope you love the end result.  If you liked this tutorial and want to learn more exclusive tips, videos and see other projects not on the blog – sign up in the box below and I’ll stay in touch with an e-letter from time to time.  You’ll immediately get the first of three project videos to keep you inspired!

Have a great day – now get stamping!

Signature

[optin_box style=”14″ alignment=”center” action=”http://www.aweber.com/scripts/addlead.pl” disable_name=”Y” method=”post” email_field=”email” email_default=”Enter your email address” email_order=”1″ integration_type=”custom” double_optin=”Y” name_default=”Enter your first name”][optin_box_hidden][/optin_box_hidden][optin_box_code]

[/optin_box_code][optin_box_field name=”headline”]If you enjoyed this tutorial…[/optin_box_field][optin_box_field name=”paragraph”]PHA+PHNwYW4gc3R5bGU9ImNvbG9yOiAjNjQ2MzVlOyI+TGV04oCZcyBzdGF5IGluIHRvdWNoISBNeSBvY2Nhc2lvbmFswqA8L3NwYW4+PHNwYW4gc3R5bGU9ImNvbG9yOiAjNjY2Njk5OyI+PHN0cm9uZz48ZW0+ZXhjbHVzaXZlPC9lbT48L3N0cm9uZz7CoDwvc3Bhbj48c3BhbiBzdHlsZT0iY29sb3I6ICM2NDYzNWU7Ij5DcmVhdGl2ZSBUaXBzIGUtbGV0dGVyIHdpbGwgdGVhY2ggeW91IHRvIG1ha2UgcHJvamVjdHMgdGhhdCB5b3UgbG92ZeKApjwvc3Bhbj48L3A+Cg==[/optin_box_field][optin_box_field name=”privacy”][/optin_box_field][optin_box_field name=”top_color”]undefined[/optin_box_field][optin_box_button type=”0″ button_below=”Y”]Send me exclusive tips![/optin_box_button] [/optin_box]

DSC02019

Sparkly Pines and Rocks

It’s Merry Monday!  I am so honored to be a guest designer this week on this very cool weekly challenge blog.  If you haven’t yet participated…definitely check it out!  The challenges are fresh and intriguing.  You’ll definitely stretch your Christmas card making abilities into a new stratosphere.  Like this week – Sequins!

117

I wouldn’t normally reach for this little embellishment, but boy what a new addiction I have now after this one!  Thanks a lot girls – look what you’ve done. Smile

Pines on Rocks Winter Scene

Creative Tips –

  • I used the large Stampscapes Pines and Rocks stamp in Night of Navy by Stampin’ Up! here.  Simple, just stamped on some Crumb Cake card stock.
  • To bring the snowy feel in, I used a Uniball Signo White Gel pen for some highlights and snow in the sky.

Pines on Rocks Winter Sequin Card (5)

  • To create some mist and bigger flakes, I used a qtip and white pigment ink.
  • For the sparkle and a fun touch, I added not only the sequins in clear, but the little pieces from the sequin holes.  They add just the right sparkle to this project.
  • The card front and banner are popped up for some character along with some subtle sponging in crumb cake.

Pines on Rocks Winter Sequin Card (8)Pines on Rocks Winter Sequin Card (7)

  • A simple banner greeting from Sweet Essentials from Stampin’ Up! finish this card perfectly.

Now it’s your turn!  I can’t wait to see your cards entered.  Have a Merry Monday!

Signature-Blog

[optin_box style=”13″ width=”500″ alignment=”center” action=”https://www.aweber.com/scripts/addlead.pl” disable_name=”Y” method=”post” email_field=”email” email_default=”Enter your email address” integration_type=”aweber” double_optin=”Y” list=”3846012″ name_field=”name” name_default=”Enter your first name” name_required=”Y”][optin_box_field name=”headline”]If you enjoyed this tutorial…[/optin_box_field][optin_box_field name=”paragraph”]PHA+4oCmeW914oCZbGwgbG92ZSBvdXIgPGVtPjxzdHJvbmc+PHNwYW4gc3R5bGU9ImNvbG9yOiAjMjQ0YzVlOyI+ZnJlZTwvc3Bhbj4gPC9zdHJvbmc+PC9lbT5zdWJzY3JpYmVyIG9ubHkgdmlkZW8gc2VyaWVzLiDCoExlYXJuIG5ldyB0ZWNobmlxdWVzIHRocm91Z2ggb3VyIDxzcGFuIHN0eWxlPSJjb2xvcjogIzI0NGM1ZTsiPjxlbT48c3Ryb25nPmV4Y2x1c2l2ZTwvc3Ryb25nPjwvZW0+wqA8L3NwYW4+Q3JlYXRpdmUgVGlwcyBlLWxldHRlcsKgYW5kIHN1YnNjcmliZXIgb25seSB2aWRlbyBhbmQgcHJvamVjdCB0dXRvcmlhbHMhPC9wPgo=[/optin_box_field][optin_box_field name=”privacy”][/optin_box_field][optin_box_field name=”top_color”]undefined[/optin_box_field][optin_box_button type=”1″ text=”Send me exclusive tips!” text_size=”32″ text_color=”#000000″ text_bold=”Y” text_letter_spacing=”0″ text_shadow_panel=”Y” text_shadow_vertical=”1″ text_shadow_horizontal=”0″ text_shadow_color=”#f6fefb” text_shadow_blur=”0″ styling_width=”50″ styling_height=”19″ styling_border_color=”#000000″ styling_border_size=”1″ styling_border_radius=”6″ styling_border_opacity=”100″ styling_shine=”Y” styling_gradient_start_color=”#a3b640″ styling_gradient_end_color=”#80902c” drop_shadow_panel=”Y” drop_shadow_vertical=”1″ drop_shadow_horizontal=”0″ drop_shadow_blur=”1″ drop_shadow_spread=”0″ drop_shadow_color=”#000000″ drop_shadow_opacity=”50″ inset_shadow_panel=”Y” inset_shadow_vertical=”0″ inset_shadow_horizontal=”0″ inset_shadow_blur=”0″ inset_shadow_spread=”1″ inset_shadow_color=”#80902c” inset_shadow_opacity=”50″ location=”optin_box_style_13″ button_below=”Y”]Send me exclusive tips![/optin_box_button] [/optin_box]

Pines on Rocks Winter Sequin Card (3)