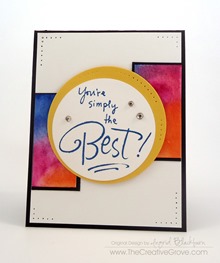
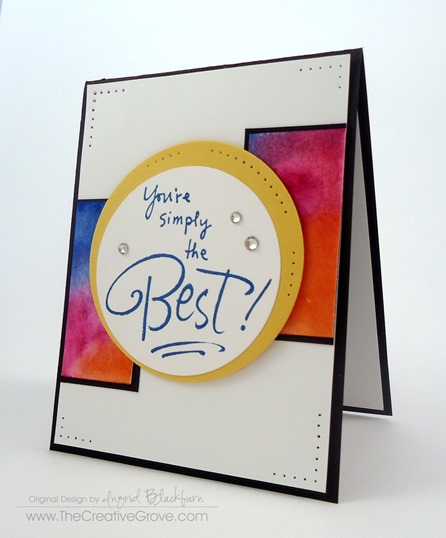
Watercolor Wash Mojo Monday

DSC01411

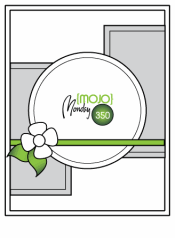
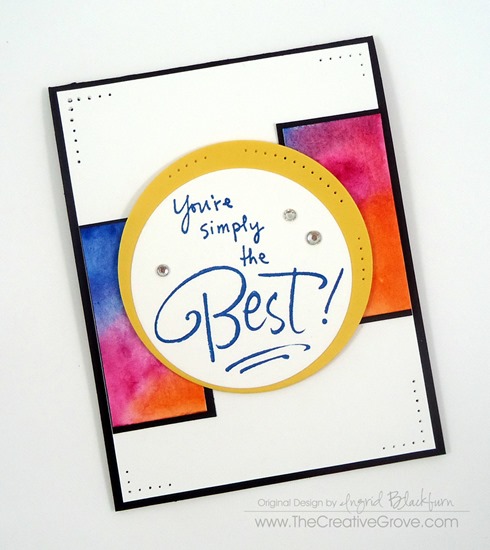
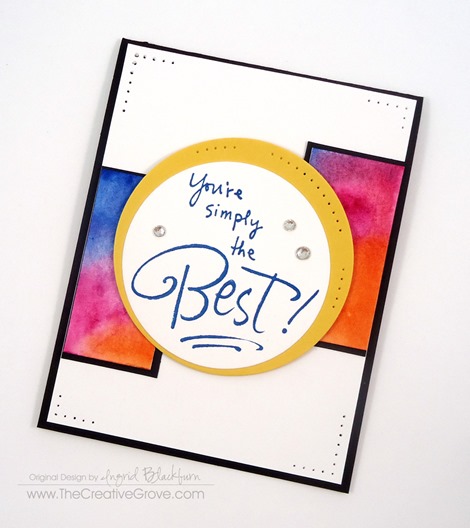
Do you sometimes just need a little pop of color in your life?  A watercolor wash is the perfect way to do just that!  Today is Monday and I have another Mojo Monday Challenge card for you.  I kept it simple and let the color be the star here without adding too much.  Here’s the original sketch and my interpretation:

                   Mojo350SketchDSC01413

If you just love the simple blend of color and want to learn various techniques to use watercolor in your cards, try our Watercolor Techniques that Wow class.

Watercolor Narrow 125

Creative Tips –

  • Choose colors that work with each other.  If you’re unsure of what to choose, get yourself a little color wheel like the one here.  The colors you see here are a Tetrad group – two sets of complimentary colors.  I knew the Magenta would blend into violet, so I chose that as a better blend then straight violet.
  • DSC01434

  • The colors used are Schminke Hordam Aquarell Yellow Lemon, Translucent Orange, Paris Blue and for the yellow – Stampin’ Up! Daffodil Yellow Cardstock.
  • The colors are the star, so the remainder of the card is kept really neutral – Basic Black and Whisper White. 
  • Stamp your greeting in a bold color like Pacific Point here.
  • I don’t own a smaller set of circle framelits for that perfect border…yes, I know – what?!!  On my list (which is quite long, for some reason it keeps getting bumped…lol).

DSC01436DSC01435


  • For an accent – try something simple like paper piercing.  Keep it balanced.
  • Pop up various elements like your greeting and card front to give your project dimension.

DSC01412

    If you liked this card – check out some of our classes or our monthly technique community!  Thanks for visiting today – now get stamping!
    Signature

    Creative Techniques Banner 72

    Hearts a Flutter Mojo Monday

    Happy Monday to you!  It’s Mojo Monday again and today is my anniversary, so I thought I’d make a special card for my sweetheart Michael.  I obviously wanted it to be somewhat masculine since I was using hearts from Hearts a Flutter.  I started with the color Basic Gray and wanted to use the new Designer Series Paper Parker’s Patterns from the brand new Spring Mini Catalog.  It all kind of fell into place there.  Today’s Mojo sketch was easy to use and I think the end result is rather striking.  I wouldn’t have used the ribbon this way myself, so it took me a little out of my comfort zone, which I love.  Hope you like it!

      Mojo275Sketch   

    Creative Tips:

    • I just love the new DSP Parker’s Patterns, and the Chevron Cherry Cobbler page was perfect for this project.  I didn’t want it to take over, so I kept the strip to 1 1/4” in width.
    • The Cherry Cobbler strip was too plain, so I stamped the outline heart image several times on it tone on tone.
    • I changed the shape of the Cherry Cobbler banner, that is the rounded one, but I wanted the draped banner, don’t be afraid to switch them up.  I love the pattern on the rounded one and thought it would be the perfect background for my heart.
    • When I placed my banner and heart on the Very Vanilla square, it was too plain, so I ran it through the Big Shot with my Chevron Textured Impressions Embossing Folder.  It’s subtle since it’s so small.  I needed it to pop too, so I added a 1/16” border in Basic Black – the Basic Gray and Cherry Cobbler were just not right; I needed the contrast of the black.
    • I needed a little more on the page, but didn’t want to take away from my several patterns that I already had going on, so I added the half punched heart from the new Occasions Paper-Piercing Pack.  I just LOVE that one, it’s perfect for the upcoming Valentine, Spring and Easter seasons.

    • For my ribbon, I added a knot as my embellishment to the sketch.  Since I was already layering the heart on top of the banner, another embellishment would have been too much.  I originally had the small punched heart there, but it took away from everything, so I added a knot to the ribbon instead.  I used the Basic Black 3/8” Taffeta Ribbon, I just can’t get enough of that ribbon – it’s my all time favorite type of ribbon that we have!
    • For the saying, I used the Teeny Tiny Wishes Stamp Set. I originally had it on a 1/2” banner, but it was just too much white space, so I cut a 3/8” banner instead.  It’s just right.  I played with a few places to have the banner cut, and felt it needed to overlap the Parker’s Patterns DSP on the left and bottom.  To create the banner part, I used the 1” square punch.
    • I added the tiny heart from the Owl Punch (I just love that heart), and I also stamped it tone on tone in Cherry Cobbler with the same banner pattern stamp from the Cherry Cobbler banner under the main heart – that pattern just rocks.
    • For a little added emphasis, I popped the main heart image and greeting banner up on Stampin’ Dimensionals


    I’m looking forward to a special anniversary with my soul mate – Michael. And now I have the perfect card.  :)  Love you honey!

    Signature Snowflake 001

    To Shop 24/7 in the Creative Store Click here!

    Stamp Sets – Hearts a Flutter (129252c, 129249w), Teeny Tiny Wishes (115370c, 127802w) Ink – Basic Gray (126981), Cherry Cobbler (126966) Paper – Very Vanilla (101650), Cherry Cobbler (119685), Basic Black (121045), Parker’s Patterns (131021) Cool Tools – Hearts a Flutter Framelits (130159) OR Bundle (131097c, 131098w) Big Shot (113439), Chevron Embossing Folder (127749), Occasions Paper-Piercing Pack (129387), Paper-Piercing Tool (126189), Stampin’ Pierce Mat (126119), Owl Punch (118074), 1” Square Punch (124094)  The Perfect Finish – Stampin’ Dimensionals (104430), Basic Black 3/8” Taffeta Ribbon (109070)

    131097L

    Apothecary Accents Butterfly

    This is a quick and fun project.  There is nothing better than a detailed card that I can make in ten minutes or less.  And this card definitely hits the mark.  It’s clean, simple and great for any occasion.  I love the neutral colors – Sahara Sand and Whisper White, and even the fact that nothing is stamped! 

    I have completely fallen in love with our new Essentials Paper Piercing Templates.  They take a simple die cut, such as this large background made with Apothecary Accents Framelits, created with our Big Shot, or Punches and instantly give them character. 

    Creative Tips –

    • Use all the elements of the corner guide to see exactly where you want to paper pierce.  I used the solid line for this card, but keep in mind to use the length of the 1/16th inch measurements in addition to the edge of the template as well.  You’ll see that the lines are short and long, line those up and you have four different depths to use for your guides to perfectly pierced lines!
    • Pick up your Basic Pearls Jewel Accents with your paper piercer to easily grab the glue dot underneath the Pearls.  When I first started using the Pearl accents, I couldn’t get them off the sheet perfectly each time.  My Ah Ha moment came when I decided to use a metal assist with my Paper Piercer or Paper Snips and I’ve never have a problem since!
    • Use our Stampin’ Dimensionals in partial spots to highlight an object.  Who says just because you use a dimensional to pop something up it ALL has to be elevated?  Here you can see that I adhered the center of my butterfly down with just regular Snail adhesive, but elevated the wings to give it the appearance of in flight.  Check out this project to see how I created a waiving banner too.

    The butterfly was made with our cool Beautiful Wings Embosslit Folder that cuts and embosses at the same time – I LOVE those! I added the Designer Frames Textured Impressions oval in the middle to highlight the butterfly.  It was the perfect accent to keep the Die Cut white. 

    Overall, this is a cost effective, simple yet elegant card that was made in a matter of minutes.  The really cool thing is that it looks nothing like that! So, check – look achieved!

    Created just for YOU-

    Ingrid

    To Shop 24/7 in the Creative Store – Click here!

    Stamp Sets – None! – There’s a first! Paper – Whisper White (100730), Sahara Sand (121043) Ink – None – There’s another first! Cool Tools – Paper Piercing Tool (126189), Essentials Mat Pack (126187), Stampin’ Pierce Mat (126199), Apothecary Accents Framelits (127003), Beautiful Wings Embosslit (118138), Designer Frames (123130) The Perfect Finish – Stampin’ Dimensionals (104430), Basic Pearls Jewel Accents (119247)