Evergreen Snowy Hillside Redo

Evergreen 005 Main R

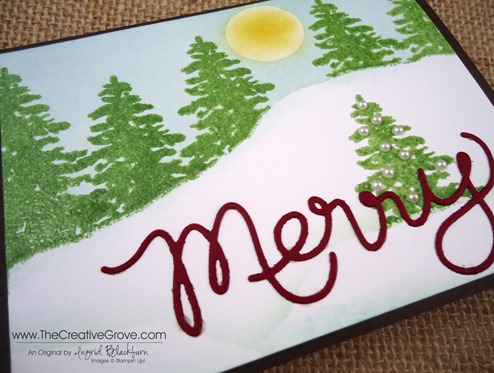
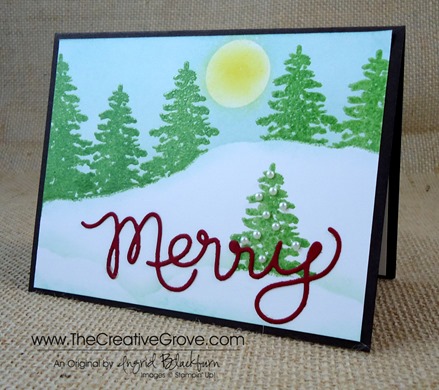
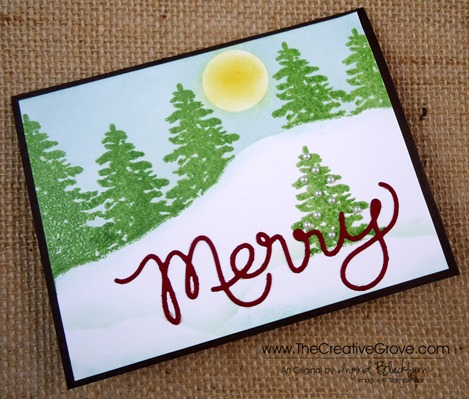
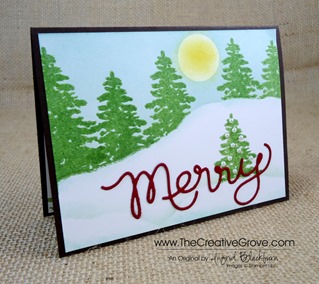
My friend and fellow CG Crew member Aleida was over yesterday for a much needed afternoon of stamping.  She wanted to make a fun card that would teach her a little something, yet give her a great Christmas card that wasn’t too difficult to mass produce.  We had the new Expressions Thinlits in our hands and this card popped into my head.  Off we went with a slightly new take on this fun snowy card.

Creative Tips –

  • I stamped the large Evergreen solid image in various heights using a torn mask for my hillside.  First I stamped in Versamark ink and then I used Wild Wasabi. 
  • To give my trees a glossy look and protect them from the brayer, I embossed all my trees in Clear Embossing powder. Evergreen 005 Side
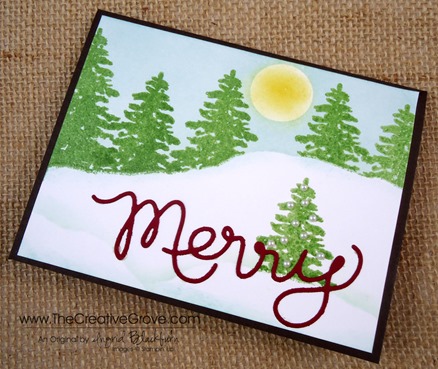
  • Once I had my skyline done I wanted a larger trees up close that I could decorate.  I tore another mask and stamped one more Wild Wasabi Tree.
  • I created a mask for the sun.  Then I used the skyline mask and sponged over my trees in Soft Sky. 
  • To accentuate the ridge, I used the reverse mask to sponge a light edge for the snow in Pool Party.
  • To create the snow drifts, I used the same mask, but alternated it’s direction.
  • I sponged in the sun using Crushed CurryEvergreen 005 CU
  • For my tree decorations, I used Pearl Basic Jewels.
  • I cut out the word Merry in Cherry Cobbler using the new Expressions Thinlit Framelits – available in the new Holiday Catalog on August 1st.
  • I matted the entire scene on a piece of Early Espresso card stock.
  • For a finishing touch I stamped a tree on the inside panel as well.
  • Evergreen 005 Main L

Aleida LOVED the card, it was fun to make and actually much faster than I anticipated.  Maybe because it was like my first, view that post here, but a bit different.  I could easily mass produce these, and their cost effective too!

Free DSP_edited-1

Don’t miss out on this great special!  Order six? You’ll get two for free. Nine? You’ll get three for free. Check out our Designer Series Papers in the annual catalog pages 151, 153, and 154.

Signature Snowflake 001

To Shop 24/7 in the Creative Store – Click here!

Evergreen 005 Angle

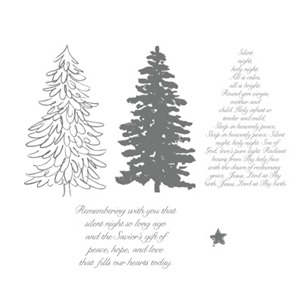
Stamp Sets – Evergreen (127973) Paper –Whisper White (107330), Early Espresso Ink – Wild Wasabi (126959), Soft Sky (131181), Crushed Curry,  Pool Party, Versamark (102283) Cool Tools – New Heat Tool (129053), Clear Embossing Powder (109130), Stampin’ Sponges  The Perfect Finish – Pearl Basic Jewels(119247), Expressions Thinlit Framelits
Evergreen 127973L

Creatively Sponging Scenery Video

This last week I played with sponging winter background scenery.  A few of you asked how I did this – so I made a video to show you all the steps to creating these little pieces of art.

You can also read my original post with all my tips and photos.  Read original blog post here.  This video is rather long due to the several steps.  I shortened it by creating two parts.  Rather than make you wait another day or have to go to a different post, I thought I’d share both video’s with you here.

Part one of my Creative Sponging series covers the sky in our project.  I know it looks like it was brayered, but I created it by using four different shades of blue.  There are specific steps to getting the trees just right as well.  I show you three different looks for the trees at the end of the second video, but my personal favorite is in this project we’re making together.  Enjoy!

[youtube=http://www.youtube.com/watch?v=2BhwRgVwCJc]


Part two of this series is all about the ground.  It’s actually a rather simple process, but I give you a few tips and tricks that I learned along the way.  Be sure to watch it til the end – It seems like it’s done, but there’s one last sponging tip.  Have fun!

[youtube=http://www.youtube.com/watch?v=_MK50jKvo7A]


Here is the completed project from the video.  It’s a little different from my other blog post.  I love the ground in this one the best, and of course the trees look really good in this one. 

I like using the StazOn Jet Black ink the best for the trees.  This card is set to go to my dad.  I think he’ll be shocked to see something like this from me.  It’s like a little piece of art.  Of course he’ll love it just because he’s my dad!  I’d love to see what creations you come up with too!

SSF_Seasonal_Sayings_thumb7

Single Stamps – Do you love that Greeting set, but wish you could buy just the one or two stamps?  Well, now you can from these select stamp sets: Perfectly Penned, Word Play, Seasonal Sayings.  Buy some of our best Greetings Stamps individually!   Hurry, this special is good for a limited time only through Jan 2, 2013! For more details, click here.  

Ingrid Blackburn


To Shop 24/7 in the Creative Store – Click here!

Stamp Sets – Lovely as a Tree (127793), Sweet Essentials (128315) Paper – Whisper White (100730), Midnight Muse (126843) Ink – Midnight Muse (126860), Marina Mist (126962), Bashful Blue (126961), Night Of Navy (126970), Versamark (102283), StazOn Jet Black (101406) Cool Tools –Stampin’ Sponges (101610), Heat Tool (129053)  The Perfect Finish – Clear Stampin’ Emboss Powder (109130)

LovelyasaTree_thumb4

Winter Wonderland

Lovely as a Tree has been in the Stampin’ Up! catalog since before I ever began stamping with SU in January of 2002.  That said – I have never owned this amazing stamp set – until now.  Yes, you read that correctly.  It is the ONLY stamp set that has stood the test of time with this company. 

Why have I never owned this classic, you ask?  Well, since Lovely as a Tree had always been in the catalog, I continually thought it was going to retire; and then I wouldn’t be able to use it for demonstration proposes.  Yes, that’s what I told myself year, after year, after year.  My girlfriend Rose laughed when she heard I broke down and bought it…actually she said – “oh great, now they’re going to retire it, just because you bought it!”  So if they do, I’m sorry Rose and everyone else!

Now that you know my personal history with this stamp set – here is the first ever card that I’ve stamped with this oldie but a goodie!  It’s nothing to complicated – I wanted the image to stand on it’s own so I created a winter wonderland at night around it.

  • First, I stamped a mask for the edge of my hill.  I cut that out and applied it to my Whisper White card stock. 
  • I then went to work creating the moonlit sky at the border of the hill and around the masked moon.
  • I started with Bashful Blue, then worked a little with Marina Mist, added some Midnight Muse and finished with a very thin edging of Night of Navy.
  • I made sure to leave a little white in the sky so that it wasn’t too dark.  This gives it two effects, depending on how you look at it – some illumination from the moonlit sky or a snow storm.
  • Once I was happy with my sky, I added a separate mask for the bottom of the trees (Keep in mind – I haven’t stamped the trees yet since I wanted to use Midnight Muse and not StazOn Jet Black). 
  • I sponged a slight amount of Bashful Blue to add depth to my snow bank around the trunks.
  • I added several masks for the snow drifts and lightly added a little Bashful Blue to each one, working from the top down.


  • I stamped my image onto a Stamp-a-majig so that I could perfectly line up the double image.  First, I stamped in Versamark® and then stamped a second image in Midnight Muse.
  • I then embossed my image using clear embossing powder.  I wanted to give my card a frozen look, rather than a snow-laden look.  If you want the snowy tree look, use white embossing powder.
  • I added a saying in Versamark® and embossed it with White Embossing Powder on the Midnight Muse card base.

My card has depth and a wintery feel to it.  This project would make a great one layer card – which is what I started out intending to make.  I ended up wanting a bit more pop, so I trimmed it and layered it.

If you want to see exact step by step instructions on how I made this card, check out my video here.  I know you’ll have as much fun as I do – and the end result looks SO much better in person.  You’ll say to yourself – did I really just make that!

Signature Snowflake 001

 To Shop 24/7 in the Creative Store – Click here!

Stamp Sets – Lovely as a Tree (127793), Sweet Essentials (128315) Paper – Whisper White (100730), Midnight Muse (126843) Ink – Midnight Muse (126860), Marina Mist (126962), Bashful Blue (126961), Night Of Navy (126970), Versamark (102283) Cool Tools –Stampin’ Sponges (101610), Heat Tool (129053)  The Perfect Finish – Clear Stampin’ Emboss Powder (109130)

Lovely as a Tree