Where do you look for creative inspiration? For me, I usually head to Pinterest or look in magazines. I love to look at photographs and generally a color palate or random organization of shapes will strike up an idea. I thought today I would take you on a journey for a simple CASE (copy and steal everything) of a photo for me. ![]()
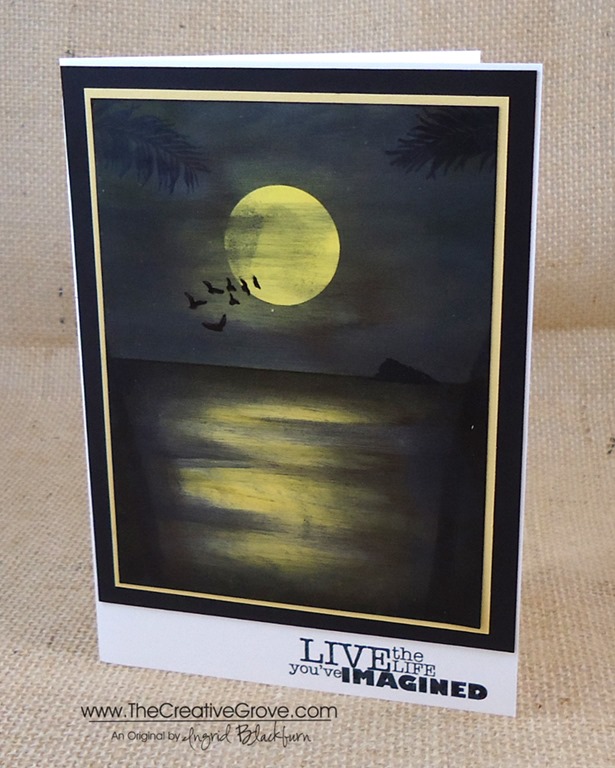
When you see a photo online, do you sometimes shift in your chair, or move your head? That to me is the sign that I’ve found something. Here is the photo I found on Pinterest and my final project:


While it’s not exact, it was my first attempt at making a mostly all black scenery. I immediately thought, I can do that. I’ll challenge myself and try something totally new. I have to admit – it felt all wrong…lol!
Creative Tips –
- You will want to start by masking a horizon line and beginning with your sky.
- Give a good coat of various shades of yellow. Here I used Glossy paper and a stylus tool to layer several coats of ink.

- Mask your moon and continue layering ink, switching to Black. You’ll want to leave a little faint yellow showing through around your moon for the glow.
- My edge of my mask lifted up, so I got a splotch of black on my moon on the left side. To cover that mistake up, I lifted my mask completely and dragged my stylus across a little to create whispy clouds. Here is my friend Amy’s who didn’t get any on hers – see the difference?

- When done with your sky, fully dry and switch your mask to reveal the water and cover the sky.
- Layer color from the sides across your water being careful to leave the middle showing the moonlight reflection.
- To create the feel of water, you will want to bring in a little black into your yellow. Do this a little at a time so that you don’t cover up too much at once. If you feel like you aren’t sure if you want to add more, stop.

- Once you have the desired look, stamp your palm trunks and leaves at the top to give the viewer’s perspective.
- Stamp the birds, layering a few over your moon.
- Create a mask for the island and add into the horizon opposite your birds with a sponge in black ink.
- Pick a saying that fits your scene.
- This card is finished 5 x 7 and the scenery layer is 4 1/4 x 5 1/2”


It’s a fun scene and looks so striking in person. I can’t wait to try it in purples next!
If you loved this card…
Be sure to subscribe to the creative tips e-letter & FREE video series. There’s a great scenic project in our first video series that I think you’ll love. And if you want to learn more about scenic cards, be sure to check out our Brayer 101 & 102 classes in addition to our upcoming Stampscapes class where we’ll make this similar project: Find out more HERE

[optin_box style=”2″ alignment=”center” email_field=”email” email_default=”Enter your email address” email_order=”2″ integration_type=”aweber” double_optin=”Y” list=”3846012″ name_field=”name” name_default=”Enter your first name” name_order=”1″ name_required=”Y” opm_packages=””][optin_box_field name=”headline”]Learn more with our exclusive FREE video series:[/optin_box_field][optin_box_field name=”paragraph”][/optin_box_field][optin_box_field name=”privacy”]Plus you’ll be added to my FREE Creative Tips E-letter where I share exclusive projects, videos & the 12 Days of Christmas series[/optin_box_field][optin_box_field name=”top_color”]undefined[/optin_box_field][optin_box_button type=”0″ button_below=”Y”]Get Instant Access![/optin_box_button] [/optin_box]
Stamp Sets – Stampscapes Stamps, Really Good Greetings (130333c, 130330w) Ink – Marvy – Black, Yellow, Brilliant Yellow Adirondack Lights – Sandal Paper –Glossy White, So Saffron, Basic Black Tools – Colorbox Stylus
