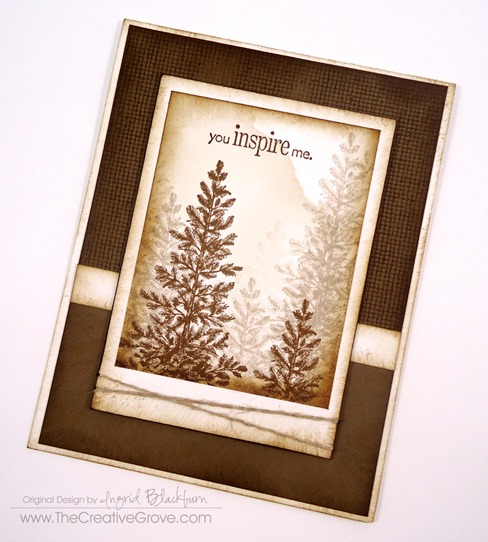
1+2=3 Stamp Series #001: Part 2

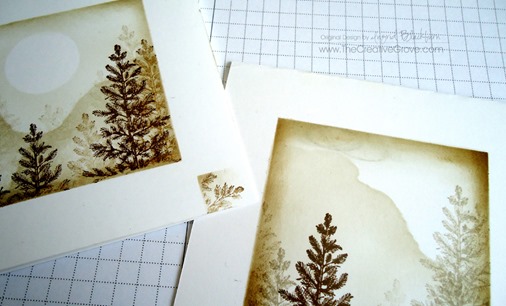
Yesterday we talked about masking and creating a scene.  But what happens when your masks or worse, sponging fails you?  Today’s and tomorrow’s projects, are the result of un-recoverable mistakes.  I’ll confess.  The project to the left below was supposed to be project 1 and the one on the right was the second.  Of course it was, I had to keep going because I wanted a one layer card as one of the projects and I kept messing up!  Can you relate?

Today is all about turning failure into a winning strategy!  I’m sure you can relate – we’ve all had this happen at some point, no?  If you missed yesterday’s project Click Here to read all about it.

Of course, it seems like when there is a mistake, it usually happens at the very end.  It’s Murphy’s Law – who is this Murphy person anyway?  If you know – tell me in the comments – I’ve always wanted to know…lol!

Here you see what was supposed to be two one layer cards.  I went the easy way out on one by using a few post it notes moving them around rather than putting my full mask back down which required more steps.  Well, the joke was on me as now I had to think outside the box to try and save my hard work!

DSC01407

And the other – on my very last pass in the upper left corner, I grabbed my sponging tool too hard and my nails left three marks…argh!  I couldn’t believe it!  There was no saving it.  So my only option was to cut.  So this project ended up as #2.  Here are the series details:

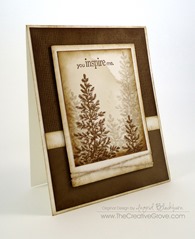
1 – Stamp – For this series I thought I’d choose a stamp set that has been available for over 20 years and is still on the market…the ever popular Stampin’ Up! set Lovely as A Tree.  This works with any large tree stamp.  Since there aren’t any greeting stamps in this set, I used one from the retired set Perfect Words.

2 – Colors – Two colors were used in all three projects: Sahara Sand and Soft Suede by Stampin Up.  For the cardstock in later projects, I only used Soft Suede along with Whisper White.

3 – Projects – while a few are a bit similar, they are vastly different.  Enjoy!

DSC01418

Series #001 – Project 2: In the Shadow of the Mountain

  • Once I cut the top off, I re-sponged it in both Sahara Sand and Soft Suede.
  • I created this one just like yesterday’s project.  I even used the same mountain mask – I just shifted it to give it a different look by creating a much larger mountain.

DSC01447

  • In this project, you see more of the trees in the distance and only two up close.
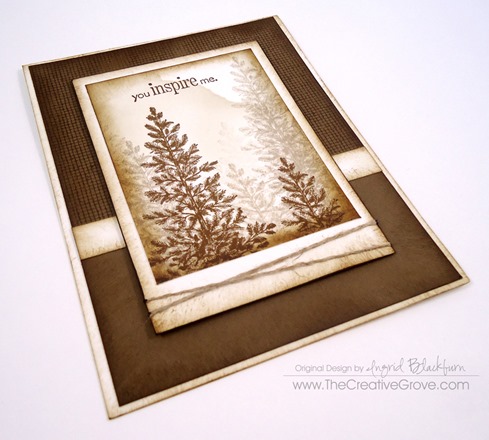
  • The actual scene measures 2 5/8” x 3 1/2” with the White Matte measuring 3” x 4 1/4”.  This gives a small space at the bottom where you can criss-cross some linen thread.  By popping up your scene you add a little emphasis to your creation.

DSC01448

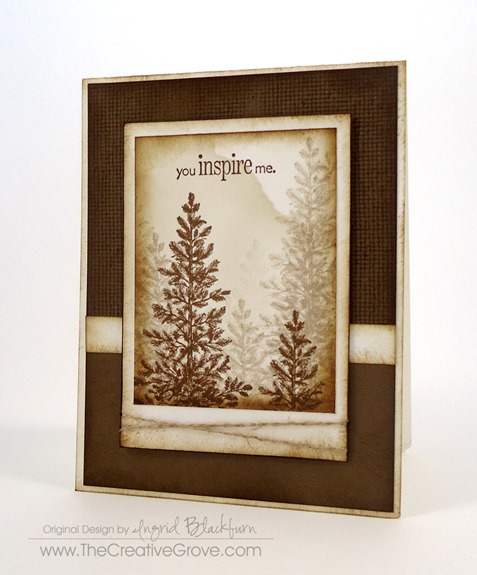
    • Rather than leaving the white space so plain in the background, choose to add a background stamp.  Here you see Canvas (retired) by Stampin’ Up!.  But several companies have stamps just like this one.  It’s a great go to design!
    • By only using the background stamp on 2/3 of the card it doesn’t overpower the card.  Leaving some pure white space on the bottom helps to keep the focal point on the scene.  Use a small strip that your probably have in your scrap bin to cover up the end of the stamping leading into the white space.  Or use another mask when you stamp it that’s torn for an easy blend.


  • DSC01419

Although the scene is similar to the first, the card is a completely different look.  I hope you liked my turn lemons into lemonade card – tomorrow’s is even better!  See you then.

Signature-Blog

[optin_box style=”14″ alignment=”center” action=”http://www.aweber.com/scripts/addlead.pl” disable_name=”Y” method=”post” email_field=”email” email_default=”Enter your email address” email_order=”1″ integration_type=”custom” double_optin=”Y” name_default=”Enter your first name”][optin_box_hidden][/optin_box_hidden][optin_box_code]

[/optin_box_code][optin_box_field name=”headline”]If you enjoyed this tutorial…[/optin_box_field][optin_box_field name=”paragraph”]PHA+PHNwYW4gc3R5bGU9ImNvbG9yOiAjNjQ2MzVlOyI+TGV04oCZcyBzdGF5IGluIHRvdWNoISBNeSBvY2Nhc2lvbmFswqA8L3NwYW4+PHNwYW4gc3R5bGU9ImNvbG9yOiAjNjY2Njk5OyI+PHN0cm9uZz48ZW0+ZXhjbHVzaXZlPC9lbT48L3N0cm9uZz7CoDwvc3Bhbj48c3BhbiBzdHlsZT0iY29sb3I6ICM2NDYzNWU7Ij5DcmVhdGl2ZSBUaXBzIGUtbGV0dGVyIHdpbGwgdGVhY2ggeW91IHRvIG1ha2UgcHJvamVjdHMgdGhhdCB5b3UgbG92ZeKApjwvc3Bhbj48L3A+Cg==[/optin_box_field][optin_box_field name=”privacy”][/optin_box_field][optin_box_field name=”top_color”]undefined[/optin_box_field][optin_box_button type=”0″ button_below=”Y”]Send me exclusive tips![/optin_box_button] [/optin_box]
 

Chat & Challenge Thanksgiving Card

One of the stamping communities, Sudsol,  I belong to has a few standing challenges each week.  I happened to be sitting at my desk when last night’s Chat & Challenge started.  I jumped right in and quickly whipped up this fun little card.  I’m quite excited – as it’s my second Thanksgiving card done – only 8 more to go to hit my Thanksgiving Stamping goal!

Chat & Challenge Sketch Chat & Challenge PM Sketch

This is a perfect Clean and Simple (CAS) card.  I love all the ‘white’ space. 

  • I chose More Mustard as my base, and went straight to my Color Coach for my other two colors – Cajun Craze and Night of Navy.  This is the creative combination option.
  • I used Lovely as a Tree (only my second time – read my other post here about my history with this great stamp set)
  • The oak leaves serve as the stamped Cajun Craze background.  I also stamped the little leaf in Cajun Craze on More Mustard for the perfect little embellishment.
  • To kick my card up a notch, I spritzed the Cajun Craze card stock with the Gold Glow Smooch Spritz.
  • My perfect finishing touches are to pop the saying and leaf up while adding a little paper piercing to the Night of Navy and the complimenting opposite corners of the Cajun Craze.
  • The sides of the greeting was made using my Decorative Label Punch.  I kept one side under and the rest I pulled through so I would only punch one side at a time.  I used the outside guide of the Essentials Paper-Piercing Pack to then add detailing to the sides.
  • I stamped my greeting from Seasonal Sayings in Cajun Craze and then just barely rolled the edges in Not Quite Navy.  Did you know that you can order the sayings from this stamp set individually too!  Check out more information here.

Fix it Tip:

  • If you mess up your Paper Piercing – for example, a bit crooked, fill in your the reversed side of the paper with your nails. 
  • The reversed side will be the bumpy side. 
  • You will still see a slight impression, but it’s rather slight.  You can then fix where you intended to punch. 
  • This works best if you are only fixing a small amount – if you have 20 holes to fix, you may want to start over. 
  • Look at my upper left corner of my Greeting – I ‘fixed’ five holes. 
  • It’s hard to see with the naked eye on the actual project because there is so much going on with the card – of course you see it now because you know!

How many Thanksgiving cards will you be making this year?  I think I’ll whip up a batch of these – they are quick, easy and I love the color combination!

B1_ChristmasGift_demo_Oct0112_NA_thu

New this October 1 – 31, 2012! Get a FREE Festive Paper Piercing Pack when you order one of the Ornament Bundles this month only!  Click here for more details on this limited time offer.

SSF_Seasonal_Sayings

Single Stamps – Do you love that Greeting set, but wish you could buy just the one or two stamps?  Well, now you can from these select stamp sets: Perfectly Penned, Word Play, Seasonal Sayings.  Buy some of our best Greetings Stamps individually!   Hurry, this special is good for a limited time only through Jan 2, 2013! For more details, click here.   Signature Snowflake 001


To Shop 24/7 in the Creative Store Click here!

Stamp Sets – Lovely as a Tree (127793), Seasonal Sayings (128009) Paper – Naturals White (102316), More Mustard (100946), Cajun Craze (119684), Night of Navy (100867) Ink – Cajun Craze (126965), Night of Navy (126970) Cool Tools – Paper Piercing Tool (126189), Stampin’ Pierce Mat (126199), Essentials Paper-Piercing Pack (126187), Paper Snips (103579), Decorative Label Punch (120907) The Perfect Finish – Stampin’ Dimensionals (104430), Gold Glow Smooch Spritz (118770)

Lovely as a TreeSeasonal Sayings 128009L

Winter Wonderland

Lovely as a Tree has been in the Stampin’ Up! catalog since before I ever began stamping with SU in January of 2002.  That said – I have never owned this amazing stamp set – until now.  Yes, you read that correctly.  It is the ONLY stamp set that has stood the test of time with this company. 

Why have I never owned this classic, you ask?  Well, since Lovely as a Tree had always been in the catalog, I continually thought it was going to retire; and then I wouldn’t be able to use it for demonstration proposes.  Yes, that’s what I told myself year, after year, after year.  My girlfriend Rose laughed when she heard I broke down and bought it…actually she said – “oh great, now they’re going to retire it, just because you bought it!”  So if they do, I’m sorry Rose and everyone else!

Now that you know my personal history with this stamp set – here is the first ever card that I’ve stamped with this oldie but a goodie!  It’s nothing to complicated – I wanted the image to stand on it’s own so I created a winter wonderland at night around it.

  • First, I stamped a mask for the edge of my hill.  I cut that out and applied it to my Whisper White card stock. 
  • I then went to work creating the moonlit sky at the border of the hill and around the masked moon.
  • I started with Bashful Blue, then worked a little with Marina Mist, added some Midnight Muse and finished with a very thin edging of Night of Navy.
  • I made sure to leave a little white in the sky so that it wasn’t too dark.  This gives it two effects, depending on how you look at it – some illumination from the moonlit sky or a snow storm.
  • Once I was happy with my sky, I added a separate mask for the bottom of the trees (Keep in mind – I haven’t stamped the trees yet since I wanted to use Midnight Muse and not StazOn Jet Black). 
  • I sponged a slight amount of Bashful Blue to add depth to my snow bank around the trunks.
  • I added several masks for the snow drifts and lightly added a little Bashful Blue to each one, working from the top down.


  • I stamped my image onto a Stamp-a-majig so that I could perfectly line up the double image.  First, I stamped in Versamark® and then stamped a second image in Midnight Muse.
  • I then embossed my image using clear embossing powder.  I wanted to give my card a frozen look, rather than a snow-laden look.  If you want the snowy tree look, use white embossing powder.
  • I added a saying in Versamark® and embossed it with White Embossing Powder on the Midnight Muse card base.

My card has depth and a wintery feel to it.  This project would make a great one layer card – which is what I started out intending to make.  I ended up wanting a bit more pop, so I trimmed it and layered it.

If you want to see exact step by step instructions on how I made this card, check out my video here.  I know you’ll have as much fun as I do – and the end result looks SO much better in person.  You’ll say to yourself – did I really just make that!

Signature Snowflake 001

 To Shop 24/7 in the Creative Store – Click here!

Stamp Sets – Lovely as a Tree (127793), Sweet Essentials (128315) Paper – Whisper White (100730), Midnight Muse (126843) Ink – Midnight Muse (126860), Marina Mist (126962), Bashful Blue (126961), Night Of Navy (126970), Versamark (102283) Cool Tools –Stampin’ Sponges (101610), Heat Tool (129053)  The Perfect Finish – Clear Stampin’ Emboss Powder (109130)

Lovely as a Tree